duncanmartin
Club Retro Rides Member
Out of retro ownership
Posts: 1,320
Club RR Member Number: 70
|
1993 Lancia Y10 GTieduncanmartin
@duncanmartin
Club Retro Rides Member 70
|
Feb 14, 2021 15:49:34 GMT
|
I spent a couple of hours yesterday, and another couple today and I'm basically one step back! The good news is that the new quilted overalls I ordered mean that spending time in the garage is much more pleasant - now I need to make better use of that time! I started off trying to work out exactly how to make the bracket that joins the top and bottom of the dash and holds the heater vent, and I cut some steel and bent some steel, and found some box that would fit and was generally making some decent progress. I realised I should probably trial fit #5 with the heating vents present, and when I did that, I discovered that it simply wasn't going to work - the bit at the top that was supposed to hold the screw for the cover section clashes with the heater vents.  So I started off making a much simpler piece that would just hold the plastic in the right place and give me a nice sturdy location for everything, so I could make the bit on the other side. I made a simple straight piece with the right sort of bend in the right place, and then I taped that in place and refitted the heater section. And I realise that there was a bit of plastic missing that held all the buttons in the top, and if I put my bracket in the right place, at least I could deal with that. So I cut and drilled and filed and sanded and got another small piece, so there is an L shape, and piece that will sit on top, reinforce it and also bolt up the buttons. (I should have taken a picture at this point, but I was trying to get stuff done.) All that's needed now is to weld them together and trial fit again. I found my welding helmet, turned on the welder, checked the settings, and discovered the gas bottle was on already. Which is strange, because I try to leave it closed so that there are no leaks, and it's not been used in ages. The regulator seems to be showing flow (again, strange?) so I test out the welder, and no gas noise. The regulator doesn't change, if I turn the dial on it, or on the gas bottle, and all the pipes appear to be free from kinks (I can't see behind the welder, but it's not up against the wall). In irritation, I attempted a test weld on something else, but it was horrible and black and splattery and broke far too easily, so I gave up. Any suggestions on how I work out if my gas bottle is empty, or there is an issue with the regulator, or the welder? |
| |
|
|
|
|
thomfr
Part of things
  Trying to assemble the Duett again..
Posts: 694
|
|
Feb 14, 2021 16:52:24 GMT
|
|
Put it on a scale. The empty weight should be stamped on the bottle.
Thom
|
| |
73' Alfa Giulia Super
64' Volvo Duett
65' Volvo Duett
67' Volvo Amazon 123GT
09' Ford Focus 1.8
20' VW ID4
71' Benelli Motorella
65' Cyrus Speciaal
The difference between men and boys is the price of their toys
|
|
duncanmartin
Club Retro Rides Member
Out of retro ownership
Posts: 1,320
Club RR Member Number: 70
|
1993 Lancia Y10 GTieduncanmartin
@duncanmartin
Club Retro Rides Member 70
|
|
|
The bottle didn't have a weight on it, but it seemed pretty light, so I tried removing the regulator and opening the valve to see what happened. A tiny hiss, and then nothing - I guess it was empty! I'll order a new one today. I did get some stuff done on the dash though - I bonded in some of the less complicated bracing parts that were single metal pieces (and a couple of the plates that will hold screws to keep everything together). It's made the structure so much more rigid it's unbelievable. I used JB Weld epoxy, and I only did a couple of bits at a time so I could get them in place properly. I've basically run out of things I can do on the main dashboard without joining bits of metal (I was tempted to try the JB Weld to join the metal pieces, but I'd rather use the MIG!). However, the cover piece I took off is missing some screw holes, so I'm going to try to bond in a couple of washers (probably the dome headed ones) to provide solid screw mounting points. I credit this newly attached piece with much of the structural improvement: 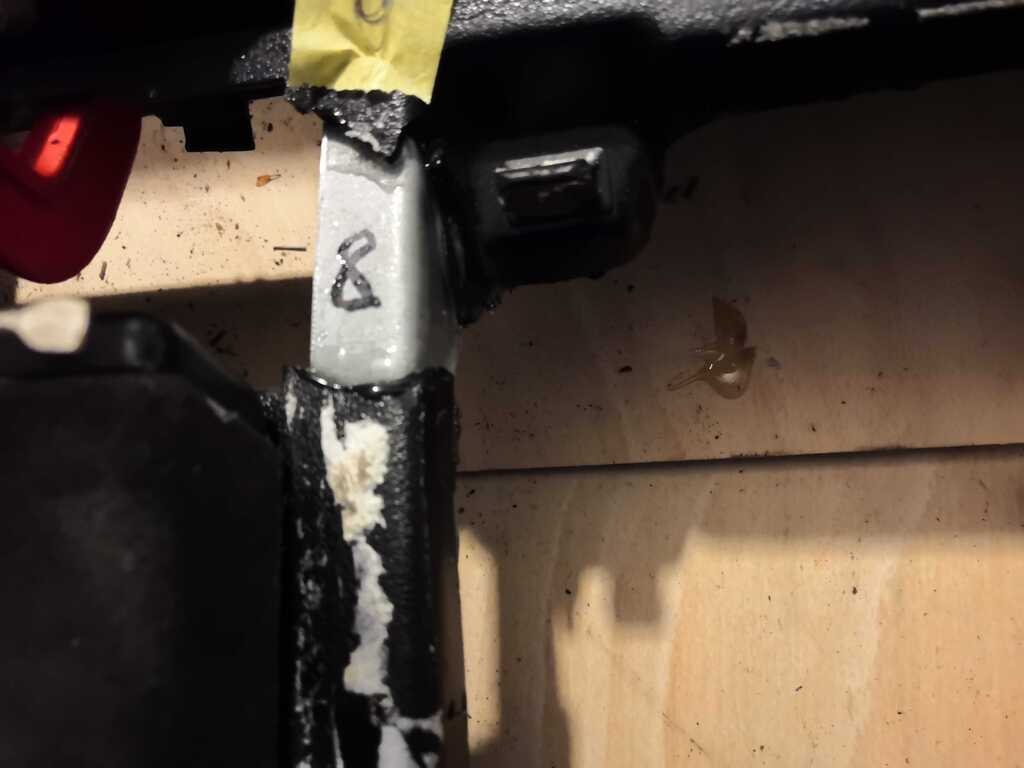 |
| |
|
|
duncanmartin
Club Retro Rides Member
Out of retro ownership
Posts: 1,320
Club RR Member Number: 70
|
1993 Lancia Y10 GTieduncanmartin
@duncanmartin
Club Retro Rides Member 70
|
Apr 10, 2021 16:28:54 GMT
|
I finally got hold of some welding gas and some motivation to get going again. So I practised my welding a bit, and then had a go at welding the first bracket that needed welding: 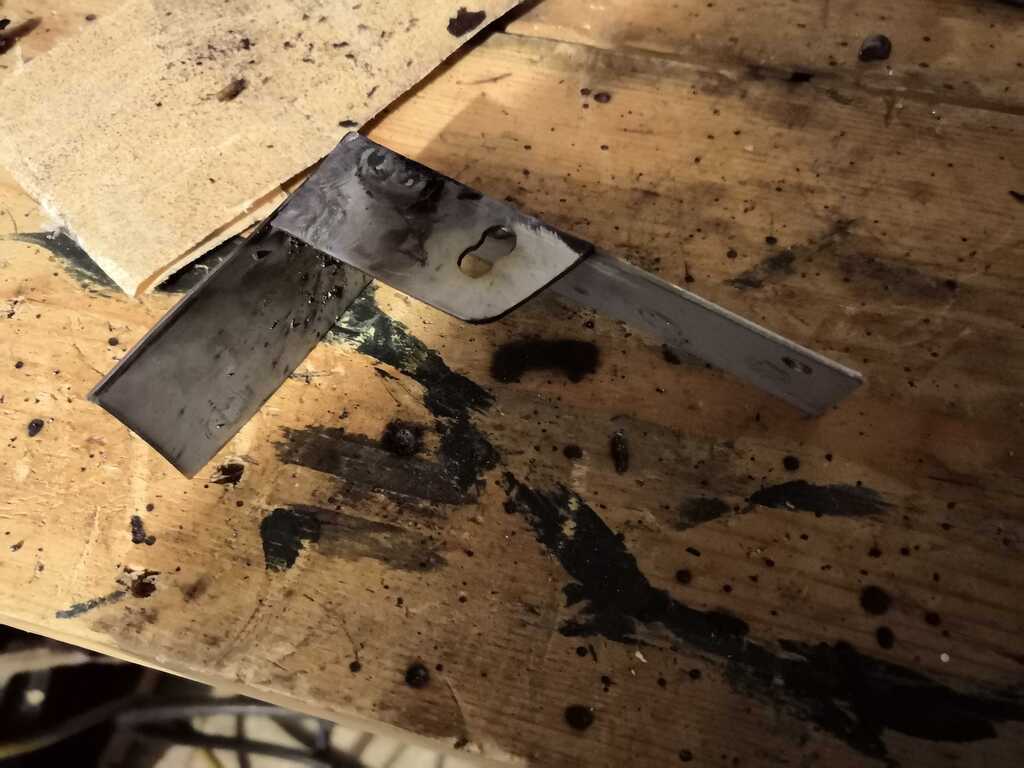 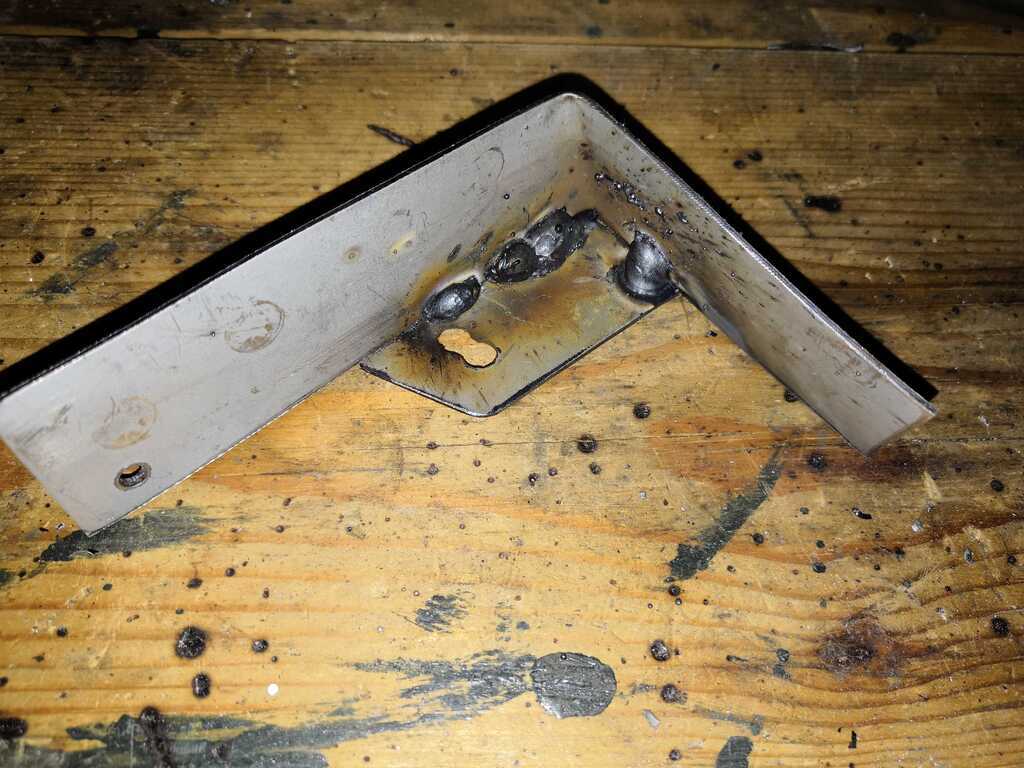 The burn marks are because I held it together with masking tape, which set on fire just as I was finishing. It's not pretty, but it doesn't need to be especially strong and I gave it a few bashes and it seems solid enough. My excuse is that I'm not sure about my welding helmet - I haven't used it in ages and I'm not sure if it's auto-darkening properly. I can't really see the weld pool, and it seems really dark when I'm welding though I'm aware of a real glow around the edges of the helmet. It doesn't seem to react and change to dark when I look at a bright light, but maybe I've just got my settings wonky. |
| |
|
|
duncanmartin
Club Retro Rides Member
Out of retro ownership
Posts: 1,320
Club RR Member Number: 70
|
1993 Lancia Y10 GTieduncanmartin
@duncanmartin
Club Retro Rides Member 70
|
Apr 11, 2021 11:03:33 GMT
|
|
My eyes are itchy today, so I did some research - my helmet is 8 years old and the battery isn't replaceable. So I got myself a new SWP one with a nice big lens and replaceable batteries (and a low battery warning light). If that one lasts 8 years I'll be happy.
|
| |
|
|
|
|
|
Apr 13, 2021 12:30:43 GMT
|
Yeah I struggled on with an older welding mask for ages. It still darkened, but the lense was scratched to curse word and the darkening wasn't adjustable. Turns out the price of welding masks has come way, way down since I bought it. New one ordered and it's amazing how much nicer it is when you can see what you're doing  |
| |
|
|
duncanmartin
Club Retro Rides Member
Out of retro ownership
Posts: 1,320
Club RR Member Number: 70
|
1993 Lancia Y10 GTieduncanmartin
@duncanmartin
Club Retro Rides Member 70
|
Apr 26, 2021 10:43:35 GMT
|
The new welding mask is ace. It's nice being able to see what you are doing before you spark it up and during (and it's blue rather than green for some reason). I actually made some progress on Saturday. I glued in the metal reinforcing piece I welded in my previous update, and it's really helped make the dashboard stiffer. I also welded a small piece of rectangular tube to some sheet and drilled and tapped a hole, so hopefully I can glue that in place soon and provide something for the other side of the heater controls to attach to. The pictures I took came out terribly though, so I can't show that.  I used the leftover epoxy to fill a bunch of the cracks, so hopefully that will also help. I also undid the steering column bolts so I could get the dash back in again, and I did up a bunch of the connectors I undid when I thought that I was going to be able to get the dash out with part of the loom still attached. I even worked out where most of the connectors go (I was vary puzzled for a while until I remembered that lots had to go on the back of the instrument cluster which happened to be on the back seat)! This involved much banging of my head on the windscreen, so took yesterday off! One thing I am aware of is that when it all has to go back together, I will need to put this thing back in (it goes in the engine bay between the heater gubbins and the engine). As you can see from the picture, it's utterly knackered. I doubt I can get a new one, and I'm guessing this is a problem for lots of retros - what alternatives are there to just sticking this monstrosity back in the car? 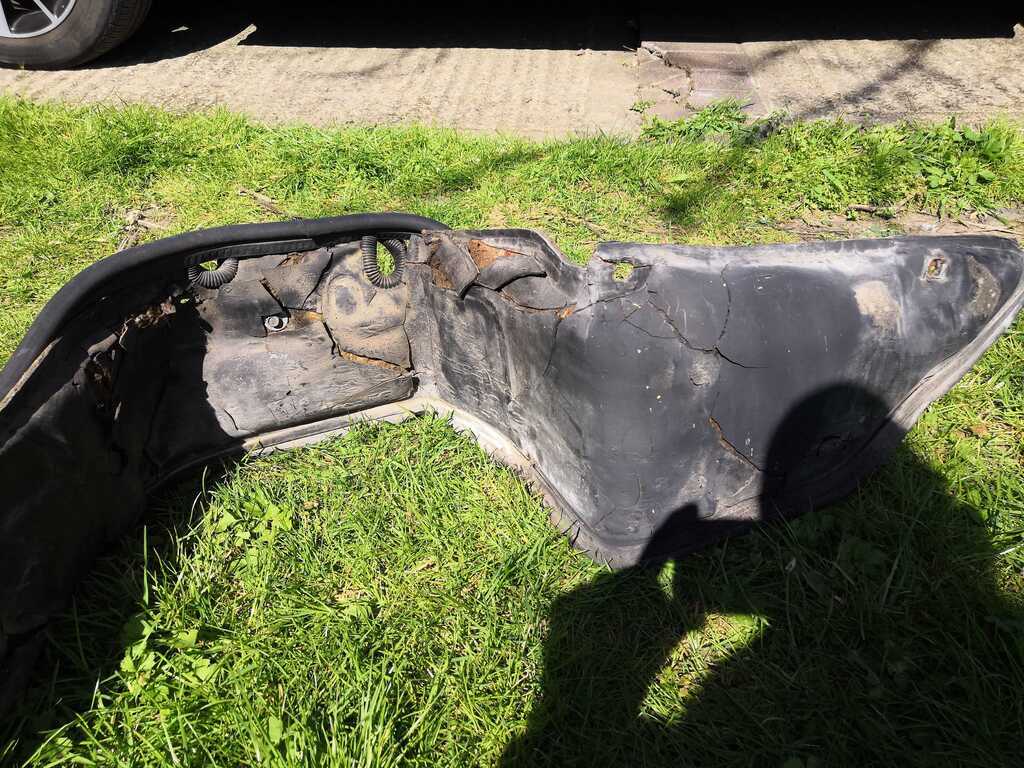 |
| |
|
|
duncanmartin
Club Retro Rides Member
Out of retro ownership
Posts: 1,320
Club RR Member Number: 70
|
1993 Lancia Y10 GTieduncanmartin
@duncanmartin
Club Retro Rides Member 70
|
|
|
Made some more progress yesterday. I tidied up and worked out where to place my welded beam, and I also drilled and tapped a couple of holes in it - one for the heater control and one for the attachment piece. I also tweaked the attachment piece so it's 95% good, and tapped a hole in that for the lower cover to go through (replacing yet another broken off plastic attachment point). Here you can see the bonded in metal support for the original plastic part and the newly bonded in steel tube plus attachment plate: 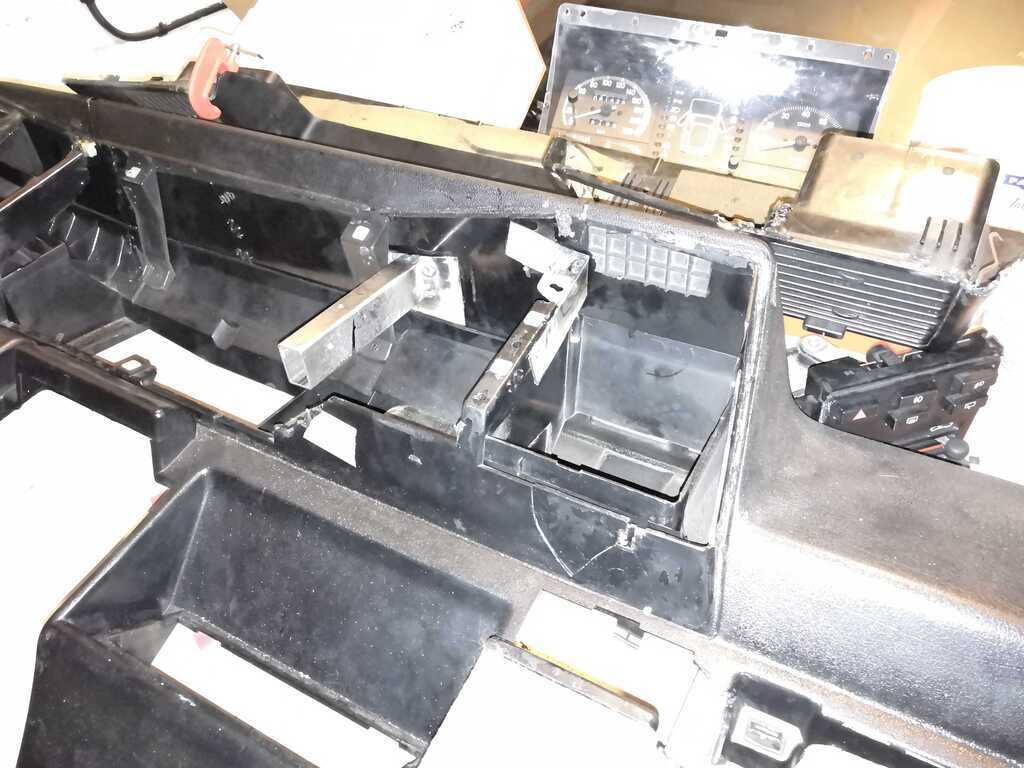 What it looks like with the heater control in place: 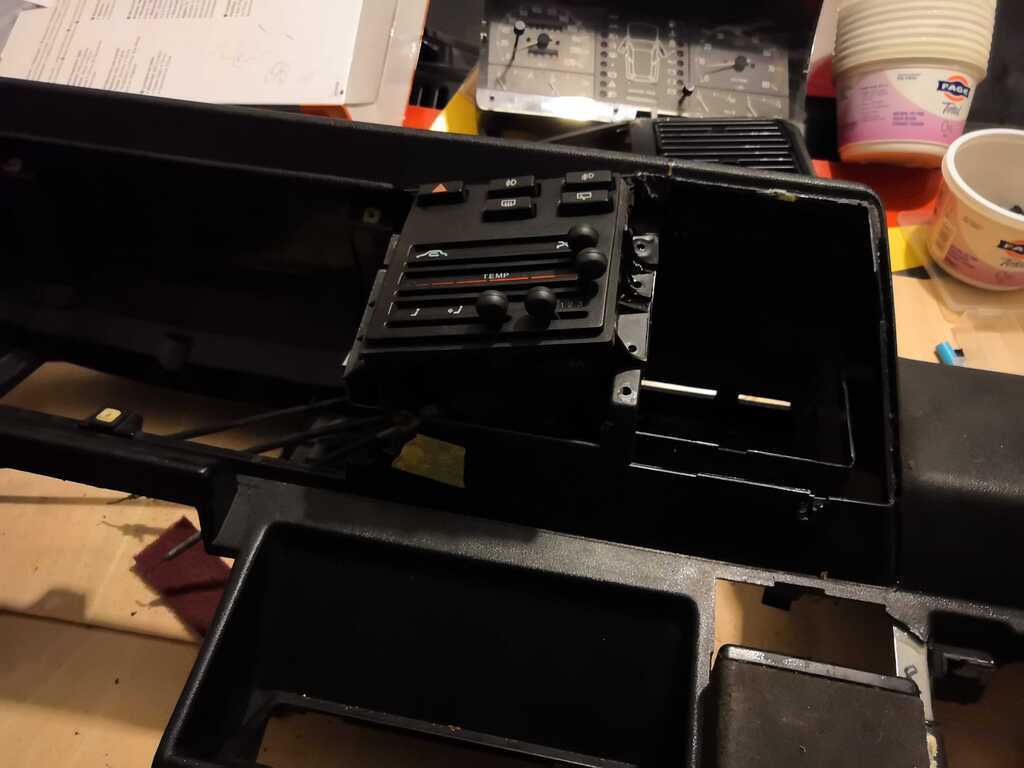 And the final piece of the puzzle that attached both sides and provides more rigidity and structure: 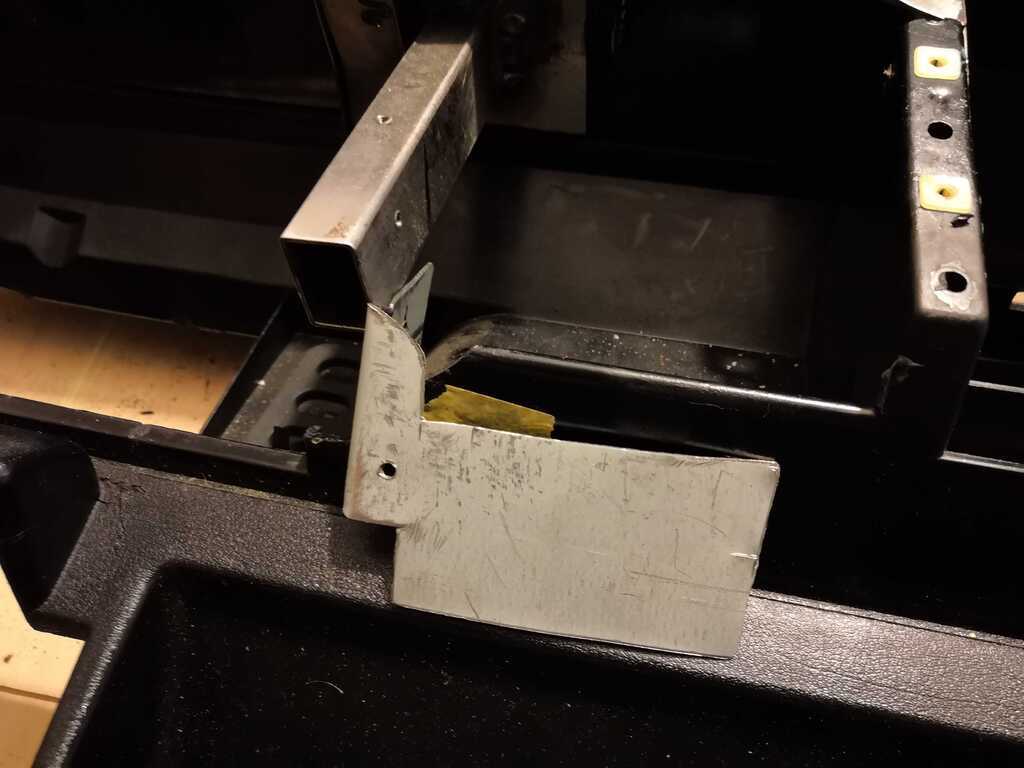 I've trial fitted it with the cover and with the heater controls and the speedo unit individually - I need to trial fit everything together before I add the final part as I might need to chop the box about a bit (it's massive overkill for this, but it was easy). Once I've got that done and the final piece bonded in, I can put the dash back in the car and take it for an MOT. I'm hoping there's not too much work needed so it can be ready for the Weekender. |
| |
|
|
goldnrust
West Midlands
Minimalist
Posts: 1,887
|
|
|
|
You've put a lot of patient hours into repairing that dashboard! I hope you are rewarded with a nice rattle free interior when it's done  Fingers crossed for the MOT. |
| |
|
|
duncanmartin
Club Retro Rides Member
Out of retro ownership
Posts: 1,320
Club RR Member Number: 70
|
1993 Lancia Y10 GTieduncanmartin
@duncanmartin
Club Retro Rides Member 70
|
|
|
I should have probably just spent the time trying to get a good one from a breaker in France or Italy!  Still, so long as it works afterwards and doesn't shake itself apart over bumps I'll be happy! Fingers crossed indeed... |
| |
|
|
|
|
duncanmartin
Club Retro Rides Member
Out of retro ownership
Posts: 1,320
Club RR Member Number: 70
|
1993 Lancia Y10 GTieduncanmartin
@duncanmartin
Club Retro Rides Member 70
|
|
|
Bloody car. I installed that last bit of scaffolding yesterday, gave it a day for the glue to set properly and then tried to fit it in the car today. I got it basically in position, but then I realised that the wiring that goes to the back of the various dash pieces were out of place and I didn't know where they went. So I took the dash out again, found out where all the varous connectors all went (at least Lancia made it so they were all different), zip tied them together so I knew which hole they should go through, and then tried to put the dash back in again. Unsuccessfully. And I broke at least one of my reinforcing structures (number 8 in the previous pictures - it tore the metal/epoxy away from the plastic). I don't think it's possible to put the dash back in without attaching the wiring loom to the back of it (how it was before). Which means undoing a huge number of stuck together clips with the dash out, zip tieing the dash loom in place, putting the dash back in and praying I can re-attach all the dash clips when they are hidden behind the dashboard. All of which is enormously uncomfortable, and I keep banging my head on the windscreen. Grrr. At this rate, maybe it'll be done by the Gathering. 2022.  |
| |
|
|
duncanmartin
Club Retro Rides Member
Out of retro ownership
Posts: 1,320
Club RR Member Number: 70
|
1993 Lancia Y10 GTieduncanmartin
@duncanmartin
Club Retro Rides Member 70
|
|
|
I bowed to the inevitable, put the dash back on the bonnet and started trying to undo the connectors between the dash loom and the car loom. I attacked most of it with contact cleaner before I started, but taking the connectors off the fusebox was painstaking. 2 hours later, I had disconnected most of the connectors by the steering wheel and removed this: 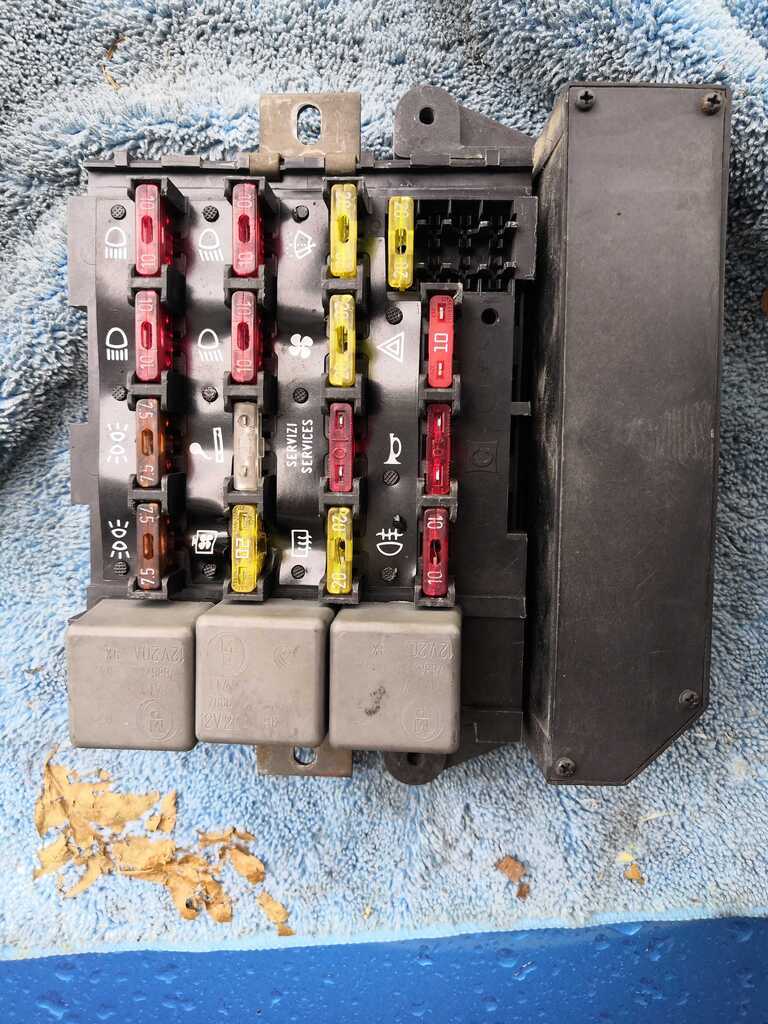 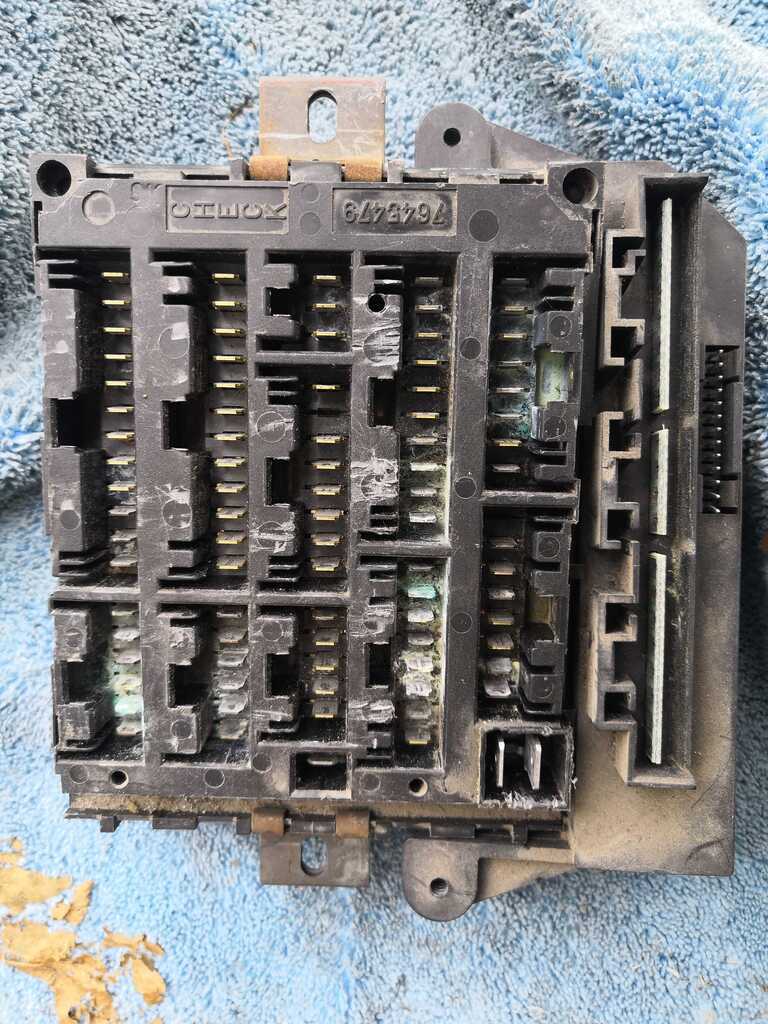 I guess I'll be spending some time trying to remove all that corrosion as well... The design is pretty neat in that none of the plugs can go back in the wrong place (at least I hope so - if they can I've got a lot of problems coming my way!  There are some wires that seem to go through the firewall I need to trace, and I've got to deal with the relay box in the passenger footwell, and then the dashboard loom can come out. 2 steps backwards, one to go, hopefully it will be forwards from there. |
| |
|
|
goldnrust
West Midlands
Minimalist
Posts: 1,887
|
|
May 27, 2021 15:37:44 GMT
|
|
Looking at all that corrosion, I'd say that might be a blessing in disguise that you had to disassemble it all. I think you might be saving yourself considerable future electrical gremlins by cleaning all that up.
|
| |
|
|
duncanmartin
Club Retro Rides Member
Out of retro ownership
Posts: 1,320
Club RR Member Number: 70
|
1993 Lancia Y10 GTieduncanmartin
@duncanmartin
Club Retro Rides Member 70
|
May 28, 2021 10:40:19 GMT
|
|
I think you are right - the only connection related gremlins I know of is indicator speed (one side is twice the speed of the other, despite all the bulbs working). If that's the only one I get then I'll have been massively lucky!
One of the guys at the LMC board recommended I find a local blaster and get him to give it a quick blast - if I can find someone I think that would save a huge amount of time.
|
| |
|
|
duncanmartin
Club Retro Rides Member
Out of retro ownership
Posts: 1,320
Club RR Member Number: 70
|
1993 Lancia Y10 GTieduncanmartin
@duncanmartin
Club Retro Rides Member 70
|
|
|
I finally found some time and motivation, and decided I would remove the rest of the dashboard wiring harness. A big chunk of it goes to the relay block in the passenger side, so I removed the mounting, split off the relays for the wiring that stays in the car, and then that end of the loom was free. The only bit left was a big section of earth wires. They were connected to an earth block nestled in near the steering column, so I had to take that off (and then hold it up with a zip tie so all the cables weren't pulled out of the back of the ignition switch). The terminal clips were really easy to remove once I discovered they had a little spring clip thing holding them on. You can just about see them here (I took the earth mount off so I could see how they worked). 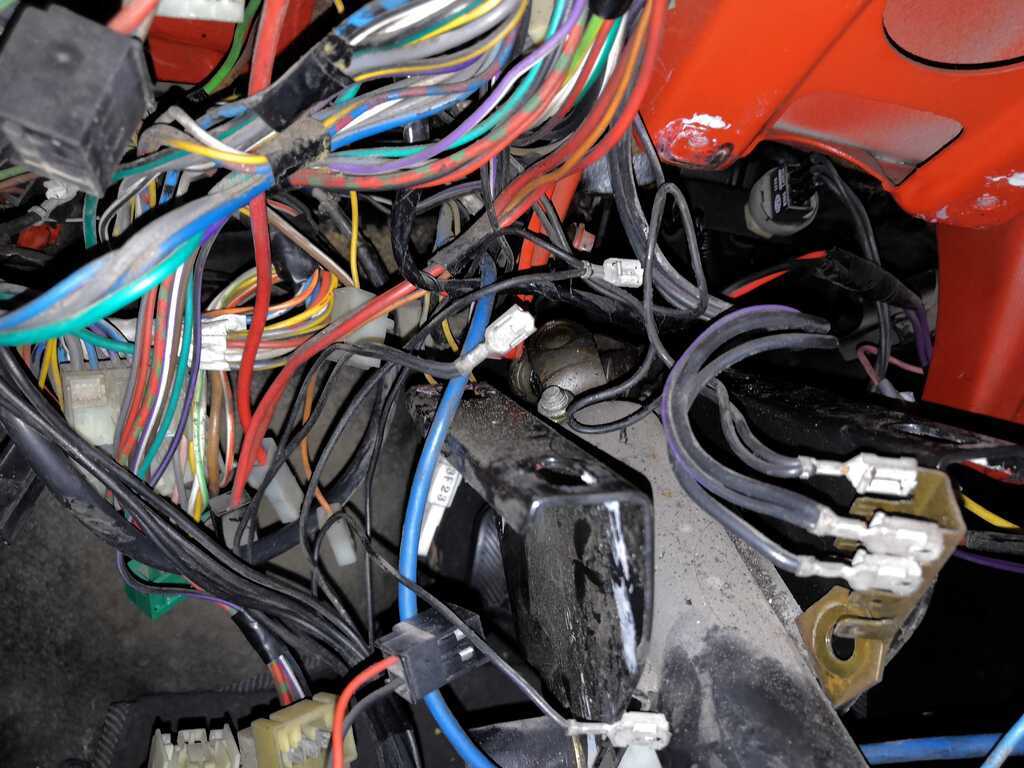 Home and dry, or so I thought. Unfortunately, each clip has 2 wires running to it, and one of these pairs has an unrelated wire running right through the middle of it! So I had to trace that rogue wire. One end of it goes to a toggle switch mounted in the centre console (using 2 lots of purple wire). The other end disappears off into the engine bay and underneath the washer bottle, where it seems to be wrapped into the loom and a load of electrical tape. I couldn't get a reasonable photo of this at all. I suspect that this is some sort of extra switch for the radiator fan, but I can't test it now I've taken the loom almost apart, and I can't get the switch connectors through the hole in the centre console without cutting them. I decided I would sleep on it. My conclusion is that I'll have to cut them, label them up and hope they aren't important! Then I should be able to get the dash loom out and zip tie it to the back of the dashboard (and clean all the connectors - that's going to take ages). |
| |
|
|
duncanmartin
Club Retro Rides Member
Out of retro ownership
Posts: 1,320
Club RR Member Number: 70
|
1993 Lancia Y10 GTieduncanmartin
@duncanmartin
Club Retro Rides Member 70
|
Aug 15, 2021 15:03:49 GMT
|
I ran out of motivation on this, so I've made no progress and I'll be going to the Gathering in the Zoe.  Maybe it will be done for next year. There is some importance in that it needs to be done before the electrician can get at our fuse box to finish the smart meter install, and it can't be moved right now. |
| |
|
|
duncanmartin
Club Retro Rides Member
Out of retro ownership
Posts: 1,320
Club RR Member Number: 70
|
1993 Lancia Y10 GTieduncanmartin
@duncanmartin
Club Retro Rides Member 70
|
Aug 16, 2021 14:15:45 GMT
|
After posting that, I finally had nothing hanging over my head, so I cleaned up the fuse box connectors with sandpaper, a screwdriver, and a lot of contact cleaner. I even cleaned the connectors on the relays! 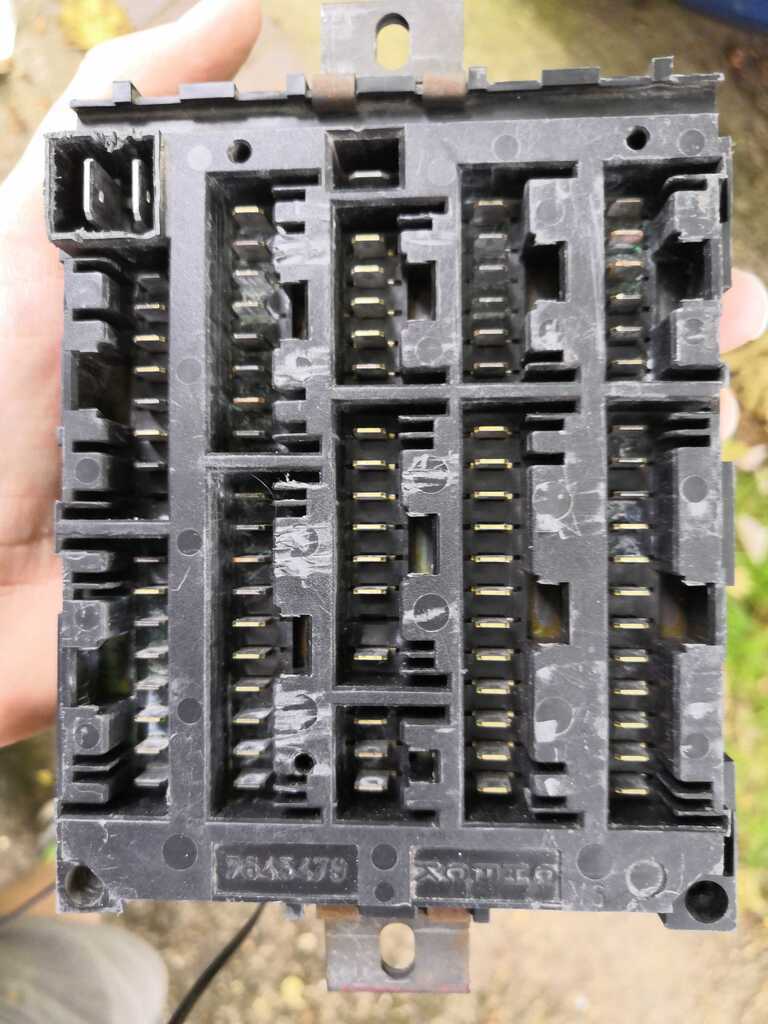 |
| |
|
|
duncanmartin
Club Retro Rides Member
Out of retro ownership
Posts: 1,320
Club RR Member Number: 70
|
1993 Lancia Y10 GTieduncanmartin
@duncanmartin
Club Retro Rides Member 70
|
Aug 27, 2021 11:44:29 GMT
|
I finally started again trying to remove the dash bit of the loom. I disconnected some of the extra random wires, split them off and then reconnected them not tangled up. Everything was going fine, and all I needed to do was work out how to unhook it from the ignition switch. I was hoping I could just unplug the whole connector and get much better access and see what's going on. The connector came out, and it had a red bit and a white bit, so I don't know why, but I split them apart, and er, I shouldn't have done that: 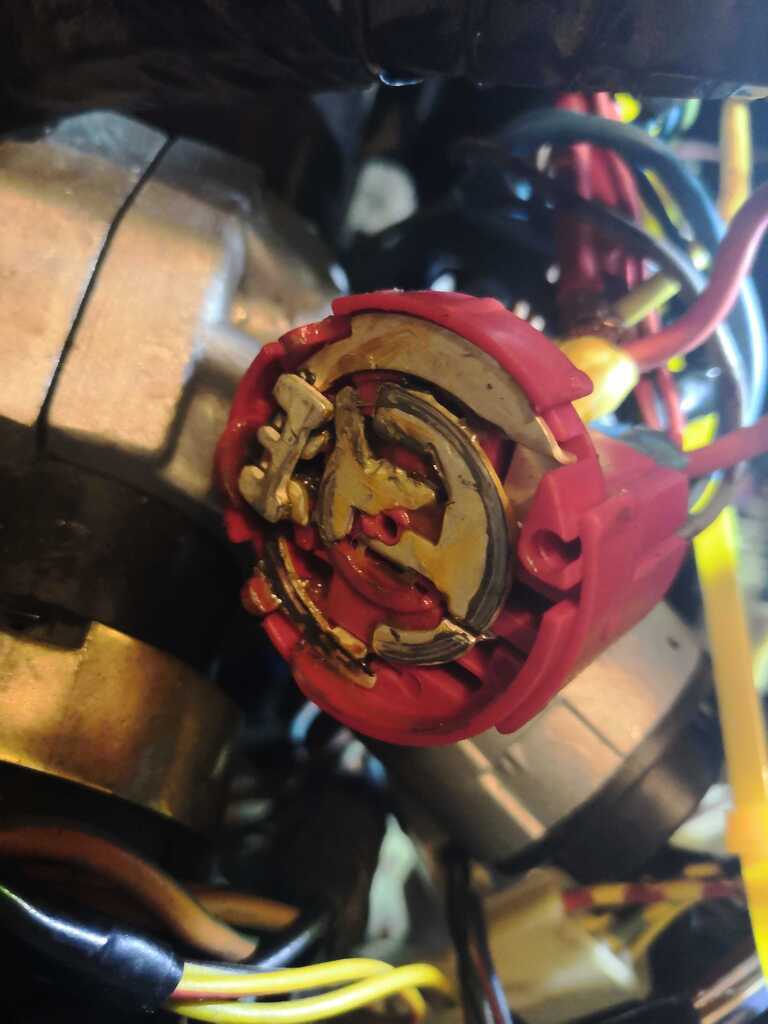 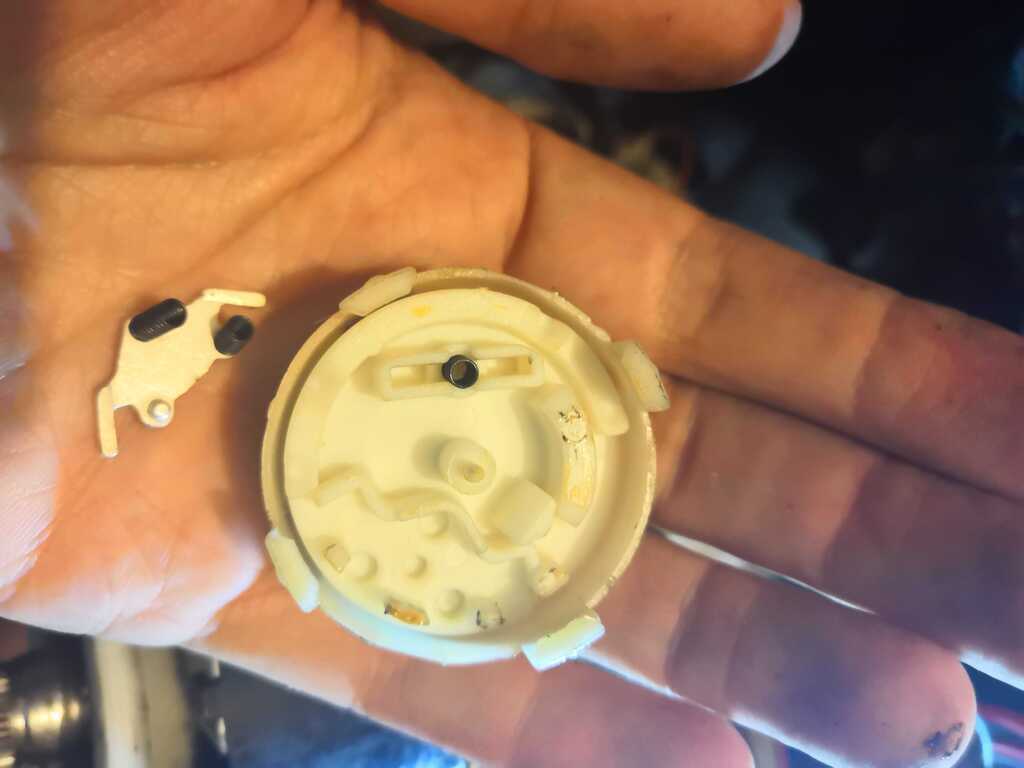 I guess I'll have to work out how to put that back together again.  I labelled all the cables and detached them from the red part, but I still can't take the dashboard loom out as some of the cables coming from that are joined into the same connector as the car loom (where it connects into the ignition switch). I need to check the wiring diagrams to see if this is how it's supposed to be. If it is, I might have to put some extra connectors into those lines so I can split it all apart and pull the dashboard loom. Sigh. |
| |
|
|
duncanmartin
Club Retro Rides Member
Out of retro ownership
Posts: 1,320
Club RR Member Number: 70
|
1993 Lancia Y10 GTieduncanmartin
@duncanmartin
Club Retro Rides Member 70
|
|
|
I've been working on this on and off. I unplugged everything and put the dash bit of the loom back on the back of the dash. I drew pictures of the back of the fusebox, speedo, heater unit, and labelled each socket. Then I went through the whole dash and car looms, matching up everything and then labelled each connector. I removed the binacle in the middle and put the dash back in, but I've struggled to get each of the connectors to plug in properly so far. I also bought a new ignition switch to replace the one I dismantled, and it turned out that the new one has a different interface (mine has a cog on the back, and the new one has a sort of disk), This is the one I bought: www.ebay.co.uk/itm/185245065339?ssPageName=STRK%3AMEBIDX%3AIT&_trksid=p2060353.m1438.l2649So I need to work out if I can fix mine or if I can change the steering lock part and use the new one. In a fit of motivation, I also bought some wheels (14" Fiat ones) because they were super cheap. They need a bit of refurbing and tyres, but I think they will look cool when they are done. I will take a load of pictures and update this thread this week... Finally, the car has moved out of the garage - partly because it's so hard to deal with the dash while not being able to open the door properly, and partly because I need to use the garage for other things. So I should probably buy a car cover - are there any recommendations for a decent cover that will fit the Y10? |
| |
|
|
duncanmartin
Club Retro Rides Member
Out of retro ownership
Posts: 1,320
Club RR Member Number: 70
|
1993 Lancia Y10 GTieduncanmartin
@duncanmartin
Club Retro Rides Member 70
|
|
|
Here's one of the new wheels balanced approximately in the right place (back wheel is the current 13" that it has on it). I reckon that will look tasty when properly polished up. 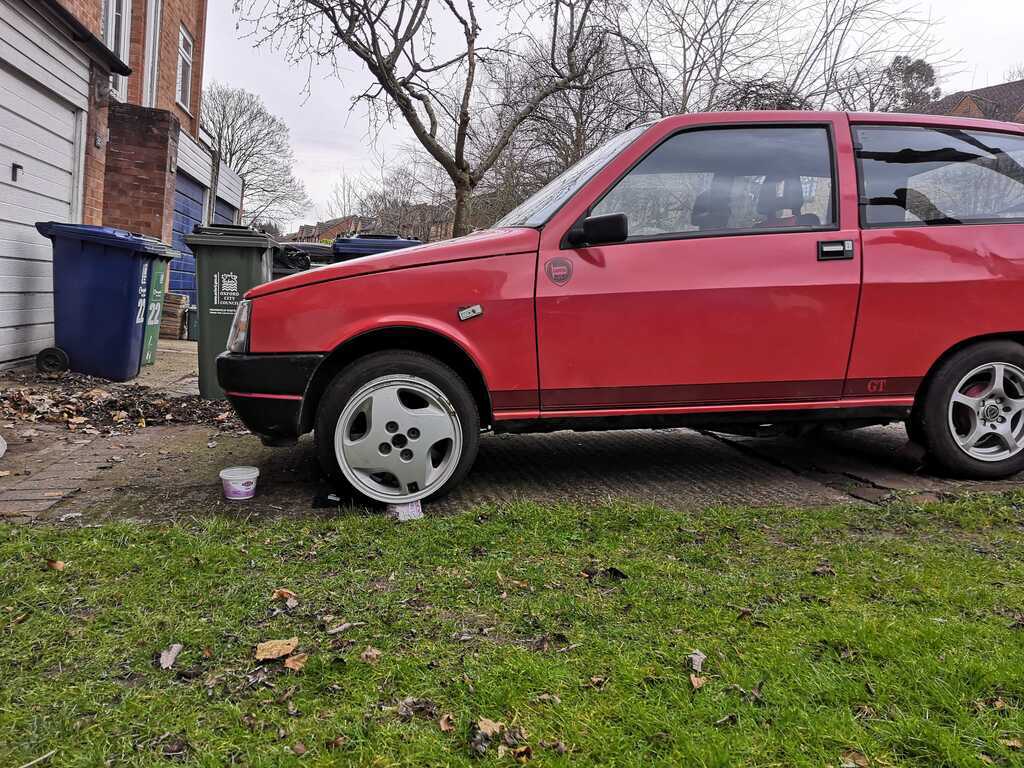 |
| |
|
|
|
|


