duncanmartin
Club Retro Rides Member
Out of retro ownership
Posts: 1,320
Club RR Member Number: 70
|
1993 Lancia Y10 GTieduncanmartin
@duncanmartin
Club Retro Rides Member 70
|
|
|
|
So near and yet so far. The cables came off the front of the heater assembly dead easy (though the plastic clips basically crumbled to dust as I did it). I could then pull the heater unit through (well most of the way) inside the car, and wiggle the dashboard around a bit more.
Unfortunately I can't get it to move very far before it pulls against the wiring that runs behind and then to it. At that point I gave up - I will have to work out a way of actually seeing where all the electrical system clips are behind the dash before I can get it off properly (either that or work blind behind the dash and unclip everything I can find - I can see that taking forever because these clips are all going to be stuck together and impossible to reach for any normal human). Still, baby steps...
|
| |
|
|
|
|
duncanmartin
Club Retro Rides Member
Out of retro ownership
Posts: 1,320
Club RR Member Number: 70
|
1993 Lancia Y10 GTieduncanmartin
@duncanmartin
Club Retro Rides Member 70
|
Jan 23, 2021 17:35:52 GMT
|
Well, there's good news and there's bad news. The first thing I did was label the stereo wires and then cut them. Hopefully that will mean I can find them, reverse engineer what they are from the back of the stereo and then splice them into a generic block connector. Then I removed (well broke) the last clip on the heater cables and pulled them all through. Finally it was time to actually start moving the dash. I started off following the instructions, trying to disconnect all the connectors. There were about 6 that connected the loom that was part of the dash to the column, and I could actually reach these ones so I disconnected them. That meant that the dash could move a bit more, and I realised that there were loads hiding behind the dash. Given how much of a struggle doing them when I could see them, and where I could actually get tools on them, I didn't fancy my chances of disconnecting the hundreds that were lurking out of reach under the dash and behind a bunch of other cabling. So I took the easy way out, cut the 3 cable ties that connected the dash loom to the dash, and just yanked the dash off the loom, leaving that still in the car. After much effort and swearing, the dash moved off the loom and appeared to be free. I almost got the whole thing out, but there were some (more) random attachments that I've no idea what they are holding it fast. Once I'd removed the random panel holding them, I could finally try to get it out of the car. There were several times during this process I thought it was going to break in half, but miraculously it didn't. So before I start the jigsaw puzzle of putting the broken shards of dashboard left in my footwell back into the dash, here's what came out: 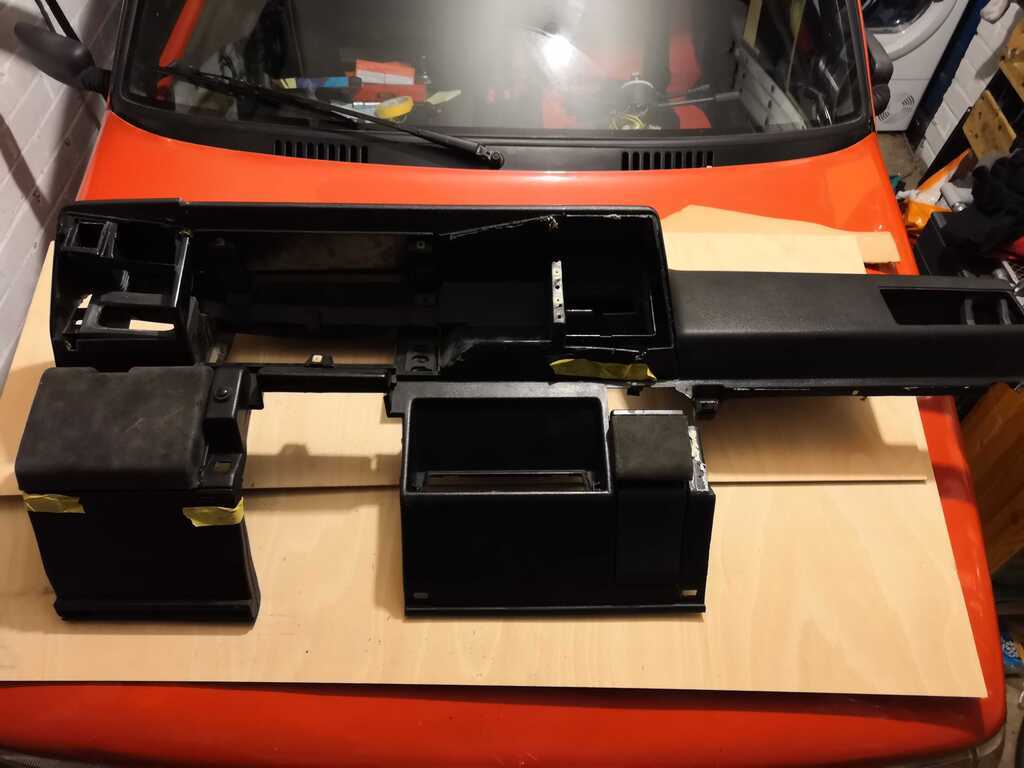 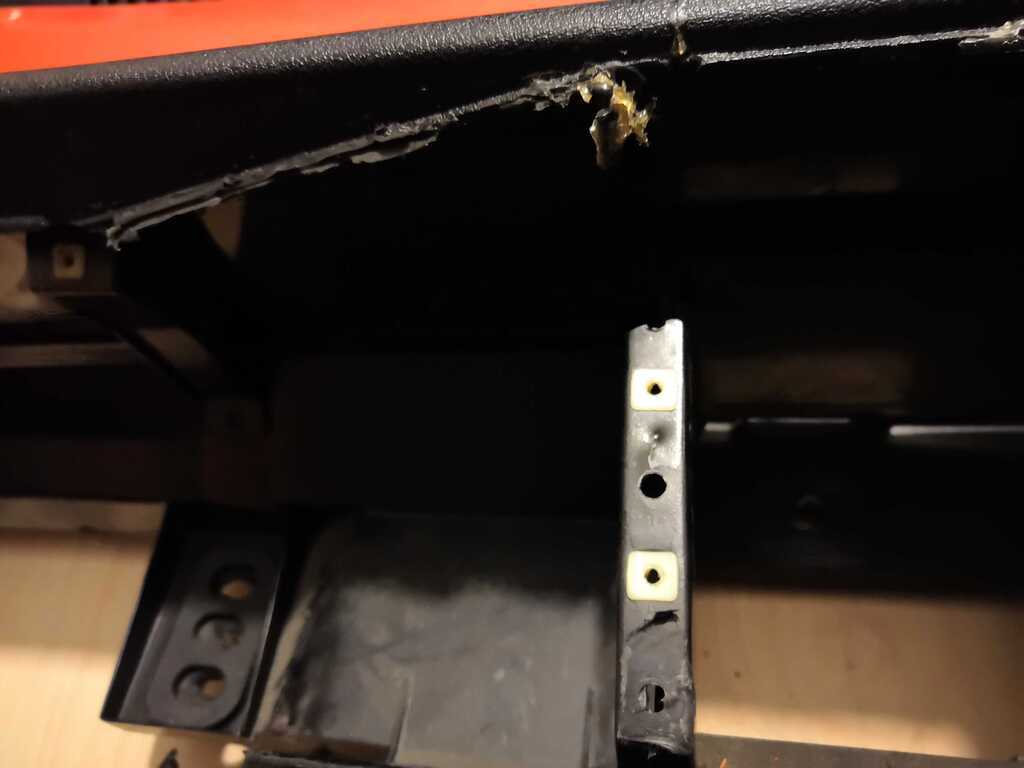 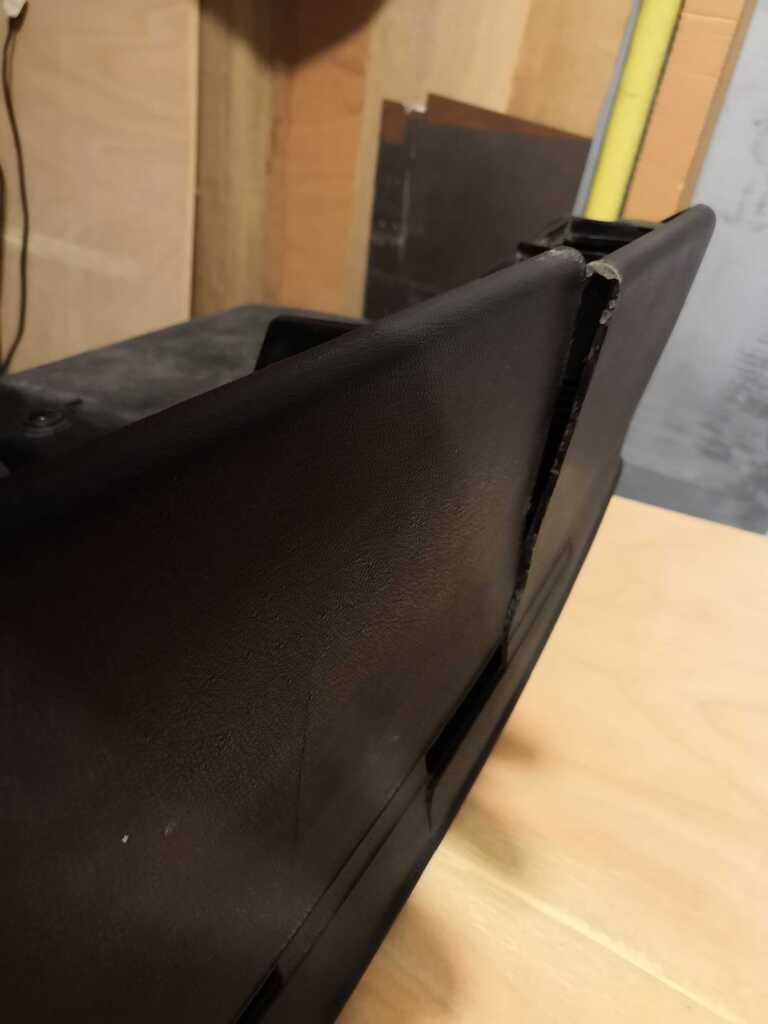 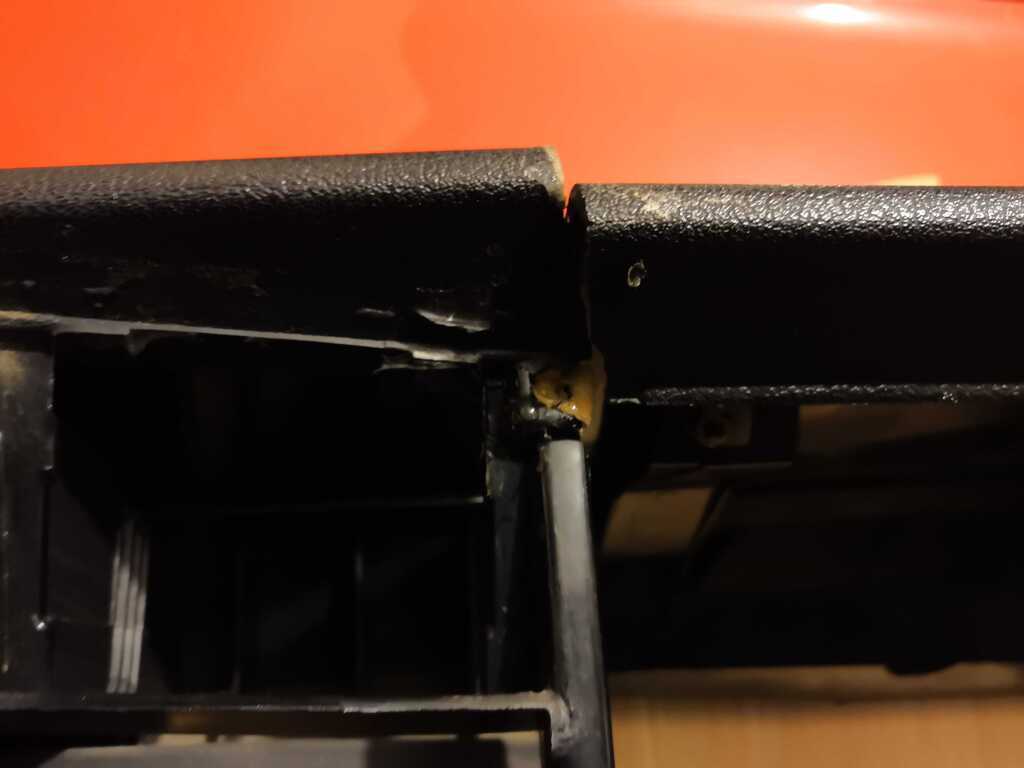 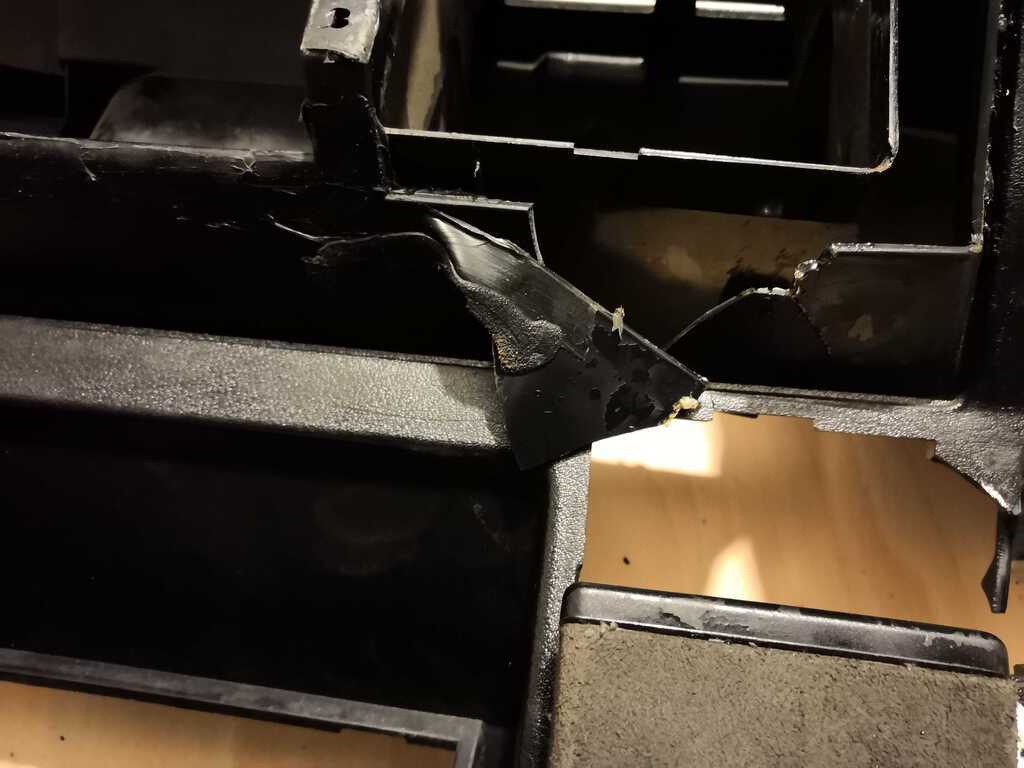 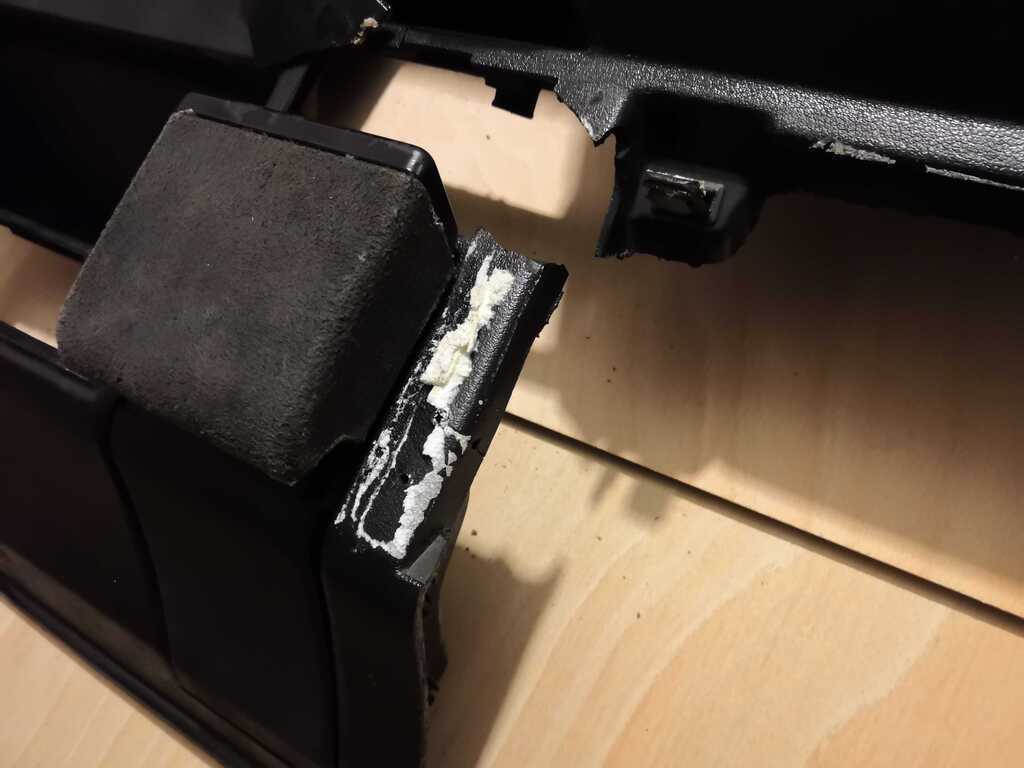 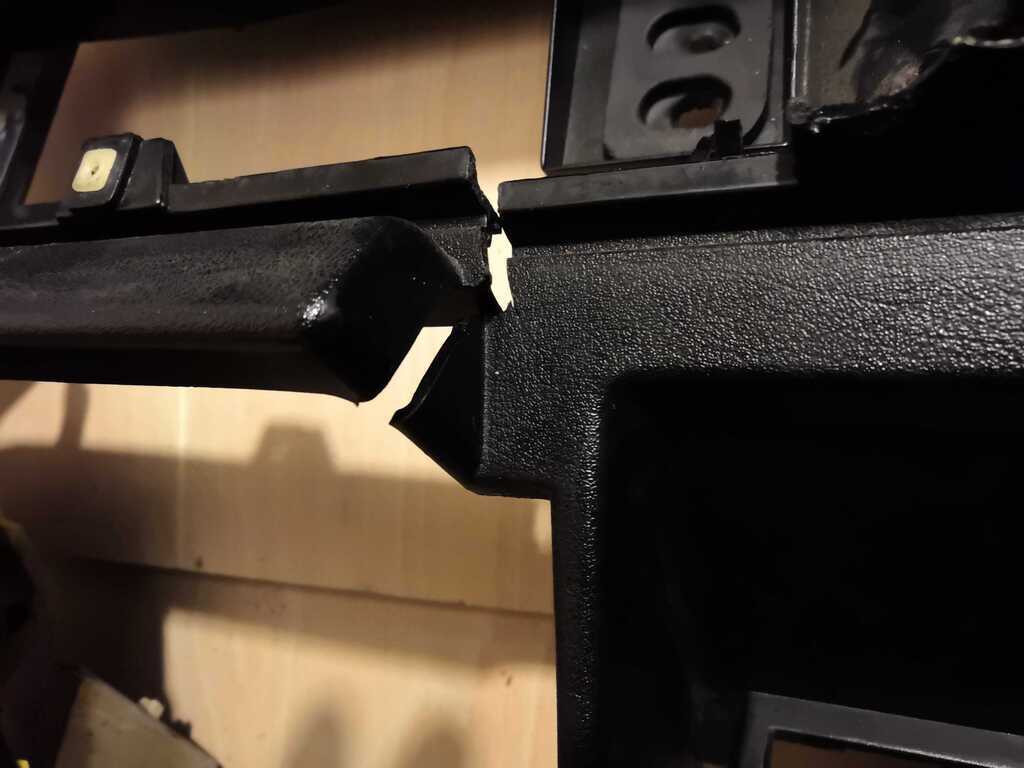 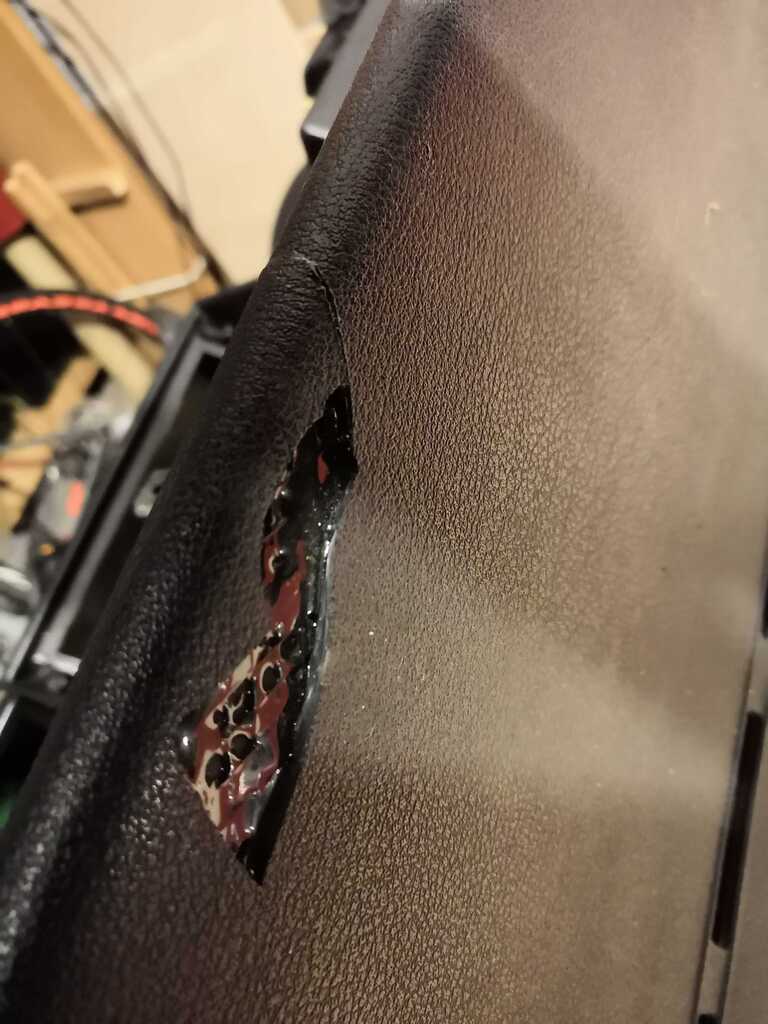 The central piece is almost entirely disconnected from the main bit that passes across the car, the whole section around the steering column is cracked to hell (possibly from resting on the steering column where I fought everything else), there are loads of missing points where there should be mounts for screws, and there is a giant crack running across the top just in front of the driver. Aside from that, it's not too bad!  I need to get hold of some epoxy and CSM and start putting some strength back into it - once I'm happy it won't fall apart in my hands I'll have to start working out how to add all the mounting points back in so that you can attach the clocks, heating etc sturdily. I'm guessing that's going to take a little while templating up bits of steel (in some cases working out how to add the mounting holes back onto the heating stuff too). After that's done, I guess it will be time for the flocking! I also need to disconnect all the bits of that loom, clean all the connectors so you can push them together and take them apart without enormous force. Once I've done all that, I can consider re-uniting the dash and the loom and putting it back in the car - don't think I'll be driving it for a little while! |
| |
|
|
thomfr
Part of things
  Trying to assemble the Duett again..
Posts: 694
|
|
Jan 23, 2021 22:25:58 GMT
|
|
How about getting a replacement from Italy in good shape and put that in?
Any Italian residents at RRF?
Thom
|
| |
73' Alfa Giulia Super
64' Volvo Duett
65' Volvo Duett
67' Volvo Amazon 123GT
09' Ford Focus 1.8
20' VW ID4
71' Benelli Motorella
65' Cyrus Speciaal
The difference between men and boys is the price of their toys
|
|
duncanmartin
Club Retro Rides Member
Out of retro ownership
Posts: 1,320
Club RR Member Number: 70
|
1993 Lancia Y10 GTieduncanmartin
@duncanmartin
Club Retro Rides Member 70
|
Jan 24, 2021 10:35:25 GMT
|
|
That would definitely be the best way to return it to OE spec. Given the current issues shipping stuff to/from Europe, and the various lockdowns in place I suspect now is not the best time to do that. Also, the plastic is kinda brittle, and spending >25 years in the Italian sun is unlikely to leave very many in much better shape than this one. I'm also kinda concerned about it getting damaged in transit.
It's been suggested to me that I should try one of those "plastic welding" kits to join the plastic cracks together. I'm gonna investigate them as well...
|
| |
|
|
|
|
|
Jan 24, 2021 10:38:56 GMT
|
|
"It's been suggested to me that I should try one of those "plastic welding" kits to join the plastic cracks together. I'm gonna investigate them as well..."
...might as well nothing to loose !
|
| |
|
|
duncanmartin
Club Retro Rides Member
Out of retro ownership
Posts: 1,320
Club RR Member Number: 70
|
1993 Lancia Y10 GTieduncanmartin
@duncanmartin
Club Retro Rides Member 70
|
Jan 24, 2021 16:26:49 GMT
|
|
I had a bit of a google and ordered a cheap plastic welder from Amazon. Will have a go with it next weekend... I'll still need to bond some brackets in so I can attach everything else (I'll use screws as well where the back of the panel is hidden). I've got some of those U clips so as I can make reasonable sized holes in the brackets and have some adjustment to line everything up - hopefully that should make re-assembly easier (and longer lasting).
To make refitting the dash easier I'm gonna remove the centre console. That and the steering column are the only bits that really get in the way (and I've not looked into how complicated removing the steering column yet).
|
| |
|
|
gib
Part of things
 
Posts: 169
|
|
Jan 24, 2021 20:51:31 GMT
|
Sorry I missed this i bought the following of eBay a couple of weeks ago to sort out my split bumper. It is incredibly easy and intuitive to use and easier than a hot air welder. Bottom line if you want to borrow either I can drop them of or you can collect depending on how comfortable you feel based on the current situation.  FB_IMG_1611520952659 FB_IMG_1611520952659 by creativeq, on Flickr  FB_IMG_1611520942183 FB_IMG_1611520942183 by creativeq, on Flickr  20210124_203540 20210124_203540 by creativeq, on Flickr |
| |
|
|
duncanmartin
Club Retro Rides Member
Out of retro ownership
Posts: 1,320
Club RR Member Number: 70
|
1993 Lancia Y10 GTieduncanmartin
@duncanmartin
Club Retro Rides Member 70
|
|
|
|
Hi
Thanks for the offer, I've actually ordered something like that. Glad to see that they work though, and liking the Avantime (and the number plate). How did you get on with that quattro resto - I've not seen you on here much?
|
| |
|
|
gib
Part of things
 
Posts: 169
|
|
Jan 25, 2021 13:30:33 GMT
|
 20190204_091248 20190204_091248 by creativeq, on Flickr The quattro is on long term hold, it place being filled by a Murena which now runs and an old Thames Wooden Put Put boat which runs when it feels like it. The picture above gives some reference from when the bumper was less intact. |
| |
|
|
duncanmartin
Club Retro Rides Member
Out of retro ownership
Posts: 1,320
Club RR Member Number: 70
|
1993 Lancia Y10 GTieduncanmartin
@duncanmartin
Club Retro Rides Member 70
|
Jan 25, 2021 14:15:46 GMT
|
Ouch, looks like the plastic weld gun saved getting a new bumper. I have to see your Murena when we're allowed out again, I've loved those things for ages and always felt that it would make an awesome stablemate for a Multipla.  Avantimes are also pretty cool - are you collecting cars built by Matra? |
| |
|
|
|
|
gib
Part of things
 
Posts: 169
|
|
Jan 25, 2021 15:59:29 GMT
|
|
|
| |
|
|
duncanmartin
Club Retro Rides Member
Out of retro ownership
Posts: 1,320
Club RR Member Number: 70
|
1993 Lancia Y10 GTieduncanmartin
@duncanmartin
Club Retro Rides Member 70
|
|
|
|
The plastic weld tool arrived yesterday. I'm hoping to get half an hour to experiment with it this evening. I don't have any items of similar thickness/brittleness of plastic to experiment on, so I might just pick a couple of inconspicuous bits and give it a go. I think I'll start with the steering column shroud, because I know I can easily get hold of another one (LHD and RHD are the same) if I mess it up!
|
| |
|
|
|
|
|
Jan 27, 2021 19:17:58 GMT
|
How about getting a replacement from Italy in good shape and put that in? Any Italian residents at RRF? Thom here i am..also had an Y10 some years ago...nice city car indeed... |
| |
|
|
|
|
|
Jan 27, 2021 19:29:08 GMT
|
|
..forget to specify: if you need help to find spares in italy, just pm me..
|
| |
|
|
duncanmartin
Club Retro Rides Member
Out of retro ownership
Posts: 1,320
Club RR Member Number: 70
|
1993 Lancia Y10 GTieduncanmartin
@duncanmartin
Club Retro Rides Member 70
|
Jan 27, 2021 19:31:21 GMT
|
The tool is a bit of a mixed bag. It didn't have the knife in the packet, the instructions were garbage, and the plug was one of those 2 pin continental ones.  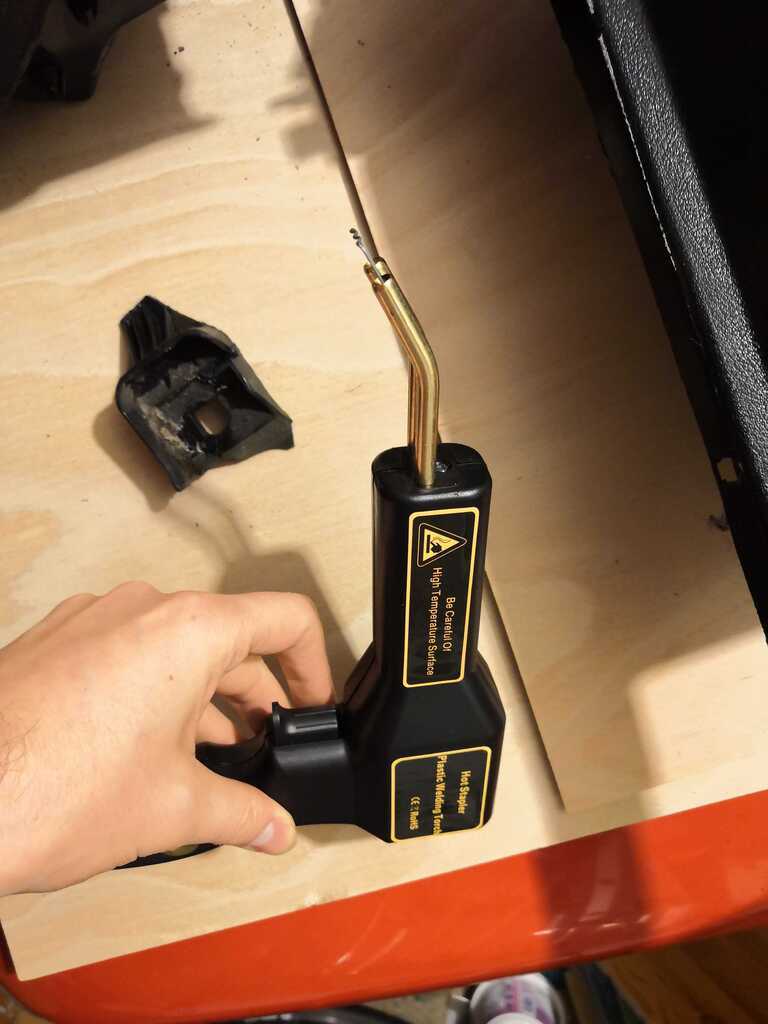 On the other hand, it works really well.  You pull the trigger, wait for the little pin thing to glow, press it into the plastic and release the trigger. A couple of seconds later, you can just pull the gun thing off and put a new pin into it. This is what the repair looks like (I trimmed the sticking out bits afterwards). 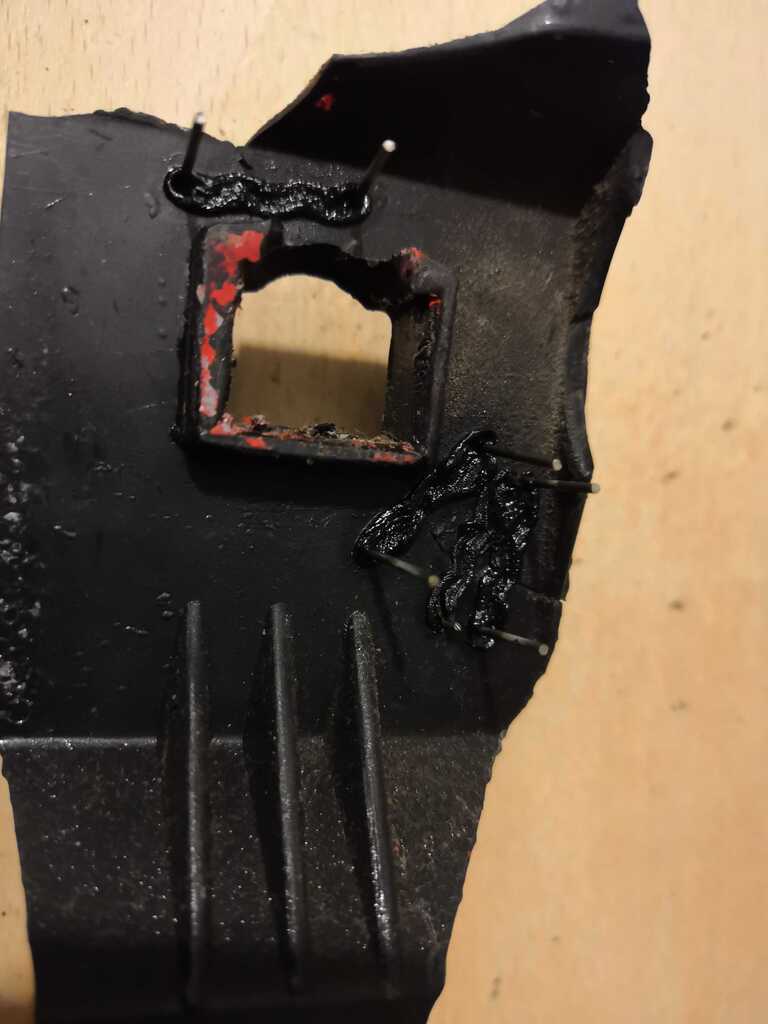 The repaired item seems pretty sturdy, so I'm happy that when I get a chance on the weekend I can still loads of them into the dash and it will hold it all together pretty well. I've still not ordered the fibreglass to repair the bits where there are huge gaps and missing bits of plastic, but hopefully I can get it organised soon! |
| |
|
|
duncanmartin
Club Retro Rides Member
Out of retro ownership
Posts: 1,320
Club RR Member Number: 70
|
1993 Lancia Y10 GTieduncanmartin
@duncanmartin
Club Retro Rides Member 70
|
Jan 27, 2021 19:35:50 GMT
|
..forget to specify: if you need help to find spares in italy, just pm me.. Thanks mate - I might take you up on that at some point. It would mostly be for the interior stuff - the Lancia Motor Club has a few Y10 gurus who live not to far from me, and they have most spares needed for RHD cars. I'm going to wait and see how all the repairs go before I decide what I need there. |
| |
|
|
duncanmartin
Club Retro Rides Member
Out of retro ownership
Posts: 1,320
Club RR Member Number: 70
|
1993 Lancia Y10 GTieduncanmartin
@duncanmartin
Club Retro Rides Member 70
|
Jan 28, 2021 19:55:04 GMT
|
I had a go at repairing the actual dash this evening. As with most of my posts, there's good and bad. I was able to repair quite a few cracks, and they are pretty solid now: 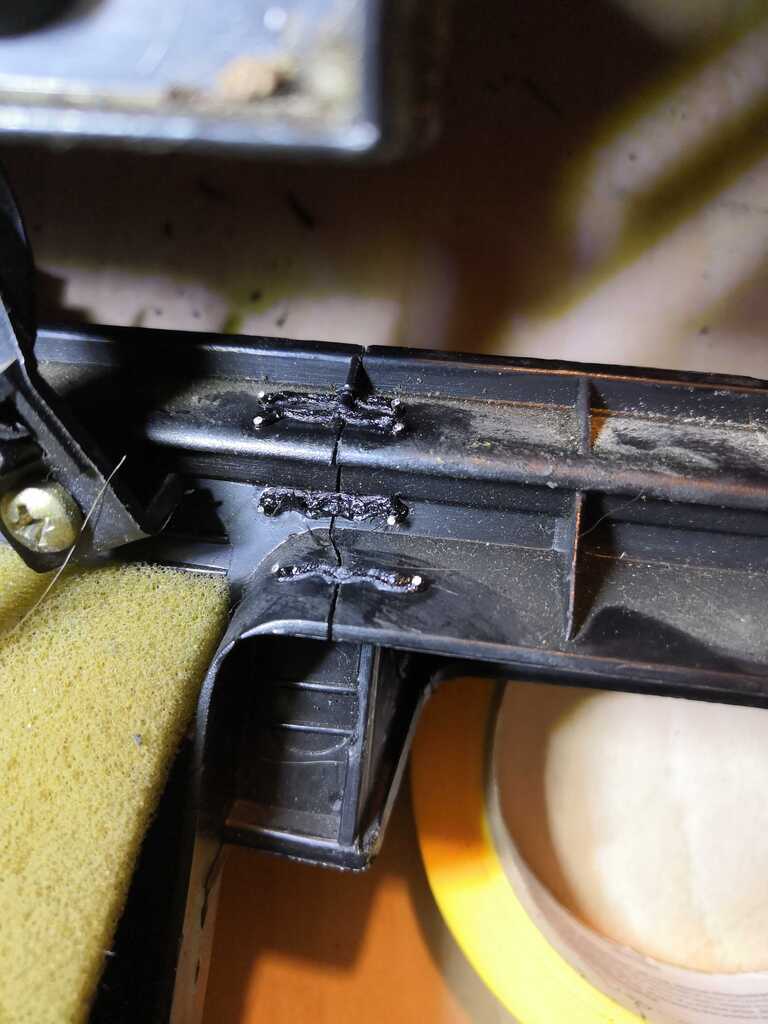 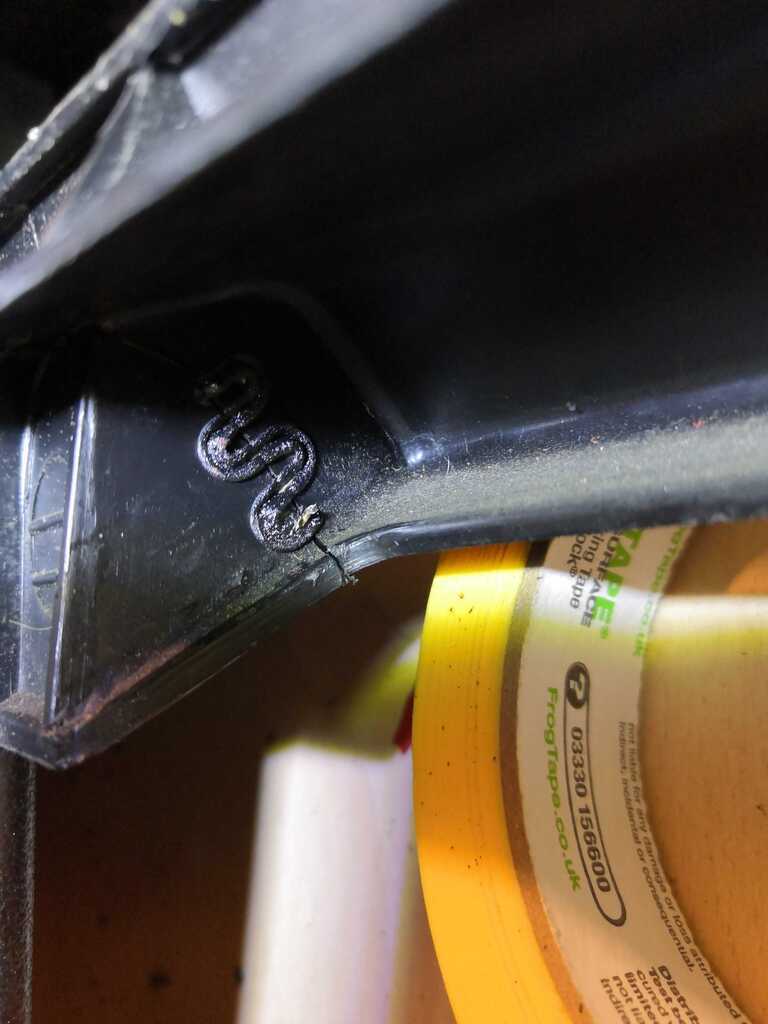 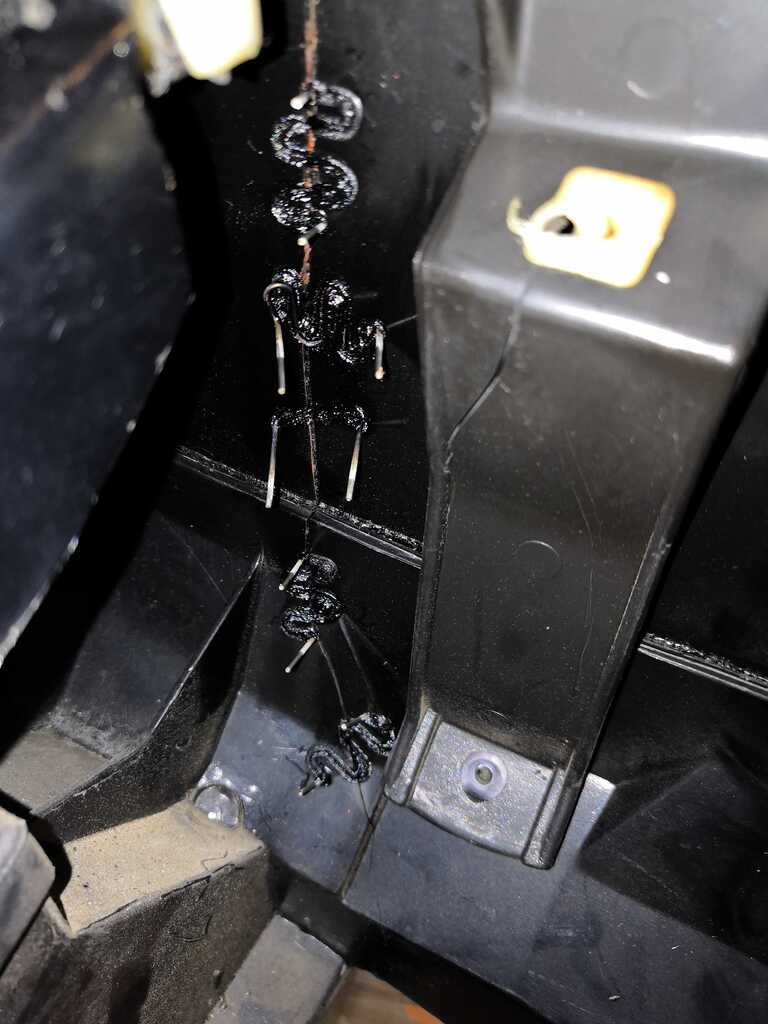 However, access to some of the cracked areas from behind is really tricky, and I managed to melt all the way through one part of the dash top (it's really thin here). 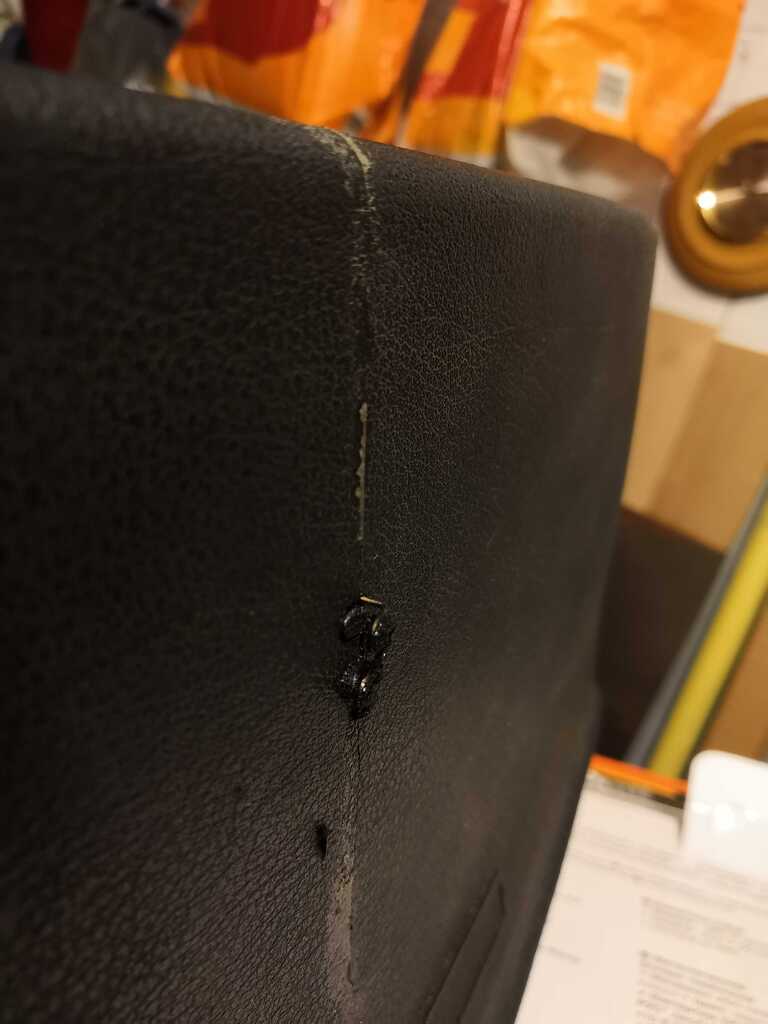 I'll try and clean this up a bit and see if I can make the original finish more presentable, but I think it might be a bit of a lost cause. This dash is never going to be great given the giant hole someone hacked in it when they installed the aircon, so I might give up on that as a bad idea and accept the idea of plastic welding from the front, before smoothing everything out and flocking it. I'll see how well I can do working from the back first though. gib How did you make the back of the bumper smooth? The little clippers that come with the kit leave a tiny bit of wire sticking out that's bound to cut my hands to shreds when I try to put the dash back in (or connect the wiring up afterwards). |
| |
|
|
duncanmartin
Club Retro Rides Member
Out of retro ownership
Posts: 1,320
Club RR Member Number: 70
|
1993 Lancia Y10 GTieduncanmartin
@duncanmartin
Club Retro Rides Member 70
|
|
|
I started on the steel reinforcing bits this weekend. Firstly I labelled everything up so I knew what went where: 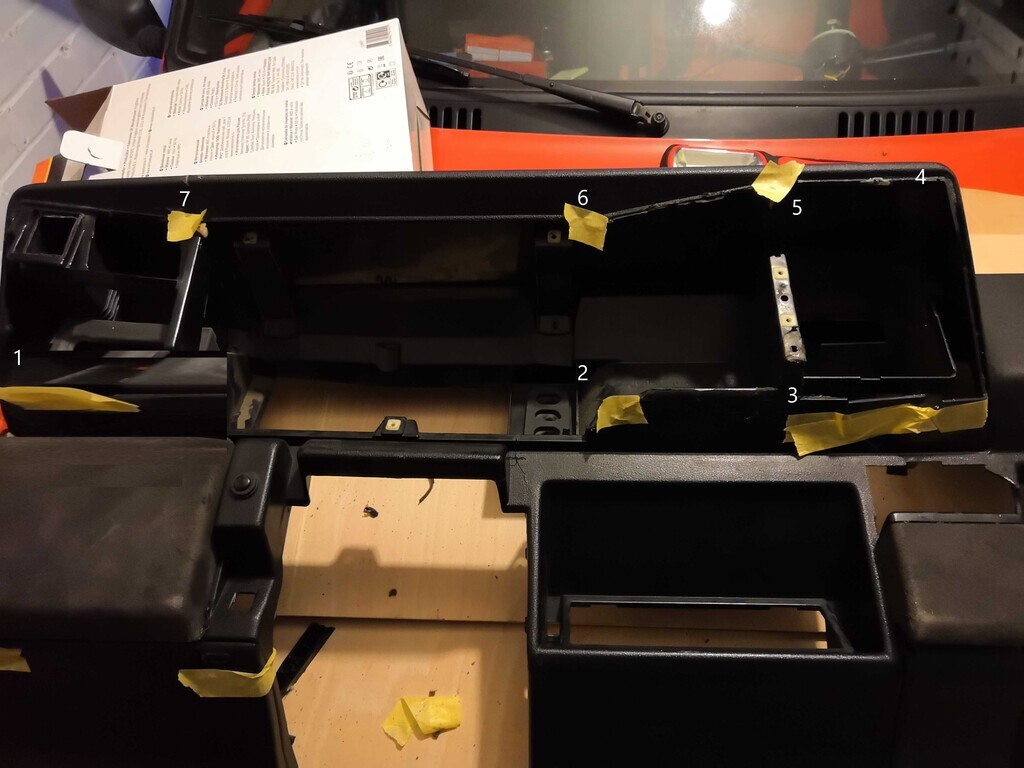 Then I started on the CAD (cardboard version), and I basically made templates for everything before I went anywhere near the steel. After I'd cut out and shaped a few of the steel templates (1.2mm zintec - hopefully will help avoid rusting), I realised that there was a rather large piece missing in the middle. The initial reinforcements: 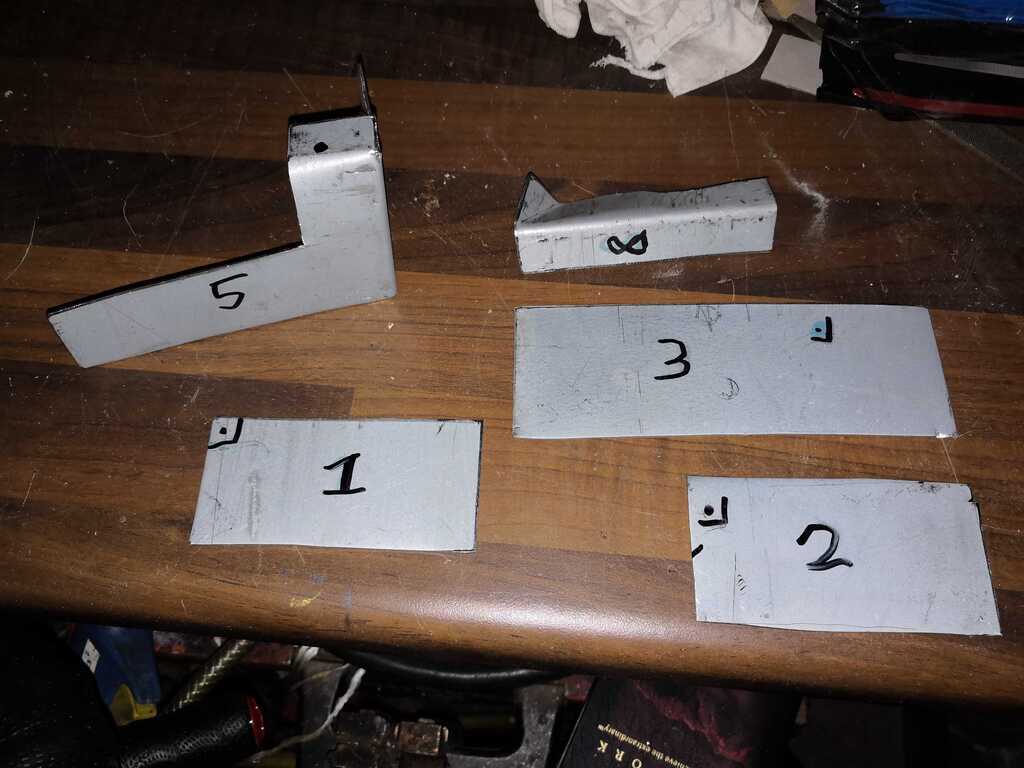 You can see in this picture, that the heater controls bolt up to some plastic in the middle of the dash. The blue ones are all there (though they need reinforcing - I think it should join the top but that has broken), but the green bit is supposed to have something similar to bolt to in the gap where the red shape is. 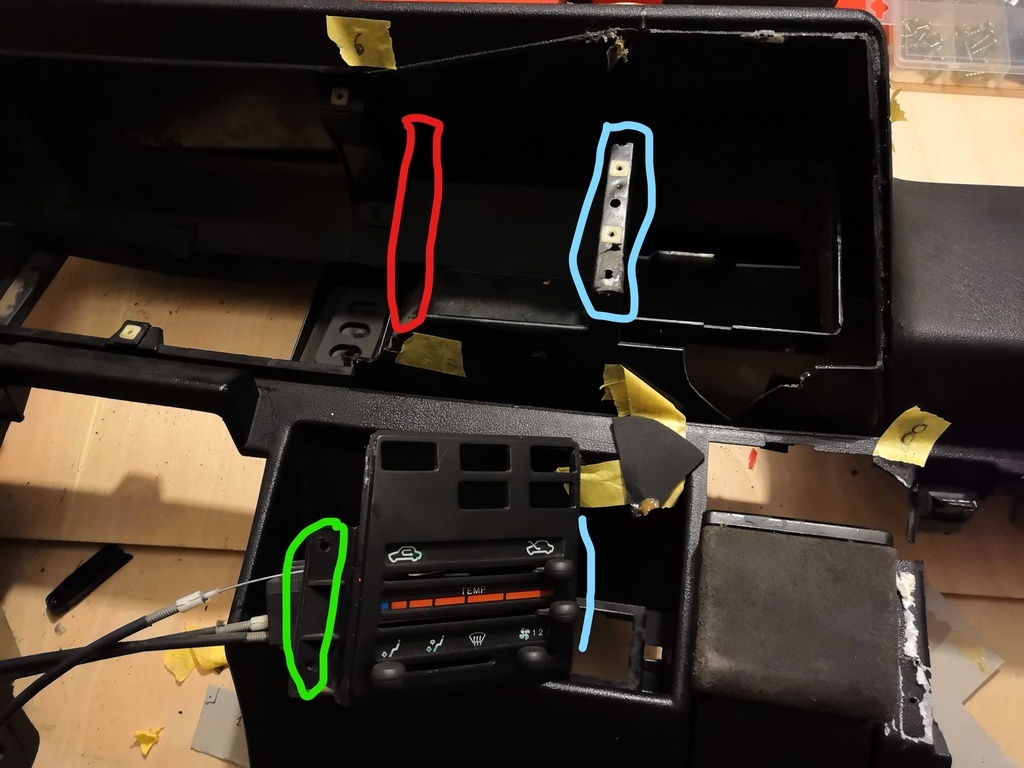 So I'm going to try to make a steel replacement (I probably have some random pieces of broken plastic somewhere, but this plastic is curse word and steel is bound to be more sturdy). The initial template looks like this, but I realised I should make it more of an "n" shape where the holes go, so I'll have to add an extra fold and some extra tabs on the end. This is going to be the most complex repair shape I have ever made, and I can't build it in pieces and then weld together in situ because that would probably melt the plastic (and or damage the epoxy holding it all in). I guess I could bond the metal together, but I'd rather make the metal structure one piece. 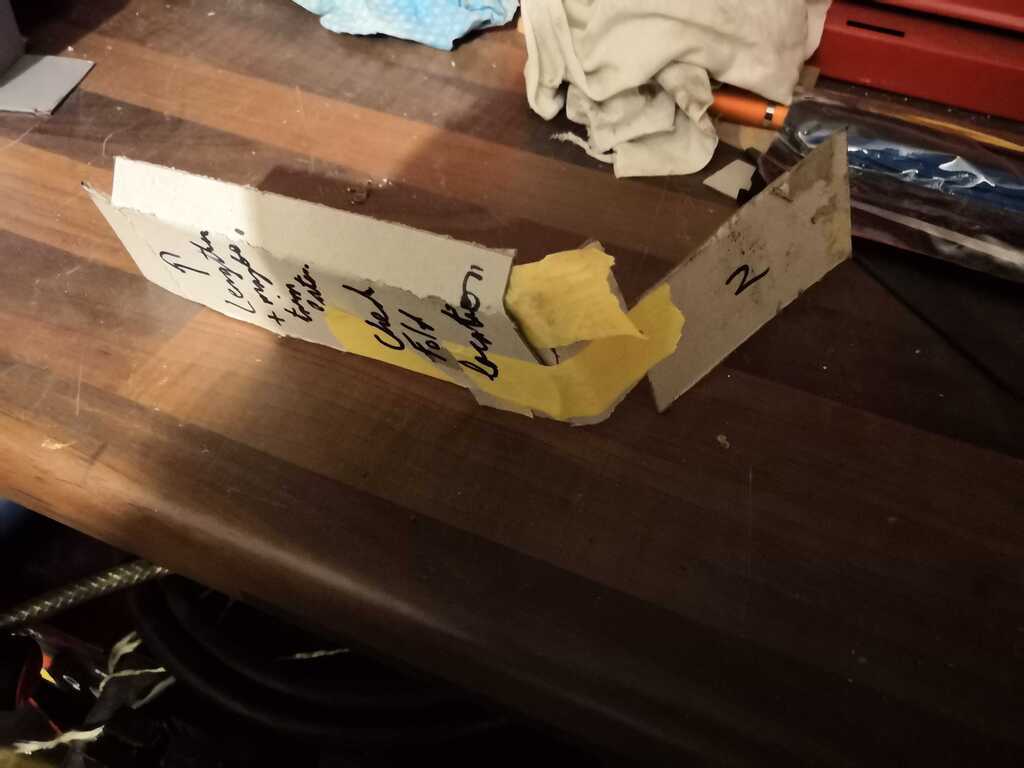 So more experiments in metal shaping to come over the next week or so. |
| |
|
|
gib
Part of things
 
Posts: 169
|
|
|
|
|
Sorry Duncan I missed this, I didn't bother smoothing them off but you can use a flap wheel on a Dremel. Just be careful to not get them too hot. I used a very good pair of side cutters that took the leg of virtually at the surface.
It is amazing how much plastic you need to fix once you get the hang of it. I think I am on about my third bag of staples.
|
| |
|
|
duncanmartin
Club Retro Rides Member
Out of retro ownership
Posts: 1,320
Club RR Member Number: 70
|
1993 Lancia Y10 GTieduncanmartin
@duncanmartin
Club Retro Rides Member 70
|
|
|
3 of them are basically finished now (I'd like to drop a tiny weld onto #5 and smooth out the corners). 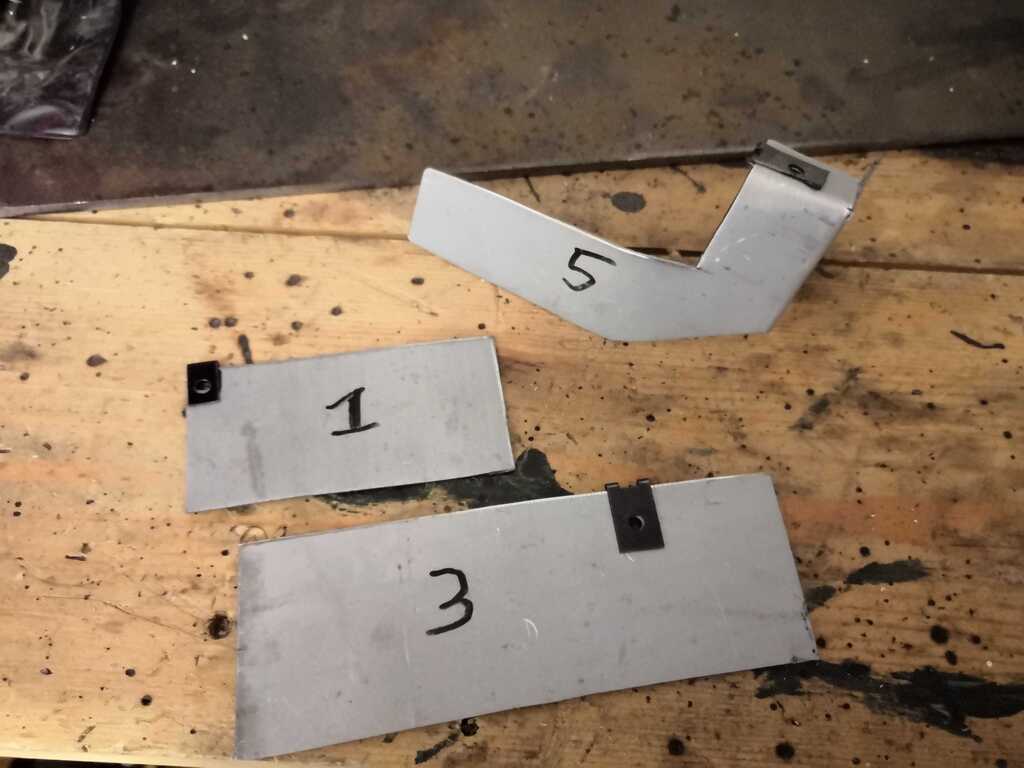 It doesn't look much different to last time, but the holes are drilled, the shape of #5 got a load of finessing, and I had a bunch of tidying to do before I could get at the workbench (and the drill press). I'm slightly concerned about #3 in that the plastic it's going to be bonded to has "relaxed" and is a bit saggy - will straightening it out and bonding in steel sort that out, or just introduce new cracks further along? Obviously getting rid of the sharp corners should reduce stress risers (I can do that now I'd rediscovered my bench grinder), and I'm thinking I'll run the epoxy out past the steel so that it can provide some reinforcement/encouragement for the plastic. I've not tried to do any bonding yet because it's freezing in the garage and I don't think epoxy likes the cold all that much. Also, I only have half a (pair of) tube left and I'm not sure how much I'm going to use just yet - I've ordered some more so I definitely have enough. I might try bonding in as many pieces as I have when it's a bit warmer - I don't think I'm going to finish the bit that joins #2 and #6 and supports the heater controls for a little while as it's quite a complicated shape. It also means I can make sure the epoxy works in a slightly less conspicuous place. |
| |
|
|
|
|


 You pull the trigger, wait for the little pin thing to glow, press it into the plastic and release the trigger. A couple of seconds later, you can just pull the gun thing off and put a new pin into it. This is what the repair looks like (I trimmed the sticking out bits afterwards).


