adam73bgt
Club Retro Rides Member
Posts: 4,998
Club RR Member Number: 58
|
|
|
|
Thanks 79cord yeah the radio doesn't look too bad in place so I'm kinda OK with it ABS is still on my list of things to sort so any and all suggestions are totally appreciated  One of the key troubles for me was being without a car while I tried to sort the pump (I do have the bike, but it's not always ideal). I may have found a solution to this however so watch this space.. Next job will be trying to work out if they're DIY-servicable and if parts are available, should be fun! Yeah the placement of the ABS pump in the engine bay isn't ideal, there are a few things in the bay which seem oddly placed to me, like the charcoal canister is mounted at an angle which didn't look right but seems factory. I've been meaning to do a proper engine bay clean, I've made a start a couple of times but been put off by the scale of the job, with the warmer weather though, it should be a relatively easy job to fit in on an evening |
| |
|
|
|
|
adam73bgt
Club Retro Rides Member
Posts: 4,998
Club RR Member Number: 58
|
|
|
|
Bit of a strange one today in that I spent quite a lot of time working on the car with little to show for it! Started off with thinking I was going to try and get the AC Compressor working but fell at the first hurdle as I wasn't able to locate the relay for the compressor clutch.. the manual I have is for an Acura and refers to a relay box that my car doesn't appear to have.. So some thinking required there. Since I was under the bonnet, I decided to do a bit of an engine bay clean, but also replace a few vacuum lines to see if I could improve the cold starting at all. Little did I realise that the more I looked, the more vacuum lines appeared! My RX7 I had previously was bad for having a lot of vacuum lines, but the Legend isn't far behind! 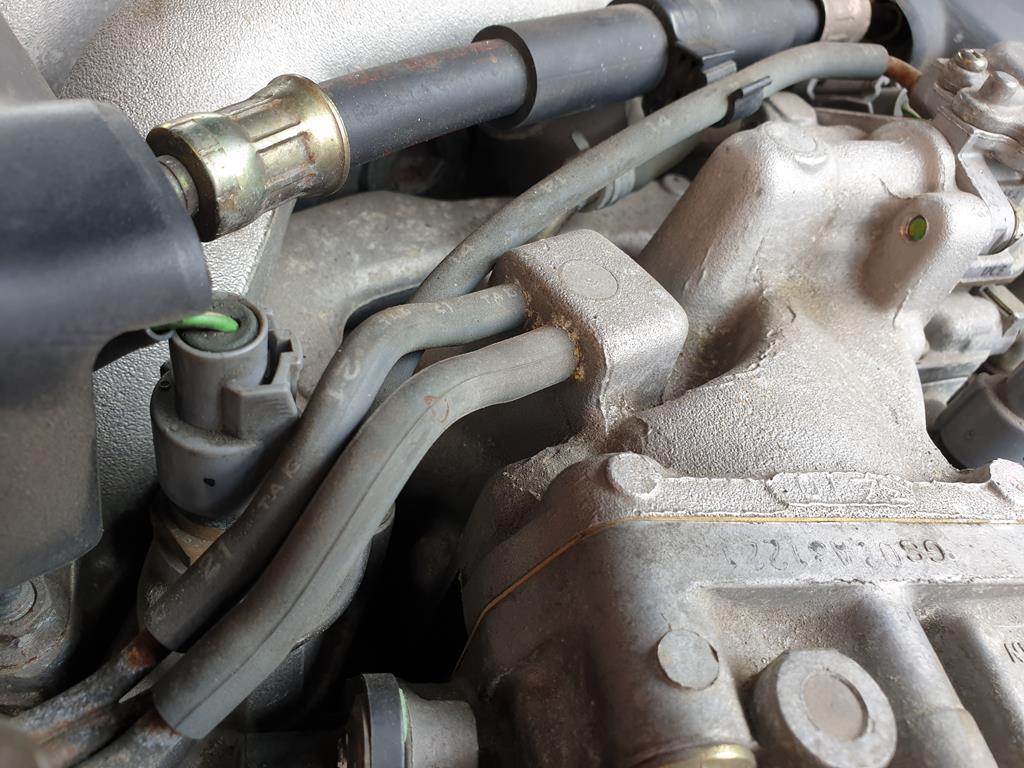 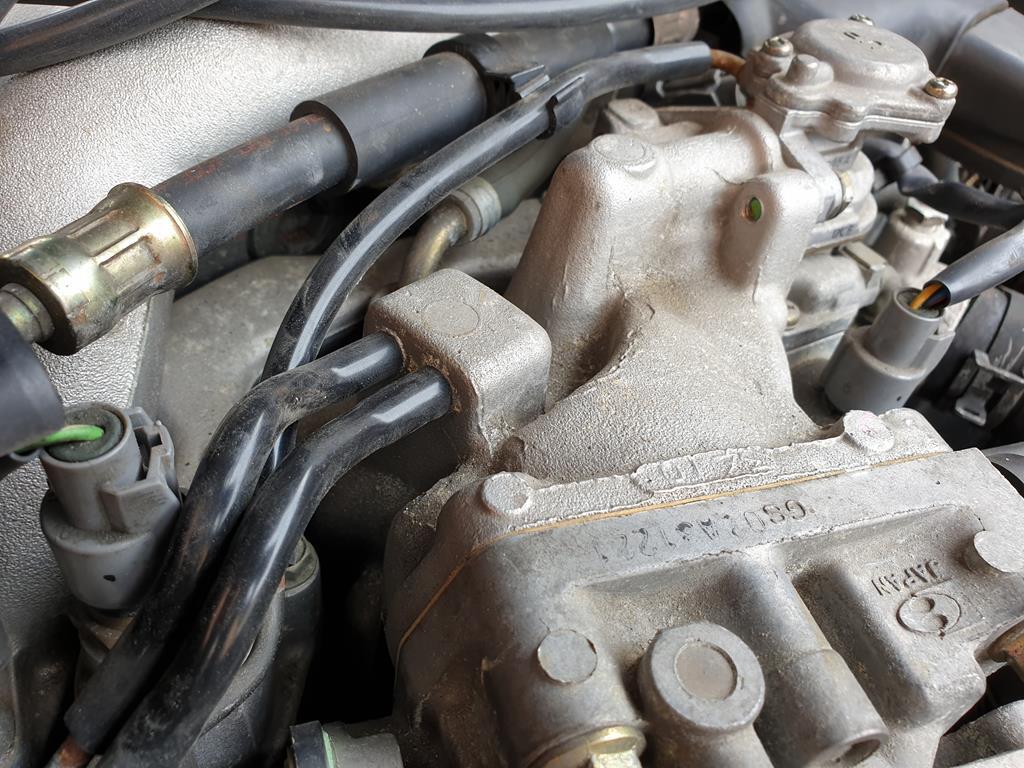 Got the airbox out to reveal a couple of hidden vacuum tanks (?) 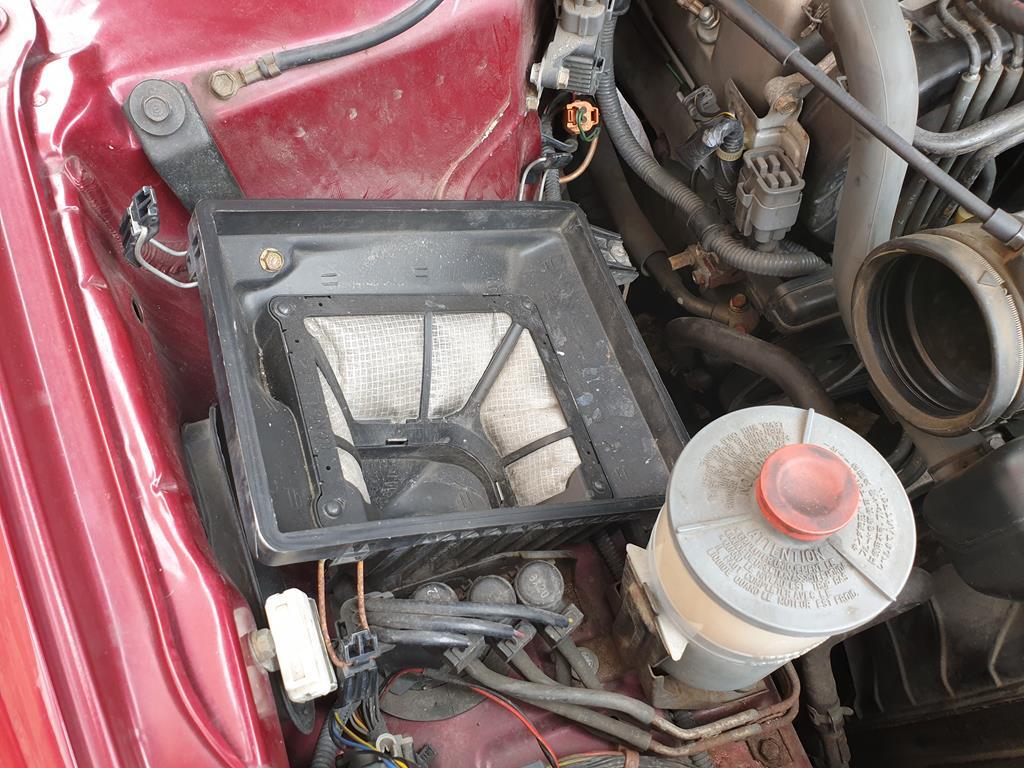 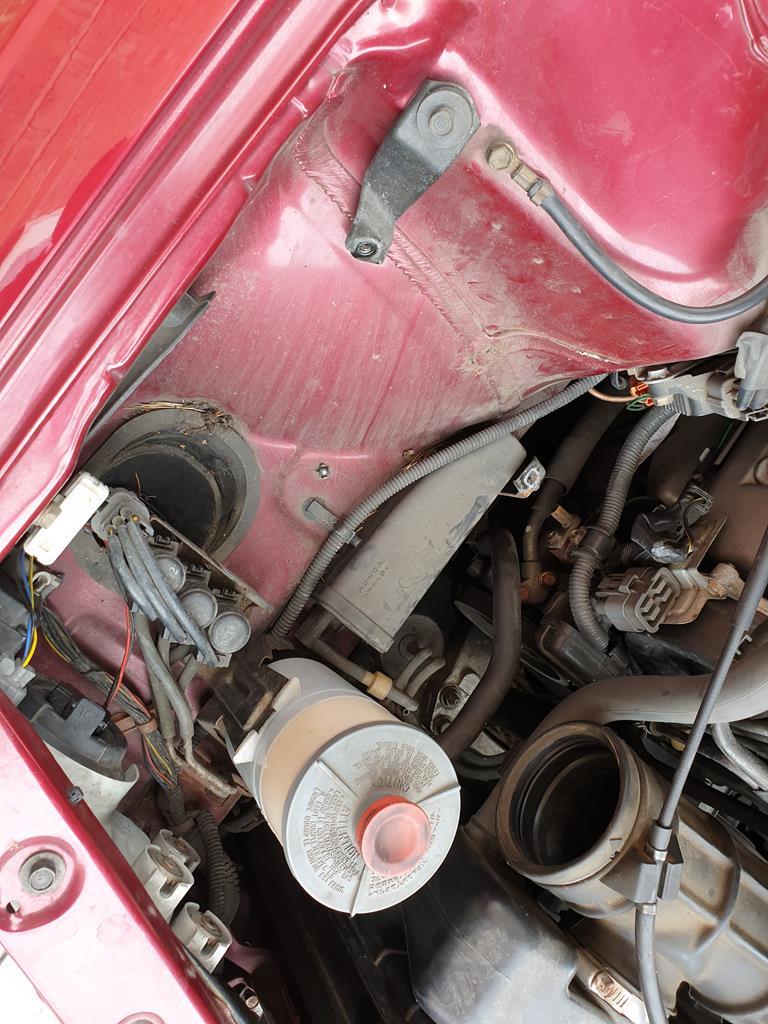 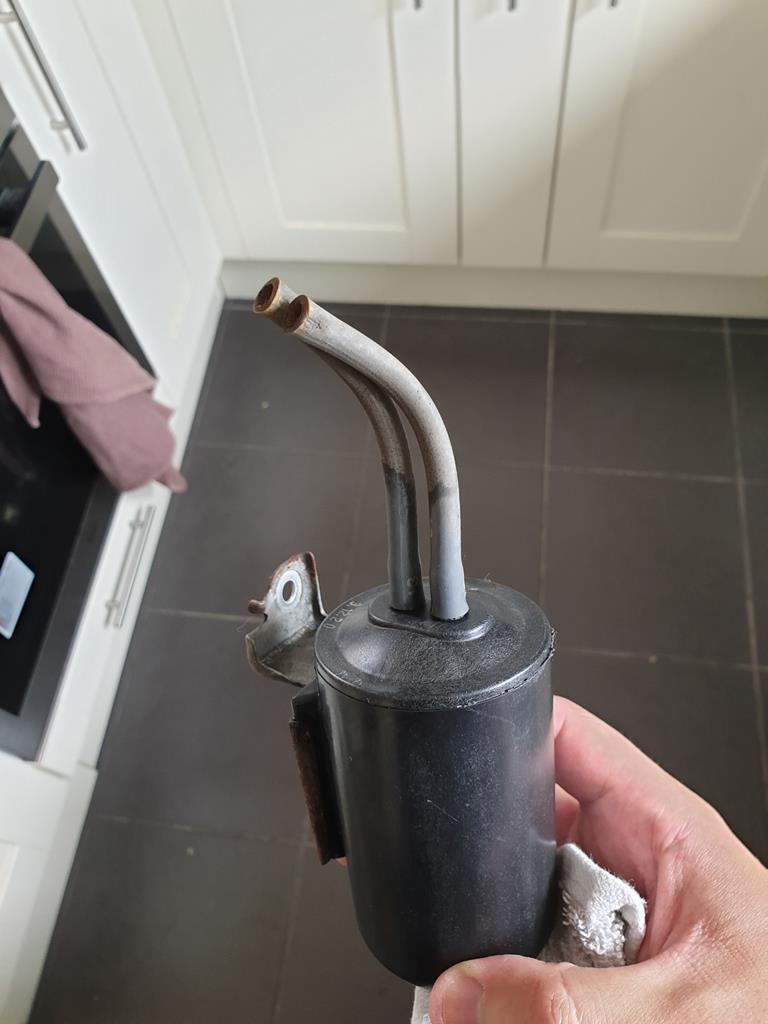 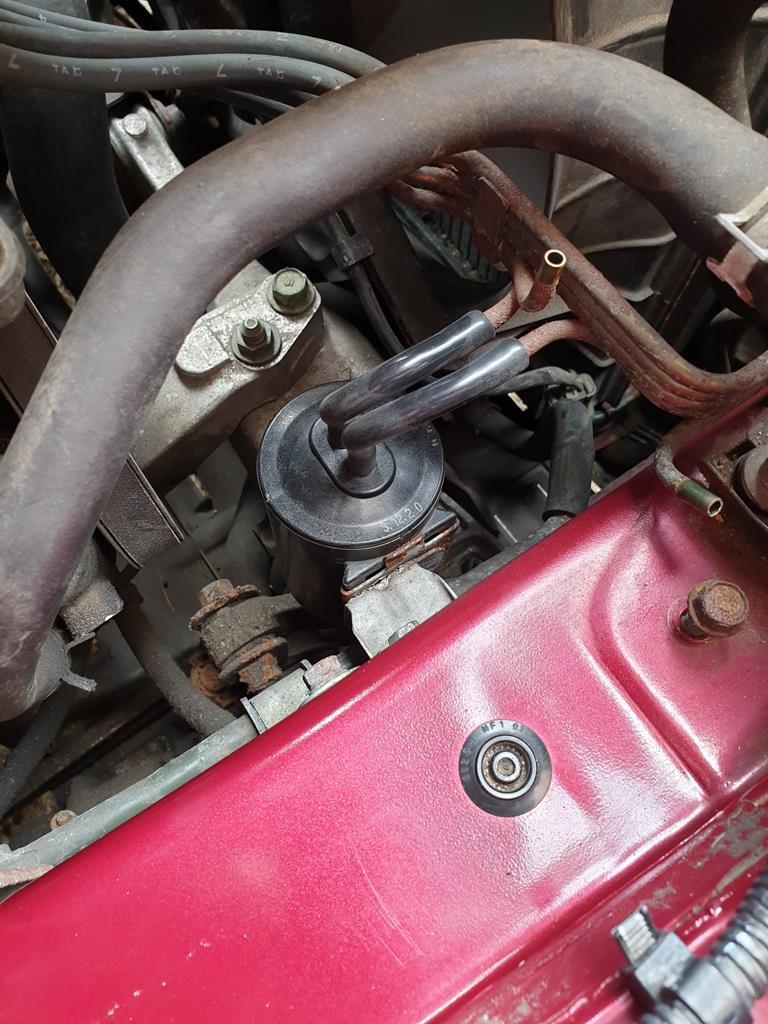 Found yet more pine needles hidden away 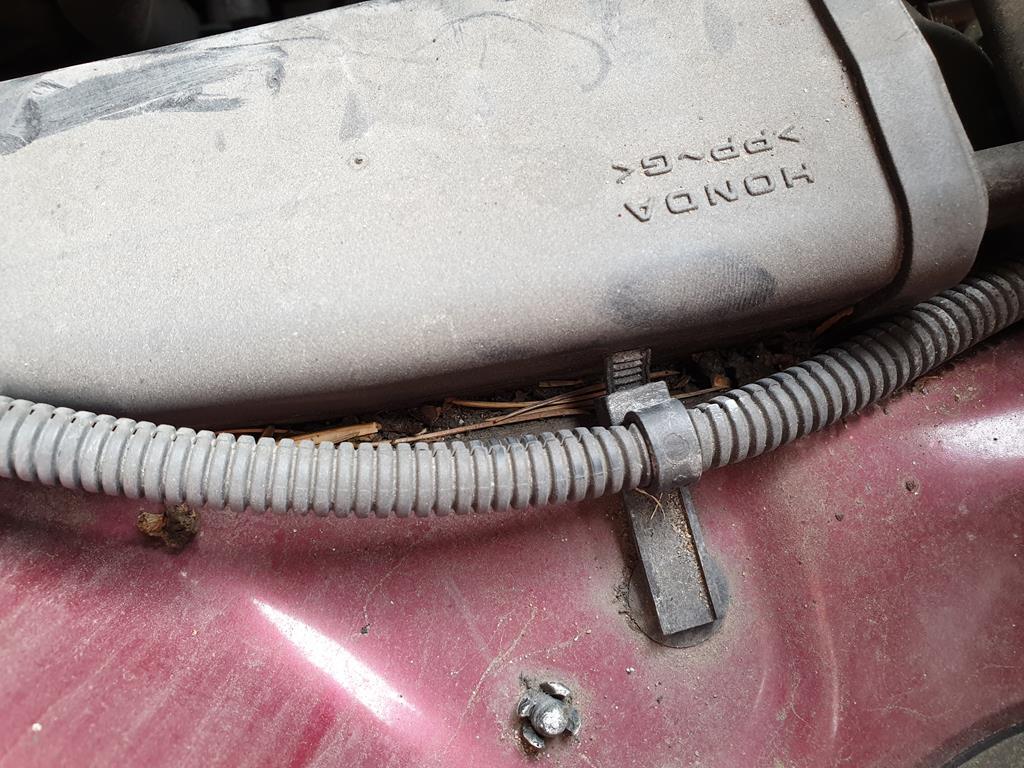 Then because it was all going so well, I forgot about the brittleness of old, heat soaked plastics.. 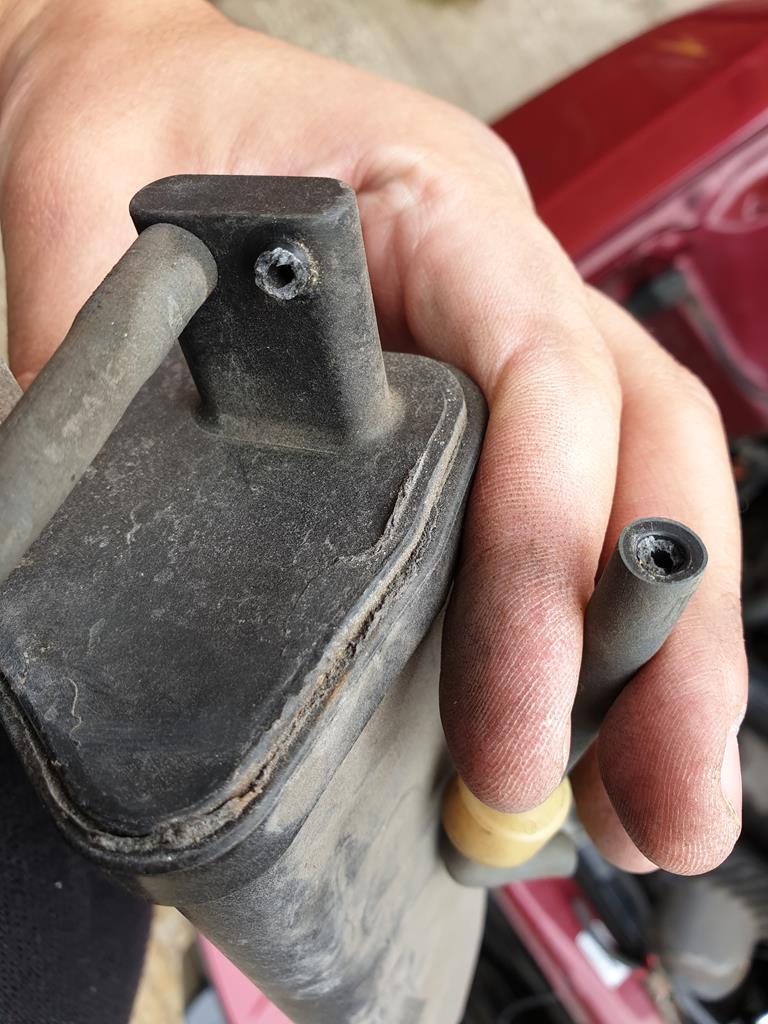 Thankfully I was able to stick the port back on with gorilla glue, and from then on I decided to cut the hose off any plastic parts rather than risk more breakages Inner wing came up nice 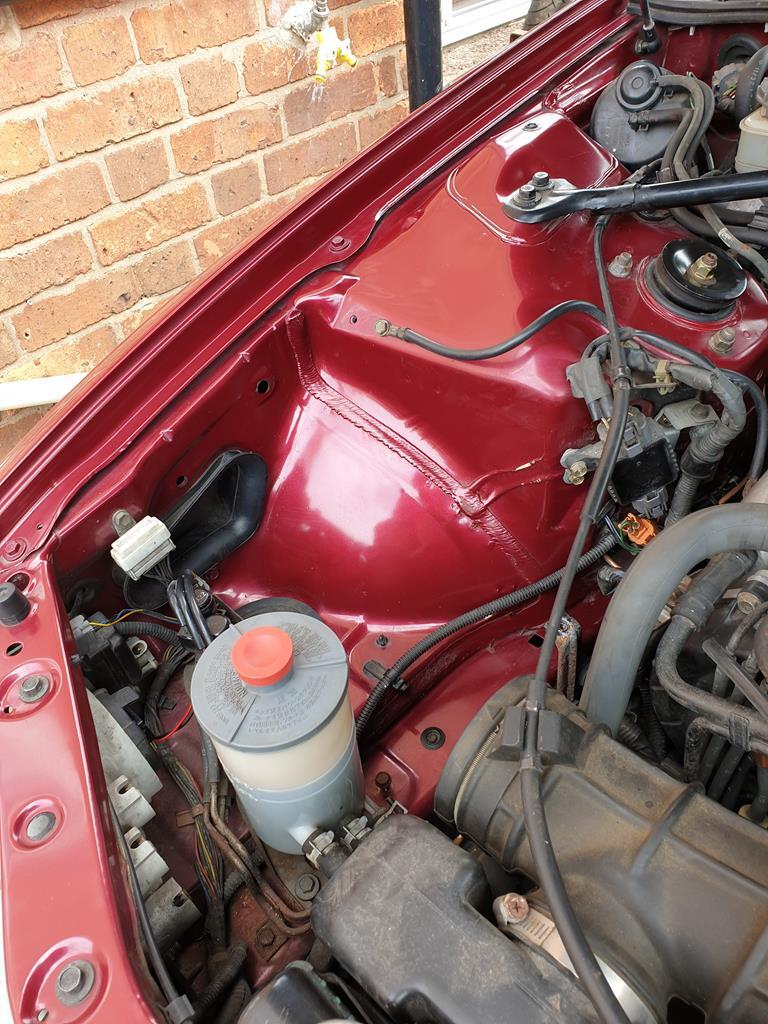 And I removed the sound deadening from the airbox to see if I could get a little more induction noise (hasn't made much difference) 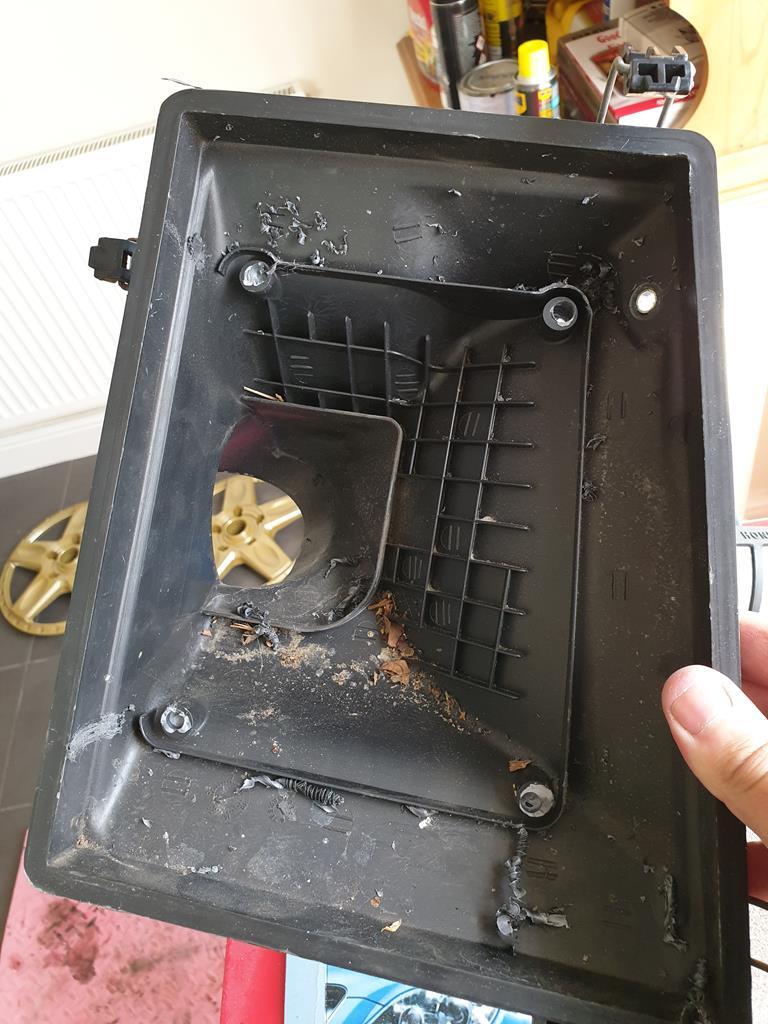  Anyway its not perfect but its getting there 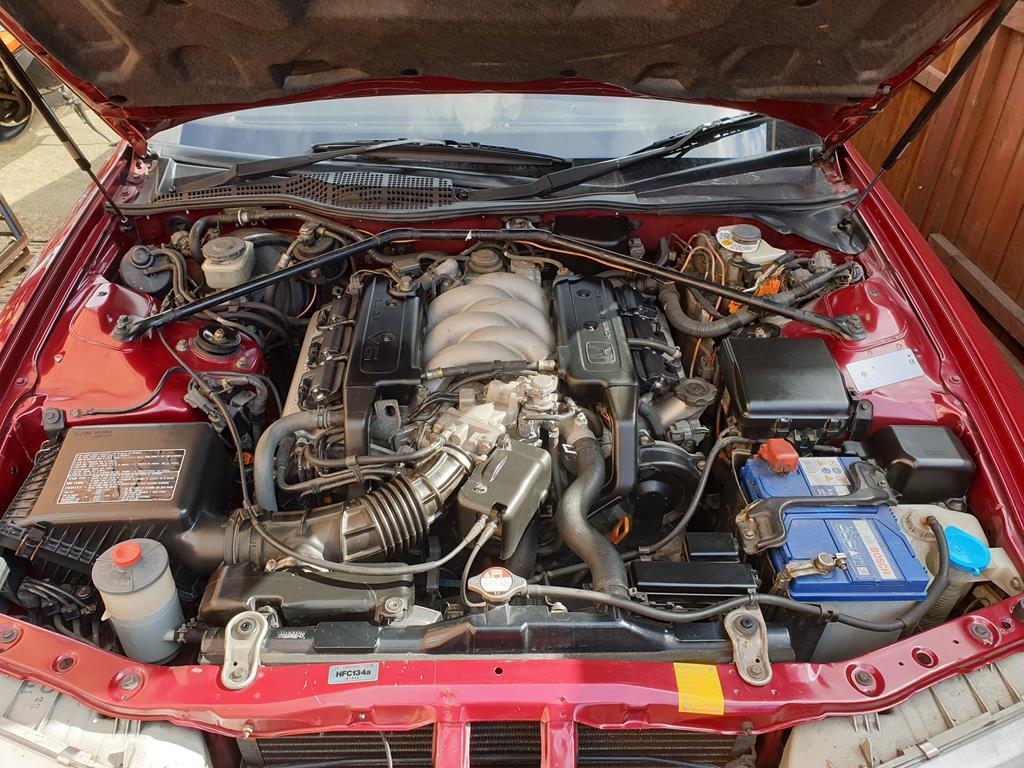 And this is all I've replaced, still only about halfway through all the vacuum hoses in the bay! 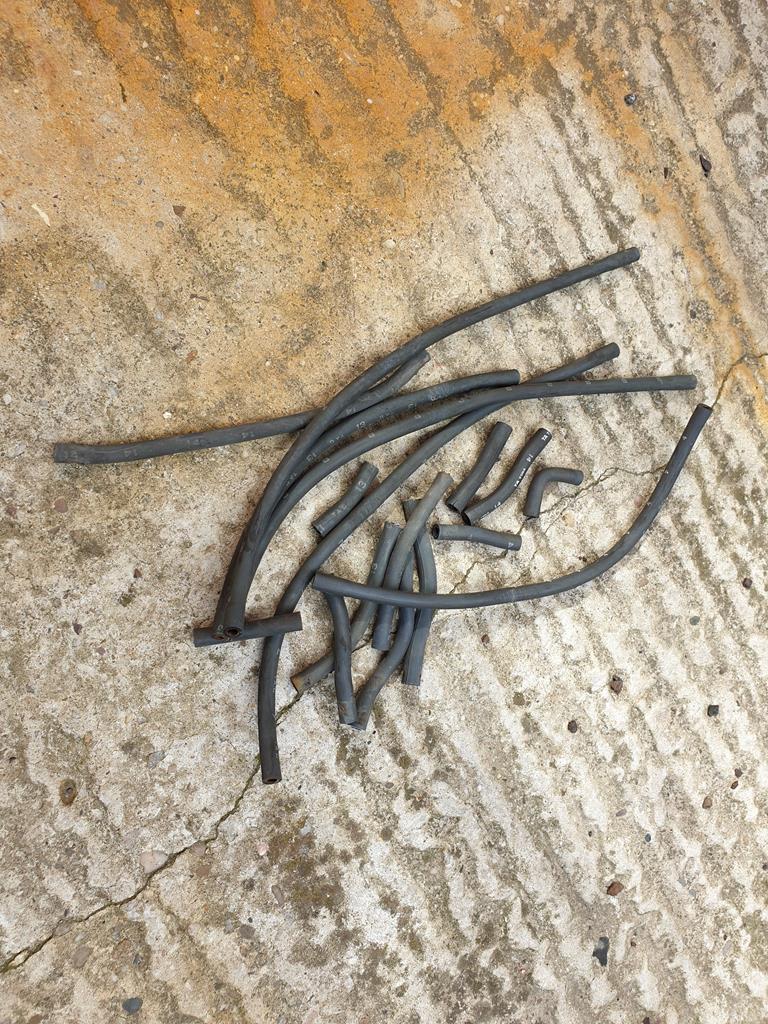 From there I turned my attention to the rear screen trims, I know the drivers side of the screen needed some attention before I could attempt refitting, namely I needed to dig out the excess amount of sealer that had been put there in the past so I could find the mounting points for the new clips. The passenger side was straightforward and is a good reference for how they should be 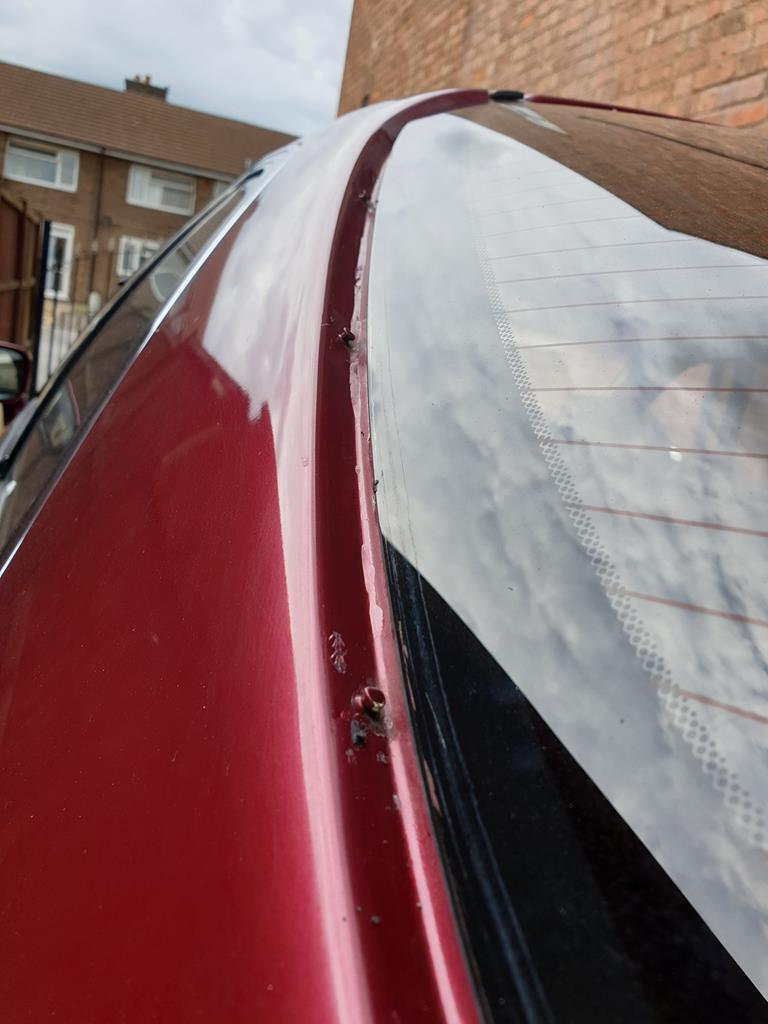 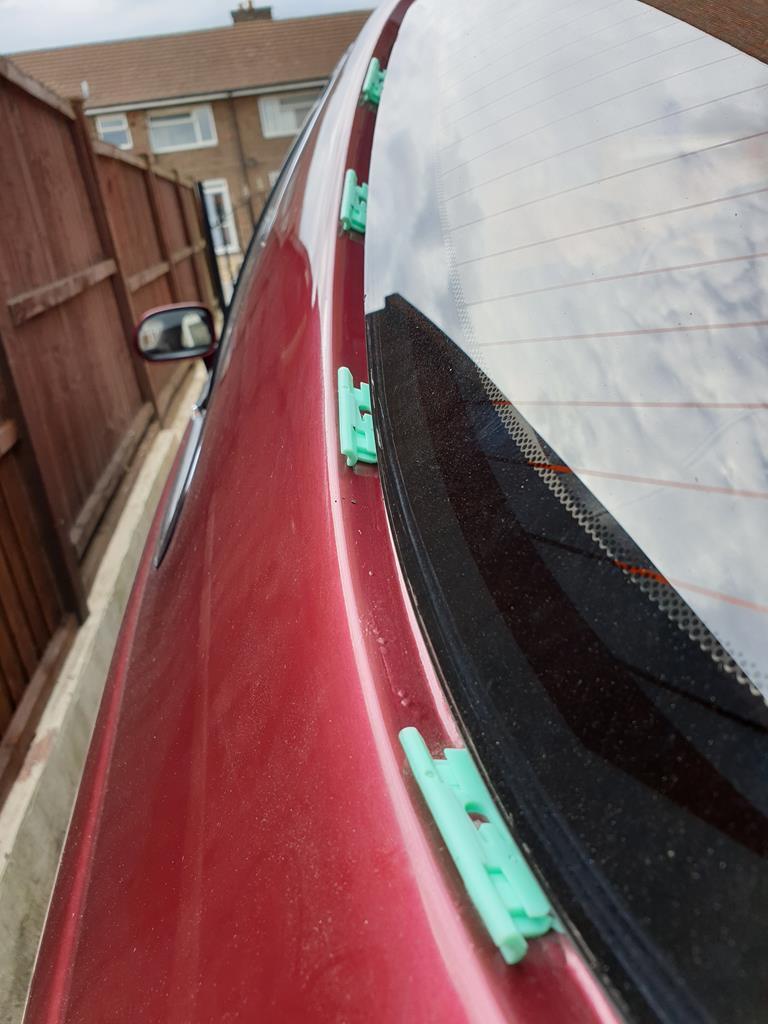 It was hard to photograph the issue on the drivers side 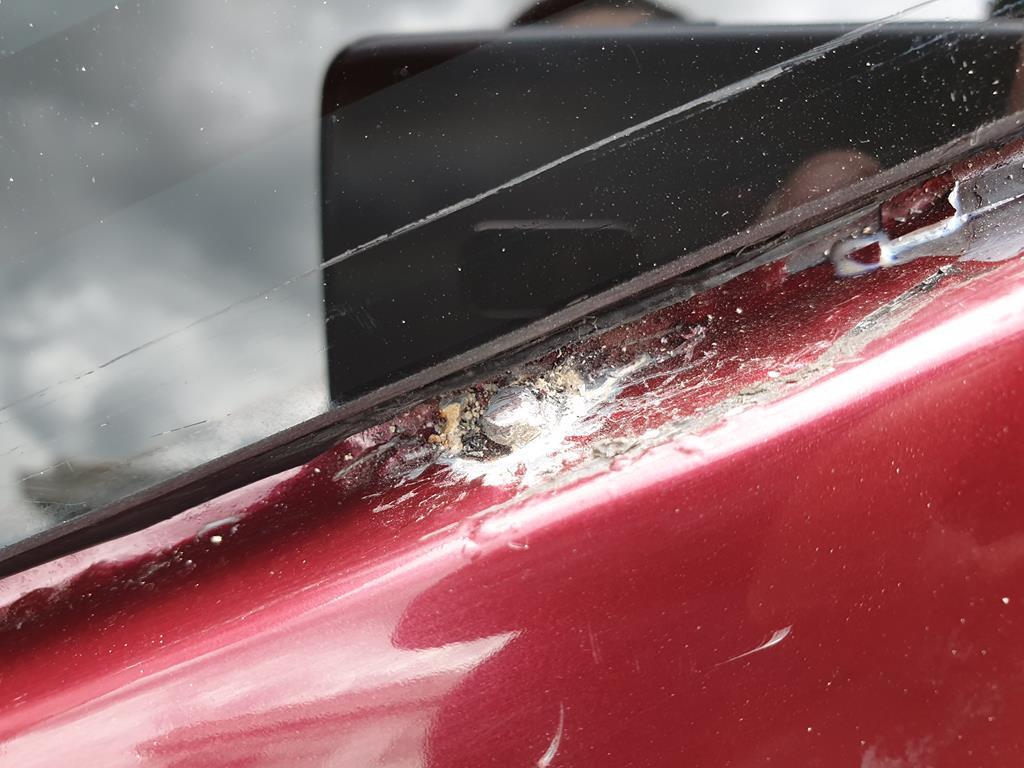 Basically these little metal posts are what the clips fit over, I had to excavate them from beneath a layer of sealant, filler and paint before the clips would fit on. And if that wasn't enough, it seems that the screen isn't fitted perfectly square as there was less clearance on the drivers side to get the clips in. I had to modify the top clip by cutting some clearance into it with a file 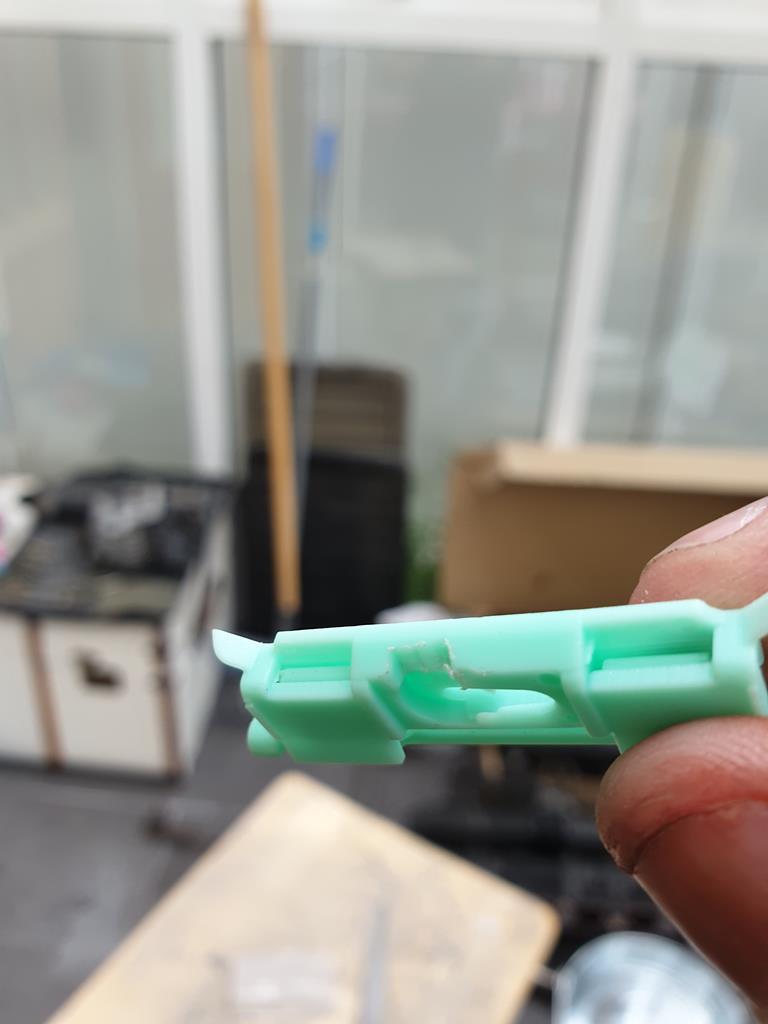 So at some point in the past, its had the rear screen out/replaced, fitted not perfectly, then the trim was stuck down because the clips couldn't be made to fit  Did eventually get there though 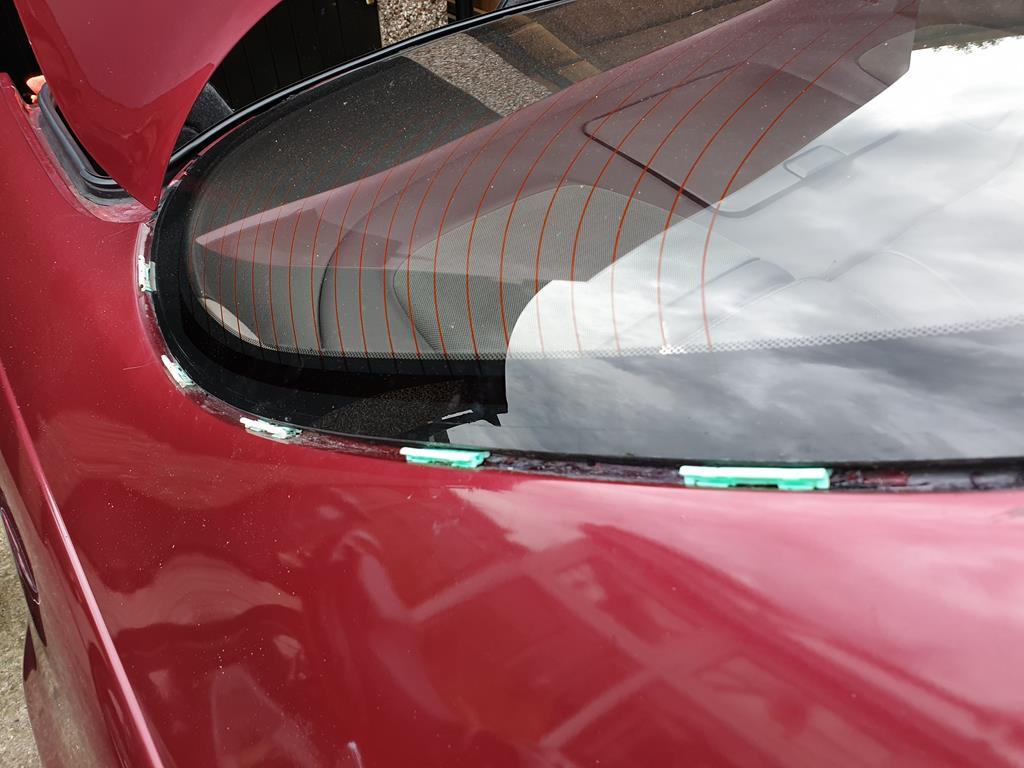 However in getting the last clip in, I slipped and took a chunk out of my finger either on the clip, or on the screwdriver I was using for leverage, so the trims themselves can wait for another day. A bonus while I was clearing sealant is that I noticed this 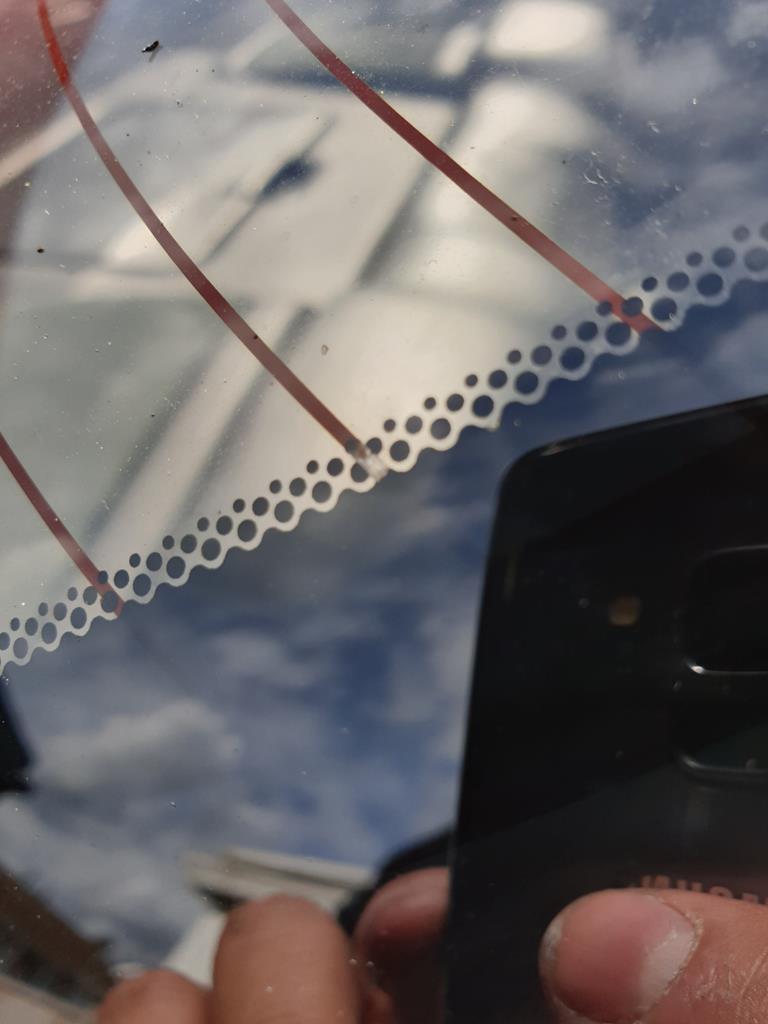 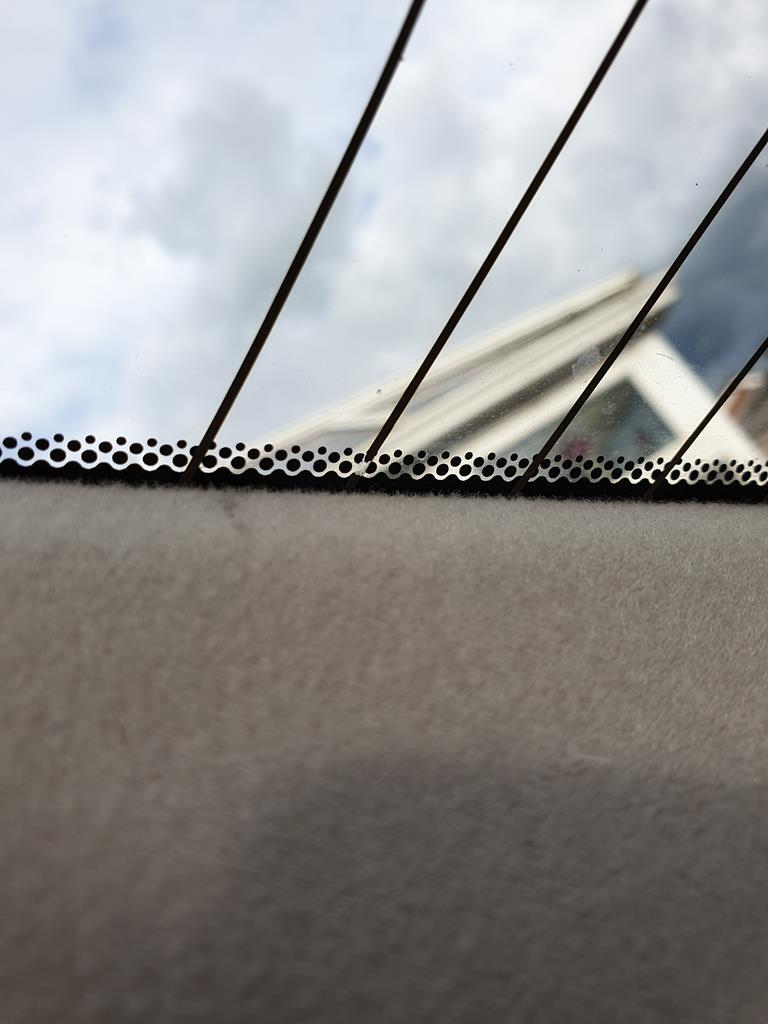 A tiny break in the rear demister, I'd been advised that a break in this could cause the whole thing to not work so I'm feeling hopeful I might have an easy fix. I had a bottle of silver conductor paint from years ago when my MGB had similar issues so I've started putting that on. It doesn't paint on very easily so I'll re-mask and do a second coat tomorrow |
| |
|
|
|
|
|
|
|
|
nice to see this moving along nicely, gonna be interesting to see if it pays off with those vacum lines.
On my first car, one of the previus owners modified the airbox for more induction noise too. here they drilled lots of holes in the bottom of the aibox.
|
| |
|
|
adam73bgt
Club Retro Rides Member
Posts: 4,998
Club RR Member Number: 58
|
|
Jun 16, 2019 22:00:31 GMT
|
nice to see this moving along nicely, gonna be interesting to see if it pays off with those vacum lines. On my first car, one of the previus owners modified the airbox for more induction noise too. here they drilled lots of holes in the bottom of the aibox. So far, no apparent difference with the vacuum lines, it still takes quite a while to start sometimes from cold which is mildly concerning so I will revisit the engine bay at some point. Haha I experimented with drilling some holes in the airbox of my BMW 520i, it did make a nice change to the induction noise to be fair! Right, update time. Finally allowed myself to make a couple of purchases for the car A Drivers side window switch, which I'm hoping will sort my electric window issues. These are quite tricky to come by as they're RHD, and Coupe specific so not a big pool of spares or breaking cars to pick from! 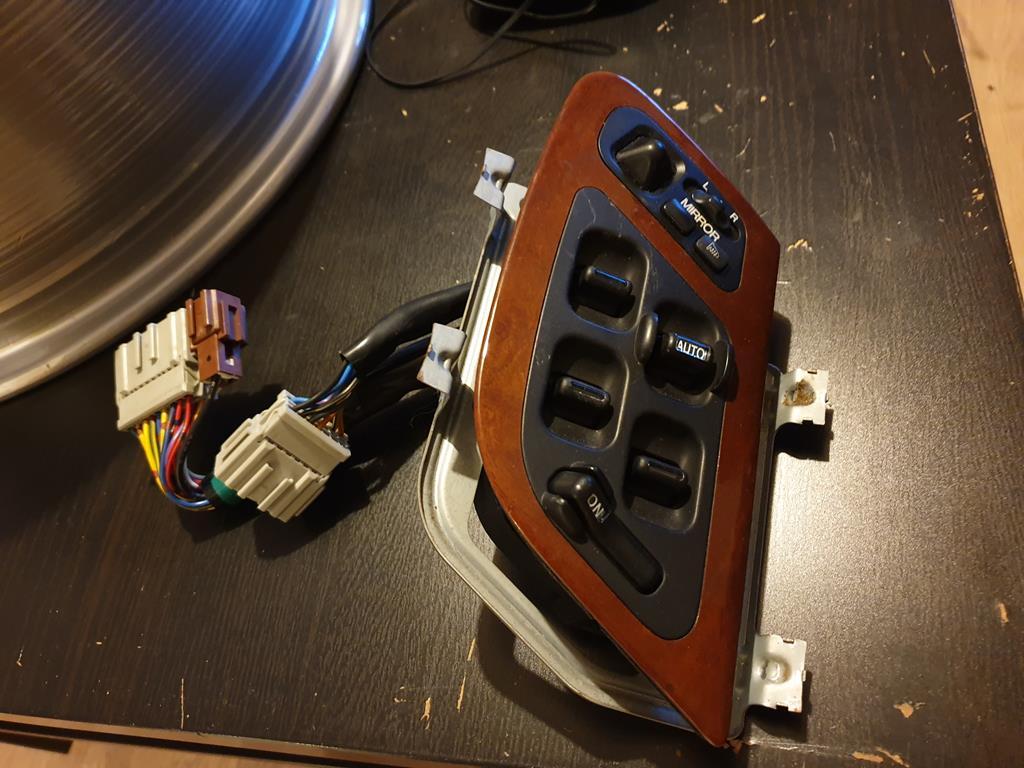 A Drivers side headlight to replace the one in my car with the chipped/cracked lens 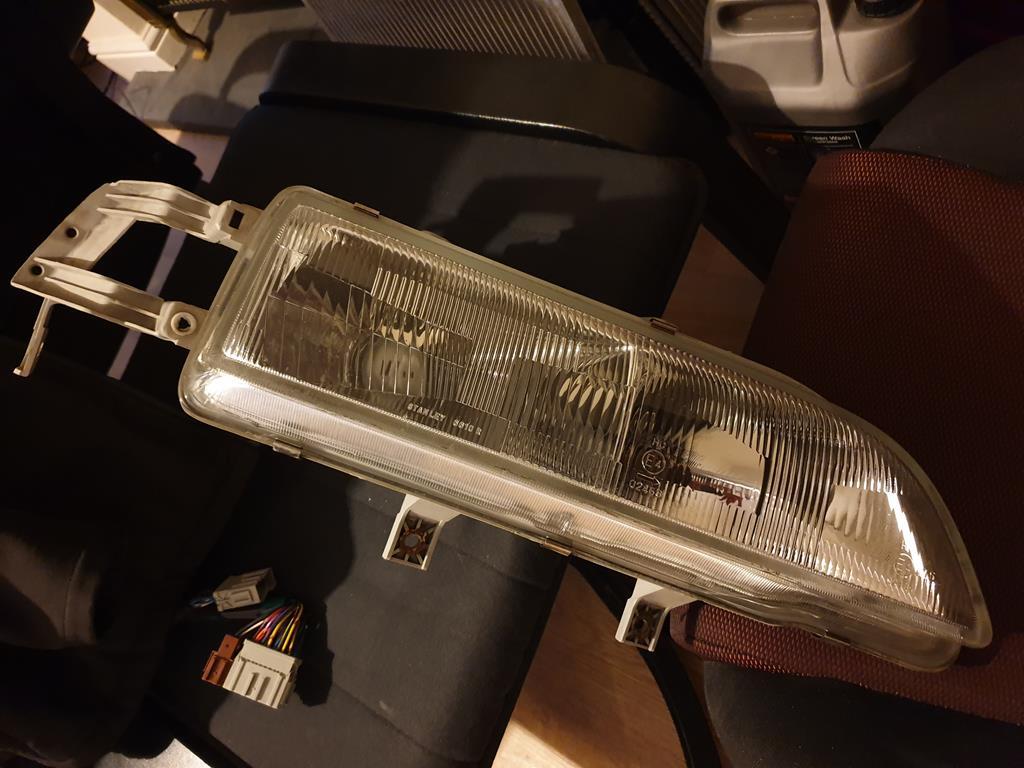 I'm also doing a little bulb upgrade while I'm at it. I've had Osram Nightbreakers before and was happy with their performance, but read some reviews and these Philips bulbs got good feedback in comparison to the Osram's so I'm curious to see how they fare 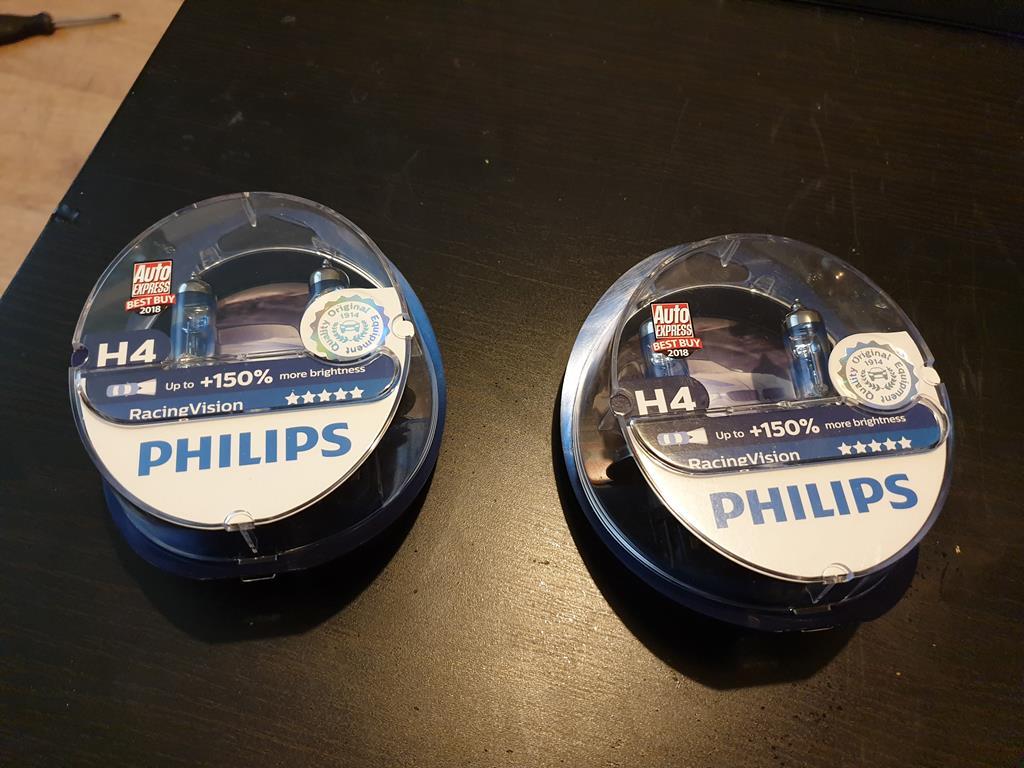 At this point I did notice a quirk about the Legend. The eagle eyed may notice that the headlight has separate dipped and high beams, yet takes H4 dual filament bulbs... I can't quite work out why this is. The plugs have all three wires for the three terminals on the bulbs, yet the dipped and high beams are definitely separate, as are the sidelights. Perhaps there is some redundancy built in for if a bulb blows, it can use the other filament in the bulb? Anyway, the other thing I bought is this ABS pump/modulator assembly 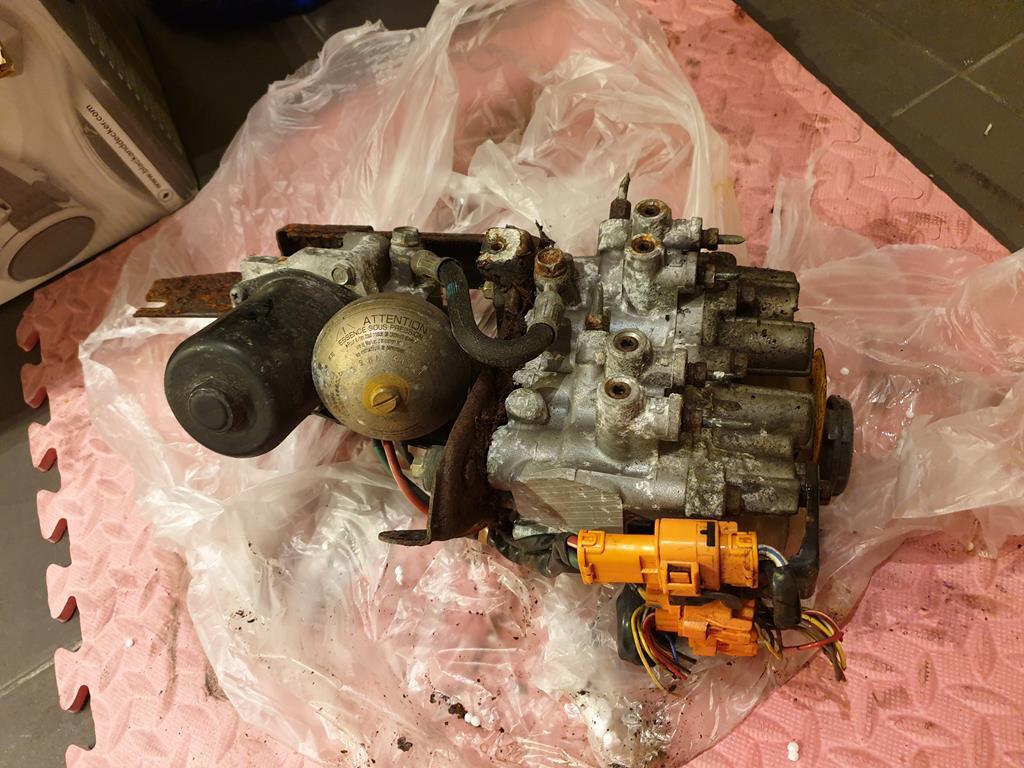 A total gamble as its untested, but will give me an opportunity to refurb bits to swap on to the car to hopefully solve the ABS light. I've made a bit of a start on splitting the modulator and pump assemblies from the bracketry, as well as removing the cut off stubs of brake lines and wiring plugs 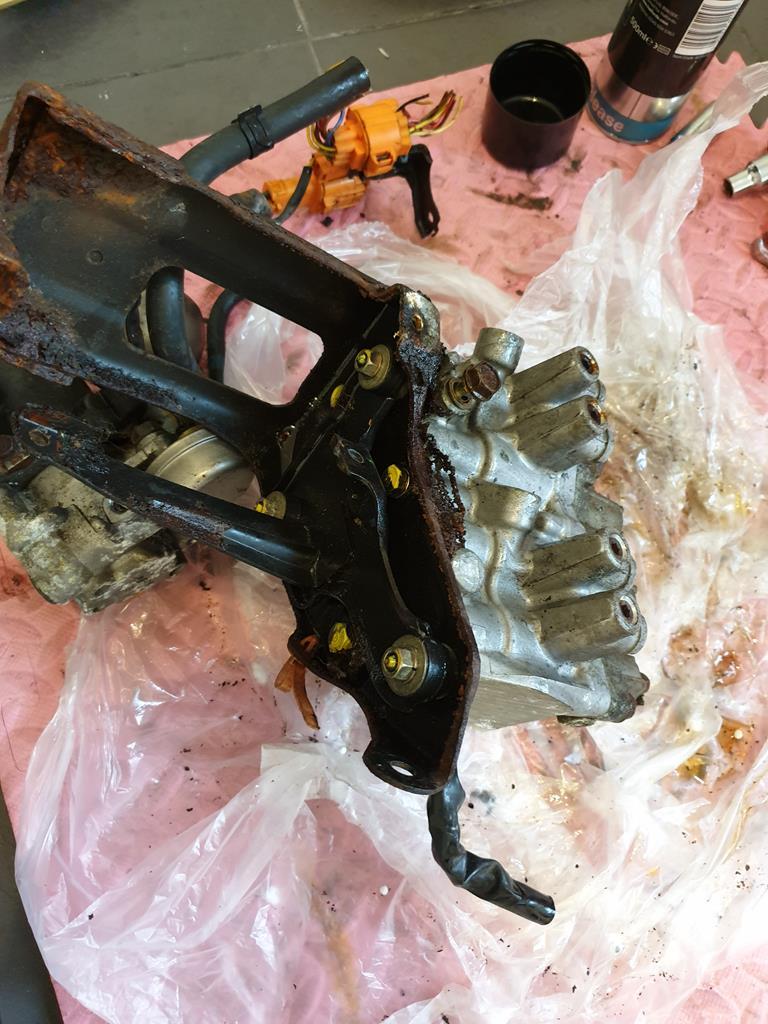 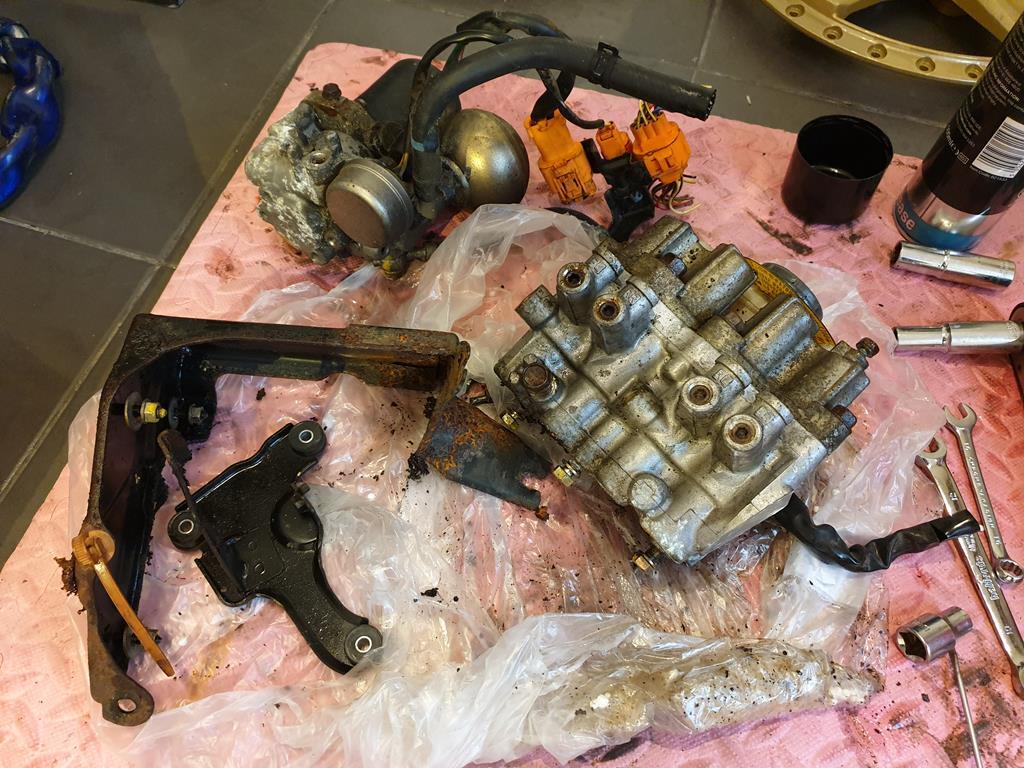 More on that soon. In wheels news, I've built both front wheels now 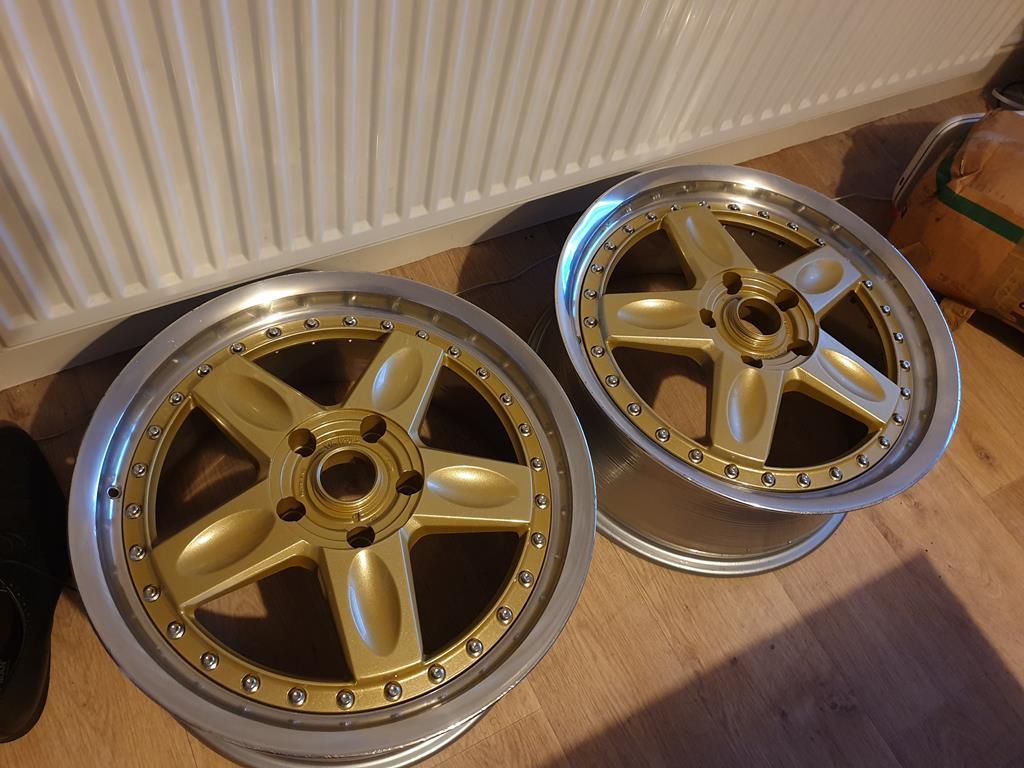 They just need tyre valves sourcing (I did buy some but they're not quite right, its tricky getting ones the right size) and they'll be ready for tyres. I do also need to fettle the centre plates a bit as the thickness of the powdercoat means they don't fit perfectly so some careful sanding required. Speaking of sanding and powdercoat, I've got the rear wheels to sit together now 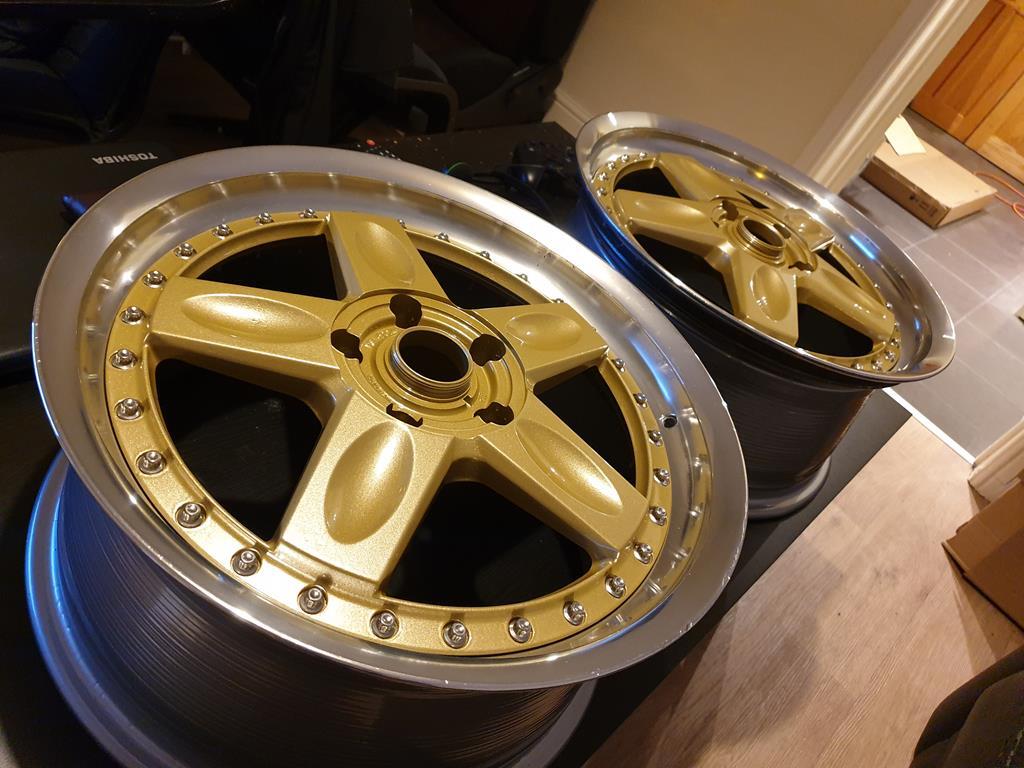 The bolts are just sat in place for now, need to add sealant and bolt them up proper. But it feels like I'm getting there with them! As ever, the main task is to keep the momentum going on all the various jobs  |
| |
|
|
adam73bgt
Club Retro Rides Member
Posts: 4,998
Club RR Member Number: 58
|
|
|
|
Been chipping away at this a bit, all the wheels are now built and sealed, valves fitted and got the tyres out the garage so just need to find the time to get them fitted up. Got on with the headlight swap, thought it was going to be a quick little job, but it soon became apparent that I'd missed a bit in the workshop manual where it states you have to remove the front bumper to get the headlights out  Its not 'too' hard a job in itself but a little fiddly. There is a screw underneath each fog light panel (or fog light if your car had them fitted...) remove that and the panel should simply come out. In reality for me, it took a fair bit of very careful prying but got there in the end 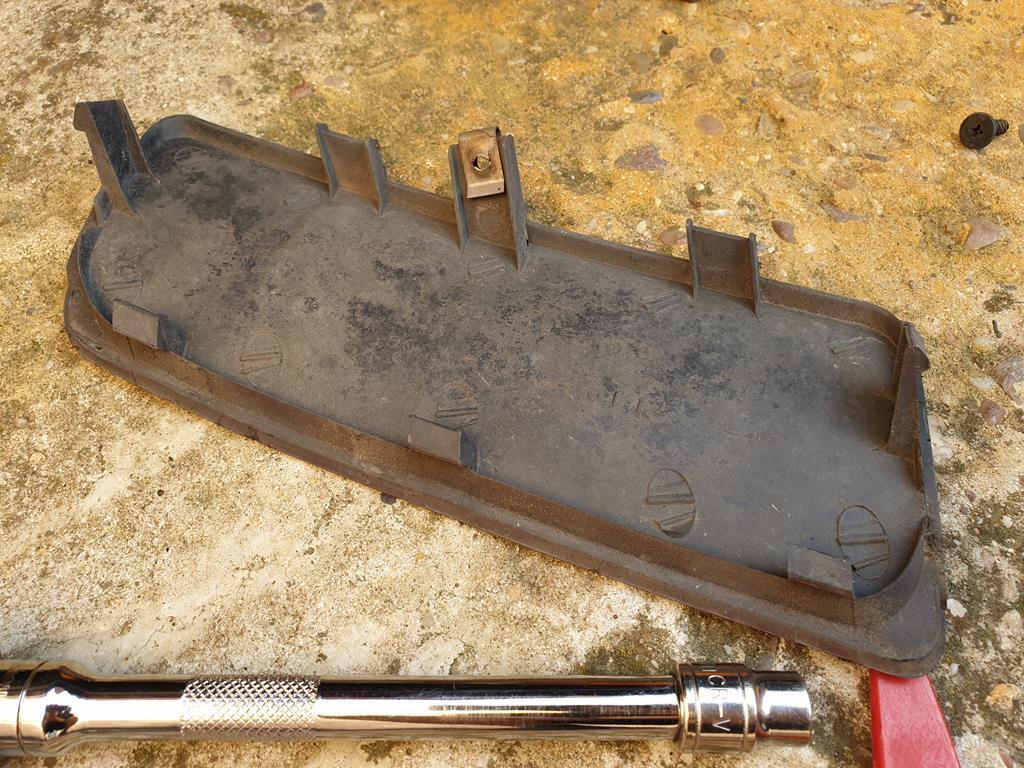 With this out the way, looking up there is a screw which retains the indicator unit 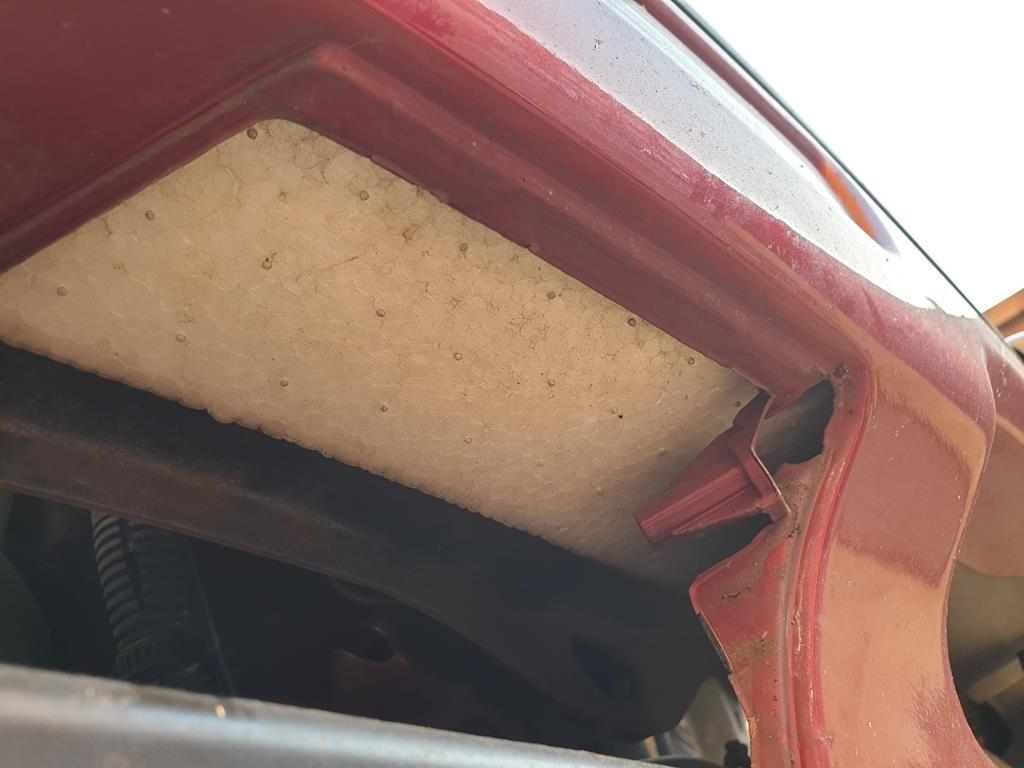 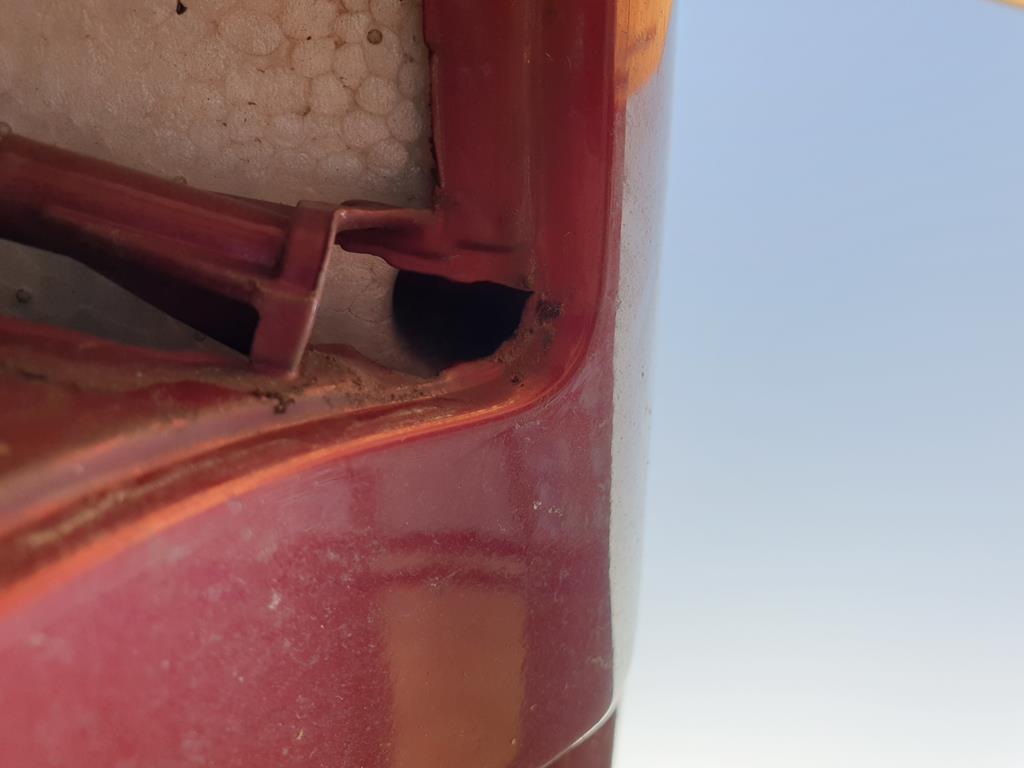 Nigh on impossible to show, but it is up in there somewhere. One came loose relatively easily, the other was a bit rusty but got there in the end 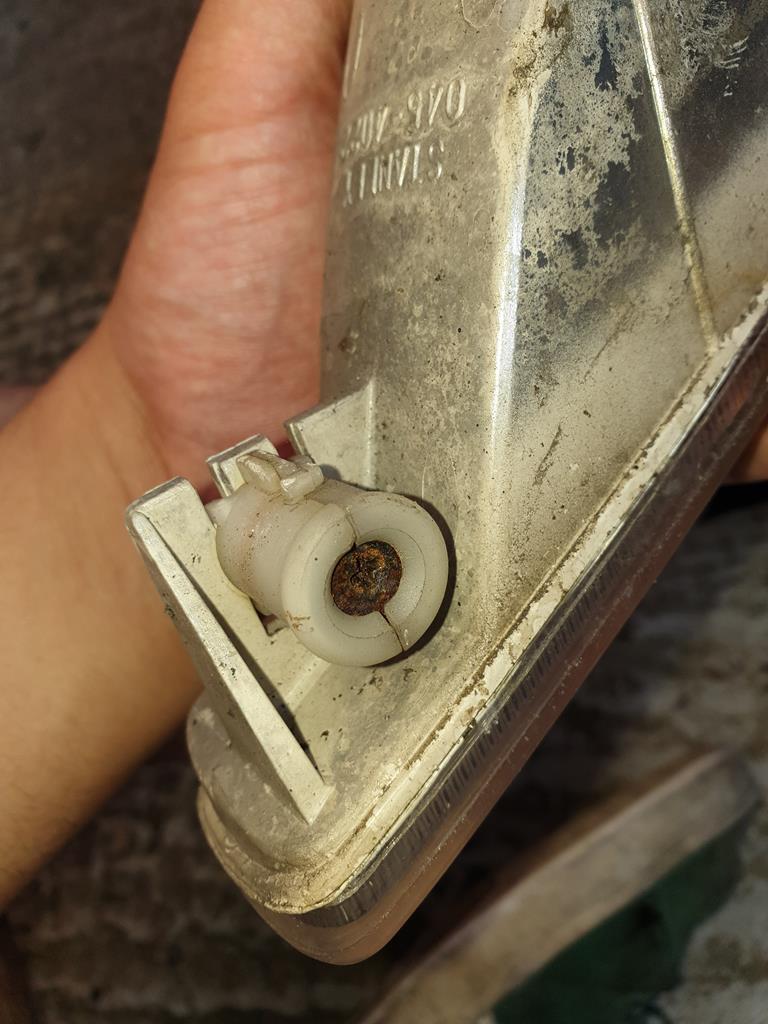 The screws are in these weird bobbin type things which slide into a holder in the bumper, turning the screw tightens them into place. Kinda complicated, kinda neat. A mini side project I was hoping to do was to "de-tango" the indicators by fitting silver bulbs, but my plans were thwarted by discovering there is an amber reflector in there with a clear bulb instead. 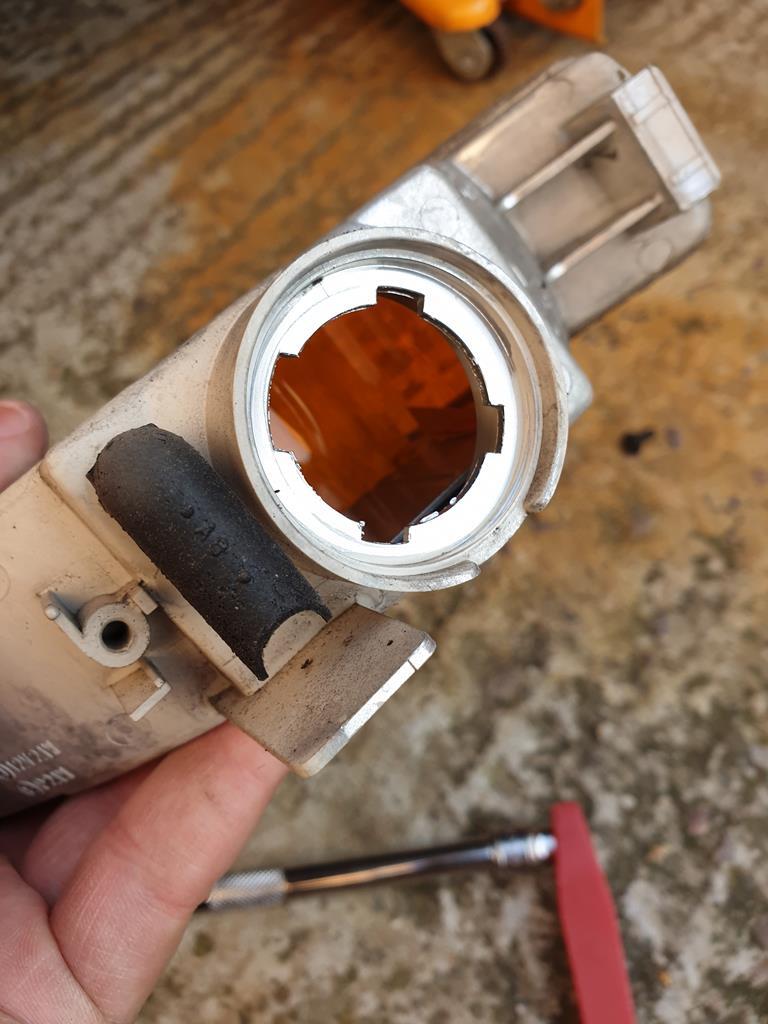 It is possible to break this up and remove it, or split the unit, but its a rare part so I'll save the brave pills for another day. Removing the indicators gives access to the two bolts (the saloon has four, because reasons) that hold the bumper on 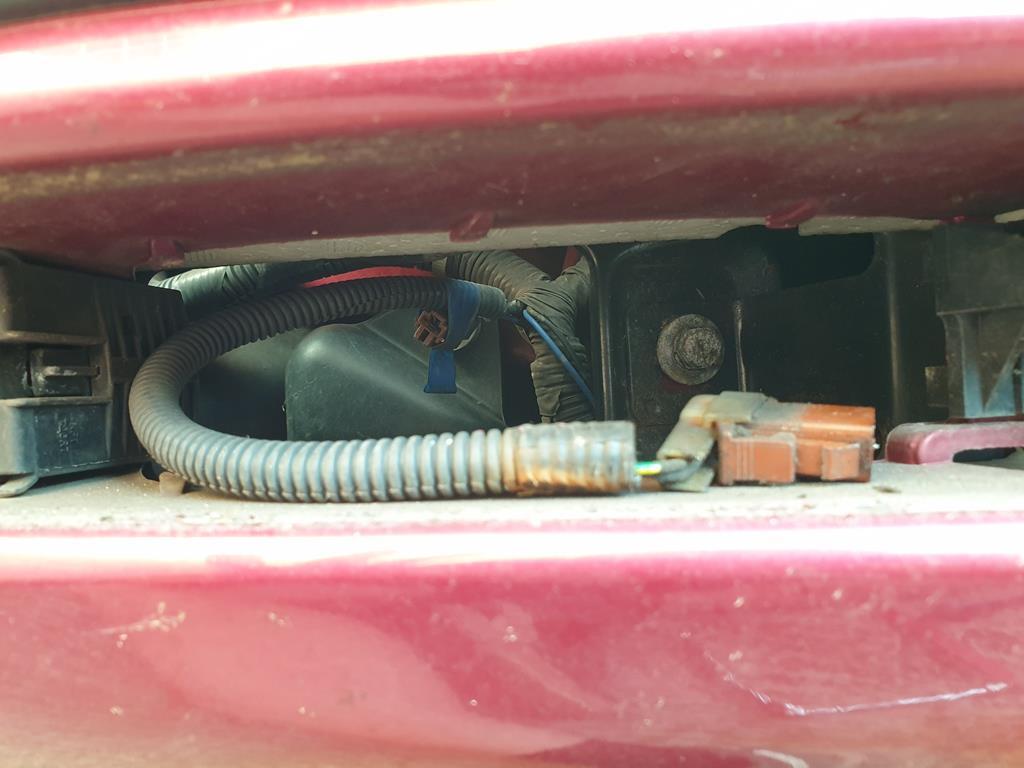 Take those out, undo 4 bolts underneath the car that hold the undertray on (only one tore out of the plastic, better than I was expecting!) anbd the bumper slides off two guides near the arches. I ended up leaving the bumper half on for easiness 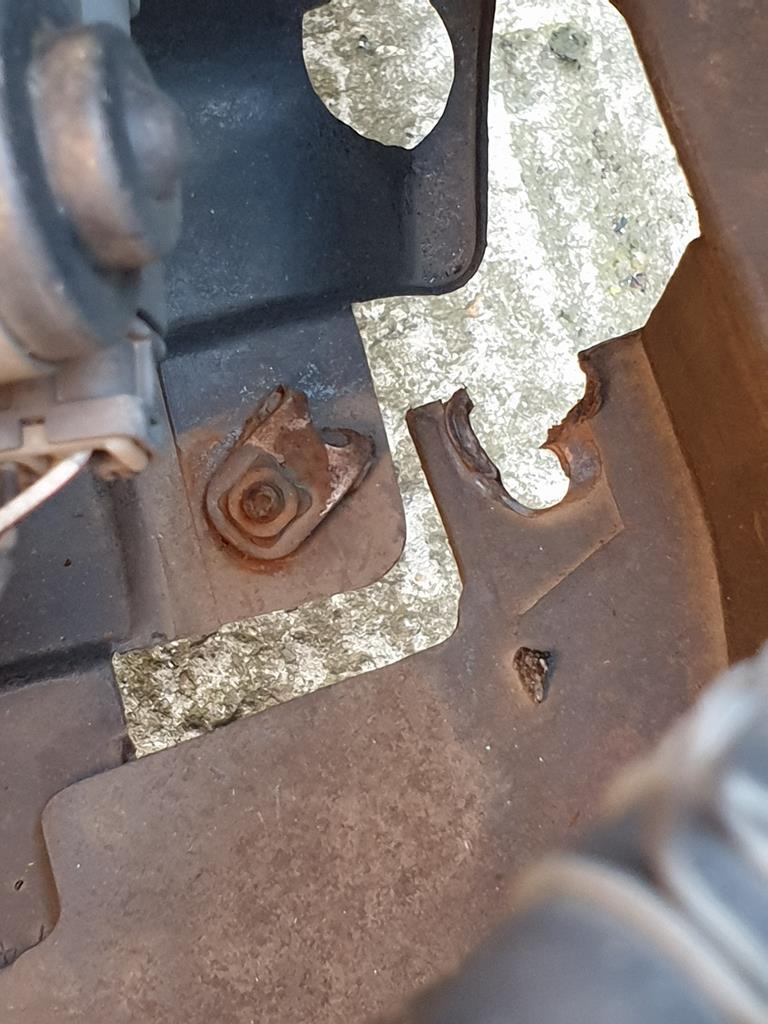 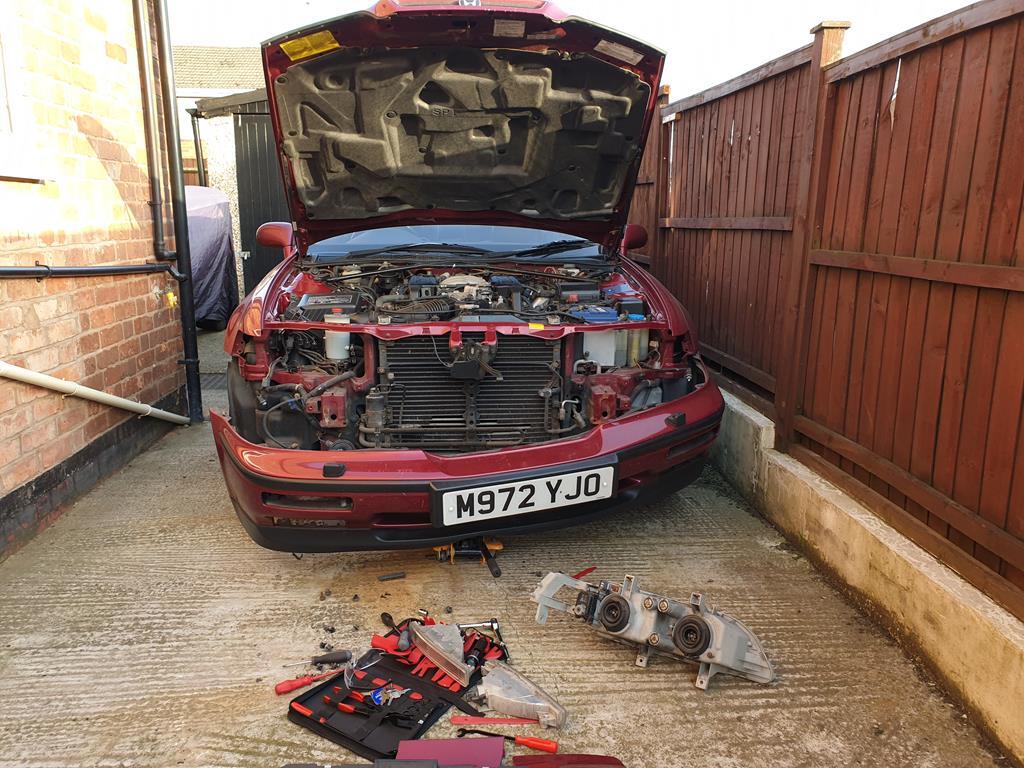 Headlights then unbolt with 2 on top, 2 underneath and 1 on the side (after you've removed the little corner lights). It hasn't come out very clearly, but cracked headlight on the bottom 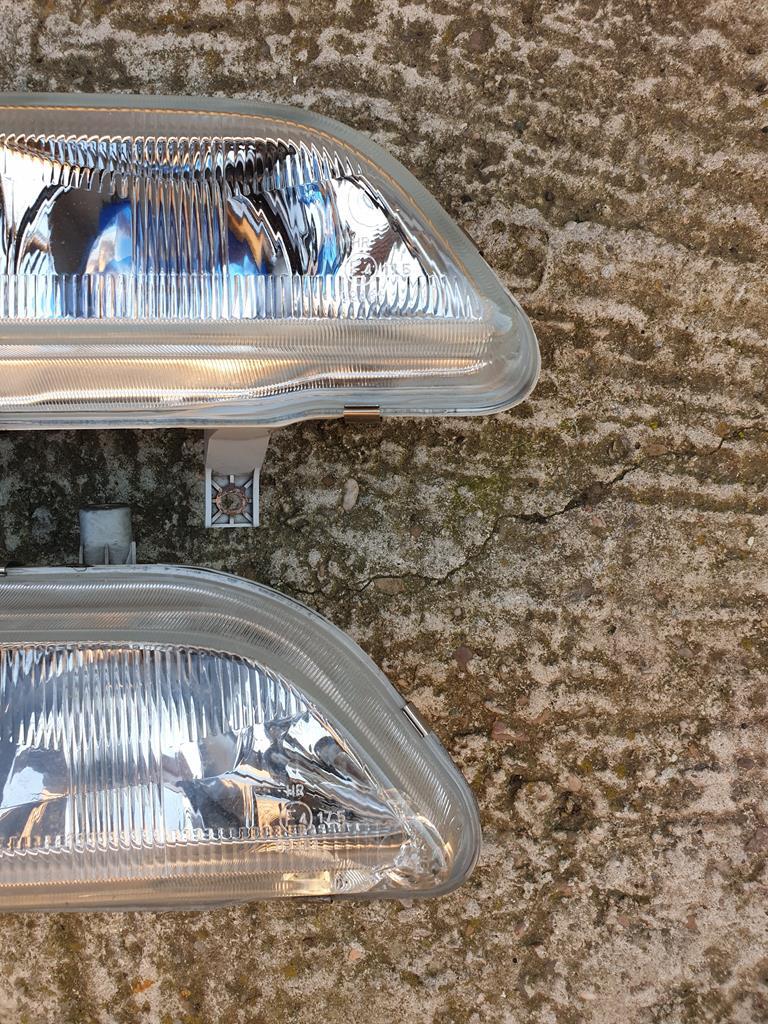 With the bumper off, I futher inspected the AC condensor, I'm amazed this is holding pressure. Obviously the fins don't have anything to do with holding pressure, but given the overall state of it, I'm still impressed! 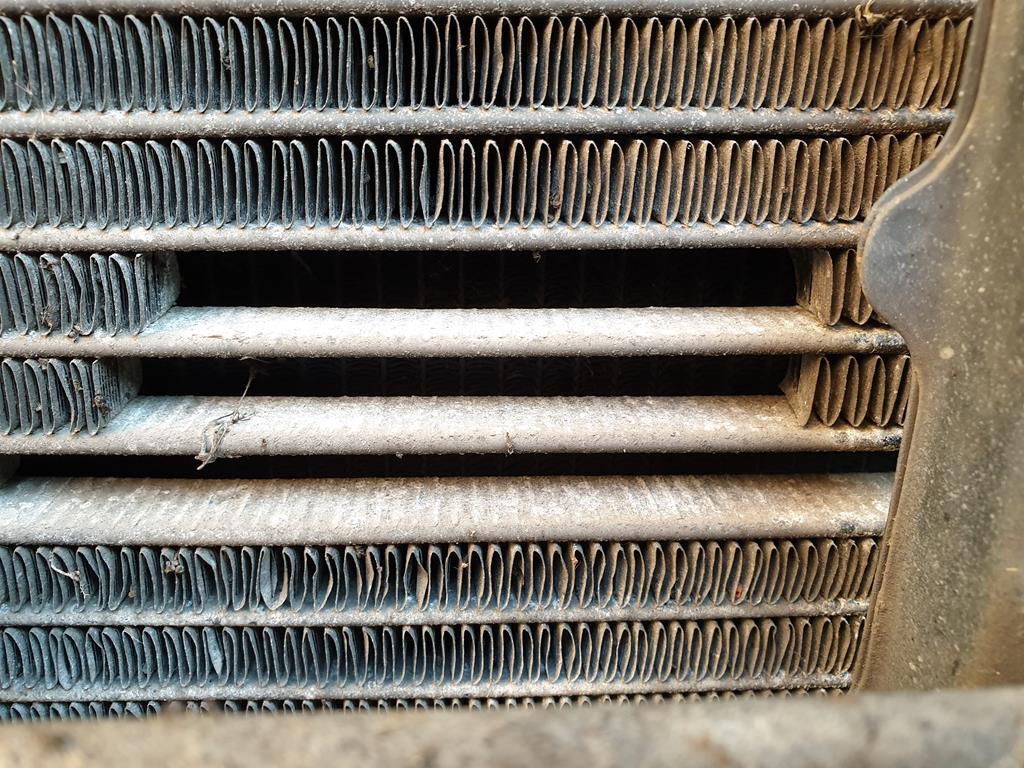 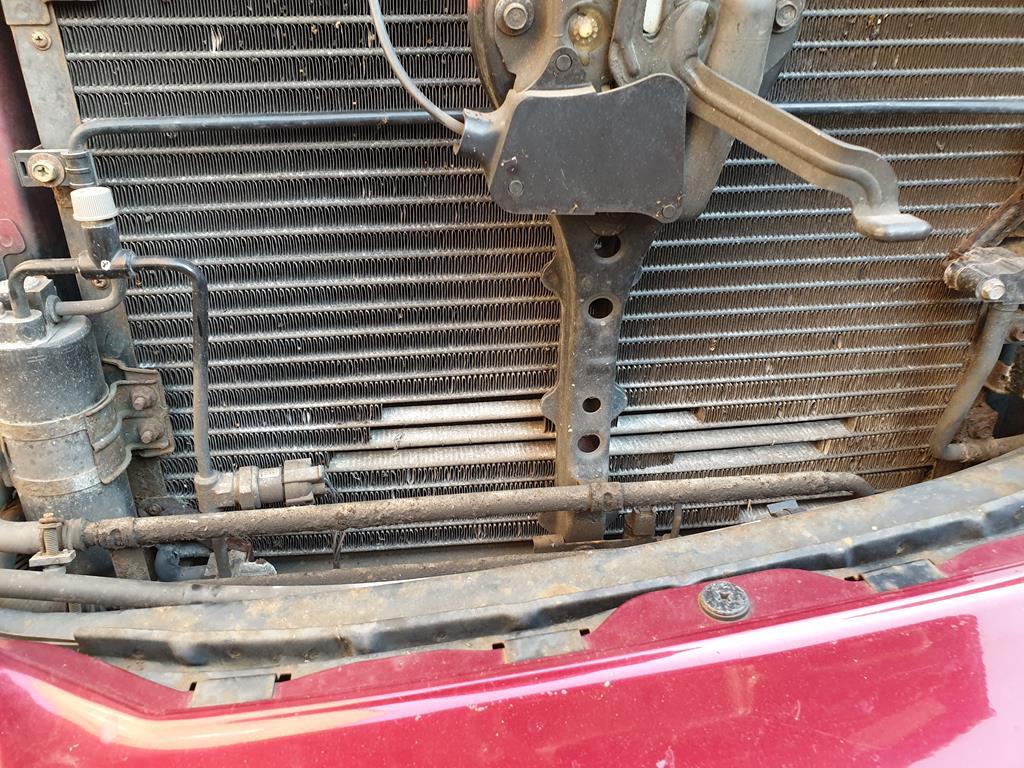 Then I chucked it all back together, drove back from a night out last night (I wasn't drinking!) took the B road route back and I'm very impressed with the output of the headlights with the new bulbs in, high beam in particular is excellent. 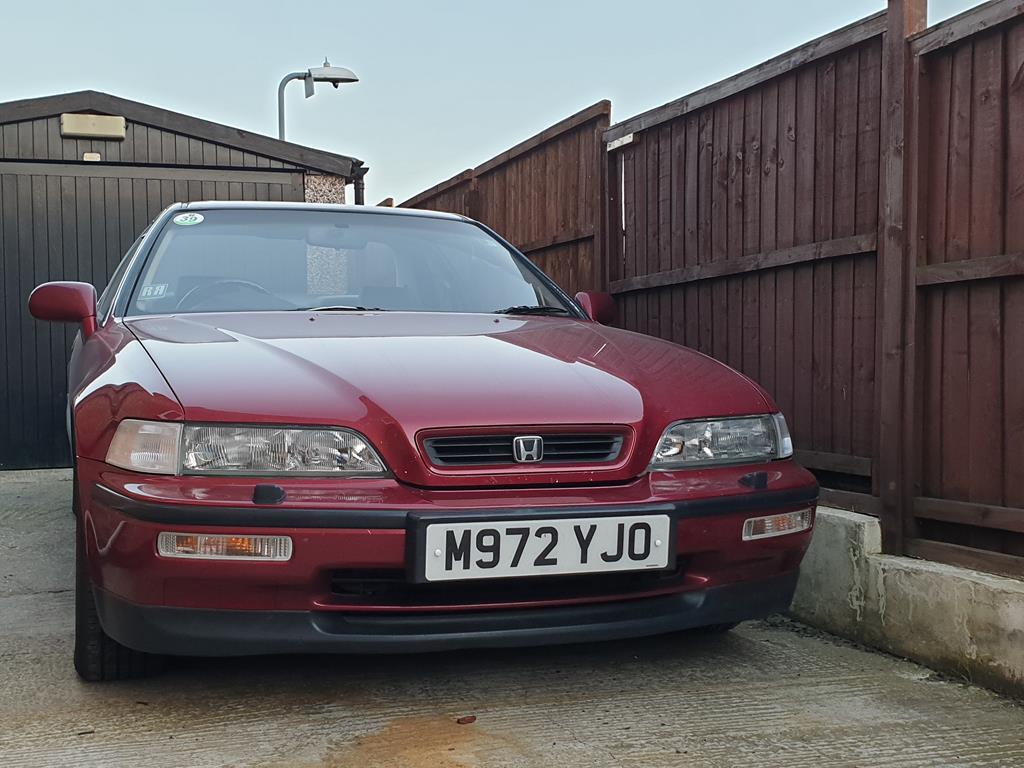 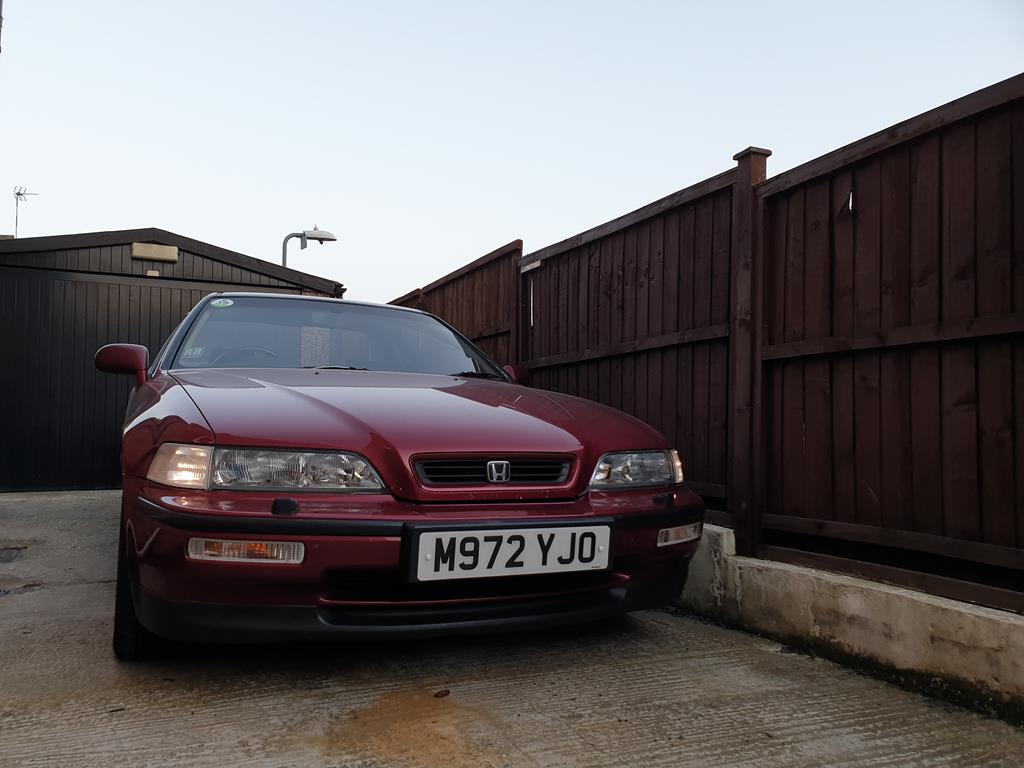 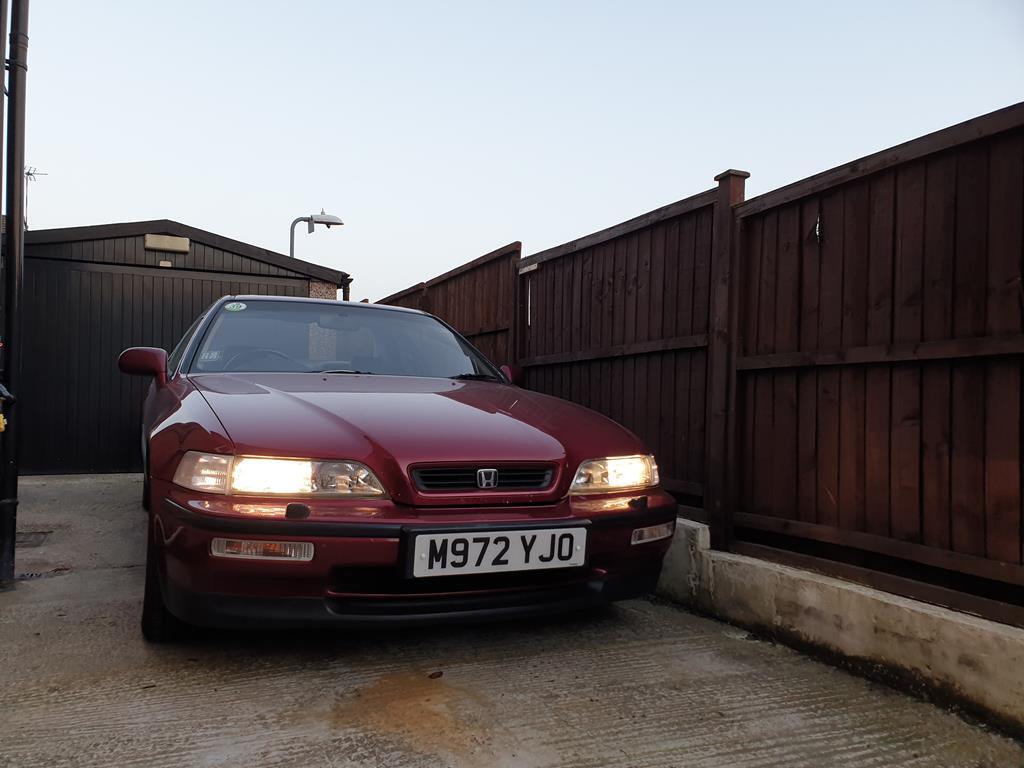 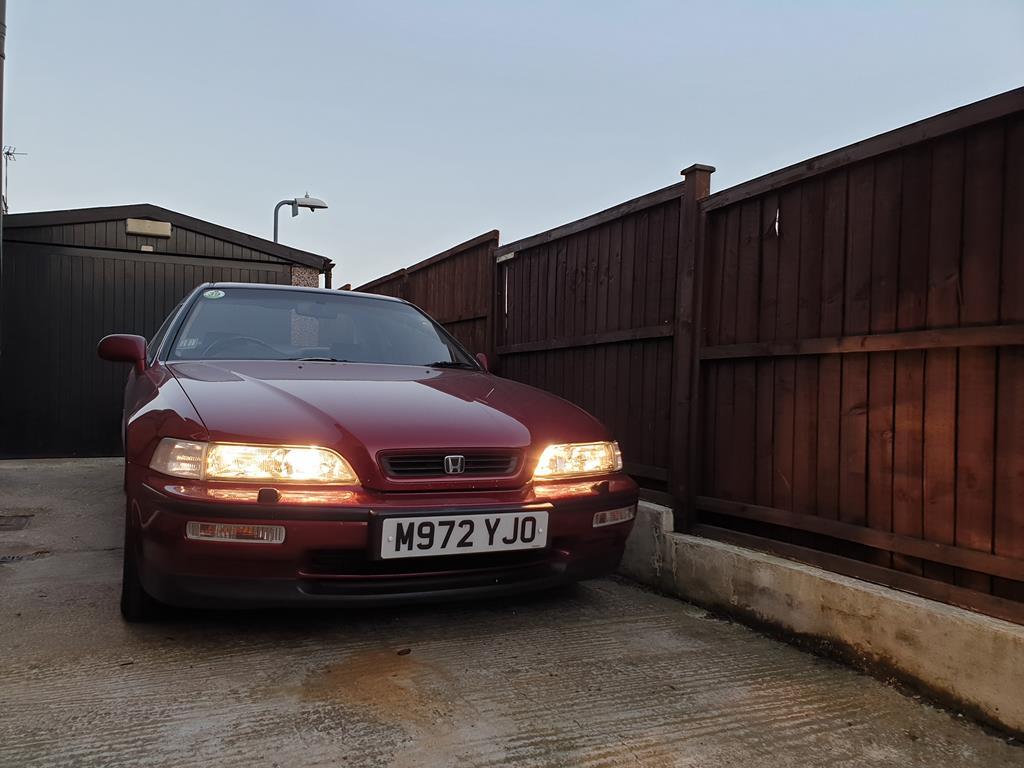 Next update will be AC related as I've been doing some investigating with mixed results so far! |
| |
|
|
|
|
|
|
|
At this point I did notice a quirk about the Legend. The eagle eyed may notice that the headlight has separate dipped and high beams, yet takes H4 dual filament bulbs... I can't quite work out why this is. The plugs have all three wires for the three terminals on the bulbs, yet the dipped and high beams are definitely separate, as are the sidelights. Perhaps there is some redundancy built in for if a bulb blows, it can use the other filament in the bulb? My Commodore had H4 & H1 bulbs in the headlights: H4 - one filament is used during dipped and the other during high beam H1 - high beam You might be able to check if your car works the same by disconnecting the high beam bulb and seeing if the other bulb switches to the other filament. |
| |
|
|
adam73bgt
Club Retro Rides Member
Posts: 4,998
Club RR Member Number: 58
|
|
|
|
Ah interesting, I may have to try that and see what happens timmy201Right, Air Con update. It hasn't worked since I've had the car, and as mentioned above, the condensor wasn't looking too clever so I figured I'd at least need to replace that and the drier before getting anything from the system. While I was messing about with the front bumper and lights, I gave one of the fill ports a poke to see what happened, and to my surprise there was a hiss of air! Knowing that the system had pressure still, I had to work out why the AC wasn't working. Looking under the bonnet it was pretty clear that the AC compressor clutch wasn't engaging when the switch was pressed. I have a pdf copy of the Acura/Honda Workshop Manual which provides a handy flow chart of what to check when the comp clutch doesn't engage. First step was to remove the clutch relay. This is in one of three relay boxes in the engine bay but I initially couldn't locate it  some better searching located it up in the corner of the bay on the passenger side 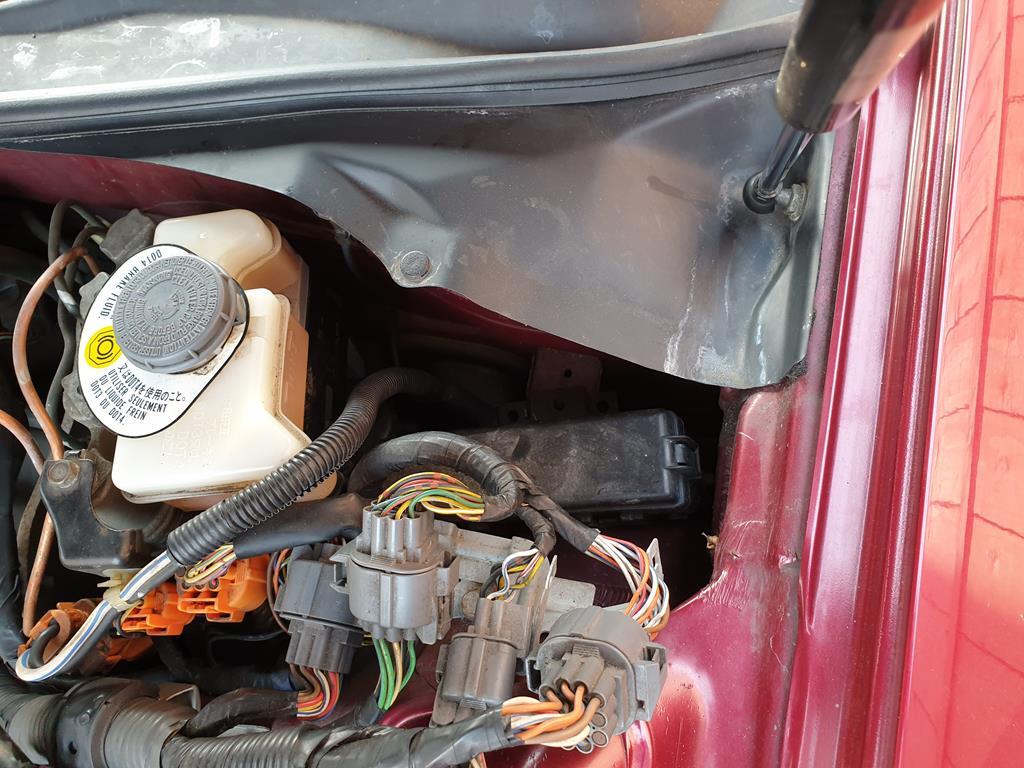 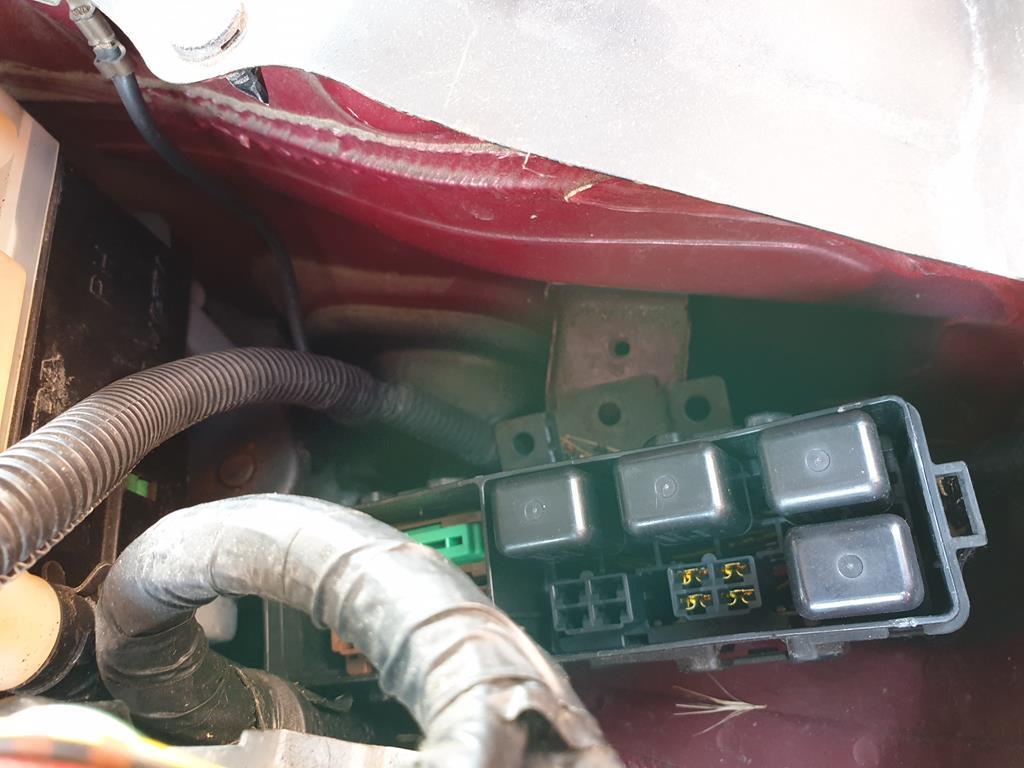 Relay box wasn't bolted down, perhaps someone has investigated this before... Anyway, with the relay removed, I check a couple of the terminals for 12V with the ignition on. 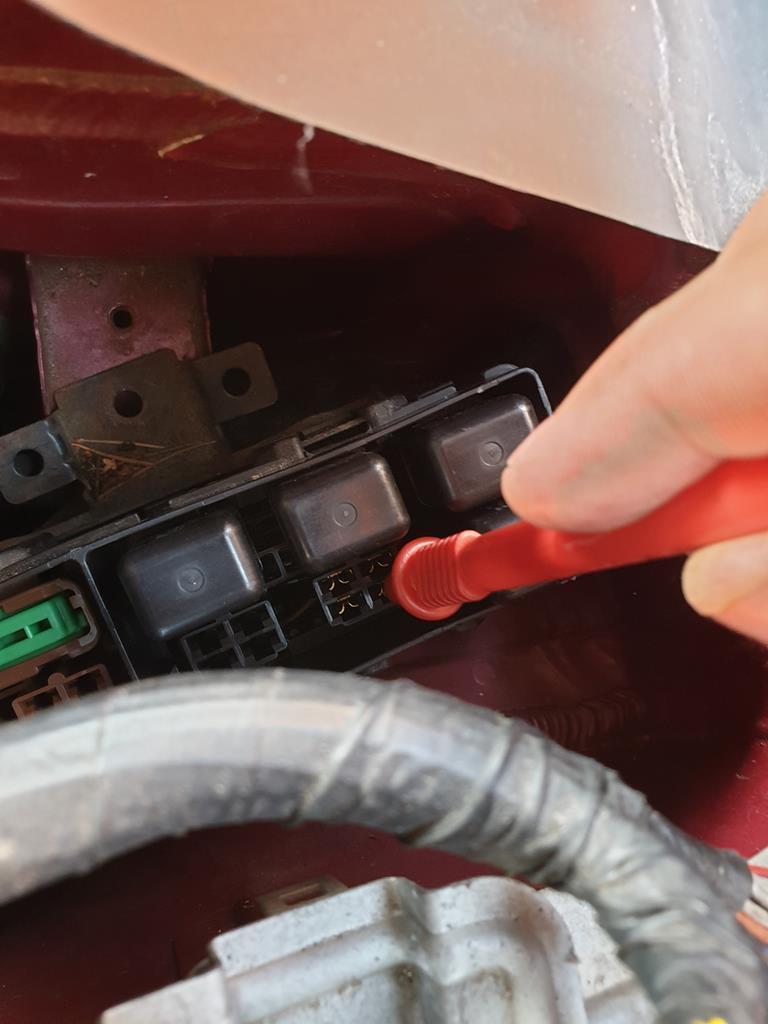 Power was present. With that checked off, a jumper wire was added to simulate the relay being closed 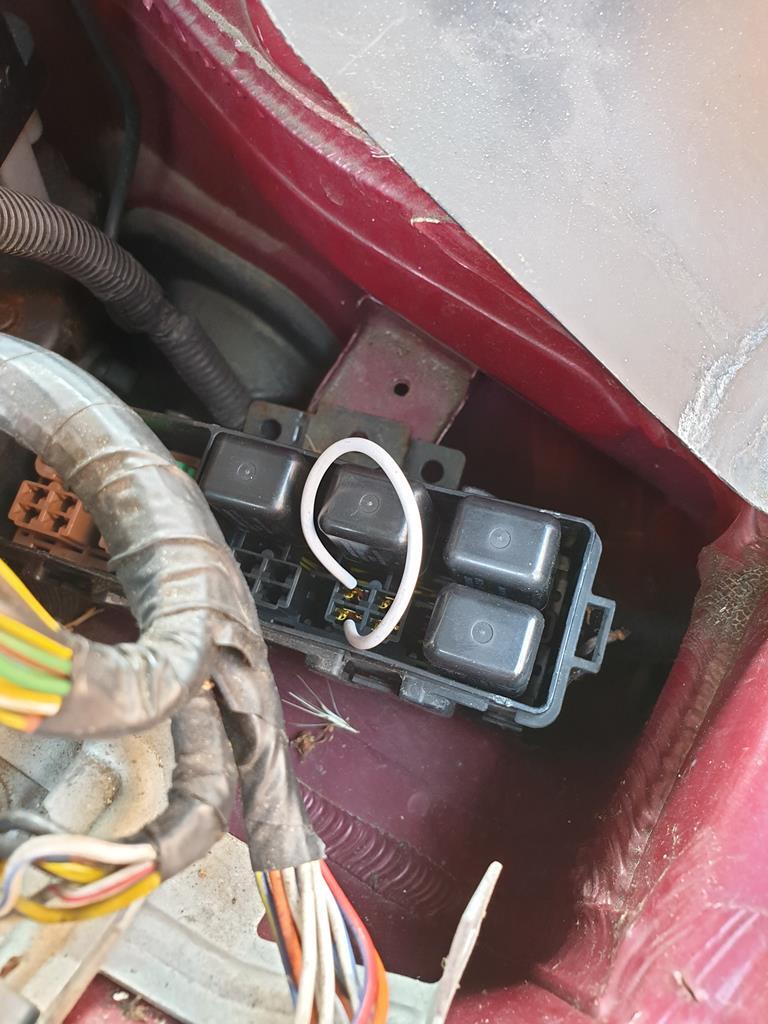 Started the engine and sure enough, I had AC! There was slightly colder air coming through the vents and the whole compressor pulley was spinning. So then I had to check the relay, did this by making up a couple of wires to be able to hook up power to the relay, this would close the contacts and I would be able to verify they were closed by checking for continuity at the other terminals 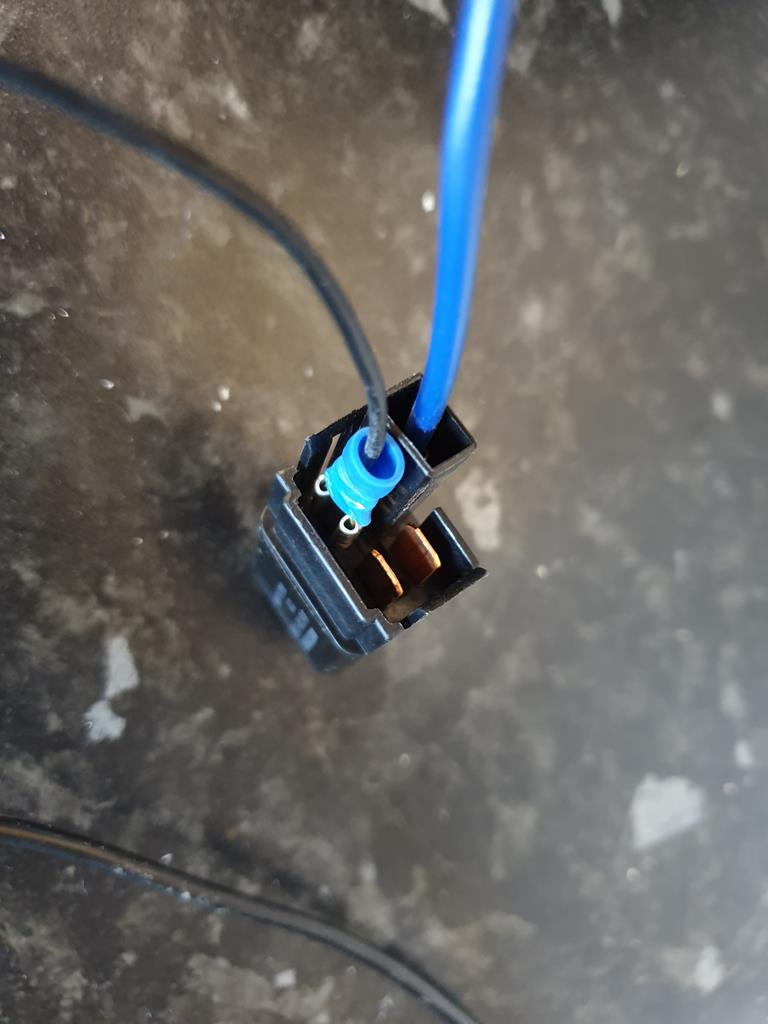 Hooked it up, got continuity and could hear the relay audibly clicking, so the relay wasn't the problem. Put it back in place and found a bolt to mount the relay box properly 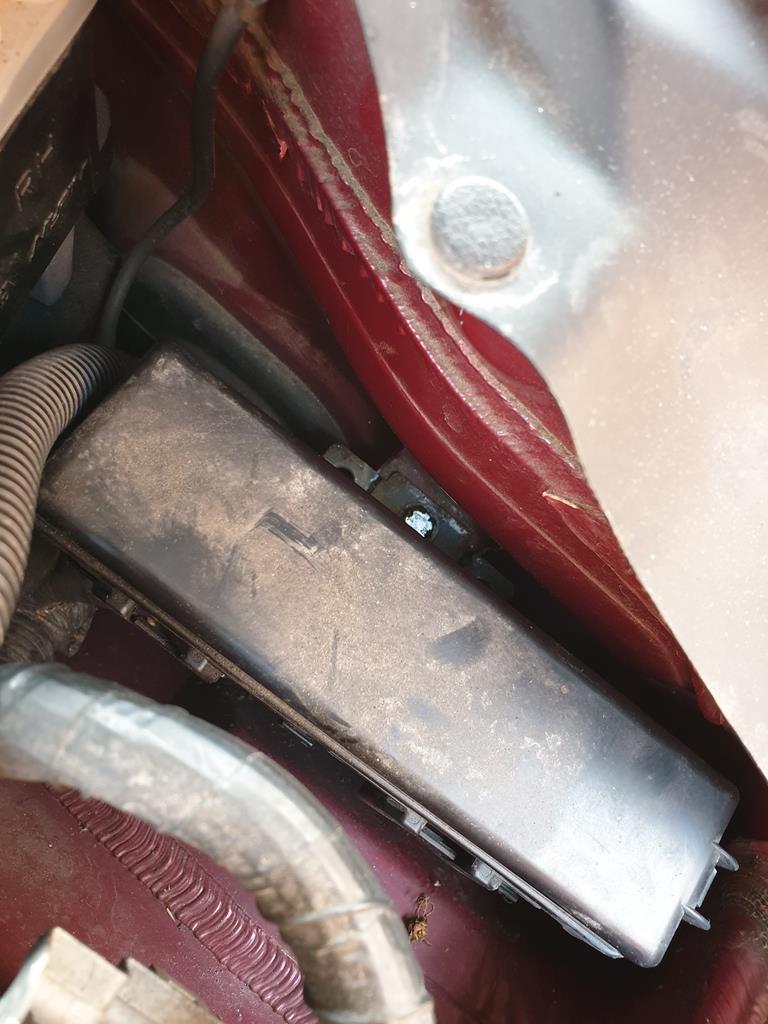 As an aside, these electrical connectors near the relay box are really odd, the bracket they're on mounts them at all random angles and it just doesn't look neat at all haha 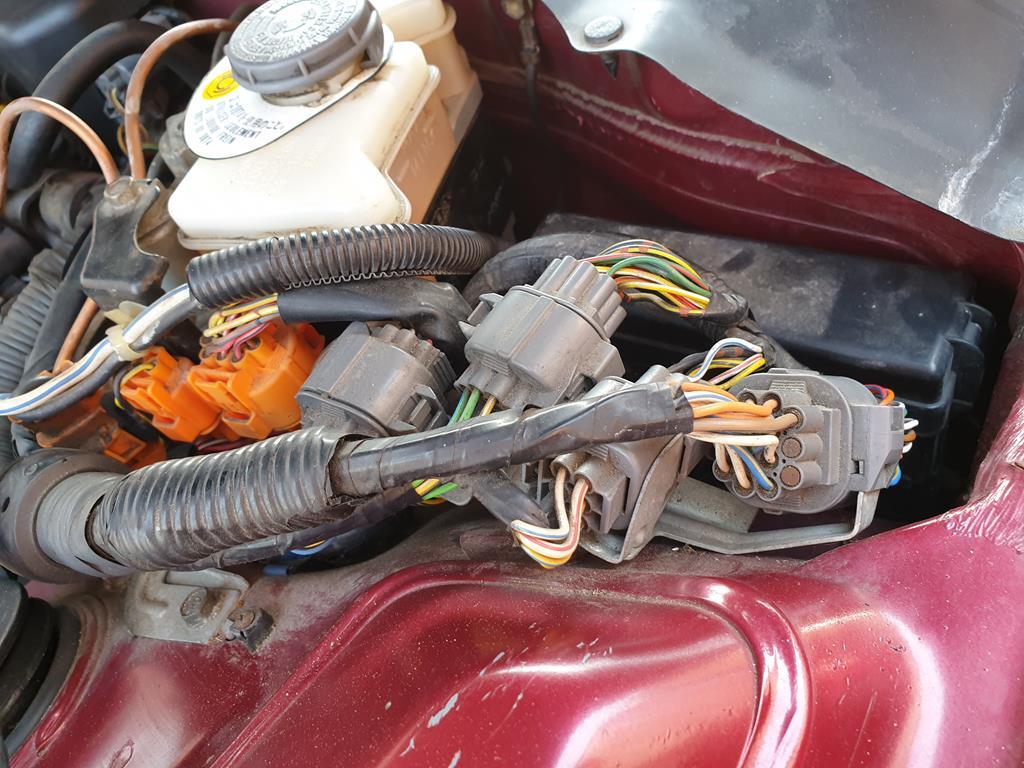 For the next step I have to locate the fan control unit (there are two radiator fans, they get controlled by a mix of coolant temp and AC demand I believe), this is located in the passenger footwell under this large protective footplate 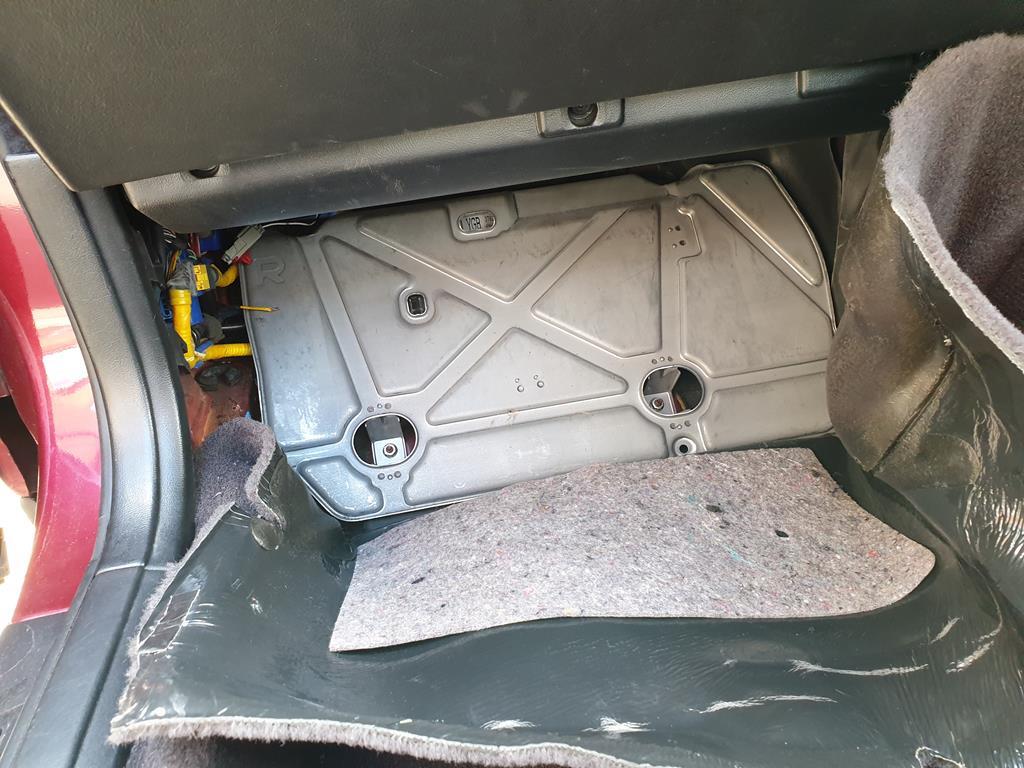 This hides the huge PCM (Powertrain Control Module) which is a massive ol computer, but thats 1994 era tech for you I guess 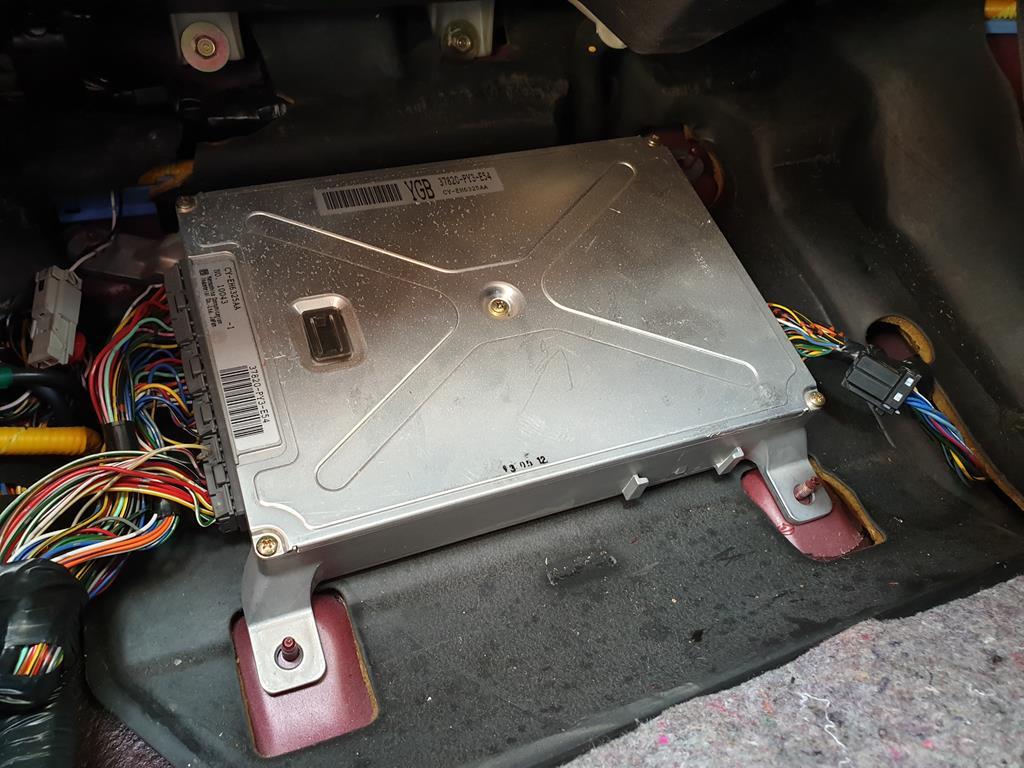 The fan control unit is clipped to the backside of the protection plate 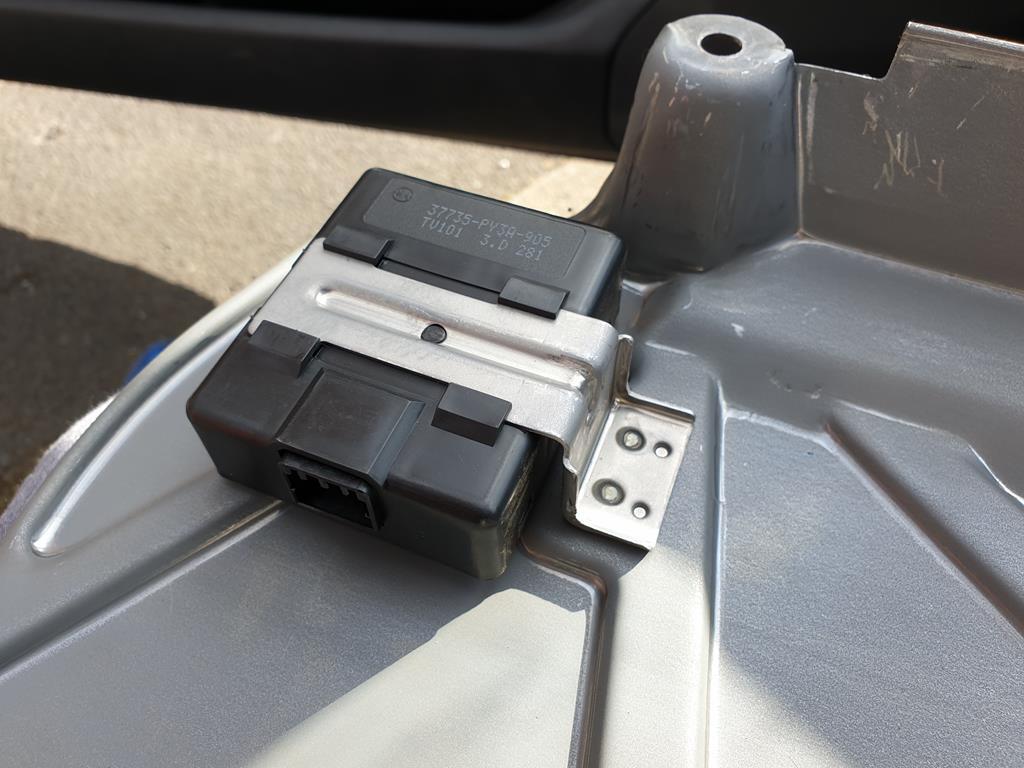 I grounded one of the terminals for the unit and started the engine, looking for any signs of the compressor clutch engaging. 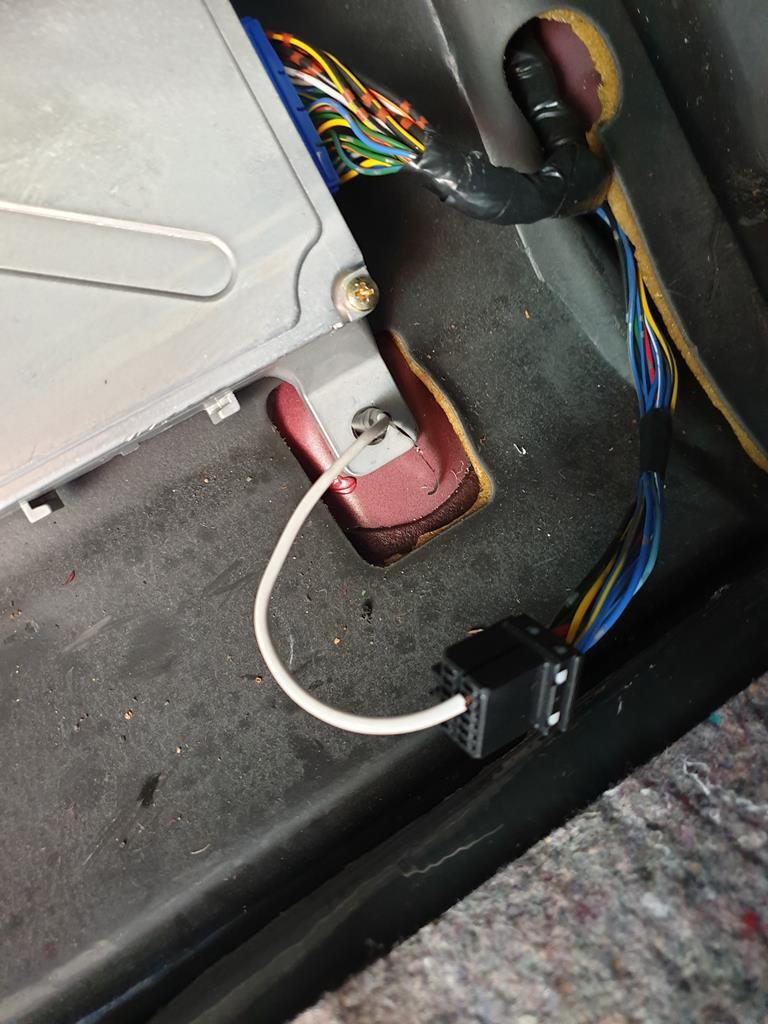 It didn't so I had to skip to the last page of the flowchart. This told me I needed a special Honda test harness, which won't have been made for over 20 years and the amount of them left in the world can probably be counted on one hand.. As far as I can tell, I didn't need it, its just a little bit more of a faff The PCM is linked to the fan control unit, so the first point was to check continuity on the wire between them. I couldn't find it. In retrospect I think this is because the terminals on the plugs are quite tight and I wasn't able to get the multimeter probes in properly, I started looking for a break in the wire between the two but honestly access in the footwell is very poor and there are a lot of wires, so I figured I'd be better off running a new wire between the two, so I know I've definitely got them connected. Sadly, this didn't work. The last check was to see if one of the power cables from the PCM (going to the clutch relay) had power with ignition on, and it did. So the final outcome of all this is that the flowchart suggests I swap the PCM out for another one... It did have to be the rarest and most expensive component didn't it! Either that or I've checked something incorrectly, but I'm pretty sure I did it right.. Anyway that was lots of uninteresting words, if you've skipped through, I tried to fix AC, AC is still broken. |
| |
|
|
wc
Part of things
 
Posts: 45
|
|
|
|
|
AC will not work if the pressure in the system is too low or high. There will be a low and a high pressure switch in the system, often part of the filter.
As yours cools marginally when you bypass the relay (this eliminates the low/high pressure switch which is in series with the compressor activation supply), it would suggest it is low on gas, but could be other things as well, so best to take it in and get the system hooked up and check initial (at rest) pressure, this will tell you if it is low on gas or not. Or find a mate with gauges and do the same. You will need to find out what your at rest pressure is supposed to be for you particular model, differs from car to car. Google will normally get you to an answer.
|
| |
|
|
|
|
|
|
|
|
And on that note: I think KwikFit have a ‘working or no charge’ policy when they regas you.
About the only thing I’d use them for..
|
| |
|
|
adam73bgt
Club Retro Rides Member
Posts: 4,998
Club RR Member Number: 58
|
|
|
|
Thanks go to wc and mrmoonyman  Dropped it off at the local KwikFit today, they'd run out of AC oil... so had to go and kill some time in Nuneaton... but on the plus side, when I came back, I was greeted with nice, cold, working Air Con in the Legend, happy days!  So that's Air Con ticked off the list. The new radiator and condensor can wait until such time I feel the need to fit them. Other things that have happened 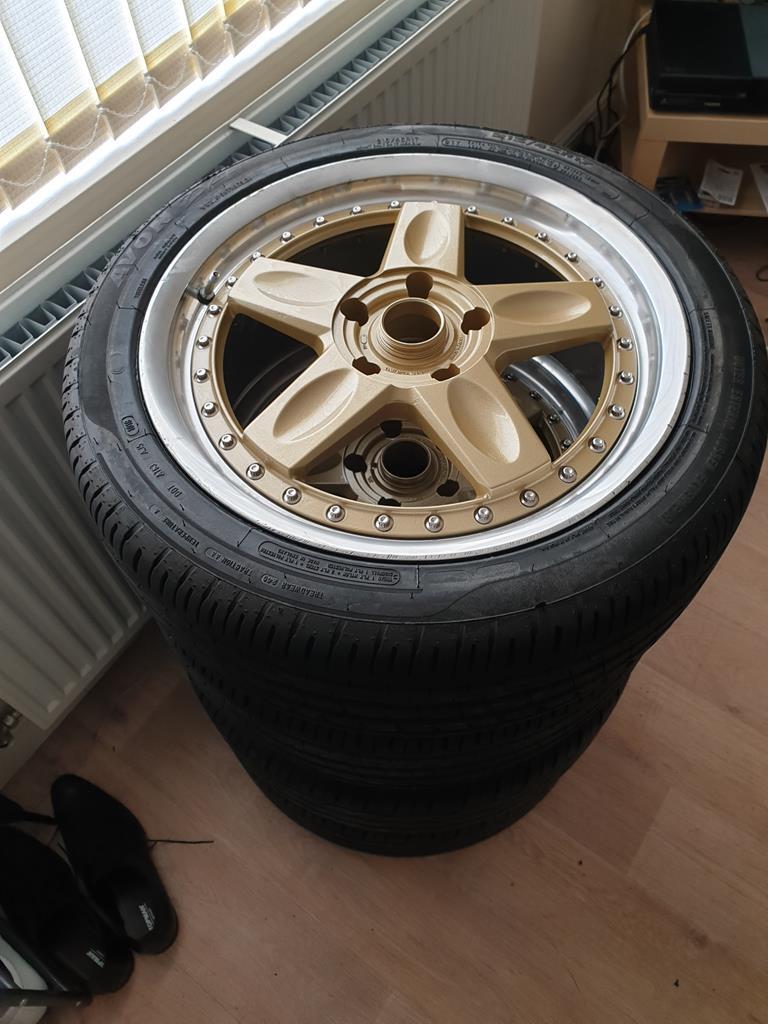 Wheels now have tyres fitted, I need to take a little powdercoat off the edges of the centres so they'll fit in flush, I also want to get a tool for tightening the centre nut so they won't go missing. Also think I need to buy some new wheel nuts as well, but aside from those little odds and sods, they'll be ready for fitting soon. I've also just ordered some lowering springs because you can't have new wheels without lows, its the rules  I know from when I had a look while doing the brakes that some of the suspension isn't in such great shape, but I don't really want to fork out on changing absolutely everything under there. So I'll take another look, try and clean up rusty arms and paint them and maybe replace the odd bushing where I can. The original dampers don't appear to be leaking and work well so I'll keep them on for the time being. If it ends up riding terrible, I'll just replace them later on, no big issue. Also, dropped into Caffeine and Machine after work on Friday as the weather was nice, so have a couple of pics 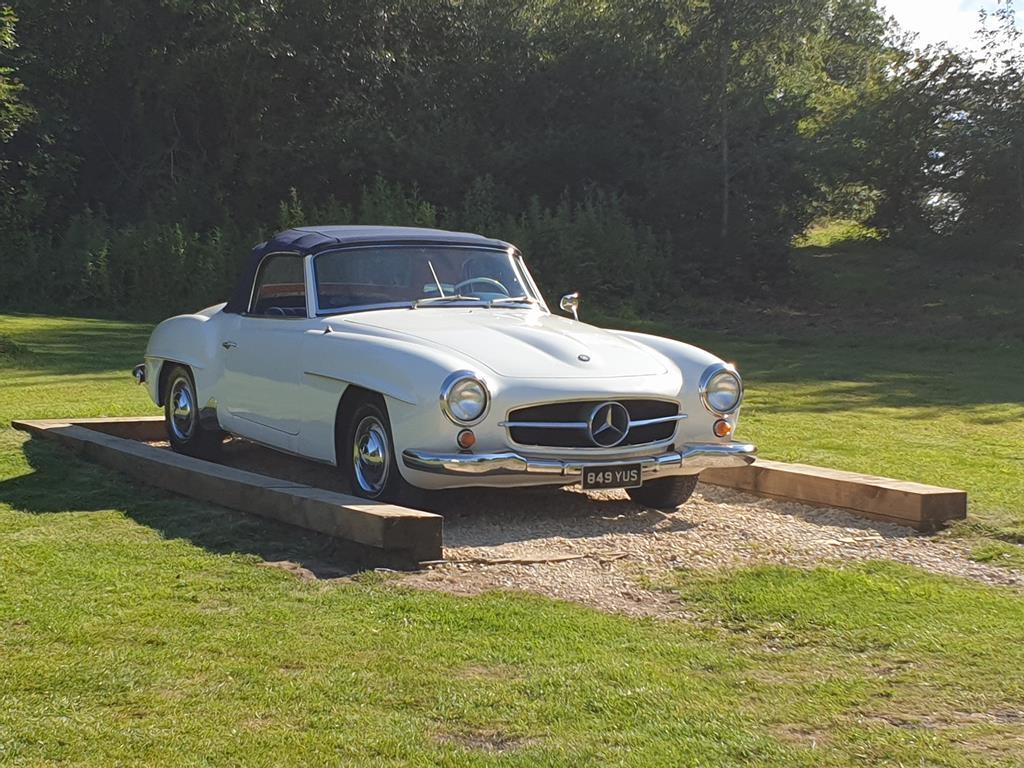 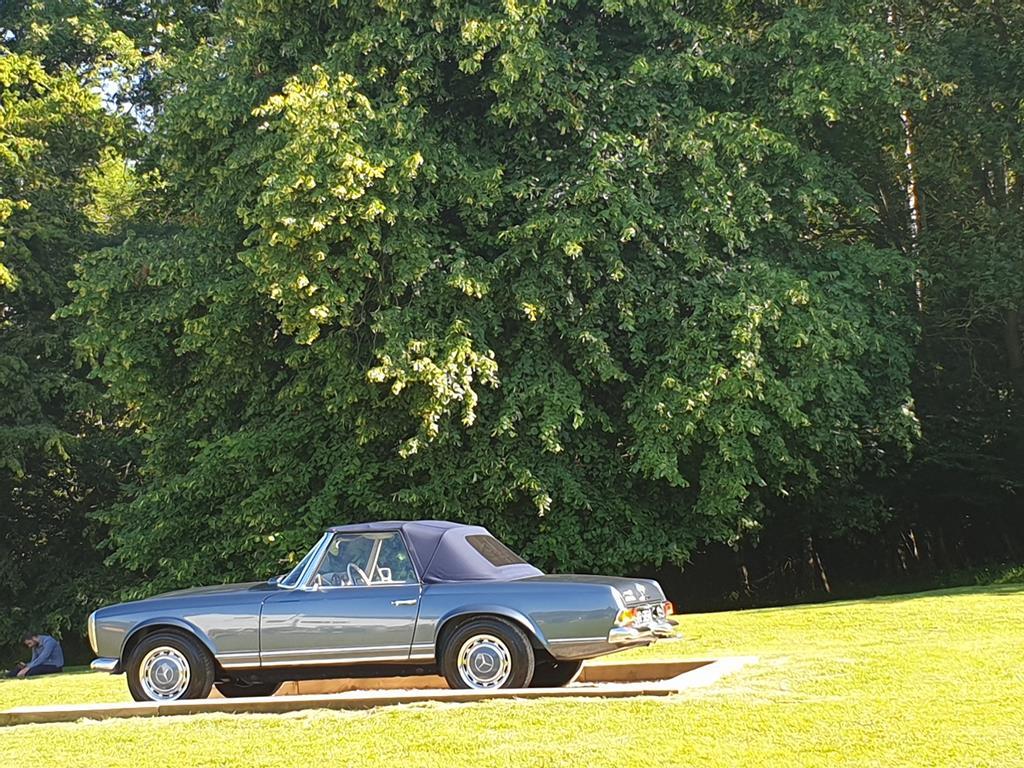 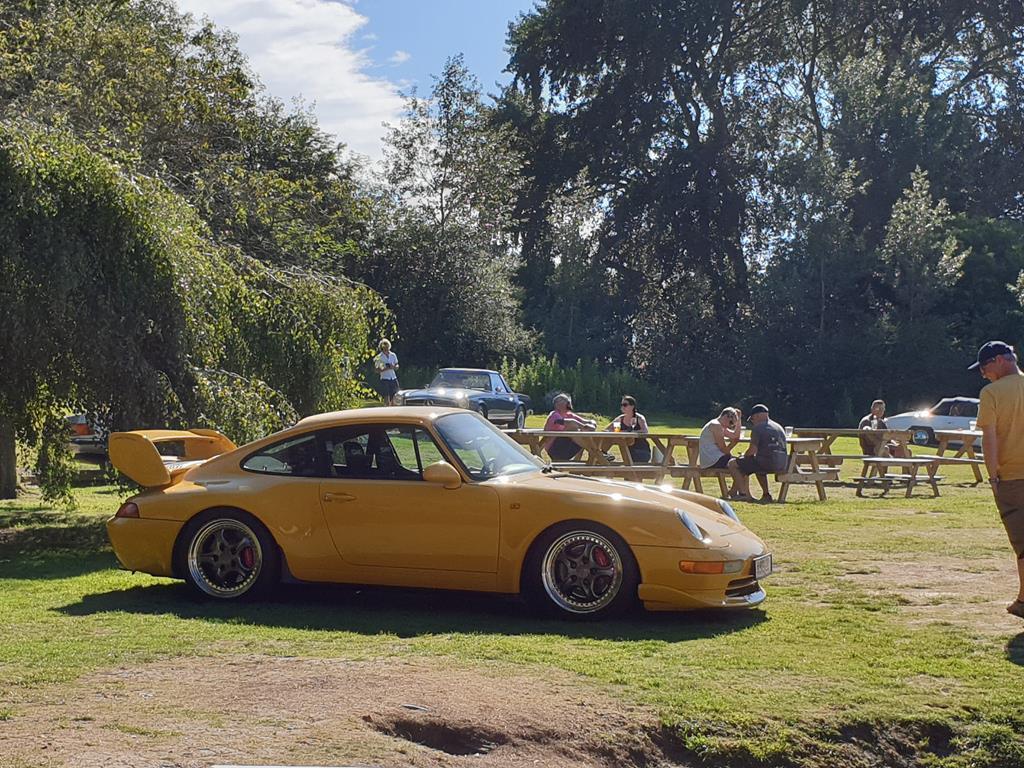 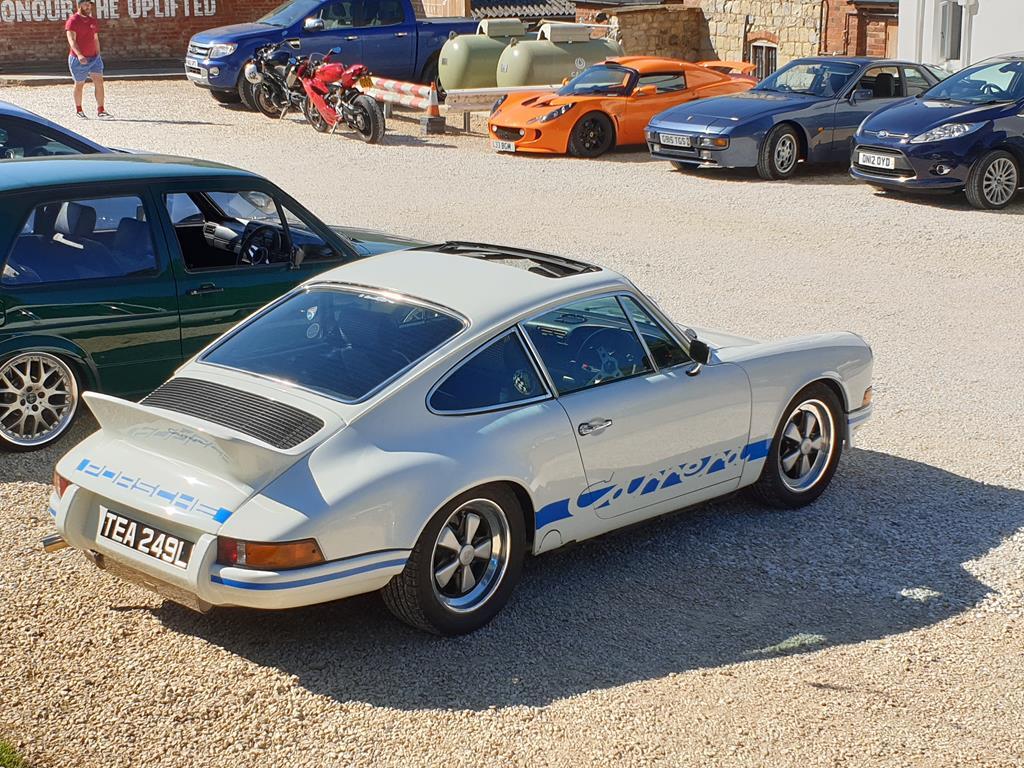 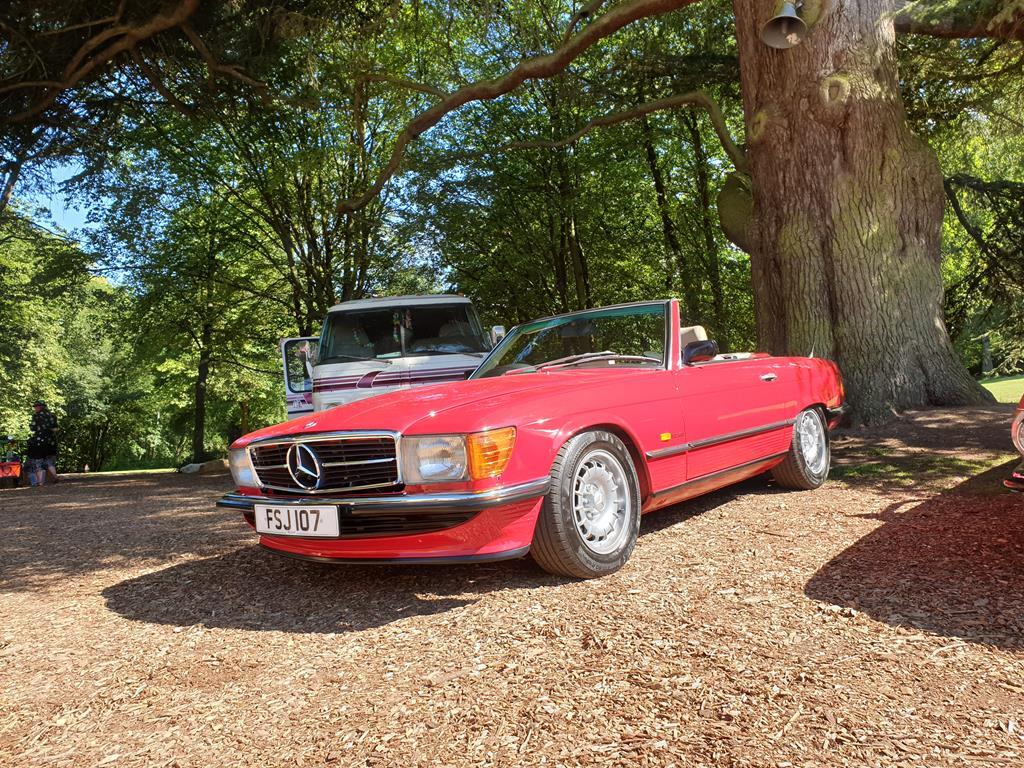 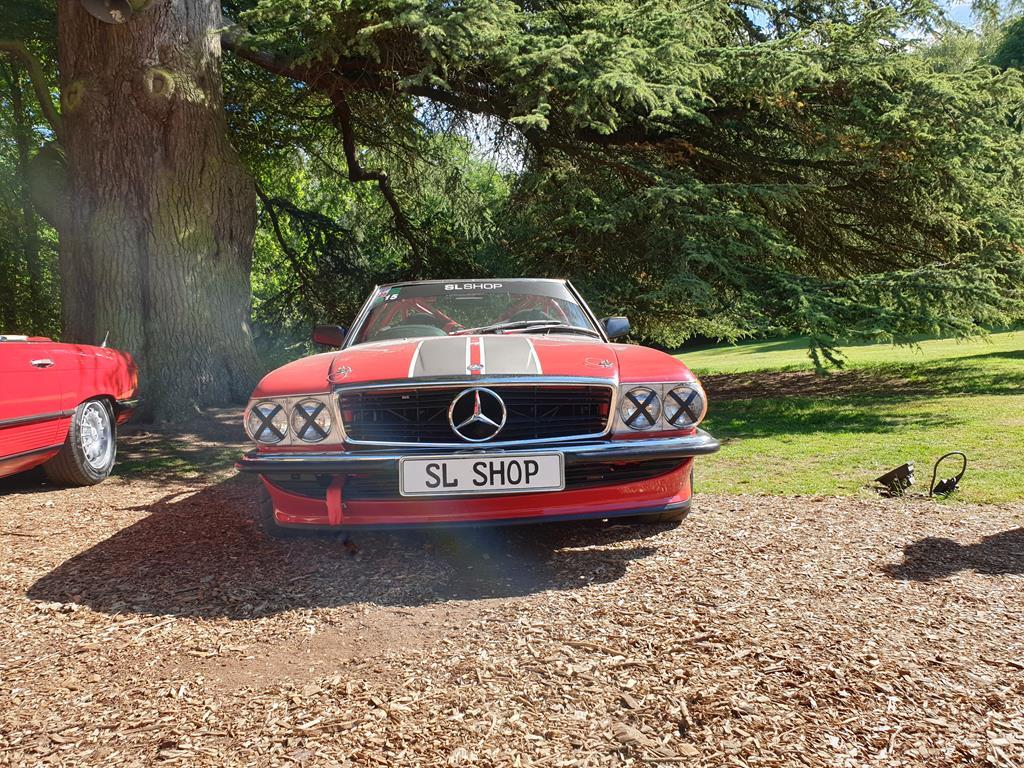 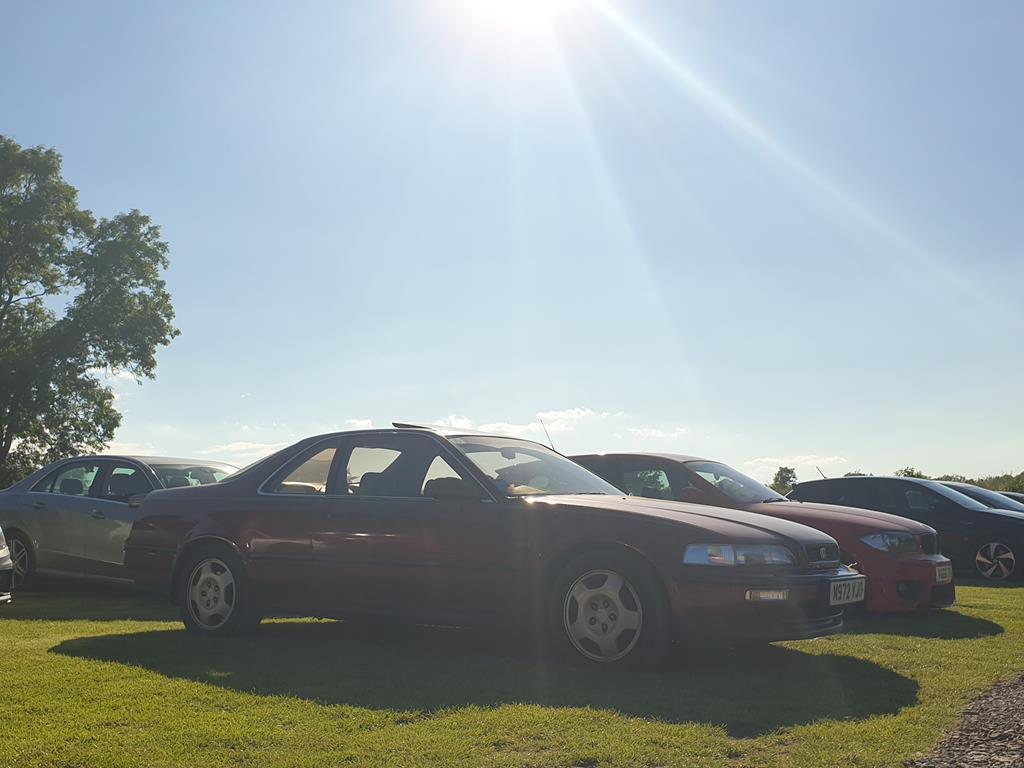 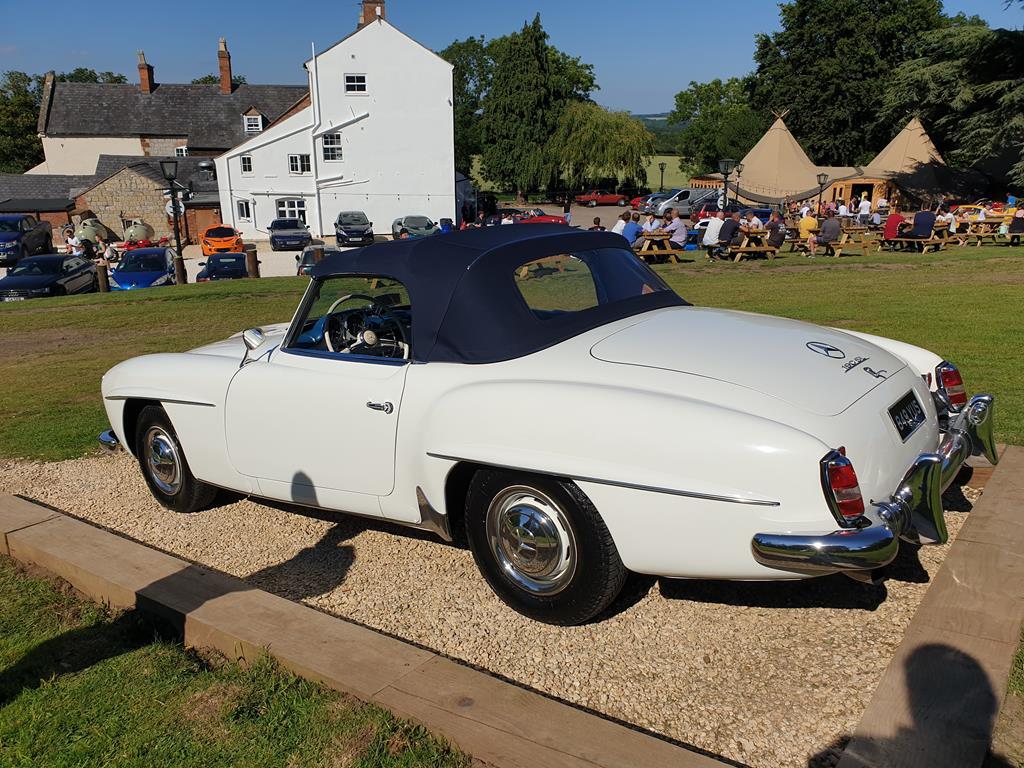 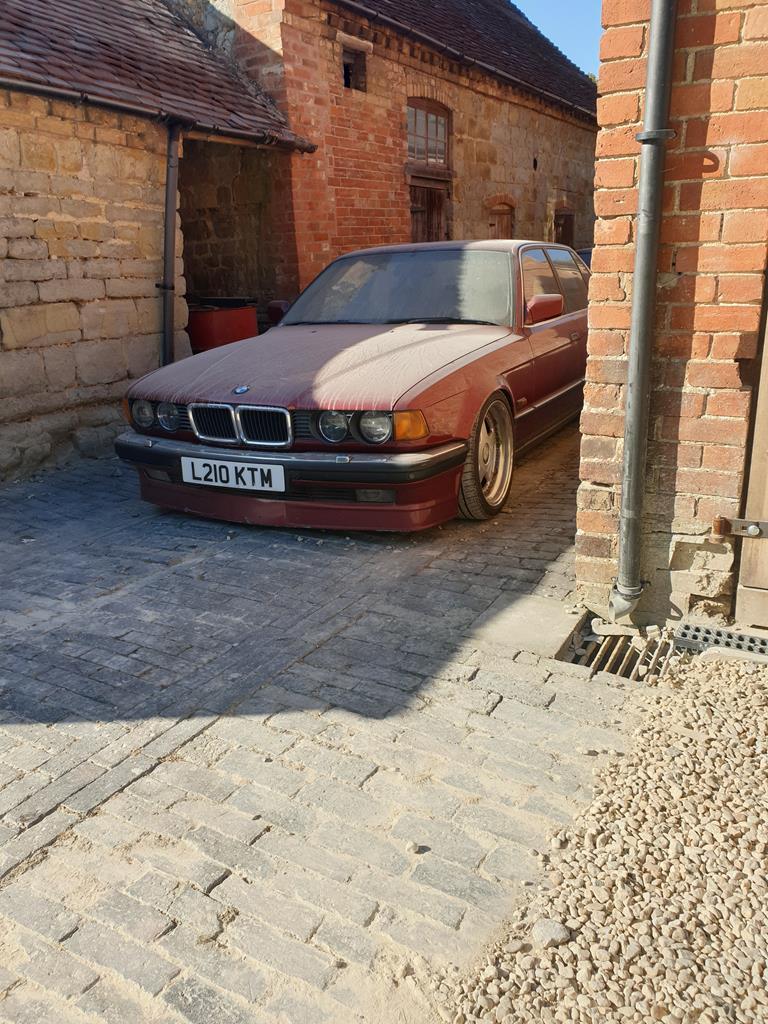 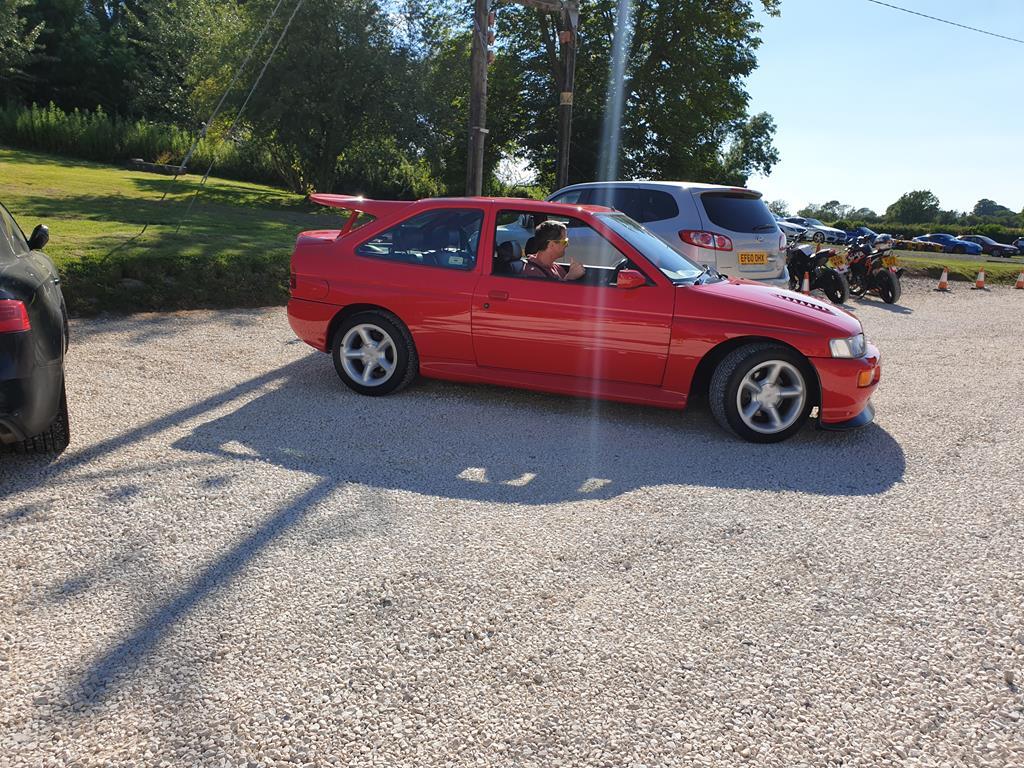 |
| |
|
|
|
|
|
|
|
|
|
Looks a nice day out. Really must get the o-rings sorted for my air con. Still, it's been two years, so no rush!  |
| |
|
|
adam73bgt
Club Retro Rides Member
Posts: 4,998
Club RR Member Number: 58
|
|
|
|
Looks a nice day out. Really must get the o-rings sorted for my air con. Still, it's been two years, so no rush!  Funnily enough I have an unopened box of assorted AC o-rings which I bought probably about 2-3 years ago when I first had plans to put AC in my BMW 520i, if I ever decide to change the condensor on the Honda, they may get used, otherwise I'll just keep growing dust on them  |
| |
|
|
adam73bgt
Club Retro Rides Member
Posts: 4,998
Club RR Member Number: 58
|
|
Jul 14, 2019 21:52:55 GMT
|
Soo these turned up much more quickly than advertised.. 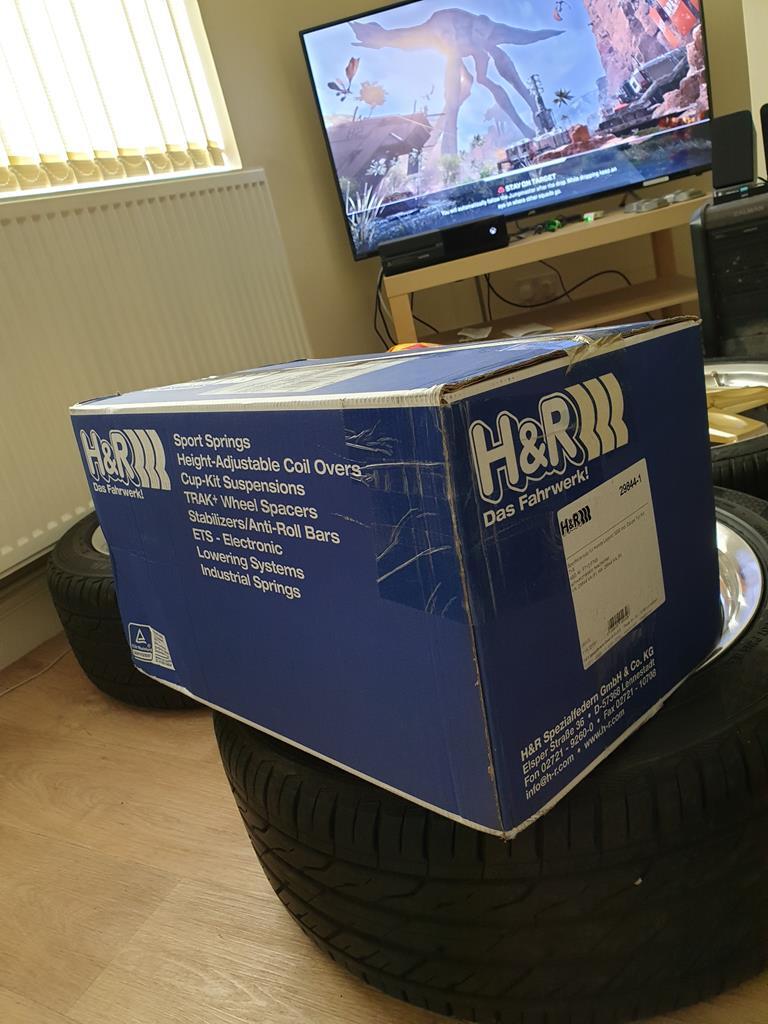 Not that I'm complaining mind, H&R lowering springs, 35mm drop all round. I've also realised that the Gathering really isn't far away so I need to keep pushing on with sorting out the car. Staying on the suspension topic, I also bought new bushes for the lower mount of the rear dampers as I knew they were in bad shape 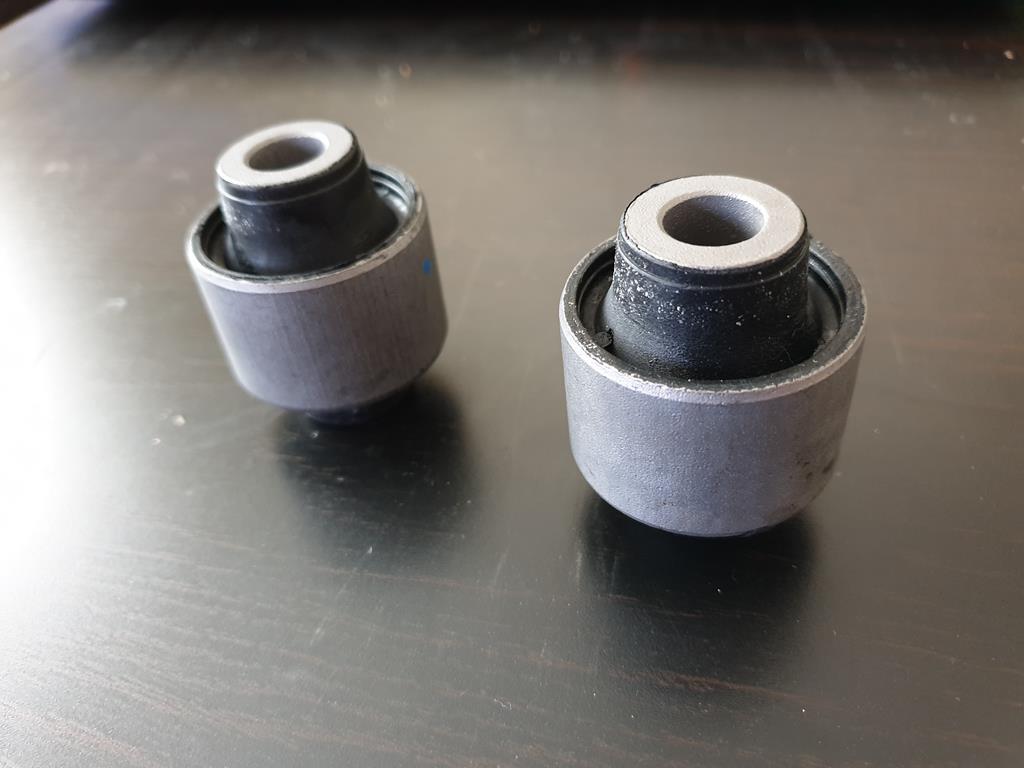 I'm half expecting the old ones to fall apart upon removing the struts so better to be prepared. Today I made a belated start on the car (got distracted by the many dramatic sports goings-on on TV this weekend!) Began by trying to get access to the tops of the rear struts. To do this, you must remove the rear seat base, the rear seat back, the parcel shelf, the speakers and then finally a plastic cap, which allows you to see the top mounts 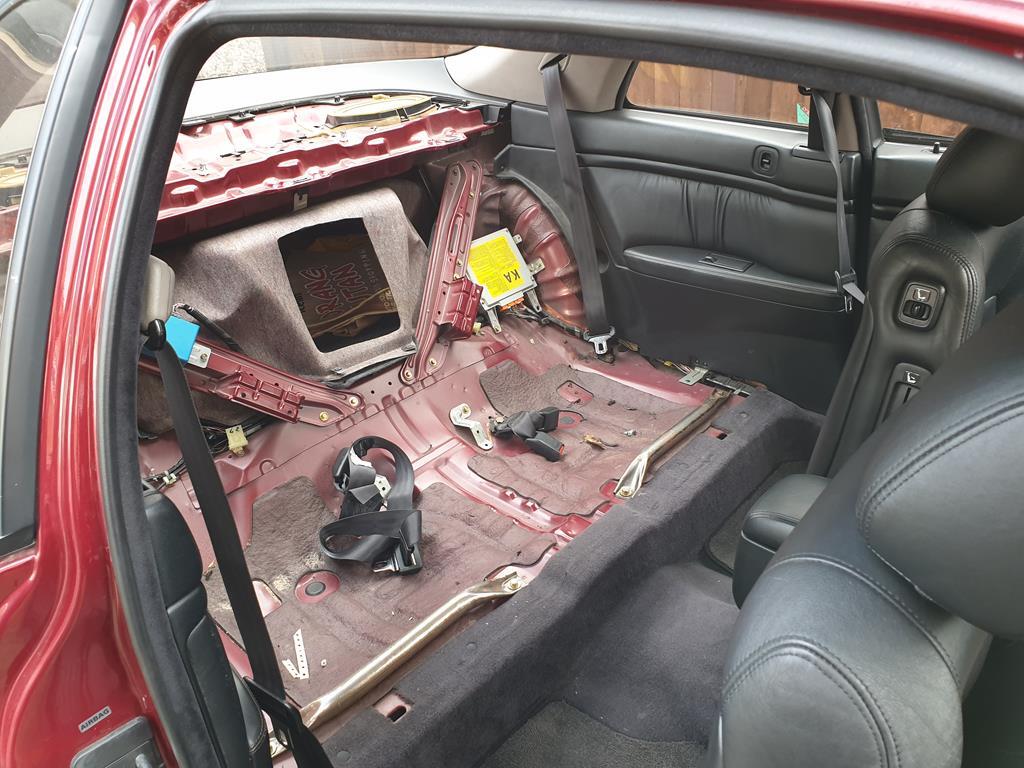 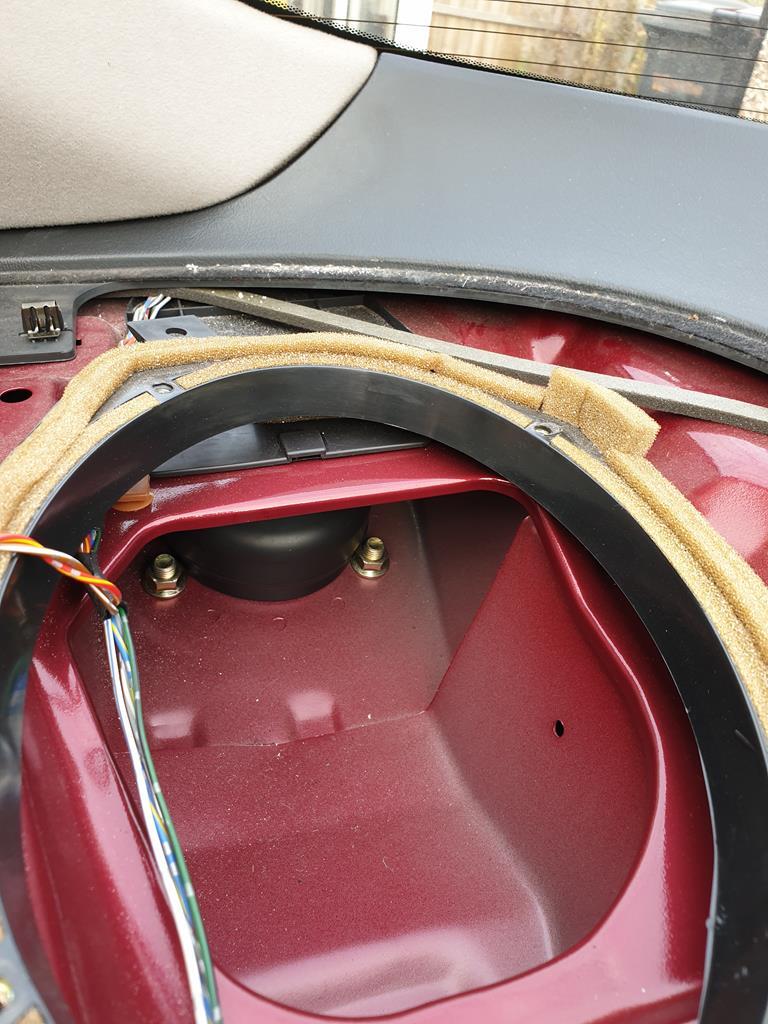 Being a coupe, headroom is rather limited back there also so its a bit unpleasant, but I'll live. As it was fairly late in the day, I actually didn't go further with the suspension work for the time being. I did notice that I wasn't the first person in here, some non standard electrical connectors and a snapped bolt for the seat mounting were dead giveaways 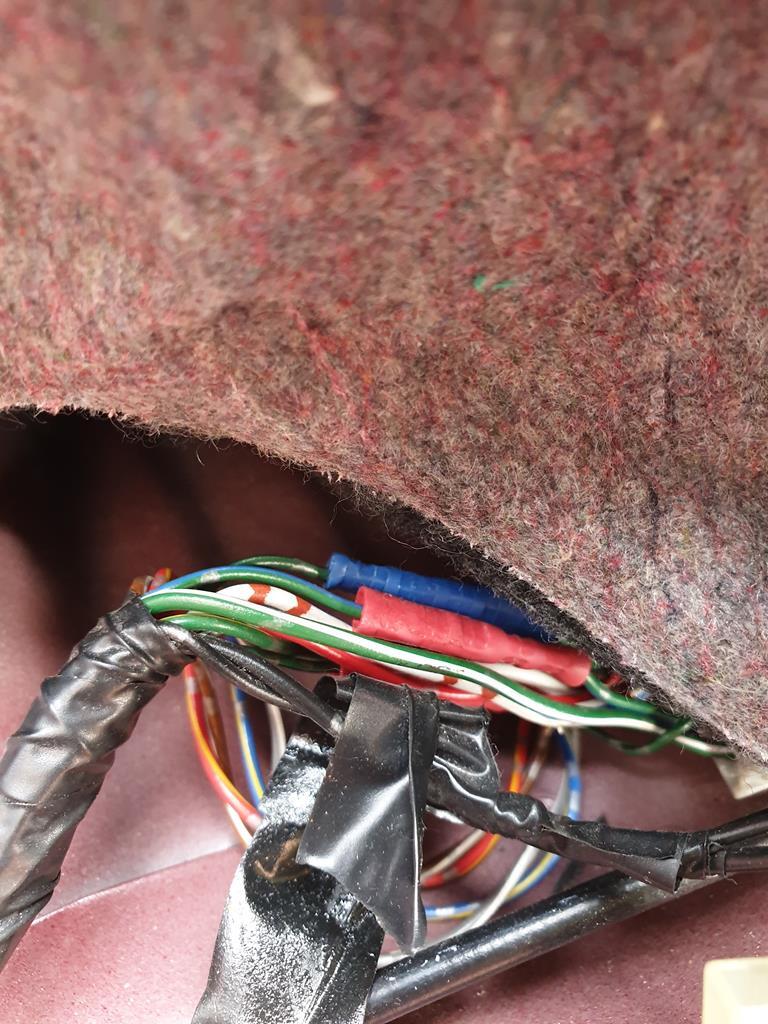 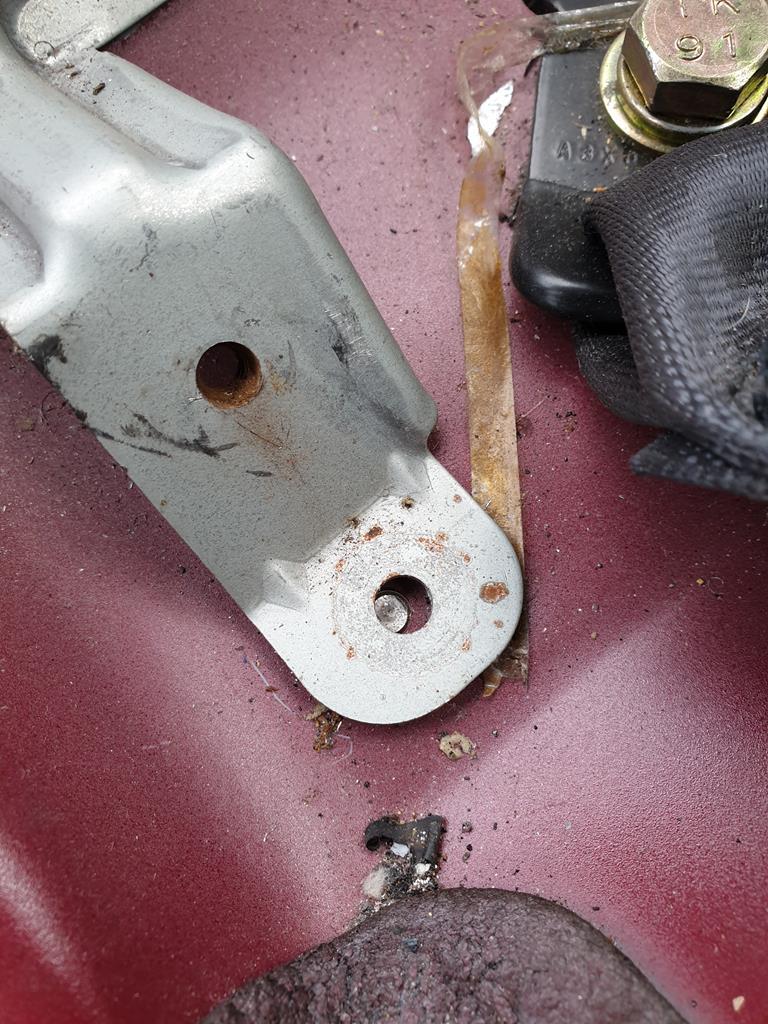 I also snapped one of the other rear seat mount bolts while trying to undo it.. So I'll try and drill those out. The eletrical stuff may just be related to the old alarm that was previously fitted but I've not investigated what circuits are involved yet. One thing that did cross my mind is that the OSR electric window didn't work, so maybe that was related. At which point I remembered I'd bought a used replacement master electric window switch which I hadn't tried out yet. So off with the door card 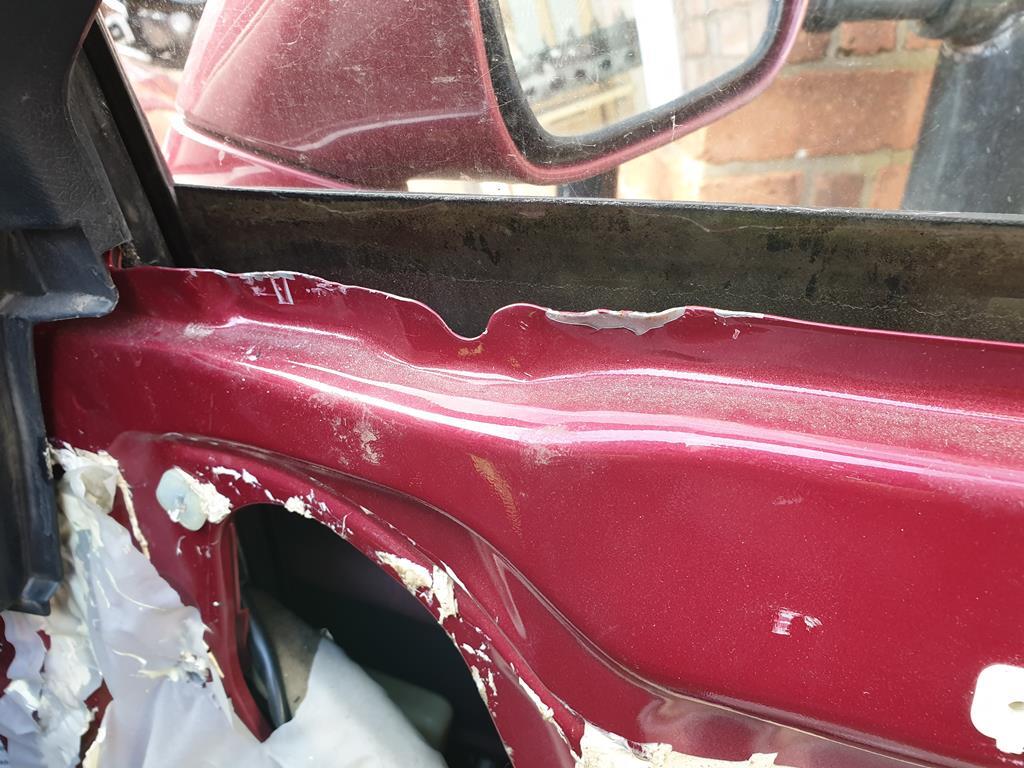 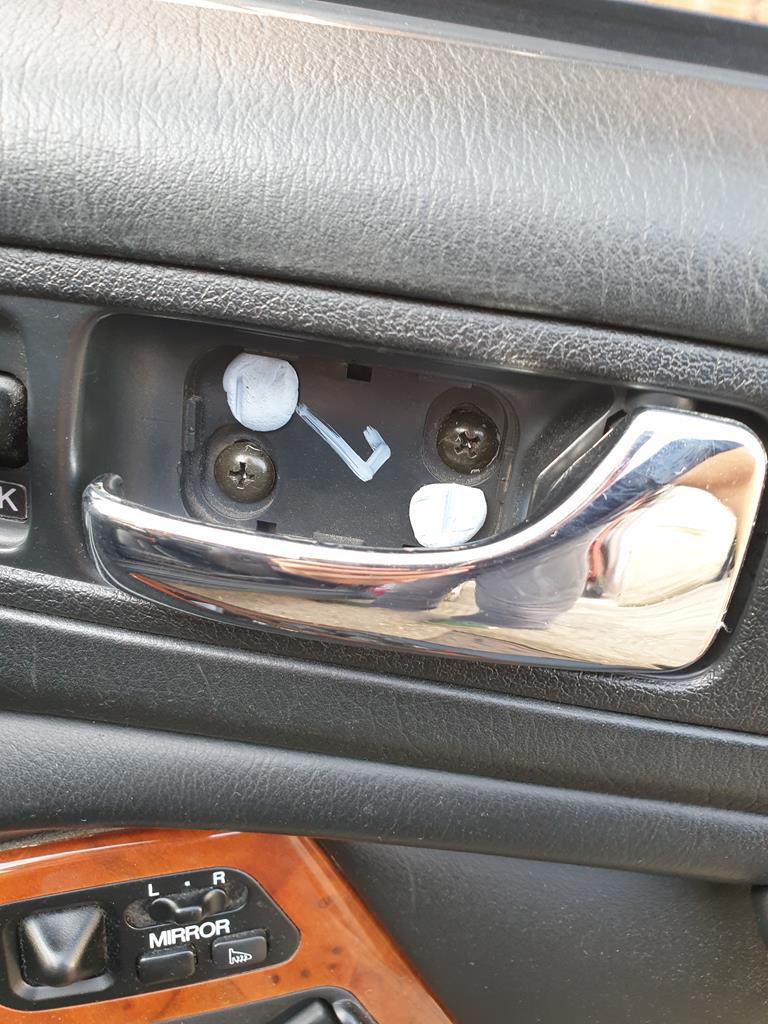 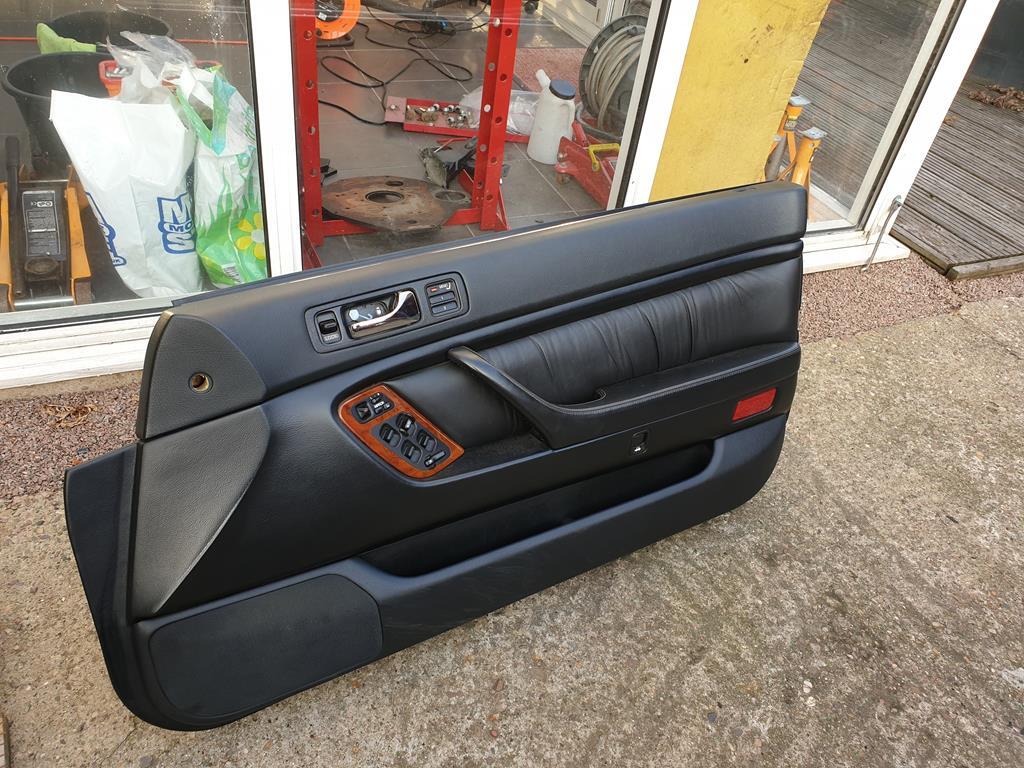 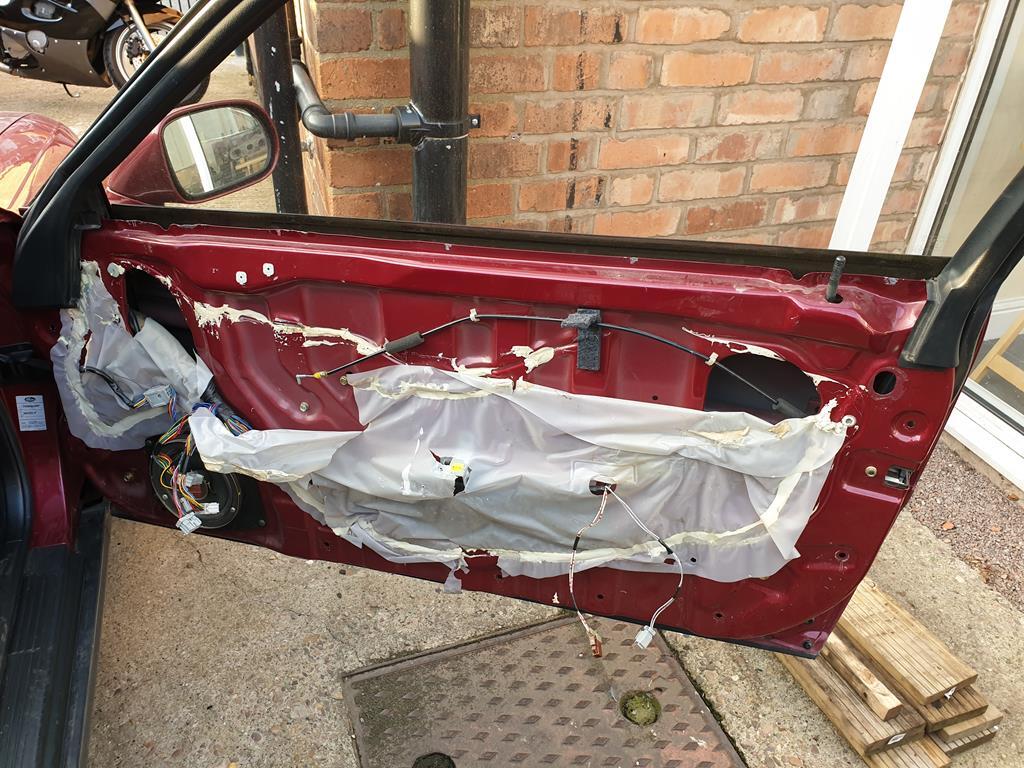 Damage to the door metal and blu tac helping to hold the screw cover on are signs that someones been in here before as well! Though that doesn't come as a surprise given the odd way in which the electric window switch on the drivers door was behaving. To recap, the OSR window didn't do anything, but the switch for the OSR on the Drivers master switch, operated the OSF window, OSF switch did nothing, and the NS windows worked as advertised. Was a simple job to unplug the old switch and plug in the new one loosely just to check the functionality. 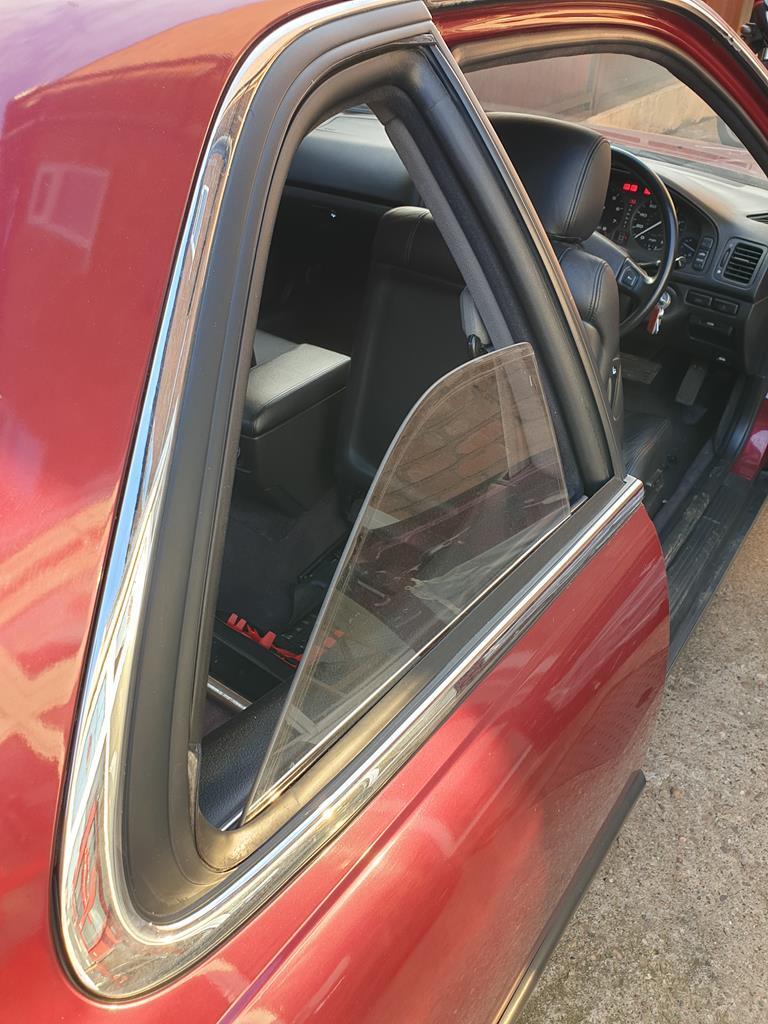 It needed a bit of a hand on the glass as it was quite stuck but lo and behold, the OSR window now works on the correct switch (also works from the switch in the back of the car as well). The NS windows still work as they should, and the OSF window works off the correct switch, with the auto down and up feature working too! I gave the seals for the rear windows a clean up as they do get a bit stuck around the top of the window's travel, and I'm going to apply a little silicone lubricant to ease this but otherwise I'm really happy thats worked. Another thing to tick off the list. I also now have access to the speaker which has been making farty noises, so I can replace it with something newer 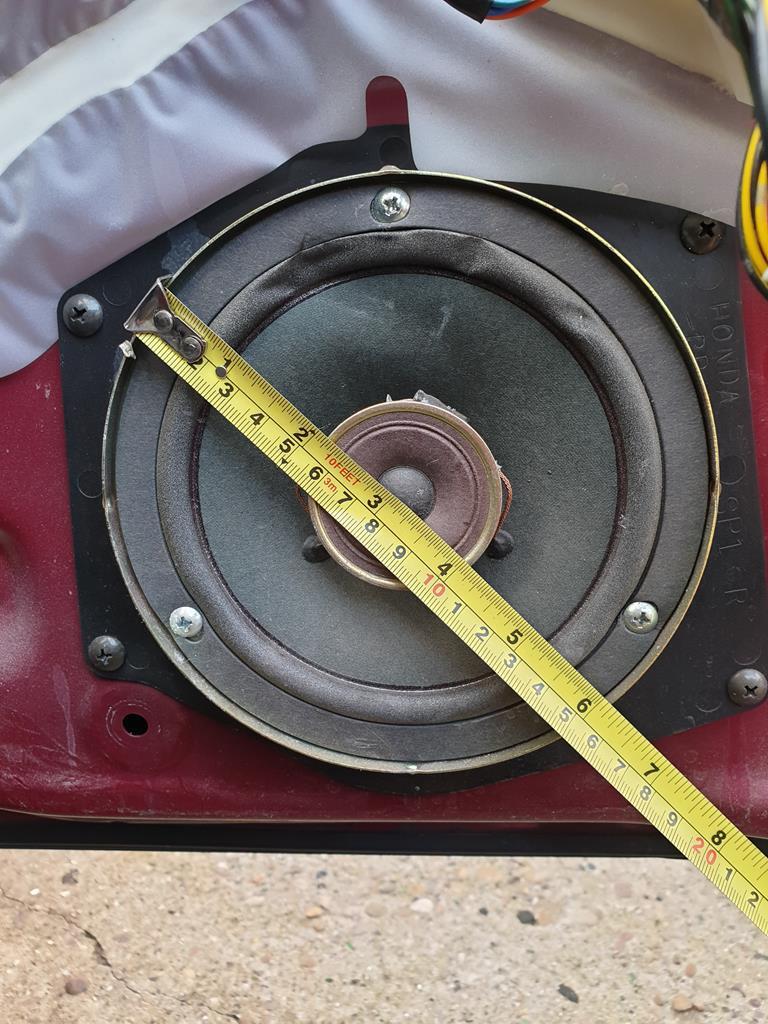 I'm going to be commuting on my bike this week so I can focus on finishing off jobs on the Legend; got to change the speaker, fit the electric window switch to the door card and reassemble, change the springs, investigate the heated rear screen while I've got good access, give the interior a good clean (might take out front seats for this also), detail the outside of the car and get the new wheels fitted once I've bought new nuts and made the centre caps fit. As long as I keep on task, should be a few good evenings work  |
| |
|
|
adam73bgt
Club Retro Rides Member
Posts: 4,998
Club RR Member Number: 58
|
|
Jul 20, 2019 20:59:05 GMT
|
Right, made some more progress. Had Thursday and Friday off work so got cracking on removing the suspension 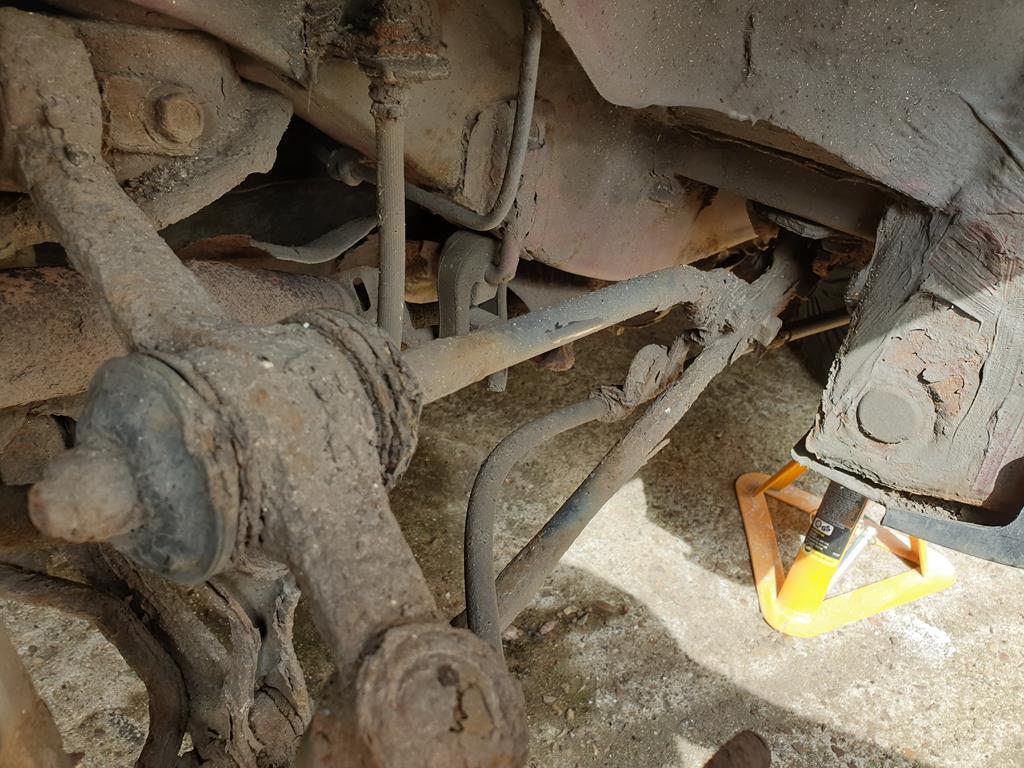 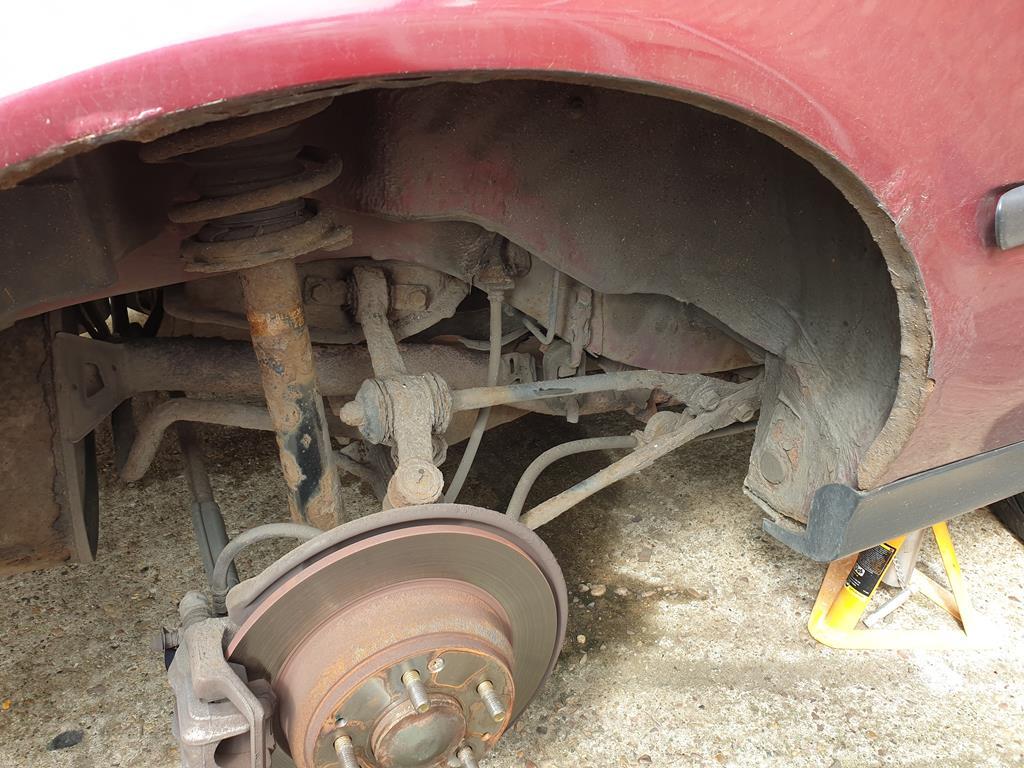 Looking at the rear suspension its all too easy to get a bit depressed about the state of it all... Decided that in the interests of time and money, for the time being I'm going to be focusing my attentions on the springs and struts. The arms will all need rebushing/replacing at some point, but I suspect it will take some time to amass the parts. Also while under the rear, I noticed the rearmost part of the exhaust heatshield simply crumbled to the touch, it was that rusty, and the exhaust itself is in poor condition. So I think at some point soon I'm going to have to bite the bullet and replace part of the exhaust system. The condition of the system will dictate how far back has to be replaced, I'm not planning on getting into removing any of the many cats on the car as I don't want any faff come MOT time. 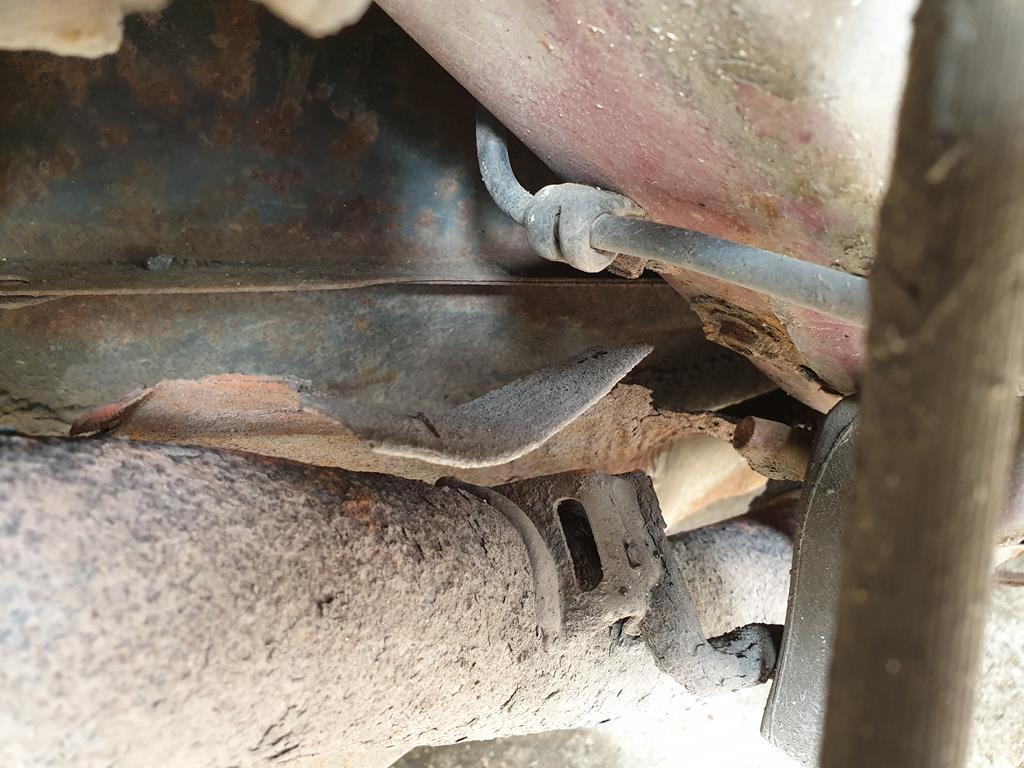 The rear struts were pretty simple to remove anyway, jack underneath the knuckle to take the suspension slightly off full droop, undo the bottom bolt which threads into a captive nut in the knuckle (lots of pentrant spray and wire brushing to get the crud off the bolt head), then undo the top three mounting nuts and the strut comes free. I don't seem to have taken any photos of it but I'm sure you all know what a strut looks like. Used spring compressors to take tension off the spring then allen key and spanner to remove the top nut and it all came apart. I then had some fun trying to remove the bottom bush so I could replace it. 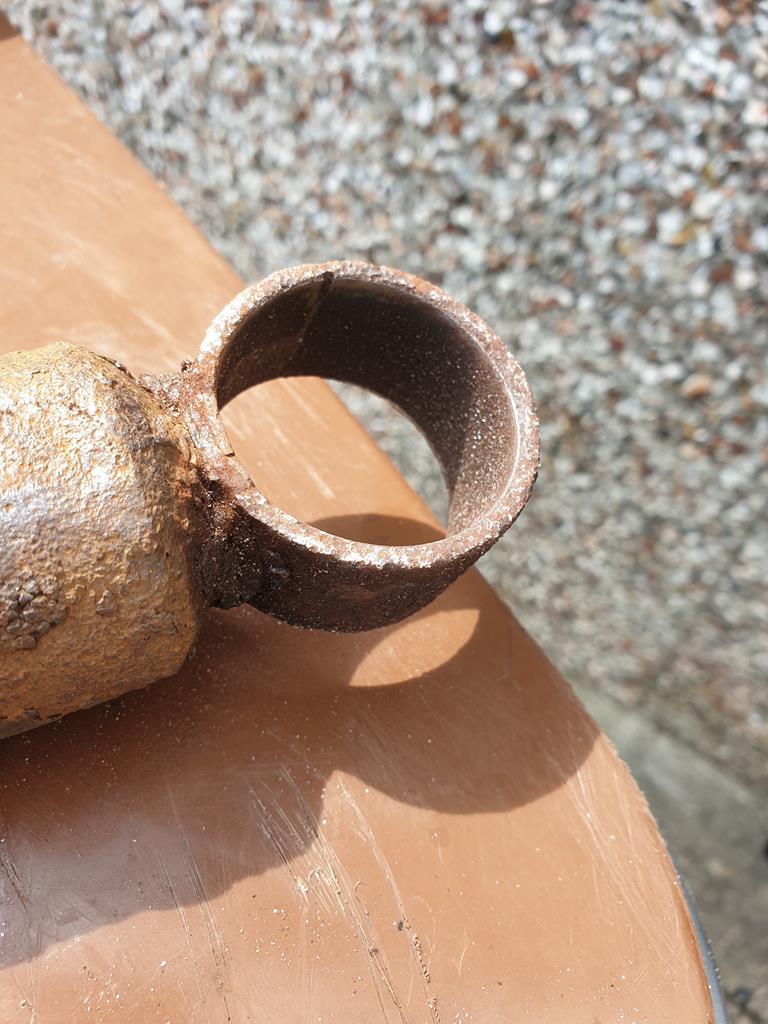 I did get there eventually with a mix of blowtorch, hacksaw and hydraulic press, but I cocked up a bit as when I looked at the eye for the bush, it was slightly bent, and as I tried to press in the new bush, I got it on an angle and bent it slighty.... The damper looked a bit rusty anyway so decided to cut my losses and ordered two new ones from the States. They should arrive Monday hopefully. With that disappointment out the way, I went to remove the front struts. Like with the rear, not too tricky a job, had to undo a pinch bolt and the lower mounting nut and bolt to remove the yoke from the bottom of the damper. 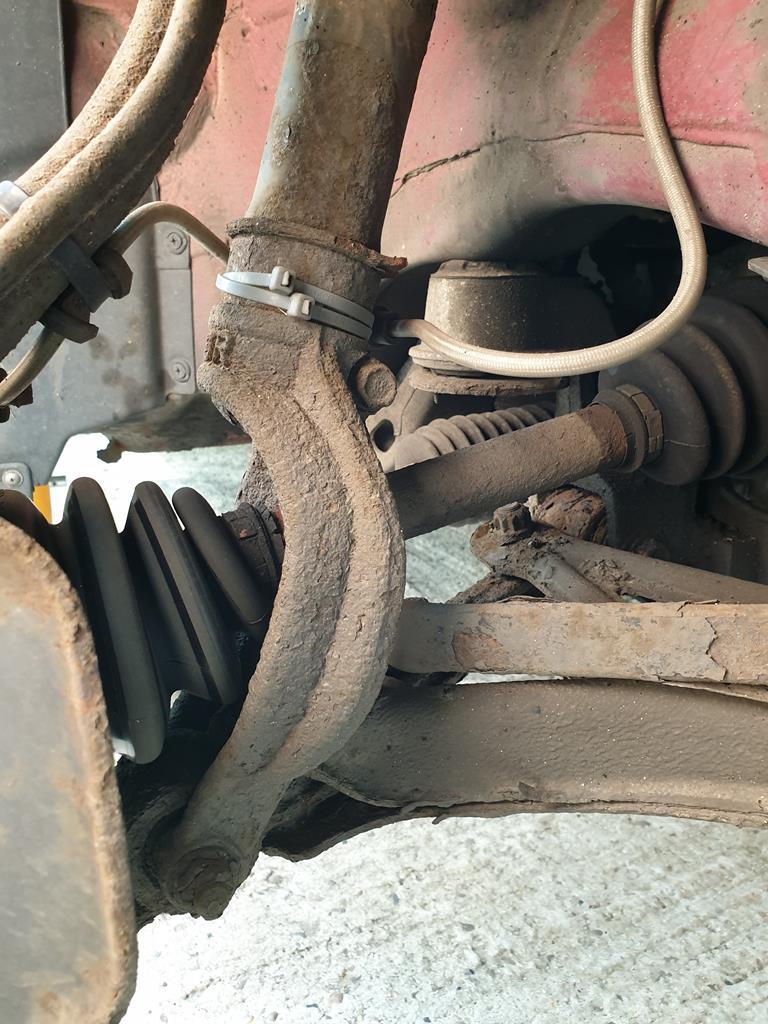 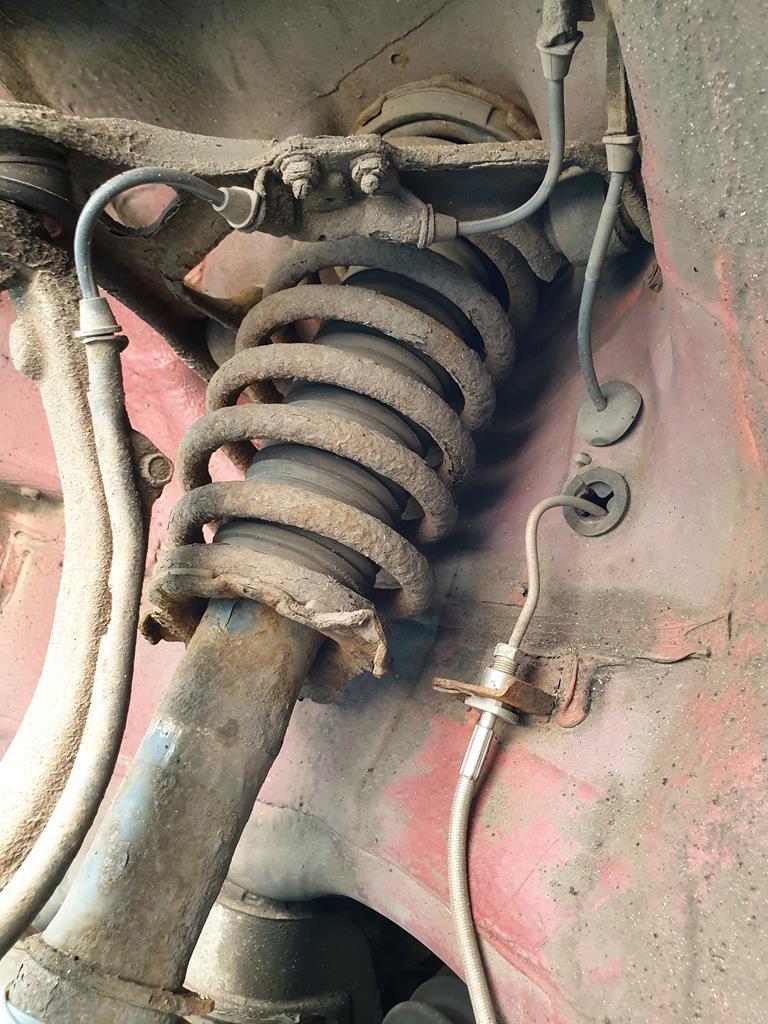 I was convinced that the yoke would be welded fast to the damper but on both sides it came off with little trouble and with a bit of manouvering was out of the way. Struts then have three nuts at the top to undo and they come out. Little note for anyone doing this, on the passenger side, you need to move the below cable out of the way to get at one of the nuts, and for the drivers side, I had to undo and move the strut brace out of the way a bit to get to the third nut. 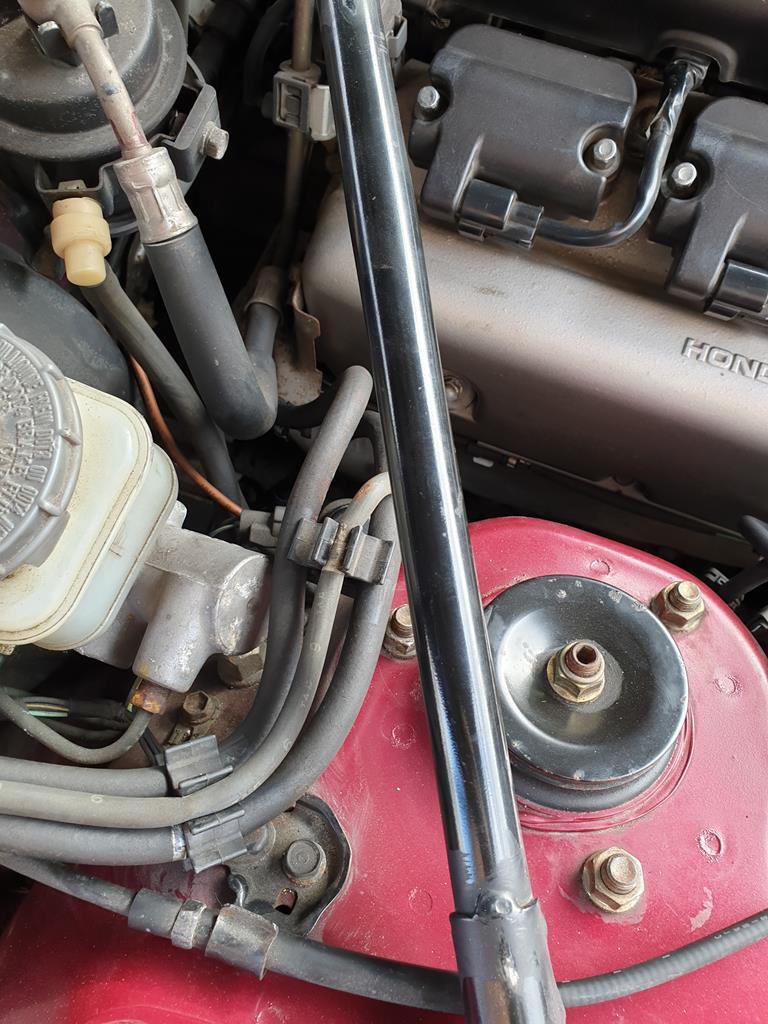 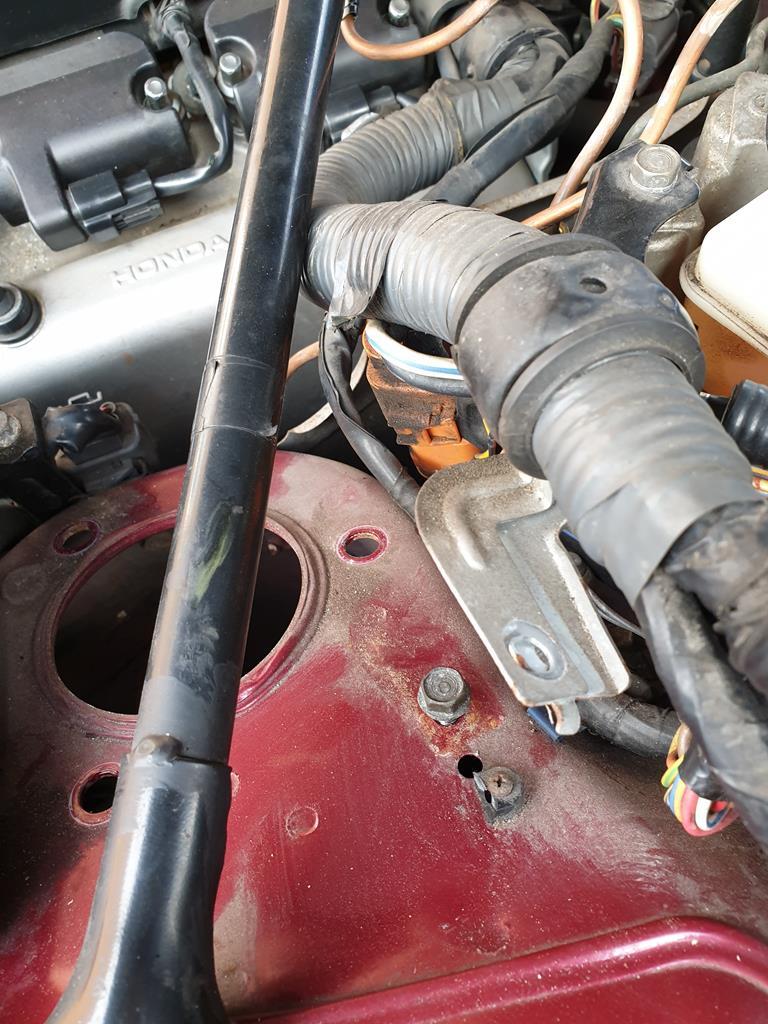 Quite why a luxury car has a strut brace is beyond me... Anyway! Front suspension with a strut shaped hole and one of the dampers with yoke 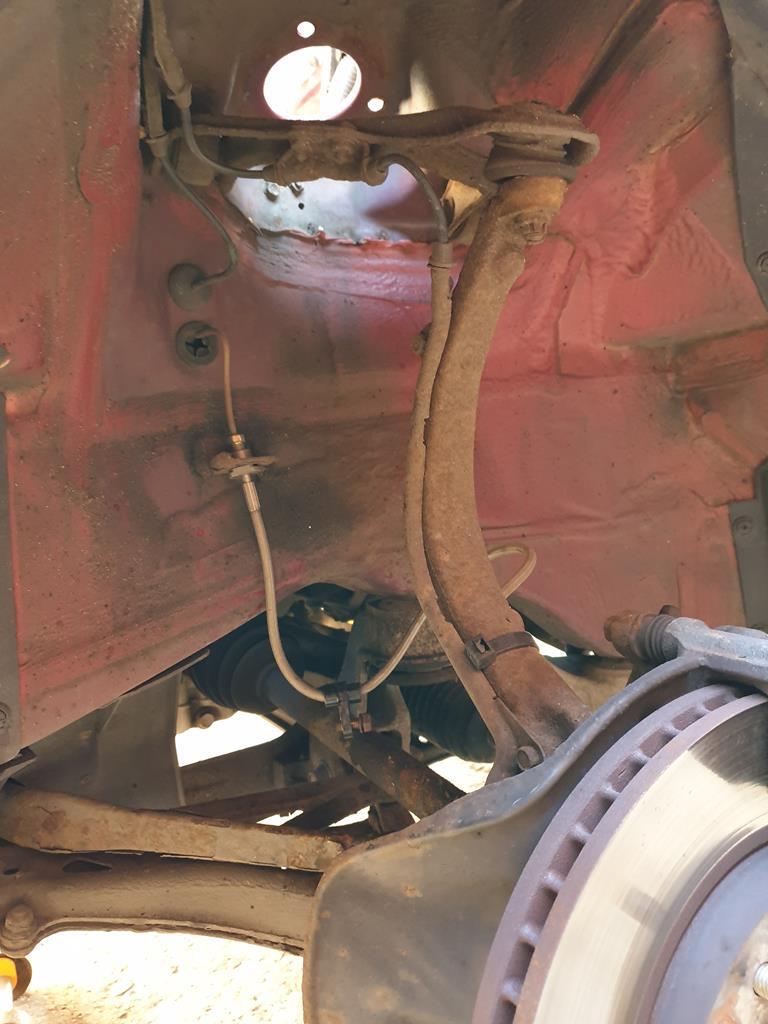 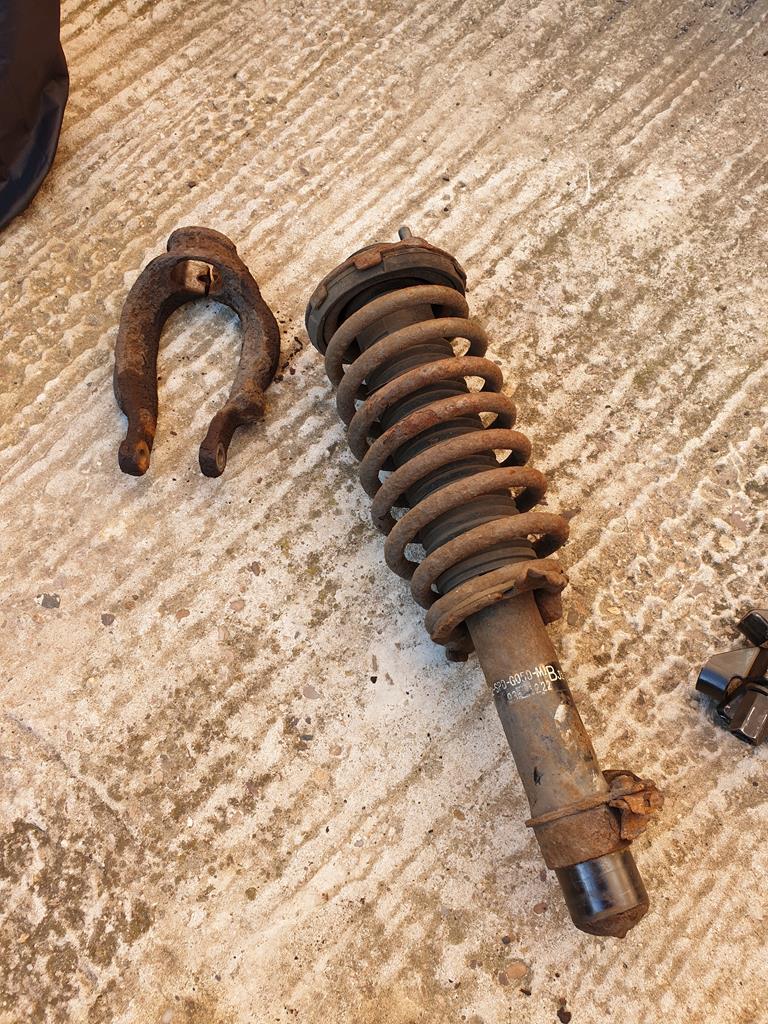 As with the rears, the fronts are original Honda items, but don't appear to be leaking or particularly worn. The fronts will get reused with a lick of paint. Getting the springs off the front struts was a bit of fun... They appear to be under quite a lot of tension before being installed into the strut, so much that I wasn't able to fully release the spring before my compressors ran out of thread... This resulted in a small, but controlled bit of excitement as the spring released itself as the spring compressor reached the end of the thread  The new springs should be a little easier as they're shorter but they're also thicker gauge... 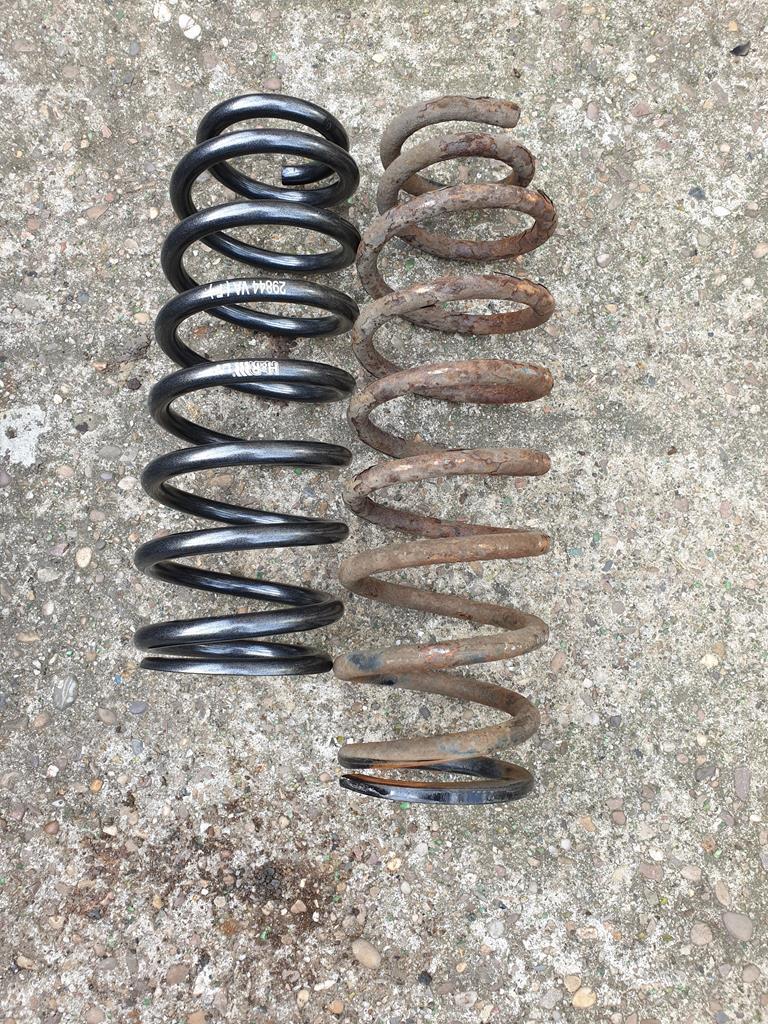 Before that though, you may notice some cable ties on the strut from where the garage clearly had some fun with retaining the new braided brake hoses needed for the last MOT. The brackets on the strut on one side were either broken off (rusty) or mangled, so in the interests of not cutting myself on reinstallation, I cut the mangled bits off and neatened up the edges with a file 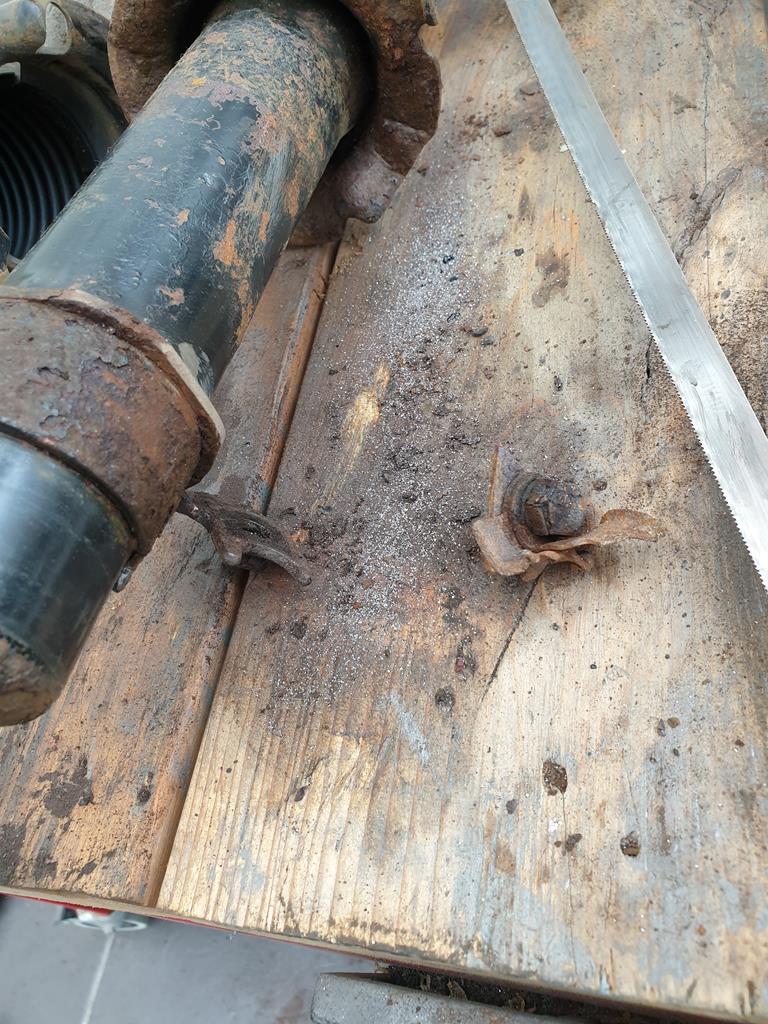 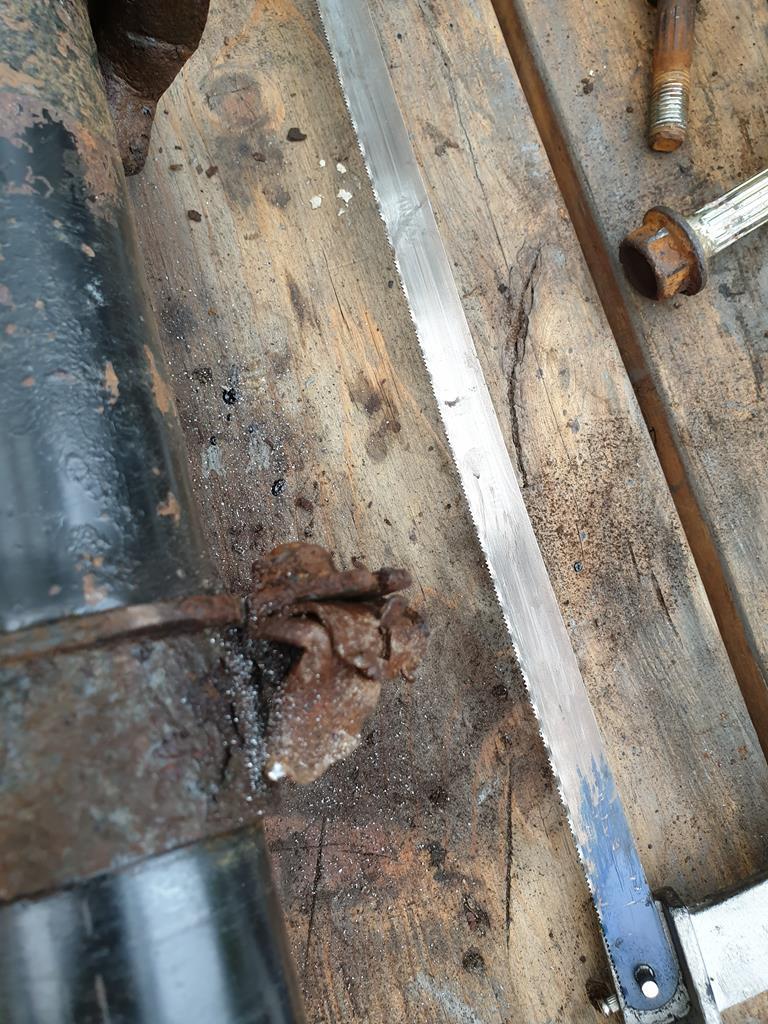 I've then given the front struts and yokes a coat of POR15 to preserve them and gave the damper gaiters a quick clean 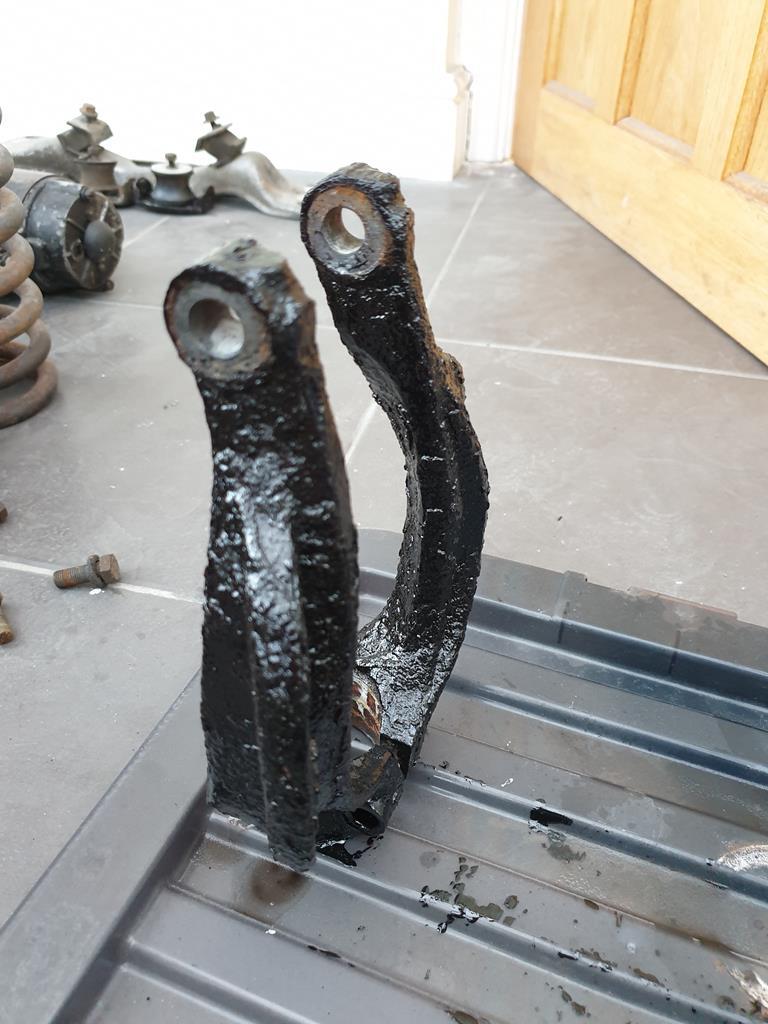 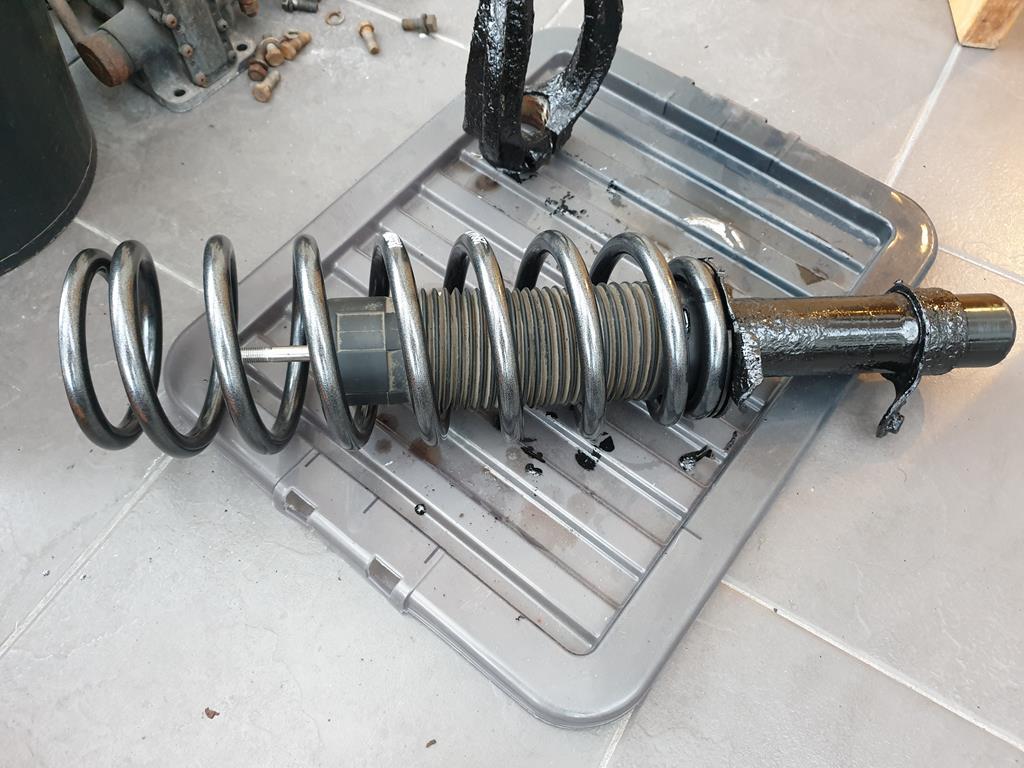 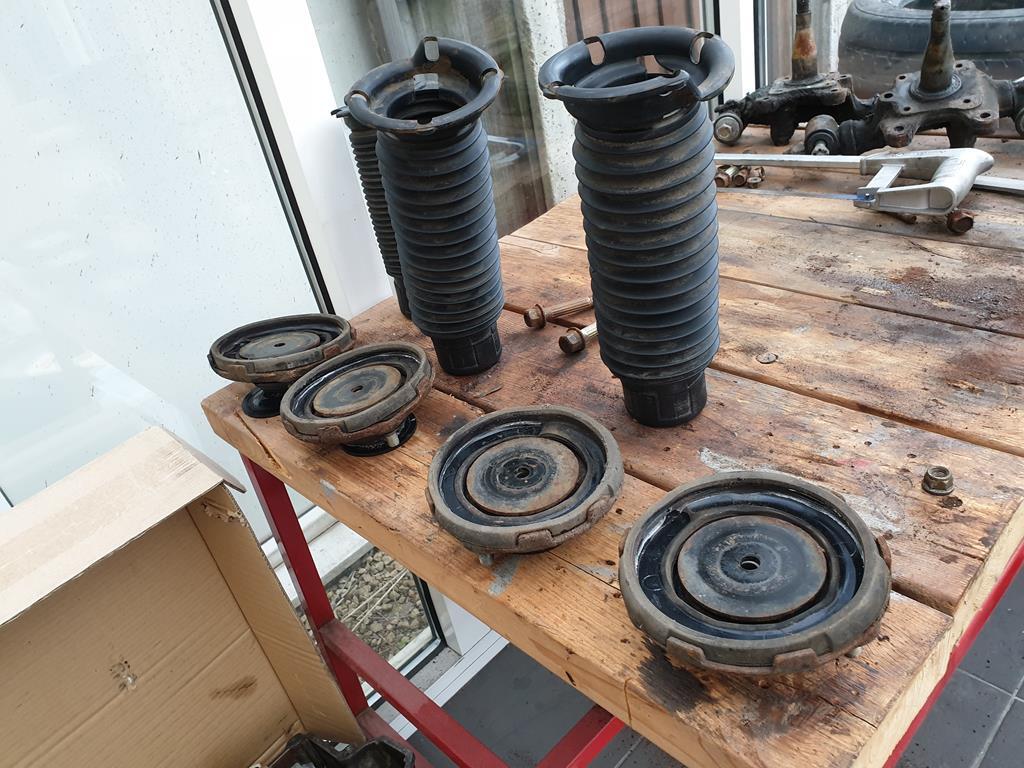 You can also see how much I'm going to have to compress the spring by to get the top mount on... Looking forward to that  Tomorrow I'm hoping to get the front struts assembled and installed, then some playing around with wheels  |
| |
|
|
adam73bgt
Club Retro Rides Member
Posts: 4,998
Club RR Member Number: 58
|
|
Jul 21, 2019 22:29:59 GMT
|
Today's efforts saw me waiting around for a delivery most of the day, then I got on with putting together one of the front struts. As predicted yesterday, the spring took quite a lot of compressing to fit, I'm not usually nervous with spring compressors but this was taking quite a lot of compressing! 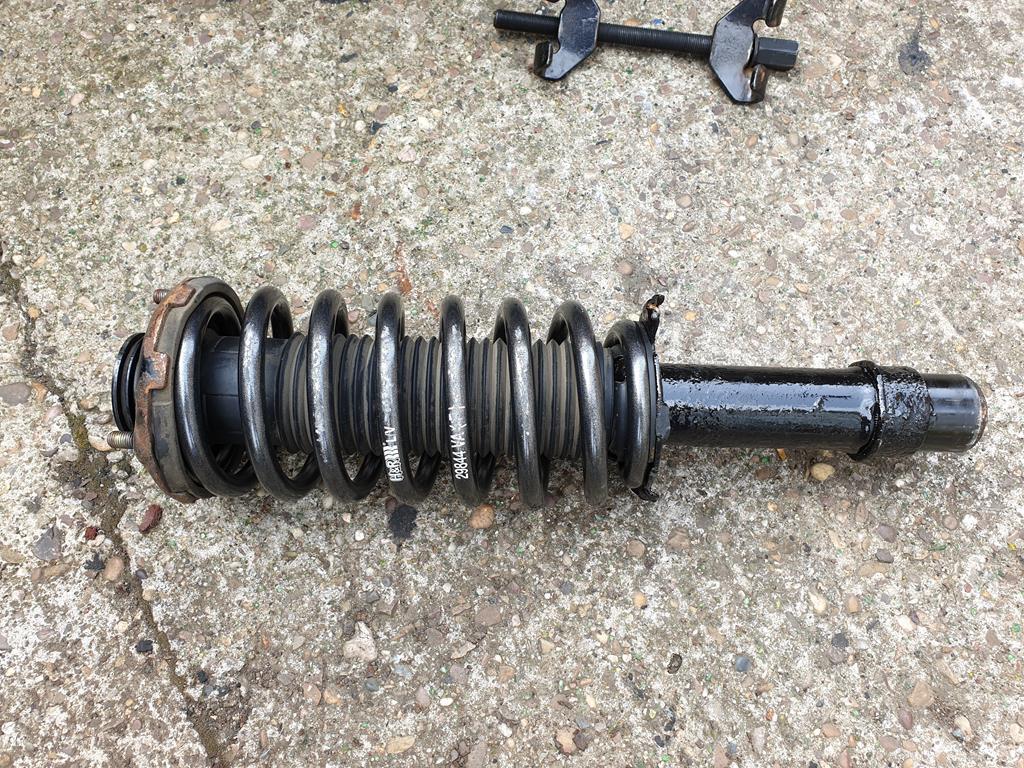 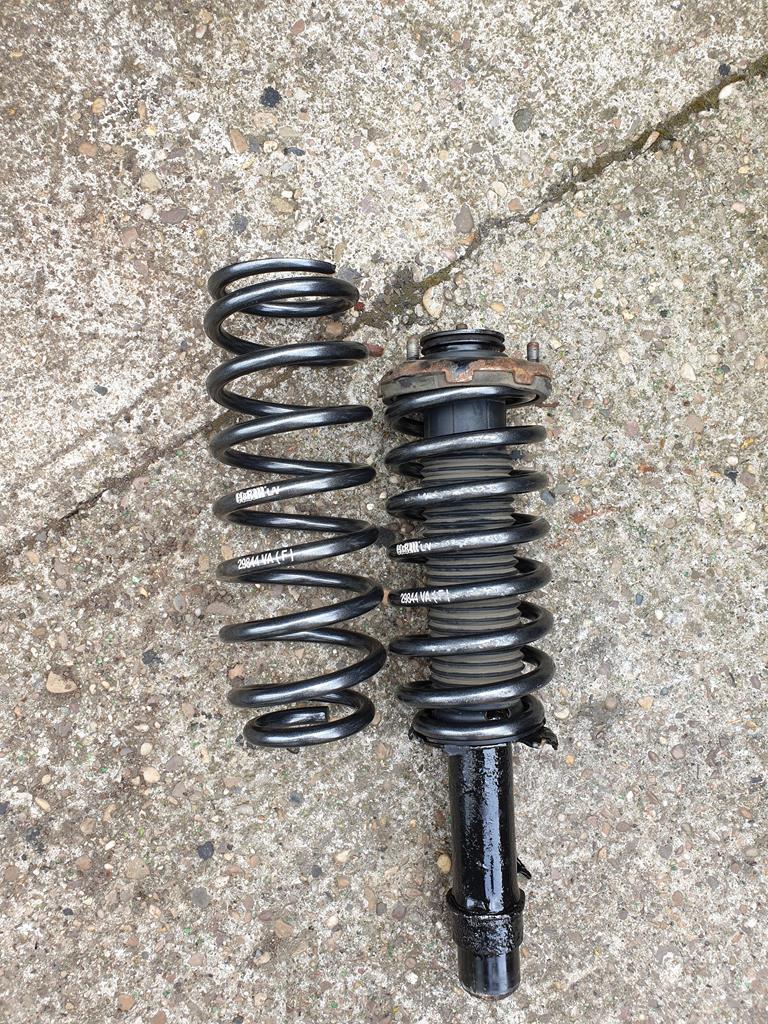 Got it together and tried it on the car, but it wasn't quite right. I hadn't correctly lined up the notch yoke with the feature on the strut 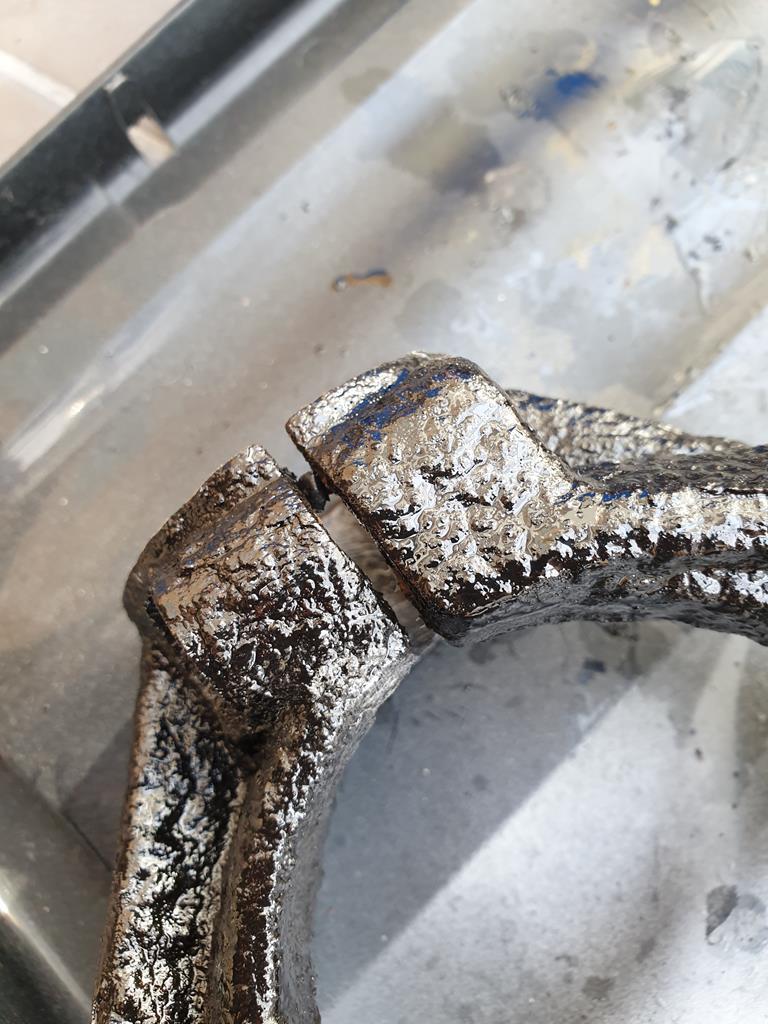 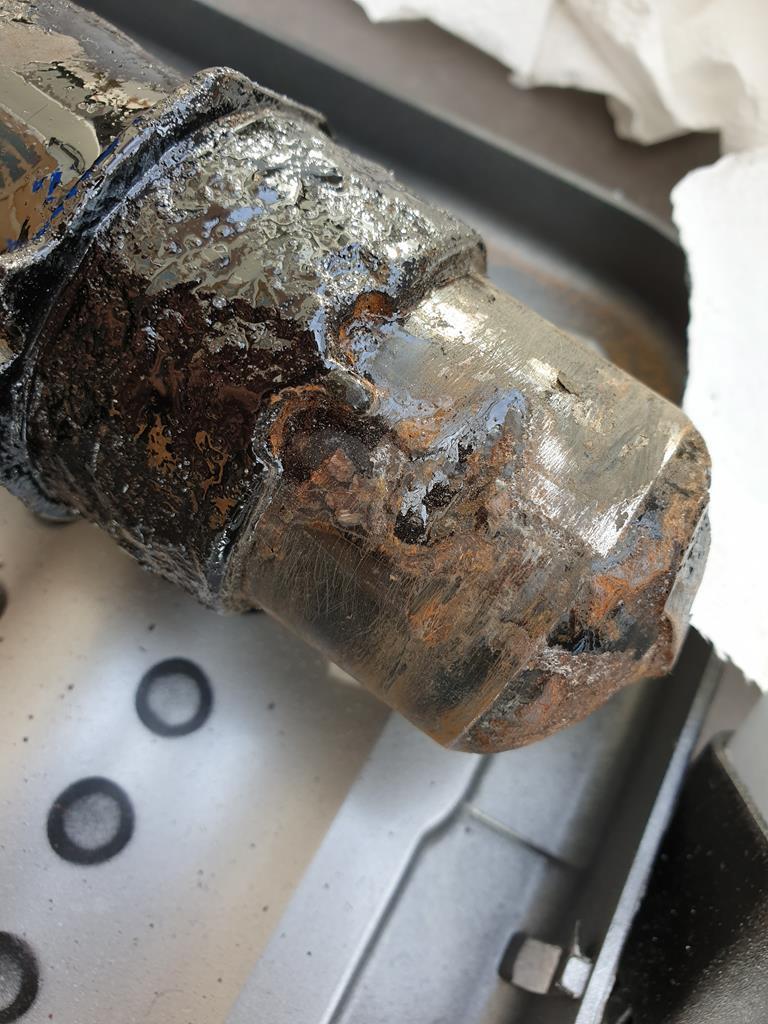 Or rather I could get the two to line up but together they wouldn't line up with the bottom wishbone properly. Basically the top mount needs to be aligned in a certain way so that the rearmost of the 3 mounting studs is at a 90 degree angle to the feature on the strut that aligns with the yoke. I took the strut off again, compressed the spring enough to take pressure off the top mount, loosened the top nut and was able to rotate it slightly to get it nearer 90 degrees. With this set, it all went back together fine 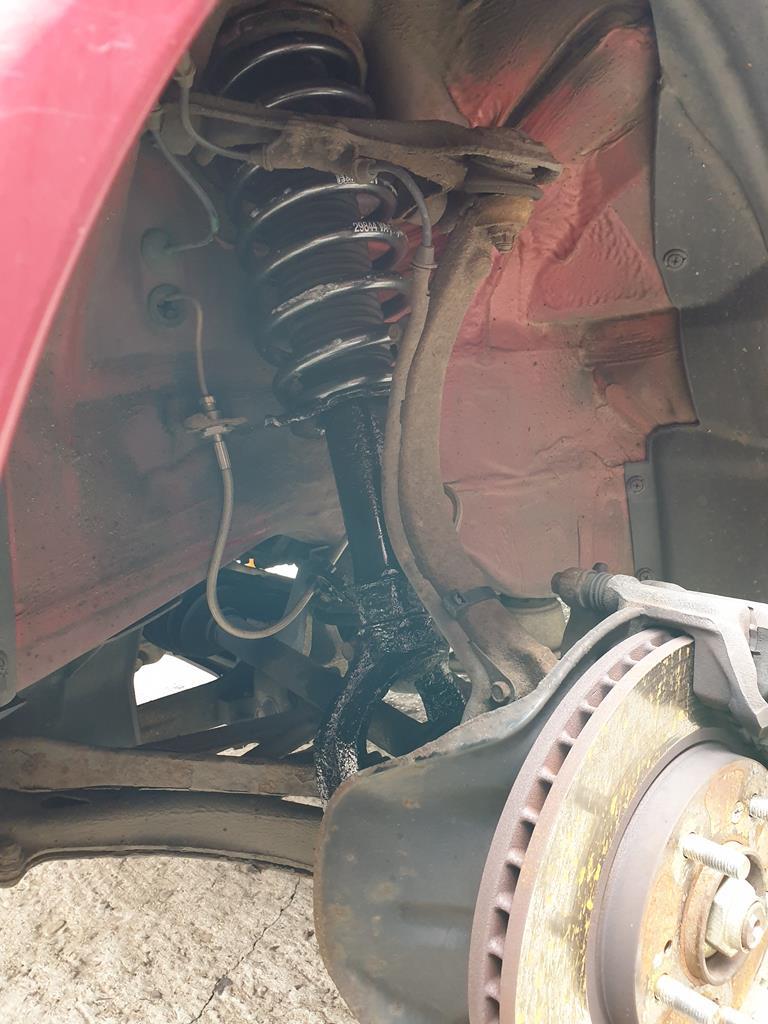 I then had a think about wheels. To recap, I've got 3 pairs of Rays CV Pro wheels, a pair of 7.5", a pair of 8", and a pair of 9.5". The 7.5s and the 8s are currently gold and the "sensible option", I chucked a 7.5 on the front just to check fitment and its clear of everything 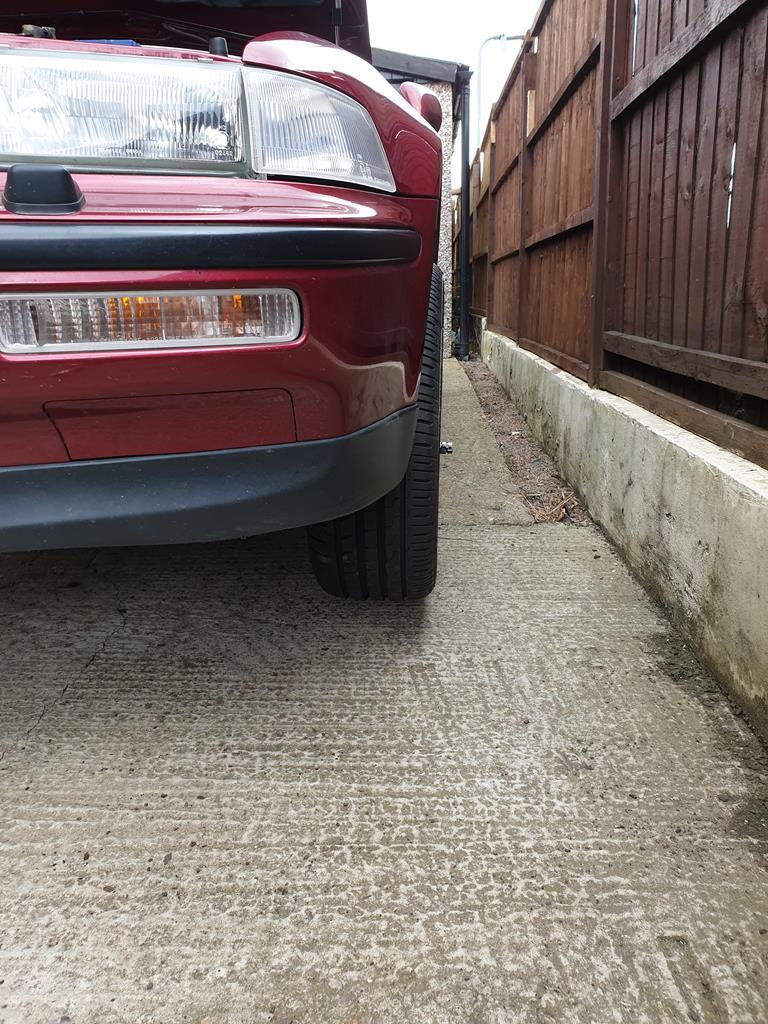 Tried the 8s on the back and they fit fine too 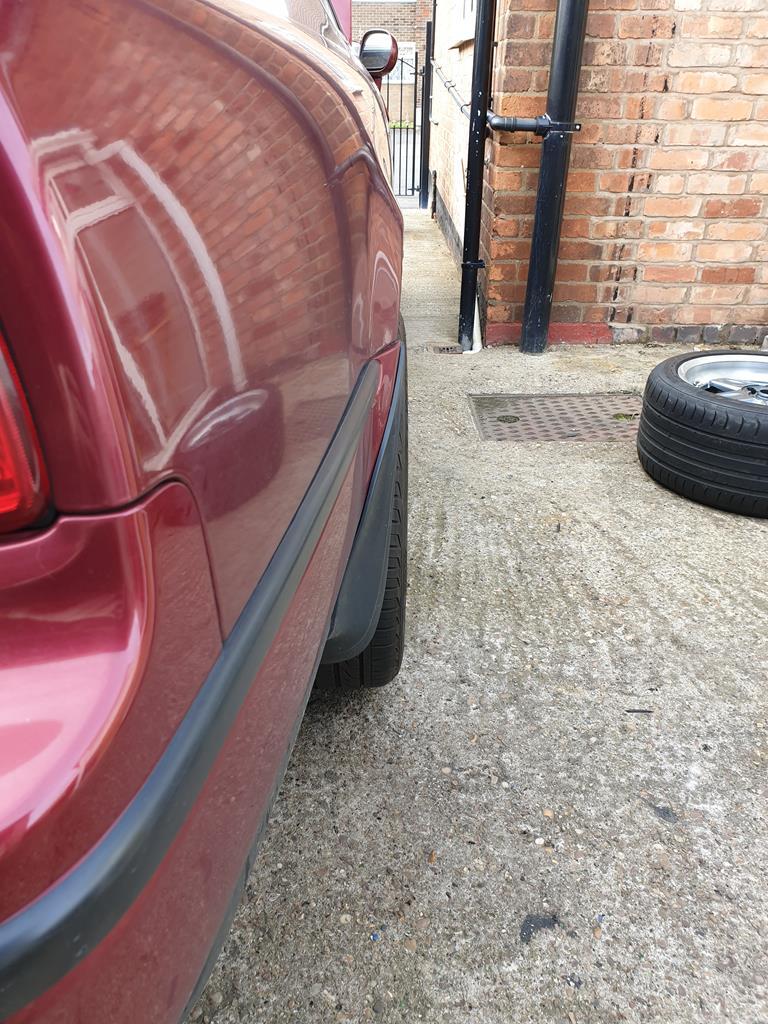 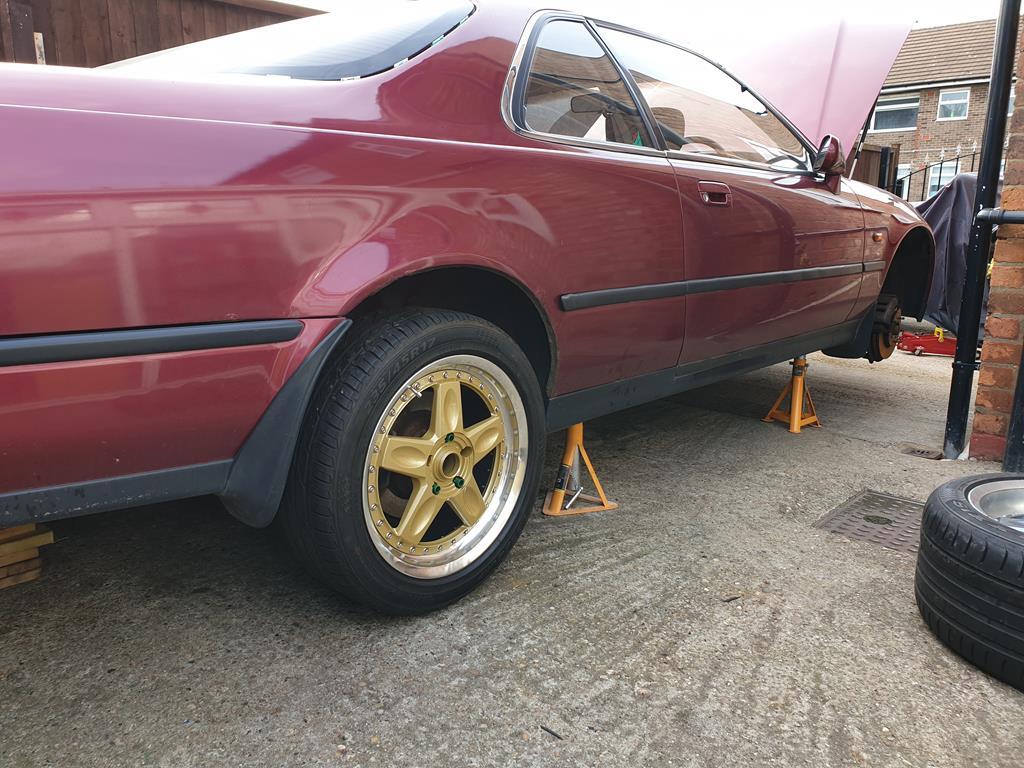 But I also know the 8s fit on the front from when I ran the odd wheels previously on page 2, and the 9.5s have the diiiish  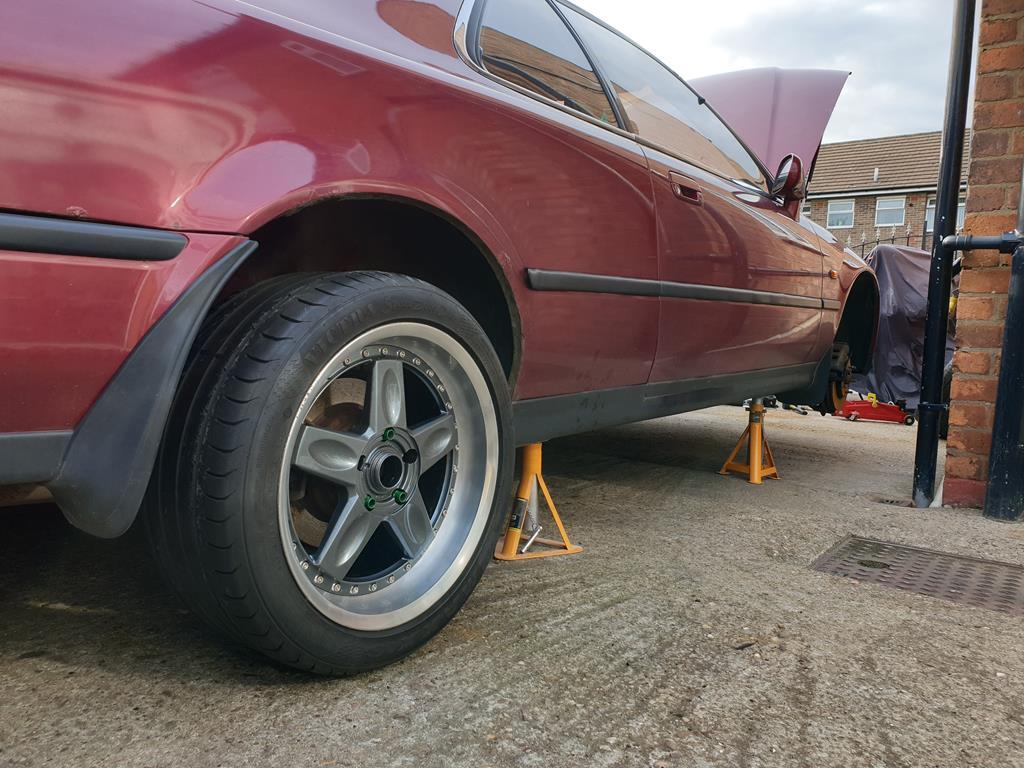 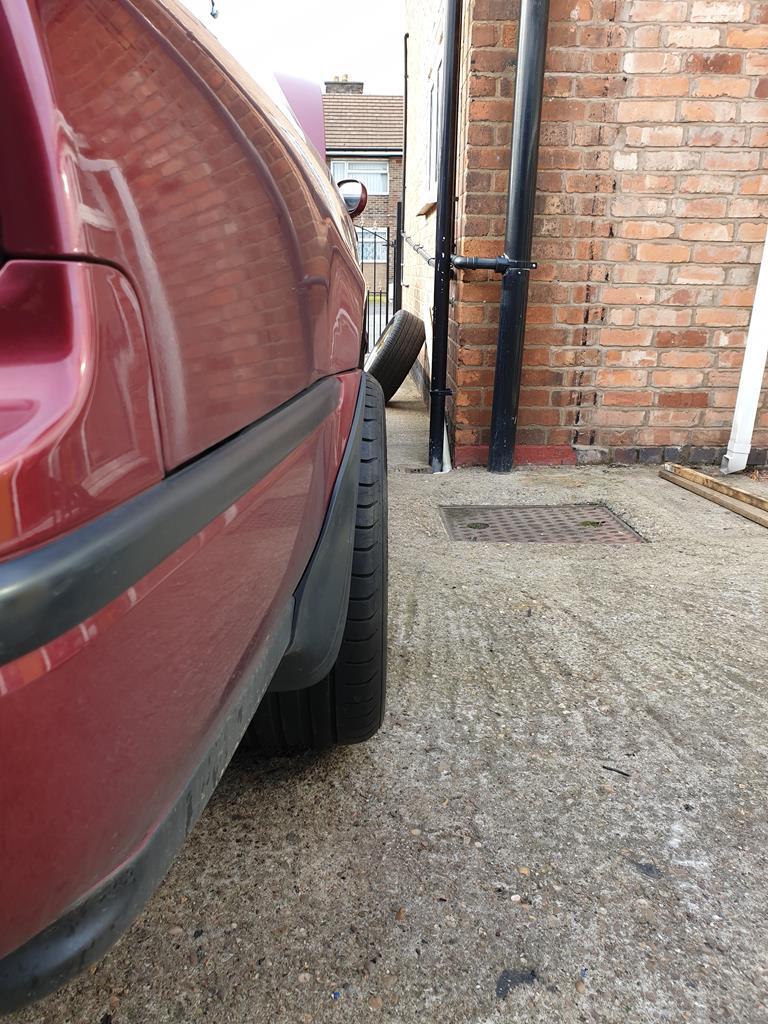 Bear in mind this is full droop, they may camber in a bit when on the ground. The 9.5s currently don't hold air and need splitting anyway as they're not the right colour, so I'll put the 7.5s and 8s on for now, sort the 9.5s in parallel and see if I can fit them later Also on the subject of wheels, previously I used Gyeon Rim coating to protect them, but my bottle ran out after one wheel, so one of the deliveries I was waiting on was a bottle of this 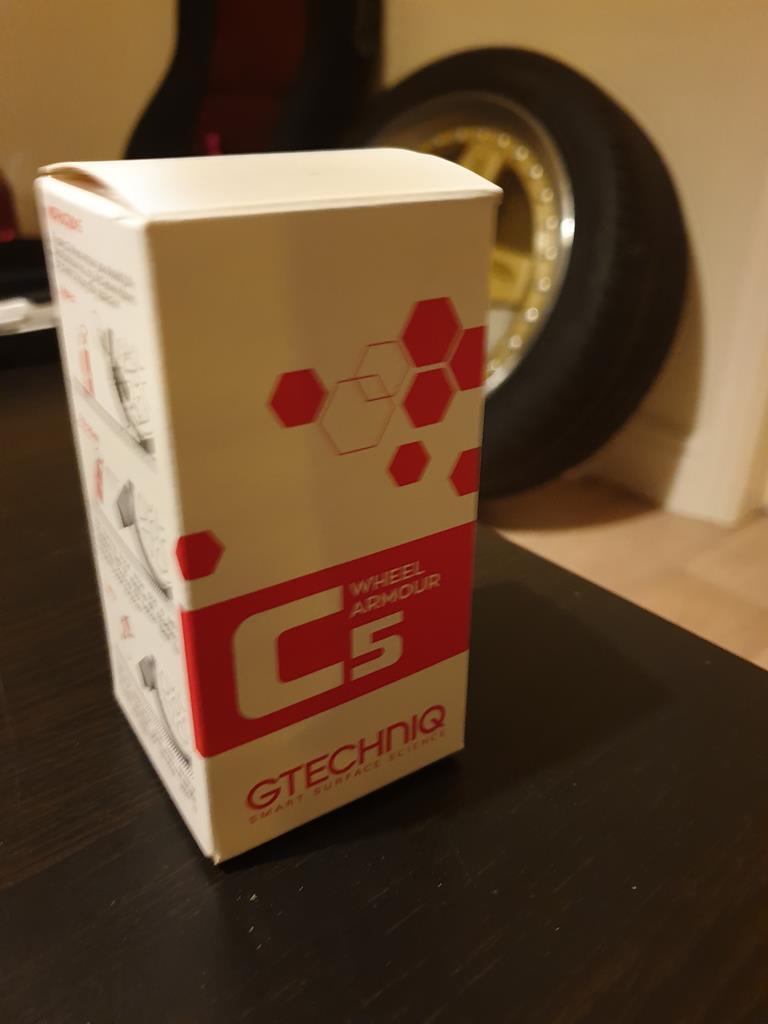 Which I've coated the other three wheels in, both products seem to get good reviews so I hope they help keep the wheels looking their best The other thing that arrived was a pair of speakers, I had a bit of faff trying to get ones that fit from Halfords, but got a pair of these JVCs off amazon, and the fitment is bang on, need to do a little wiring to fit them as I don't want to cut into the original loom, but thats a job for tomorrow 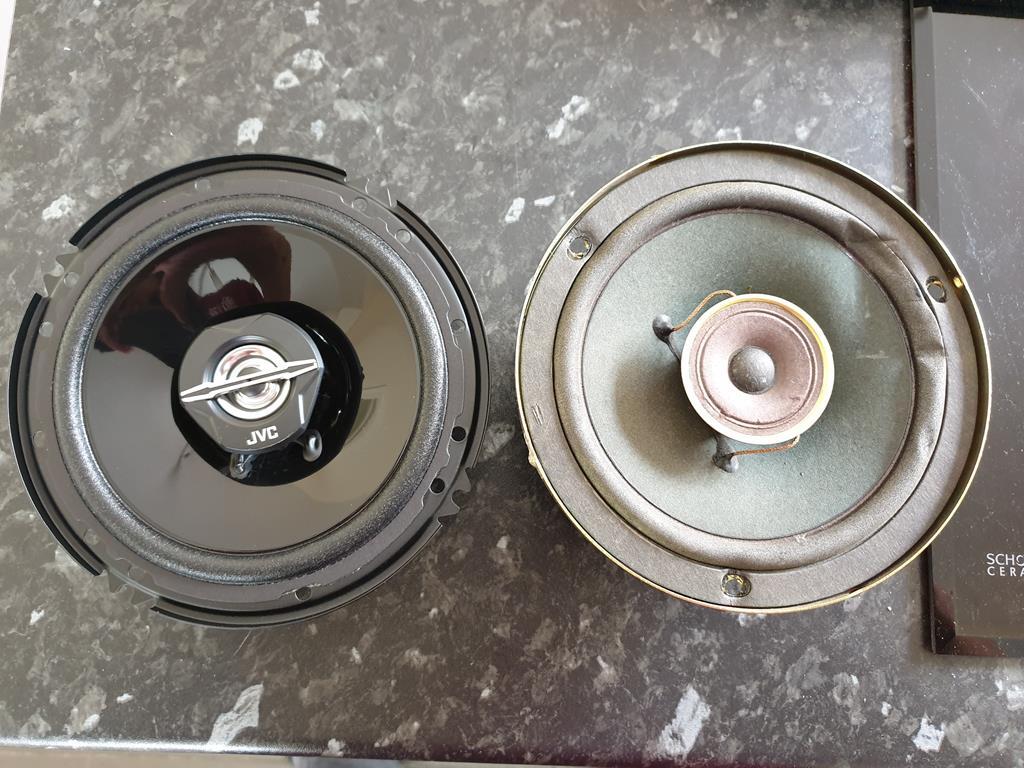 |
| |
|
|
Paul
Posted a lot
  
Posts: 2,005
|
|
Jul 22, 2019 10:00:54 GMT
|
|
Top work as always!
I remember having the same problem lining up the top mounts after changing the springs on mine...but you only get it wrong once ;-)
|
| |
|
|
adam73bgt
Club Retro Rides Member
Posts: 4,998
Club RR Member Number: 58
|
|
Jul 22, 2019 20:05:05 GMT
|
Top work as always! I remember having the same problem lining up the top mounts after changing the springs on mine...but you only get it wrong once ;-) Haha you're not wrong, they even make you line up the rear top mounts as well! Although this was the least of my worries today... Started the day off well with a package from RockAuto, excellent service from the US considering I only ordered them the other day (OK I did go for the quicker shipping) 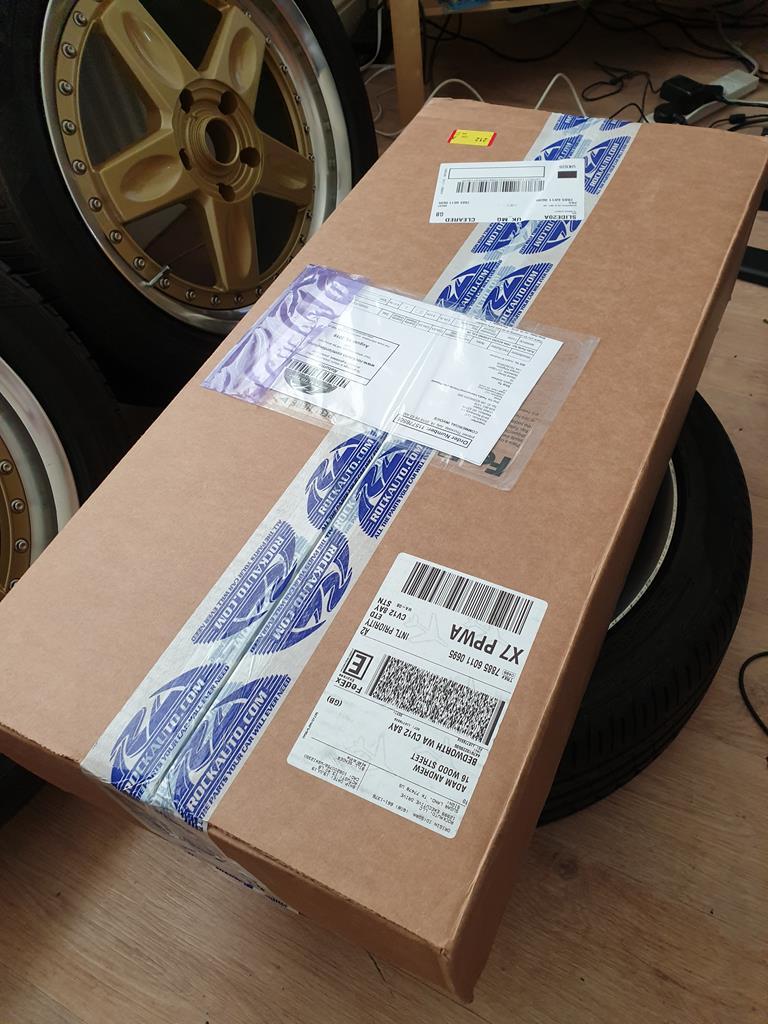 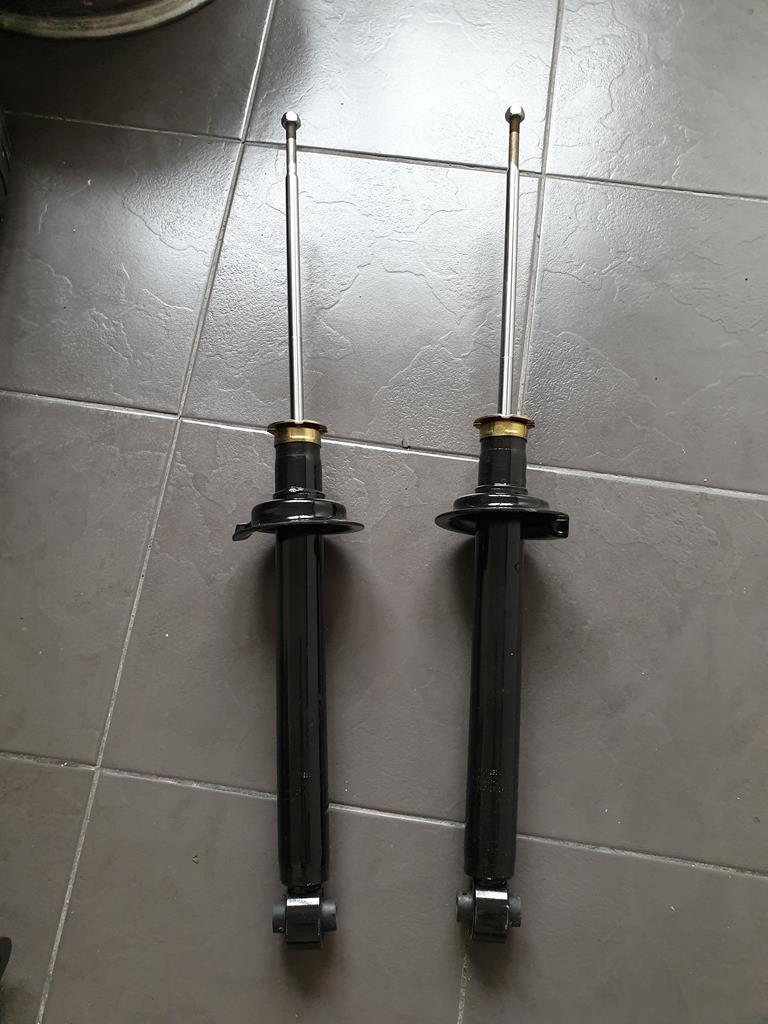 Pair of Monroe dampers, look good and match up the originals well, result. They were missing the bump stops but they were easy to transfer from the old ones after I knocked off the little metal collar with a tap from the hammer 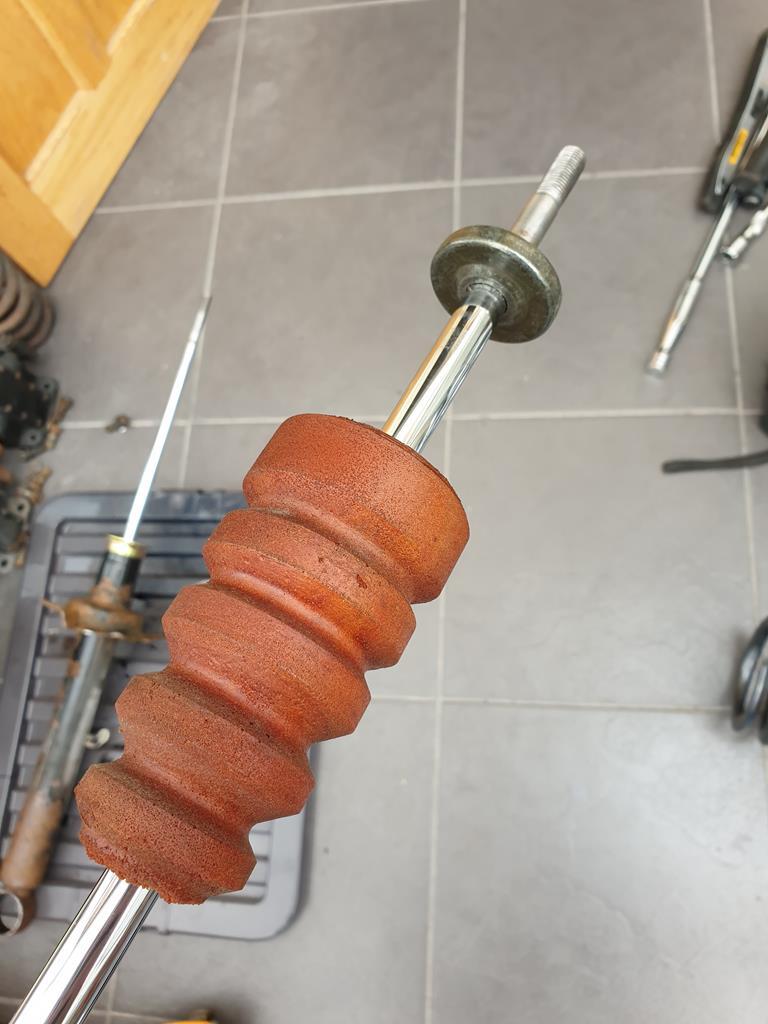 Built up each strut, noting the required orientation of the top mount, didn't have to use the spring compressors for these as I was just about able to compress the spring by hand while getting the top nut started Then I went to fit them on the car, poked the studs through at the top and got nuts started on them to hold the strut in place but was left with this at the bottom mount 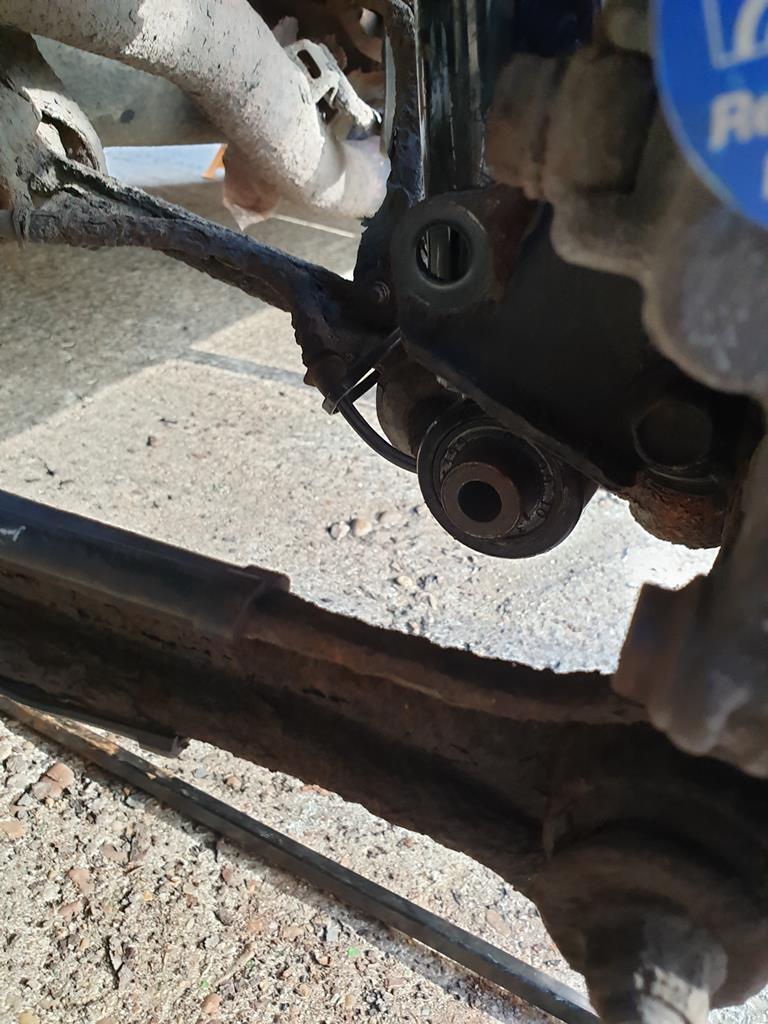 I first tried jacking up the strut to align it with the hole in the knuckle but as it starts getting close, the cup of the trolley jack clashes with the knuckle. Similarly tried to lever down the knuckle using a bar but can't get the knuckle/arm to come down enough 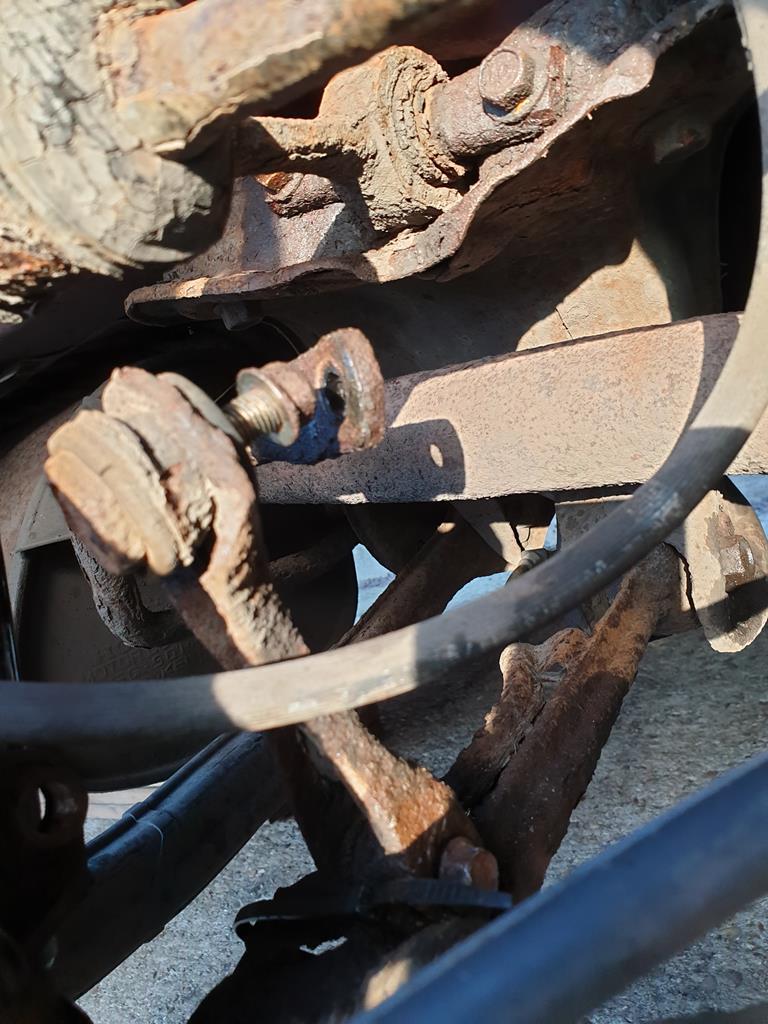 I even managed to get the very rusty anti roll bar link to detach but to no avail. So now I'm a bit stuck as to what to do.. Either I need to find a smaller headed jack that will lift the strut all the way, or after sitting and poking at the suspension a bit, maybe I need to bite the bullet now and replace the rusted arms and build the whole corner back up again. Not quite sure which way to go on it at the moment |
| |
|
|
adam73bgt
Club Retro Rides Member
Posts: 4,998
Club RR Member Number: 58
|
|
Jul 24, 2019 20:48:45 GMT
|
Made some further progress. Now I don't suggest anyone follows what I'm doing here if they have a Legend themselves, but this appears to be working for me.. First off I cleaned up the area where the strut bolts in, at first I thought the crush tube in the bottom bushing might have been slightly bigger on the aftermarket struts, meaning it wouldn't fit, but measured up and they're identical to the originals, just a tight fit. Removing some of the rust around the area will help though 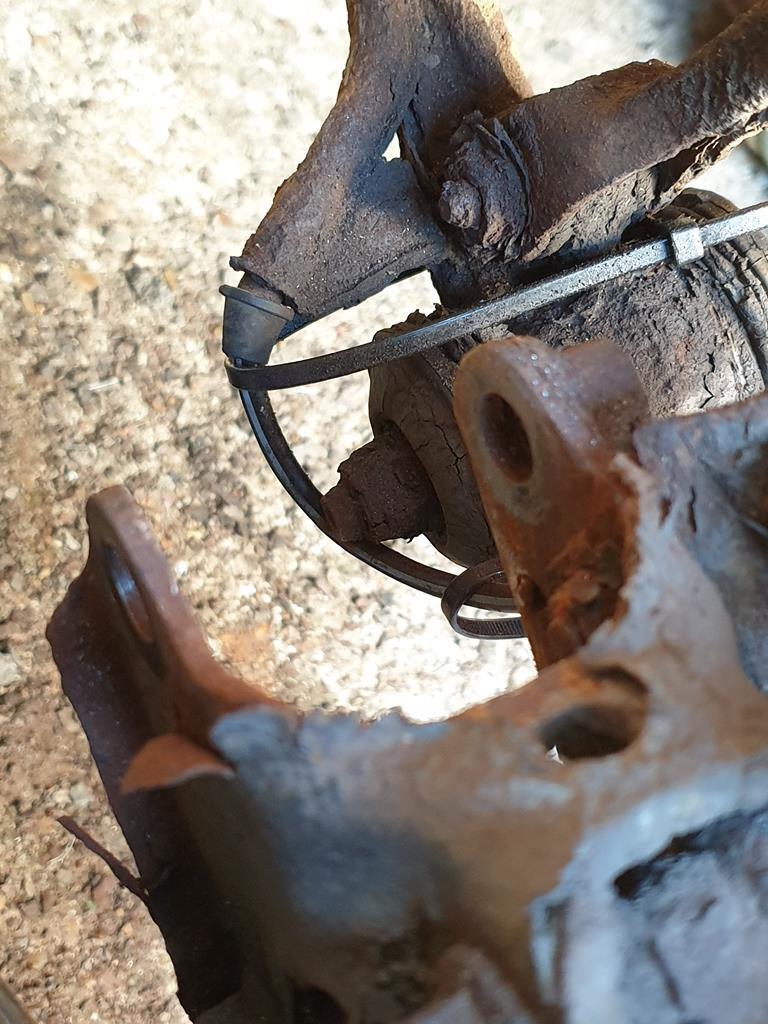 This helped a little but I still couldn't move the arm enough to get the strut mounted. So I unbolted one end of the upper arm 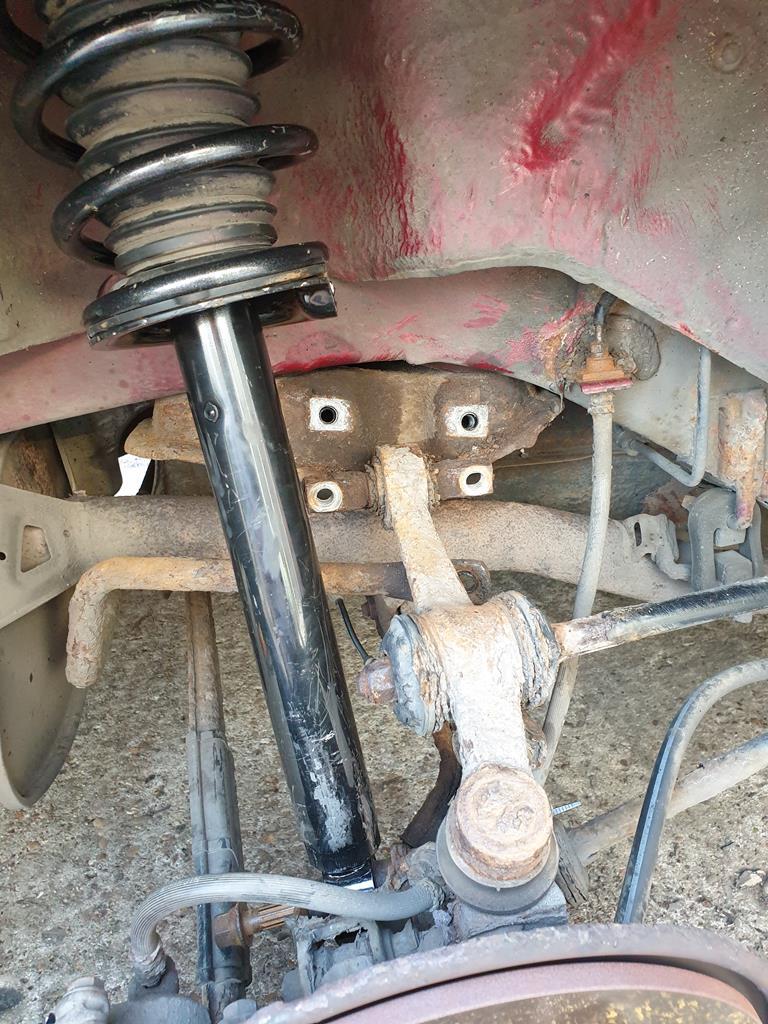 The hope here being that this would allow me to lever the knuckle that bit lower to be able to tap the strut into place with a rubber mallet. Well with some "careful persuasion", I managed to get it together. The fact that the bottom bolt has a very tapered point to it certainly helped 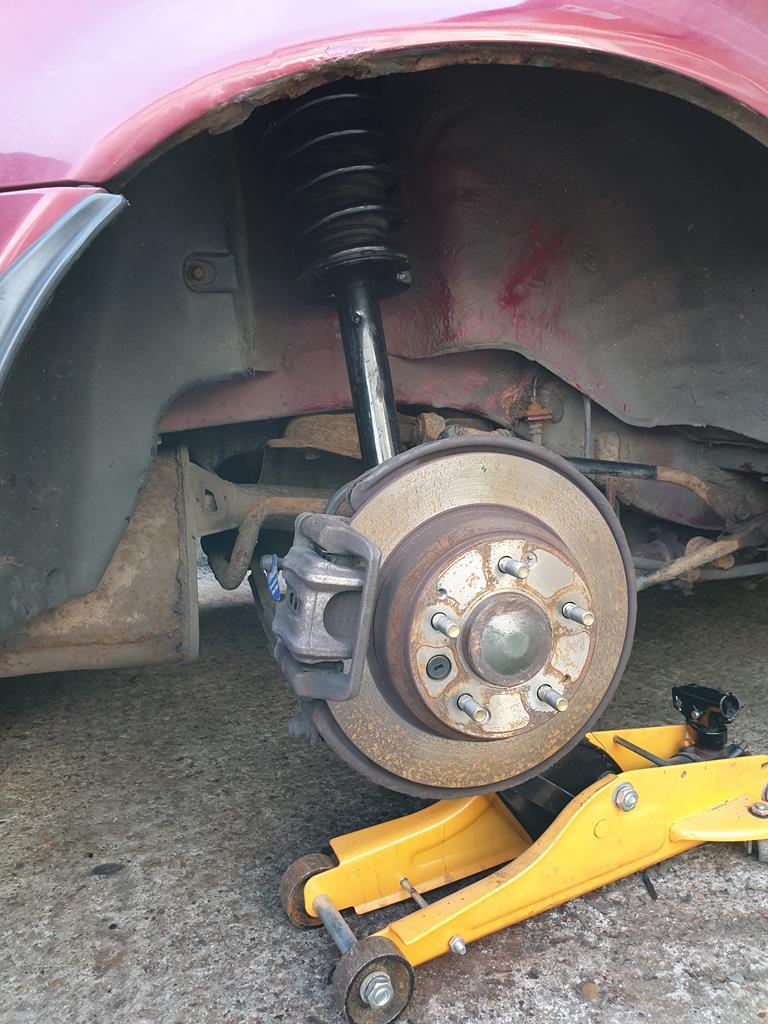 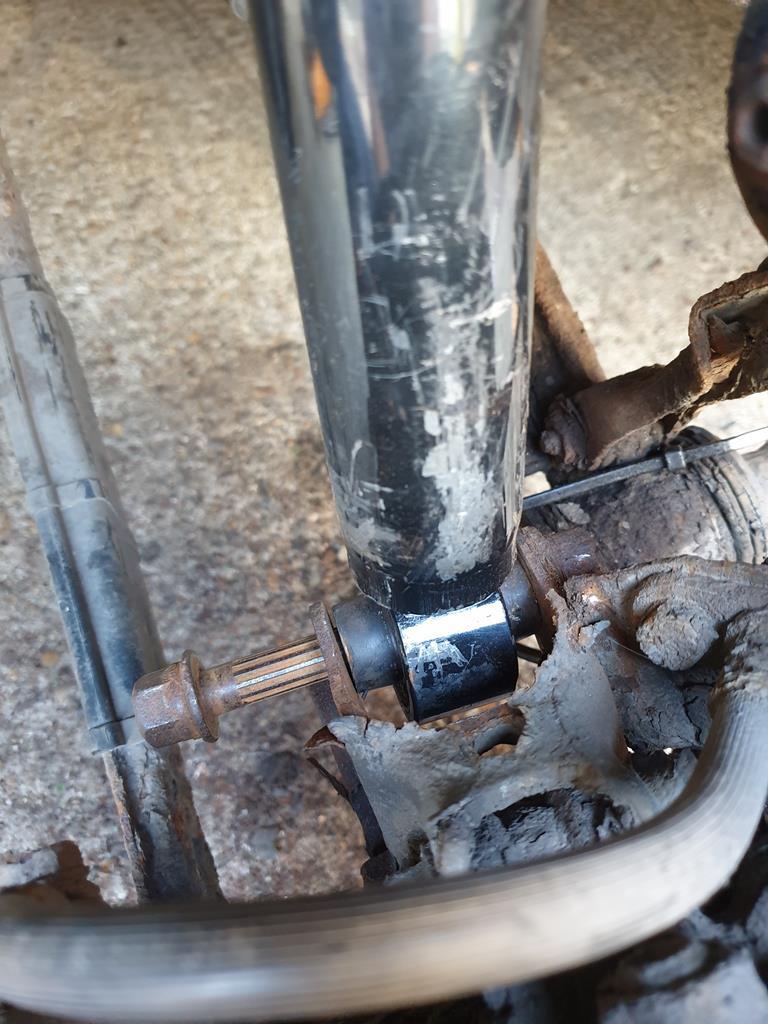 Jacked up the corner until it was holding the car's weight and torqued up all the fixings I needed to. Then today I cracked on with the other side, which thanks to the width of my driveway is right up against the fence  Having learned the knack though, this side went together more quickly and I've got the strut bolted in place, the only trouble currently is that the bolts for the upper arm are binding up a bit as I tighten them. (Forgot to mention it was a little bit of a faff getting the holes for the arm lined up on the other side as well, others would just undo the ball joint at the other end of the arm I believe) I'll come back to sort that tomorrow anyway, then its just the remaining front corner to do and I should have the car back on its wheels! I think my auto gearbox filter is arriving tomorrow though so I might change that and the ATF while I've got it in the air. Also prodded one of the rusty areas of the arch the other day while getting annoyed with the suspension.. 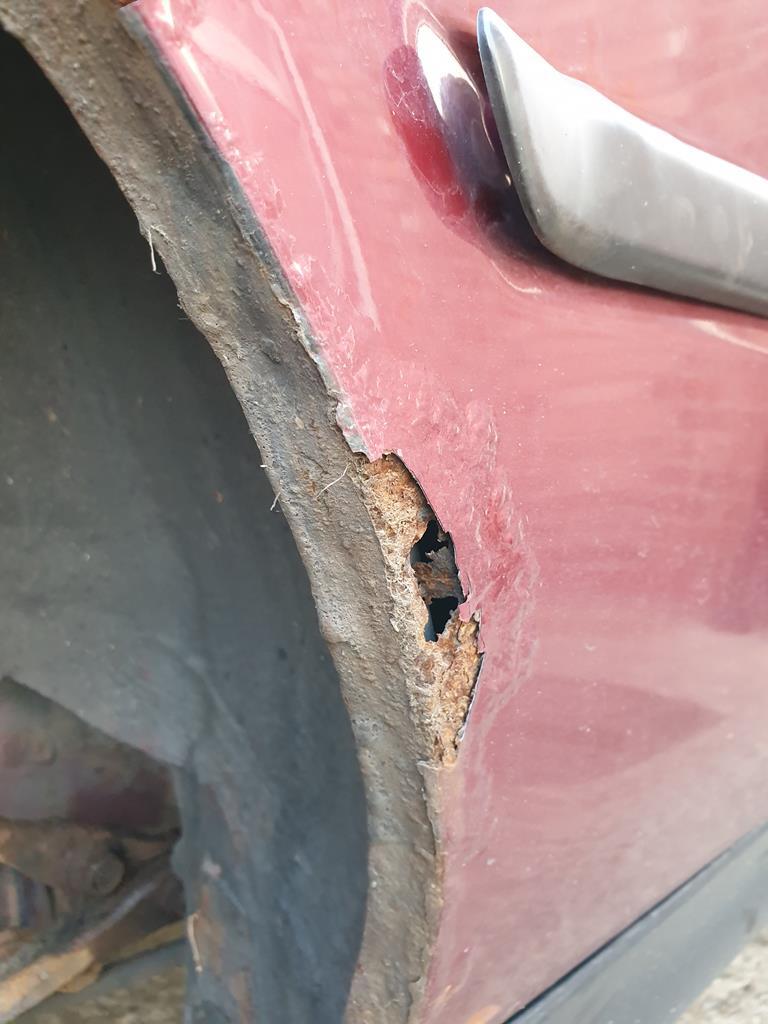 Won't be long before I need to make the call to the bodyshop... |
| |
|
|
adam73bgt
Club Retro Rides Member
Posts: 4,998
Club RR Member Number: 58
|
|
Jul 28, 2019 21:04:35 GMT
|
Tried to make some more progress. Confirmed that the upper arm bolts feeling tight on the rear passenger side corner were definitely from the bolts chewing the threads, so got them out sharpish. Got some new bolts to replace them and have carefully run a tap down the captive threads and they seem to be OK still. Have still been having fun trying to fit that arm though, tried to do it earlier, but between the constant rain, limited space and bolts that start off fine then get tighter (due to the arm putting pressure on the bolts), it just wasn't happening today. I'll try again tomorrow, may have to remove the radius arm from the upper arm but I'm reluctant due to the crustiness! I have had success on some non-suspension related work though, ordered some replacement speakers that are a perfect match for the old door speakers 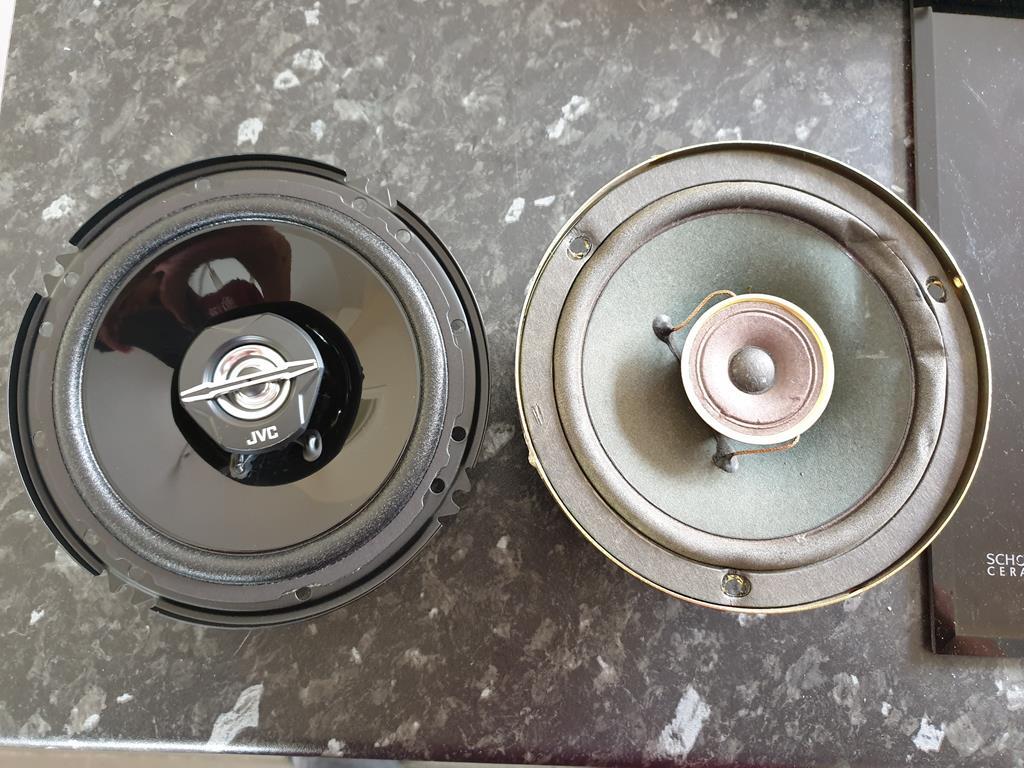 I didn't want to cut or mess about with the wiring in the car so removed the plug off the factory speaker by snipping the wires and drilling out the rivet 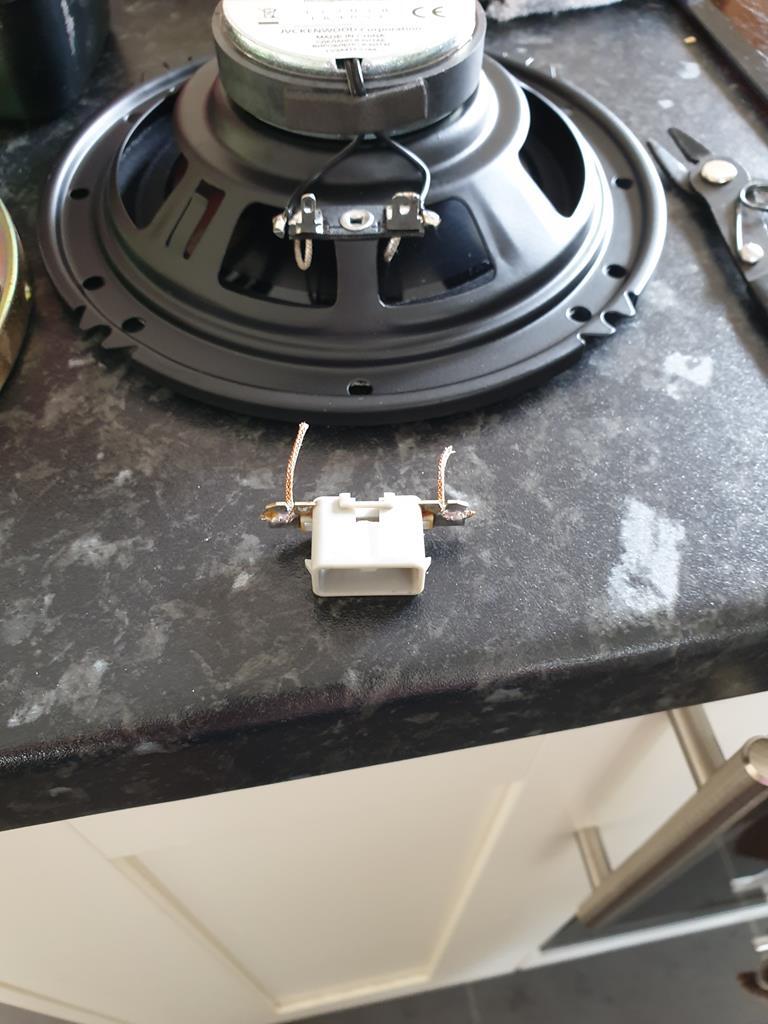 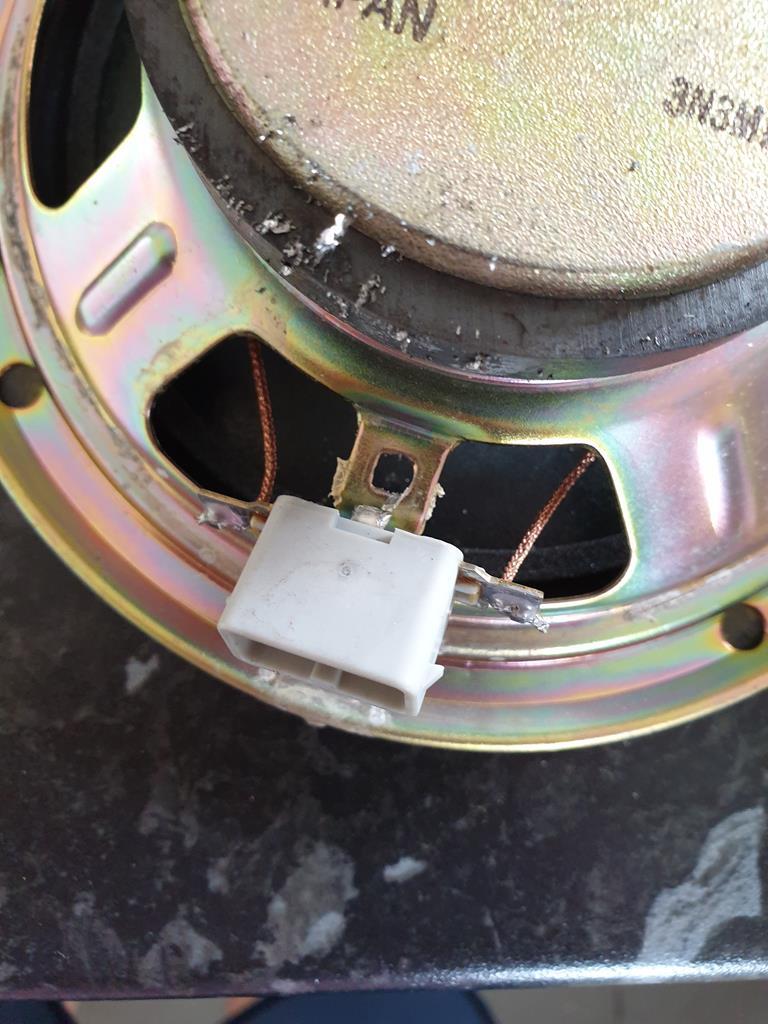 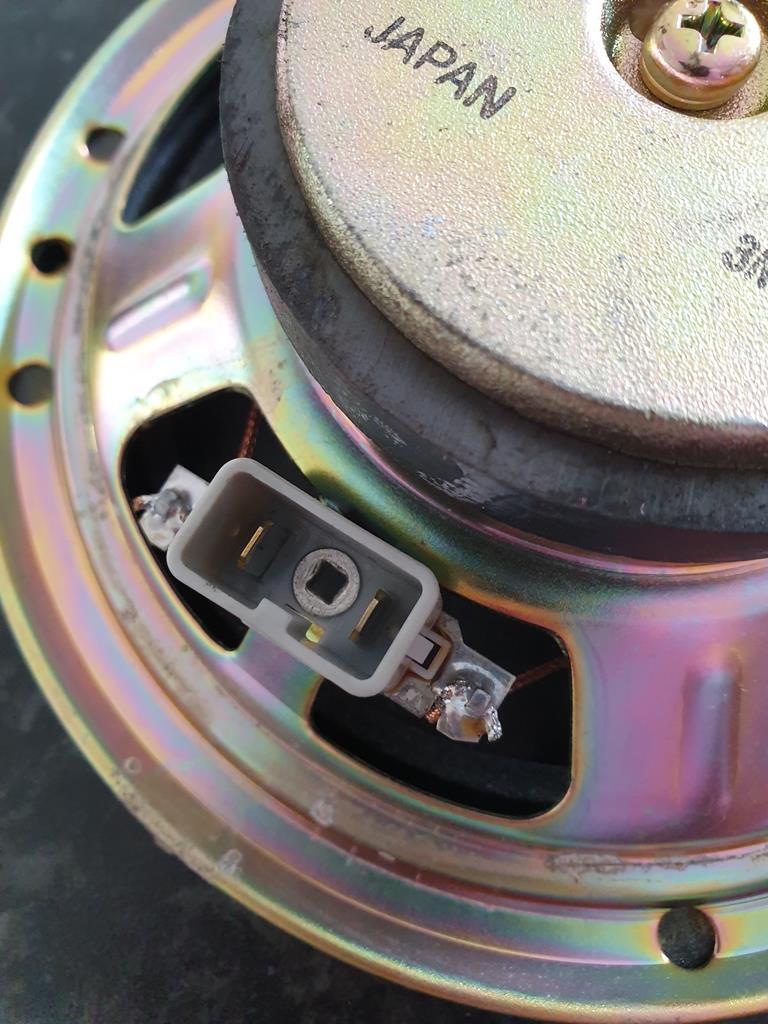 Then after checking the polarity of the terminals, I soldered it to the new speaker and put some electrical tape on to strengthen it up a bit 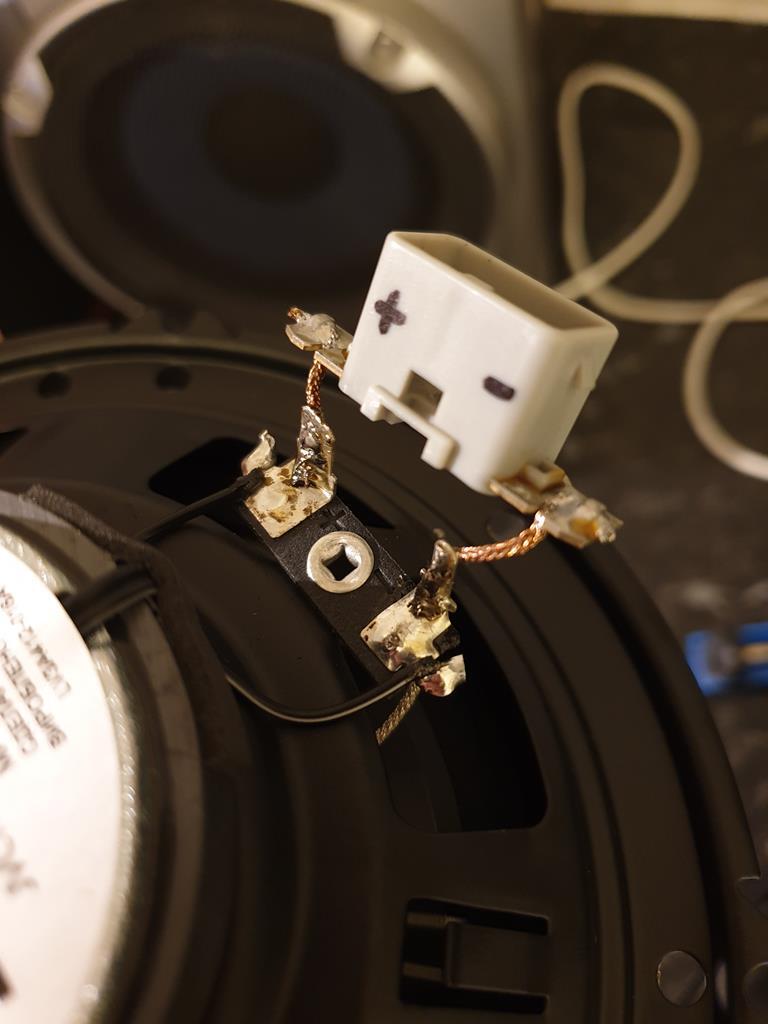 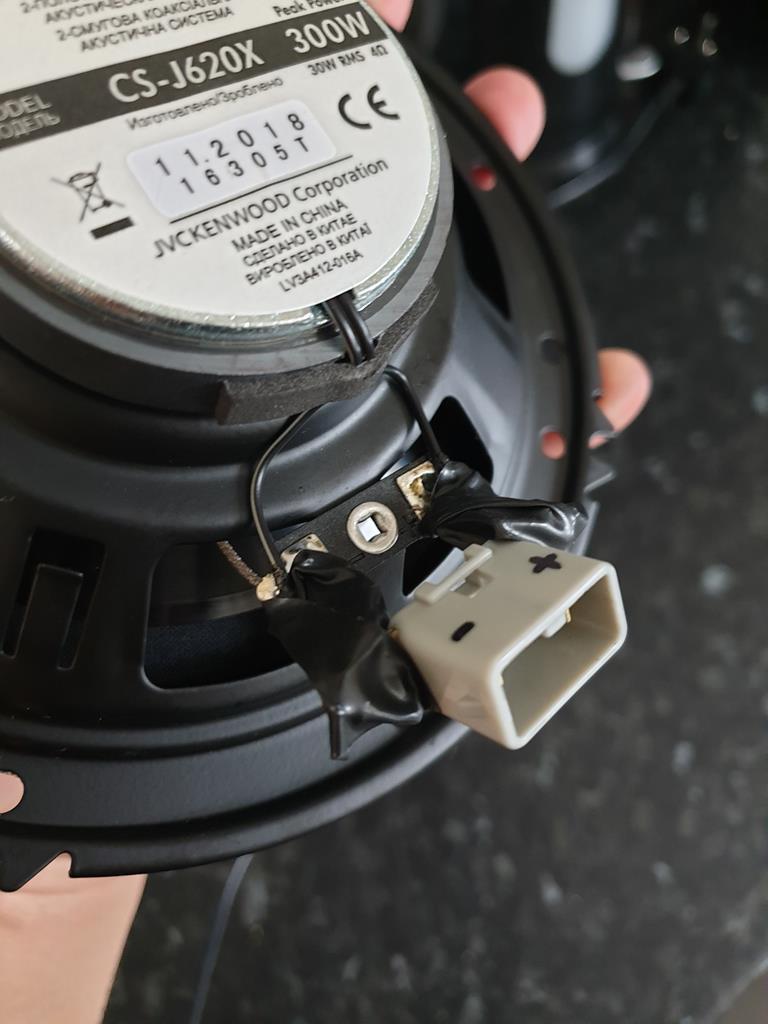 Plugged it in and all works fine so thats mounted. At some point I'll do the passenger side speaker too so they match but its not a huge priority at the moment. Also I compared my old and replacement electric window switches, the wood grain was a bit different, and better looking on my old switch (on the right) so I removed the switches from the panel and swapped them over, also gave them a good clean while I was at it 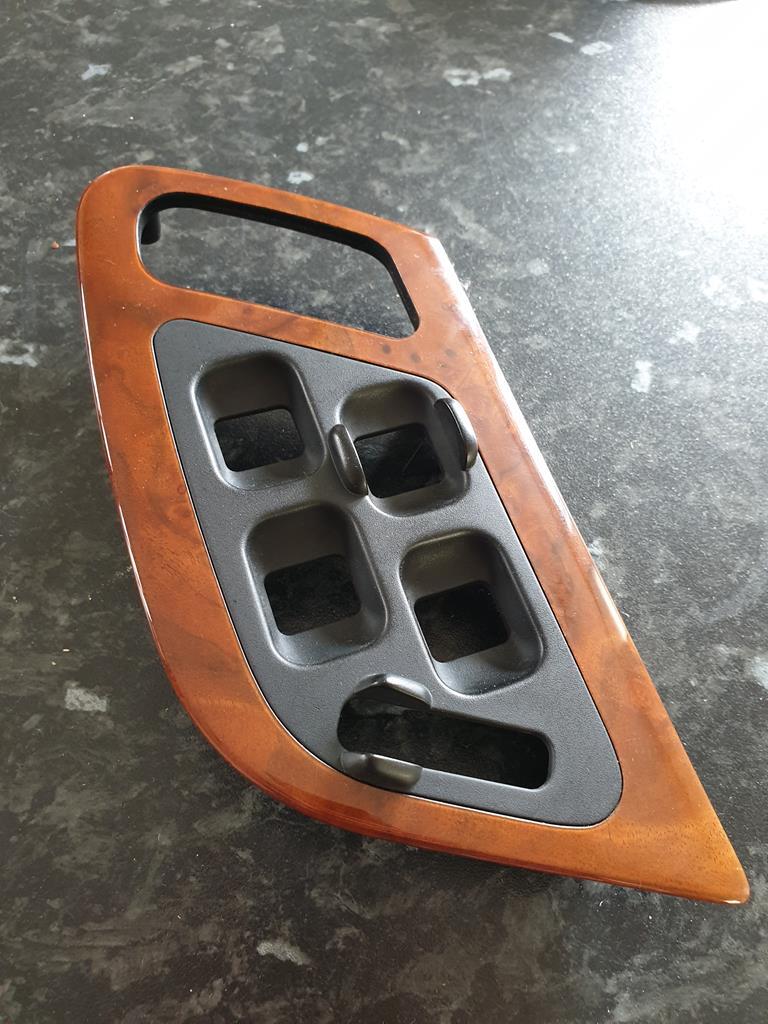 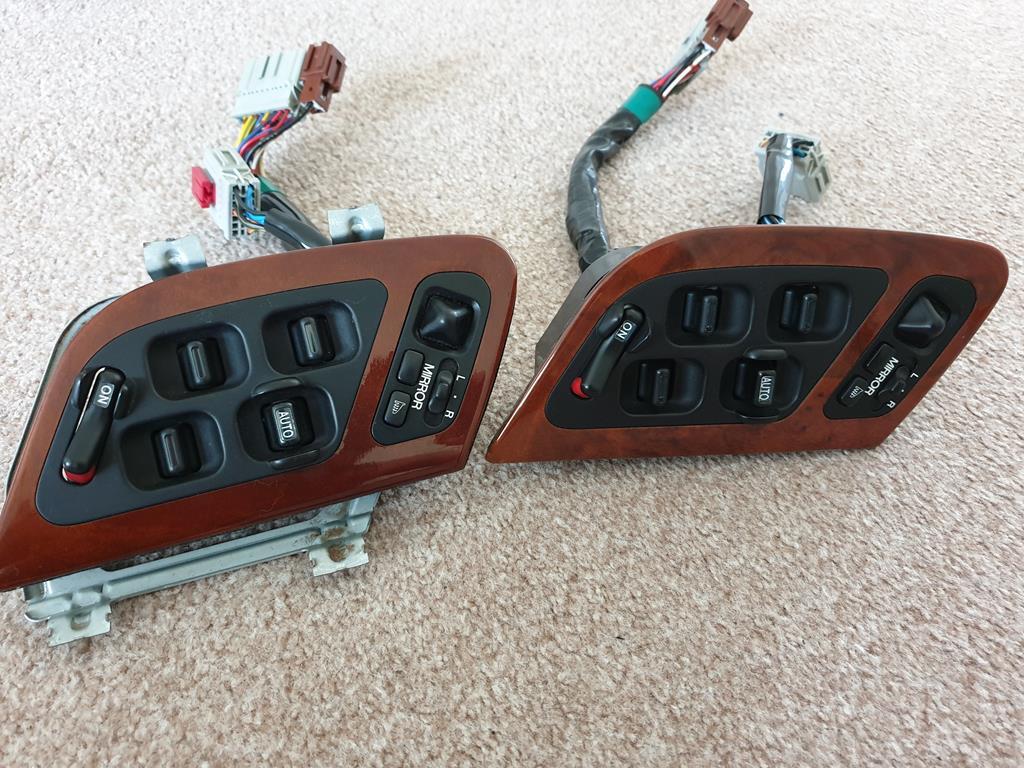 Thats been fitted to the door card and it all went together with a little fettling. So now I just need to get this damn suspension finished! |
| |
|
|
adam73bgt
Club Retro Rides Member
Posts: 4,998
Club RR Member Number: 58
|
|
|
|
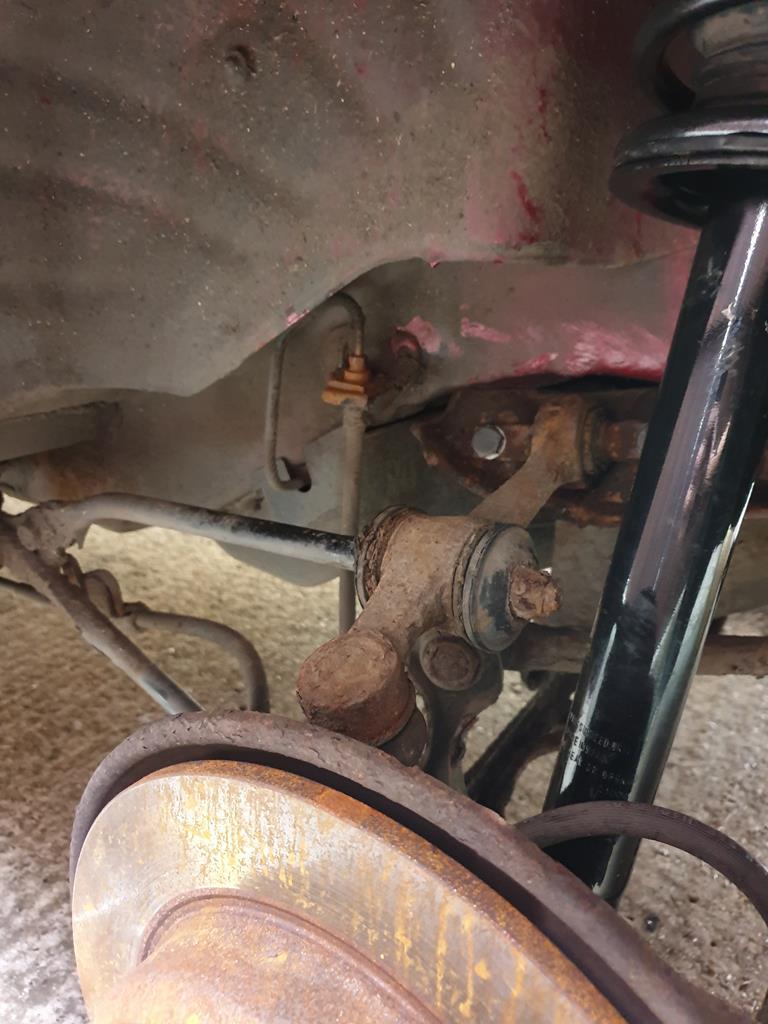 Doesn't look like much but that is one nearside rear upper wishbone bolted back to the rear subframe where it belongs  An unpleasant task that required jacking of the rear suspension, pry bars and the use of a small ratchet strap to coerce the arm into a position such that I could get the bolts in without cross threading (it was very easy to cross thread again). With that done it took mere minutes to torque up all the fixings and then chuck the wheel on. The front offside was the last corner to do, I'd learnt my lesson from the other side and made sure to get the alignment of the strut right the first time round! 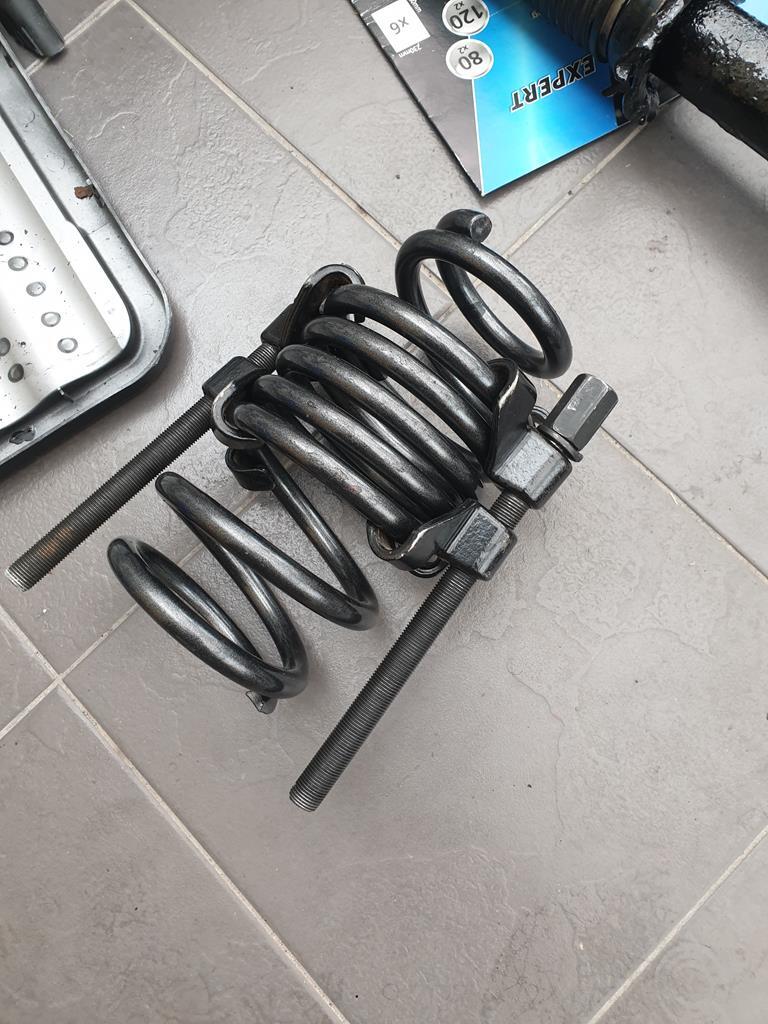 I'm usually not too bad with spring compressors but the strength of these springs and the amount they needed compressing did make me a little nervous  That aside, the suspension went together pretty quick (I was working quickly as it was raining) and in no time at all, the car was back on its wheels for the first time in about 2 weeks 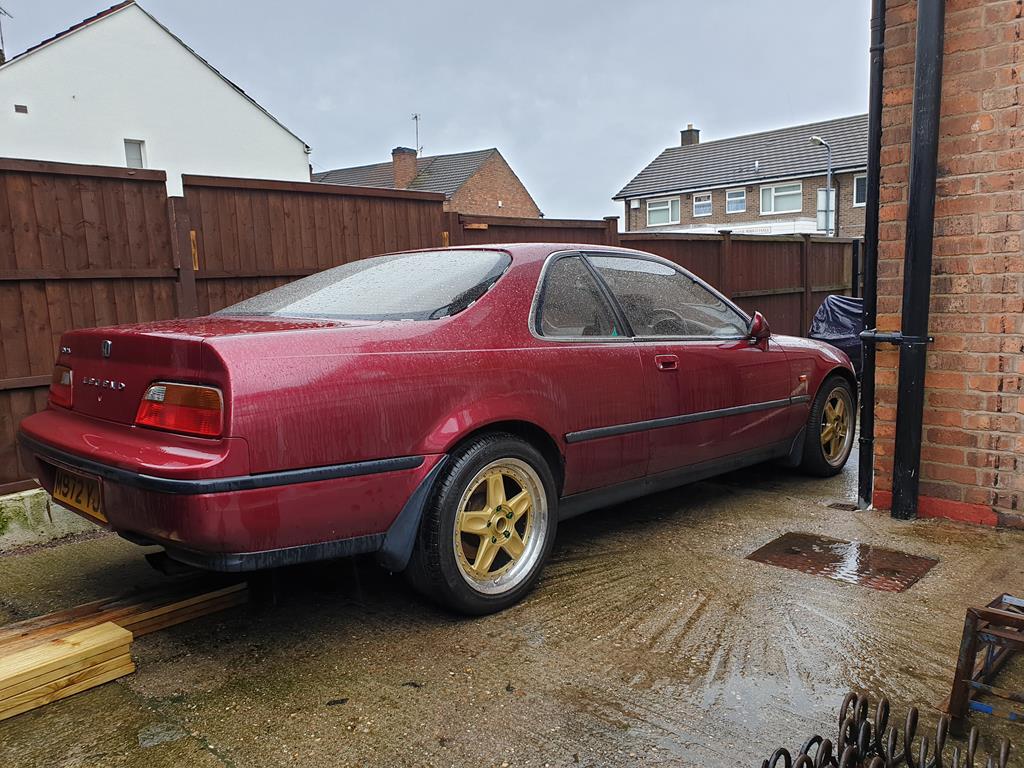 Rear seat was a rather fiddly affair to refit but its all back together now 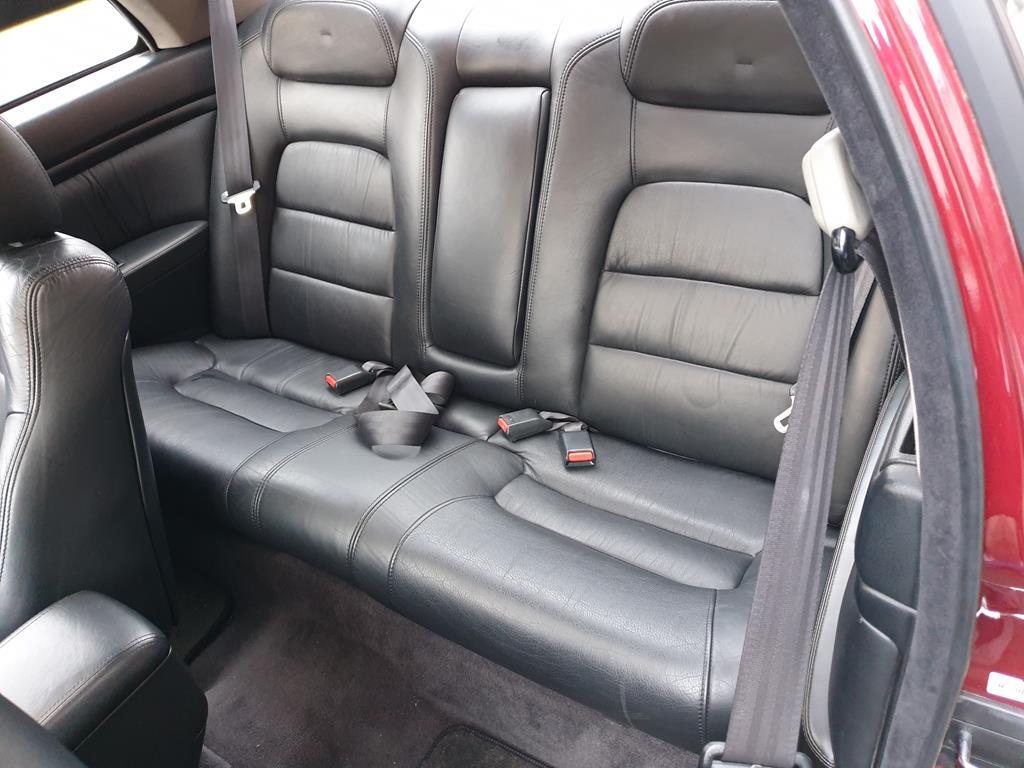 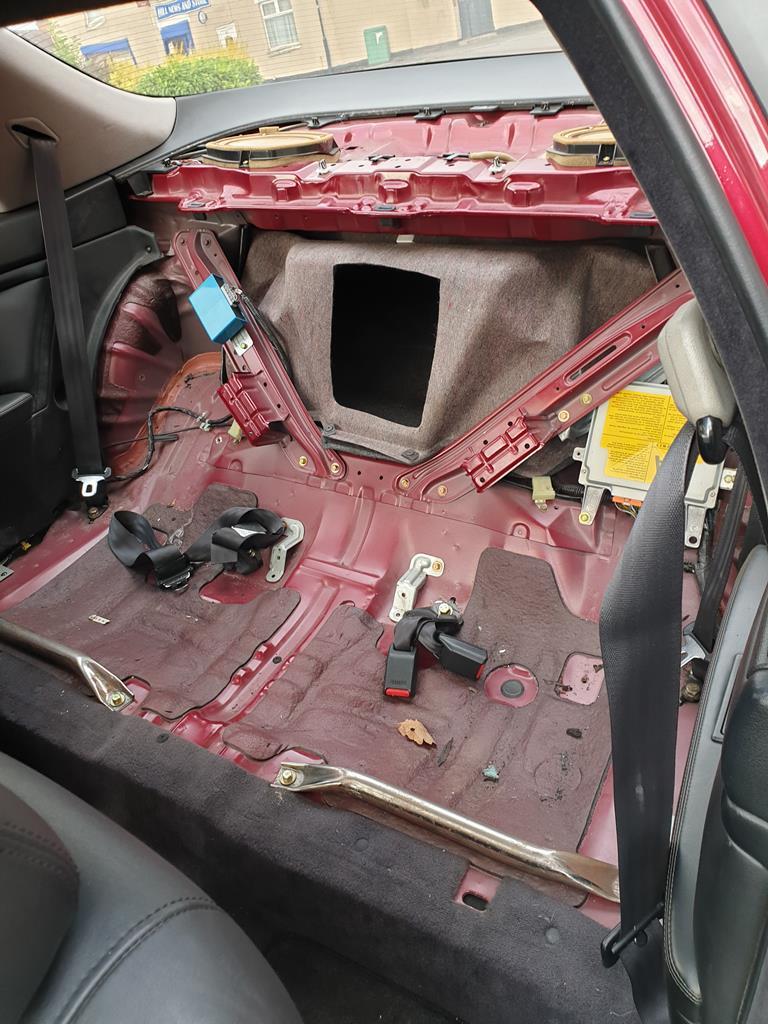 I haven't washed the car or taken any good photos yet but have a side shot from the works car park 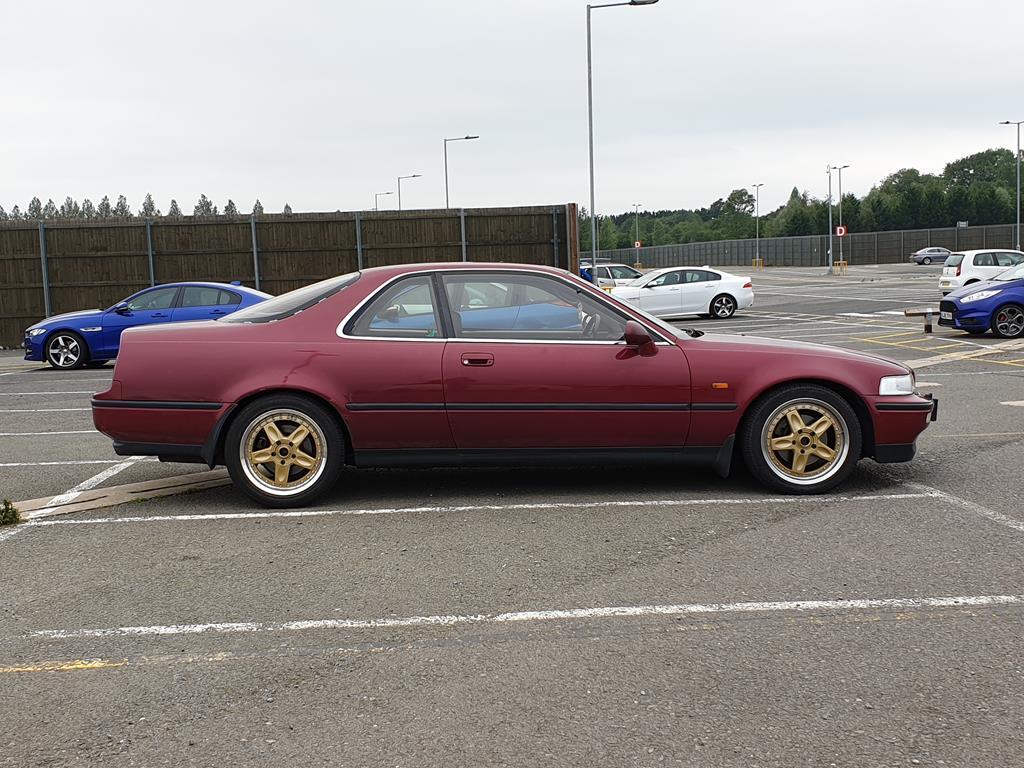 The ride height has dropped to about where I wanted it and its looking pretty good to me! I do need to get some shorter tuner nuts so I can fit the centre caps but I'm happy. There is a slight issue in that the rear right wheel catches the arch occasionally so I need to create a little more clearance there; the suspension feels comfortable still but cornering is noticeably flatter than previously I've ticked a few things off my to do list on the car now, but I've also added a few things! Still left to do is: ABS light Refit rear and front screen trims Paint scuttle tray and wiper arms Heated rear screen Passenger door speaker Radio aerial has started making noise again Fit wheel centre caps ATF and filter change Bodywork Suspension bushings Exhaust Some things more essential than others but nothing stopping me from using it  |
| |
|
|
|
|
 One of the key troubles for me was being without a car while I tried to sort the pump (I do have the bike, but it's not always ideal). I may have found a solution to this however so watch this space.. Next job will be trying to work out if they're DIY-servicable and if parts are available, should be fun!
 One of the key troubles for me was being without a car while I tried to sort the pump (I do have the bike, but it's not always ideal). I may have found a solution to this however so watch this space.. Next job will be trying to work out if they're DIY-servicable and if parts are available, should be fun!


