|
|
|
|
|
|
Yeah it's an odd one, that cage.. They've welded in the front and bolted the back!?
I'm not sure what you can do about putting it right, though. The *best* thing to do would be cut it out and buy a new one, but if you don't have the budget for that then it's obviously out of the question!
If you can live with the not-that-amazing fit of the front roll bar, then just box the front feet in properly with 3mm sheet and it'll be a LOT safer than it is now.
|
| |
|
|
|
|
scdan4
Part of things
 
Posts: 39
|
|
Aug 18, 2021 16:55:57 GMT
|
make sure you get it flat before welding the sills, there's a fair bit of stiffness lost there especially if the spot weld at the bottom of the B pillar has come away. Thank you - I will be careful as there is a goodly amount of stuff missing from that area. I am only showing you the worst bits though, most of it is very good and belies the time its spent standing unfinished under a tarp. This was the damp side furthest into the hedge so had little opportunity to dry out ever. If I can get the cage right first then that should add quite a bit of reassurance when I start chopping there. I've no idea how deep the frillyness goes as I deliberately haven't looked too hard but suspect the tinworm is in all of it in that area. Mechanic next door says pull the engine and box and put it on it's roof to do the work. I have to say I'm a little bit tempted to do it that way just for the craic. Obviously it would be a stupid thing to do. Yeah it's an odd one, that cage.. They've welded in the front and bolted the back!? I'm not sure what you can do about putting it right, though. The *best* thing to do would be cut it out and buy a new one, but if you don't have the budget for that then it's obviously out of the question! If you can live with the not-that-amazing fit of the front roll bar, then just box the front feet in properly with 3mm sheet and it'll be a LOT safer than it is now. I'm not really up for changing the cage out for a new one, I think that I'd rather work with what I have. The money would be better spent elsewhere and I think, when correct, it'll be enough. It's not going racing and it will always be safer than the R1 track bike my mid life crisis wanted to buy.. I can't live with it like that though. It's effing terrible it's coming out and going back in properly. Cut off the current mess and put some flat feet on the bottom of the A and B post tubes. Discard current lands and fit new box shaped ones (to the correct heights to make the frame fit nicely left right front back and without twisting.... ) Weld the lands in strong, bolt cage to lands. 5 minute job WCPGW? Hoving a look and a think today has made me realise that it's even more terribly fitted than I previously thought it was. Those lands made to take the B post 4 bolt feet which I had thought of as being a box section made of plate with a flange bolted to it? 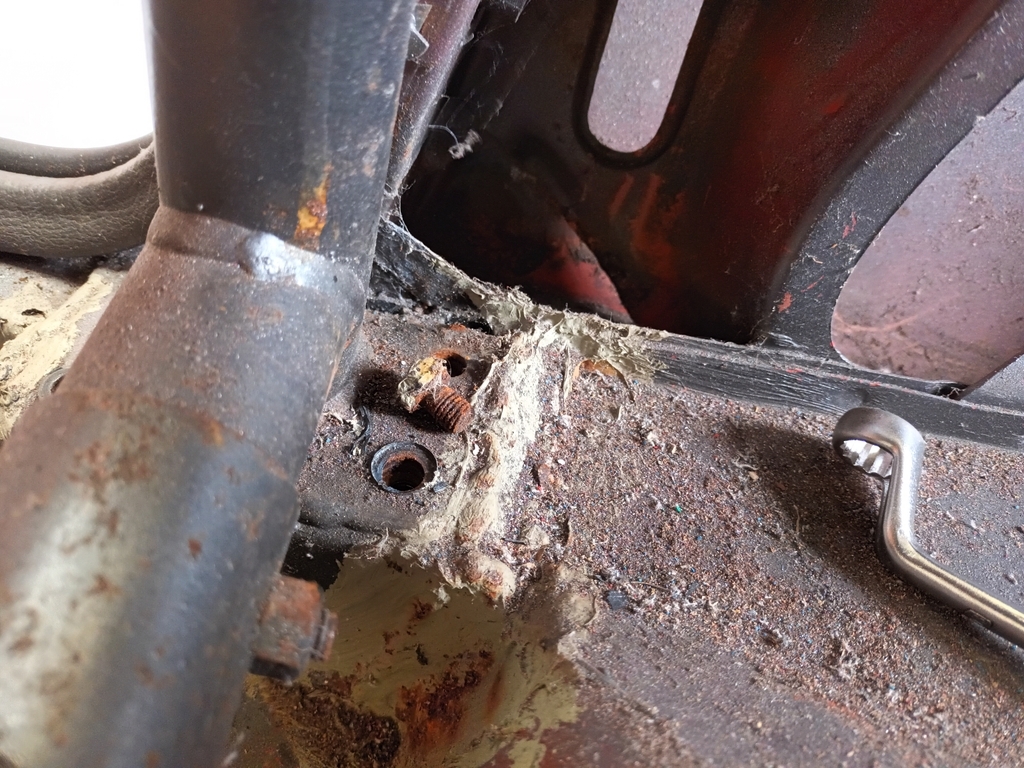 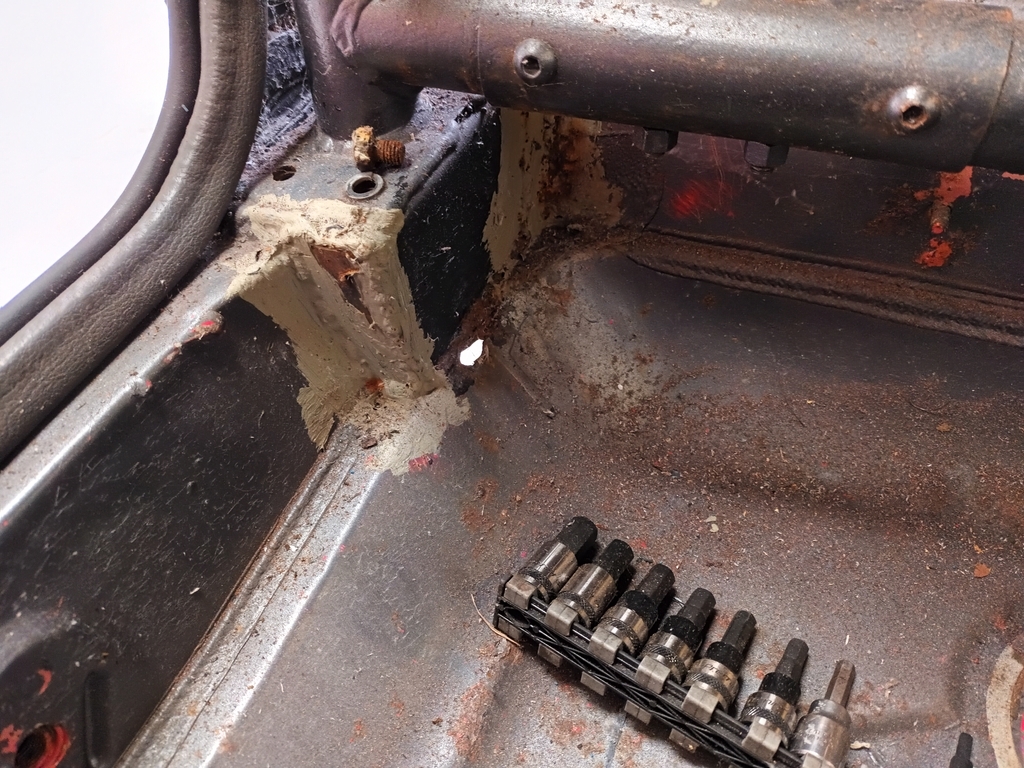 Nope, they too are badly welded to the together and the bolts are merely decorative bodgers delight shortened specials. What a throbber. I hope that's the last of his handiwork surprises and I've now found them all. |
| |
|
|
scdan4
Part of things
 
Posts: 39
|
|
Aug 18, 2021 17:10:28 GMT
|
Welding has been going well, and the boot floor looks like this now 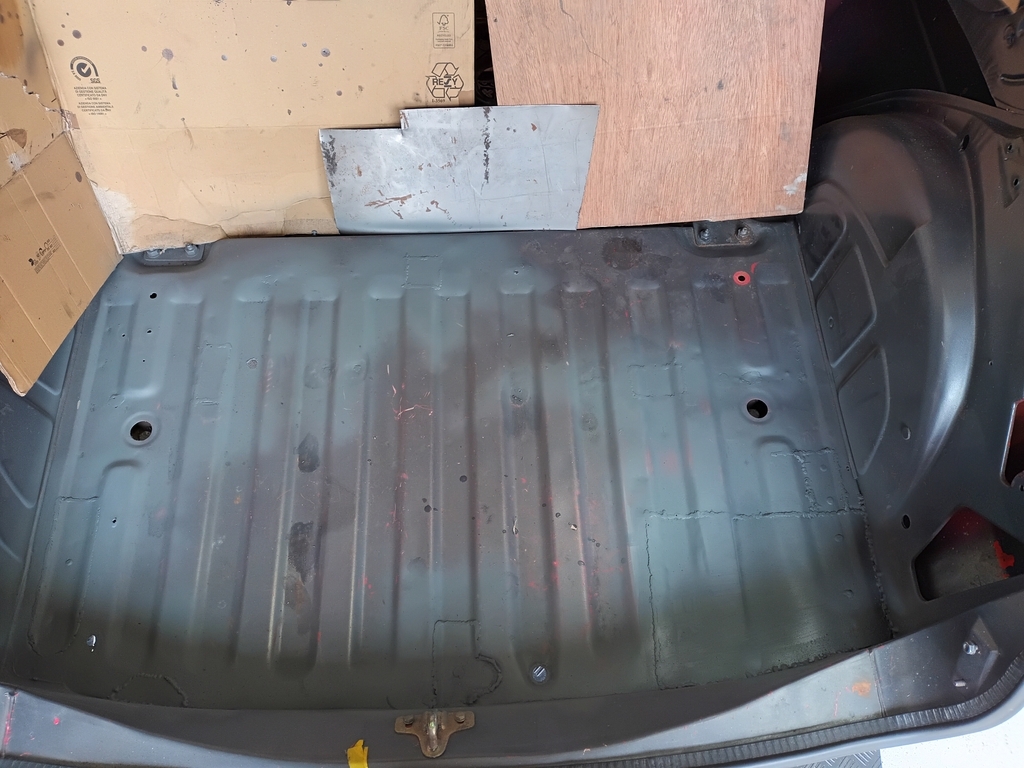 There is a clear progression in how nice they look with the last few being genuinely good enough to call OK. "I've charged for worse Dan" I could also have tried to dress the welds back further but having proved i could on a few of the nicer ones I decided I didn't care enough to stay here doing this and had better things to do with my time.  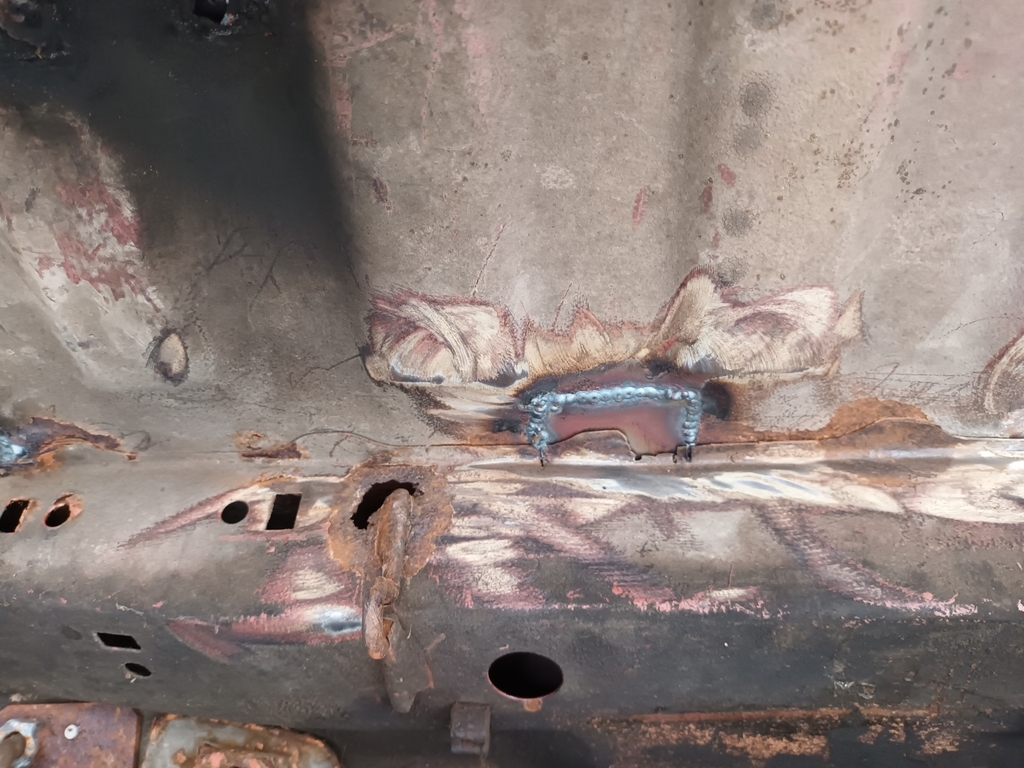 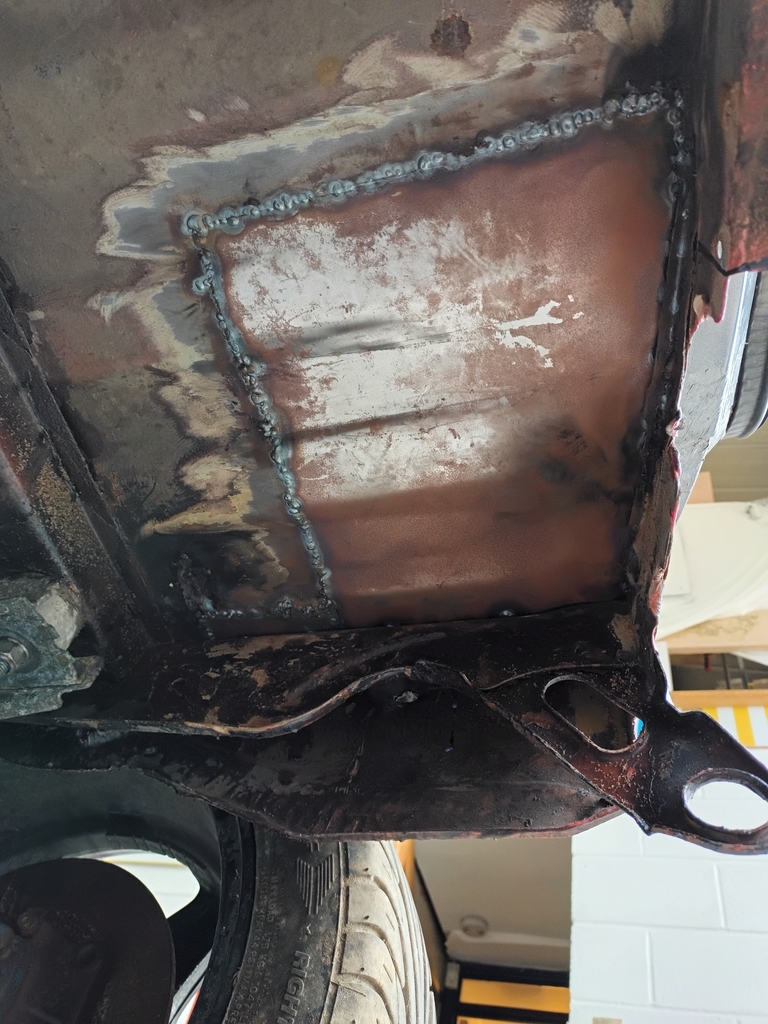 I'm pleased with my penetration. Even the big ugly looking first one which has a lot of weld sitting on the top shows good penetration, and some of the others again look genuinely OK Top and bottom liberally coated in hydrate 80 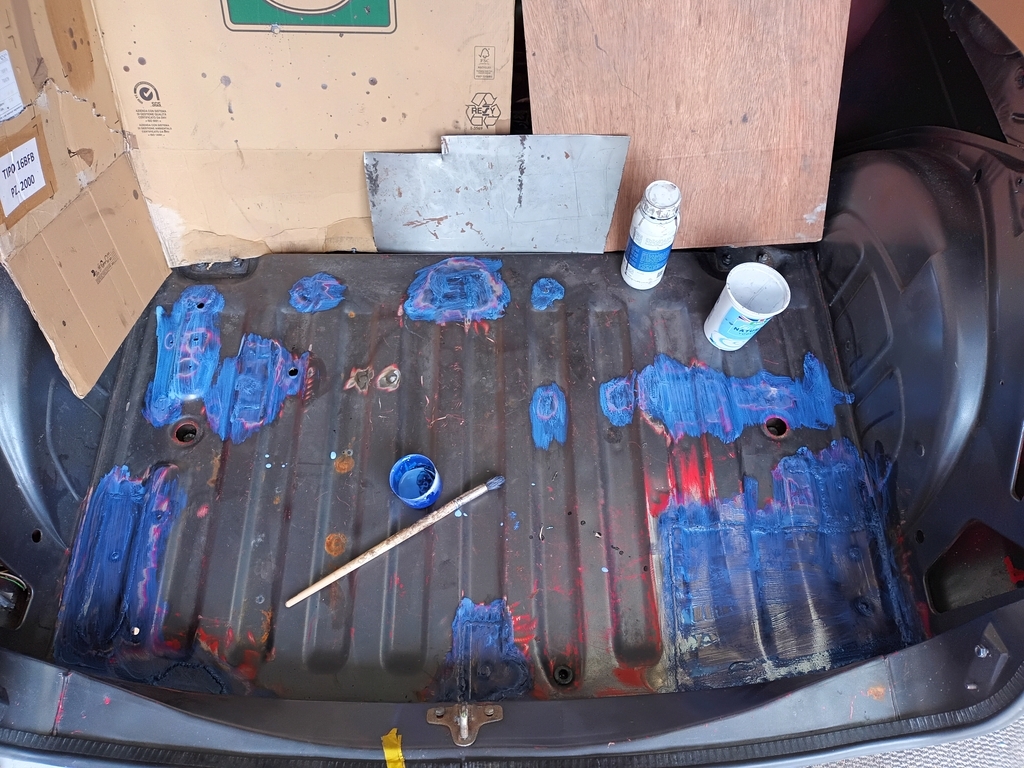 Which was then sprayed with zinc primer. Boot floor done and welding practice paying off with visible results. I'm happy. |
| |
|
|
|
|
|
|
|
I'm not really up for changing the cage out for a new one, I think that I'd rather work with what I have. The money would be better spent elsewhere and I think, when correct, it'll be enough. It's not going racing and it will always be safer than the R1 track bike my mid life crisis wanted to buy.. I can't live with it like that though. It's effing terrible it's coming out and going back in properly. Cut off the current mess and put some flat feet on the bottom of the A and B post tubes. Discard current lands and fit new box shaped ones (to the correct heights to make the frame fit nicely left right front back and without twisting.... ) Weld the lands in strong, bolt cage to lands. 5 minute job WCPGW? Lol yeah totally understandable.. MSA blue book will tell you all you need to know for re-installing it properly, but if you need any guidance drop me a message, I used to do this stuff (cages) a lot!  Honestly with the original tin foil bodywork being so thin it's very difficult to flatten back welds properly without weakening the joint. The weld shrinks and pulls the joint down so it will never be flat enough to not require a skim of filler anyway, so I wouldn't bother! |
| |
|
|
scdan4
Part of things
 
Posts: 39
|
|
Aug 31, 2021 19:35:14 GMT
|
Slow progress is being made, and I'm tickling it along in the right direction. I'd like to be able to do a bit more but life with its commitments gets in the way. Progress is progress, keep doing the next bit and it'll get done. I cut the welds holding the front half of the cage in place and moved it out the way. I'd assumed that it would fit out of the doors and be able to put away somewhere else out the way but it doesn't fit so I'm currently working around it. Cutting it out left a damage where id attacked the welds and revealed rusty metal, both worse on the drivers side. 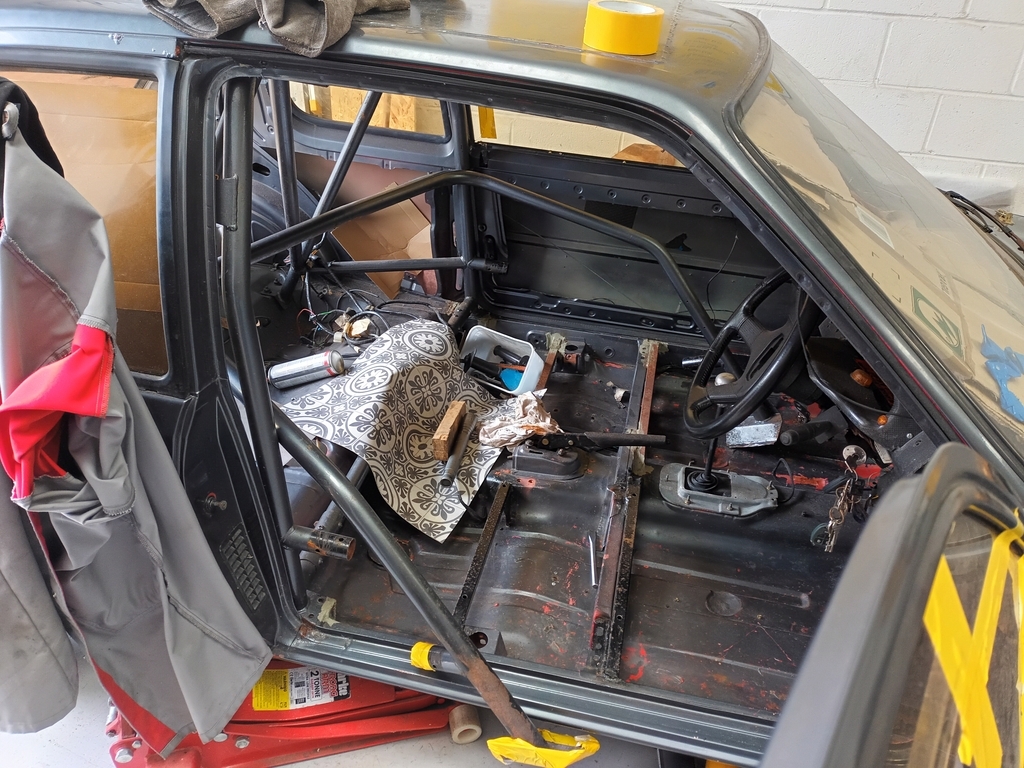 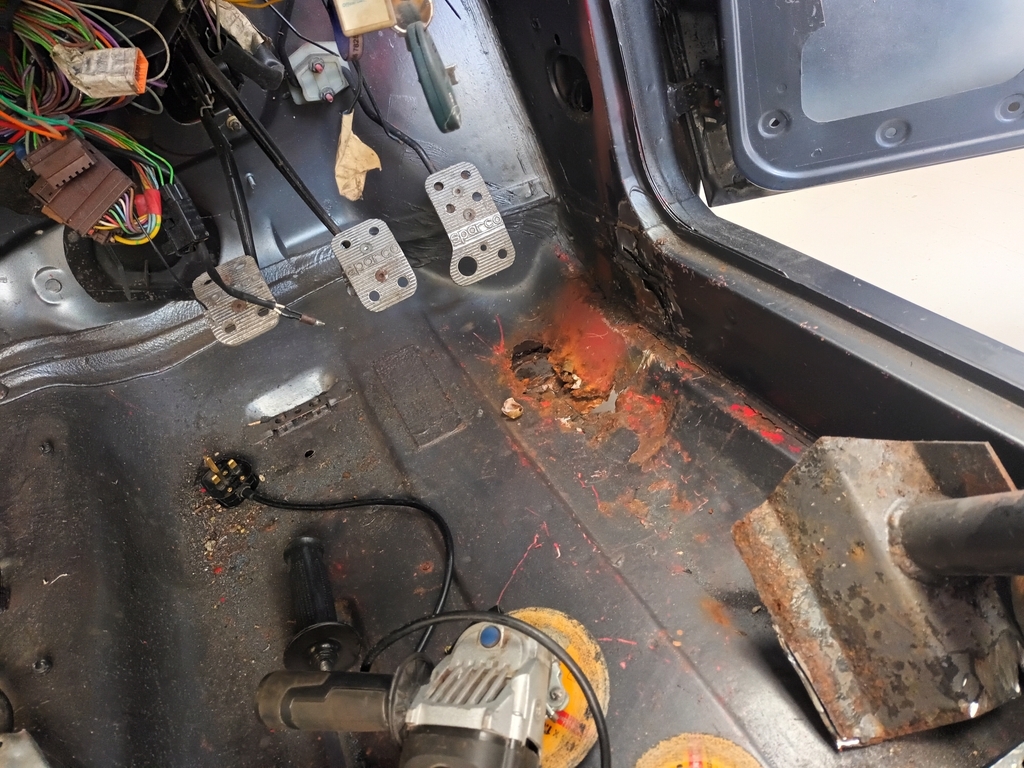 Got going on the drivers side and made a repair piece for the bottom of the a pillar which was mullered where the cage foot had been welded to it. 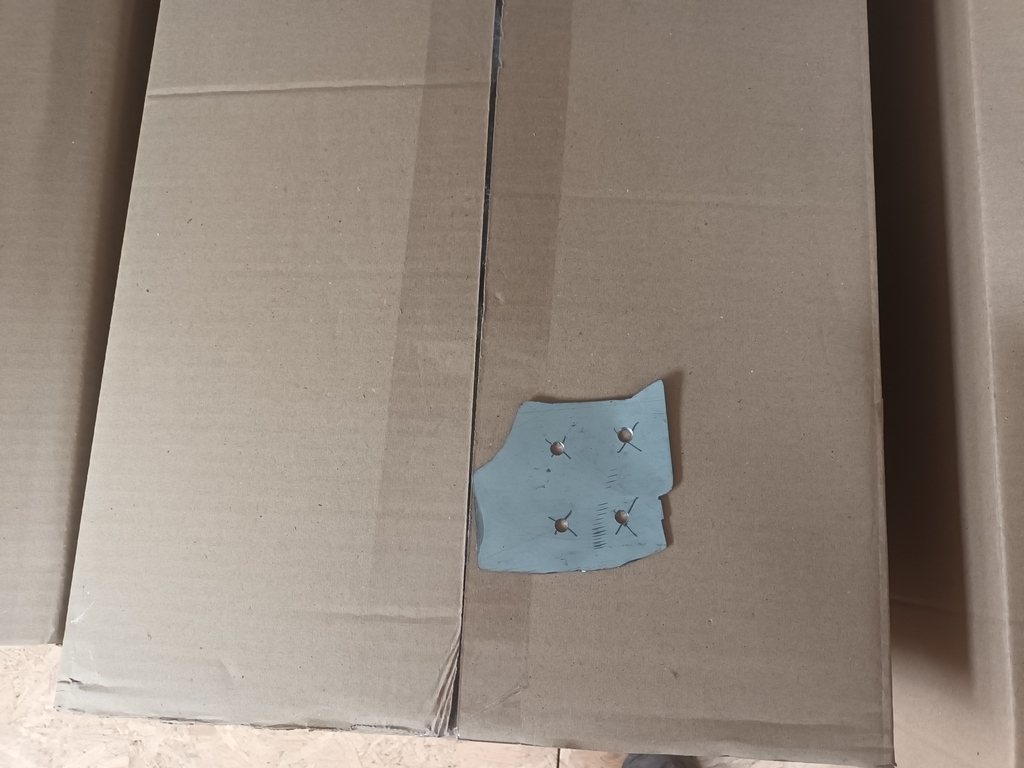 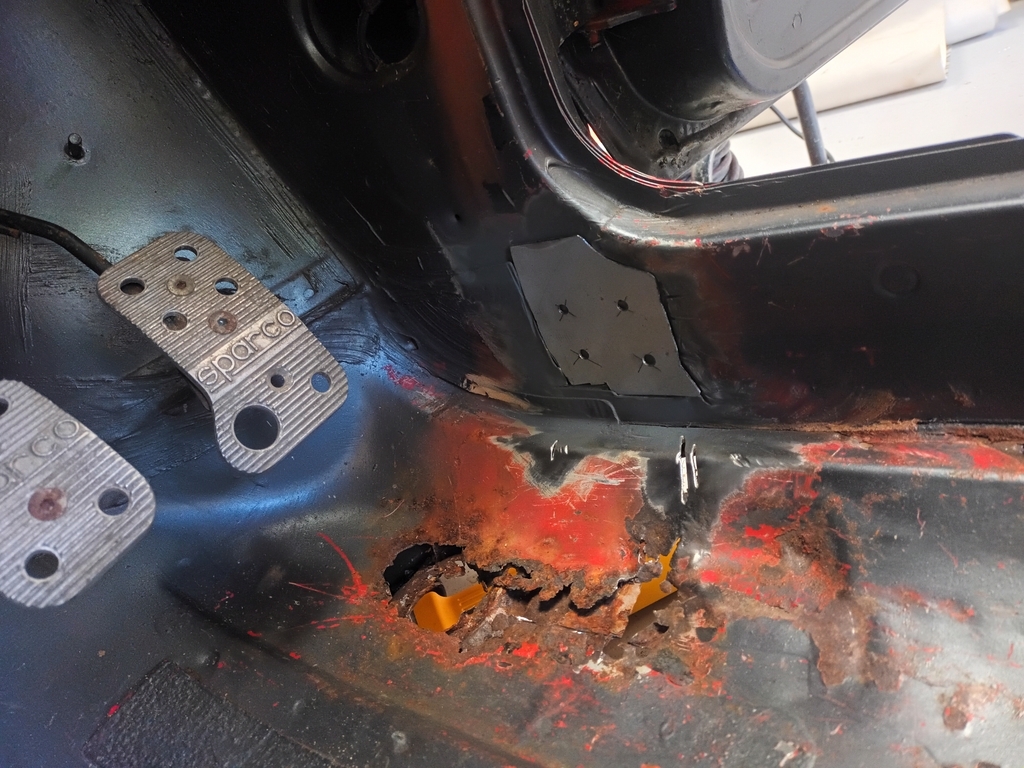 Welded that in and ground it back a bit, but didn't take a photo which is a shame as it looked neat and tidy. Cut out the rotten bit of drivers floor and bashed the jacking point back into some sort of shape. It's very tired and weak, so for now I welded a bit of metal in to give it a enough strength it's shape but the plan is to then incorporate a hard jacking point here with the cage base thing. 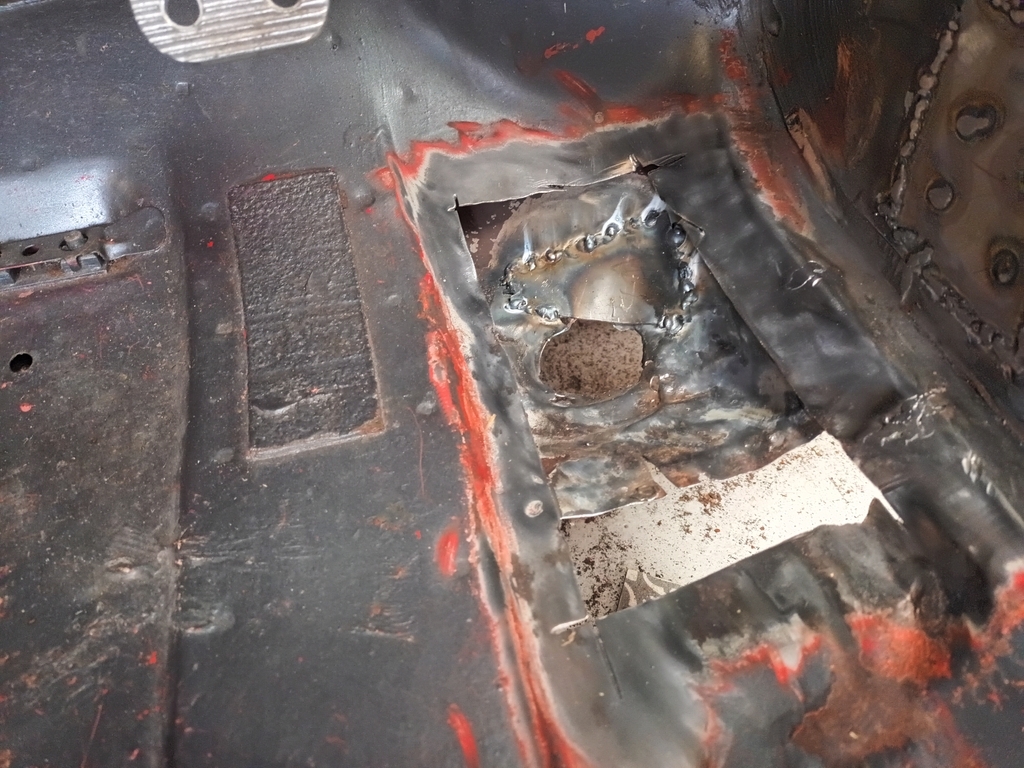 Sprayed it all in zinc primer and then made and fitted a patch for the hole which left it all looking like this 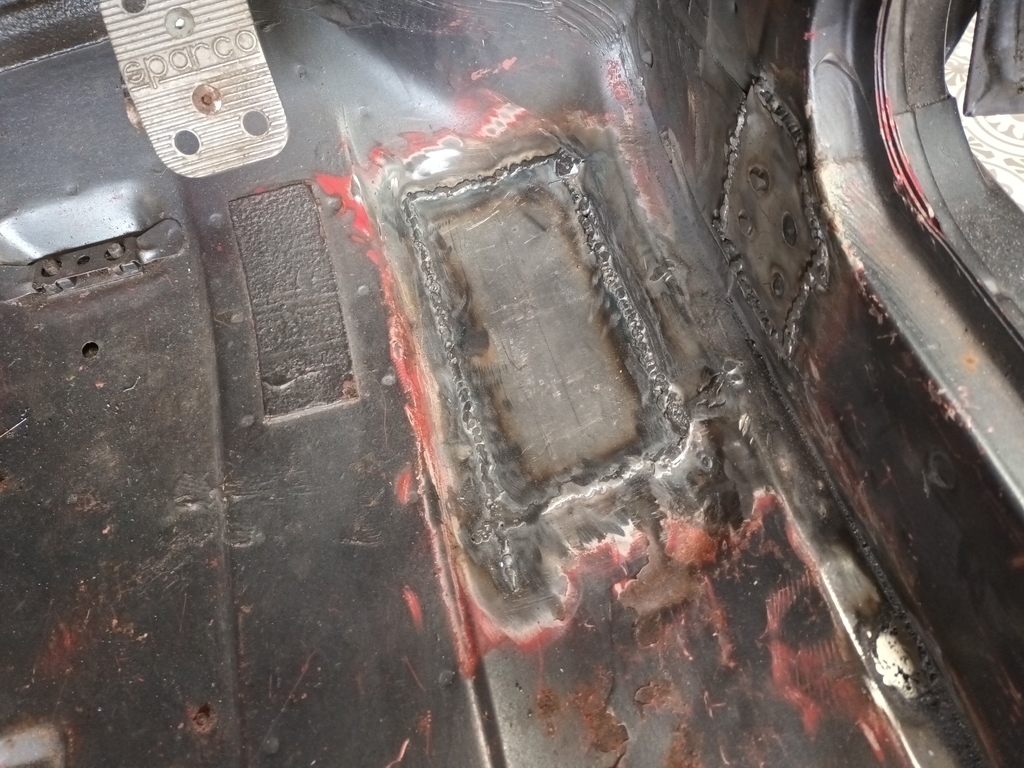 Which I'm pleased with, it looks pretty enough and gives a good base for proper cage reinstallation. Need to do the passenger side next. It should be easier as I think its less rusty and it was a much neater cage removal. 5 minute job surely. |
| |
|
|
scdan4
Part of things
 
Posts: 39
|
|
Sept 9, 2021 13:31:22 GMT
|
Cage is out. What a ballache. Having never mucked about with a Cage before I was naively assuming that it would be a proverbial 5minute job to run a grinder through the welds and then simply lift the front and rear parts out through the rear hatch. Ha. No. Not so easy. You can get a welder places that you can't get a grinder, like between the cage tube and the b pillar. And then when i finally managed to chisel and lump hammer my way through and free it I discovered "just pop it out the hatch" was very optimistic. It's all a learning curve. I enlisted help. 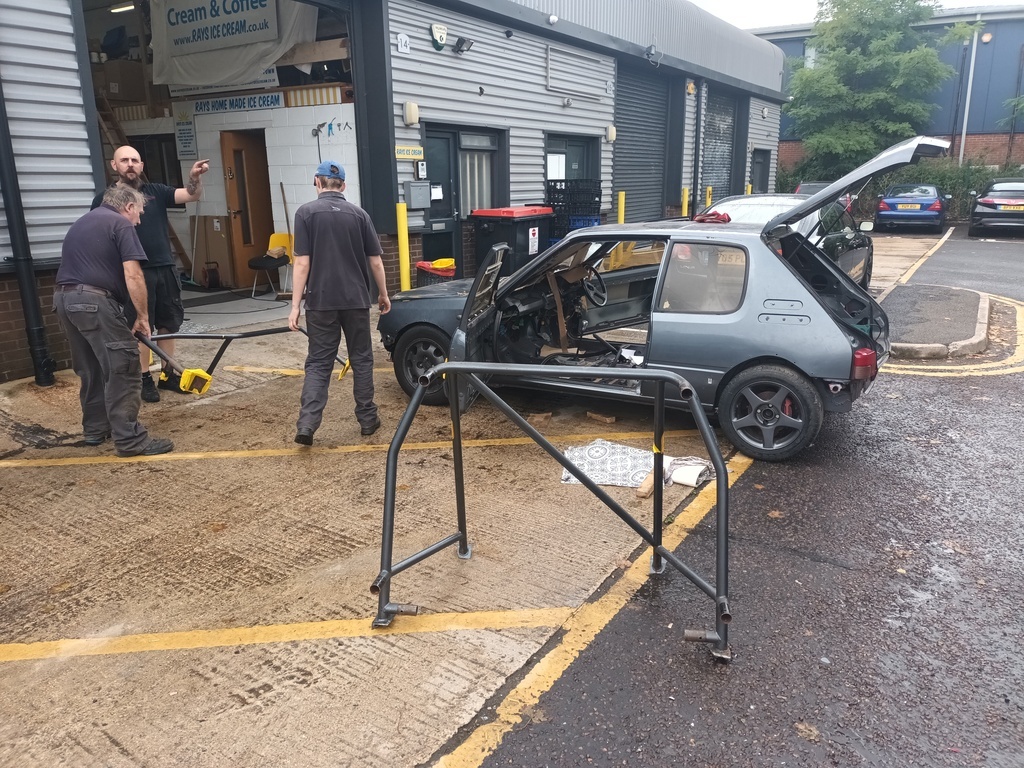 It's out, leaving a bit of a mess which I can fix and then wrestle it back in again. Going to take the passenger door off for that, it will make it easier. 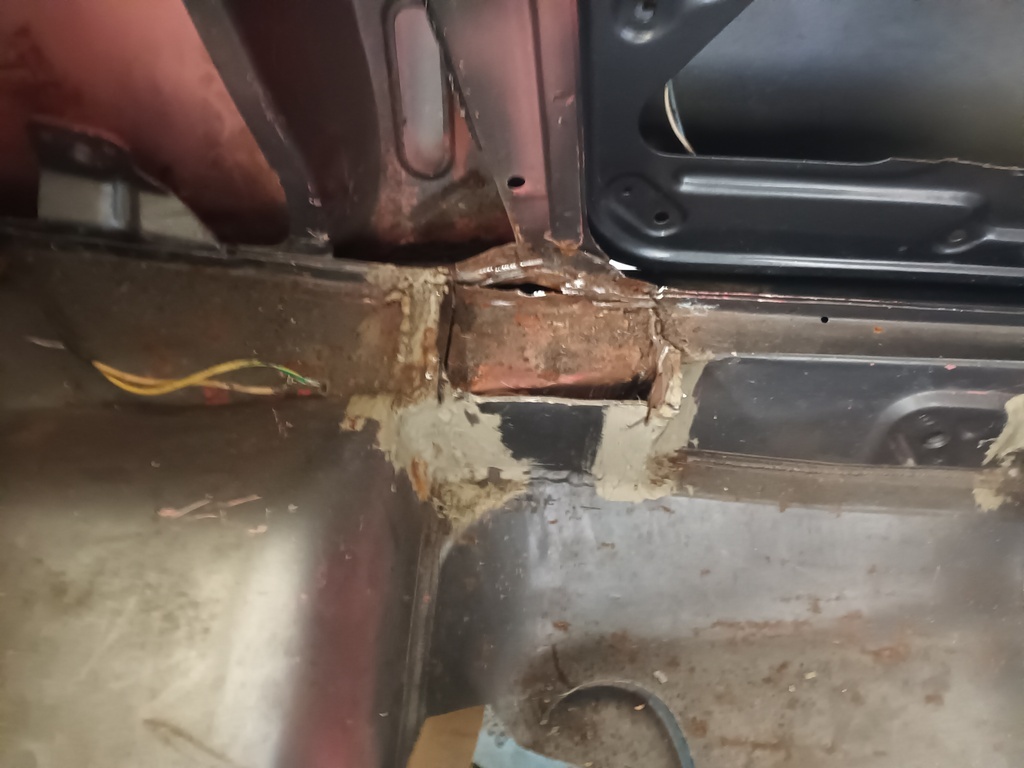 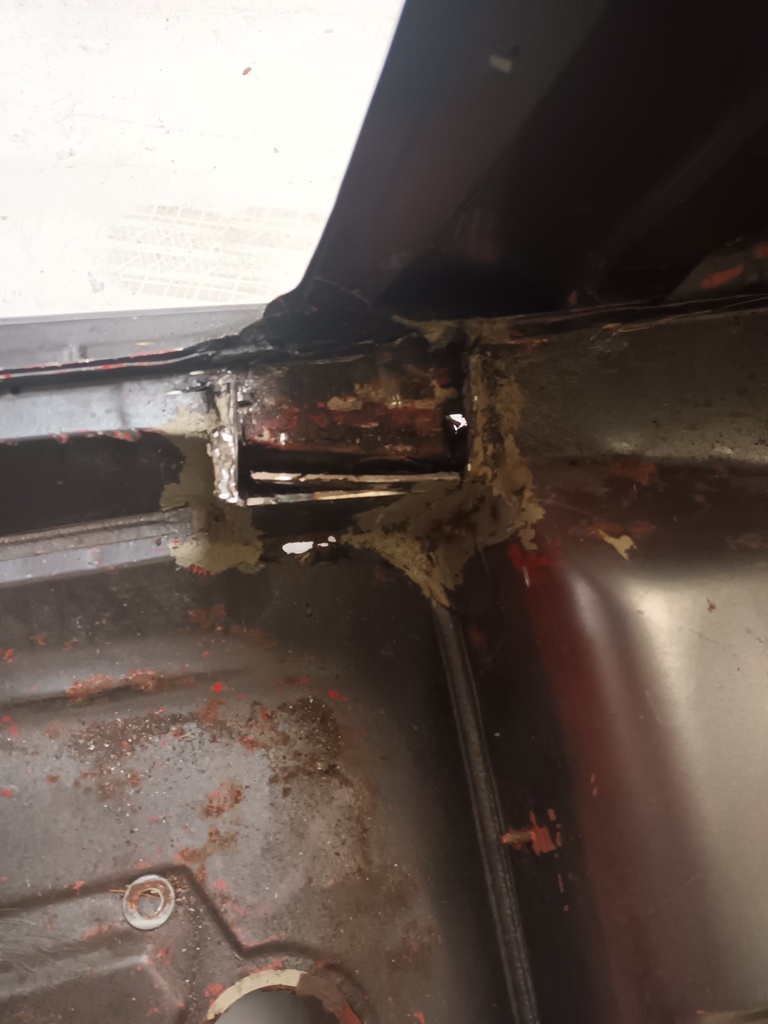 Had a dive into the front wheel arch to see what welding needs doing, (happily not a lot) and while there tried cleaning the disc up to see if it's salvageable. 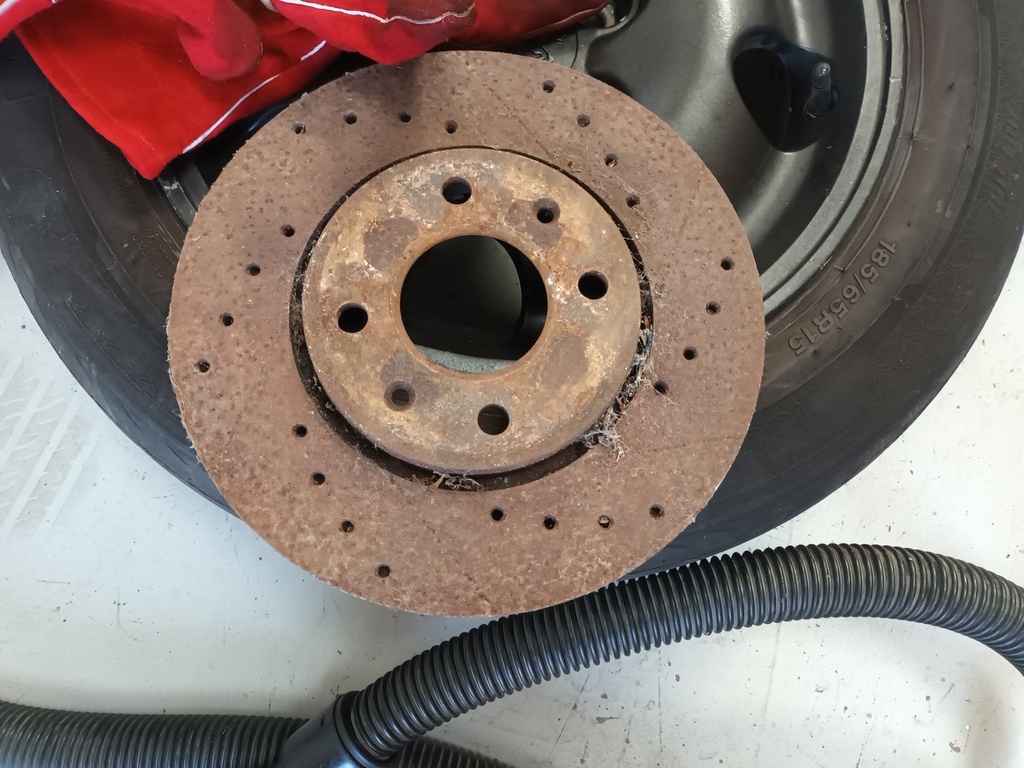 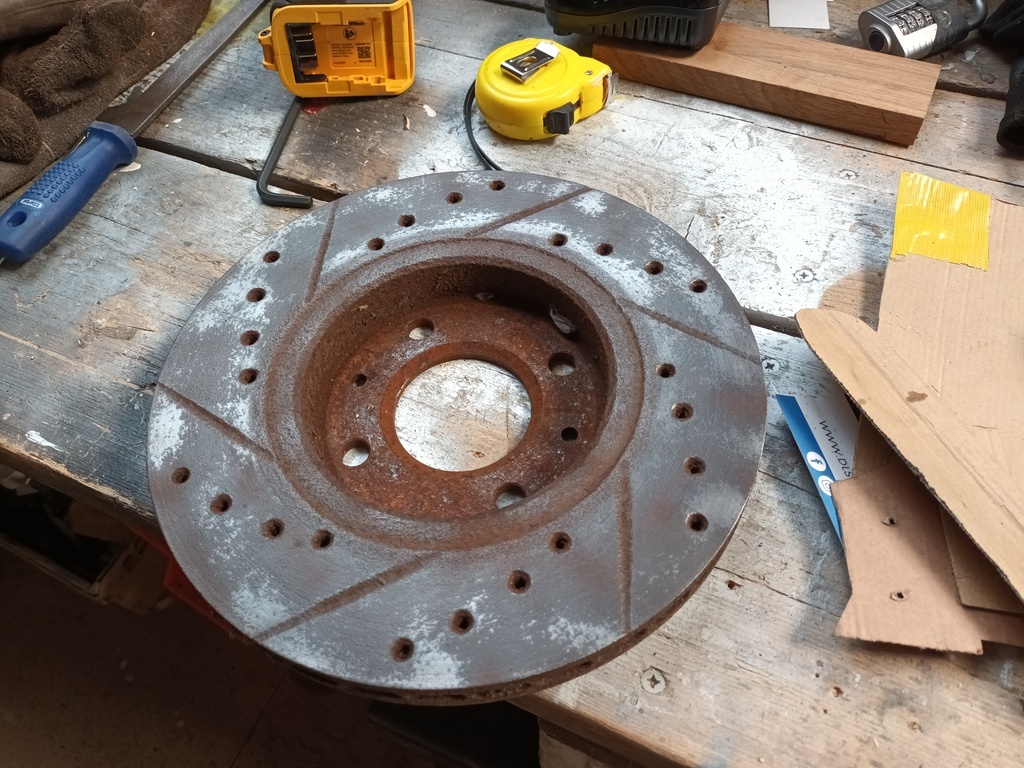 No, not really. Not a surprise as the pitting looked fairly deep. The view in the wheel arch was good though, revealing a fancy trigger wheel and more importantly a sump spacer. 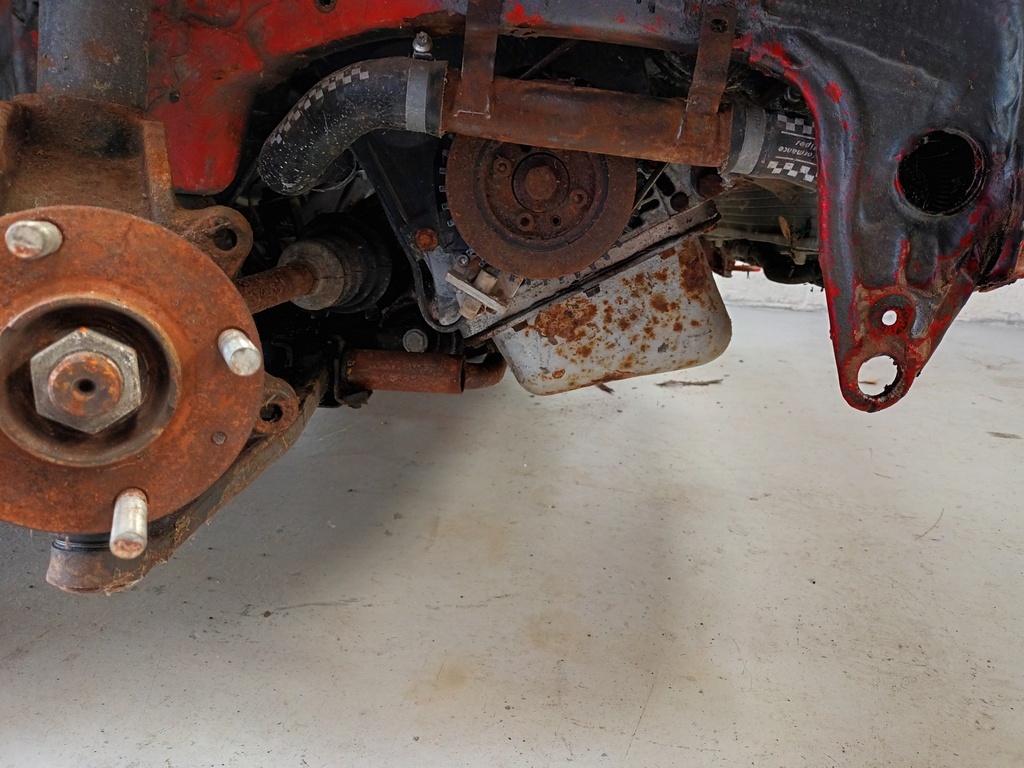 But that will have to wait. Cut measure weld the b post rust away and the cage back in next. Can't take too long surely? |
| |
|
|
|
|
|
Sept 14, 2021 8:14:33 GMT
|
|
Yeah removing a cage is rarely an easy job! It's the right thing to do though.. now you can tidy up the mounting points, remove all evidence of the previous bodge job, and start fresh!
IIRC that sump spacer is standard on the MI16 engines and there to stiffen up the block.
|
| |
|
|
scdan4
Part of things
 
Posts: 39
|
|
Sept 26, 2021 17:24:51 GMT
|
Time to sort the mess out. I started, gingerly, at the top and let in a few repair pieces until it looked like the top of the sill / beam thing was intact Then i jacked it up onto ramps to 'just have a look at what needs underneath' and proceeded to pull away by hand really quite a lot of rotten metal, leaving a good view all the way through and out the other side. Although it can't have been doing much, having seen how much was missing I was too scared to lift it to drop it down again, so sorted it there. I kept an eye on the door all the way through and it kept its alignment, so i think its all good on that front despite the car not being flat and level whilst this was done. I've said before that I'm learning welding, so this was the introduction to upside down welding to rubbish metal tutorial. Can't say I enjoyed it particularly, and that was inside in a clean dry unit on a very flat floor. Those peeps that report doing that sort of stuff outside in the rain and dark I now hold in even higher esteem. Anyway 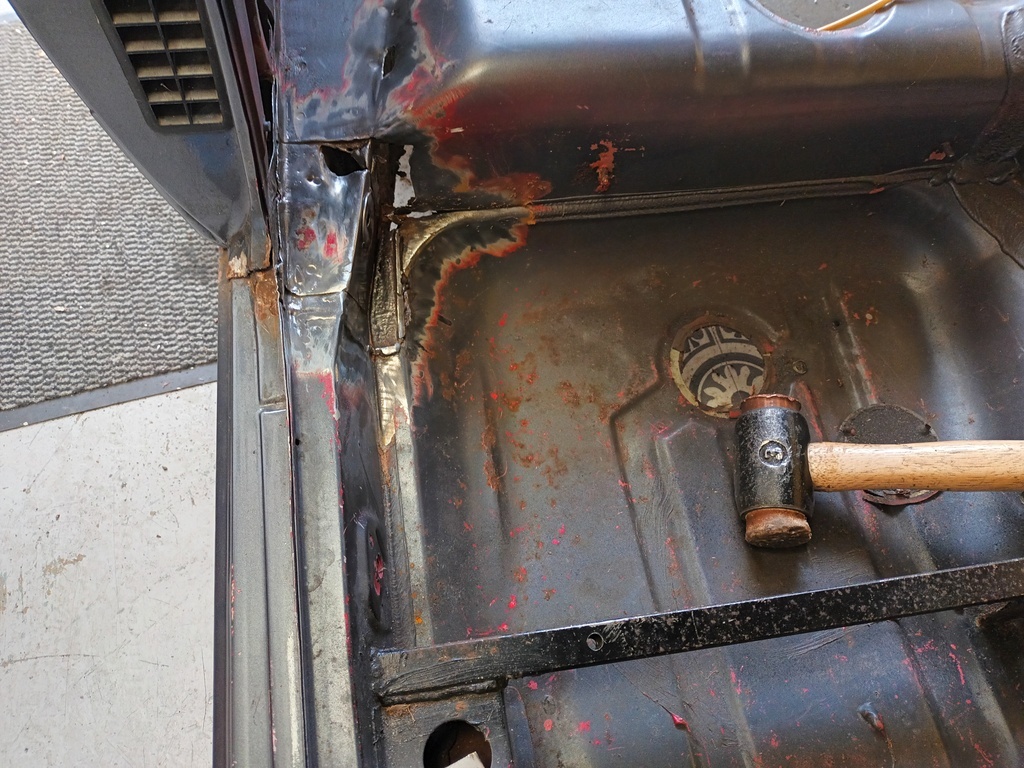 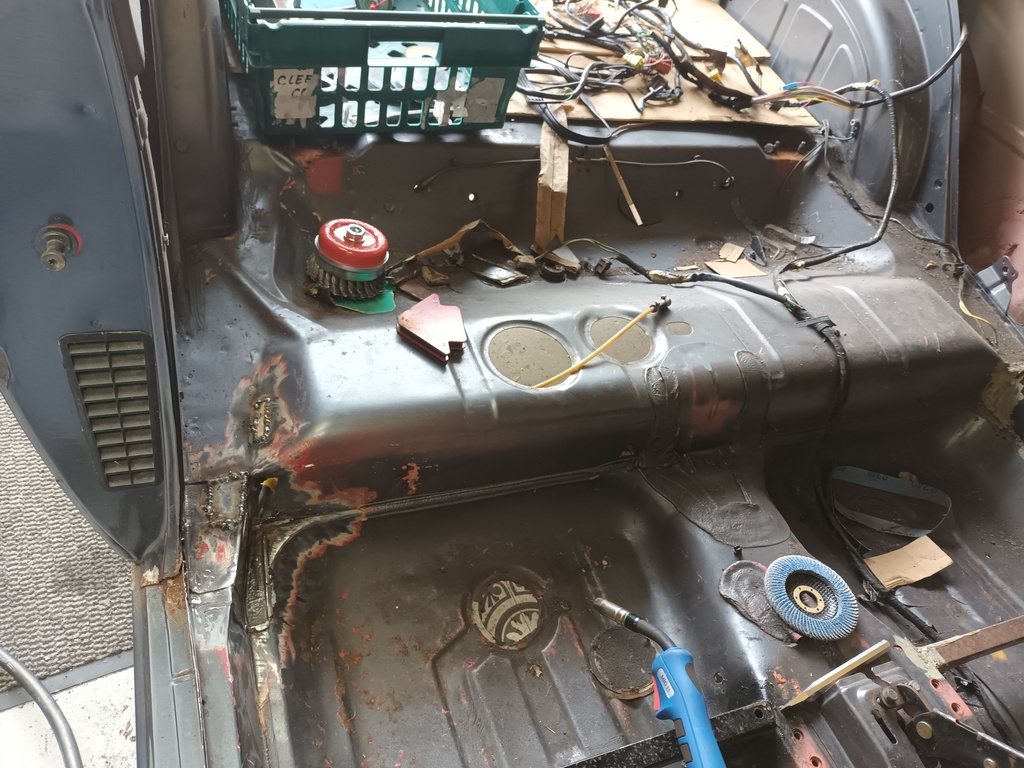 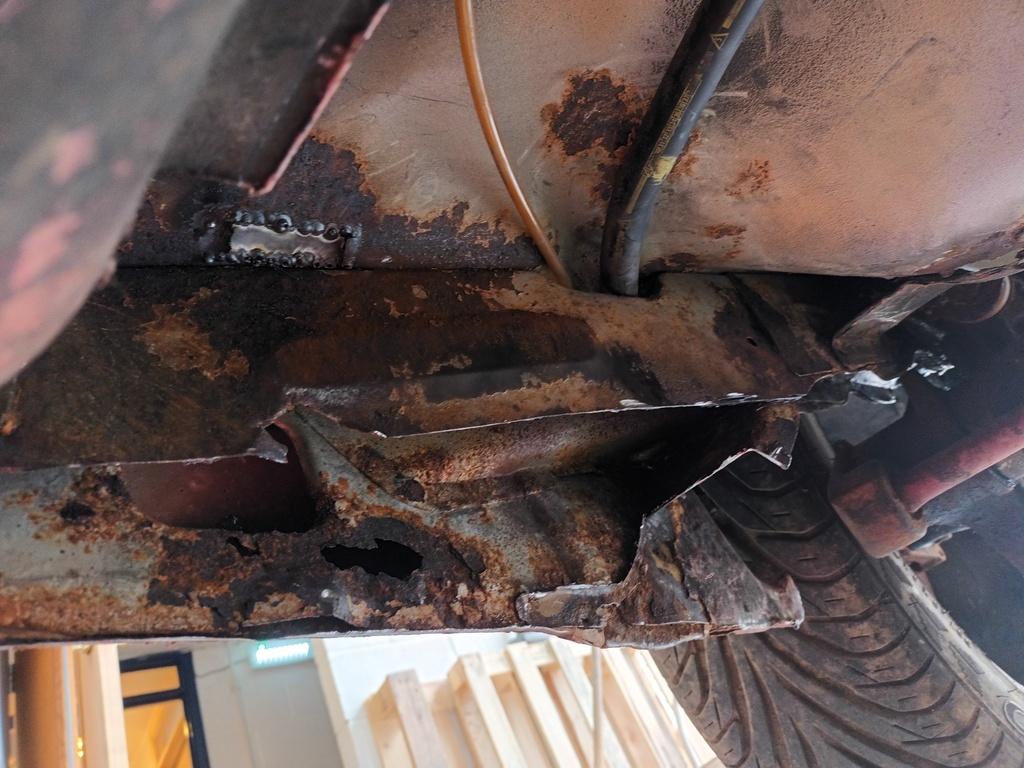 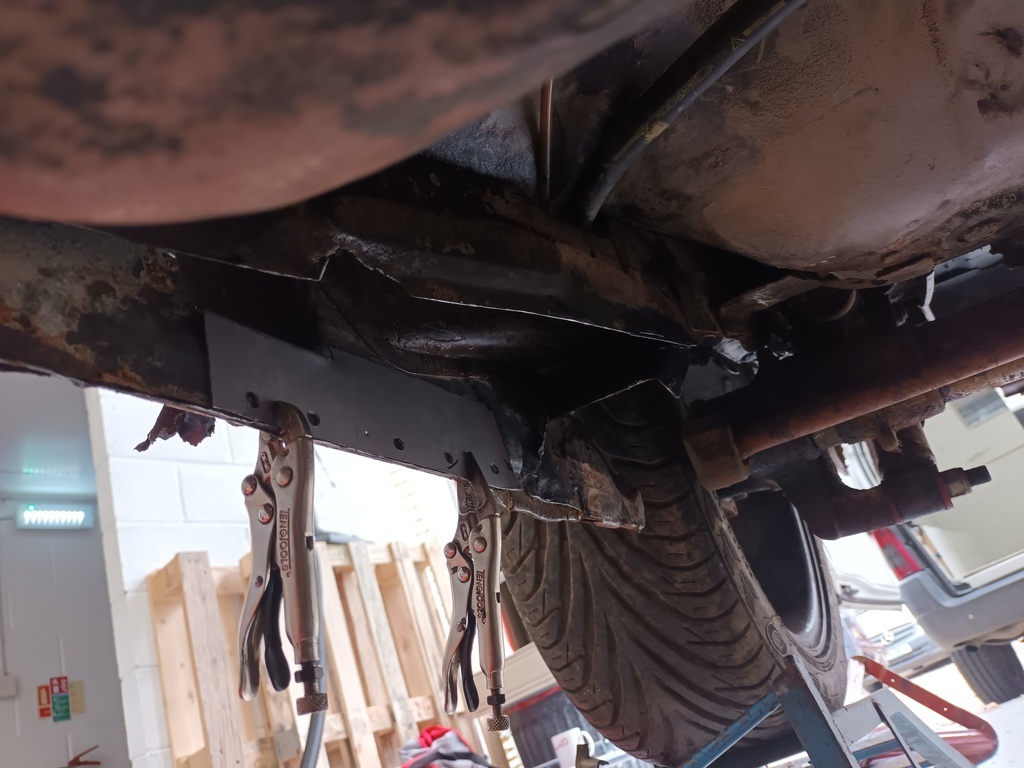 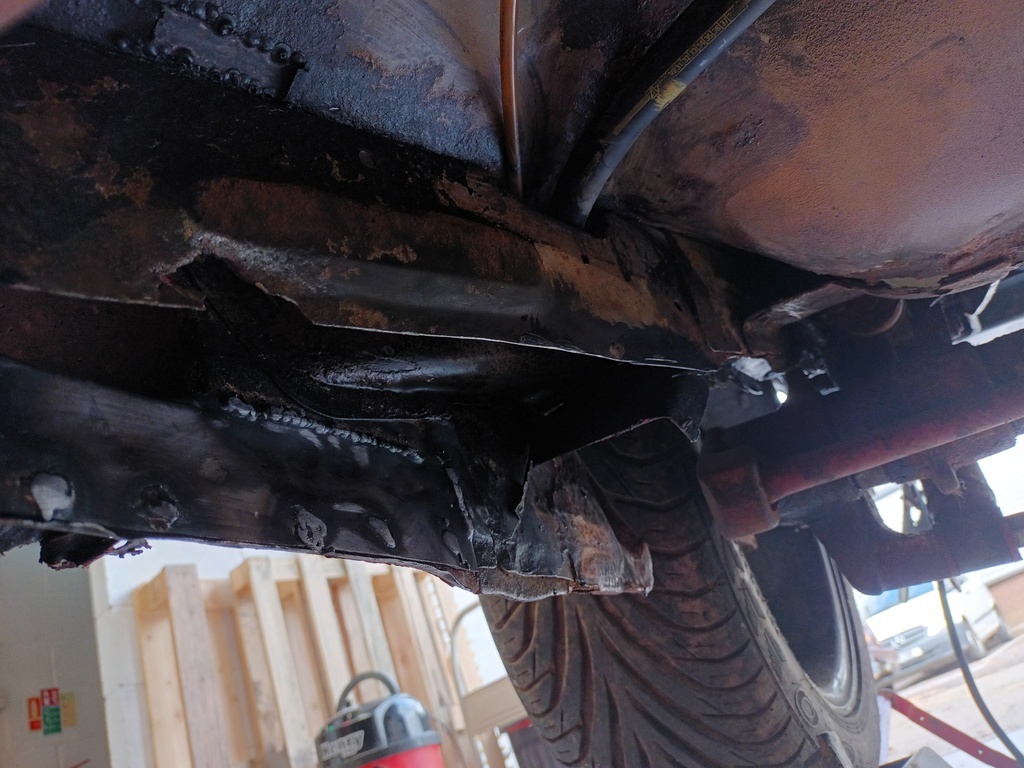 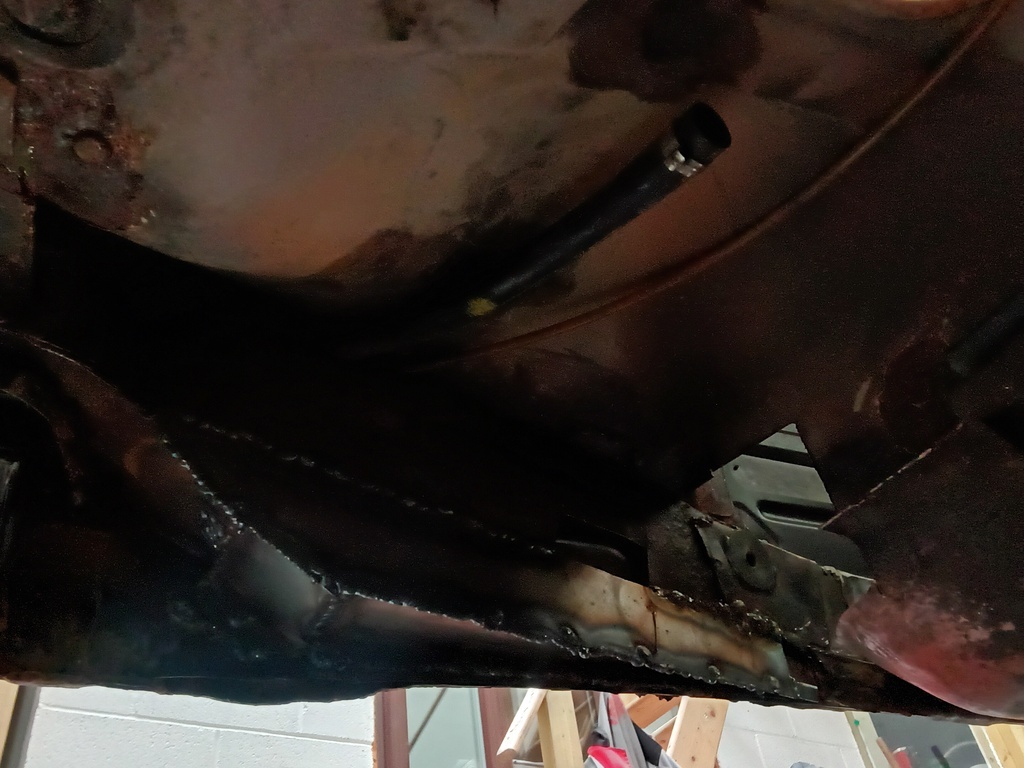 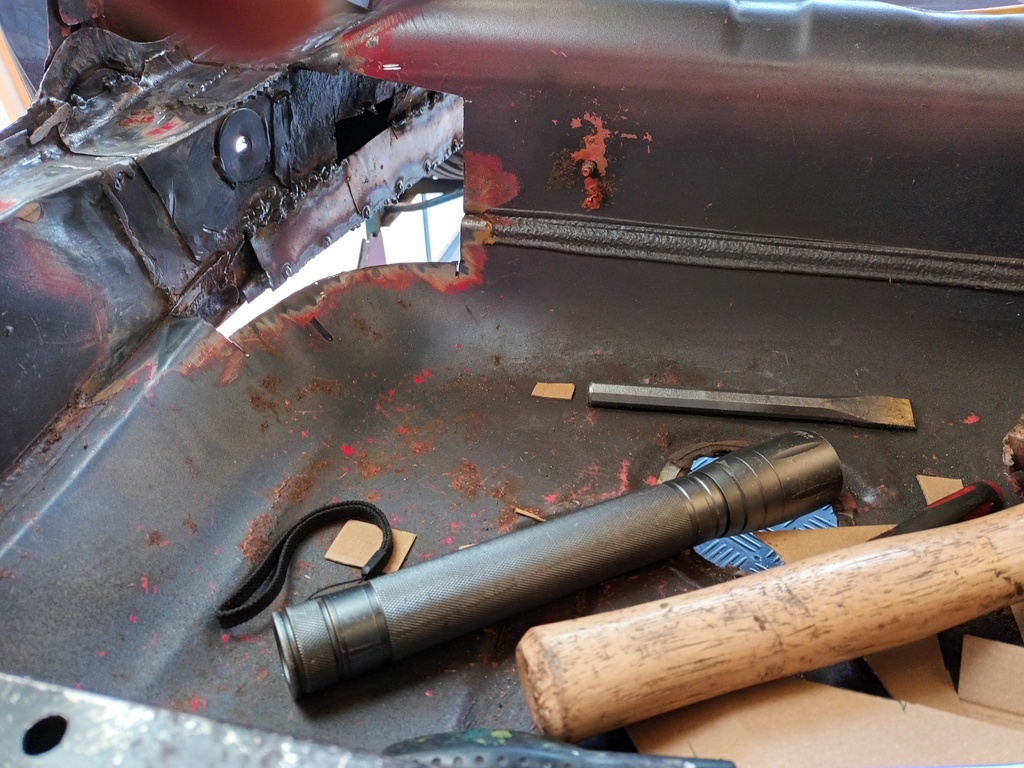 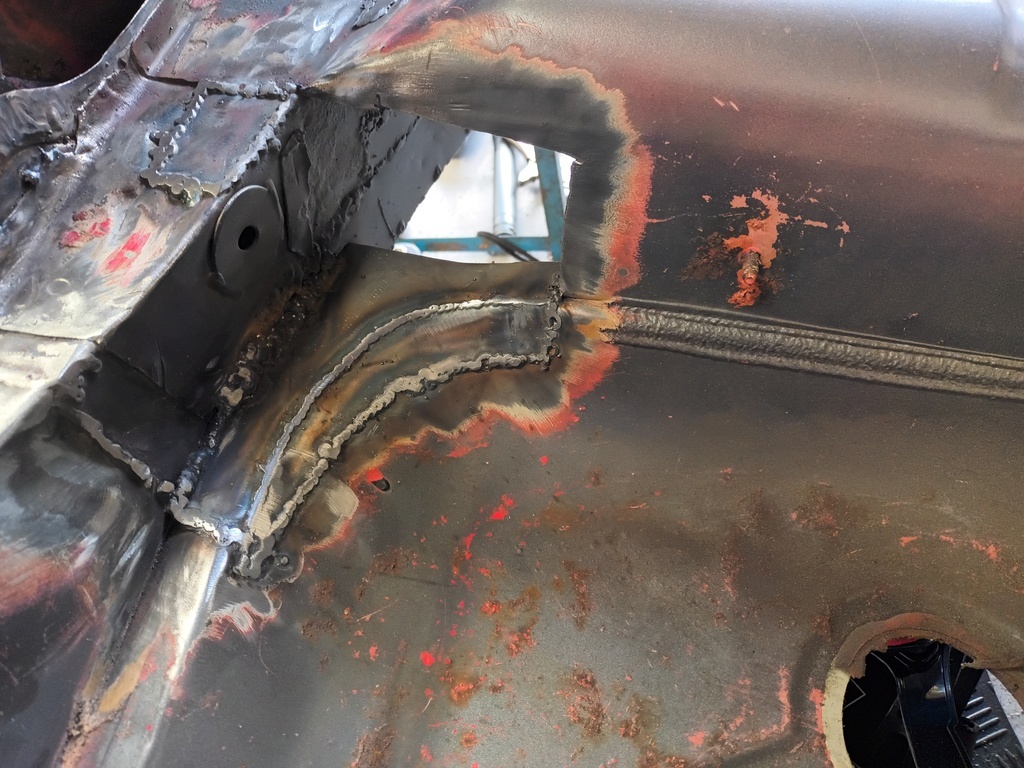 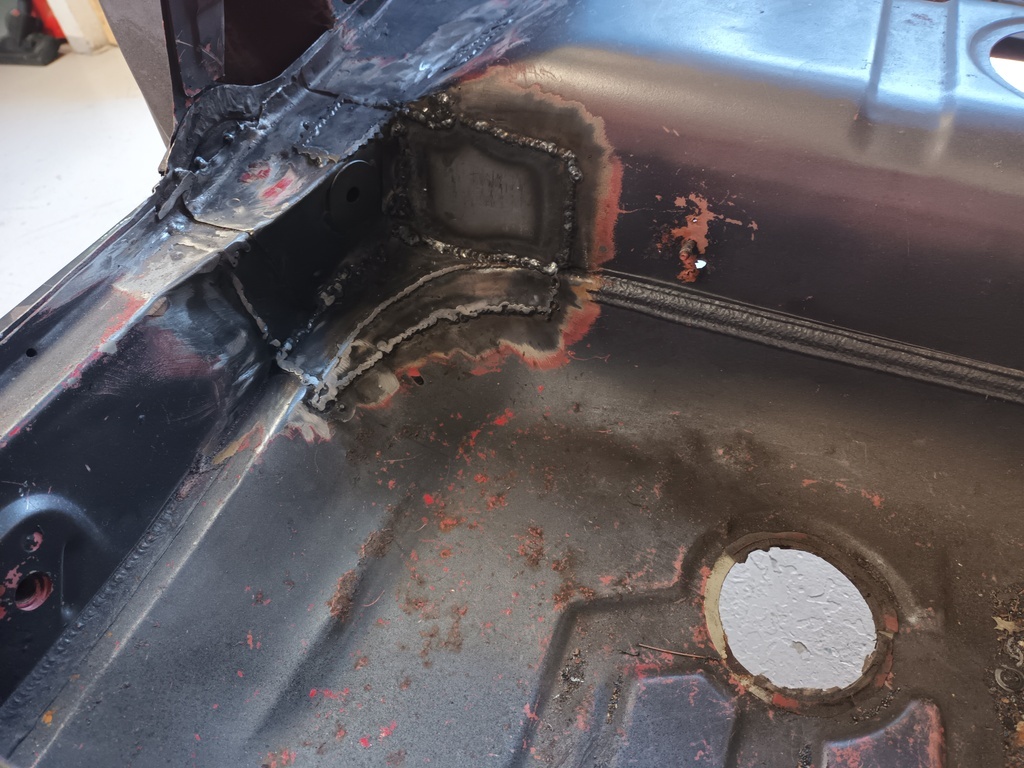 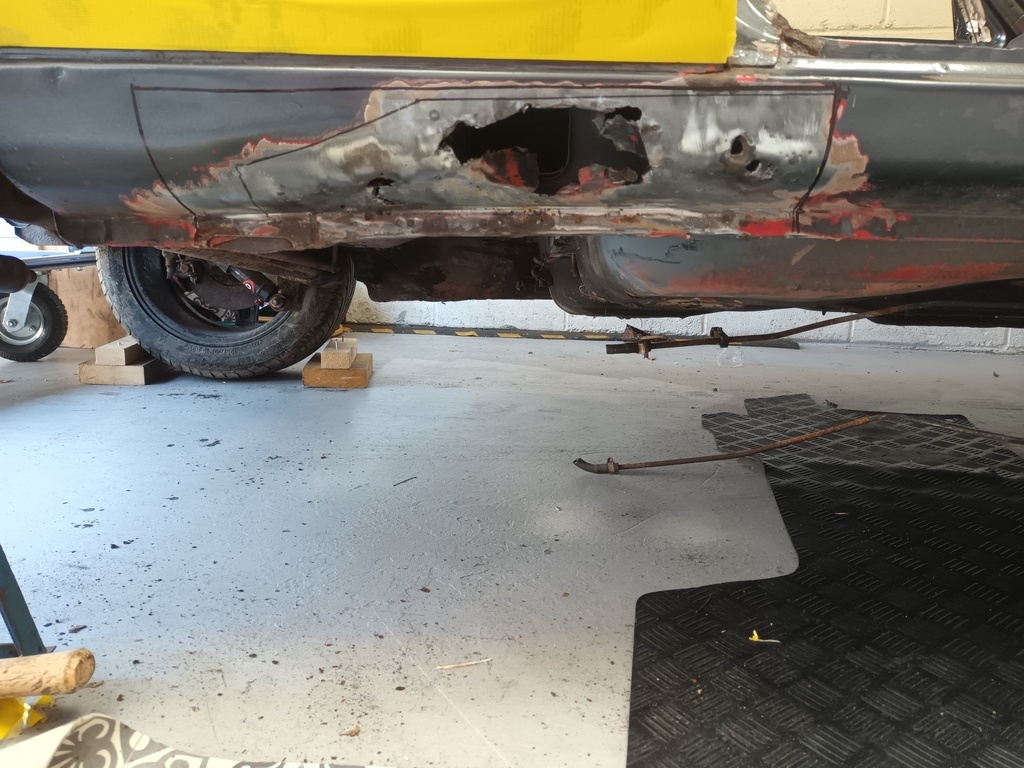 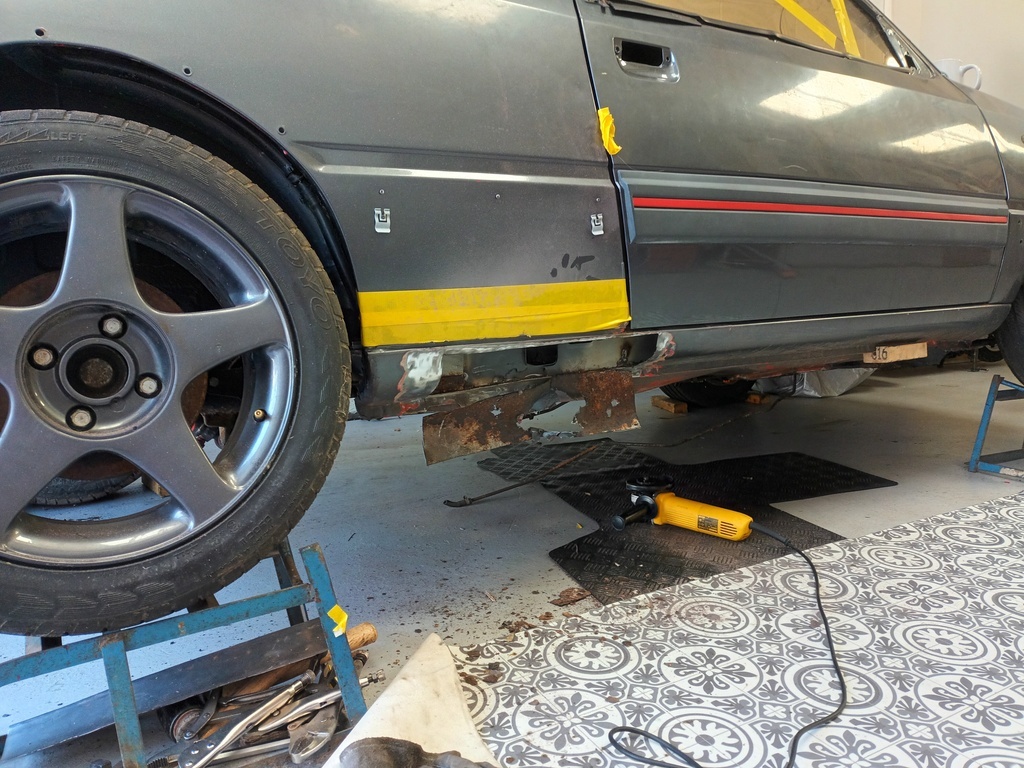 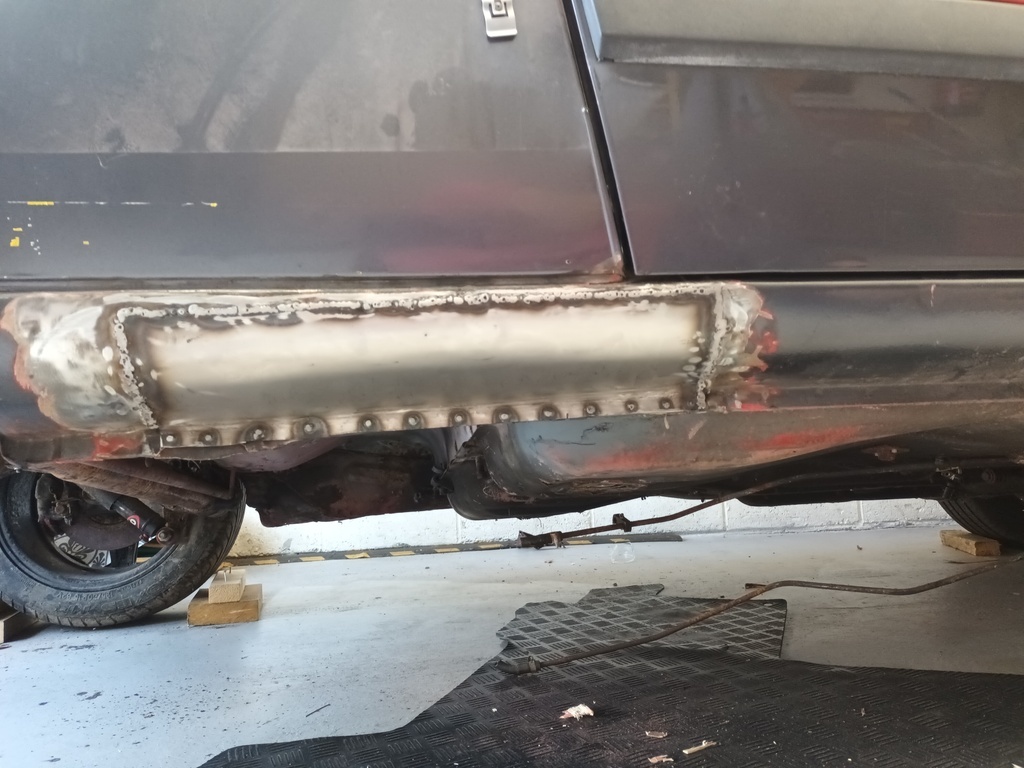 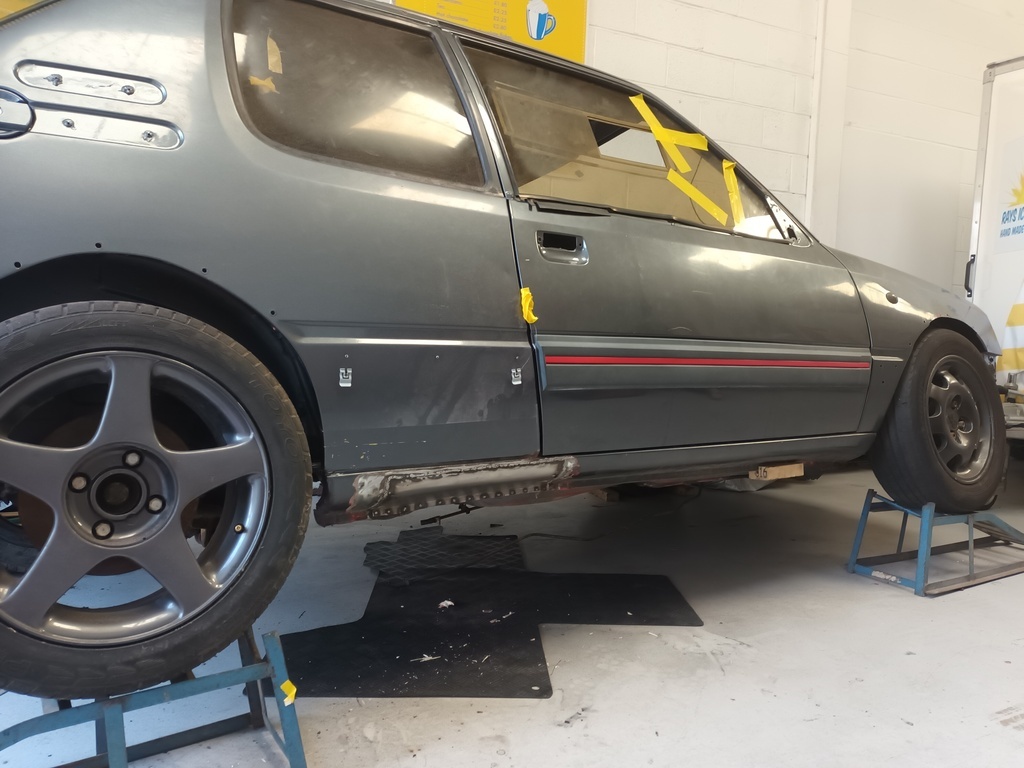 And just like that the rottenest bit of the ropey old peugeot became solid and safe again. And I'm really, really pleased with my last outer sill repair patch. I made that from sheet metal and it fits in there lovely. Proud of meself for that. Thats the drivers side B post area repaired. Progress rodders, progress.  |
| |
|
|
|
|
|
Sept 26, 2021 19:01:06 GMT
|
|
Really nice work there.
I'd not have to balls to buy another 205 now due to the work they need.
My first gti was £600 back in the olden days and solid.
|
| |
|
|
scdan4
Part of things
 
Posts: 39
|
|
|
|
Thanks. I was pleased with myself. For some reason when they were cheaper I wasn't much interested, i liked them but had experience of them as passenger, mates had them, I'd had a 1.4 one ... there was always another fish to fry. (And good times were had). I'm not the only one that is getting the mid life nostalgia it seems, despite having been in pieces in a hedge for a decade and being a relative distress sale bargain this is the most expensive car I've ever bought myself. Progress is still slowly being made and the cage is back in to measure up and fit and it's fitting much more nicely. 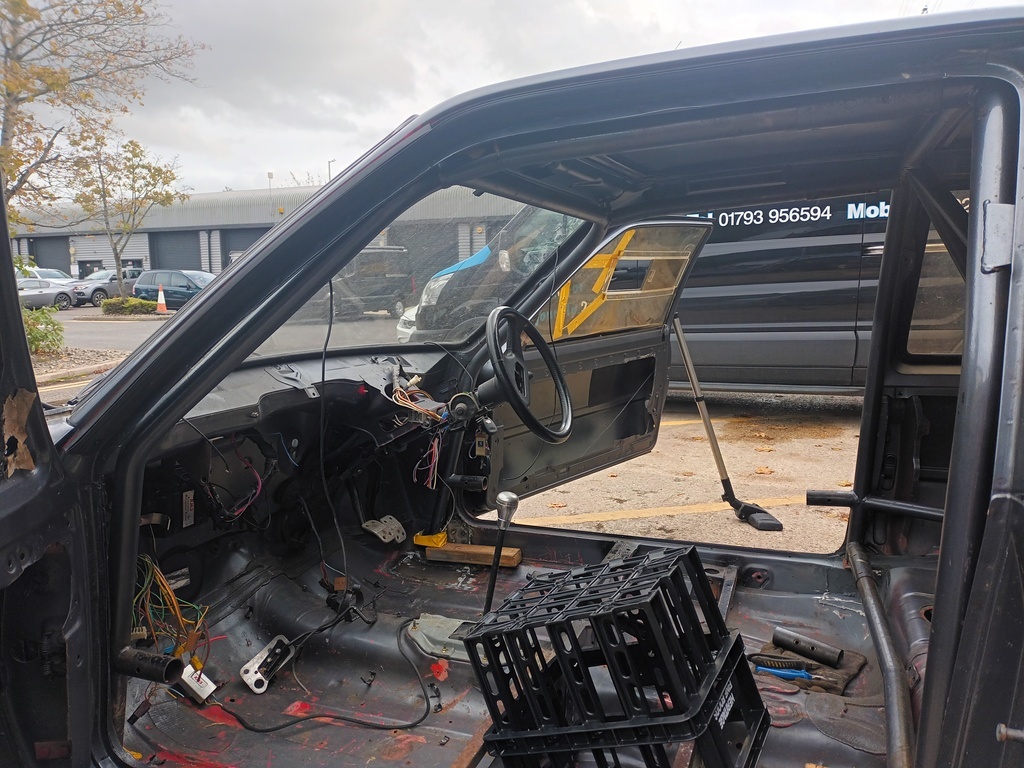 Following the screen pillar much more neatly and naturally now, mainly because the front feet are naturally landing about an inch further forward than they were before - you can see from the repair at the bottom of the a post how much further back it was. Obviously, now the front of the cage has moved out my door bars aren't long enough, but that is easily resolved. Happily for the wallet each length is just a bit less than a metre so a 2m length of cds tube will do it with minimal waste. 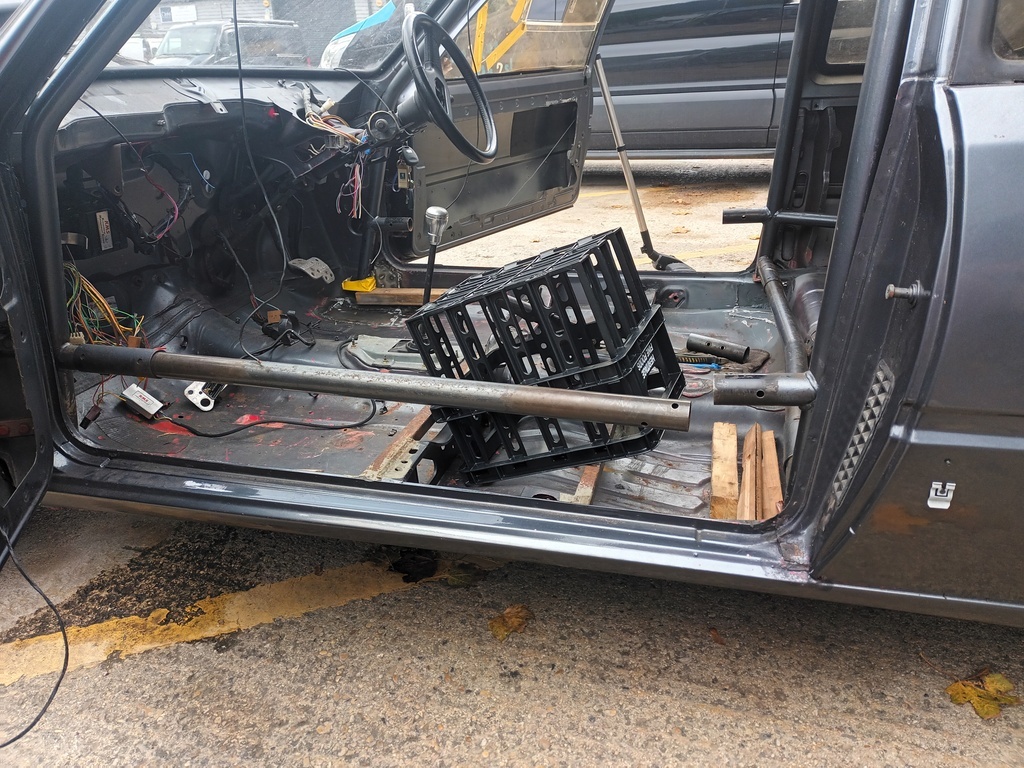 Got fed up with the clutter so removed the dash and most of the loom. It was in poor condition and full of scotch blocks, crimps and extra bits all just waiting to cause headaches so will be replaced with something better, newer and reliable. 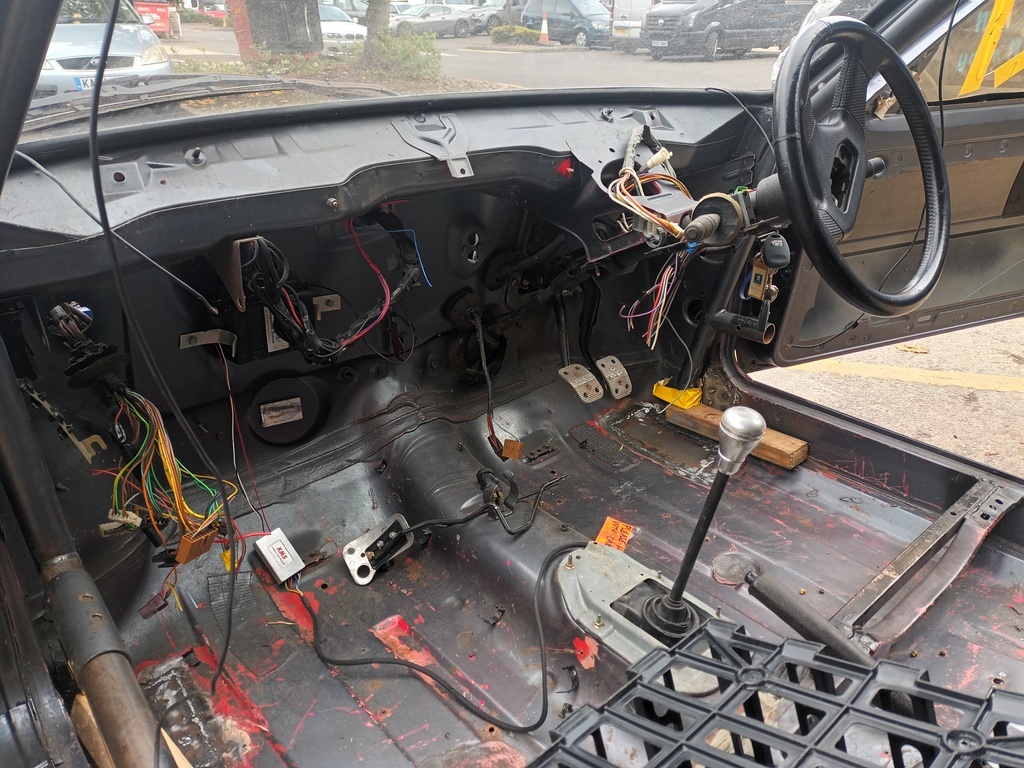 |
| |
|
|
|
|
75swb
Beta Tester
Posts: 1,052
Club RR Member Number: 181
|
|
|
|
|
Always loved a 205 gti, that cage will be much better for the work you're doing to it. They were too expensive for me to insure when they were cheap and too expensive to buy 10 or 15 years later. Same as the old 635i, 1275 minis, and other assorted chod I tried to buy when younger!
|
| |
|
|
scdan4
Part of things
 
Posts: 39
|
|
|
|
I'd forgotten about insurance, that's another reason I didn't have one. Nickable and crashable. Deepest Devon where I grew up had exactly zero car thefts but there were plenty of holes in the hedges so insurance for a young male could still be challenging. Then I moved to brizzle* and bought a xr4i. Disclock, remote immobiliser, different physical touch immobiliser the only way to stand half a chance of it still being there. (*just off Filton Ave which at the time was one of, if not the joyrider capital of Europe. Joy.) As I'm waiting on metal to come in the post and having had a tidying stint I finally took the front slam panel off. Check. Out. My. Trumpets.* 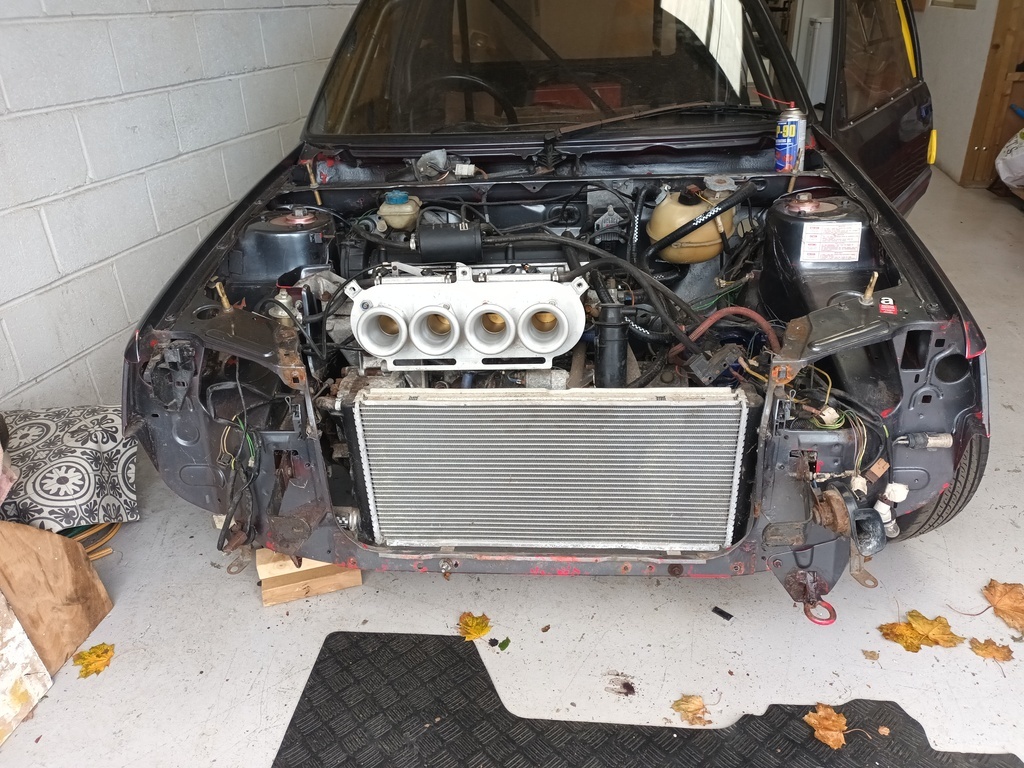 Nice new* Nissan radiator as well, half full of brown. 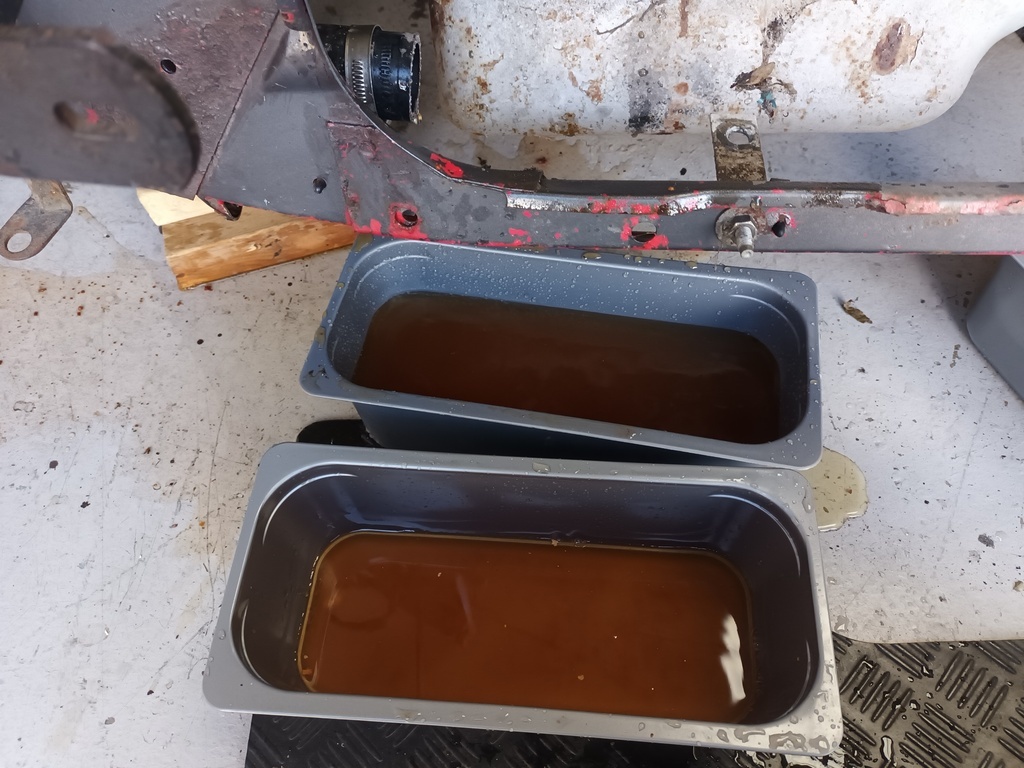 It's been damp in here. That alternator looks like it will never turn again, the oil filter looks near rusted through in a couple of places and the block is covered in white fuzz. 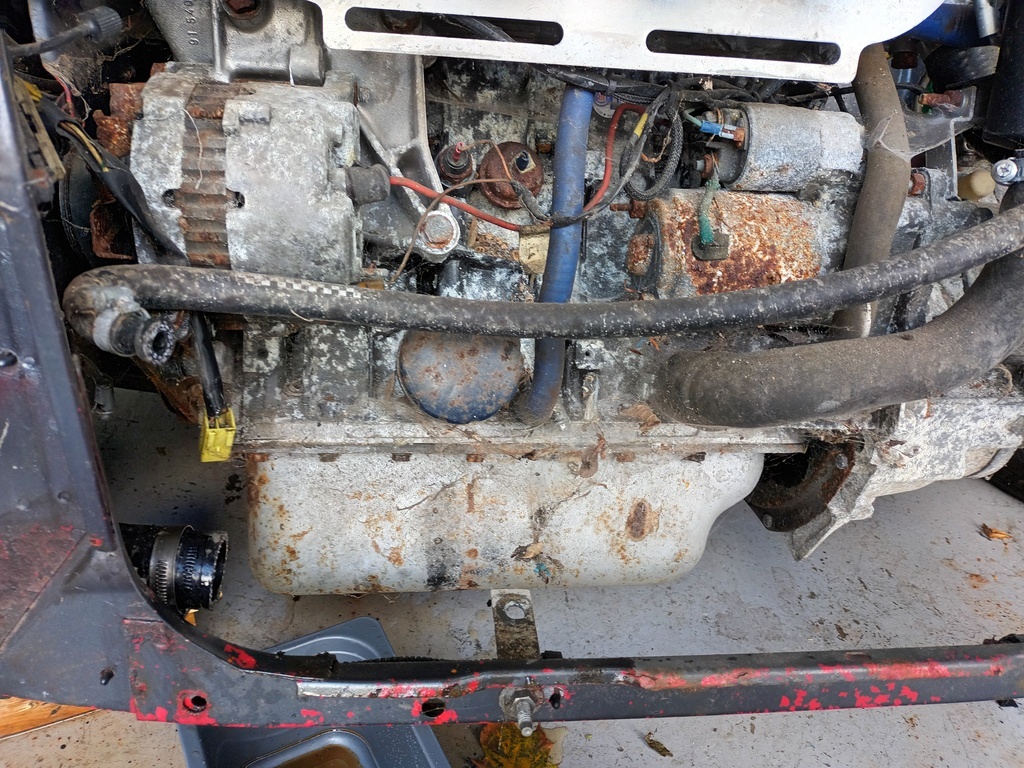 Which means that it's an alloy one. Happy days. This car really does seem to have all the trick bits on it. *and to the left of the trumpets check out the air temp sensor mounted in and shrouded by a 19mm nyloc. Ffs. And crimps, crimps everywhere. |
| |
Last Edit: Oct 6, 2021 14:53:09 GMT by scdan4
|
|
|
|
|
|
|
|
What a journey! Was the engine a surprise?
|
| |
|
|
bstardchild
Club Retro Rides Member
Posts: 14,975
Club RR Member Number: 71
Member is Online
|
|
|
|
|
Oh looking good - just found this thread and I'm in for the journey
|
| |
|
|
|
|
|
|
|
|
If you need an alternator I have a near-unused one from my 8V engine that you can have. I think I also have a starter motor in good nick too.
Drop me a PM if you're interested, they were going to the dump so you can have them for the cost of shipping!
|
| |
|
|
scdan4
Part of things
 
Posts: 39
|
|
|
|
|
Yes please, I'd be a fool to turn that down!
|
| |
|
|
scdan4
Part of things
 
Posts: 39
|
|
|
|
What a journey! Was the engine a surprise? To be honest the engine was about the only known quantity. "Hey Dan, you're looking for a toy, I need cash, fancy an abandoned mi16 205 track car? " was about the totality of the conversation. It's a bit worse condition than I guessed but with more trick bits on it than I hoped for so still feel like I've done well. 😁 |
| |
|
|
scdan4
Part of things
 
Posts: 39
|
|
Oct 24, 2021 18:29:31 GMT
|
Progress has been made. First, put the cage in, support it in the right place, mark up to cut tatty end of tube off nice and level 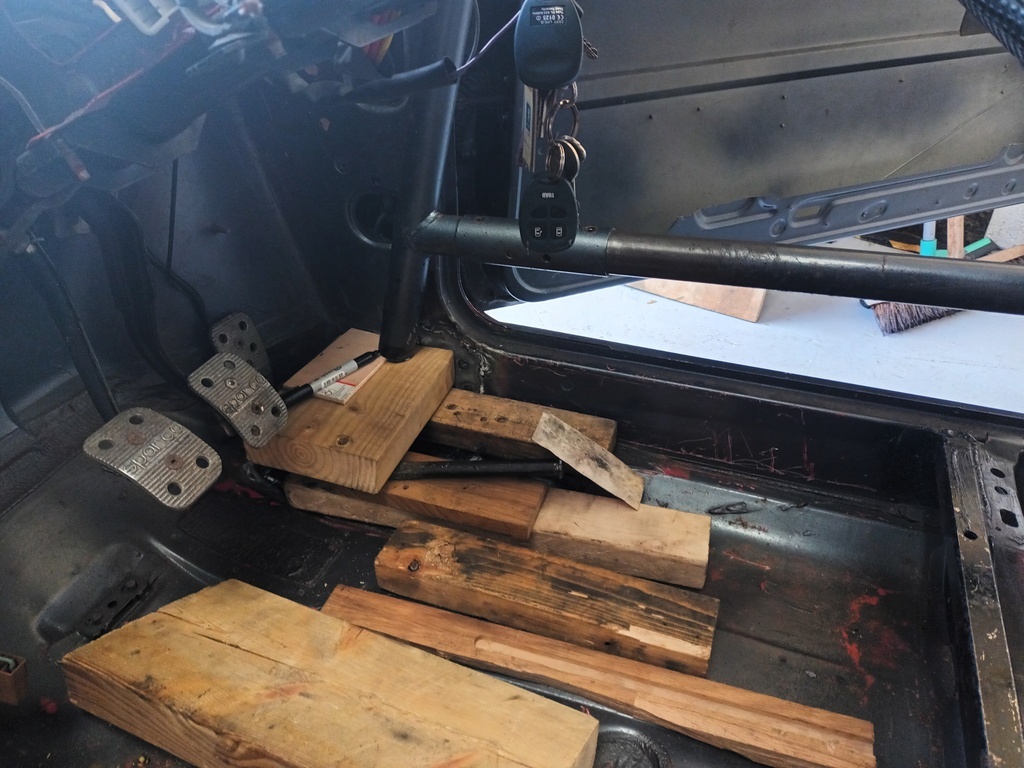 Take the cage out. Cut it off 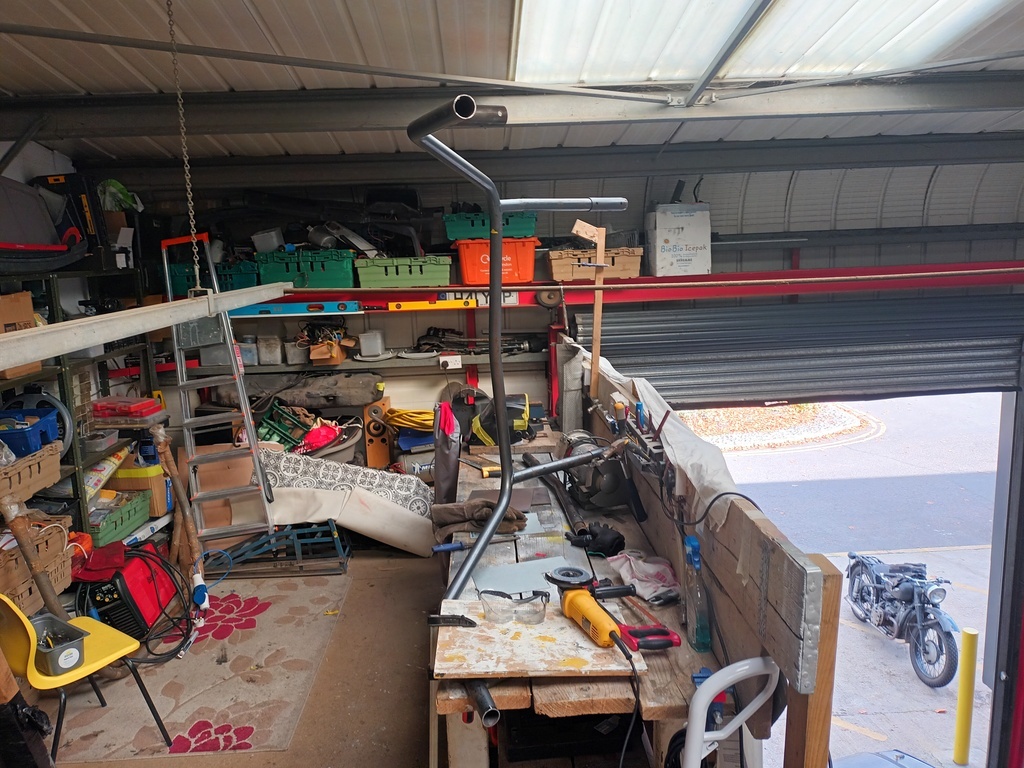 Put the cage back in, make a box out of cardboard 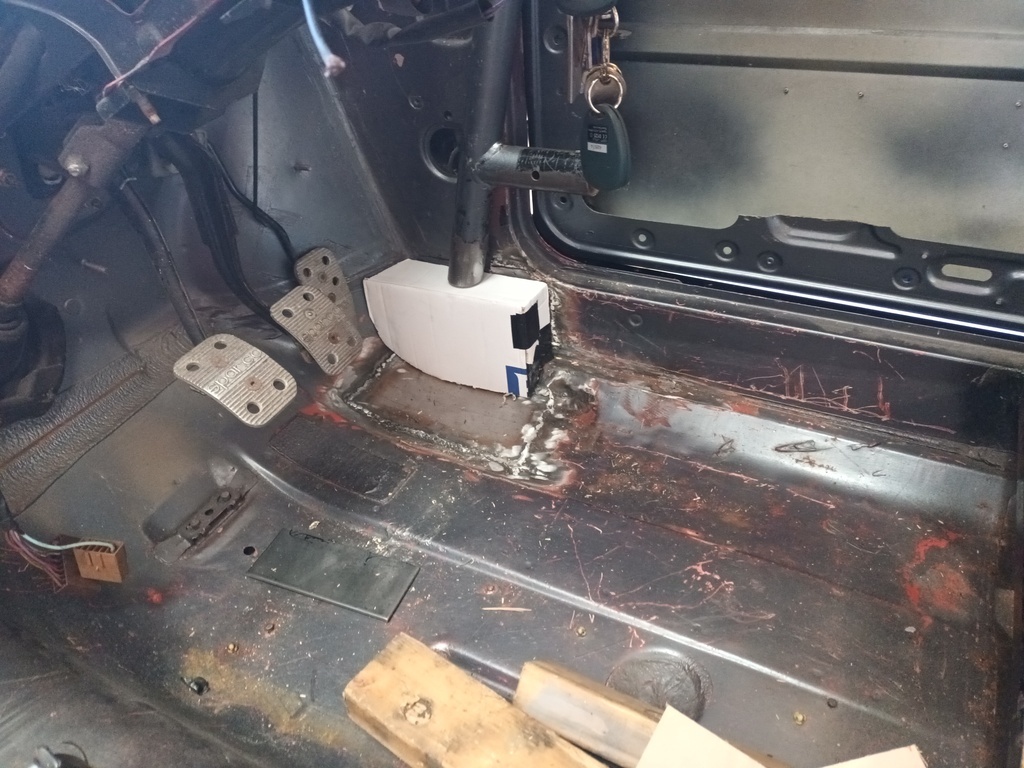 Make a box out of 1.5mm and make a foot made out of 4mm 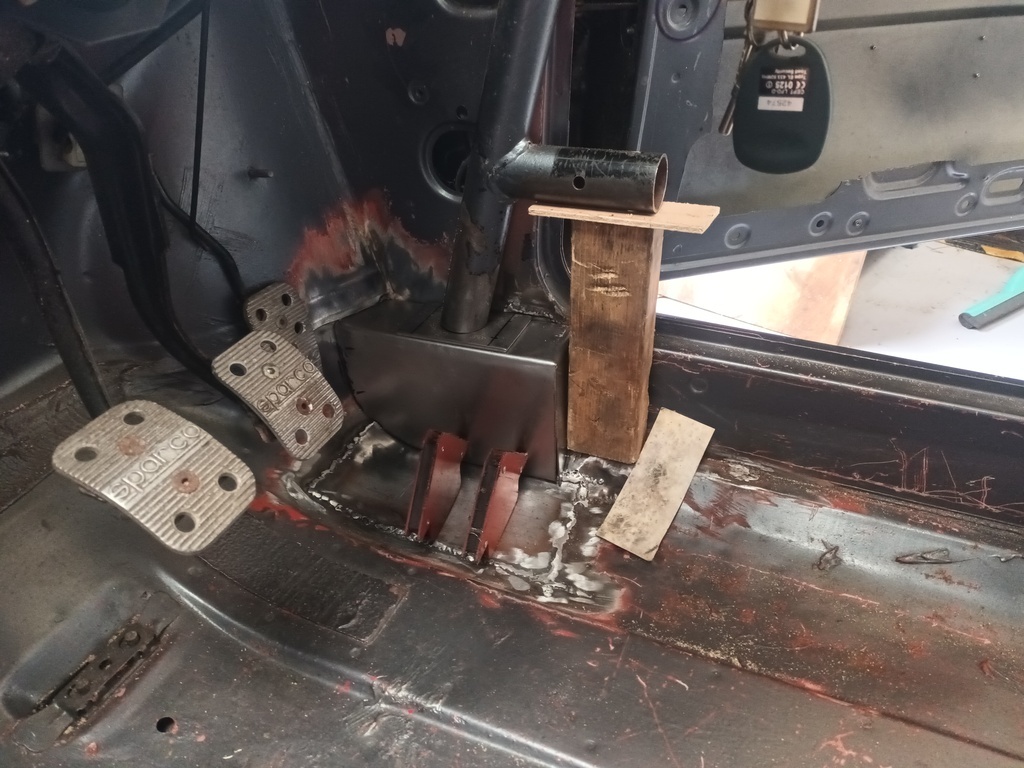 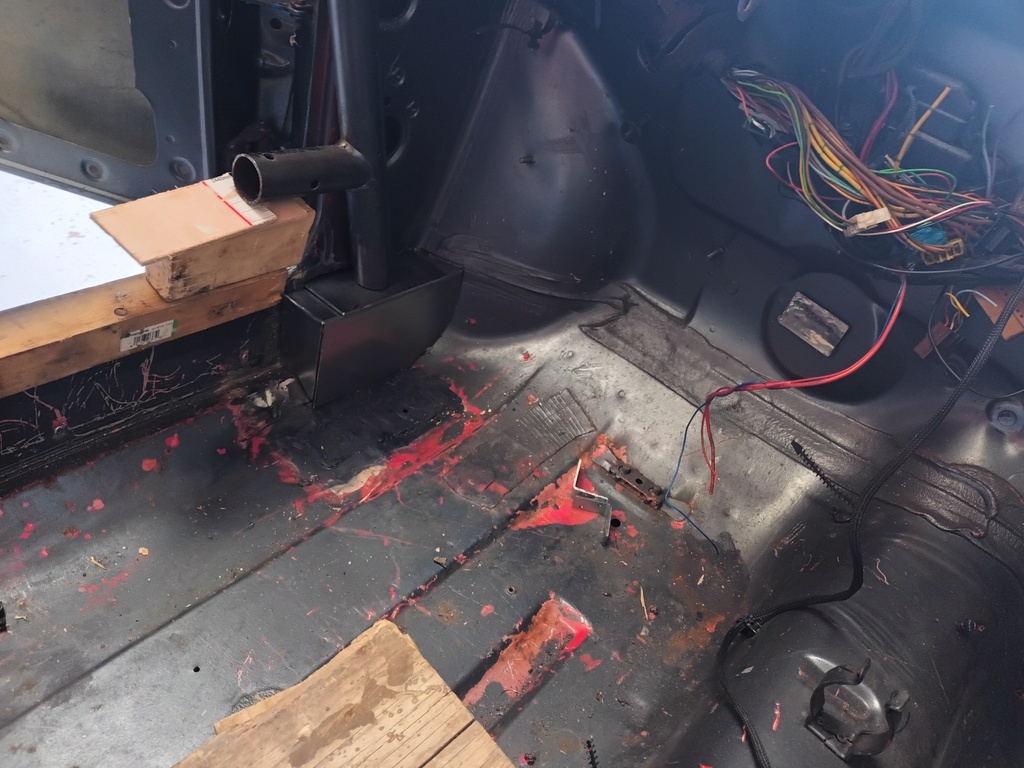 Do that on both sides and mark up for holes 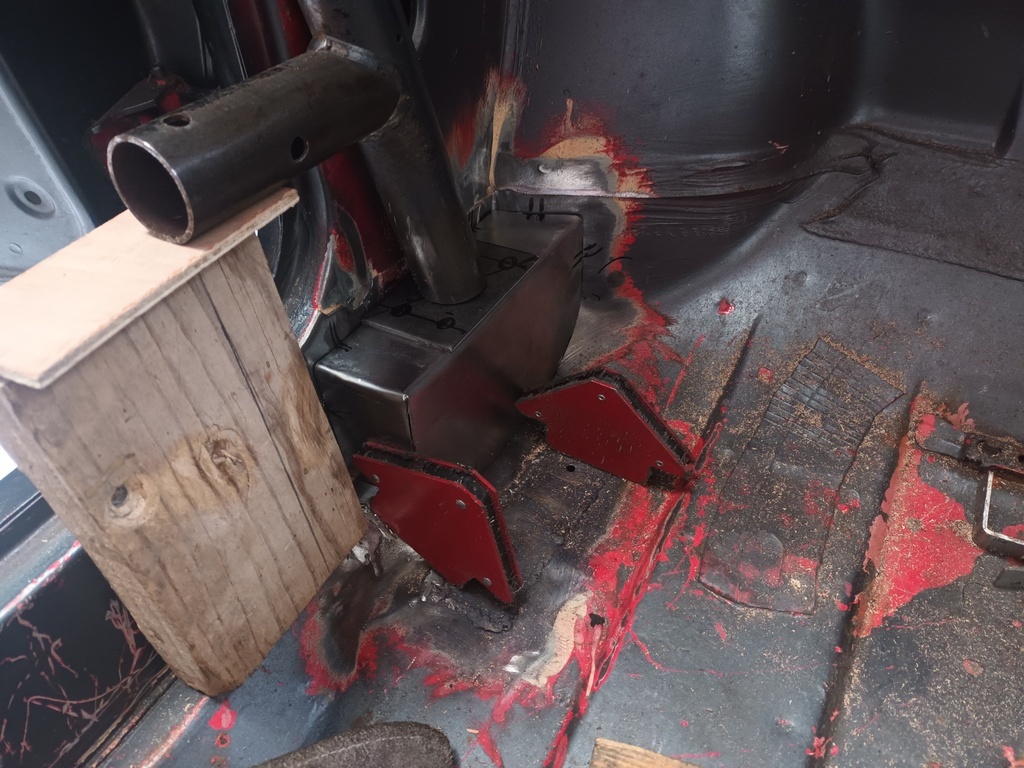 Make a box out of cardboard for the b post 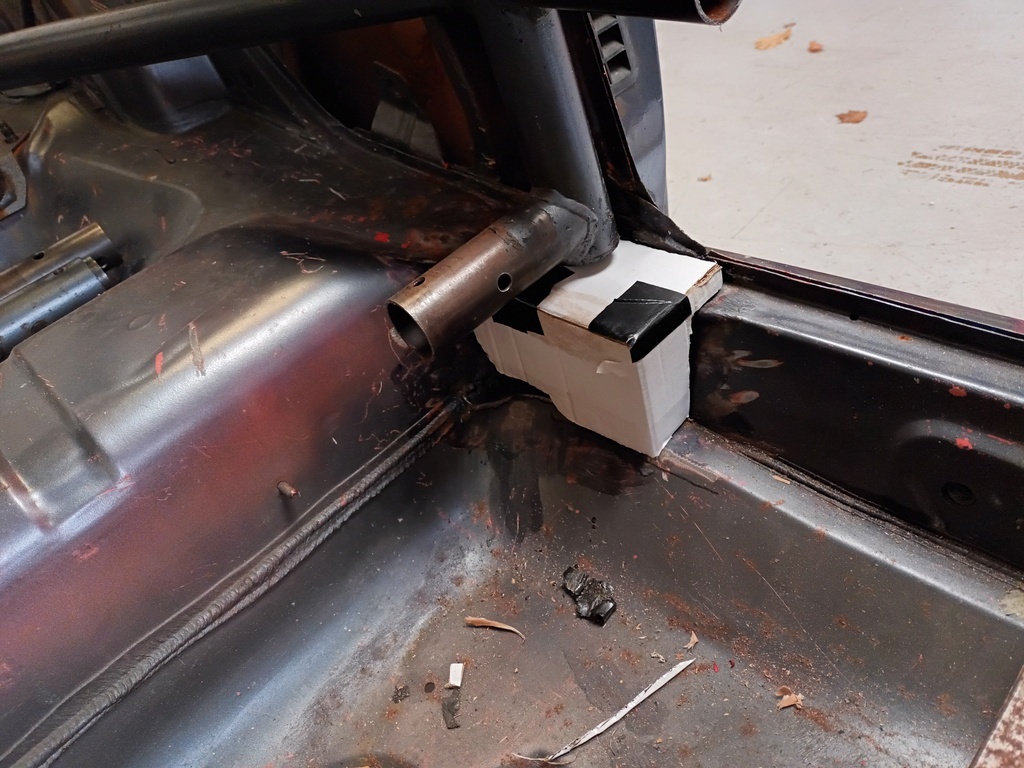 Spot the mistake. I was quite annoyed with myself. They are not perfect isomers, but was measured bespoke and then folded the wrong way, carefully. I did swear a bit. 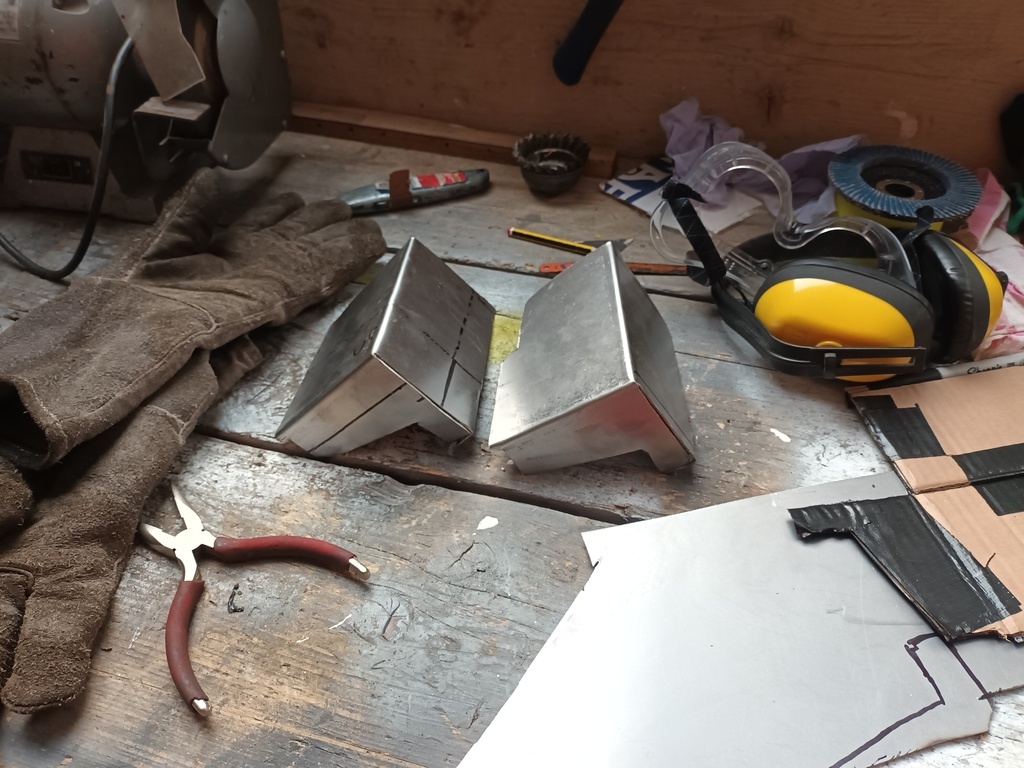 Boxes have 3mm plate inside, 4mm plate outside all clamped and drilled through together 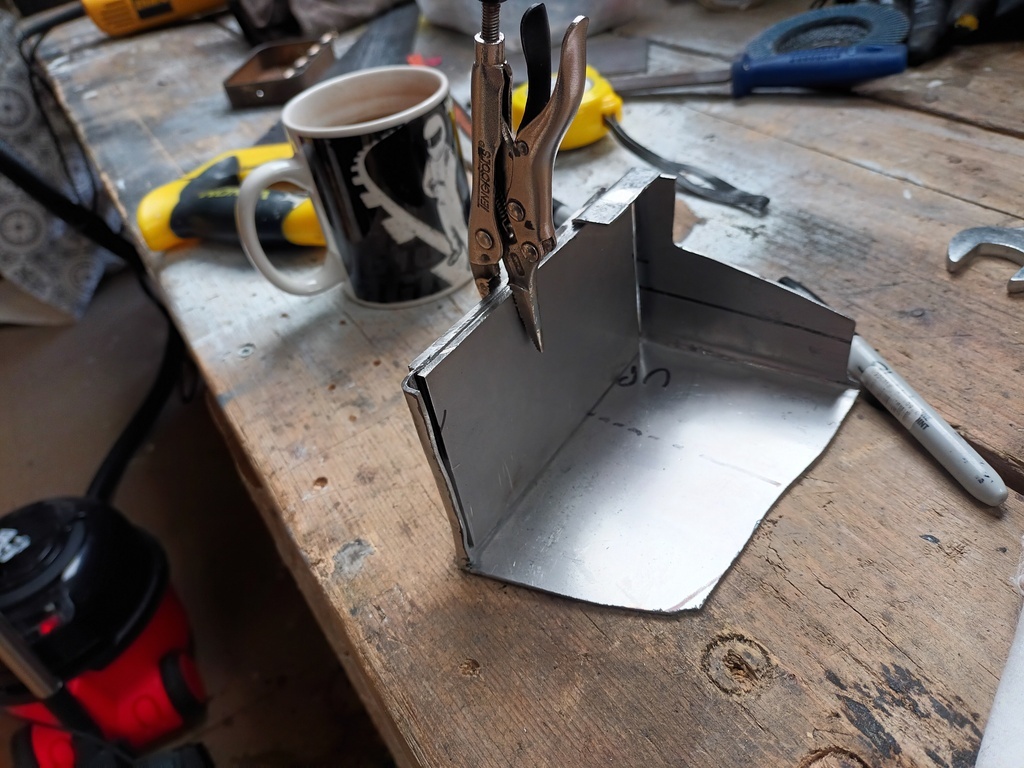 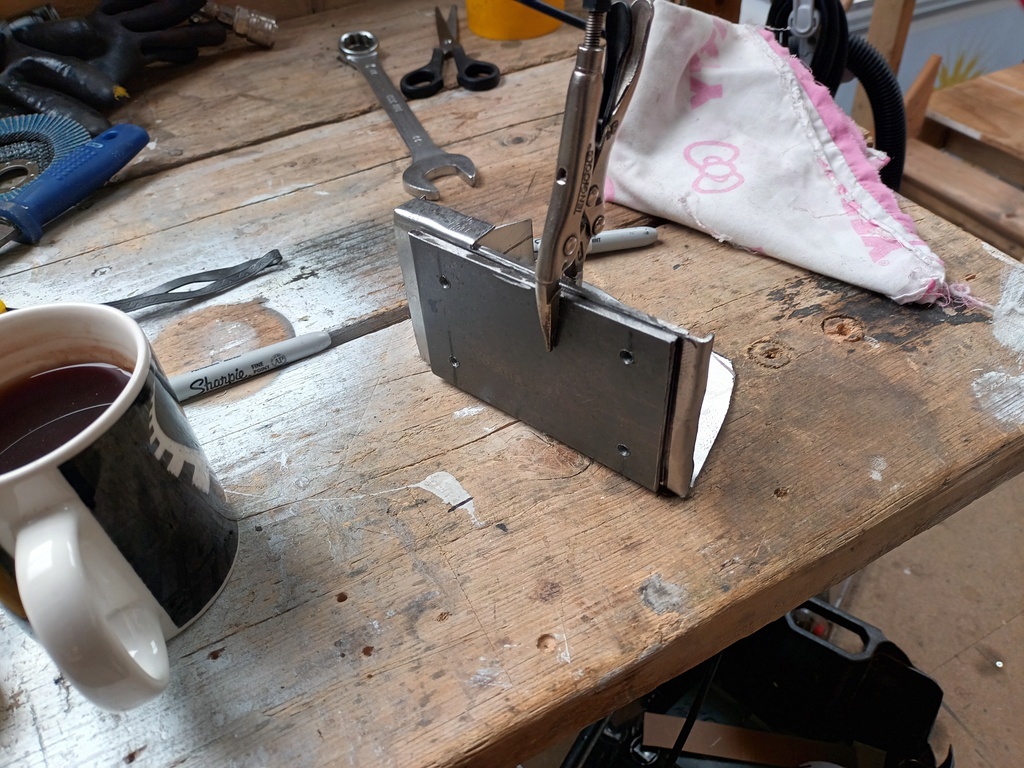 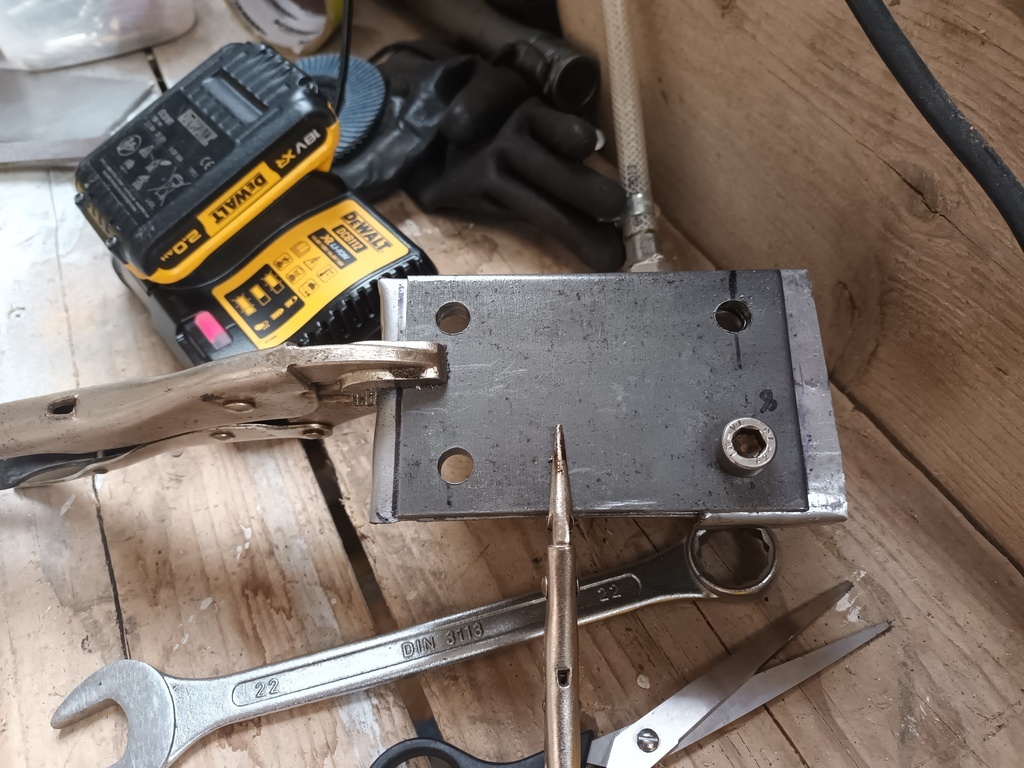 Then captive nuts welded onto the 3mm plate and the 3mm plate welded into place 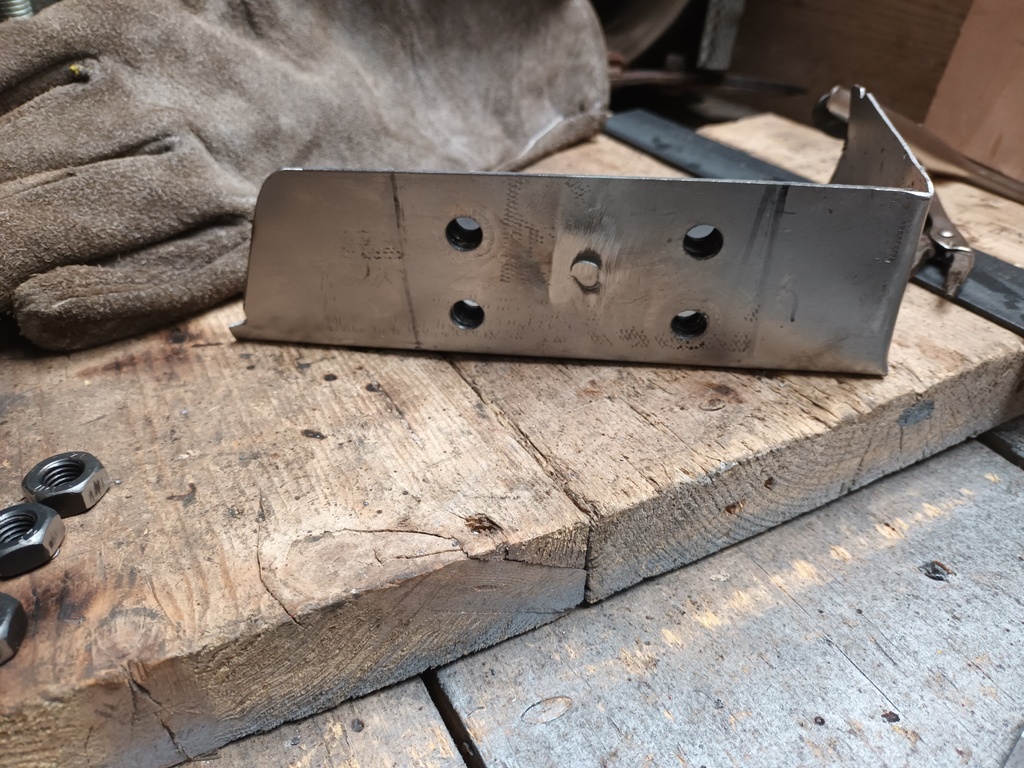 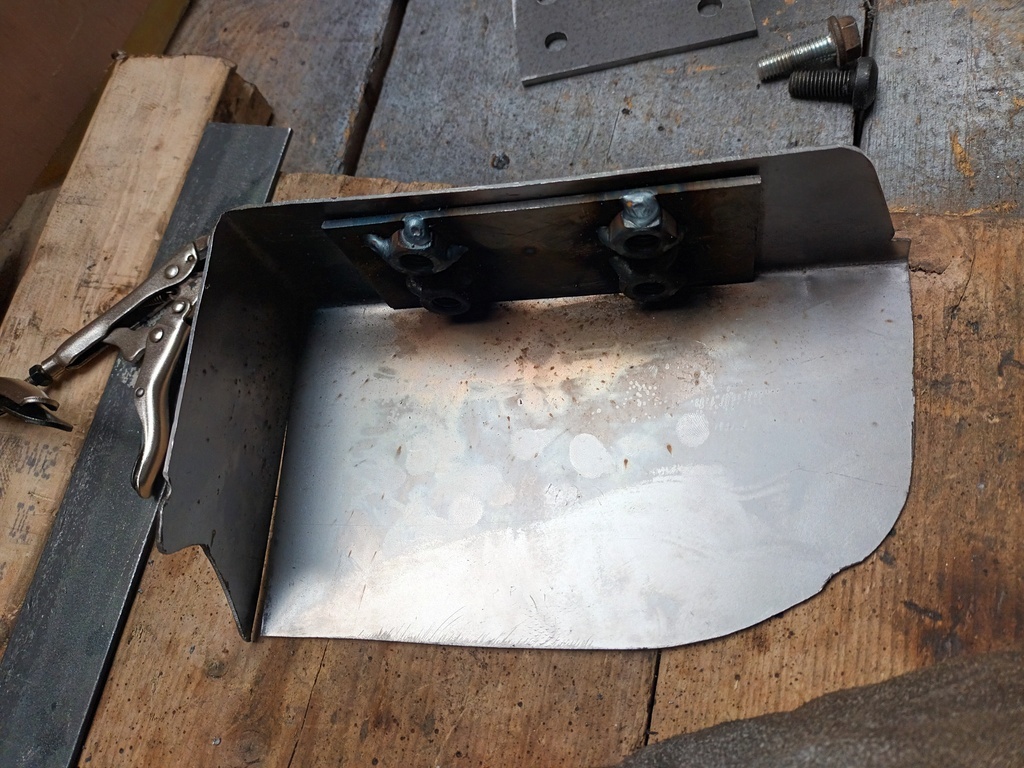 All lines up lovely and ready to tack into the car 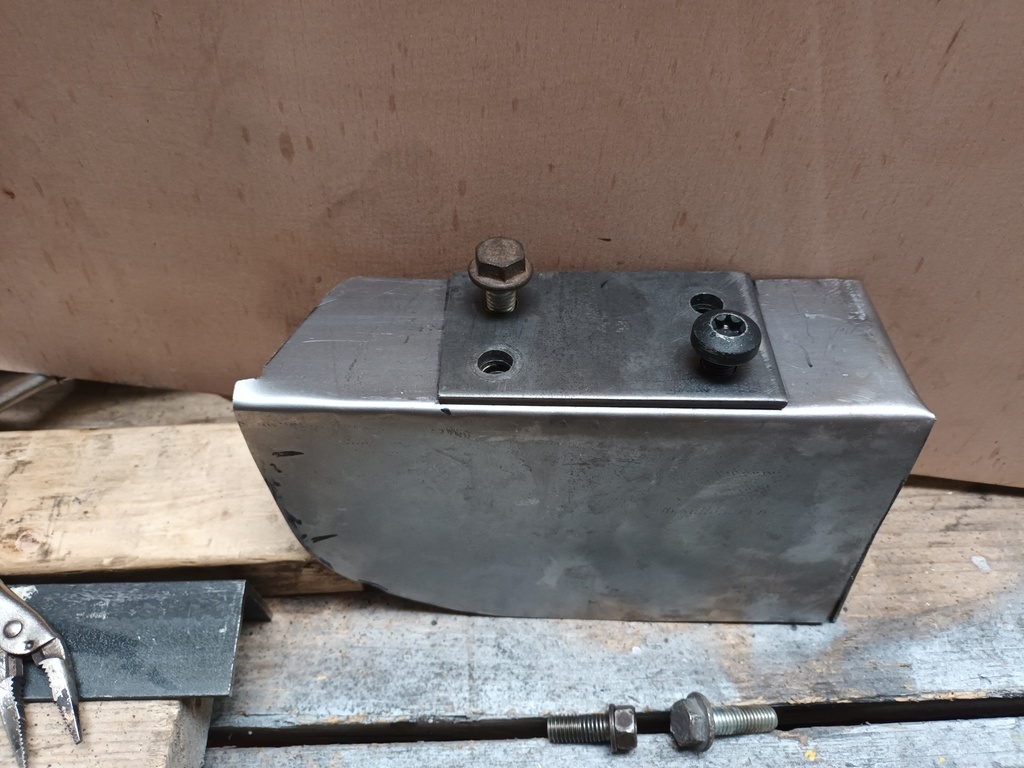 Got straight on with it and welded the b post bits in 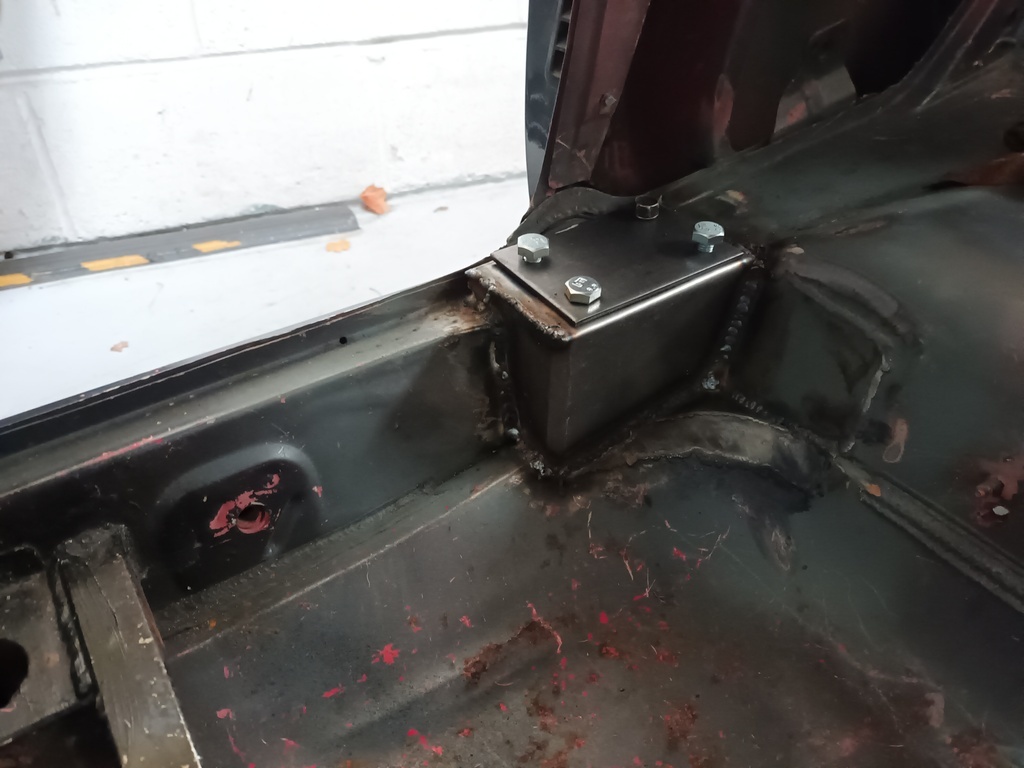 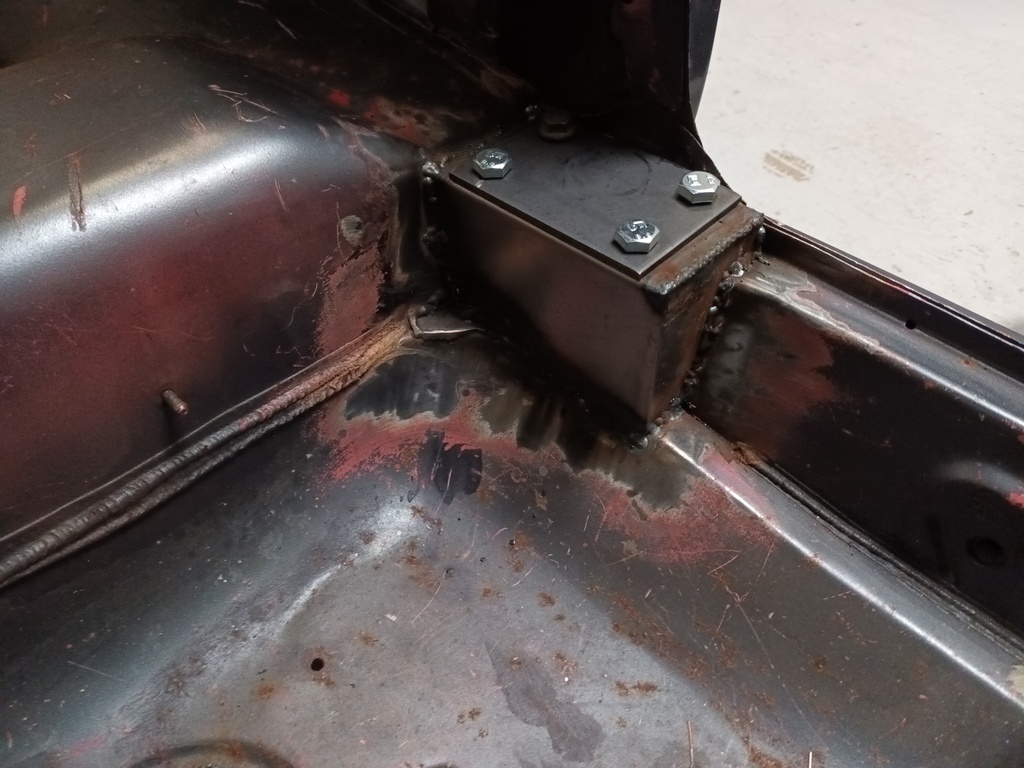 Then put the cage back in 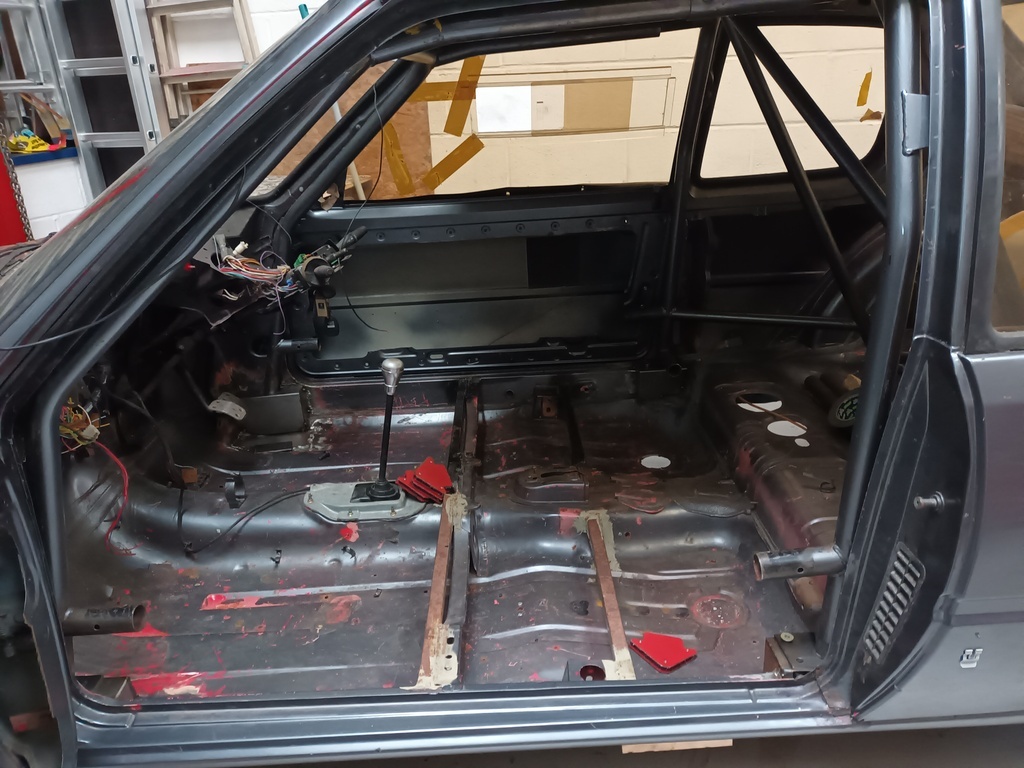 Ah flip thats a bit short. Both sides. 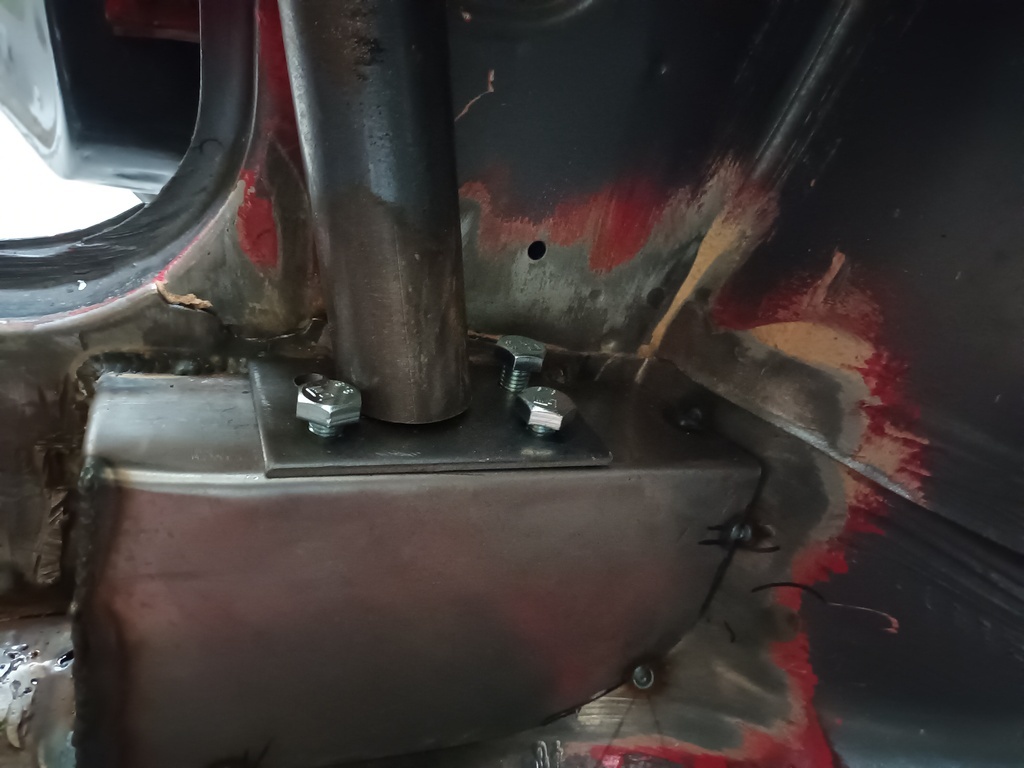 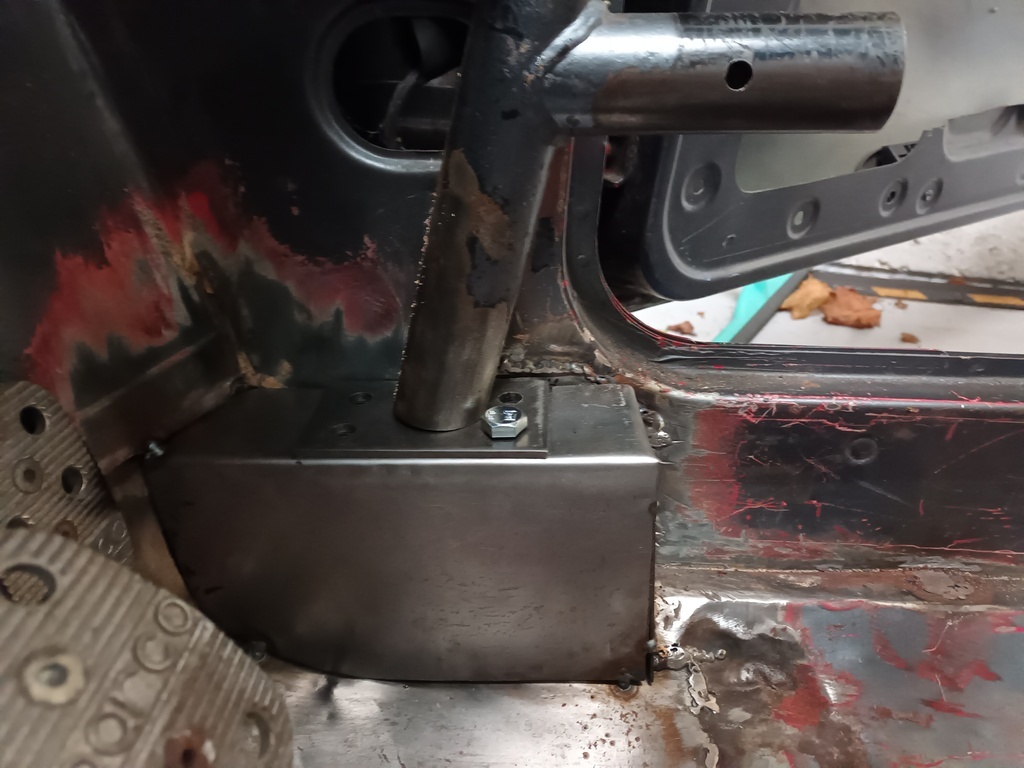 Stretch it out the tiniest touch 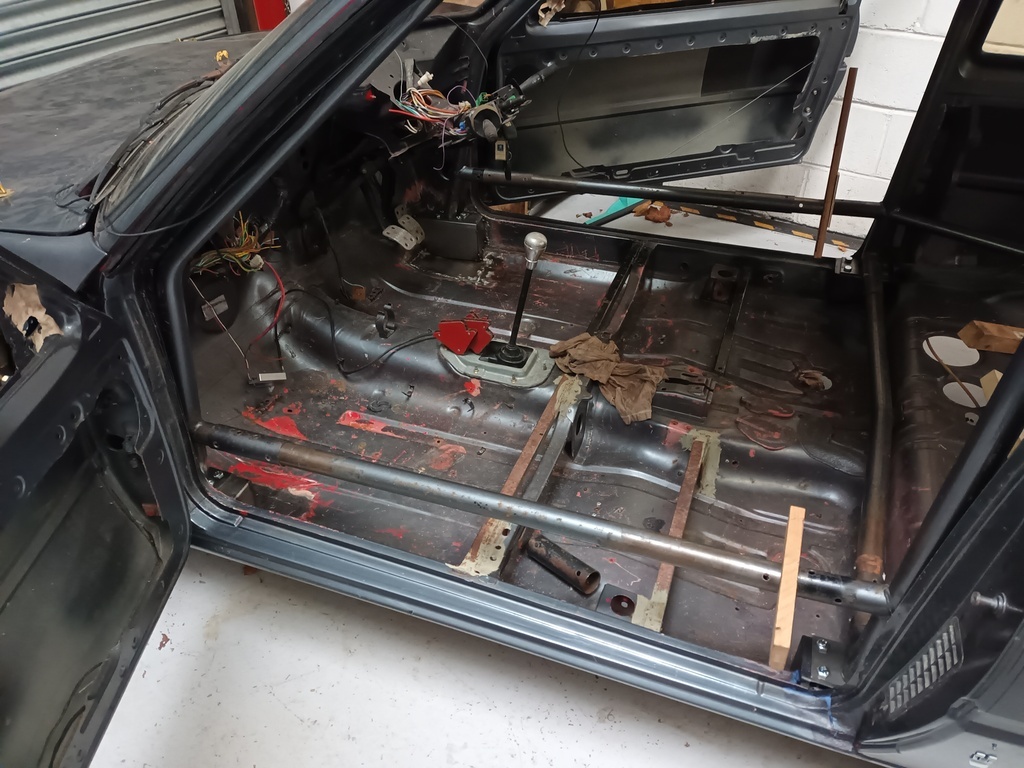 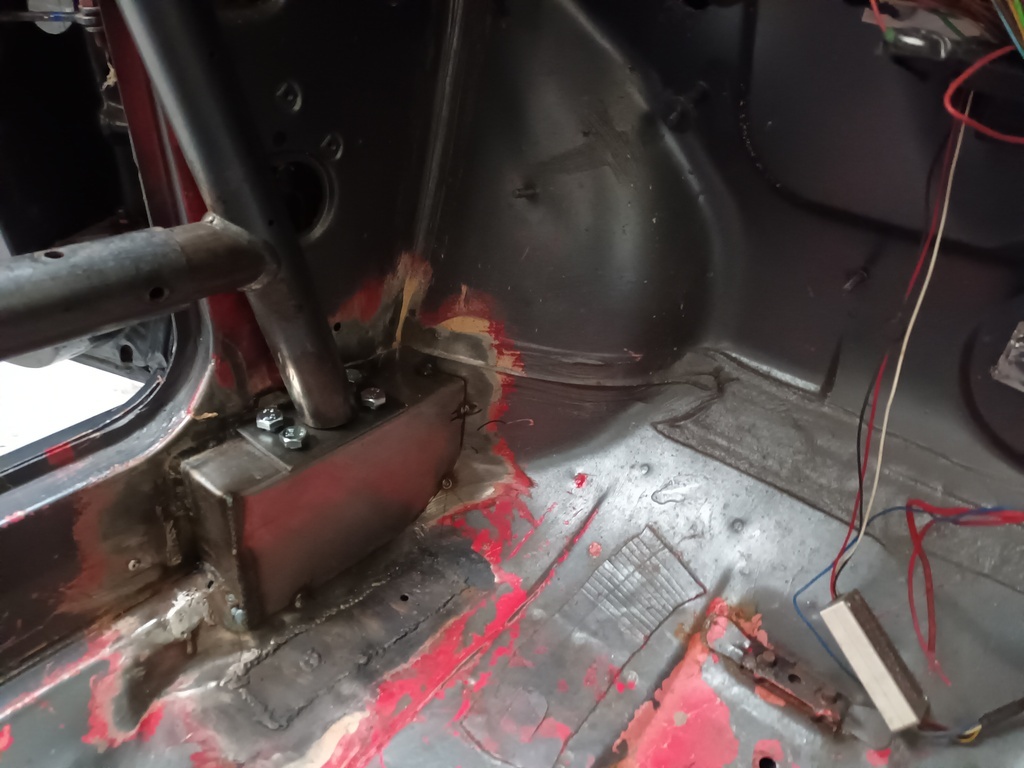 Thats much more like I wanted. Tack the front boxes in and tack the feet onto the cage tube all round 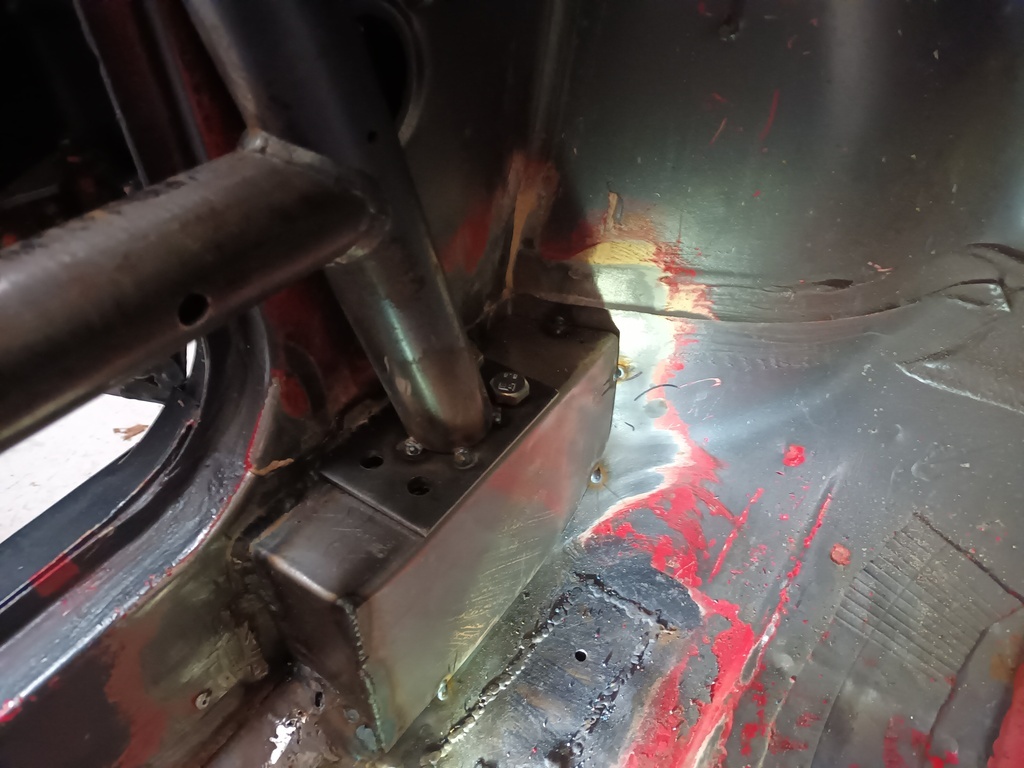 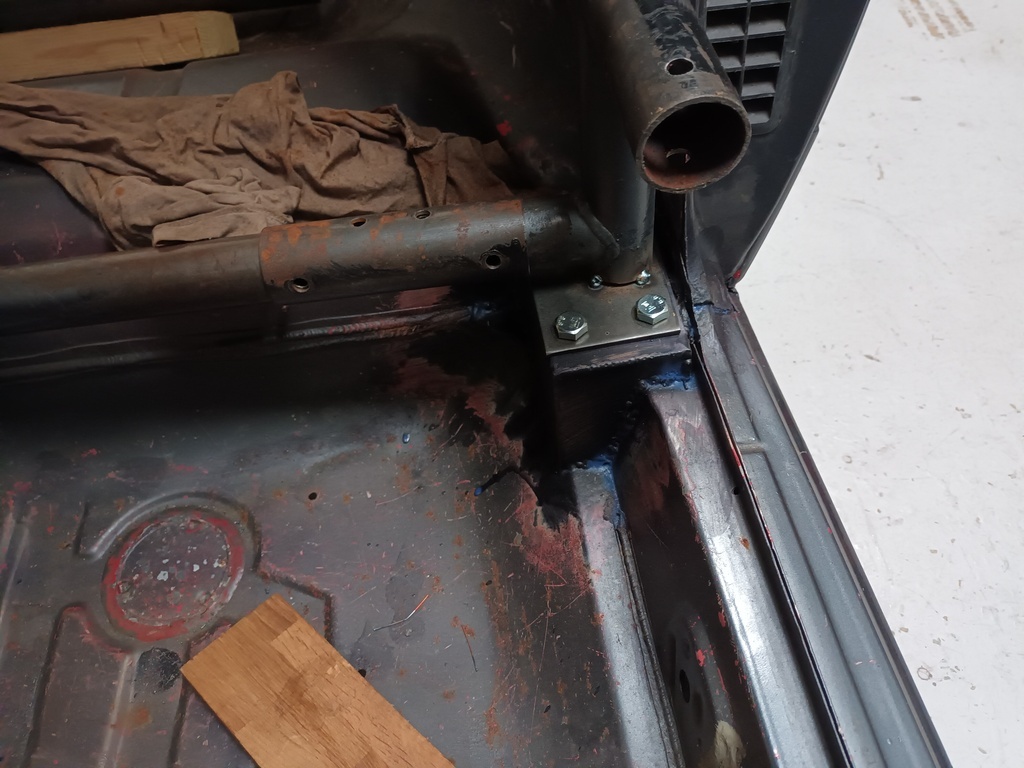 Take the cage out and weld the front boxes in 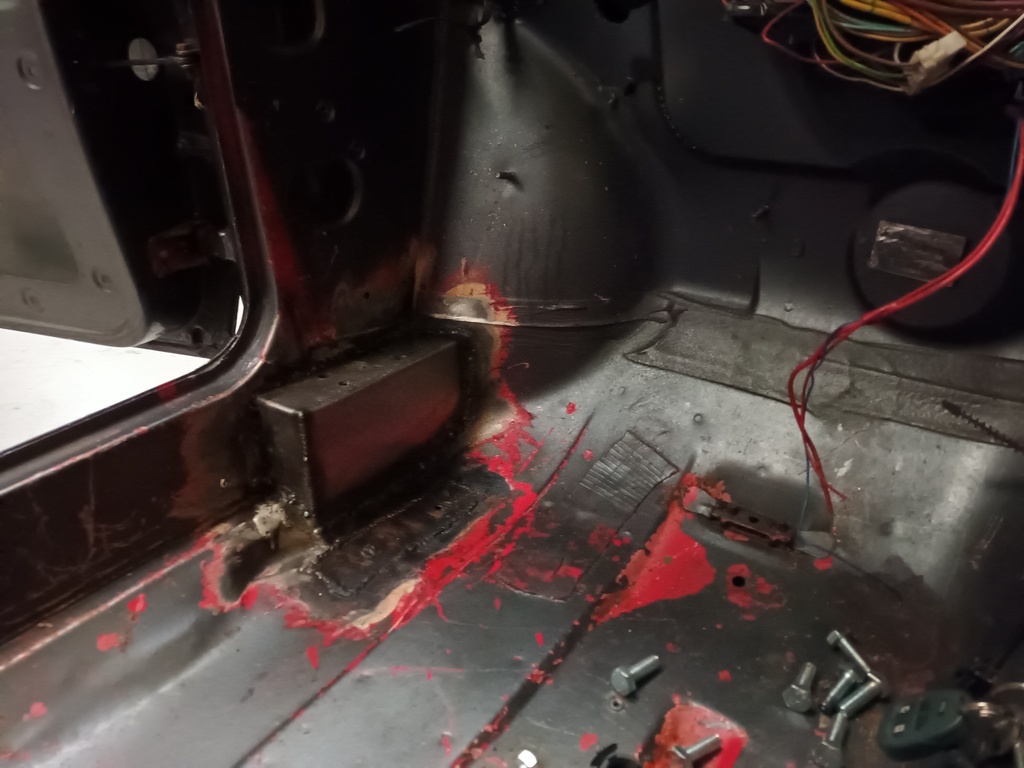 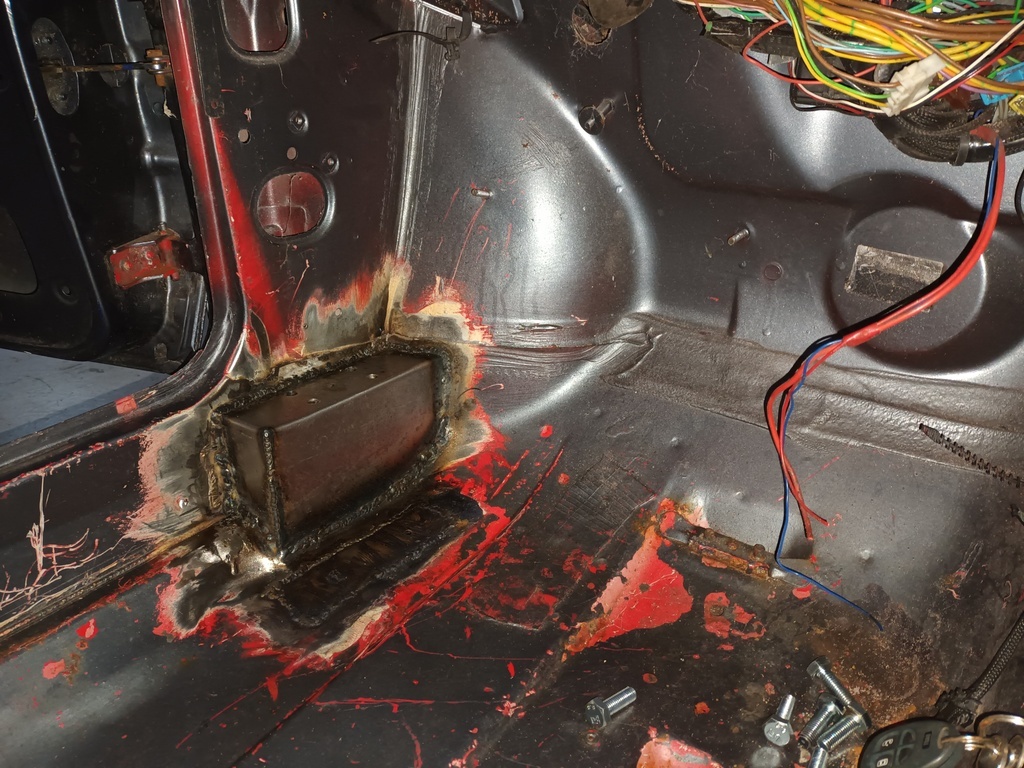 Paint everything in hydrate 80 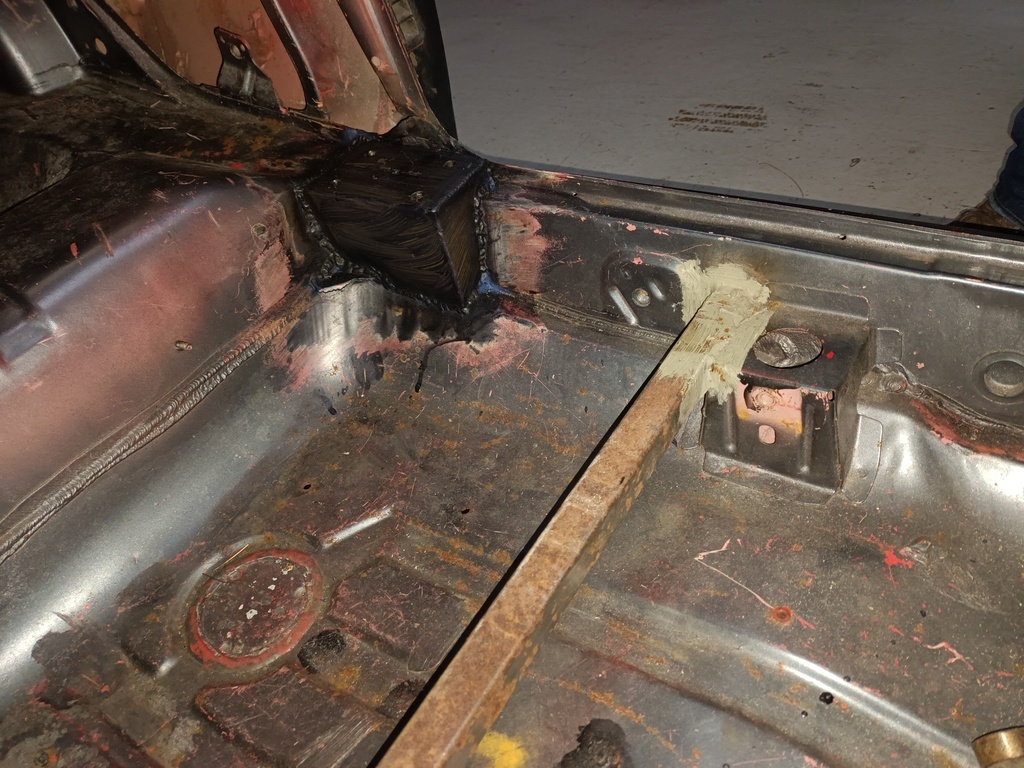 And knock the tacked exactly in the correct place foot off of the roll cage while moving it about. Ffs. 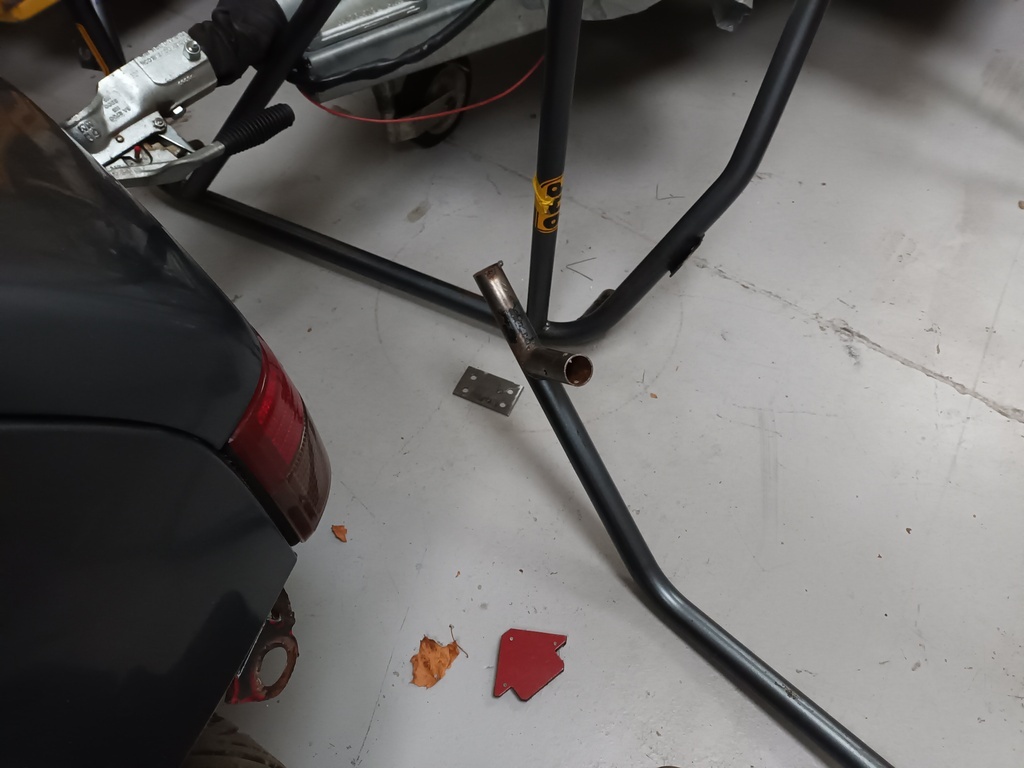 Definite progress. This time next year rodney... |
| |
|
|
bstardchild
Club Retro Rides Member
Posts: 14,975
Club RR Member Number: 71
Member is Online
|
|
Oct 25, 2021 21:07:53 GMT
|
|
Question?
Are you adding in bolt in facility or keeping it? - just wondering why you wouldn't just weld in the cage?
|
| |
|
|
|
|
|
Oct 26, 2021 14:22:56 GMT
|
|
great progress so far, you are doing the 205 proud
|
| |
|
|
|
|


