adam73bgt
Club Retro Rides Member
Posts: 4,998
Club RR Member Number: 58
Member is Online
|
|
Jan 15, 2020 22:40:24 GMT
|
Gutted to see the damage caused by the hit and run but glad you managed to get most of it fixed despite the lack of help. Can you park in a different place in future or are you obliged to use the same stretch. I have no idea how much the coilovers are your considering but might be worth giving GAZ a call they did mine from a drawing but you could send them one of your originals for a plan, they can make them with spring seat adjustment to any basic or adjustable spec you want, its a similar set up to an 800. 2.25" springs can be bought pretty cheaply too. It's the parking space directly outside my house so I end up there most of the time, the road I live on is used as a cut through for a lot of people so can get a fair bit of traffic. I do have a gated driveway but being next to a junction, its a bit of a faff getting the car in and out. I'm just thankful that in the 3 odd years I've been living here, those have been the only two hits *touch wood* ! Weirdly coincidentally, I was stepping out of my house the other day when the bus was going past at the same time, with the bus driver who actually saw the hit and run happen. He stopped and described what happened, he was stopped as there is a bend and he couldn't get through, the offending car decided to try and get past the bus but got stuck also, they then scraped along my car as they reversed back and shot off down the side road. Coilover wise, looking at £230 for cheapy chinese Accord ones, £420 for base level Teins for Accords, or £1085 for KA7/8 Legend specific K Sports... The problem is that the car doesn't really "need" them at all, so I'm struggling to justify the kind of outlay. If I'd researched it better in the first place I probably would have gone straight for the Chinese coilovers and just seen how it went. I might still do that, I can always revert to the standard struts with the H&R springs if its terrible. Though somewhat ironically, while picking up some parts for my MGB the other night, I ended up going down some very rough single track roads with some semi-flooded sections so maybe a good thing I didn't have the car super low after all  |
| |
|
|
|
|
|
|
|
Jan 16, 2020 22:52:43 GMT
|
|
I wander if my suspension would work on your car. Though mines a different model (accord coupe)it's technically two years older so it's possible they share design. I can take some measurements if you want?
|
| |
1972 viva 'Sparky'
|
|
820
South East
Posts: 793
|
|
Jan 17, 2020 16:07:54 GMT
|
|
Haha yes I have been tempted to modify my daily too but resisted because of the wibblepoo roads and speed humps.
You know the cheap Chinese stuff will either not fit, knock or soon fail but at those prices I am sure we have all been lured in.
|
| |
|
|
adam73bgt
Club Retro Rides Member
Posts: 4,998
Club RR Member Number: 58
Member is Online
|
|
Feb 16, 2020 11:13:50 GMT
|
Ebejeebies sorry I totally forgot to respond on this! Given the amount of variants of Euro and US Accord, something likely could be made to work, though I've parked plans for any further lowering on this just for the moment 820 I think you're right, I'll be giving the Chinese coilovers a miss for now  Not too much happening on the Legend, poor weather and a bit of a lack of motivation seeing to that. I did have to change one of the front wheels as it had got a slow puncture, put on the full size spare from the boot to find that its a 26 year old original Dunlop SP 2000  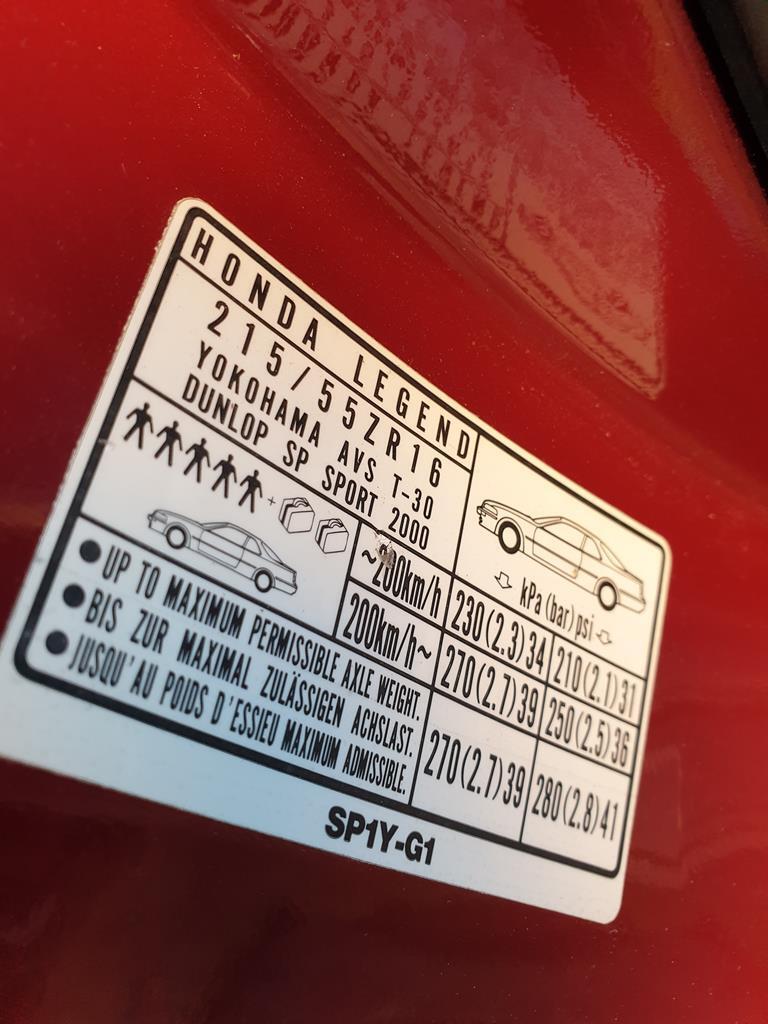 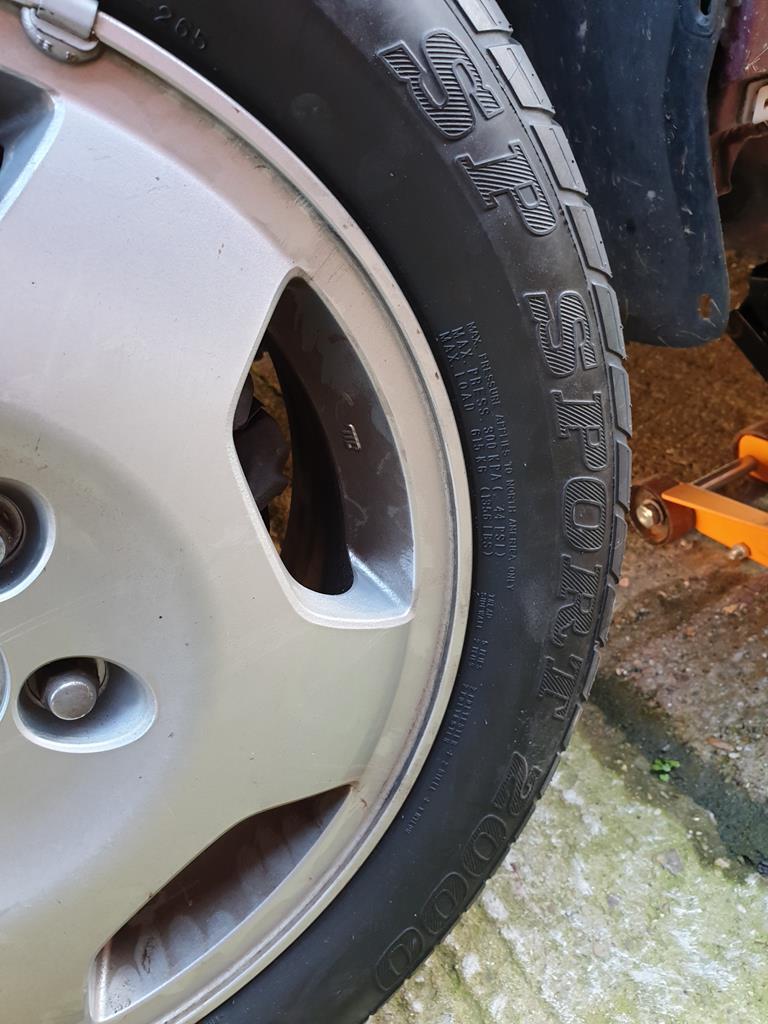 It's actually not doing too badly, if it can hold up until the salt is all out of the way and I can refit my nice wheels, so much the better. Speaking of which, finally rebuilt one of the new 9.5j rear wheels for the car the other day 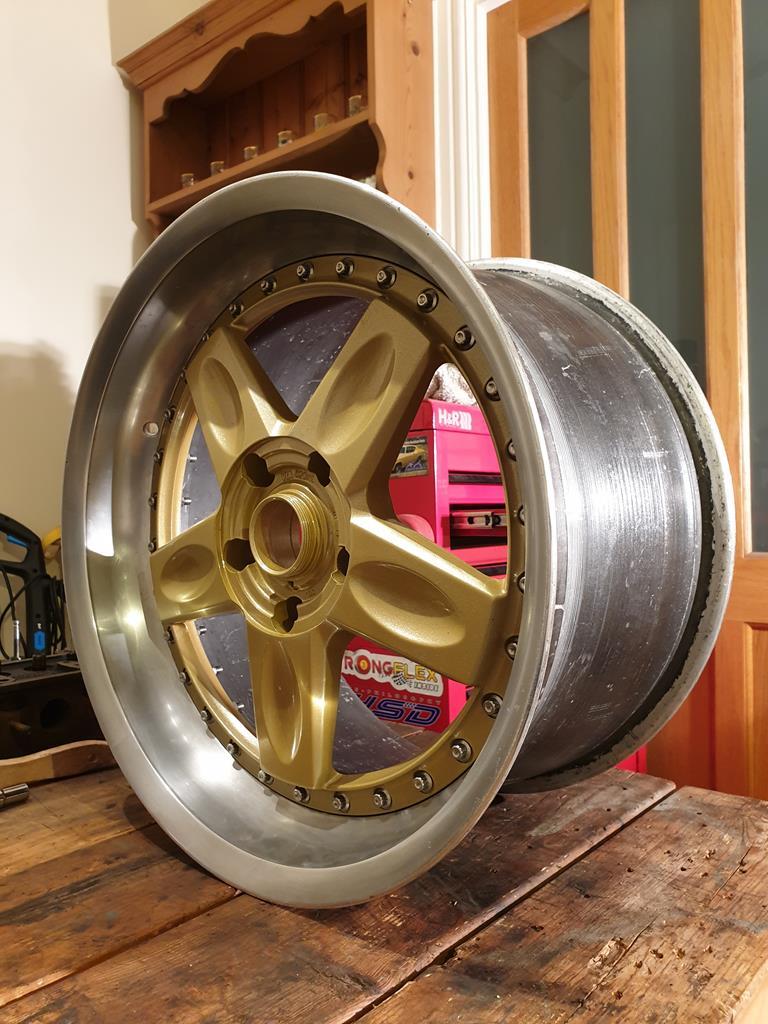 Looks great with the dish, just wants the lip polishing up again. Biggest expenditure I've made on the car for a while though, was a recent order on RockAuto for a couple of service items (fuel and oil filter) and a load of suspension arms to replace some of the very very tired bushings on the car 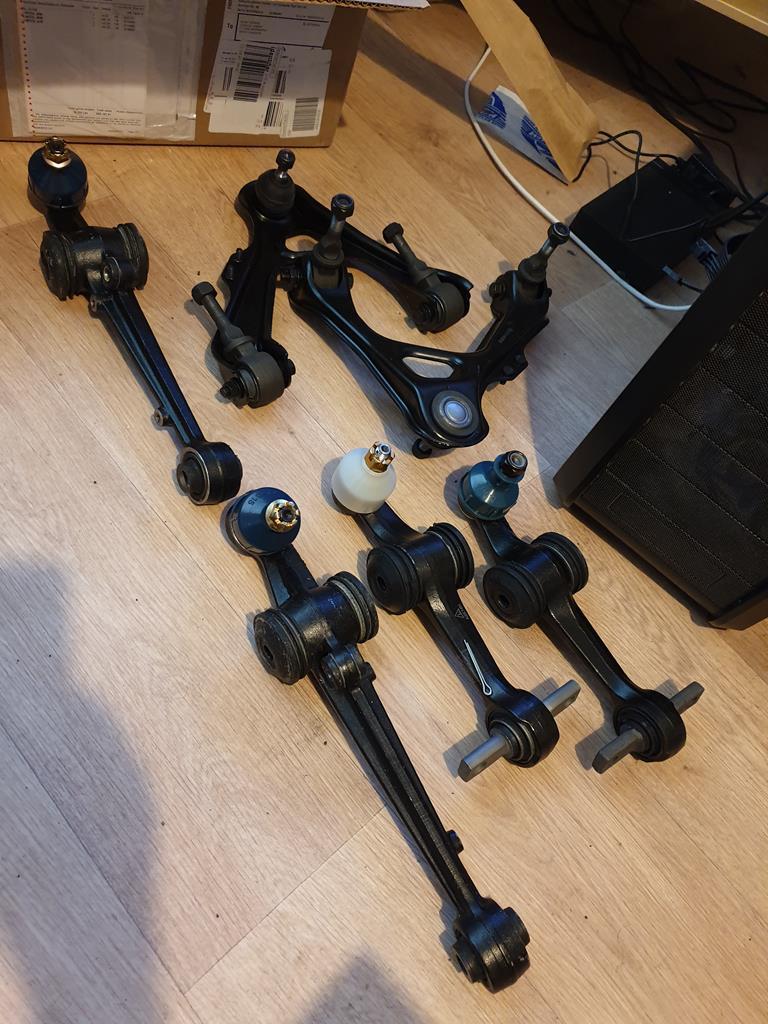 Got bottom and top arms for the rear and top arms for the front. Bit of a mix of brands but they all seem well made. Curiously, one of the cheaper Beck Arnley arms I got, turned out to be Lemforder branded on the bag inside the box! 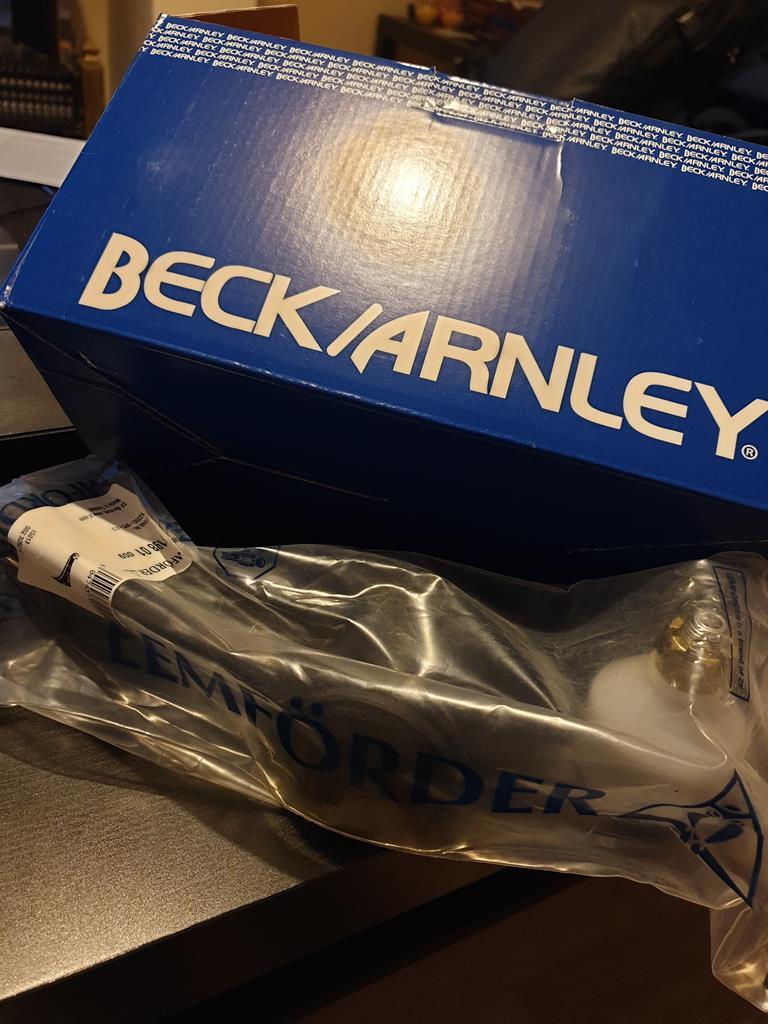 All I need is a semi-dry weekend and I can treat the car to a bit of attention 
|
| |
|
|
adam73bgt
Club Retro Rides Member
Posts: 4,998
Club RR Member Number: 58
Member is Online
|
|
|
|
Well things have changed just a bit since my last update! Working from home has meant I've got plenty of Legend off the road time to get on with some of the above jobs, and the weather is even playing ball as well  The first job I started on was sorting out the ABS light which has plagued the car ever since I bought it. I did a "code read" way back when which indicated that the ABS pump itself was at fault, so I bought a second hand unit which has sat doing nothing for about a year now... I got it out and got it a bit more ready to fit in the car 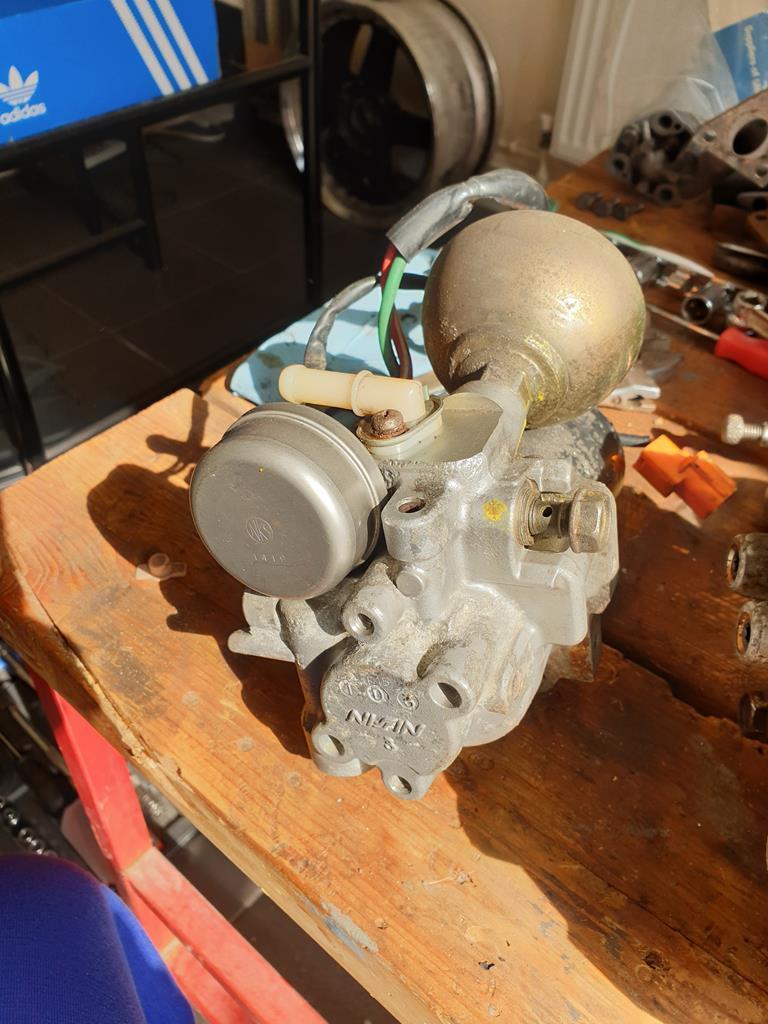 Now being an early-ish ABS system, the Legend has a separate pump and modulator, the modulator sits above the pump right up in the top corner of the engine bay near the scuttle panel. I had quite a bit of a fight getting the eletrical connectors all apart as I suspect 26 odd years of engine bay heat had got them pretty much welded together, but I got there eventually. Next, the manual suggests to relieve any pressure from the modulator using a special Honda service tool and the bleeder screw on the modulator. The tool is long since NLA.. Looking at the spare modulator I have on the bench, you can see that Honda chose to use a bleed screw with a square rather than a hex shape? 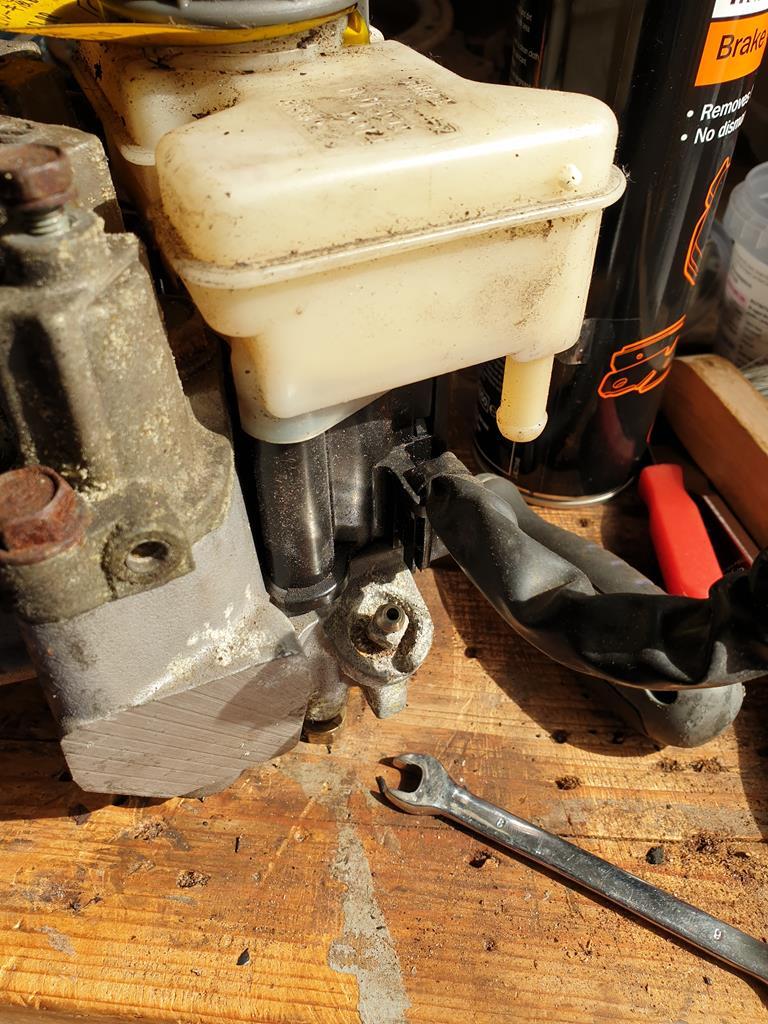 I can get it undone using an open ended 8mm spanner, but with the modulator in place on the car, there is no way to do this as the spanner hits the suspension turret.. So not quite sure what to do there! If I can get a socket with an 8mm square end, then I could crack the bleed screw off, then put a tube on and use a spanner or mole grips to open it fully perhaps While I consider my options there, I decided to get on with the rear suspension, more specifically the upper control arm 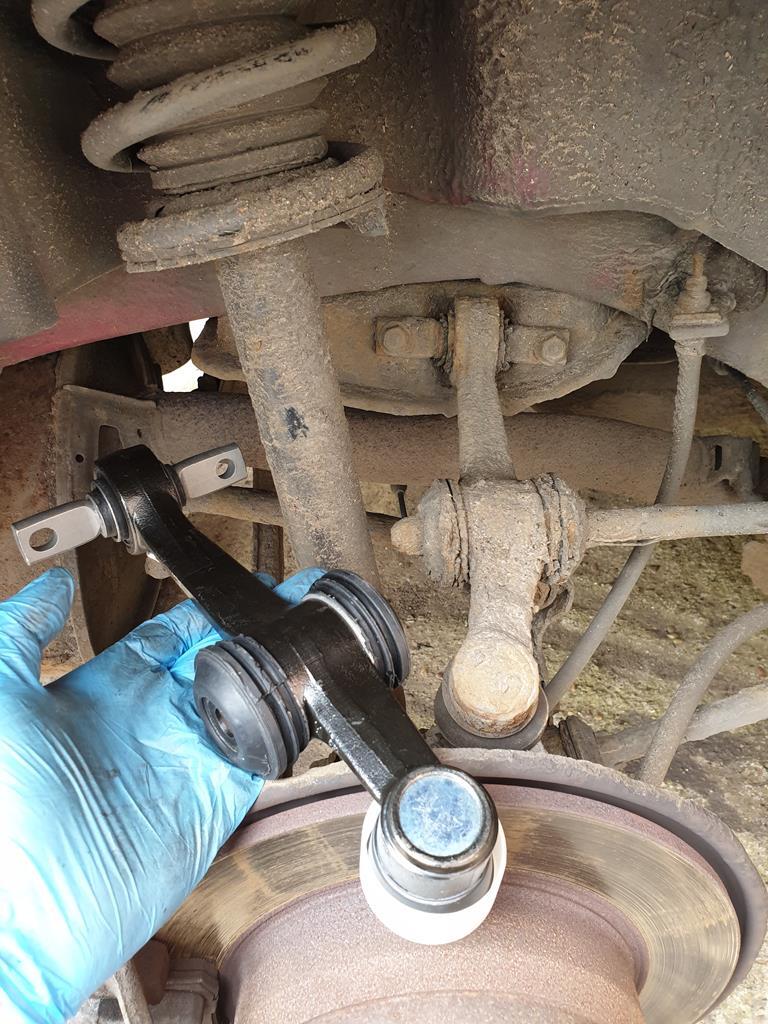 Old one was still very crusty. To remove, first I had to undo and remove the bottom bolt for the suspension strut so I could move it out of the way a bit. Then it was a case of removing the very rusted split pin at the ball joint end (I butchered it out with a selection of chisels and punches  and loosening off that nut. I then was amazed that the bolt on the end of the radius arm came off with a mix of breaker bar and impact gun, I then used a ball joint splitter to get the ball joint out of the knuckle, and undid the two bolts that hold the arm to the subframe and the whole thing came off. 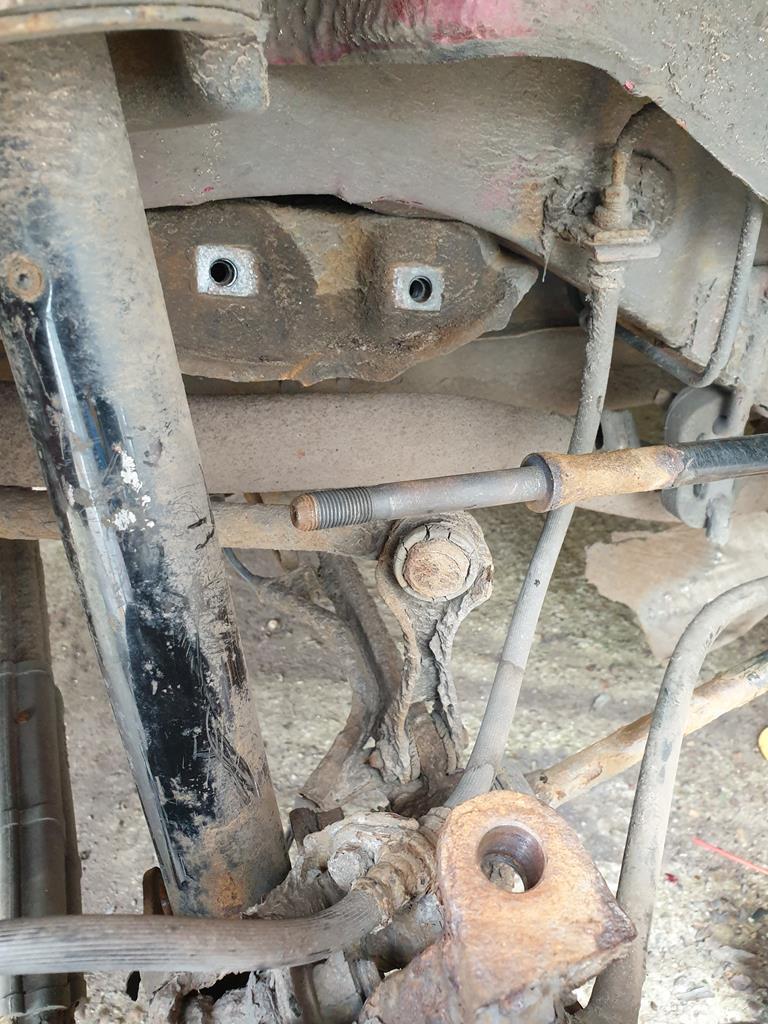 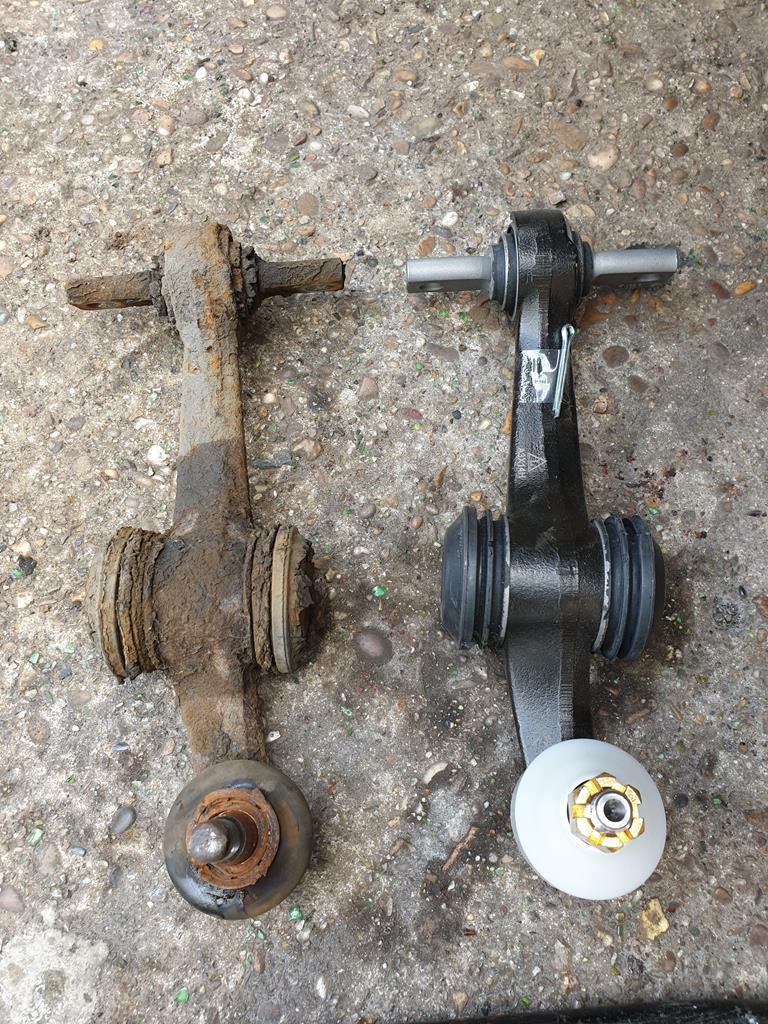 I haven't put the new one on just yet as I got distracted poking at the rust again.. 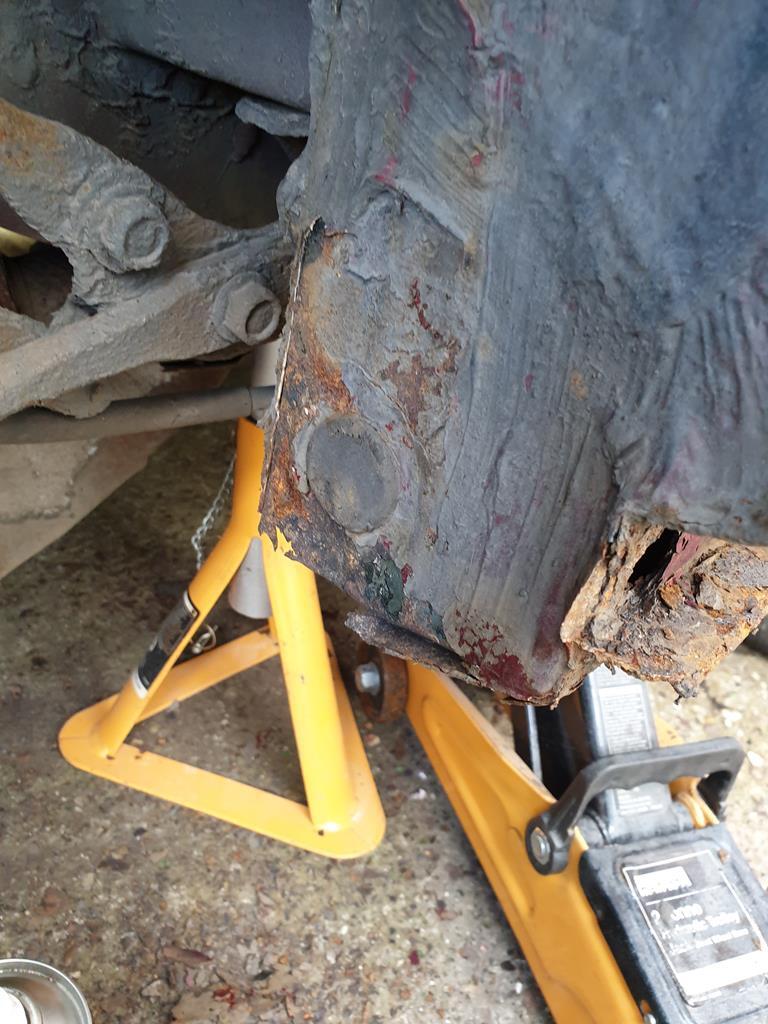 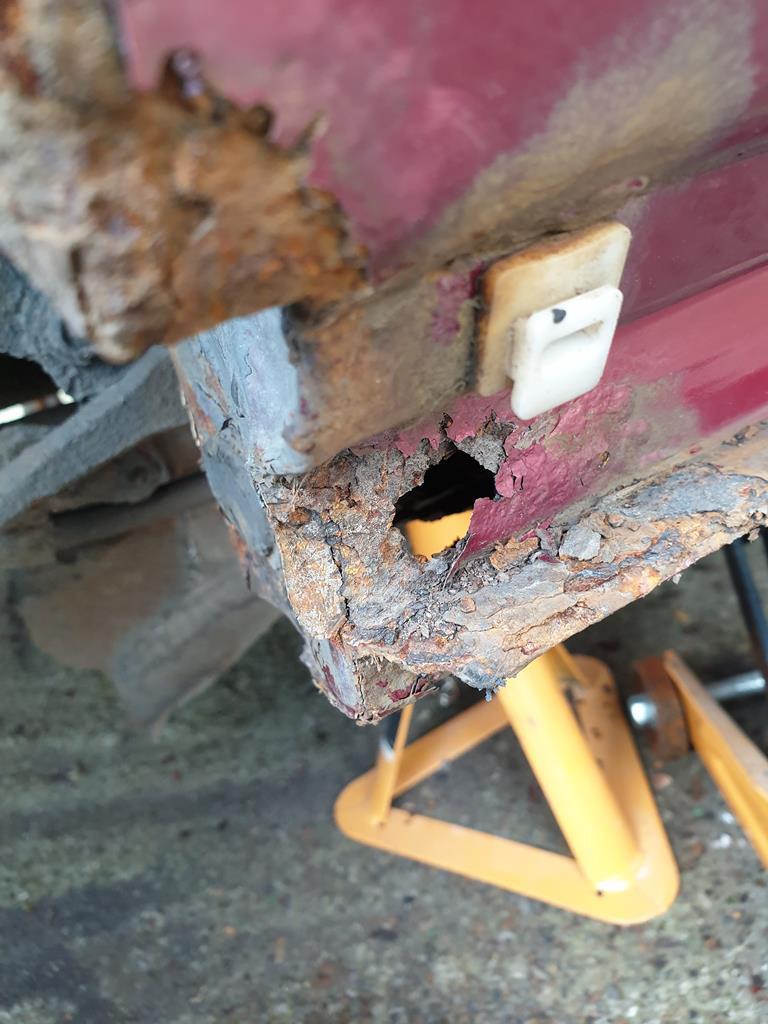 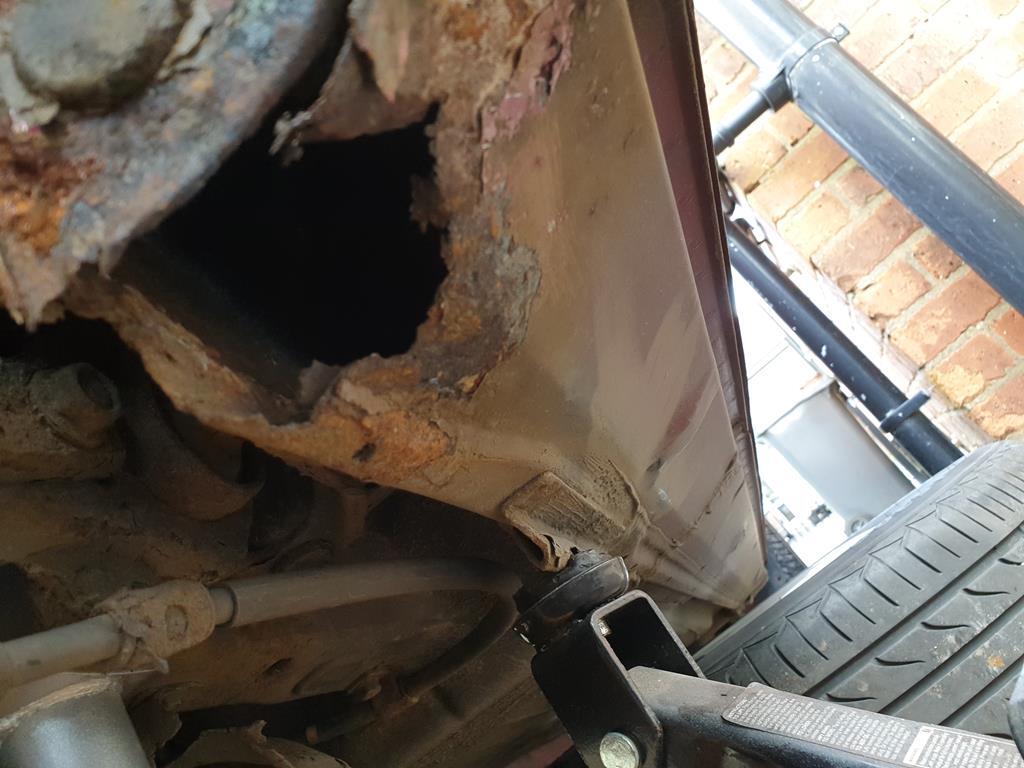 I had wanted to get the rear bumper off to check there wasn't any rust hiding behind it but when it came to undoing the mounting nuts on the side, one bracket had rusted off and the whole nut and stud was rotating on the other... the rear inner arch behind the liner did look alright though.. 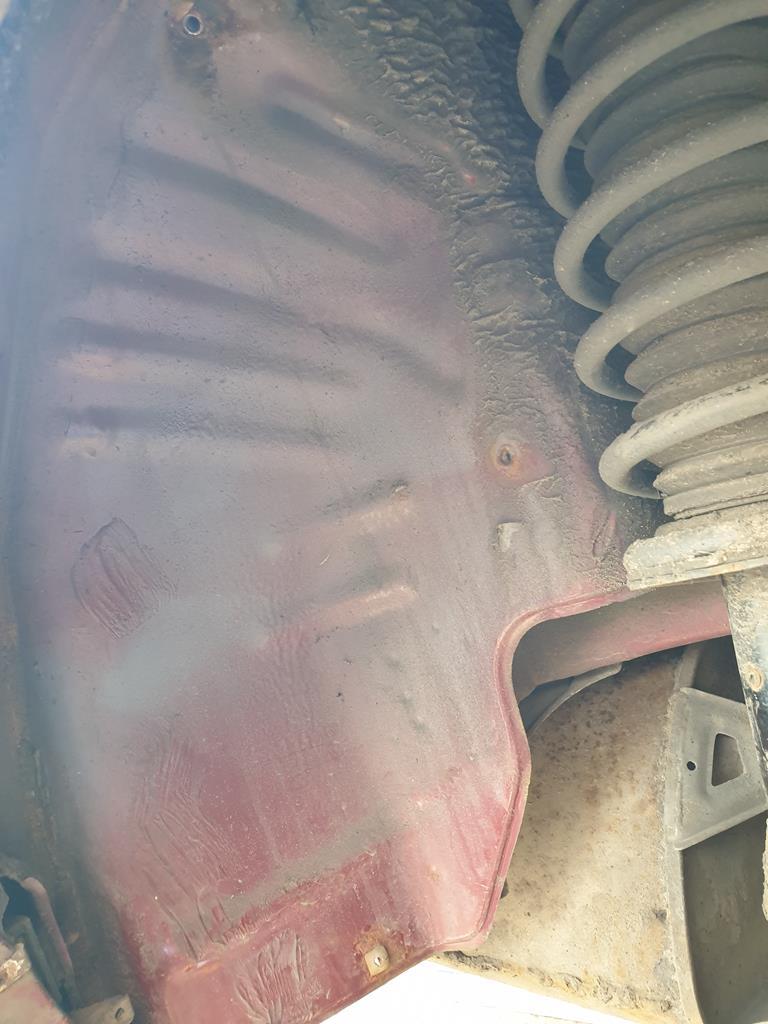 The rust is really the limiting factor on what I end up doing with this car. Ultimately I'm also a bit limited by the Lockdown in what I can do about it also, so I've got a few options I think: 1. I could finish all the jobs I can do with the parts I have, and sell the car as is (after the lockdown) and get something else because the cost of the welding may well outweigh whatever I could get for the car once repaired. 2. I could finish all the jobs with the parts I have, then pay to get the rust sorted after the lockdown, which is going to cost £££ and will mean that I'll have to keep the car for a while longer for it to make any financial sense 3. I could use this time at home during the lockdown to get a mig welder and learn to repair it myself. Would still need to get the paint done professionally so it looks alright and there's absolutely no guarantee I could even fix it semi-decently, being an arch lip that also curves inwards and I don't think any panels are avaialble for these... For now though, I may as well chuck on the suspension parts, fix as many of the issues with the car that I can and then see where I am on the rust |
| |
|
|
stealthstylz
Club Retro Rides Member
Posts: 14,960
Club RR Member Number: 174
|
|
|
|
|
|
| |
|
|
adam73bgt
Club Retro Rides Member
Posts: 4,998
Club RR Member Number: 58
Member is Online
|
|
|
|
Ah thats a good shout, I've got one of those but on a T handle type thing 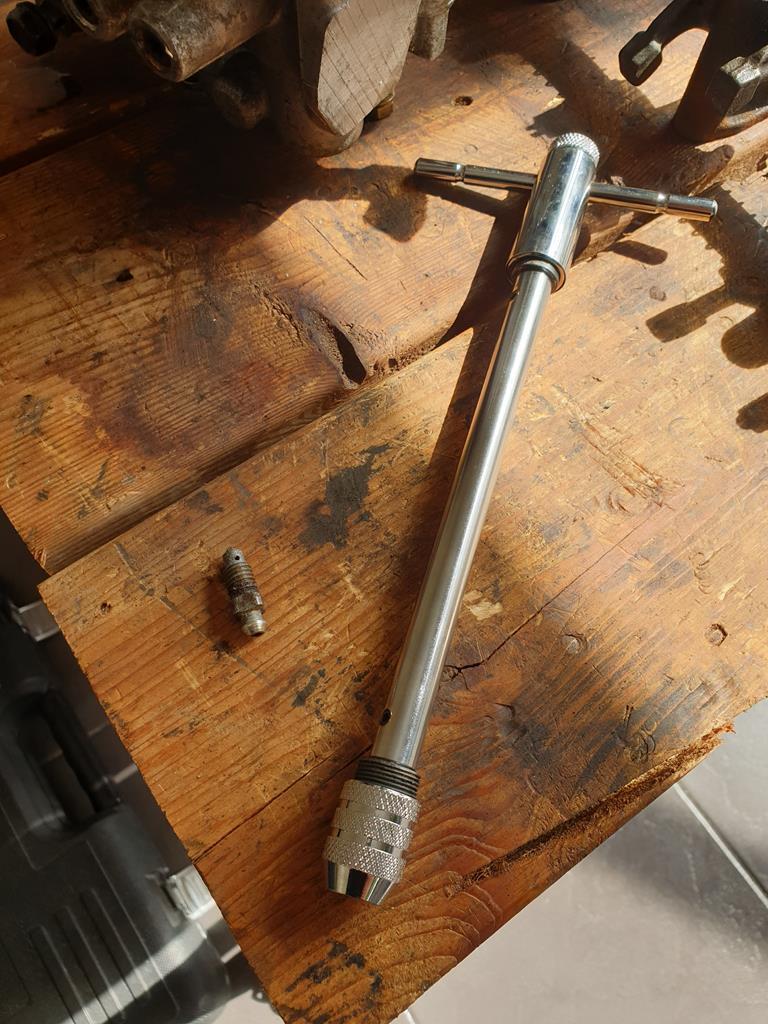 It wasn't quite big enough but looks like I've got the smaller of the two, I'll have to give the larger size a go |
| |
|
|
|
|
|
|
|
|
First off,stop poking the rust. Nothing good h as ever come of it.
It would be a shame to get rid of it after all the work you've put in.
The second you start talking about professional welding/painting your wallet gets alot lighter. Unfortunately I don't think there's a huge market for these (as cool as they are) so you probably won't see a return on any large amounts of money you put in.
I would tackle the welding my self, the end of the sill looks like it gets covered by black side skirt thing, so that doesn't have to be super pretty just fit for purpose.
Arch wise, I've seen some that are being broken on fb, maybe there's are in better nick than yours, would be easier than starting from scratch.
I still want to get a picture of mine and your next to each other so you can't get rid of it just yet
|
| |
1972 viva 'Sparky'
|
|
|
|
|
|
|
|
On the P38 with a similar set-up, although it's a Wabco ABS modulator, 30 pumps of the pedal with ignition off will depressurise the system.
And yes, they seem to go out of their way to make stuff hard to get to. For me it was two hard lines that took the best part of a day to line up and get screwed in!
|
| |
|
|
adam73bgt
Club Retro Rides Member
Posts: 4,998
Club RR Member Number: 58
Member is Online
|
|
|
|
Ebejeebies you do make a lot of sense, I did message one of the Legend breakers on fb about an arch/rear wing but they didn't get back to me, I'll keep trying a few georgeb I'll probably give the pedal a good few pumps anyway in case it helps, although if the pump has been at fault, it may not have much pressure in there anyway as its not been running... Did a little bit more fighting with the lower control arm this afternoon, as with much of the suspension it is all very corroded which makes getting things apart a pain. The cable for the ABS sensor is clipped into a metal conduit which bolts to the LCA, both the conduit and the bolt heads were so rusted I just broke it off 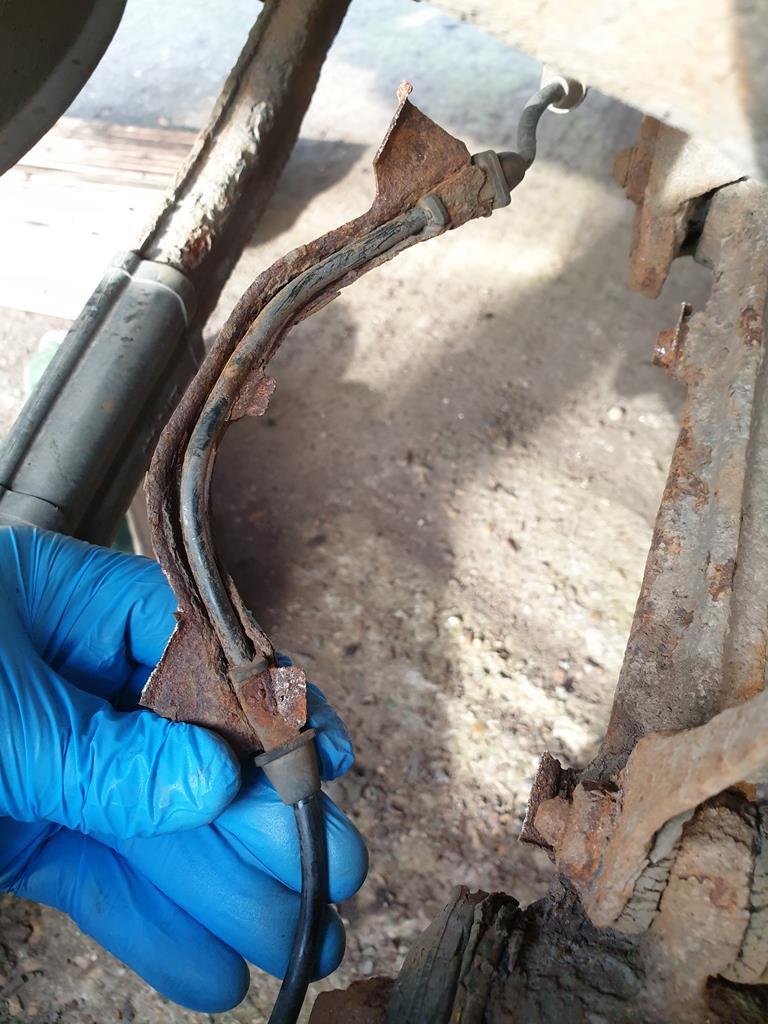 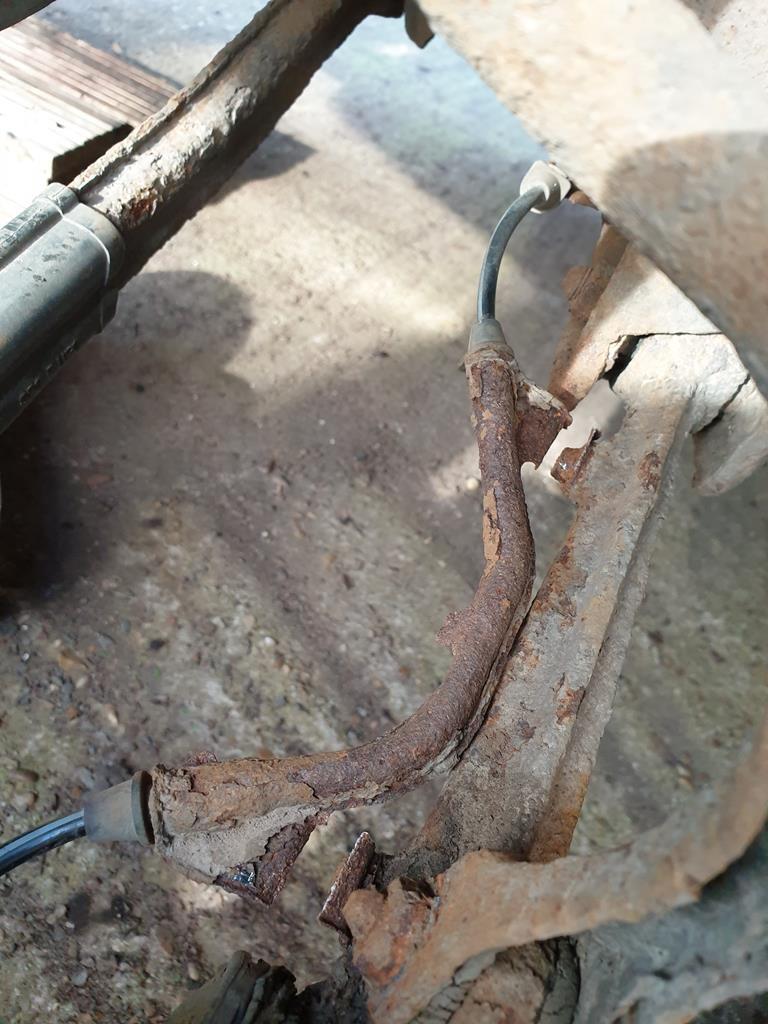 A bit of careful prising (while trying not to cut myself on the rusty metal) and I got the cable free 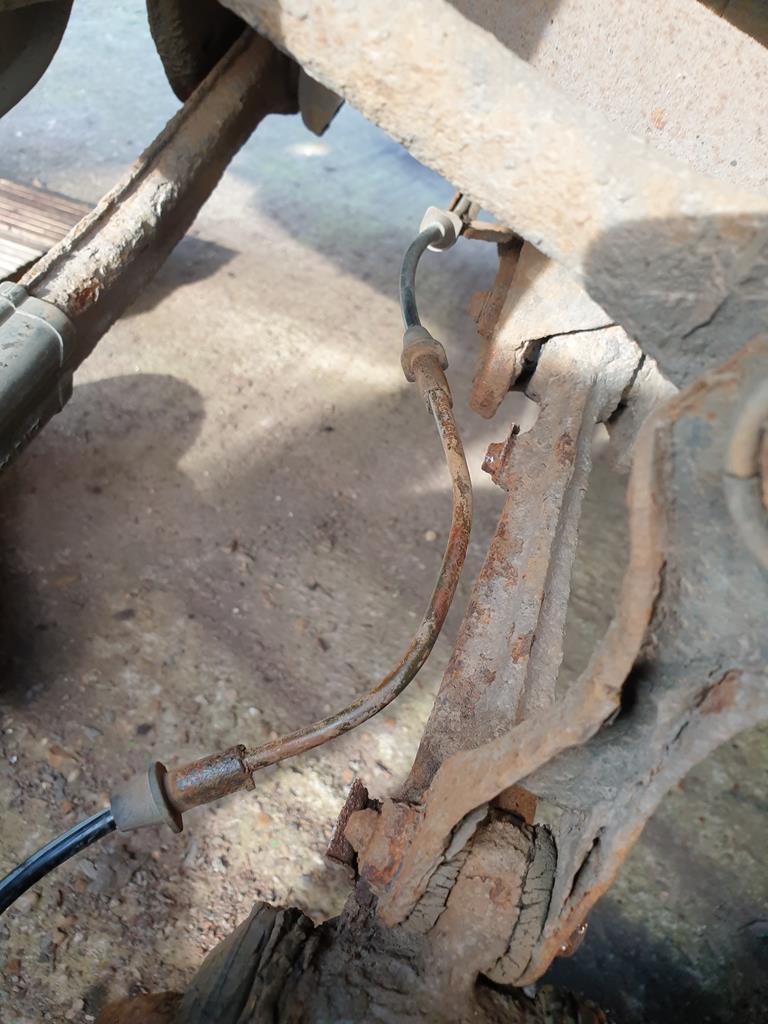 The new arm has the bosses on it for the screws so I'll probably use a couple of P clips or similar to secure the cable to it. The next bit to detach is the drop link for the ARB. The bolt head on this was rusted but also quite rounded 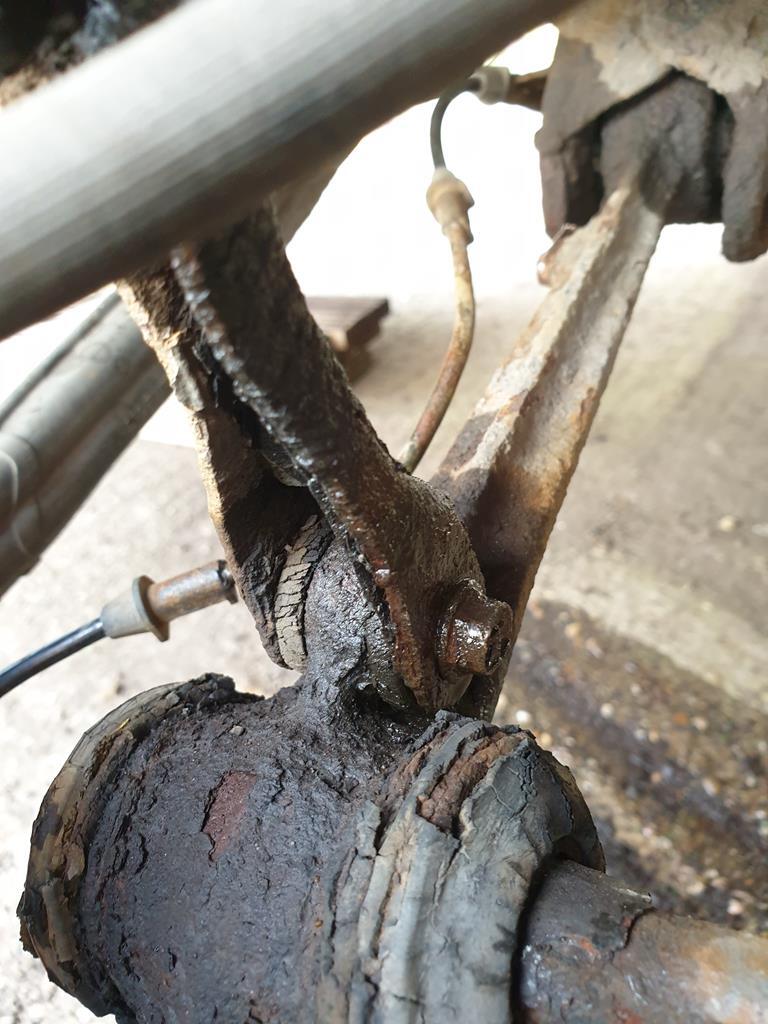 To my surprise, the nut on the ball joint end came undone easily enough 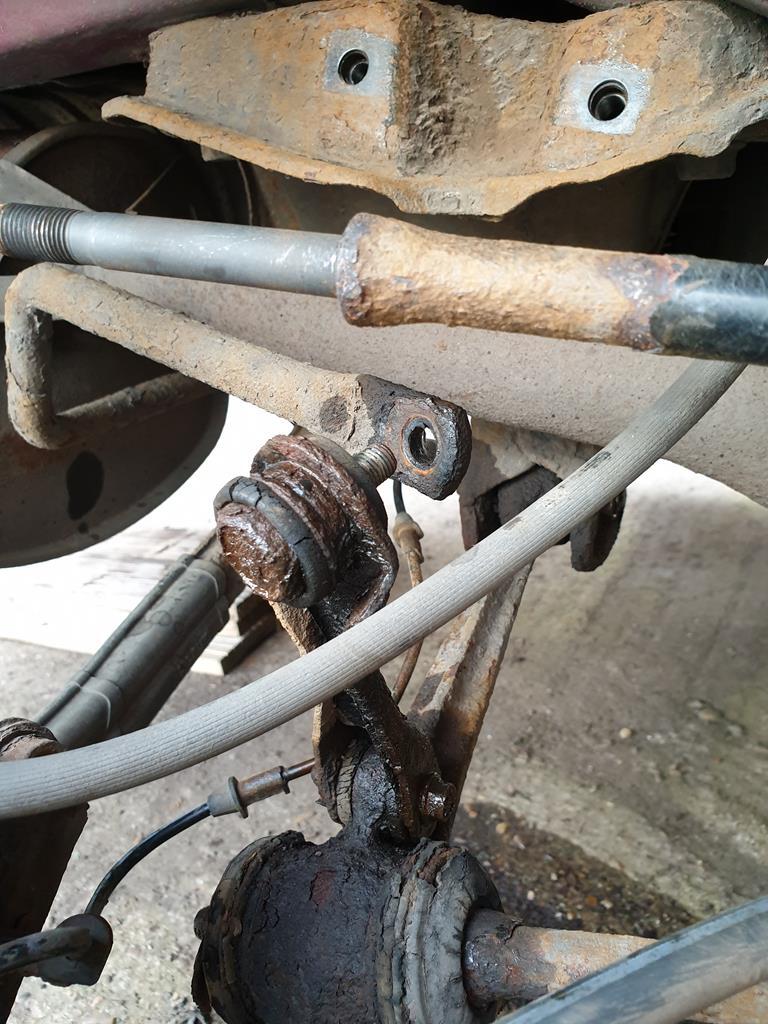 So I can at least try and separate the drop link from the arm on the bench. The link is rough, and they are still available via Rockauto in the States, but they seem to come without the ball joint bit at the top, if I can find a complete link somewhere I may buy some to replace these, or I'll just have to clean this up as best I can I'm currently stuck trying to get the nut on outer ball joint of the LCA undone. It took a fair amount of hacking to get the rusty split pin out and now its just a case of battling with rust and lack of access 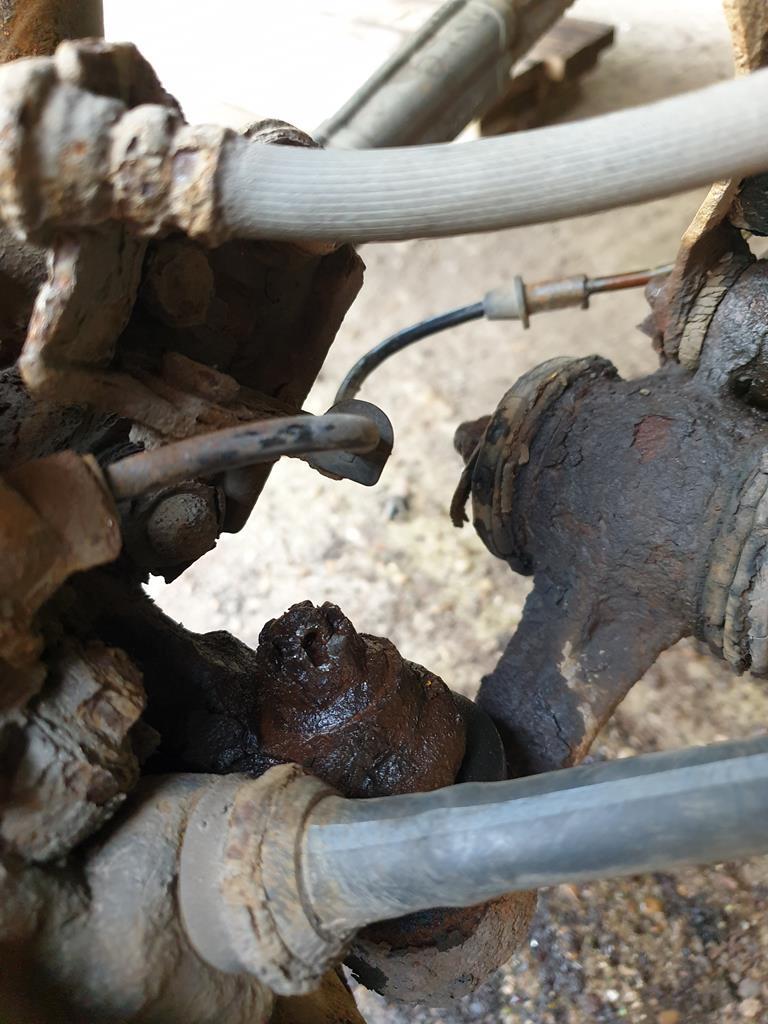 Annoyingly I could do with a 17mm ring spanner, as the body of my ratchet spanner is a little too big to fit and the open end tends to want to round the nut. One thing about this lockdown is that it's making me notice the tools I'm missing  To help hold the knuckle in place while I try and undo the nut, I did loosely attach the UCA 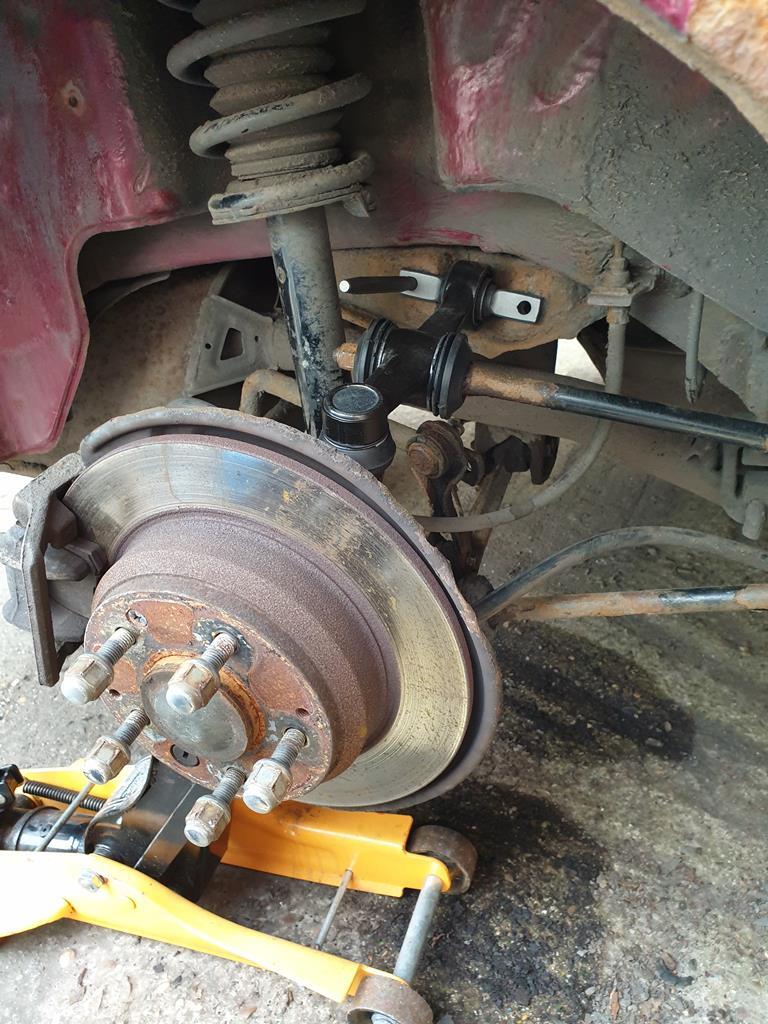 Here shown with a punch in one of the mounting holes to help locate the bolts mounting it to the subframe. Went on fairly easily except for being a bit of a pain to get on the radius arm, there's a crush tube within the big bush in the middle of the arm which needed tapping on with a socket and a hammer. Bit more fighting and the LCA should come out then it should be straightforward. I'm trying to hold off the temptation to lop a coil off the rear springs as sometimes it sits a little high in the rear end... Then will just be a case of repeat on the other side, I did pull back the arch liner on that side to have a look at trying to remove the bumper again, happily whatever coating Honda used on the petrol filler neck did the job as it looks brand new 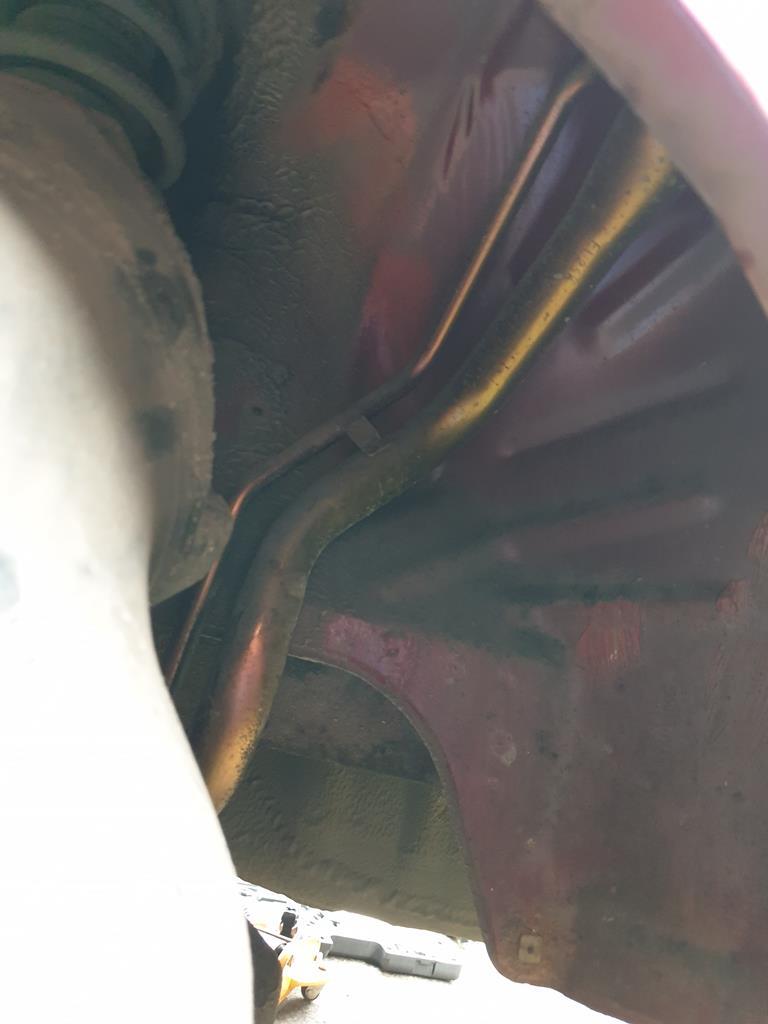 So ending on a high note this time at least 
|
| |
|
|
|
|
adam73bgt
Club Retro Rides Member
Posts: 4,998
Club RR Member Number: 58
Member is Online
|
|
Apr 11, 2020 21:41:10 GMT
|
This is one of those cars that likes to fight me.. Since the last update, I managed to get the split pin out of the drivers side upper control arm ball joint, but it came out in multiple pieces.. and the nut itself is pretty stuck. Today however, the tap sockets I ordered arrived. quick test fit on the spare ABS bleed screw I have showed that it did fit over it, so I prepared the area on the car just in case brake fluid went everywhere 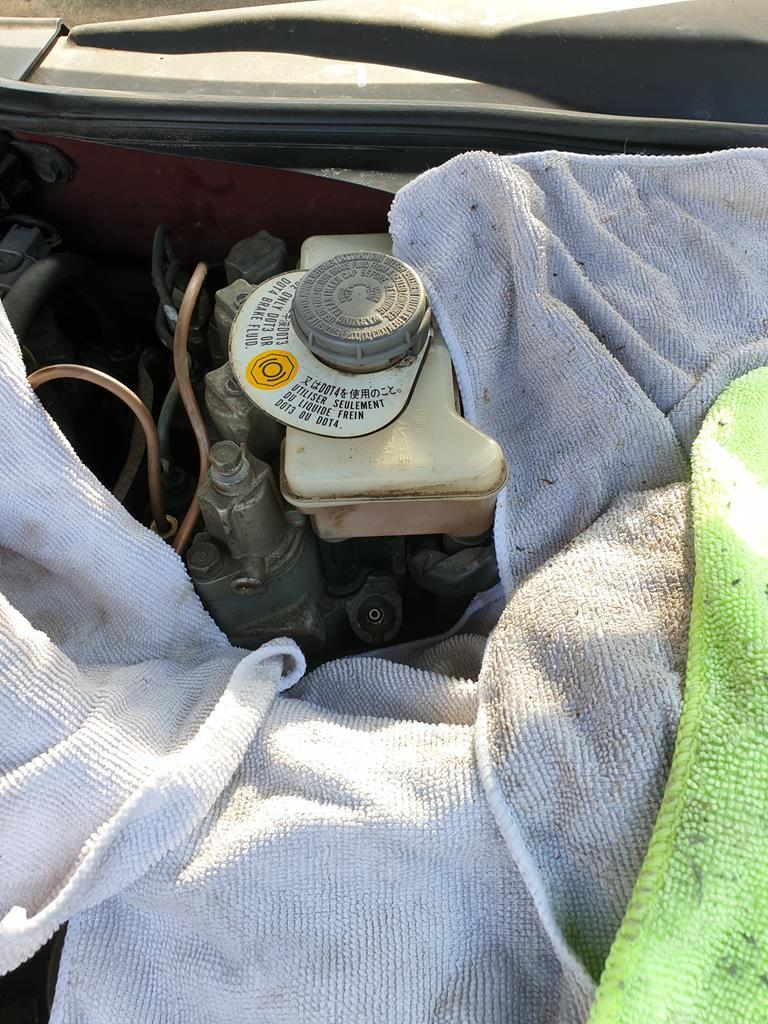 Only to find that that the socket didn't fit over the bleed screw thanks to the boss on the ABS modulator body.. So I'm basically just going to have to risk taking it off without bleeding the pressure, if the pump truly isn't working, I think it will be low risk. To that end, I carried on taking off bits around the ABS pump ready to remove it. Got two screws out of the heatshield that protects it from the nearside exhaust manifold but its still secured somehow. The Honda manual recommends removing this from the bulkhead 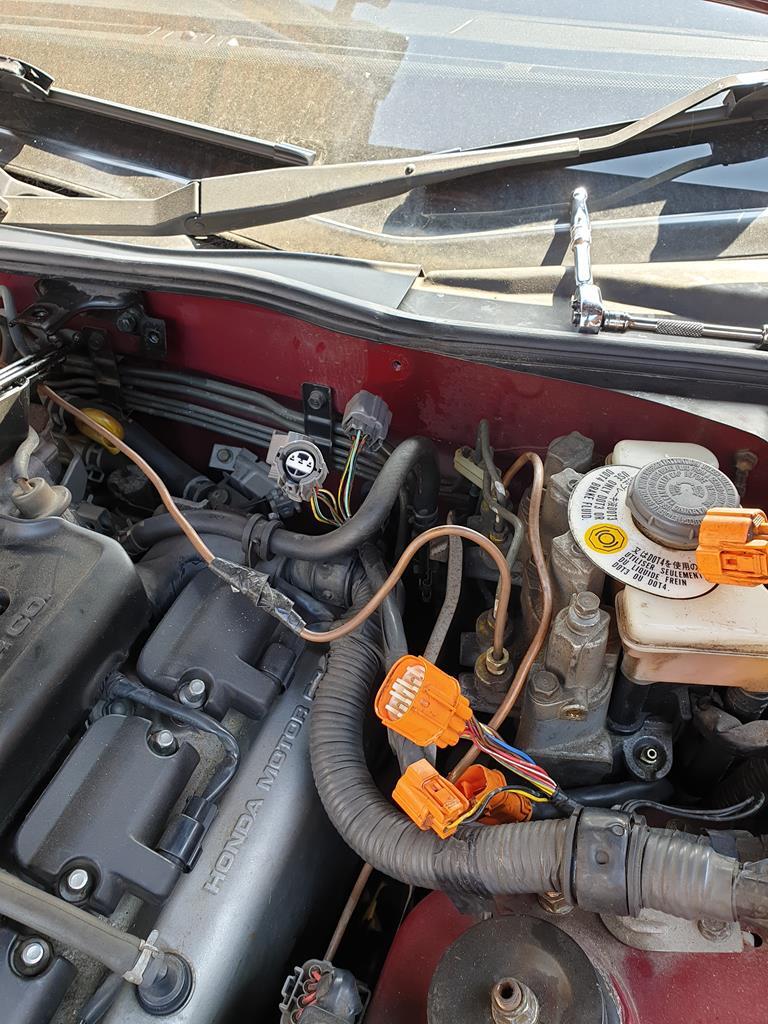 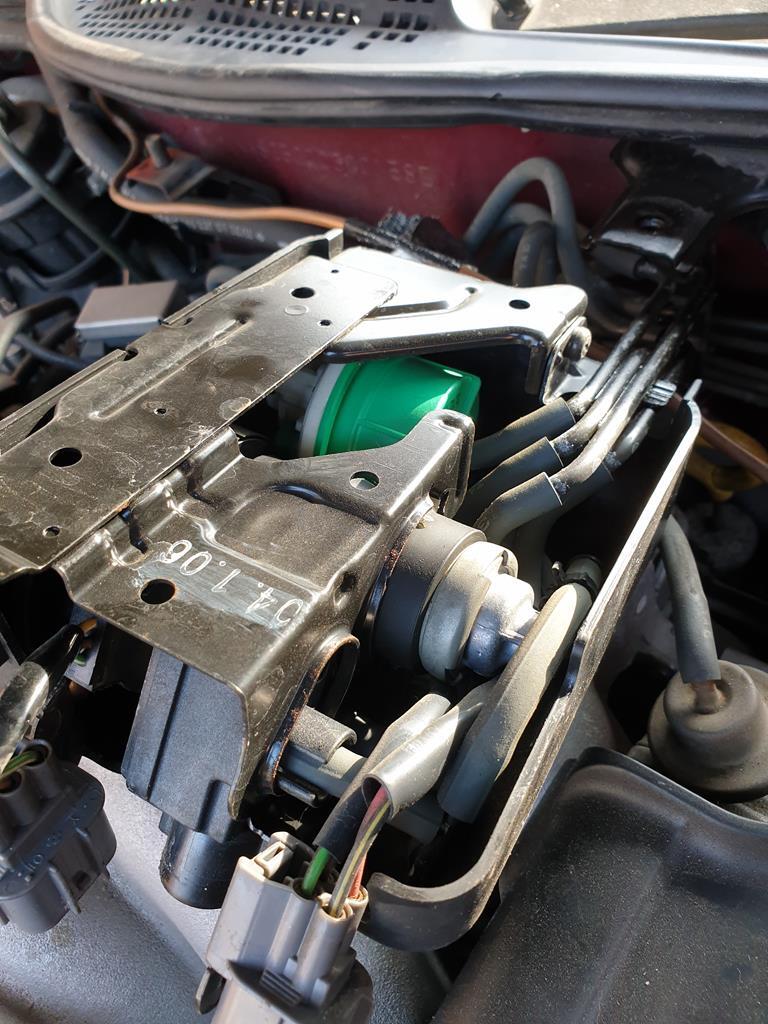 Its a control unit for a few of the emissions systems on board the car, EGR and the like. It reminds me of my RX7 in that theres a lot of vacuum hose and solenoids which just looks untidy and nasty to me, but theres no point in me trying to delete any of it. The guys in the US running Acura Legends do seem to note issues with the EGR system blocking up and leading to head gasket failures so that might be something for me to look at in the future but not a priority. Anyway, with that removed, it still wasn't looking particularly easy to access the lower bolts for the ABS unit, so I gave up and targeted some other "easy wins" while under the bonnet. I've had a fuel filter ready to be swapped on for a little while now, and thankfully it is actually easy to access on the Legend 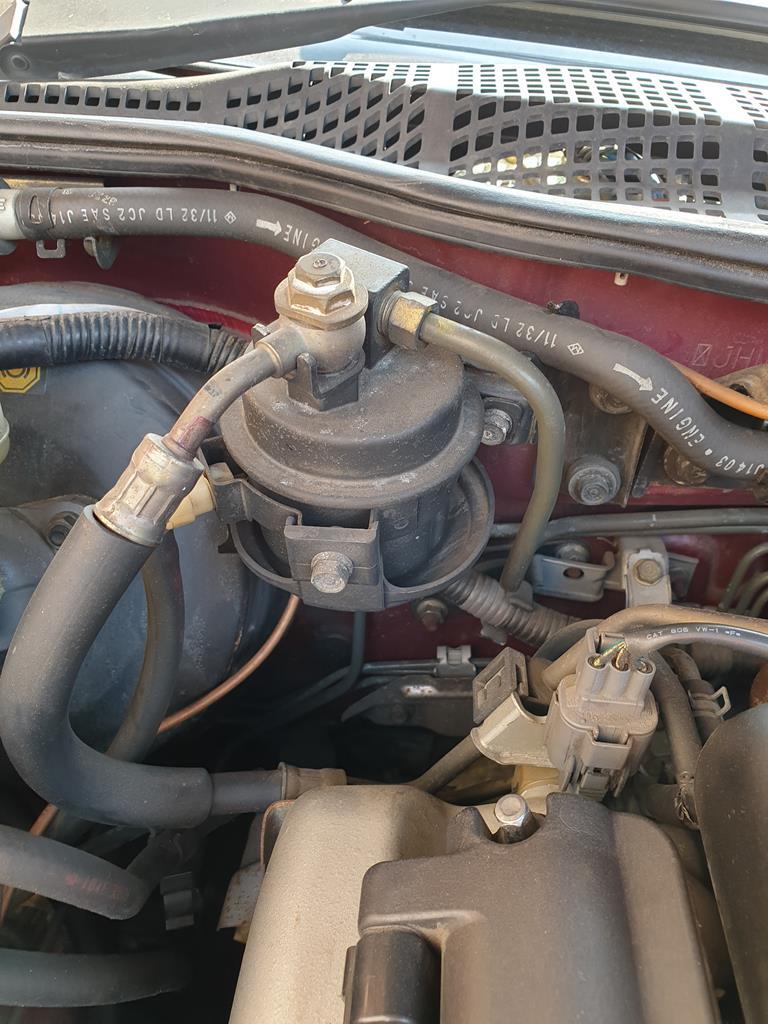 The little bolt in the top of the banjo bolt is for relieving the fuel pressure, I needn't have worried as nothing came out when I undid them! The banjo bolt came out fine but the other connection on the filter is reallly tight (I did say the car was fighting me right?) tried a few things but no movement, I've just kept spraying penetrant at it in the hope it will come undone easier tomorrow. Given that fail, I moved onto another couple of jobs which have been on my list for a while. A while back I took a load of the window trims off the car to clean out the gutters of tree detritus from the time the car had been sitting. When I put the windscreen trims back on, they didn't quite fit right as some of the clips had broken so they were due to come back off as I had replacement clips ready to go 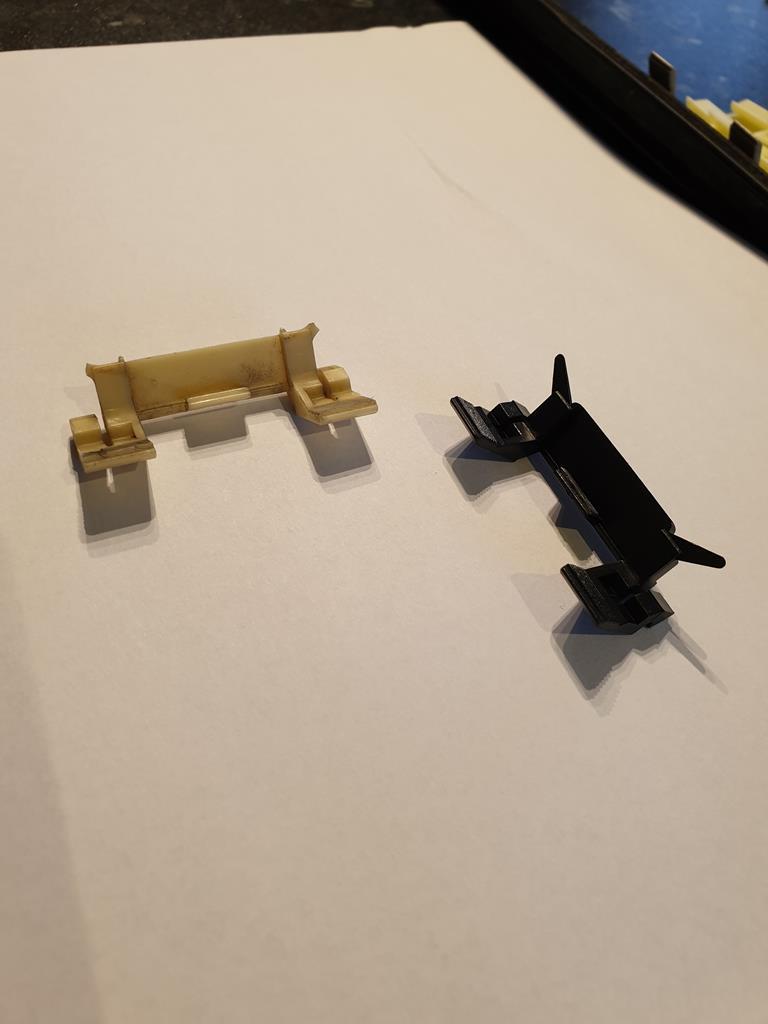 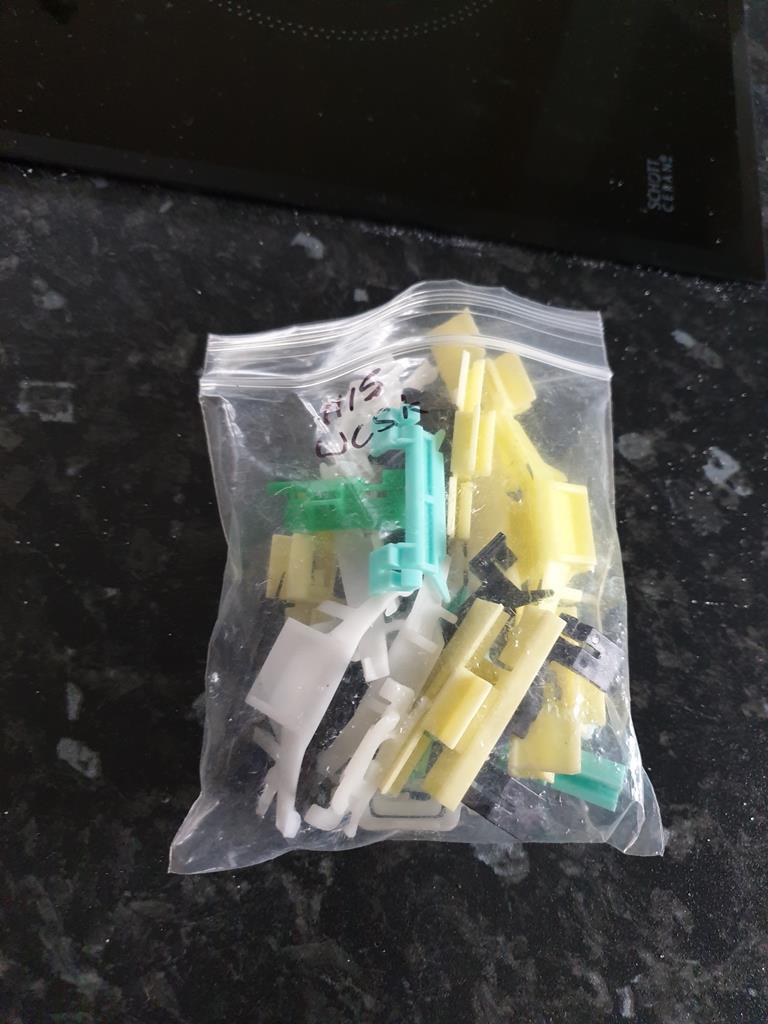 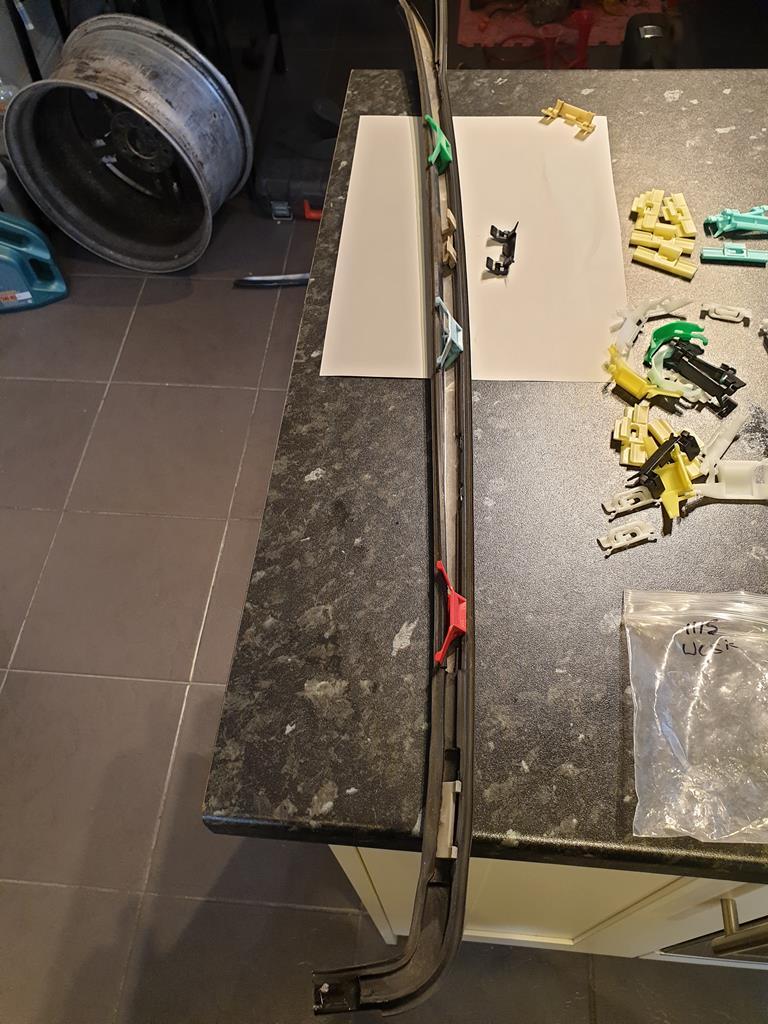 Another point is that the wiper arms had the black paint coming off and the underlying metal showing through, so they came off also 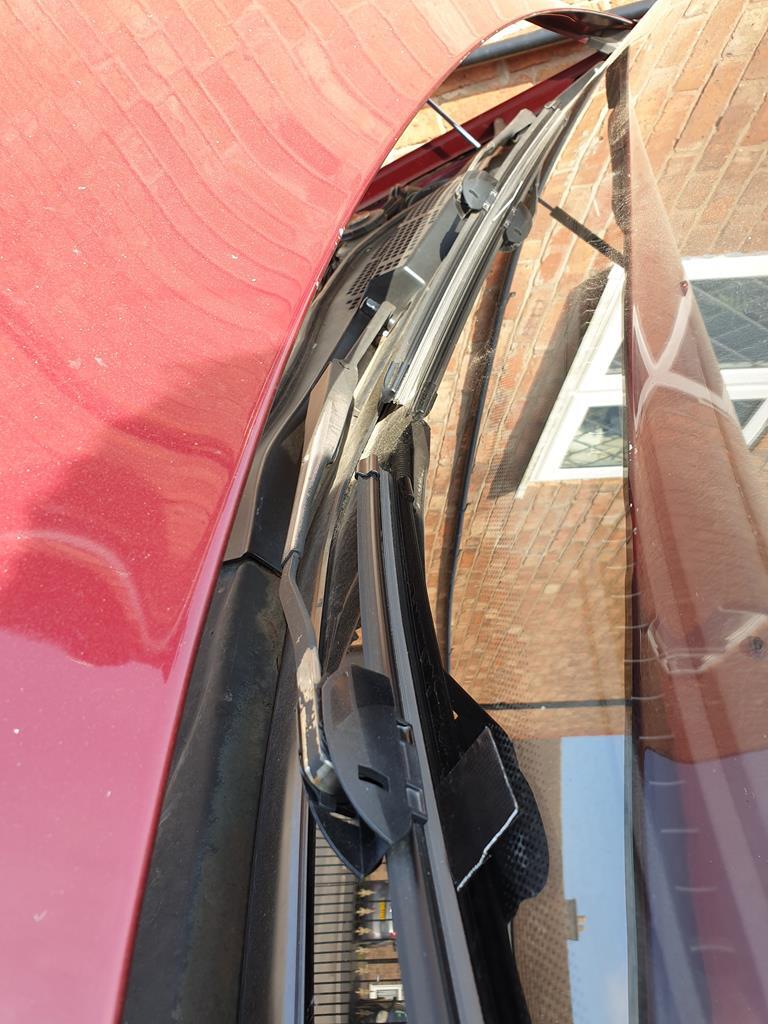 (Using some tape to help me get the arms back on in the right orientation) I'd also wanted to get the scuttle panels off as I knew there was more tree debris hiding under there. The first panel is like a finishing trim for the bottom of the screen which was clipped in 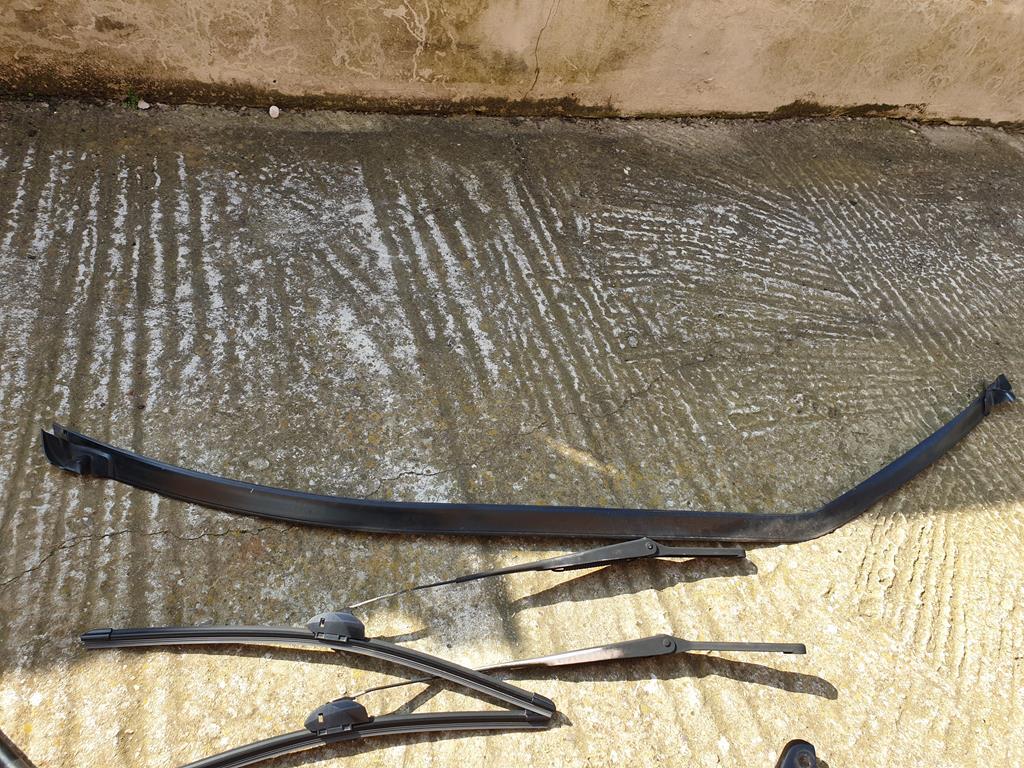 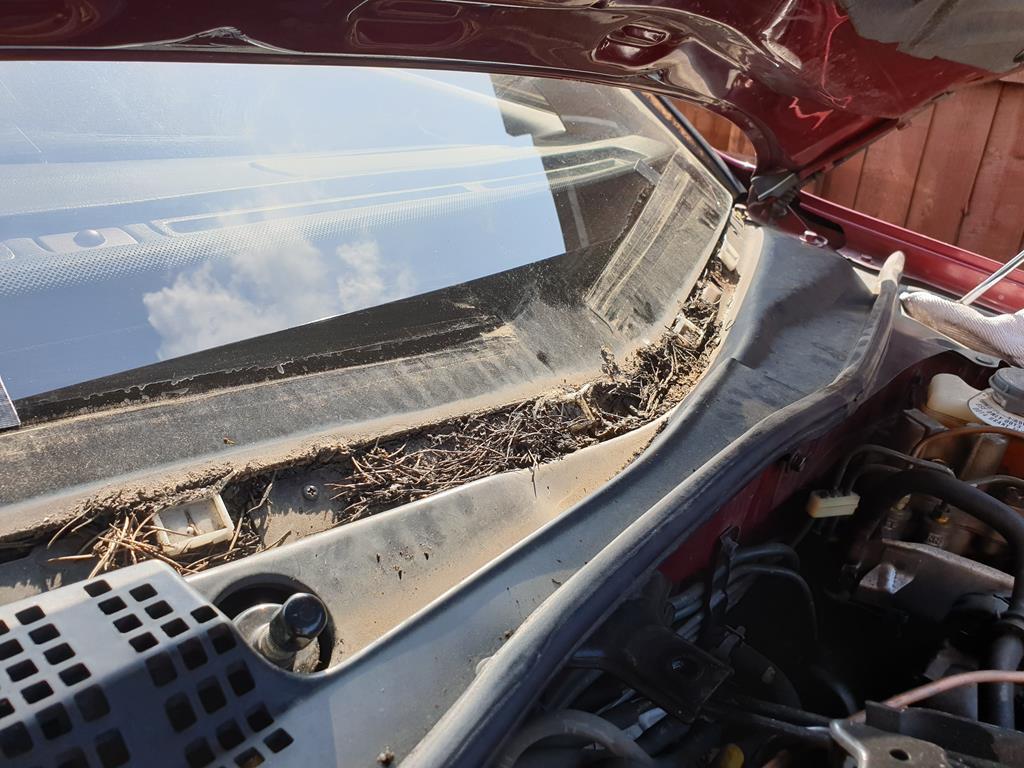 As you can see, lots of mud and pine needles hiding under that. The lower scuttle panels are in two parts, the drivers side is plastic and clipped in pretty simply 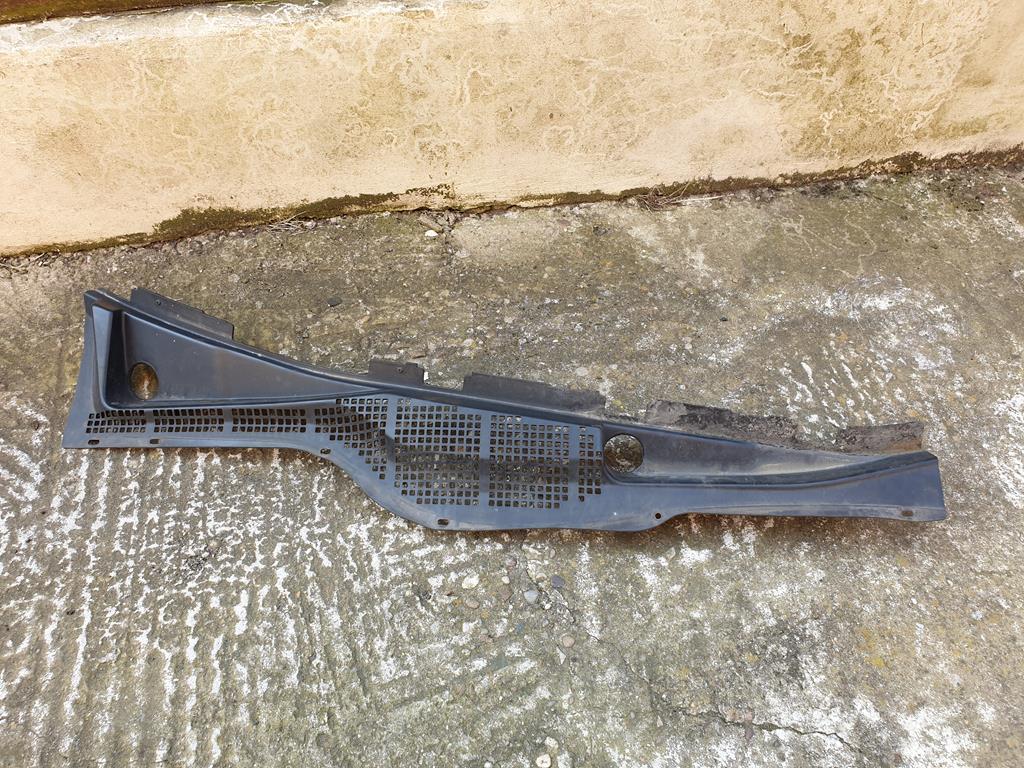 Noticed that there is a drain hole in it which was completely plugged with mud 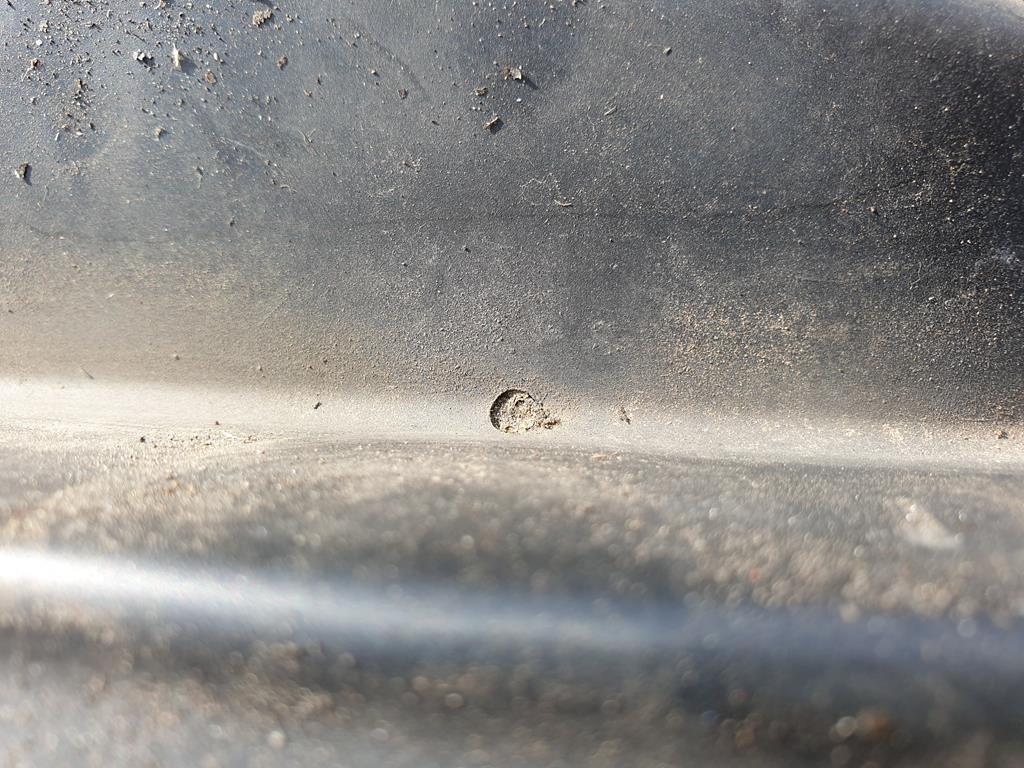 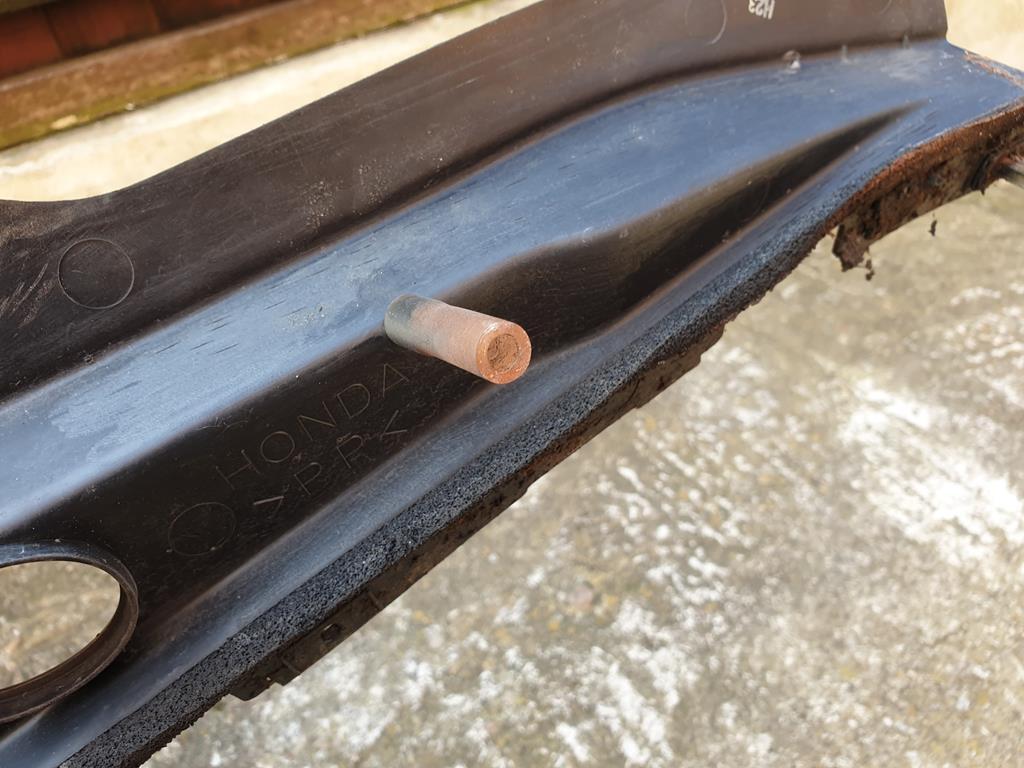 Which was easy enough to sort. The Wiper motor and linkage was hiding under that 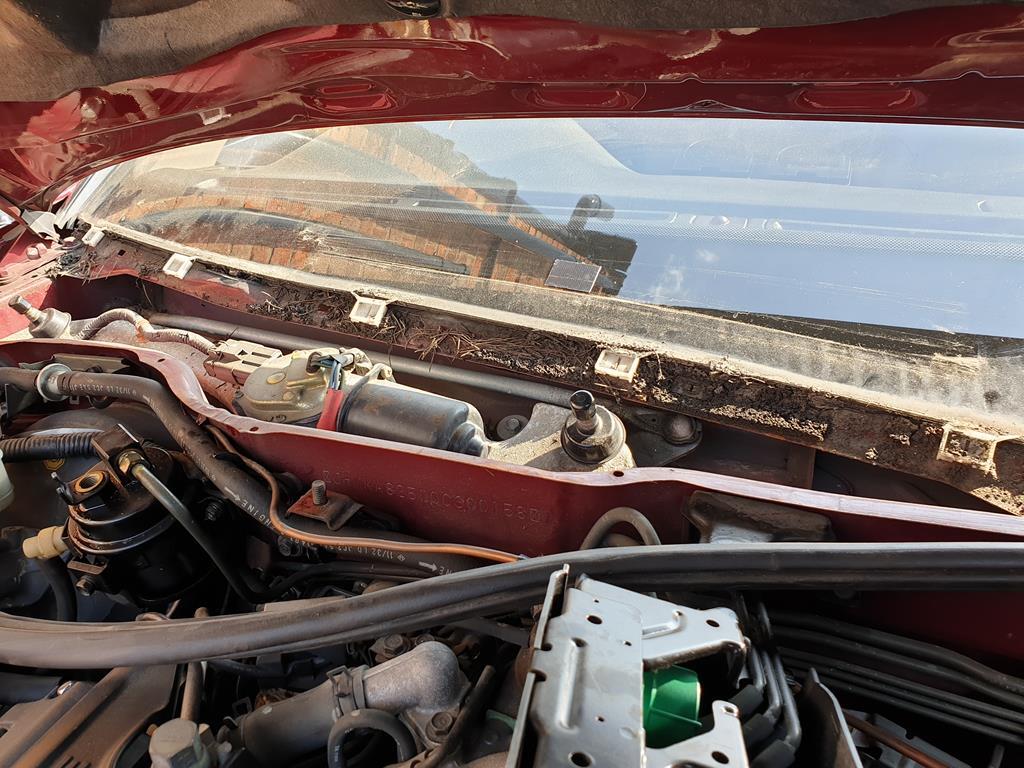 In and around the motor and linkage was other bits of tree. The other bit of the scuttle on the passenger side is steel and is also clipped in aside from where the bonnet gas strut mounting point goes through it 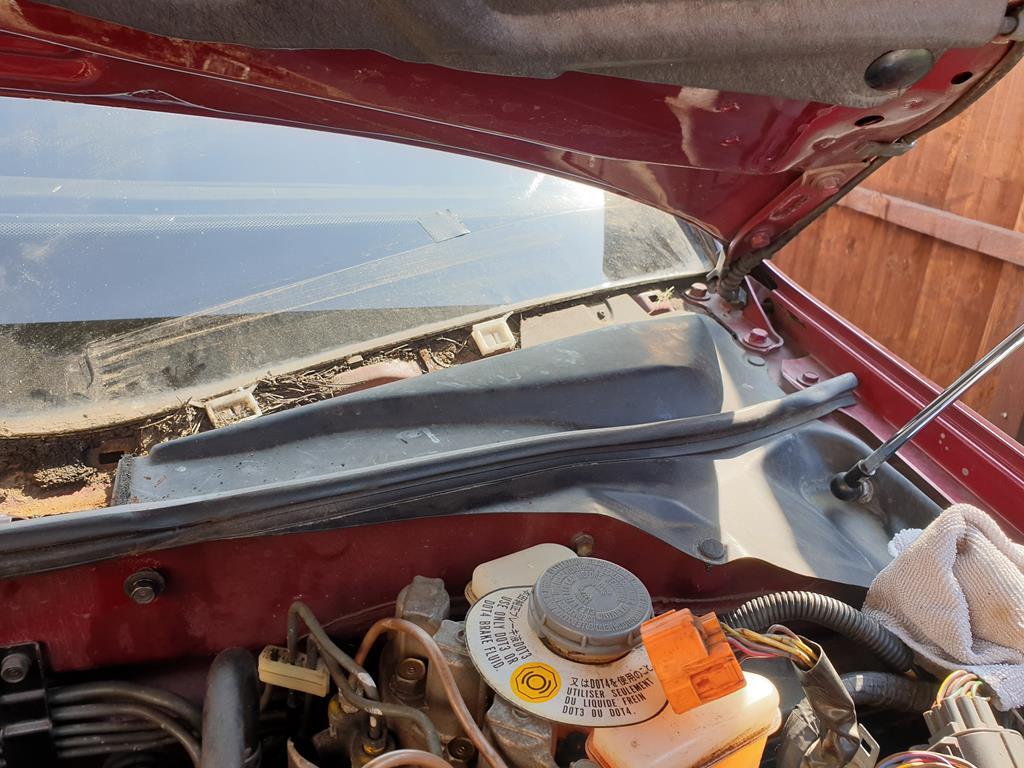 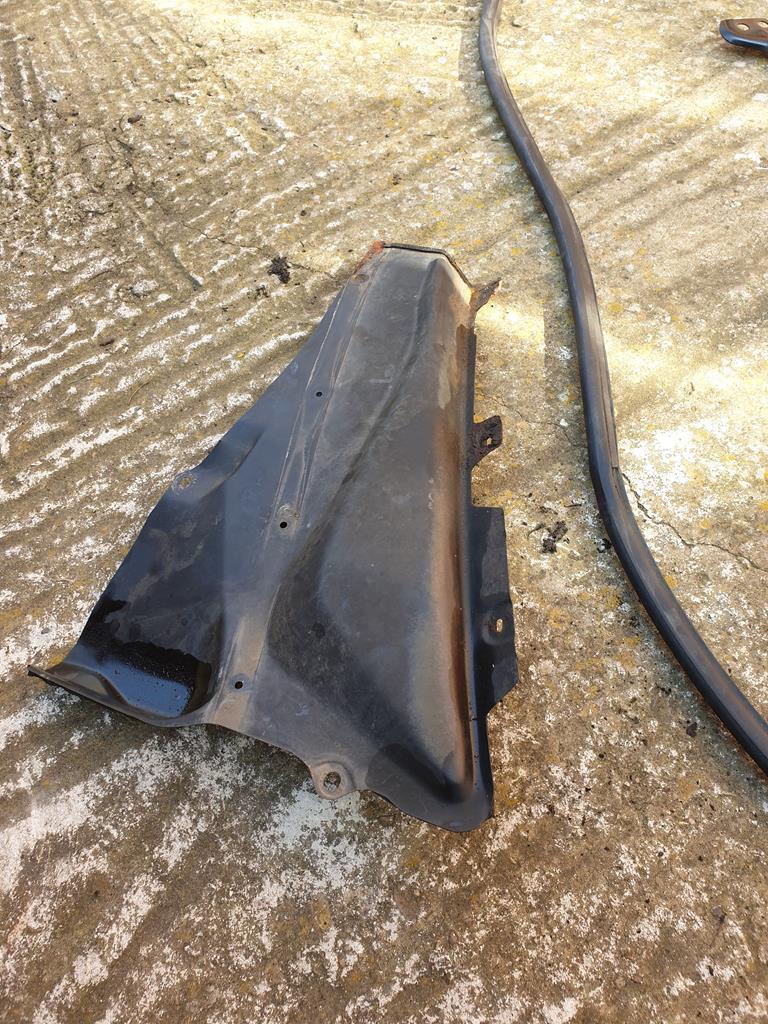 It's probably a good job I did tackle this now, as the mud and rubbish sitting on the scuttle panel had started to rust it out 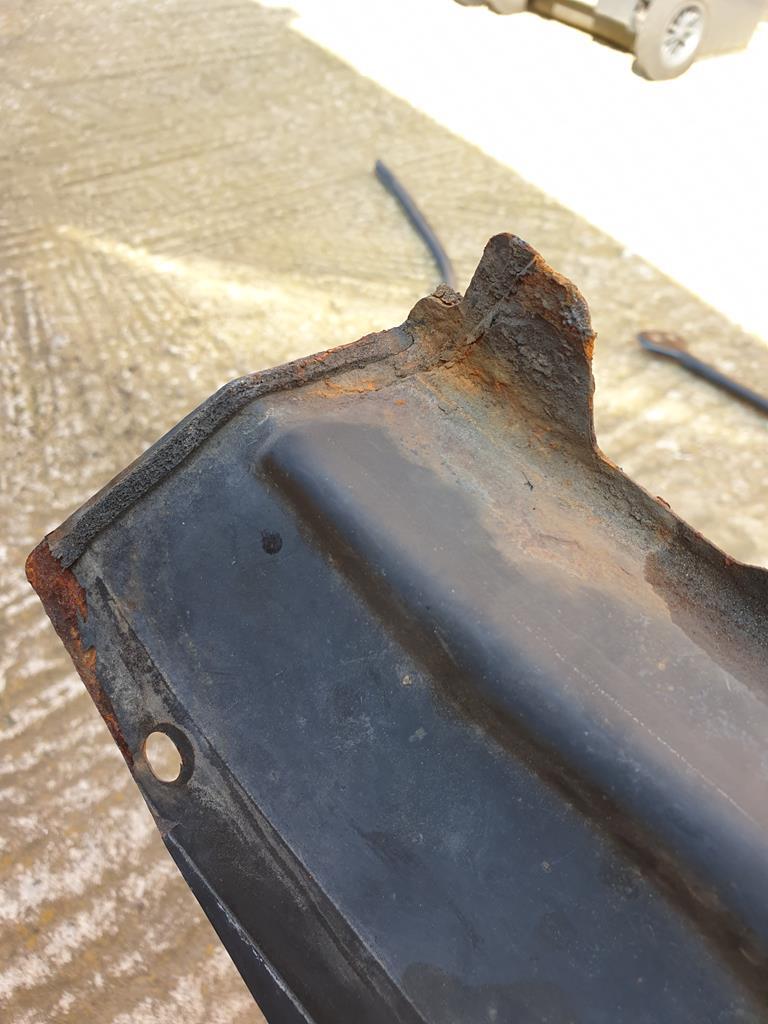 So I've been wire brushing and sanding that back ready for some etch primer and satin black. 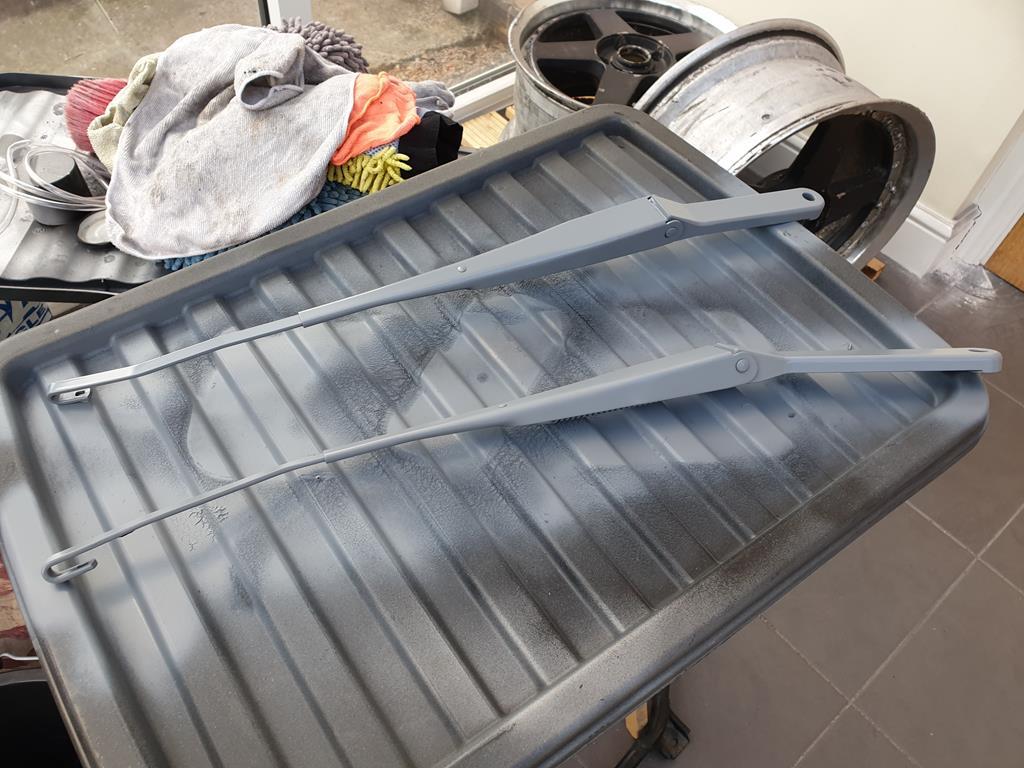 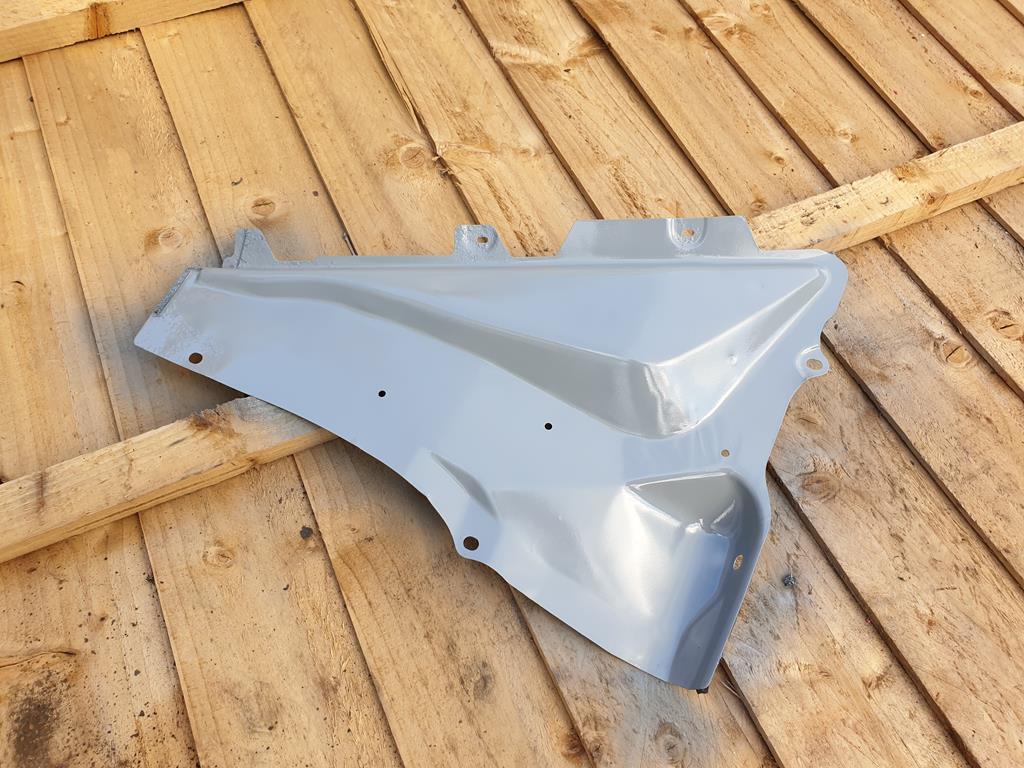 (Doing the wiper arms as well) It won't be the neatest job in the world but it should tidy things up quite nicely. I've also been getting as much of the tree curse word from out of the scuttle area as possible before I put it all back together. So yeah, lots of words but not necessarily that much achieved, but working on a few different jobs at once seems to work for me  I've got this whole week off basically so I'd like to get the jobs on the car all sorted but we'll see how much it wants to continue fighting me! |
| |
|
|
goldnrust
West Midlands
Minimalist
Posts: 1,887
|
|
|
|
Progress is looking good  Regarding the sills, my vote is to get hold a MIG welder and get stuck in. Being hidden under trim it doesn’t have to be mega neat, and once you’ve got a welder you’ll wonder how you ever worked on a car without one! Haha. Cars of this age always seem to be the fighters. In my limited experience, 70s and older cars have often already been apart by now, and obviously younger cars are less corroded. But the sort of jobs you’re tackling with the suspension will be bolts that may not have moved since the day the car was made. |
| |
|
|
adam73bgt
Club Retro Rides Member
Posts: 4,998
Club RR Member Number: 58
Member is Online
|
|
|
|
|
Thats a very good point, certainly my MGB came apart more easily than this! The rusted suspension arms I've been removing do have some remnants of OE Honda part numbers on them so as you say, the bolts will have been on there for the past 26 years or so without having been disturbed!
|
| |
|
|
|
|
|
|
|
I can definitely relate to modulator removal procrastination!  |
| |
|
|
adam73bgt
Club Retro Rides Member
Posts: 4,998
Club RR Member Number: 58
Member is Online
|
|
Apr 14, 2020 21:25:50 GMT
|
Feels like the tide is turning, got the metal scuttle tray and wiper blades tidied up and in Satin Black 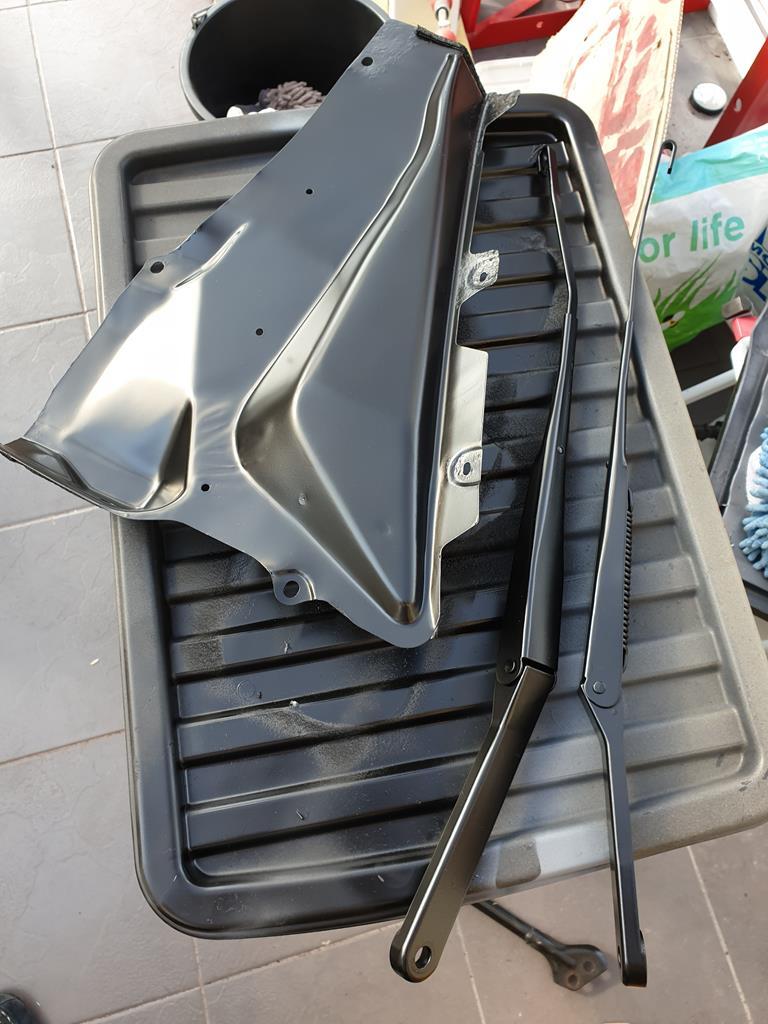 Won't be winning any concours but they're a decent improvement. I had nearly given up with the fuel filter when a spanner slipped off it as I was trying to get that union undone, at which point it dawned on me that I should be using a flare nut spanner not a regular one, so a bigger one of those is on order which I hope will allow me to actually change the filter. So I ended up back at the ABS pump/modulator. I'd left this with a heatshield that I had removed two fixings from but was still pretty well affixed to the engine bay. There was a further bolt which was hard to see but reachable, then there was one more bolt which was hidden further down, past two air con lines. 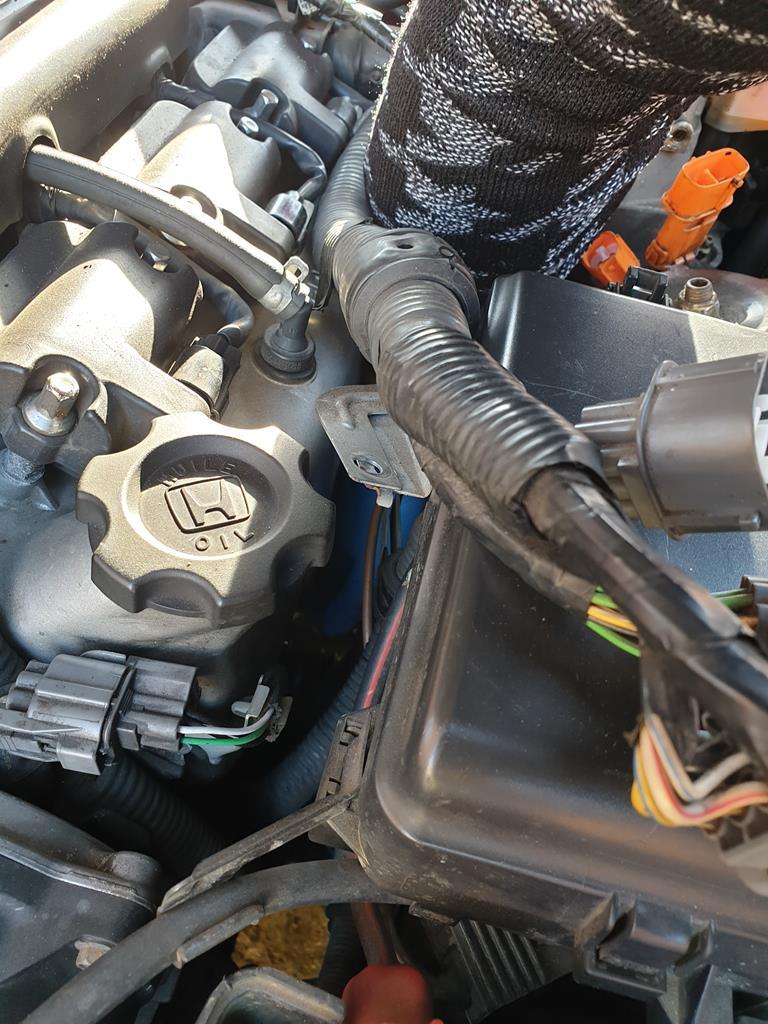 Absolute zero visibility, had to thread my arm between the cam cover and the shock tower, but was able to get a 10mm ratchet spanner on the bolt and remove it one handed without dropping it... A bit of a faff later, and the heatshield was liberated 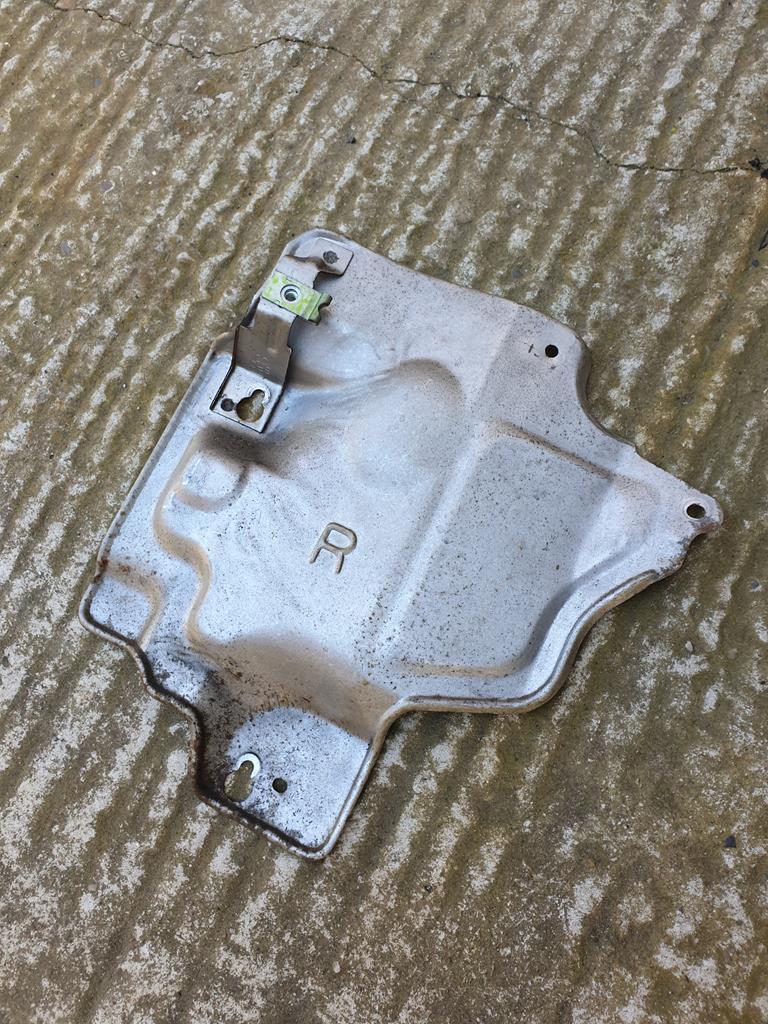 With that out of the way, I could investigate what was actually holding the pump assembly into the car. Partially aided by looking at the replacement assembly I had to see where the bolts were likely to be. One was quite easy to get to at the front of the mounting bracket, one was hidden deep down behind the modulator but was reachable with a few socket extensions linked together, the last one however felt inaccessible. It was back down between the engine and wing, and the aforementioned A/C lines were getting in the way again. I decided it was worthwhile getting the front of the car in the air and seeing if it was visible from underneath. 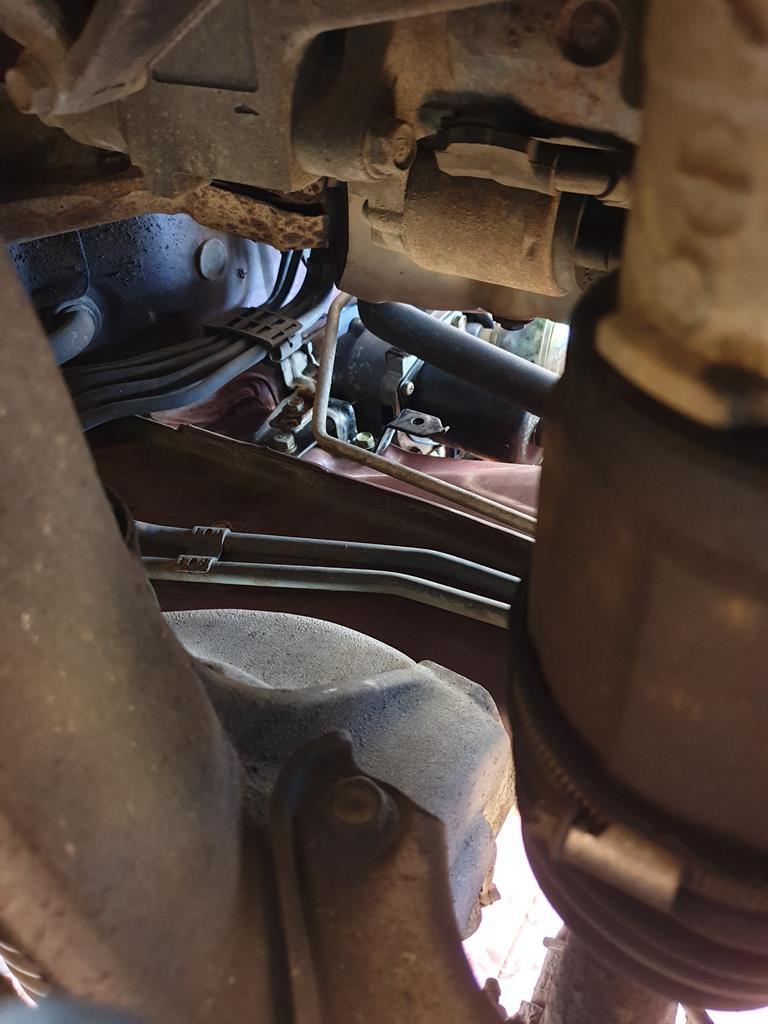 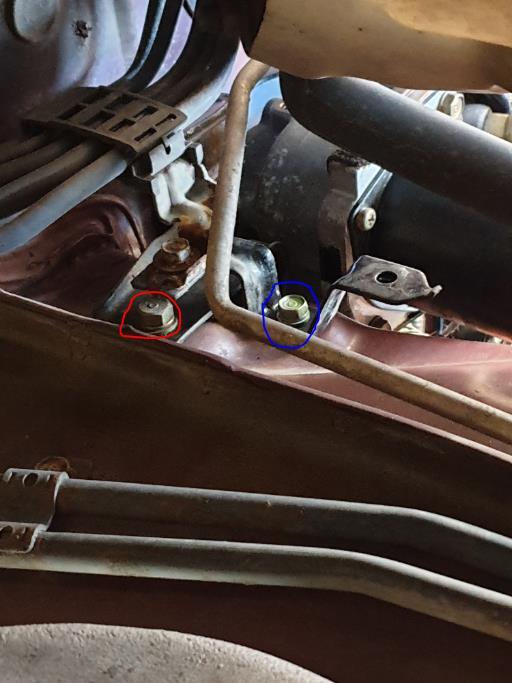 In the red circle is the last bolt holding the ABS assembly on, it's rather obscured by the pipe bracket so I undid the bolt in the blue circle to move it out the way a bit and give me better access. A couple of pipes going into the ABS modulator were a pain to get out thanks to poor access again, but finally, I got it out 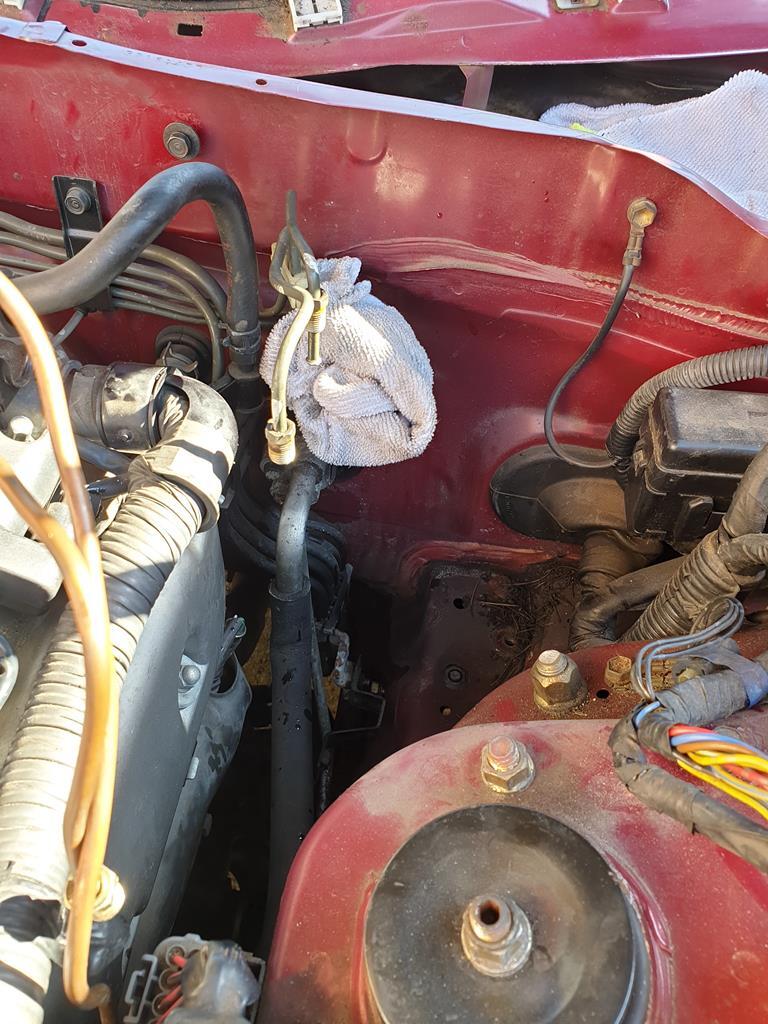 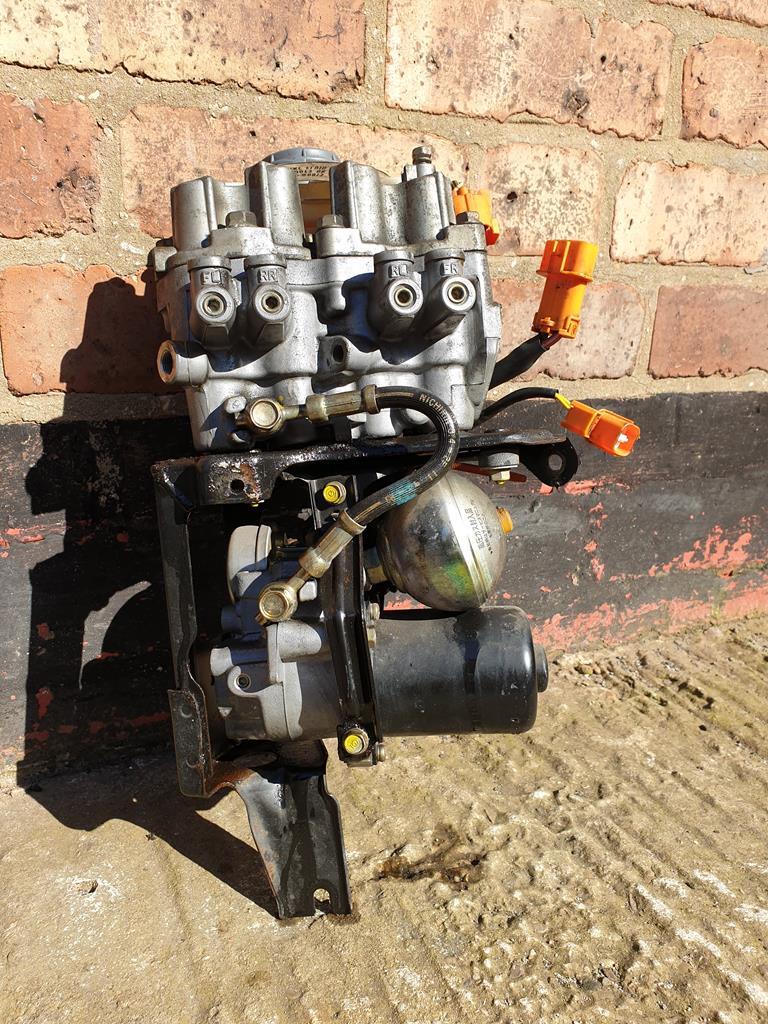 Externally the original and replacement modulators and pumps look very similar, (original on the left in both photos) 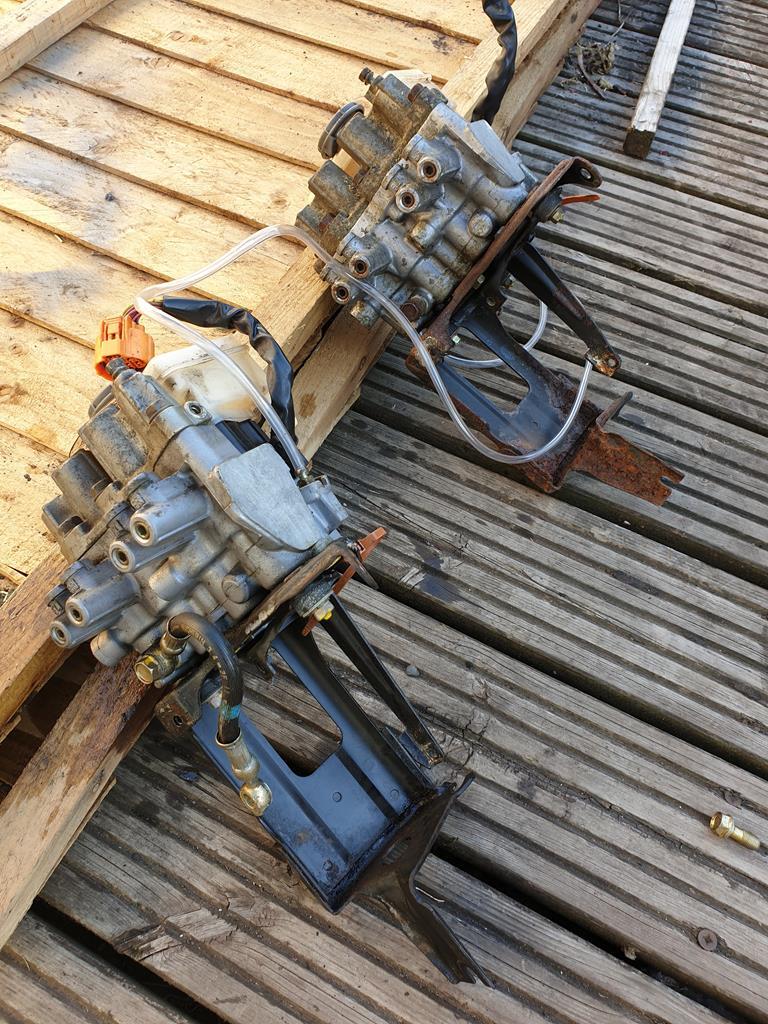 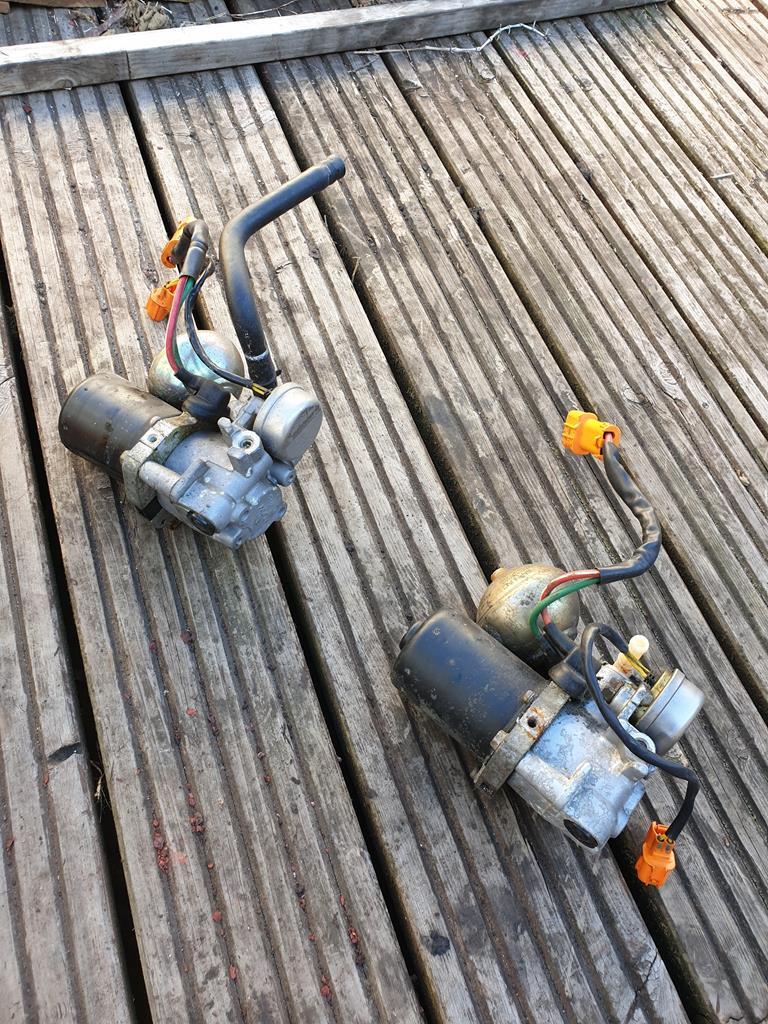 I was always going to be re-using the modulator as the replacement one from the breaker had the wires cut, I'm also re-using the original bracket as it is in much better condition than the other one. It was a pretty simple job to swap the pumps over, theres only a couple of bolts holding it to the bracket, and just the high and low pressure hoses going to the modulator. I did carefully crack off the bleed screw but there was nothing in the way of pressure held in the unit so had no need to worry there, and confirms the error code about the pump not working! I didn't take any more photos but I did drop the assembly back into the car after cleaning the mounting area a little. Took quite a bit of moving it around to get it back on the mounting bolts (having the lower mountings on the bracket slotted, was a good move from Honda) and then a bit of messing about getting the brake lines to attach again. Which is about as far as I got today, tomorrow I'll be bolting the ABS assembly down properly, reinstalling the heatshield and reconnecting all the wires. I'm also going to have to work out how to bleed the system and will be able to make a bit of a start on reassembling the scuttle panel bits |
| |
|
|
|
|
|
|
|
|
Bloody hell! That's a bit of a monster. At least on the '38 the modulator and pump/accumulator are separate items.
|
| |
|
|
adam73bgt
Club Retro Rides Member
Posts: 4,998
Club RR Member Number: 58
Member is Online
|
|
Apr 15, 2020 13:23:16 GMT
|
|
And its still got the master cylinder with a massive servo on the other side of the bay! ABS and braking technology has certainly come on a long way since this system.
|
| |
|
|
adam73bgt
Club Retro Rides Member
Posts: 4,998
Club RR Member Number: 58
Member is Online
|
|
Apr 28, 2020 20:51:13 GMT
|
Bit behind on updating this! So where I'd left off, the ABS unit was more or less back in place. With the car up in the air, it was actually fairly easy to tighten up the mounting bolts for the ABS unit and the heatshield as well. 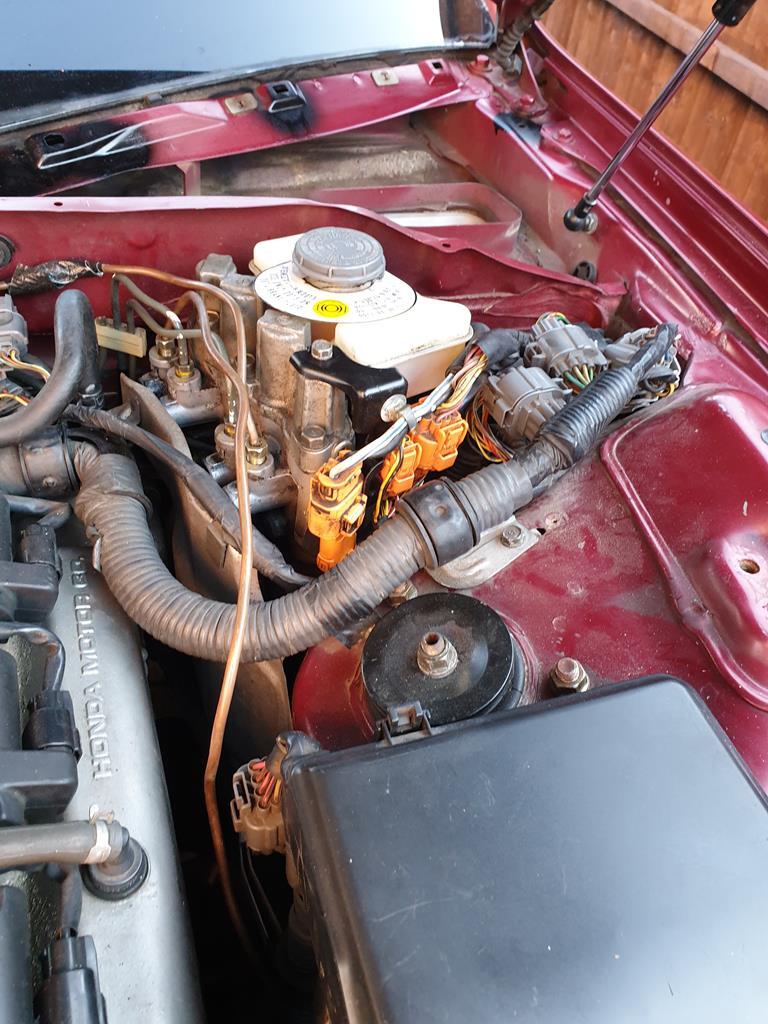 I gave the "cold" side of the heatshield a bit of a tidy up where there was some surface rust and gave it some paint. I also took the opportunity to adjust the routing of the replacement front brake lines done at the last MOT, they're still not factory by any means but are much tidier and not cable tied/taped to the strut brace bar. With that done, I tidied up the scuttle area a bit more, vacuuming out any remaining dead leaves and tidying up a little surface rust with some paint. I then did the bonnet on head balancing act to get the first of the scuttle trim panels in place 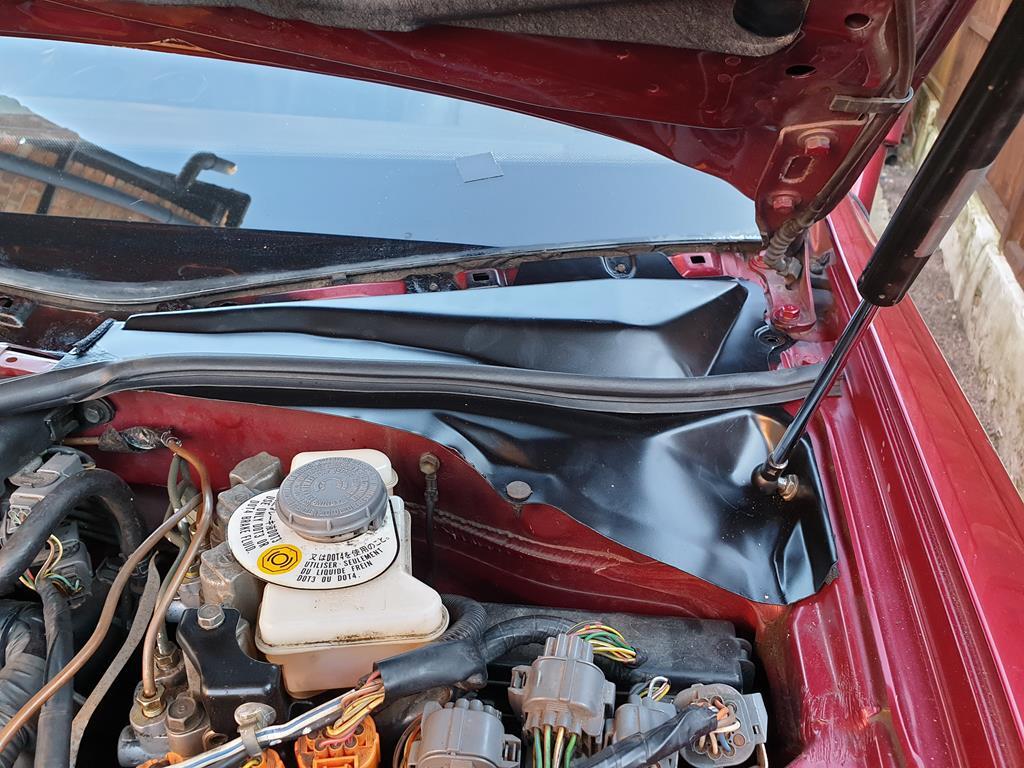 I didn't put the plastic scuttle trim panel on just yet. My attentions turned back to the fuel filter after my 14mm flare nut spanner arrived. This job very nearly went bad after I'd partially rounded the union before with a normal spanner, and even with the flare nut spanner on different flats, it still wanted to round off! As this was the main fuel line from the tank, replacement of the line wasn't really something I wanted to be thinking about, so repositioned the flare nut spanner and gave it one last go 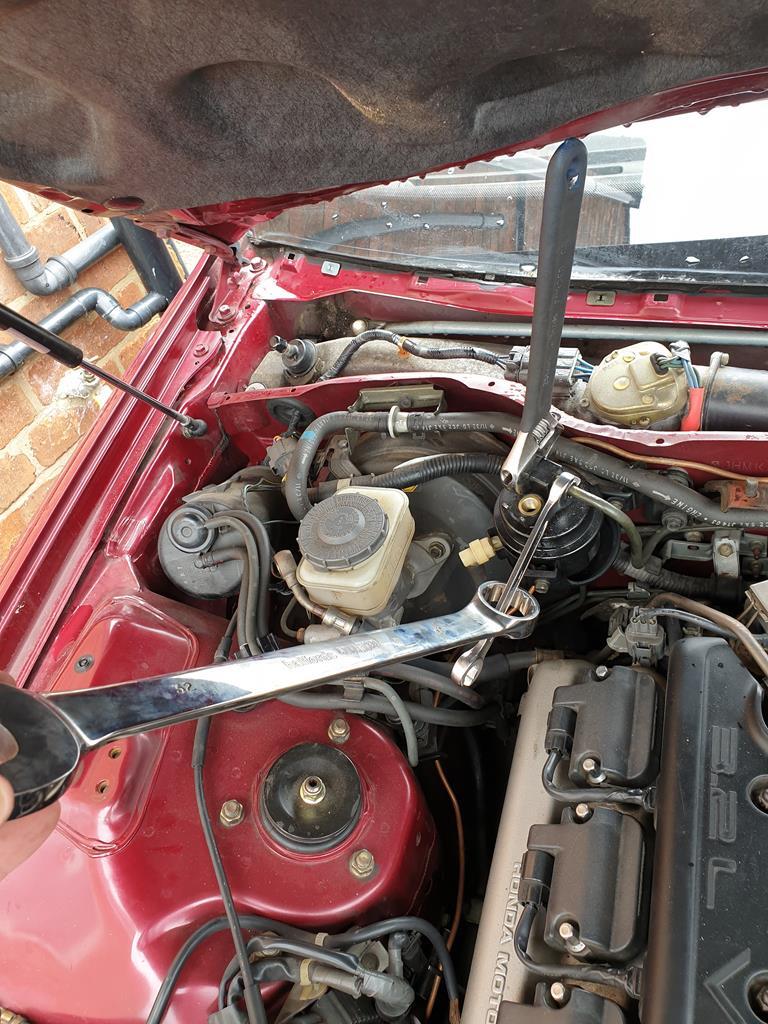 With an adjustable spanner holding the filter in place, and a 32mm spanner (bought for a BMW E34 viscous fan coupling in case you were wondering) hooked around the flare nut spanner, it finally cracked off!  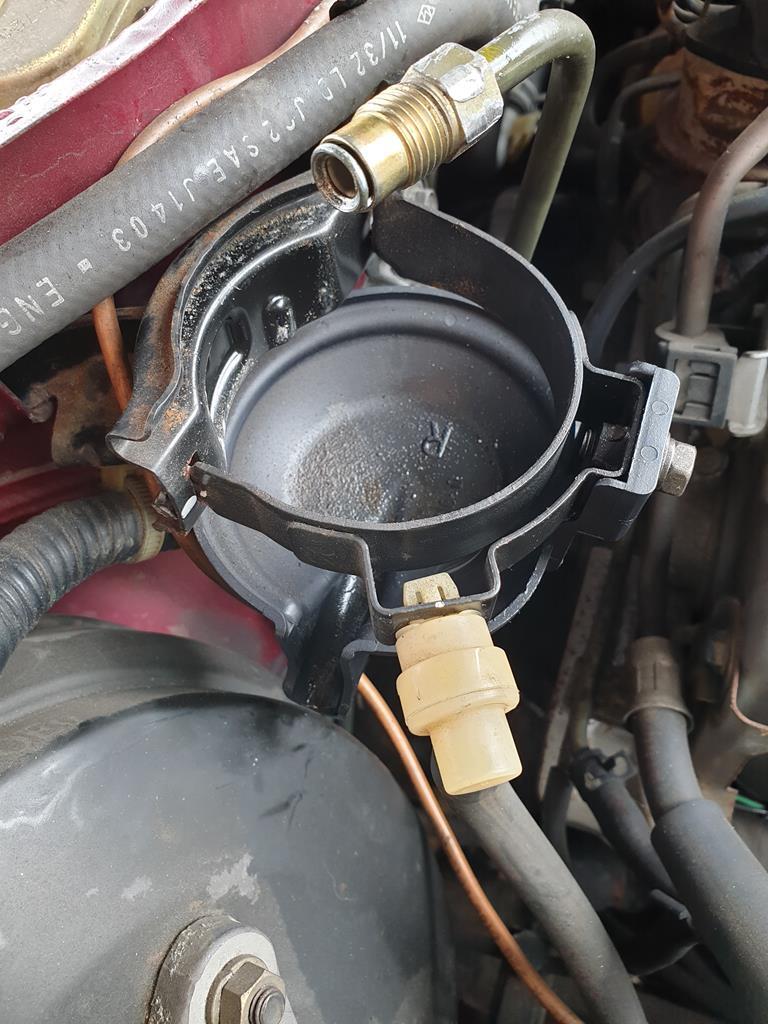 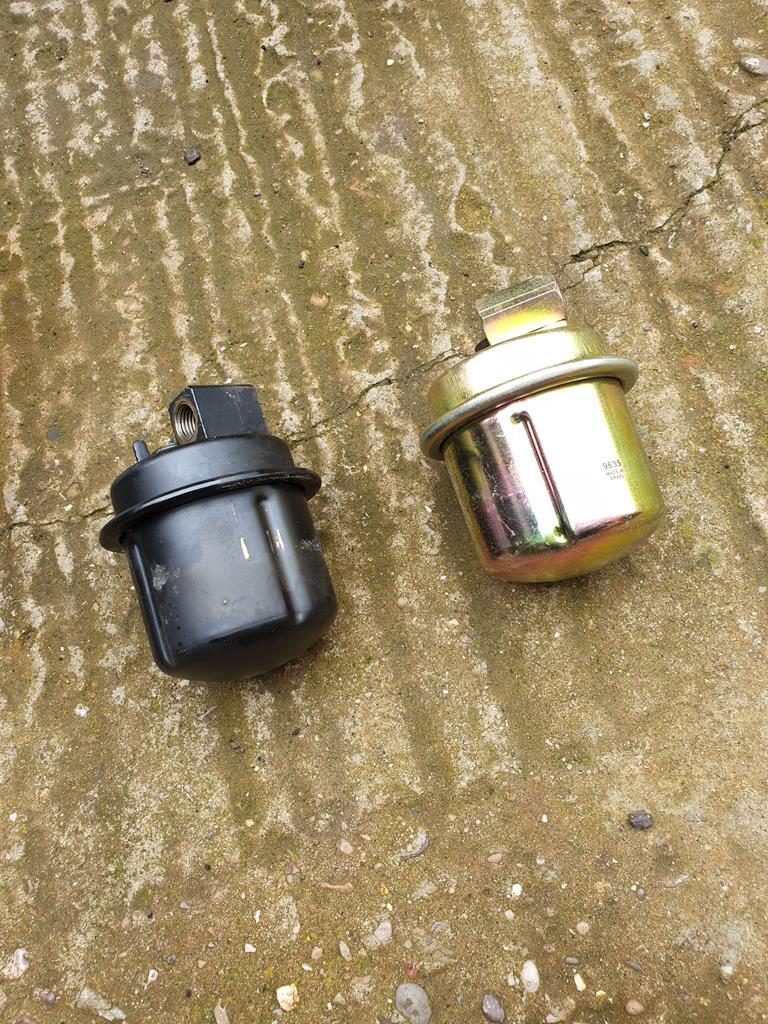 New one is nice and shiny. I'm not sure if it's worrying or reassuring that the filter holder has a little spout on it, I presume to direct any leaked fuel away from the exhaust that it sits above. Honda trying to make sure every eventuality was covered, or were they expecting the filter to leak at some point?... In any case, new filter on, unions tightened to spec and no fuel leaks with the ignition on so happy days! I got the plastic side of the scuttle trim put on, but there was one last trim at the bottom of the windscreen to go, the condition of the clips that hold it on weren't in great condition 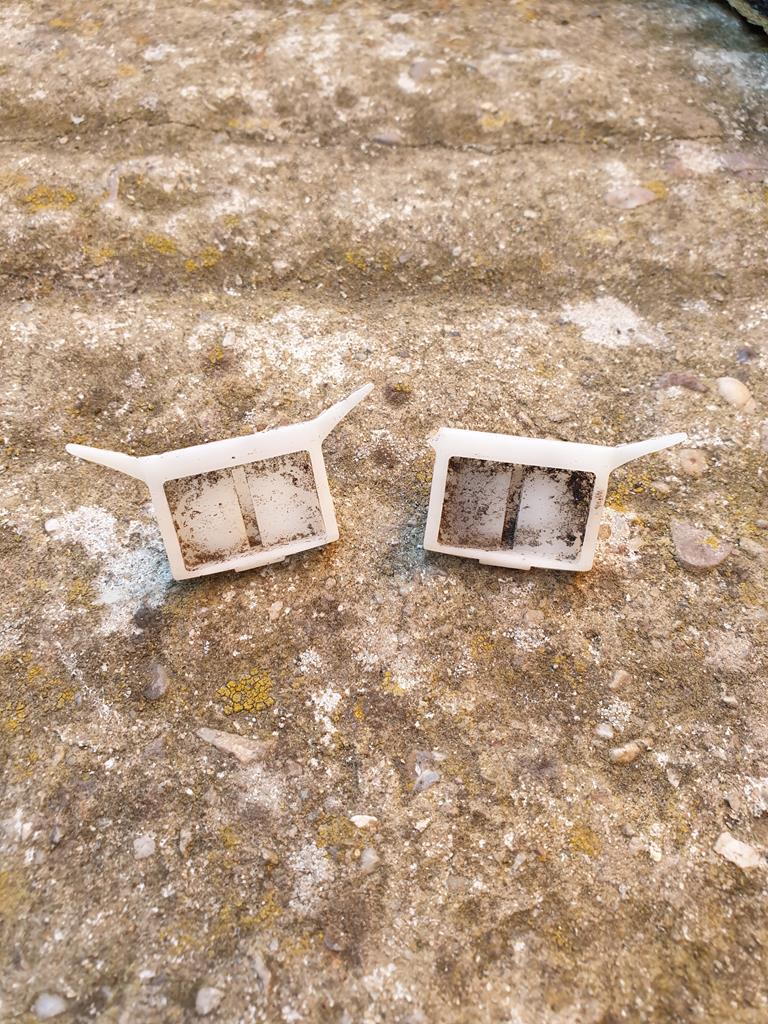 Most had one of the little "arms" that locate it into the trim, snapped off. After a little trawling on US ebay, I managed to find some for sale, posted from China but came a lot quicker than some of the UK based items I've ordered recently! Odd times indeed.. 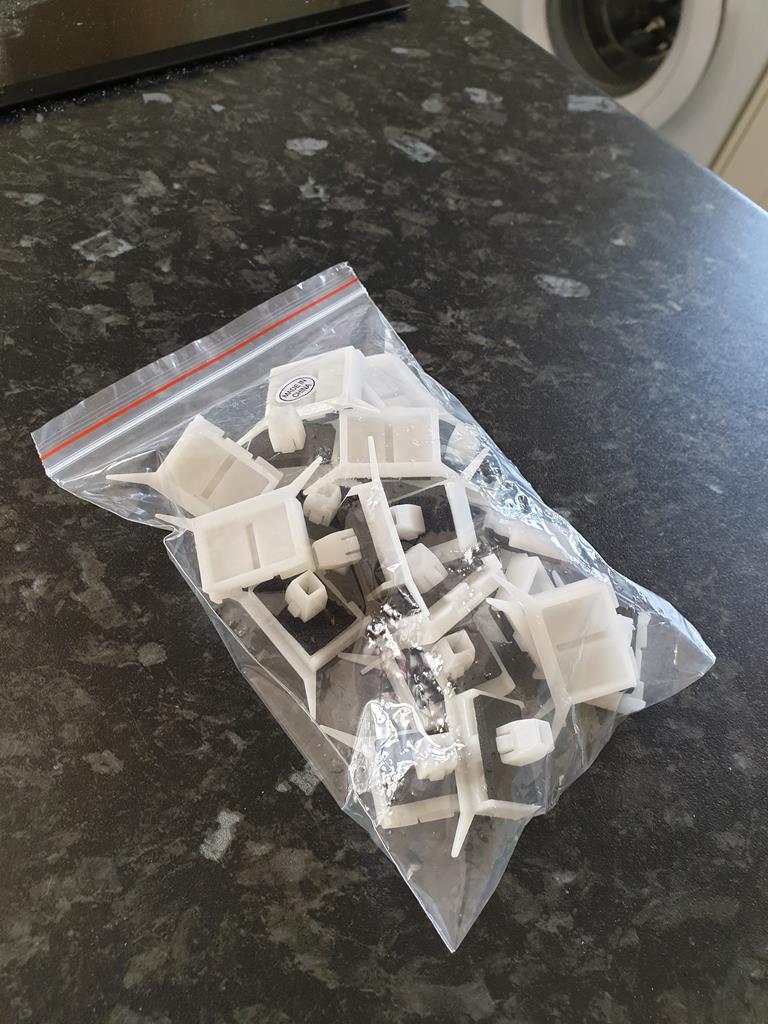 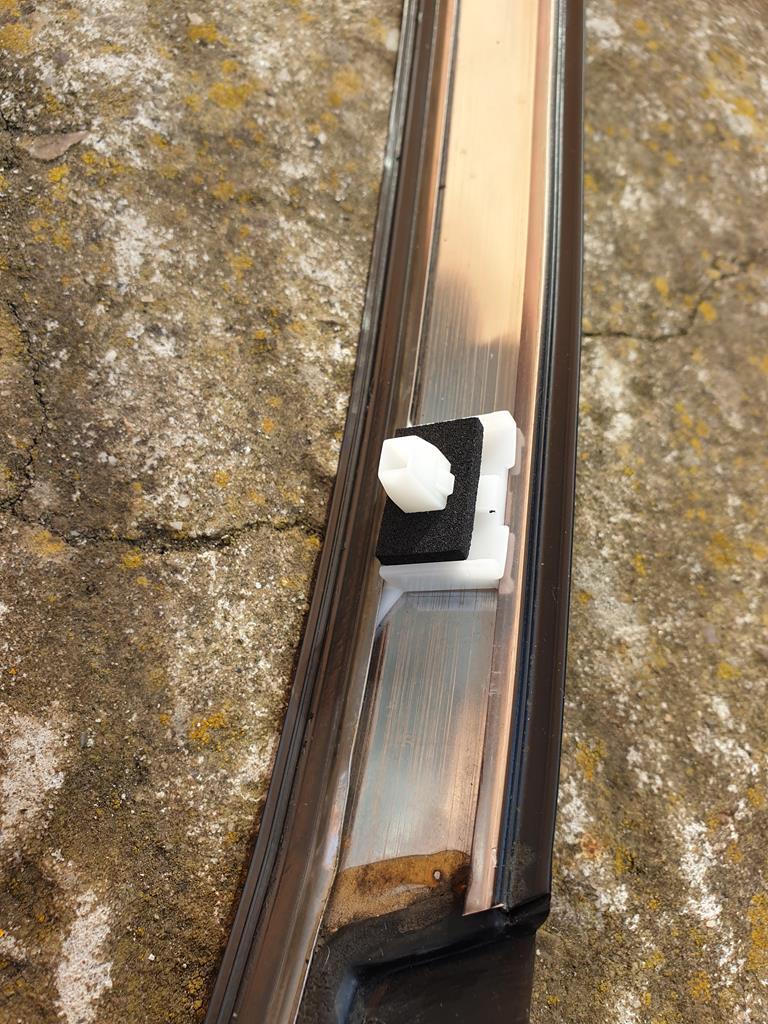 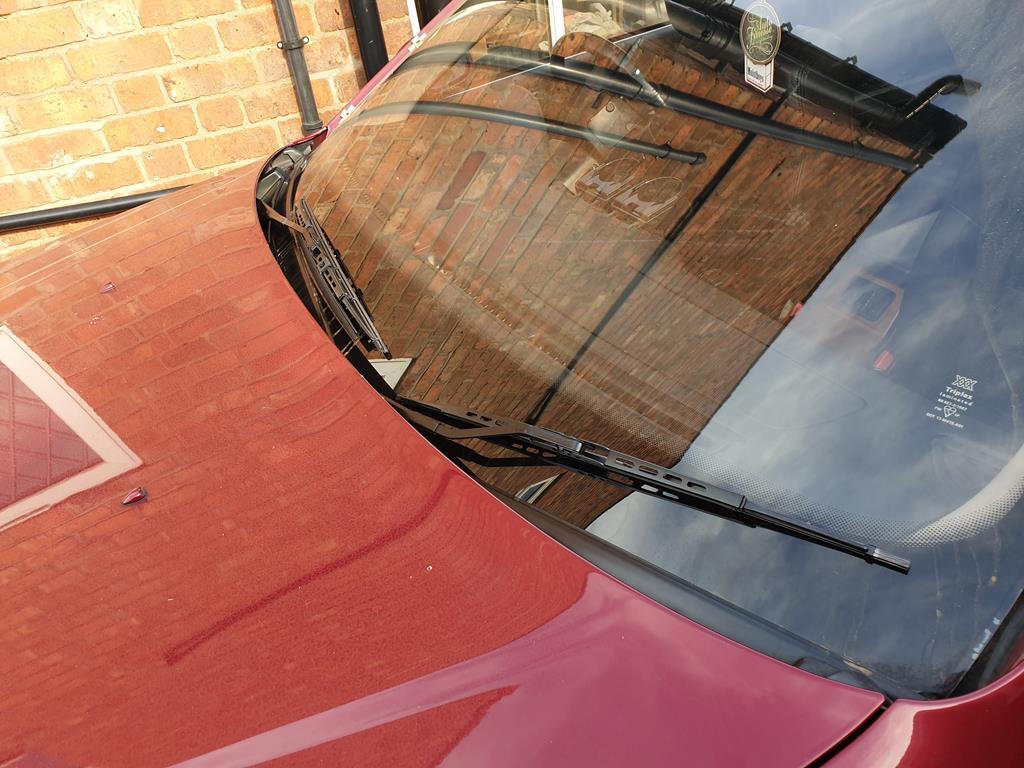 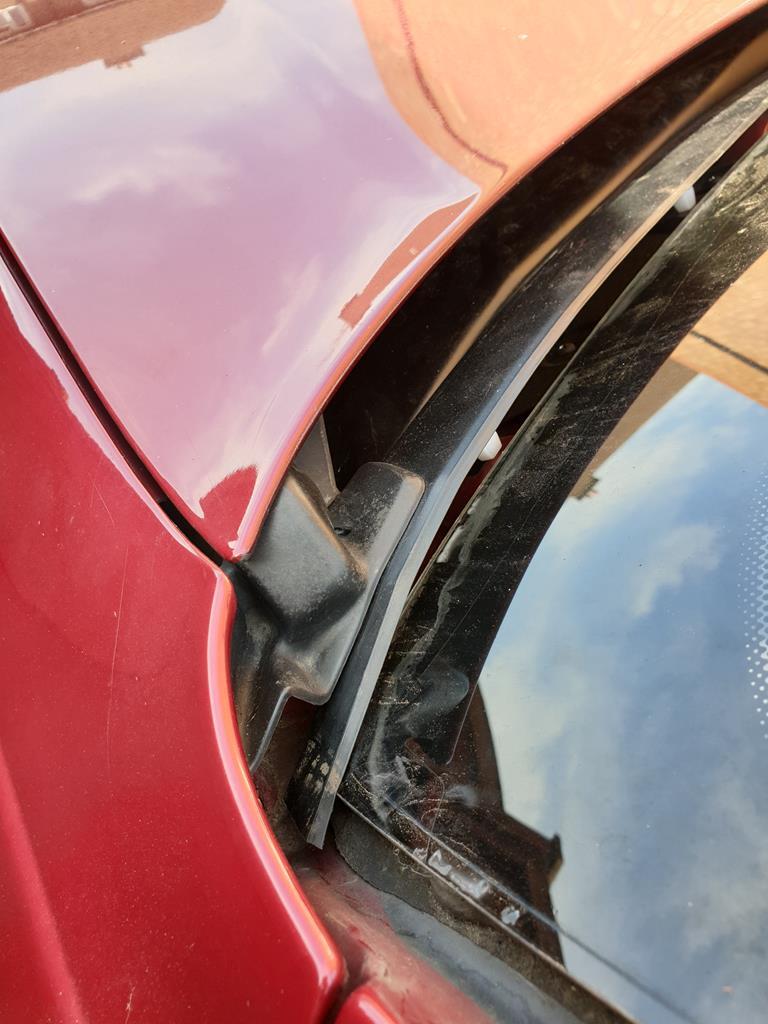 Loads more clips than I'll ever need but they did the job perfectly, bit of a faff to get the trim in just the right place with the end rubbers covering the bonnet hinges but got it all clipped down and the wipers back on. It's subtle but it will be nicer not seeing my patchy wiper blades while driving now. My focus has gone back to the suspension now as I really need to get the car back on the road. To give a bit more access to the tricky ball joint nuts, I've taken the drivers side rear caliper and disc off. While doing so, I noticed that the disc appears to have been rubbing on the dirt shield 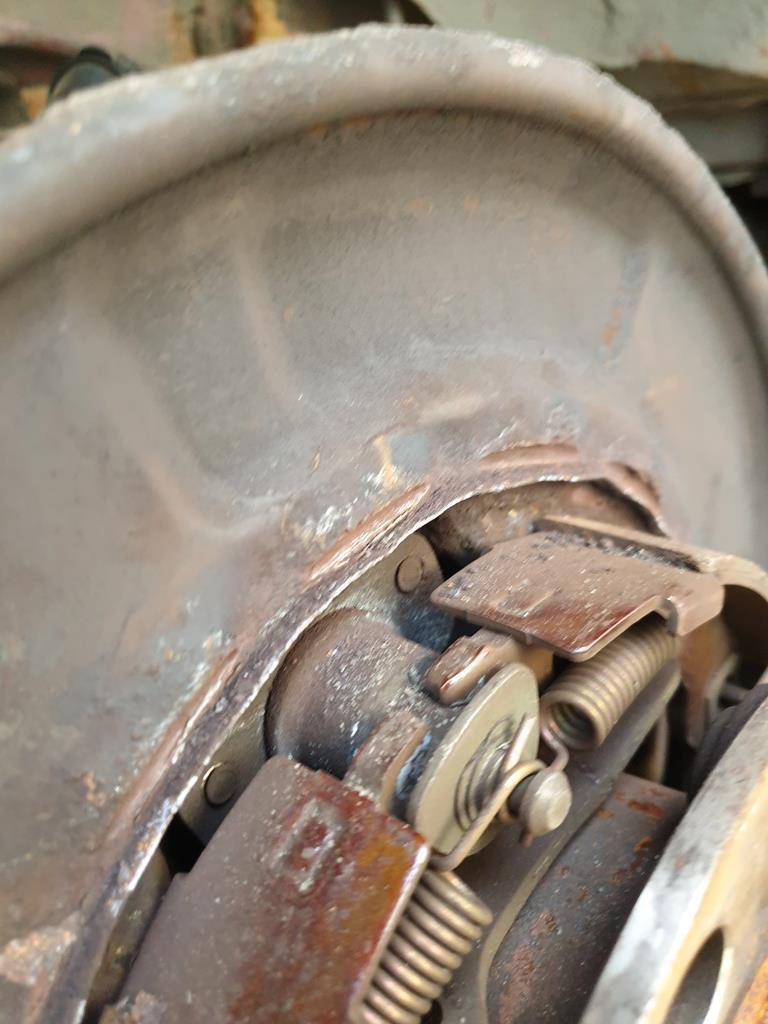 So far I've not quite been able to work out why this is the case as it wasn't particularly audible while driving, but my main focus at the moment is on getting these crusty suspension arms off, and there may be some other bits I change while I'm there.. |
| |
|
|
adam73bgt
Club Retro Rides Member
Posts: 4,998
Club RR Member Number: 58
Member is Online
|
|
May 12, 2020 21:31:59 GMT
|
Life has largely got in the way of major progress, but there are some updates. Initially there aren't many/any photos as it was mostly just general hacking and swearing at the rear suspension arms trying to persuade them off the car. On the drivers rear side, I did eventually get the upper arm off and new one loosely in place, and the lower arm eventually came off as well. Being able to get the new lower arm on has so far evaded me, its a balance of slotting it onto the radius arm which locates to the middle of the lower control arm, while locating the ball joint end into the knuckle and the inner bush needs to avoid the exhaust and locate into the subframe. All of which, the car is resisting intensely! There is another suspension change which I hadn't planned on but I blame lockdown induced boredom... 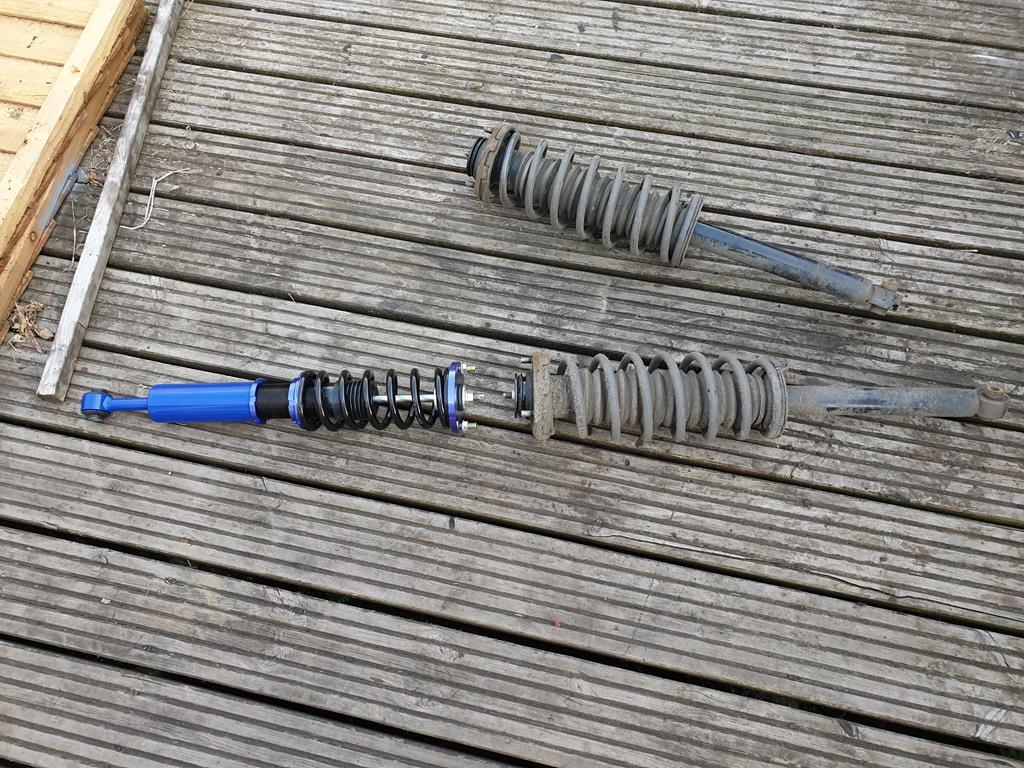 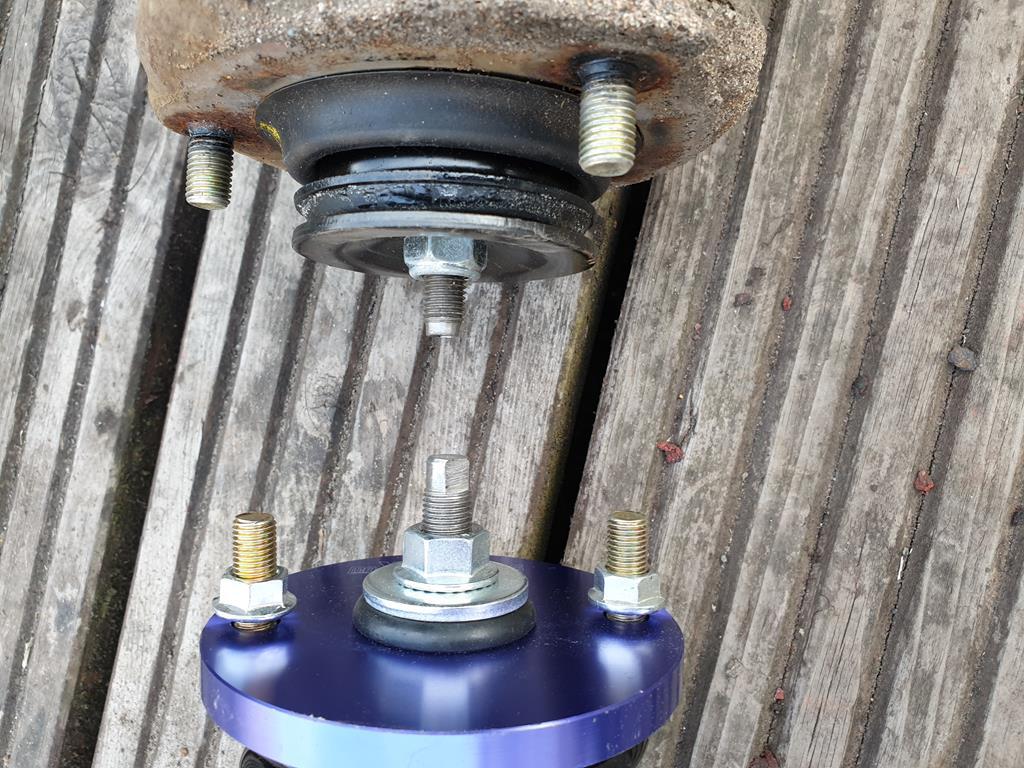 I bought myself some cheapy Acura TSX/Honda Accord (CL7/9) coilovers  As you can see above, the top mounts are quite different on the Accord and the Legend, so I ordered some new Front and Rear Legend top mounts. This just allows me to keep the original struts as complete units ready to swap back on if/when the coilover experiment fails  First thing I had to do was drill out the top mounts as the coilovers use a bigger diameter damper rod 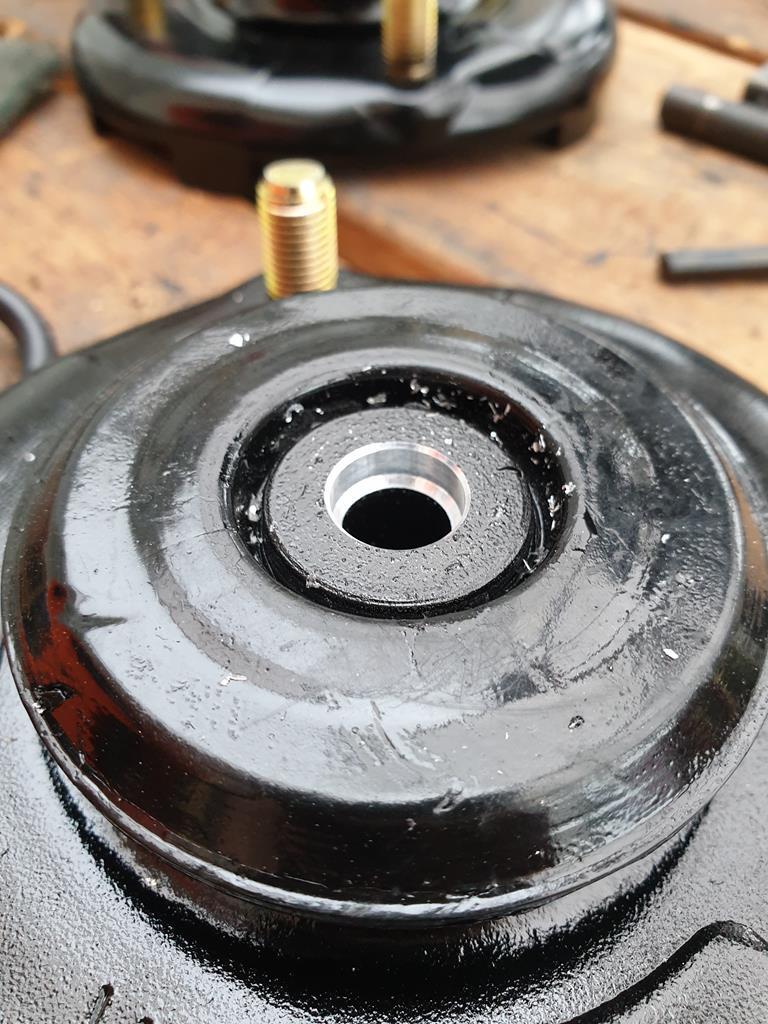 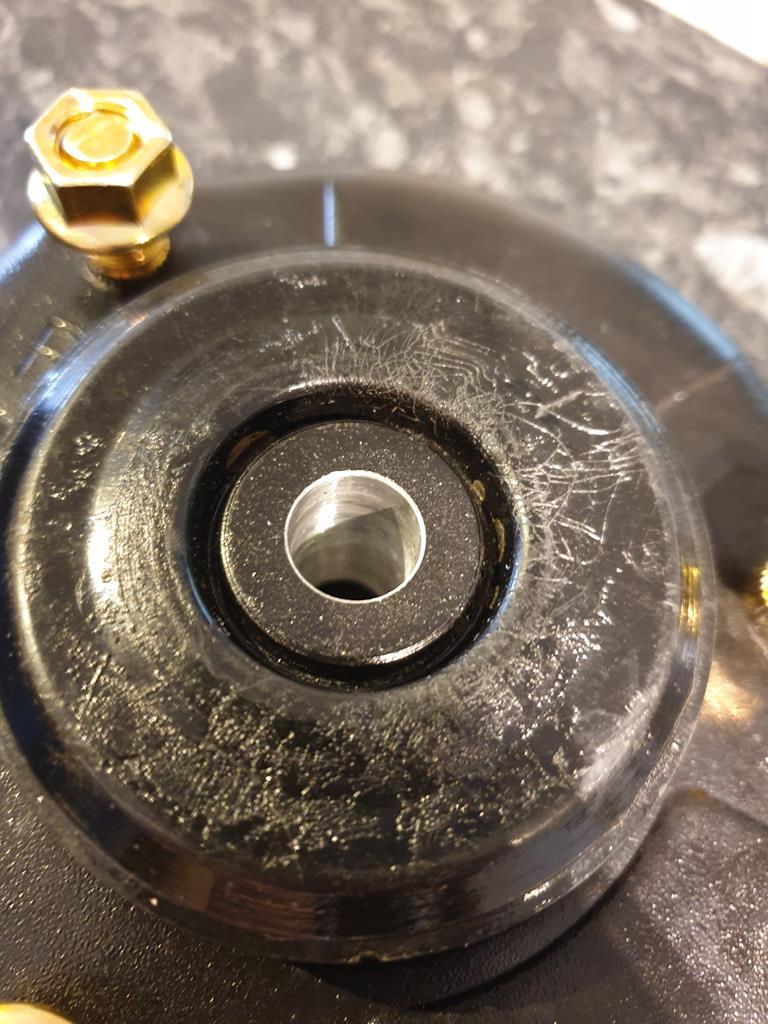 I used a step drill bit to give me the 12mm pilot hole, then a 12mm drill bit to drill it out. ( I did also have to buy a pillar drill to be able to do this but I needed one anyway right?...) I then took the coilover top mounts off and did a bit of measuring and calculating to account for the different thicknesses in the new and old top mounts. Basically, I had to make a 14mm spacer to go over the damper rod; luckily for me, there was a crush tube in the old rear lower control arm that I just removed which had the correct diameter, so I cut it down to length 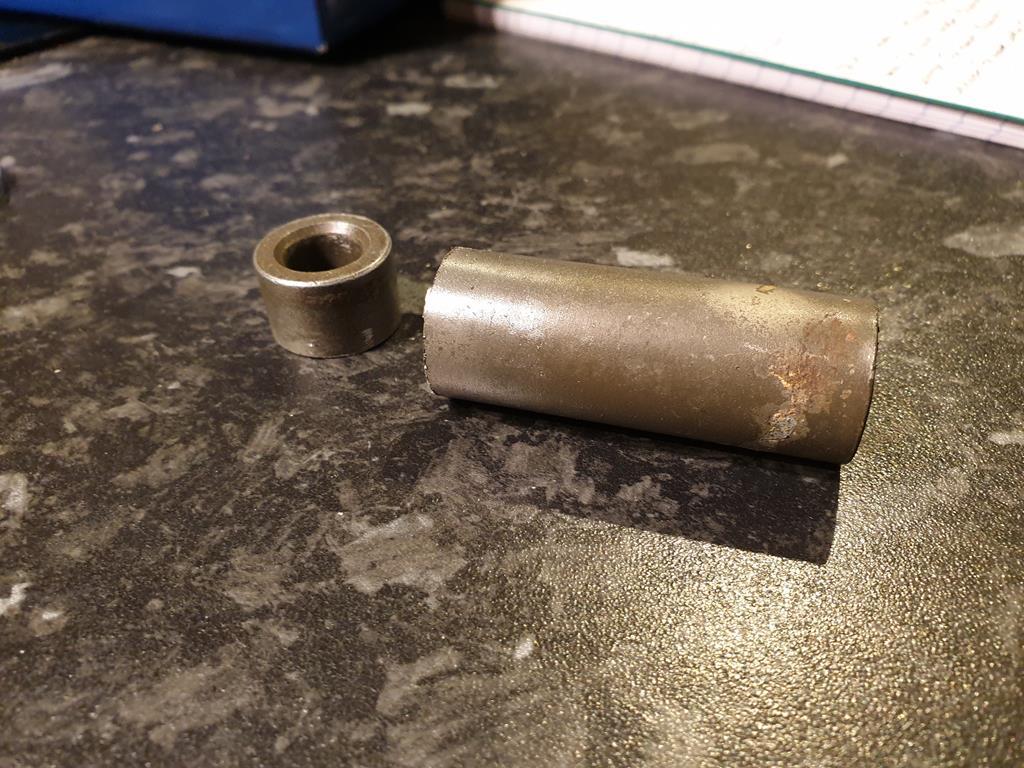 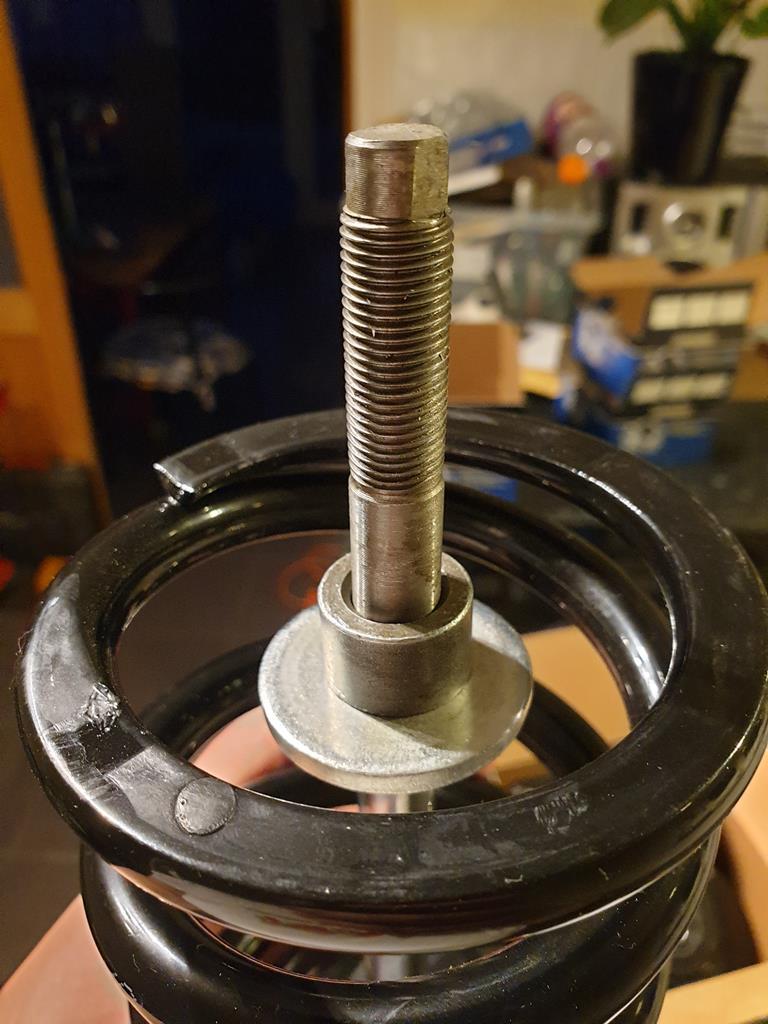 And it did the job. I don't seem to have any pics of the completed strut but its all gone together OK. Not fitted to the car yet due to the aforementioned messing about with the lower control arm. NOW, while I was getting a bit fed up with trying to fit said lower control arm, my attention was drawn to a suspect area at the rear of the drivers side rear wheel arch, so I did a little digging. 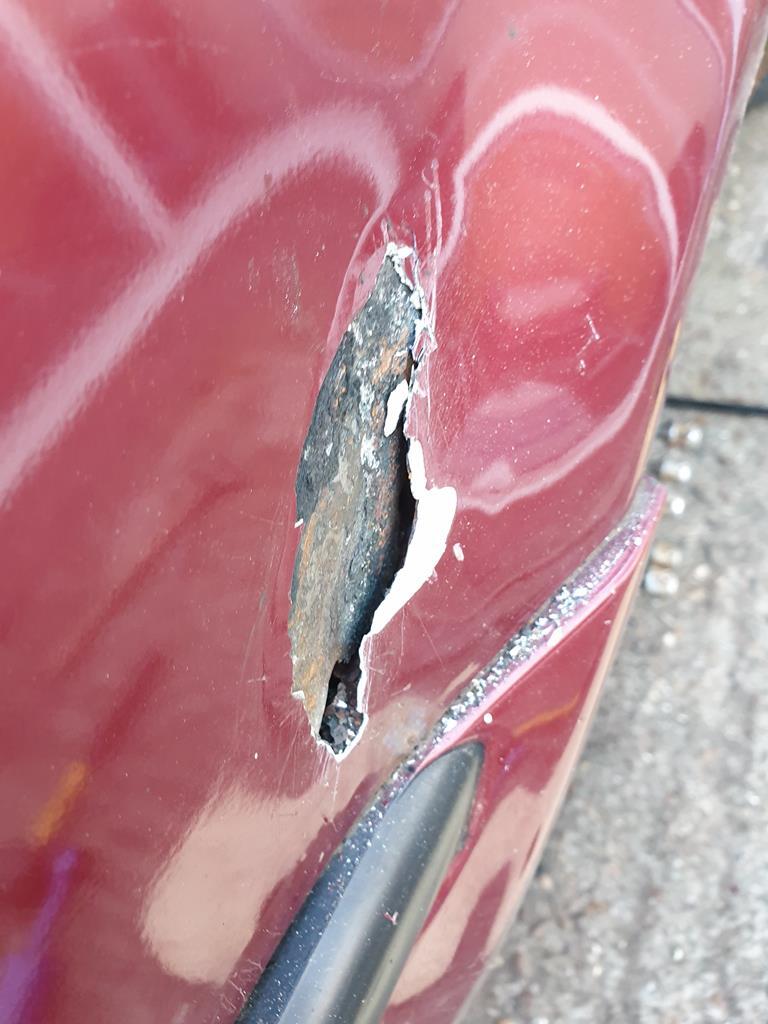 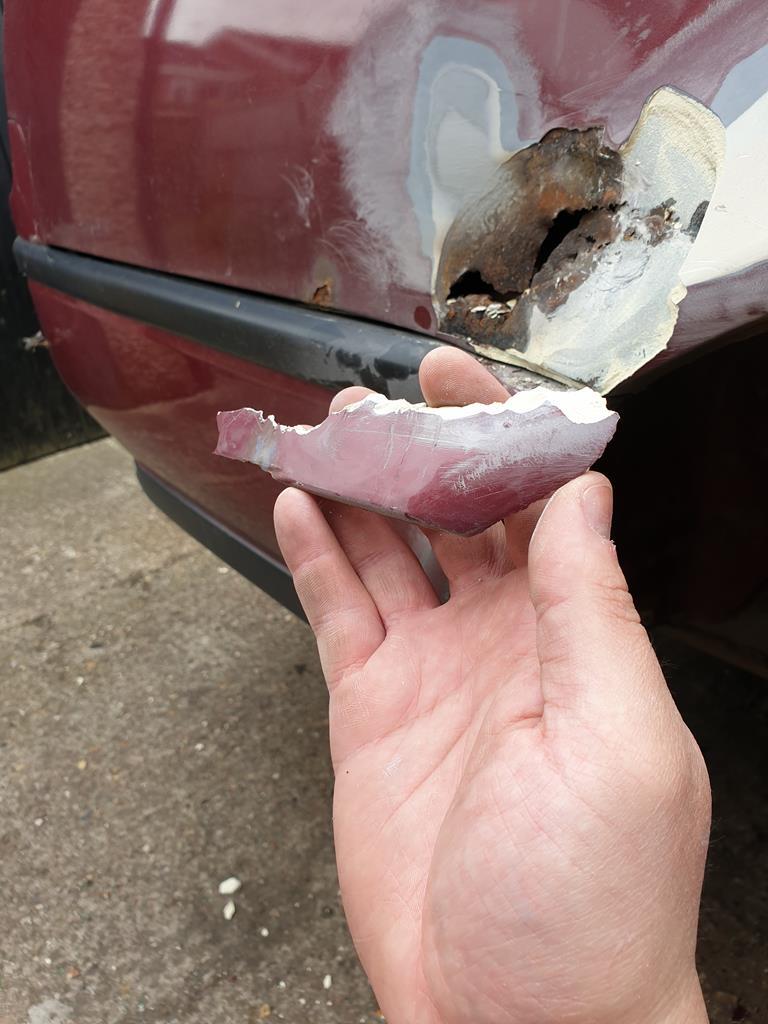 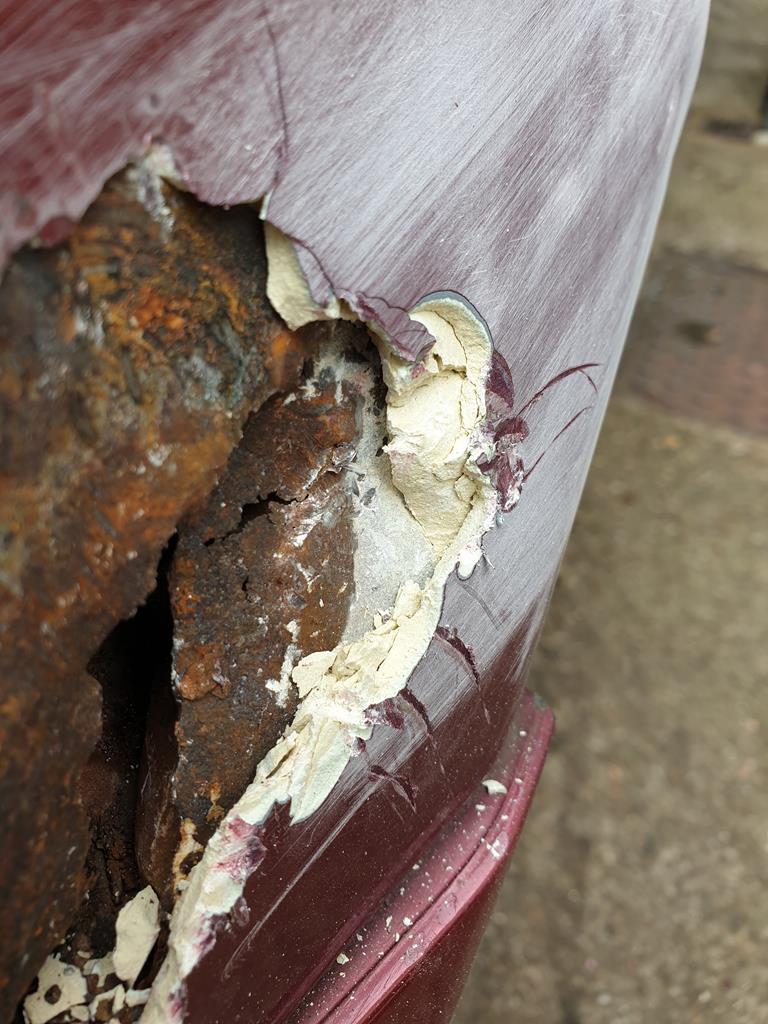 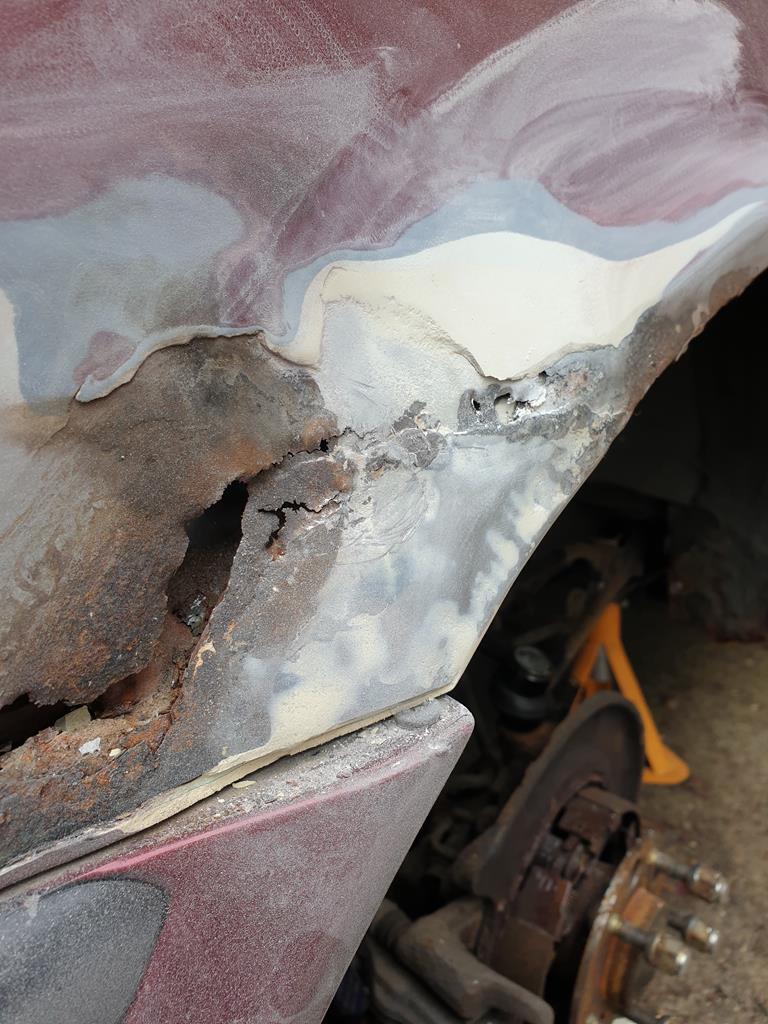 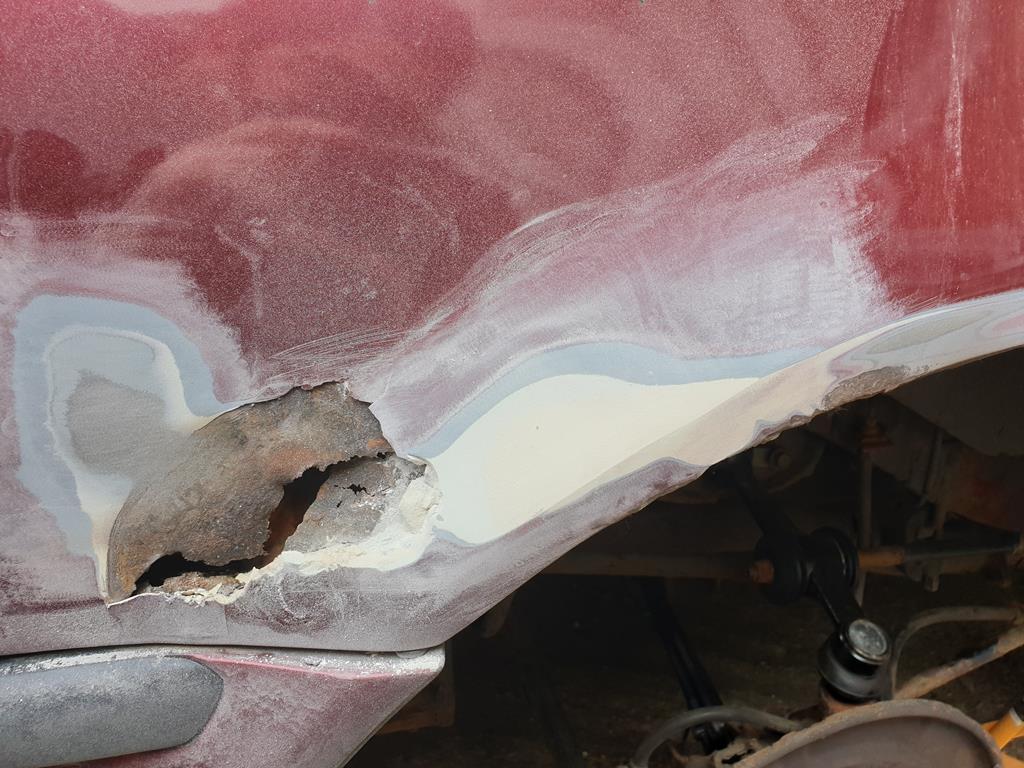 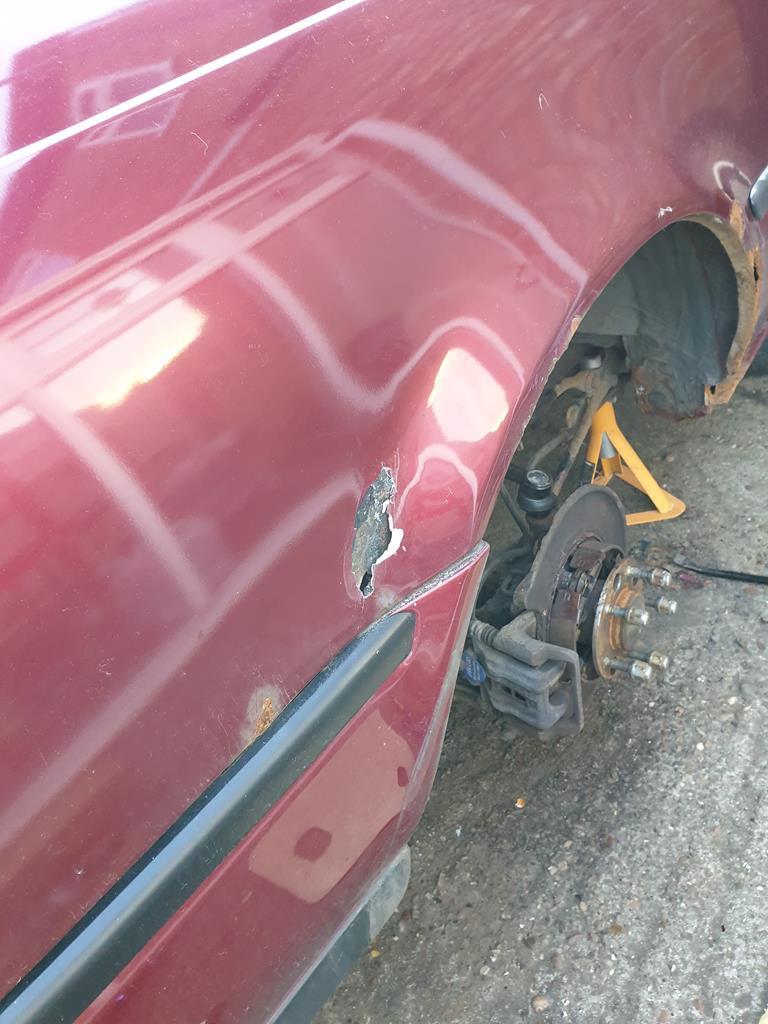 I hope those are somewhat in the right order.. but yeah, a hidden rust hole with what looks like the remnants of a poor welded in patch then the rear of the arch lovingly sculpted in filler.. Currently enquring about the arches on the one breaking Legend Coupe that I can see at the moment to see if I can get some second hand panels for this as this looks like it will be a hard shape to make by hand (unless you shape it in filler I suppose...) I'll still try and get the suspension on while I weigh up my options, on the one hand I did want to learn welding, but also I can see this car snowballing and keeping me from getting other stuff done, we shall see |
| |
|
|
goldnrust
West Midlands
Minimalist
Posts: 1,887
|
|
|
|
Damn. That's a bit annoying. Coilovers look shiny though, which makes up for the rust  Whilst it's a bit daunting, I don't actually think that would be too hard to do without a repair section. Leaving behind the instagram welders and stuff, those of us in the real world will always need some filler to finalise the shape of a repair if you want it to be seamless when painted. And I think you'll find even those professionals will spray a thick layer of high build primer which is essentially like putting a couple of mm thick coat of filler over the whole car before blocking it back... If bending up the section you need is going to be tricky, break it down into more simple shapes and weld each of those in individually. For example here you could make the essentially flat vertical section of the wing, then weld on the arch flare on that, both of which just need very gentle curves that you can probably bend over your knee, then make a third folded section (hammered in a vice ) for the arch lip. Yes it's a bit more welding, but the end result will be just as strong. What I would say is that you might not have found the full extend of that rust yet. Until you've got clean shiny metal round all the edges of the rusty spot there could be more hiding. Personally I wouldn't do any more digging till you're sure that welding it up yourself is what you want to do. If you decide that it's not the direction you want to go, then it's easier to go a different route (professional repair/sell/etc) if the car's not already got half the wing cut off! |
| |
|
|
|
|


