adam73bgt
Club Retro Rides Member
Posts: 4,998
Club RR Member Number: 58
|
|
May 13, 2020 10:24:39 GMT
|
Yeah I hear you, I really am trying to work out whether this is all going to be worth my time/money or not, I like the car, but its also going to massively distract from the MG which is a mistake I've made many times before... I think the rear bumper needs to come off really to see the full extent (though I'm not planning on cutting anything out of the wing just yet!), and typically all the captive nut/studs are rusted tight and I think at least one of the tabs holding the captive nut has rusted off. Maybe I'll get the coilovers on, slam it and decide I love it again, or maybe I'll just look to get shot! What isn't helping is that my brother has just told me he's selling his car for a very reasonable price, it isn't retro but it is very much a "me" sort of car  |
| |
|
|
|
|
adam73bgt
Club Retro Rides Member
Posts: 4,998
Club RR Member Number: 58
|
|
May 25, 2020 21:24:11 GMT
|
Some may have seen from my MG thread that there have been some developments, I've got a new daily now for the time being in the shape of what used to be my brothers Jag S Type Sport 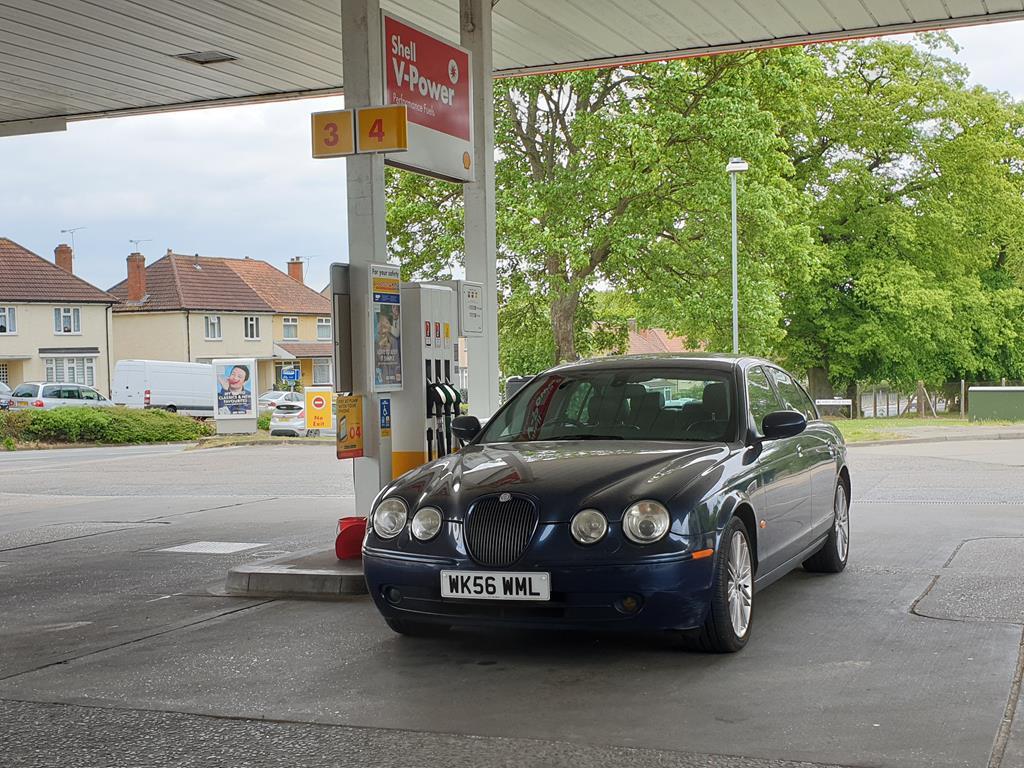 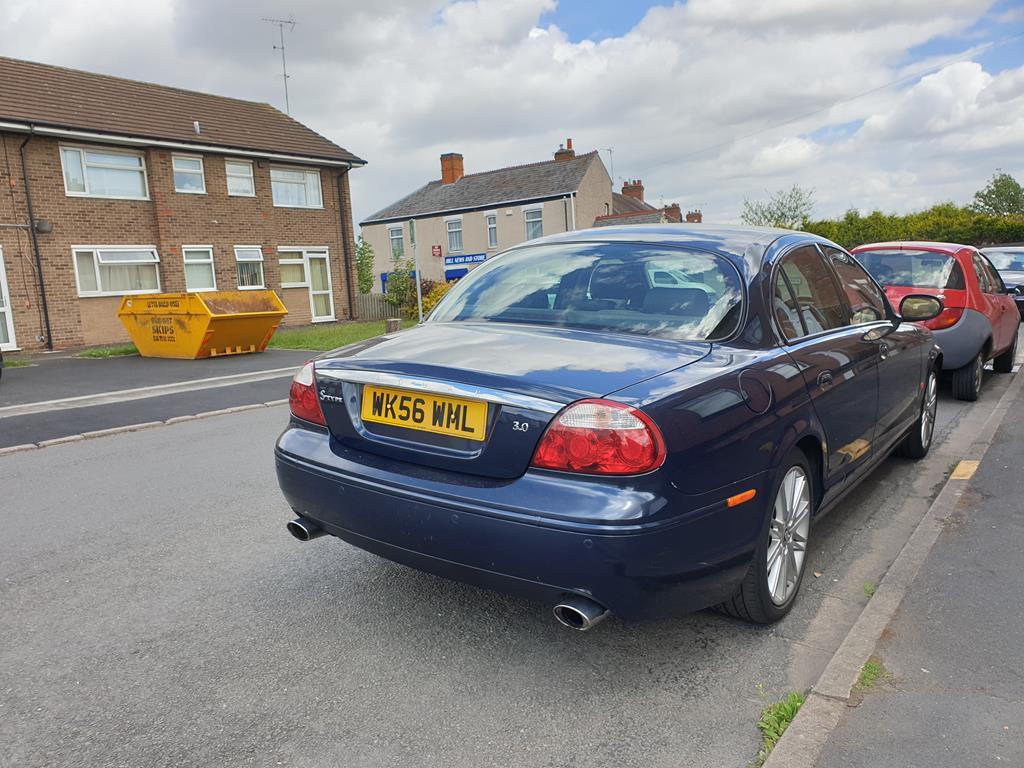 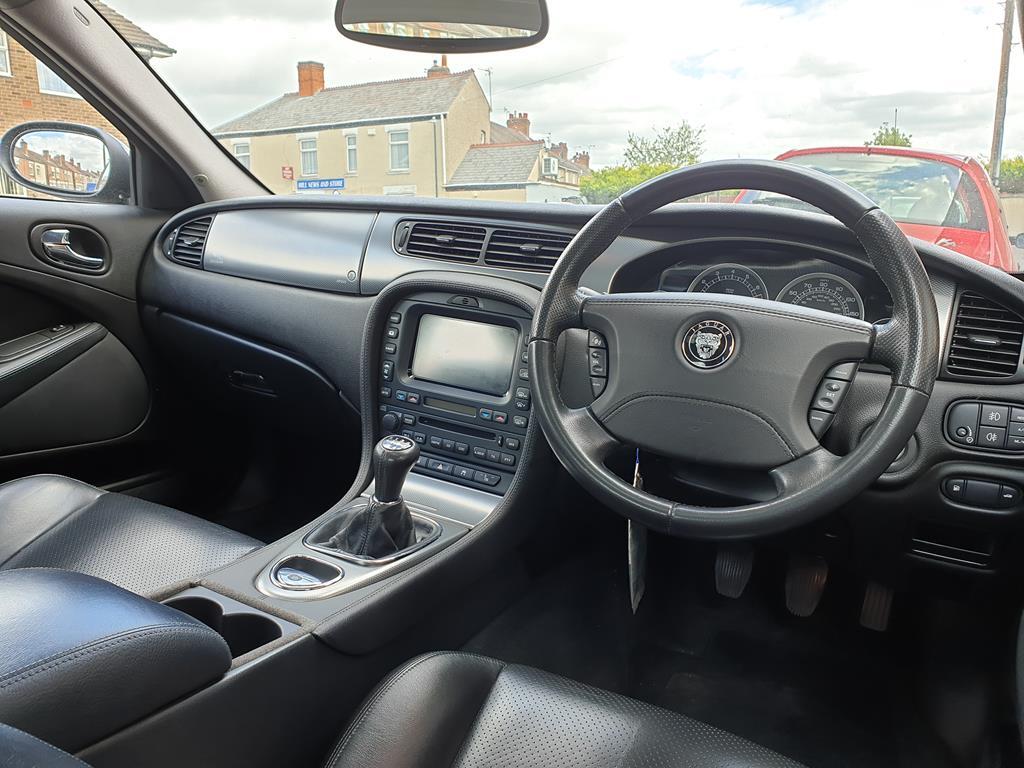 So that's taken a bit of pressure off getting the Legend back on the road, unfortunately I'm also on the job hunt due to Covid related cutbacks at work, so thats going to delay any bodywork on the Legend. However I did make a bit of progress with it today, it's not going to look like much but it was quite a pain trying to get both the upper and lower control arms in at both ends while also fully home on the radius arms. 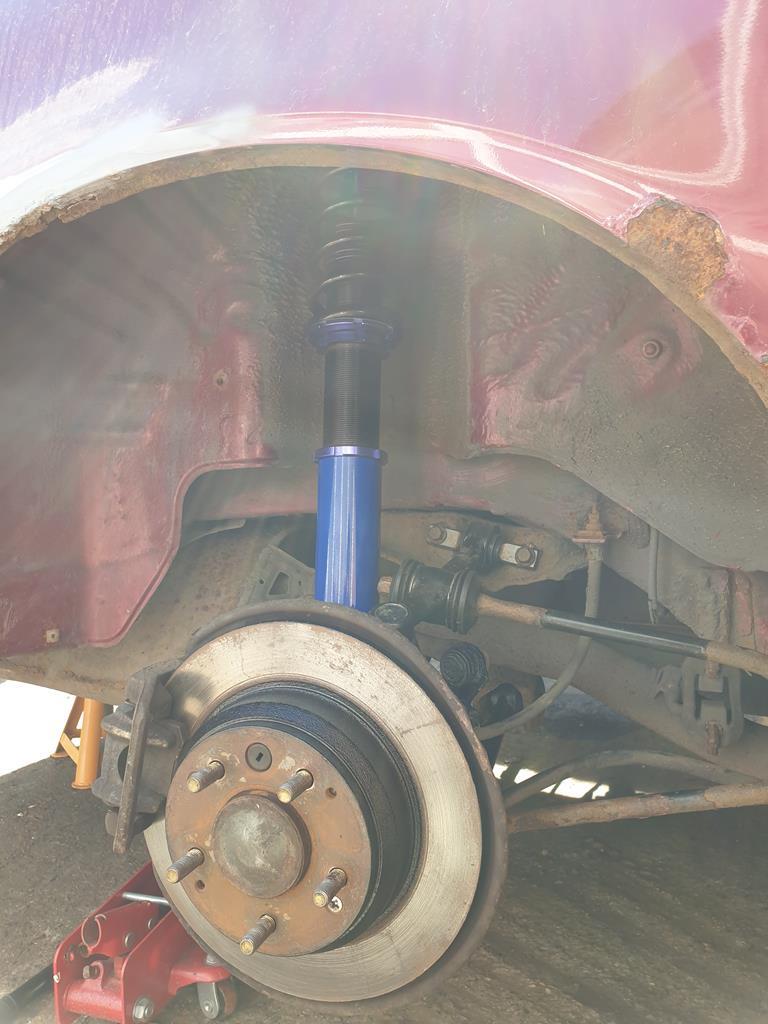 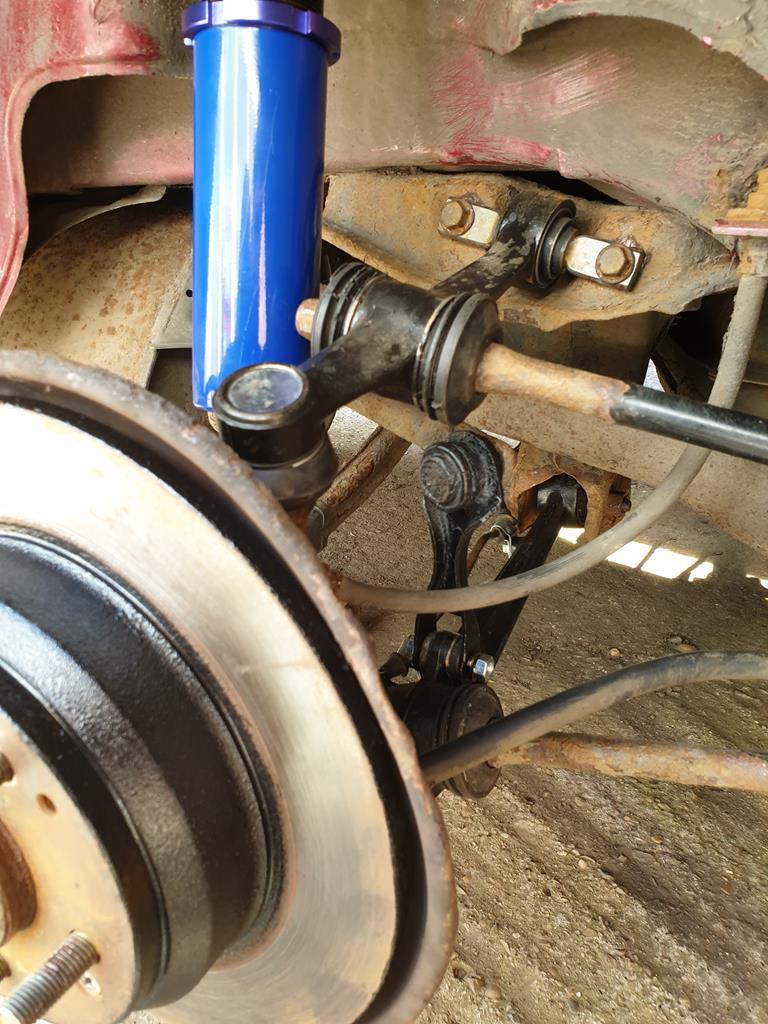 But thats the drivers rear side all back together, just need to put the split pins in the ball joint castle nuts. Next I'll either drop this side with a wheel to see how the ride height looks, or I'll crack on with the other side |
| |
|
|
|
|
|
May 25, 2020 21:37:11 GMT
|
|
Sorry to hear about the job. That's a right bummer. I hope you aren't too long finding another.
The Jag looks rather nice though. I've never really lusted after one to be honest but that does look rather nice inside. It would appear to the correct number of pedals too.
|
| |
|
|
adam73bgt
Club Retro Rides Member
Posts: 4,998
Club RR Member Number: 58
|
|
May 25, 2020 22:26:38 GMT
|
|
Thank you, I hope so too!
Yeah I've looked at them occasionally but never really felt the need to actively hunt one down, but the interior spec and the 3 pedals certainly made this one a lot more attractive to me! (even if the gearchange itself is a bit loose..)
|
| |
|
|
adam73bgt
Club Retro Rides Member
Posts: 4,998
Club RR Member Number: 58
|
|
Jun 17, 2020 22:46:46 GMT
|
Damn another 3 or so weeks on, about time for an update. I've been a bit distracted by other goings on, but I have also found some time to work on the Legend. I haven't taken many photos as the car has been annoying me so it's been more a case of just get on with it. Split/cotter pins arrived for the castle nuts so put those in meaning that the drivers rear side is all done. Next job was the passenger rear side, I was stuck on this side with the castle nut on the lower arm which was refusing to come undone. By the time I got it off, it looked like this 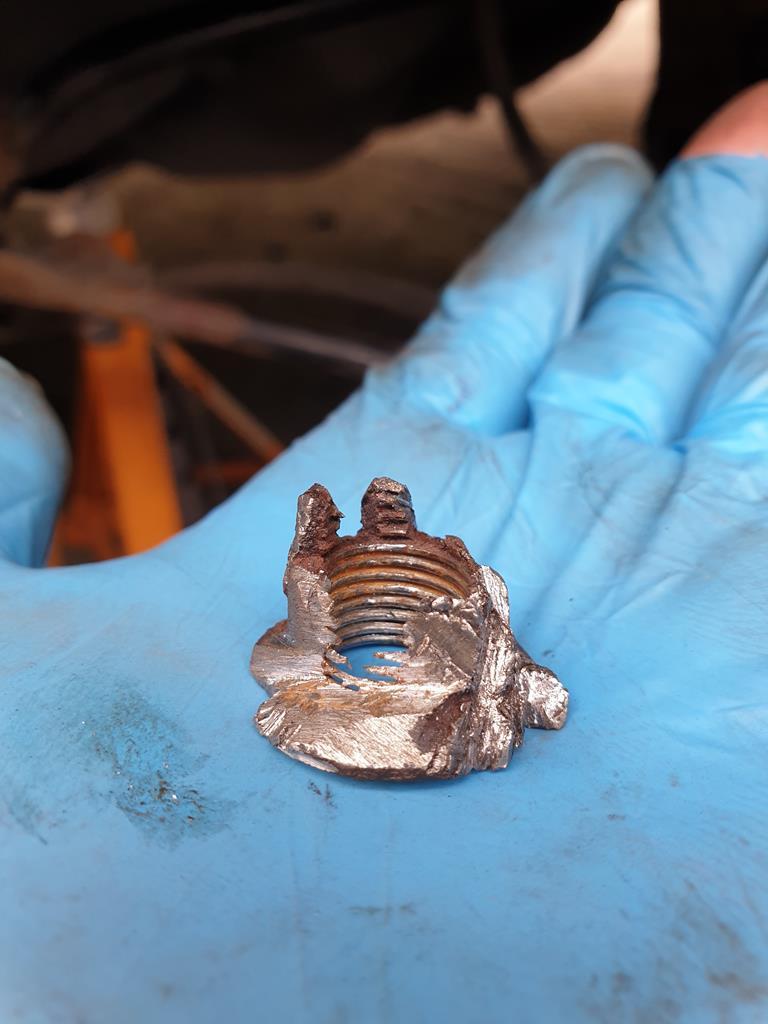 Seriously hampered access meant that it took a combination of files, hacksaw and chisels to finally get it free. Of course on doing that, the ball joint splitter then didn't want to play ball 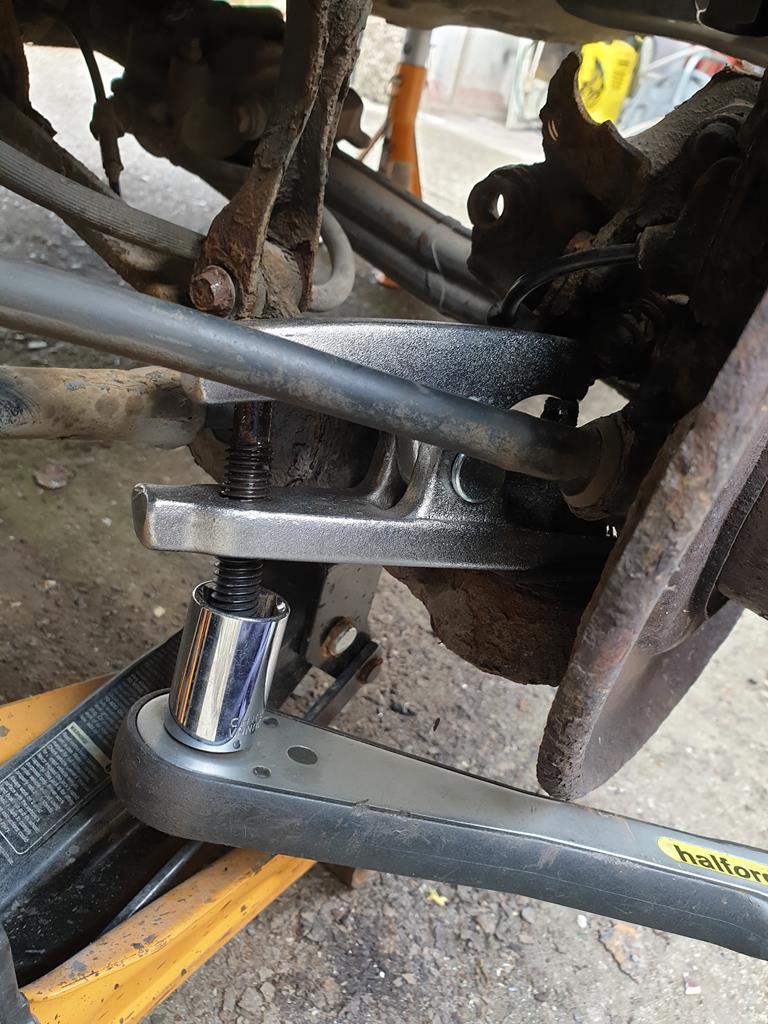 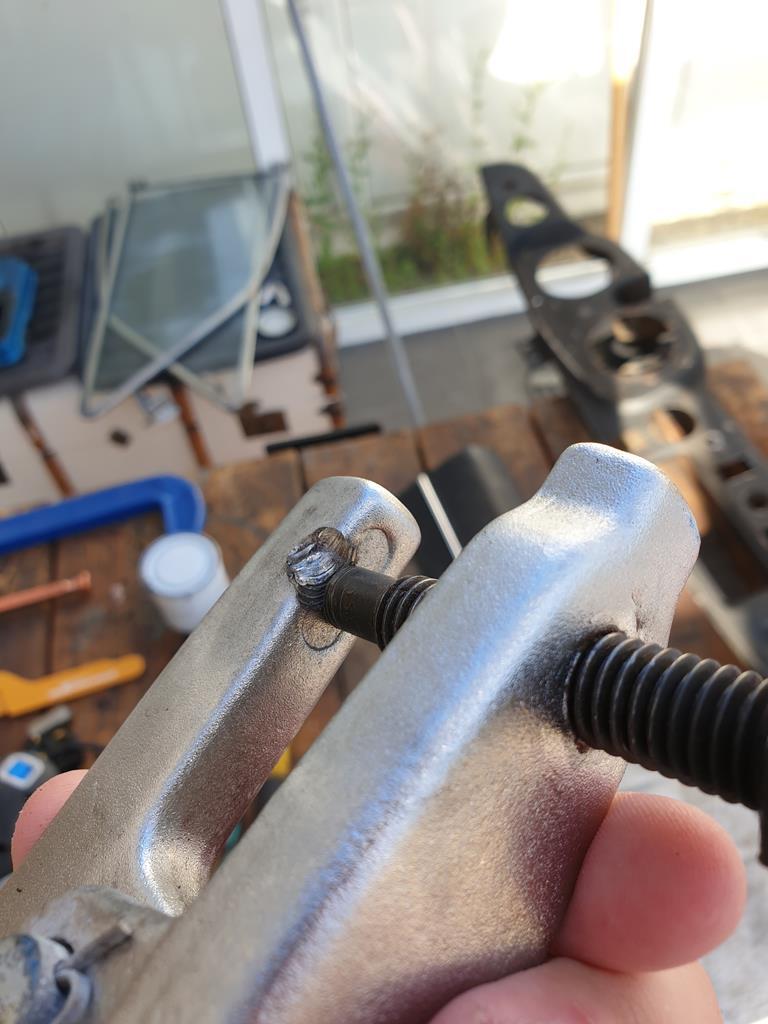 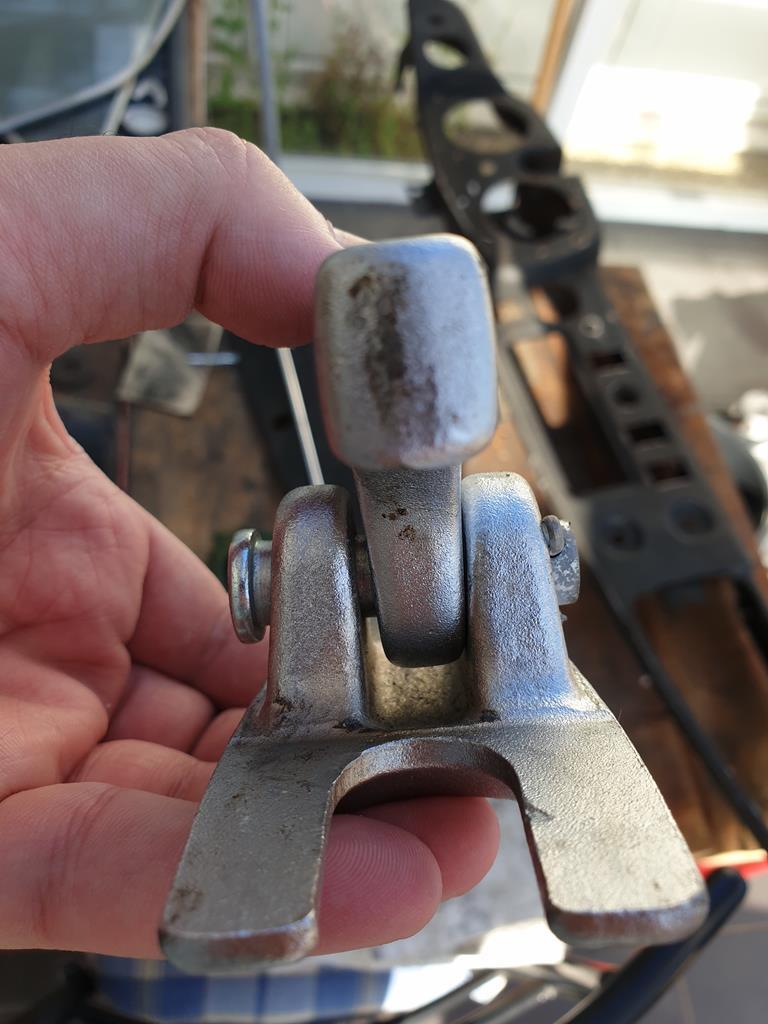 The play in the splitter meant that the bolt kept wanting to run off the splitter under load, so I fashioned up a washer to take the play out which sort of worked, it still wanted to run off, so I got it somewhat tight, then twatted the joint with a hammer and it broke free  Salvaged the ARB link from this grotty thing, by hacking through the captive nut etc. 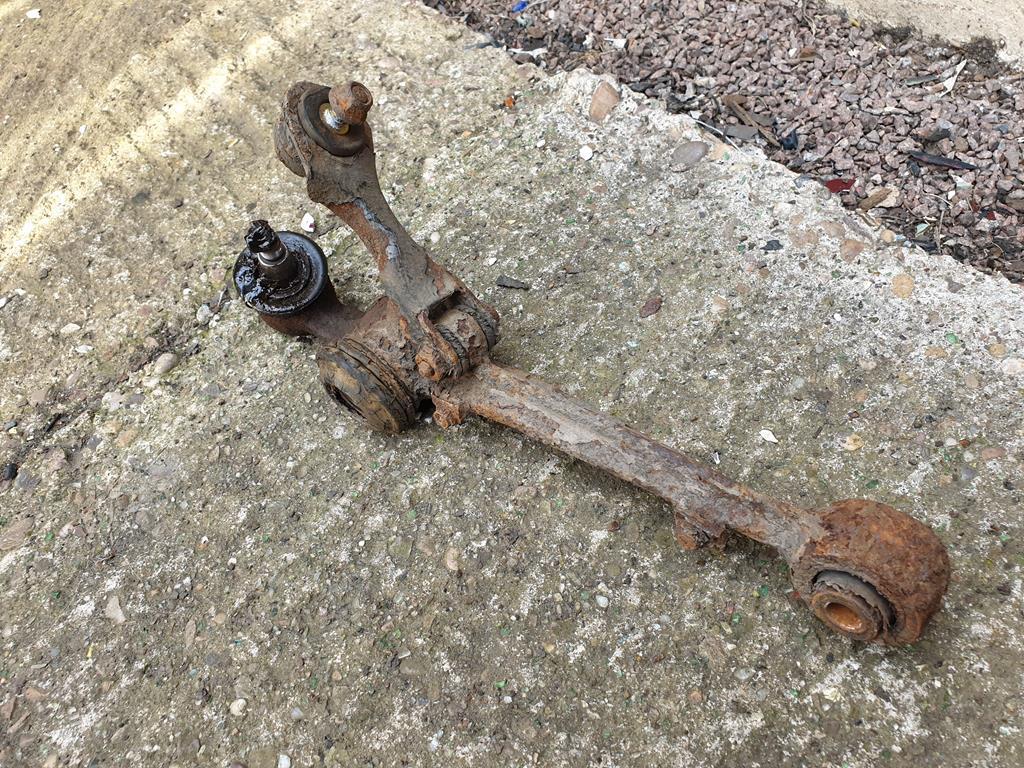 Did a quick and dirty tart up job on it and stuck it on the new arm 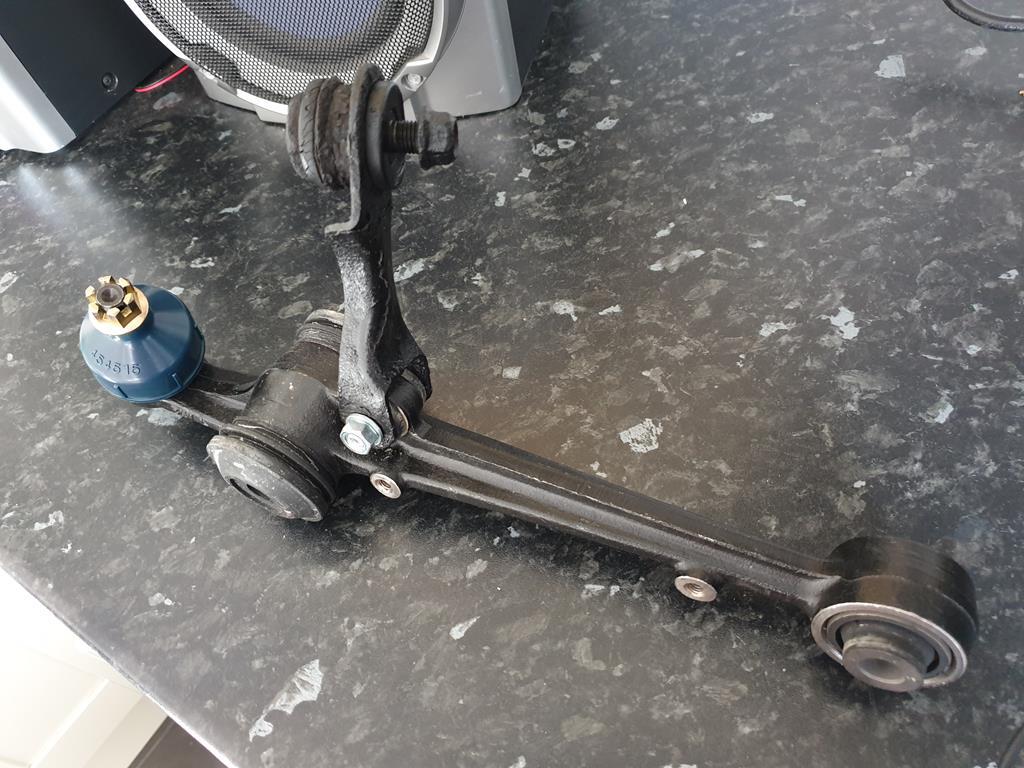 Which then went on the car, was much quicker to do this side once I knew the right way to get all the arms to play ball. Just needs everything torquing up then thats the rear suspension done. Tried a wheel on quickly for a slight mojo boost 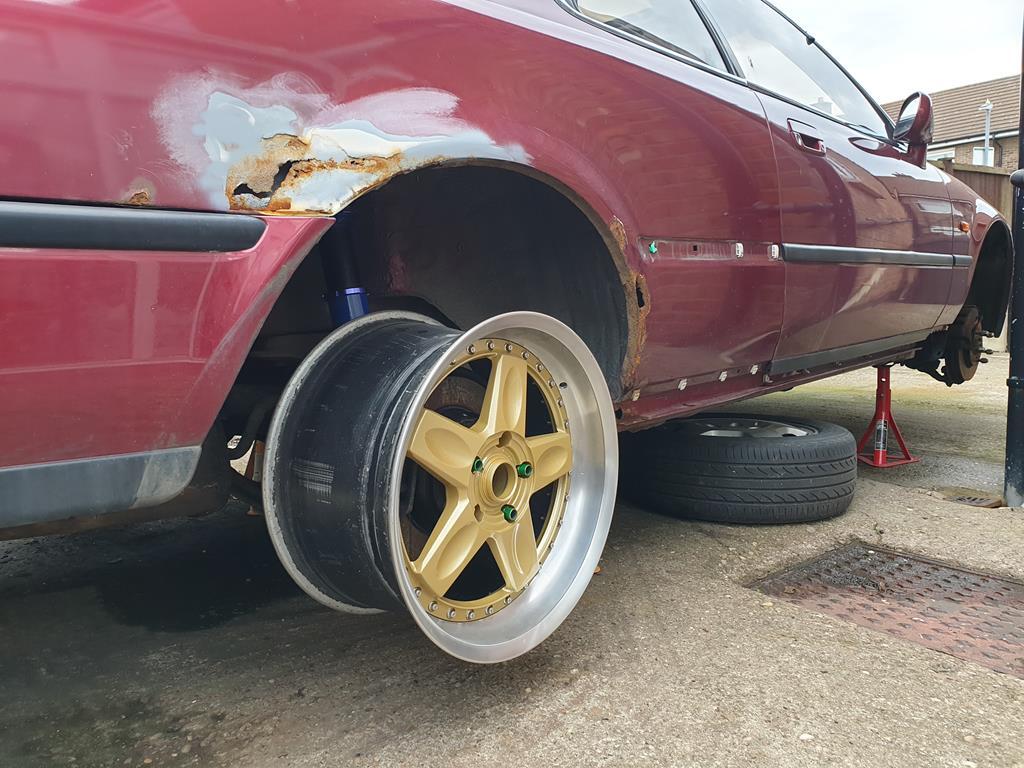 Jacked up under the wheel with some wood and found that my coilover settings were way off and it's still way too high  so that needs some adjustment. Next job is front coilovers which are build and ready to go, only slight issue is that the slot in the coilover body doesn't quite line up with the pinch bolt 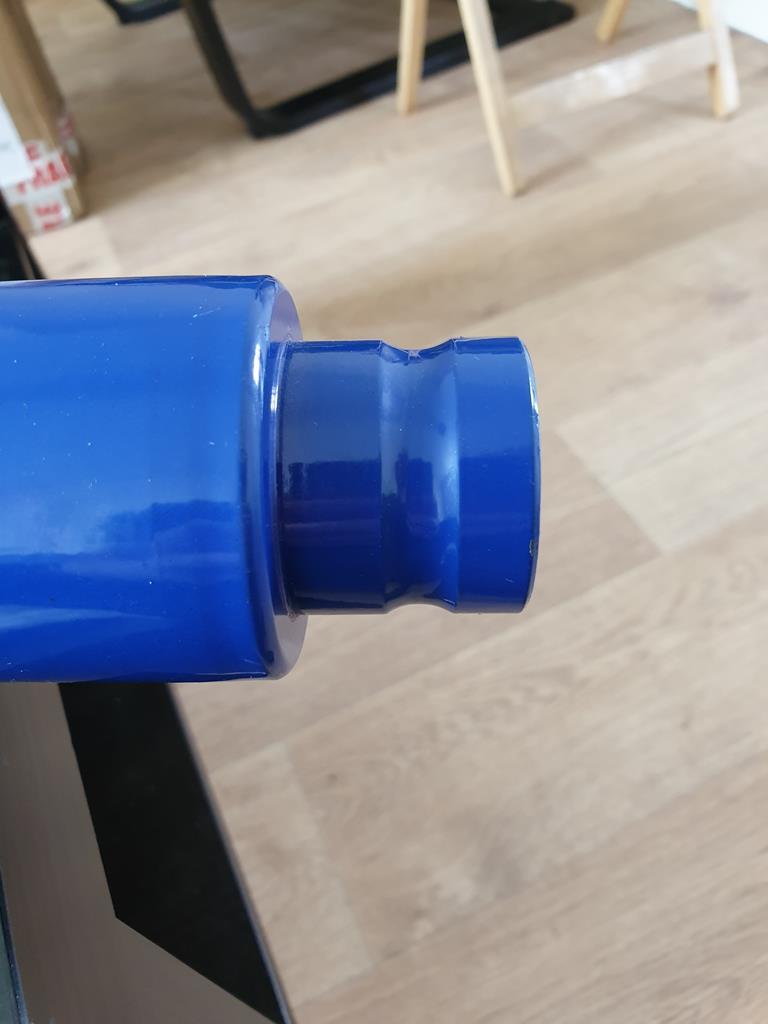 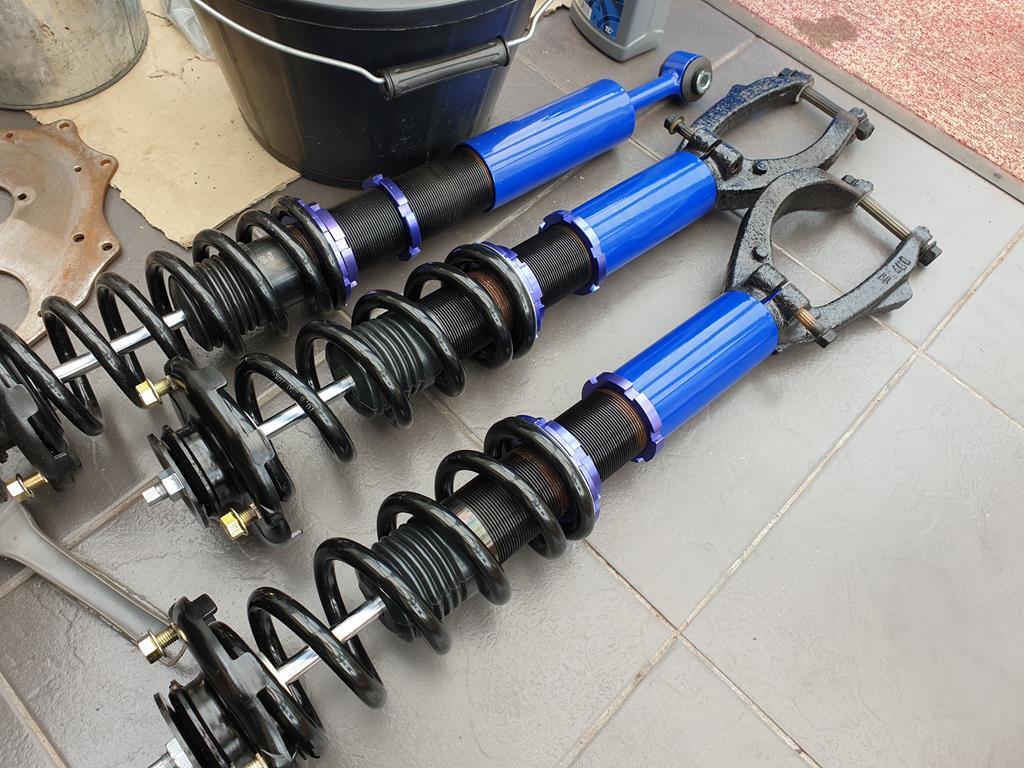 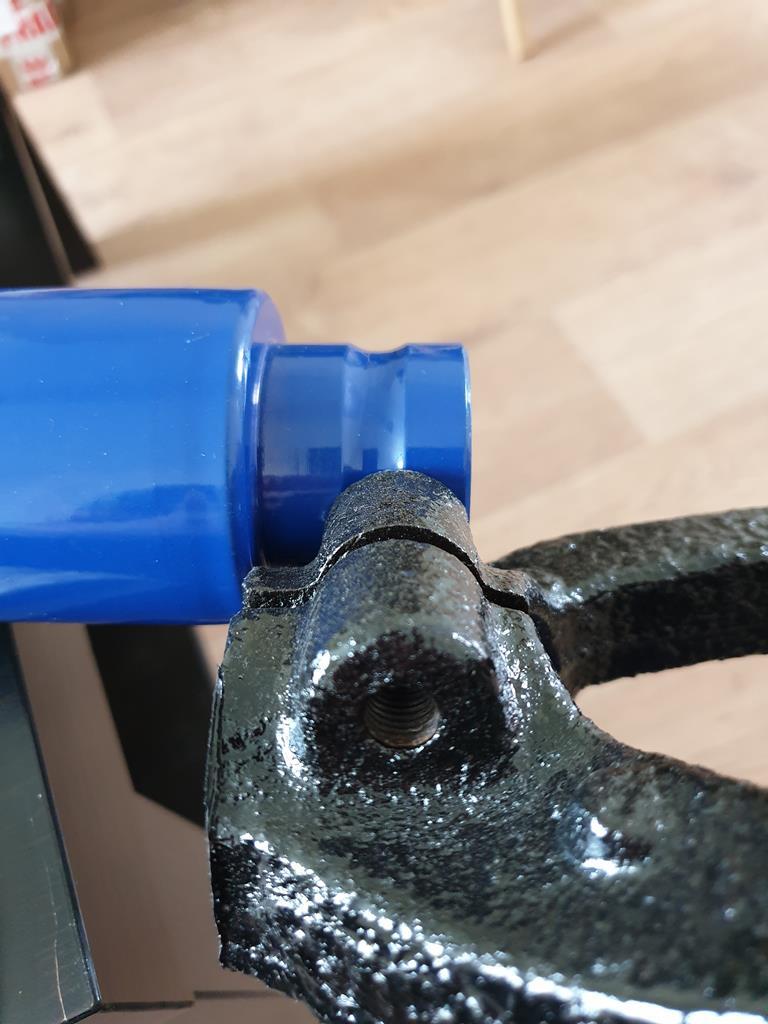 So I'll either have to hope the pinch bolt can just buzz through it, or I'll run a drill or file through while its on the car and all set up.. Other jobs (mostly so I remember what needs doing) are, fit the new clip on the rear screen trim so it seals, paint the two remaining front screen trims and fit, front coilovers as mentioned, bleed the brakes, trans oil and filter change, investigate/fix the rear heated screen, remove the rear bumper to assess the extent of the rust, general rust repair, get the RAYS wheels fitted, trim the rusted exhaust heatshield, maybe replace the back box, fit the new radiator and fit the new AC condensor Good job the Weekender has been postponed till September now eh  |
| |
|
|
adam73bgt
Club Retro Rides Member
Posts: 4,998
Club RR Member Number: 58
|
|
Jun 22, 2020 22:21:14 GMT
|
Few more days, bit more work. I got the nearside rear suspension all torqued up and started looking at setting the suspension height. In the last update, I was way off! So I did a bit of experimentation using a wheel fitted and jacked up to check the ride height after making height adjustments. This is where I got to 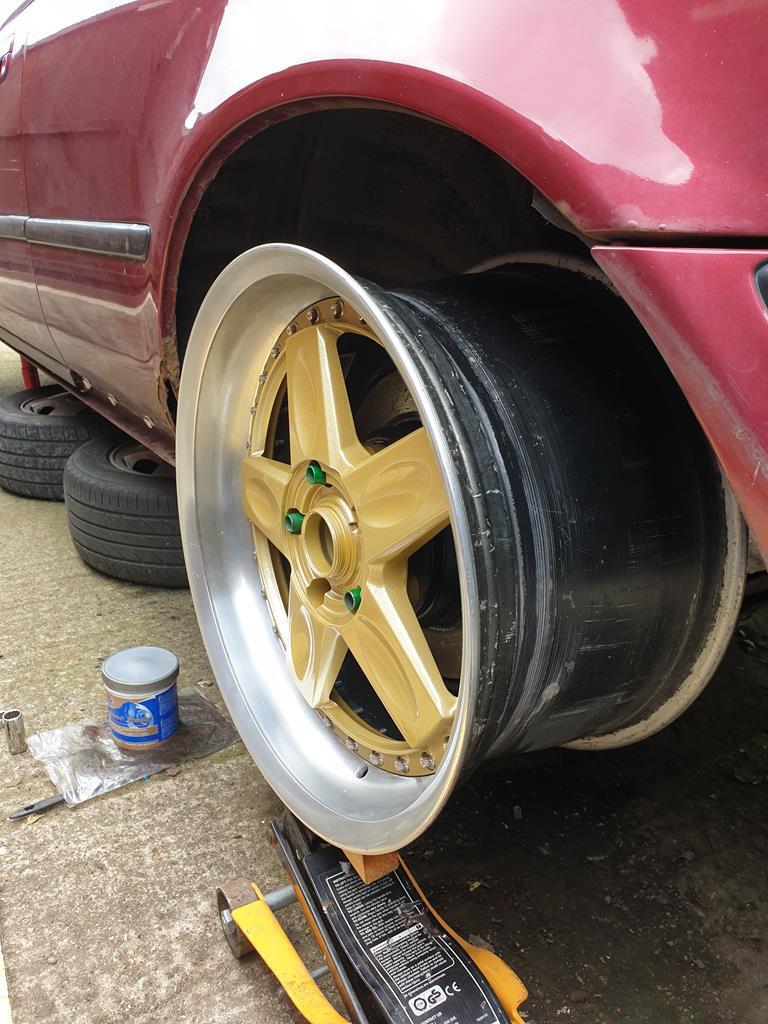 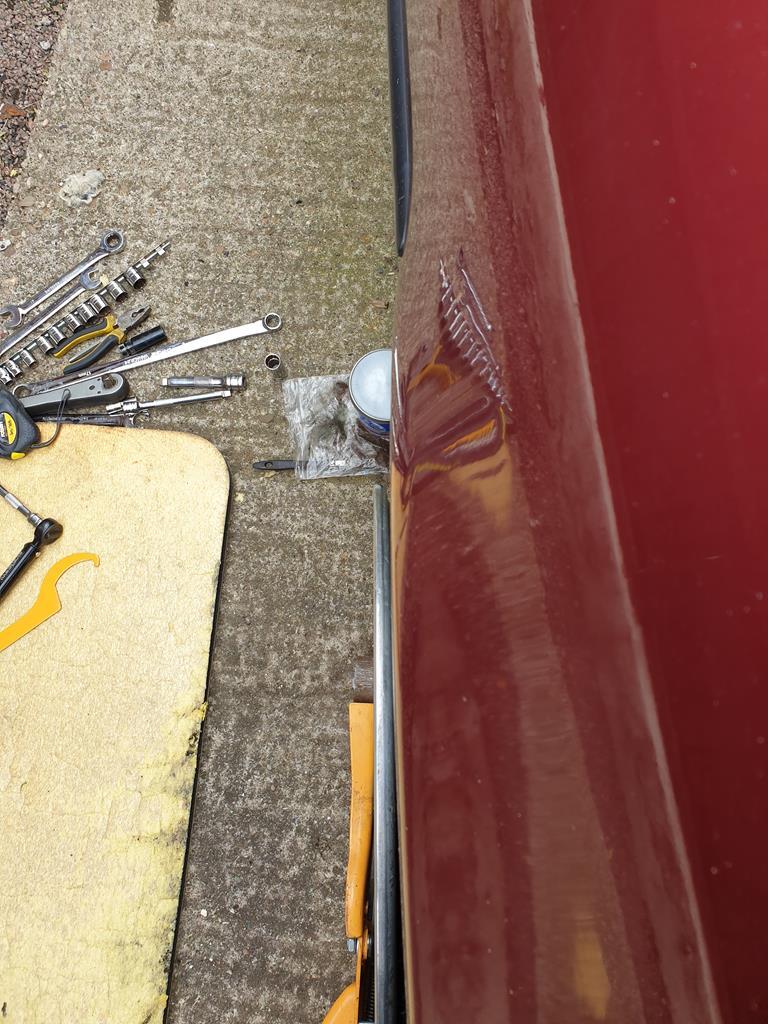 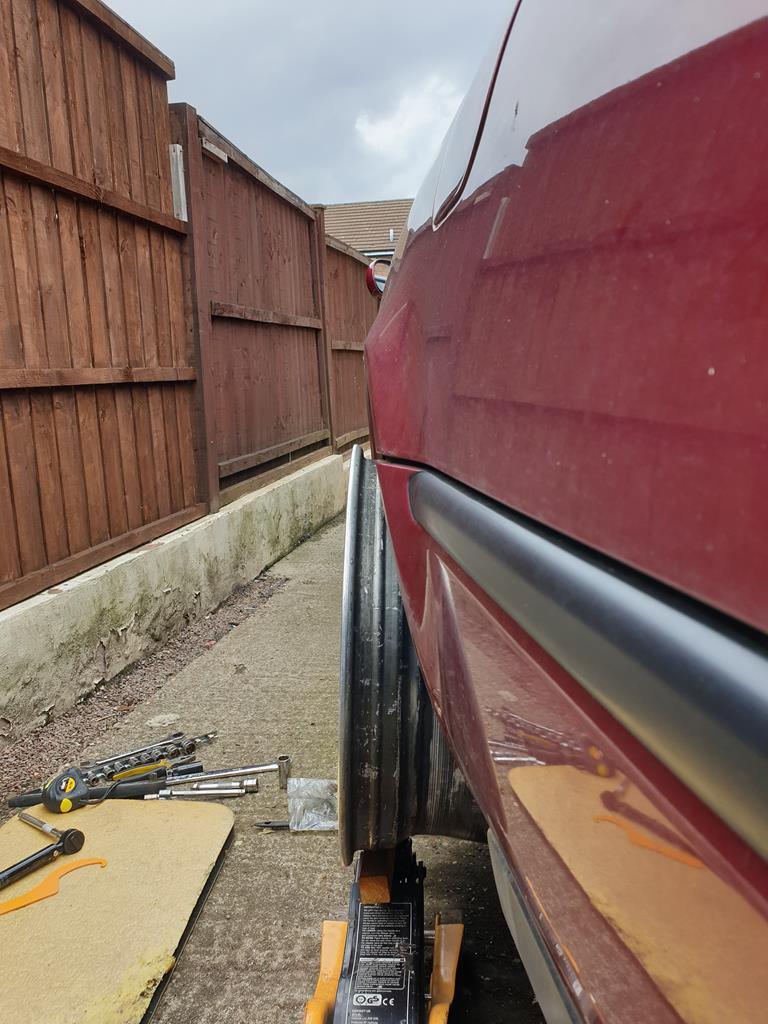 The fitment in the arch is fine, just need to take a bit more height out. I'm leaving it there for the moment though as I needed to get the car back mobile to move it about on the drive, and I'll wait until I've worked out my wheel/tyre combo. More on that in a moment though. I turned my attention to the front coilovers ahead of getting the car back on its wheels, was going well as the front struts are quite easy to remove, undo the pinch bolt and lower strut bol, separate the strut fork from the strut then remove the strut after undoing the top mount nuts. A page or so back, I mentioned that I was going to use Accord CL7/ Acura TSX lower strut forks. These are the same as the Legend where it mounts to the lower control arm, but take the smaller diameter damper strut body of the coilover. 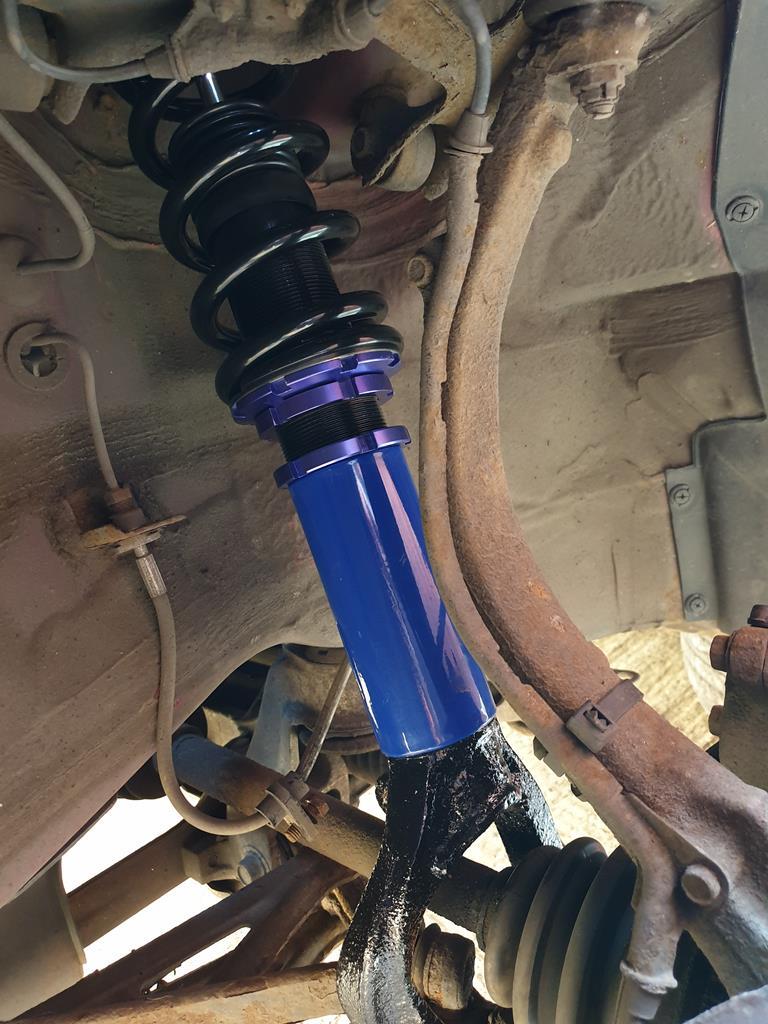 There is an issue however 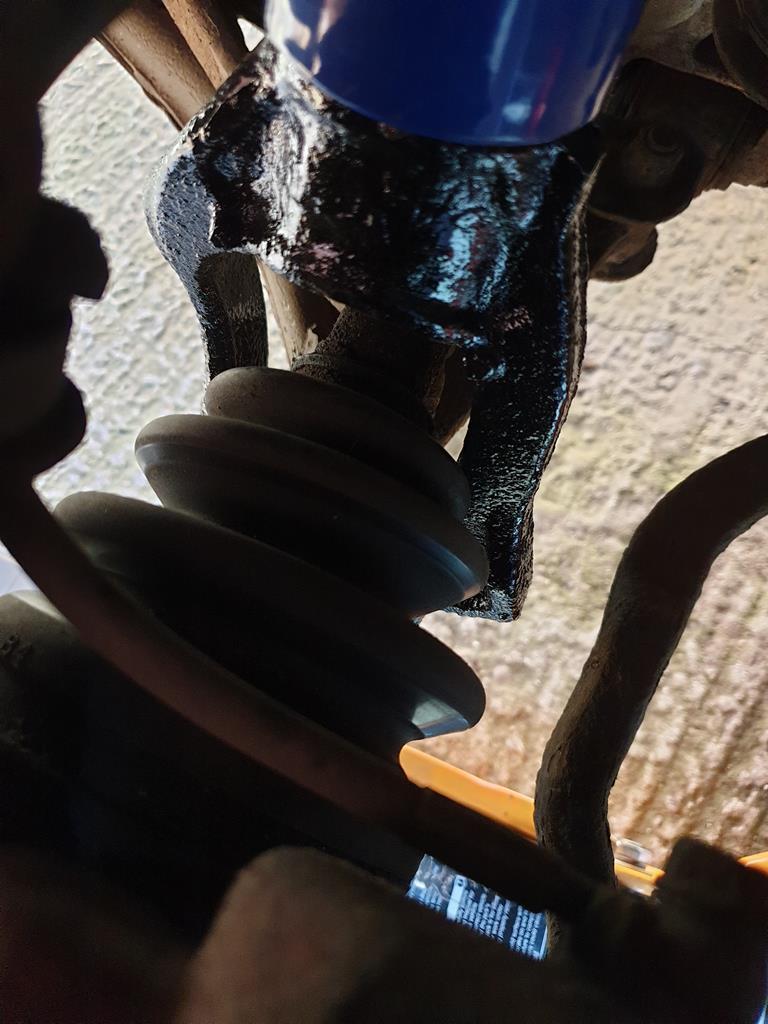 Hard to photograph, but basically the Accord strut fork doesn't sweep back as much as the Legend one so one side of it is very close to and indeed touching the CV boot. It's only light but its enough that I'm sure would end up with a torn boot and grease everywhere. I've looked at mk3 Legend bits but I don't think they'll help, grinding a little bit of the fork to clear is another option but it doesn't feel right to be grinding suspension components! The last option is to put the Legend forks back on, but machine up a sleeve to allow the fitment of the coilover strut. I think I'll end up doing the latter, just need to have a chat with a mate who has a lathe  Anyway, I still needed to move the car, so I chucked some wheels on and eventually got it back on the ground 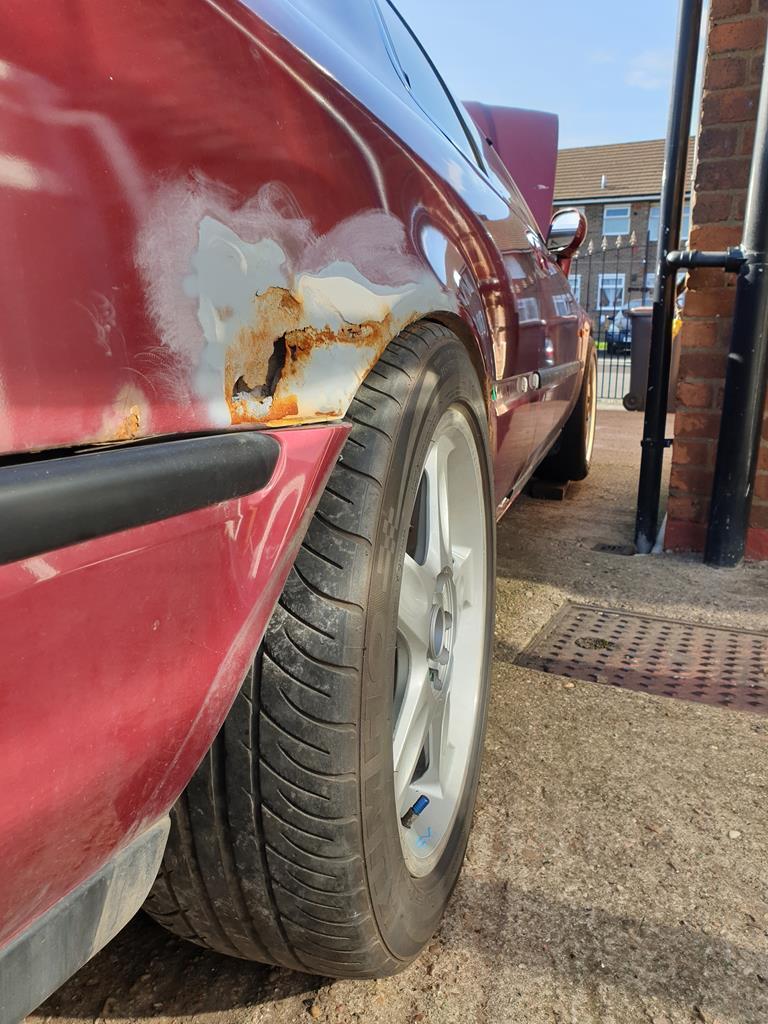 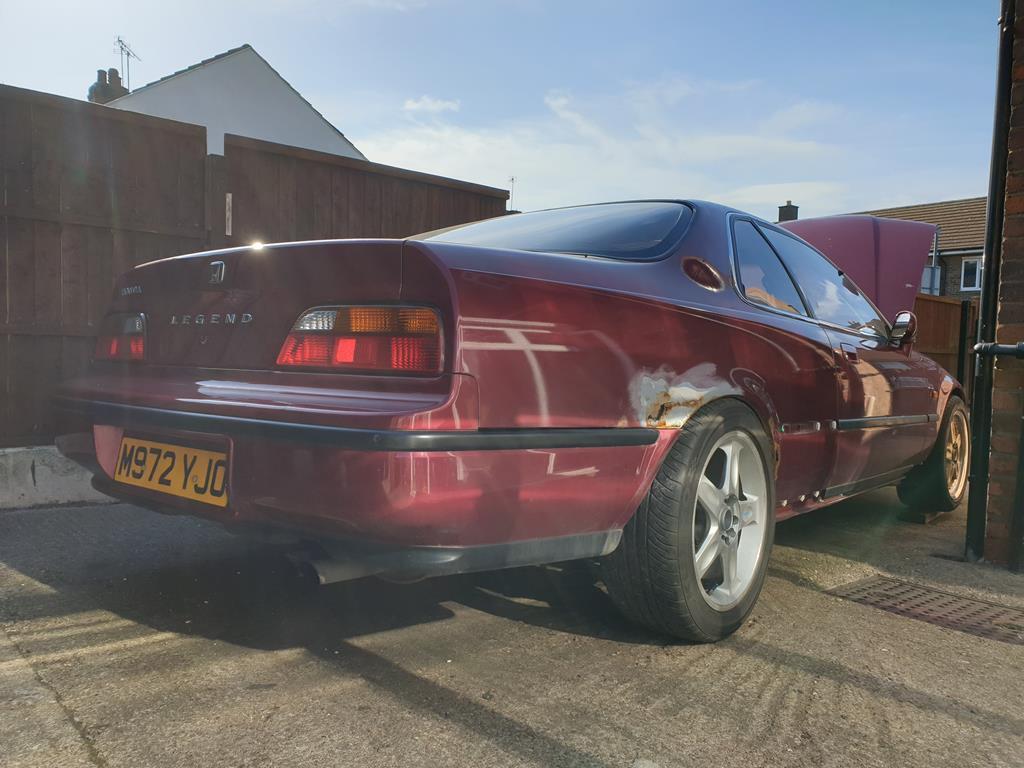 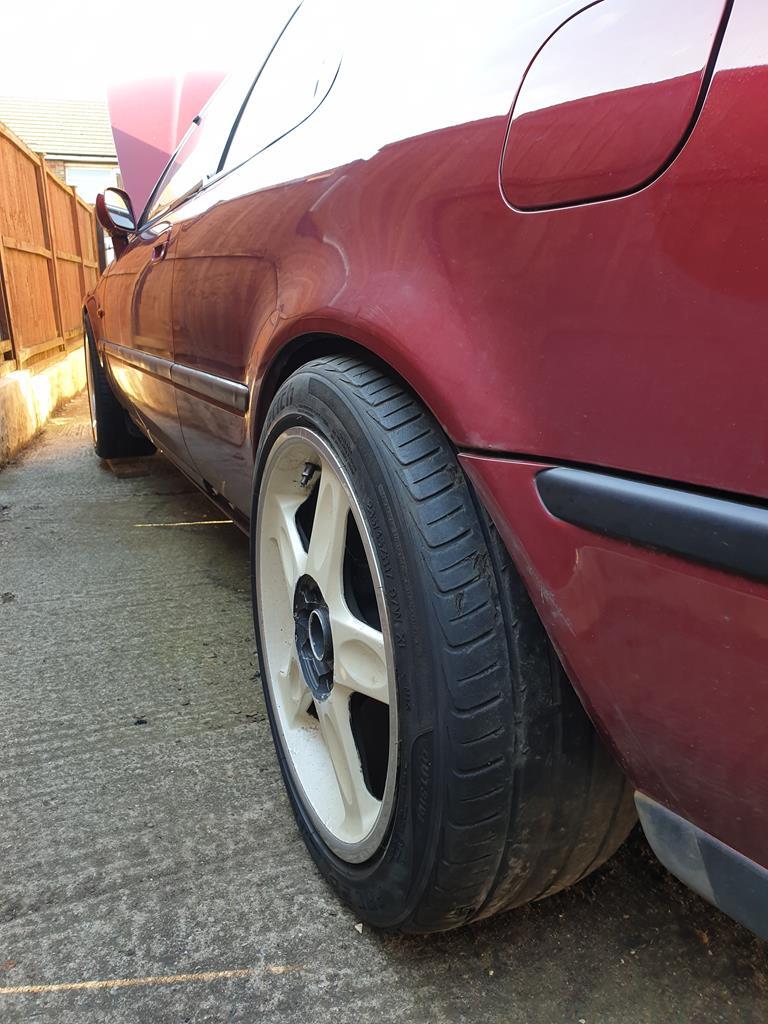 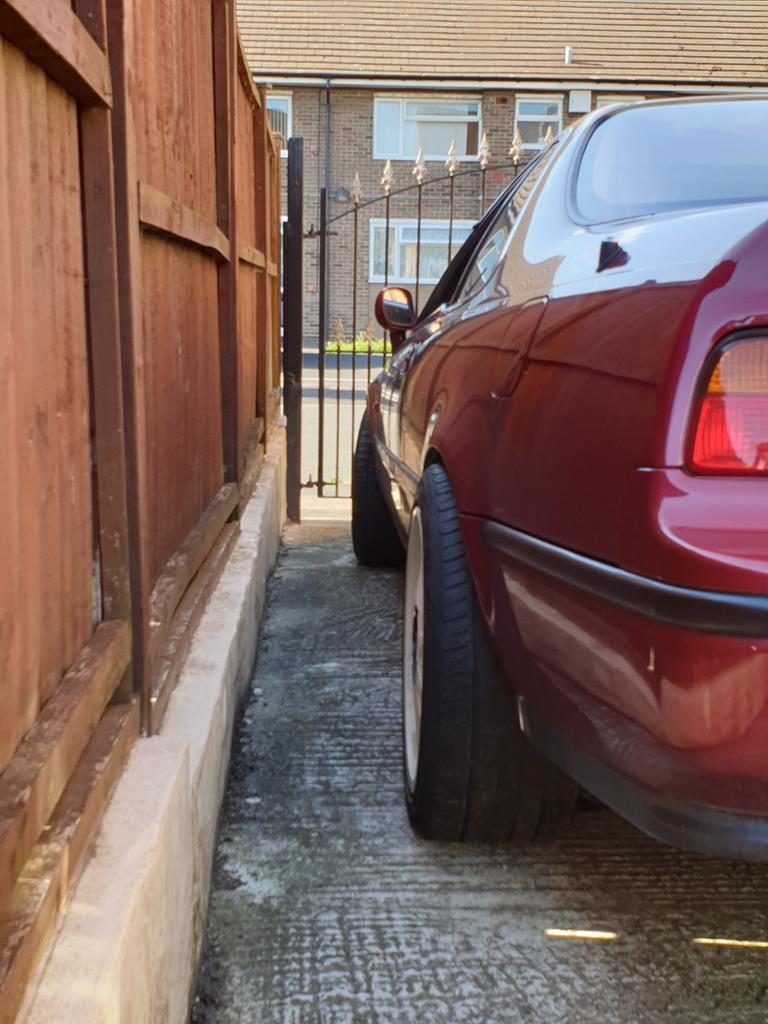 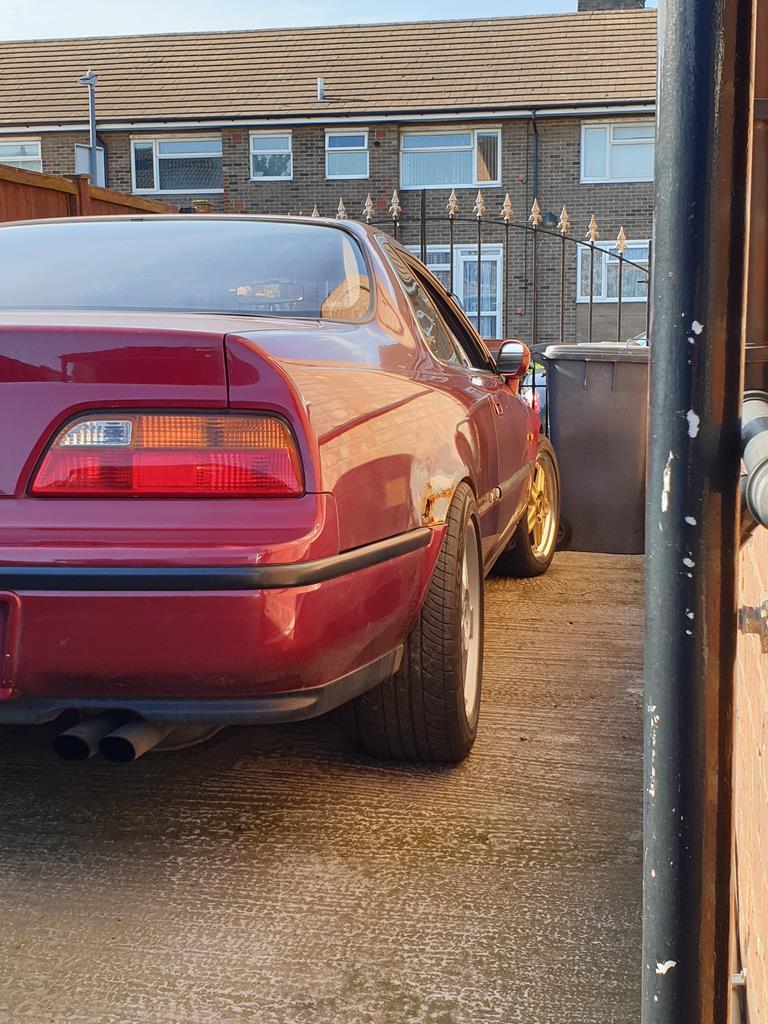 It's getting there, the front right is still on just the lowering springs until I sort out the fork issues. The tyres and wheels I put on are a bit of a mish-mash. On the front are the 8j splits that I've had on the rear previously but plan to use on the fronts this time. On the rear are two different wheels which I have for sale currently but gave me an opportunity to play around with some specs; the rear left is a 9j with a 235/45 r17 tyre and the rear right is a different offset 8j with a 225/50 r17 tyre. The rear right tyre is a bit chunky and is basically on the arch lip haha. Ultimately I think I'm going to have the 9.5j splits on the rear with 235/45 r17 tyres (handily I can nick these tyres from the front wheels), then for the fronts it will be the 8j splits with 215/45 r17 tyres which I have in my small stash of 17" tyres  So a half finished job on the suspension, once I've got tyres on the right wheels, the front cv boot clearance sorted and found a way to mount the brake pipes to the front struts, it should be about golden on that front! Moving the car around did highlight that the Air Con doesn't appear to be working again, my guess is all the gas has gone, so putting in my new condensor is definitely on the list of jobs to do! |
| |
|
|
|
|
|
|
|
|
Ive got a couple of spare front forks of my accord, which I believe are different to the cl ones. If you want, I can measure them for you and if they are any good you can have them.
|
| |
1972 viva 'Sparky'
|
|
|
|
|
|
|
Looks much better with the rust holes nearer the ground.  Hope you get the forks issue sorted out easily enough, would shaving off a few mm off with a die grinder be enough without weakening the fork? |
| |
|
|
|
|
|
Jun 25, 2020 10:24:32 GMT
|
...could you change the boots for some with small bellows at the forks end ? ...just a thought ...  |
| |
|
|
adam73bgt
Club Retro Rides Member
Posts: 4,998
Club RR Member Number: 58
|
|
Jun 25, 2020 12:59:18 GMT
|
Ive got a couple of spare front forks of my accord, which I believe are different to the cl ones. If you want, I can measure them for you and if they are any good you can have them. Oo that would be great if you could please? I'll have a measure of the legend forks later on Looks much better with the rust holes nearer the ground.  Hope you get the forks issue sorted out easily enough, would shaving off a few mm off with a die grinder be enough without weakening the fork? It certainly helps take the rust further out of the eyeline 😂 I suspect I probably could get away with grinding back the fork a bit, it's not totally clear how much would have to come off, but they're not usable as they are anyway so probably worth a go.. ...could you change the boots for some with small bellows at the forks end ? ...just a thought ...  That thought did cross my mind as well, might be possible as long as the Legend doesn't use some odd bellows size. The main thing that puts me off doing that though is that the boots are in quite good condition and it would be a messy job to change them 😂 |
| |
|
|
|
|
adam73bgt
Club Retro Rides Member
Posts: 4,998
Club RR Member Number: 58
|
|
Jun 25, 2020 18:33:19 GMT
|
A picture to better illustrate the differences between a CL7 Accord and KA8 Legend damper strut mount fork thing (Accord on left, Legend on right) 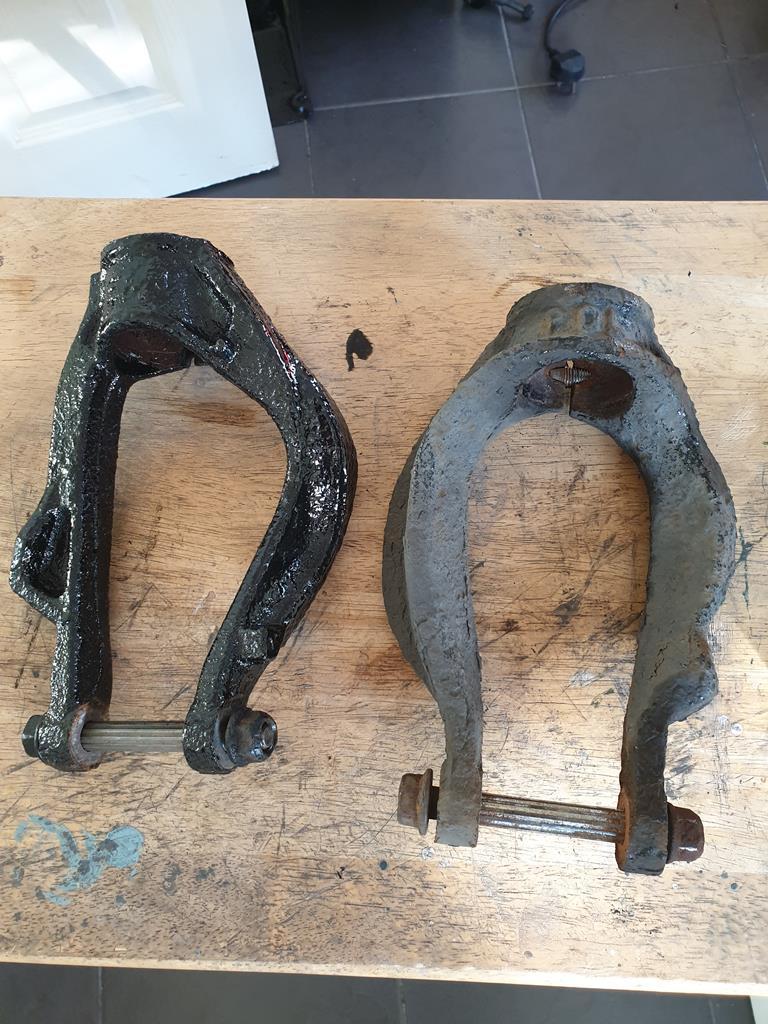 Not quite a direct comparison, more a mirror image as thats a drivers side Accord fork with a passenger side Legend fork but we get the idea. the Legend fork is swept back more on both sides, the Accord one where it touches the boot is also a bit thinner than the Legend fork so maybe limiting how much I'd want to grind off.. In any case, the Accord appears to take a 42mm diameter strut compared to around 49mm for the Legend so thats the difference that would have to be taken up if I were to get some sleeves/collars made. Would then just have to measure and machine a groove for the pinch bolt as well |
| |
Last Edit: Jun 25, 2020 18:34:00 GMT by adam73bgt
|
|
adam73bgt
Club Retro Rides Member
Posts: 4,998
Club RR Member Number: 58
|
|
|
|
A quick update. Spoke to my mate with the lathe, next week we should be having a look at making some sort of sleeve to resolve the front coilover issue so that should be that sorted. I got my tyres and wheels sorted out so that I've got the wheel and tyre combo's that I'm planning to run now. To recap this means 17"x8" front wheels with 215/45 r17 tyres and 17"x9.5" rear wheels with 235/45 r17 tyres. The fronts I'm not too worried about but I knew on the rears that the 9.5" wheels might be pushing things a bit; the tyres are stretched slightly but it's very subtle which is what I wanted. 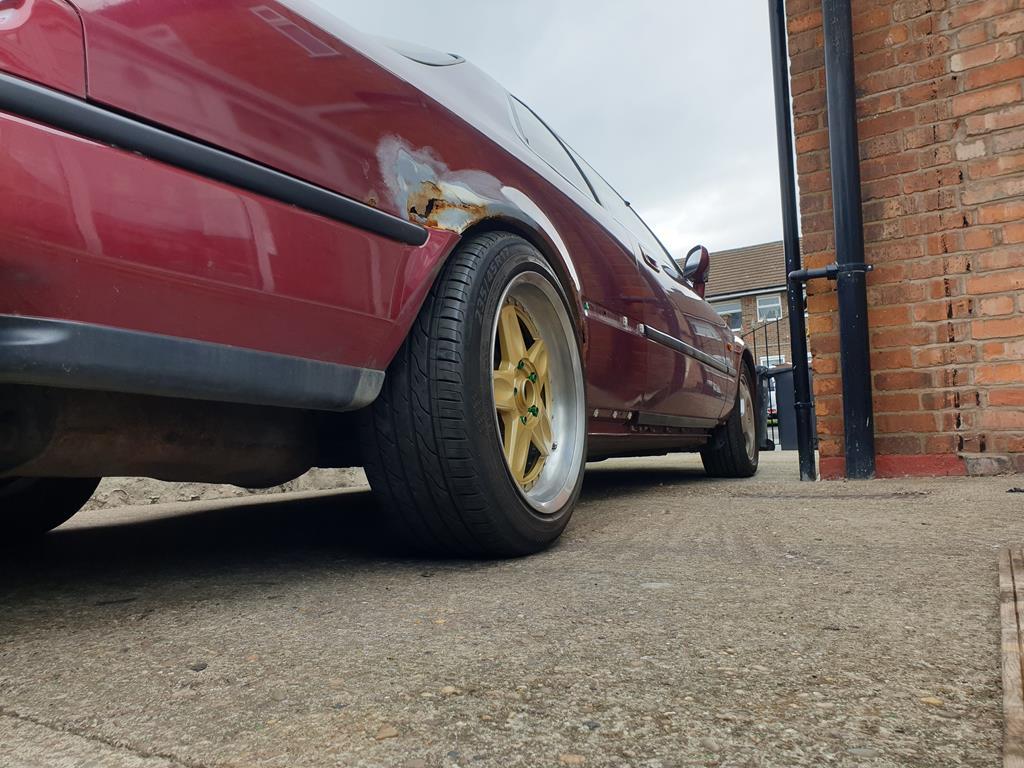 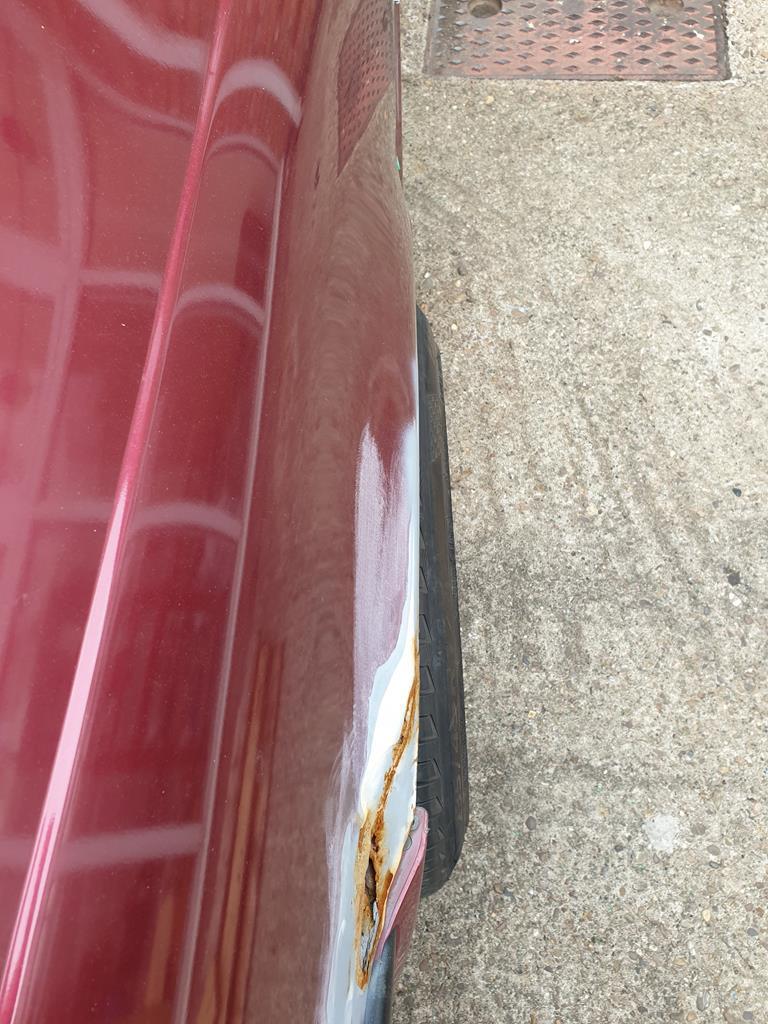 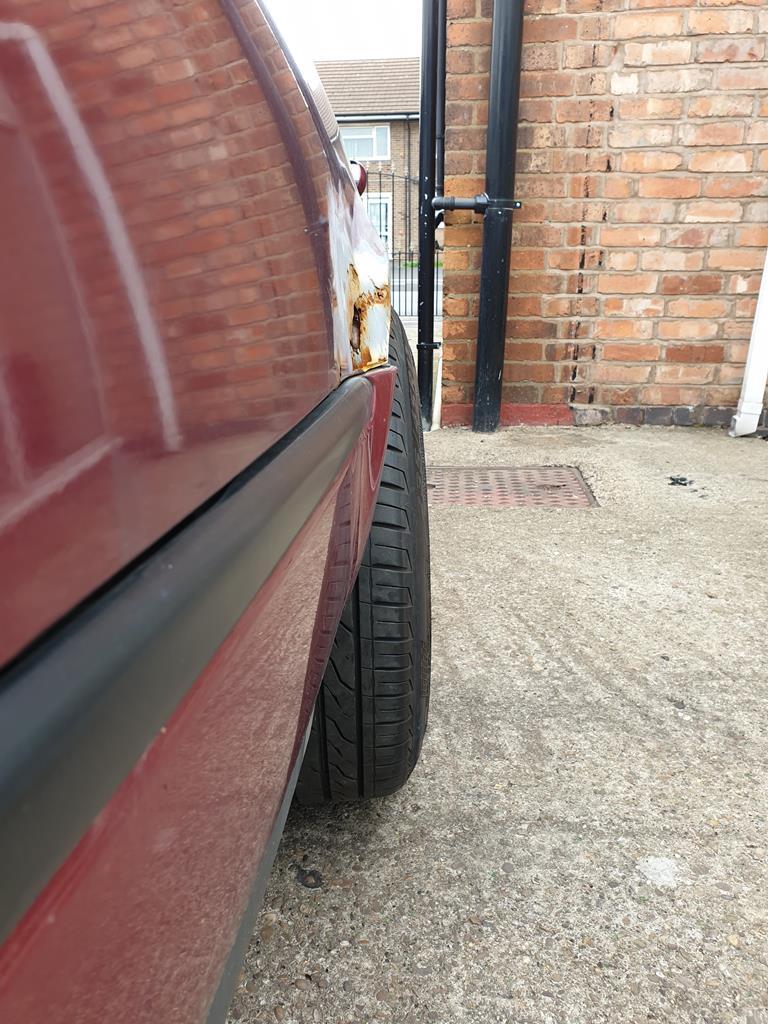 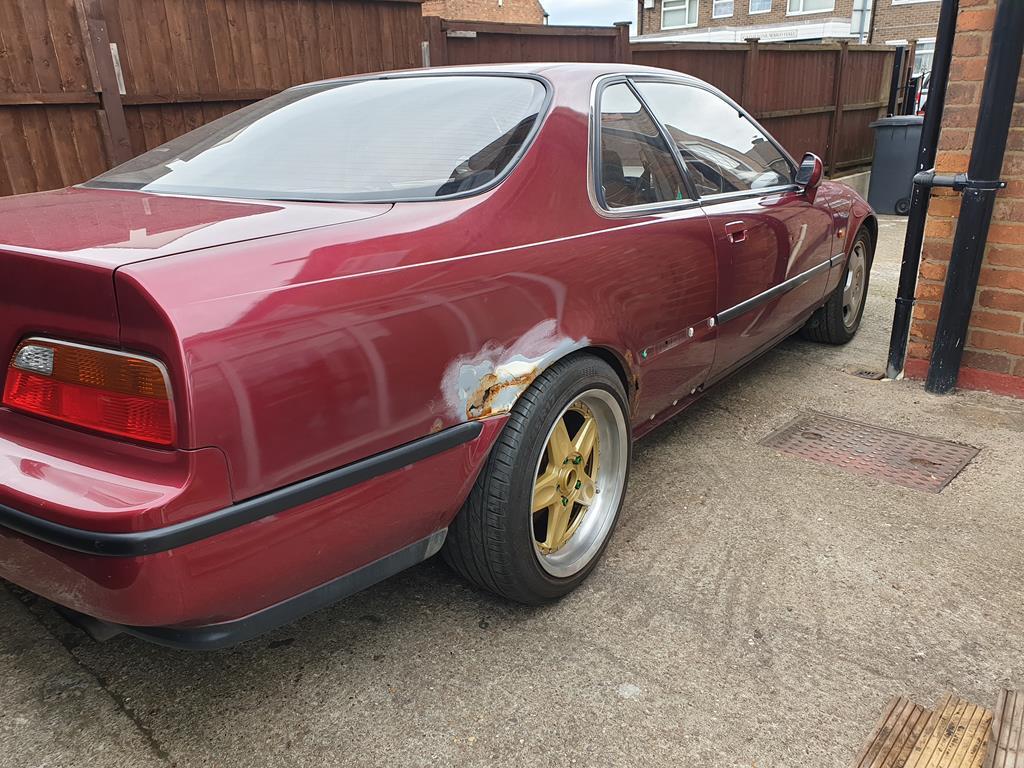 I do need to roll the arch lip (or in the case of the rusted areas, rebuild then roll the lip  ) and the ride height may be able to come down a smidge, but otherwise that is about perfect, so I'm very happy with that. No photos but another job I sorted was to make the centre caps for the RAYS fit. Ever since I had them and the wheel centres powdercoated, they've never fit together quite right, so I did a bit of sanding to make the caps fit and sprayed a bit of clear lacquer on the bare alloy bits to stave off any corrosion. I've also bought some shorter "tuner" wheel nuts so that the caps will actually fit over them! Just in the process of sorting out a tool to tighten down the big centre cap nuts now. As it was raining today, I decided to have a look at a job inside the car which I've been meaning to do for ages. Working out why the rear demist doesn't work. A while back I tried a different relay to see if that was the issue but it didn't fix it. There was a break in one of the demister lines which I painted back in but no luck either. With the rear seat and parcel shelf out, it was a good opportunity to check out the wiring for the demister to see if I was getting power there; the connections are hidden behind the C pillar trims which are clipped in place and carefully pull off. This side was fine 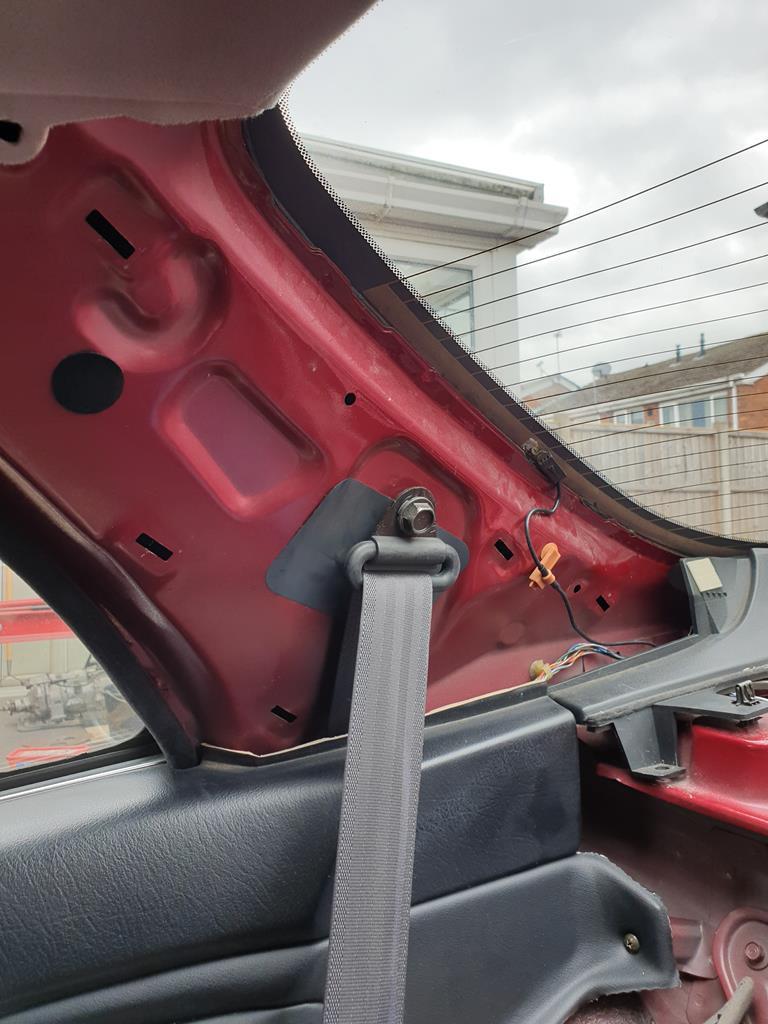 But what about the passenger side? 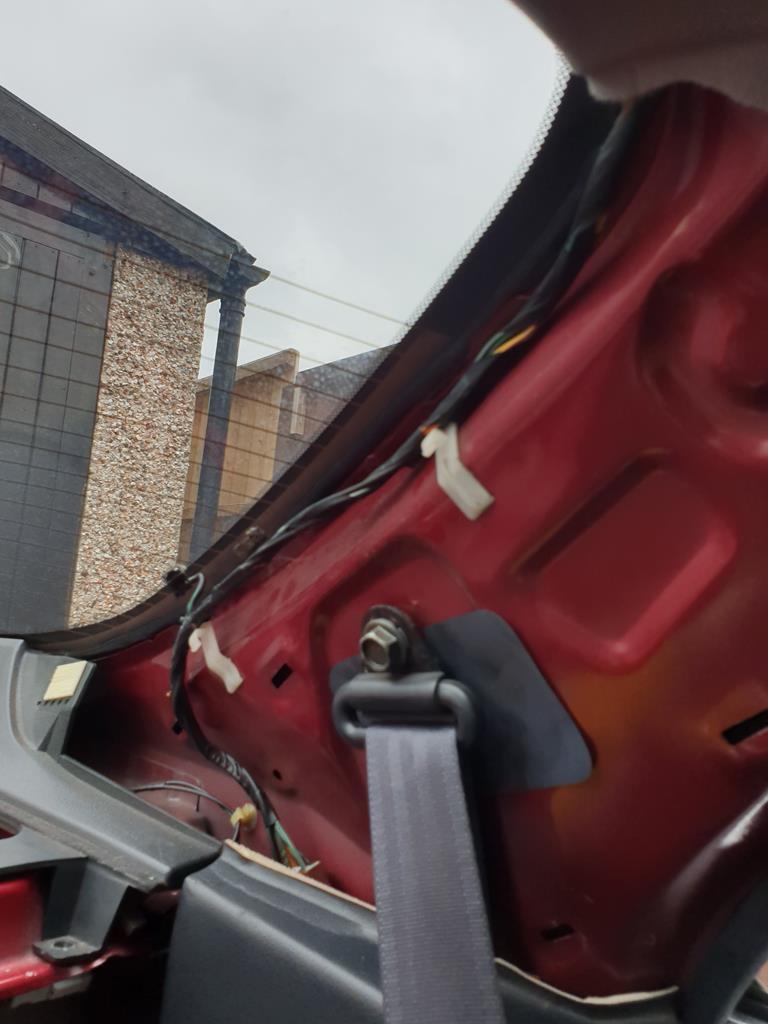 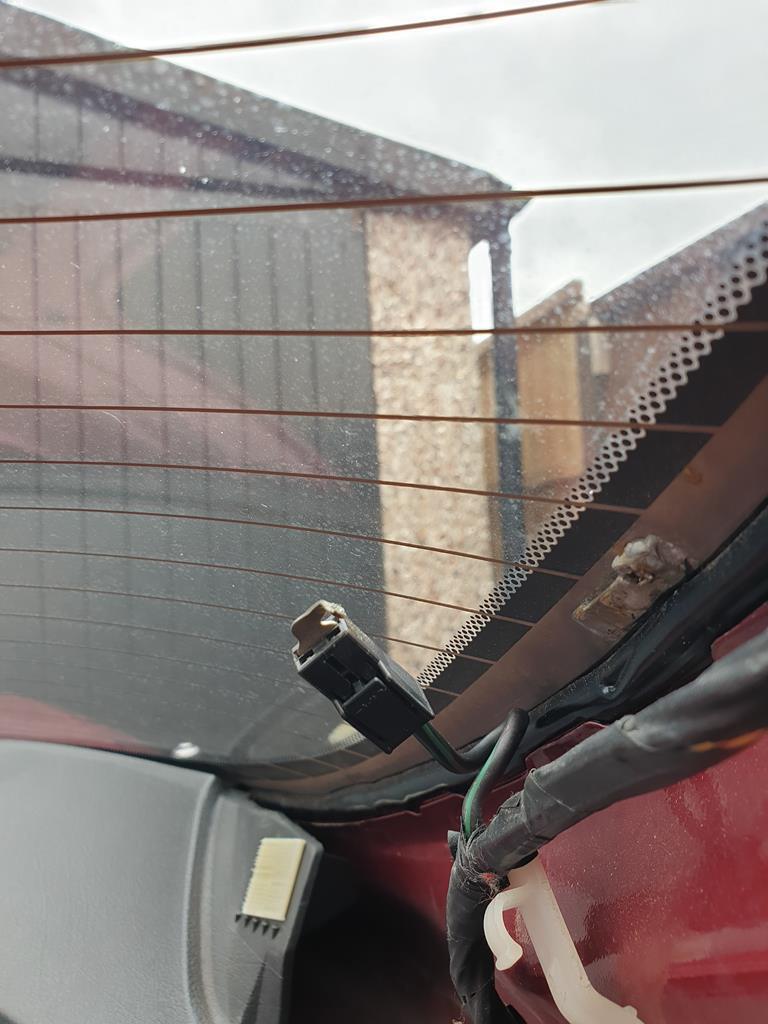 Well that certainly isn't going to work... The rear screen has been replaced at some point in the past I think which I assume is when this broke. Rather than trying to solder the broken bit back in place, I figured it would be easier to add a little wire, still plugs into the stock wiring loom. 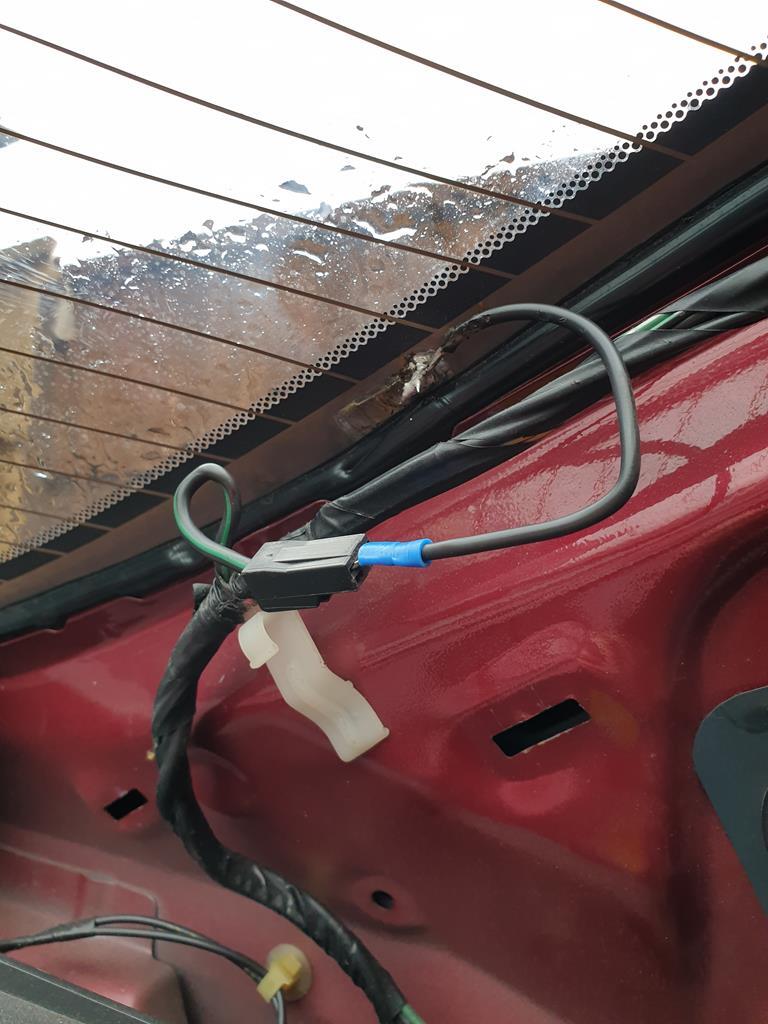 So that should be that fixed. Another thing to tick off the list as per below: Other jobs (mostly so I remember what needs doing) are, fit the new clip on the rear screen trim so it seals, paint the two remaining front screen trims and fit, front coilovers as mentioned, bleed the brakes, trans oil and filter change, investigate/fix the rear heated screen, remove the rear bumper to assess the extent of the rust, general rust repair, get the RAYS wheels fitted, trim the rusted exhaust heatshield, maybe replace the back box, fit the new radiator and fit the new AC condensor The brakes are semi bled, need doing again though as the travel is looong. While I've got the car in the air I should be able to do the transmission fluid change, sort the heatshield and probably start tackling the radiator and condensor. Front coilovers should be sorted next week hopefully. The more jobs I tick off, means I'm getting closer to having to sort out the rust.. I've already started scoping out cheap mig welders in preparation  |
| |
|
|
adam73bgt
Club Retro Rides Member
Posts: 4,998
Club RR Member Number: 58
|
|
Jul 24, 2020 10:45:20 GMT
|
An update on this, not had a chance to get over to my mates to sort the front suspension issue just yet, but managed to find an extremely rare piece of the Legend jigsaw puzzle. I had to hire a van to go pick it up, which meant a 7:22am train to Leamington yesterday 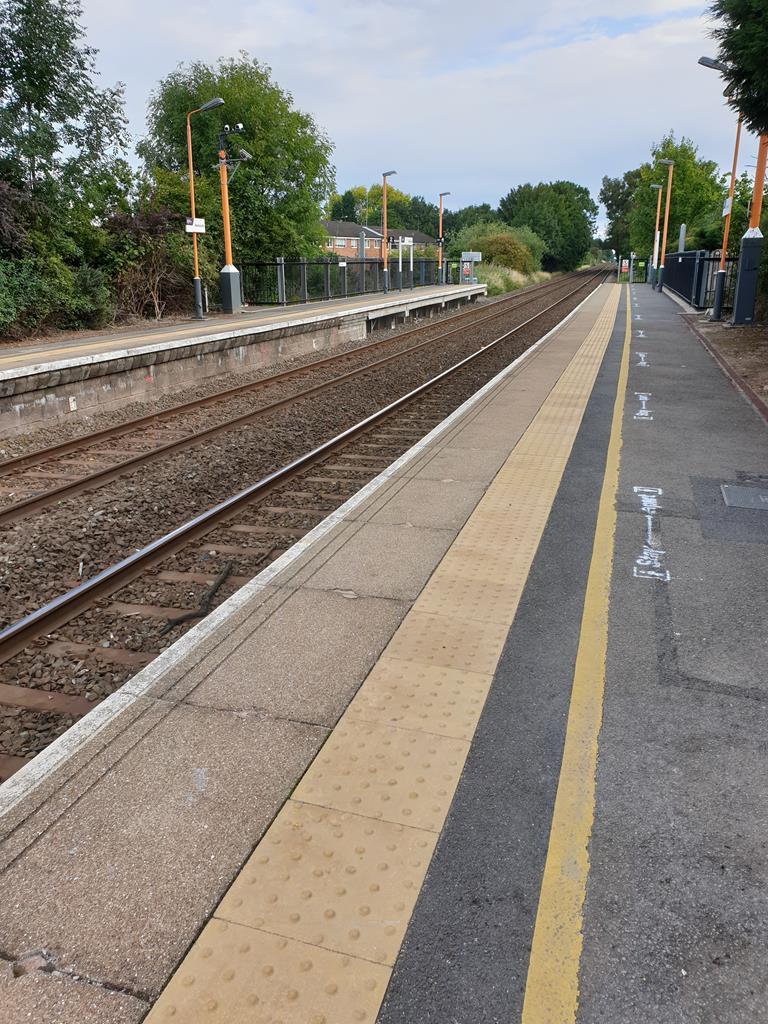 Followed by a drive up to near Manchester to fetch this 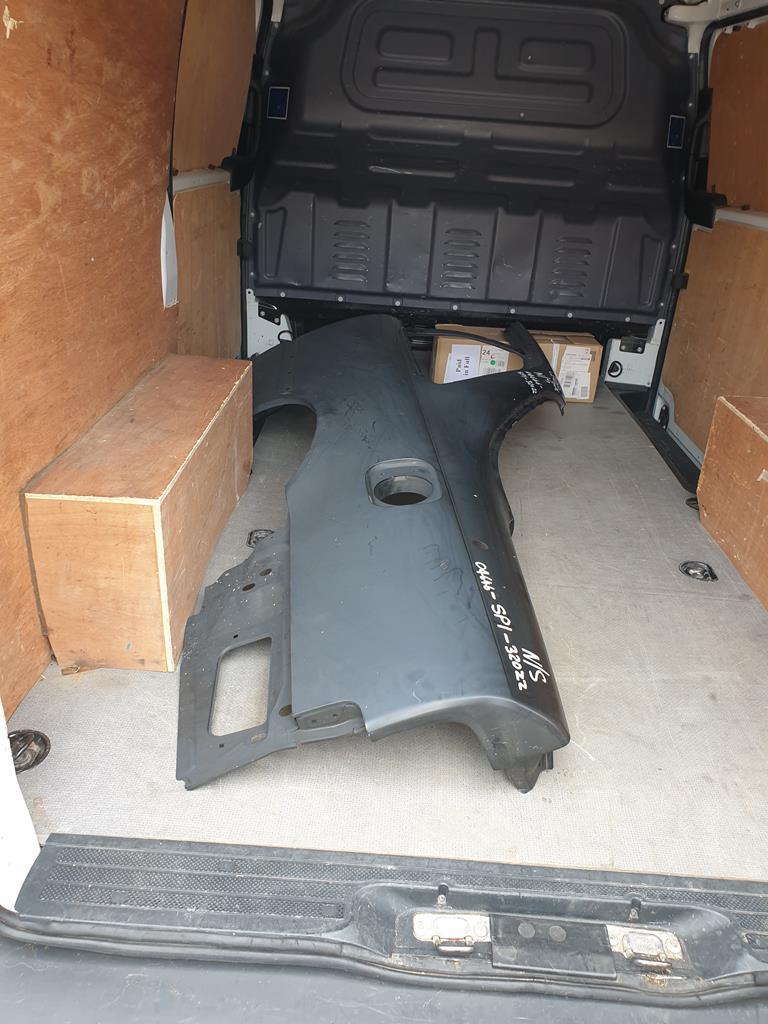 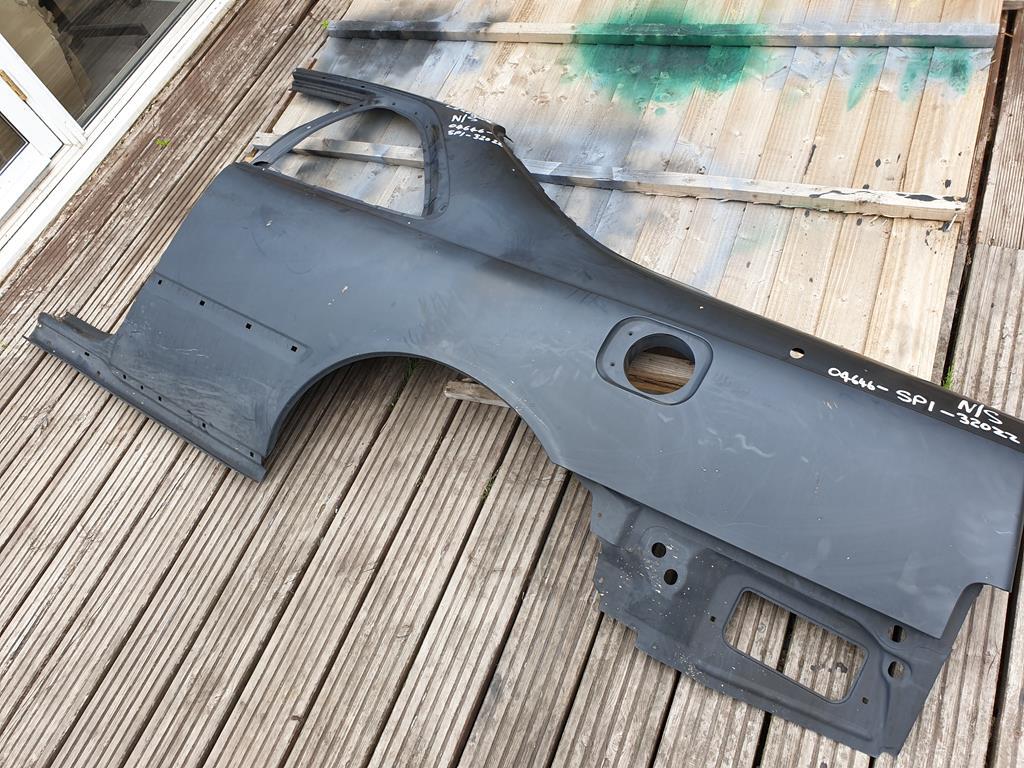 What must be one of, if not the last NOS rear wing panel available for a 2nd gen Legend Coupe in the UK! Unfortunately he had already sold the Drivers side wing he had but this will certainly come in handy for reparing my car, a little before and after below  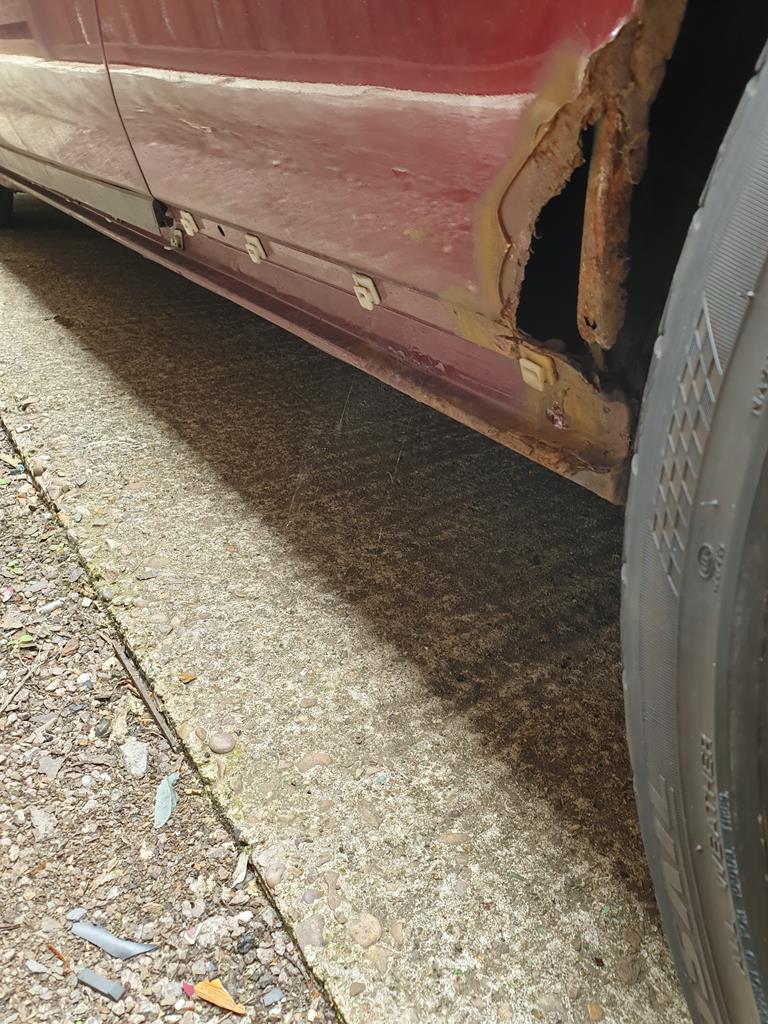 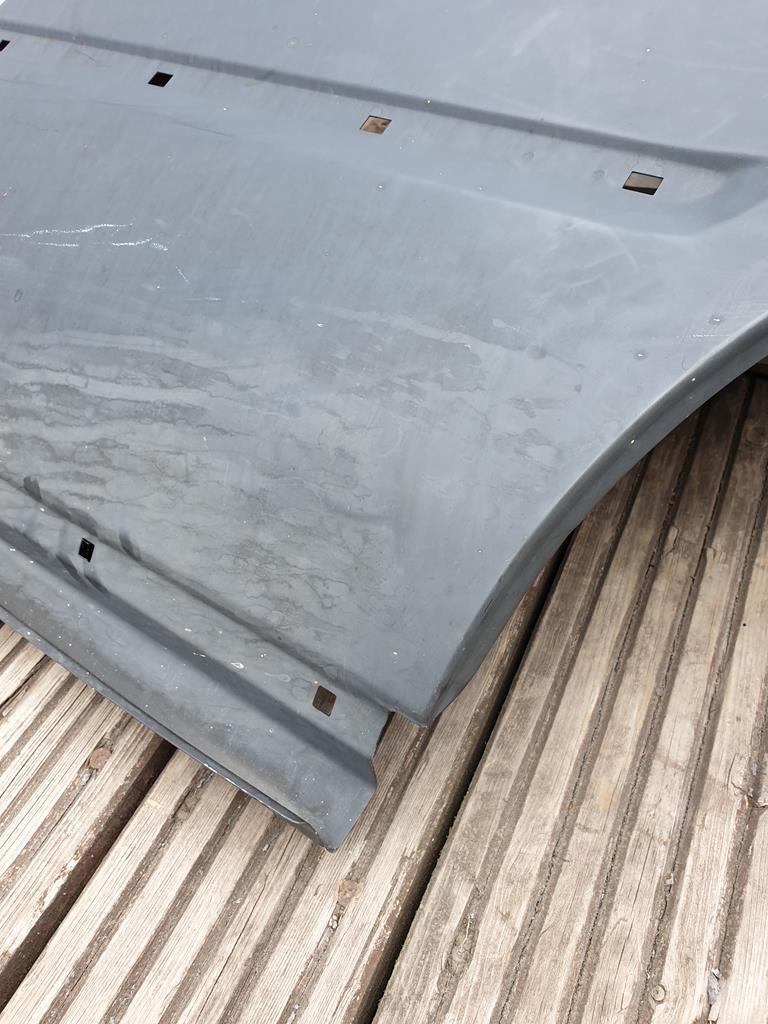 But now I'm left with a bit of a conundrum. This panel is perfect and while I don't think it's worth replacing the whole side of the car, it will need a panel cutting and welding in carefully so that it can be a seamless repair. Which means I'm thinking I'm going to find a bodyshop to do this as I don't have the confidence that I could do it. I've had good and not so good experiences with bodyshops before though so I'm not particularly looking forward to having to find one to take on the work.. |
| |
|
|
|
|
|
Jul 24, 2020 12:20:33 GMT
|
|
Please don't cut the panel, replace it as a whole or cut just above the B & C post it will be a much nicer job and you will then be sure its not going to be full of filler where the body shop has just noshed the wheel arch section on!
|
| |
|
|
|
|
|
Jul 24, 2020 12:33:26 GMT
|
Exactly what gtviva advises - I would advise strongly against cutting the panel just to gain the section around the wheel arch - Vehicles manufactured in the Far East have very thin outer panels and you are just going to end up with buckets of filler in the rear wing to hide the repair - still could be fitted quite effectively with some minor reduction to the entire new panel but ideally it requires 90% of your new panel fitting - I'm not touting for business has I'm always stacked out with work but any advice / help I can offer and its yours - its not a huge job in the grand scheme of things & can be factored in if you are prepared to wait a little PM me if you want to talk it through - Chris |
| |
Last Edit: Jul 24, 2020 12:37:03 GMT by Deleted
|
|
adam73bgt
Club Retro Rides Member
Posts: 4,998
Club RR Member Number: 58
|
|
Jul 24, 2020 13:19:52 GMT
|
Hmm interesting, I was thinking it would be best to avoid fitting the whole thing as that means getting into removing the rear screen etc. etc. but I hear what you both say in terms of it being a cleaner repair. It makes sense that after actually being able to find a panel like this that I get the best use out of it! I suppose this is also the side that was hit by the Tesco van towards the end of last year and was subsequently repaired by an accident repair place, so there is likely filler in there already that could be eradicated by the fitting of the whole (or most of) the new panel... I've got plenty of time to think about it anyway as I'm in no particular rush to get it sorted thanks to my ongoing Covid enforced job situation. I did want to try and get the Legend out to the Weekender at the very least this year and while it does have MOT until November thanks to the extension, whether its really worth driving a holey car all that way or not remains to be seen. I do have an alternative Retro Ride for the Weekender should I have to leave the Legend at home in the form of my brother's new Saab 9000  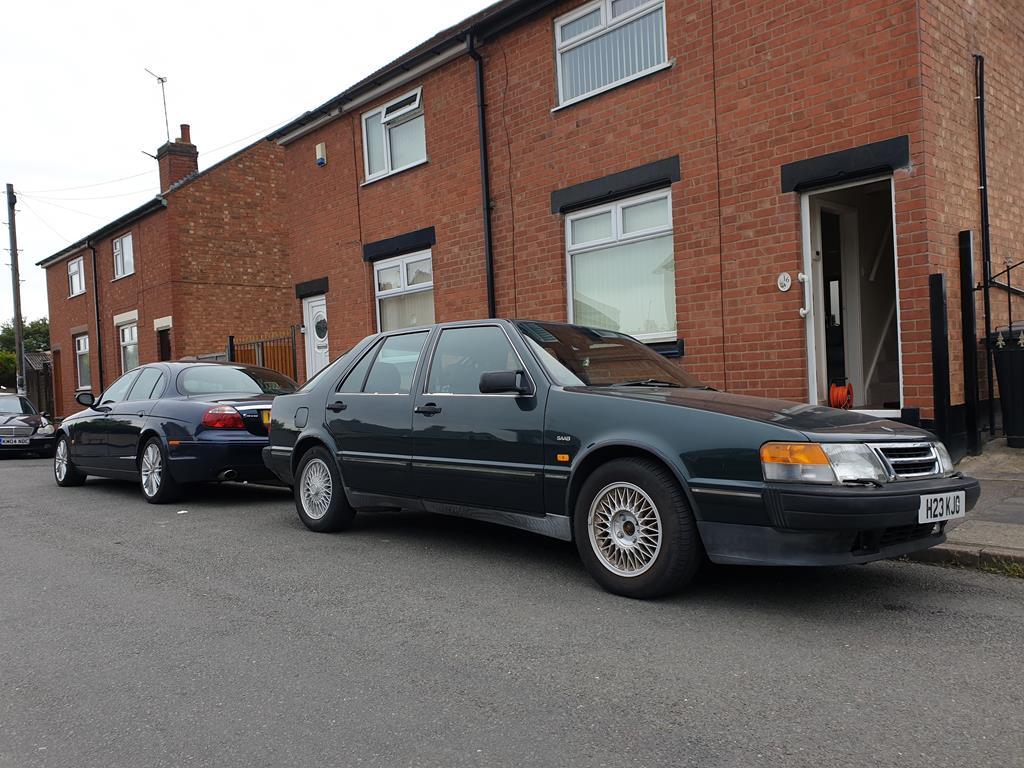 @grumpynorthener I may shoot a PM your way to get a bit more of an idea of the work involved, thanks  |
| |
|
|
adam73bgt
Club Retro Rides Member
Posts: 4,998
Club RR Member Number: 58
|
|
Feb 27, 2021 17:35:46 GMT
|
Well it has been a LONG time coming but I've finally done something with the Legend for the first time in about 9 months  So where I'd left off, I'd just bought that new rear quarter panel, I was swanning about in an S Type, had just lost my job thanks to Covid and helped my brother buy a Saab 9000. The S Type soon made way for my brothers old Yaris T Sport (I have so far resisted modifying it or making a thread  ), I eventually got into some night shift work which is paying the bills and the quarter panel is still sat in my garage. I spent most of my free time getting my MGB back to being something of a rolling shell again, but as I got to the point where any further jobs on it would require significant expenditure, I turned my attention back to the rather sad looking Legend. I know the biggest issue with the Legend is the bodywork, I have a MIG welder now but not necessarily the skills to use it well, and the other option of paying for the bodywork I haven't explored yet/ wouldn't have the money at the moment anyway. I do have a fair bit of other parts for the Legend though which I can be getting on with in the meantime  First of which was the front coilover issue; As Legend coilovers are heinously expensive, I've opted to adapt Honda Accord CL/ Acura TSX cheapy chinese coilovers to fit. This was going well apart from the bottom mount on the front coilovers. The Legend uses a bigger diameter damper body and the damper fork mount from the Accord fouled the CV boot. I was going to have a mate turn up some collars on his lathe to fit the Accord coilovers with the Legend forks but he flaked on me, so I was left looking for another solution. Some further research suggested that KA9 Legend forks have the narrow damper body and would clear the CV boots. Went to everyone's favourite auction site, found a car being broken and got the forks (also ended up with the struts but thats by the by), I wouldn't like to guess when I got them but suffice to say it's been some time... That's a lot of words.. heres a couple pictures of the standard Legend set up 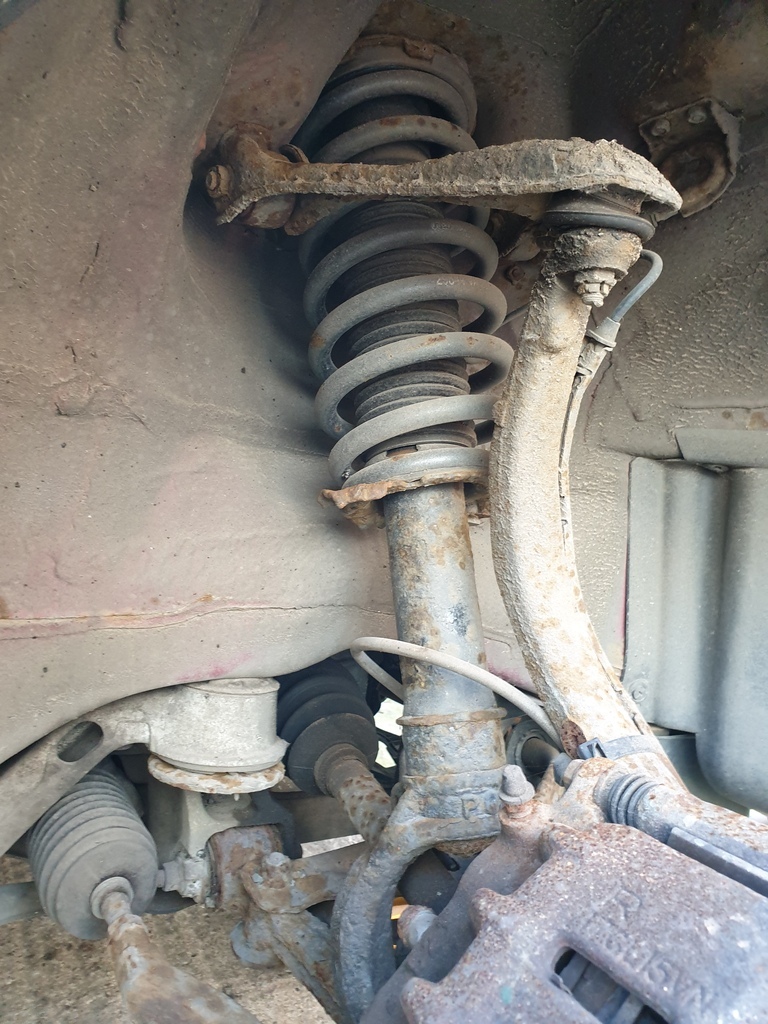 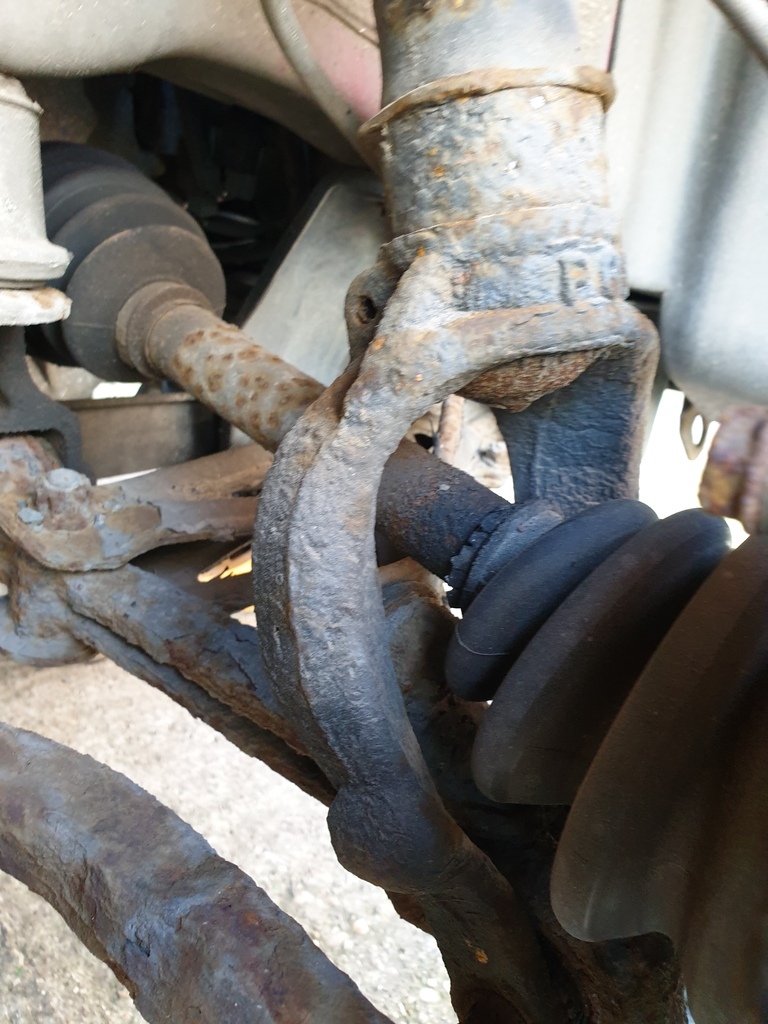 Good clearance to the boot there. While underneath the car I did notice some more rust, but after some prodding it appears to be surface rust where seam sealer or underseal has come away 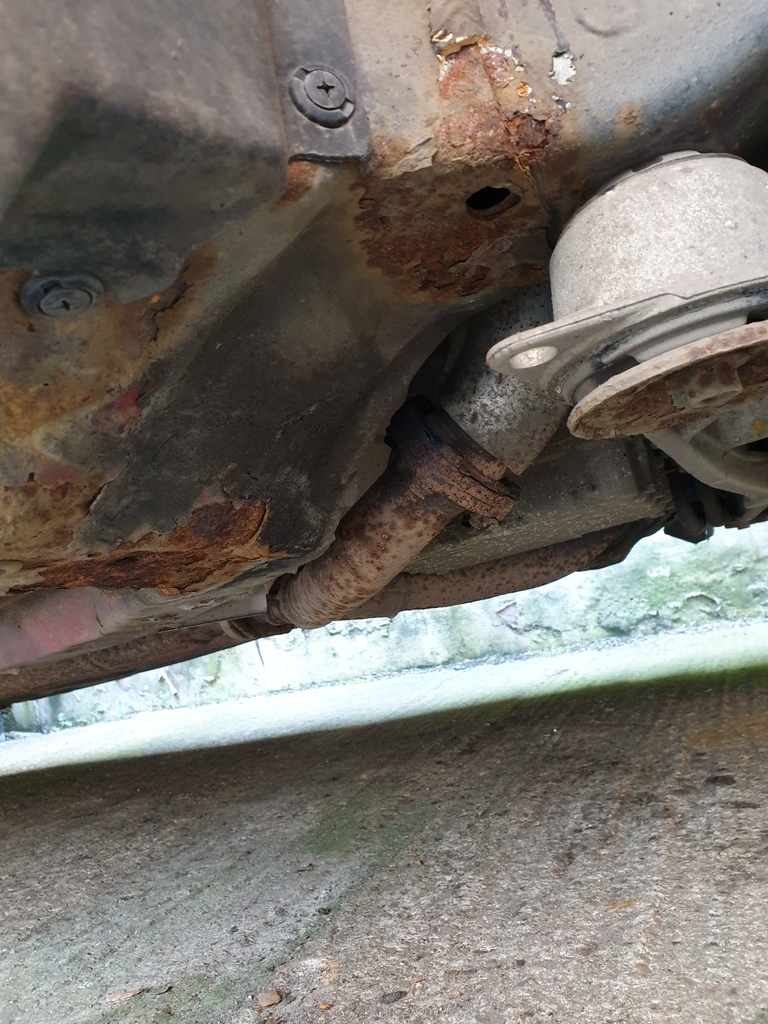 I'll get on that with a wire brush and some hydrate 80 but for now I shan't get distracted, a bit of faffing around and the new coilover was in place 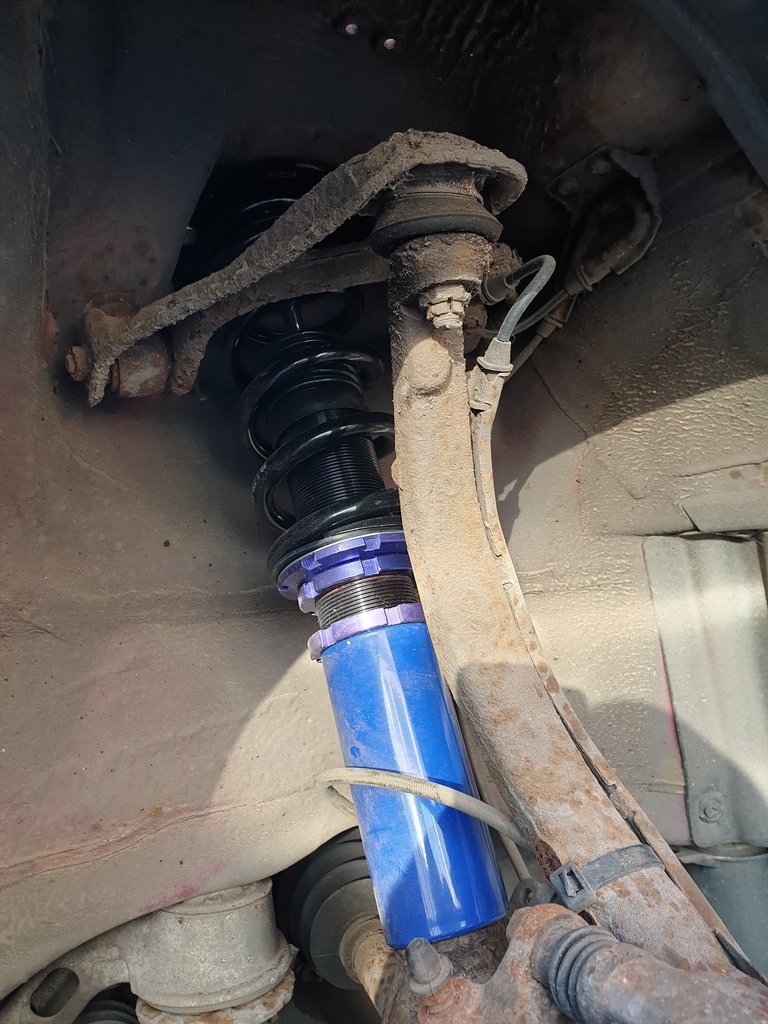 And with the KA9 fork it looks like I've just got clearance to the boot, certainly more than the Accord fork was giving me 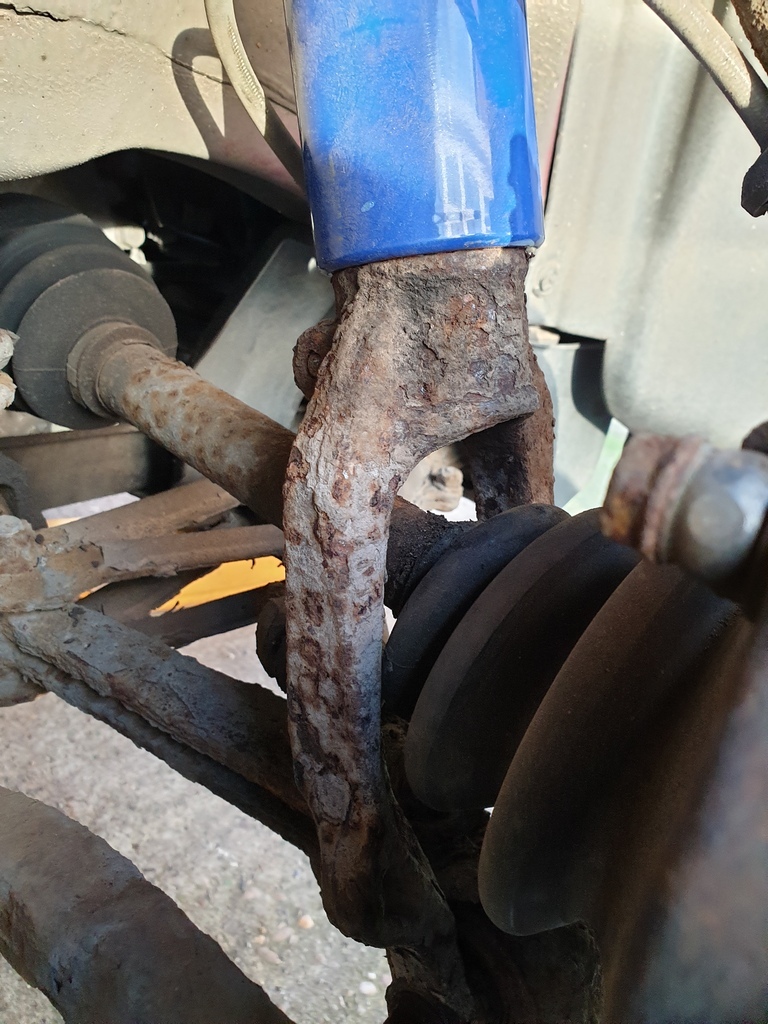 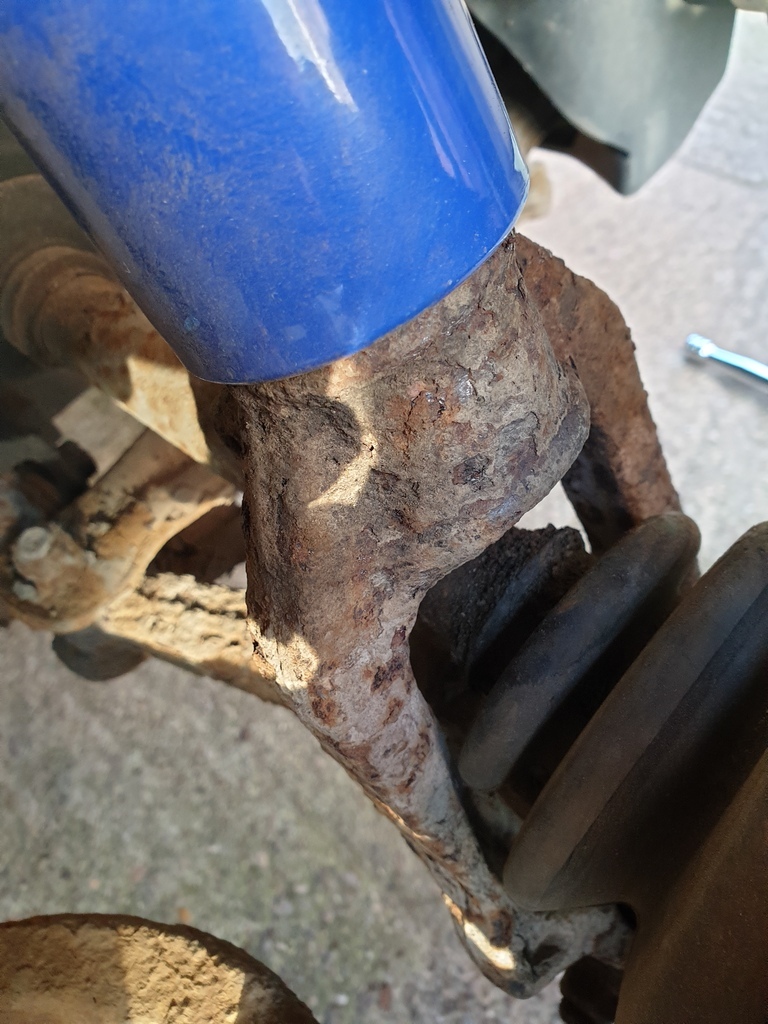 So that is a win in my book, I just need to change the other front fork over as it is currently sat on an Accord one. The car doesn't look any lower as I was quite conservative with the settings for now but final adjustment can wait for a later date. 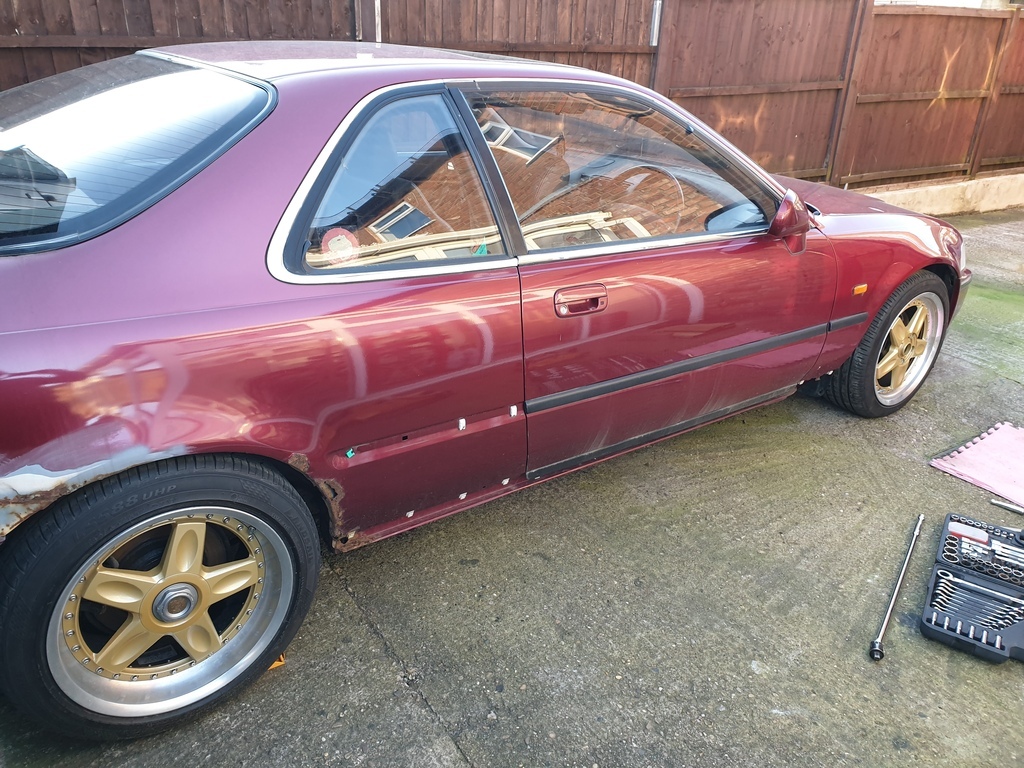 I've got a bunch of parts in the car that can be fitted and other bits that need to be bought (the battery is totally dead for one) so hopefully will have some more updates on this soon. After all it looks like we're going to be allowed out at some point this year and I need something retro to go to the Gathering in  |
| |
|
|
eternaloptimist
Posted a lot
   Too many projects, not enough time or space...
Posts: 2,578
|
|
Feb 28, 2021 16:27:59 GMT
|
|
This is such a smart looking thing. Good to see a bit of progress.
|
| |
XC70, VW split screen crew cab, Standard Ten
|
|
|
|
|
Mar 16, 2021 23:25:50 GMT
|
|
Hi where did you get abs pump from ?
|
| |
Last Edit: Mar 16, 2021 23:59:43 GMT by Rich: removed massive unnecessary quote w/pics
|
|
adam73bgt
Club Retro Rides Member
Posts: 4,998
Club RR Member Number: 58
|
|
Mar 17, 2021 12:45:02 GMT
|
Hi where did you get abs pump from ? That was from a breaker on eBay, still not totally sure it's fixed the problem as the brakes need bleeding and the car taking round the block, otherwise it might be possible to source one from a breaker in America? I don't know if the pumps are different or if just the mounting differs |
| |
|
|
|
|


