|
|
|
Mar 17, 2021 14:30:29 GMT
|
|
Pumps are the same for KA7 and KA8's.
Usual problem will be pump not building pressure as the nitrogen has gone.
You can get it rebuilt or disconnect the ABS system by unplugging it from behind the rear upper seat
|
| |
|
|
|
|
|
|
|
Mar 17, 2021 14:31:16 GMT
|
Interested to see where this build is at now  |
| |
|
|
|
|
|
Mar 17, 2021 15:17:56 GMT
|
|
Really cool, nice wheel choice too
|
| |
|
|
adam73bgt
Club Retro Rides Member
Posts: 4,998
Club RR Member Number: 58
Member is Online
|
|
Mar 17, 2021 21:05:53 GMT
|
Thanks guys  Not actually been a huge amount of progress since the last update since I hoped  I blame starting a new job, which will be good as it will mean a little more money to help get the Legend sorted I did do some actual stuff, a new battery meant no more jump starting everytime 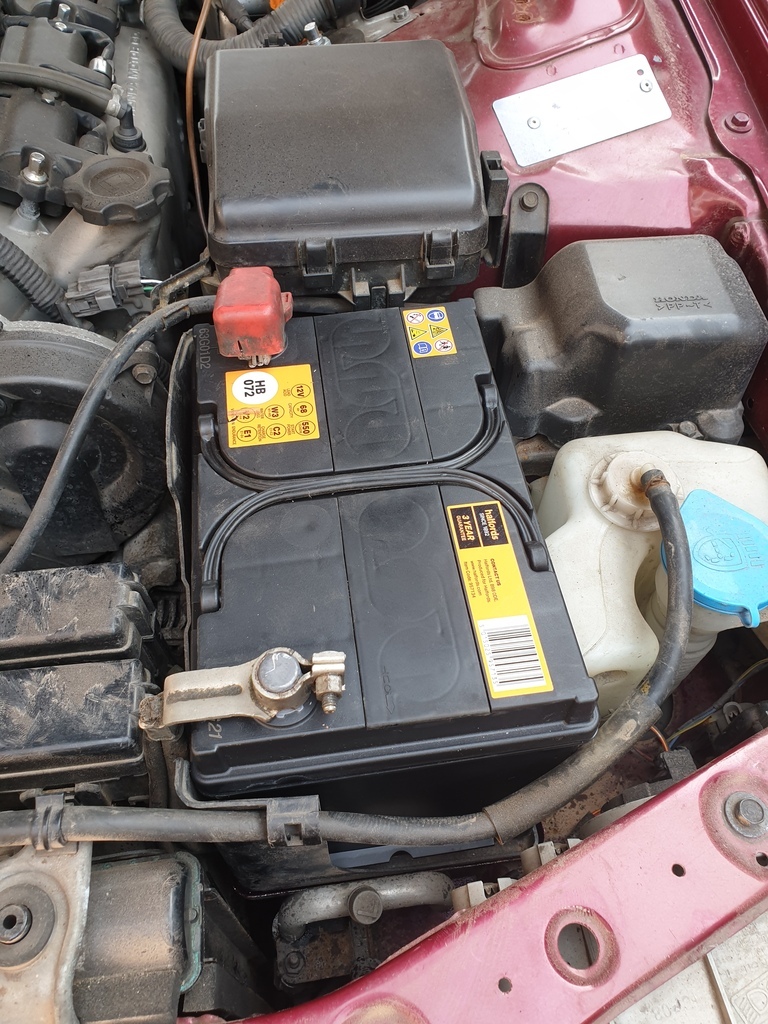 Cleaned up some of the more obvious mould around some bits of the interior 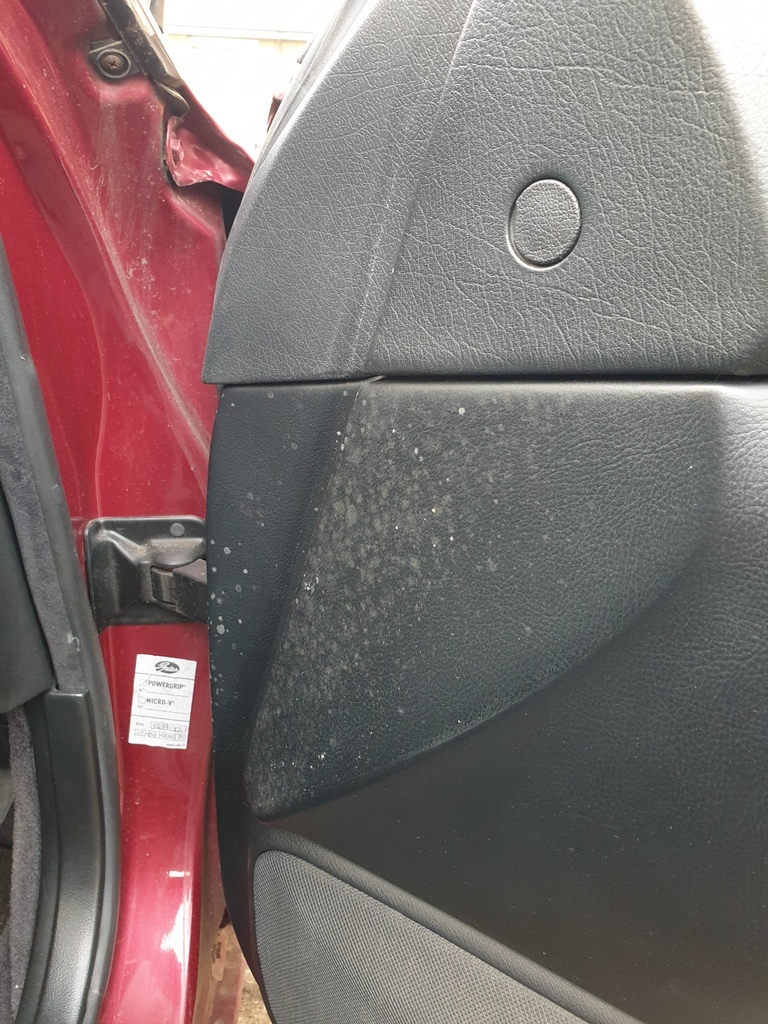 With the battery connected and while checking some stuff I found I had gained a windscreen washer... 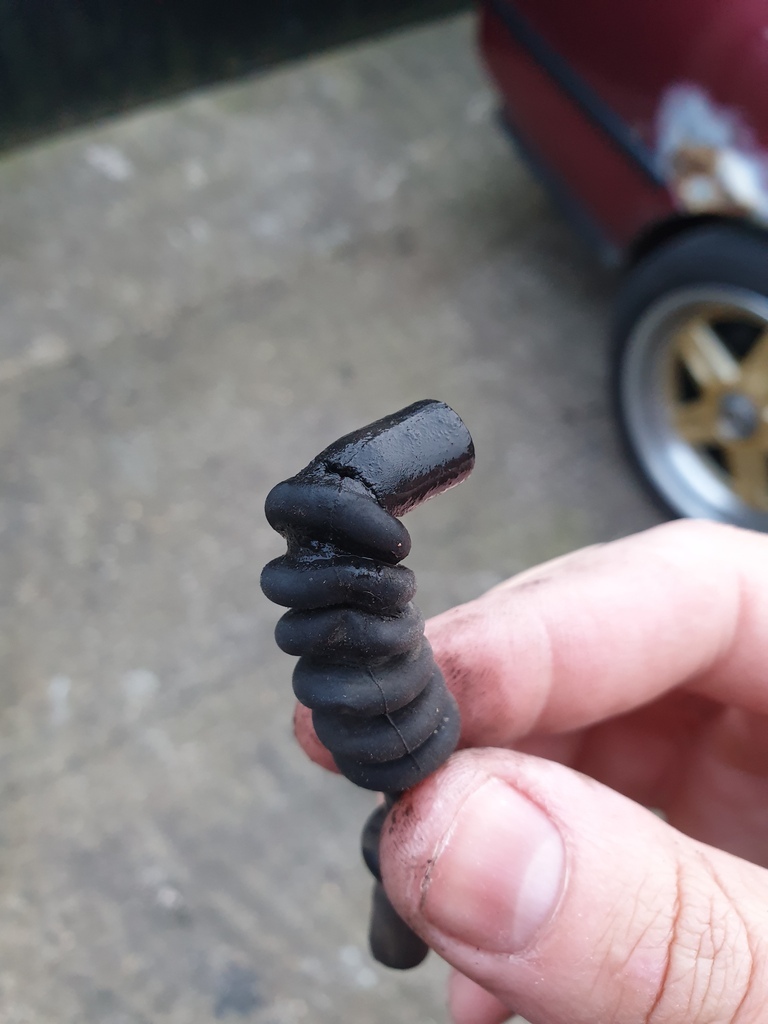 This bit of hose was near the bonnet hinge and had given up. I didn't even bother looking to see if the originals are available, a bit of silicone hose and thats sorted. I've also been ordering some bits, abrasives, bilt hamber anti corrosion stuff etc... and have been taking a look over my MIG welder as I think it might be time to bite the bullet soon. We'll see if I do that or something completely different on the car by the time I get to the next update  |
| |
|
|
adam73bgt
Club Retro Rides Member
Posts: 4,998
Club RR Member Number: 58
Member is Online
|
|
Mar 20, 2021 23:32:50 GMT
|
OK well plans changed a little, since the Weekender looks like its going ahead in May, and I had tickets rolled over from last year, I've now got a new target date to have the car ready for. Should focus the mind at least  I went a bit Roadkill and made up a list of the things I could remember that need doing 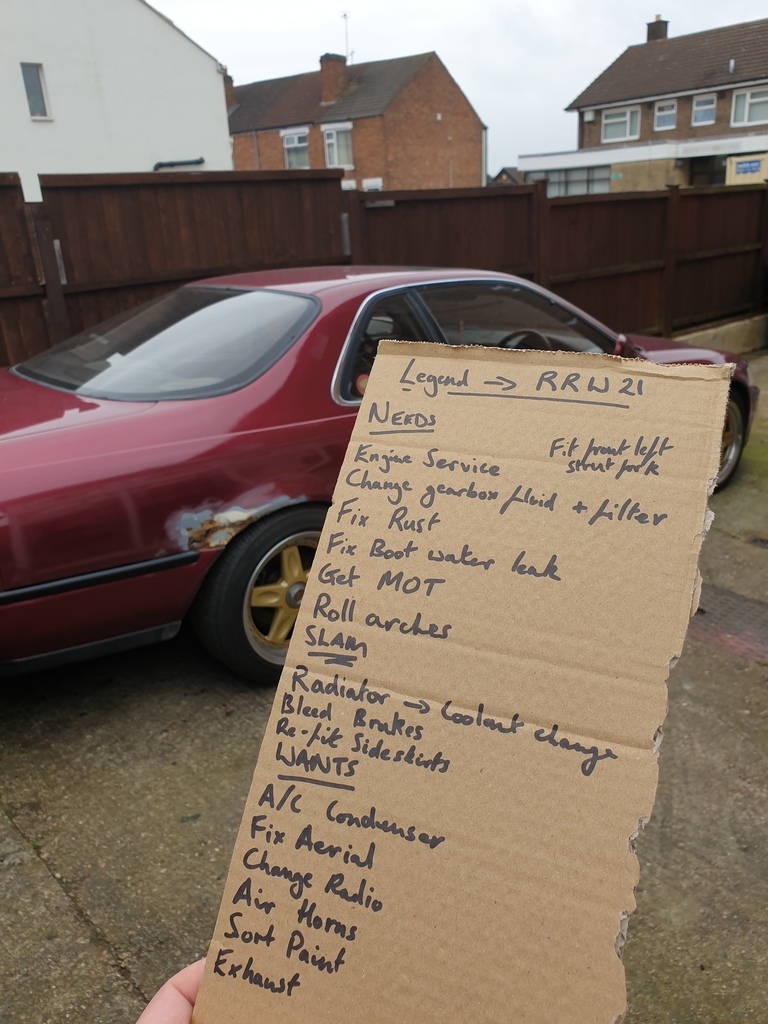 Some of the bits for the bodyworking haven't turned up yet so I've decided to focus on mechanical stuff that I have parts for and can get on with. Well I say that, I actually started by removing the rear window trim 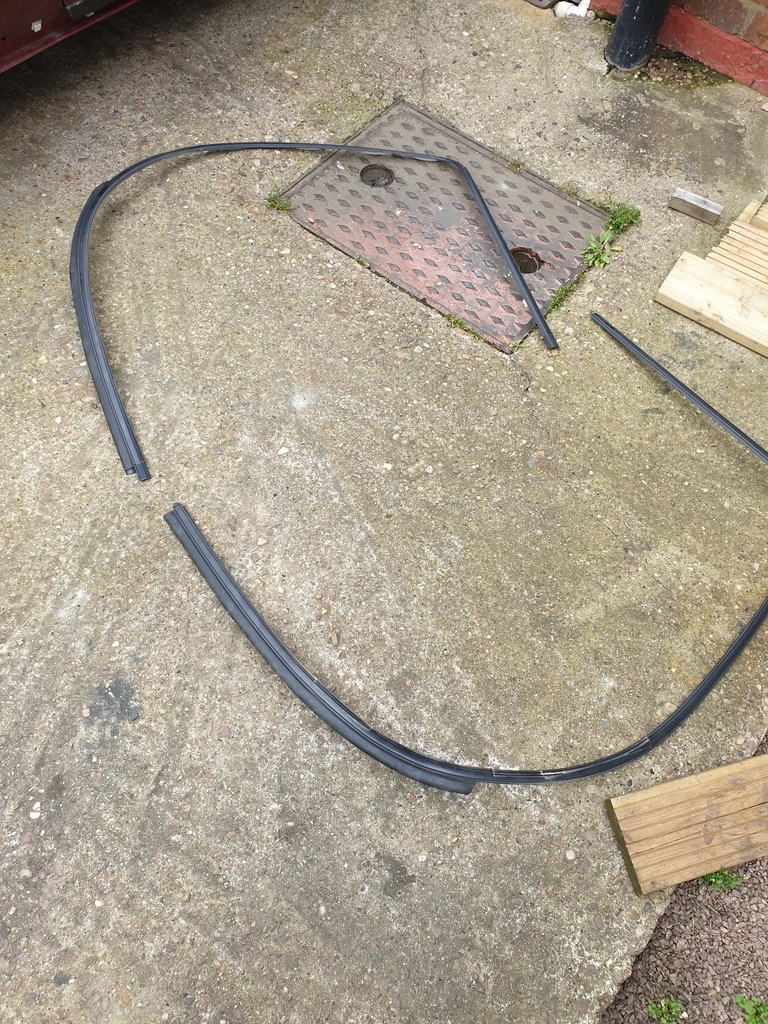 I guess it would have been 2019 when I first took these off to clear out the pine needles that had gathered from when it was parked under a tree in a previous life. The issue I had since then is that one of the lower clips had broken and was letting water past. 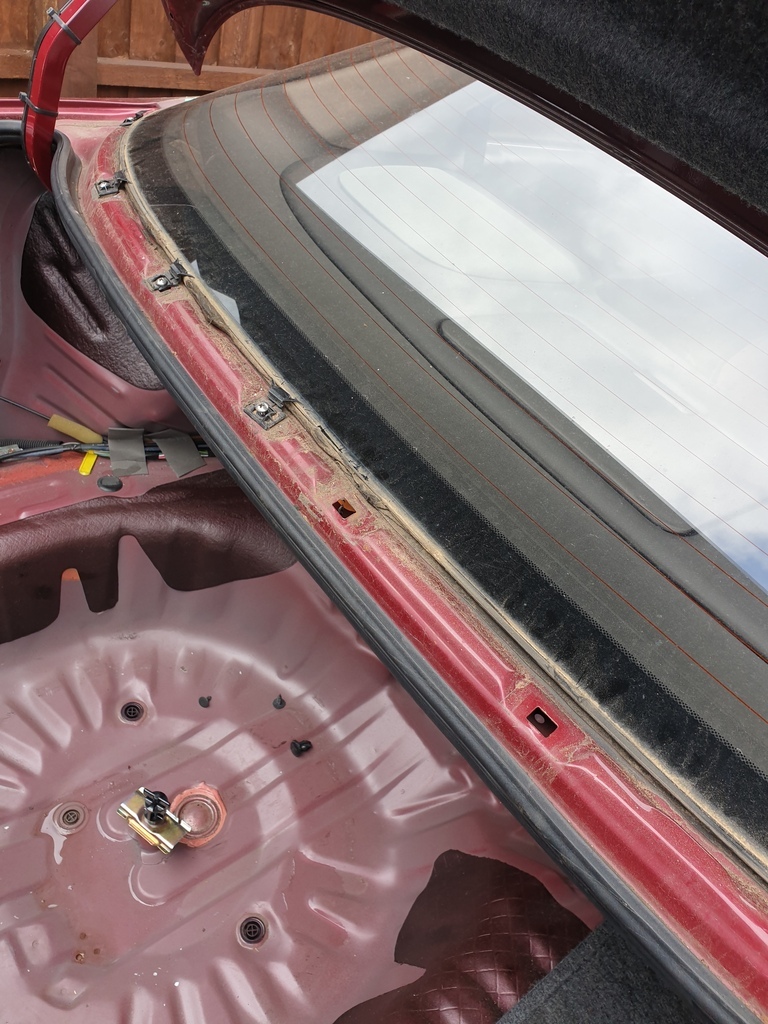 This is an issue as these holes go straight through to the boot 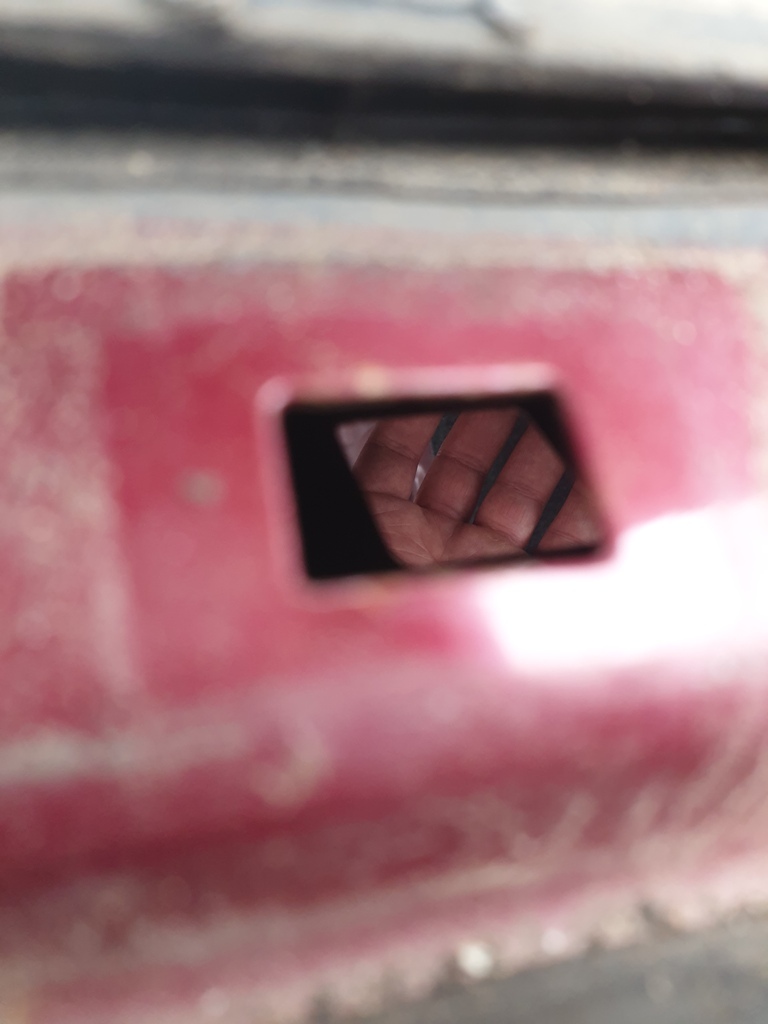 (Picture of hand in boot through clip hole as proof  ) I did buy a replacement clip ages ago but had been putting off the job, in the meantime the boot carpet had been getting nice and soaked.. That is now inside but I keep tripping over it so sorting the boot leak would be handy. Also months of being sat and neglected had allowed the sludge and grime to build up again... 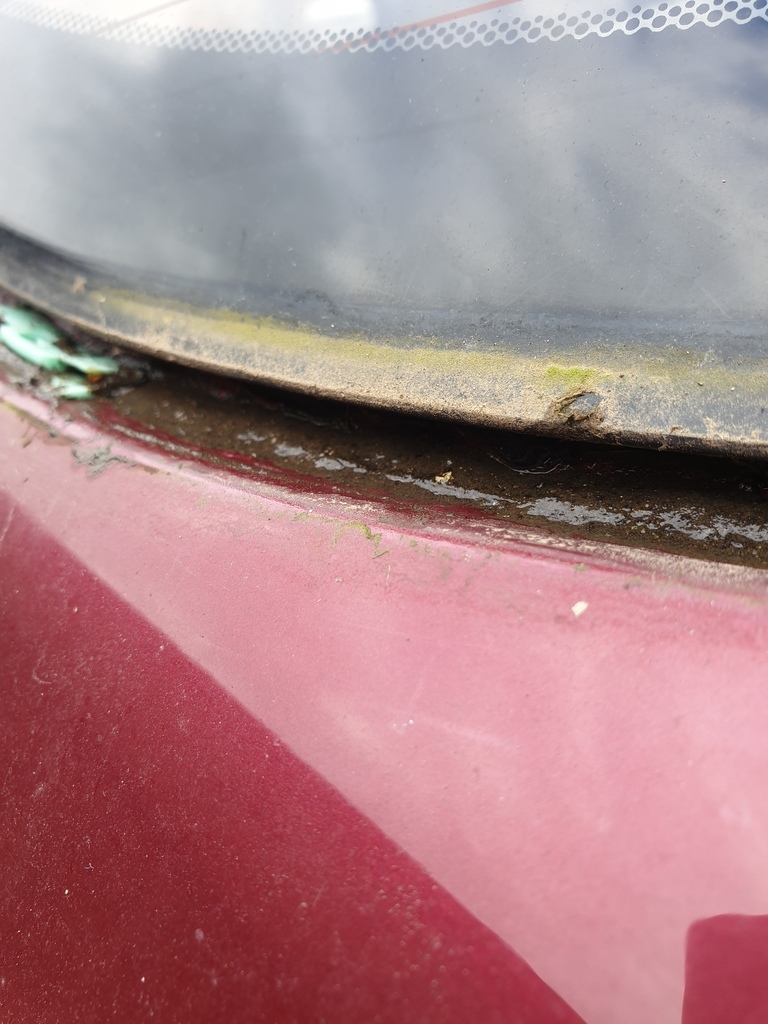 Bit of Deja vu as the boot seal came off and the whole area got a good clean up. 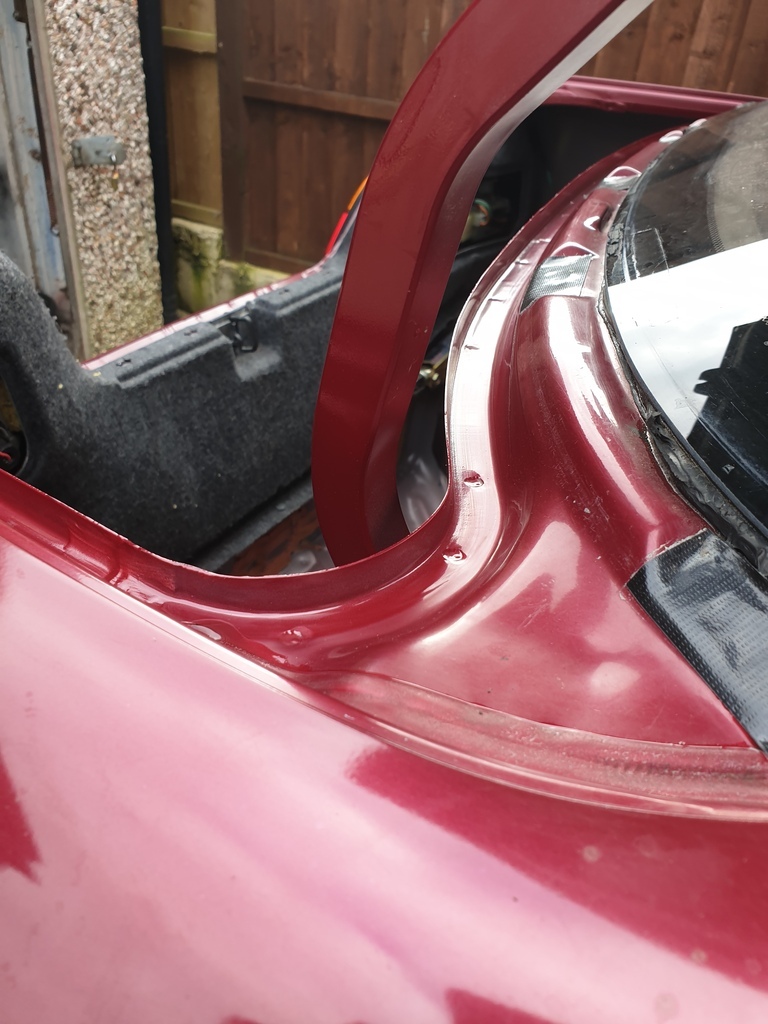 And I gave the car its first wash in a looong time 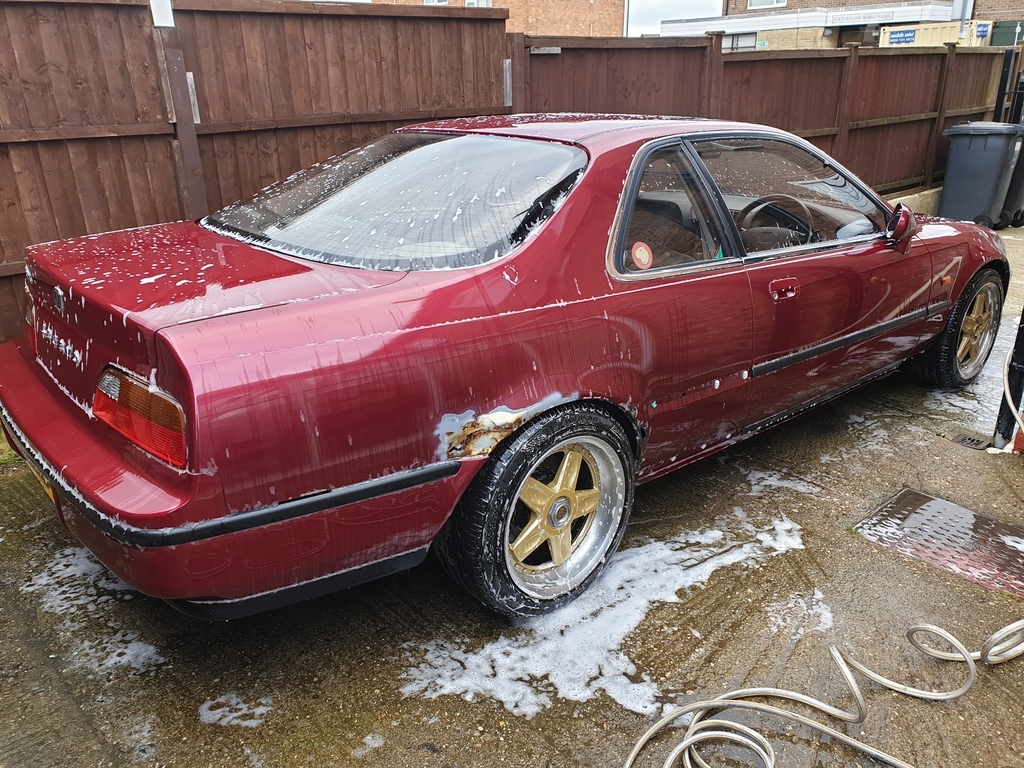 May seem a bit counter intuitive when theres lots of other more important jobs to do rather than washing it, but I feel more motivated to work on it when it doesn't look like a bag of curse word  I've had to order more of the clips as they're all a bit brittle and I broke a couple more while removing the trims  so won't be finishing that job just yet, but its started at least.. |
| |
|
|
adam73bgt
Club Retro Rides Member
Posts: 4,998
Club RR Member Number: 58
Member is Online
|
|
Mar 21, 2021 21:16:55 GMT
|
Decided that today I'd focus more on the front end of the car, the brakes need to be bled and some other bits doing so getting the front end in the air was a start. Had to roll the car up on some planks of wood to get the jack up under the front lifting crossmember which runs across the front of the engine bay. Front left wheel off and it took no time at all to replace the strut mounting fork with the KA9 item 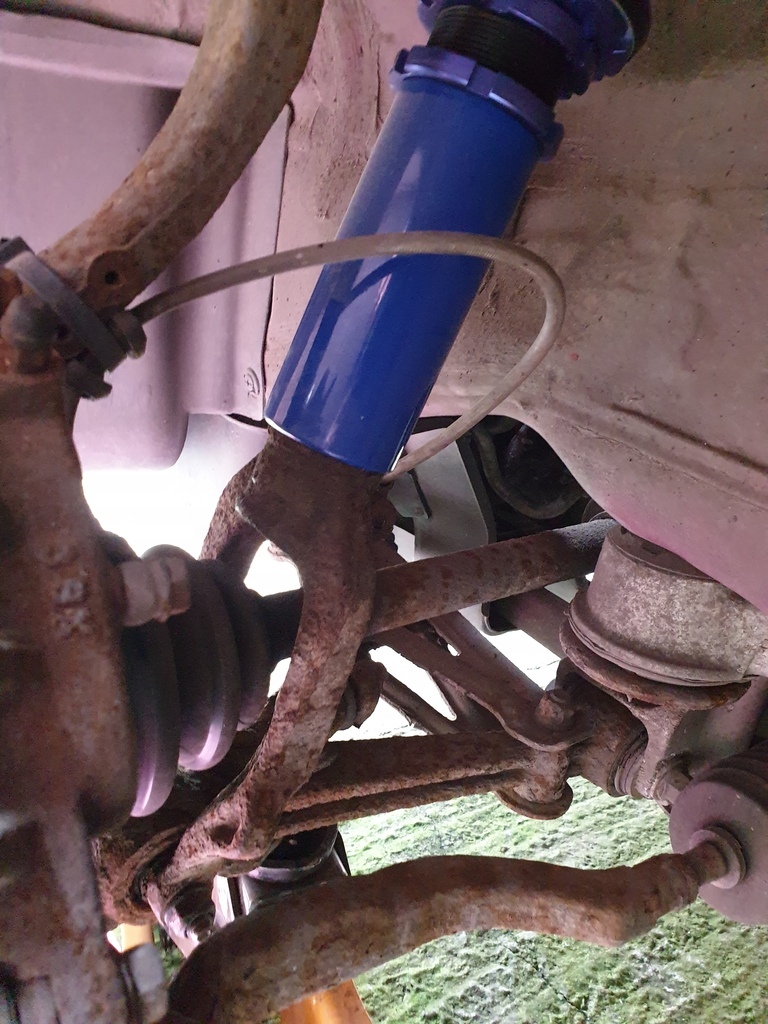 Next I had a go at another job which has been in the planning for some time. The coilovers don't have any mountings for the brake hoses so I had to come up with something else, a bit of looking around Youtube suggested that some saddle clamps and P clips may do the job 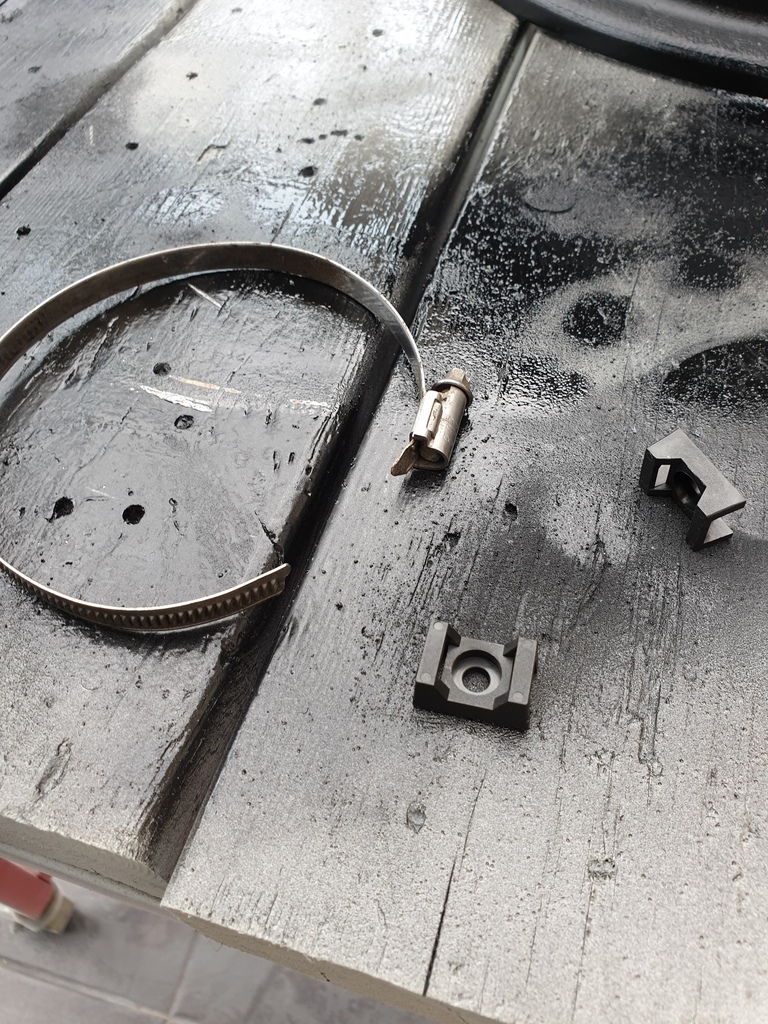 (I was going to use the hose clamp to hold the saddle clamp to the strut but went with cable ties in the end) The idea is to use a small bolt and nut to go through the saddle clamp and attach it to a P clip on the other side which can go around the hose. I modified this idea a bit as my hoses have loose brackets on them which I wanted to utilise to move the hose further from the strut. This is what I came up with 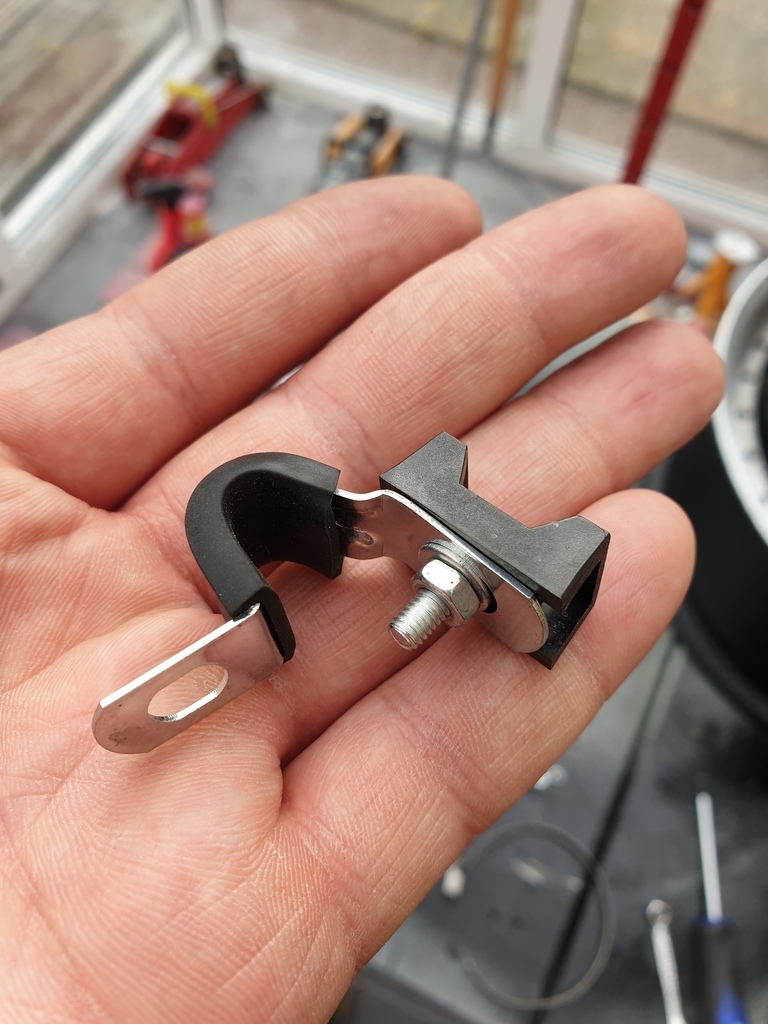  A bit of bending got the P clip to be the right shape to be a little bracket to hold the hose, bolted that to the hose bracket, tightened the cable ties and jobs jobbed. Time will tell how long lasting this is but it'll be good for MOT and cheap to sort in the future should it break. Nipped round and repeated the process on the other side and thats a job off the list (well it wasn't on the list, but was on the mental list at the back of my head  ) 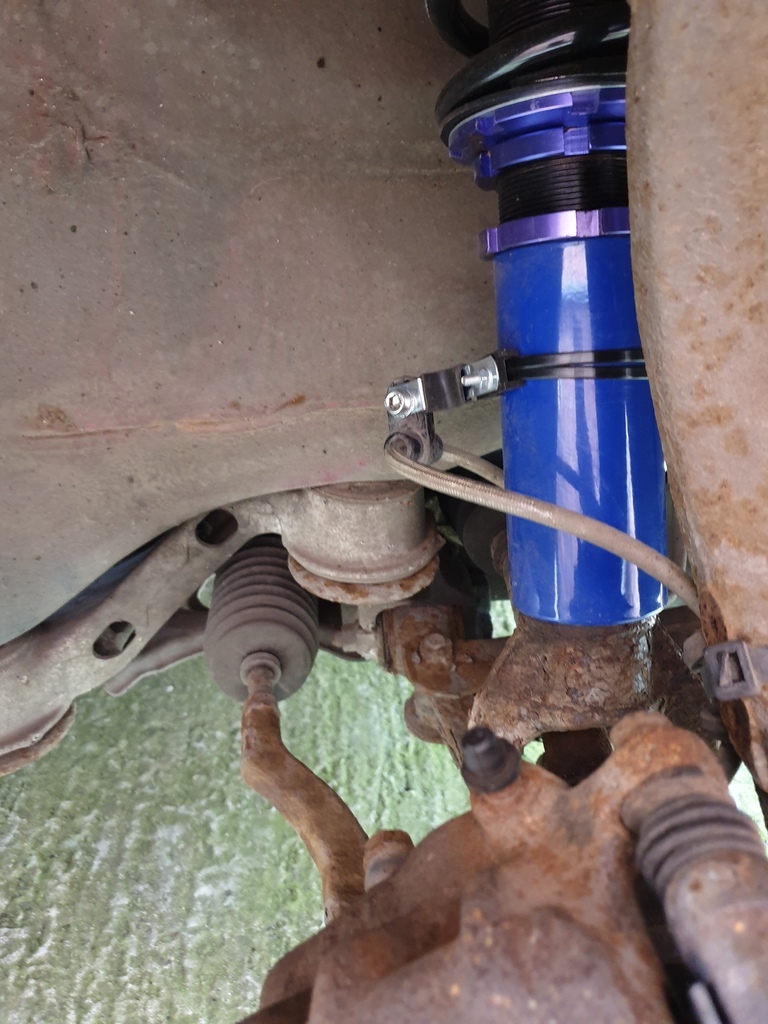 Before I lift the rear of the car and get into brake bleeding, I thought it would make sense to have a look at fitting the replacement radiator and AC condenser 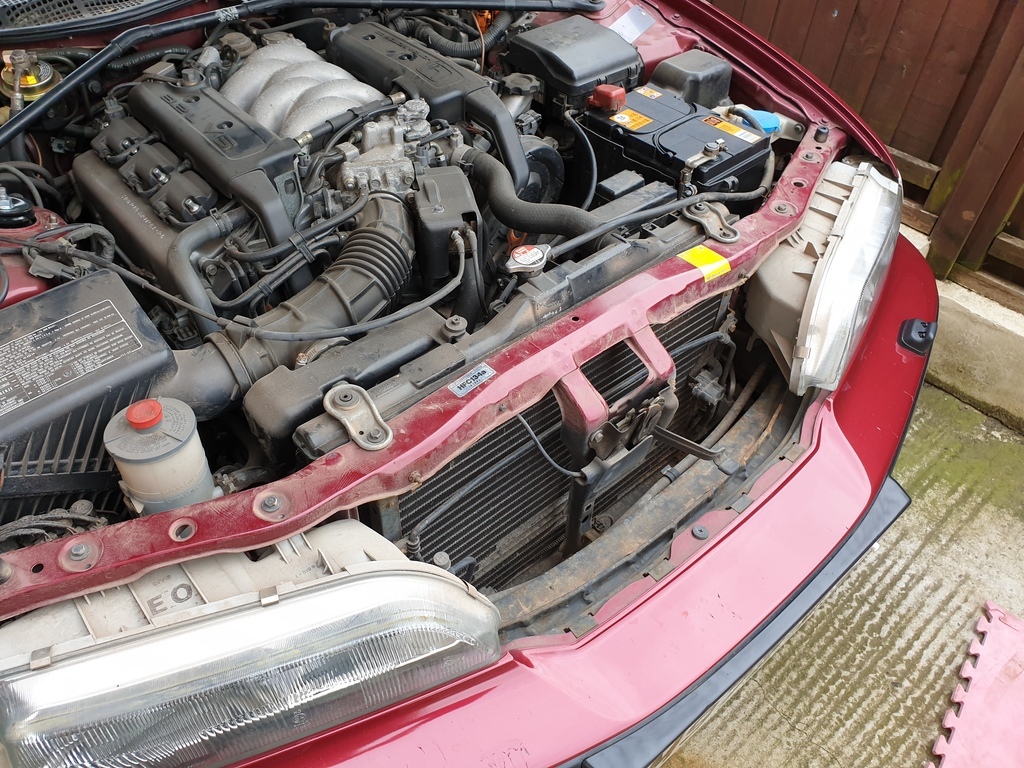 The factory manual is very light on details when it comes to removing the radiator.  Sounds remarkably simple right? Well unless the Acura Legend's are radically different, it doesn't mention that there is a very small hole in the undertray to allow access to the radiator drain plug and the connectors for the fans and ATF cooler lines are nigh on impossible to get to. I soon decided the undertray needed to come off and as its sort of interlinked with the front bumper undertray, I took the bumper off  Got most of the fixings out for the undertray proper but of course a couple have turned to rusty cheese. By this point I couldn't be bothered with dealing with that so got distracted by this bottle thing that was behind the bumper 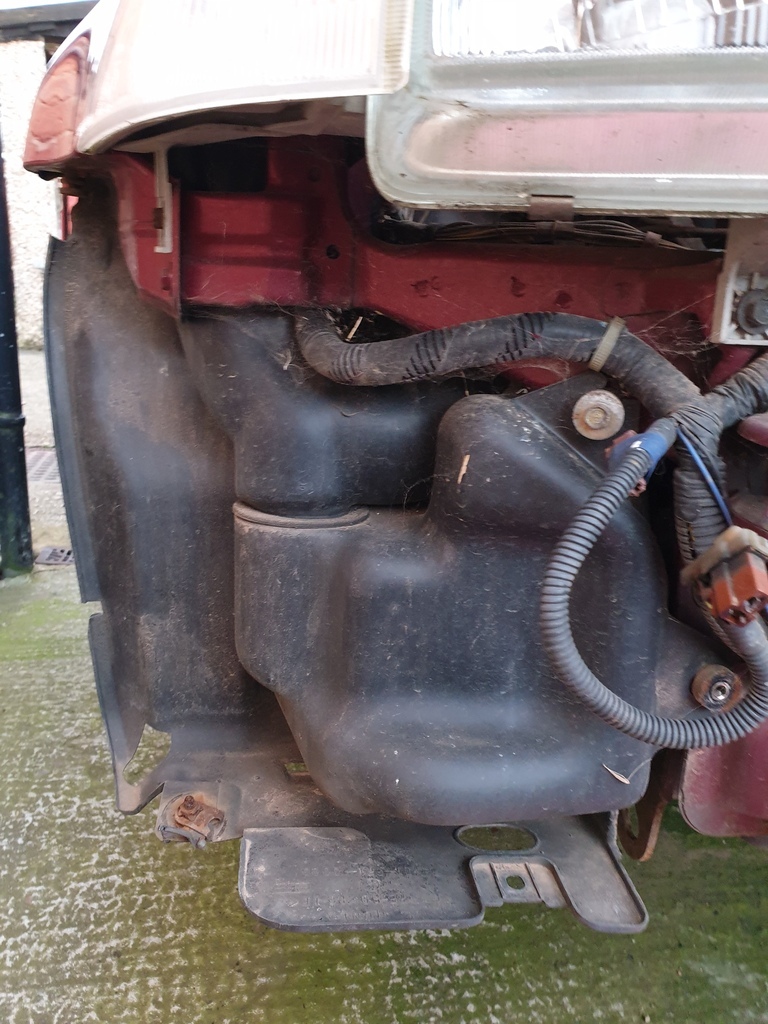 On closer inspection, it's a massive intake silencer. 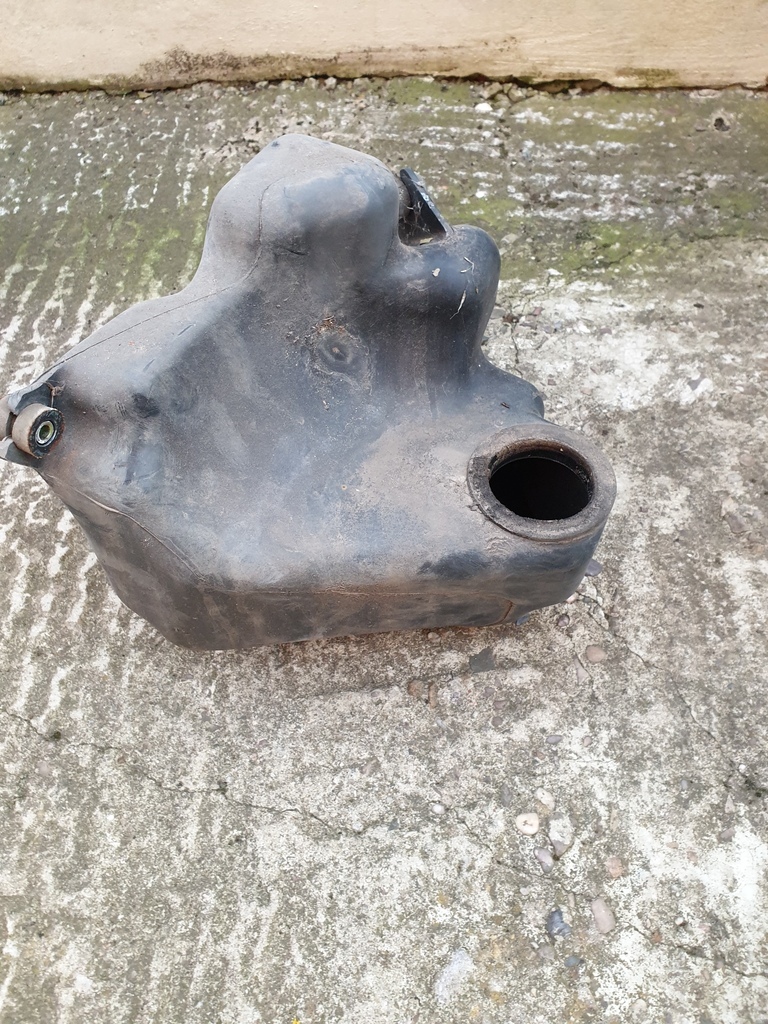 I guess being a luxury coupe they wanted to muffle the sound of the V6 as much as possible (something I wish to rectify  ) It doesn't look like a very efficient design though, the intake for it appears to be in the engine bay going into the inner wing behind the white plug in the below photo 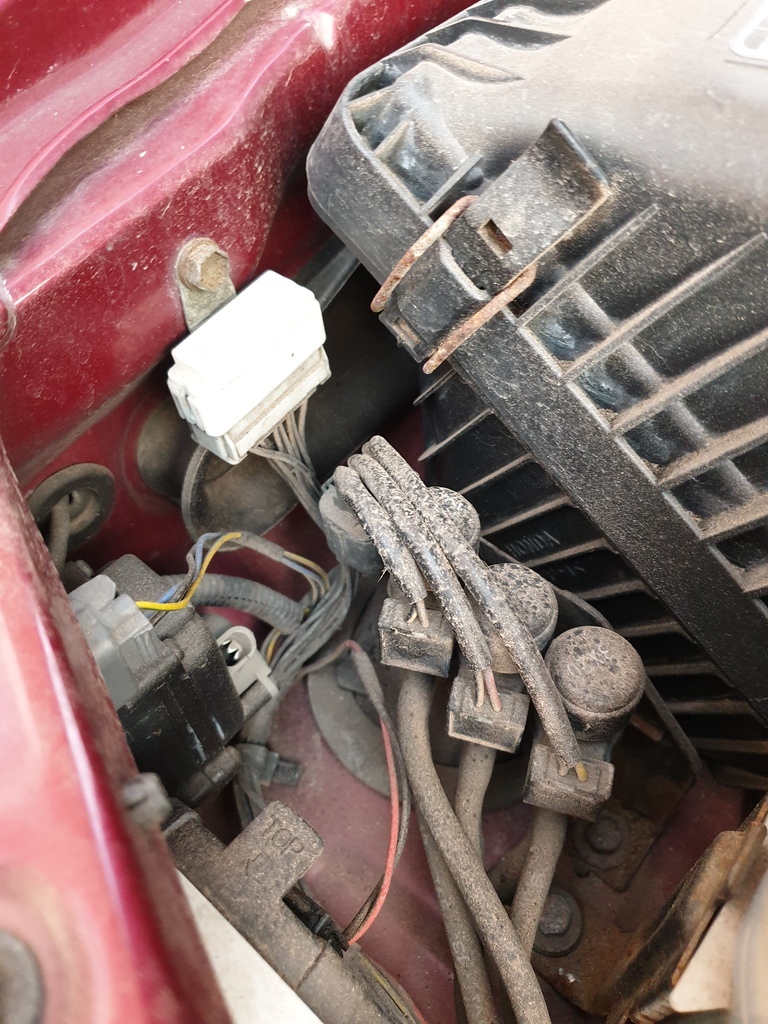 It goes down past the silencer, then back up into the air filter box. This must mean it's always drawing warm engine bay air in.. 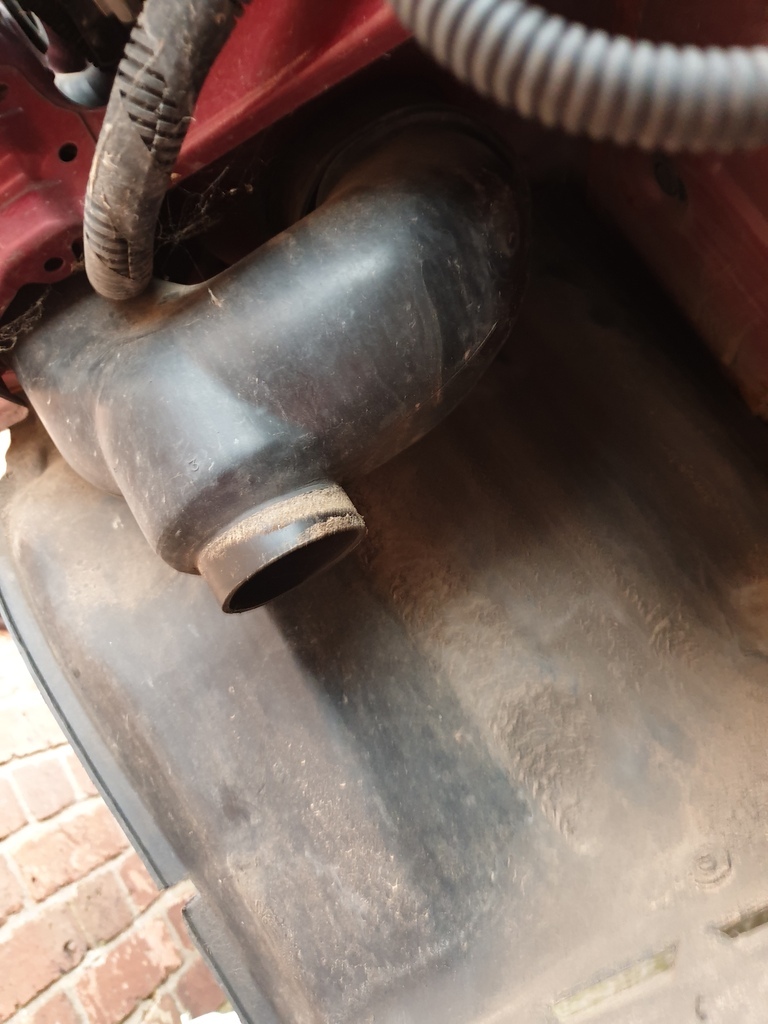 The design of the silencer with it's one entry/exit also meant that among the leaf litter and debris I found within, was also the remains of a long dead mouse... Lovely!  I'll likely not reinstate this in the hope of getting a bit more of that V6 sound, time will tell if it actually makes a difference. Next job is to continue with trying to get the undertray off  |
| |
|
|
Paul
Posted a lot
  
Posts: 2,006
|
|
Mar 22, 2021 18:07:23 GMT
|
Fixed your list for you. 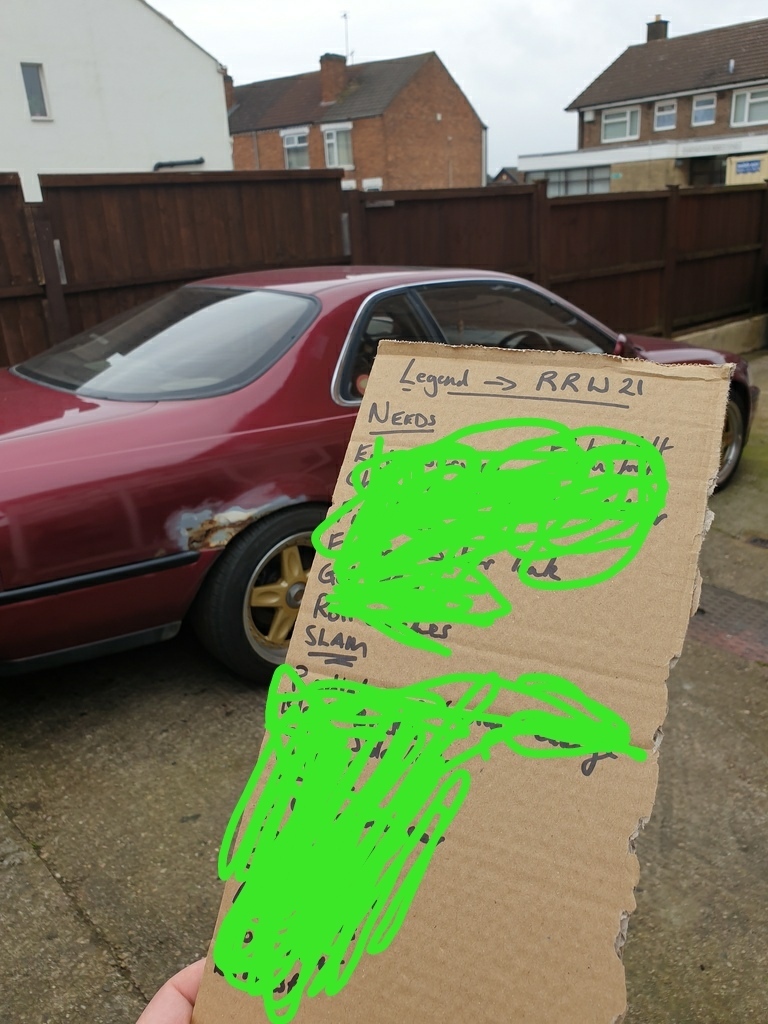 Fingers crossed we'll see this at the Weekender  |
| |
|
|
adam73bgt
Club Retro Rides Member
Posts: 4,998
Club RR Member Number: 58
Member is Online
|
|
Mar 22, 2021 18:28:57 GMT
|
|
Hahaha it's already low enough to be a pain to get the jack in at the front, more adjustment of the coilovers to come after the MOT
|
| |
|
|
adam73bgt
Club Retro Rides Member
Posts: 4,998
Club RR Member Number: 58
Member is Online
|
|
Mar 29, 2021 20:49:29 GMT
|
Had a busy weekend and didn't do anything on the car in the evenings last week so with a good forecast for today, I had to make up for lost time  A quick job to get out of the way was a bit more pulling to get the U bend out of the restrictive intake tract 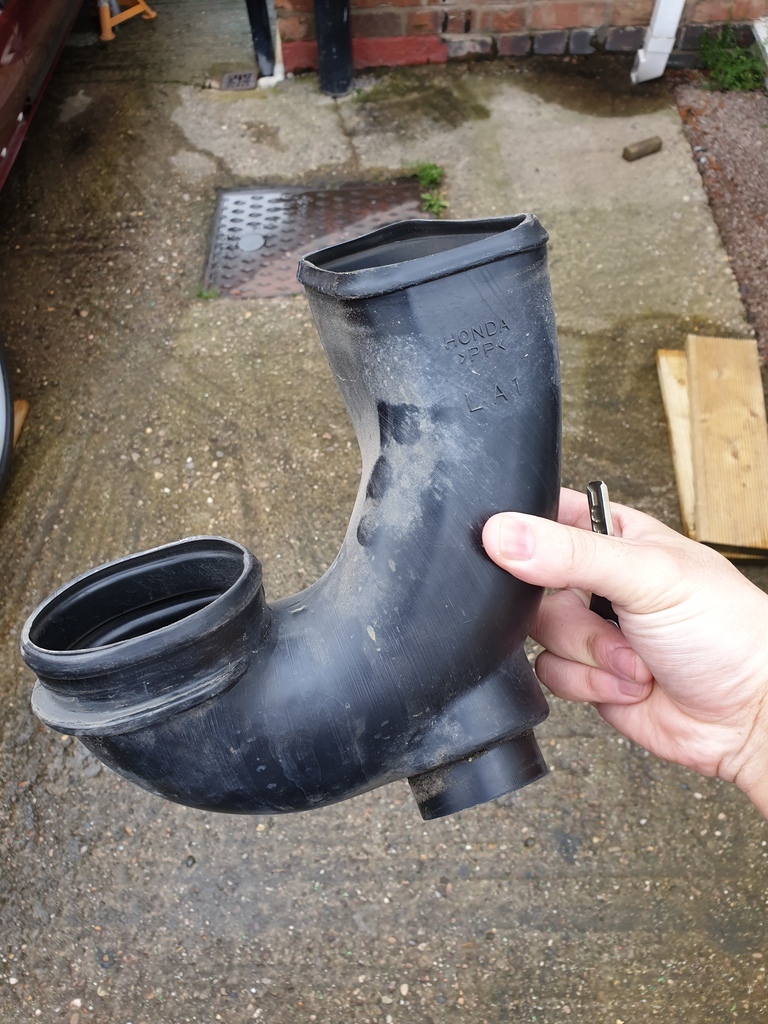 And I made a cheeky offer on a K&N panel filter on ebay, the old one needed replacing anyway and I'm living in hope that I'll hear some V6 induction after all this  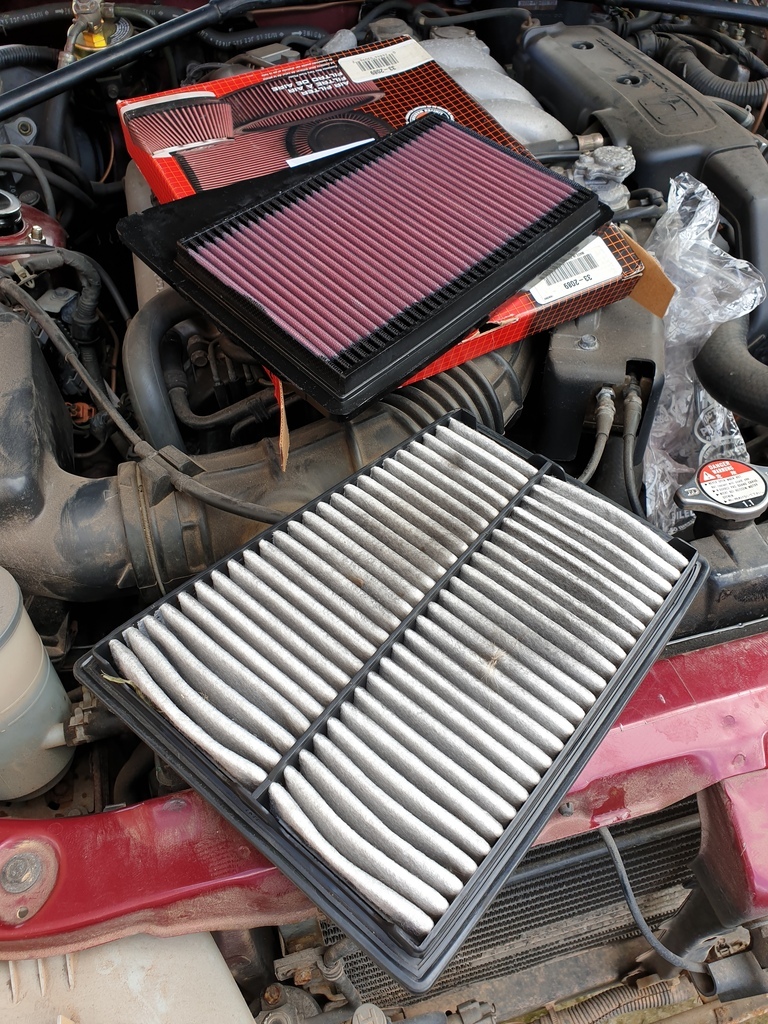 Then onto the real work, that radiator had to come out. I spent all of 5 minutes trying to remove or drill one of the several rusted in place undertray bolts before losing my patience and going all brute force at the undertray to get it out of my way! 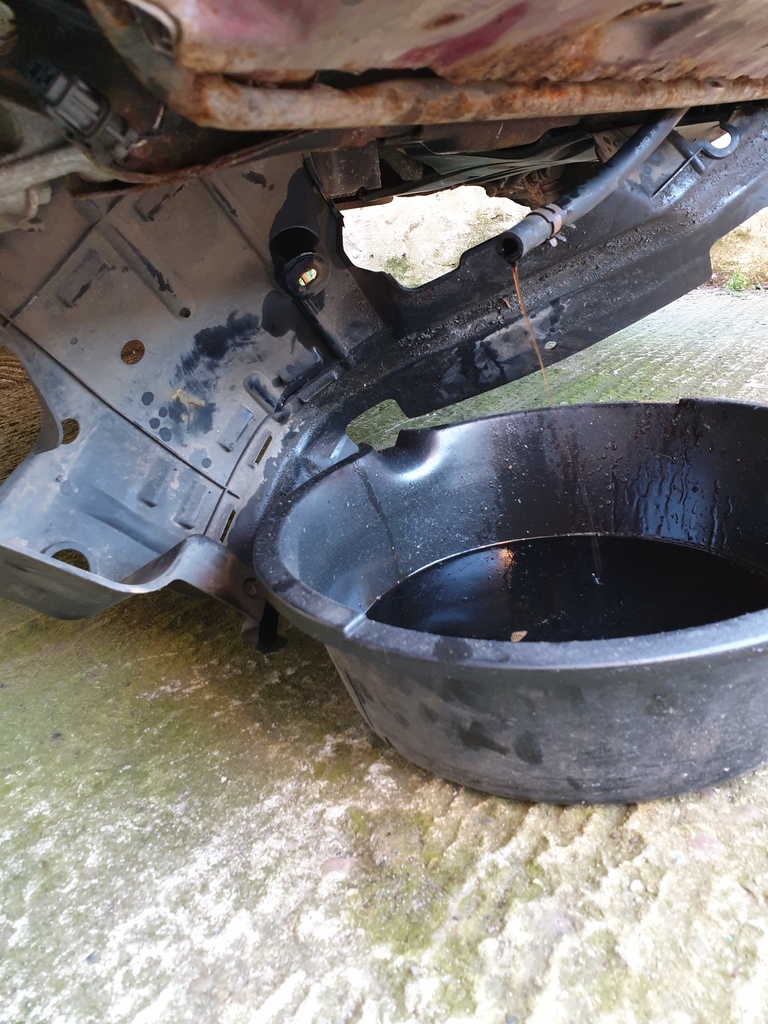 Neatly folded out of the way while I drained the ATF cooler  Not too many photos at this point as I was mostly faffing with old radiator hose clamps, mercifully the electrical plugs for the fans were nice and easy to separate. I did find that the workshop manual was being very optimistic though, I had to move the intake hose and a fair few bits it didn't mention to actually get the radiator out 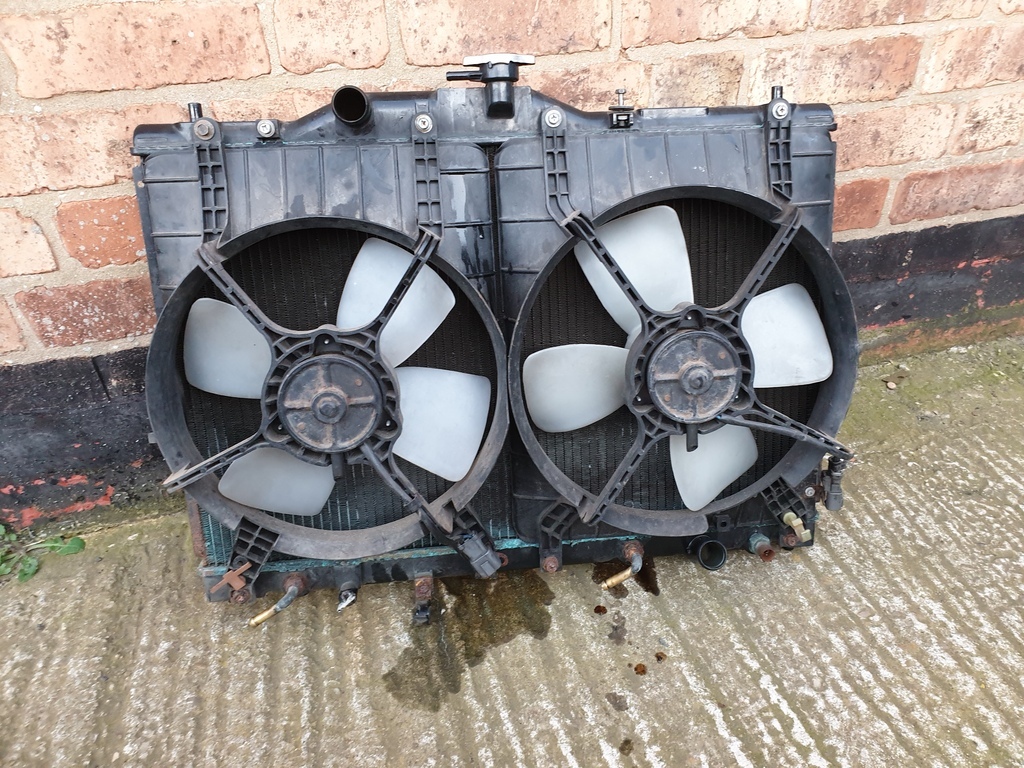 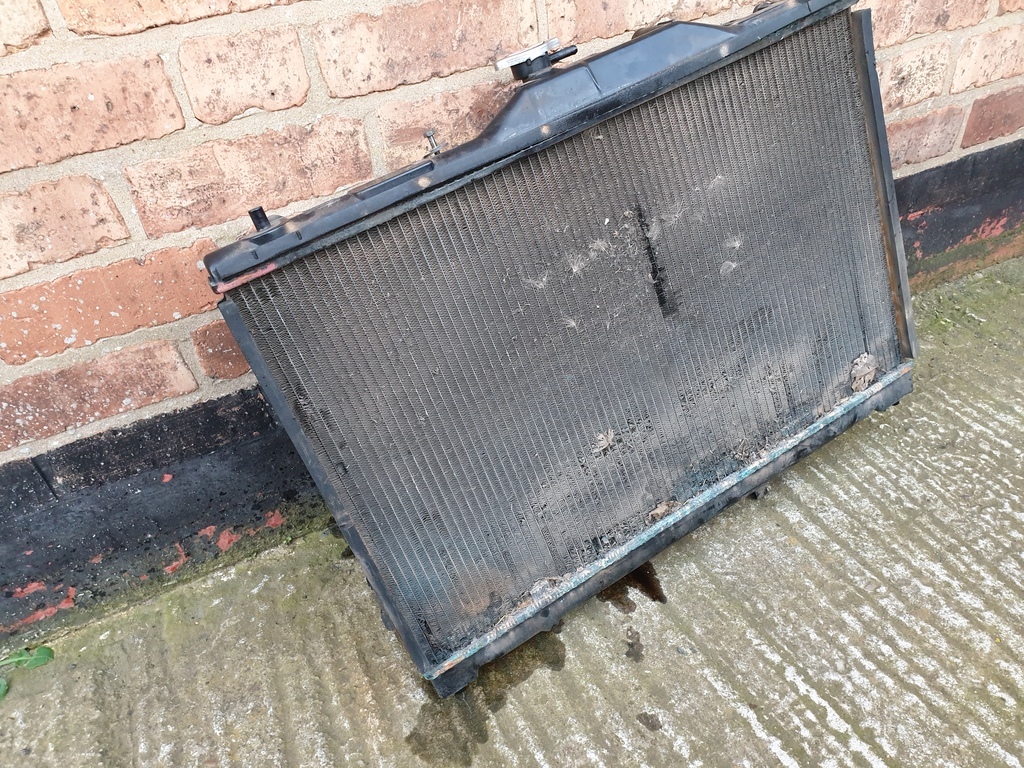 A bit grotty and the bottom bolts for the fans look like they've been in the North Sea but as long as I can get the fans and temp sensor out in one piece I'm happy. They'll get transferred to the new radiator. There is also some foam on the old one to help "seal" it to the chassis frame, I might get some foam to replicate this as I'm sure it will help the efficiency of the rad. Next was tackling the crusty looking AC condenser 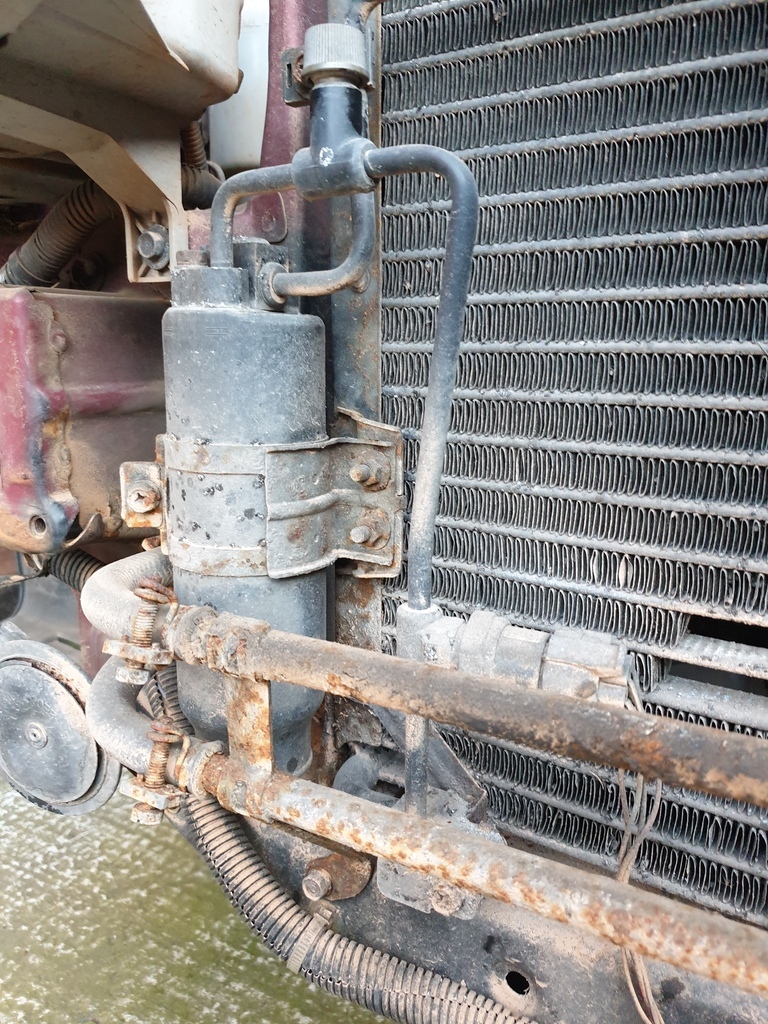 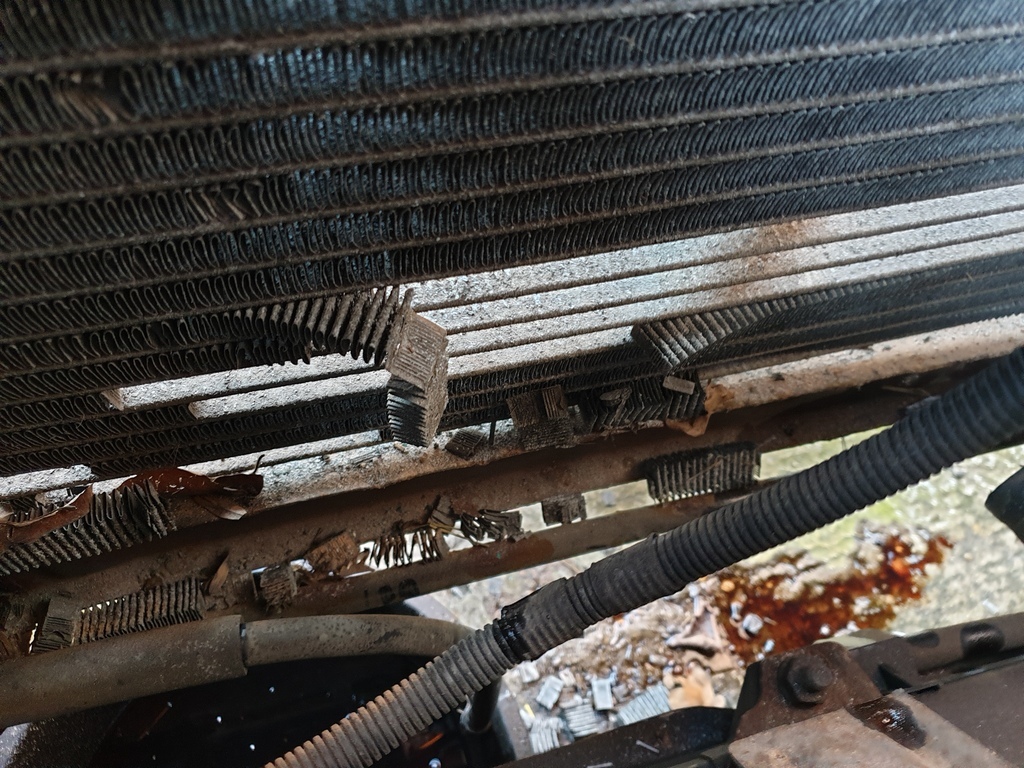 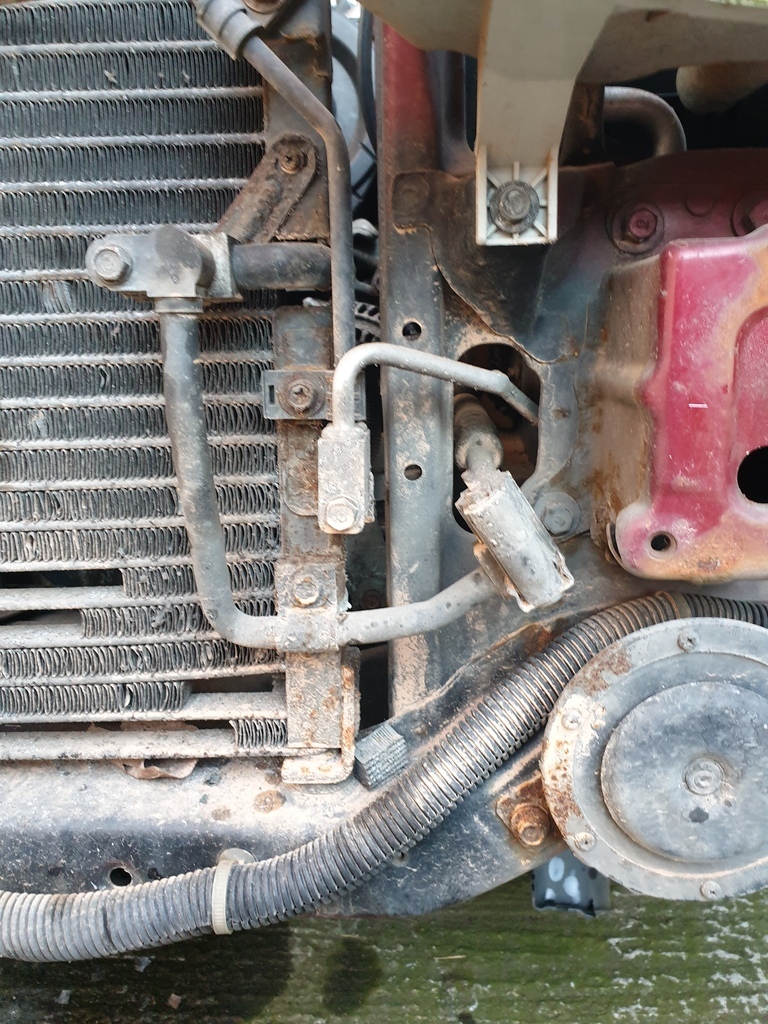 Zero gas left in any of the lines so no doubt this was leaking, I was amazed it worked at all back in 2019. All was going well with removing the very fragile alloy lines etc. and it is almost ready to come out save for one rusty rounded bolt head  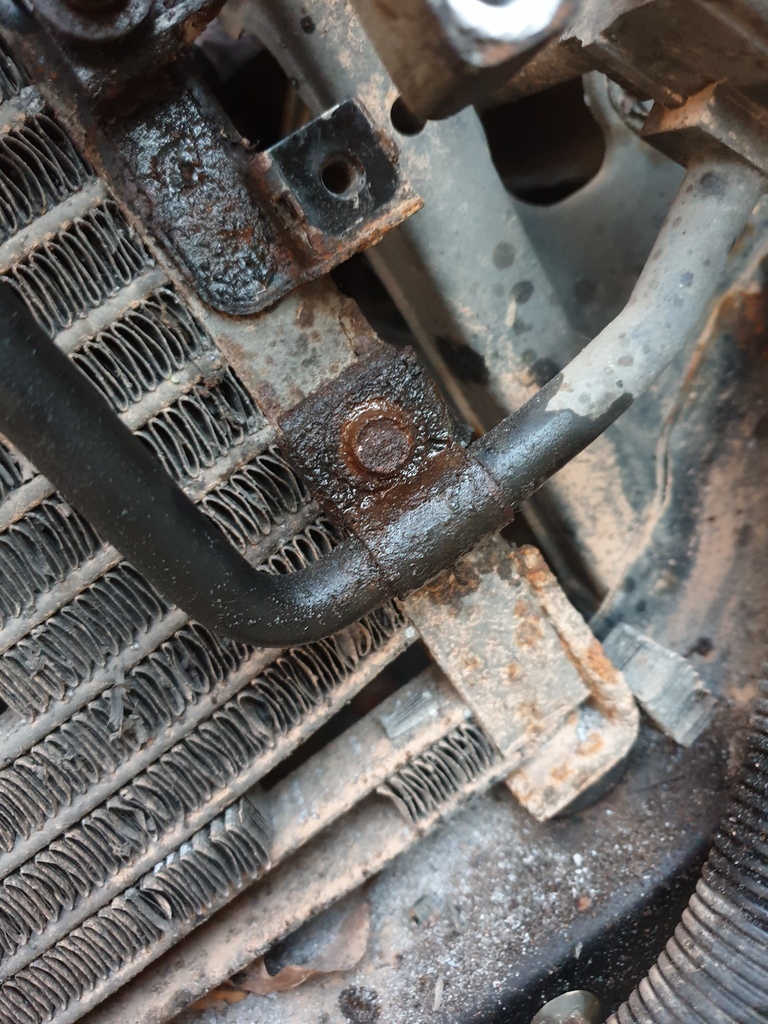 After that though, the condenser will come out and I can begin the reverse process of putting it all back together. I'll run the hose through the engine to give it a bit of a flush, the old coolant looked very watery.. And while I've got good access, I'll change the engine oil and probably look at doing the ATF as well. I'm setting myself a tentative target of getting the above jobs, and the brake bleed done by this weekend, I just want to get the mechanical jobs out of the way before it has to go off for bodywork |
| |
|
|
bstardchild
Club Retro Rides Member
Posts: 14,971
Club RR Member Number: 71
|
|
Mar 29, 2021 22:21:48 GMT
|
|
Blimey that AC rad has seen better days!!!!!
Good luck with the RRW21 prep
|
| |
|
|
|
|
adam73bgt
Club Retro Rides Member
Posts: 4,998
Club RR Member Number: 58
Member is Online
|
|
Mar 29, 2021 22:48:49 GMT
|
It's turned to a Shredded Wheat sort of consistency, just disintegrates when you look at it  will be glad to have the new one on the car in its place |
| |
|
|
75swb
Beta Tester
Posts: 1,052
Club RR Member Number: 181
|
|
|
|
|
Love it. How are you getting on with parts availability? Nearly bought one of these on more than one occasion, but wasn't to be.
|
| |
|
|
adam73bgt
Club Retro Rides Member
Posts: 4,998
Club RR Member Number: 58
Member is Online
|
|
|
|
|
Parts can be a bit tricky, they don't seem to share many bits with other Honda's and once you get away from regular service parts it can be difficult to find anything in the UK.
They sold more in the US and rock auto is good for bits like suspension arms and the radiator and condenser but even then one of the rear arms is NLA and I don't think any body panels exist outside of taking cuts from breaking cars.
It's mostly little annoying things like window rubber trims that won't quite stay in place that could do with replacing but aren't available 🙃
|
| |
|
|
adam73bgt
Club Retro Rides Member
Posts: 4,998
Club RR Member Number: 58
Member is Online
|
|
|
|
Update time, had a little setback on the bodywork front, first bodyshop I spoke to saw the photos and decided it was a bit too big of a job for them at the moment, so onto plan B there  I have been cracking on with the mechanical jobs regardless however. Last time I was one rusty, rounded bolt away from having the condenser off. I came back the next day with a freshly charged drill and sorted that. 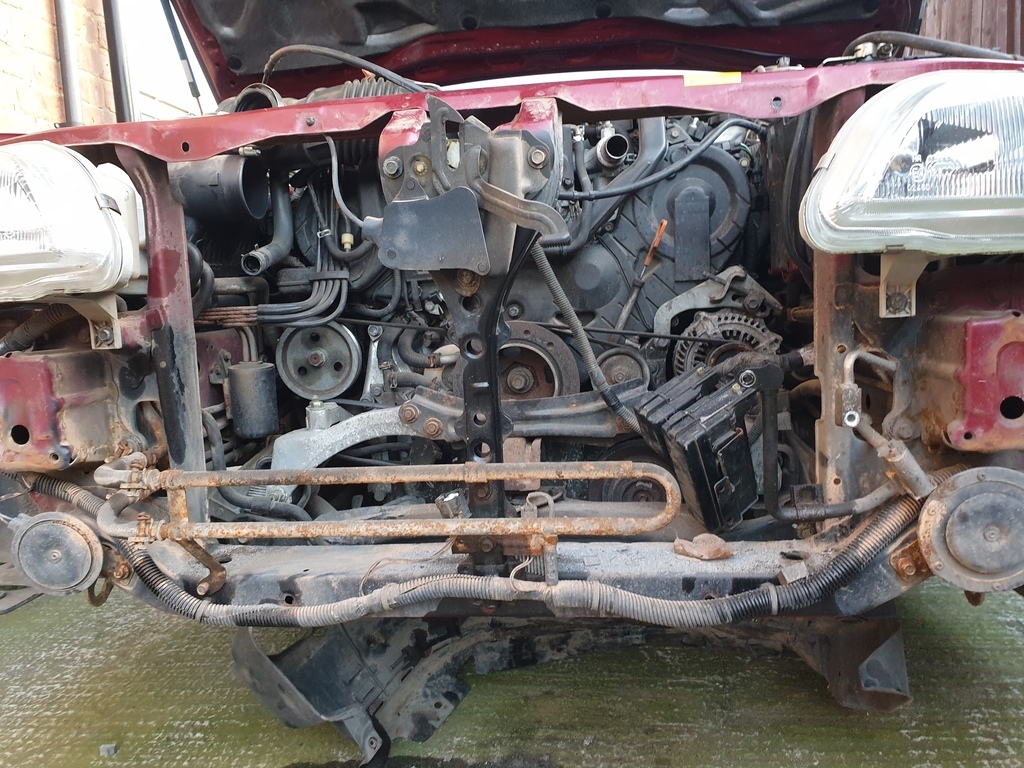 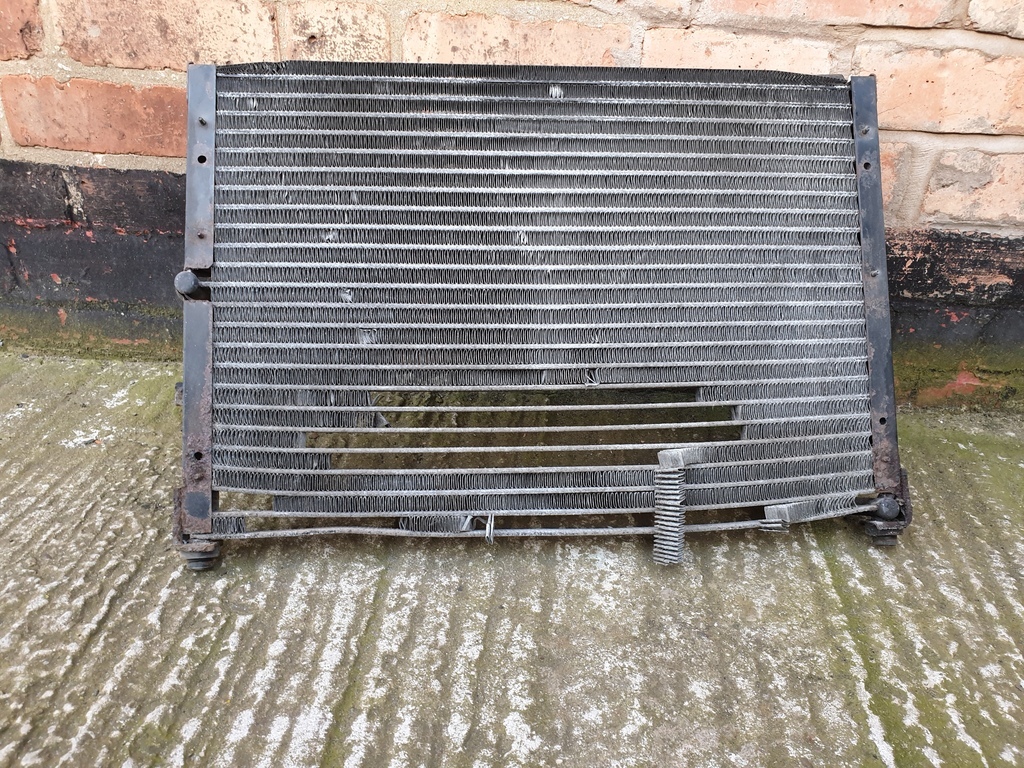 The front end of the car got a bit of a hose down and clean up while everything was off, I've also been using some ACF50 that I usually use on my bike for a bit of anti corrosion protection for awkward to reach areas. Next up was transferring bits from the old radiator and condenser to the new items. 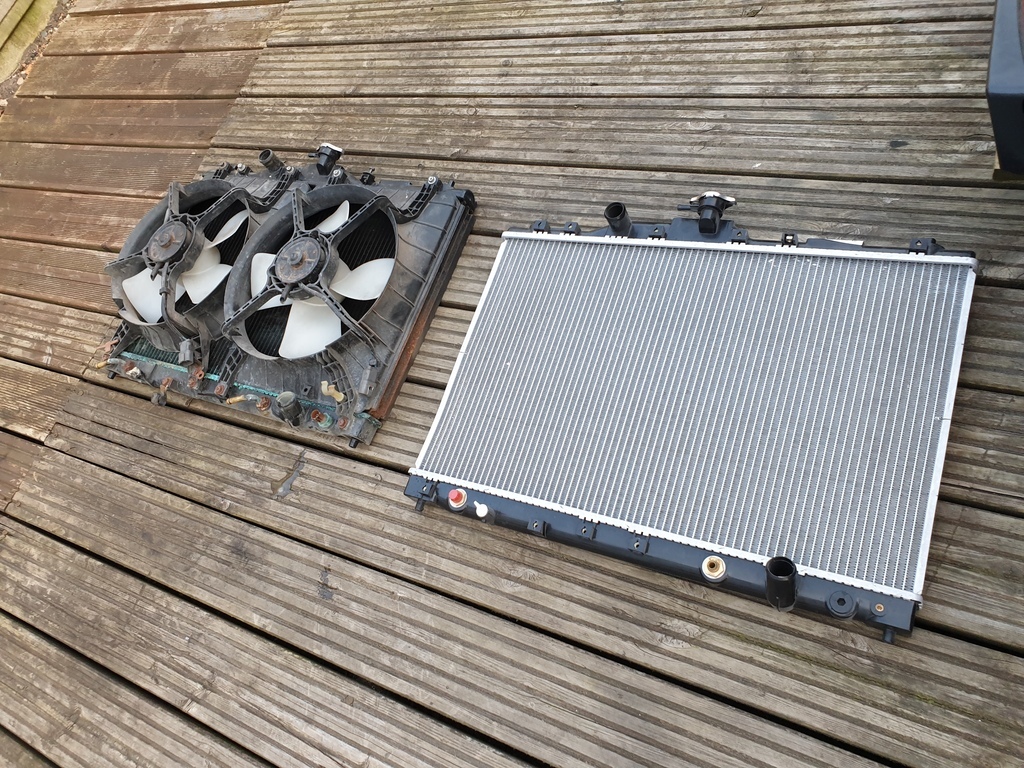 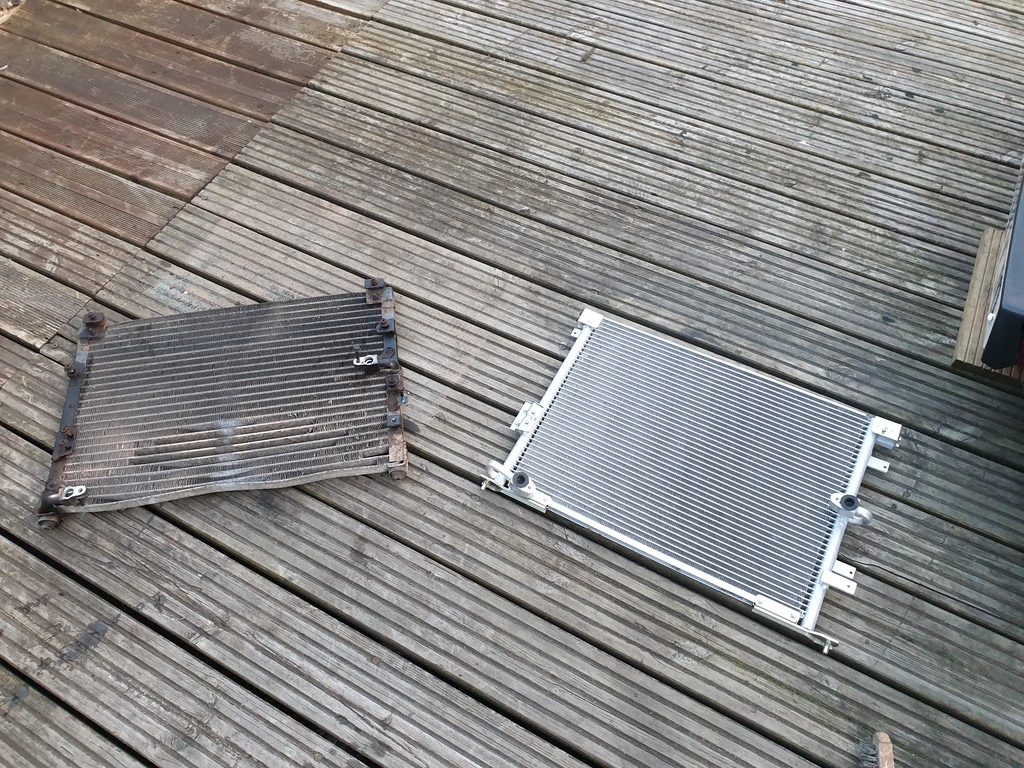 Pretty straightforward apart from some of the fixings being very rusty, got them all out apart from one holding one of the fans on, and one holding a pipe clip thing on. Luckily the bottom fan shroud holes are slots, so didn't even need to remove the rusted one  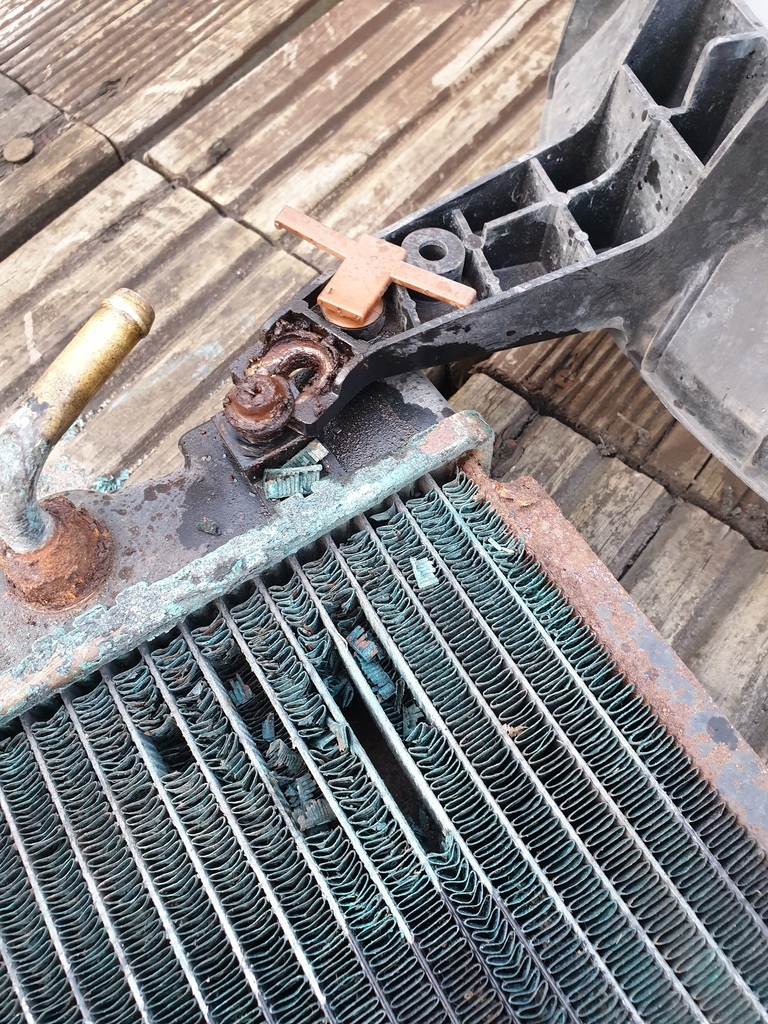 As the saying goes, installation was the reverse of removal. So the condenser was the first to go in, aside from a bit of faffing around with bolts it went into place fairly happily. I put new O rings in where needed along with a little PAG oil to lubricate them. 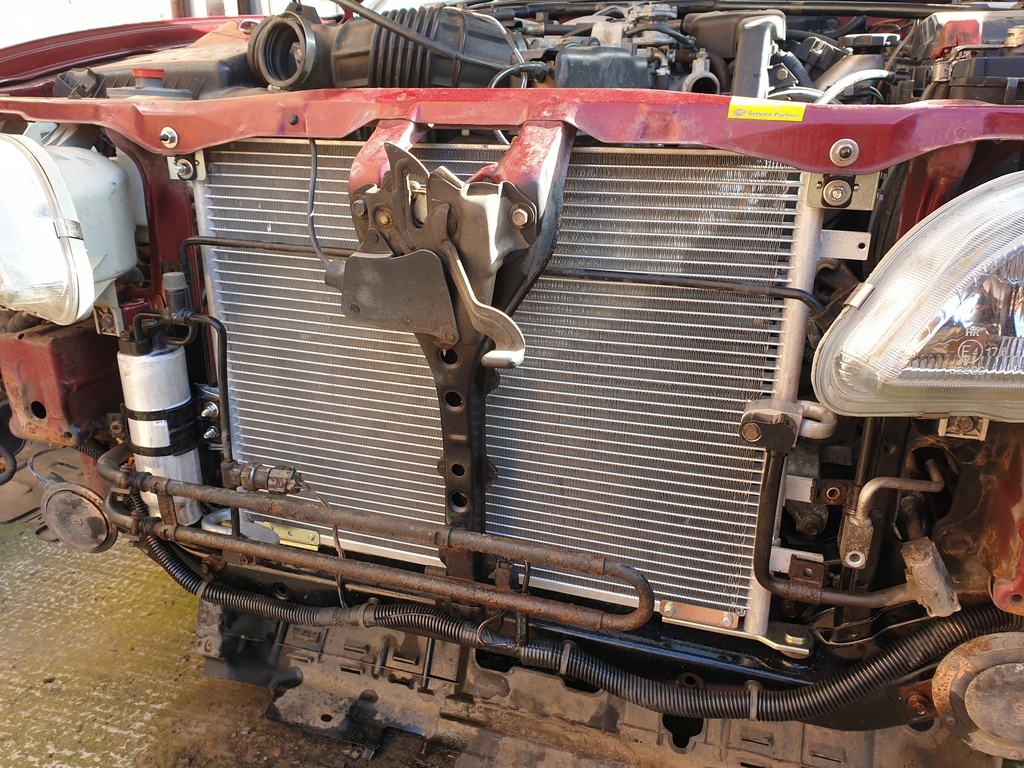 Before I went any further I did an oil change as the filter is nice and easily accessible from the top without the radiator and hoses in the way 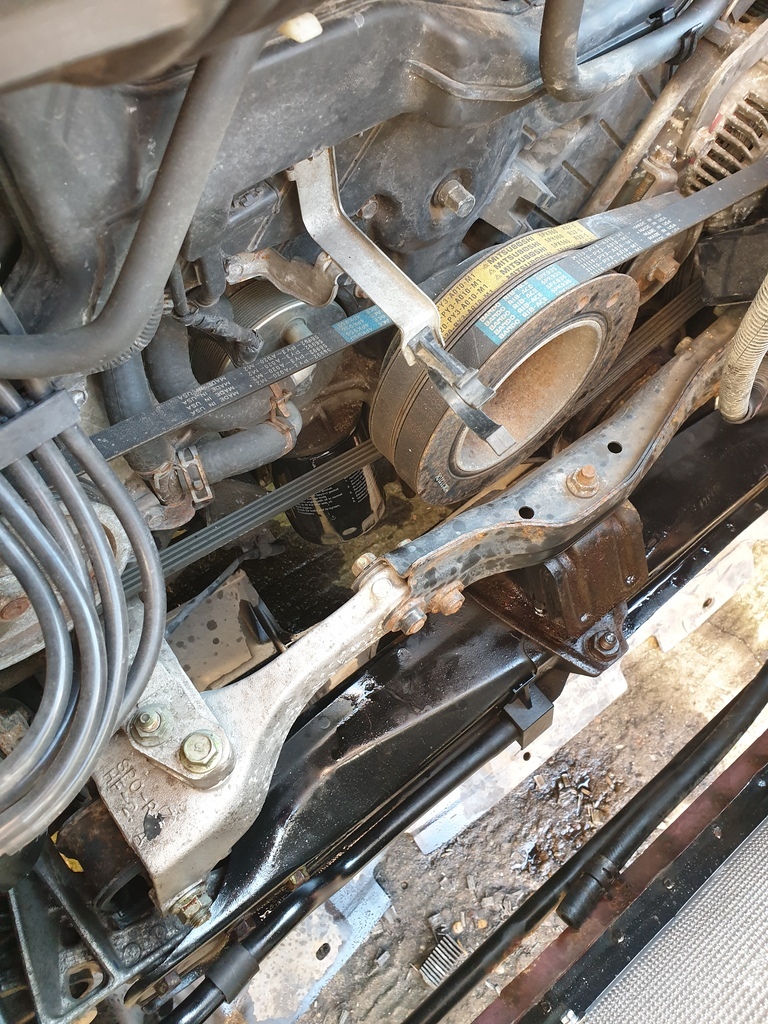 I gave the coolant header tank a clean out as best I could 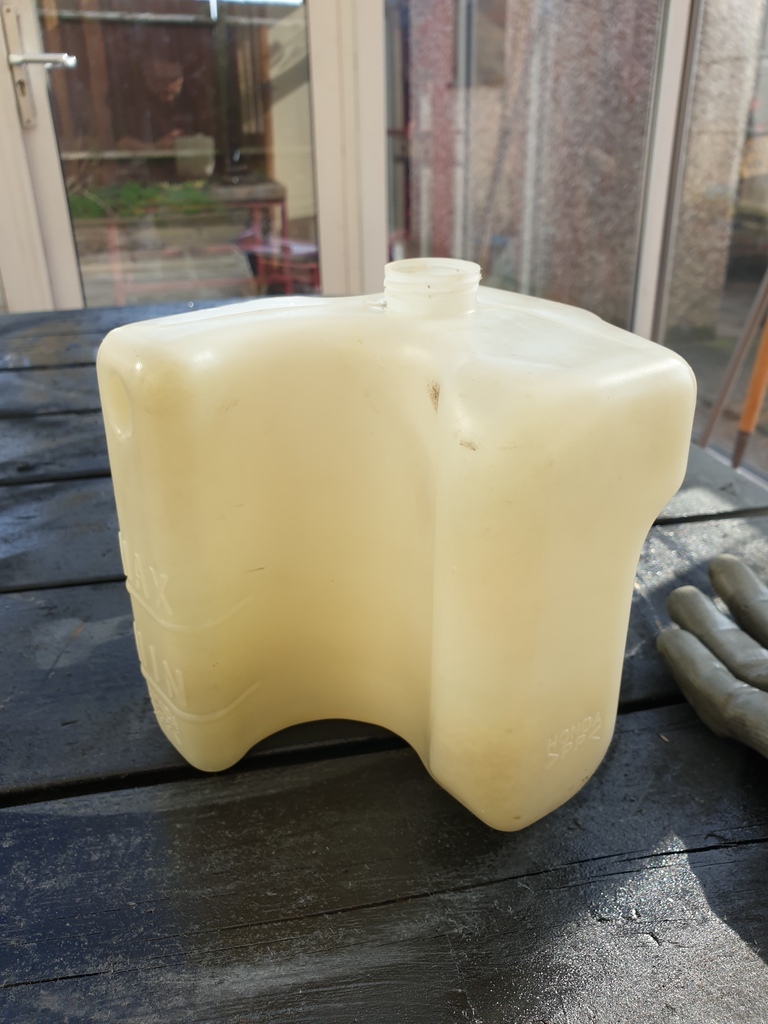 Then I don't seem to have taken any photos of it but the radiator dropped into place fairly easily. One pretty big issue became obvious though. 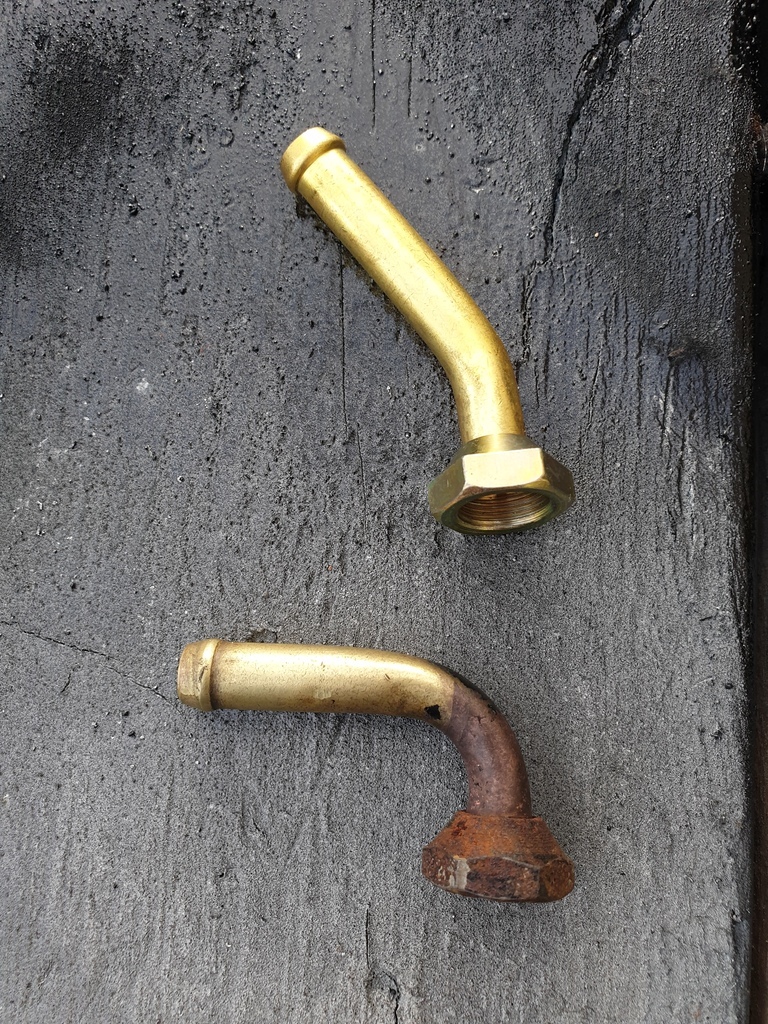 These are the unions for the built in ATF cooler in the radiator. The new ones were the complete wrong angle. I had put the old ones in a Deox C bath with some other bits, and after a bit of work did manage to get them loose again. It's not pretty but it works so I'll live with it! The other issue I was having was the new bottom radiator hose wasn't fitting right. I just couldn't get enough engagement on the bottom outlet of the radiator. I could get the clamp on and get it on at the other end at the engine but it just wasn't right. Gave the old hoses a good close inspection and they actually appear to be fine so I've re-used the old ones. I didn't take a photo of the new hose fitted, but basically the shape wasn't quite right so it was rubbing on the front engine mount bracket that the OEM hose is bent to avoid 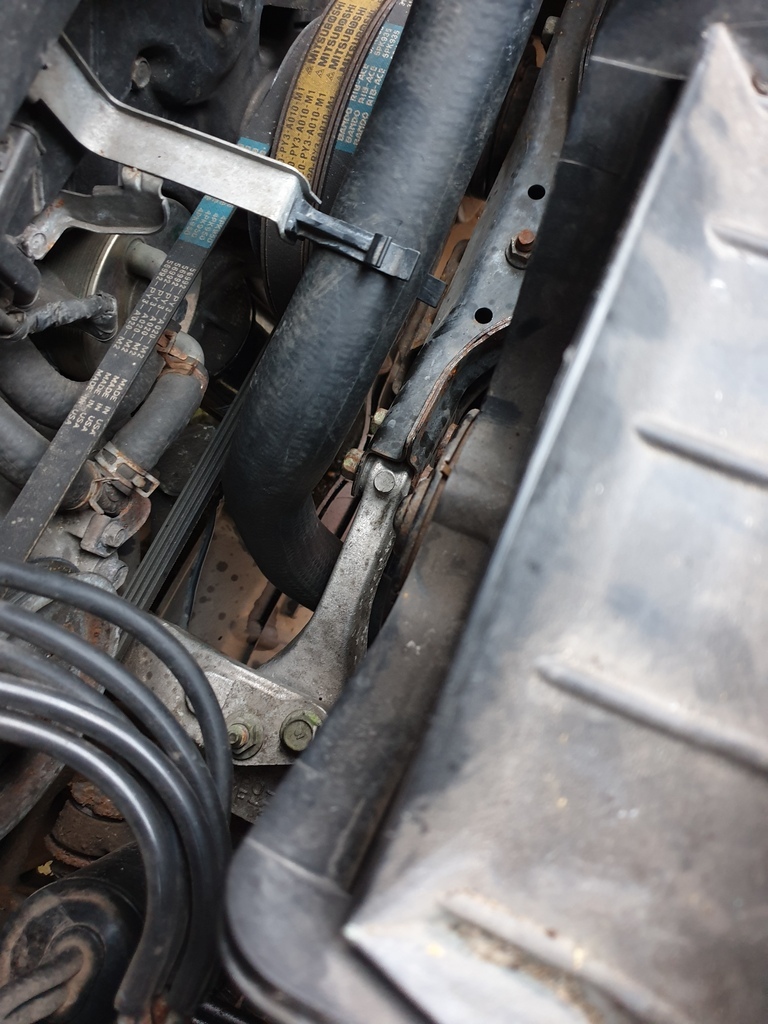 And that was it really, put all the various other bits back together and it looks largely the same as it did when I started  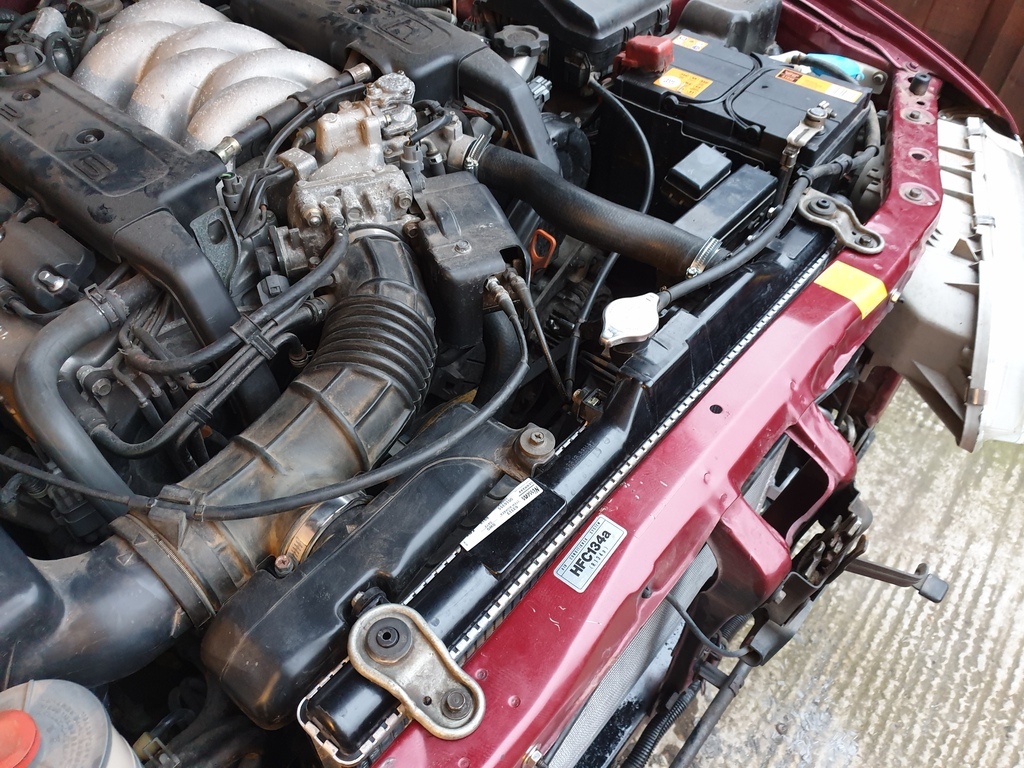 Except it is a lot better now, the condenser was very much dead, no pressure left in the system at all and while the radiator was holding water, it did not look like it had much life left in it so I'm much happier now. Filled up the radiator with some genuine Honda coolant and it seems to run happily enough so thats a couple of jobs off the list  Not sure if I'll get them done this weekend but next jobs I want to get done are bleeding the brakes and the gearbox fluid drain and filter change, I can also refit the rear window trim as I've ordered the entire remaining stock of Legend rear window trim clips in the UK  That will be three more things off the list and should make the car driveable again, then I really need to focus on bodywork! |
| |
|
|
adam73bgt
Club Retro Rides Member
Posts: 4,998
Club RR Member Number: 58
Member is Online
|
|
|
|
End of the bank holiday weekend and I nearly got all the jobs done but still pretty successful. Took a day and a bit off for non car-y things then yesterday afternoon was spent tidying up the Yaris as it had got very mucky as a daily driver! So today I started with reattaching the engine undertray and front bumper to the Legend. I had thought I might end up having to cut off the undertray but it did bolt back into place, however I did later find that with the engine running it rattled a bit so I might end up going back to trim it! With the front end back together, I moved onto the rear window trim, a job I dread because I know it's not going to be perfect. In the end it wasn't too bad, the main thing I had to do was a little work on the one clip I was reusing. They all have little foam pads which help with sealing off the holes in the body, but the old ones were flattened with time, so I set to making a new one out of double sided foam tape 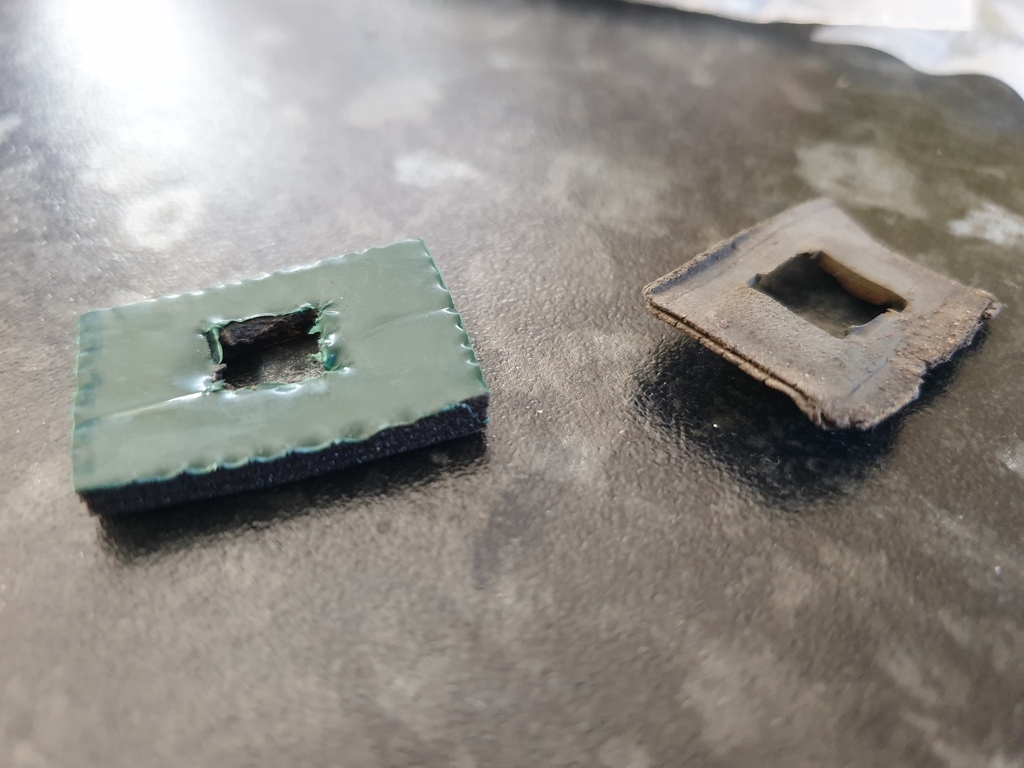 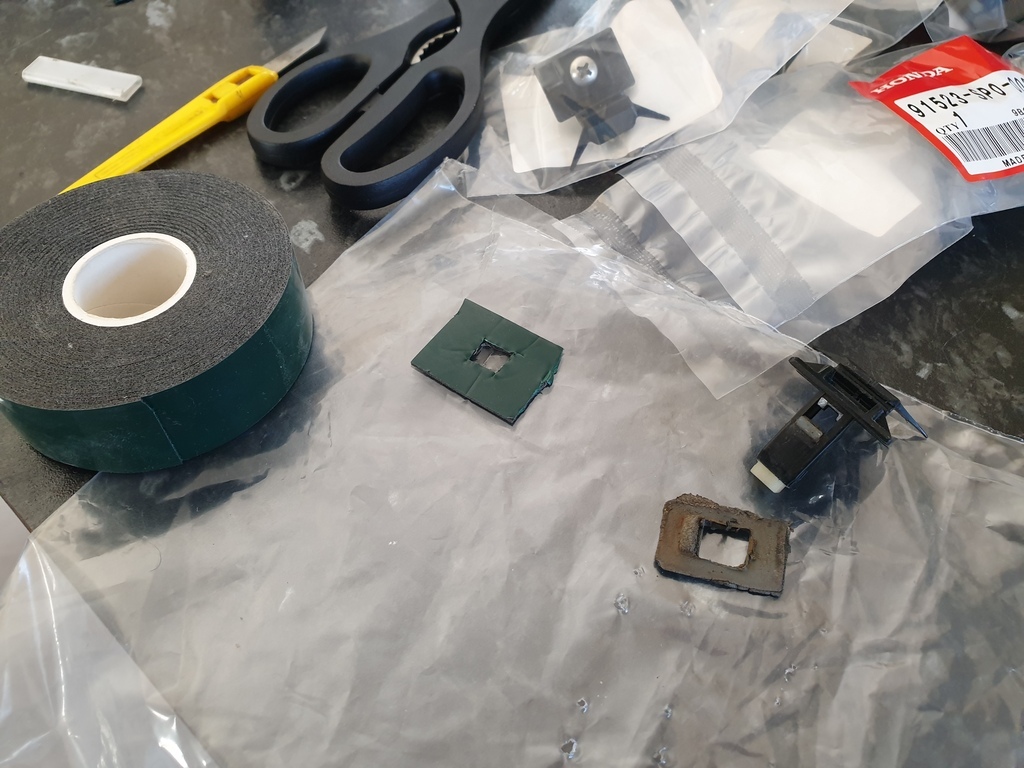 Clips were then installed on the trims and the trims installed on the car with a thin smear of silicone sealant around the clip holes so hopefully thats the boot water leak fixed! The other job I got done was the brake bleeding, which should have been simple but turned into a bit of a saga! I have Gunson eezibleed which is a bit of a faff, but none of the caps fit the Legend master cylinder so had get a universal cap which not only was a bit of a faff to fit to the master cylinder with its chain that goes underneath, but the hose fitting size was much bigger than that on the eezibleed. I of course started this job in the evening when the shops were all closed so had to rig something together using a couple bits of different size clear hose and a bit of old garden hose as well  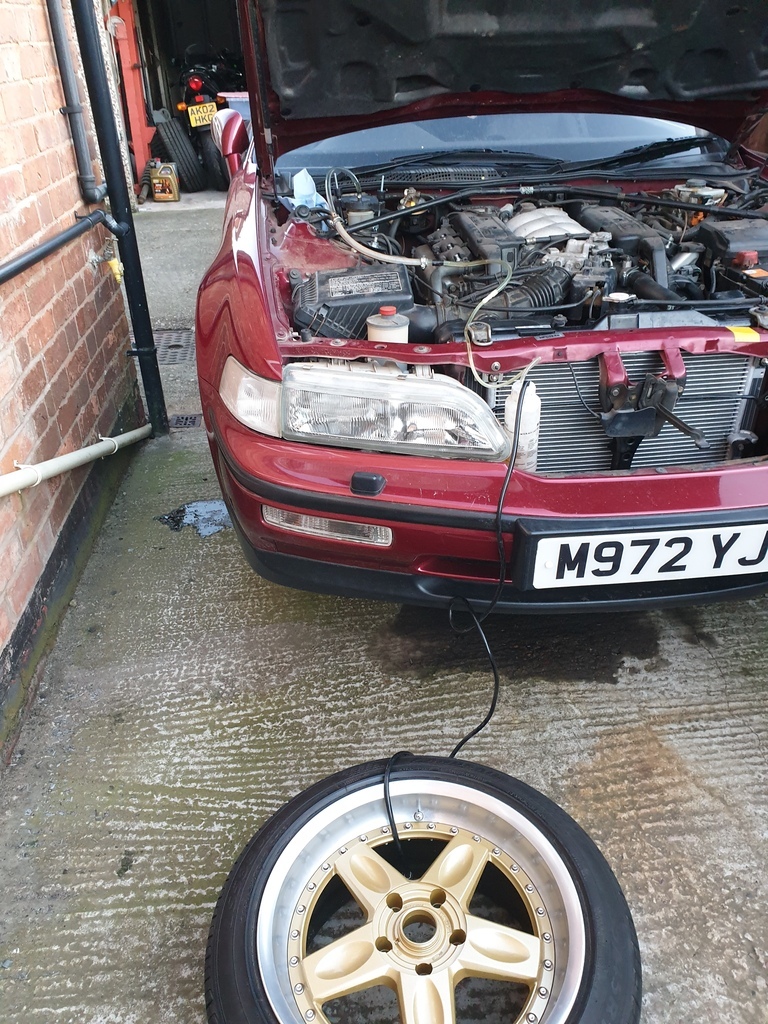 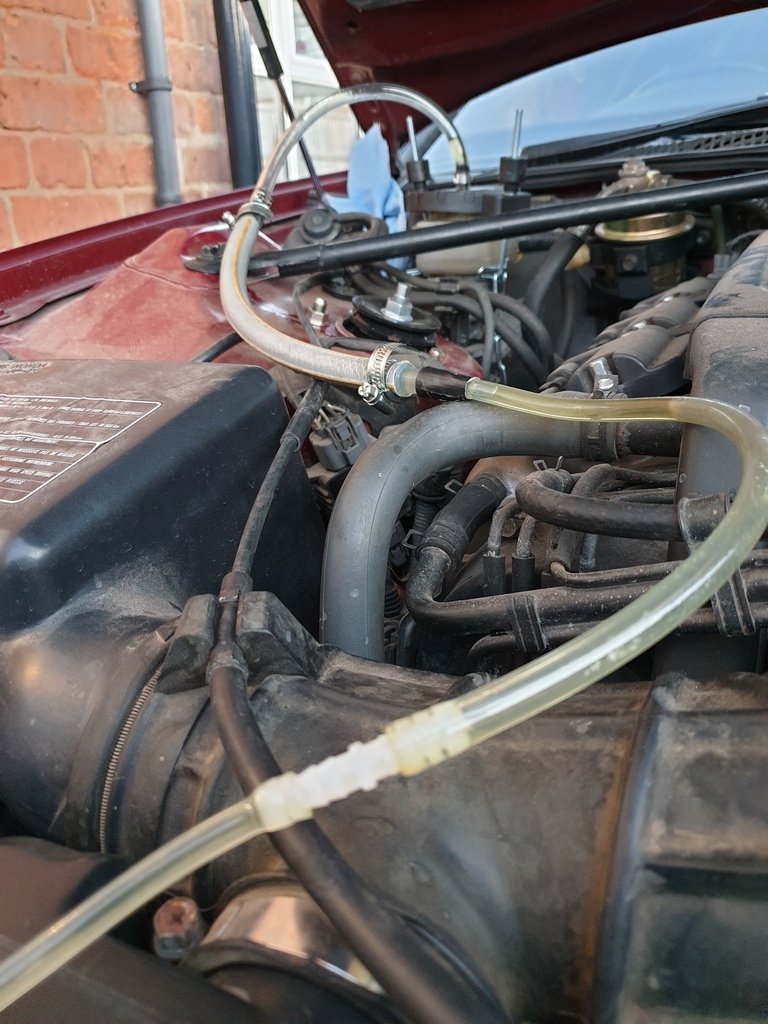 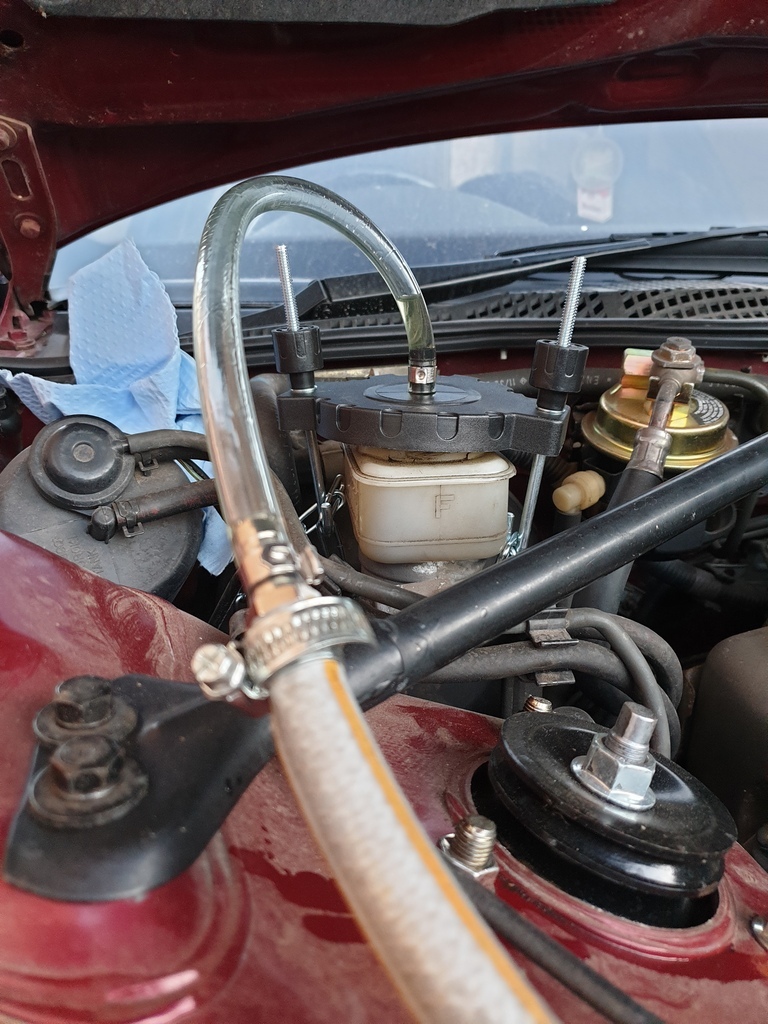 Had a couple leaks when I pressure tested it but with a couple joints nipped up it actually worked!  I even had to bodge a hose to go on the bleed screws as I'd used the hose I usually use for that for the connection to the master cylinder. So I ended up using some silicone hose to connect to the bleed screw and stepped it down to a bit of clear so I could see the fluid and bubbles 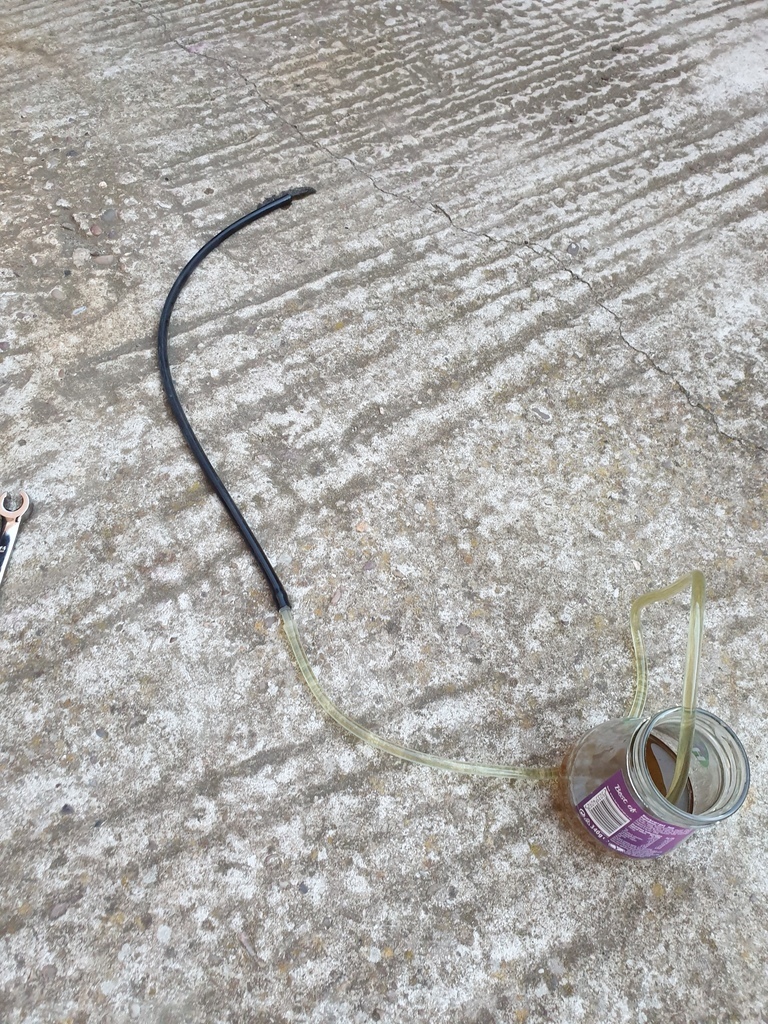 Anyway, went round the car a couple times and now have a decent feeling brake pedal  I didn't get round to doing the ATF and filter but I'm hoping that should be a fairly straightforward job for tomorrow. |
| |
|
|
adam73bgt
Club Retro Rides Member
Posts: 4,998
Club RR Member Number: 58
Member is Online
|
|
|
|
ATF and filter changed. Easy to type but not the most pleasant job to do, not a lot of room under the car on axle stands to work in, and very messy! To summarise: Drain plug out to drain whatever ATF didn't come out when I took the radiator out, drop the pan on the gearbox by removing a load of little bolts, with the pan off it's 3 more bolts to remove the filter. Sprayed a load of brake cleaner to clean the remaining bits of ATF, got the pan and drain plug magnet clean in particular. 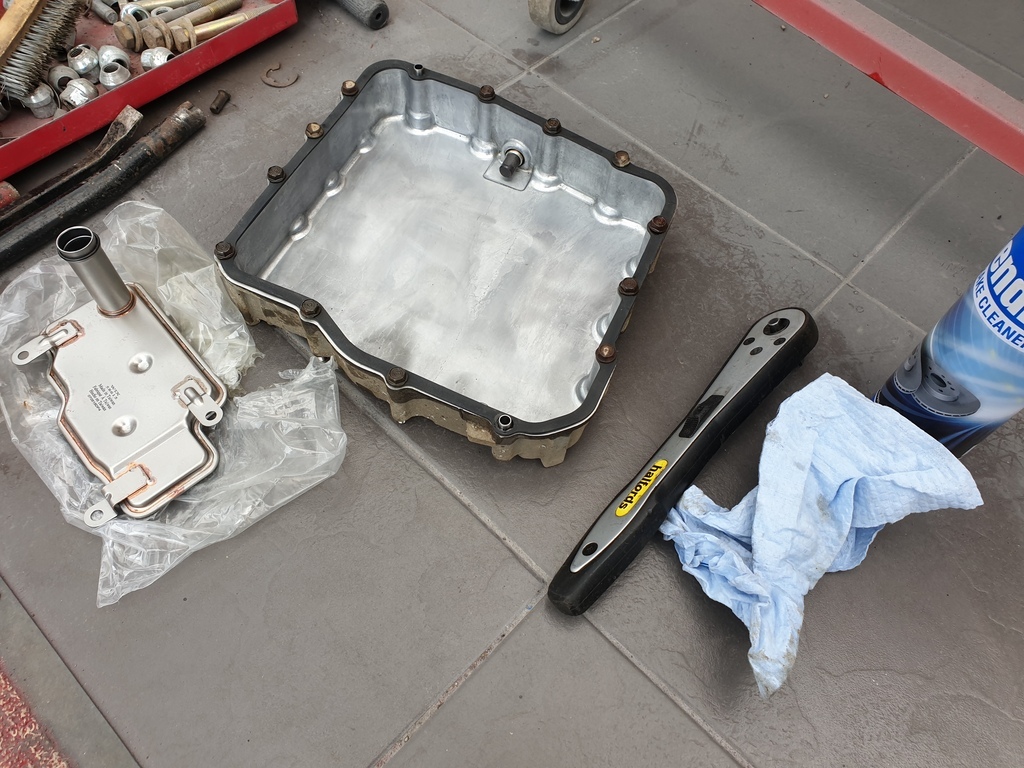 The magnet had quite a lot of build up on it, but I have no record of when the ATF was last changed so that doesn't concern me too much, the fluid was still red in colour which was comforting. Pretty simple reverse job to put the filter then pan in (not forgetting the O ring that goes on the filter or the new gasket for the pan, torque up the bolts then refill through the filler/dipstick tube. All of this while the weather put on occasional mini snow storms  Hopefully now though the gearbox should shift a bit more smoothly when I get to drive it  |
| |
|
|
Paul
Posted a lot
  
Posts: 2,006
|
|
|
|
ATF and filter changed. Easy to type but not the most pleasant job to do, not a lot of room under the car on axle stands to work in, and very messy! To summarise: Drain plug out to drain whatever ATF didn't come out when I took the radiator out, drop the pan on the gearbox by removing a load of little bolts, with the pan off it's 3 more bolts to remove the filter. Sprayed a load of brake cleaner to clean the remaining bits of ATF, got the pan and drain plug magnet clean in particular.  The magnet had quite a lot of build up on it, but I have no record of when the ATF was last changed so that doesn't concern me too much, the fluid was still red in colour which was comforting. Pretty simple reverse job to put the filter then pan in (not forgetting the O ring that goes on the filter or the new gasket for the pan, torque up the bolts then refill through the filler/dipstick tube. All of this while the weather put on occasional mini snow storms  Hopefully now though the gearbox should shift a bit more smoothly when I get to drive it  It made a HUGE difference when I did mine on my Legend...you're bound to notice the difference. Nice work as always. |
| |
|
|
adam73bgt
Club Retro Rides Member
Posts: 4,998
Club RR Member Number: 58
Member is Online
|
|
|
|
|
Thank you 😊 I'm hoping it will make a good bit of difference! It wasn't terrible but it did thump a bit from 1st to 2nd so hoping it will be nice and smooth now
|
| |
|
|
adam73bgt
Club Retro Rides Member
Posts: 4,998
Club RR Member Number: 58
Member is Online
|
|
Apr 12, 2021 12:13:13 GMT
|
|
A small but important update on the Legend, it's at the bodyshop! 😁
Took it over for them to have a look at and ended up leaving it there, so hopefully it should be back with me in about a week or so.
Driving it the couple of miles down the road did highlight a couple of issues though, firstly and most annoyingly the ABS light is still on 🙃 so might have to go with the unplug the module route in the meantime, I'll read the codes when I get it back anyway, might be a bleeding issue.
Secondly, the gearbox was a bit too smooth 😂 did quite a lot of slipping so maybe the fluid level isn't quite right. It's quite hard to get a good reading on the dipstick as the tube is used for it as well as filling so you get ATF on the walls of the tube giving you a false reading. Easily checked once I get the car home anyway.
Thirdly, despite leaving the handbrake off, there is a bit of brake drag noise. That might be from the discs needing to clean up the light layer of rust or might need the caliper sliders going through.
And lastly, the rear wheels do catch the arches which I knew they would, I've asked the bodyshop to look at rolling the rear arches between remaking them and painting them anyway so hopefully that will resolve itself.
All I can really do now is wait until it returns 😬
|
| |
|
|
adam73bgt
Club Retro Rides Member
Posts: 4,998
Club RR Member Number: 58
Member is Online
|
|
Apr 24, 2021 19:56:16 GMT
|
A short but big update, it's back from the bodyshop! 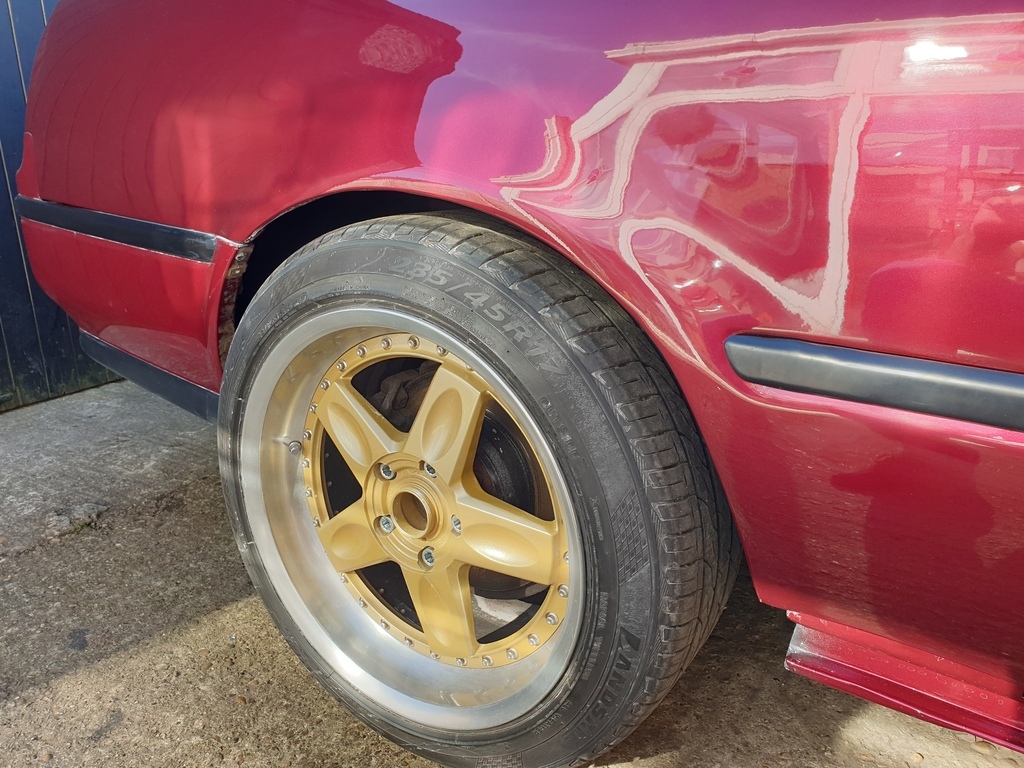 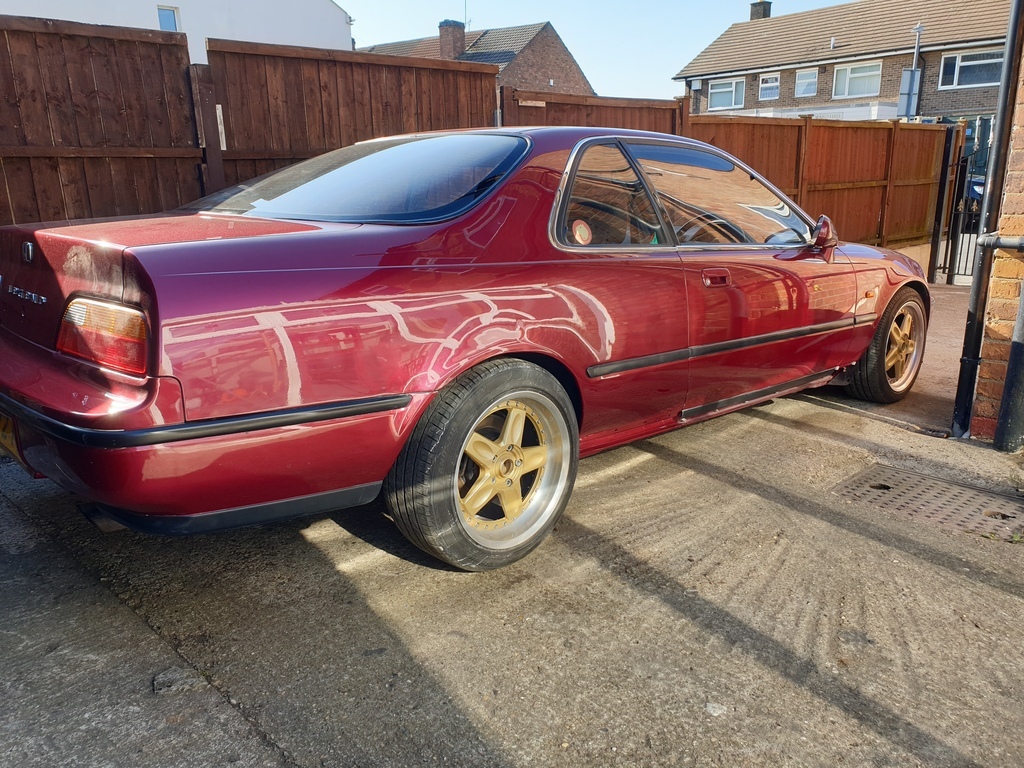 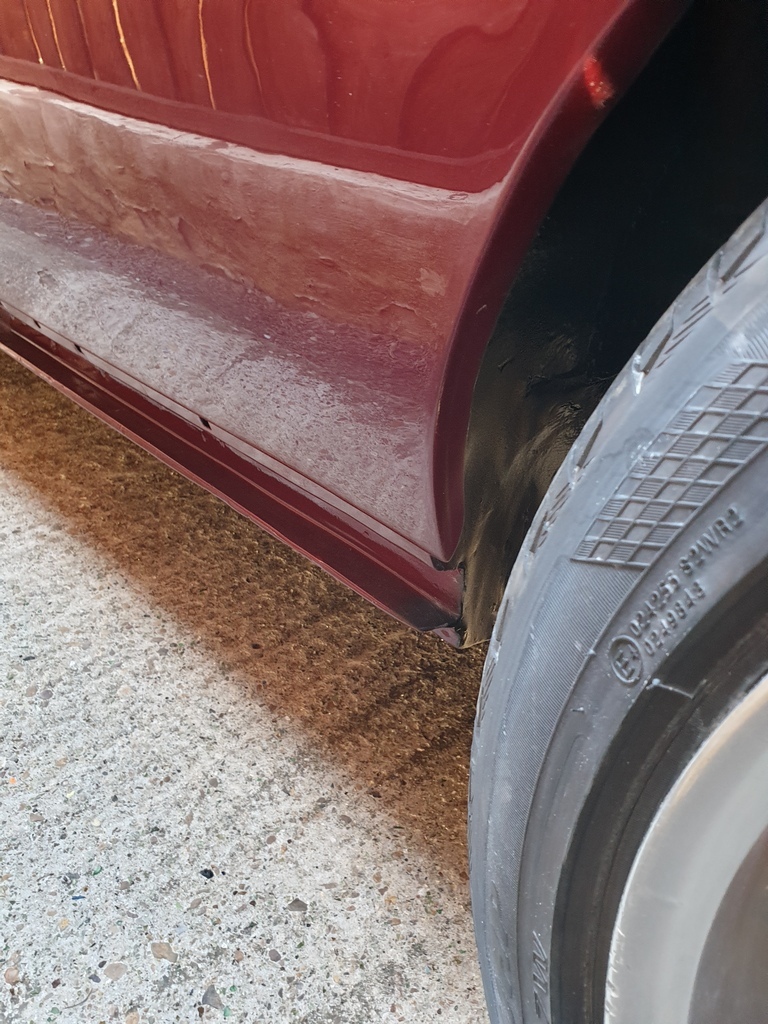 Very happy now that the rot is gone and its all solid and looking tidy  So now comes the build up ready for MOT. Also in other big news, I've managed to get a spot on the Deadline display at the Weekender so a little extra pressure to get it all done in time! |
| |
|
|
|
|


 Not actually been a huge amount of progress since the last update since I hoped
  I blame starting a new job, which will be good as it will mean a little more money to help get the Legend sorted


 ) It doesn't look like a very efficient design though, the intake for it appears to be in the engine bay going into the inner wing behind the white plug in the below photo


