|
|
|
Jul 31, 2023 13:03:56 GMT
|
Onward I have put the front loom in and started to see what and where things need to change. Originally the starter motor was feed direct front the battery in the offside wing. I cant fit the battery there so have put a direct feed between the alternator and the starter motor and then it doesn't matter which way the main cable comes from. I extended the starter solenoid wire from its original length with an easily separable connector. The exhaust had to come off and i need to make sure i can do it all from underneath if possible. 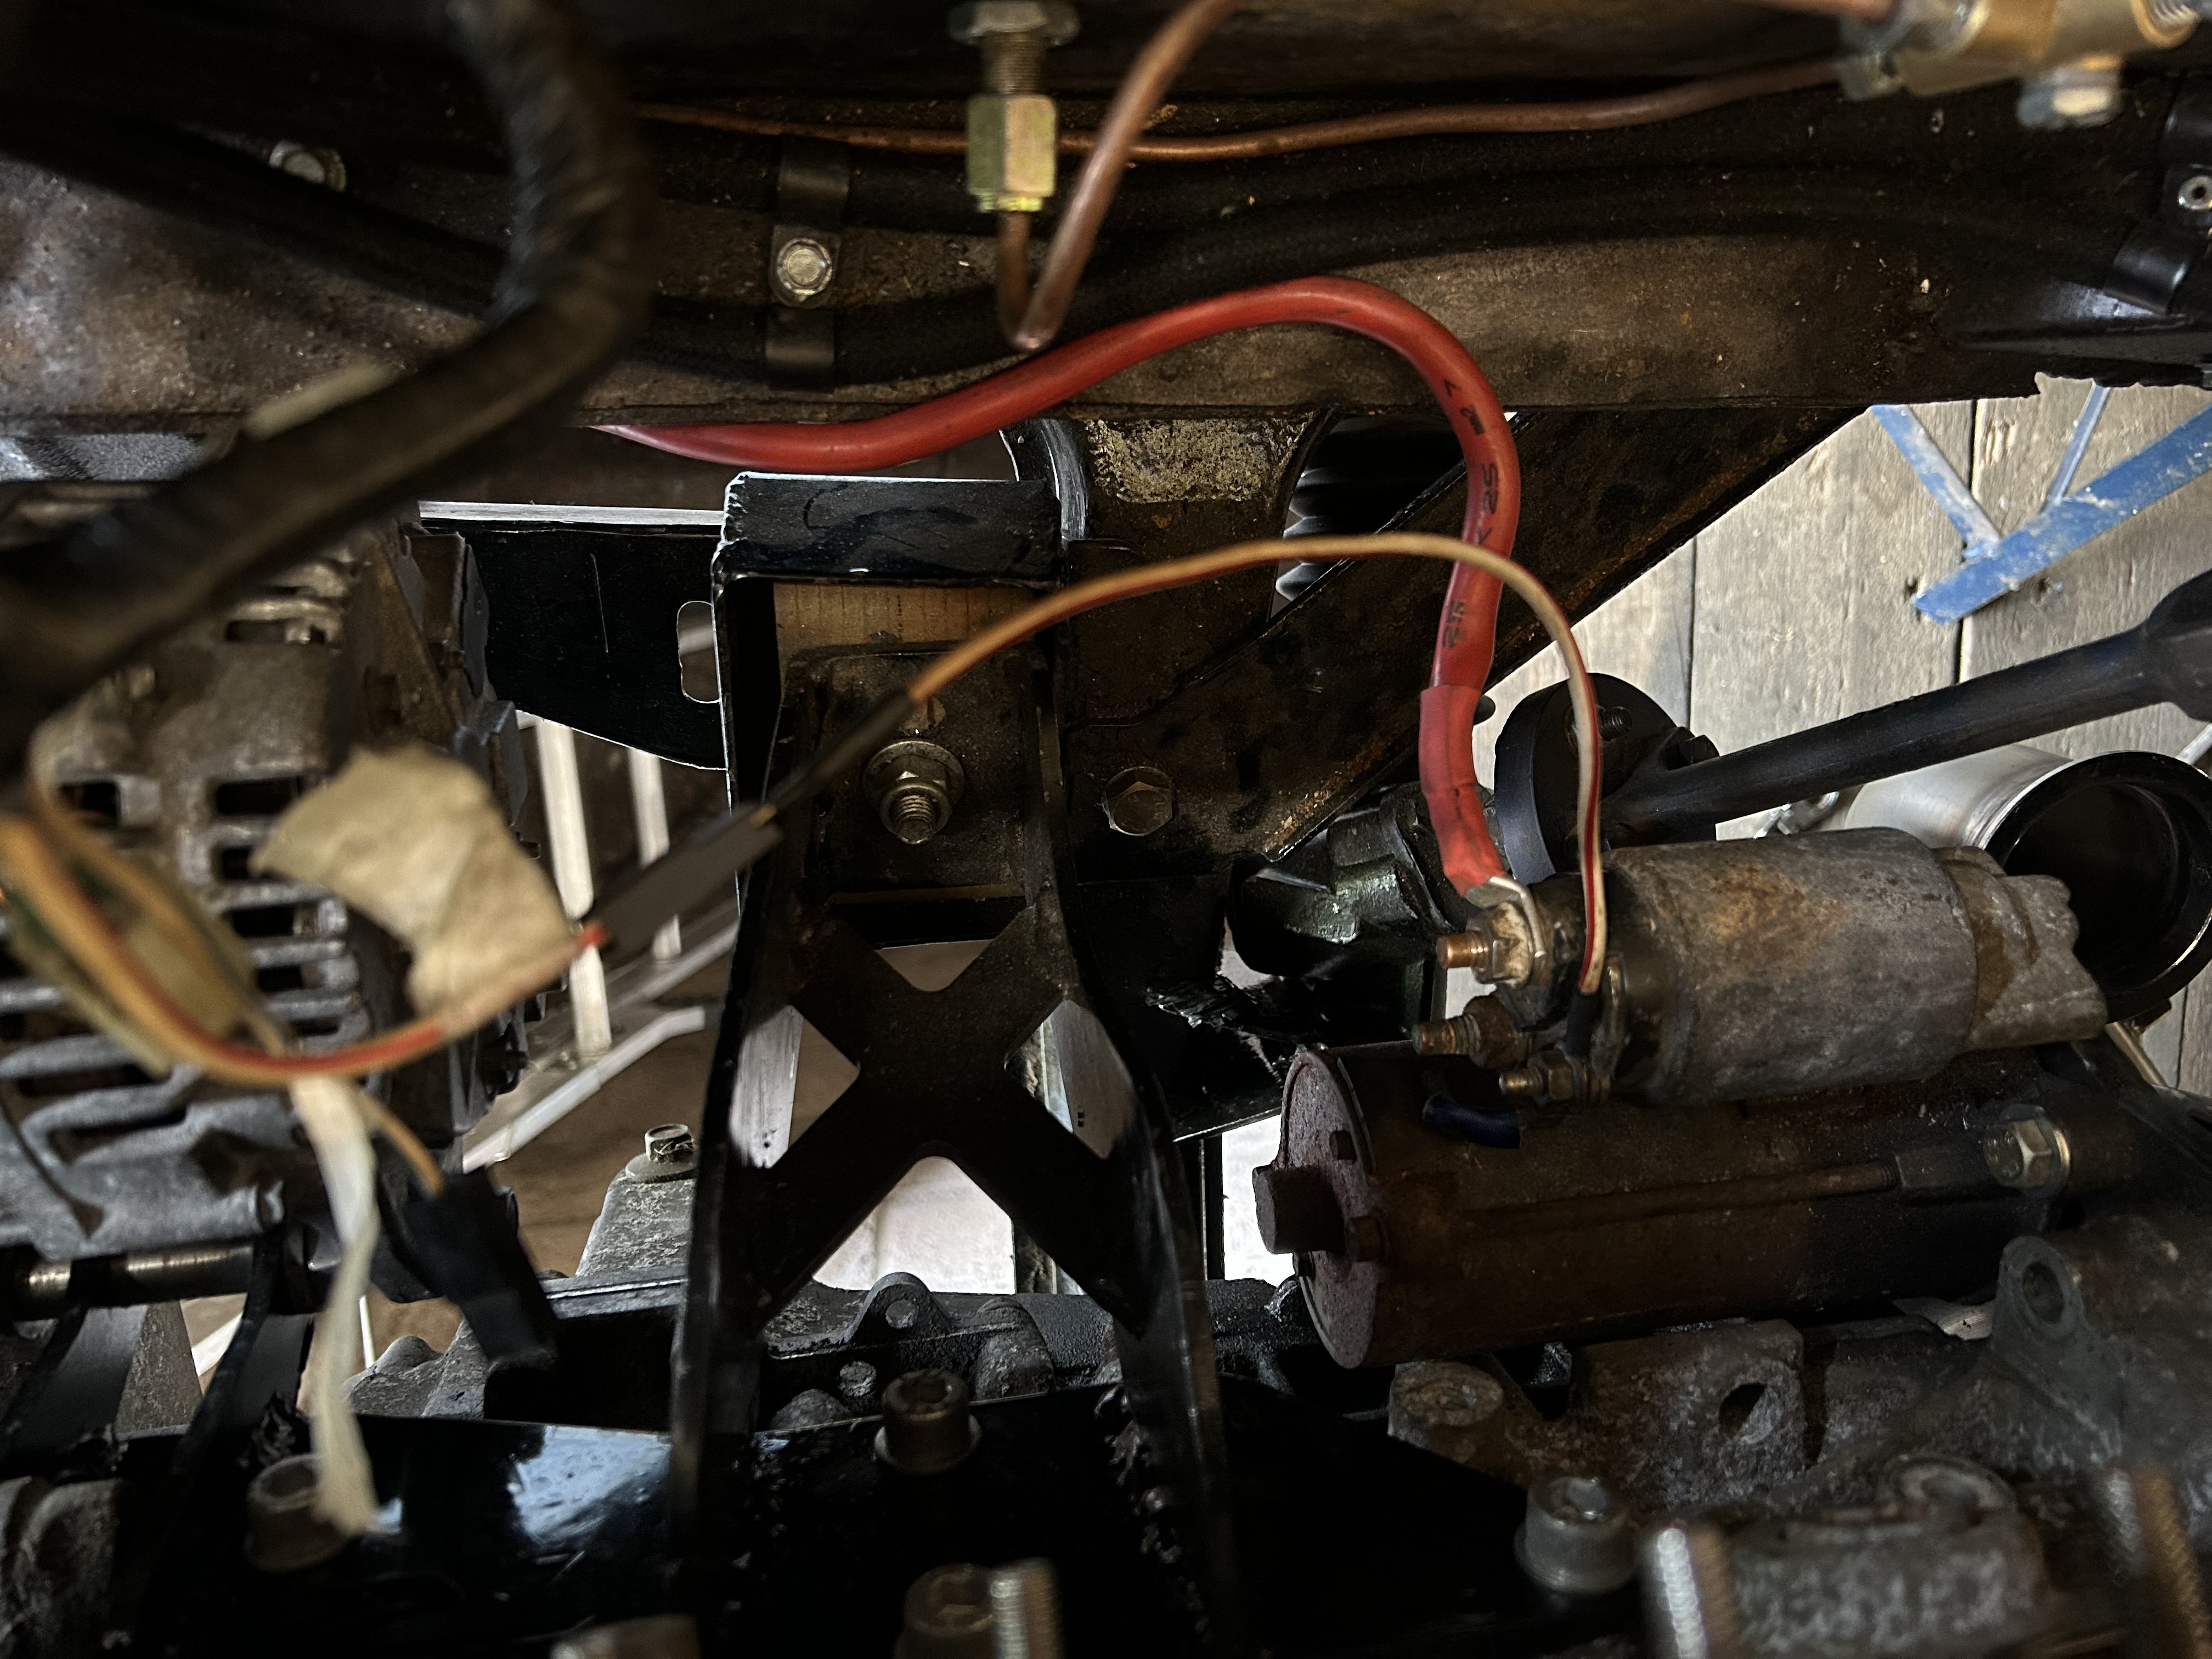 Untitled Untitled by Nevtiger, on Flickr The alternator is off an NBV MX5 and has a two pin connector which took a while to work out the make etc. Its a Yazaki 2-way 58 series plug. So shell bought and crimps sorted. One connection is the Ignition lamp and the other is the 12v supply to the windings. Helpfully the plug is marked D and p. I think that is D = Light & p = windings.... That's the way it's getting wired anyway. You can see there are two Brown/Black ignition light wires fitted. One comes up to this: 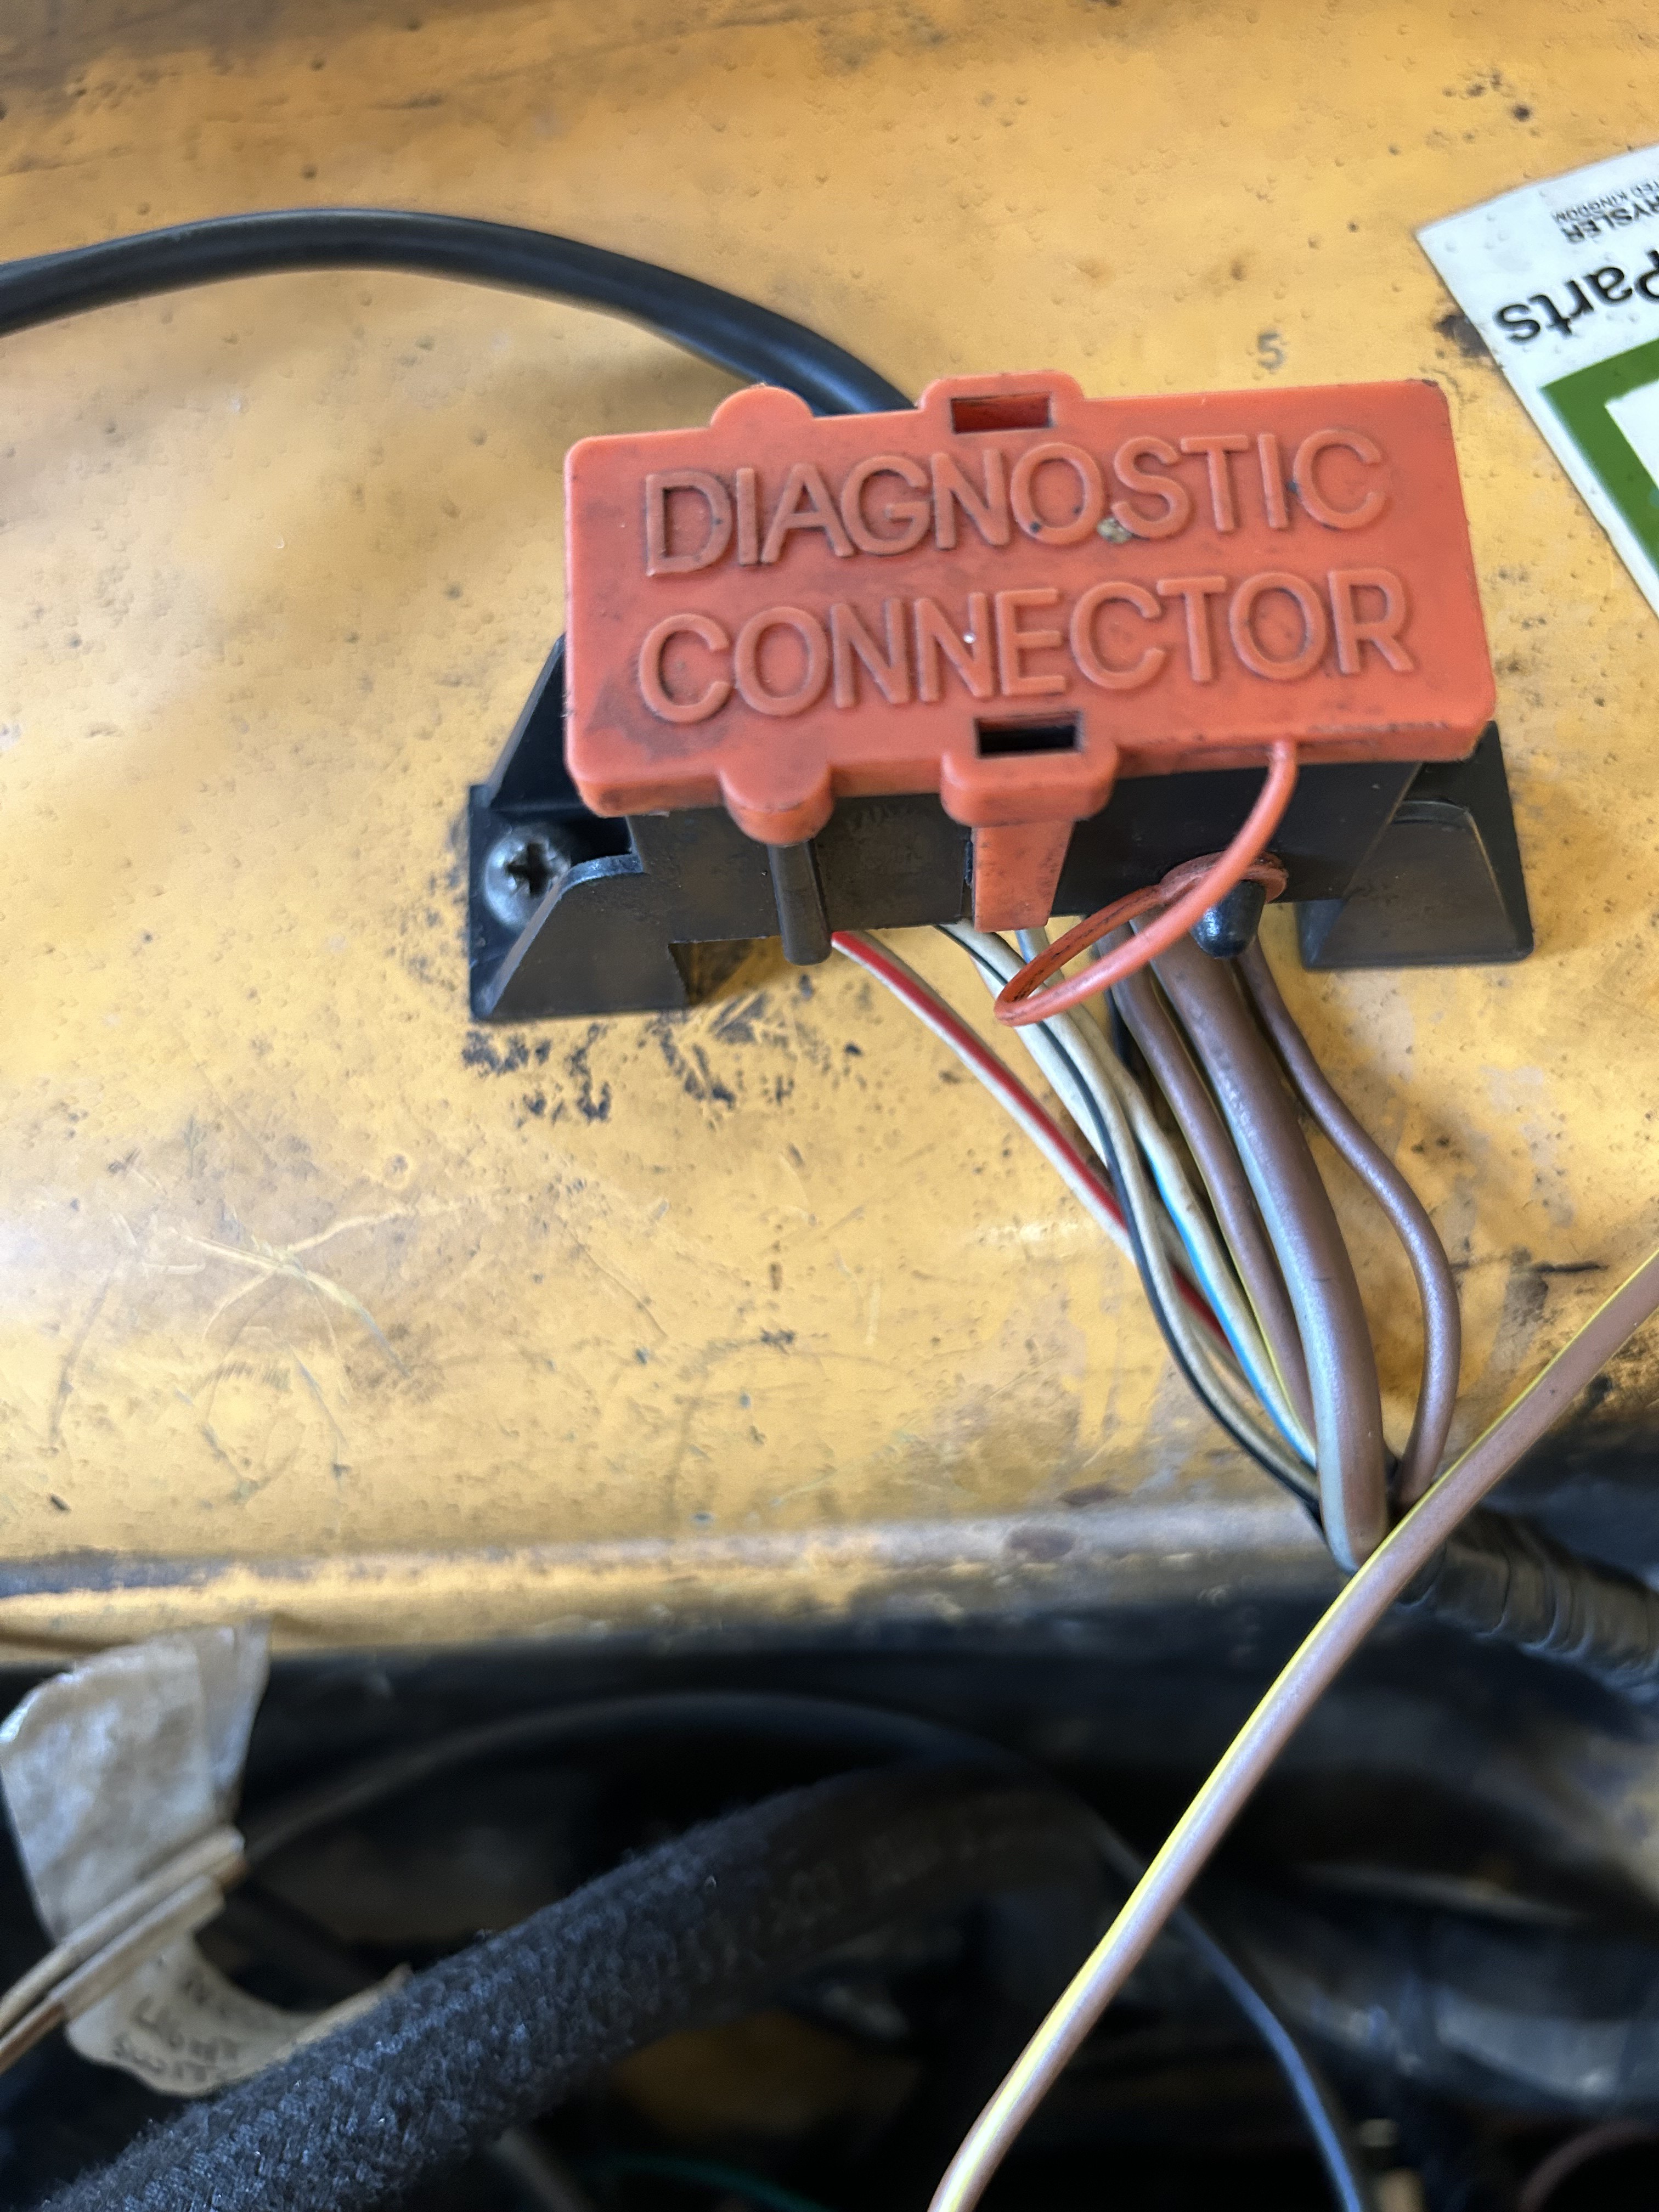 Untitled Untitled by Nevtiger, on Flickr I am keeping this as it may help in the future - who knows - but it is part of the car. I then realised that there was no actual 12v feed into the car loom anymore! But soon realised this needs connecting.  Untitled Untitled by Nevtiger, on Flickr Need to find the correct female terminals and redo the other side of the pug down to the starter motor. I have plenty of this type but in the wrong size as i need 6.3mm for these. Cant remember what they are called though.... I'm going to use this existing feed to the Diagnostic Plug from the Battery feed to bring power up to the Fuel Pump relay  Untitled Untitled by Nevtiger, on Flickr Had trouble putting the nut on the batt feed off the alternator. AH!!!!  Untitled Untitled by Nevtiger, on Flickr Left to do; Water Temp sensor for instrument panel needs extending, Oil Pressure and Oil light wires need extending to where ever i fit the original Sunbeam (GLS/TI/Lotus) sender on the Jaguar block, mount the battery some where.... Then the car loom will be ready apart from tidying up. I am going to make a battery box and use a Red Top 25 under the bonnet somewhere i hope :-) |
| |
Last Edit: Jul 31, 2023 13:04:49 GMT by nevtiger
|
|
|
|
|
|
|
Aug 15, 2023 12:57:21 GMT
|
I have been thinking on where to put the battery. I don't want to compromise the spare wheel space and around it with a normal battery so i thought i would use a Red Top 25 and stick it below the expansion bottle plenty of space  Untitled Untitled by Nevtiger, on Flickr Need to make a battery housing which i have started 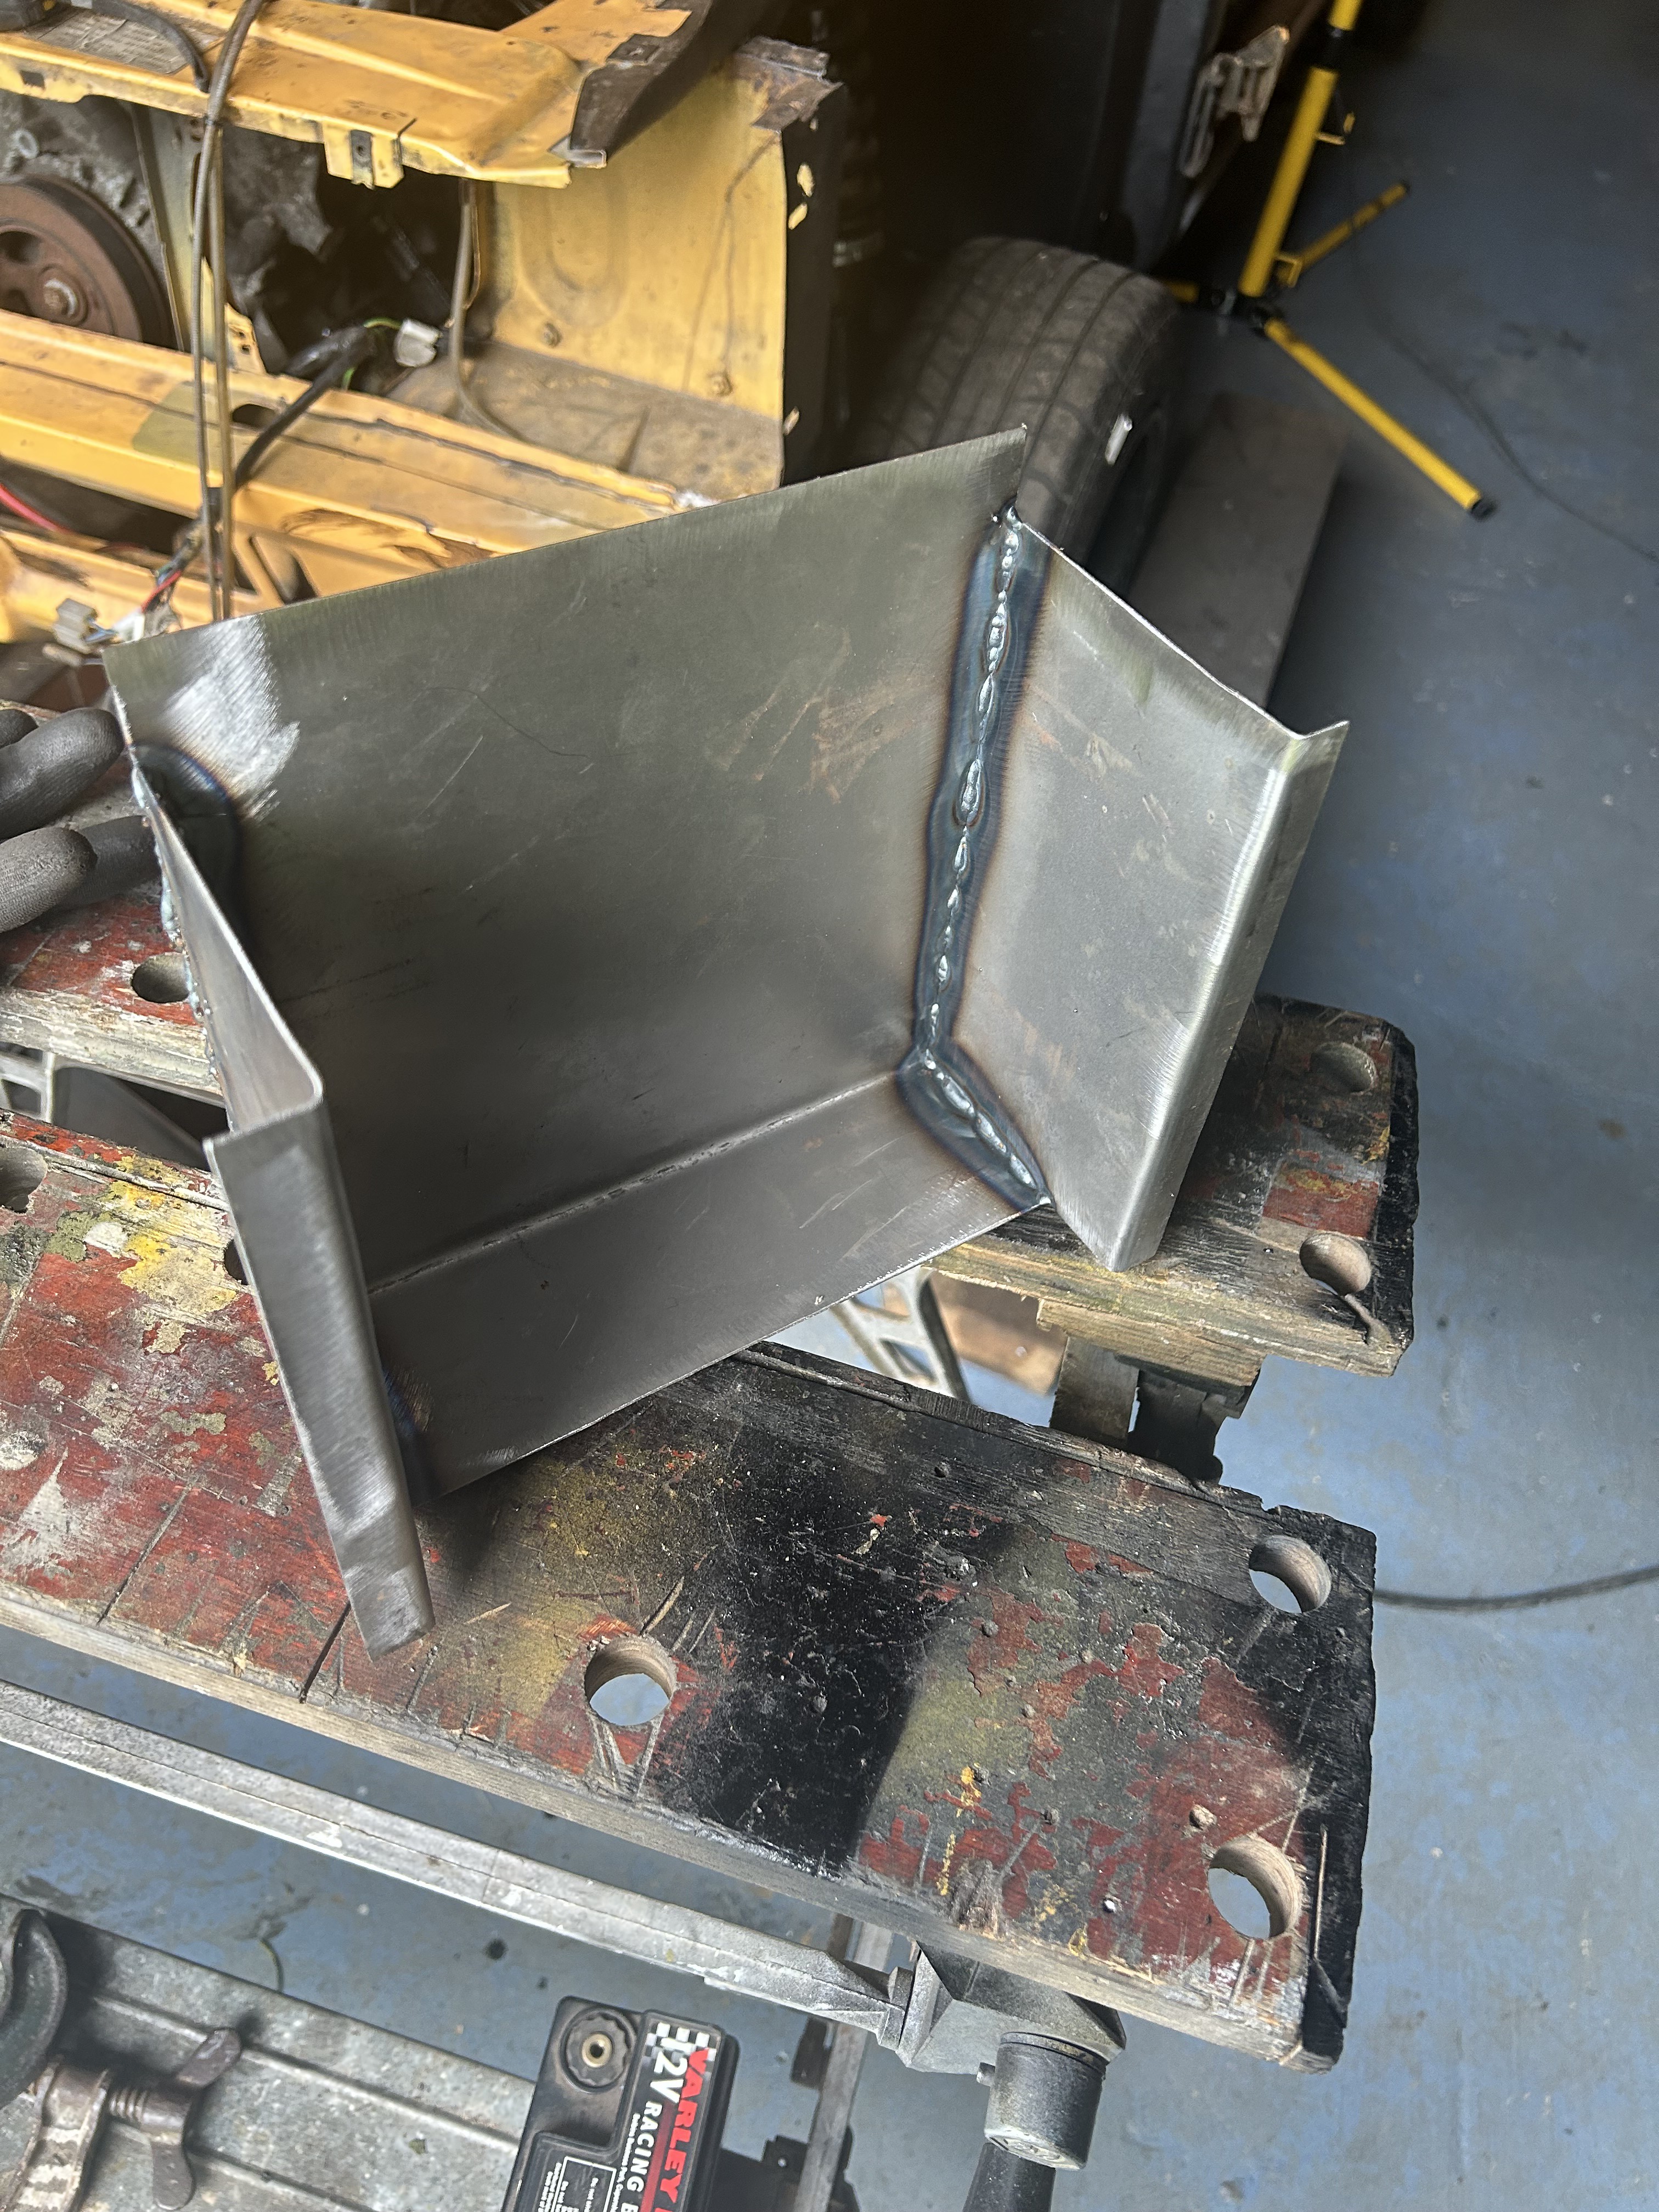 Untitled Untitled by Nevtiger, on Flickr The Lotus/TI/GLS 6 dial dash has an electric oil pressure gauge and low pressure light. Therefore i will need to plumb this into the engine. There is are existing oil pressure and oil temp sensors on the engine but they are not used by the new ECU from the original conversion kit so i can use one of these ports and make an adaptor. |
| |
|
|
|
|
|
Oct 18, 2023 11:11:39 GMT
|
Back to regular work on the Sunbeam now. I have spent a fair chunk of time not working on the Sunbeam due to being in NZ, training for an event in Iceland, being in Iceland. But now having time spare again it feels good. The battery tray/holder/box has come along nicely. Needed to make a battery clamp 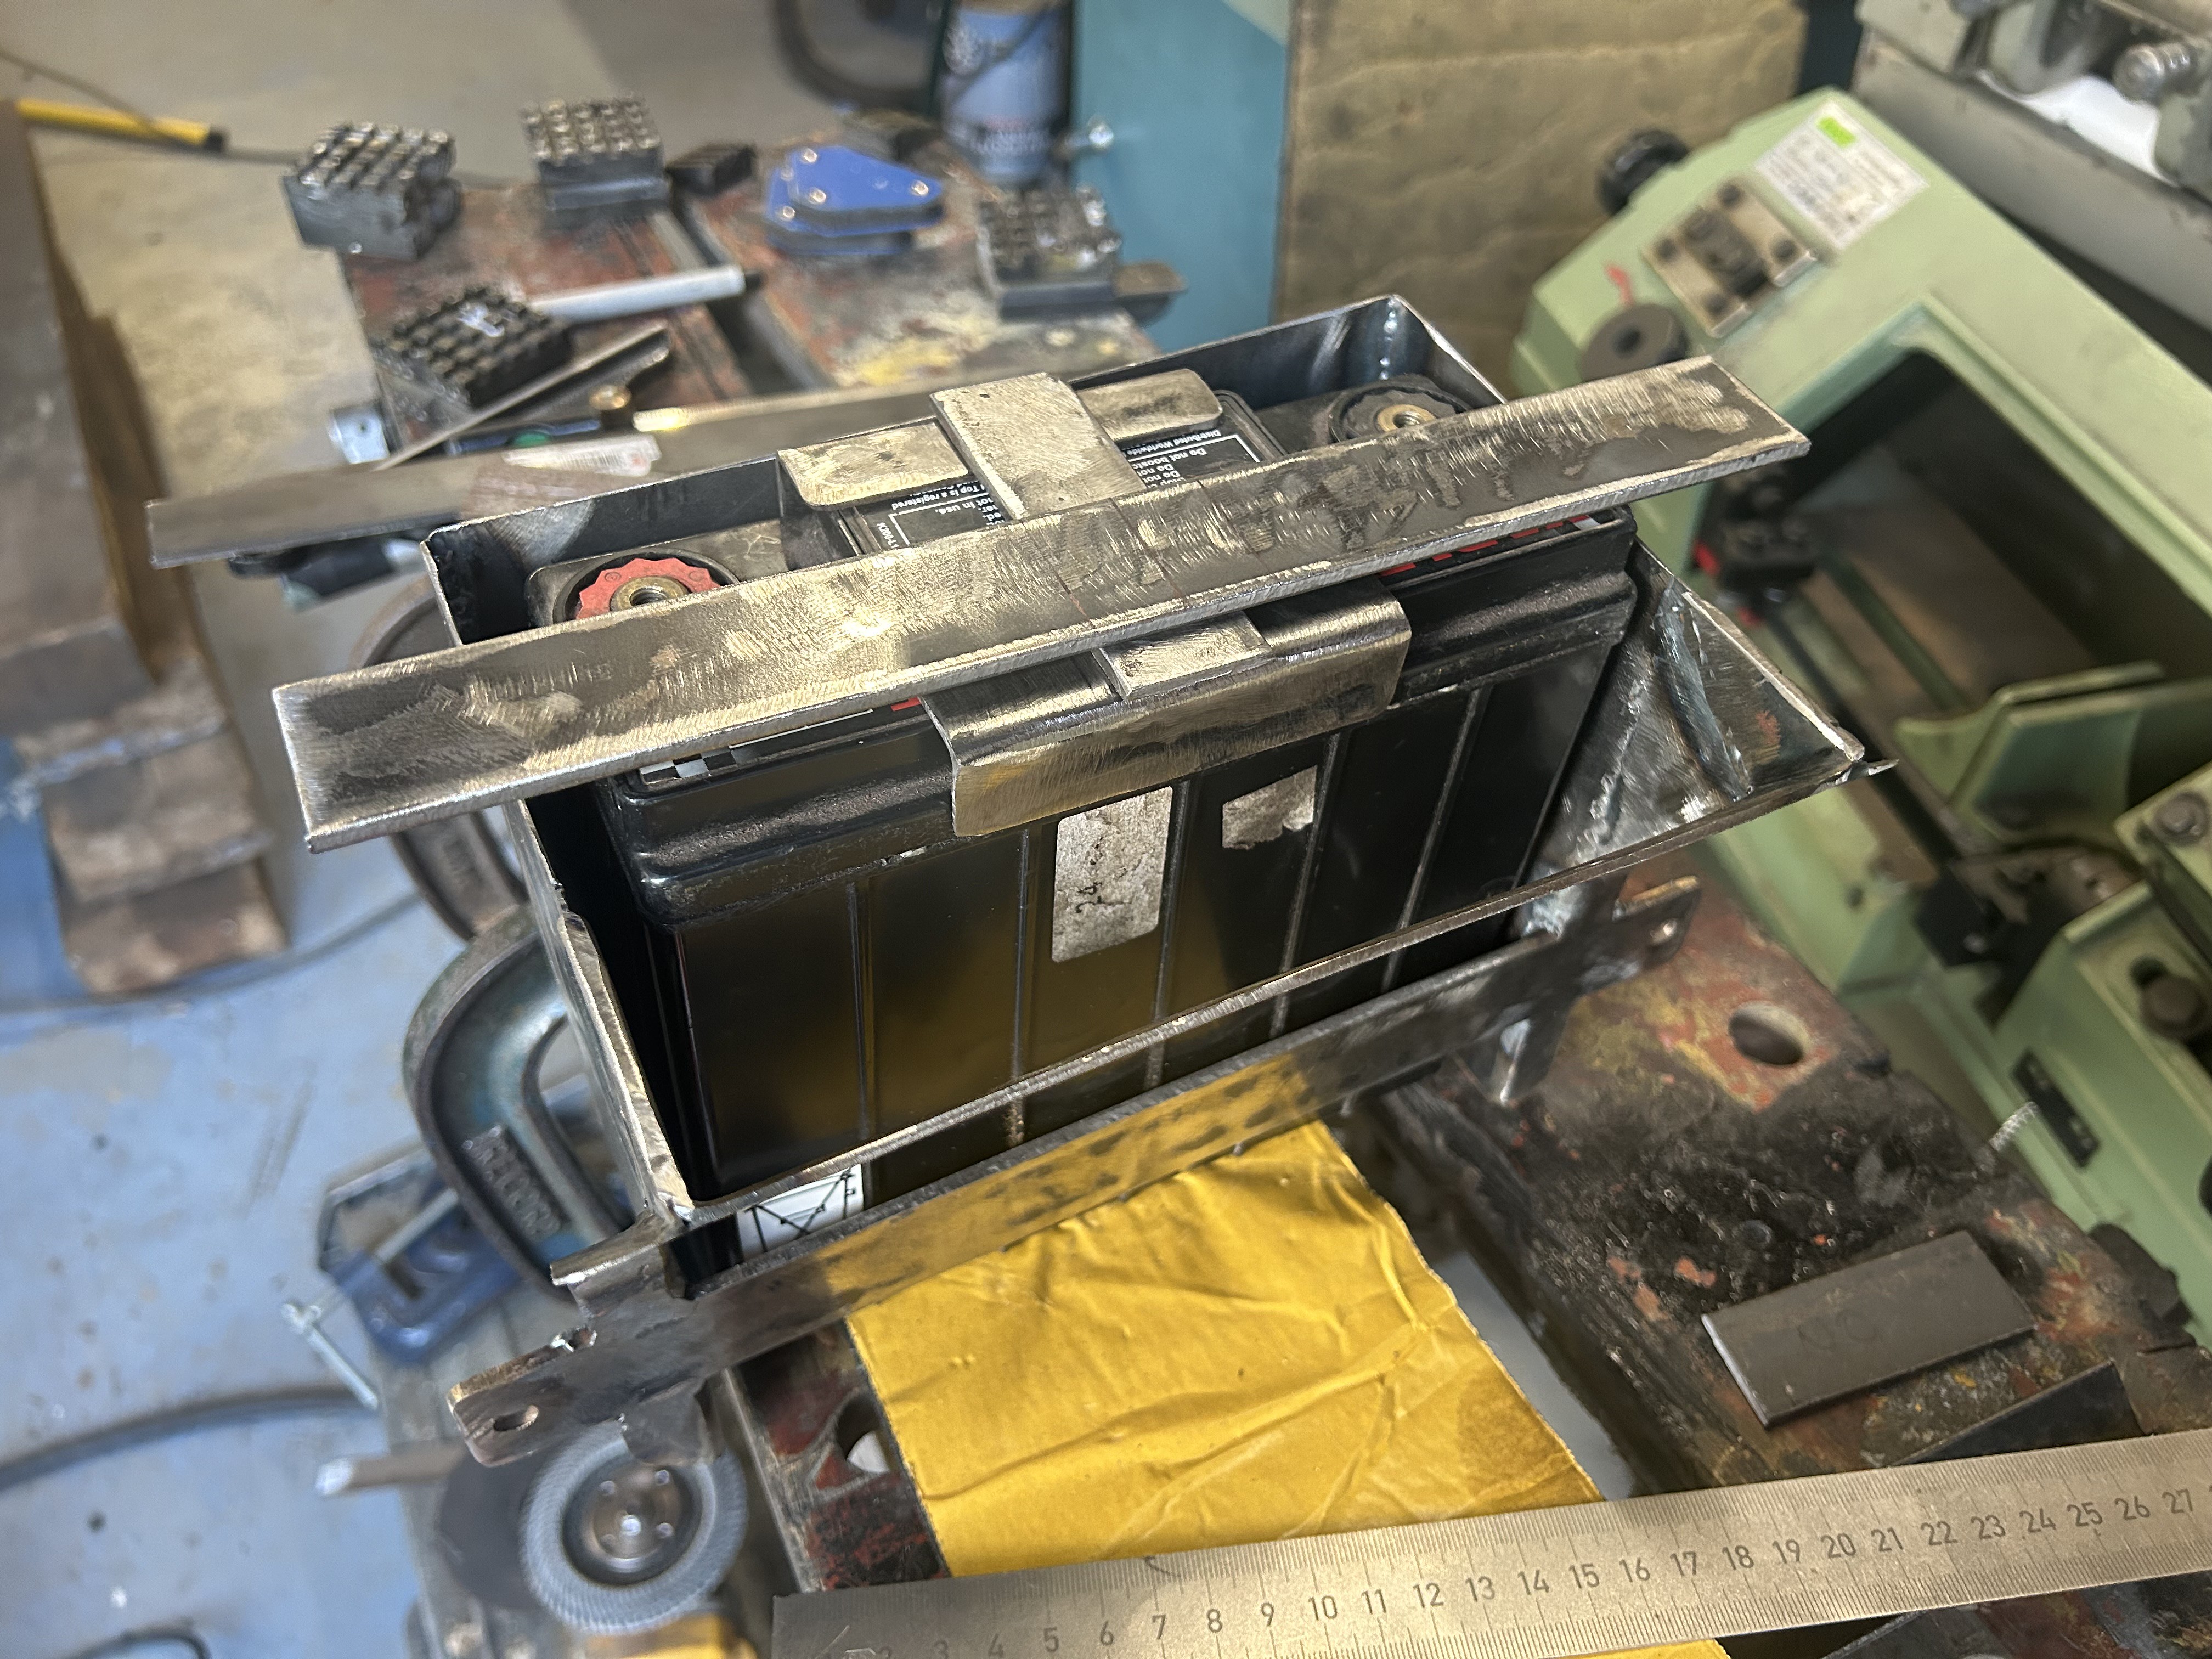 Untitled Untitled by Nevtiger, on Flickr But that sits quite around and looks a bit 'nailed together' so maybe i should do some recessing?  Untitled Untitled by Nevtiger, on Flickr All the same level now  Untitled Untitled by Nevtiger, on Flickr That's better  Untitled Untitled by Nevtiger, on Flickr I also bought myself a new welding helmet that has a clear/natural screen and a much bigger screen. Trouble is i can now see my bad welding as it happens........ Some tabs to mount the clamp on.  Untitled Untitled by Nevtiger, on Flickr And then add some drainage holes/lightness holes/visually pleasing holes 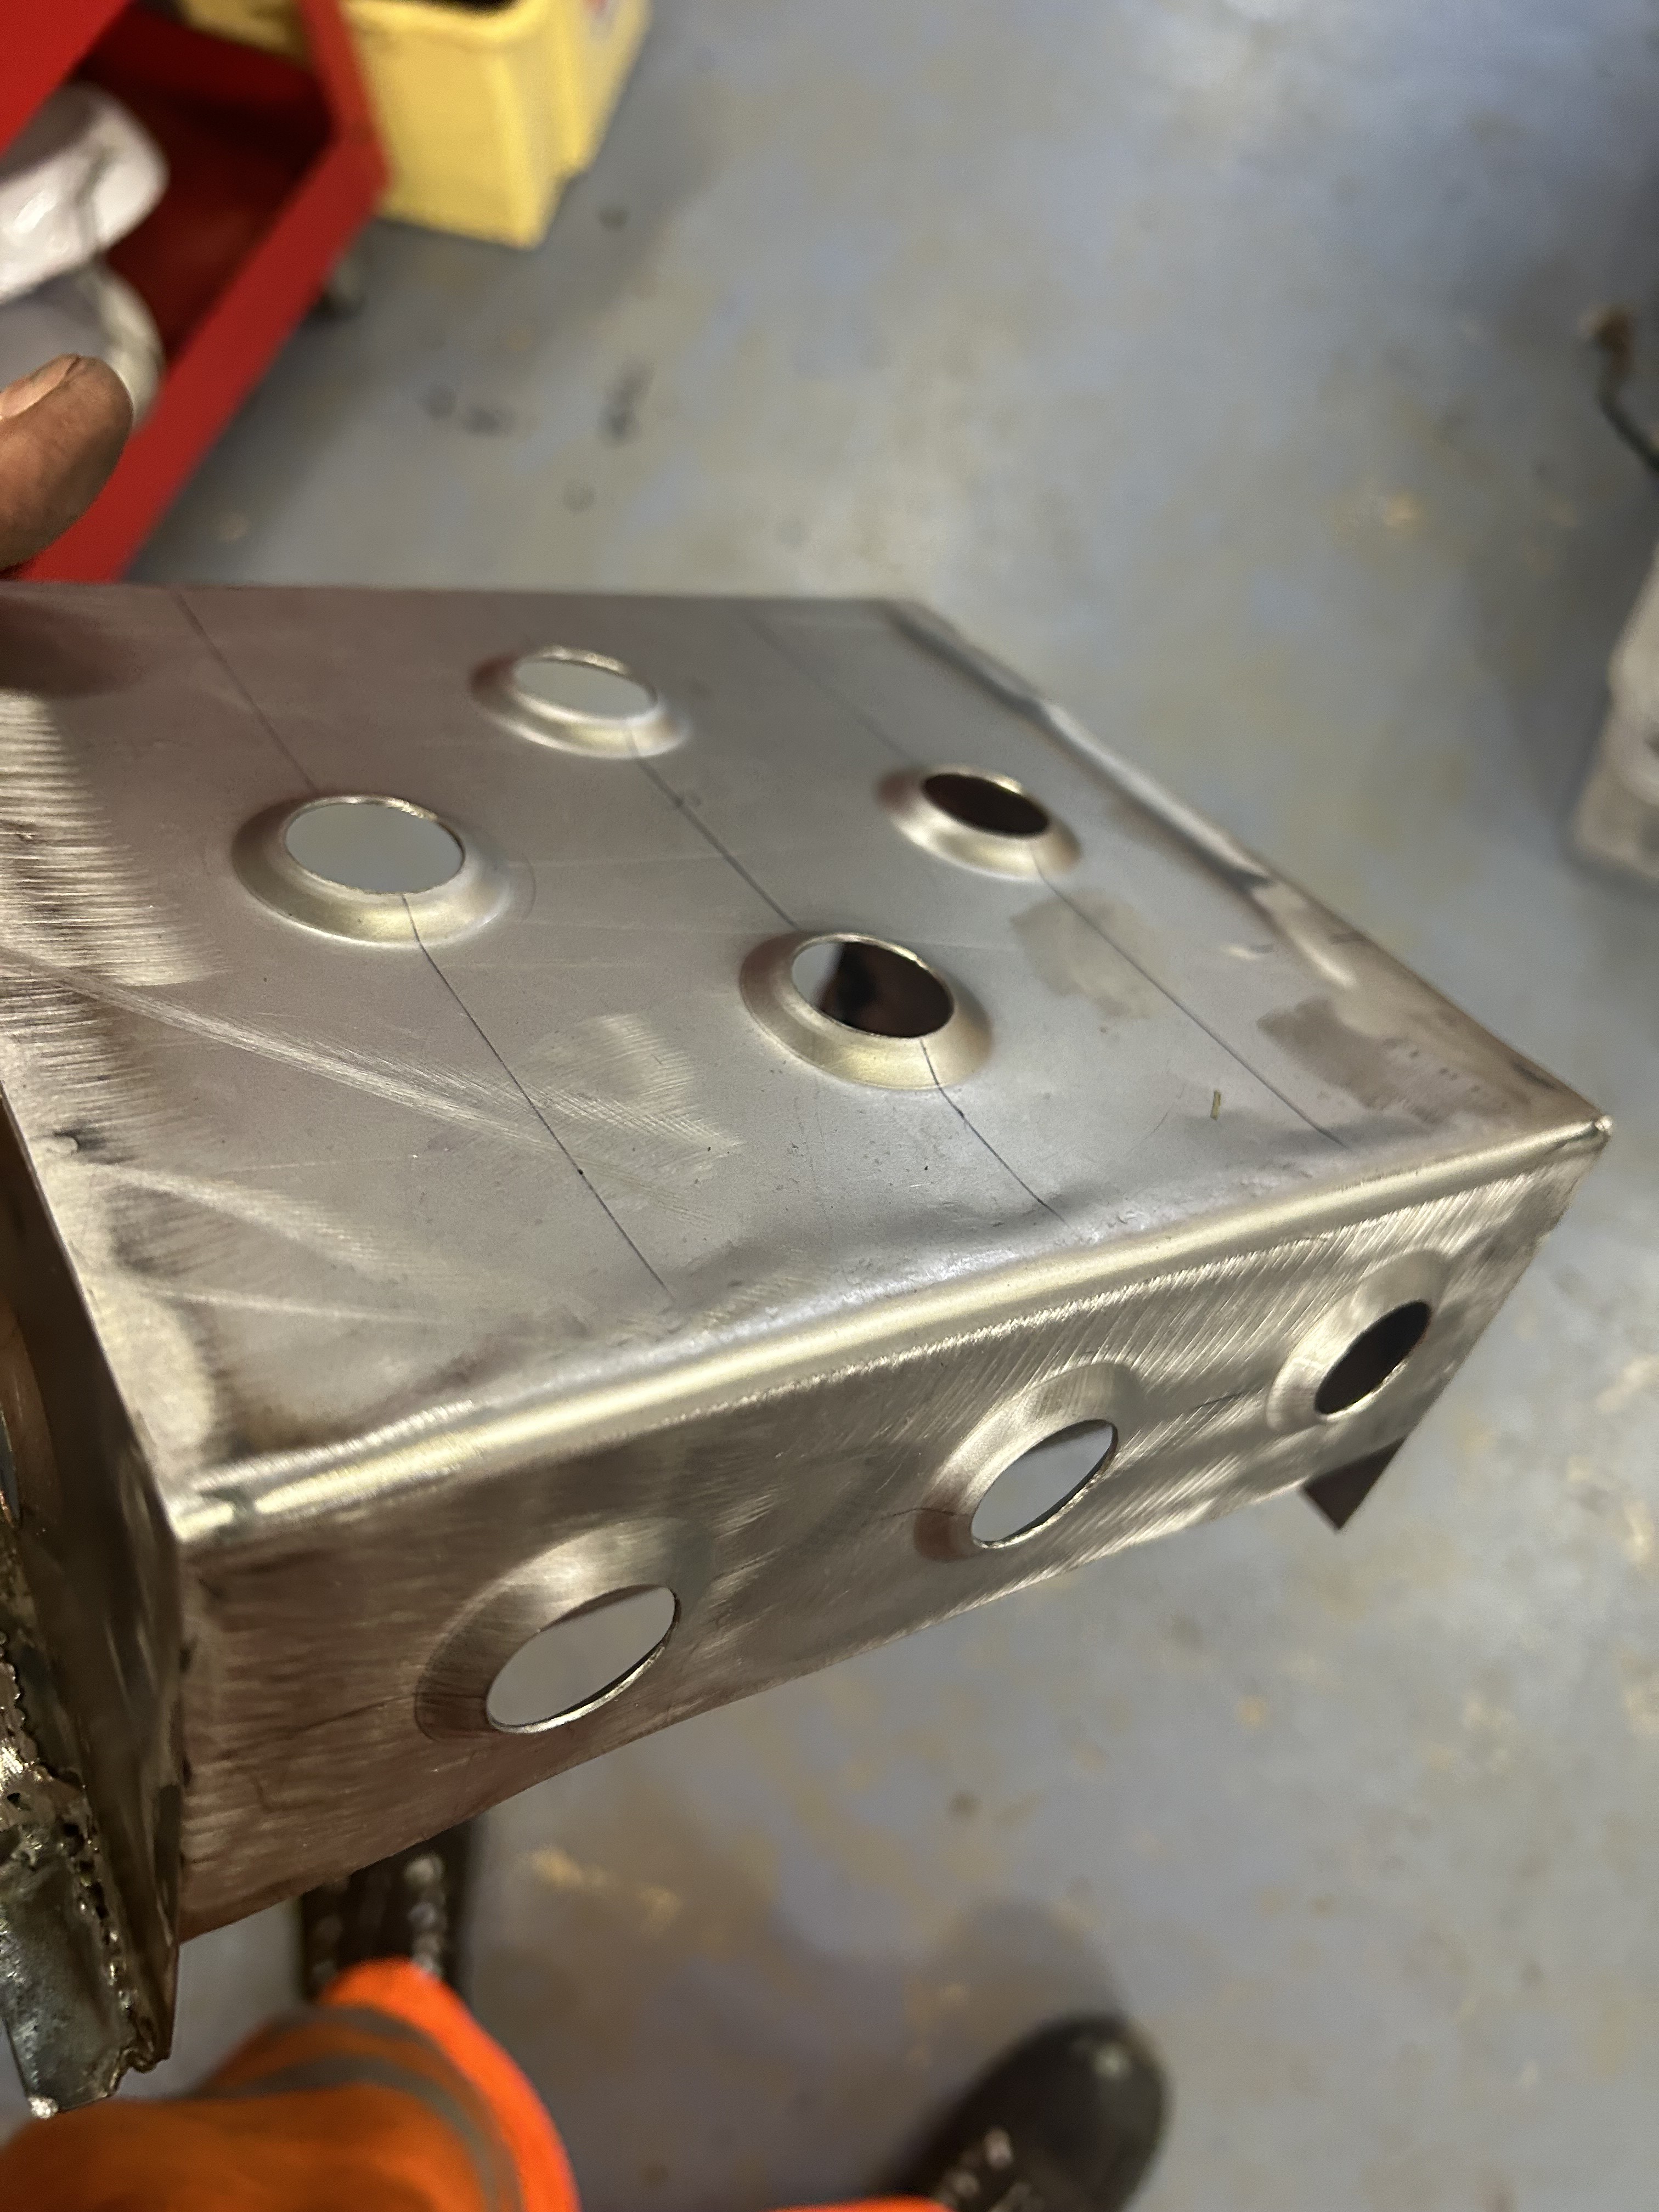 Untitled Untitled by Nevtiger, on Flickr Bolt it in and start adding the cables  Untitled Untitled by Nevtiger, on Flickr  Untitled Untitled by Nevtiger, on Flickr So that's engine and body to the negative done.  Untitled Untitled by Nevtiger, on Flickr But the box needs some slight relieving where the cable come in. I shall try to dress down with a lip....... |
| |
|
|
|
|
|
|
|
With the Battery mostly nailed into place and some cables to and from it was time to get on with more wiring. When i bought parts of the Rocketeer kit i had also bought the ECU and wiring loom. The loom is for a LHD MX5 as its longer so could give me a bat more to play with... First was to drill, tap and fit the temp sender adaptor things.  Untitled Untitled by Nevtiger, on Flickr One for the ECU, one for the dash and then a return for the dash one to work!  Untitled Untitled by Nevtiger, on Flickr I ran out of spare bits of Green/Blue so made a piece up with some Type 44 and heat shrink..... The engine loom is laid in now and i have started to make fit where it should and add P clips as necessary. I'm not a long way from taking it all out ready for paint now (again)  Untitled Untitled by Nevtiger, on Flickr If you look closely you can see the near side cam sensor hanging on the engine. I don't have enough room to fit it with the connector. I shall need to modify it slightly by adding a tail and potting it so i have more clearance to the bulkhead. The original car (if a GLS/TI/Lotus) dash has an Oil Pressure gauge and Oil Pressure Warning light in a combined sender. The sender is 3/8 NPT and the block is M10 x 1.0 thread. As it turns out that is an easy adaptor to buy. 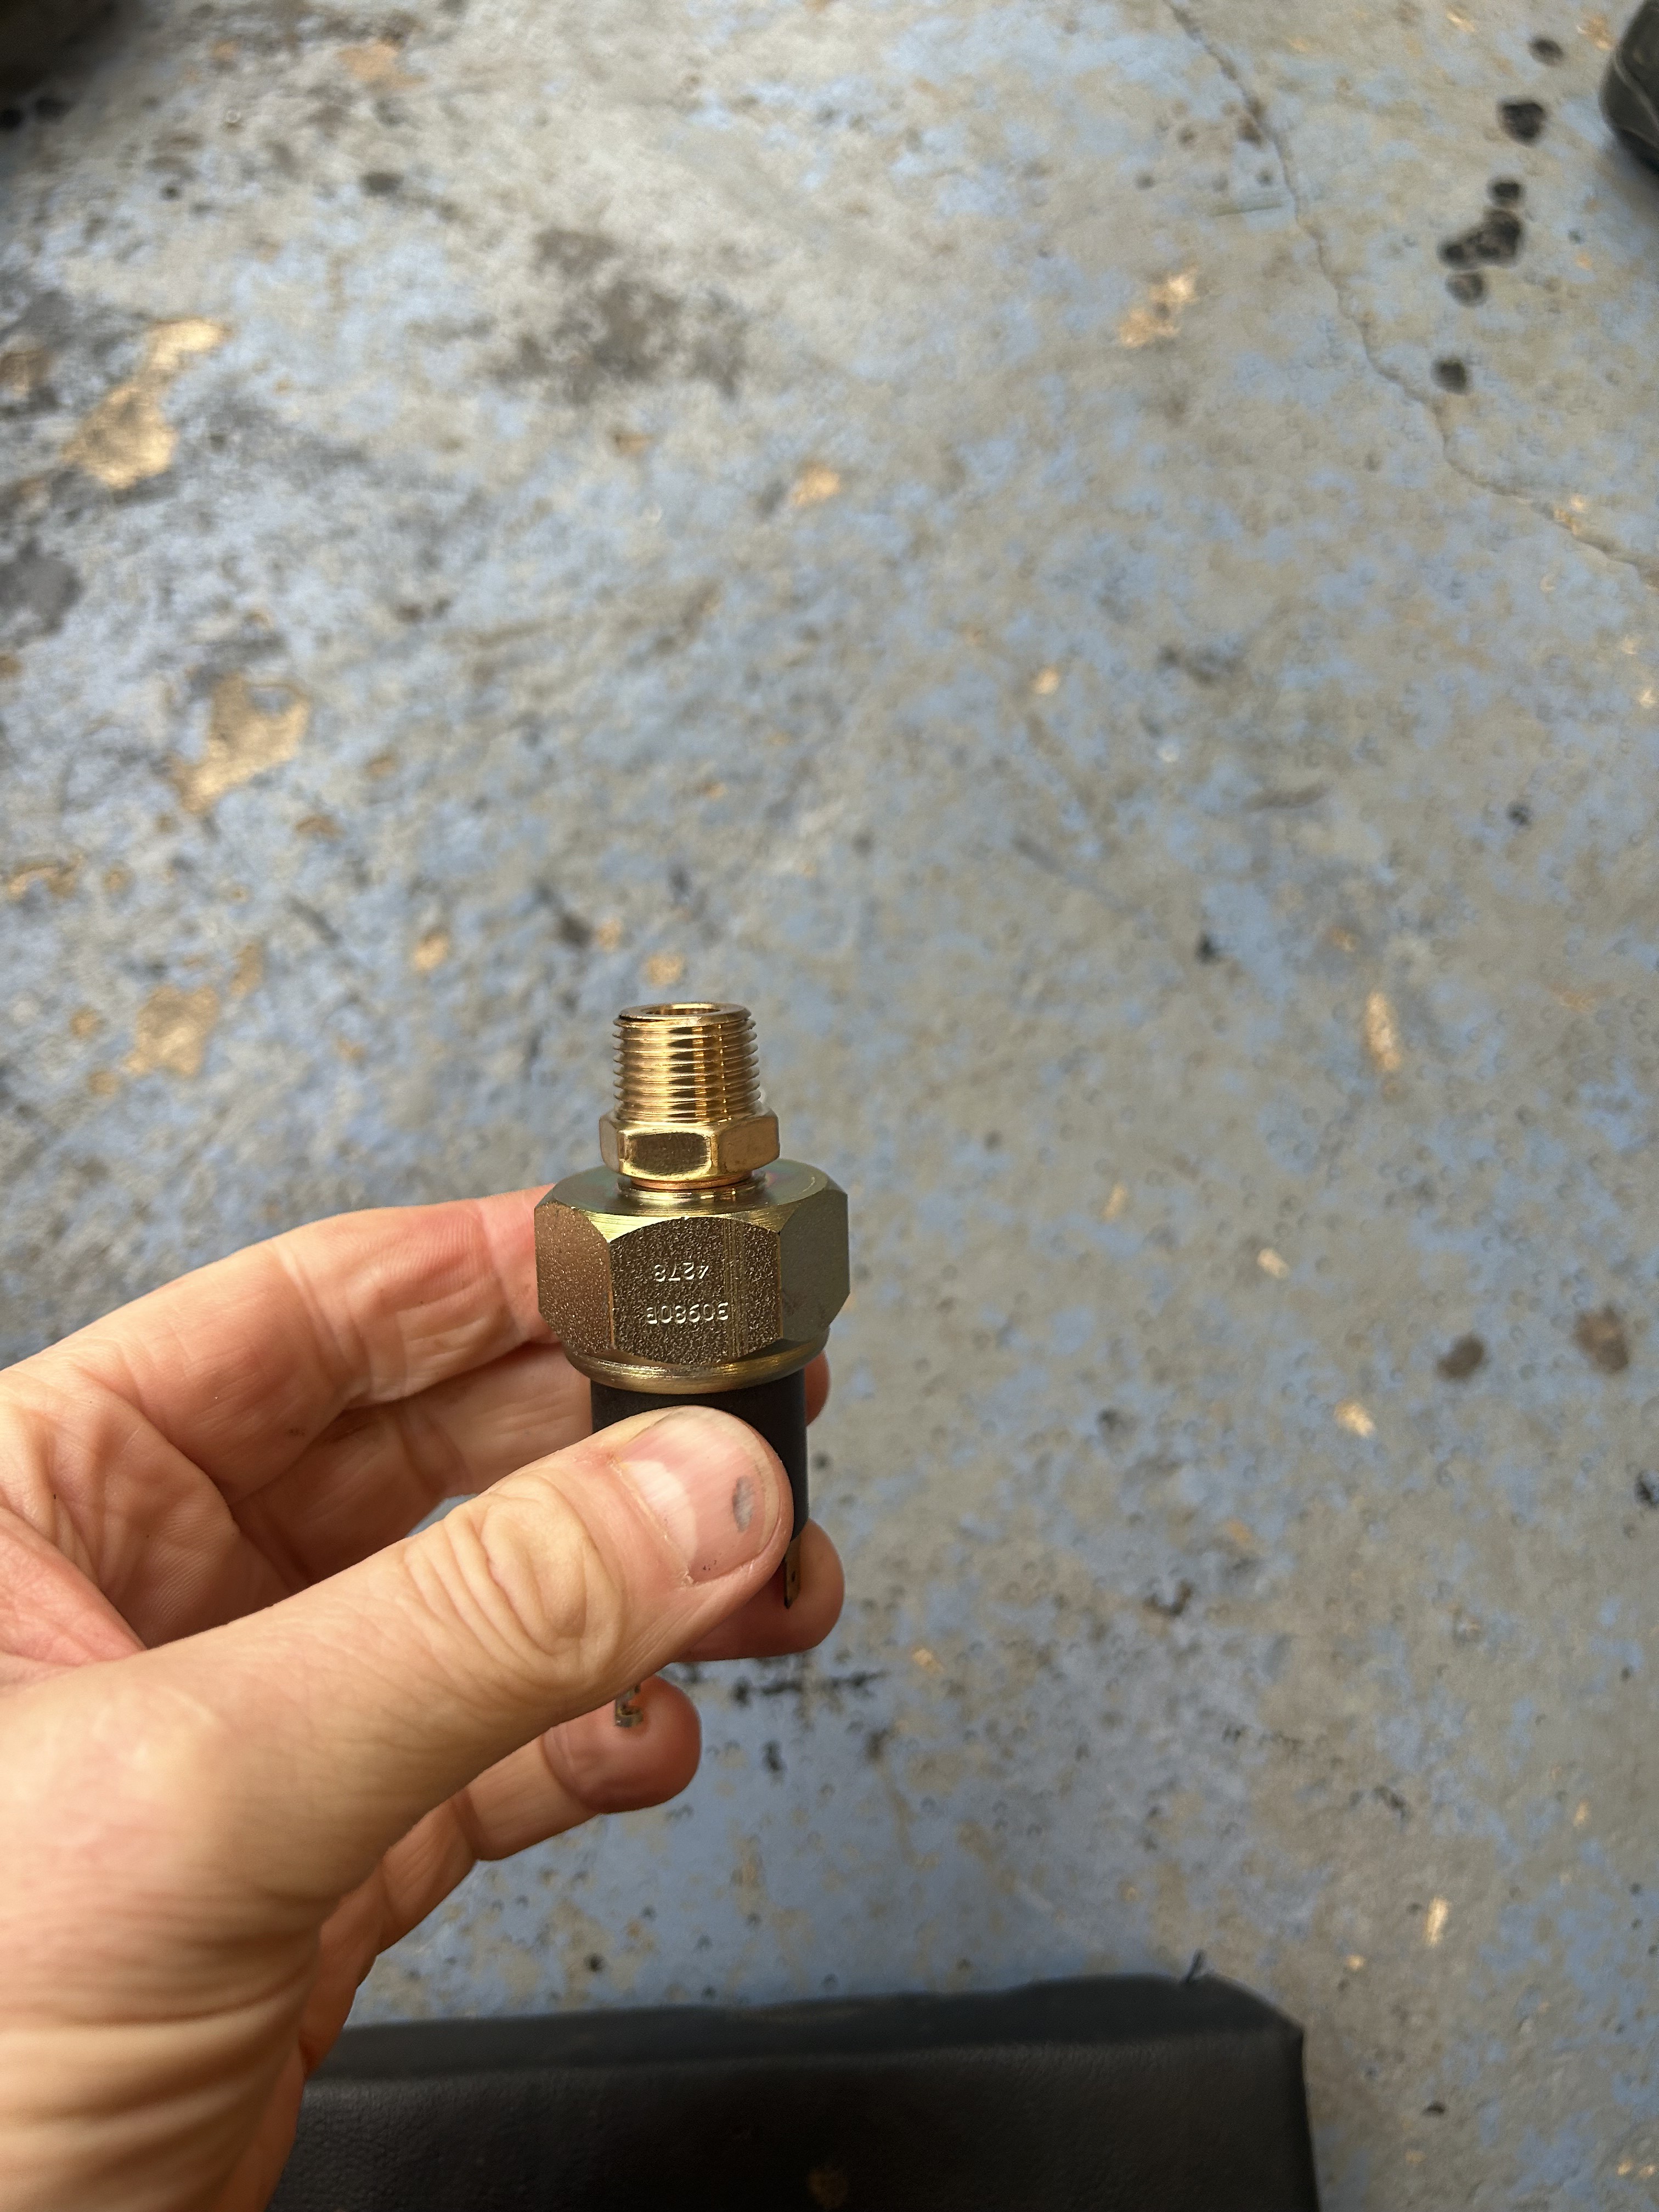 Untitled Untitled by Nevtiger, on Flickr Next i need to work out where the ECU is going and sort some fans out. |
| |
|
|
lebowski
Part of things
  Hillman Avenger, Clan Clover
Posts: 488
|
|
Oct 24, 2023 12:14:07 GMT
|
|
Nice work. Are you running a heater and a thermostat? I can't see where your coolant pipes are routed.
I initially ran without a thermostat on mine, but it ran too cold and didn't want to go over about 50c except when idling at a standstill. Even with the electric water pump barely ticking over it stayed very cold, and some flow is necessary to avoid localised boiling around the cylinders. I ended up replacing the thermostat and putting one of the (3!) temperature sensors in the heater circuit.
|
| |
|
|
|
|
|
Oct 24, 2023 12:38:22 GMT
|
lebowski really good question! I am running without a thermostat as i don't really have enough room for one and the temp sender block. I was rather assuming that the water pump being controlled would be sufficient to regulate the temperature at the lower end...... otherwise i might need a Land Rover radiator muff! I will need to re-visit it.....
|
| |
|
|
|
|
|
Oct 24, 2023 13:45:32 GMT
|
If you can't fit a thermostat in the standard position you might be able to use one of these. You'd need to find the right place to put it to function properly, but it give you a bit more flexibility with packaging. |
| |
|
|
lebowski
Part of things
  Hillman Avenger, Clan Clover
Posts: 488
|
|
Oct 24, 2023 13:51:41 GMT
|
|
The 80's/90's Renaults such as the Renault 5 used a thermostat which goes inside one of the hoses. It might be possible to fit one in as it doesn't need a housing or anything, but it would depend on your hose diameter. You'd just need to ensure that your sensors are located somewhere sensible on the engine side of the circuit.
I have a Renault thermostat here which I can measure if it's any help.
|
| |
|
|
|
|
|
|
|
Right, so, well. It seems i have ben a dick. mea Culpa and all that over the thermostat issue. Whilst walking down the garden to the garage having a think i suddenly realised i had a thermostat housing that comes as part of the kit!  Untitled Untitled by Nevtiger, on Flickr So why hadn't i used it? I think because its too long and i thought the holes were to close together to get my 5/8 x 18 water tempp sender in. The length can be absorbed by taking the hose back i think. And the drilling and tapping for the larger sender.......  Untitled Untitled by Nevtiger, on Flickr It just all fits together but i did need to put the ECU WTS in the lathe a bit! I have taken one of the washers off as well and its still fitting  Untitled Untitled by Nevtiger, on Flickr Thank you to lebowski for pointing it out and to biturbo228 for jogging my memory about the remote housing. |
| |
|
|
|
|
|
|
|
With the engine loom laid in i need to sort out two things; radiator fans and ECU placement and associated wiring for fans, fuel pump power in etc. First the fans. The engine = V6 3 litre The Radiator = IL 4 2.2 litre So it should be adequate with plenty of cooling fan power and the ECU controlling the water pump. First thing was to goole 'Circles into a Rectangle calculator'. That worked and it seems two 9" fans will be the biggest i can have. Yep it was right! I guess i could have done it long hand but...... 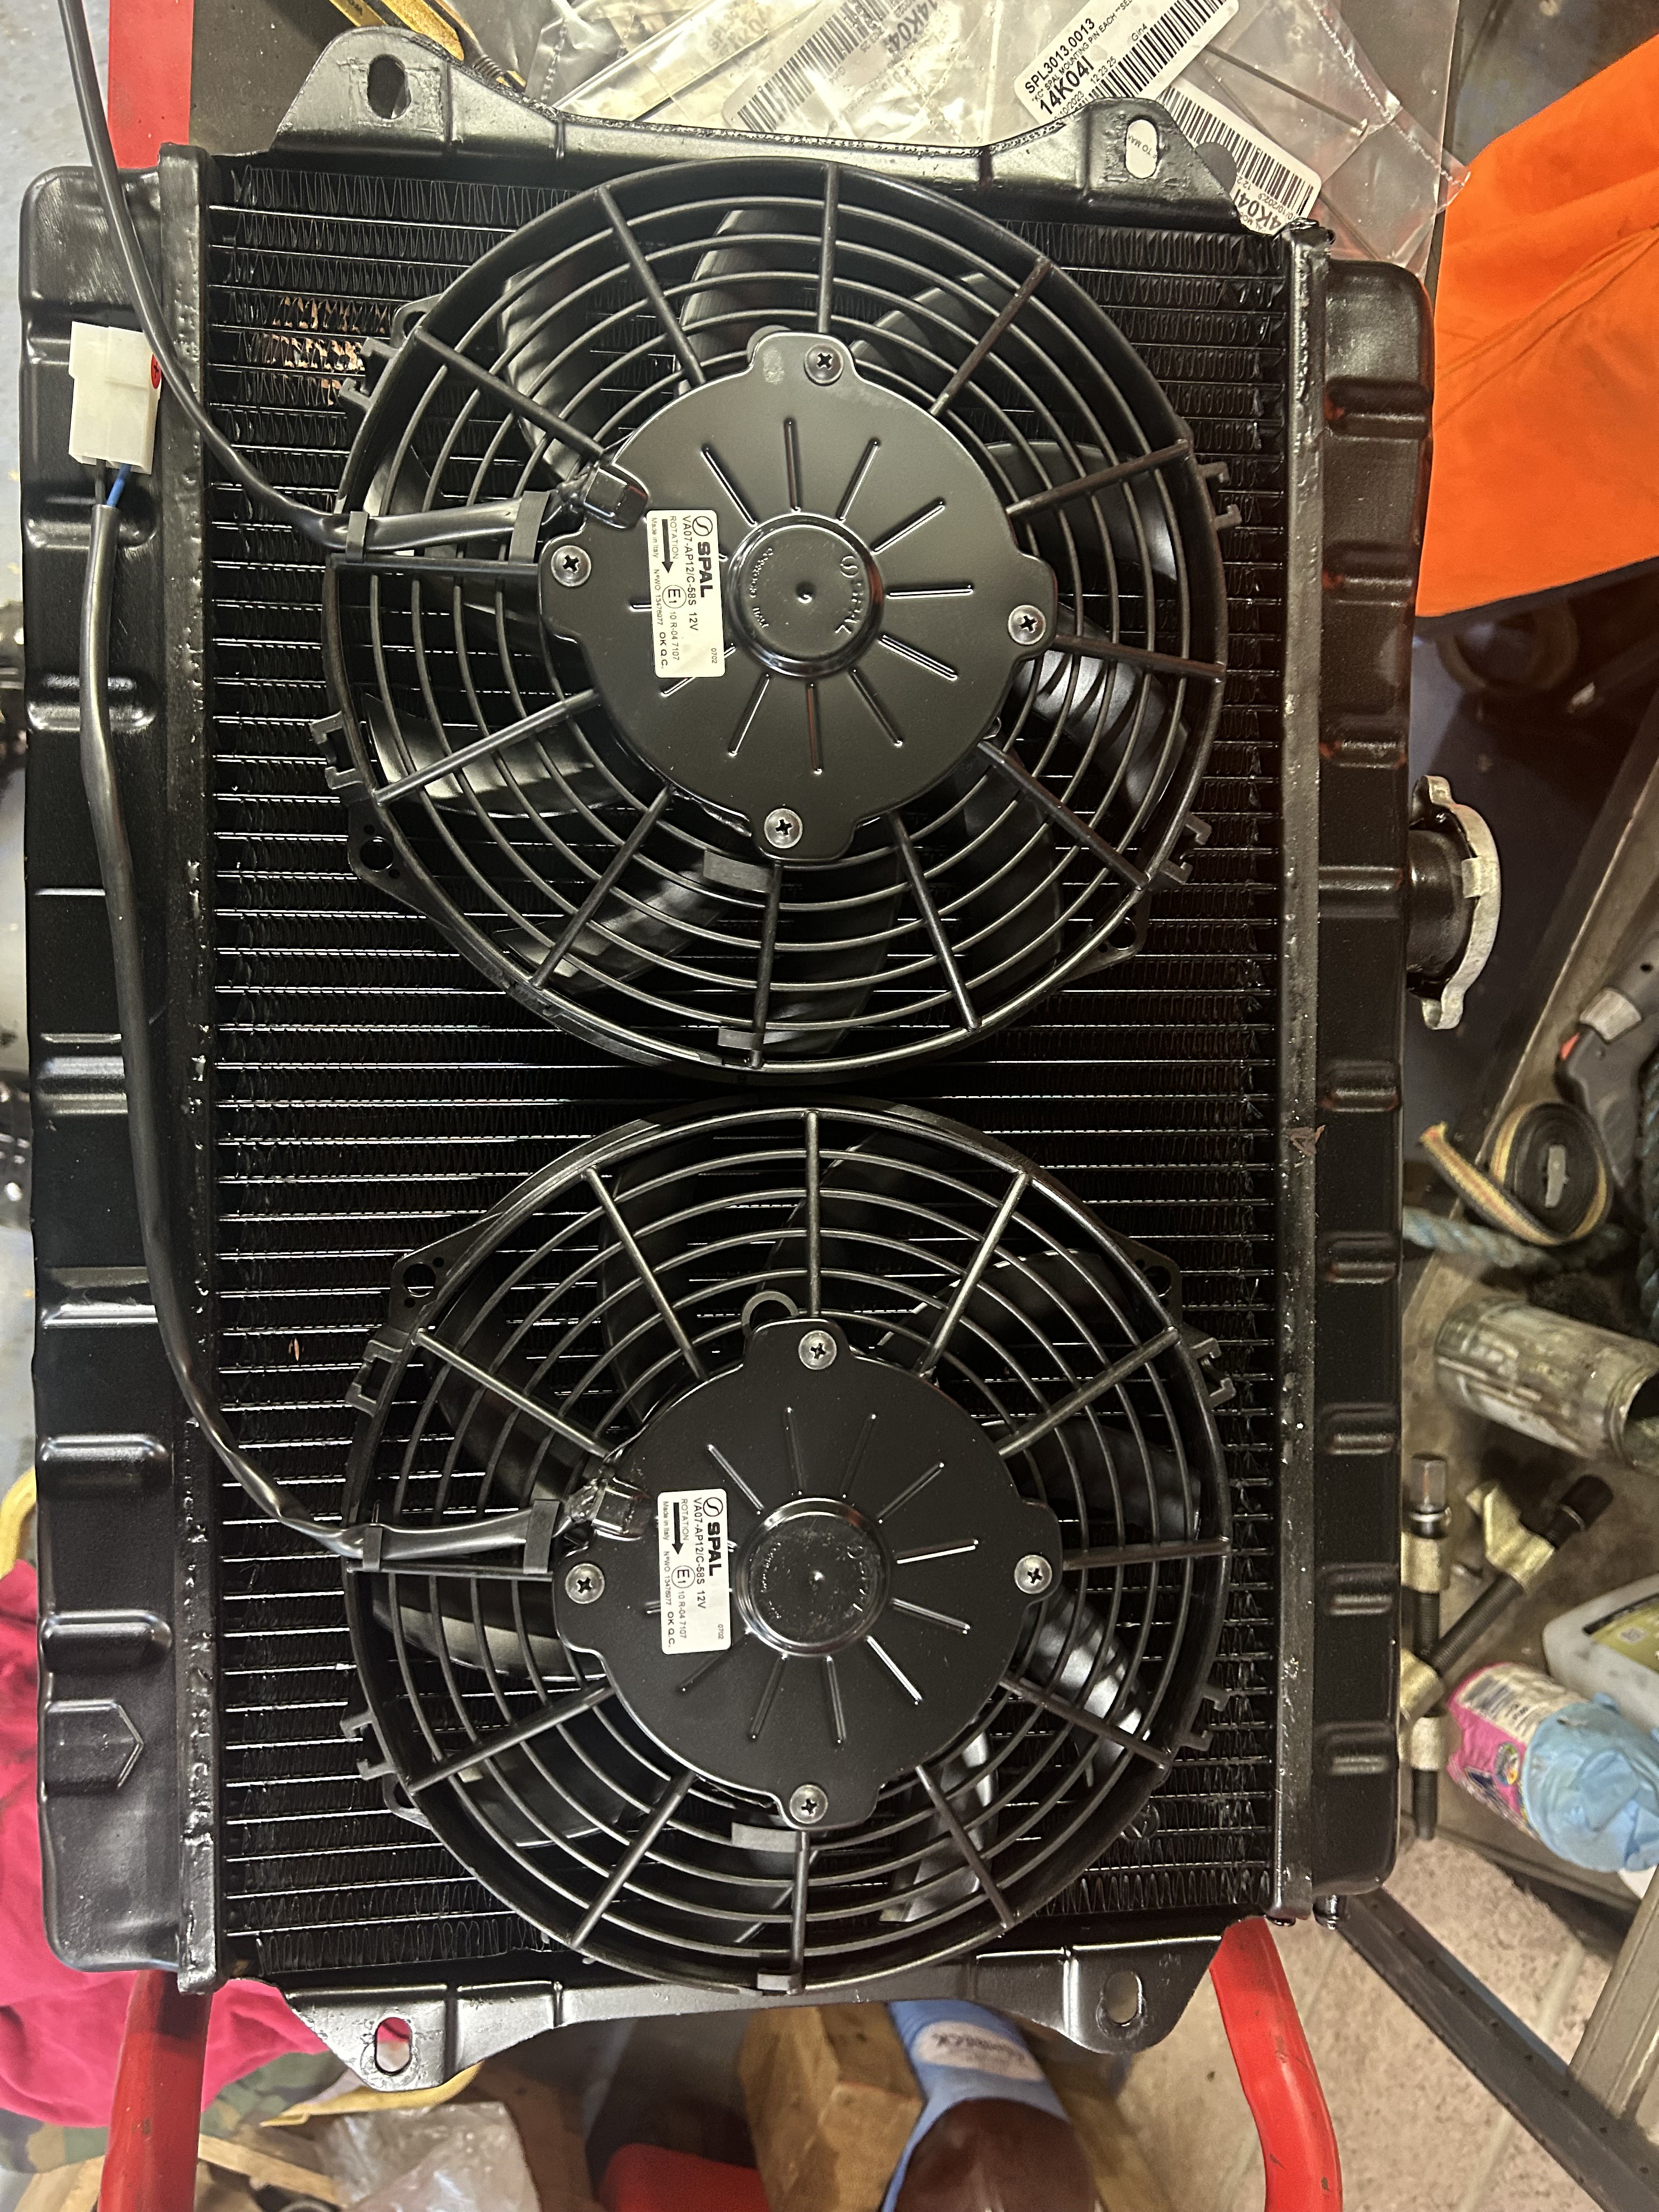 Untitled Untitled by Nevtiger, on Flickr A temporary mounting solution to work out how to make it all fit.  Untitled Untitled by Nevtiger, on Flickr First part of the body removed, i will need to replace the strength that this was providing  Untitled Untitled by Nevtiger, on Flickr More cutting and some drilling later  Untitled Untitled by Nevtiger, on Flickr On the standard Sunbeam Lotus the panel is modified like this, well not quite as much maybe. Now to mount the fans on a sub assembly  Untitled Untitled by Nevtiger, on Flickr Then weld and drill and shape.  Untitled Untitled by Nevtiger, on Flickr  Untitled Untitled by Nevtiger, on Flickr And see if it fits back in there. Yes i know i put the fans on upside down!  Untitled Untitled by Nevtiger, on Flickr I need to beef up the headlight box and front panel area a bit and make an arrangement of 4 x captive bolts so the assembly can be slid in and out easily. |
| |
|
|
|
|
|
|
|
Nov 30, 2023 13:47:48 GMT
|
The last week has been taken up by the RAC Rally. Serviced for 136 the 1600 Sunbeam. Come 1st in Class, 19th Historic and 21st overall!  Untitled Untitled by Nevtiger, on Flickr Cheesy - look at me I'm cover in mud - shot.  Untitled Untitled by Nevtiger, on Flickr best bodge of the event for me was repairing this leaf spring until a new one turned up. The car that these were fitted to went onto almost finish the rally but knocked off the very last stage by another car.......... 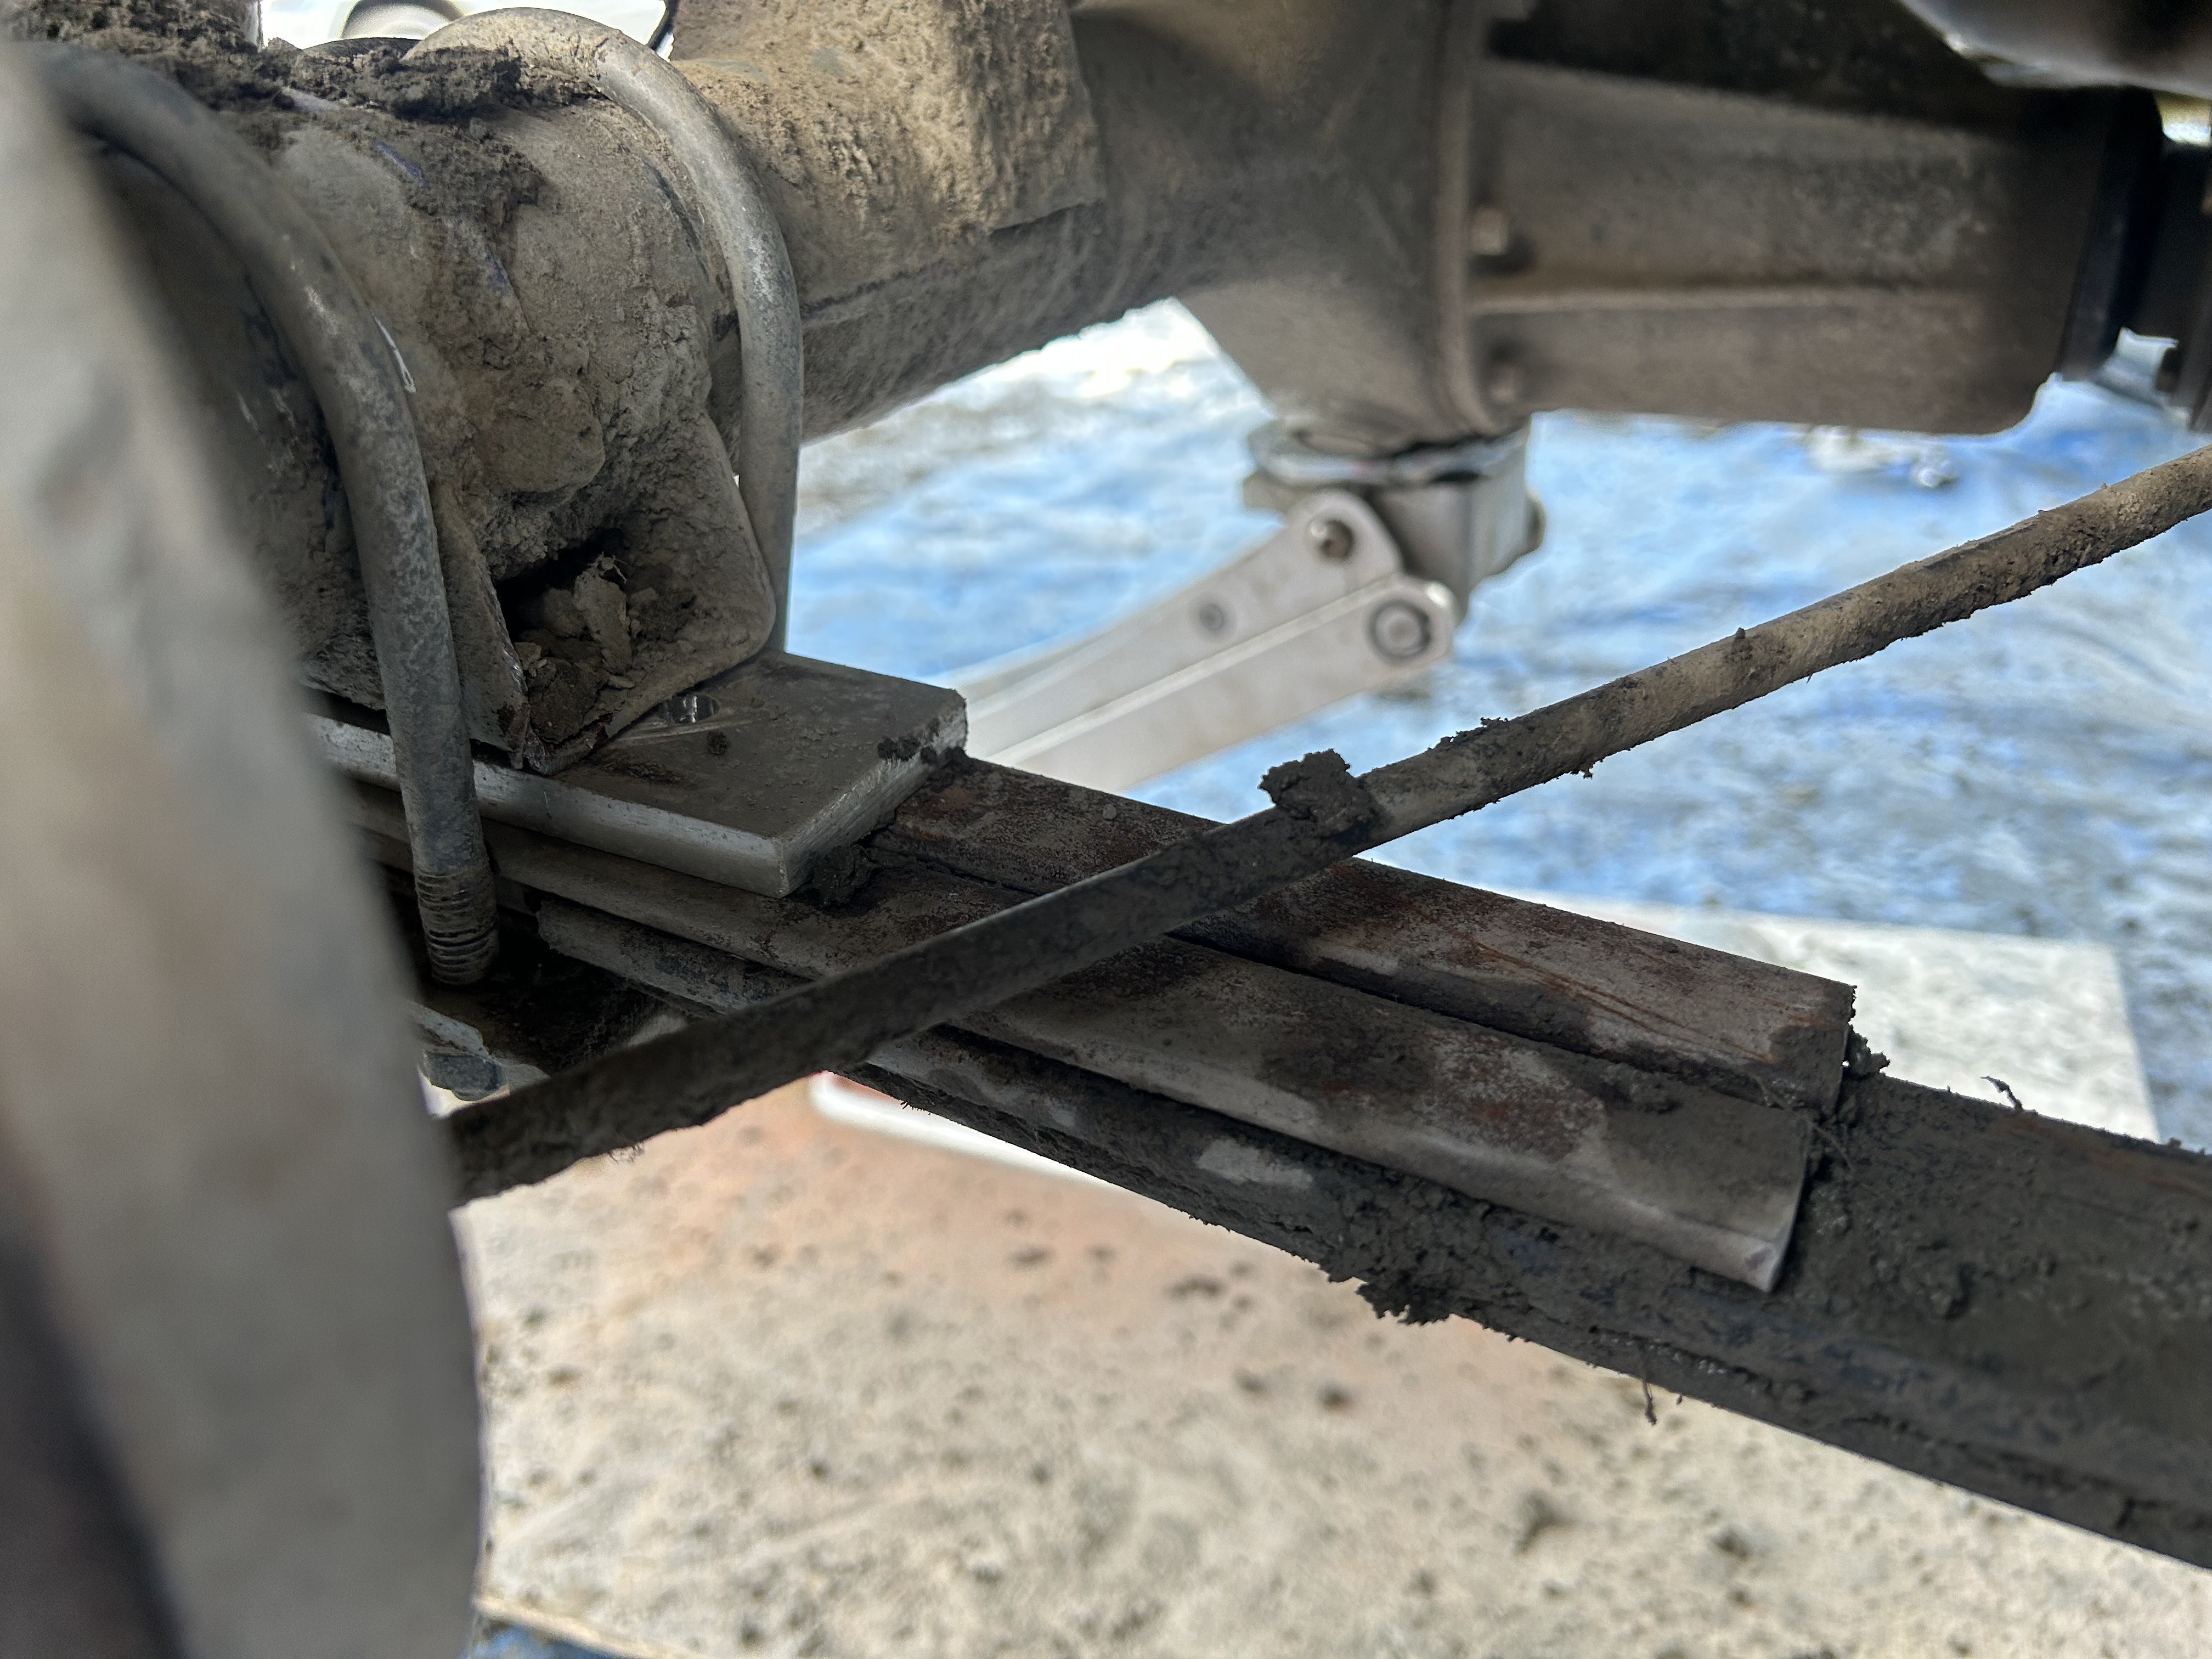 Untitled Untitled by Nevtiger, on Flickr And back to the 'Beam Lower fan mount is now on. 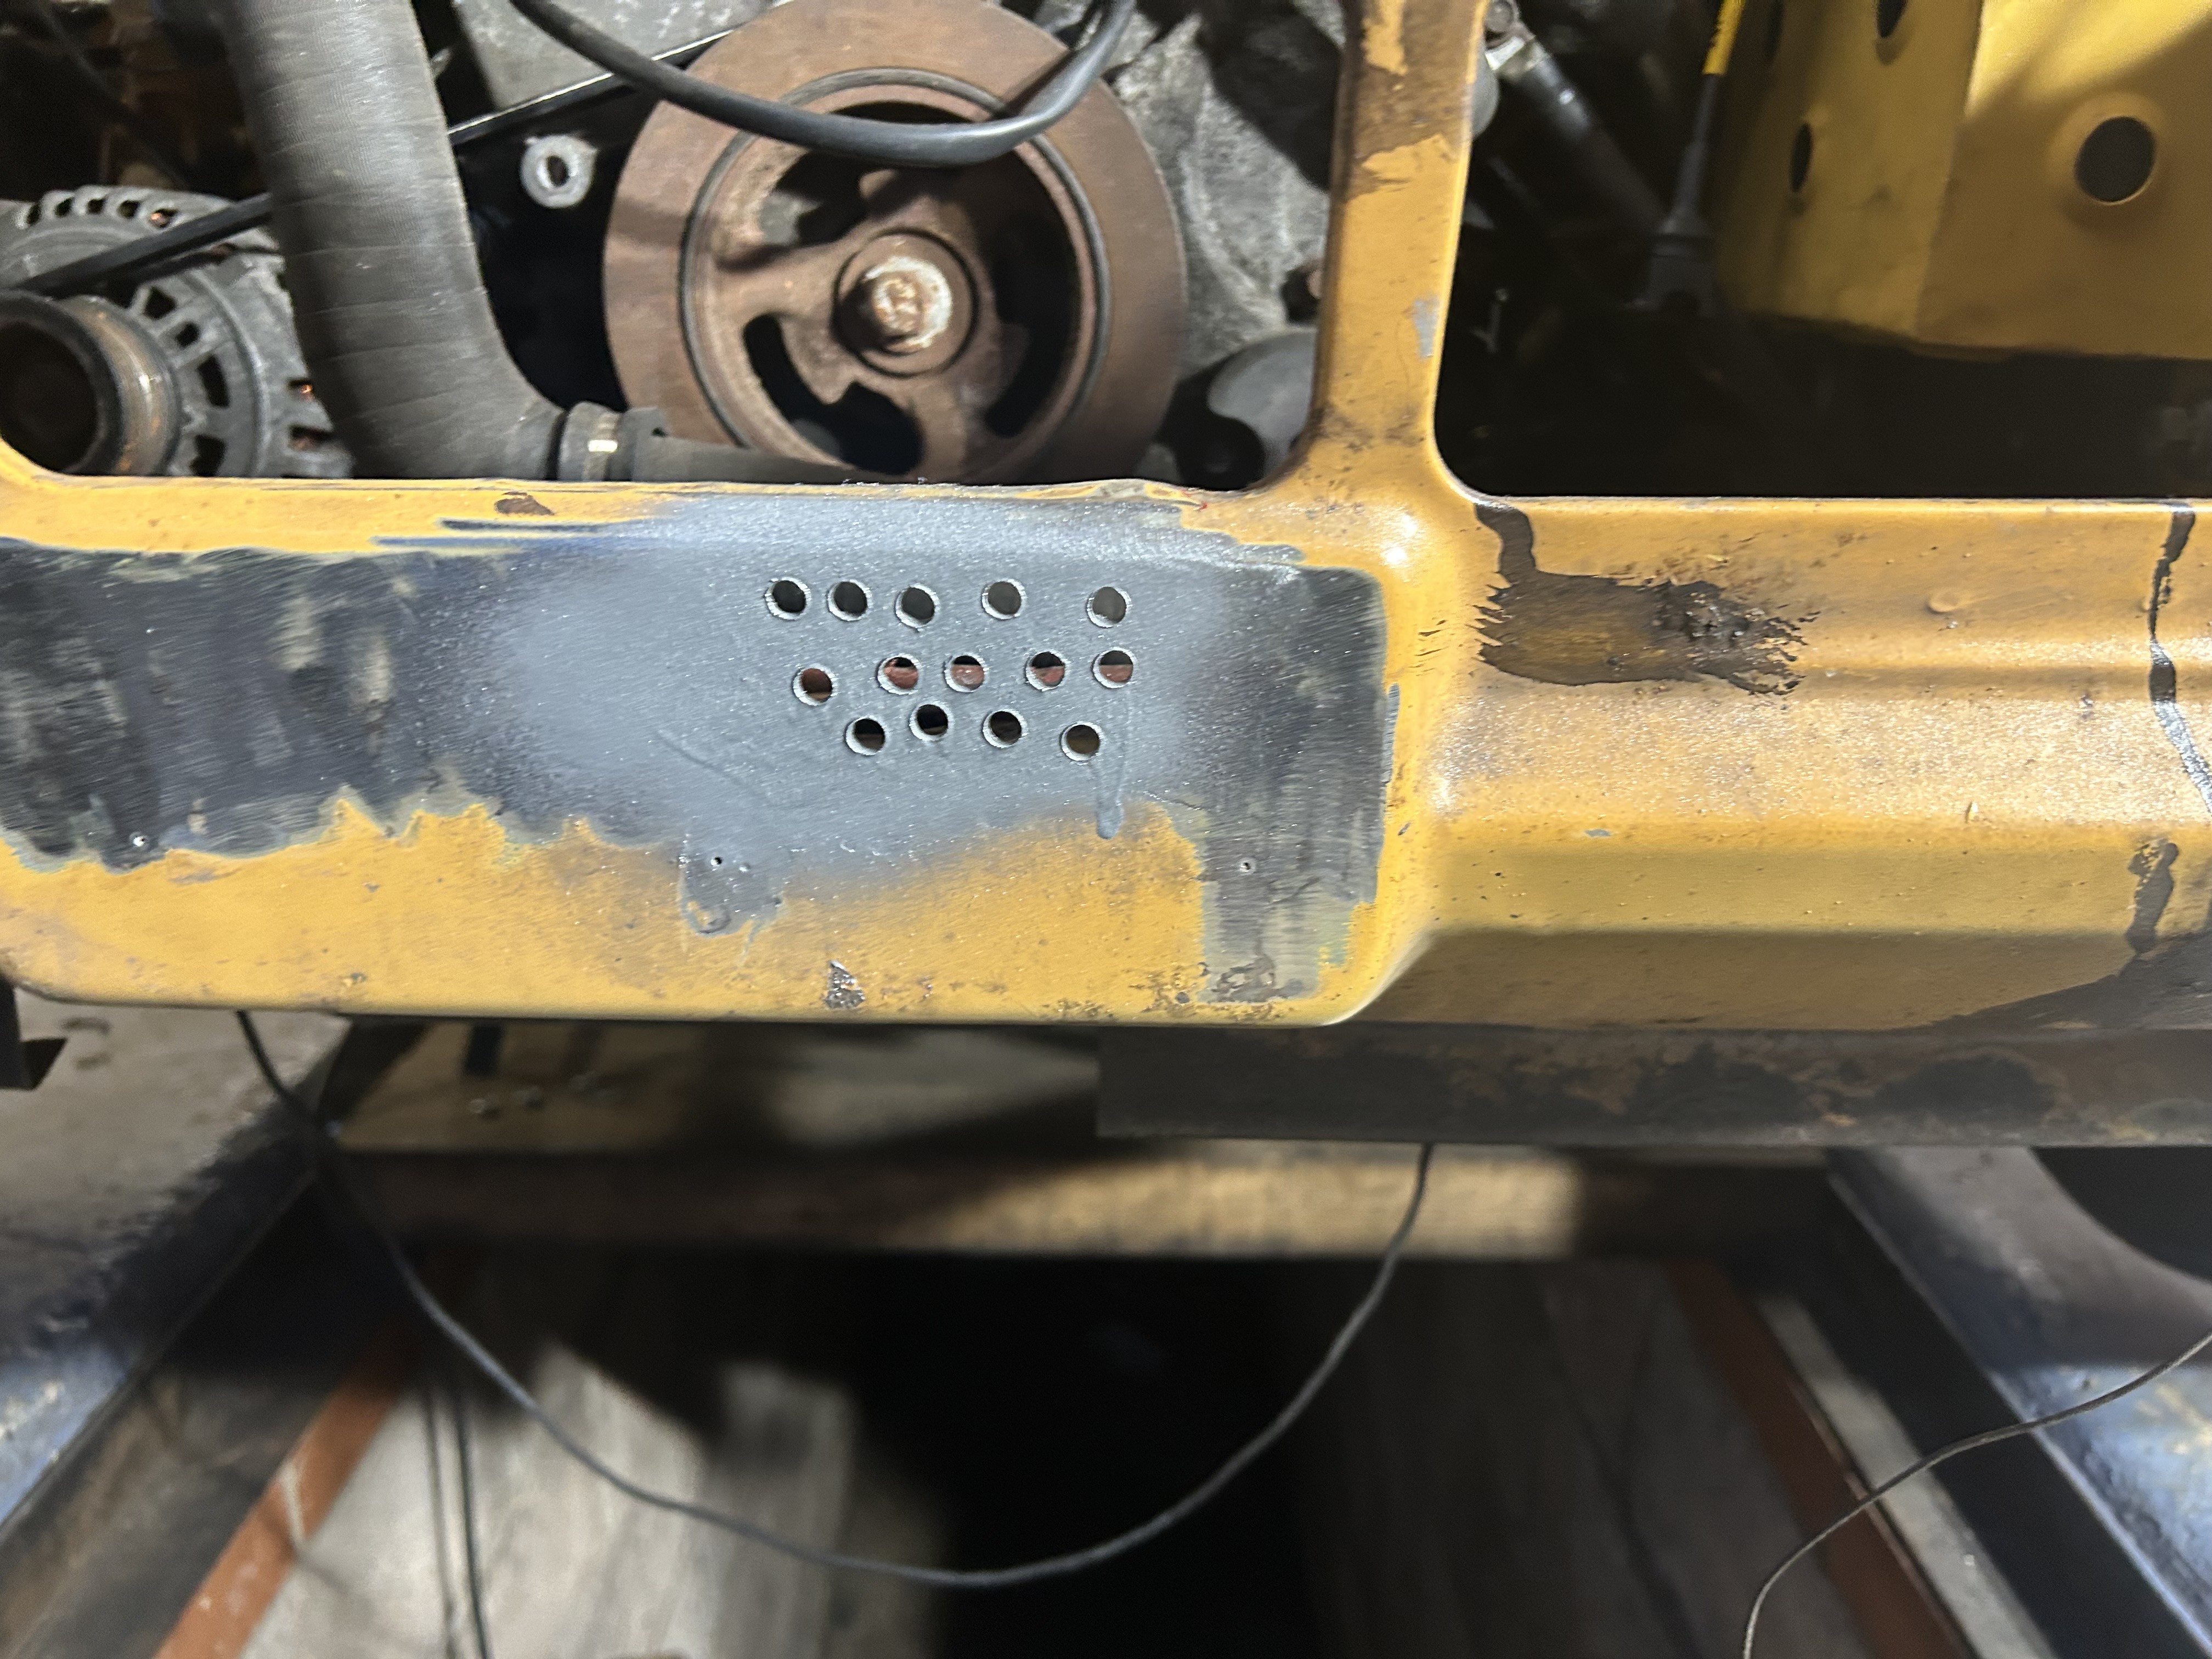 Untitled Untitled by Nevtiger, on Flickr  Untitled Untitled by Nevtiger, on Flickr 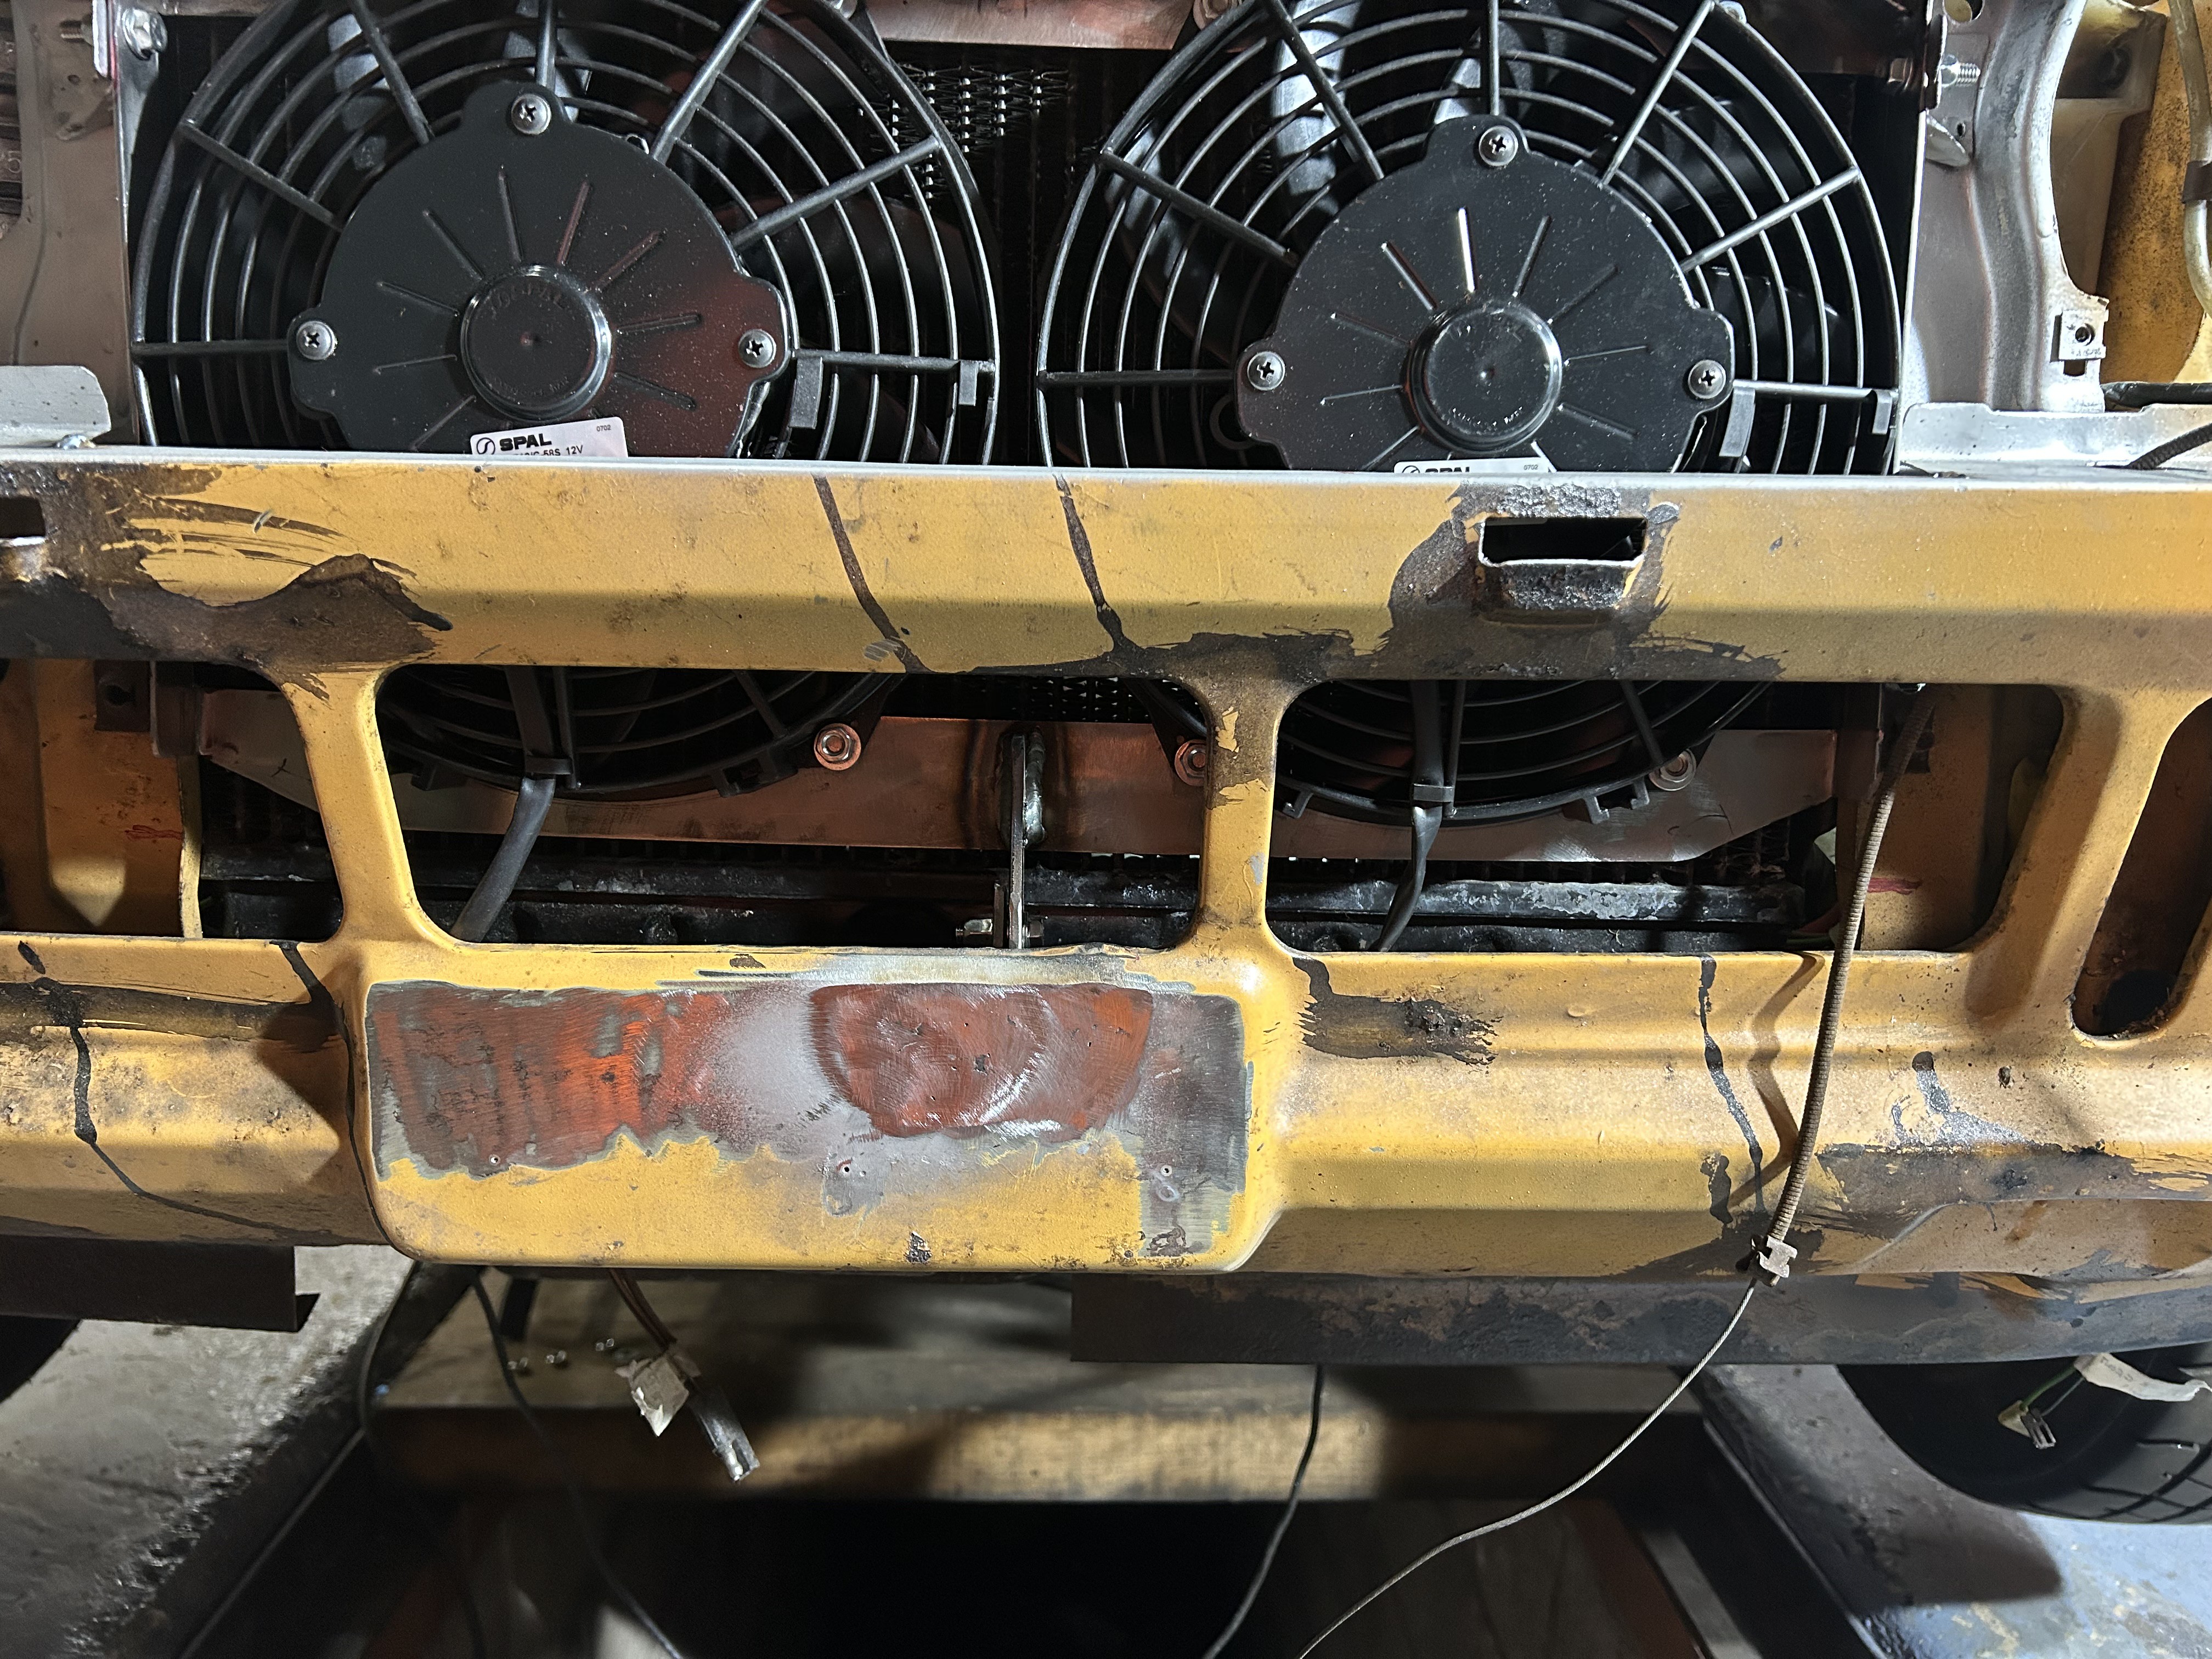 Untitled Untitled by Nevtiger, on Flickr The only other metal work i need to do before stripping and sending for paint is the bonnet slam strength strut which i need to reinstate and the hole for the loom to go into the cab. |
| |
|
|
|
|
|
|
|
It's a bit hard to see but this edge is quite flimsy. So i need to strengthen it. I could put a return edge on it but i think that might stop airflow to the radiator, every little helps! So a flat bar of 2mm should help.  Untitled Untitled by Nevtiger, on Flickr I need it to look hard nice so some nice bends at each end to tie it back in to the front panel should help.  Untitled Untitled by Nevtiger, on Flickr Before i finish that off i need to tie into the vertical fillet that support the bonnet latch. I used the original one turned through 90 degrees but for some reason really really cocked up some holes.  Untitled Untitled by Nevtiger, on Flickr I blame the temperature of the garage being sub zero. So. Start again. 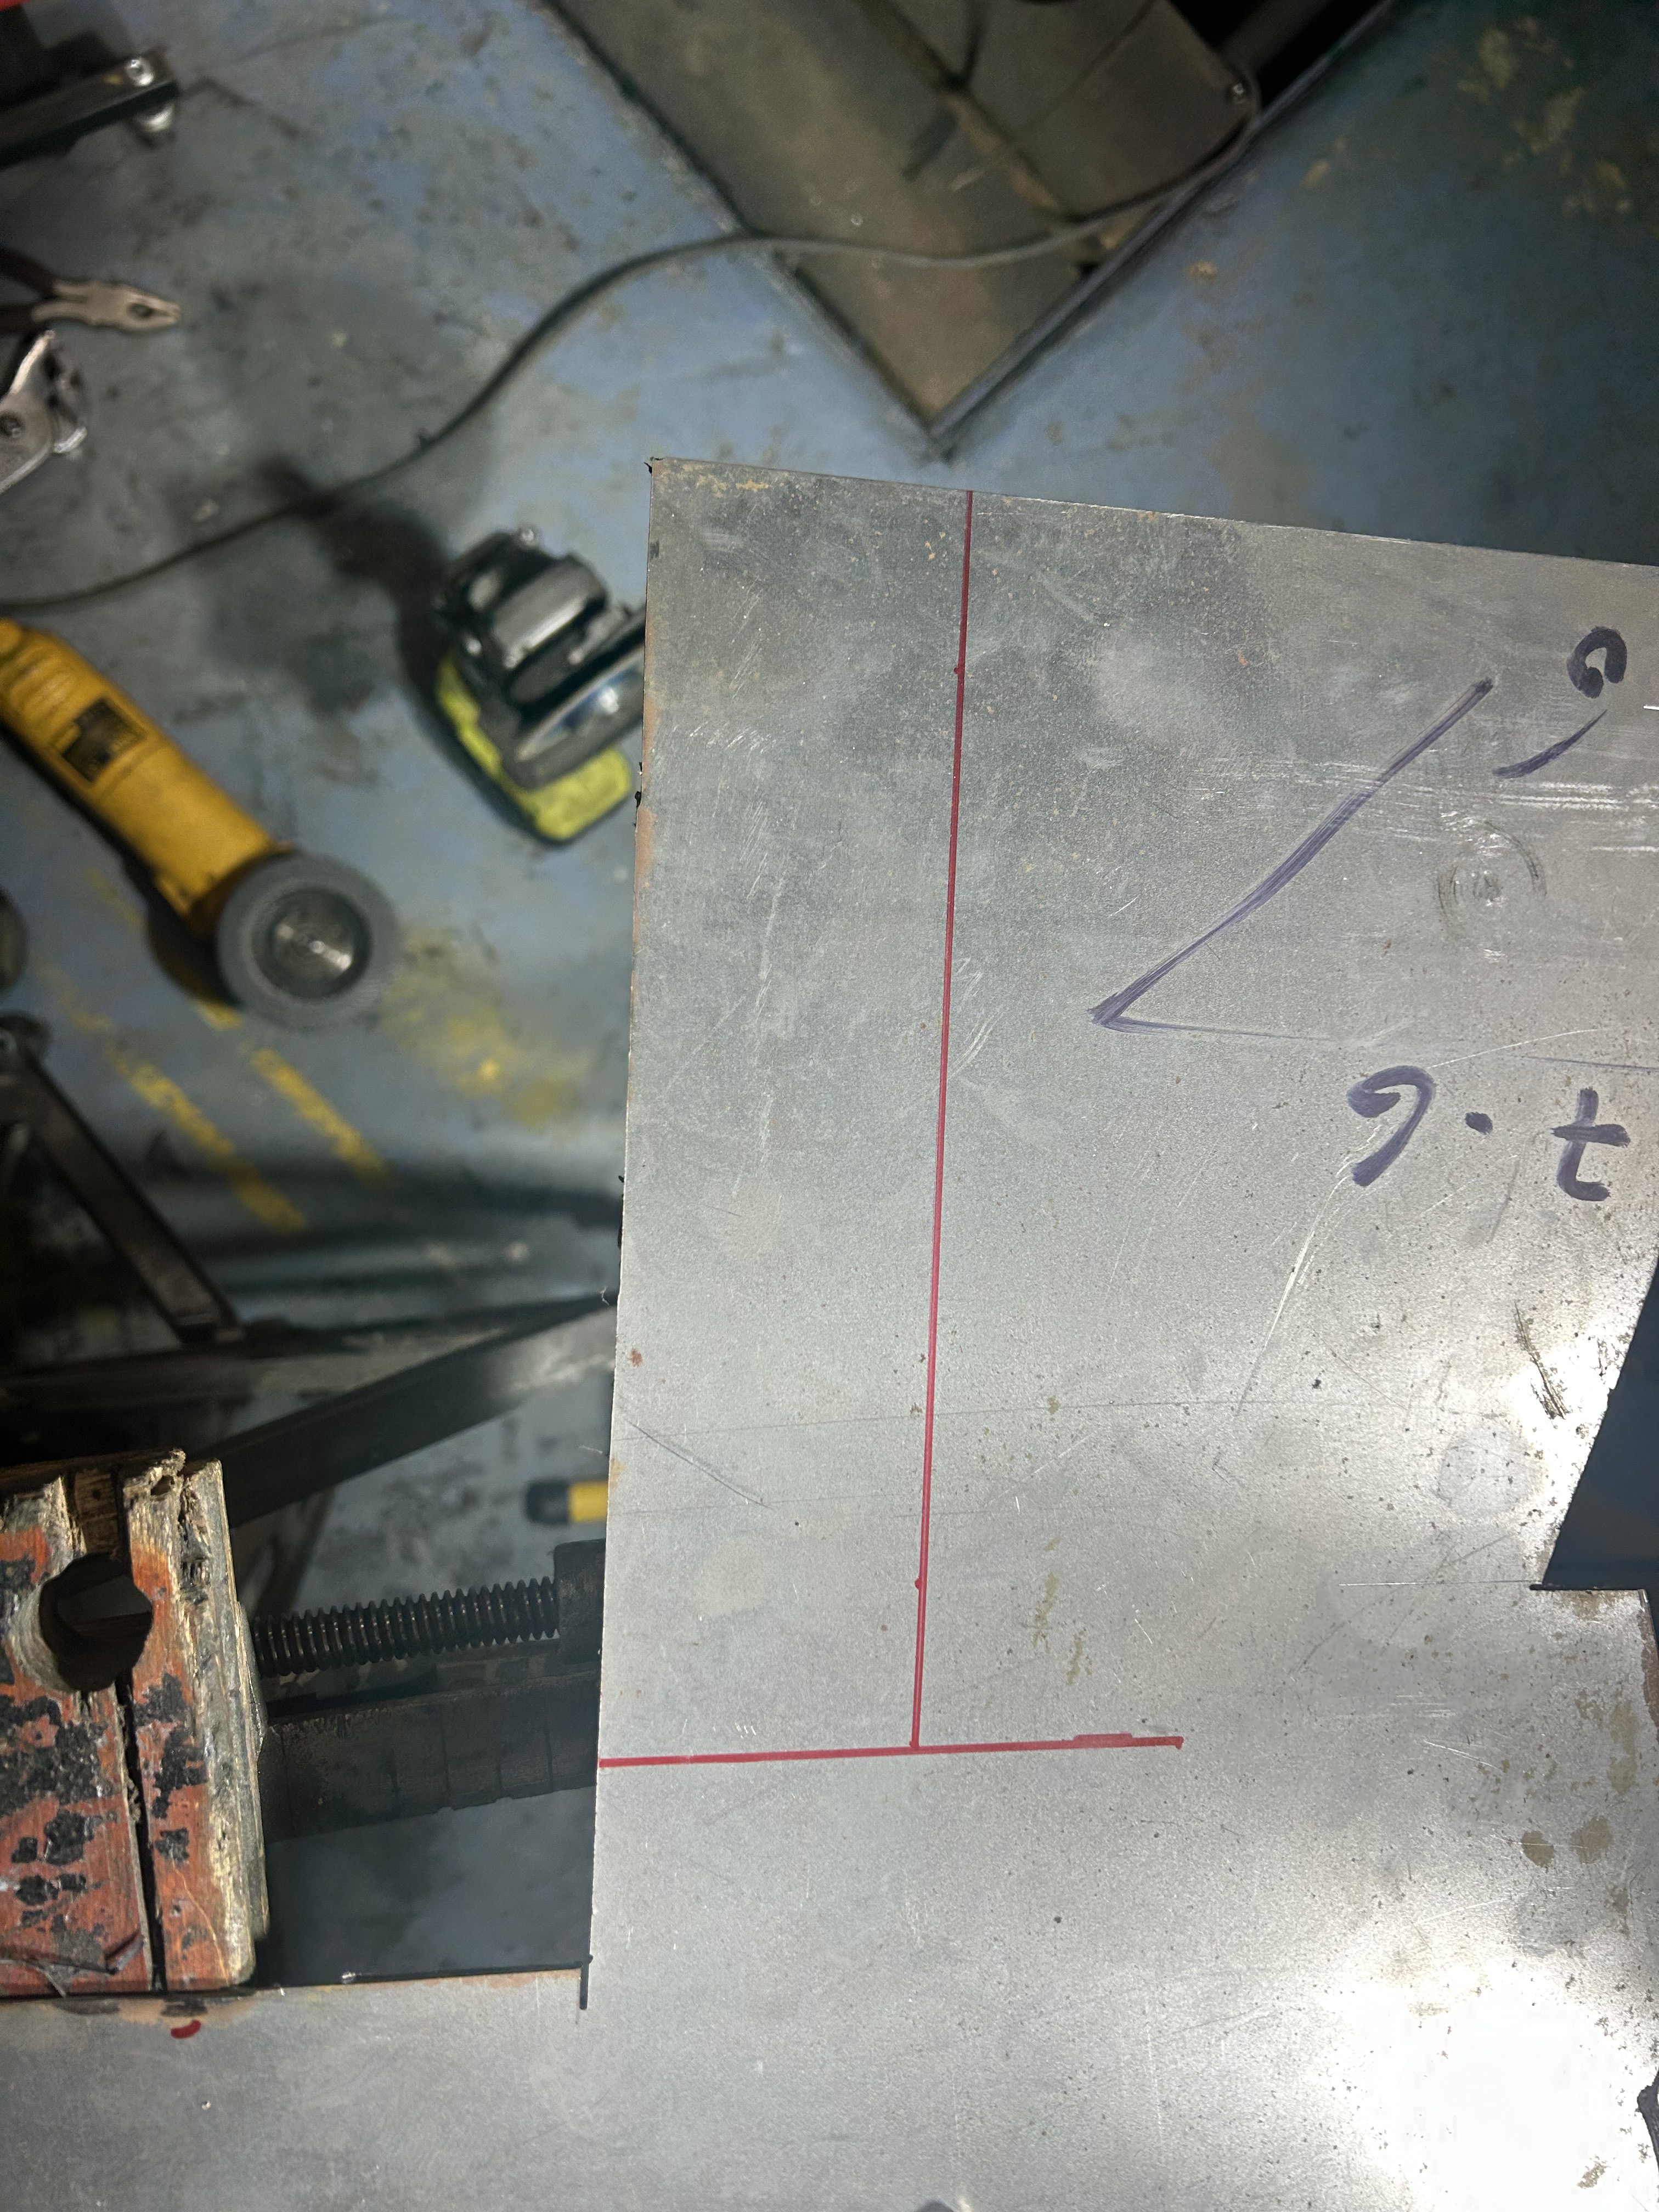 Untitled Untitled by Nevtiger, on Flickr This is better  Untitled Untitled by Nevtiger, on Flickr  Untitled Untitled by Nevtiger, on Flickr need to bend into a U shape and then fit it up. |
| |
|
|
|
|
|
|
|
It's a bit hard to see but this edge is quite flimsy. So i need to strengthen it. I could put a return edge on it but i think that might stop airflow to the radiator, every little helps! So a flat bar of 2mm should help.  Untitled Untitled by Nevtiger, on Flickr I need it to look hard nice so some nice bends at each end to tie it back in to the front panel should help.  Untitled Untitled by Nevtiger, on Flickr Before i finish that off i need to tie into the vertical fillet that support the bonnet latch. I used the original one turned through 90 degrees but for some reason really really cocked up some holes.  Untitled Untitled by Nevtiger, on Flickr I blame the temperature of the garage being sub zero. So. Start again.  Untitled Untitled by Nevtiger, on Flickr This is better  Untitled Untitled by Nevtiger, on Flickr  Untitled Untitled by Nevtiger, on Flickr need to bend into a U shape and then fit it up. |
| |
|
|
|
|
|
|
|
First weld on the a strengthening bit  Untitled Untitled by Nevtiger, on Flickr  Untitled Untitled by Nevtiger, on Flickr Then weld on the new vertical part.  Untitled Untitled by Nevtiger, on Flickr  Untitled Untitled by Nevtiger, on Flickr Check for clearance  Untitled Untitled by Nevtiger, on Flickr Declare ones self as happy. The very last bit of welding needed is on the headlight boxes. Not sure why i didnt do these back when i was doing the shell but as the gas is almost empty i better get this right. measure, cut, weld, bend, yay.  Untitled Untitled by Nevtiger, on Flickr 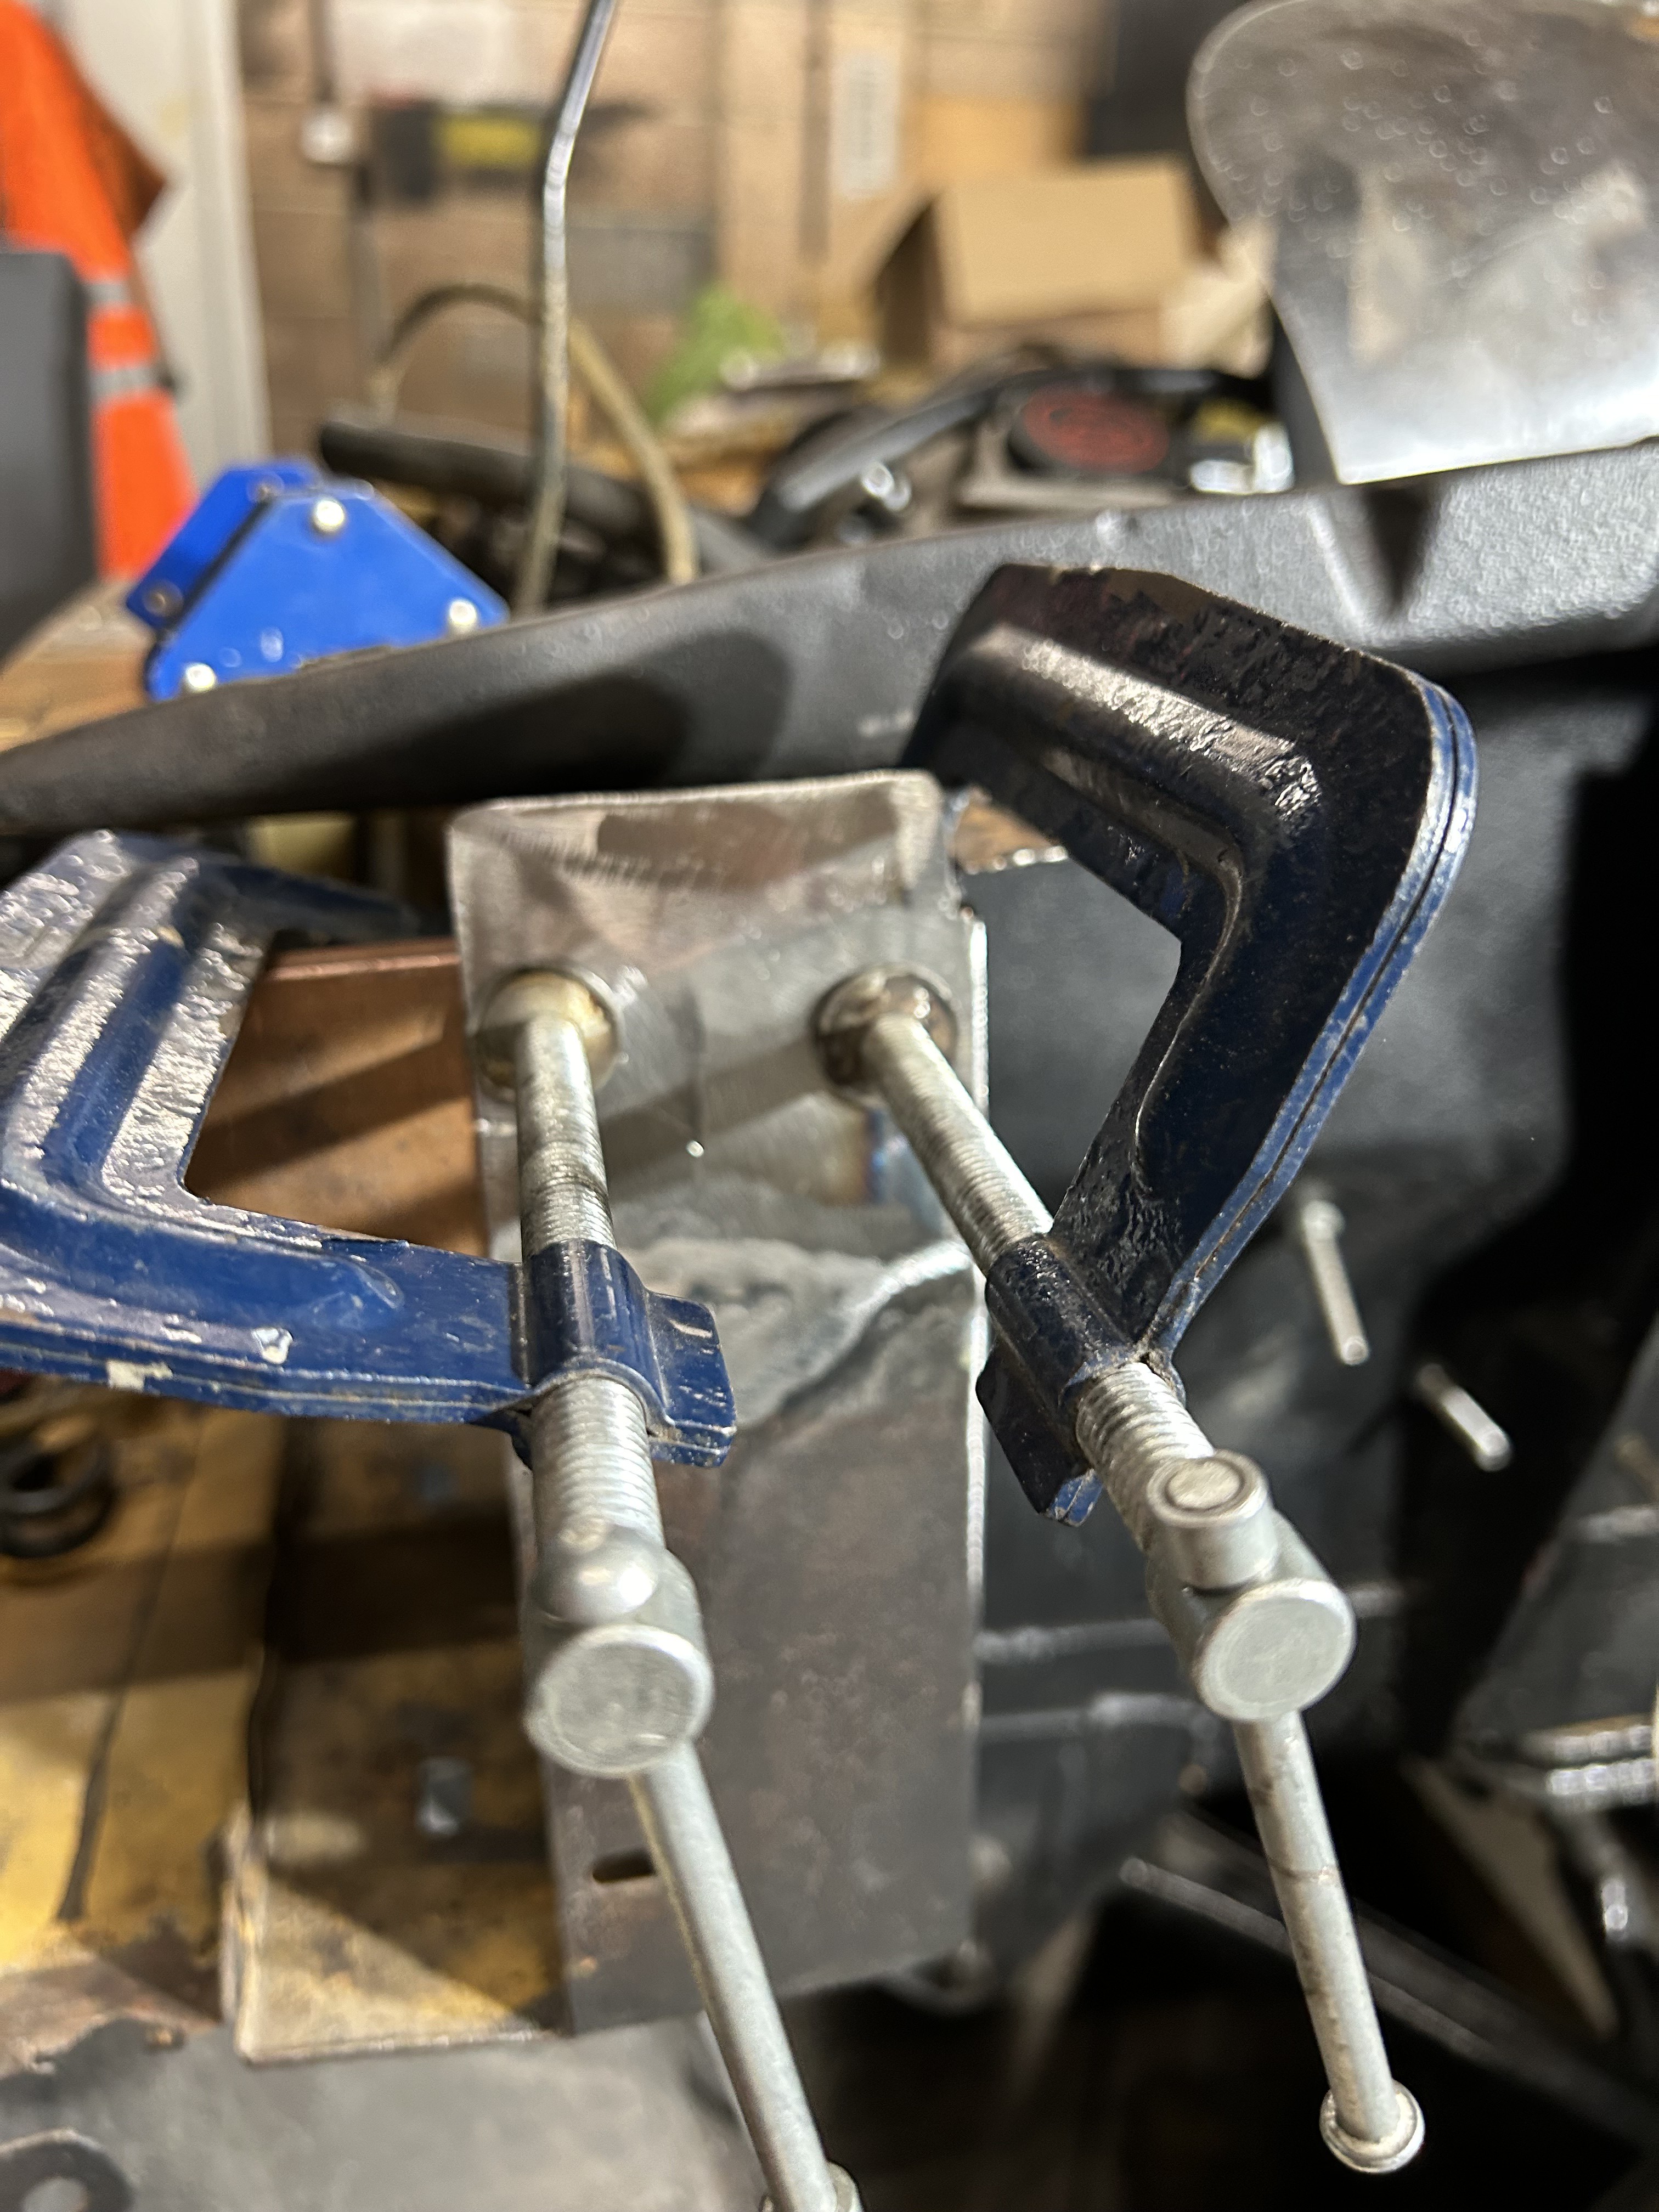 Untitled Untitled by Nevtiger, on Flickr And before treatment and paint 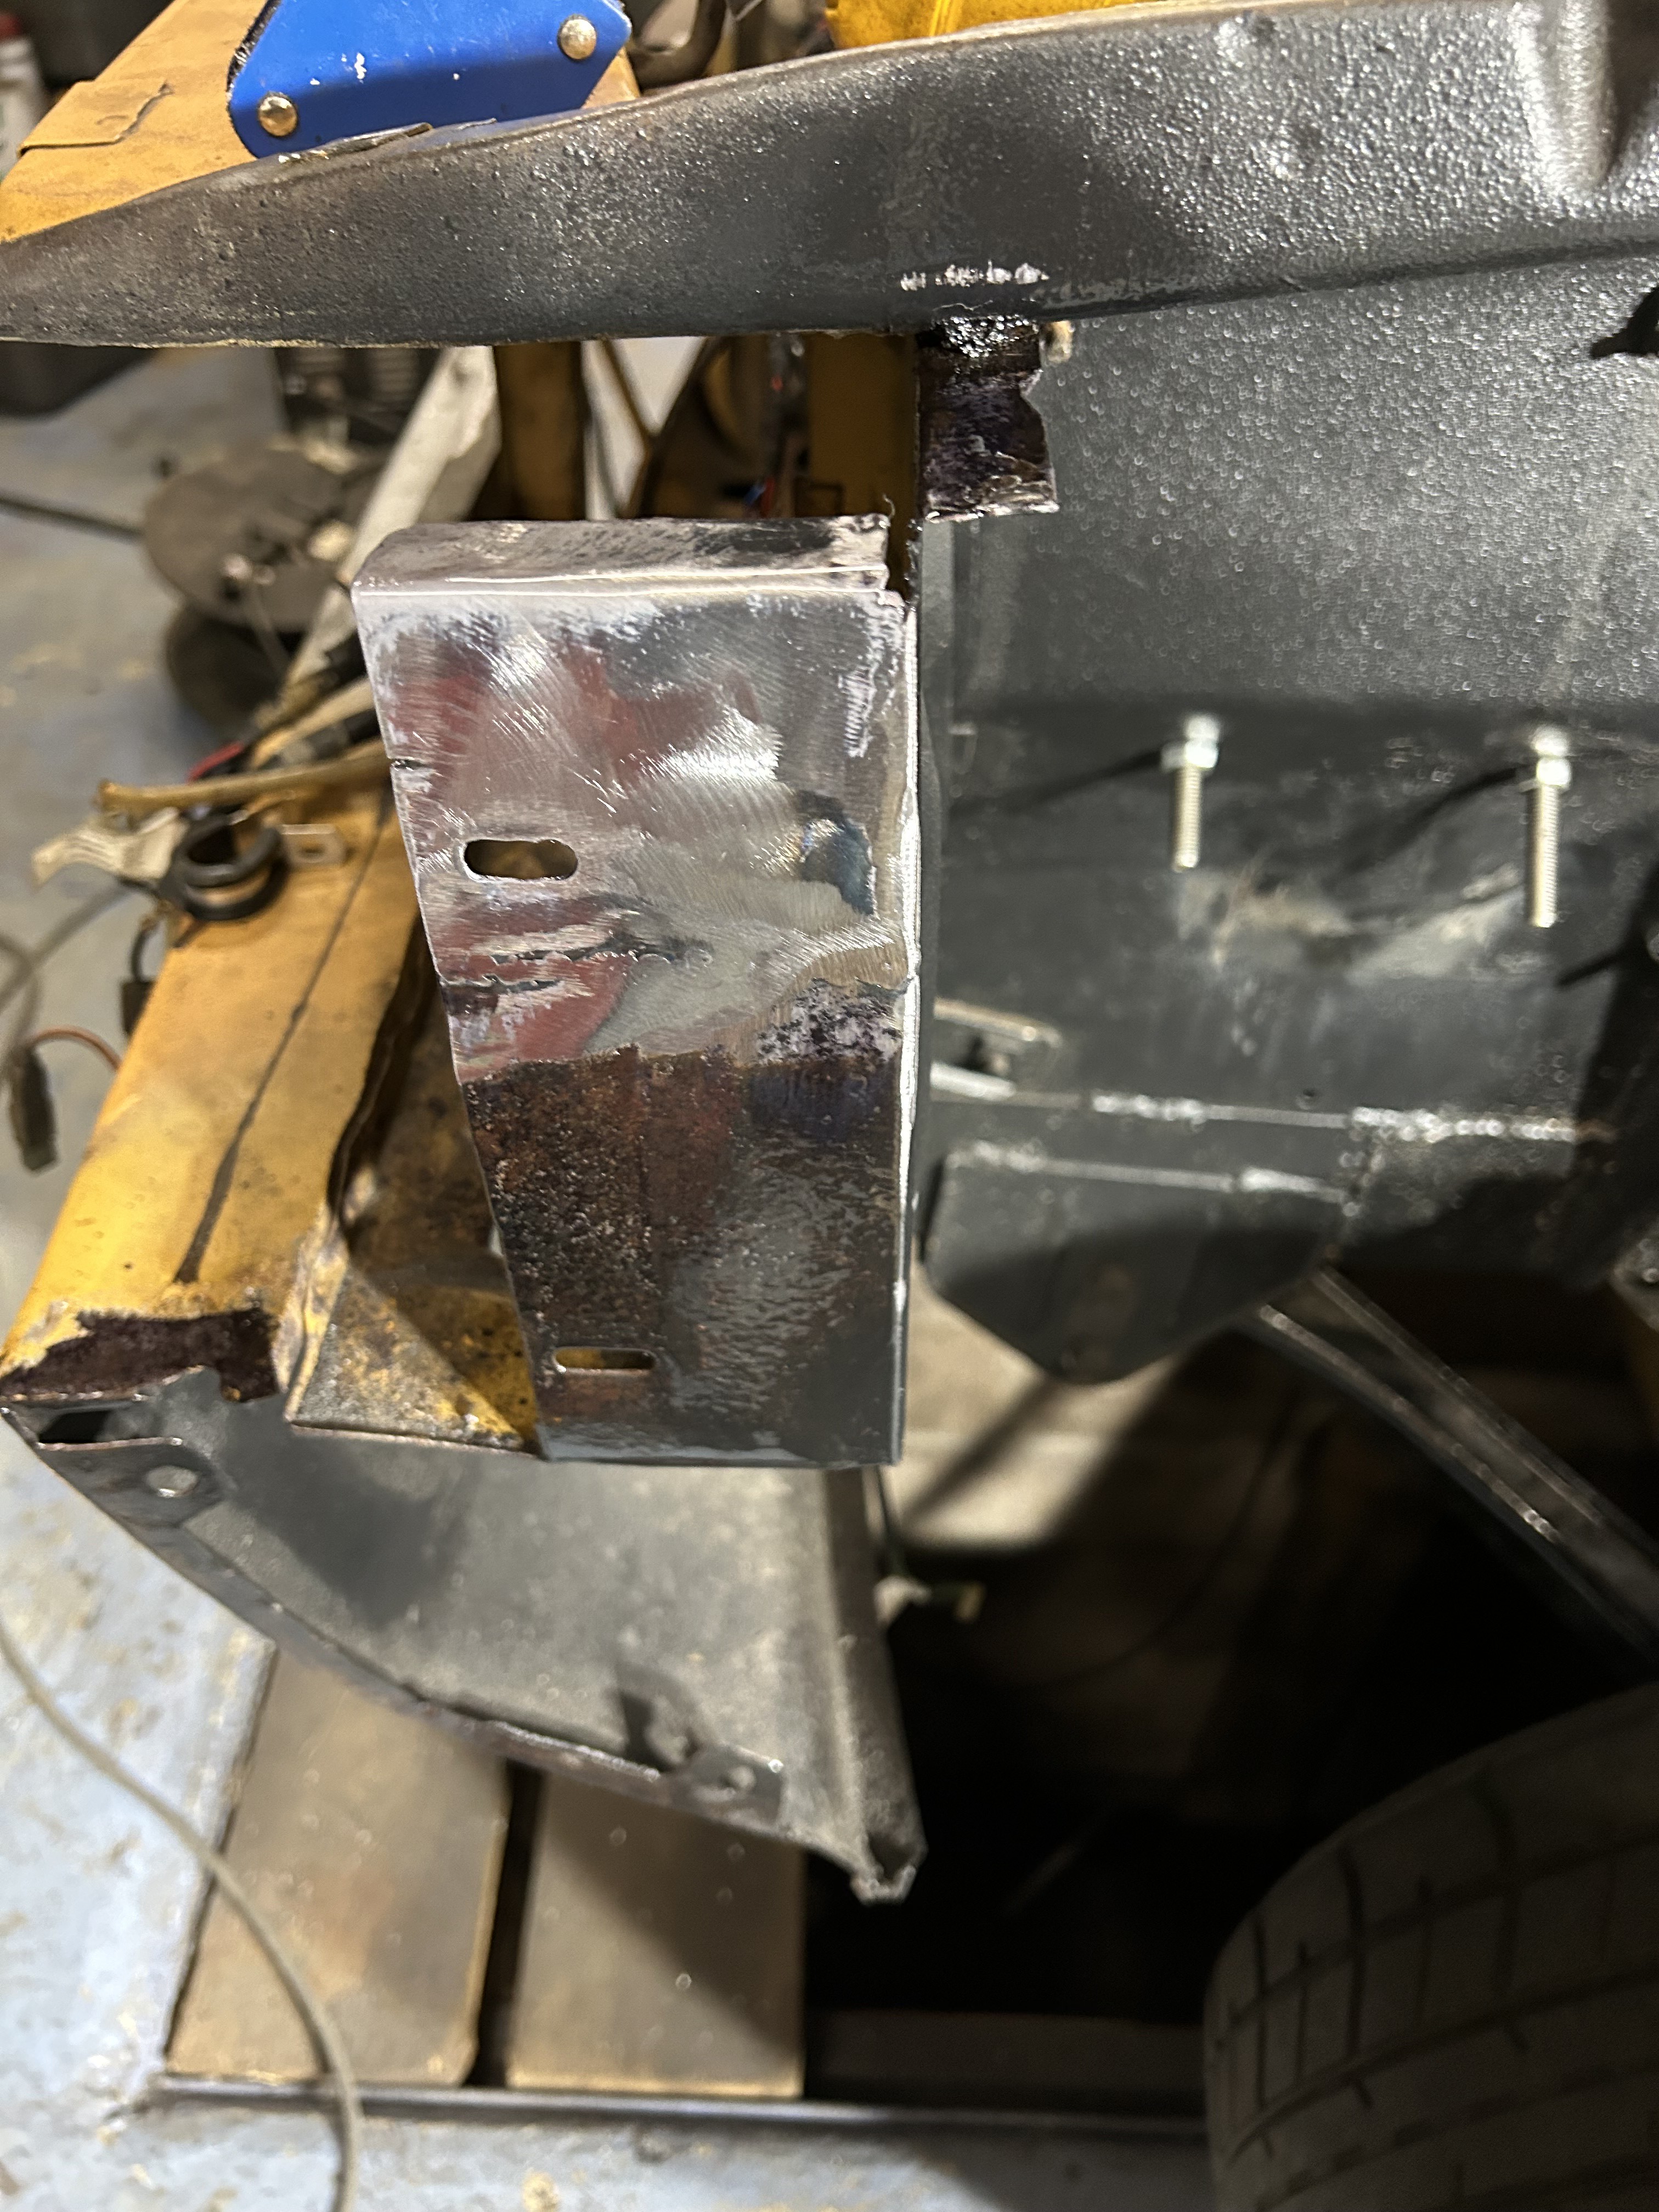 Untitled Untitled by Nevtiger, on Flickr Now back to the loom and ECU. |
| |
|
|
|
|
|
|
|
Remember i had a Sunbeam Lotus (Black) 'parcel shelf' and i took it apart? All marked out on a sheet of Aluminium 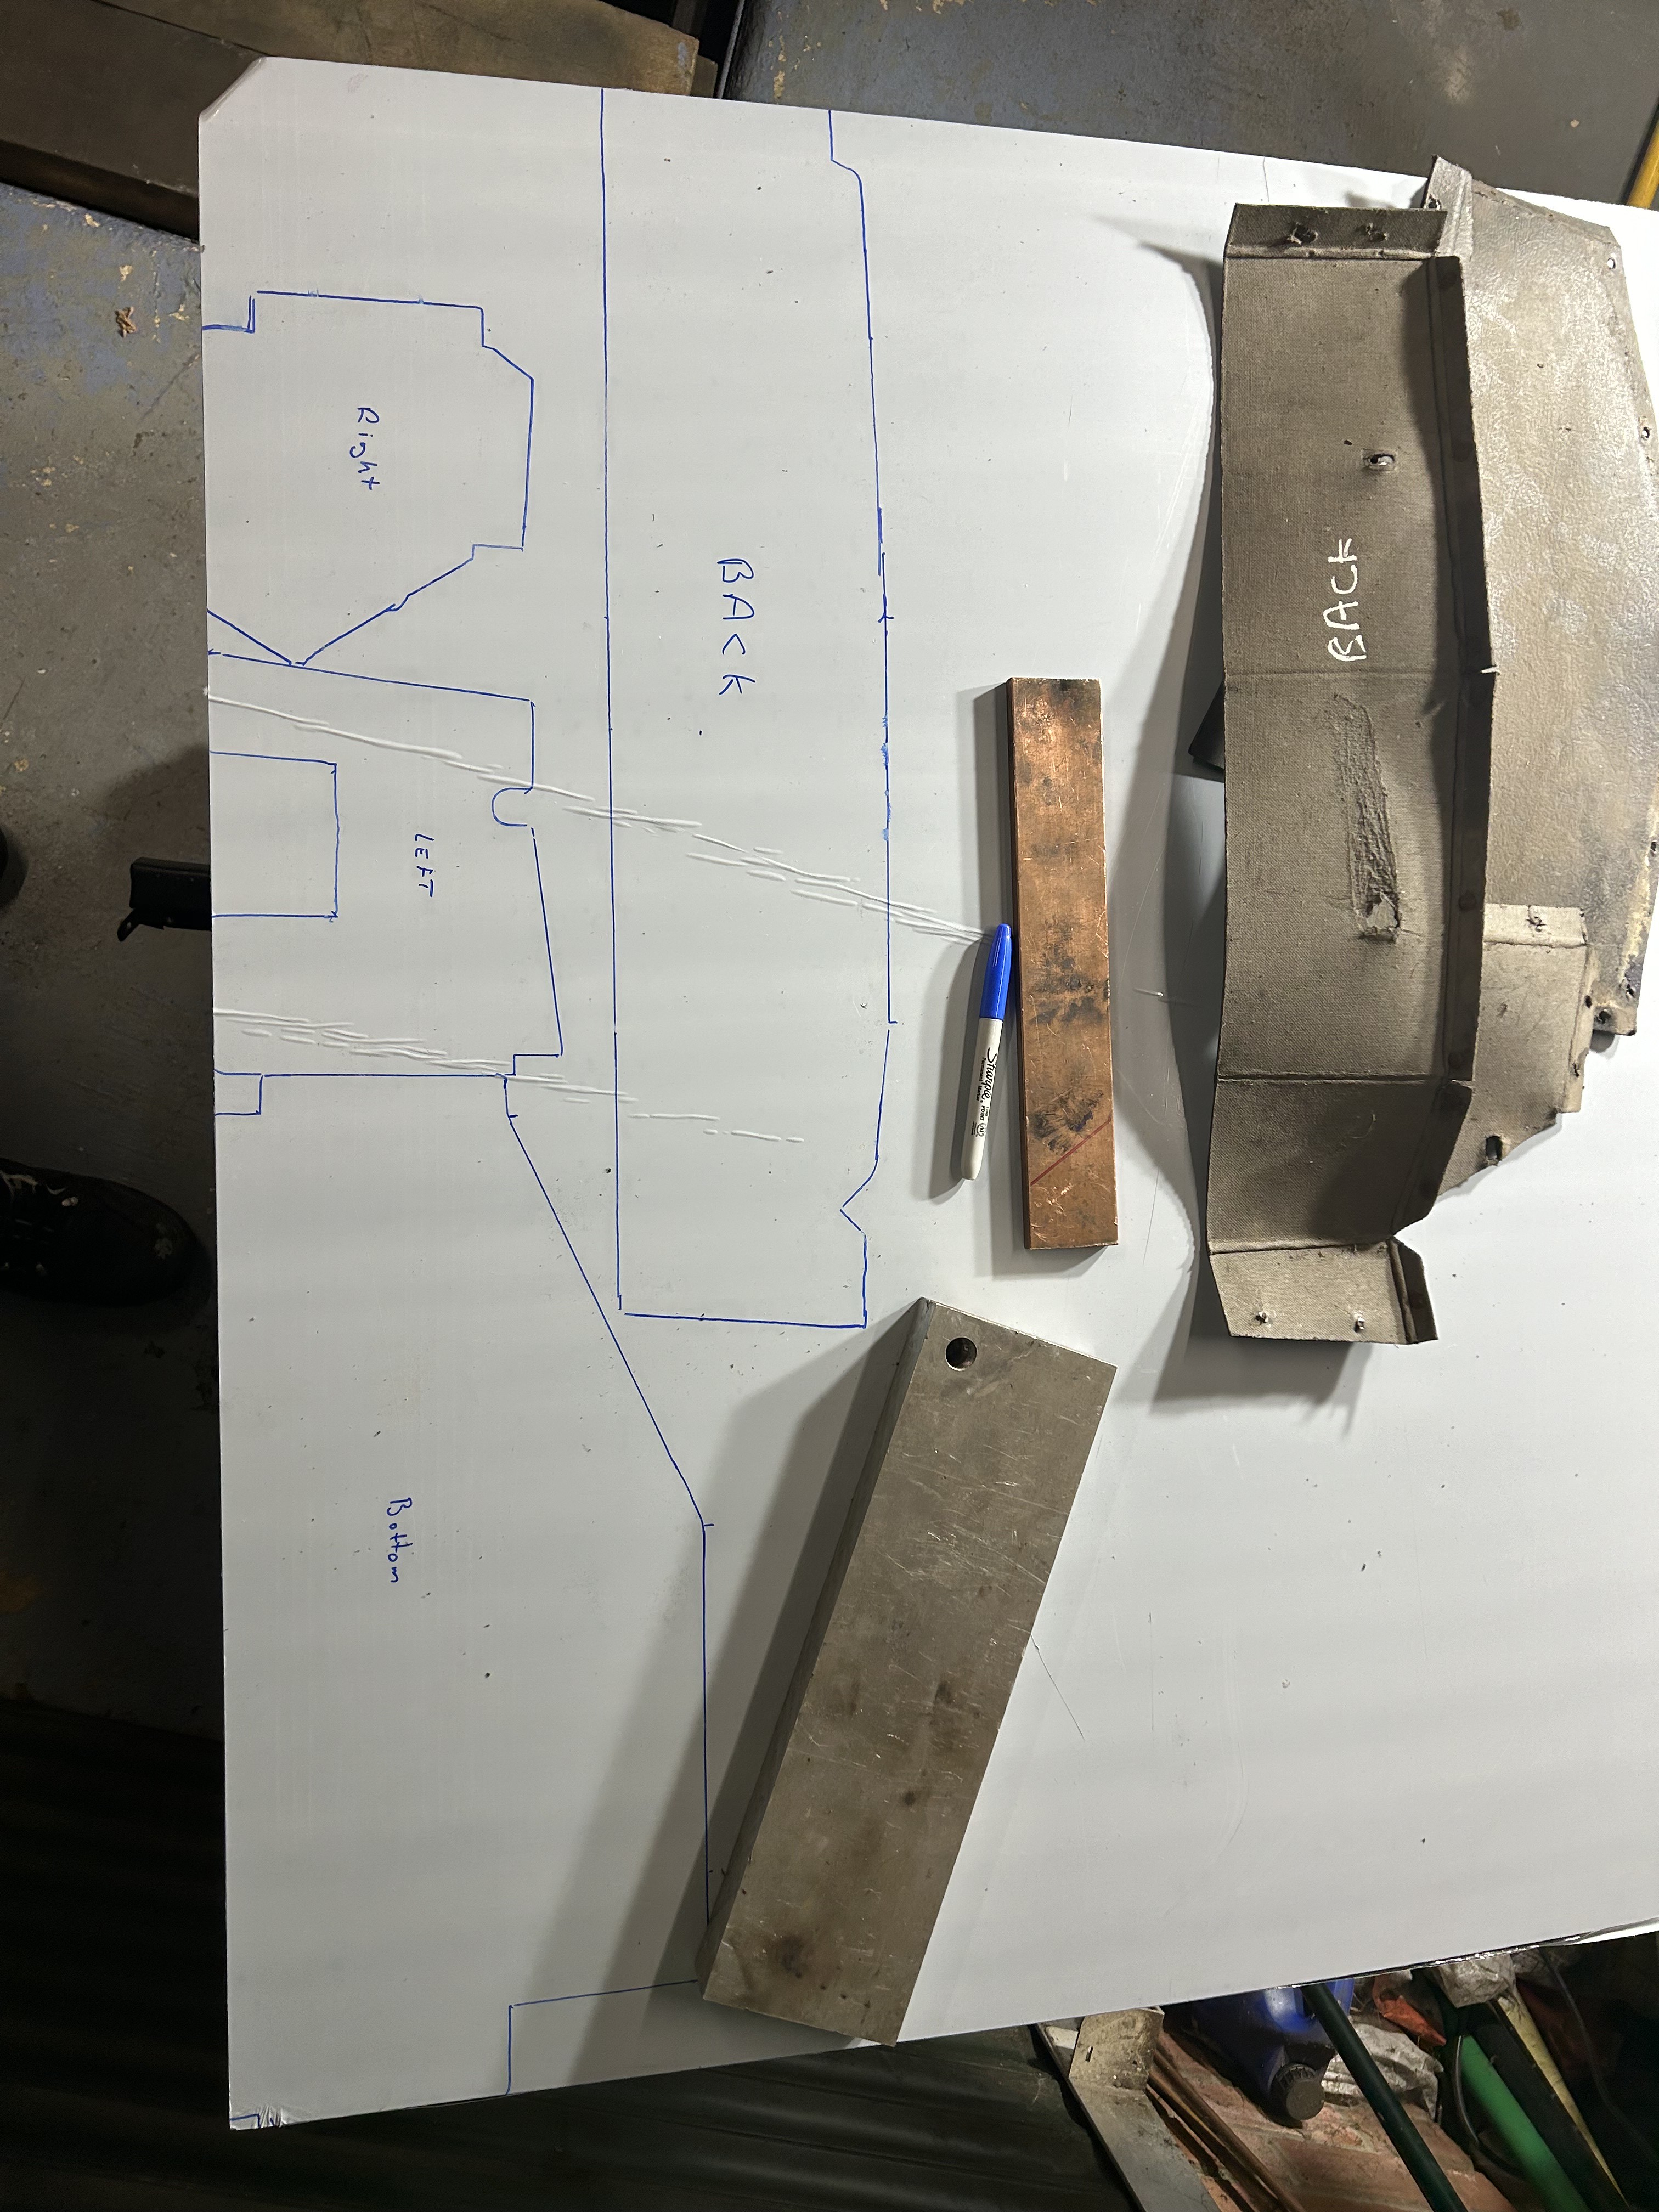 Untitled Untitled by Nevtiger, on Flickr First bit cut and bent - before i cleaned the edges by the looks of things. Bit to keen. Some assembly. I have use bolts as i will need to take it apart again to fit vinyl and mount the ECU and fuse box  Untitled Untitled by Nevtiger, on Flickr Clamp, drill, bolt. This will get riveted eventually.  Untitled Untitled by Nevtiger, on Flickr And finally here we are.  Untitled Untitled by Nevtiger, on Flickr  Untitled Untitled by Nevtiger, on Flickr  Untitled Untitled by Nevtiger, on Flickr It would be far neater to do the final assembly with a TIG (and have never tried). But i don't have one and sort of wanted it to be a facsimile of the original. |
| |
|
|
stealthstylz
Club Retro Rides Member
Posts: 14,960
Club RR Member Number: 174
|
|
|
|
|
Looked to be going really well.
|
| |
|
|
|
|
|
|
|
I'm having real trouble logging in and accessing my threads currently? With the parcel shelf made that gives me an idea of where to put the loom through. Only needs a 38mm hole. I didnt have a 38mm hole saw but Screwfix did.  Untitled Untitled by Nevtiger, on Flickr My idea is to mount the ECU on the underside of the shelf and then the Relays/Fuses next to it. A bit like this:  Untitled Untitled by Nevtiger, on Flickr It fits so putting everything on there looks like this  Untitled Untitled by Nevtiger, on Flickr  Untitled Untitled by Nevtiger, on Flickr  Untitled Untitled by Nevtiger, on Flickr Then with suitable domed or counter sunk bolts i can then put a vinyl covered floor in there and no one will notice. I might move the main relay and fuses into the new relay/fuse holder but that will mean extending the wires which I'm not overly keen on. Once that was done i needed to run the Front and rear fuel pump wiring, fans wiring, feed from battery and Tacho and Ignition input wires.  Untitled Untitled by Nevtiger, on Flickr  Untitled Untitled by Nevtiger, on Flickr Now its time to take the engine back out, tidy and terminate the wiring and then strip everything out ready for paint!!! |
| |
|
|
|
|
|
Dec 20, 2023 16:00:18 GMT
|
Time to get the engine out 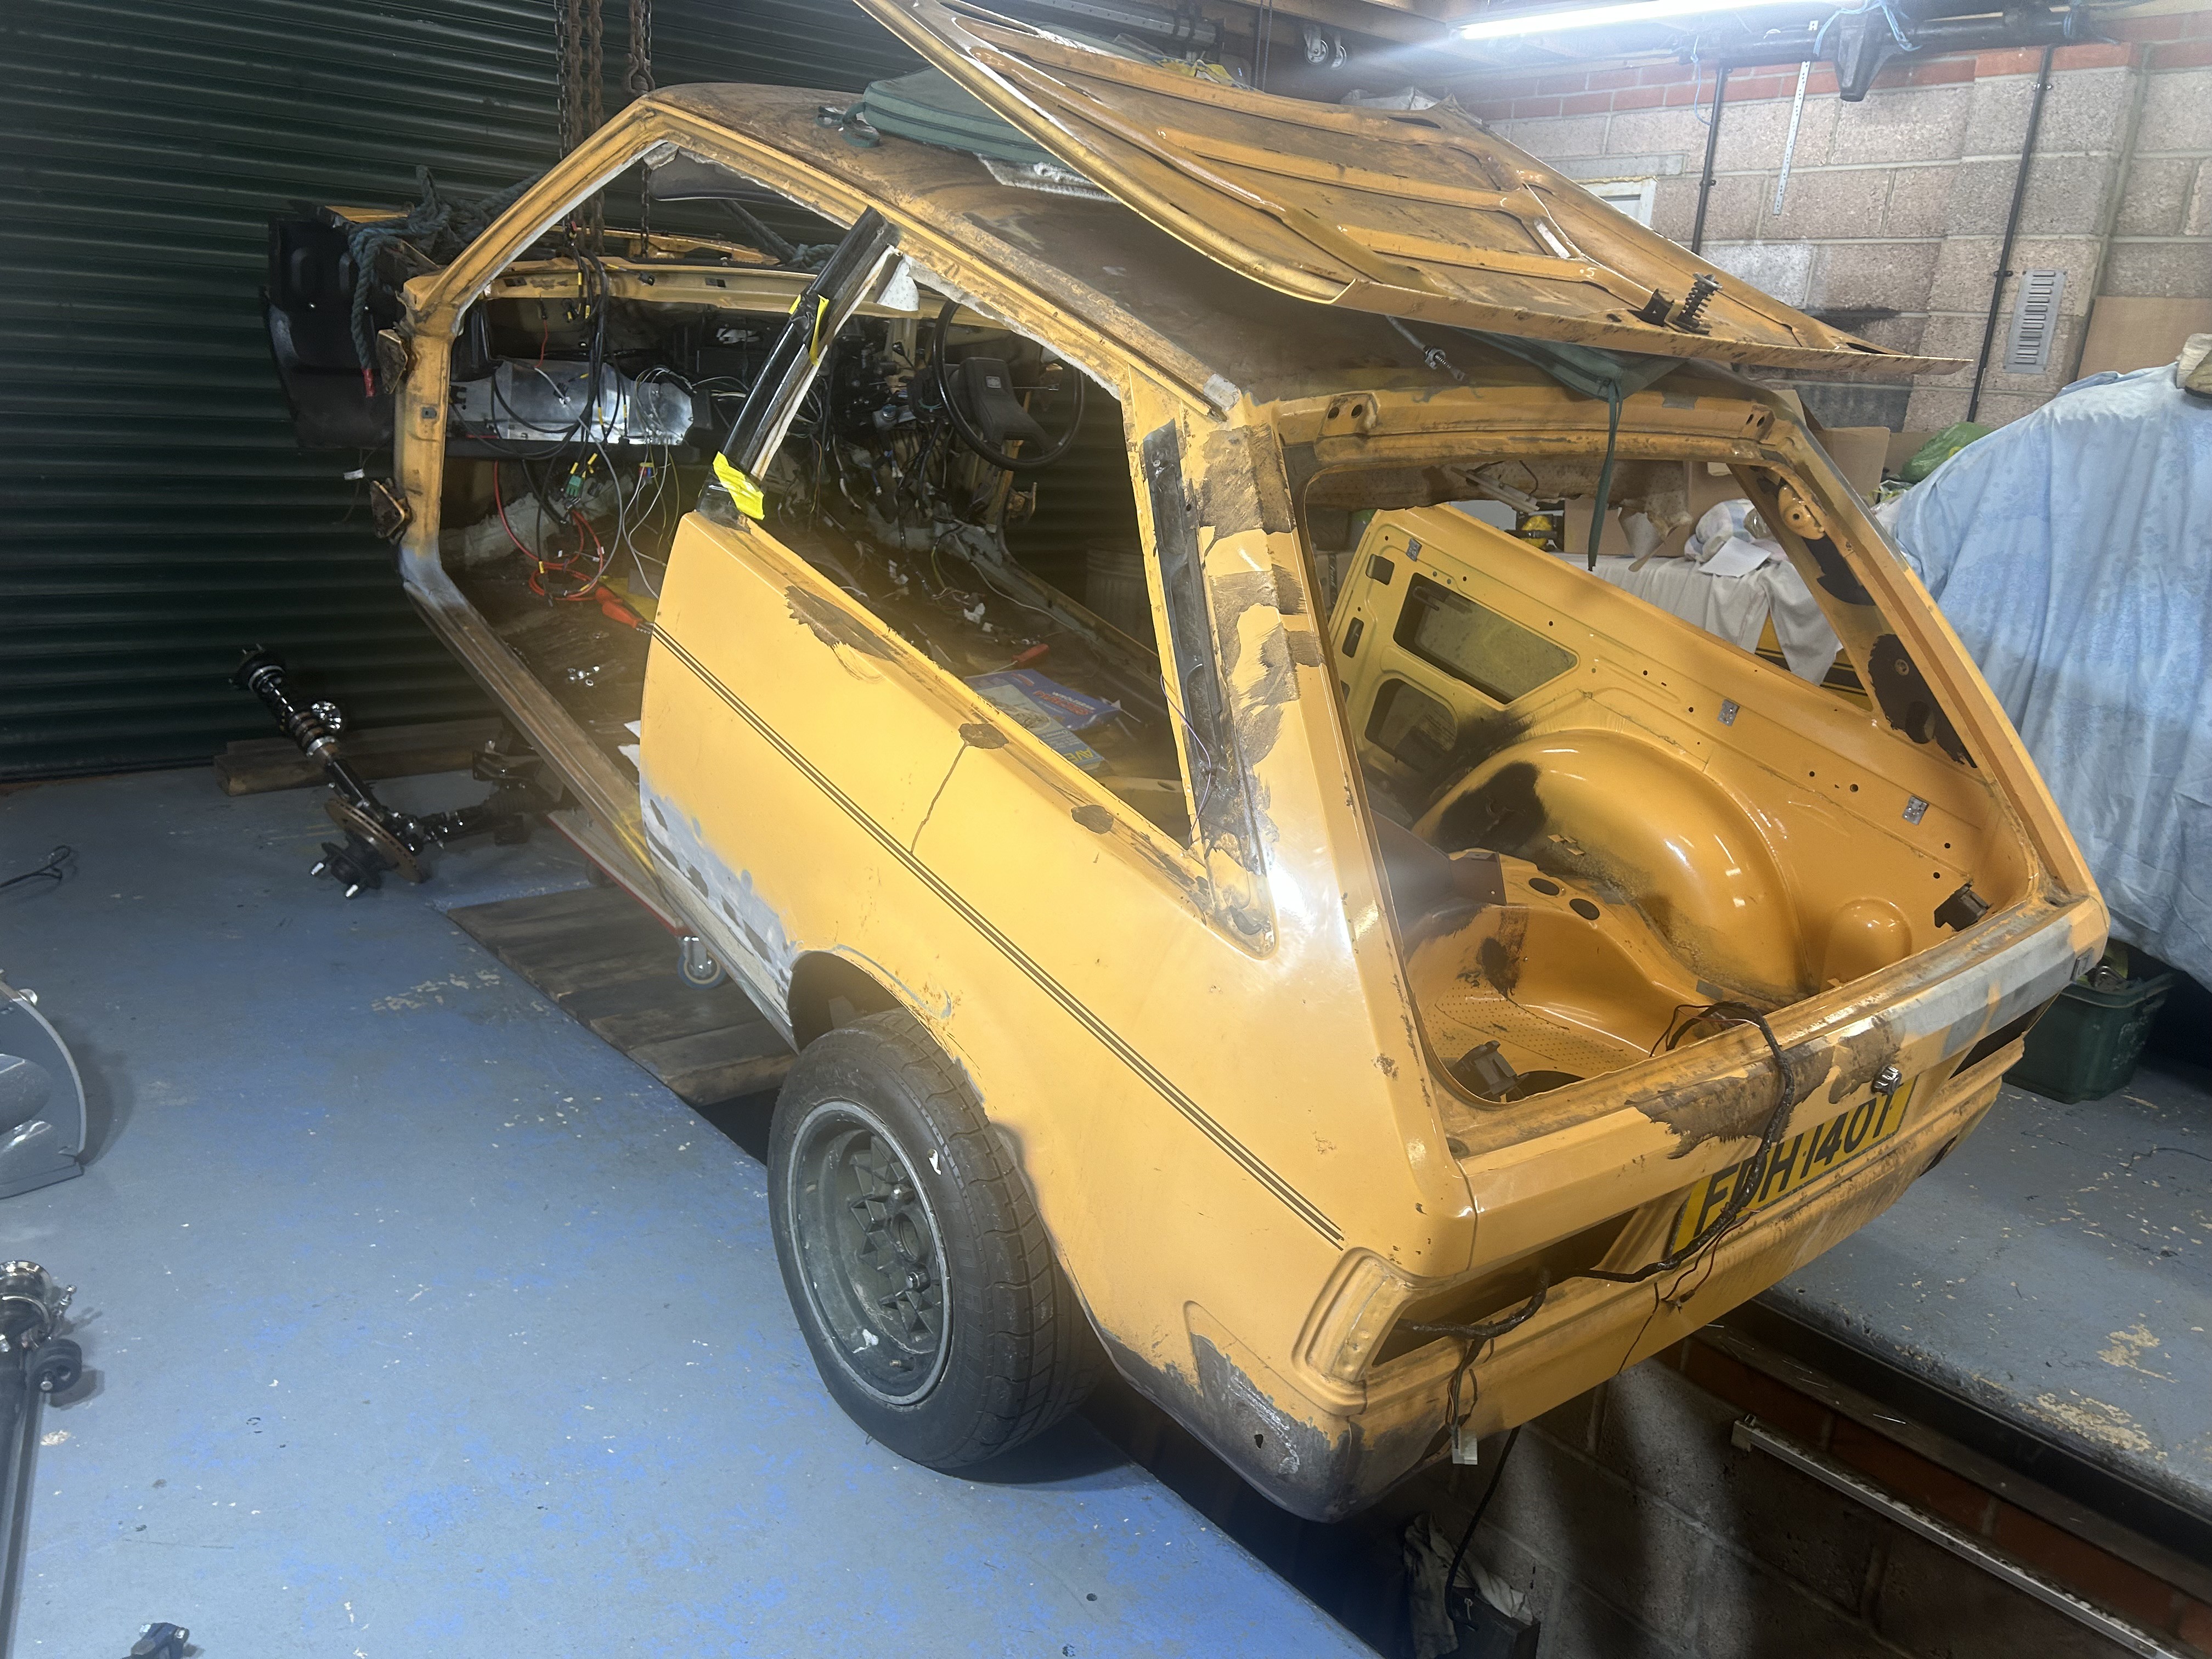 Untitled Untitled by Nevtiger, on Flickr High enough now  Untitled Untitled by Nevtiger, on Flickr And gearbox separated from the engine. Whilst i was at it i removed the slave cylinder as i shall be using a concentric one now.  Untitled Untitled by Nevtiger, on Flickr |
| |
|
|
|
|
|
Dec 20, 2023 21:24:48 GMT
|
|
Out of interest, why would you convert to concentric clutch cylinder? They seem nothing but hassle ( my brother has gone through 2 in only a few rallies). And they are such a ball ache to replace
|
| |
|
|
|
|
|
|
|
jonsey Very good point. I happen to have got a concentric set up with the adaptor plate. I use a concentric set up on the Tiger and other than the initial bleed it has been trouble free. My initial concern was space but actually the slave fits without drama although close. I have moved it forward 10mm so need to alter the release arm slightly as well i guess. It might be a better solution if i can squeeze in a bleed hose to some where sensible - but i would need to do that on the concentric as well. Hmmmm, you have me thinking now!!! Thank you
|
| |
|
|
|
|
 Untitled by Nevtiger, on Flickr
 Untitled by Nevtiger, on Flickr
 Untitled by Nevtiger, on Flickr
 Untitled by Nevtiger, on Flickr
 Untitled by Nevtiger, on Flickr
 Untitled by Nevtiger, on Flickr
 Untitled by Nevtiger, on Flickr
 Untitled by Nevtiger, on Flickr
 Untitled by Nevtiger, on Flickr
 Untitled by Nevtiger, on Flickr


