jonomisfit
Club Retro Rides Member
Posts: 1,782
Club RR Member Number: 49
|
|
Nov 17, 2019 21:11:37 GMT
|
Winter is coming. Metal goes rust in winter. Metal has started going rusty in the "summer". I cleaned down the seat and gave it a coat of primer to protect it a bit  P1020820 P1020820 by jono_misfit, on Flickr  P1020821 P1020821 by jono_misfit, on Flickr  P1020822 P1020822 by jono_misfit, on Flickr  P1020823 P1020823 by jono_misfit, on Flickr looks quite good in a colour. I think it makes the holes more apparent. Maybe I should paint it yellow so it looks like a proper swiss cheese? Once this has dried it'll get a top coat. Whilst I was doing that I cleaned up a few other bits and gave a coat of weld through primer, as I think there may be a few more bits to weld.  P1020824 P1020824 by jono_misfit, on Flickr drivers heel plate  P1020825 P1020825 by jono_misfit, on Flickr I also cleaned back and painted a few bits of the transmission tunnel as well. Next job may well be back onto the other morris seat. |
| |
|
|
|
|
jonomisfit
Club Retro Rides Member
Posts: 1,782
Club RR Member Number: 49
|
|
Nov 17, 2019 21:00:56 GMT
|
I had a quick sort of tidy up, put the bumpers back out the way and moved the cars round a bit. Then trial fitted the engine, made much easier by the stands as the balance is such I can just lift one end of the car up without too much effort (when the shell is bare...)  P1020809 P1020809 by jono_misfit, on Flickr  P1020810 P1020810 by jono_misfit, on Flickr lifted up into position  P1020811 P1020811 by jono_misfit, on Flickr a bit tight here  P1020812 P1020812 by jono_misfit, on Flickr quite a bit of space to the bulkhead  P1020813 P1020813 by jono_misfit, on Flickr Decided I needed to do this properly and not guess on the space front, dropped the engine out again. Added the gearbox and lifted back in.  P1020815 P1020815 by jono_misfit, on Flickr a better clearance this time  P1020816 P1020816 by jono_misfit, on Flickr gearbox lines up nicely.  P1020818 P1020818 by jono_misfit, on Flickr its a weighty beast of a box  P1020819 P1020819 by jono_misfit, on Flickr I need to dig the bonnet out and check how it clears the engine. It looks very tall to me. I may need to make new engine mounts and drop the engine down slightly. Will see though. The bonnet is right at the back of the mezzanine, so not very enthusiastic about getting it down! |
| |
|
|
jonomisfit
Club Retro Rides Member
Posts: 1,782
Club RR Member Number: 49
|
|
Nov 15, 2019 20:55:08 GMT
|
I got a couple of hours on the car today. Finished cleaning back all the screws, excess weld, etc. primed the area and welded on the patches.  P1020802 P1020802 by jono_misfit, on Flickr for whatever reason the drivers side bumper mount has a reinforcing plate on it, but the passenger side doesnt, so whilst I was doing the repairs I made a doubler plate as well. 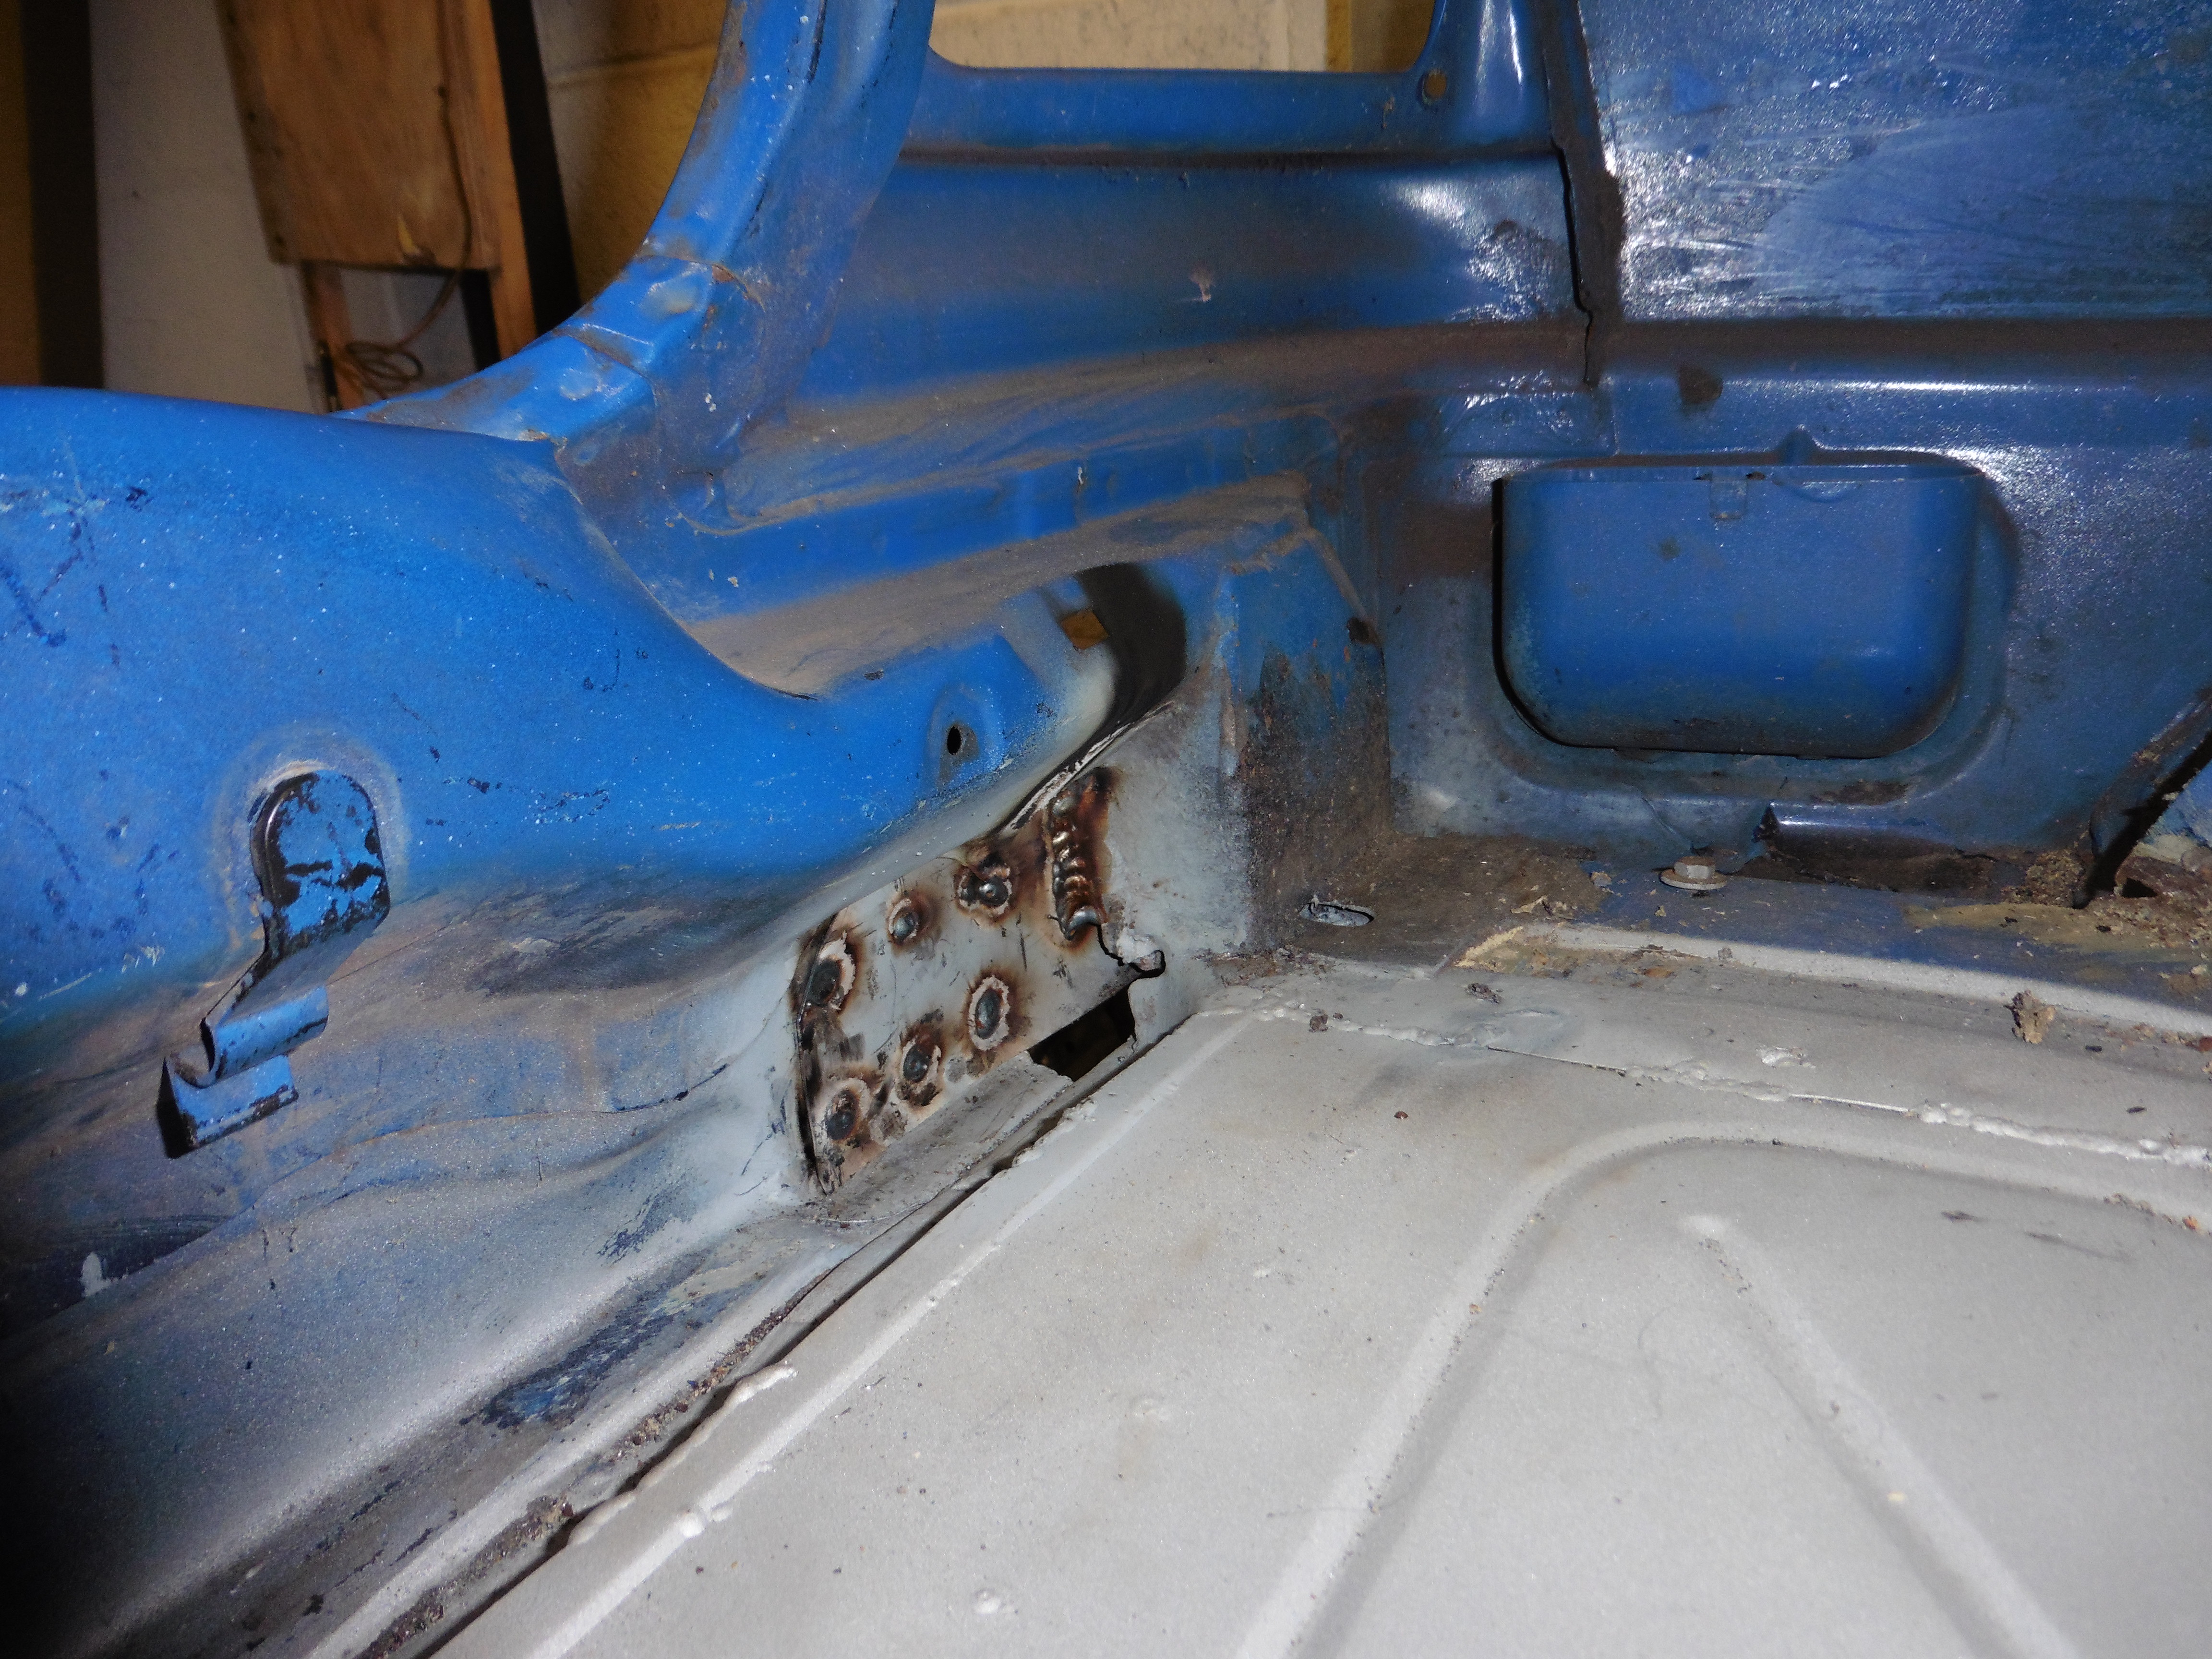 P1020803 P1020803 by jono_misfit, on Flickr I cleaned back the welds, zinc primed the metal inside, then made the external patch up and welded it in. I cleaned back those welds, then drilled out the bumper mounts in the doubler plate  P1020804 P1020804 by jono_misfit, on Flickr  P1020806 P1020806 by jono_misfit, on Flickr  P1020805 P1020805 by jono_misfit, on Flickr should hopefully distort less. And as the car is off the spit I thought i'd check the bumpers. rear, a great moulding and a great fit. A quality product  P1020807 P1020807 by jono_misfit, on Flickr and the front... very poor fit and not great quality  P1020808 P1020808 by jono_misfit, on Flickr The front bumper has quite a bad twist in it. Once the wings etc are on I may well bolt it all up, then heat the bumper so it relaxes its fit, otherwise it'll end up cracking on the mounts with the tension it'll be under. I think next job will be cleaning back seams and stitch welding. |
| |
|
|
jonomisfit
Club Retro Rides Member
Posts: 1,782
Club RR Member Number: 49
|
|
Nov 14, 2019 18:33:46 GMT
|
|
Migwelding forum is useful for recommendations.
There was a thread in general? Recently which had some suggestions.
I've got a sealy supermig 220 which works ok and is 230v, but if I was getting a new one it would probably be an inverter mig.
|
| |
Last Edit: Nov 14, 2019 18:34:09 GMT by jonomisfit
|
|
jonomisfit
Club Retro Rides Member
Posts: 1,782
Club RR Member Number: 49
|
|
Nov 14, 2019 18:28:09 GMT
|
|
Looks good.
We demand more swaged holes.
|
| |
|
|
jonomisfit
Club Retro Rides Member
Posts: 1,782
Club RR Member Number: 49
|
|
|
|
|
I'm not convinced the escort didn't have some wood in it at some point
|
| |
|
|
jonomisfit
Club Retro Rides Member
Posts: 1,782
Club RR Member Number: 49
|
|
Nov 11, 2019 18:17:28 GMT
|
|
Wood screws are a legit fix method....
|
| |
|
|
jonomisfit
Club Retro Rides Member
Posts: 1,782
Club RR Member Number: 49
|
|
|
|
|
My assumption is someone needed to fill holes and banged in some screws then welded them up....
|
| |
|
|
jonomisfit
Club Retro Rides Member
Posts: 1,782
Club RR Member Number: 49
|
|
Nov 10, 2019 21:12:46 GMT
|
cleaned up the hole  P1020784 P1020784 by jono_misfit, on Flickr closed the massive gap at the end of the chassis leg. I left a small hole in the top so it can drain if water gets in  P1020785 P1020785 by jono_misfit, on Flickr then forgot to take any more pics of this bit, but made a patch and welded it in. Done in two pieces, first a new upstand, then a plate that covers the whole hole. then onto the door bars  P1020786 P1020786 by jono_misfit, on Flickr I was lazy and bought a set of these, rather than make my own. The don't come notched for the tubes though.  P1020787 P1020787 by jono_misfit, on Flickr Made a cardboard template so I could work out where to trim  P1020788 P1020788 by jono_misfit, on Flickr then trimmed and welded in the gussets  P1020789 P1020789 by jono_misfit, on Flickr  P1020790 P1020790 by jono_misfit, on Flickr then did the other side  P1020791 P1020791 by jono_misfit, on Flickr  P1020792 P1020792 by jono_misfit, on Flickr then lowered the car onto its sill stands  P1020793 P1020793 by jono_misfit, on Flickr  P1020796 P1020796 by jono_misfit, on Flickr The threaded rod adjusters I put on the chassis spit worked great for lowering the car down. I also played raising it and they worked well on that too. Spit out  P1020794 P1020794 by jono_misfit, on Flickr and pushed back out of the way 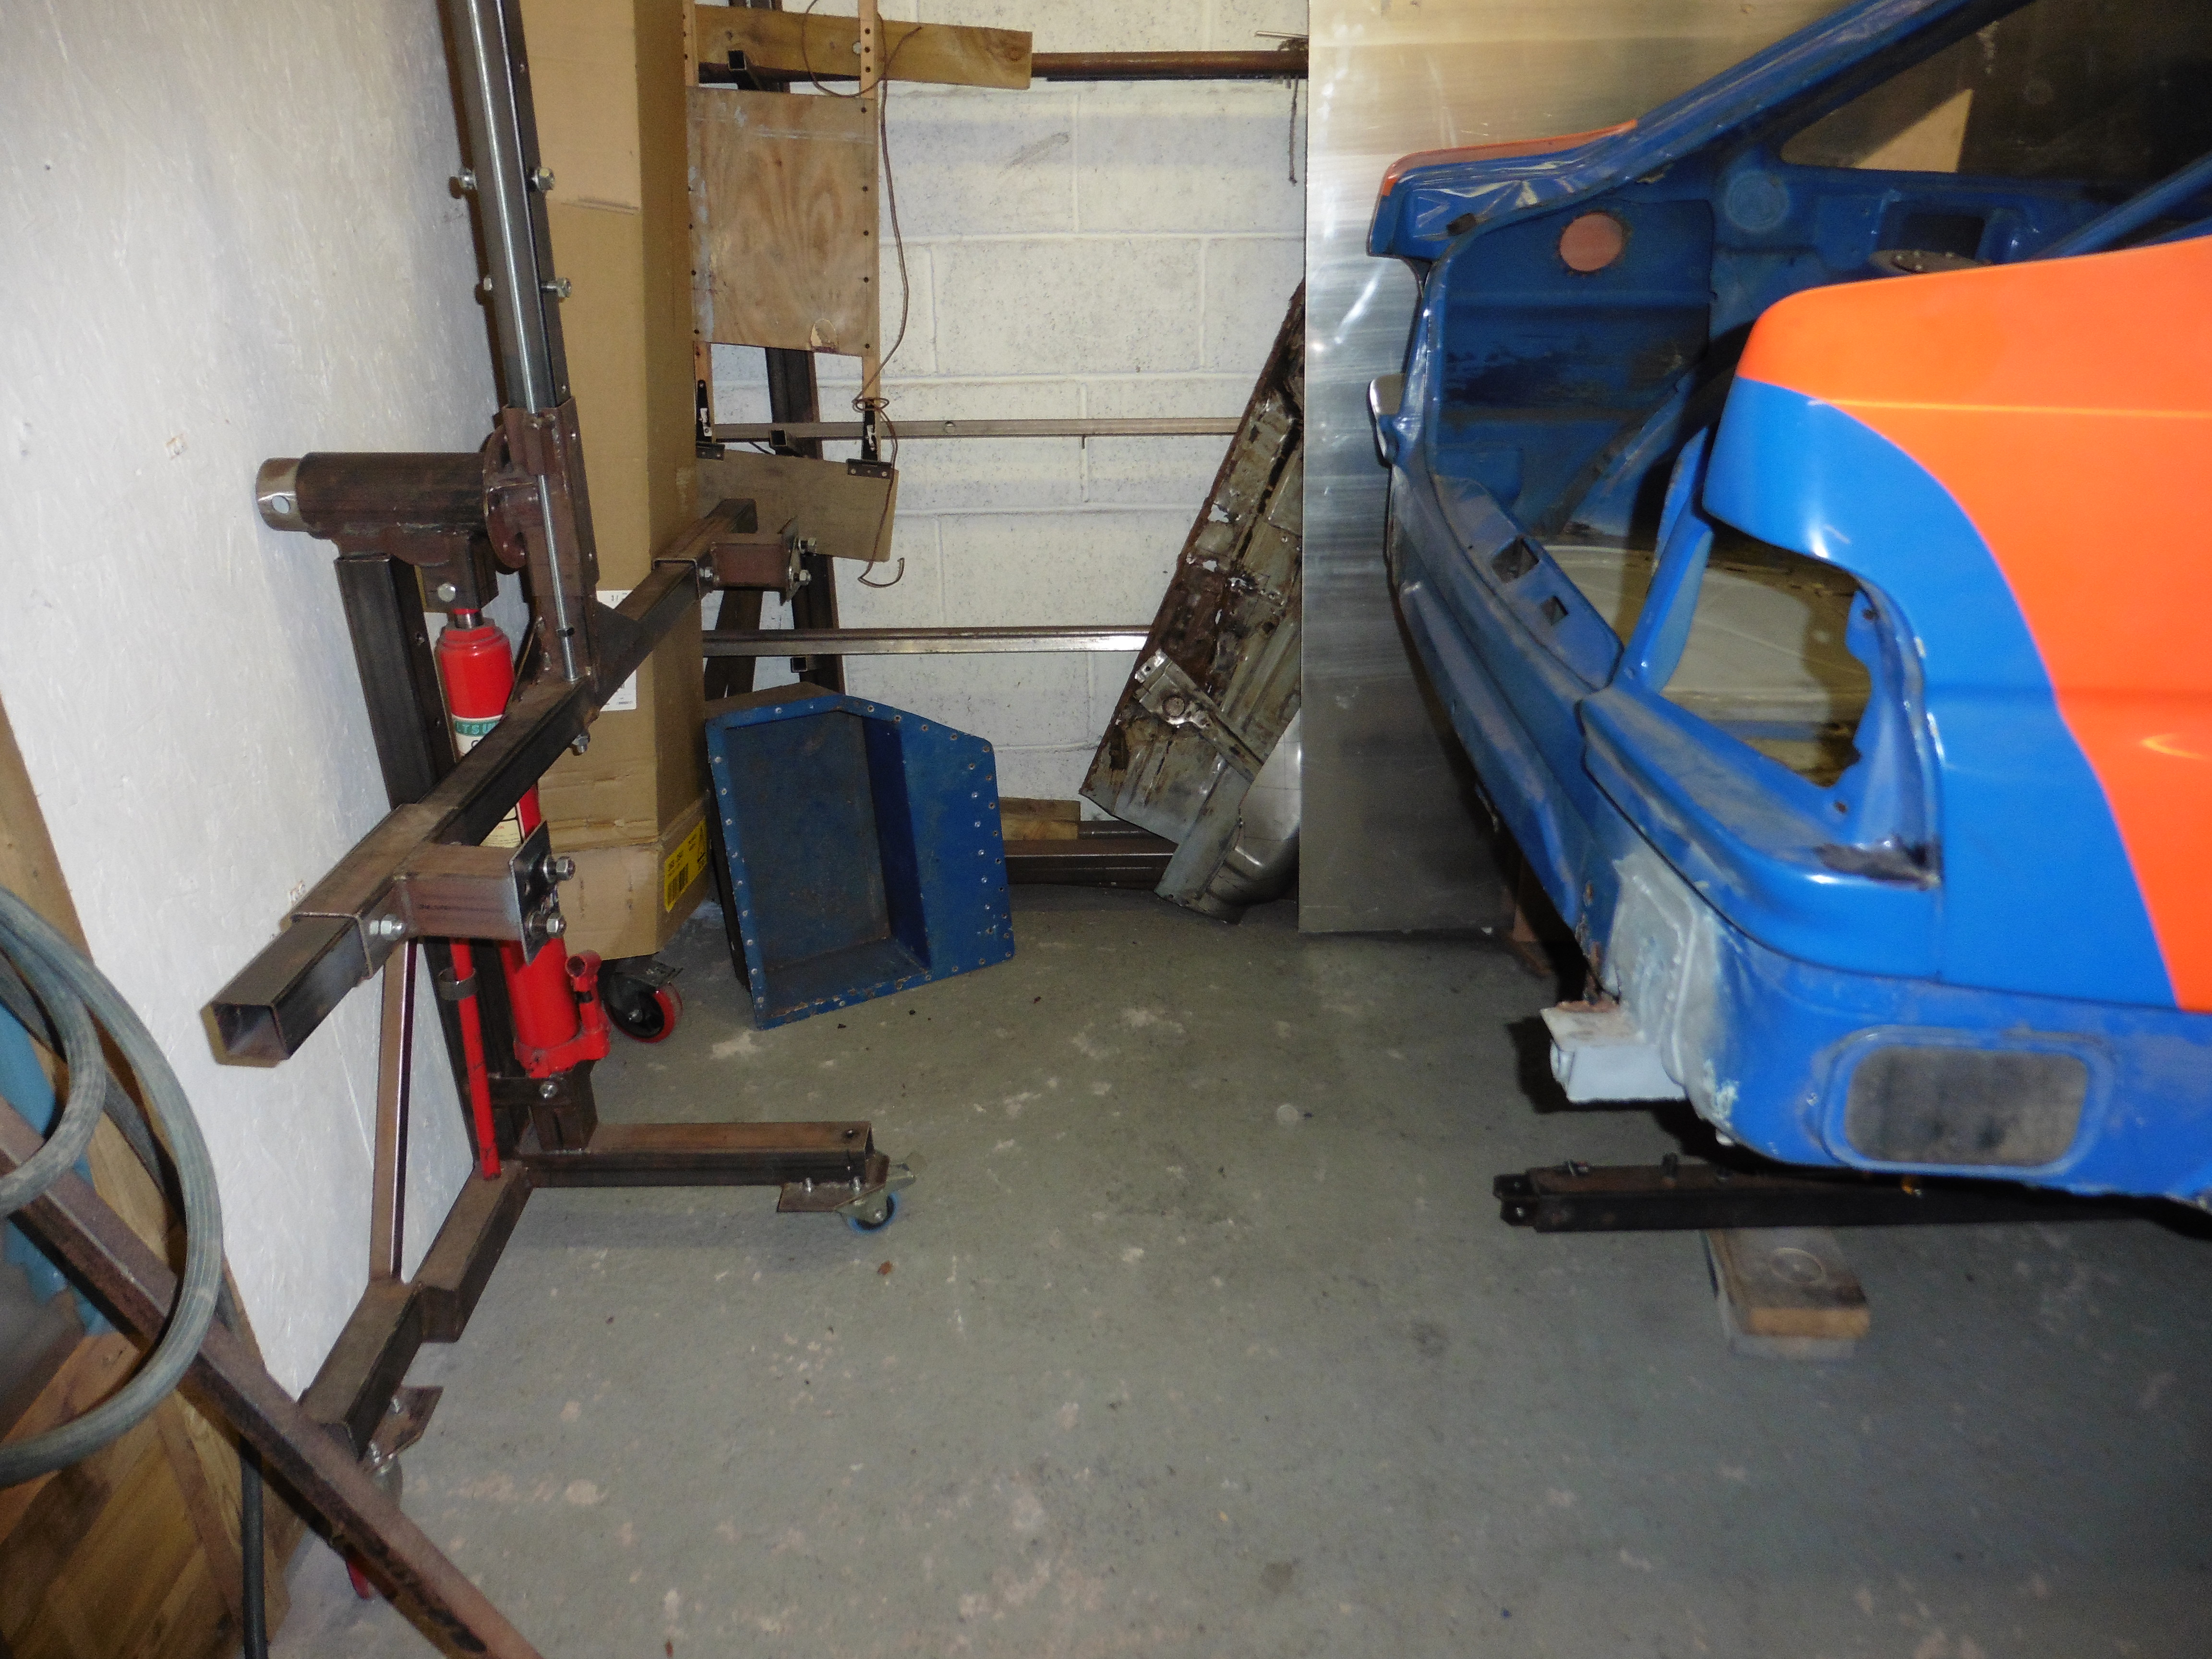 P1020795 P1020795 by jono_misfit, on Flickr the bit to fix 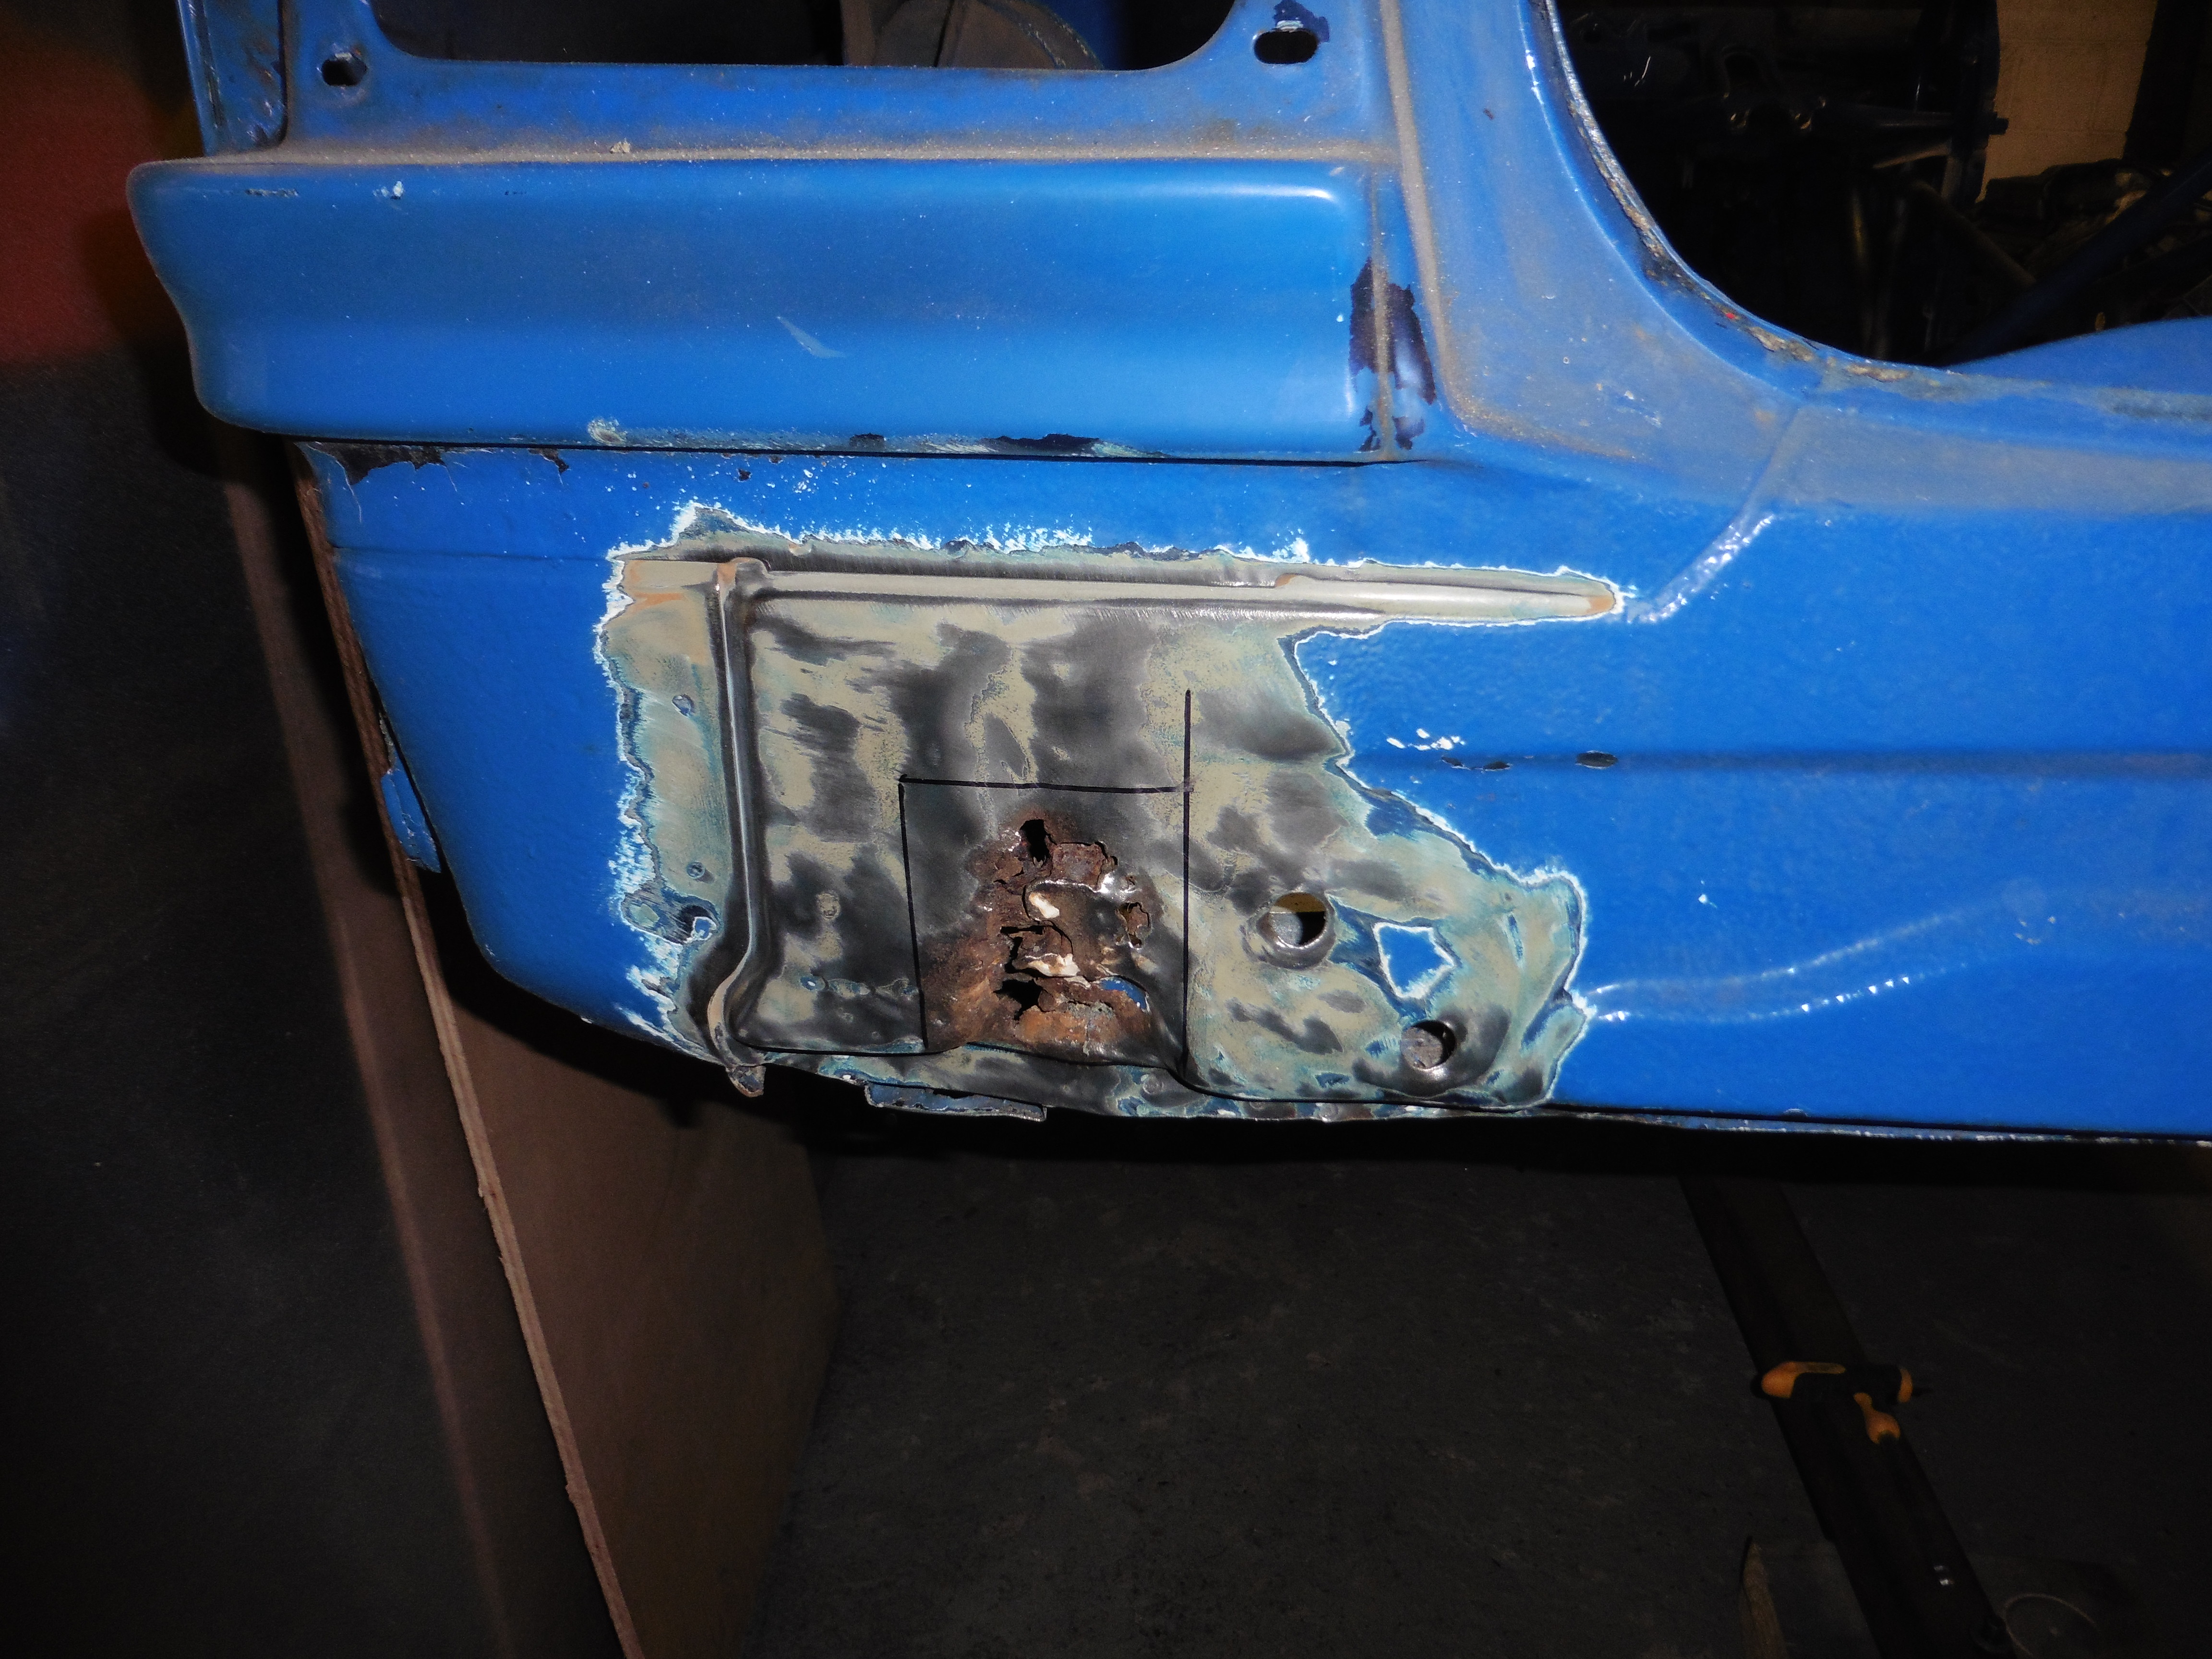 P1020797 P1020797 by jono_misfit, on Flickr trim out the panel and  P1020798 P1020798 by jono_misfit, on Flickr Umm.... why are there wood screws in there, and why have they been welded to the side plate? Proper bodge! I cant see this being Karman! 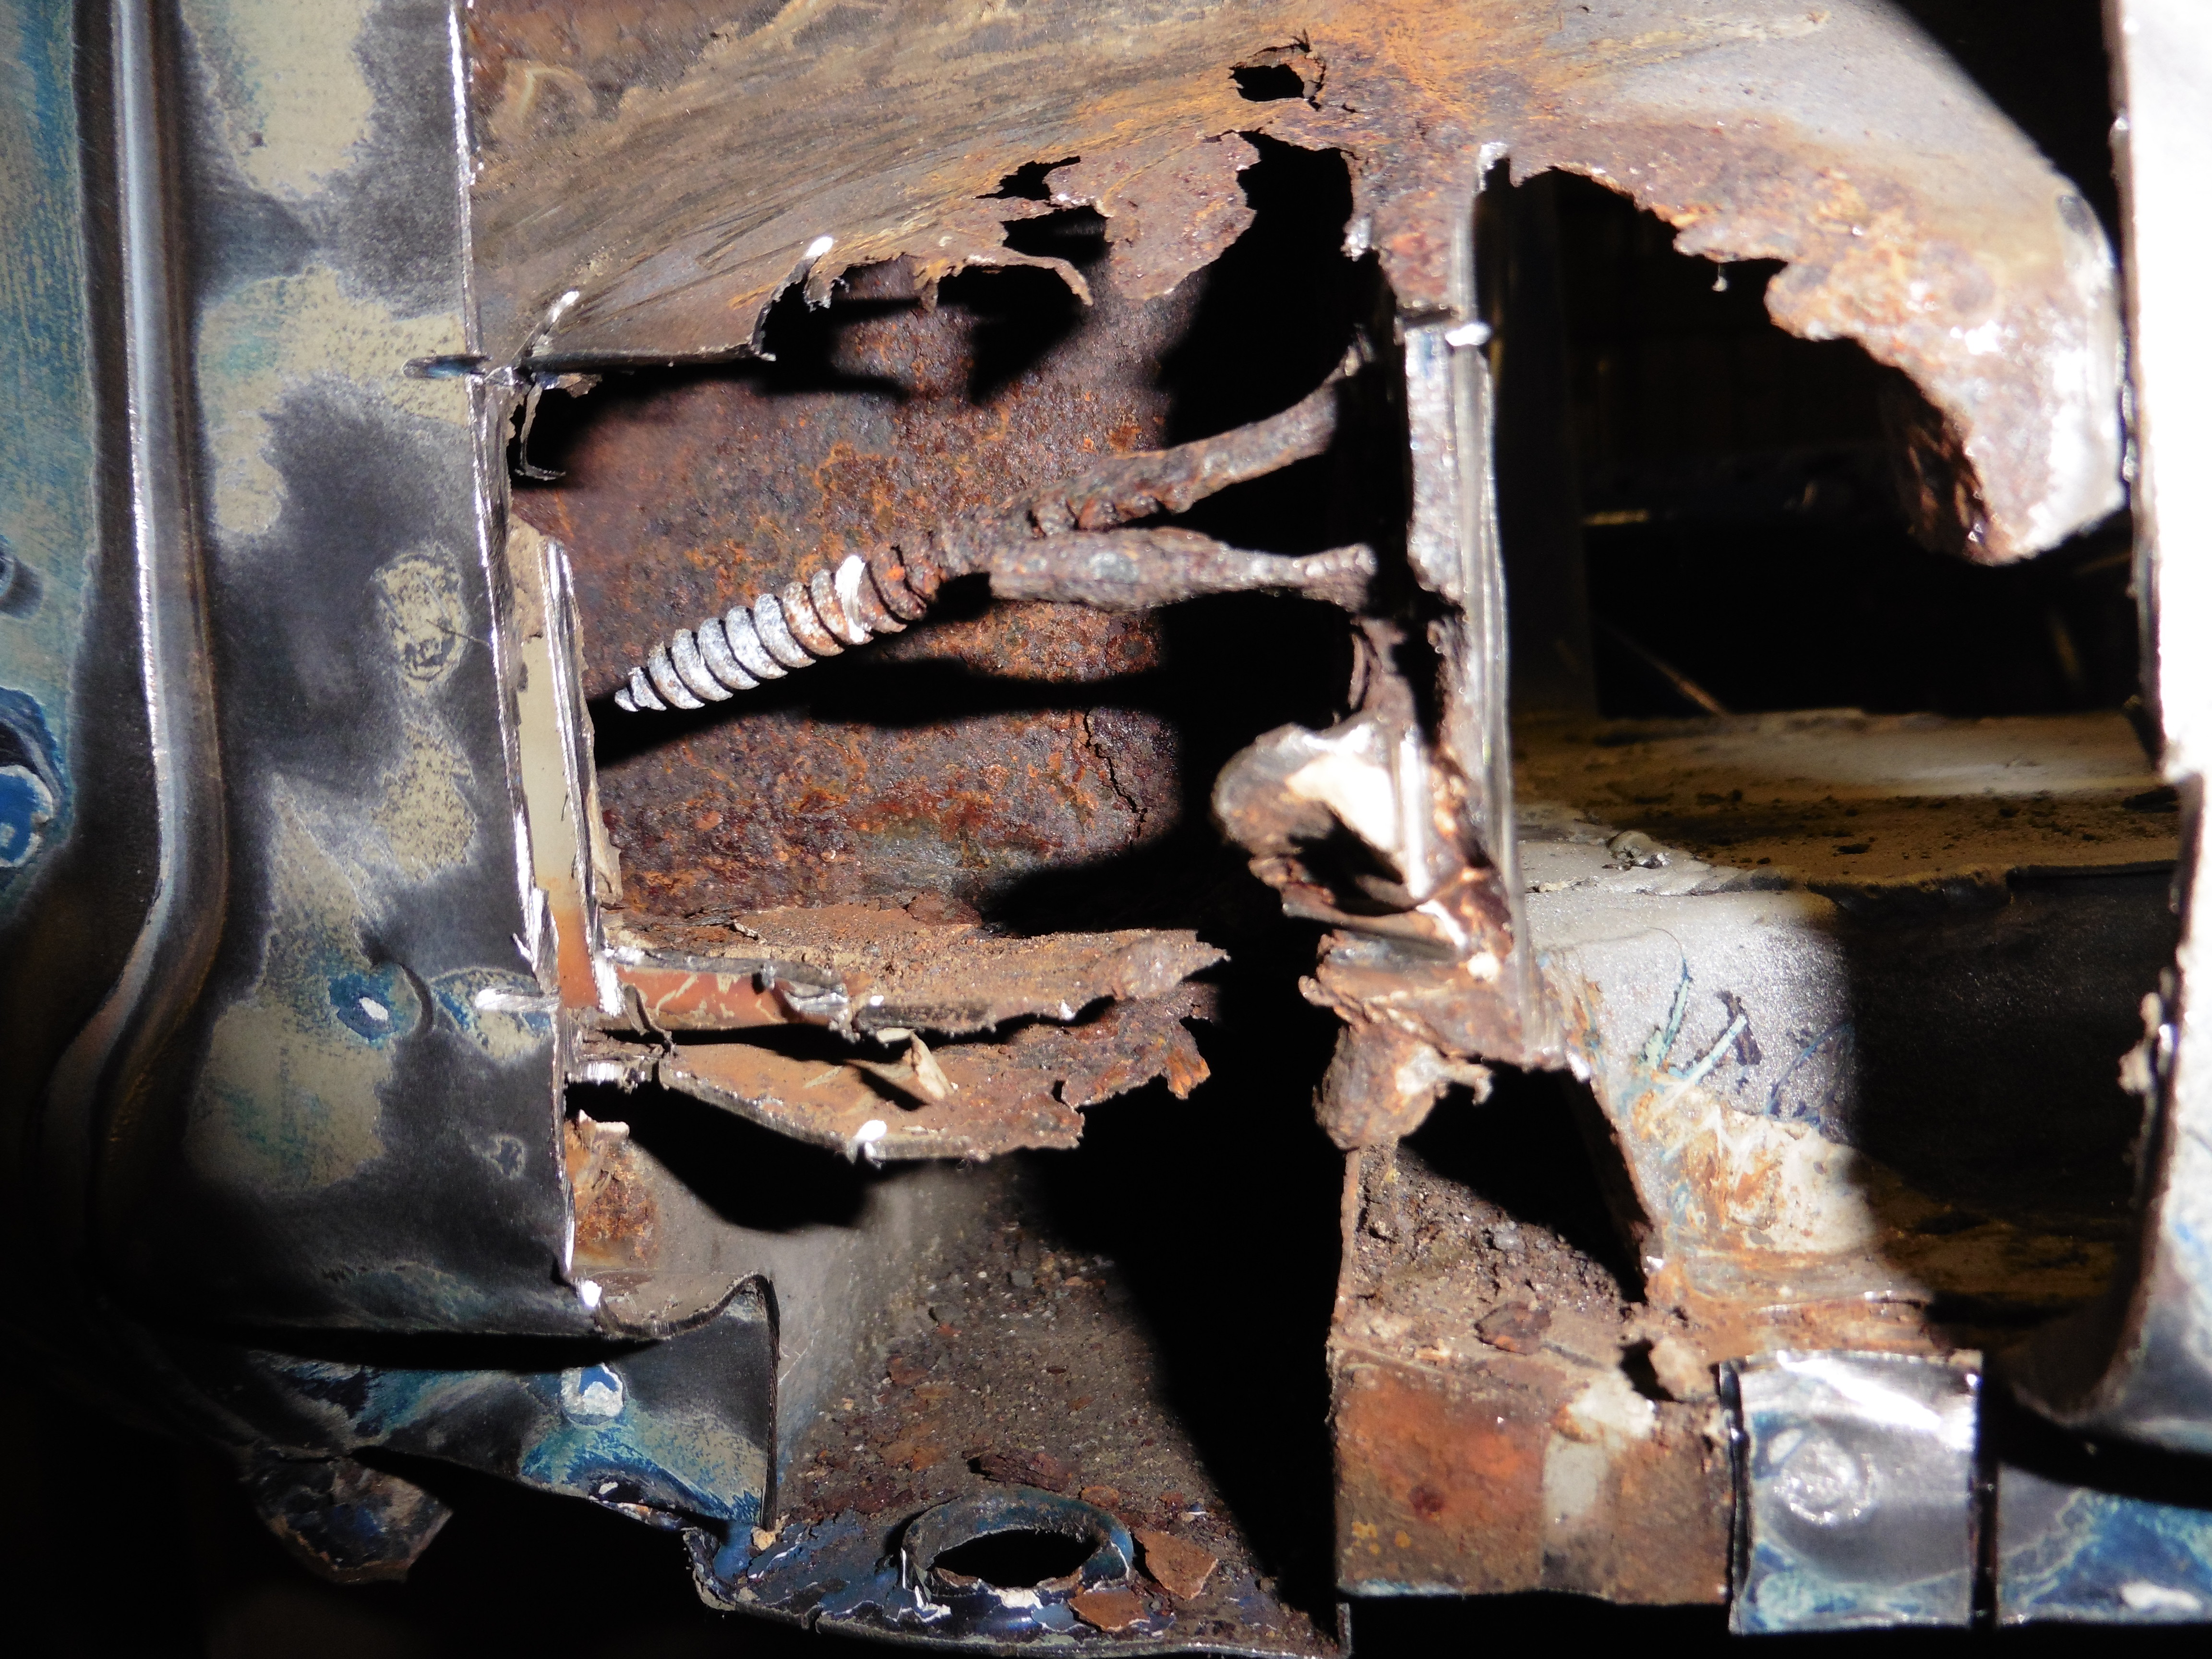 P1020799 P1020799 by jono_misfit, on Flickr I clean back everything and coated it with hydrate 80. When I'm back on it next i'll clean back and start repairing.  P1020800 P1020800 by jono_misfit, on Flickr  P1020801 P1020801 by jono_misfit, on Flickr The box is the reason its rotted out. Its trapped dirt round the weld points. |
| |
|
|
jonomisfit
Club Retro Rides Member
Posts: 1,782
Club RR Member Number: 49
|
|
Nov 10, 2019 13:02:35 GMT
|
|
Good looking holes
|
| |
|
|
jonomisfit
Club Retro Rides Member
Posts: 1,782
Club RR Member Number: 49
|
|
|
|
More hole filling  P1020768 P1020768 by jono_misfit, on Flickr The whole panel may get cut out depending on where I mount the fuel tank. then started marking out for the sill stand tubes  P1020769 P1020769 by jono_misfit, on Flickr  P1020770 P1020770 by jono_misfit, on Flickr and cut some holes  P1020771 P1020771 by jono_misfit, on Flickr jiggered it round a bit using the die grinder to open things out a bit, then measured it about 20 times to make sure its level and in the right place. Then welded them in  P1020772 P1020772 by jono_misfit, on Flickr  P1020773 P1020773 by jono_misfit, on Flickr and the rear  P1020774 P1020774 by jono_misfit, on Flickr 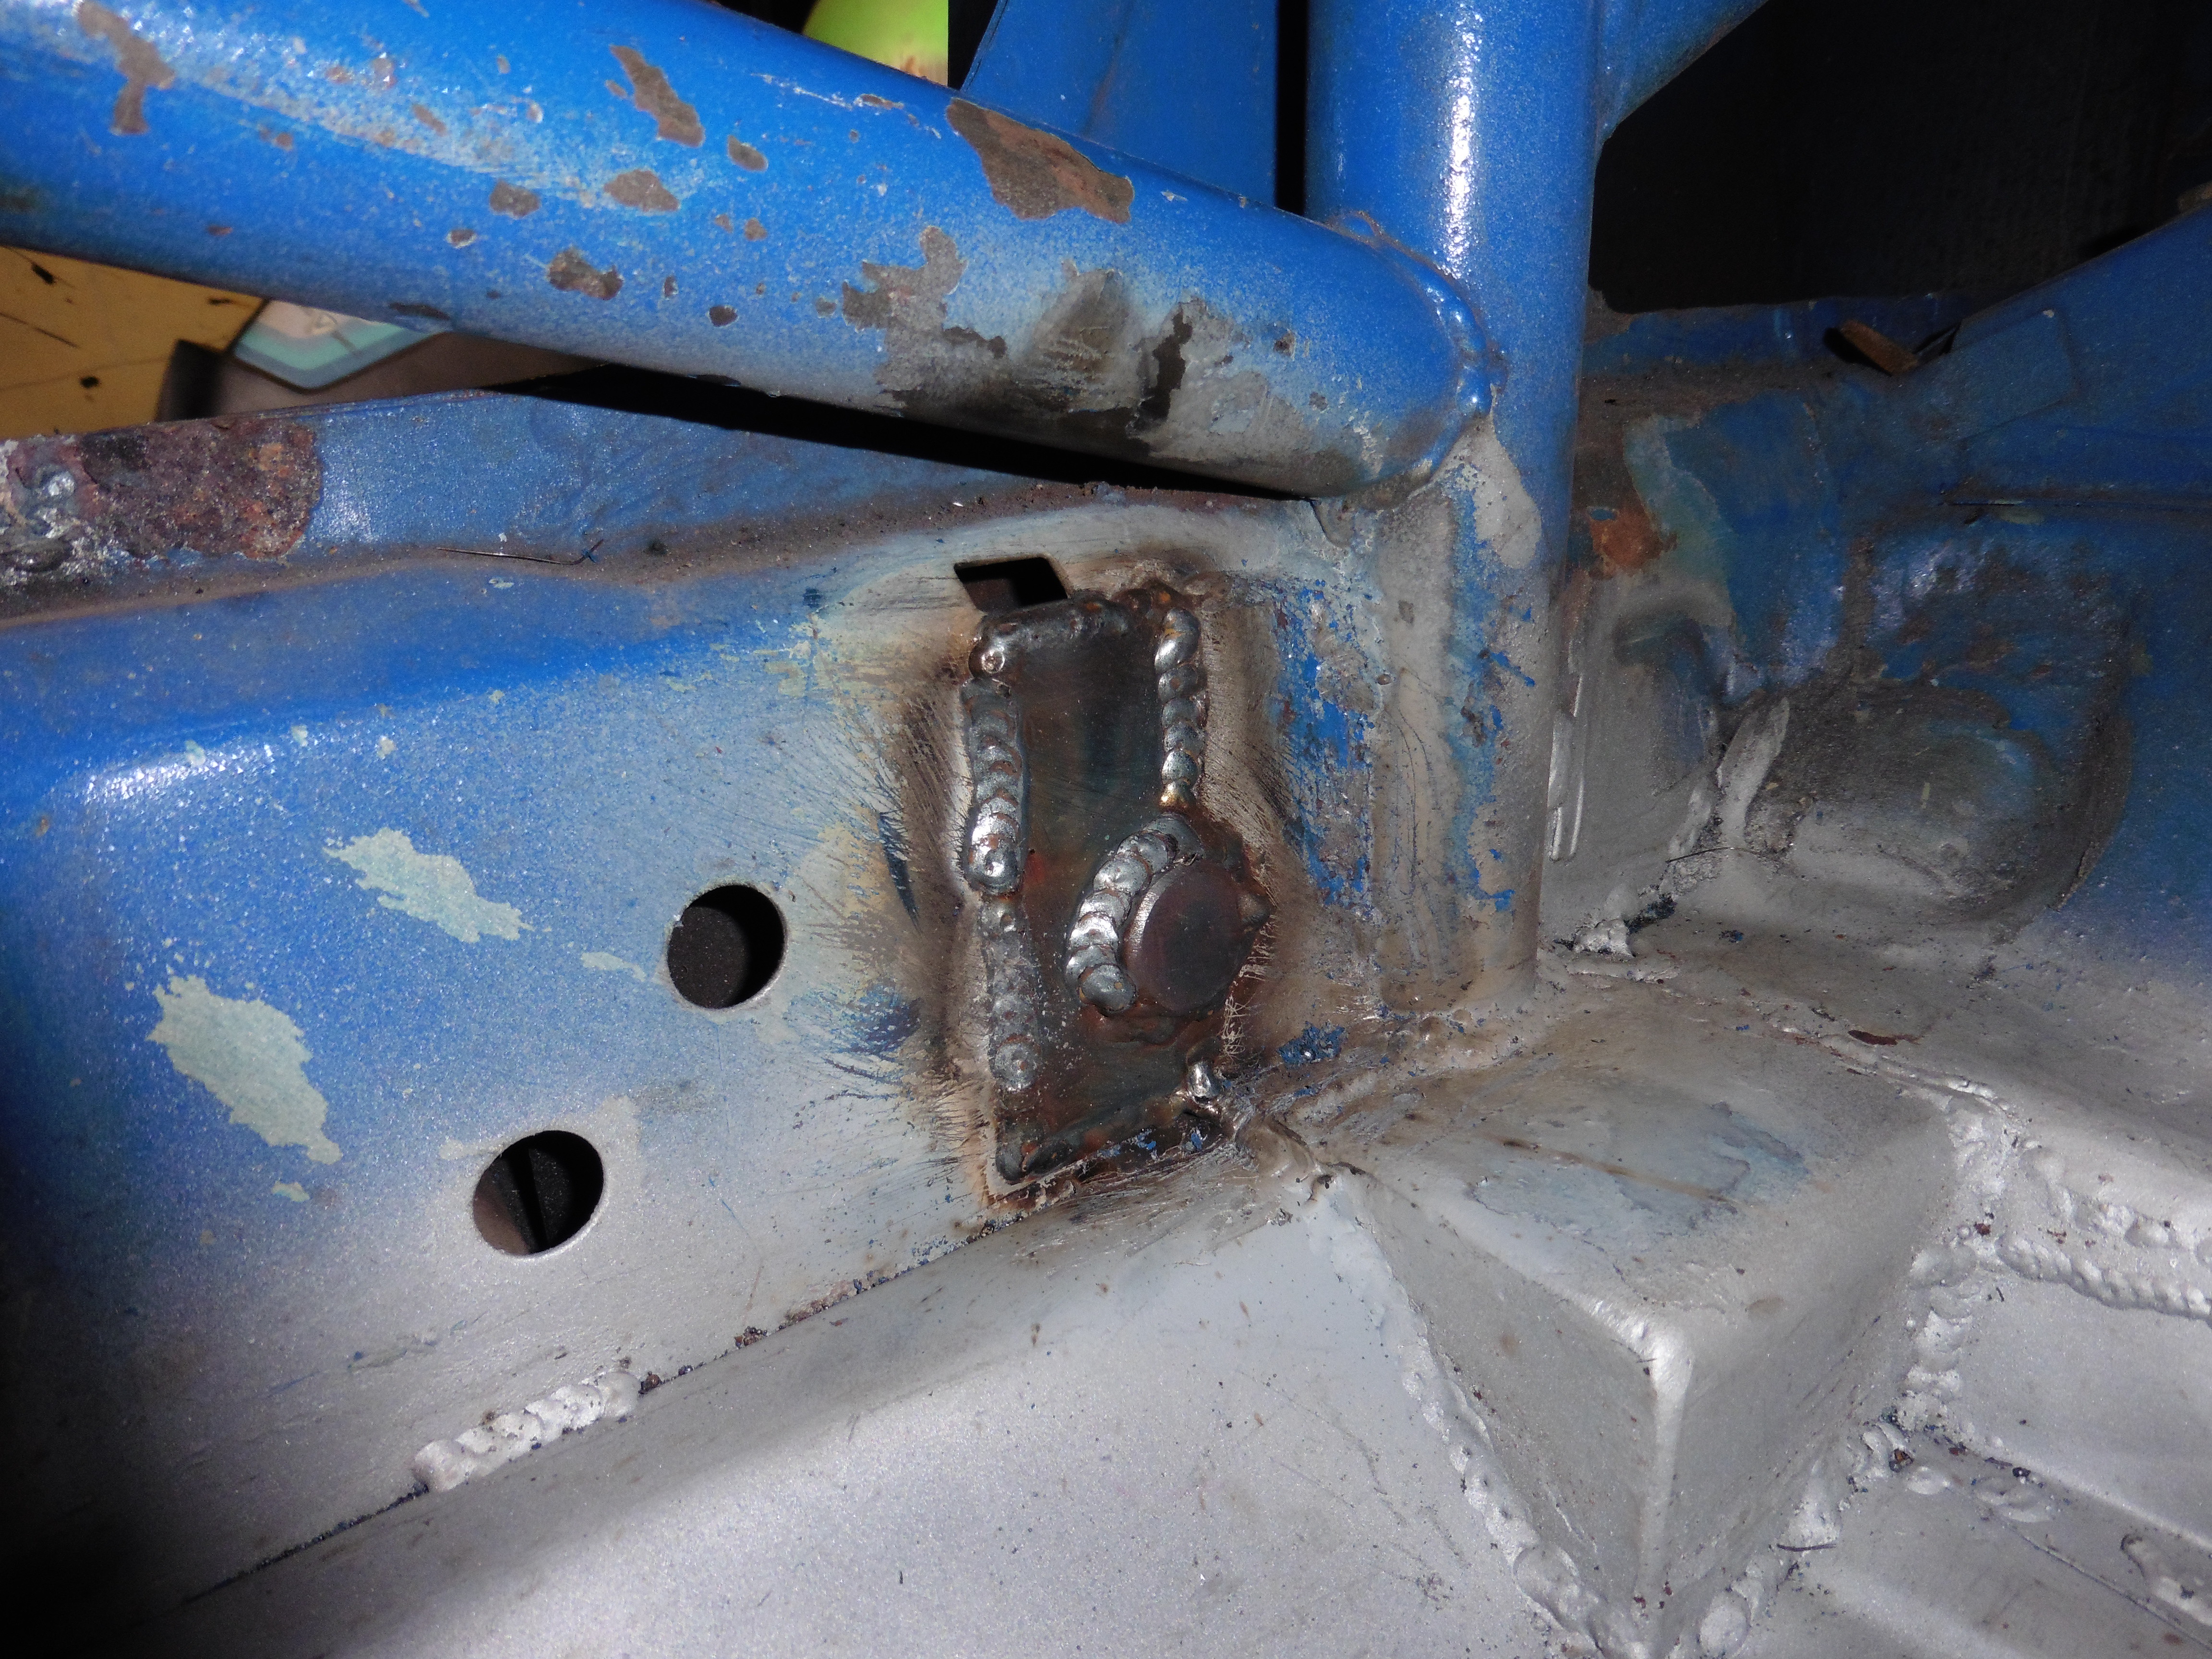 P1020775 P1020775 by jono_misfit, on Flickr and the other side  P1020776 P1020776 by jono_misfit, on Flickr  P1020777 P1020777 by jono_misfit, on Flickr  P1020778 P1020778 by jono_misfit, on Flickr  P1020779 P1020779 by jono_misfit, on Flickr I was impressed by just how different in terms of position the skirt clip holes were side to side. The sill stand tubes are in line with the door seams and set back 20mm both sides. the driver to passenger side skirt clip hole is about 40mm further forward on the passenger side v's the drivers. Still academic as I wont be using them. then tidied up this bit  P1020780 P1020780 by jono_misfit, on Flickr  P1020781 P1020781 by jono_misfit, on Flickr then started cleaning back this bit. Another bit where the lack of protection on the car post turrets etc. has lead to a rot out point.  P1020782 P1020782 by jono_misfit, on Flickr  P1020783 P1020783 by jono_misfit, on Flickr Still shouldnt be too bad next time I'm on the car. |
| |
|
|
|
|
jonomisfit
Club Retro Rides Member
Posts: 1,782
Club RR Member Number: 49
|
|
Oct 27, 2019 21:50:10 GMT
|
|
|
| |
Last Edit: Oct 27, 2019 21:52:49 GMT by jonomisfit
|
|
jonomisfit
Club Retro Rides Member
Posts: 1,782
Club RR Member Number: 49
|
|
Oct 27, 2019 20:57:19 GMT
|
So, I spent about 45 mins this morning trying to locate the heater fan for the escort. I eventually found it, right at the f-ing back, as expected. blower in  P1020749 P1020749 by jono_misfit, on Flickr a lot of space behind it 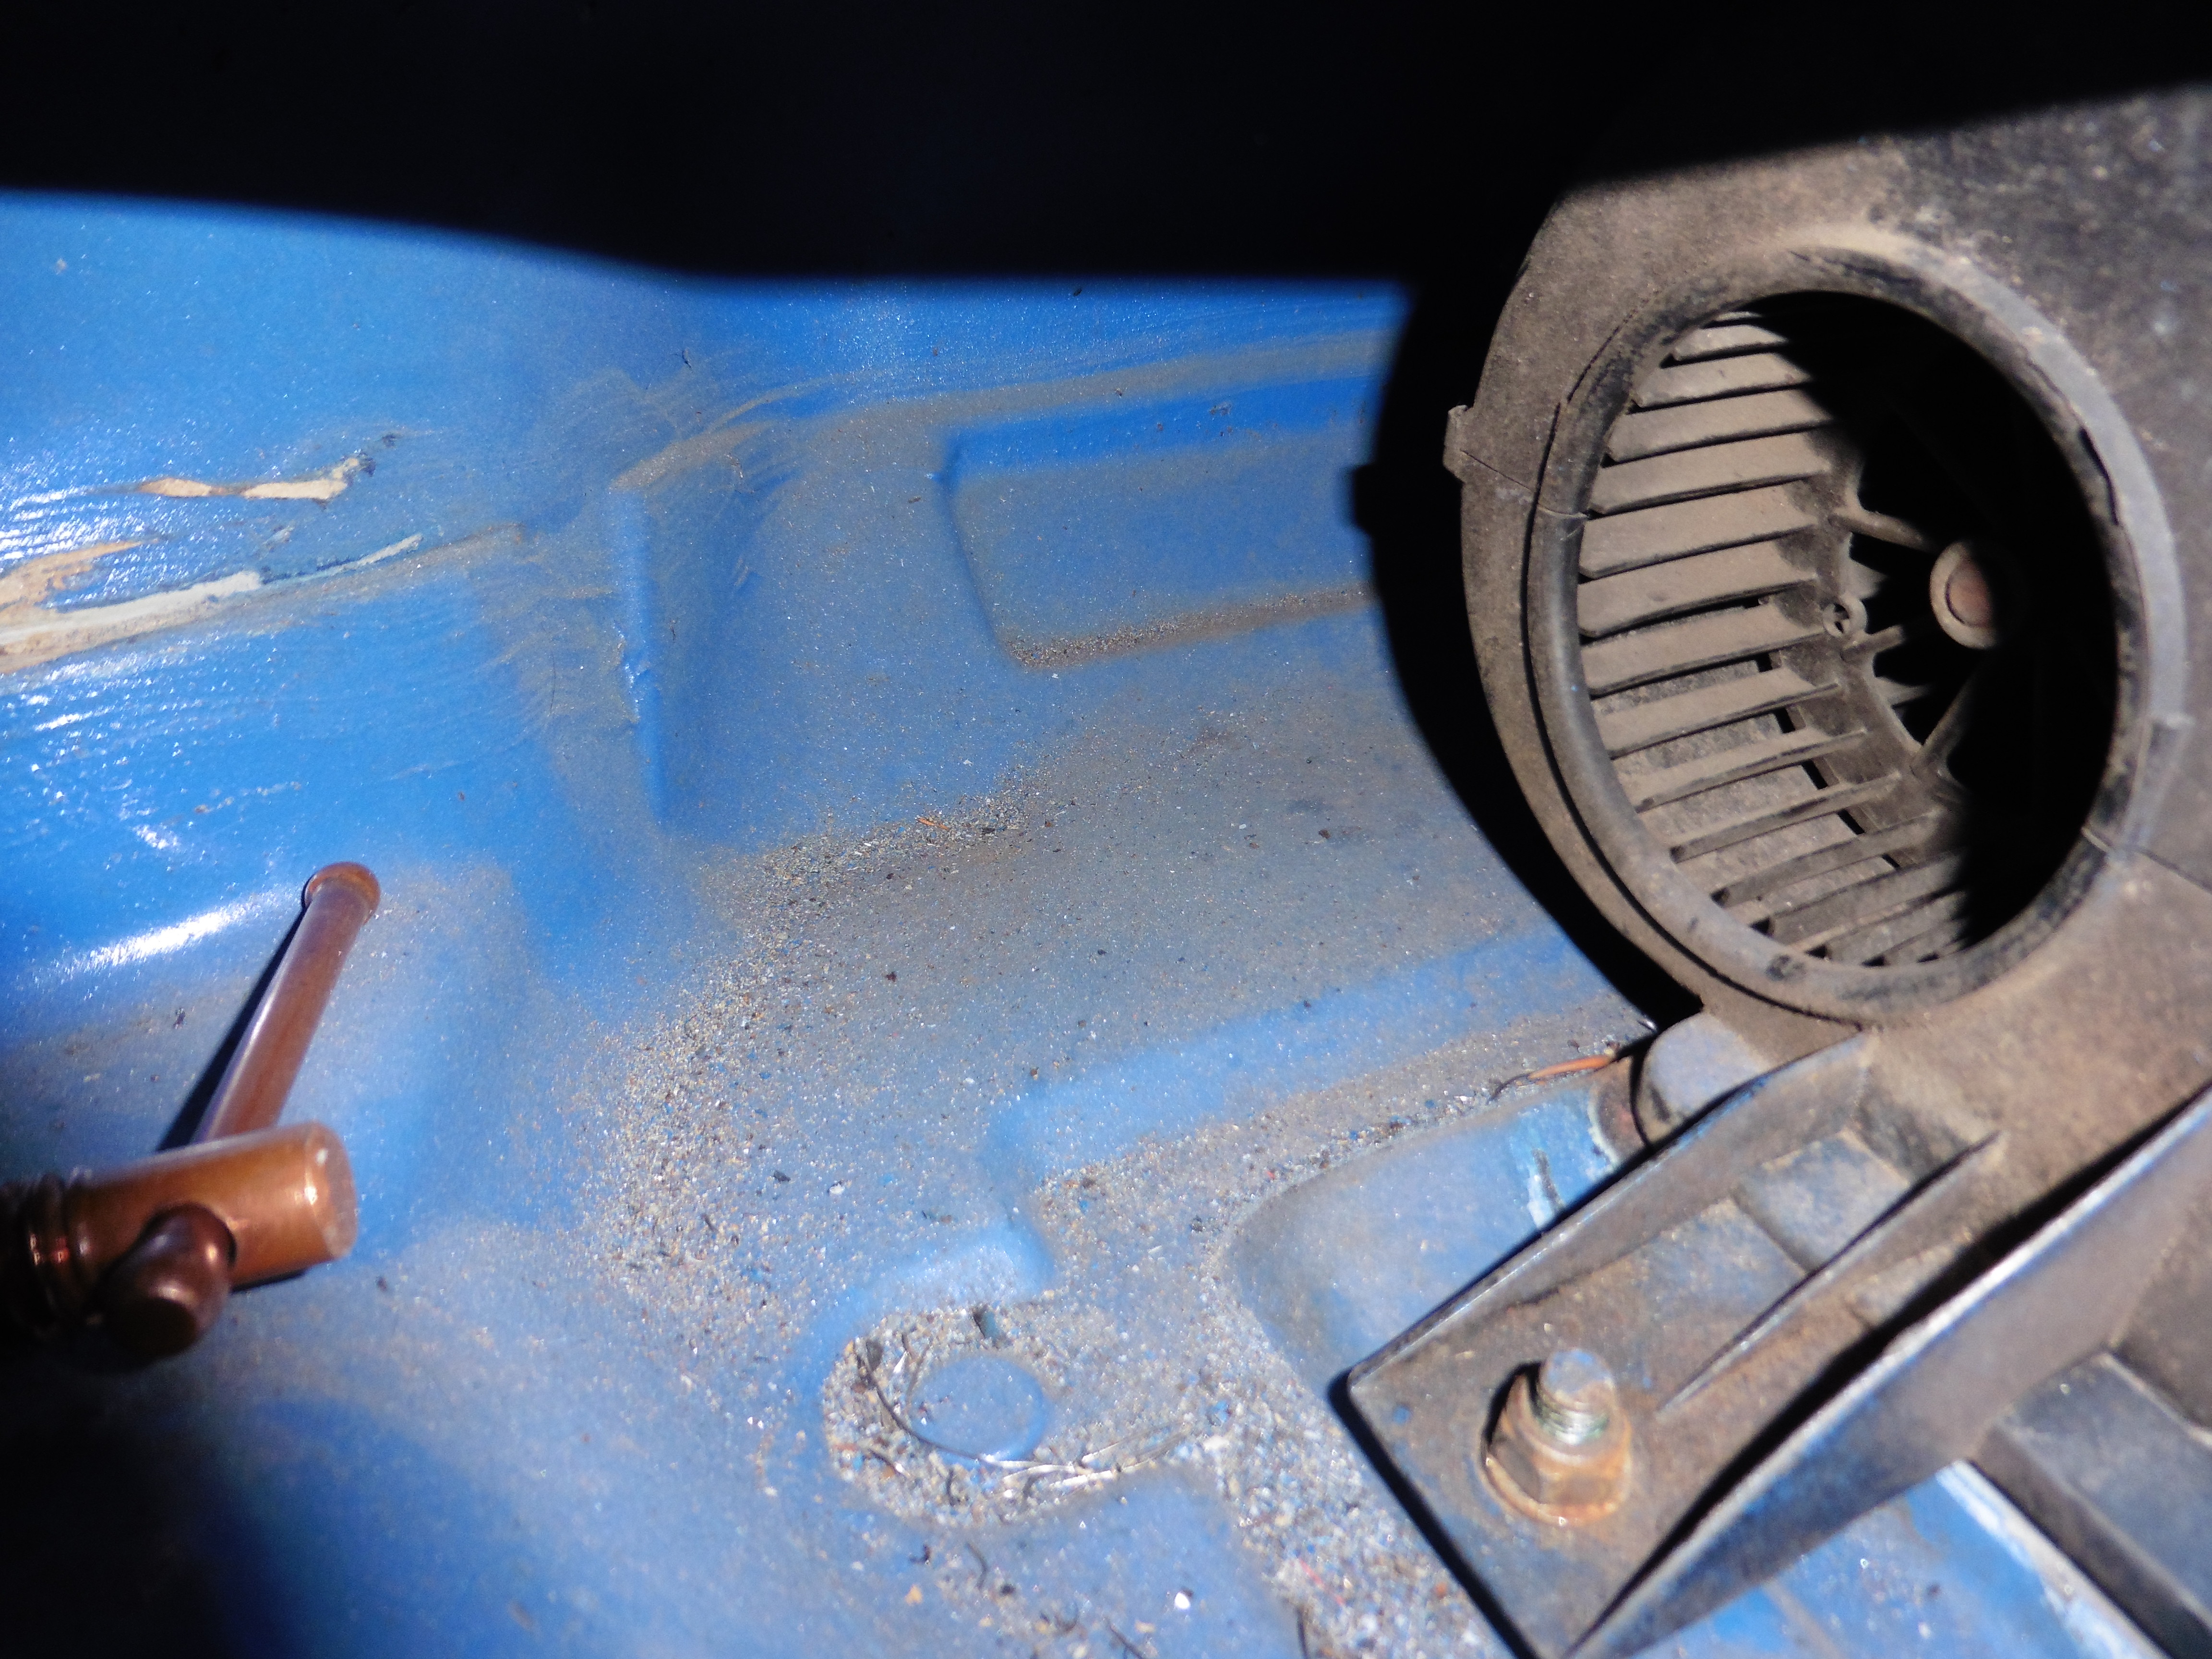 P1020750 P1020750 by jono_misfit, on Flickr  P1020751 P1020751 by jono_misfit, on Flickr This means that, if I'm so inclined, I can cut open the heater box, run a dash tube through it, then weld it back up again. There's loads of space there, which makes me think its where the evaporator in Air con cars goes. then on to these bits.  P1020752 P1020752 by jono_misfit, on Flickr a lot of the rally cars have a reinforcing gusset to the cage here. whilst I'm here I might as well sneak a small one in. CAD 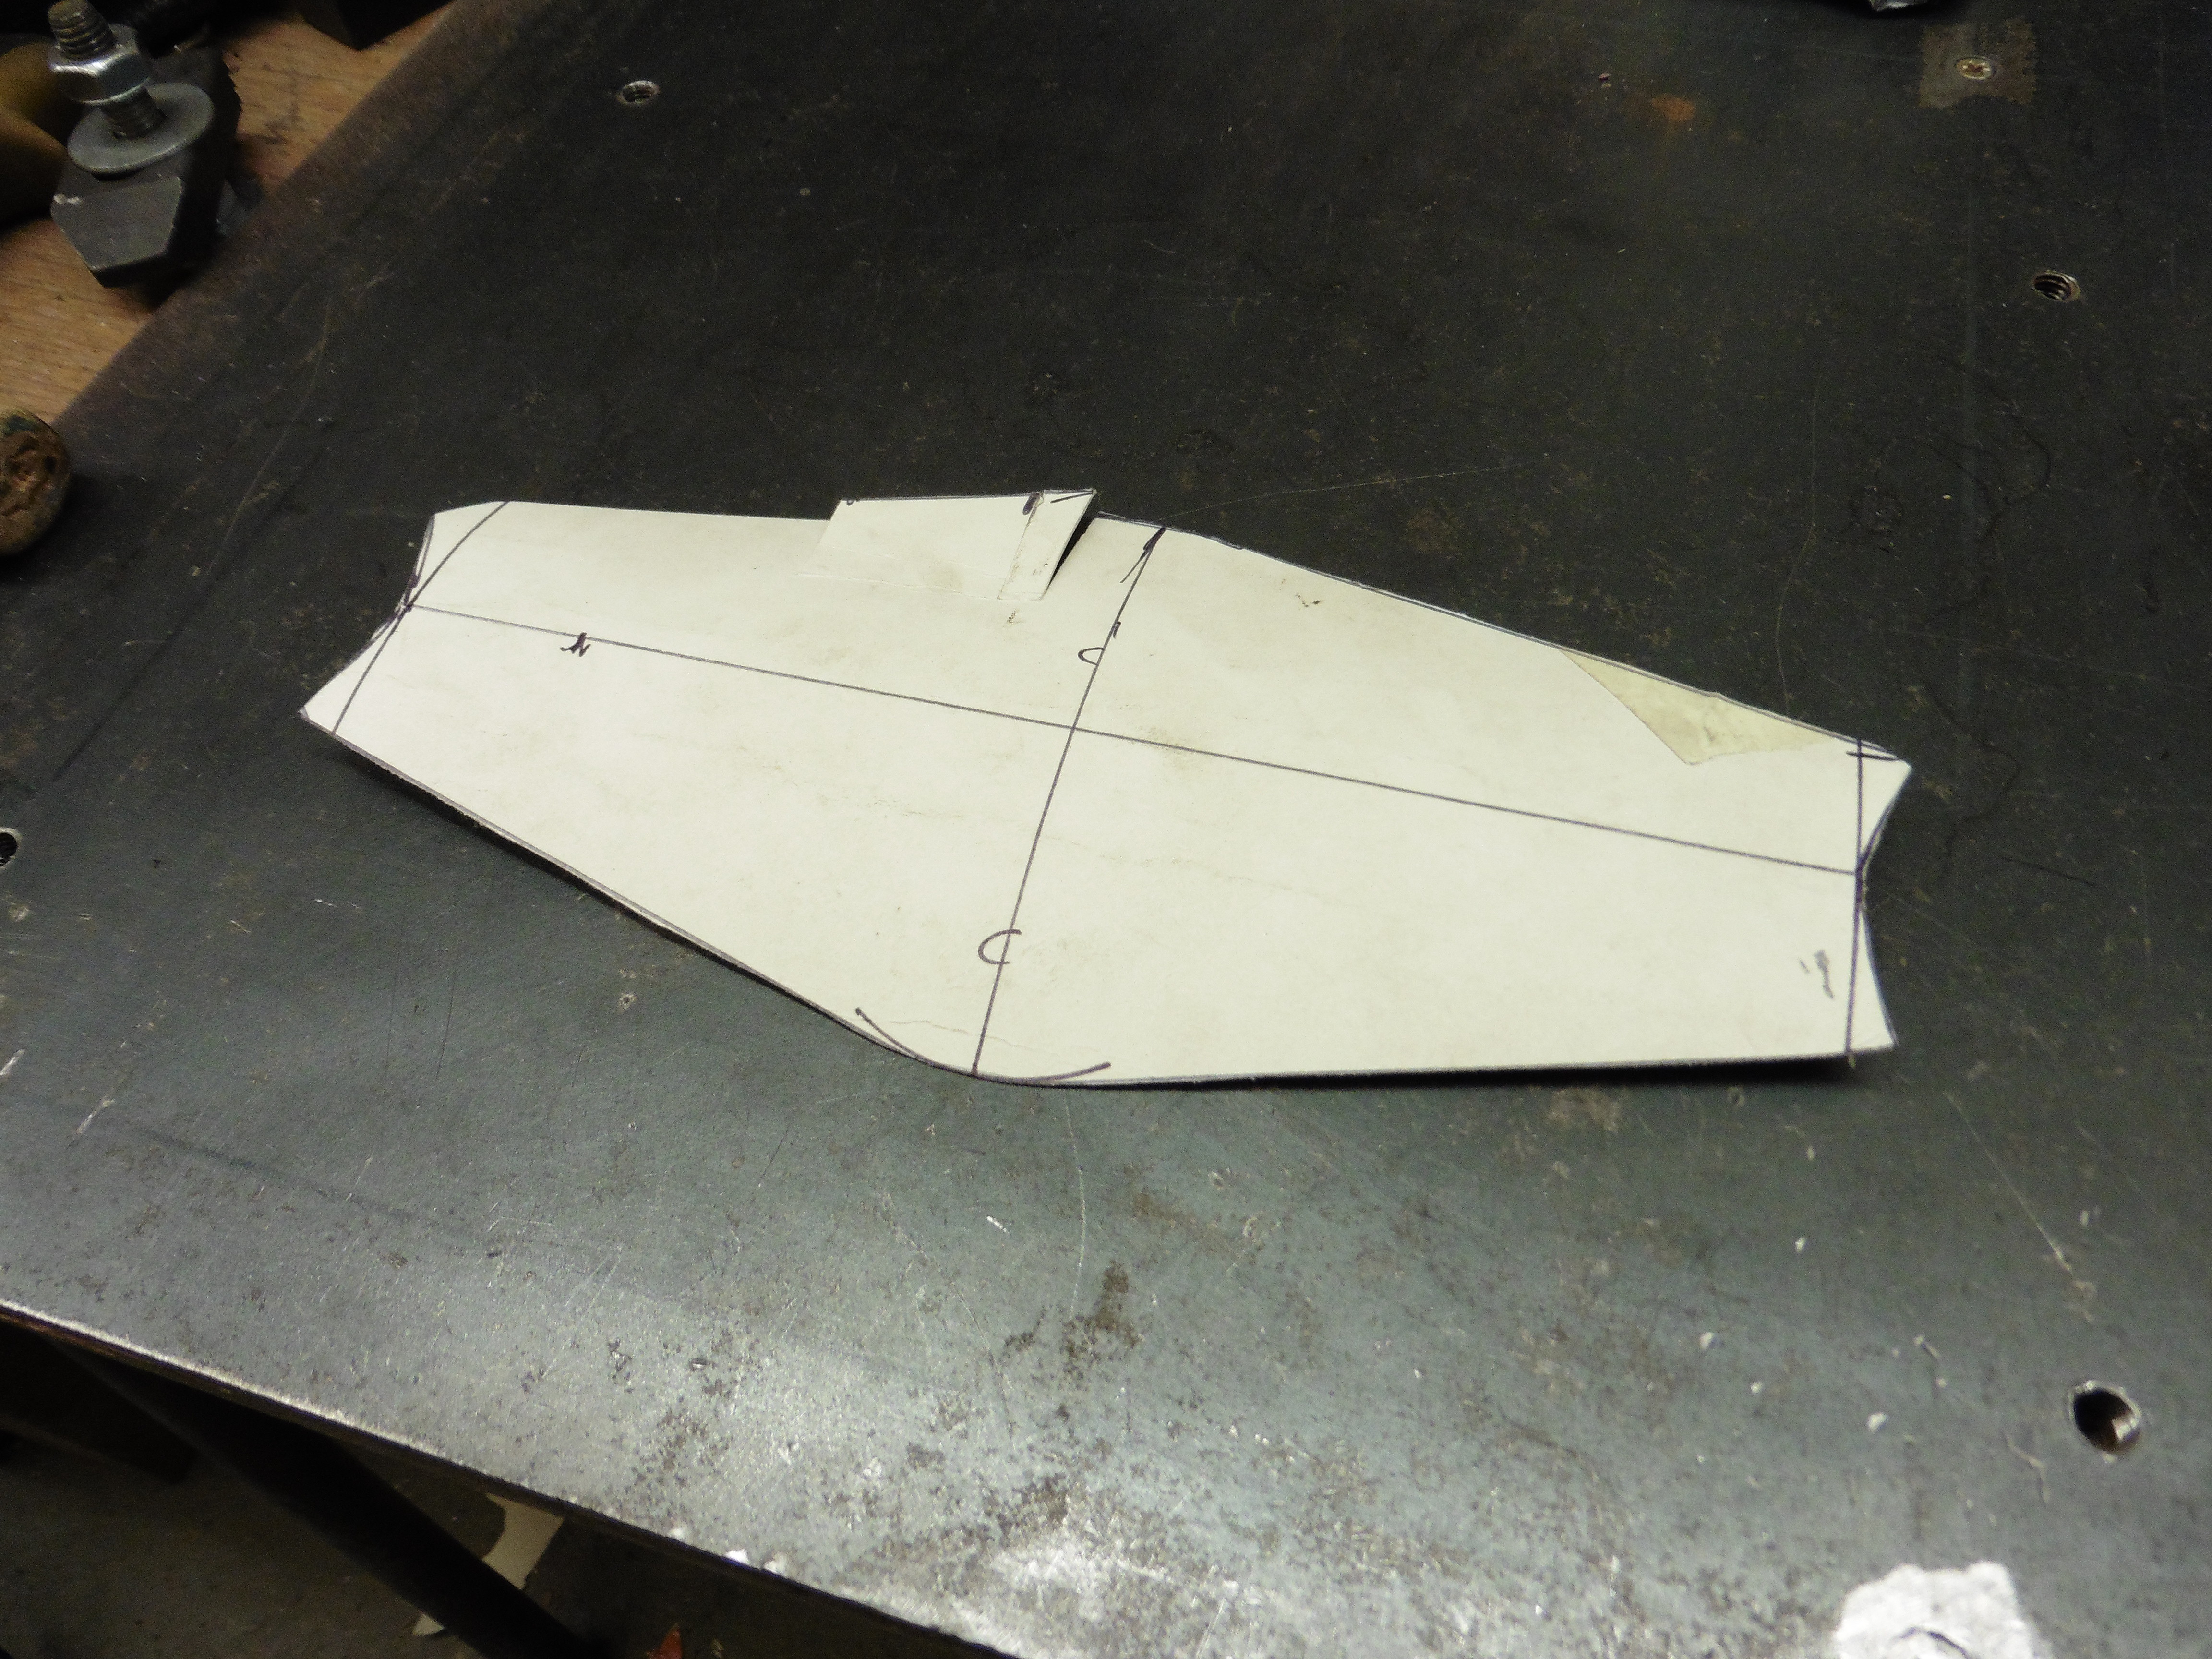 P1020753 P1020753 by jono_misfit, on Flickr goes like so  P1020754 P1020754 by jono_misfit, on Flickr converted into 1.2mm steel  P1020755 P1020755 by jono_misfit, on Flickr mark out the other side  P1020756 P1020756 by jono_misfit, on Flickr weld  P1020757 P1020757 by jono_misfit, on Flickr  P1020759 P1020759 by jono_misfit, on Flickr and the other side  P1020758 P1020758 by jono_misfit, on Flickr  P1020762 P1020762 by jono_misfit, on Flickr then replaced the holey section of a post where the water bottle mount had trapped muck 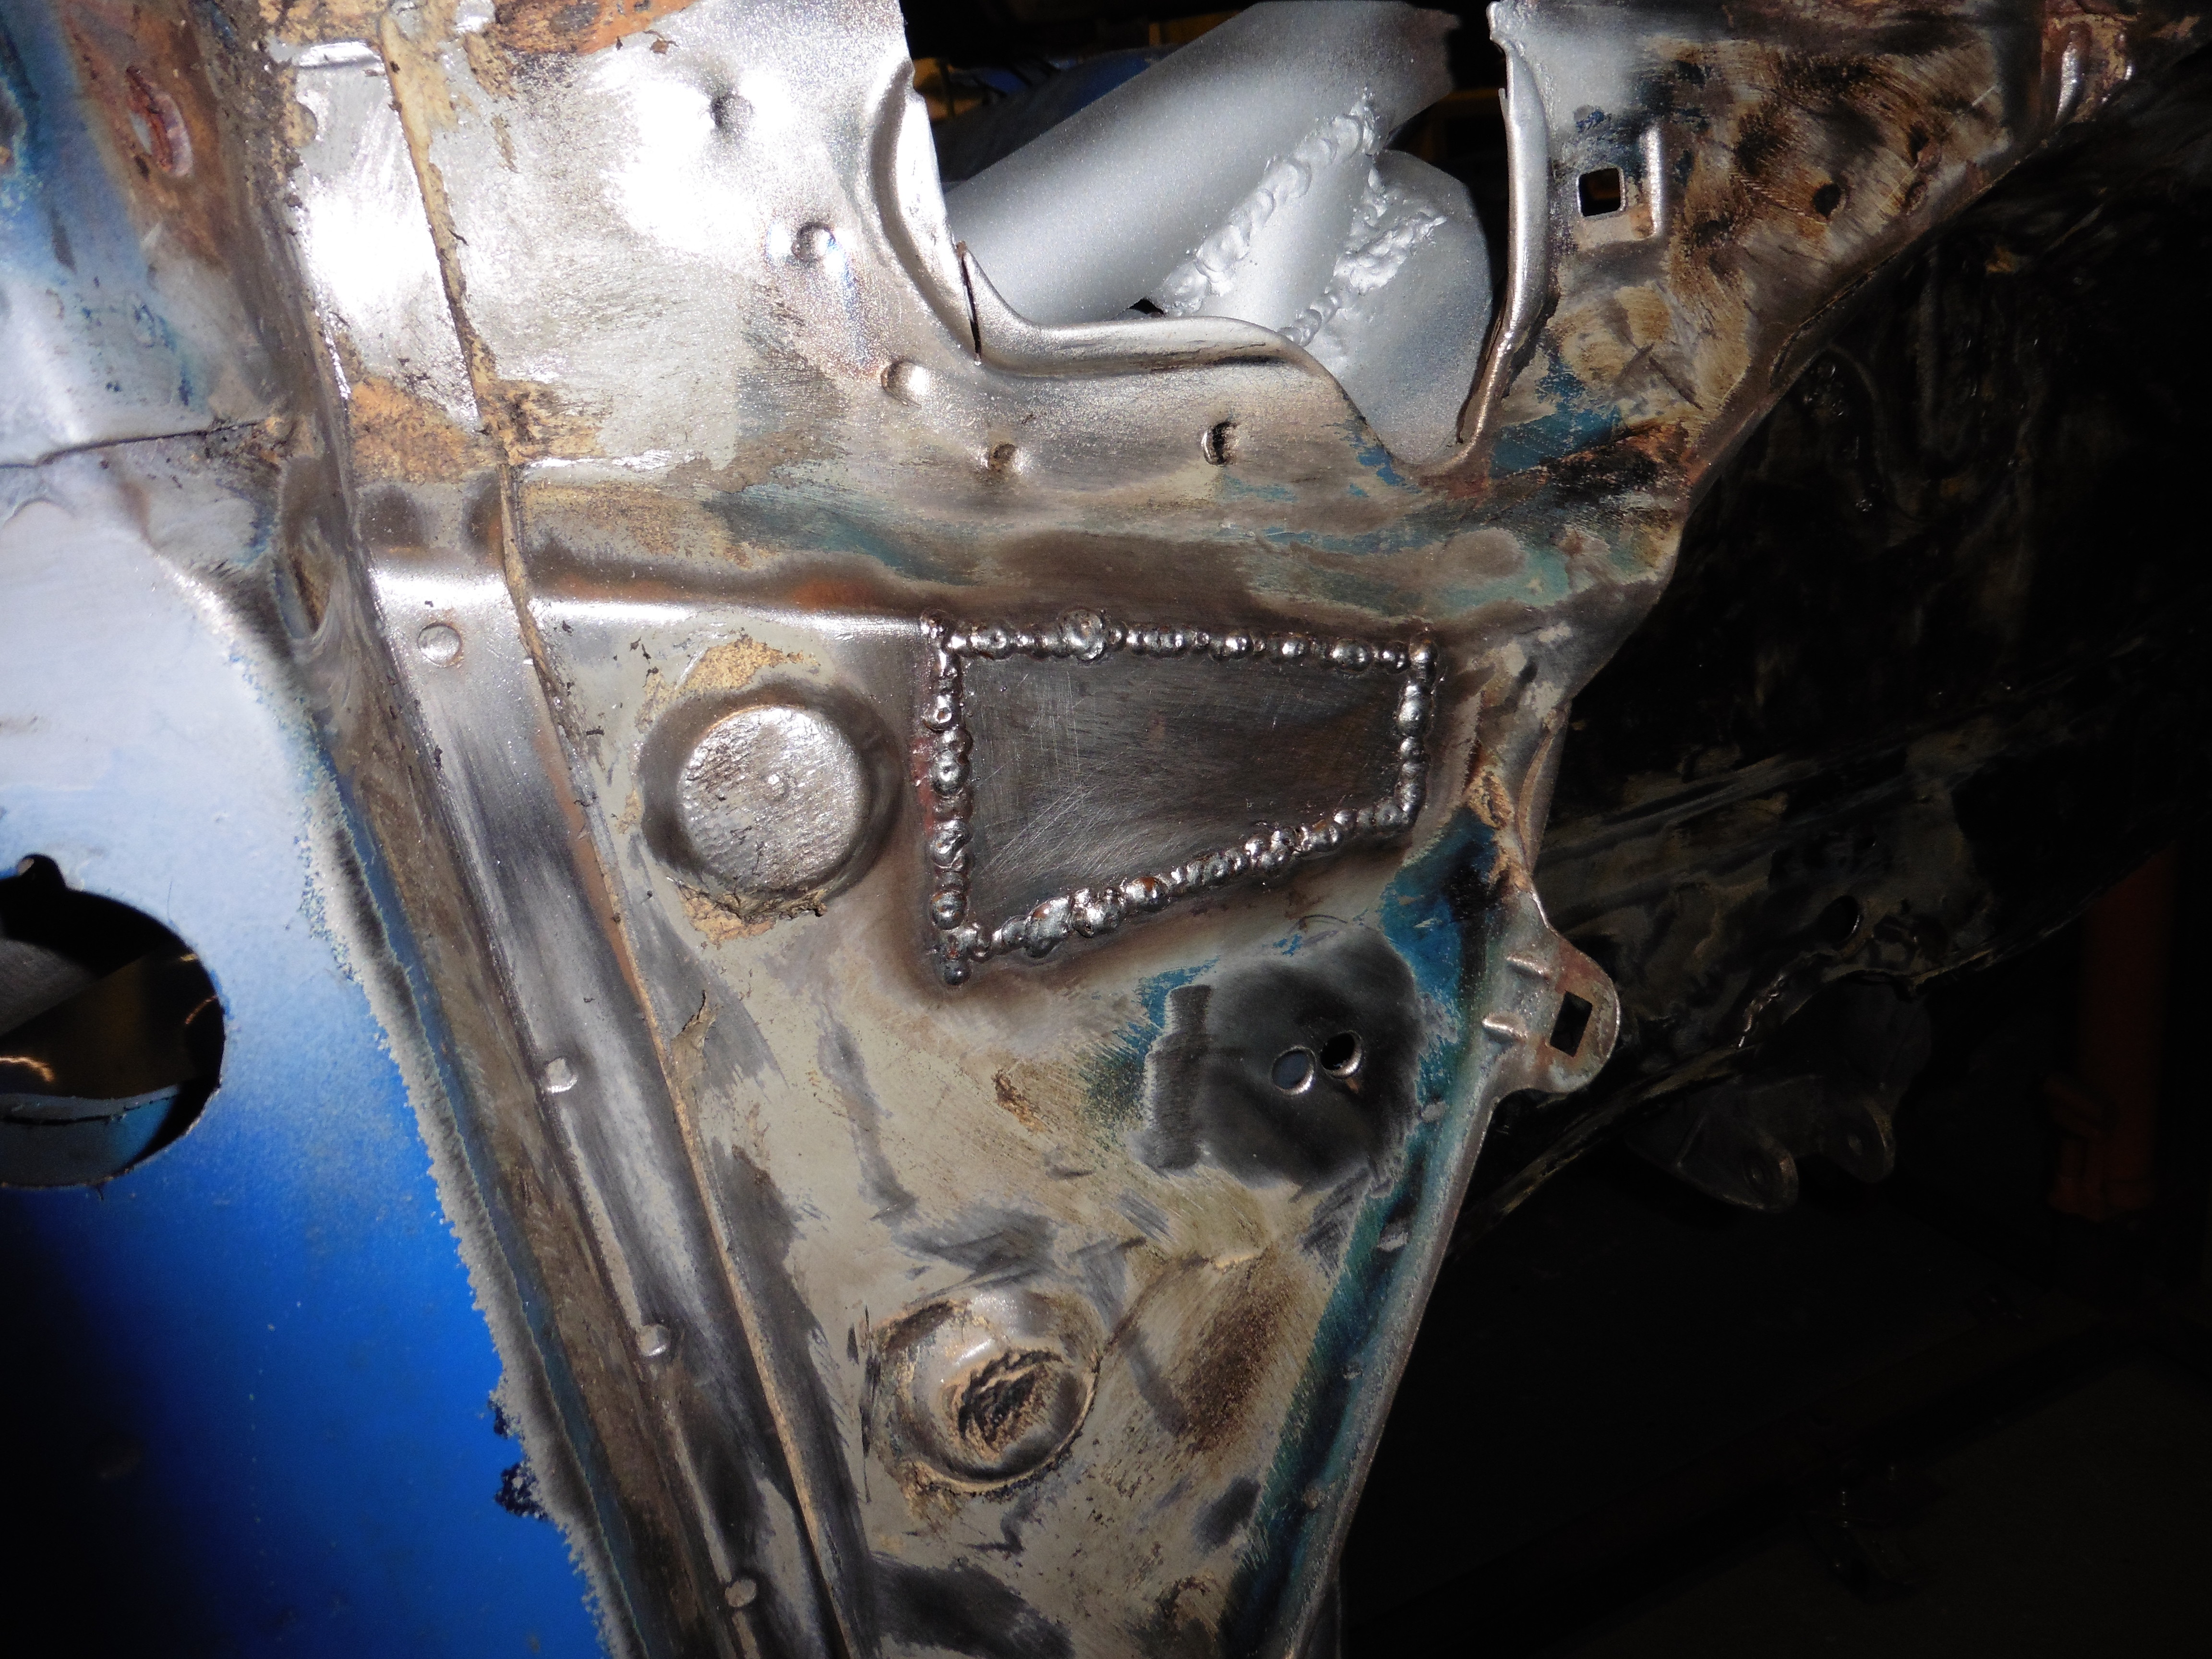 P1020760 P1020760 by jono_misfit, on Flickr cleaned back a bit  P1020761 P1020761 by jono_misfit, on Flickr Then onto a few odd jobs. I levelled the car so I can fit still stand tubes, but had run out of time to start to did a few fill in jobs. The car is measleed with holes for various things that have been bolted in, most of which wont be used, or are now in the wrong position for me, so hole filling time. old harness holes (which need to move back further)  P1020763 P1020763 by jono_misfit, on Flickr  P1020764 P1020764 by jono_misfit, on Flickr  P1020765 P1020765 by jono_misfit, on Flickr  P1020766 P1020766 by jono_misfit, on Flickr There's also on that last pic something I need to tidy up. A previous owner appears to have removed a bracket with a particularly blunt badger. Its a mess. They "tidied it up" by putting a plate over the inside. then cleaned a couple of seams and started doing a few stitches.  P1020767 P1020767 by jono_misfit, on Flickr Till next time. |
| |
Last Edit: Oct 27, 2019 20:58:05 GMT by jonomisfit
|
|
jonomisfit
Club Retro Rides Member
Posts: 1,782
Club RR Member Number: 49
|
|
Oct 22, 2019 21:40:51 GMT
|
|
That's a possibility.
I could use one of the small remote heaters you can buy from kit car suppliers.
|
| |
|
|
jonomisfit
Club Retro Rides Member
Posts: 1,782
Club RR Member Number: 49
|
|
Oct 22, 2019 17:07:51 GMT
|
|
I kind of half think that as well about the bulkhead.
From what I can see on the web others run dash bars through the heater box and blank the heater. I think I'll try a dry fit of the heater and have a think.
Thanks, I'll make sure to give it more support although I suspect its fit will be pretty poor already as it looked warped on the floor.
All comments are welcome. Thanks for taking the time to post.
|
| |
|
|
jonomisfit
Club Retro Rides Member
Posts: 1,782
Club RR Member Number: 49
|
|
Oct 19, 2019 19:04:59 GMT
|
My bumper turned up finally so hung it up in the roof out of the way. Its a GRP multi part replica and the quality is not great. There will need to be a lot of work fixing damage on it and making it look / fit a lot better!  P1020739 P1020739 by jono_misfit, on Flickr then started welding in the holes in the bulkhead  P1020740 P1020740 by jono_misfit, on Flickr  P1020741 P1020741 by jono_misfit, on Flickr I was pretty poor at taking pics today. Cut a square of steel to fill in round the cut out for the cage. Marked the offset centre, then punched a 38mm hole in it.  P1020742 P1020742 by jono_misfit, on Flickr cut a slot in it, pushed it over the cage and welded it in  P1020743 P1020743 by jono_misfit, on Flickr and did the same the other side  P1020744 P1020744 by jono_misfit, on Flickr  P1020745 P1020745 by jono_misfit, on Flickr i then fixed some rust holes (including the bit in the bulkhead above, then started thinking about a dash bar. After about 20 mins of fighting I managed to get the dashboard out from the storage area and fitted it  P1020746 P1020746 by jono_misfit, on Flickr there is not a good line of sight between pillars that doesnt end up going through the heater box or clashing with the dashboard  P1020747 P1020747 by jono_misfit, on Flickr and tying in to the legs means I need to cut through the demister trunking as well  P1020748 P1020748 by jono_misfit, on Flickr This is probably why one wasnt fitted. You can have a dash bar, but not if you want to keep your heater. I need to go do some research and see how others have fitted it. |
| |
|
|
jonomisfit
Club Retro Rides Member
Posts: 1,782
Club RR Member Number: 49
|
|
|
|
|
More of a colander 😁
|
| |
|
|
jonomisfit
Club Retro Rides Member
Posts: 1,782
Club RR Member Number: 49
|
|
|
|
|
Sierra style inner wings, and have wrc top mount rings welded on where the standard Sierra strut top bells would be.
Ford grp a used a variety of different style but eventually ended up at these designs.
I still need to get some top mounts, but they have a bit of expense to them.
|
| |
|
|
jonomisfit
Club Retro Rides Member
Posts: 1,782
Club RR Member Number: 49
|
|
|
|
|
Whilst that is undoubtedly true, I do have to give them the credit of it's a 3dr sierra floorpan I've adjusted to fit the escort.
They are quite a different floor pressing.
|
| |
|
|