jonomisfit
Club Retro Rides Member
Posts: 1,754
Club RR Member Number: 49
|
|
Jul 11, 2019 21:22:17 GMT
|
Well.... i think its best to say the panel fit wasn't what I was hoping for, but it was probably in line with what I was expecting. I think most of the issues are Sierra rwd floor pan v's escort / sierra AWD floorpan, but some look like manufacturing issues. Anyway enough of the moaning. Start knocking out the bigger dents and cleaning up the strengthening plate  P1020472 P1020472 by jono_misfit, on Flickr  P1020473 P1020473 by jono_misfit, on Flickr cleaned, de-rusted, and primed  P1020474 P1020474 by jono_misfit, on Flickr then I roughly clamped the floorpan in place so I could get a sense of the job ahead  P1020475 P1020475 by jono_misfit, on Flickr then doodled on where I'll need to cut it  P1020476 P1020476 by jono_misfit, on Flickr the strange cut line is to avoid some of the features that will cause me issues, but also include those i need, whilst covering all the rust areas.. this floorpan piece under the cage food needs some adjusting  P1020477 P1020477 by jono_misfit, on Flickr and this is the main culprit of not fitting well, both the step on the left, and the height of the step  P1020478 P1020478 by jono_misfit, on Flickr but before blaming anything else I need the footwell stiff and in the right position, so tack on the bits i fettled earlier clamp into position.  P1020479 P1020479 by jono_misfit, on Flickr 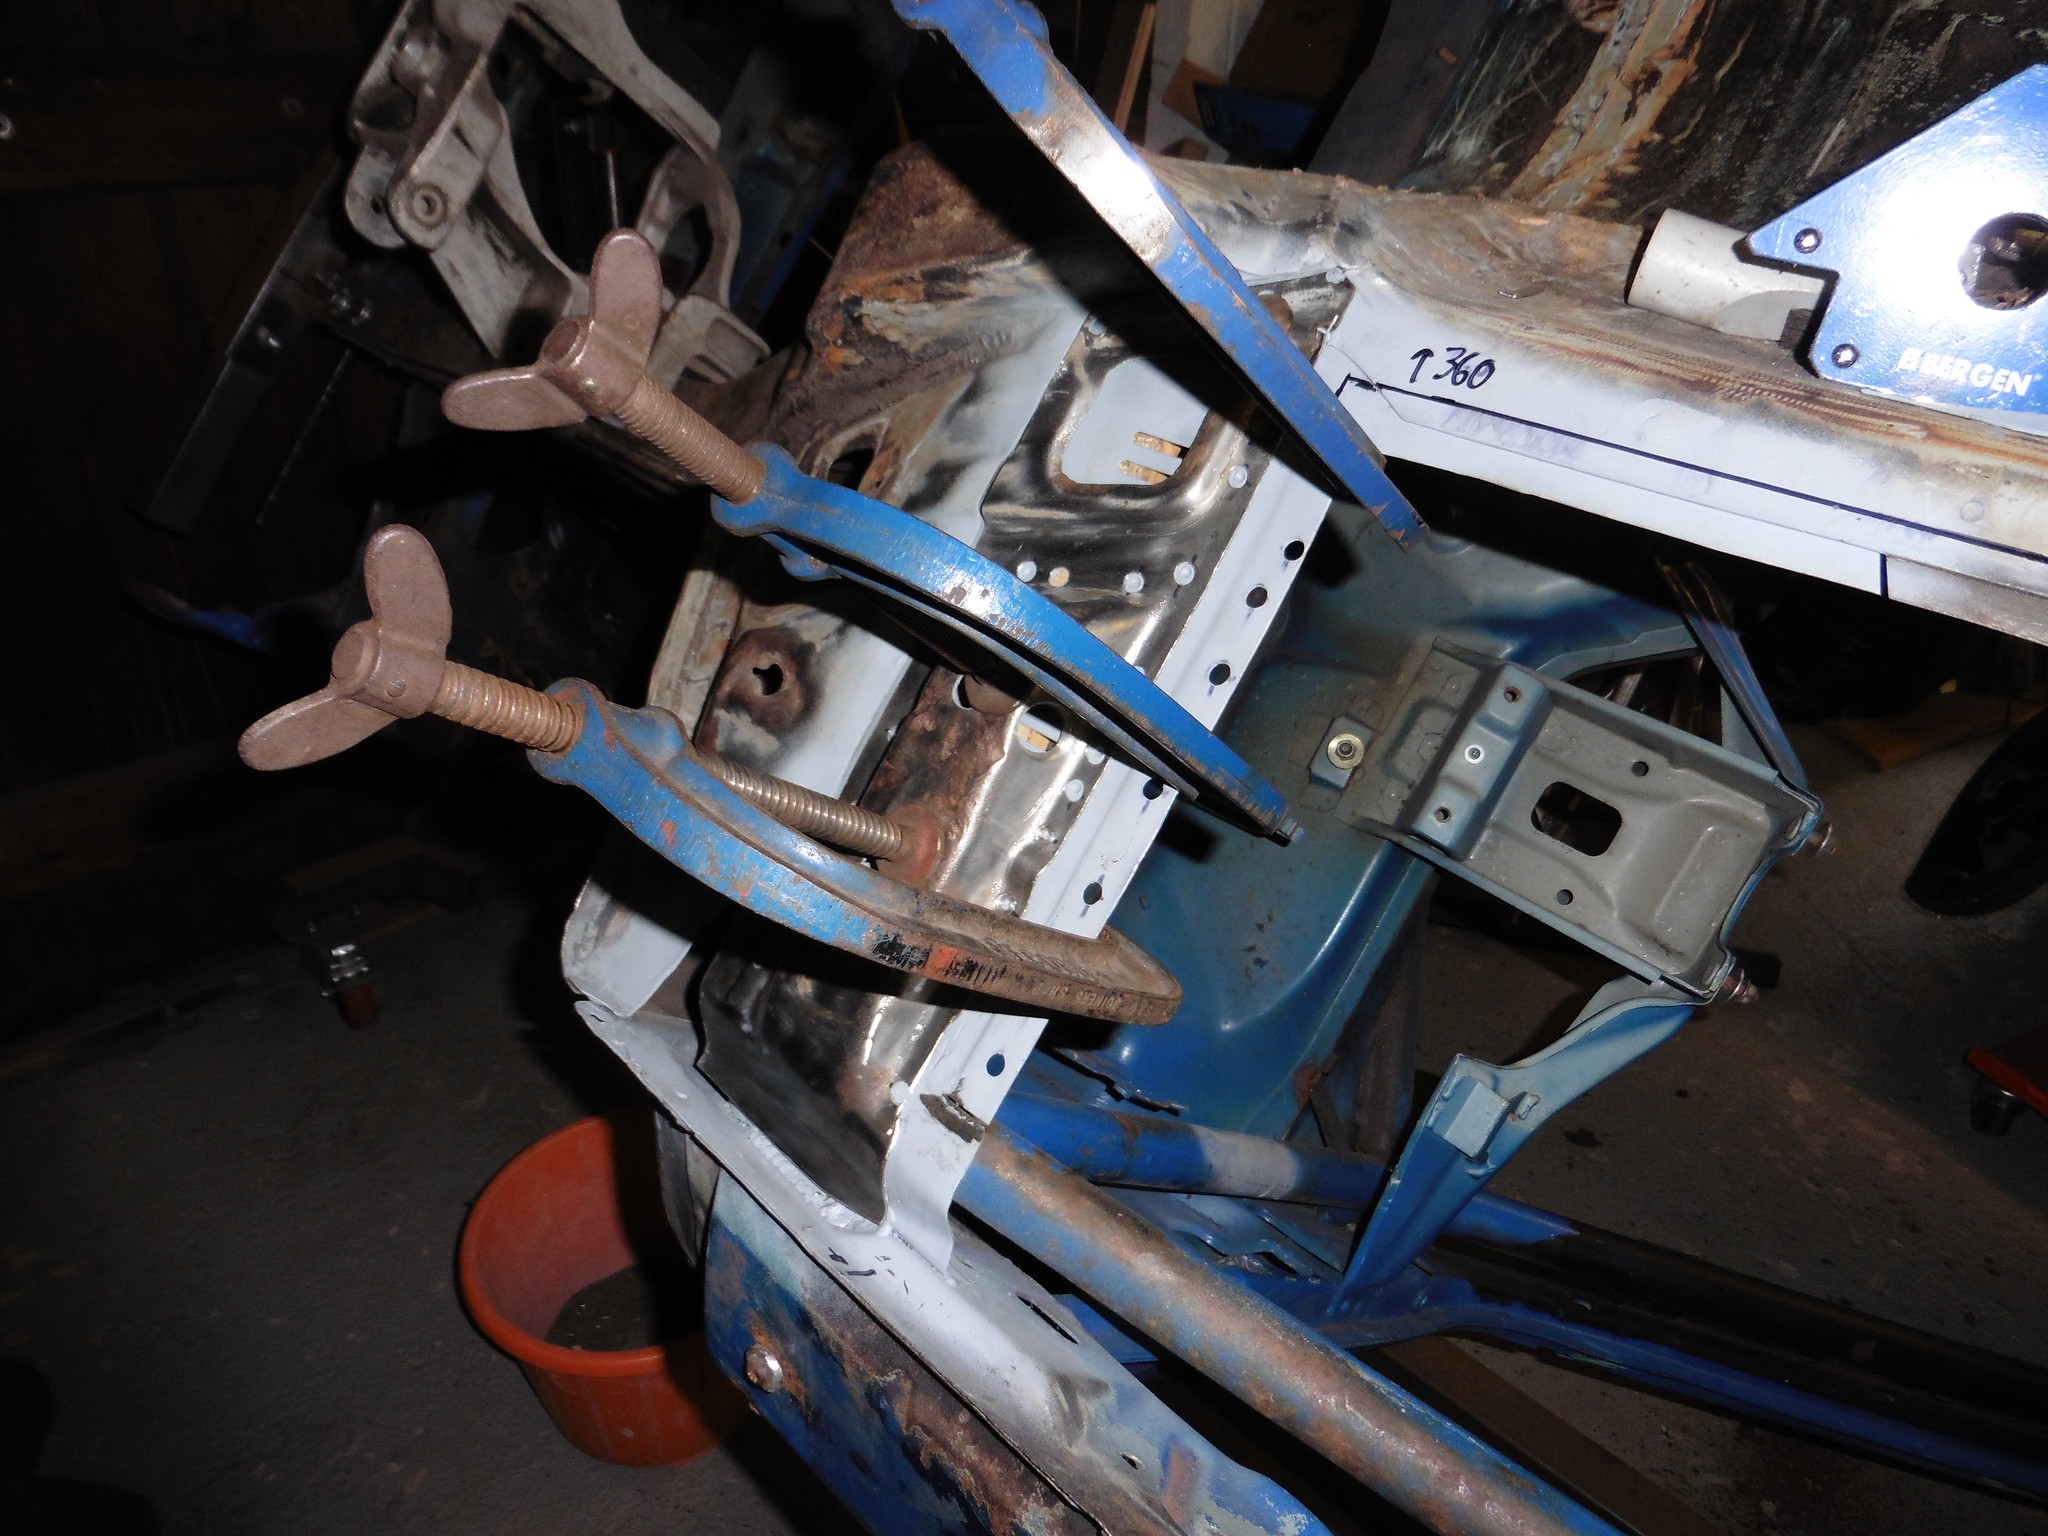 P1020480 P1020480 by jono_misfit, on Flickr tacked in. Not fully welded as if I need to adjust anything I want it to be fairly straight forward to remove.  P1020481 P1020481 by jono_misfit, on Flickr  P1020482 P1020482 by jono_misfit, on Flickr the gap on the left has opened a bit more than i would have liked  P1020483 P1020483 by jono_misfit, on Flickr fairly flat floor, which is good as it was pushed up before. 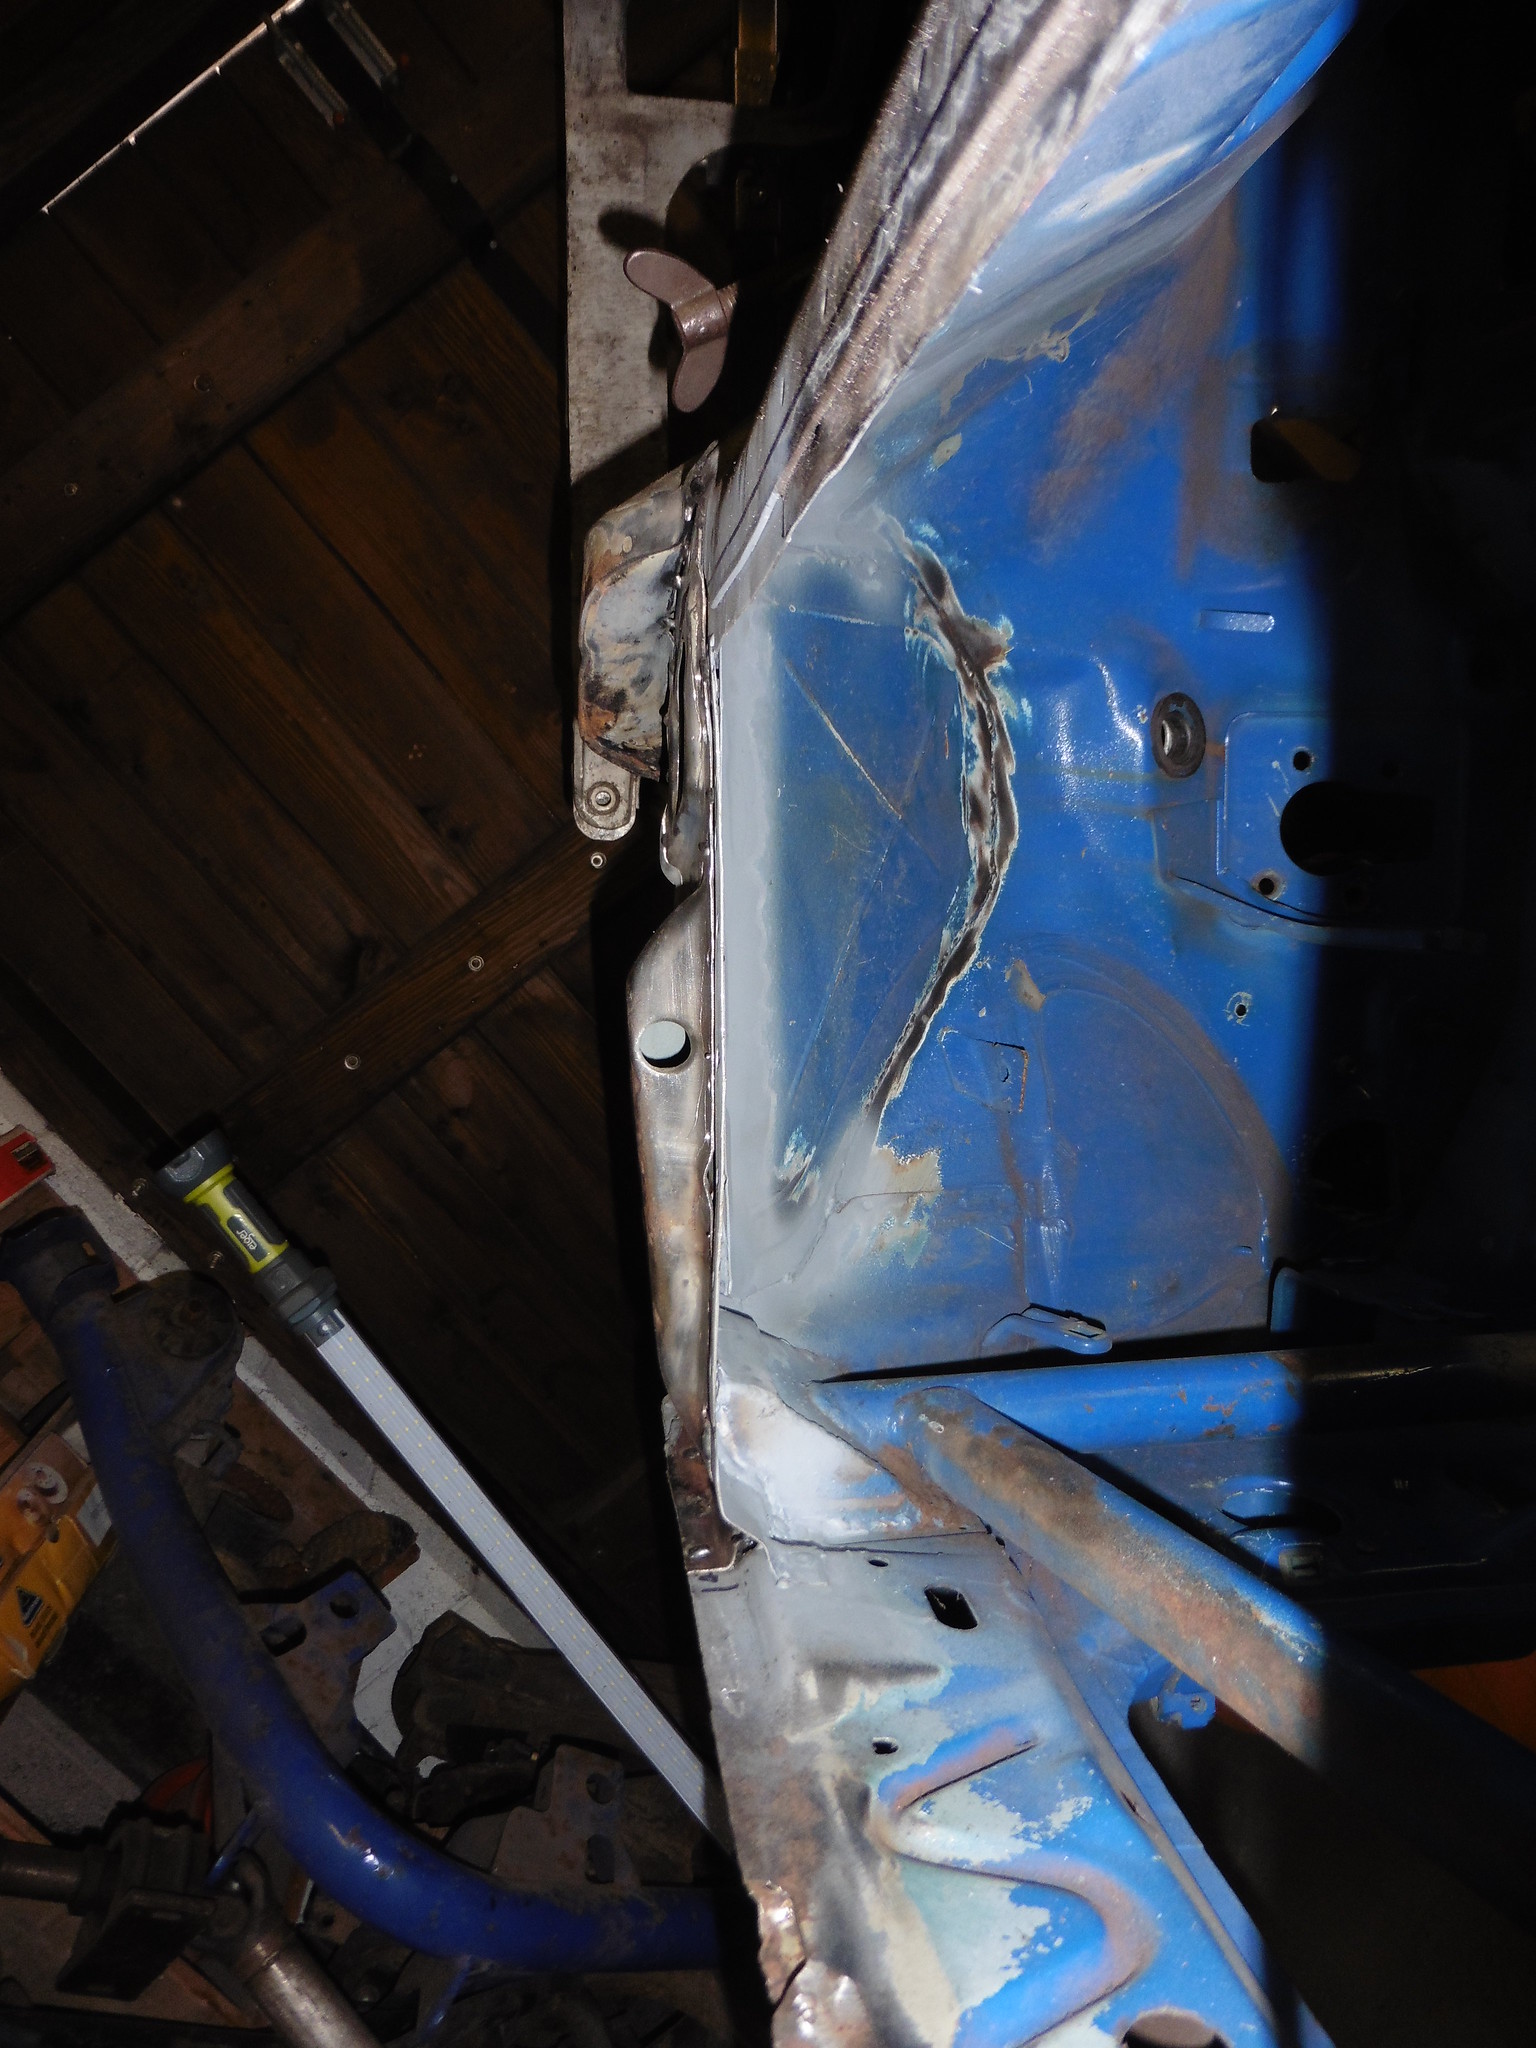 P1020484 P1020484 by jono_misfit, on Flickr pulled on the big boy pants and cut the panel  P1020485 P1020485 by jono_misfit, on Flickr  P1020486 P1020486 by jono_misfit, on Flickr re-trialling to see what needs further adjusted 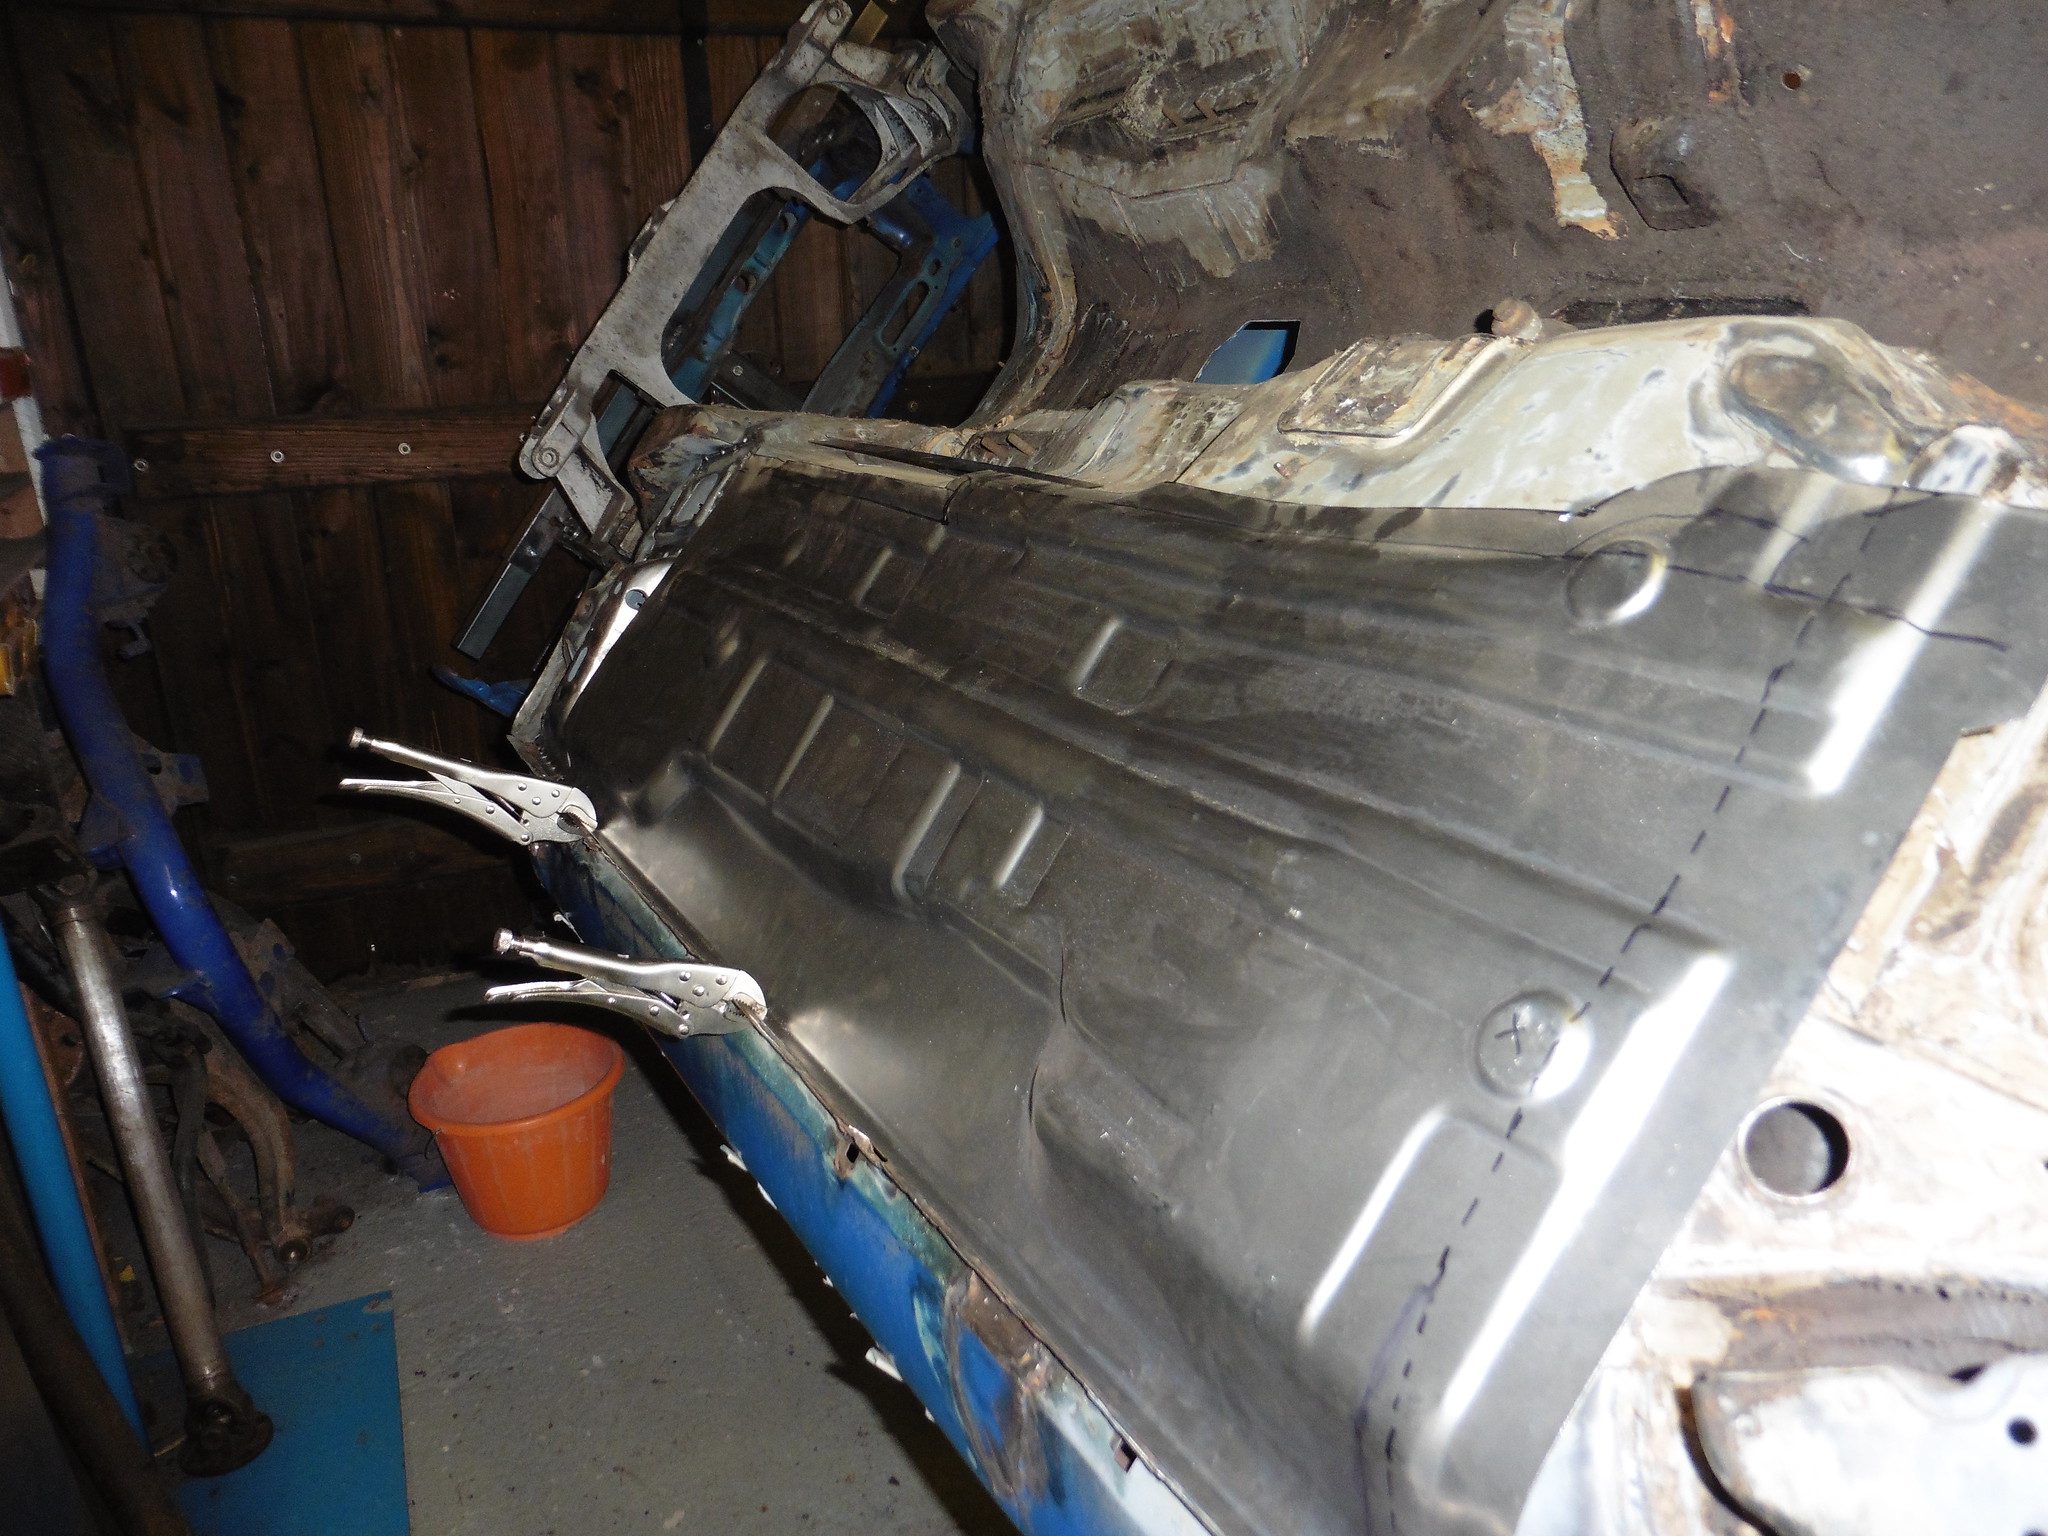 P1020487 P1020487 by jono_misfit, on Flickr most of its a fair fit, however this corner is still 17mm high  P1020488 P1020488 by jono_misfit, on Flickr 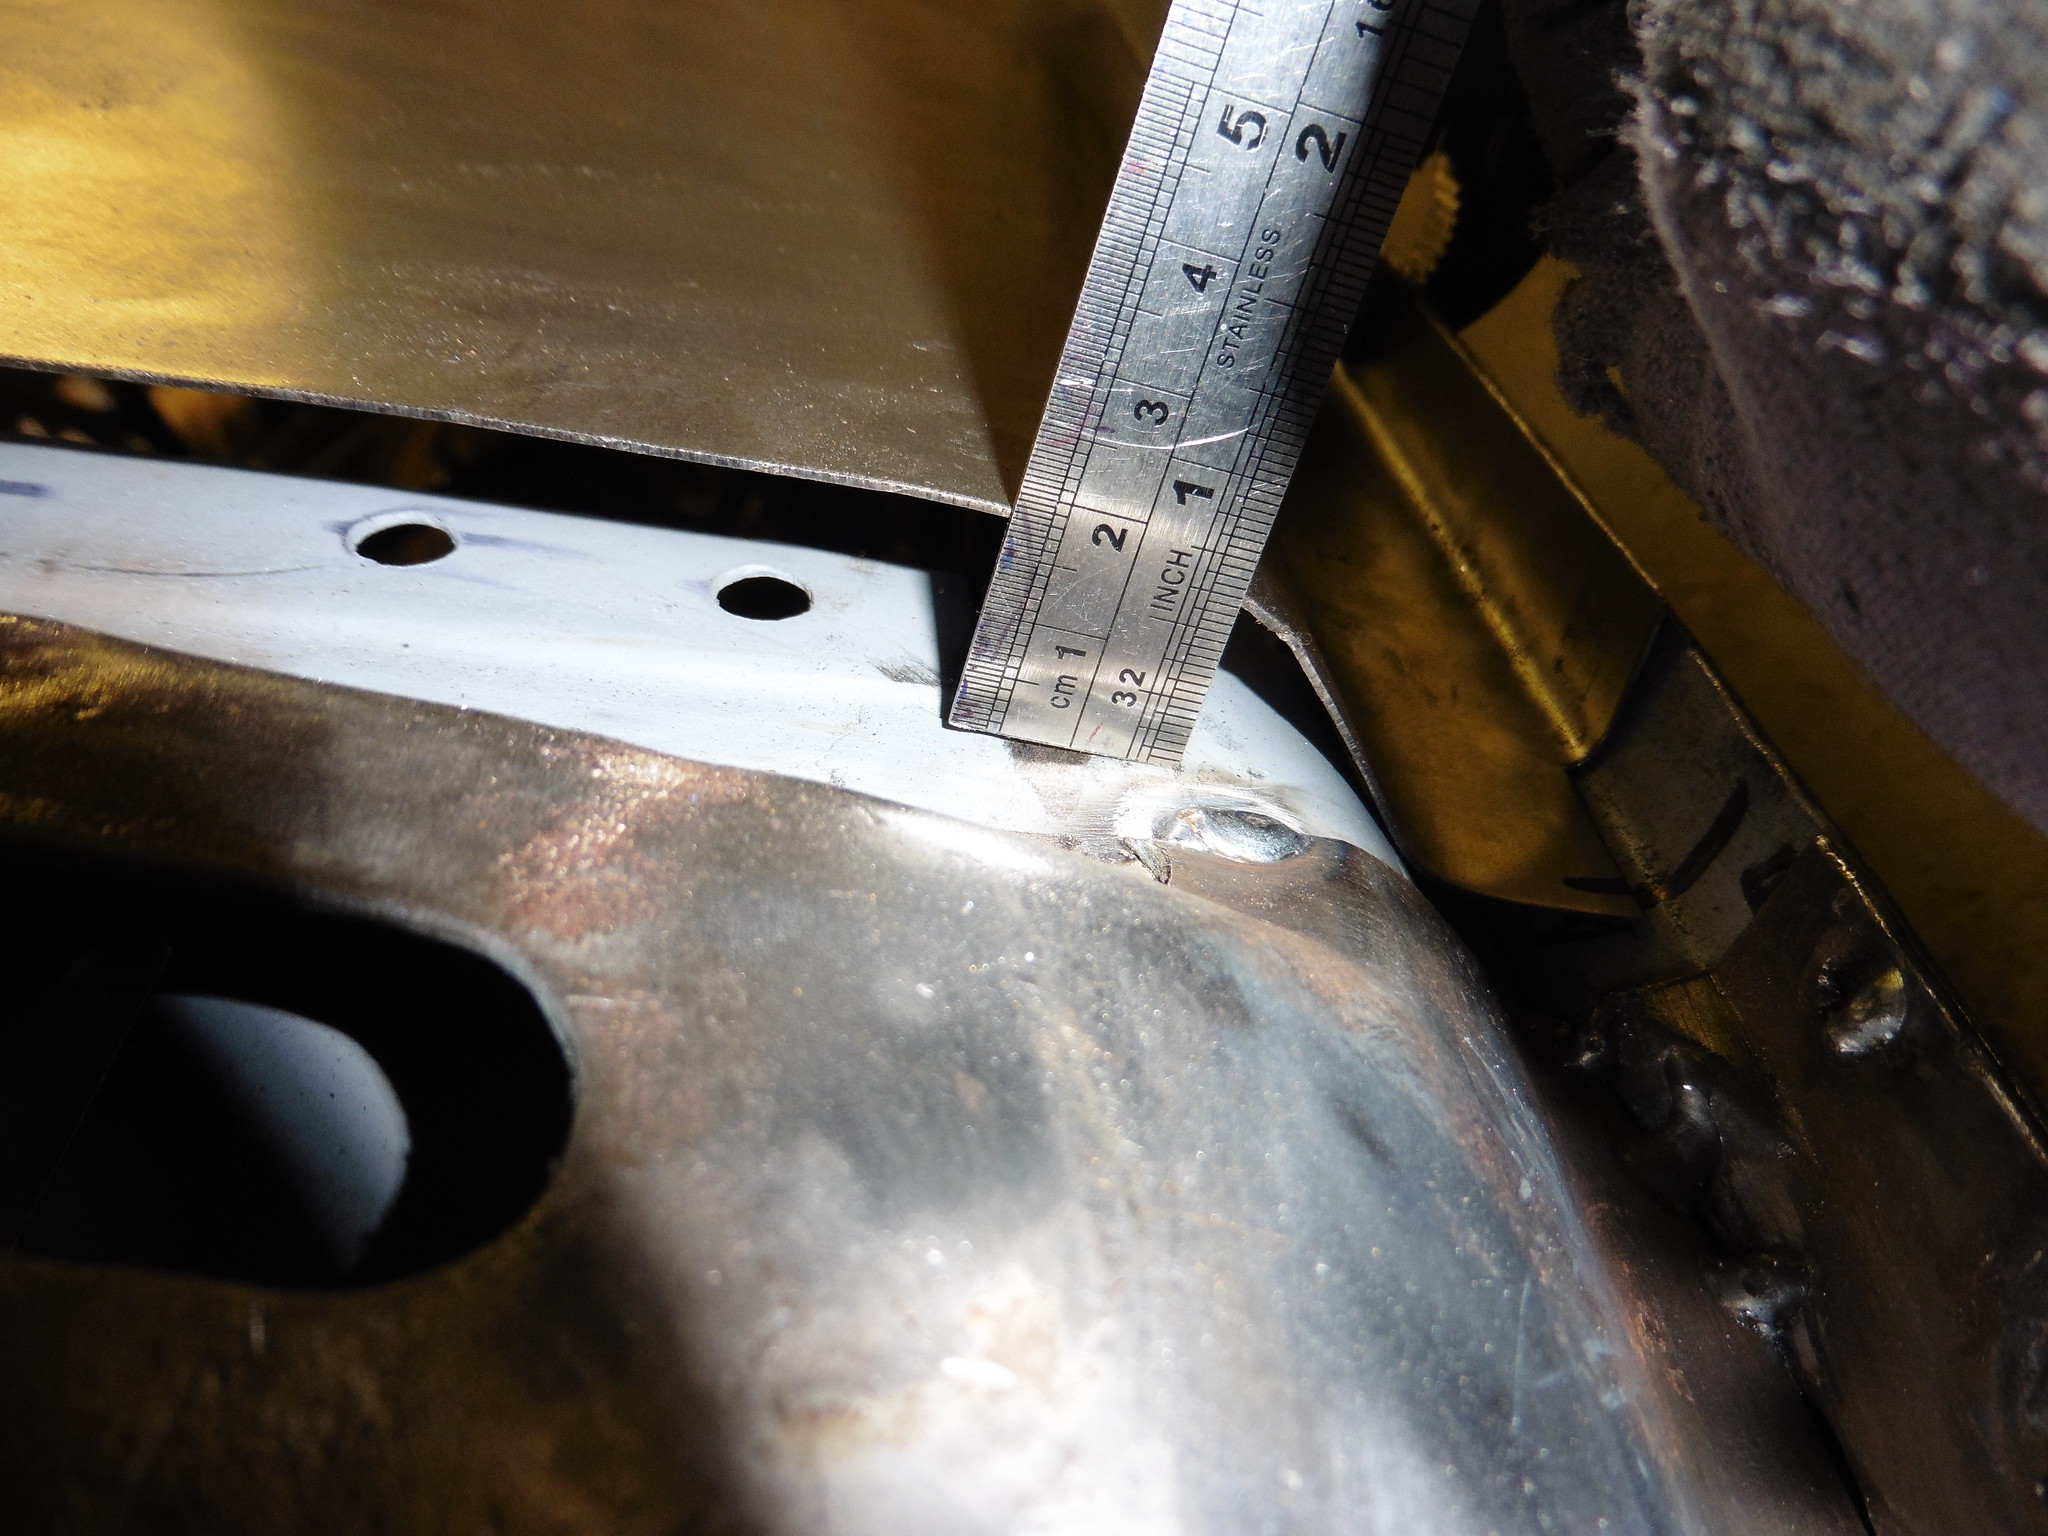 P1020489 P1020489 by jono_misfit, on Flickr Its supposed to fit inside, but I cant get enough movement on it. I measured, and the pressing is about 15mm deeper than the one I cut out. I'm assuming its a rwd/AWD difference thing... this seems to be one of the culprits  P1020490 P1020490 by jono_misfit, on Flickr the escort floor has an additional pressing to step over this difficult to see, but its the welded area  P1020491 P1020491 by jono_misfit, on Flickr marked up some further adjustment points  P1020492 P1020492 by jono_misfit, on Flickr nothing for it, but to slice the step area to allow some adjusting 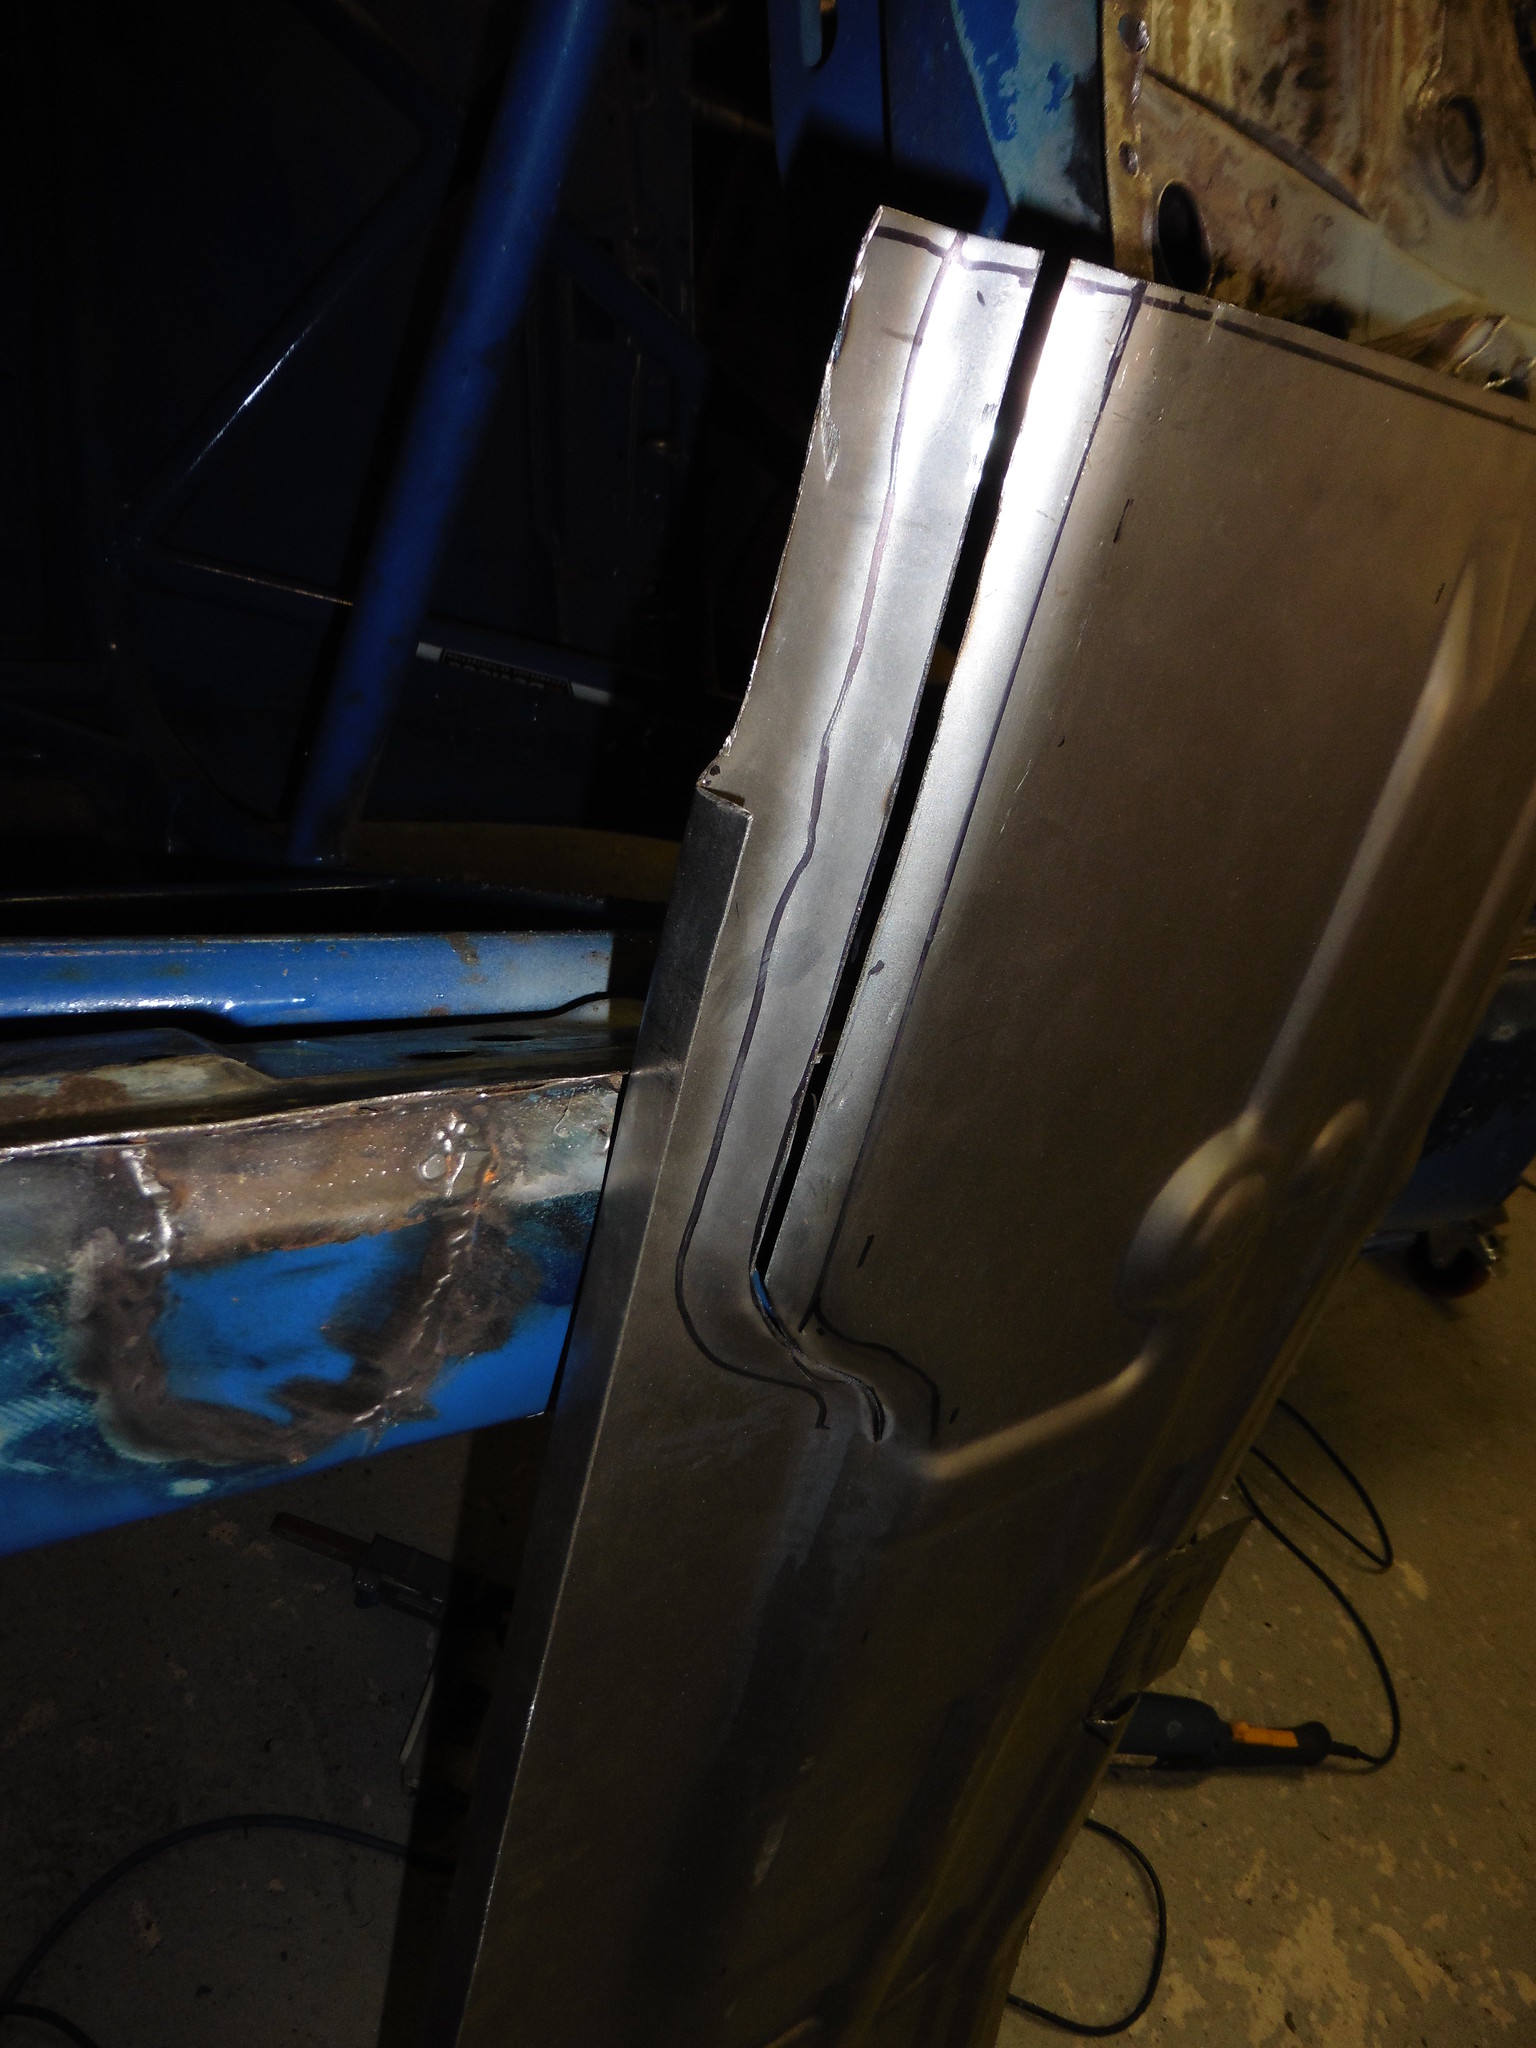 P1020493 P1020493 by jono_misfit, on Flickr started flatting some of the unwanted features  P1020494 P1020494 by jono_misfit, on Flickr clamp in again, this time with the front end tucked inside as required  P1020495 P1020495 by jono_misfit, on Flickr getting better  P1020496 P1020496 by jono_misfit, on Flickr a slight bit of dressing required on the step to fit better  P1020497 P1020497 by jono_misfit, on Flickr there's a lot of tension here, so the slice probably isnt to the right length to take out the stress 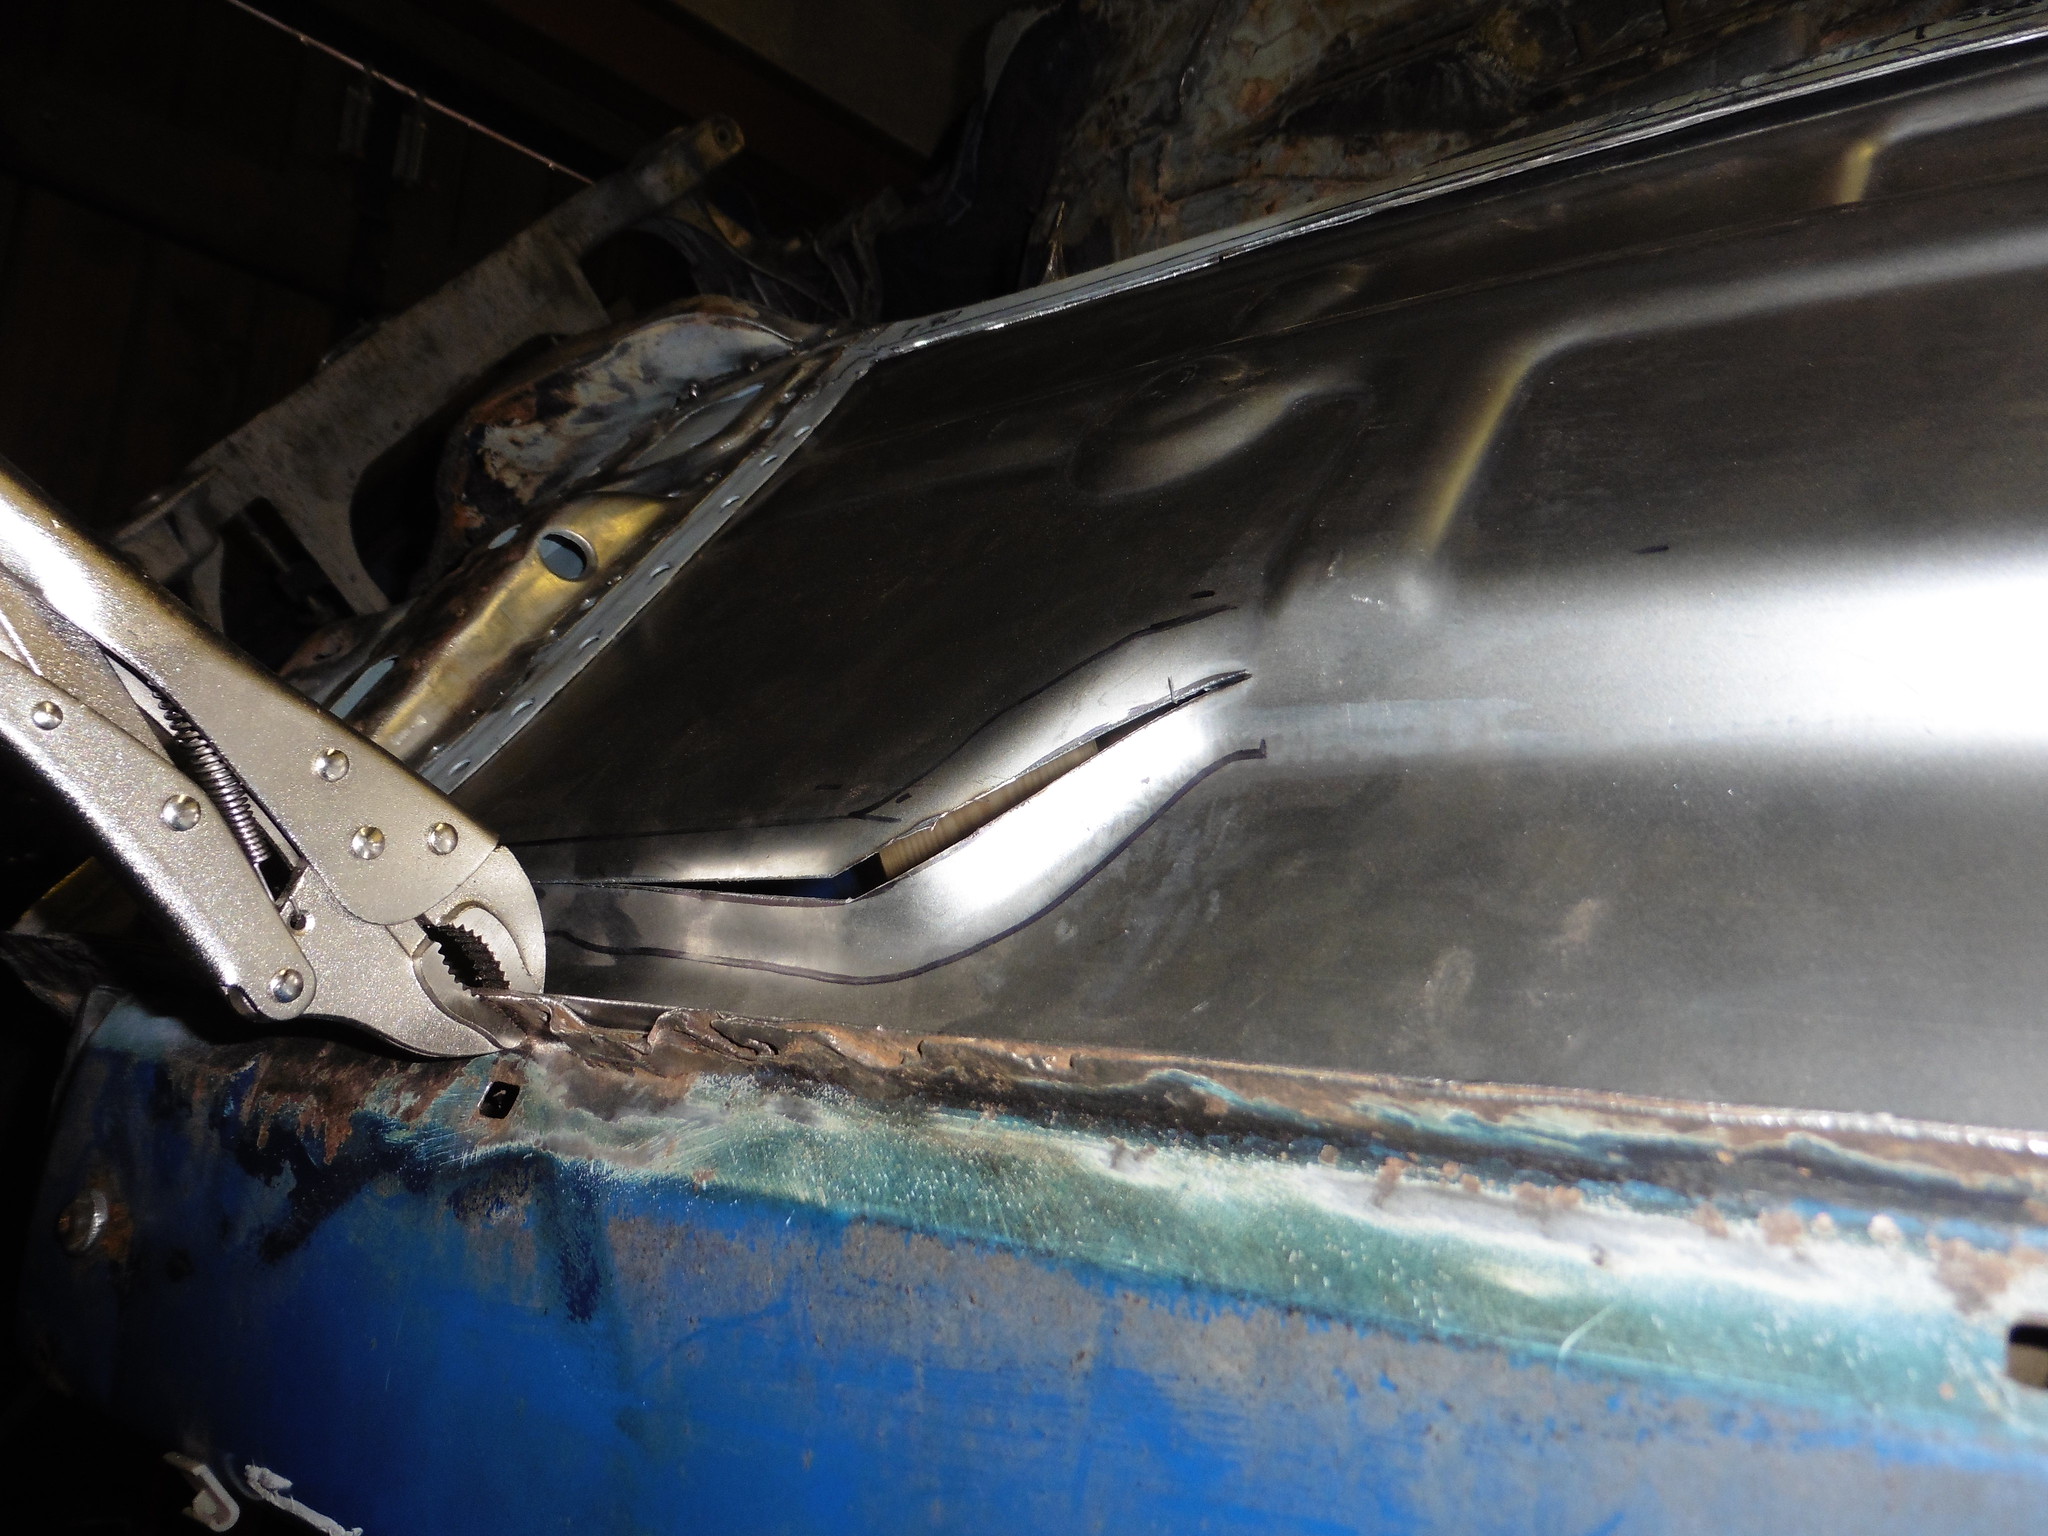 P1020498 P1020498 by jono_misfit, on Flickr much better, tension relieved and also allows the mid floor brace to touch correctly. 600mm of slotting to get it right....  P1020499 P1020499 by jono_misfit, on Flickr still a load of tidying up and trimming to go, but feeling like its starting to get there now. Even though it wont be perfect, it'll be considerably better than the floor that was in there previously. Probably back to it Saturday. |
| |
Last Edit: Jul 11, 2019 21:25:38 GMT by jonomisfit
|
|
|
|
jonomisfit
Club Retro Rides Member
Posts: 1,754
Club RR Member Number: 49
|
|
Jul 11, 2019 17:57:57 GMT
|
|
It's only double skinned in a couple of places. The jacking point I removed and the gearbox mount. The rest of it is single skinned with a mid pan reinforcing member.
I've got no history but I think it was once a rally car, then used for circuit racing / track days, judging by the driver / codriver seat mounts, then the battery mount that was in place of the codriver seat.
|
| |
|
|
jonomisfit
Club Retro Rides Member
Posts: 1,754
Club RR Member Number: 49
|
TIG welders jonomisfit
@jonomisfit
Club Retro Rides Member 49
|
Jul 10, 2019 20:37:21 GMT
|
|
I cant proclaim to have much experience with other brands, but my R-tech one seems pretty good.
If you go on the mig welding forum there will be a whole host of recommended ones for various budgets and brands.
|
| |
|
|
jonomisfit
Club Retro Rides Member
Posts: 1,754
Club RR Member Number: 49
|
|
Jul 10, 2019 16:24:31 GMT
|
|
I've never been 100% certain, but assume it's for the e-coating process as they get filled by foam sealant and covered with sound deadening pads, so can't see then having any use in service.
Most repairs in this area people cut them out and plate them solid.
|
| |
|
|
jonomisfit
Club Retro Rides Member
Posts: 1,754
Club RR Member Number: 49
|
|
Jul 10, 2019 12:39:52 GMT
|
today was this morning only out on the car. interior piece welded in  P1020465 P1020465 by jono_misfit, on Flickr and the plugs done from external then cleaned back  P1020466 P1020466 by jono_misfit, on Flickr this is the section behind the cage leg pre-clean up  P1020467 P1020467 by jono_misfit, on Flickr cleaned back, rust killer applied, then a coat of Uber zinc primer.  P1020469 P1020469 by jono_misfit, on Flickr infill plate made  P1020468 P1020468 by jono_misfit, on Flickr and welded in  P1020470 P1020470 by jono_misfit, on Flickr  P1020471 P1020471 by jono_misfit, on Flickr I've a few other rust repairs to do, then it'll be clean back, trim, and fit the floor. It already looks like the depth of the front section will need to be reduced to get it to meet all the required points. |
| |
|
|
jonomisfit
Club Retro Rides Member
Posts: 1,754
Club RR Member Number: 49
|
|
|
|
Marked up a rough cut location  P1020440 P1020440 by jono_misfit, on Flickr drilled out the accessible spot welds  P1020441 P1020441 by jono_misfit, on Flickr  P1020442 P1020442 by jono_misfit, on Flickr and used the ball end carbide in the angled die grinder to get the less accessible ones and peeled back the lip  P1020443 P1020443 by jono_misfit, on Flickr then zipped along the cut mark  P1020444 P1020444 by jono_misfit, on Flickr to give me a full on Flintstones mobile  P1020445 P1020445 by jono_misfit, on Flickr that doesnt look promising  P1020446 P1020446 by jono_misfit, on Flickr actually, the mid sill is in good condition, a couple of minor repair spots needed, but generally just a clean and paint required 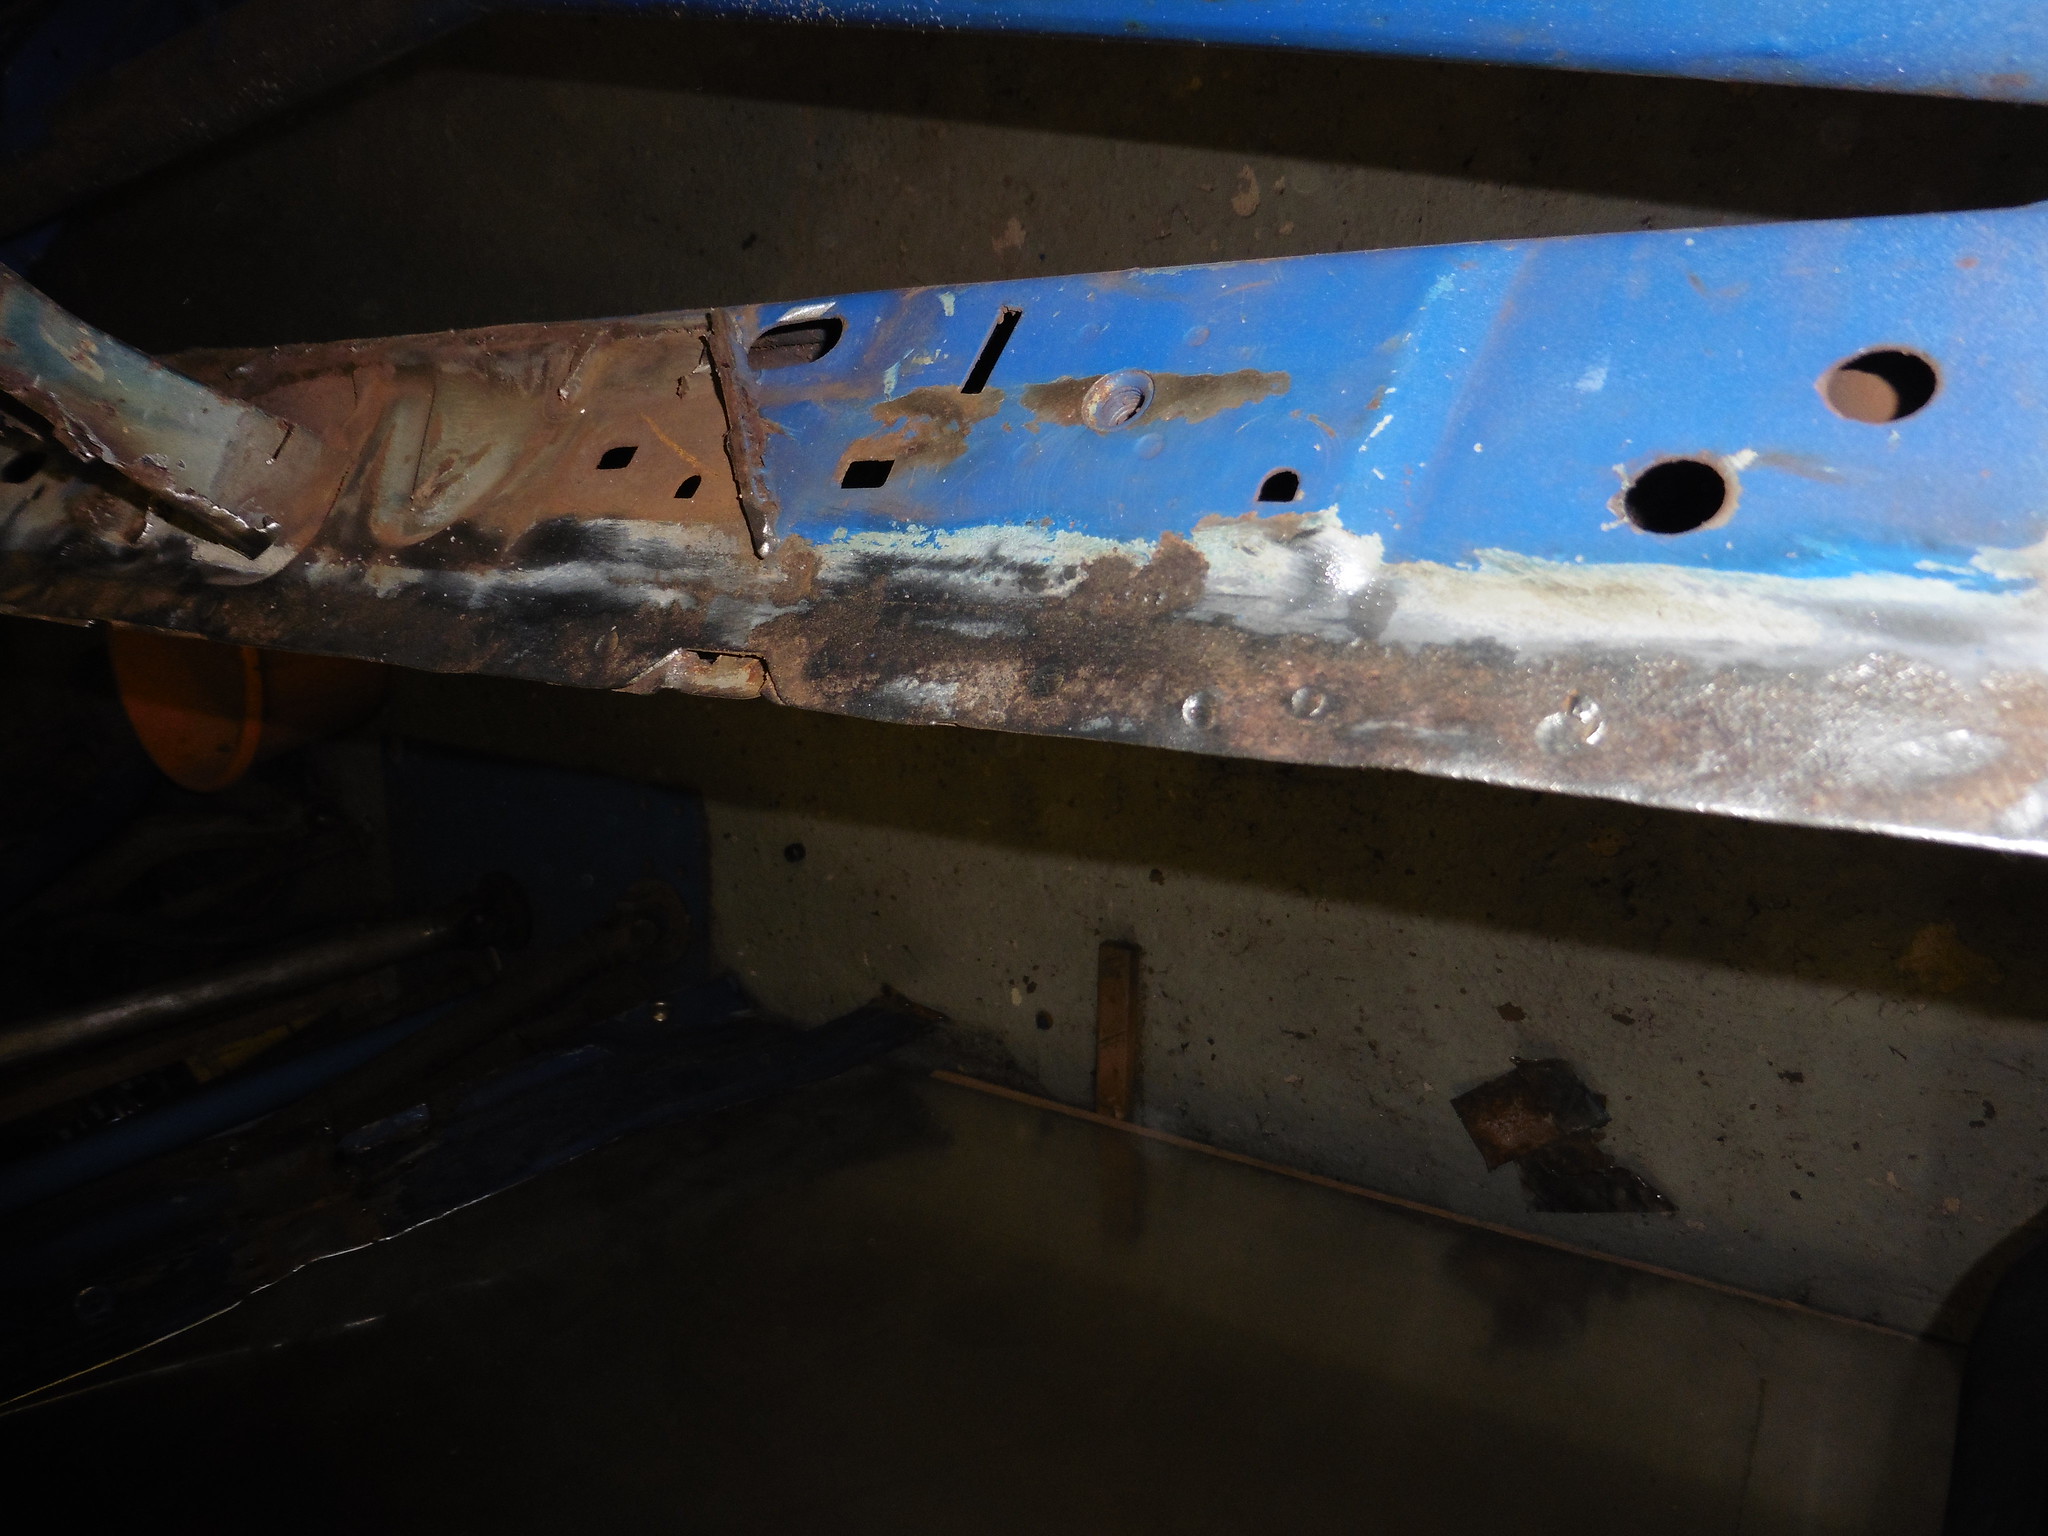 P1020447 P1020447 by jono_misfit, on Flickr  P1020448 P1020448 by jono_misfit, on Flickr and the floor pan put in position  P1020449 P1020449 by jono_misfit, on Flickr it touches at the required points  P1020450 P1020450 by jono_misfit, on Flickr a few adjustments needed  P1020451 P1020451 by jono_misfit, on Flickr a bit of shortening required  P1020452 P1020452 by jono_misfit, on Flickr if you compare the next two photos you can see a few differences in the pressings. I think they are mainly to do with the differences between 2wd and 4wd floor pans (this is a 2wd floorpan as 4x4 are not yet available) P1020449 by jono_misfit, on Flickr P1020440 by jono_misfit, on Flickr It may look slightly different, but it'll still work fine, so it it shall go. But first, there are a fair few other bits to sort out. Like this suspiciously crusty bit under the cage foot.  P1020453 P1020453 by jono_misfit, on Flickr to access it though, this needs to come out. X marks the spot weld spots  P1020454 P1020454 by jono_misfit, on Flickr It does mean i'll be able to straighten out the damage to it from all the badly placed jacks.... as expected, a large hole under the cage foot, just like the passenger side had  P1020455 P1020455 by jono_misfit, on Flickr  P1020456 P1020456 by jono_misfit, on Flickr I cleaned it all back to solid metal, but forgot to take a pic The jacking point looks disgusting here, but its body wax and is generally in good condition  P1020457 P1020457 by jono_misfit, on Flickr there are also some rust spots on the tunnel that need addressing. black line is where the floor joint will be made.  P1020458 P1020458 by jono_misfit, on Flickr some of the rust spots are above the intended cut line. However it needs to be there as wider that this the trans tunnel section is different due to the 2wd floor pan. so trim back and clean further, patch it, then cut and weld the floor to this point.  P1020459 P1020459 by jono_misfit, on Flickr cleaned back metal is all solid, and a good point to work to.  P1020460 P1020460 by jono_misfit, on Flickr patch piece made, and clamped to check it'll fit  P1020461 P1020461 by jono_misfit, on Flickr making the reinforcing rib on the curve was a pain!  P1020462 P1020462 by jono_misfit, on Flickr cleaned and primed ready for welding  P1020463 P1020463 by jono_misfit, on Flickr  P1020464 P1020464 by jono_misfit, on Flickr that was it for today. I may get a bit of time on it tomorrow. |
| |
|
|
jonomisfit
Club Retro Rides Member
Posts: 1,754
Club RR Member Number: 49
|
|
|
|
|
That may be the case, but I'm more inclined to think it's either a 2wd vs 4wd change or more likely an Express panels convenience thing as this way they can fold the edge rather than press a very detailed shape in.
|
| |
|
|
jonomisfit
Club Retro Rides Member
Posts: 1,754
Club RR Member Number: 49
|
|
|
|
|
Shape wise it looks like it'll fit ok.
As it's a rwd Sierra pressing some of the details are different so I need to be careful where I cut.
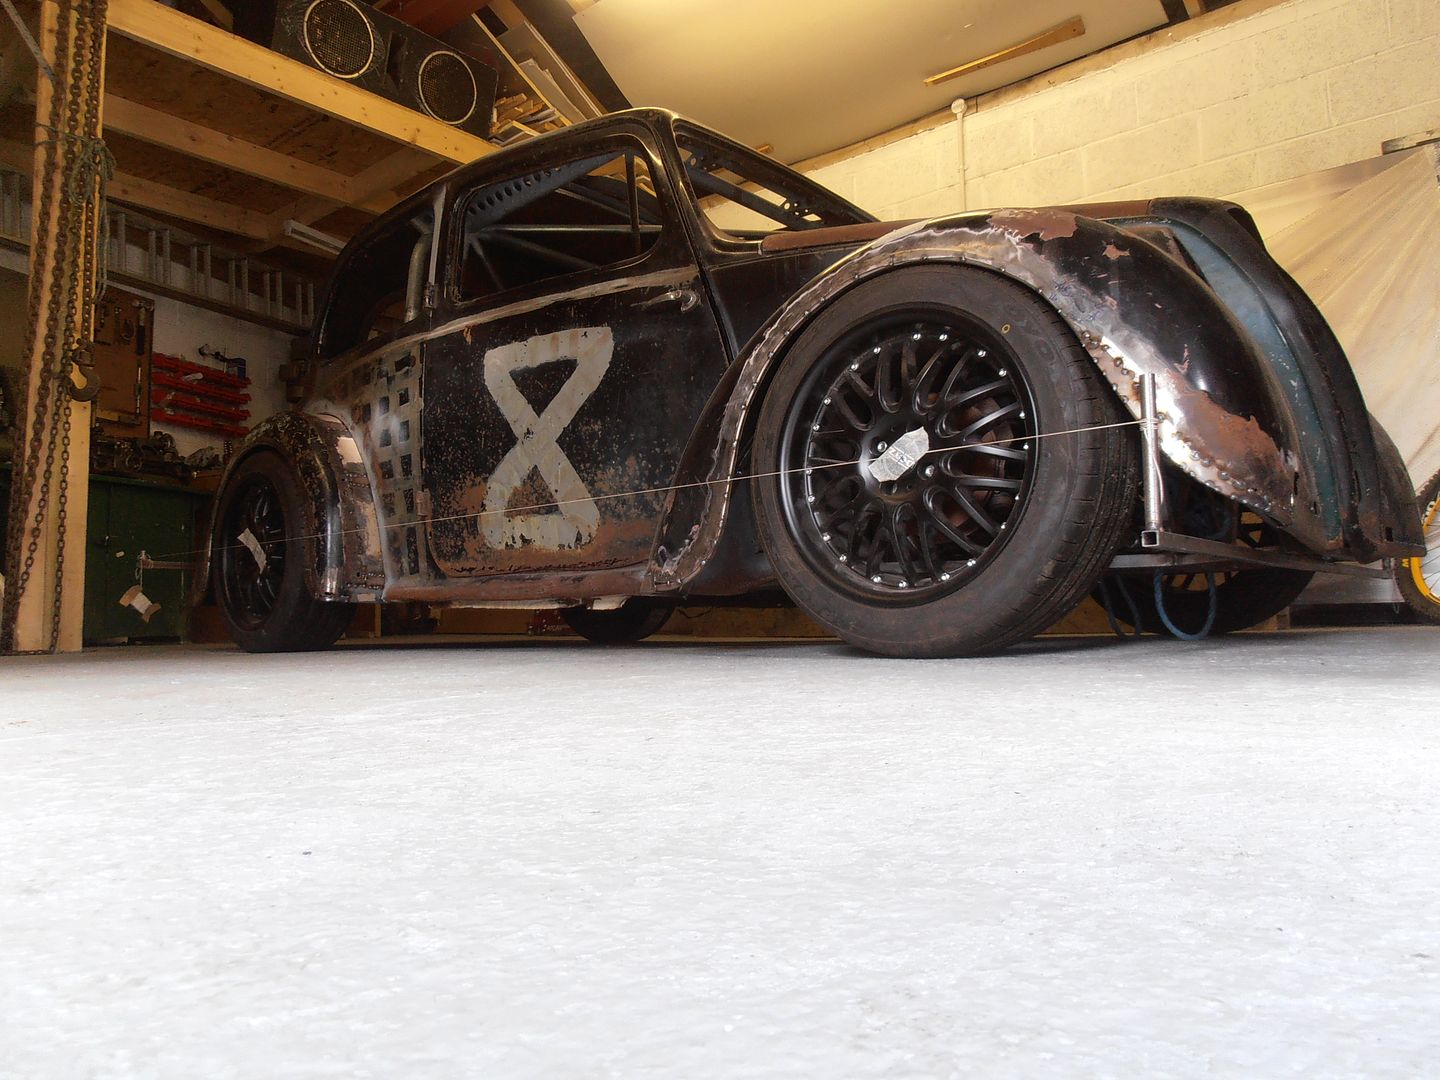
Pics up later. Currently have an escort rs cosworth flintstones special..
|
| |
|
|
jonomisfit
Club Retro Rides Member
Posts: 1,754
Club RR Member Number: 49
|
|
|
|
I was away for the weekend and got back to this lying in the middle of the drive....  20190708_152255 20190708_152255 by jono_misfit, on Flickr thankfully all was OK when I opened it.  20190708_152622 20190708_152622 by jono_misfit, on Flickr  20190708_152633 20190708_152633 by jono_misfit, on Flickr Hopefully get chance to check it out properly tomorrow. I have noticed this edge isnt right v's the factory panel.  20190708_152641 20190708_152641 by jono_misfit, on Flickr the factory panel has a 5mm wide 45 degree offset on the top edge, whereas this is just folded square. it also feels thicker metal v's the factory stamping, but will check it tomorrow. |
| |
|
|
jonomisfit
Club Retro Rides Member
Posts: 1,754
Club RR Member Number: 49
|
|
|
|
|
The pics are great and a shame to see them come to an end.
For me RR has just got to the point that there are too many threads with too many good and interesting things on to have any hope of keeping up with them all or providing feedback/ comments.
Motivation to persevere with a thread has to come from within, as often people enjoy the content but don't feedback.
|
| |
|
|
|
|
jonomisfit
Club Retro Rides Member
Posts: 1,754
Club RR Member Number: 49
|
|
|
|
|
Agreed. Completely over priced. Completely.
|
| |
|
|
jonomisfit
Club Retro Rides Member
Posts: 1,754
Club RR Member Number: 49
|
|
|
|
Today was mainly spent marking out, a lot of it, like tons... Marking out  P1020424 P1020424 by jono_misfit, on Flickr start drilling some terminus points  P1020425 P1020425 by jono_misfit, on Flickr and start trimming using the air shears  P1020426 P1020426 by jono_misfit, on Flickr rough trimming  P1020427 P1020427 by jono_misfit, on Flickr mark out the majority of the holes and drill the centre  P1020428 P1020428 by jono_misfit, on Flickr this is where the shape starts deviating from the drivers seat, trim in the trunk reliefs  P1020429 P1020429 by jono_misfit, on Flickr start bending some of the flanges  P1020430 P1020430 by jono_misfit, on Flickr start the major folds  P1020431 P1020431 by jono_misfit, on Flickr I've also marked out for the cage clearance hole P1020431 by jono_misfit, on Flickr start the side folds  P1020432 P1020432 by jono_misfit, on Flickr I'm not sure you can see easily, but compared to the drivers this is a more vertical hip / thigh support which then bells out part way up.  P1020433 P1020433 by jono_misfit, on Flickr cut the cage relief hole, then folded the shoulder support wings  P1020434 P1020434 by jono_misfit, on Flickr again these are bent further round than the drivers side  P1020435 P1020435 by jono_misfit, on Flickr very roughly thrown into position  P1020436 P1020436 by jono_misfit, on Flickr  P1020437 P1020437 by jono_misfit, on Flickr an indication of how much lower the passenger is, it about 150mm further down.  P1020439 P1020439 by jono_misfit, on Flickr the passenger seat will also be reclined back at a slight angle. Next session will be adjusting it to fit better in the hole. |
| |
|
|
jonomisfit
Club Retro Rides Member
Posts: 1,754
Club RR Member Number: 49
|
|
|
|
|
Yep, you can guarantee a lot of the 25k escort cosworths are rotten underneath.
Its interesting looking at the projects section if the escort cosworth forum as there are a lot of very substantial repair for rust. Forum is probably owners only for that reason.
Mines in fairly good condition compared to a number of them. Most of my rot is caused by poor protection after the cage etc were fitted.
My favourite too, hence having to get this when it came up, even though I've got the Morris to finish.
|
| |
|
|
jonomisfit
Club Retro Rides Member
Posts: 1,754
Club RR Member Number: 49
|
|
|
|
|
I'll find out soon enough.
10 days turned out to be 1 day. In the post and here tomorrow!
|
| |
|
|
jonomisfit
Club Retro Rides Member
Posts: 1,754
Club RR Member Number: 49
|
|
|
|
|
Me too. I can't see it being a worse fit than the chassis leg though!
|
| |
|
|
jonomisfit
Club Retro Rides Member
Posts: 1,754
Club RR Member Number: 49
|
...jonomisfit
@jonomisfit
Club Retro Rides Member 49
|
|
|
|
Stunning as always
|
| |
|
|
jonomisfit
Club Retro Rides Member
Posts: 1,754
Club RR Member Number: 49
|
|
|
|
Mrs_misfit wanted peace in the summer palace so I tidied the workshop a bit, contemplated for a while, then decided to make a start on seat no.2 as it was quiet work. start with the template  P1020418 P1020418 by jono_misfit, on Flickr mark some lines  P1020420 P1020420 by jono_misfit, on Flickr mark some more lines  P1020421 P1020421 by jono_misfit, on Flickr and some more  P1020422 P1020422 by jono_misfit, on Flickr and some more  P1020423 P1020423 by jono_misfit, on Flickr some slight changes to the seat v's the drivers one, to sort it being lower, to give some extra space for a wider range of passengers (about 35mm wider on the base), and to clear some other obstacles the other seat didnt have to. Will see how it goes. |
| |
|
|
jonomisfit
Club Retro Rides Member
Posts: 1,754
Club RR Member Number: 49
|
|
|
|
having decided to order the floor, that put me into a bit of spin as to what to hit next on the escort. So decided to do a few bits in prep of when it arrives / removing the old floor. Feet doubler plates on this side look a bit suspect. get out the trimming tool  P1020413 P1020413 by jono_misfit, on Flickr that looks properly manky.... 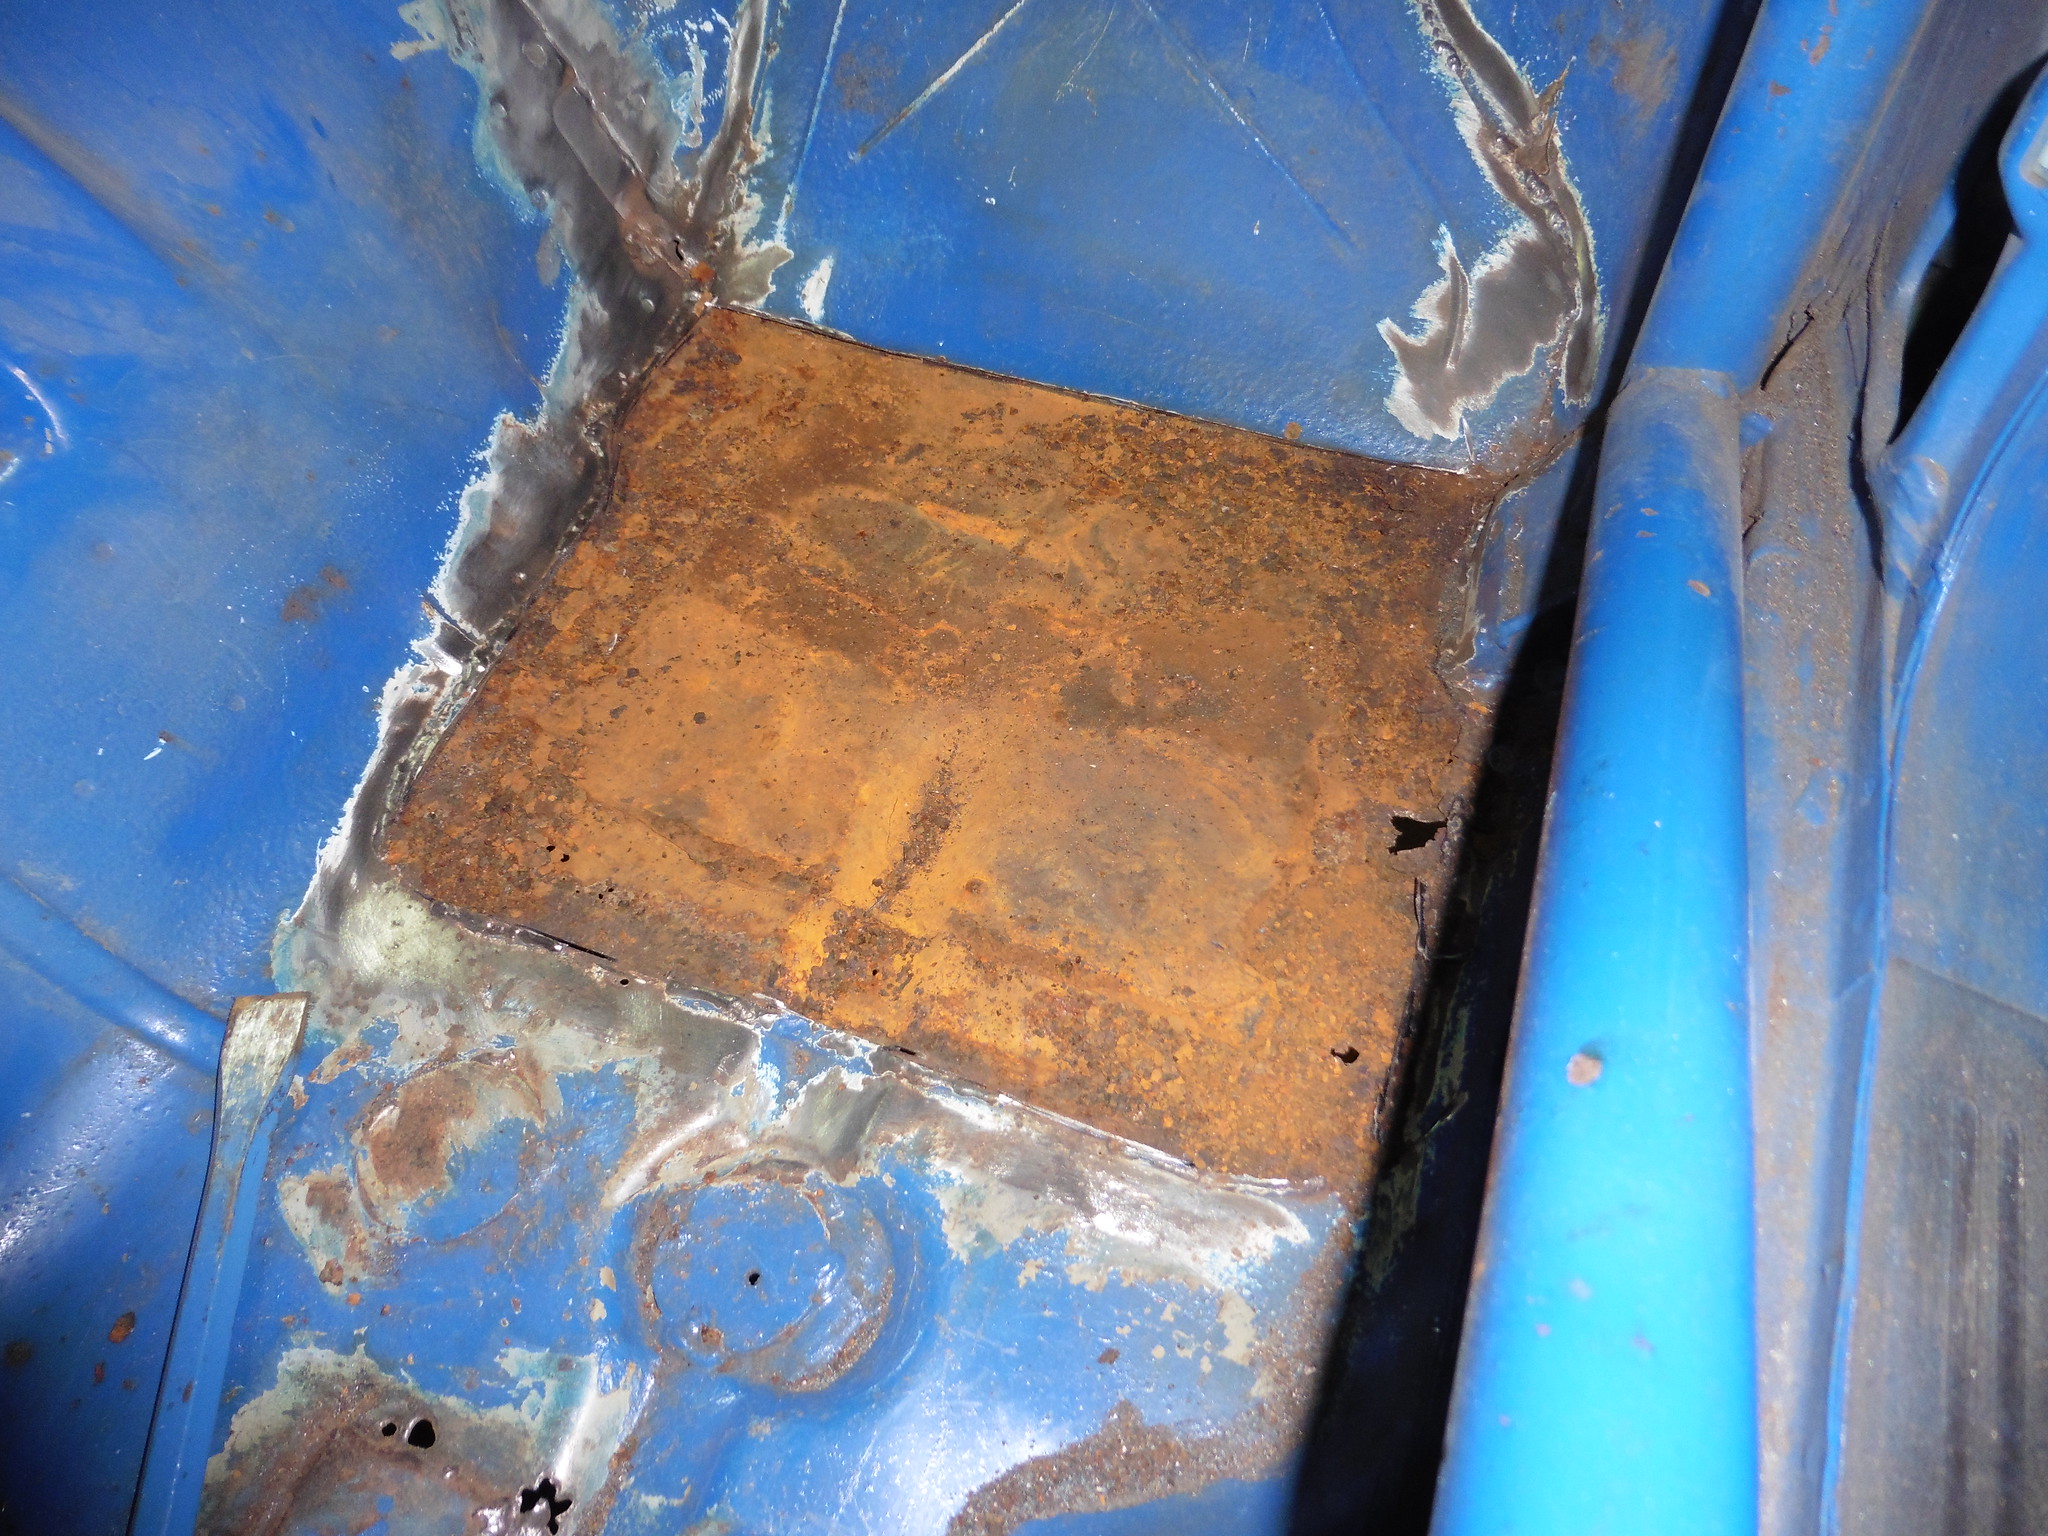 P1020414 P1020414 by jono_misfit, on Flickr wait, whats that? it looks like... it almost looks like some cowboy has left the sound deadening in there and has put the strengthening plate over the top..... chip off the sound deadening and the important bits are in pretty decent condition.  P1020415 P1020415 by jono_misfit, on Flickr  P1020417 P1020417 by jono_misfit, on Flickr I'm assuming it was left to act as additional padding.... removed the passenger seat mounts, as I have a proper seat rail kit to fit  P1020416 P1020416 by jono_misfit, on Flickr At this point Mrs_Misfit wanted to use her summer palace, so noisy tools were put away. |
| |
|
|
jonomisfit
Club Retro Rides Member
Posts: 1,754
Club RR Member Number: 49
|
|
|
|
|
Half floor ordered, but its 10 day to dispatch.
|
| |
|
|
jonomisfit
Club Retro Rides Member
Posts: 1,754
Club RR Member Number: 49
|
|
|
|
|
Visibility is surprisingly ok...ish, but I suspect parking will be fraught with concern as you have no idea where the exact front is.
Thanks. I can see there being a lit of tweaks to seating position once the thing is mobile.
|
| |
|
|
|
|