goldnrust
West Midlands
Minimalist
Posts: 1,887
|
|
|
|
I had sworn I'd not get myself stuck in another big restoration and weldathon, but like a moth to the flame, it seems I just can't help myself   I've been a little absent from the forums recently, but I was I need of a mojo boost recently and found myself back reading about some other members money pits restorations. It did the trick, so figured it couldn't hurt to do a thread about this old heap! Cast your mind back to the end of March... Spring was properly springing, we had some great warm days, perfect weather for my Spitfire to be out zapping about. And yet I was discontent. Somehow the idea of wanting a v8 had implanted itself in my head, and although I spent a fair amount of time investigating the idea of putting one on the front to the spitfire, in the end I decided it would be a better idea to get a car where the v8 fitted a little more easily, where the car was actually designed for it*. I also found myself missing my short lived XJ6 (x300). I'd had a very nice time just wafting about the place in that big old jag for the 6 months I owned it, but it was not without it's challenges as a daily, and after running into major rear subframe/diff issues, I moved on. I toyed with various different idea, looking for something that could offer me some of the proper old fashioned driving experience that the little Triumph did, but with a more relaxed luxuriant attitude and a suitably interesting power plant, and quickly one idea stood out. It wasn't a great idea, it was pushing my budget and it was invariably going to end with an expensive project and probably a lot welding, but the idea kept popping back into my mind. So I went looking for a Daimler 250 v8. As most of you are aware, it was the first Daimler after the Jaguar buy out and is essentially a Jaguar mk2, but with Daimler's own 2.5l hemi-headed V8 in it. I went looking for an obvious project, attempting to learn from my mistakes and not buy another car which is 'just about roadworthy' but is intact barely held together with bodges. After a couple of weeks looking this old girl popped up: 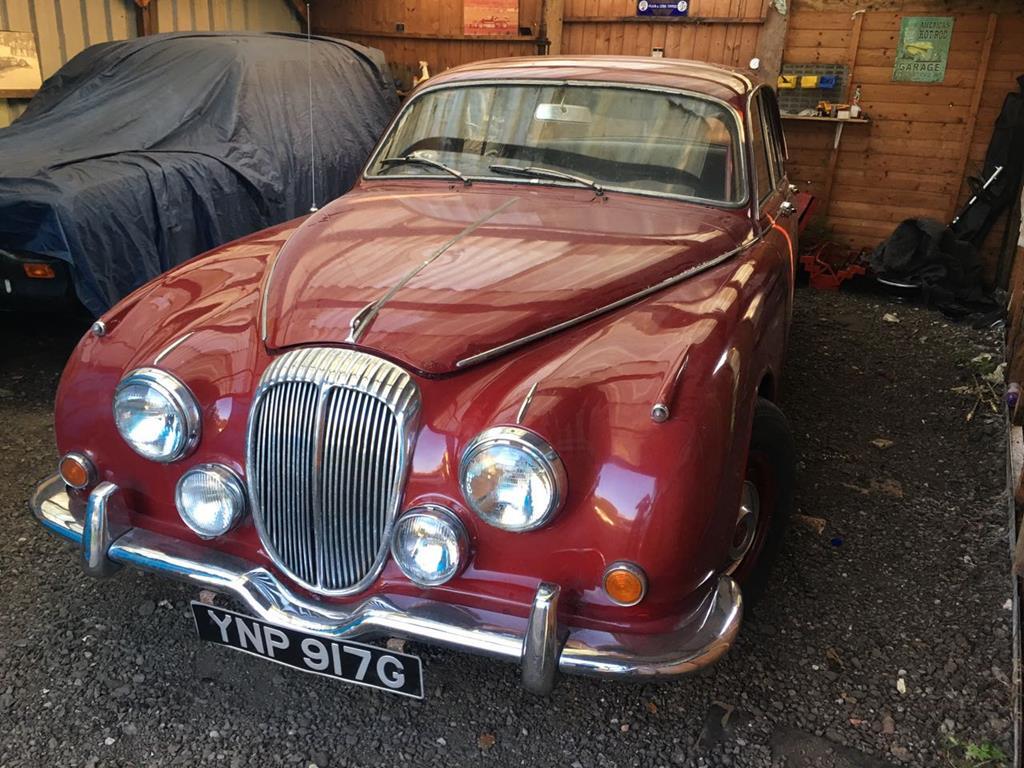 The previous owner told me he thought the car had been laid up for around 10 years. A quick online check soon showed me that it was last taxed in 1987... not long after I was born!! It's going to be a fairly big project then... On balance I decided it was worth going for. The shell was remarkably solid (potentially due to not having seen the last 30 years worth of rain/salt), it suffered from a few of the usual mk2 issues but compared to the state of many of the 'projects' you see for sale (with huge gaping rust holes or sills that are clearly full of filler from even the small advert photos) this was going to require much less metal work. Aside from the missing drivers door, it was pretty complete, the research I'd done suggested that often refurbishment was reasonably priced, but replacement was pricey, so this was good news. It just about ran and would select gears the brakes sort of worked and it could be moved short distanced under it's own steam, all of which s good news. On the downside, having sat for so long, every single rubber component was perished and would need looking at, and I was bound to run into all the usual issues with corrosion due to sitting. It also wasn't super cheap, considering the condition. Still now I'm a few months int the project and have a better understanding of just how much you can sink in to a restoration, I look at some of the cheaper projects and realise how much more expensive they would have been in the long run and feel reassured I didn't spend unwisely. A week or so later it arrived with me on the back of a flat bed. I didn't get many pictures, as I wasn't planning on writing about it, but here's a quick one of me looking a bit stressed trying to get the car safely tucked under the carport. 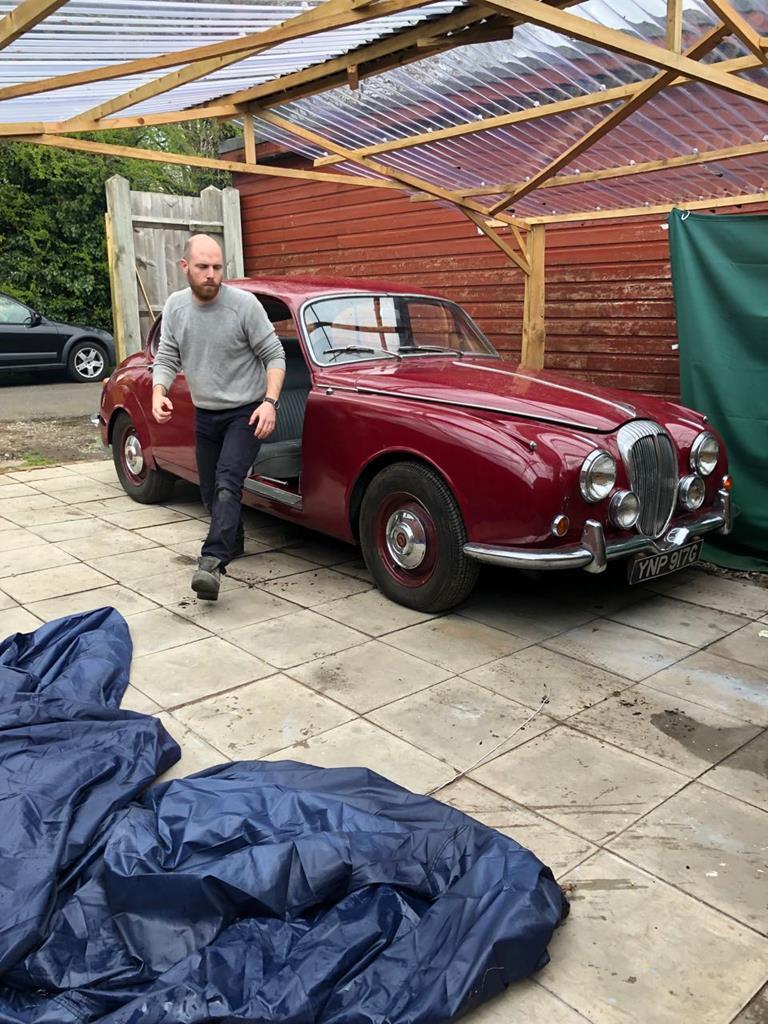 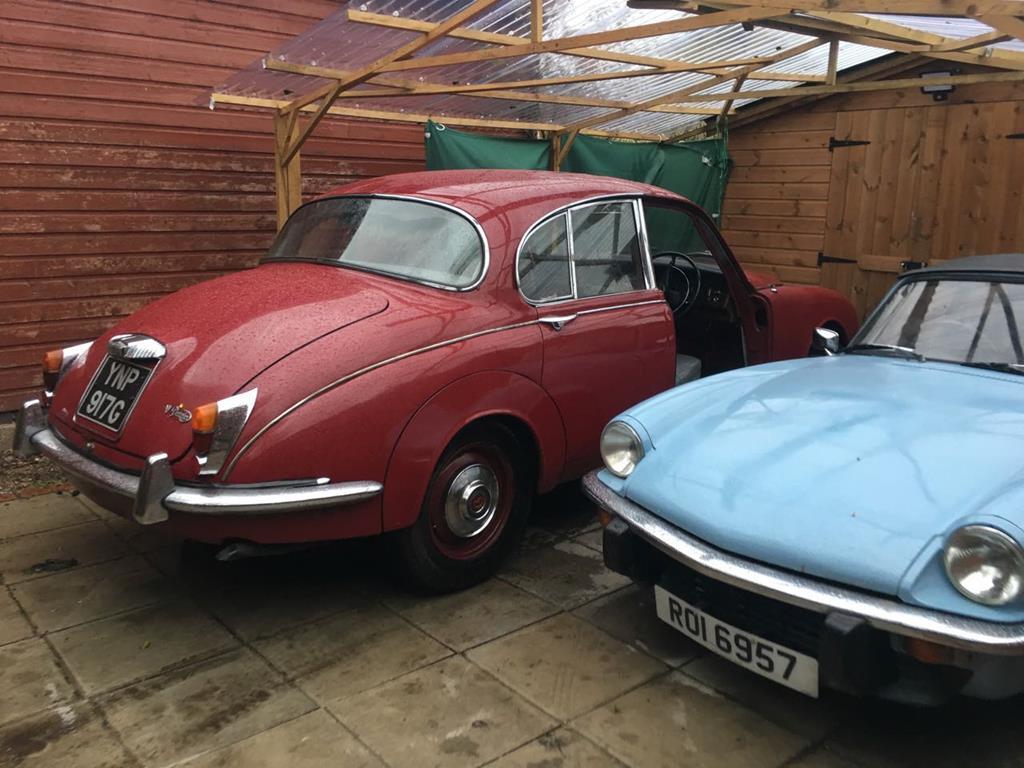 Inside as you can see is 'ok'. The red aftermarket carpet set clashes horribly with the paint work, and it's been re-trimmed at some stage. Regency Red paint was never offered with grey interior. The head lining is shot, not a surprise and the leather is very stiff and dry. The wood veneers are all present but in a poor state, under several layers of manky old varish. It's oddly lumpy, someones just put new varnish straight over the flaking old I presume! 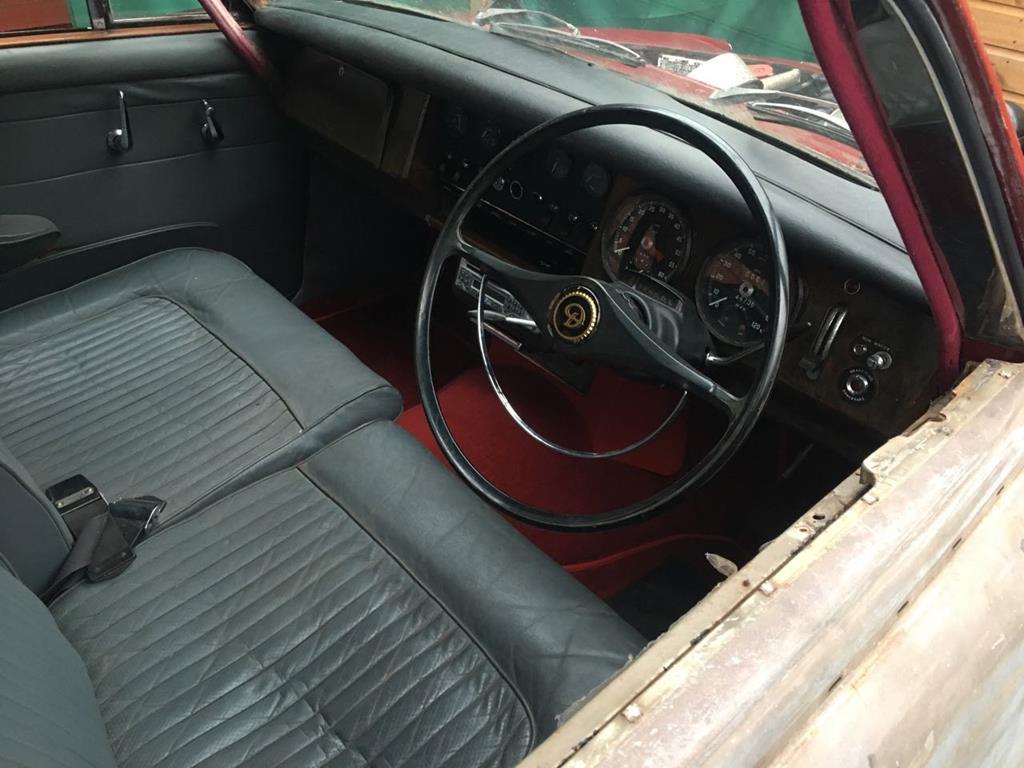 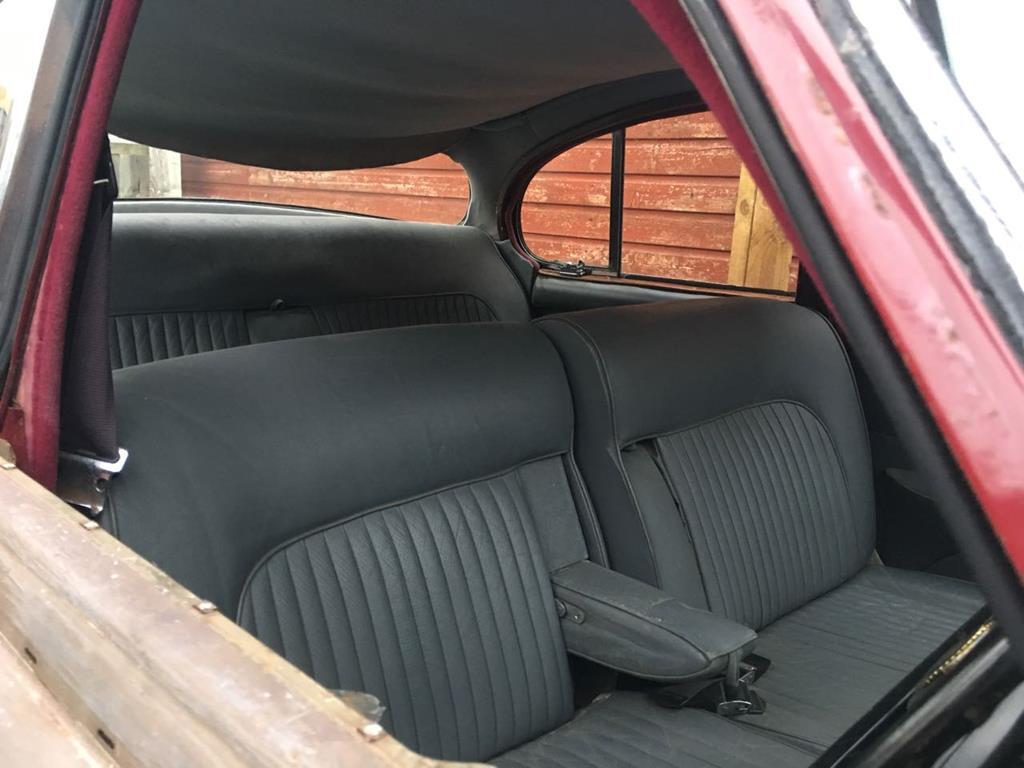 And last but not least, the v8 engine! All there, but dirty and a bit uncared for. 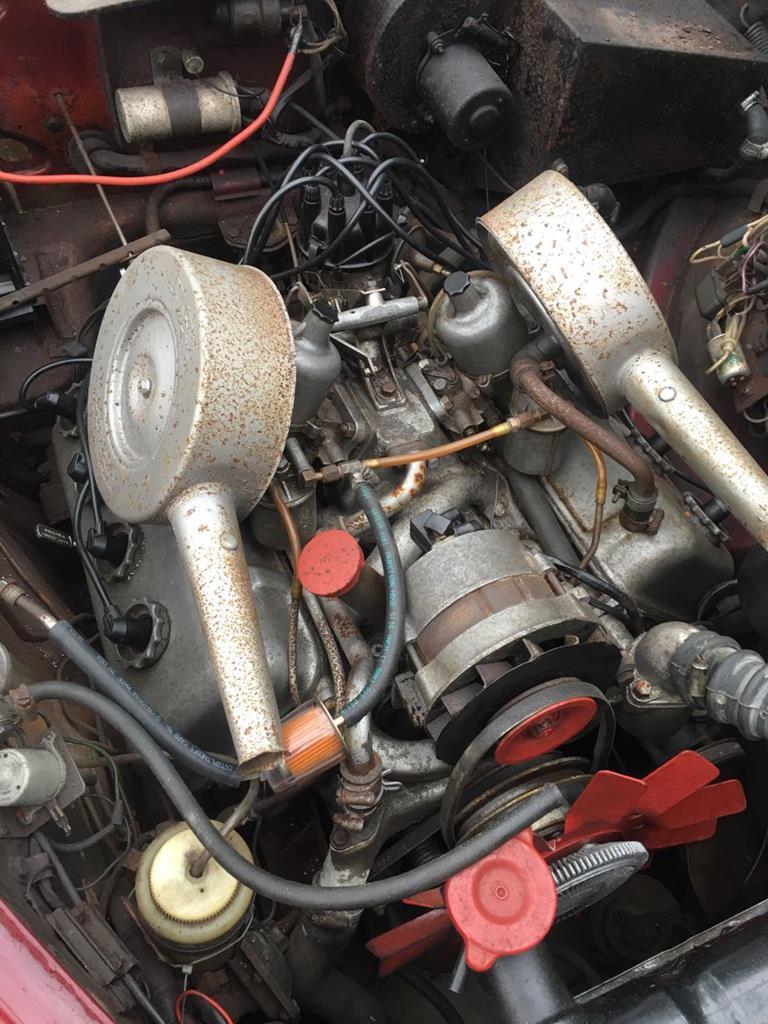 Before the car had even arrived I had been on eBay and sourced a replacement door that would need only minor repairs. Luckily the previous owner had supplied me with the window frame, glass, door fittings etc. It was just the door shell that was missing (too rusty to be worth repairing he said). As it turned out, I was also missing one of the hinges. So in the short term I just taped the door in place to help keep the neighbourhood cats and alike out! 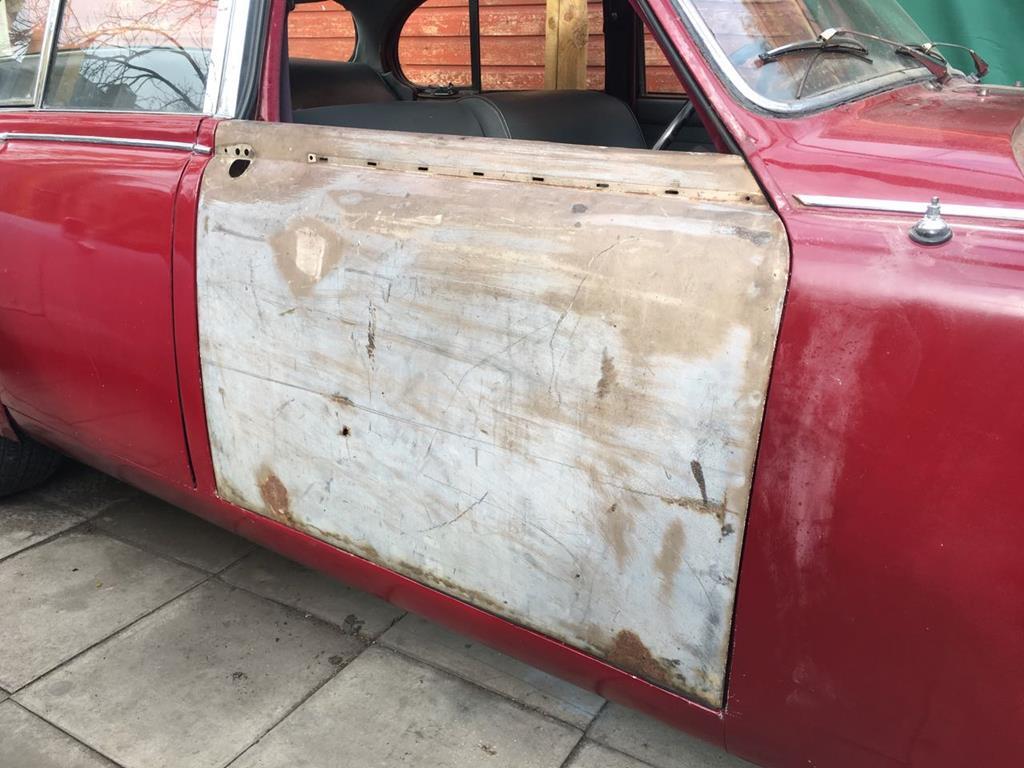 After that there was nothing more but to sit in the drivers seta and make 'brumm' noises for a bit, and daydream about one day cruising up the road in it.... So that was day 1. I've had some down time from work this summer, so progress has been fairly rapid, but there's still a long way to go. I'll try post some more updates over the next few days, bringing us up to date  * As it happens the Jaguar mk2 shell is designed for a XK straight 6 engine, and the Daimler V8 is almost as much of a squeeze in this bay as it would be in a Spitfire....hahaha |
| |
Last Edit: Apr 30, 2023 11:19:57 GMT by goldnrust
|
|
|
|
|
|
|
|
|
|
Ive always fancied one of these.
|
| |
|
|
|
|
|
|
|
|
Excellent project and its one of those cars where most of what you have can be repaired / refurbished - with Mk2 Jag prices now running the Daimler prices are now starting to tag along - not that this matters but its always nice when you don't have spend 3 x the physical value of the car to get it something like right - that said costs can easily escalate on any restoration - the interior leather can all be made supple / repaired with the right products - there are loads of videos / help available on how to sort / undertake you own veneer repairs etc - Much of the under bonnet stuff will refurb with more time than money spent on it etc - Hope it all goes well
|
| |
|
|
|
|
|
|
|
|
As grumpynorthener has said nice project.
I have rebuilt a couple of those engines in my youth, plenty can be done to them without over stretching them reliability wise.
Bookmarked
|
| |
|
|
|
|
sonus
Europe
Posts: 1,392
|
|
|
|
|
Welcome to the Daimler V8 Hemi club 👍 Would love a 250 Saloon as tow car for my Daimler powered TVR 😁
|
| |
Current
1968 TVR VIXEN S1 V8 Prototype
2004 TVR T350C
2017 BMW 340i
Previous
BMW 325d E91LCI - sold
Alfa Romeo GTV - sold
Citroen AX GT - at the breakers
Ford Puma 1.7 - sold
Volvo V50 2.0d - sold
MGB GT - wrecked by fire
MG ZT 1.8T - sold
VW E-golf Electric - sold
Mini Countryman 1.6D -sold
Land Rover Discovery TD5 - sold
|
|
goldnrust
West Midlands
Minimalist
Posts: 1,887
|
|
|
|
Thanks guys  @grumpynorthener As you mention I had seen that prices are on the up (as are most classics to be honest!) and one of the motivations to go for it was to get chance to own one before it got out of my reach. As you say, while it's not the specific aim of the restoration, it's nice that the money I'm spending now shouldn't be just money down the drain. Part of the experience for me is learning new things, so I've already started looking into the techniques I'll need to sort the veneers out, and likewise after the success of making a seat cover for my motorbike from scratch, I will be having a go at some of the retrimming that's required myself too.  peteh1969 peteh1969 Yes I had read about how much power these engines can be made to handle. I'm amassing quite a collection of scans of old magazine articles and things (a lot from Russ Carpenter) which details how to get the best from the engine. Crazy ideas around fuel injection and big superchargers have been banded about over drinks with my friends (they're all into Japanese performance stuff and it keeps them from thinking I've gone mad buying an old slow auto cruiser!) but all of that is a very long way up the road and not really worth worrying about right now. First things first, I want it presentable and on the road to be enjoyed. So where was I... with the car safely home, and space made for it under the carport, there was nothing for it but to make a start! The first task was to start feeding the leather. Whilst dry and stiff, the only damage is to the rear drivers side seat where there's a small amount of stitching coming undone and where a small section on the lower edge of the seat is torn, so it's definitely going to be a case of trying to save the existing leather rather than replace it. It's now had several treatments and there's some definite improvement, so fingers crossed if I keep at it between now and when the car sees the road it will be good and supple. I figured as good a place to start as any, would be to make sure I was happy with the engines health, I knew it ran, but as the oil pressure gauge is one of several that are currently not working... I wanted to make sure it was ok! When I'd driven the car off the flat bed and into the carport, it was clear that the engine wasn't on all 8 and that it was pretty rattly at the top end, so I was a little nervous. My first check was to pull some plugs and have a look, and this gave the first clue as to why it was running poorly. The plugs themselves were old and dirty and a mixture of Champion, Bosch and NGK... but this wasn't the issue. It was quickly apparent that the plug leads were broken and were just sort of resting in the distributer. Which isn't going ot be helping much! While I was investigating, I thought it was worth popping the valve covers off and having a quick look underneath. 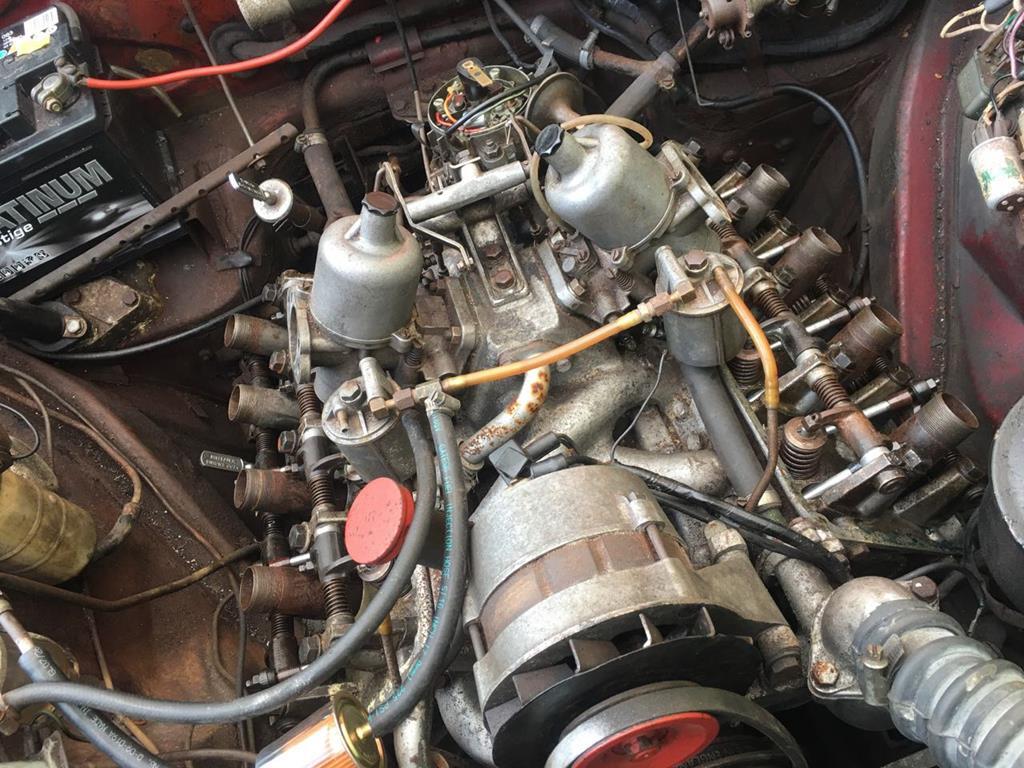 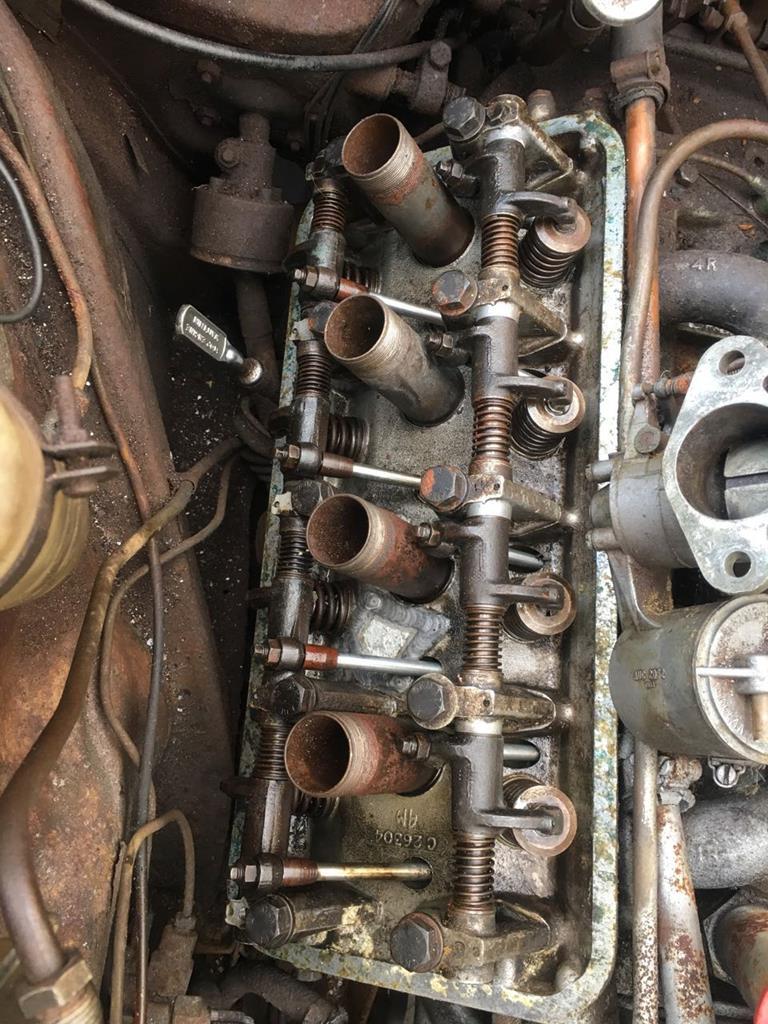 Hmmm! Not terrible, but not amazing. There's definitely some surface corrosion from when the car sat, but it's not too drastic. Generally there's not much oil staining, and the oil itself looked brand new. There's also evidence of a repair to both heads, which looks to have been done to a good standard, and is completely free from oil staining, so I don't think the car can have gone far since the repair was made. I've read these engines can suffer with corrosion in the heads which results in this kind of repair. I have zero history with the car, just a car, a v5 and some keys, so there's a lot of automotive archeology to be done! There are some signs of a previous owner doing some restoration work (some to a good standard, other very dubious!) and I suspect that these heads were repaired sometime since the car has been off the road? Whether this means that the exhaust valves have been swapped for stainless that make it suitable for unleaded or not I have no way of telling. With the covers off I checked the valve clearances and found them all to be pretty loose, so adjusted them all up to the spec from the workshop manual (my first purchase!), popped the valve covers on, bodged the plug leads and hooked up a cheap electronic oil pressure gauge and crossed my fingers.... Phew! That's good news indeed. Much less top end noise, and decent oil pressure. This is good news. As you can hear it's not running happily though, the carbs clearly needed work, who knows what fuel was in the tank and how long it had been there! Either way I thought it was worth checking the ignition timing. Handily Daimler thought it was a good idea to put the ignition timing mark at about 7 O'clock on the front pulley. Deciding to jack the car up so I could check this, started a while chain of events that ultimate have set me on the path of a much bigger restoration! Starting to jack up the car it was clear that the rubber front subframe mounts had become detached from their steel backings. So essentially the whole front suspension was just 'resting' under the front of the car.. eek! Nothing for it but to get the front of the car up in the air and get the subframe off so I could replace the mounts. 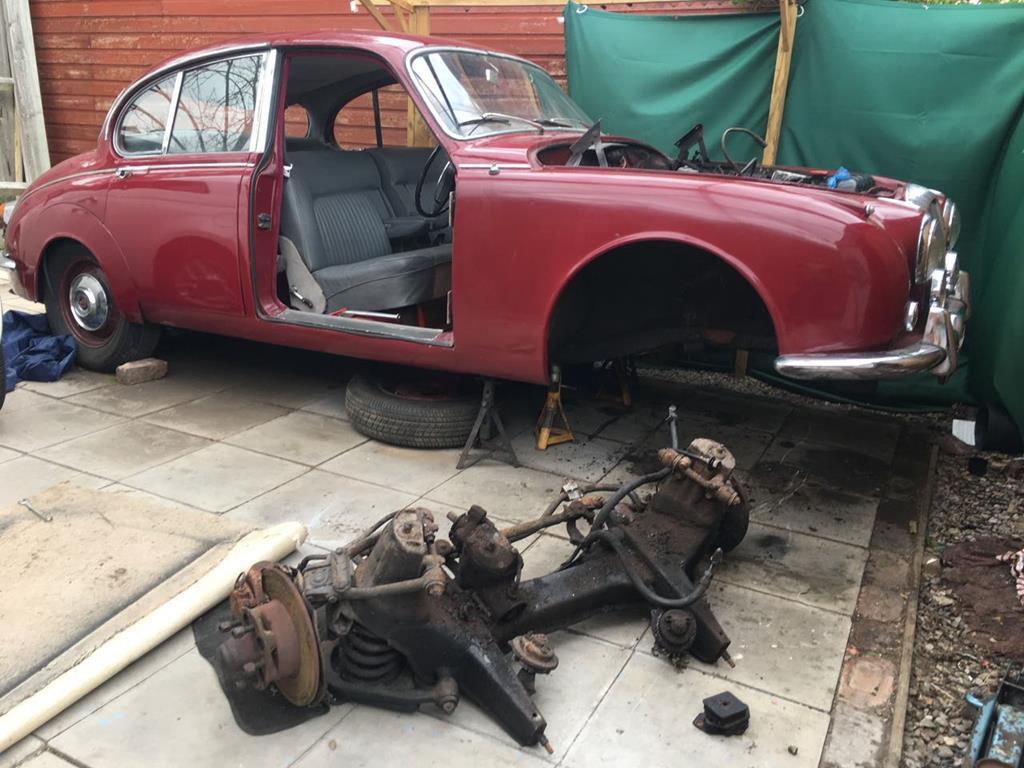 The subframe itself was, like all of the under bonnet and underside of the car, very very dirty and covered in seemingly inches of grime. But nothing looked too scary. 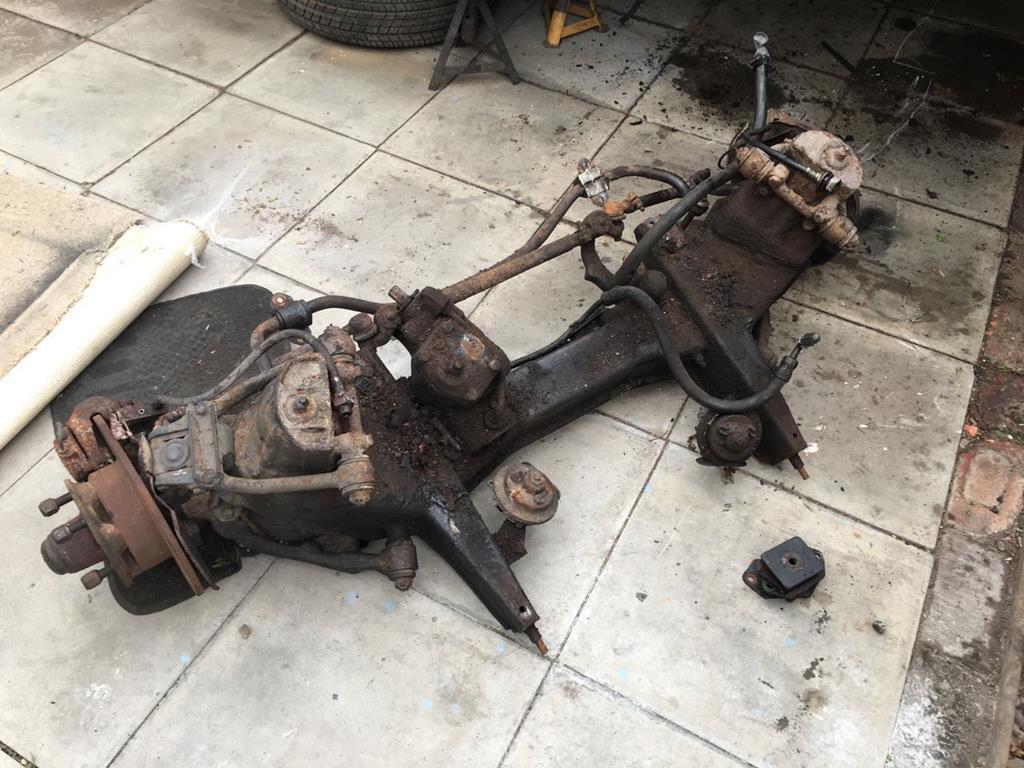 Having now removed the subframe, and jet washed it and the engine bay to remove some of the major dirt, it was clear that the right hand chassis rail was in a bad way. 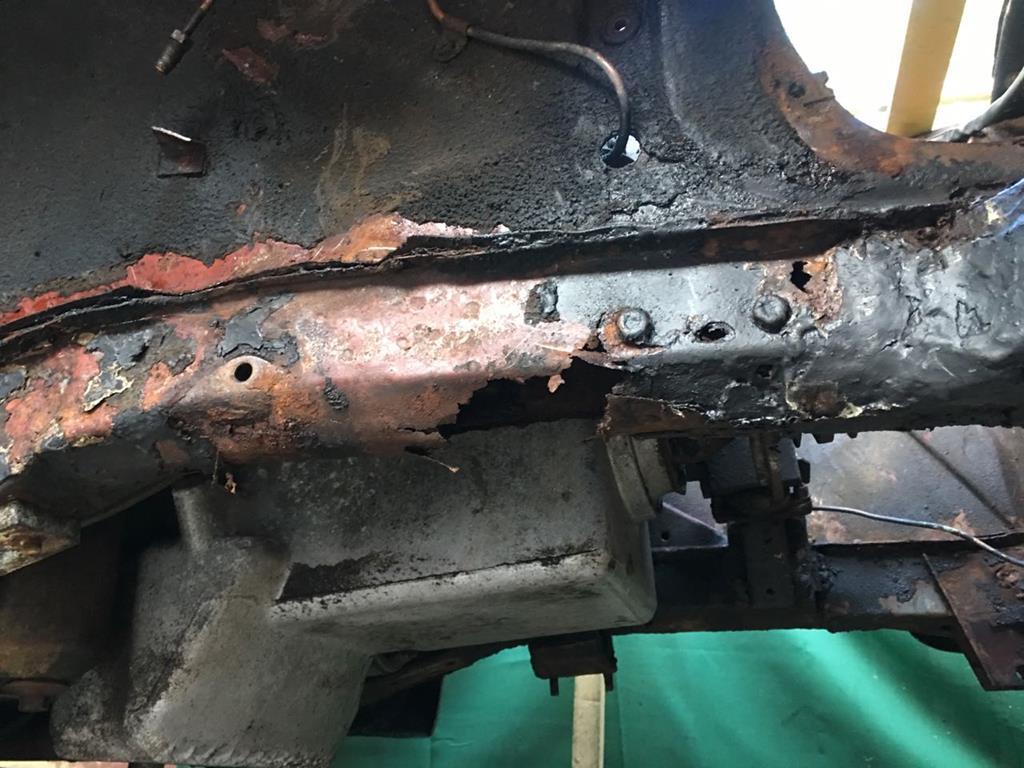 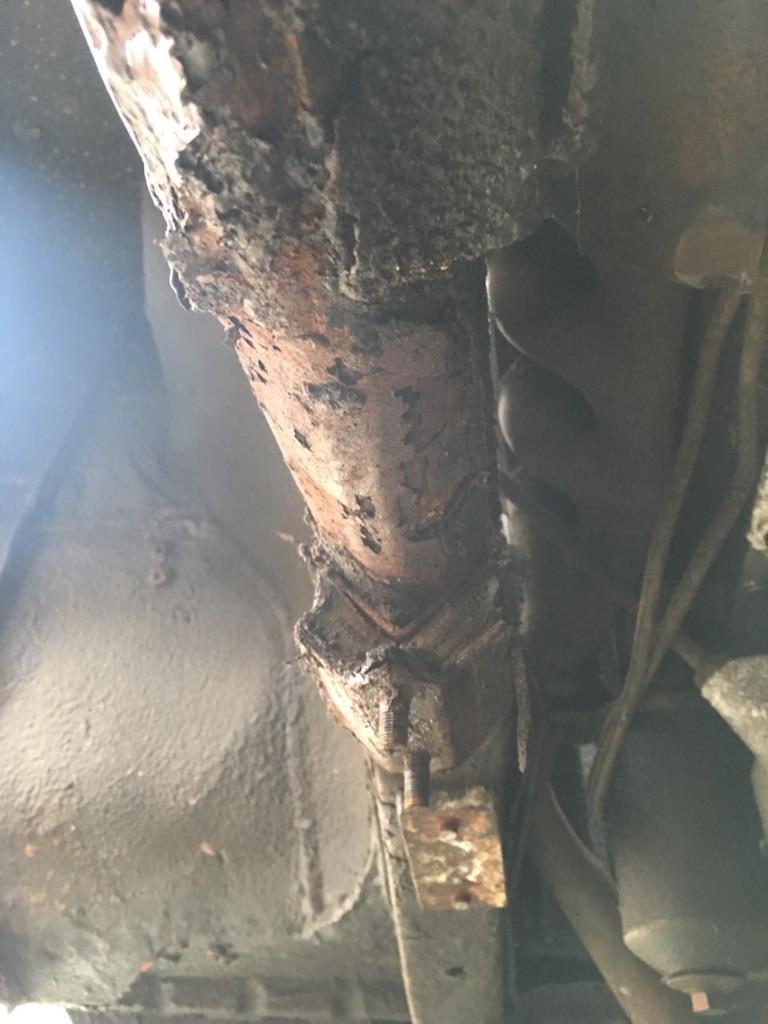 After much swearing and grumbling, there was nothing for it to get on with fixing it. In the first of many painful times for my wallet I bit the bullet and bought a reproduction chassis leg. But before I could get on with welding it in, I realised I really needed to take the engine out to get access. Stripping it down didn't take too long, and hopefully my tried and tested method of buying a roll of sandwich bags to separate out groups of parts shan't fail me when it comes to putting it back together. 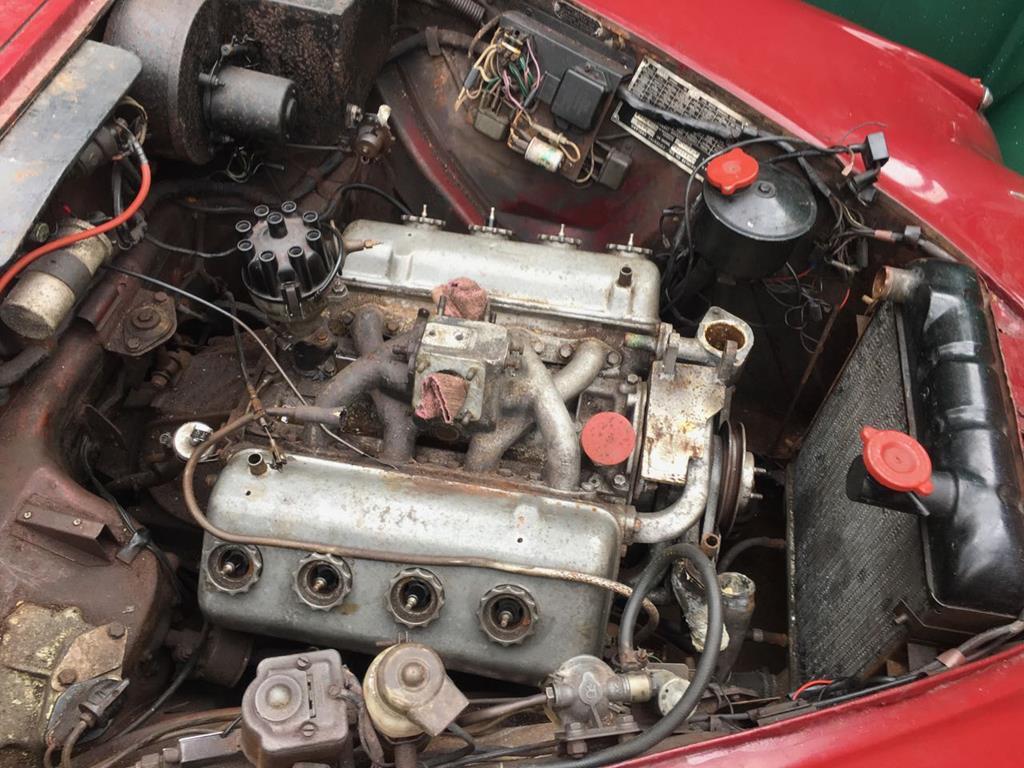 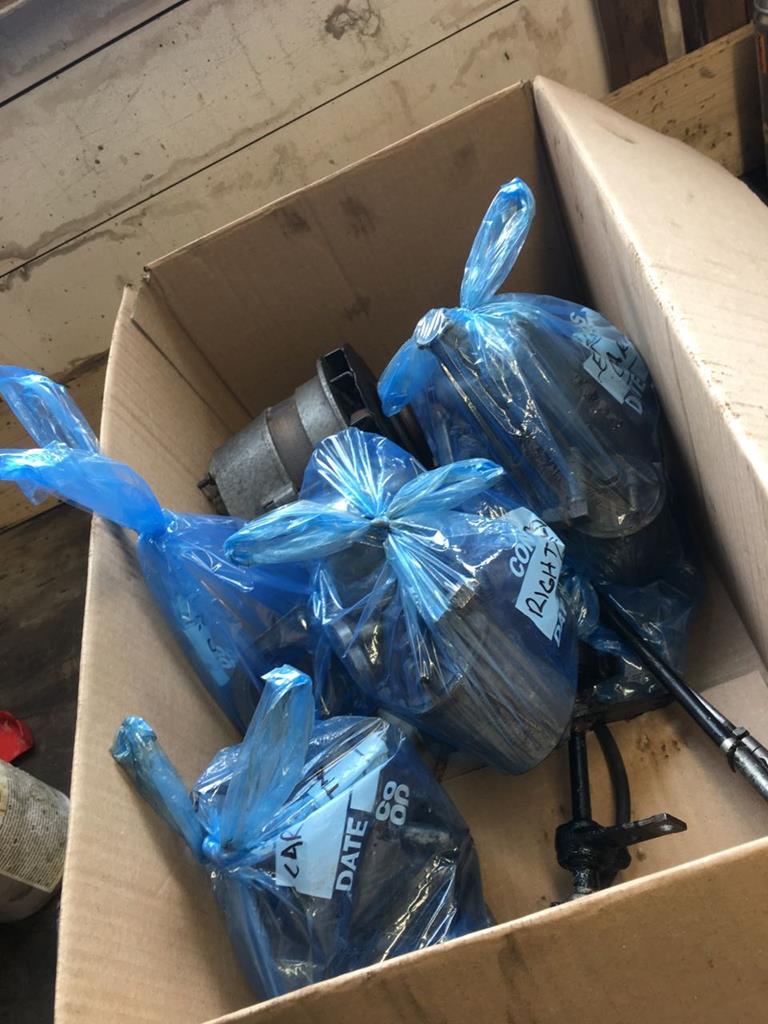 I had to be a little creative with the engine crane to get the engine out, now that the car was stranded without subframe under my fairly low carport... but with the help of a friend I did it and only minimal blood was shed in the process. 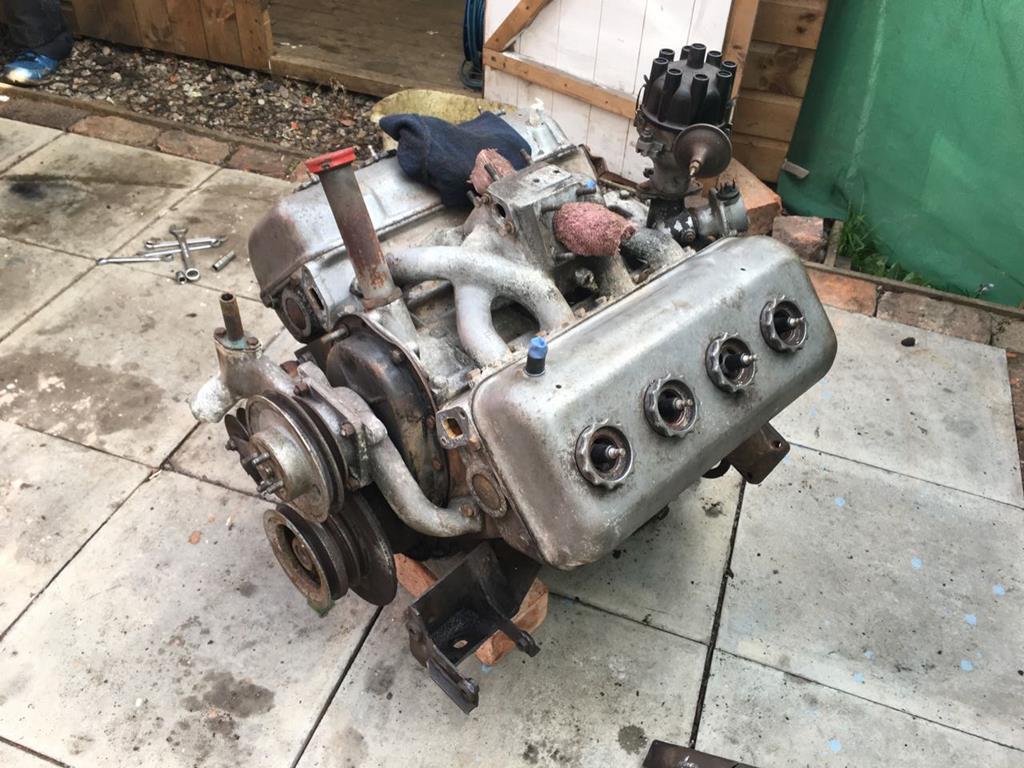 With the engine out I could see what a horrible mes the engine bay was, and just how much of it was surface rust under the dirt rather than paint. 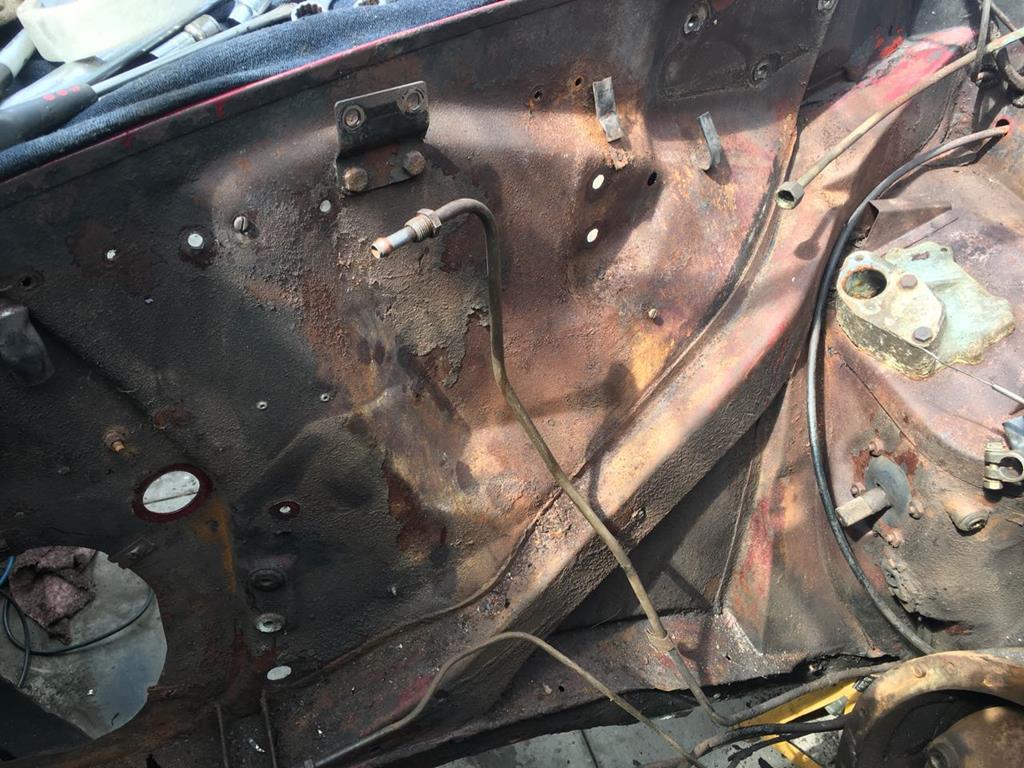 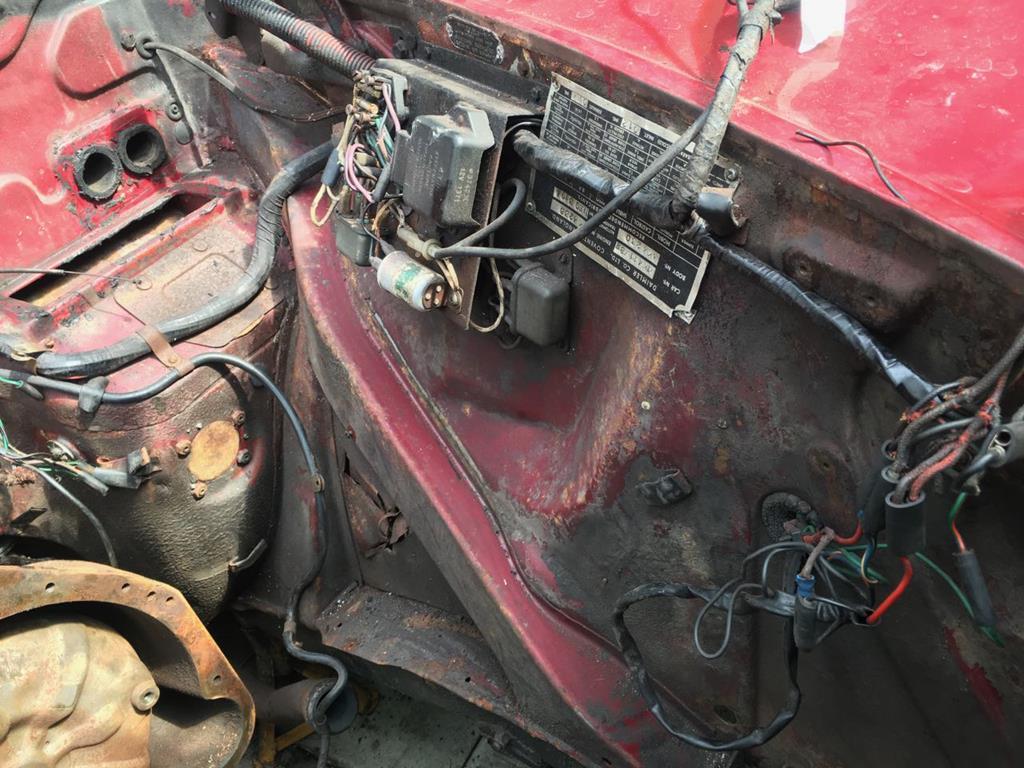 It also revealed one of the previous 'repairs', it looks like someone was struggling with some of the exhaust downpipes nuts, so decided to go through the inner wing with some hideously blunt instrument in order to get to them. What a mess! 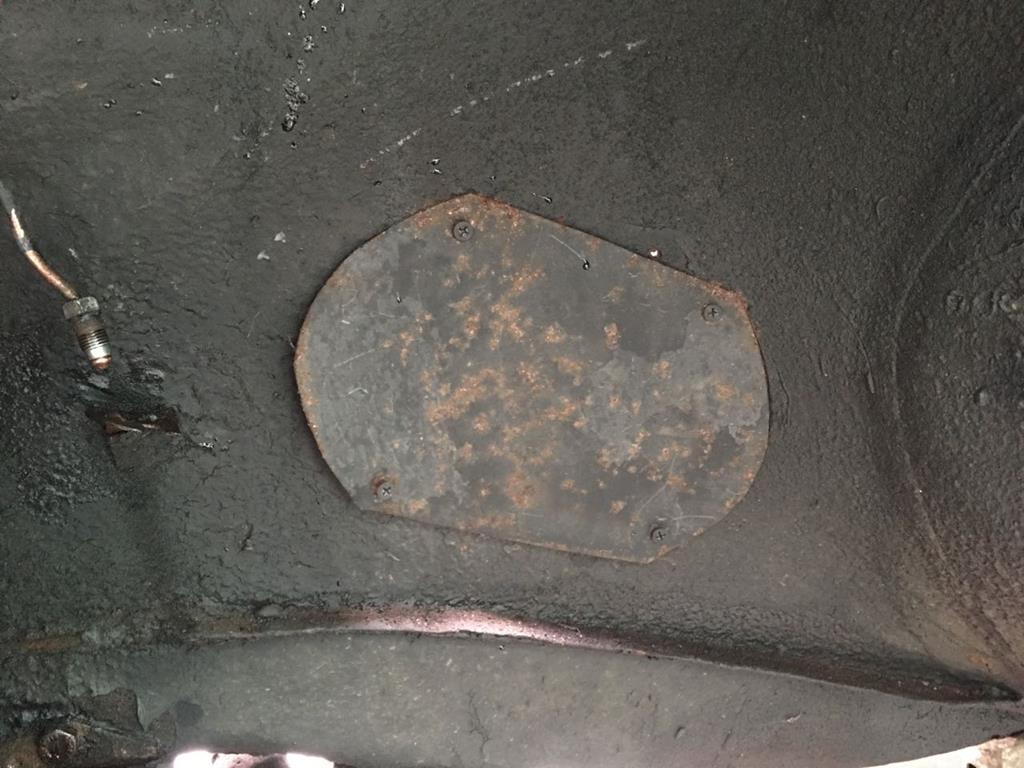 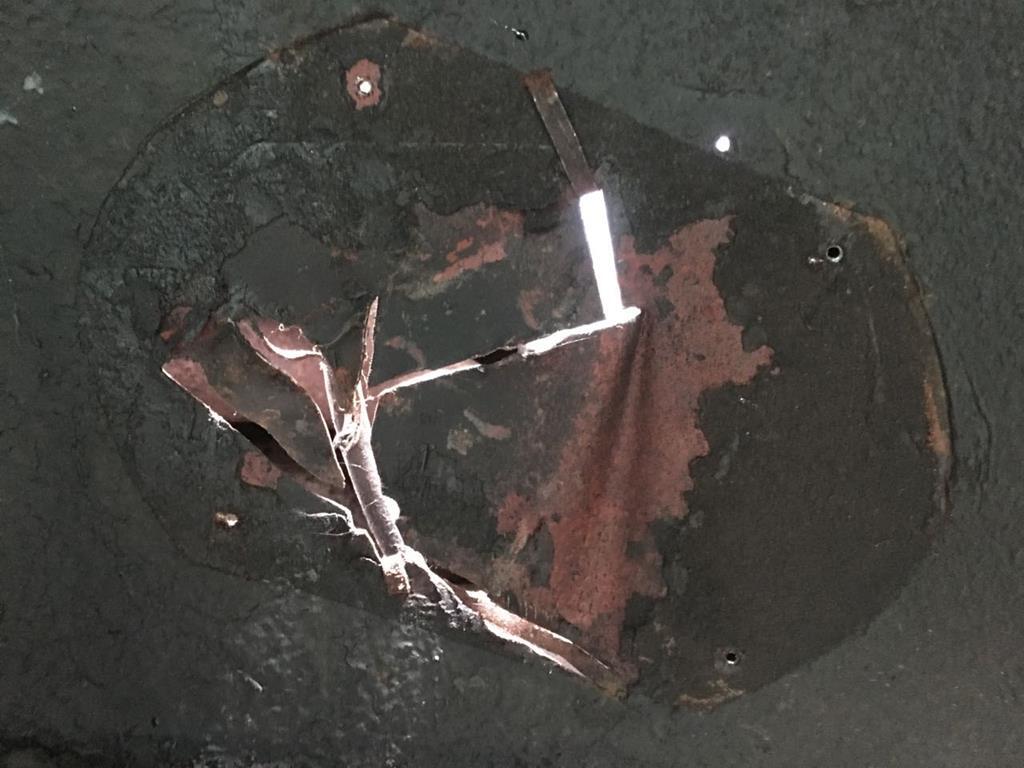 Let the weldathon commence! |
| |
Last Edit: Aug 8, 2019 21:17:26 GMT by goldnrust
|
|
goldnrust
West Midlands
Minimalist
Posts: 1,887
|
|
|
|
Start with the easy bit, the nasty mess in the passengers inner wing was soon patched up 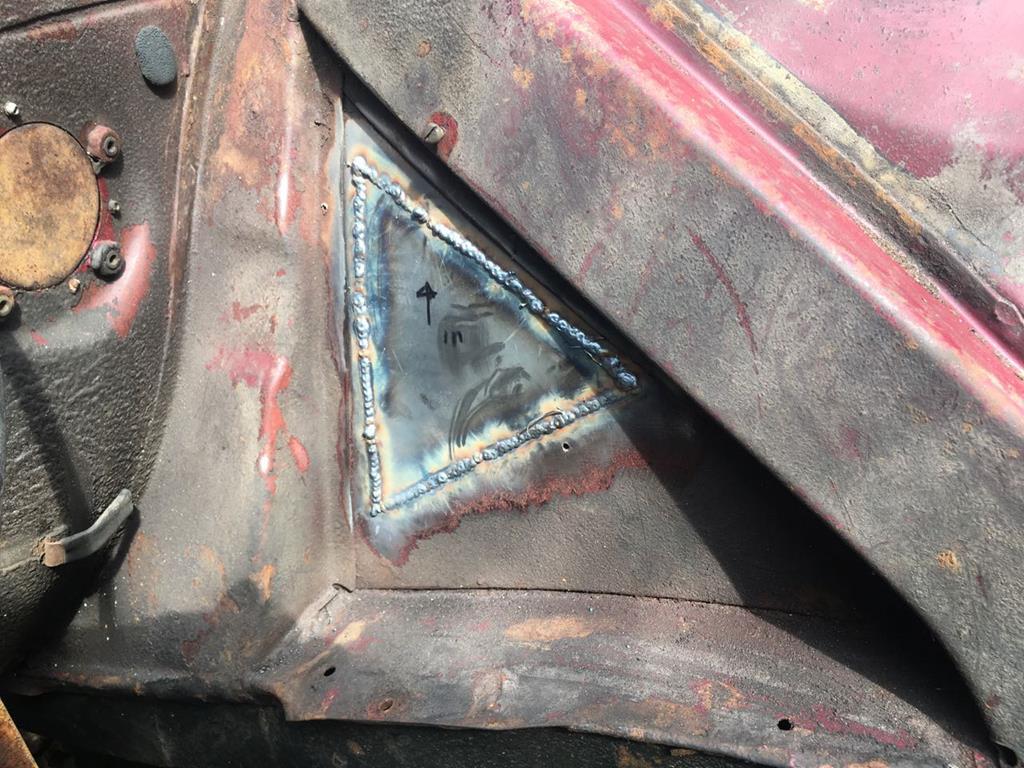 I found some small holes I the upper chassis rail on the passengers side and the bottom ice of the radiator backed was rotten, so that got chopped at the same time. 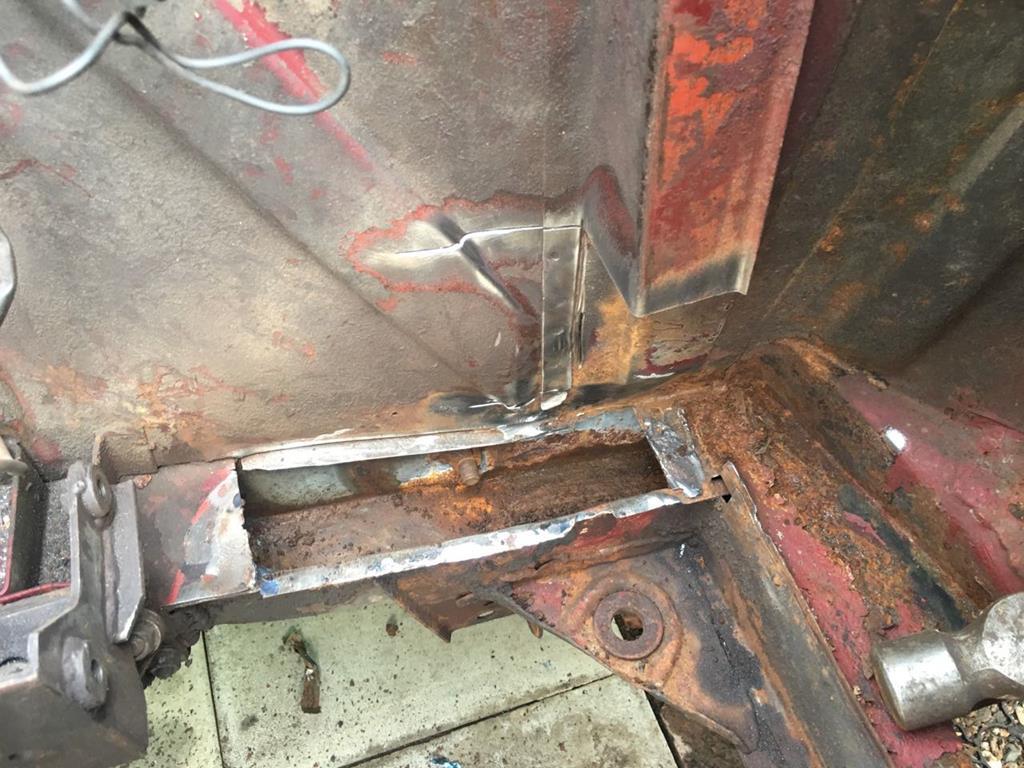 And then new metal popped in place and a quick blast of zinc primer to keep the rust at bay. 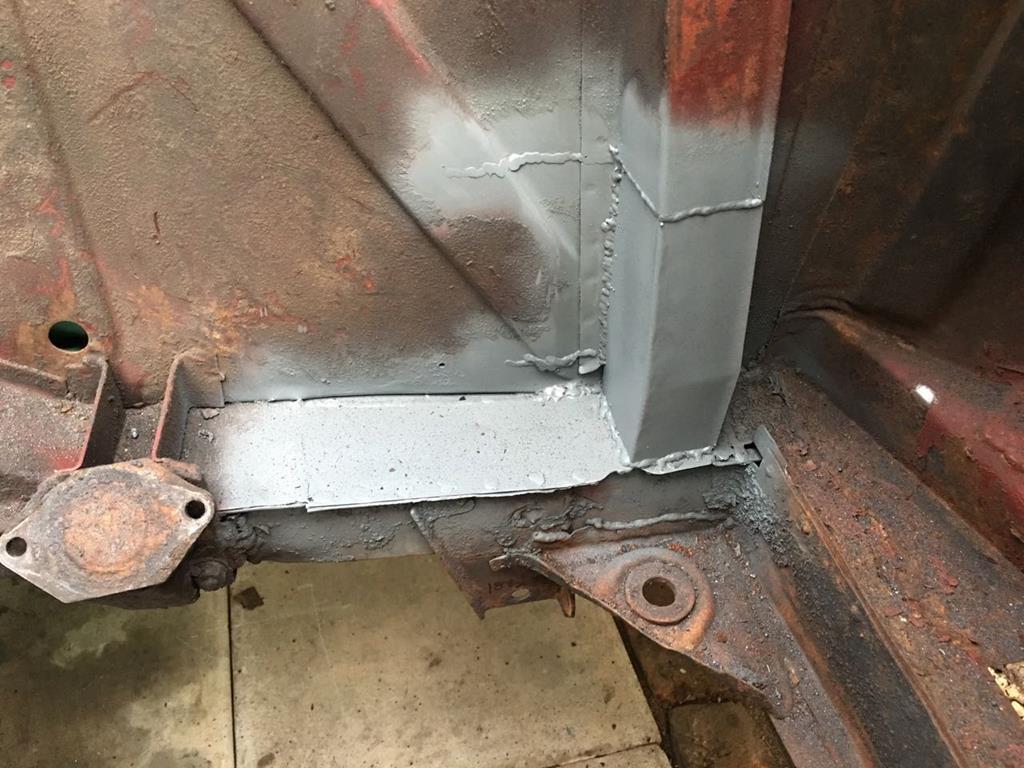 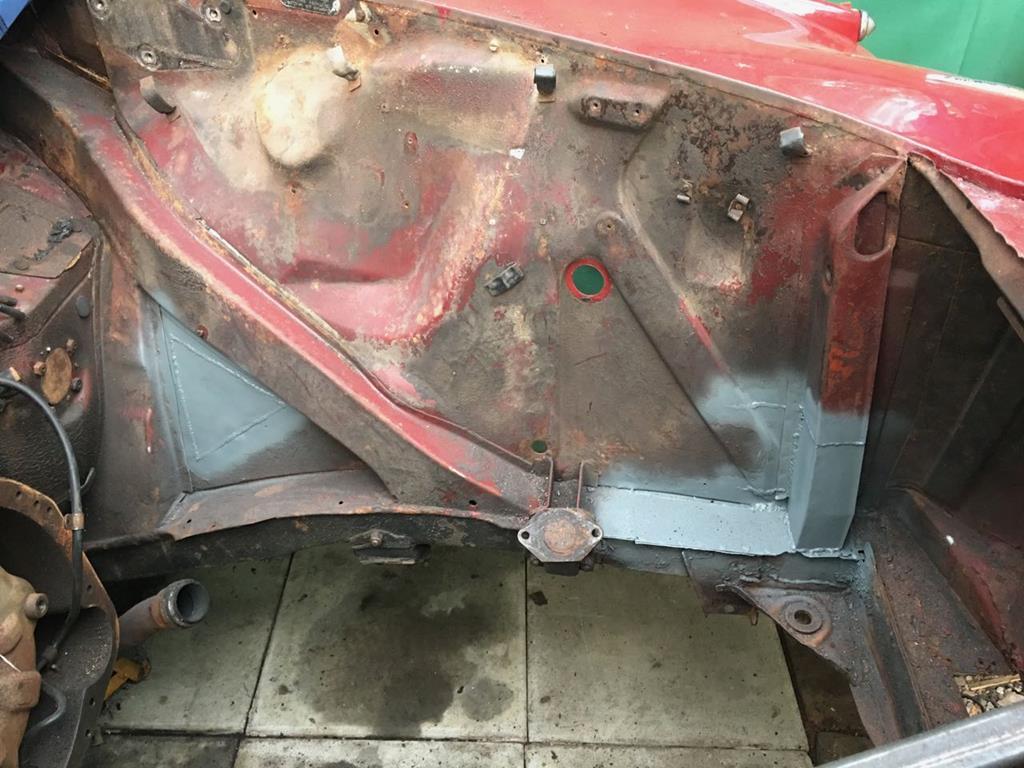 It's all so easy to type isn't it... and so much more work to do, hot and dirty and loud and generally unpleasant! Never again I've sworn! Anyway... I put a bit of bracing on the drivers side then got busy chopping out the rusty mess that was previously the chassis rail. 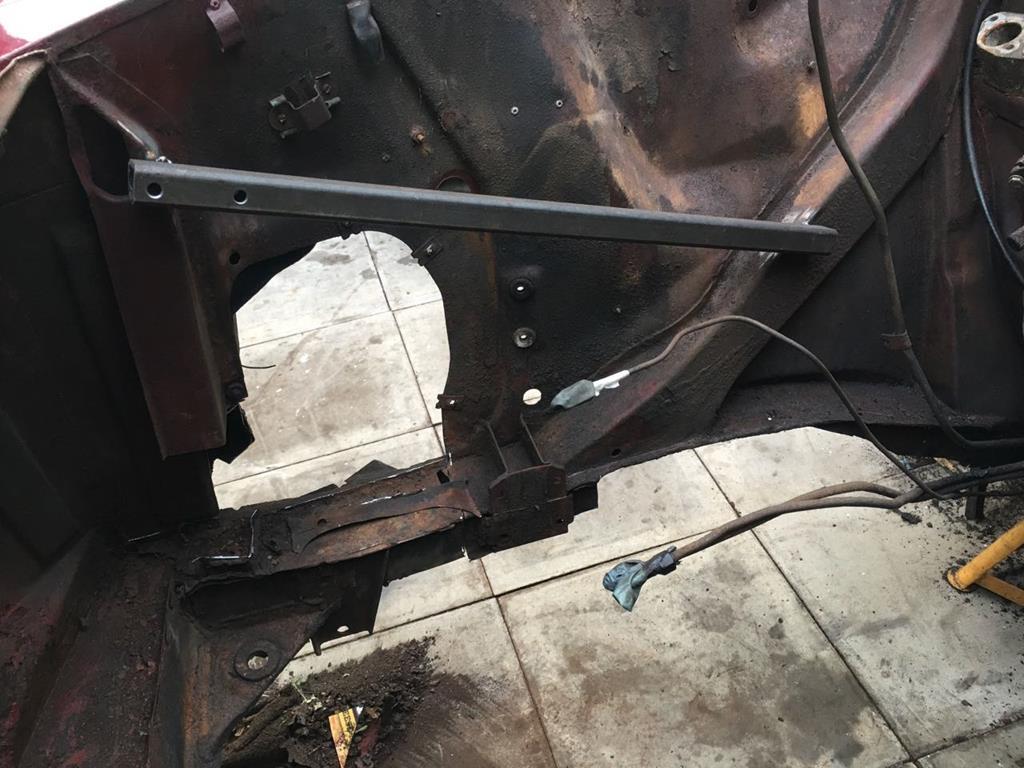 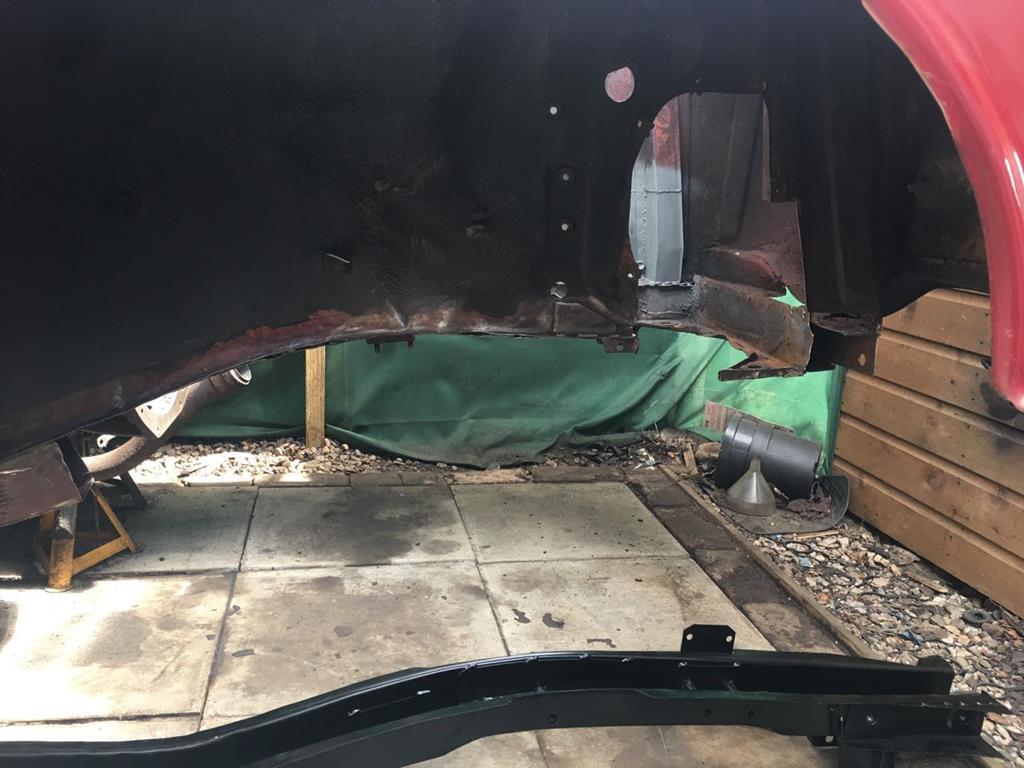 Can see the replacement sneaking into the bottom of that photo! I did a fair bit of measuring and checking before welding the new rail in. Offering the new rail up, it looks like the the inner wing had been pushed up slightly. I can only presume the old rail had lost it's strength enough to allow it to push upwards where the weight of the shell pushed on the subframe. Still with some gentle taps of hammer and dolly, the ripples came out of the inner wing and then it matched the profile of the replacement chassis rail just nicely. 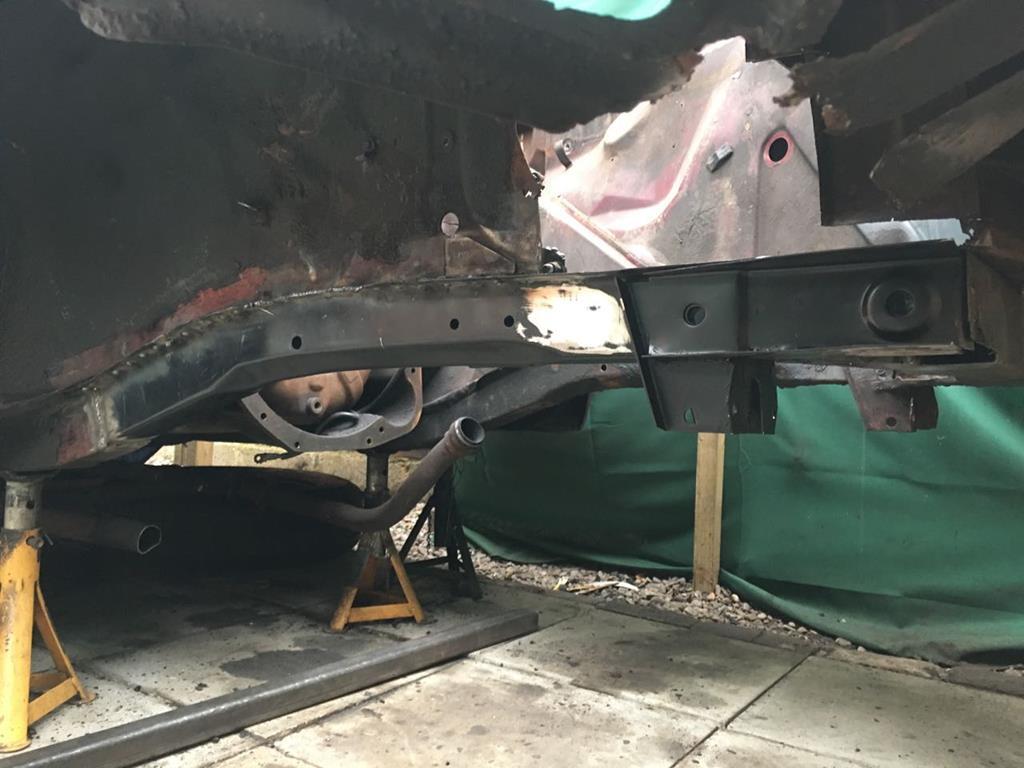 As it was a much more simple shape and less critical (no suspension mounts or anything!) I decided to make my own front cross member repair sections, and to just patch the 'crows foot' that joins the front corner of the wing to this cross member. 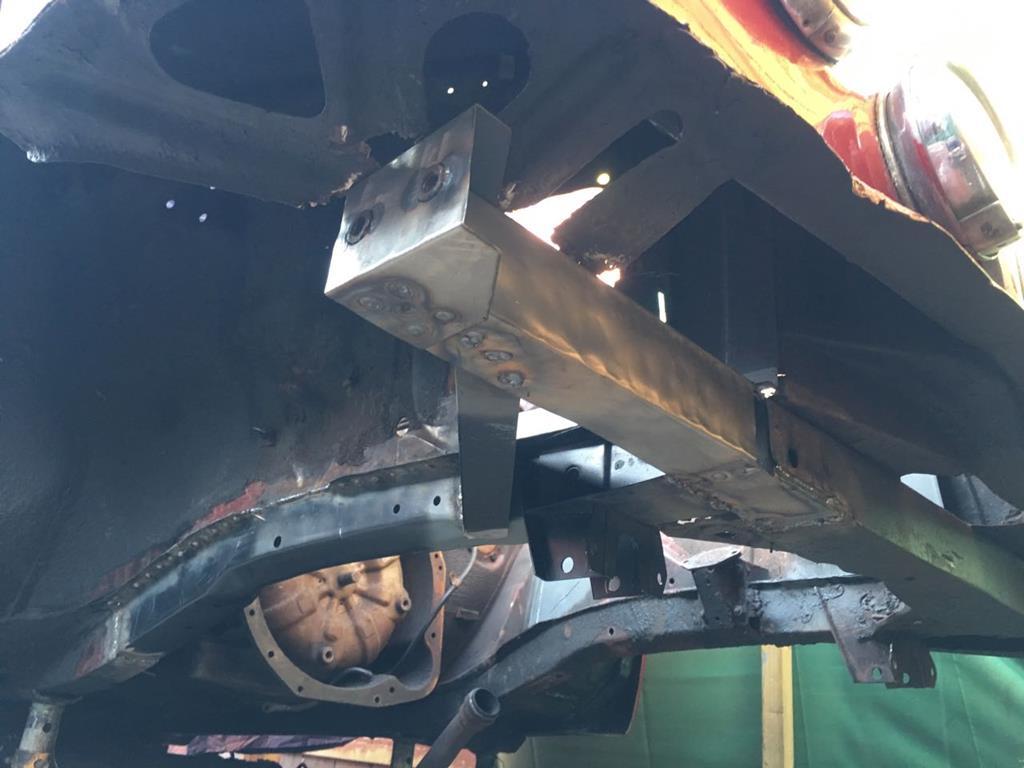 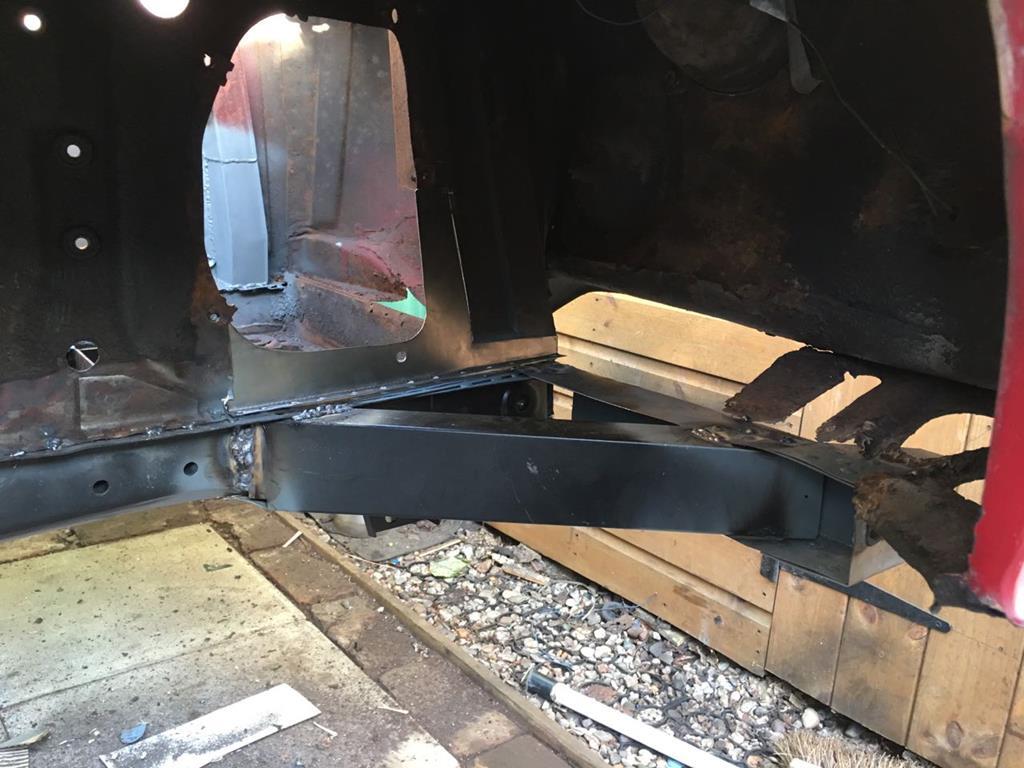 At this stage, with the engine out and being able to see how little paint was actually left in the engine bay, I decided it would be stupid of me not to paint the engine bay properly, to stop any further corrosion as much as for cosmetic reasons. While I was prepping and priming the engine bay, I also made a couple of small repairs to the frame of my replacement door and got that prepped for paint too. 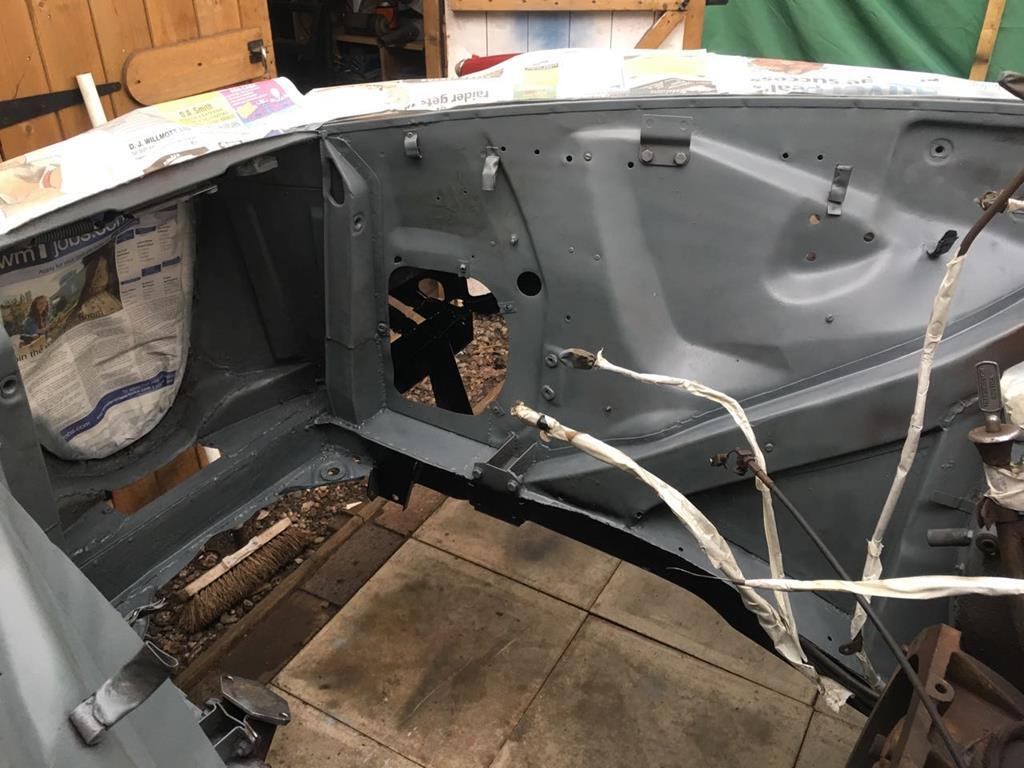 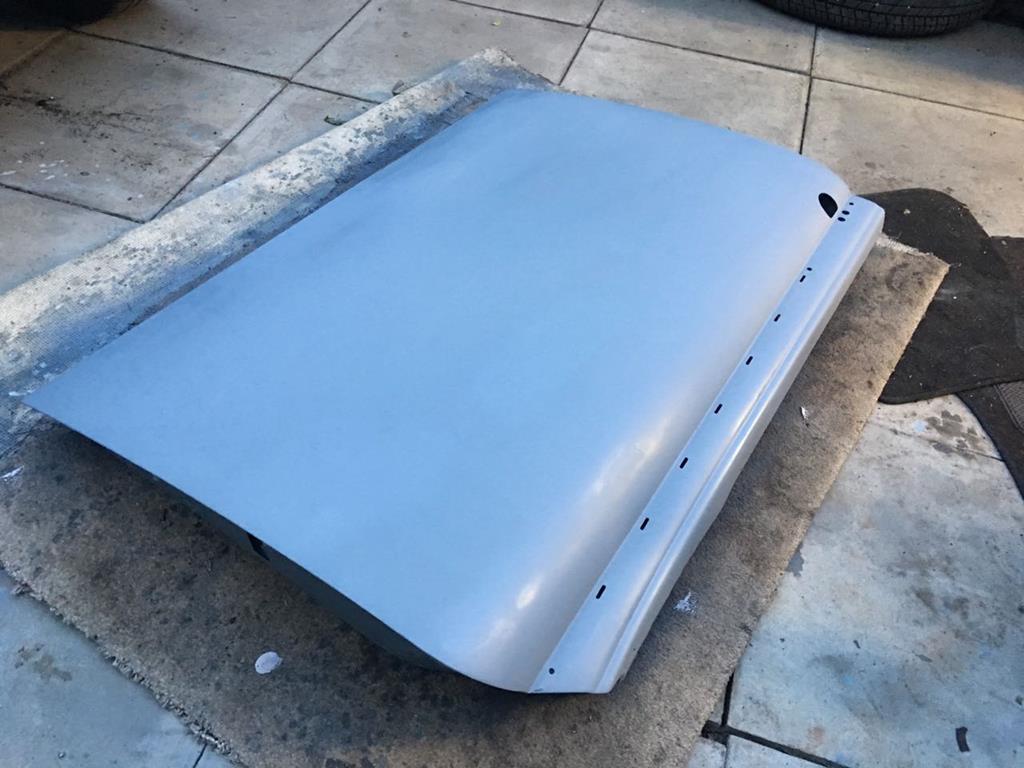 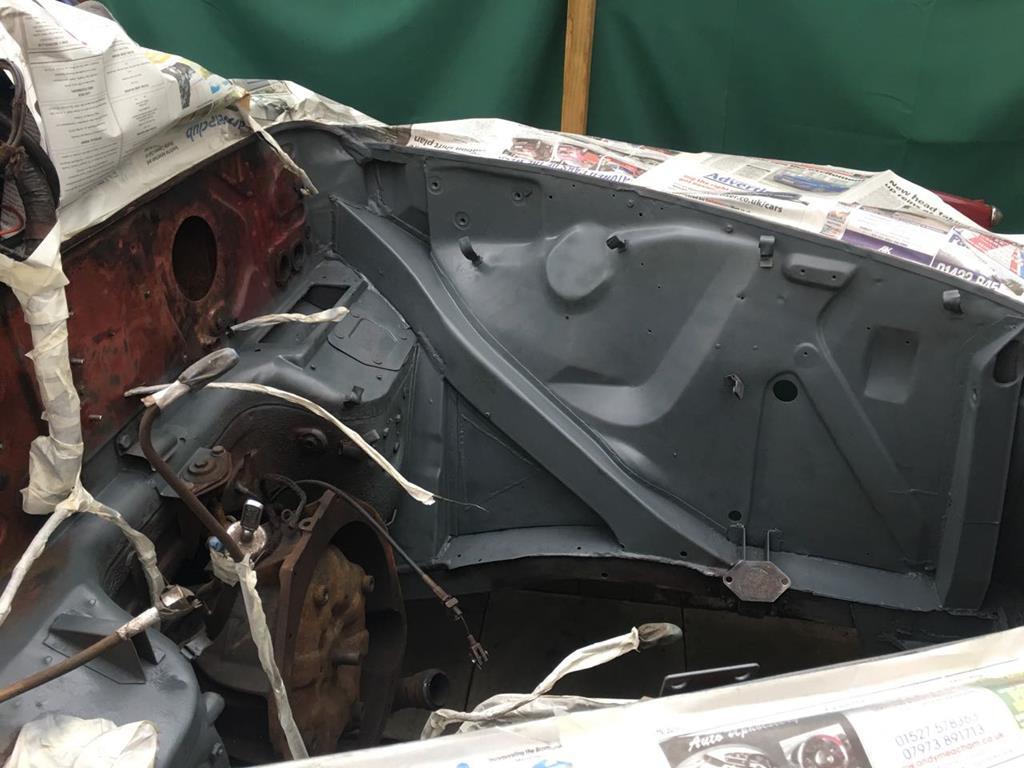 I don't have the luxury of a decent indoor painting space at my current house, so the results are never going to be close to a professional standard (I also lack the skill!) but I was pretty happy with how the engine bay came out. The door could have been better, and I feel I probably rushed the prep in a few places. The main thing is the inside edges of the door shell is painted and sorted now, I can easily flat and blow over the outside again at another time. 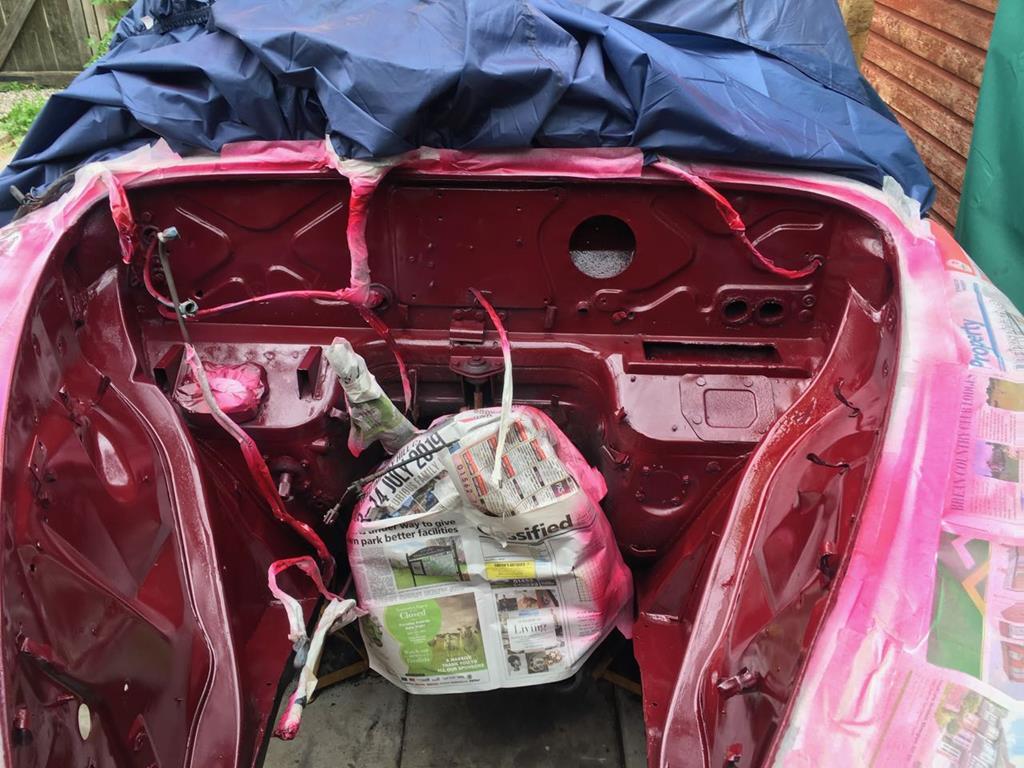 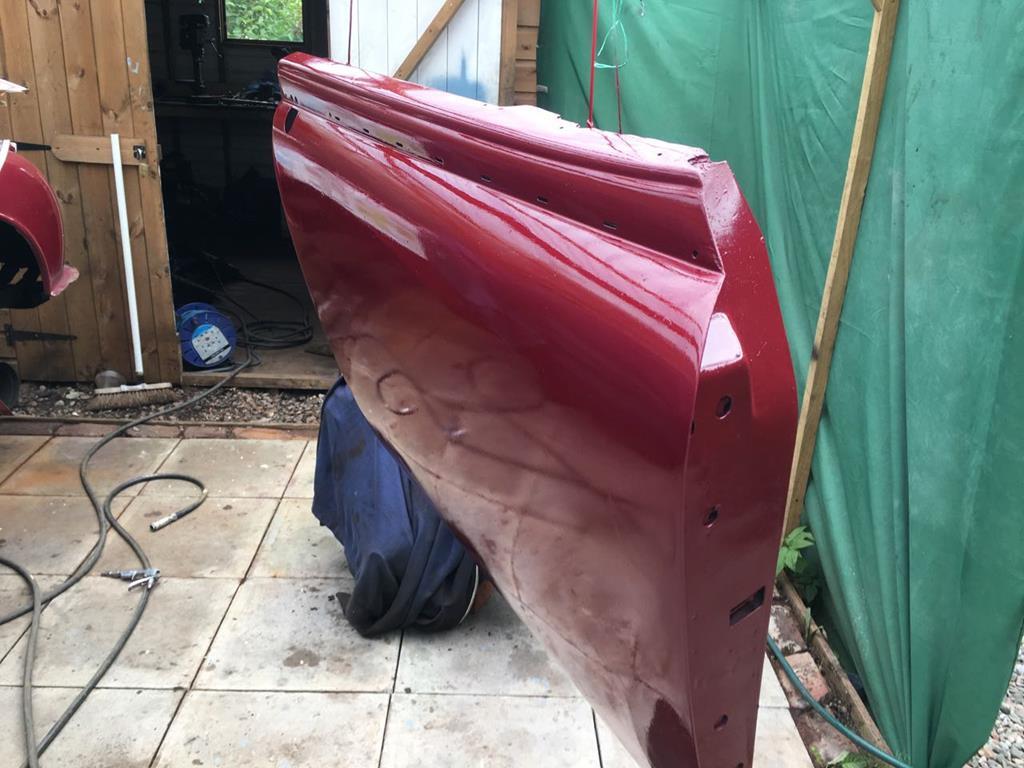 With the engine bay now looking nice and shiny, there was no way I could put the dirty horrible old engine back in there, could I! So I set about giving it a quick cosmetic once over. A good clean, a bit of paint, some half arsed polishing of the valve covers and things were looking much better! 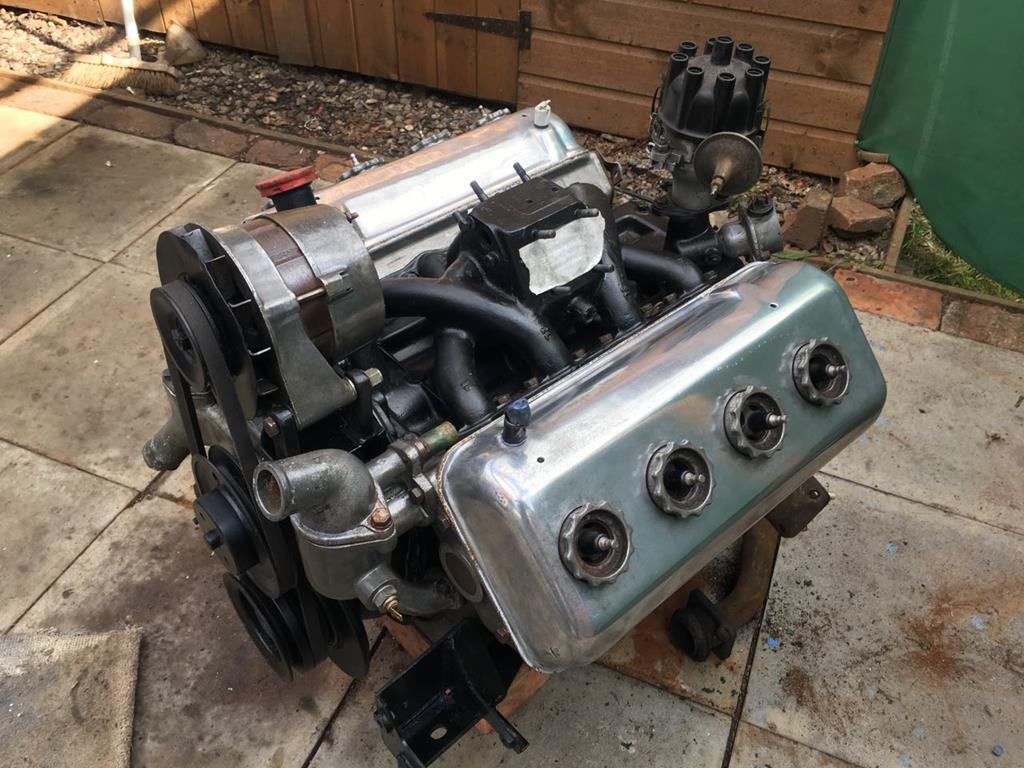 While I had the engine out, I also put new gaskets on the water pump, hosed through all the coolant galleries (removing tones of dirt and rubbish), new exhaust manifold gaskets and new exhaust studs for the downpipes join, new inlet manifold gaskets and took the sump off, cleaned a little slide out of the bottom and then resealed it to the engine and finally treated the engine to a fresh pair of rubber mounts. I'm a little lacking in pictures around this time, but while the engine was out I also removed the gearbox and gave that a once over. I gave it a damn good clean externally, then removed the sump, cleaned it out, adjusted the brake bands as per the workshop manual and then refitted the sump with a new gasket. The gearbox cross member got a wire wheel down and a lick of fresh paint and I replaced the rubber bushes in the crazy jaguar sprung rear gearbox mount set-up. I did get a picture of old Vs new of those... no prises for guessing which is which! 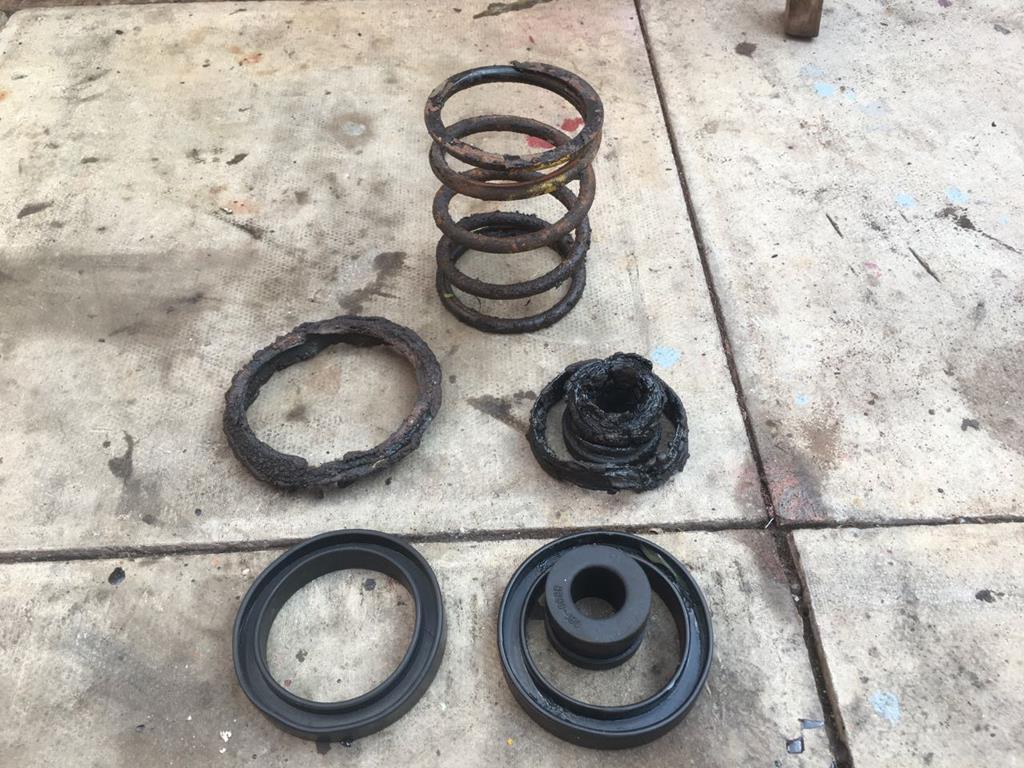 And with that job sorted, I could put the engine back in. 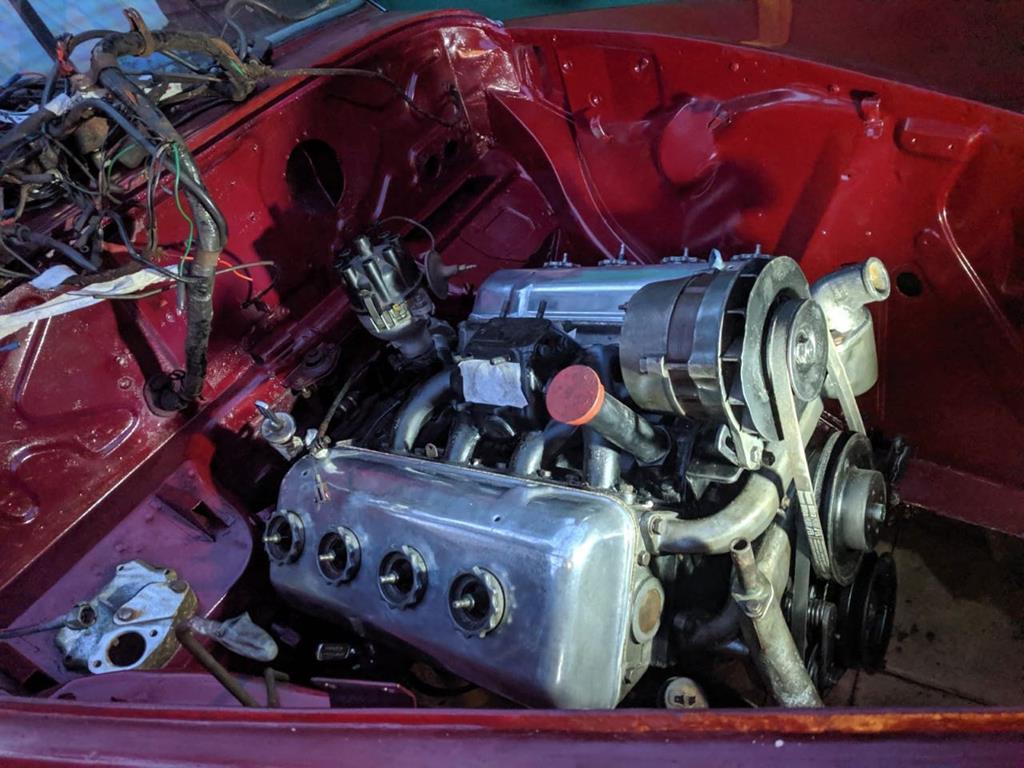 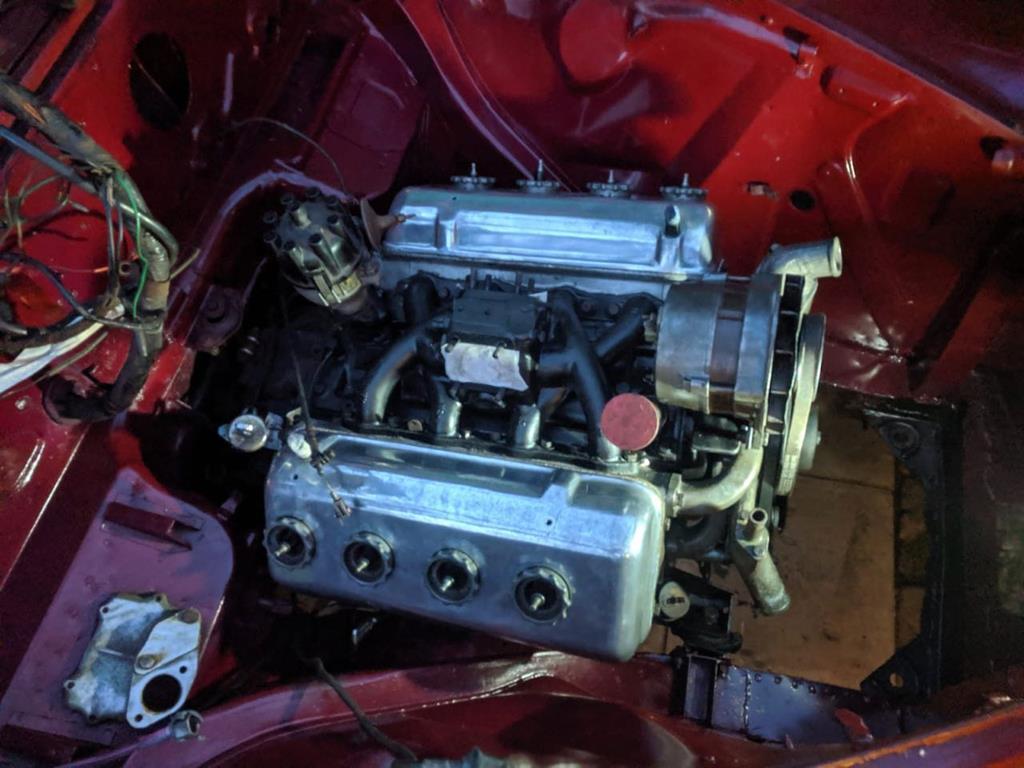 Which was hugely satisfying! Will dig out some more pictures and continue the yarn tomorrow! |
| |
Last Edit: Aug 8, 2019 21:11:33 GMT by goldnrust
|
|
|
|
|
|
|
Yes I have had first hand experience of getting a lot of power from these engines on carbs and injection, having be taught performance engine building by the late Ron Beaty of Forward Engineering. The first thing I would say get done is while you do the frames and body get the heads off checked and new valves seats, springs, stem seals all the usual things and have them and the inlet manifold ported and polished that will help you in so many ways later on with getting it running right later, the engine has to be out so use the dead time to do the basics on the engine while it's al ready out. |
| |
Last Edit: Aug 8, 2019 21:10:22 GMT by peteh1969
|
|
goldnrust
West Midlands
Minimalist
Posts: 1,887
|
|
|
|
Ah too late! If I would have posted about this back in April/June while this stage of the work was going on, I could have taken your advice, but as this is all a bit retrospective, I shall just have to bare it in mind for the future. As I'd seen that the engine ran 'ok' without smoke or nasty noises, I thought for stage one of this project, I'd not open that can of worms for now. Unless I am mistaken, I had read that they swapped the head studs out for head bolts in the saloon version engines, specifically so the heads could be removed with the engine in the car? Either way, when the times comes to freshen up the engine and/or make some power it sounds like I know who to speak to now!  |
| |
Last Edit: Aug 8, 2019 21:31:40 GMT by goldnrust
|
|
sonus
Europe
Posts: 1,392
|
|
|
|
|
I have a spread sheet with what I believe is all the different camshaft upgrades available past and present for the Daimler V8. I am currently building a 2.8 fuel incected fast road engine with pulse tuned intake and exhaust for my TVR. Currently aiming for more than 100 % volumetric efficiency 😁 A lot of info in the 'max overbore' thread on the dloc forum 👍
|
| |
Current
1968 TVR VIXEN S1 V8 Prototype
2004 TVR T350C
2017 BMW 340i
Previous
BMW 325d E91LCI - sold
Alfa Romeo GTV - sold
Citroen AX GT - at the breakers
Ford Puma 1.7 - sold
Volvo V50 2.0d - sold
MGB GT - wrecked by fire
MG ZT 1.8T - sold
VW E-golf Electric - sold
Mini Countryman 1.6D -sold
Land Rover Discovery TD5 - sold
|
|
|
|
|
|
|
|
Love these! My wife and I had one as our wedding car, was lovely wafting along in.
Look forward to more updates
|
| |
|
|
|
|
|
|
|
|
Ahhhhhh this is already so cool! Many many wants. Going to be an awesome bit of kit when done!
Chop chop with the rest of the updates!
|
| |
|
|
goldnrust
West Midlands
Minimalist
Posts: 1,887
|
|
|
|
sonus That sounds like a pretty serious engine build. I'll have to check out that thread on the DLOC. I've read a couple of interesting things on there, including an interesting thread about fitting a 4 speed ZF box from an X300.. But I've not joined up or anything. Worth becoming a member do you think? Where were we... With the engine back in, I thought it wise to try and put some of the other engine bay components back in, for no other reason than that my shed isn't overly large and I could do with the room back! 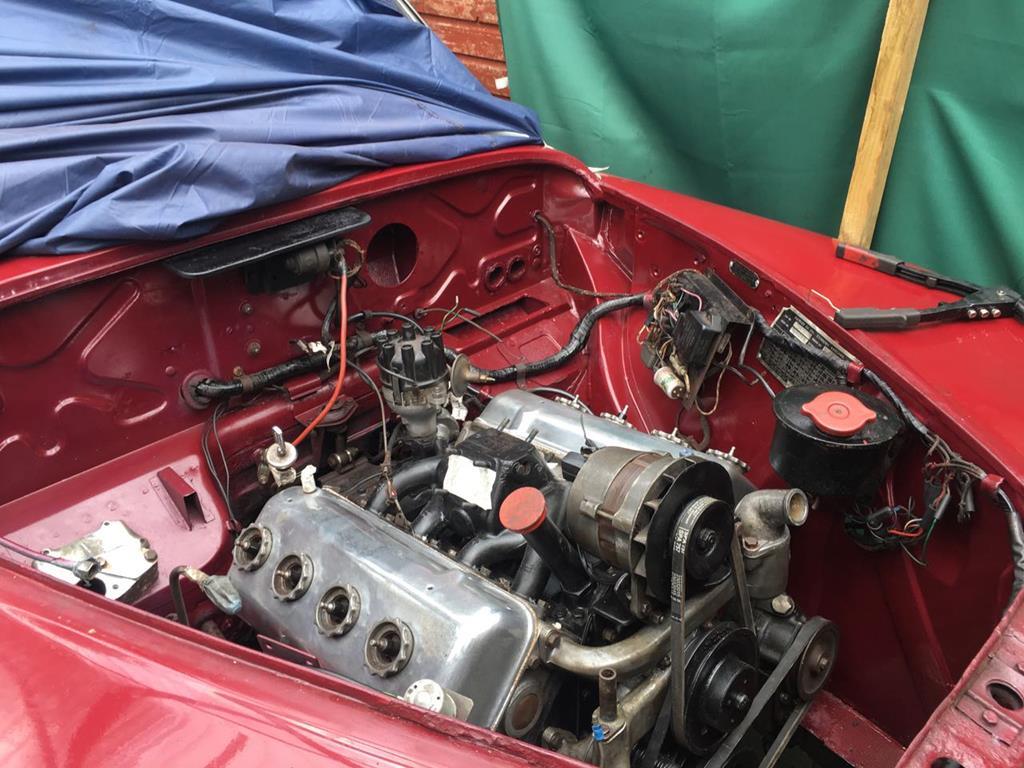 Power steering pump, reservoir back along with the loom roughly draped round. Next up was the radiator, mine loops a bit ropey, but appears to hold water. So for now a quick repair to the structure on the lower drivers corner, a damn good flush out with the hose and I'll see how it goes. The price of proper replacements is rather scary, though equally I was surprised at how cheap the Chinese aluminium versions were, so if and when this one is no good there are options. 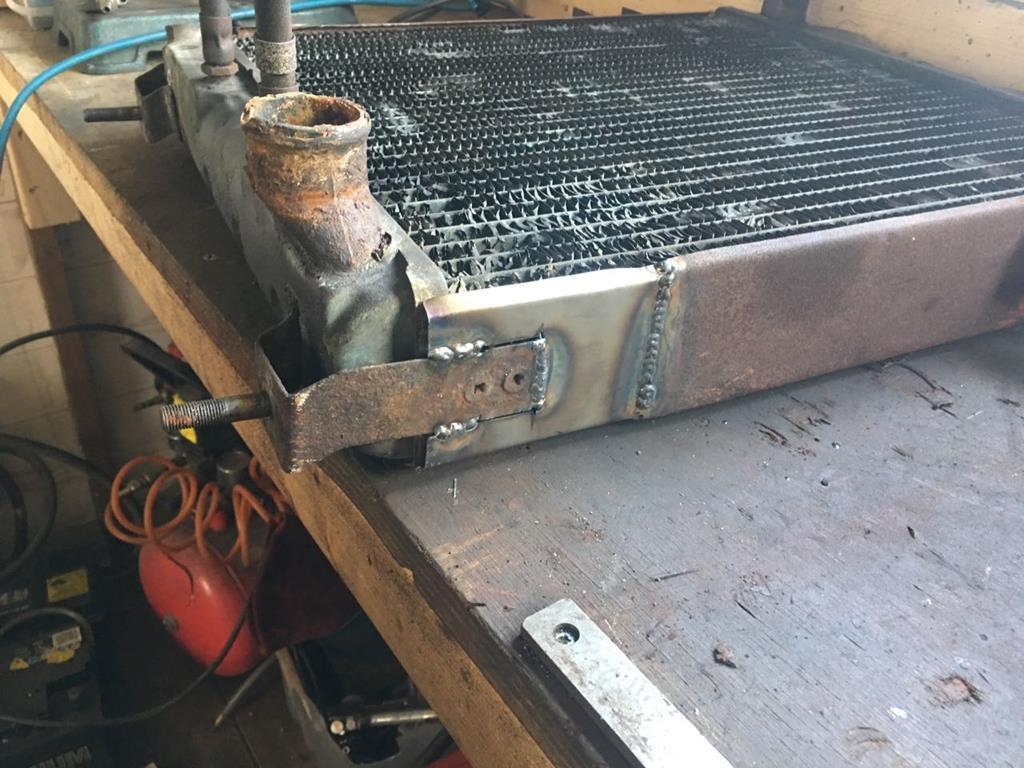 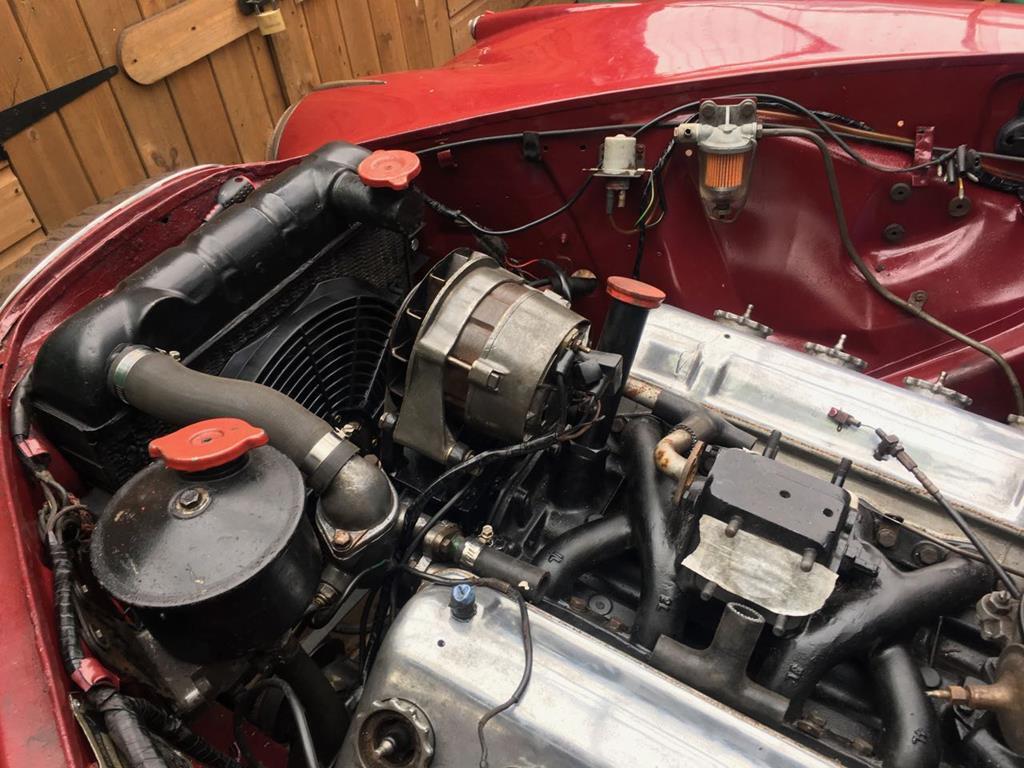 All new cooling hoses, clamps and mounting rubbers to go with the radiator. I've also taken this opportunity to the fit an electric radiator fan. I've no idea whether the viscous coupling was good or not, but in the past I've always felt it was a worth while modification. With a bit of space made in the shed, I paused there with the engine bay. I'm not the tallest chap, and with the tall wings on the Daimler and the front being so high, it wasn't the easiest way to work. What I needed was some front suspension so I could get the car back on the floor. So that was next! Stripping down the subframe went fairly smoothly. The nuts holding the suspension arms on were clearly never going move, so I didn't even try. A bit of grinder and air chisel action later and all the nuts were safely split. 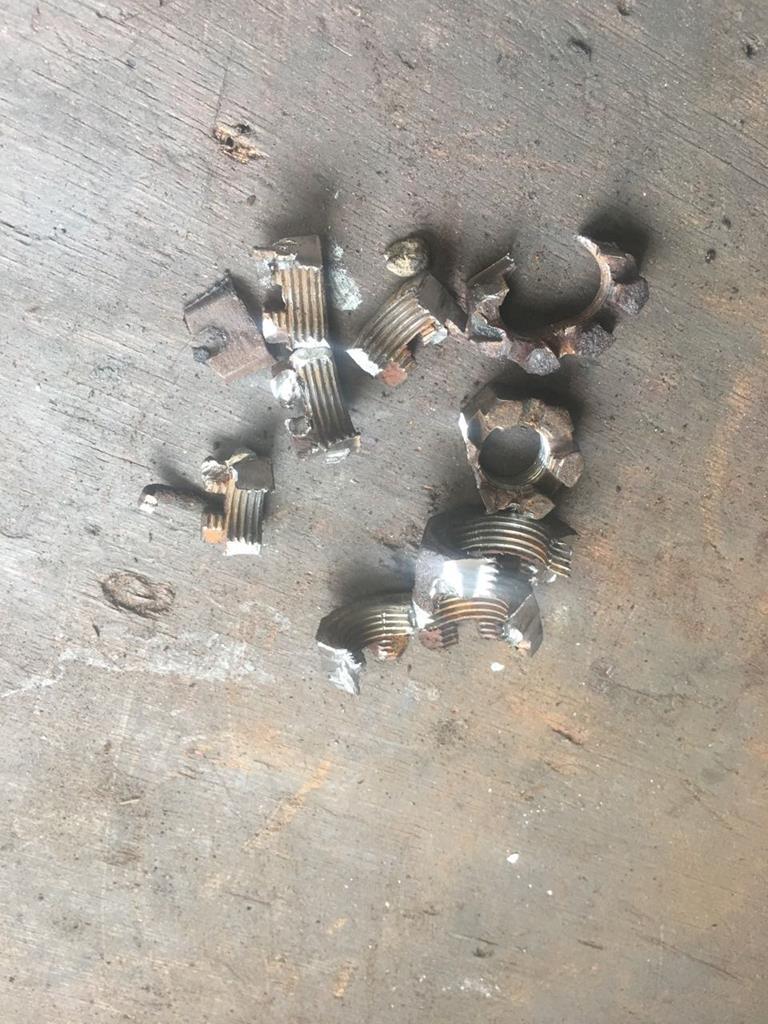 I wire wheeled down the subframe and all the other components ready for paint 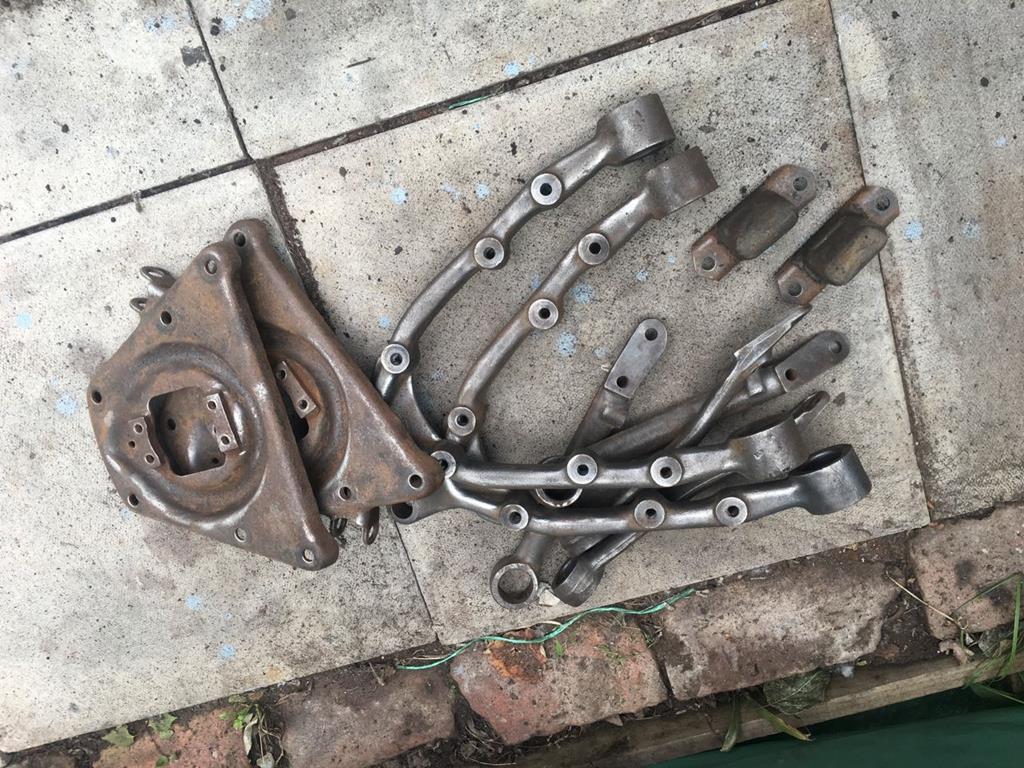 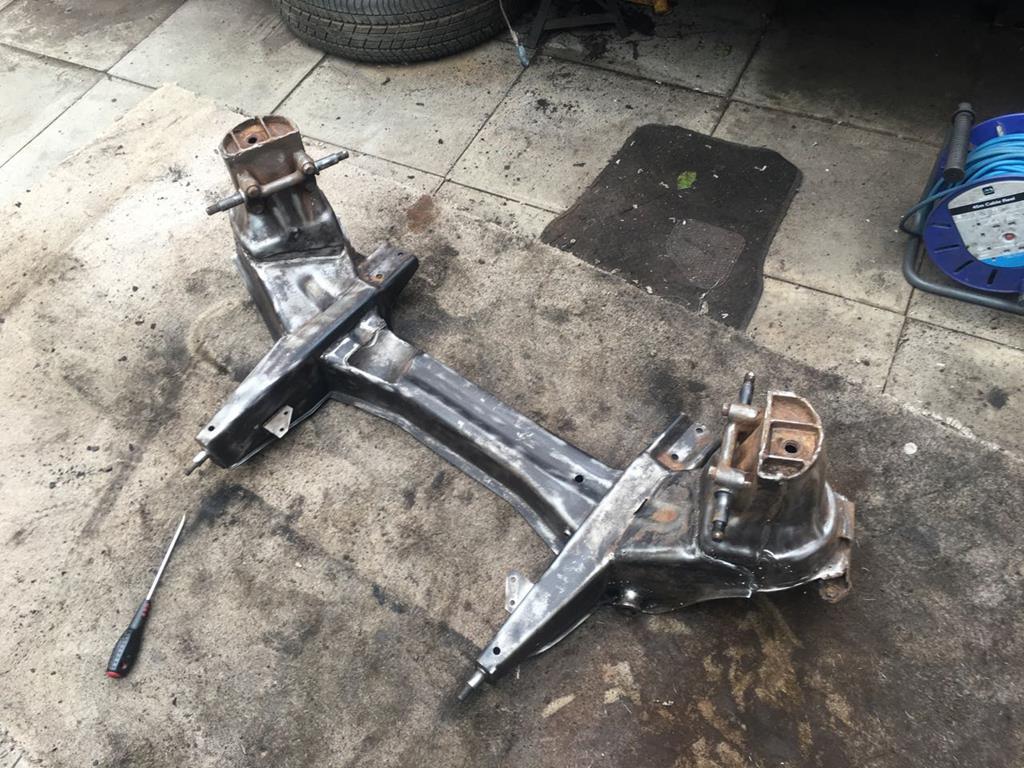 I also went shopping and returned with a light wallet but many many new parts. All new bushes, new upper and lower ball joints, complete new track rods and many other small seals and bits and bobs. 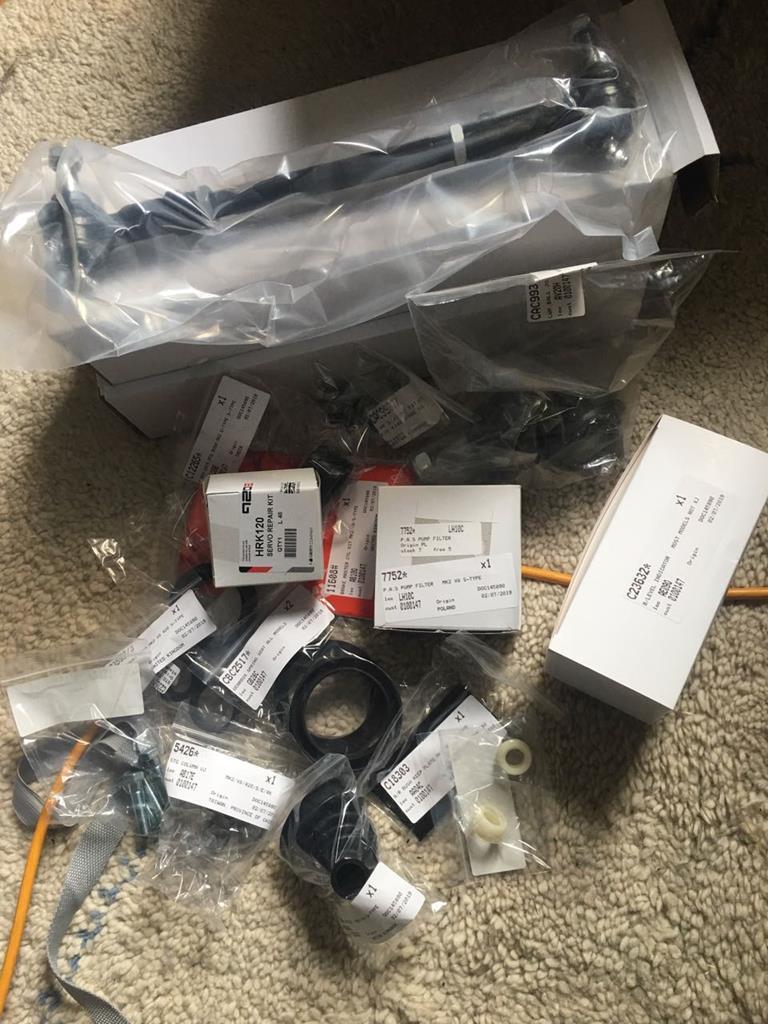 Here's the freshly painted upper arms with the new bushes installed 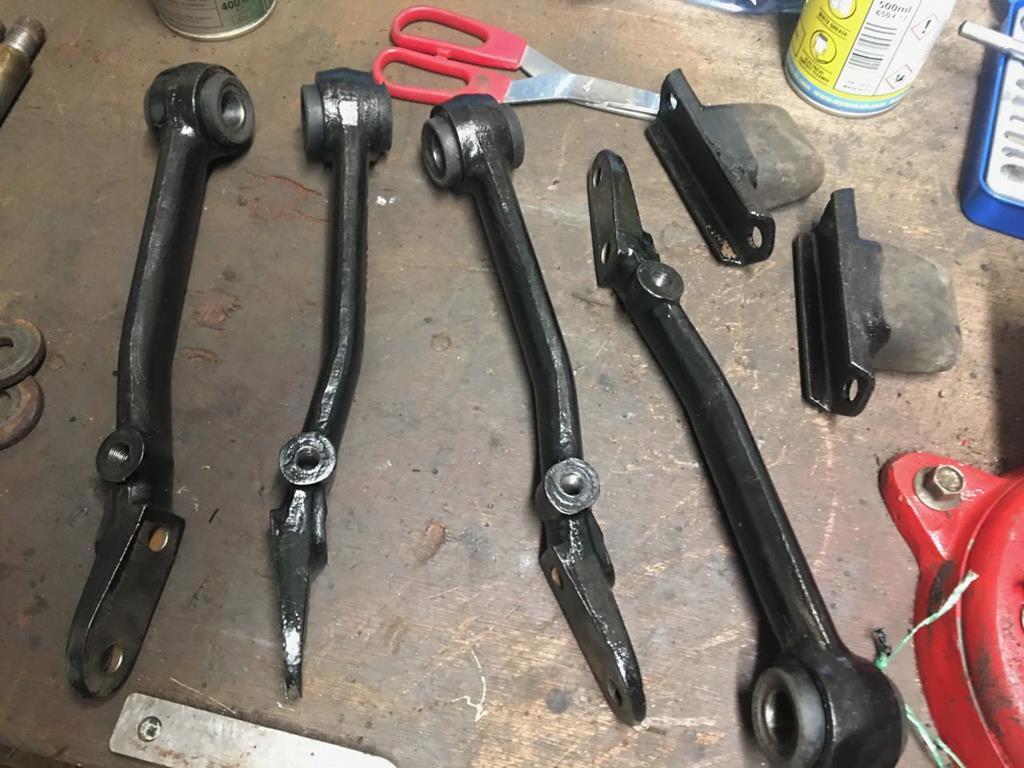 Shortly after buying the car I bulked up my imperial tool set, and the tap and die set in particular has been earning it's keep on this project! HEre's the painted fresh hubs getting the threads cleaned out ready for the new lower ball joints to go in with various other freshly painted components in the background! 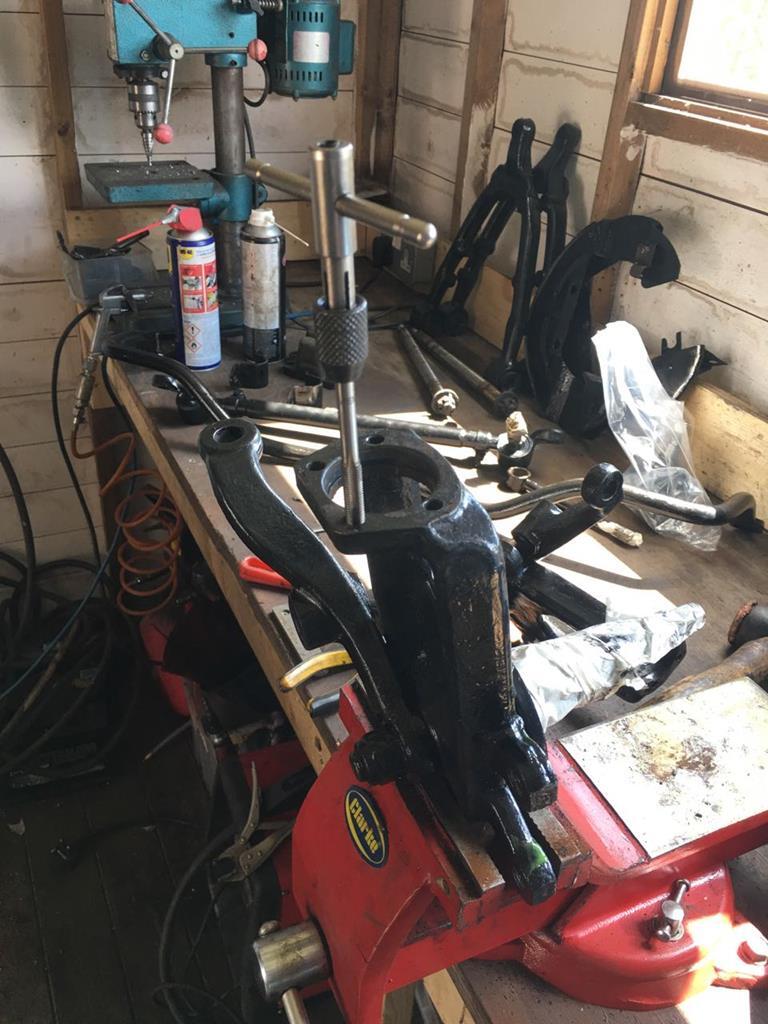 Removing the front subframe complete had gone ok, but it was flippin' heavy! Rather than risk injuring myself trying to re-fit it to the car whole, I re-assembled it onto the car. First up was putting the subframe back in on all new mounts. 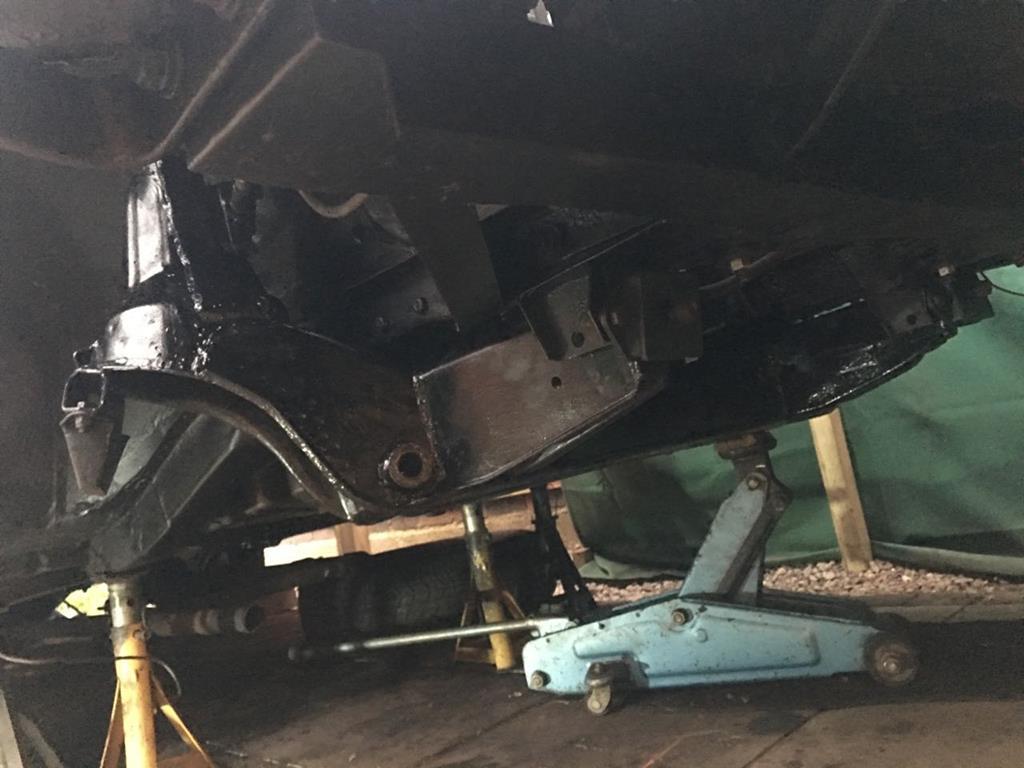 And after that I didn't think to take any more pictures...  While I was under there the front inner wings got wire brushed back and painted with rust killer/paint/underseal where appropriate. With the front suspension back in, all freshly painted and sorted it was a nice feeling. It meant I could put the car back on the ground and that felt like a good milestone  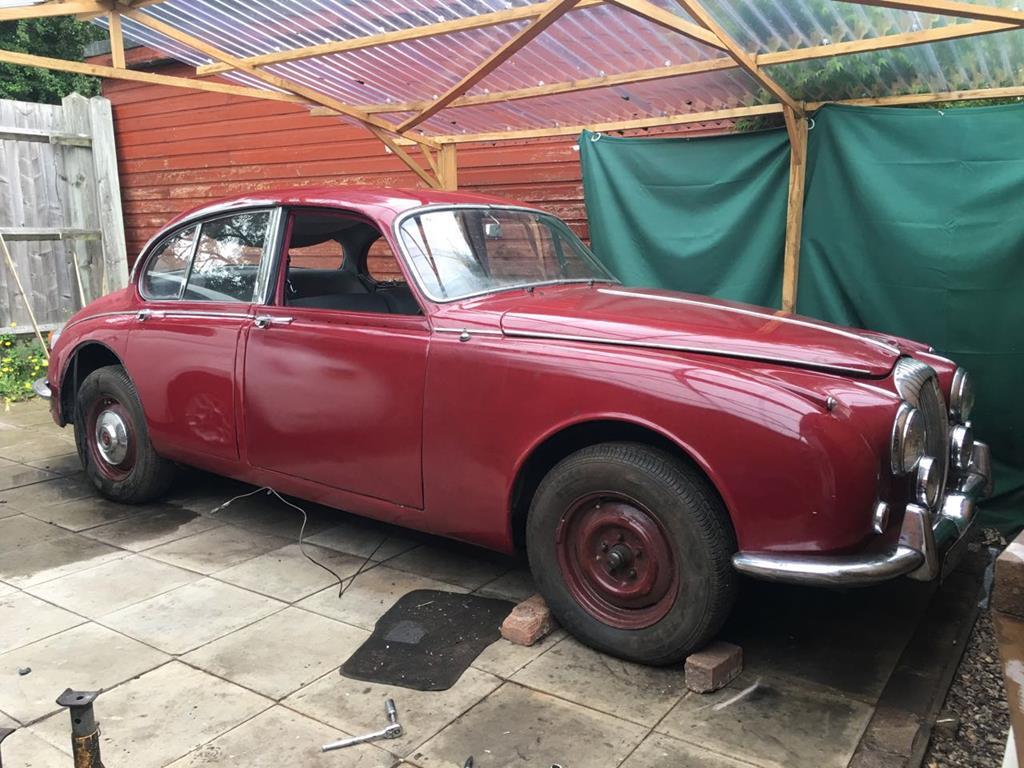
|
| |
|
|
|
|
|
|
|
|
Great work, engine and bay are looking great. (as are the metal repairs)
|
| |
|
|
goldnrust
West Midlands
Minimalist
Posts: 1,887
|
|
|
|
Thanks Elky. In this retrospective section, we've now made into early July. Having had good success with the front suspension, I could now reach things in the engine bay! Next up was the front brakes, which once again quickly got expensive. Again I apologise for the lack of pictures at this stage. Once again I'm lacking in picture, but these Daimlers have the early Jaguar/Dunlop discs all round. Being such an early design, there's some unusual design elements. Namely, instead of the seals fitting to the callipers, and the pistons being the sliding surface, the pistons have the grooves for the seals and the bore of the calliper is the surface which needs to be smooth and perfect (like a master cylinder). The downside of this is that once corrosion sets in, you can't just replace the pistons and seals, you have to essentially buy a new calliper. The brakes had worked to some extent when I got the car off the flatbed and drive it onto my drive, so I hadn't worried too much... But investigating the callipers it was clear than both front brakes were seized solid. 3 of the pistons I was able to remove, and see just how bad the bores were (the answer being really bad) but the 4th I couldn't even get to move with the help of a vice, a big hammer and various levers/chisels! After that setback, I thought it wise to investigate the master cylinder and servo. Thankfully neither of these were showing any internal corrosion. I've built rebuild kits for both regardless. I'm slightly nerves about stripping the servo down to fit new seals, especially as some of the diaphragms are not available if I damage them, but brakes is nothing something I want to skimp on. Another small bit of good news on the brakes is that the brake discs all appear to be brand new. The surface rust comes off with a bit of scrubbing with a scouring pad and I don't think they have ever been used. The pads appear new too (though I damaged a couple trying to disassembly the seized callipers). Possibly that means that the brakes have been rebuilt in the past 30 years, which makes it seem even more of a shame to have them seized solid. Having priced up replacement front piston assemblies, I found the price for a conversion kit to a modern style 4 pot calliper that would use the standard discs isn't too much more expensive. For the moment I've parked the brake project and moved on to other challenges. The question of whether to bite the bullet and go for the 4 pot conversion still remains. So deciding to move on, I figured the next move was to give the rear suspension the same treatment that the front had received. 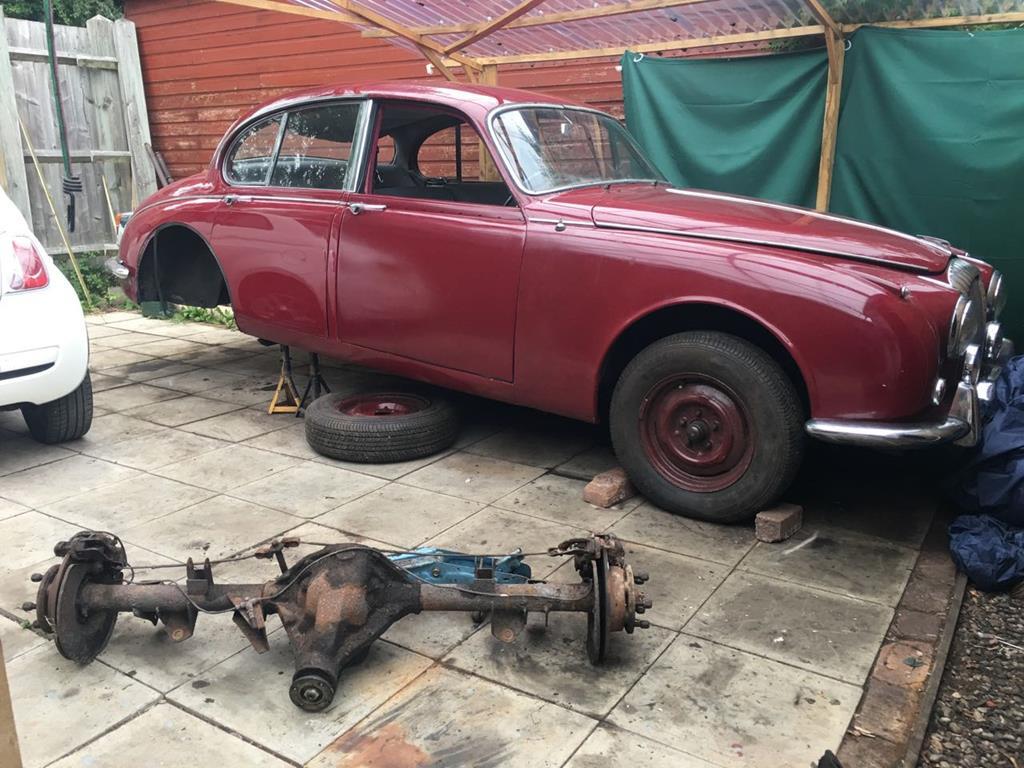 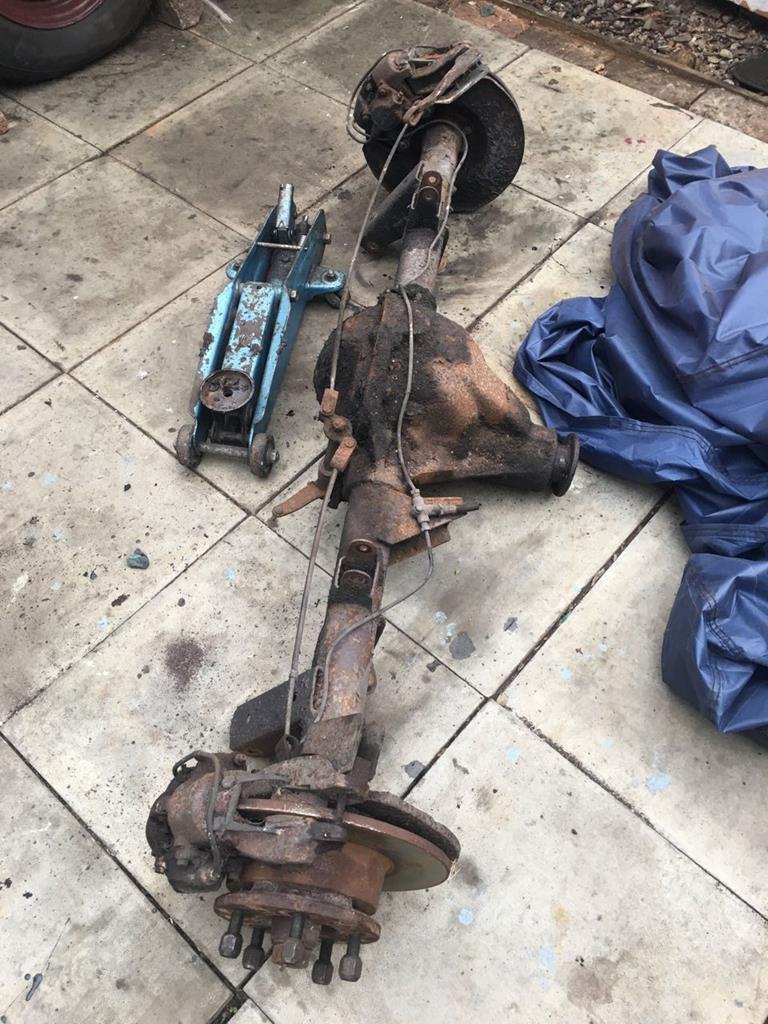 It came out with relative easy, though just like the front it's damn heavy! I've not dared look at the rear brake callipers yet, I'm presuming they're gonna be better than the front ones, as the front really can't have been doing anything. haha. Removing the rear suspension also meant removing the exhaust, which I knew was bad and would be replaced but I have to admit I didn't realise it was quite this bad! 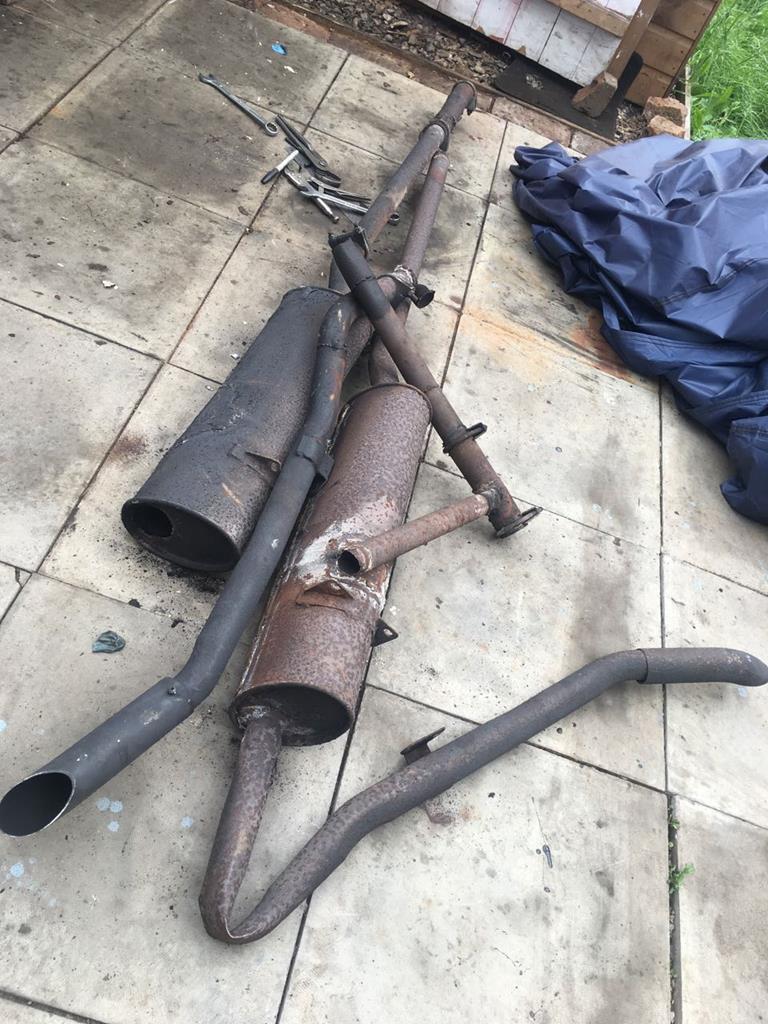 Just like the front, removing the suspension revealed some metal work that needed attention. The rear spring channels / hangers (essentially the last couple of feet of the chassis rails) are a notorious rust trap, and mine were no exception. What was disappointing, was the poor patches. Several of these were purely cosmetic, having been slid up the side of the spring and only welded at the bottom. Enough to fool the MOT man (and me when I viewed the car), but adding zero strength.  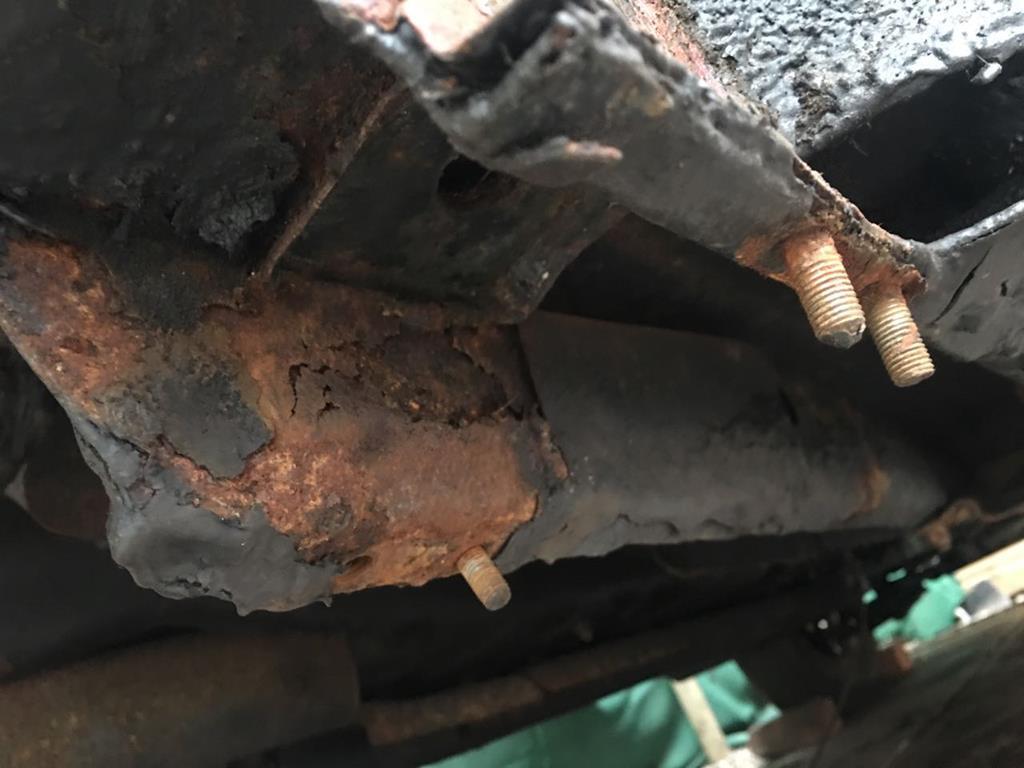 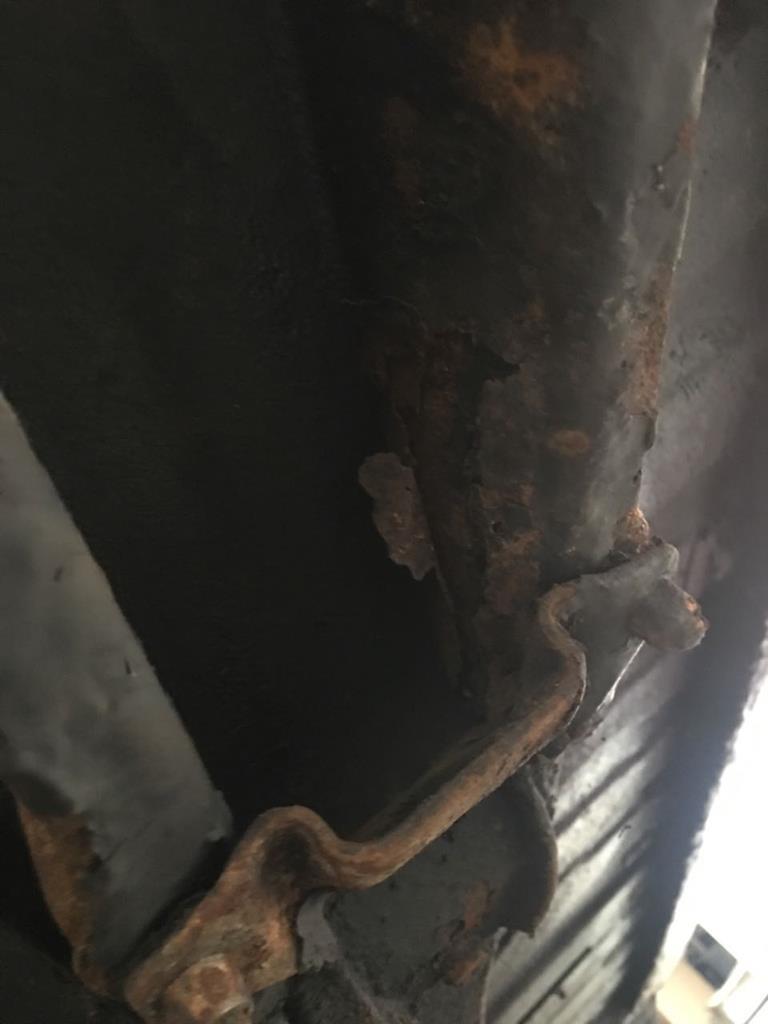 Faced with a mess like this, clearly patching wasn't gonna work, so the only solution was to spend yet more hundreds of pounds on repair panels. I purchased entire new spring hanger assemblies for both sides of the car. While having preformed repair panels makes life a lot easier, this is definitely one of the more involved sections of metal work, simply because of how much of the rear of the car ties to and from the spring hangers. Removing the rear seat base, to access the top of the spring hangers, revealed more rust. Nothing too drastic, some small holes in the seat base itself where the spring hangers attach and then after a bit of poking around with a screw driver, some holes formed in the central seams of the wheel arches. Not easy to see in this picture, but you can see daylight (well dusk!) in a few places. 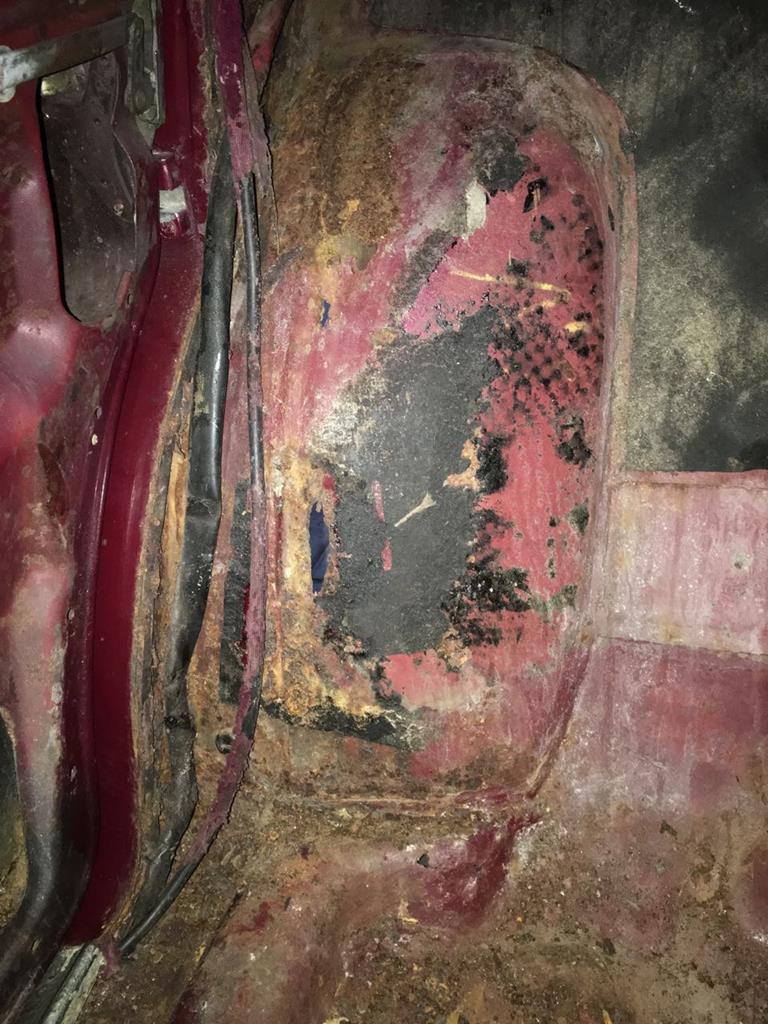 So now I was going to be doing more 'proper' welding and grinding inside the car, I didn't want to risk damaging my seats/glass/wood trim. I felt the best way forward was to take the project the next level, and fully strip the interior, and remove the windows and doors. Then I could do one pass and get all of the tin worm out of the shell in one go. More weldathon then! 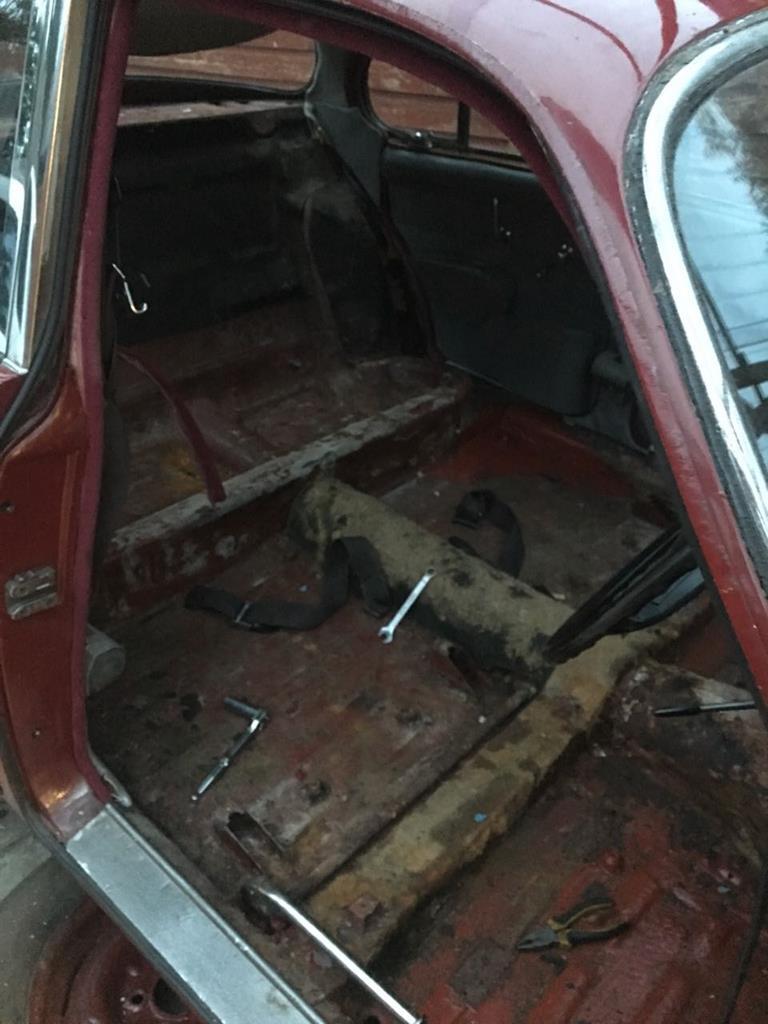 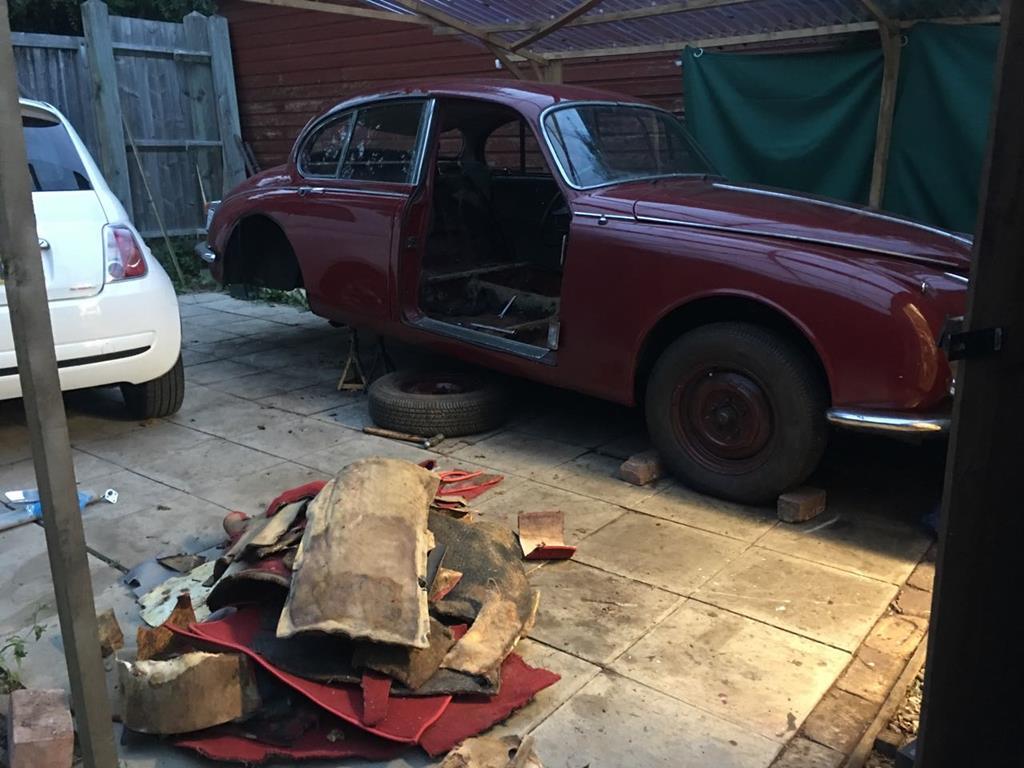 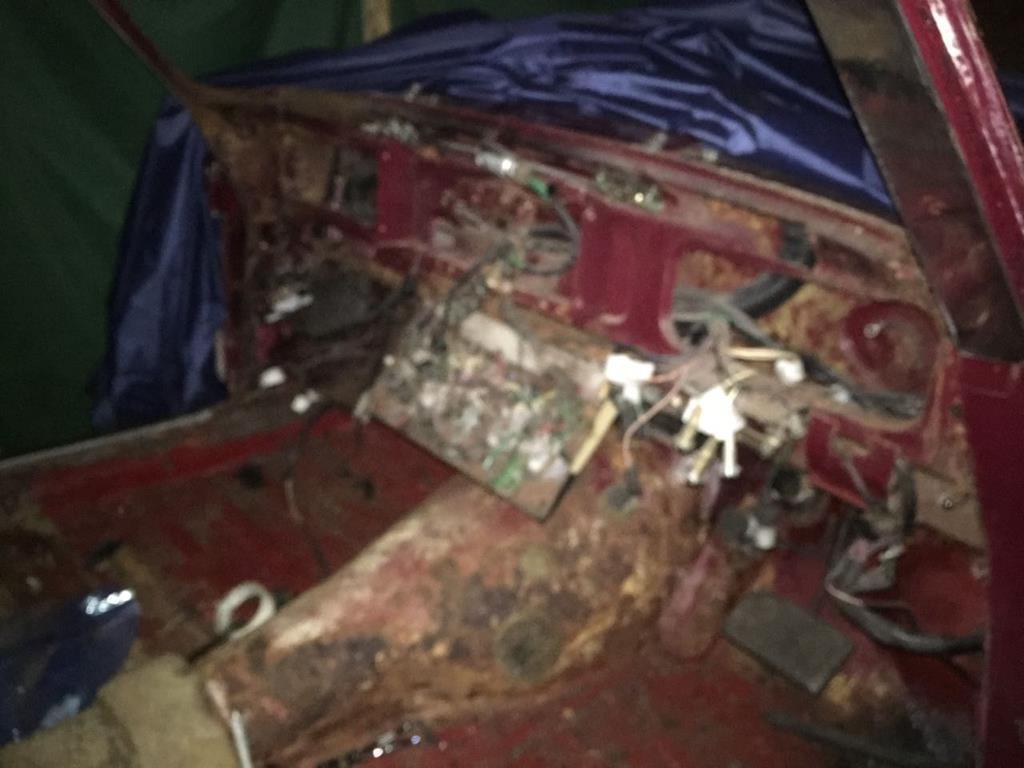 Lots of that interior wont go back in again, and the parts that do, will be refurbished first. As you can see from the pile of manky old carpet (and boy was some of it grim!) I have identified that the original interior colour was beige. So another question I'm considering is what colour should I trim the car in when it does go back together. Sticking with grey is easiest for the seats, but equally I read good things about leather re-colouring kits, and going back to beige/cream would be elegant. Equally, if I'm going down a lightly modded route, and this is not a car with providence or history so I'm not going to worry any purists, is there another option that would look nice. Black is an option that's been suggested by some of my friends. |
| |
|
|
adam73bgt
Club Retro Rides Member
Posts: 4,998
Club RR Member Number: 58
Member is Online
|
|
|
|
Just spotted this thread, I had wondered what had been going on with the Spitfire but this is even cooler, looks like good progress already  |
| |
|
|
goldnrust
West Midlands
Minimalist
Posts: 1,887
|
|
|
|
Nothing for it but to break out the grinder and get chopping! While I waited for the repair panels to arrive in the post, I got on with some of the easier repairs. First up, both rear wheel arches got new metal to replace the corroded seams. All the old metal chopped out and then repairs seam welded in. 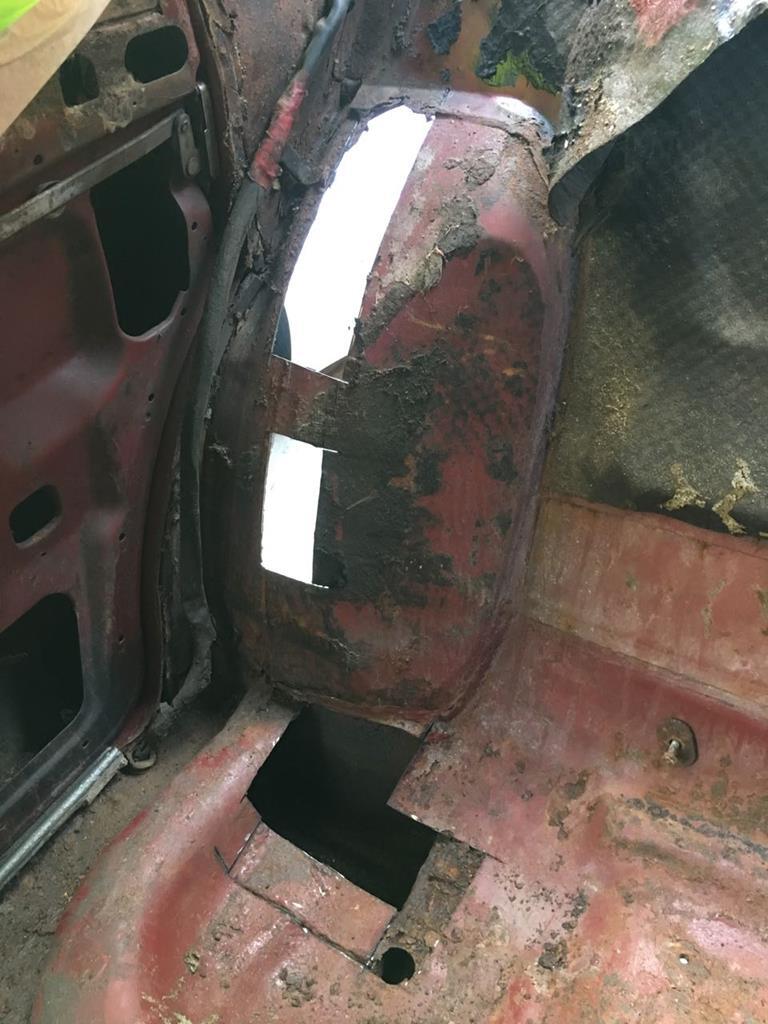 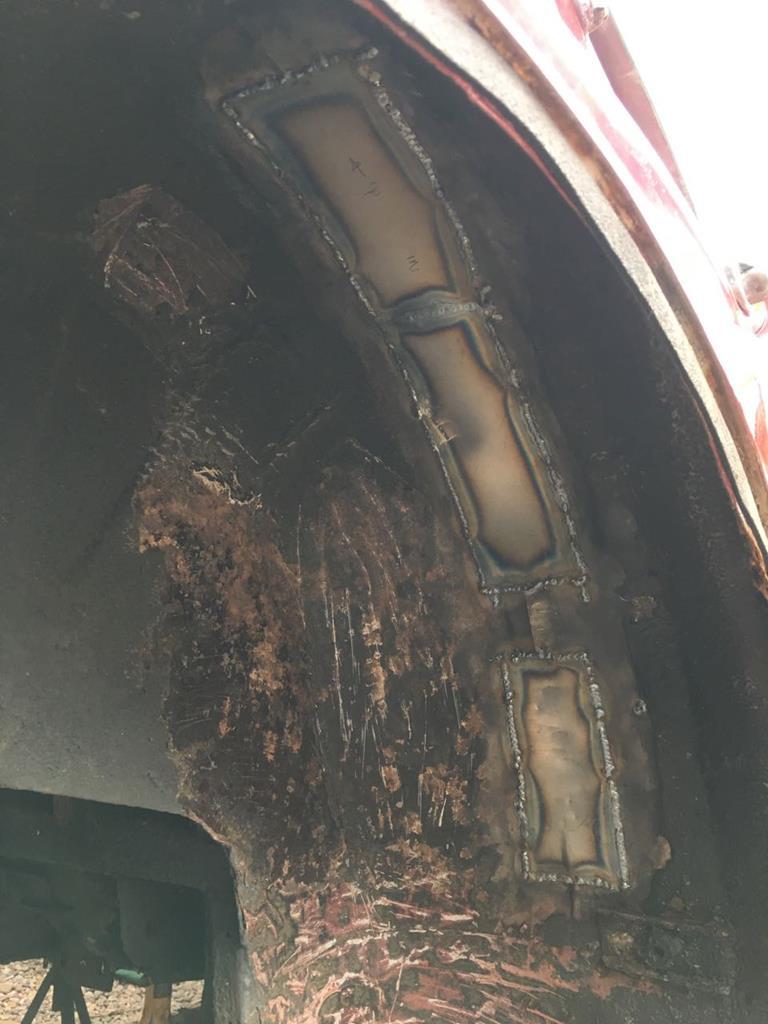 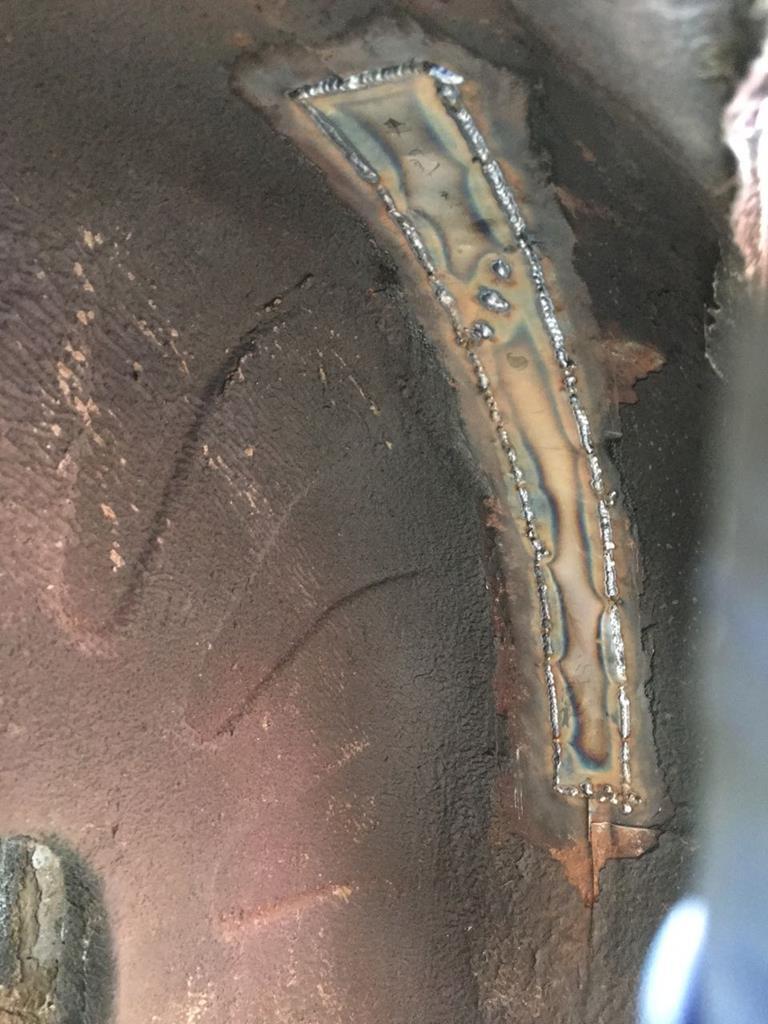 That went fairly well, so next I did a small repair to the rear window frame. 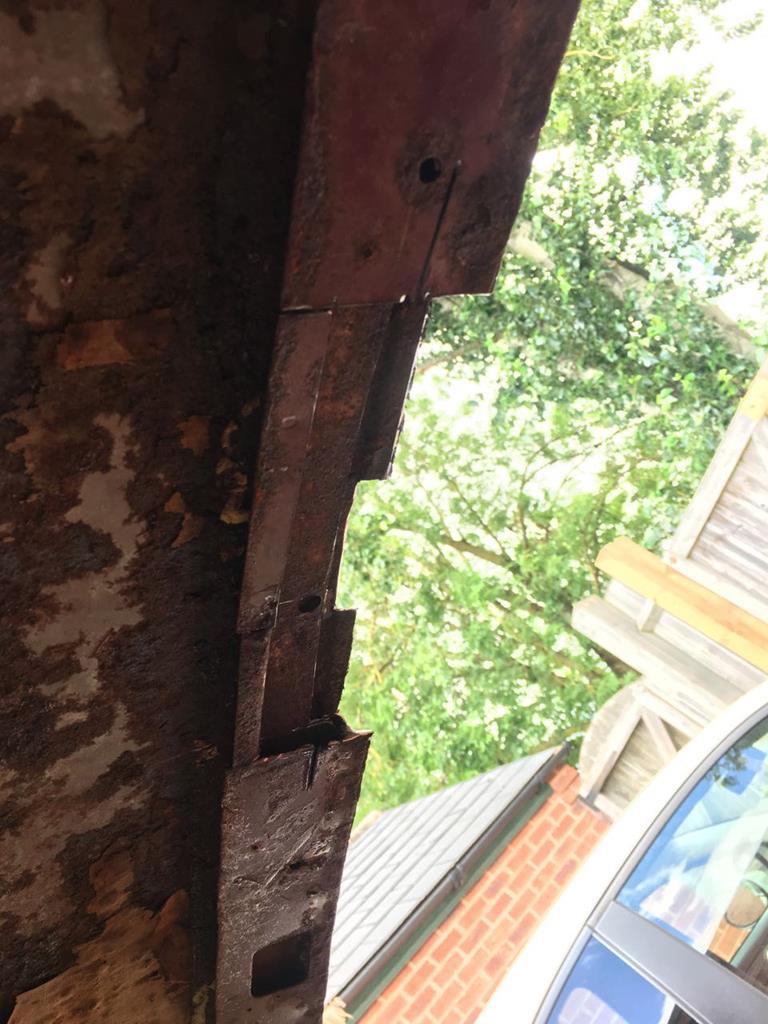 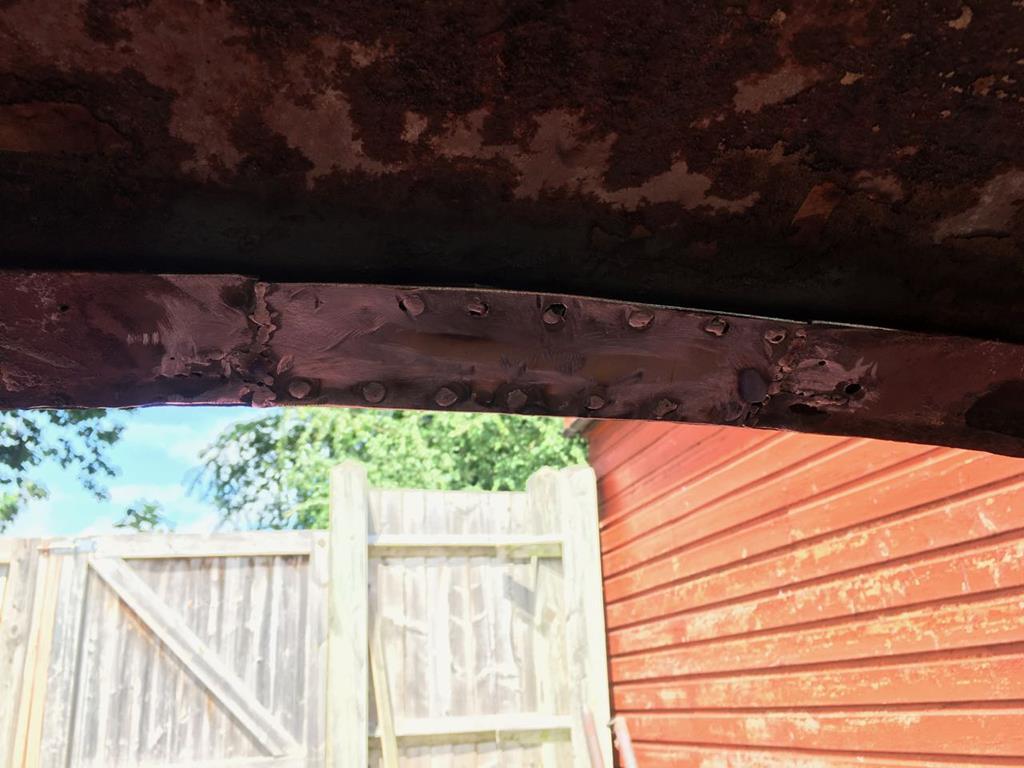 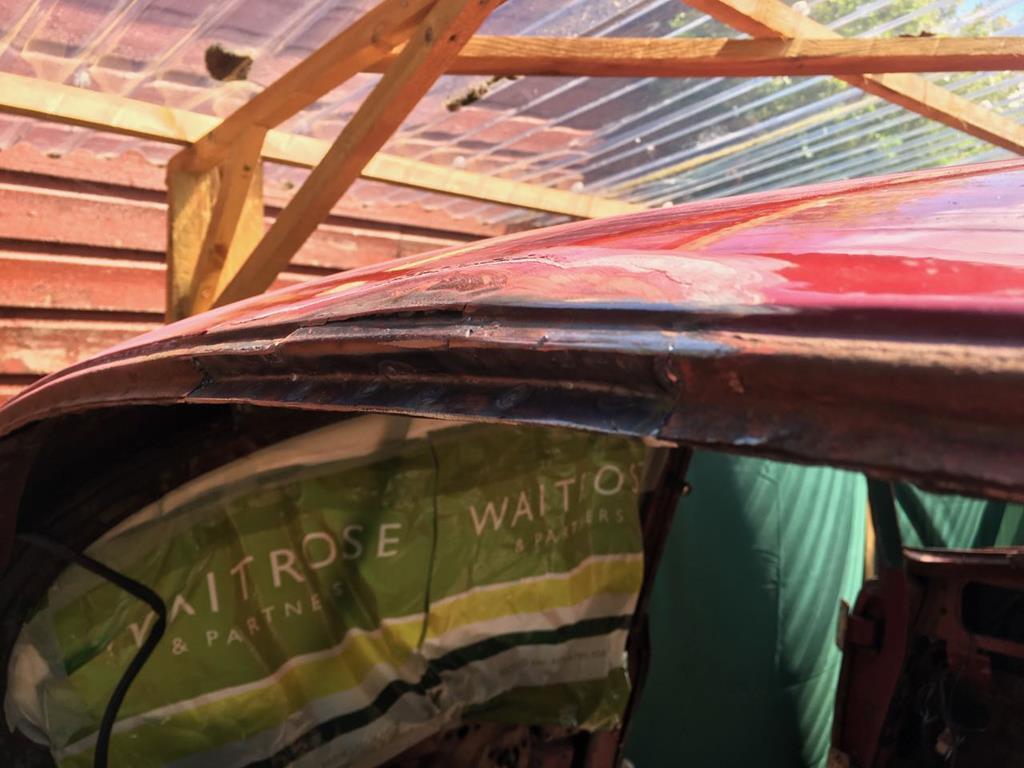 Slightly more involved the lower corner of the front window needed rebuilding. This had several layres, so took some time to work out how best to attack it. Like most of my repairs, I'm confident it's strong and functional, but will require a skim of filler to be pretty! 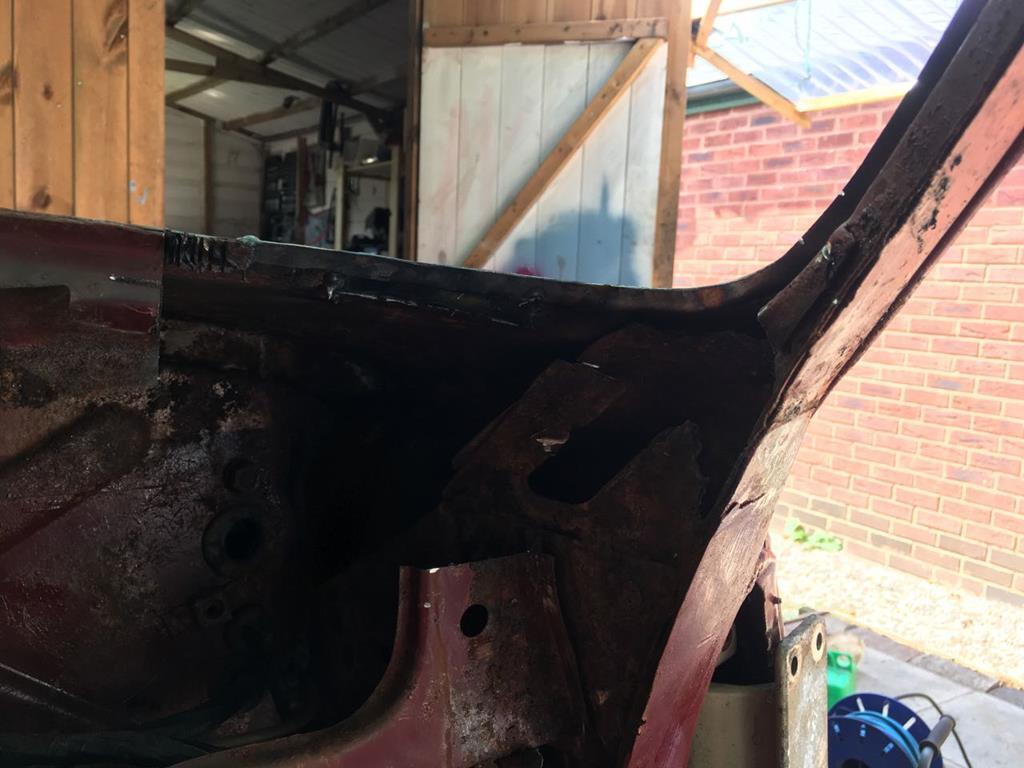 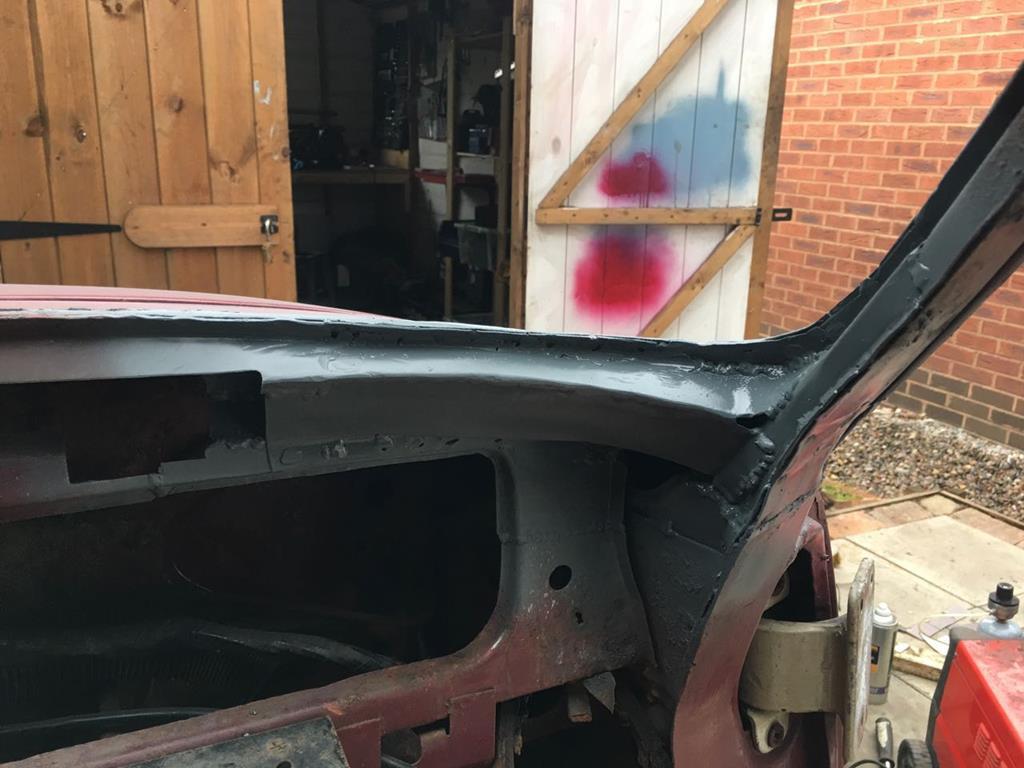 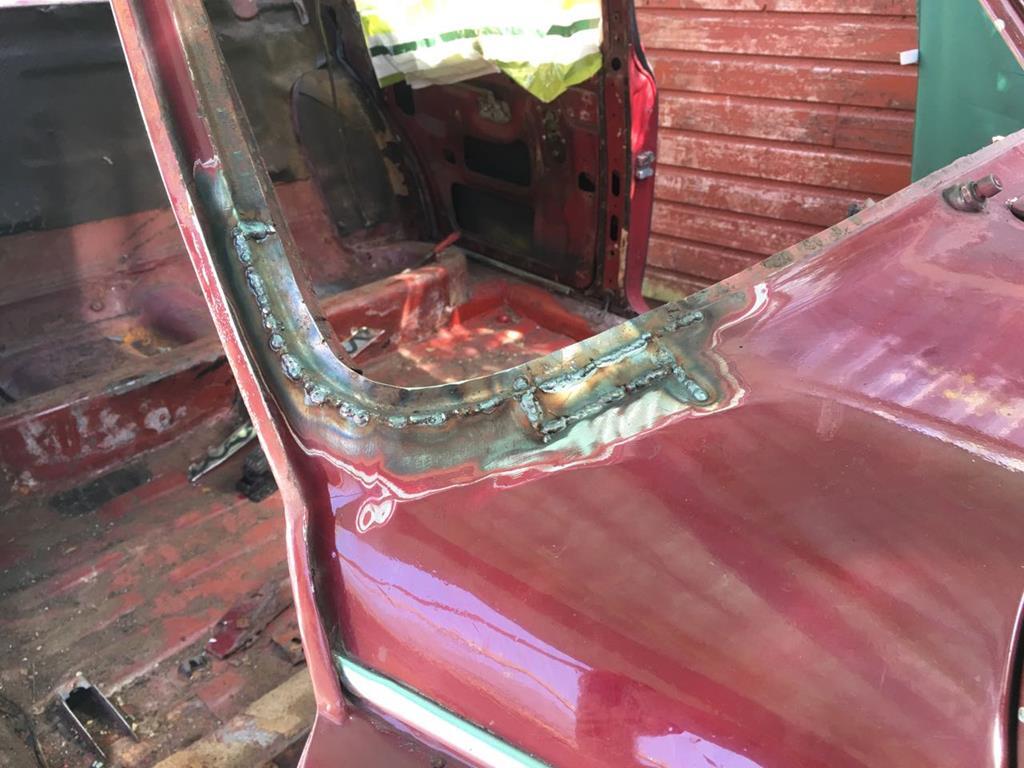 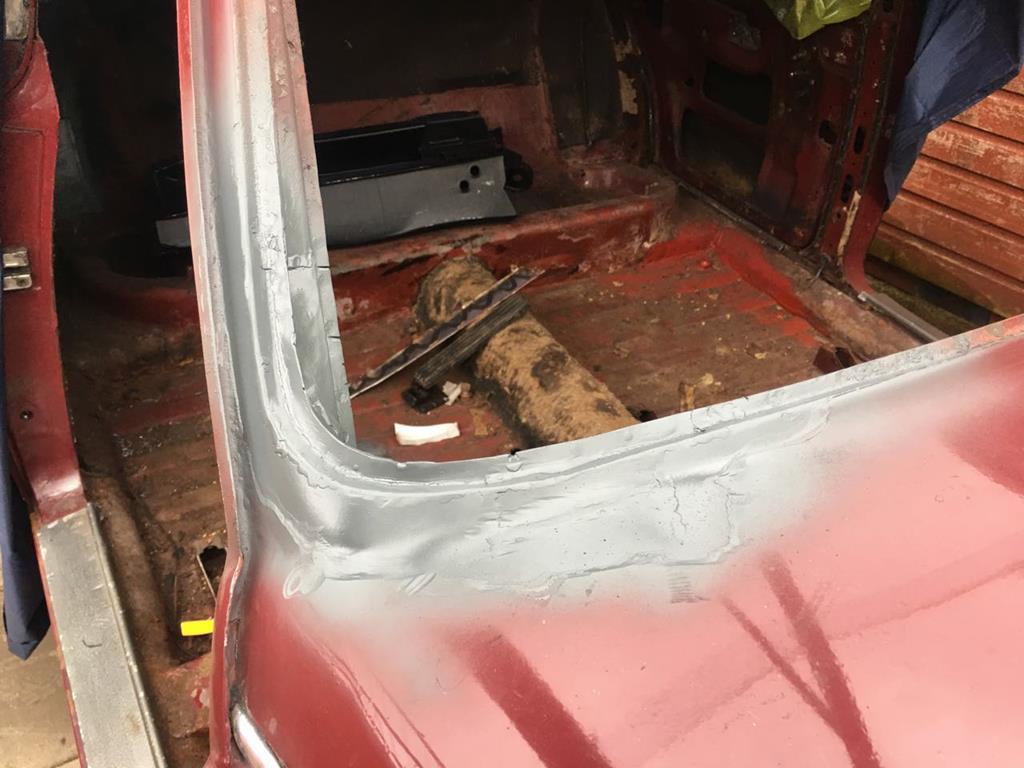 I then investigated some deep looking cracks in the paint, around the bottom of the B pillar and bottom of the A post. From my Lancia experience, I knew these type of cracks usually meant there was something a miss under the paint/filler! Thankfully, both rust issues were fairly contained, and with a selection of small patches, I was soon able to fix both problem areas. The most frustrating thing was removing the lead loading before I could start. Not my favourite job and one that always makes me a bit nervous! 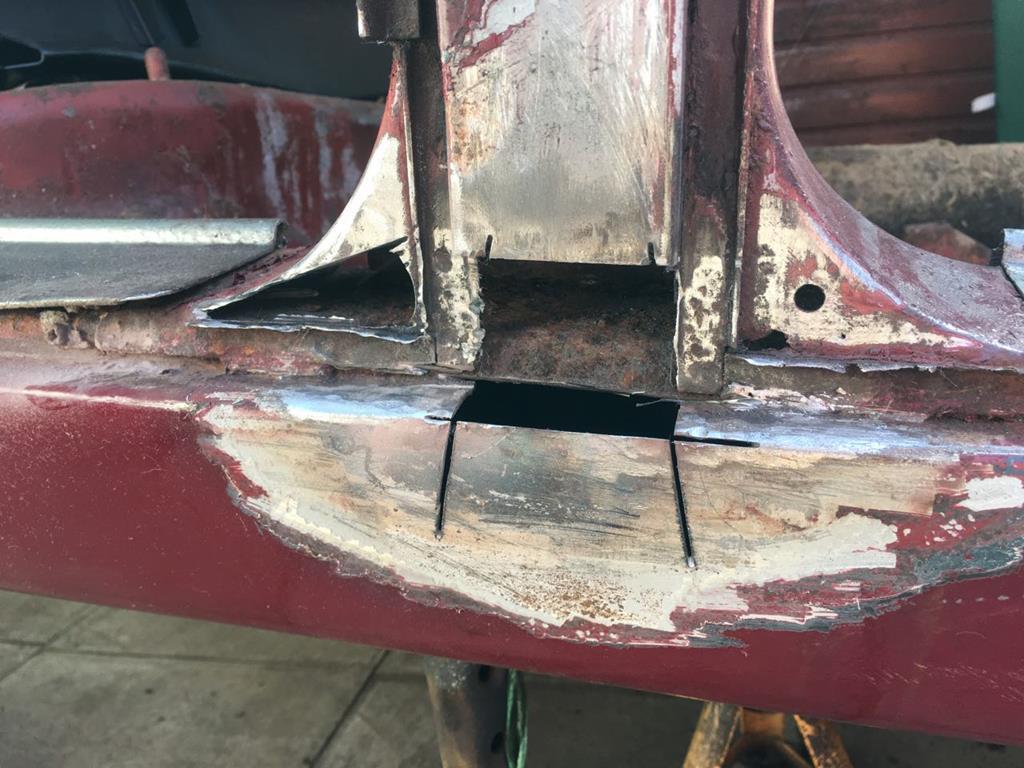 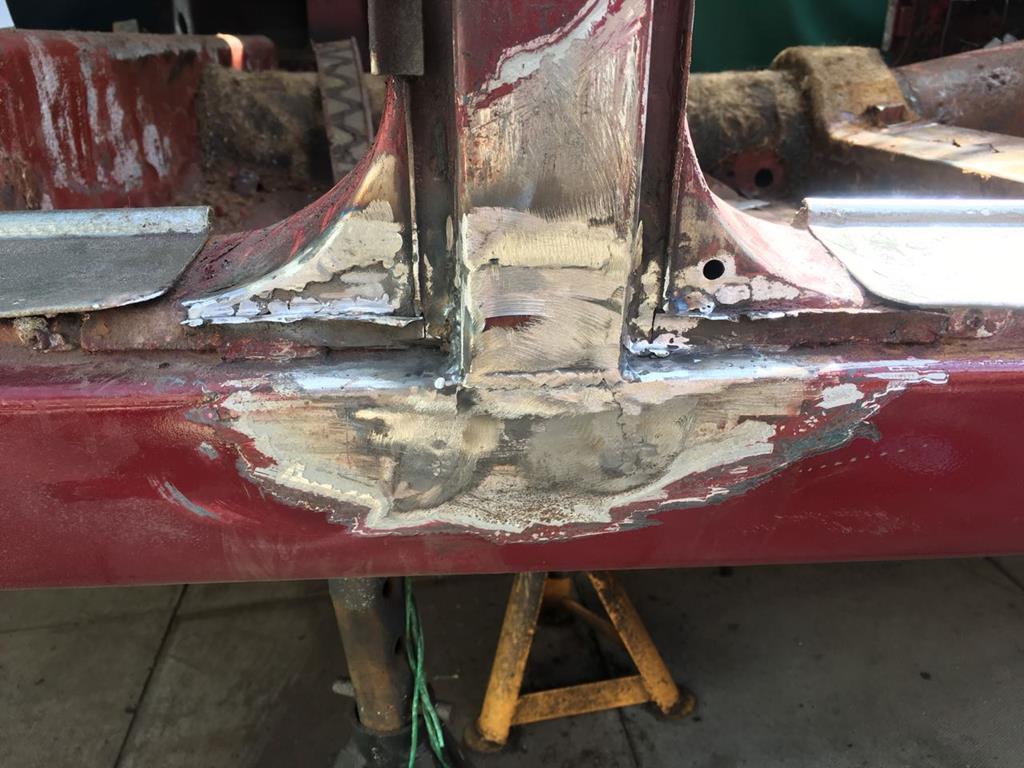 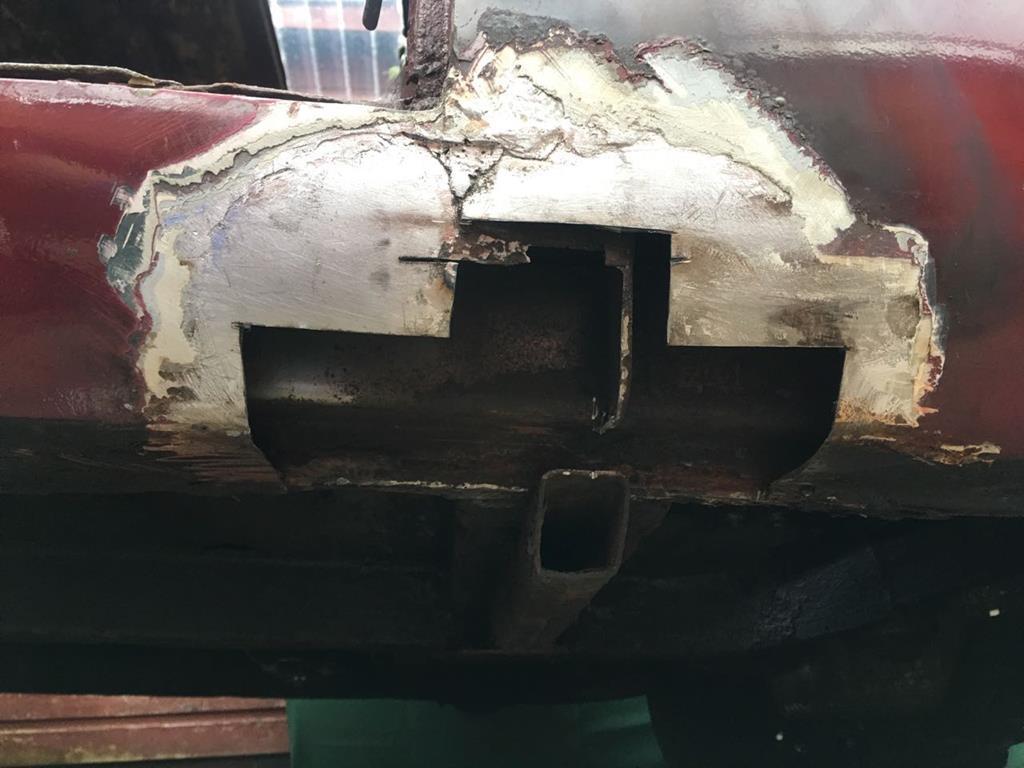 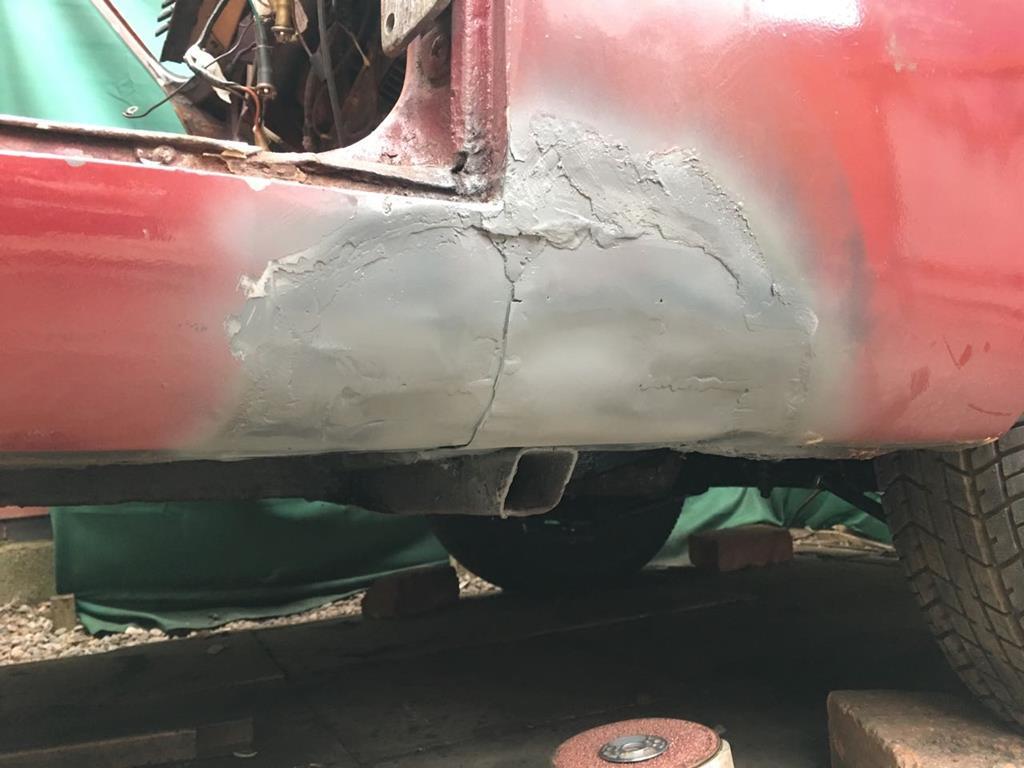 It's not the neatest patch on the sill, but it appears the base of the front wing has already been repaired, so the metal work wasn't perfect to begin with. Still, it should require less filler than I removed to get it straight for paint, and latest theres good strong metal under it now. This left one more of these 'cracks' to investigate, before I'd have to get brave and tackle the spring hangers. This time on the passengers side A pillar/sill. This time digging away the filler and lead, revealed a bigger problem. 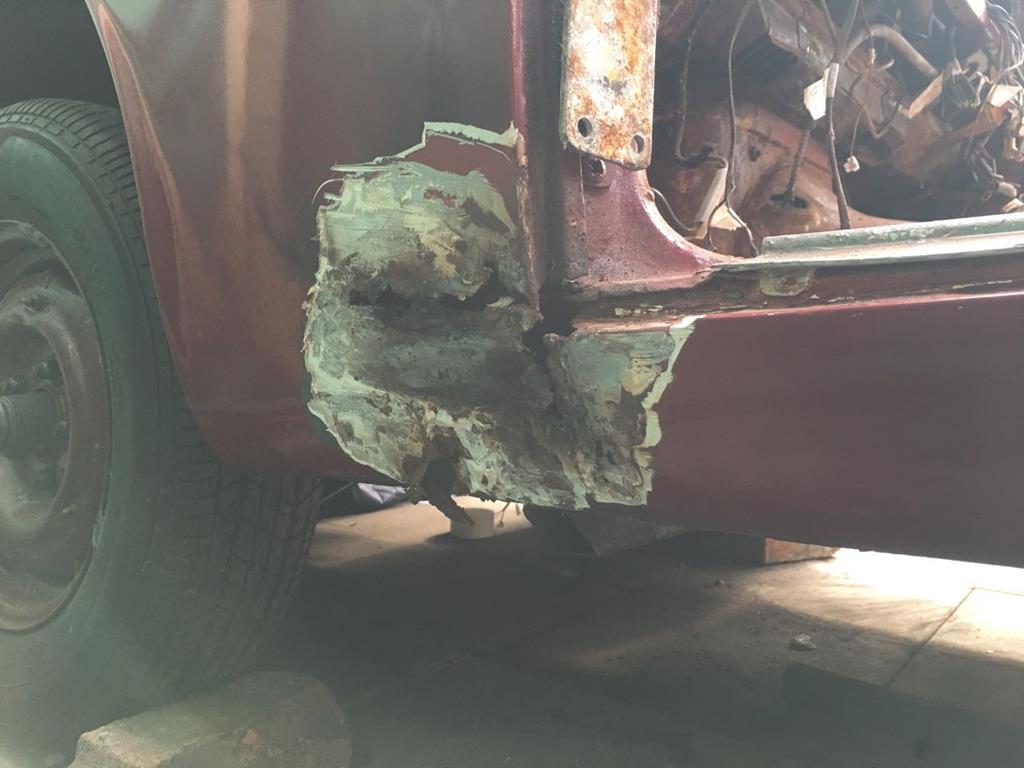 Nothing that can't be fixed, and will be straight forward shapes to patch but as the car is tight to the fence on this side currently, I decided to park this (put it I the corner of my memory with the brakes and closed the mental door on it!) and get on with the spring hangers. Once the car is back on it's wheels, I can turn it around and this wont take long to fix. So time to take a grinder to the drivers side spring hanger, mostly it just crumbled away! But here is what remained of it once I'd swept it up, with the new repair panels! 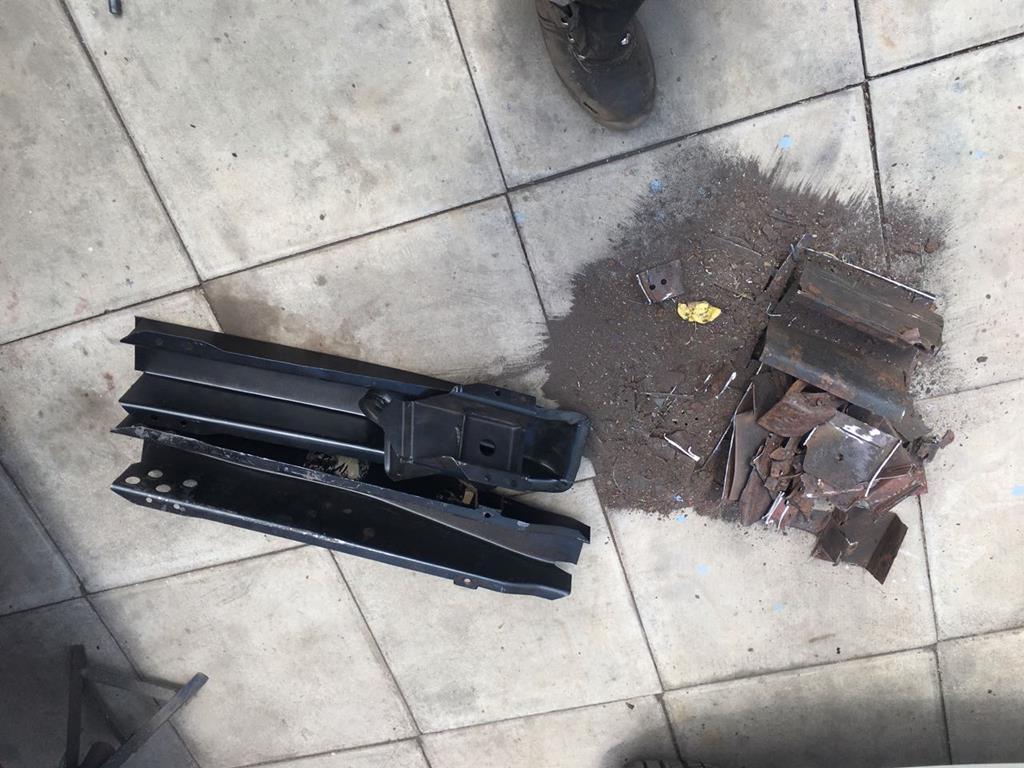 Which left a rather big hole under the car. 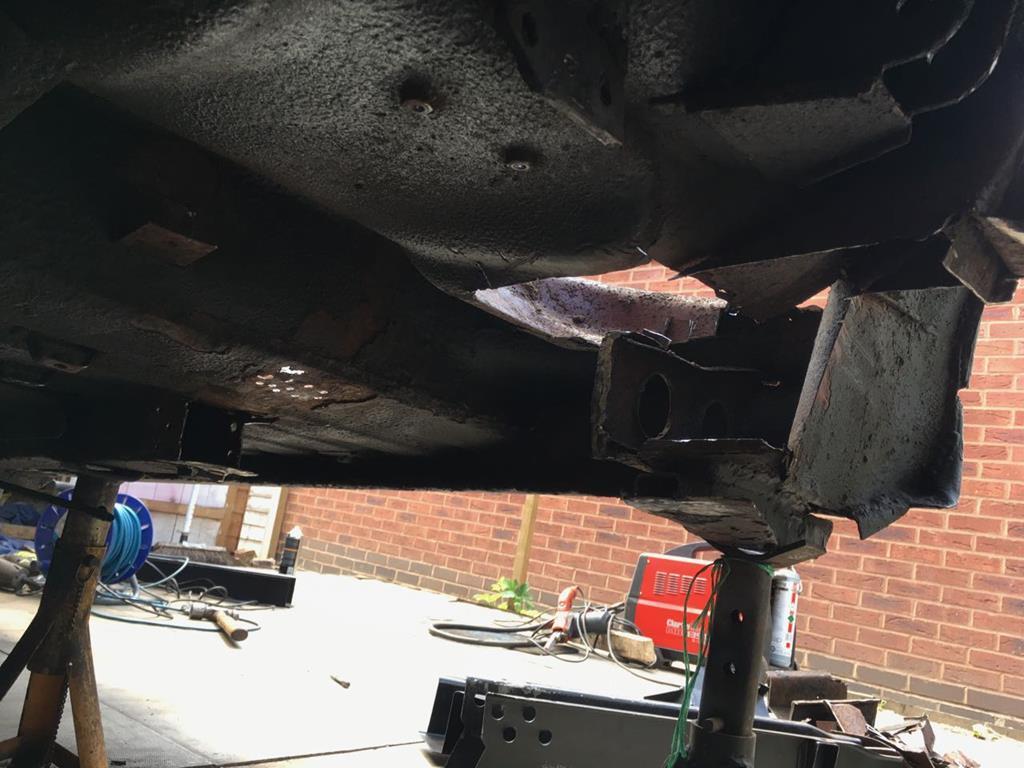 I did a lot of measuring before removing the old spring hangers, as getting the mounts for the rear suspension in the right place is obviously fairly critical! Thankfully the forward most spring mount was part of the chassis rail itself, which wasn't being replaced so I was able to leave that as a fixed point and work backwards from it. Here is the new spring hanger all welded in. 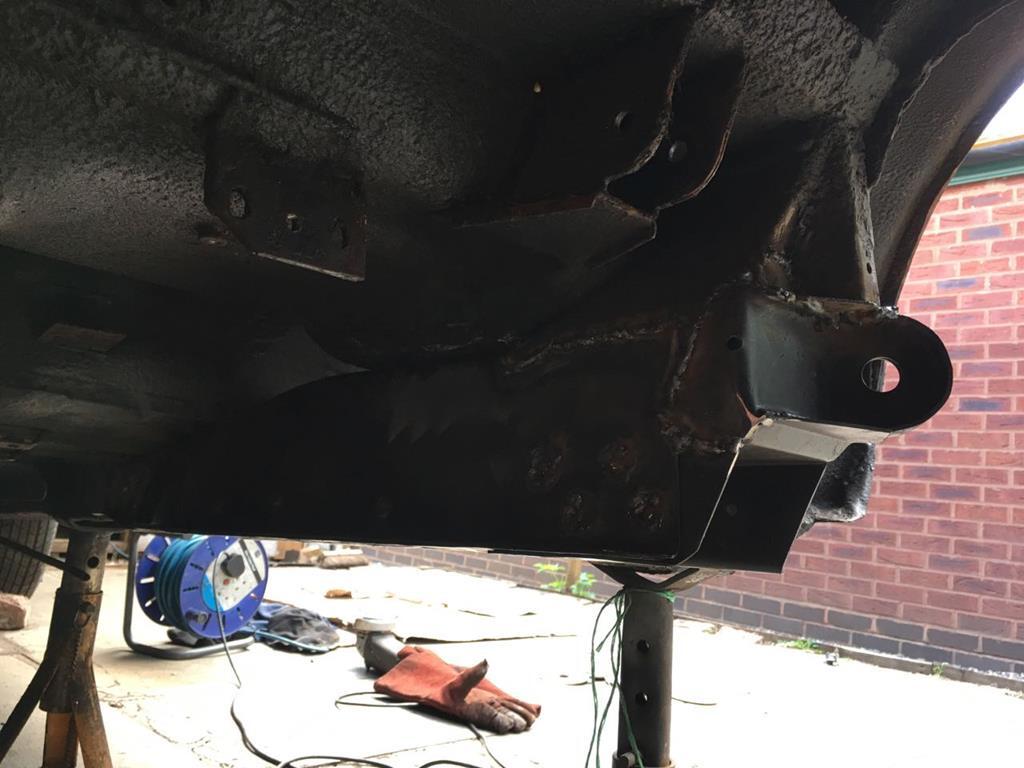 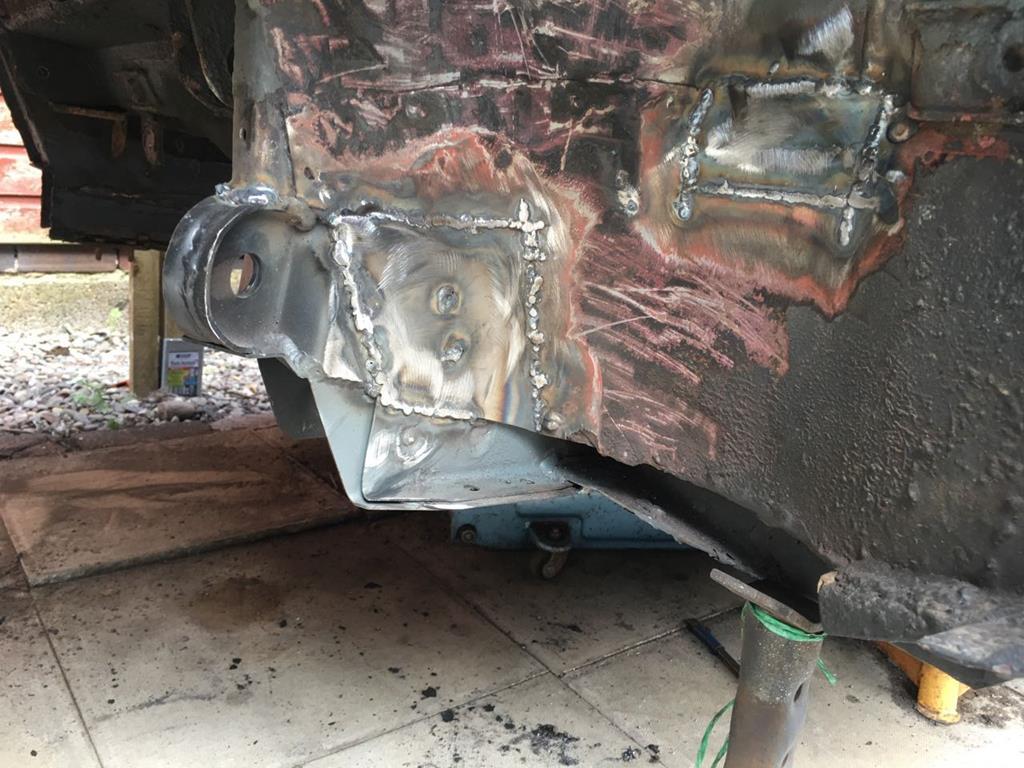 And inside the seat base is sorted 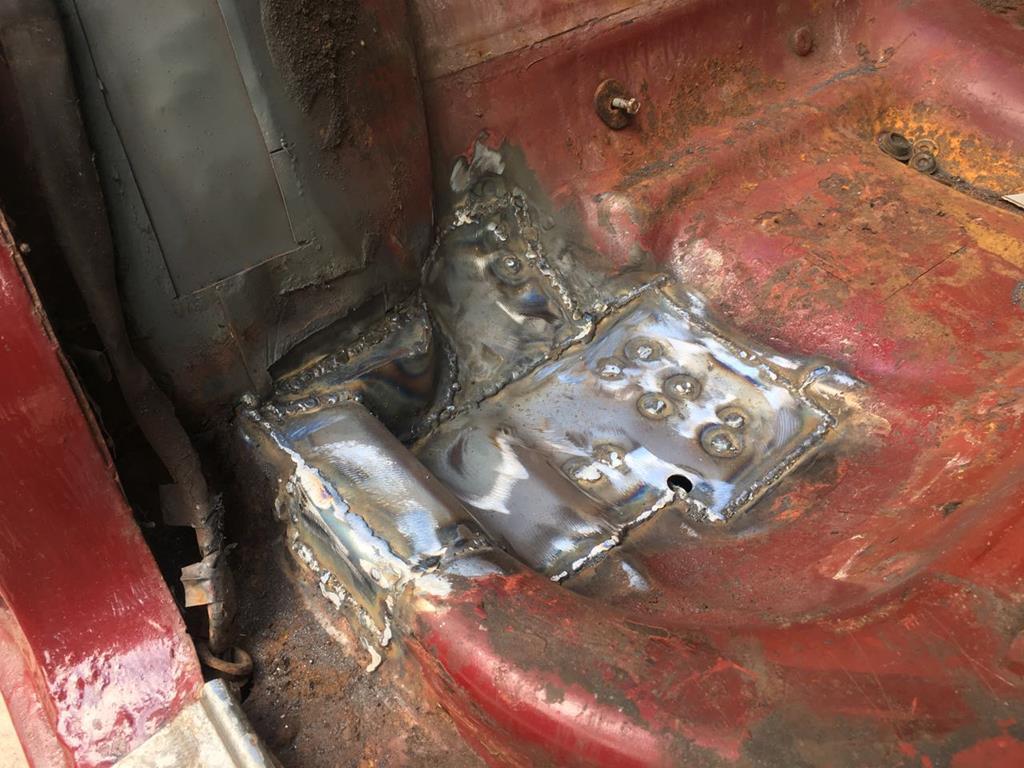 So, with that seeming to have gone ok (I won't know for sure till the axel goes back in!), it was time to repeat the process on the passengers side. No need for as many pictures, just look at the drivers side ones in a mirror! Here it is held in place with clamps while I checked and double checked my measurements. 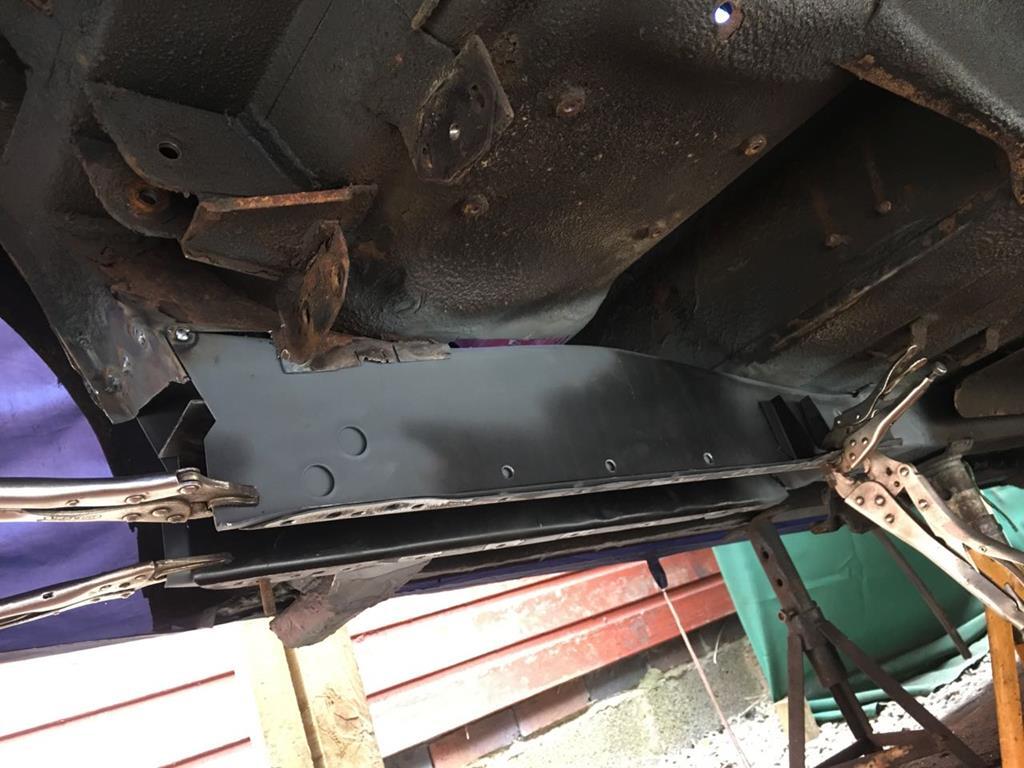 As you can see, it's actually a little bit easier than the drivers side, as the drivers side also incorporated the panhard rod mount and this doesn't. I got it all lined up, and set to work with the welder. 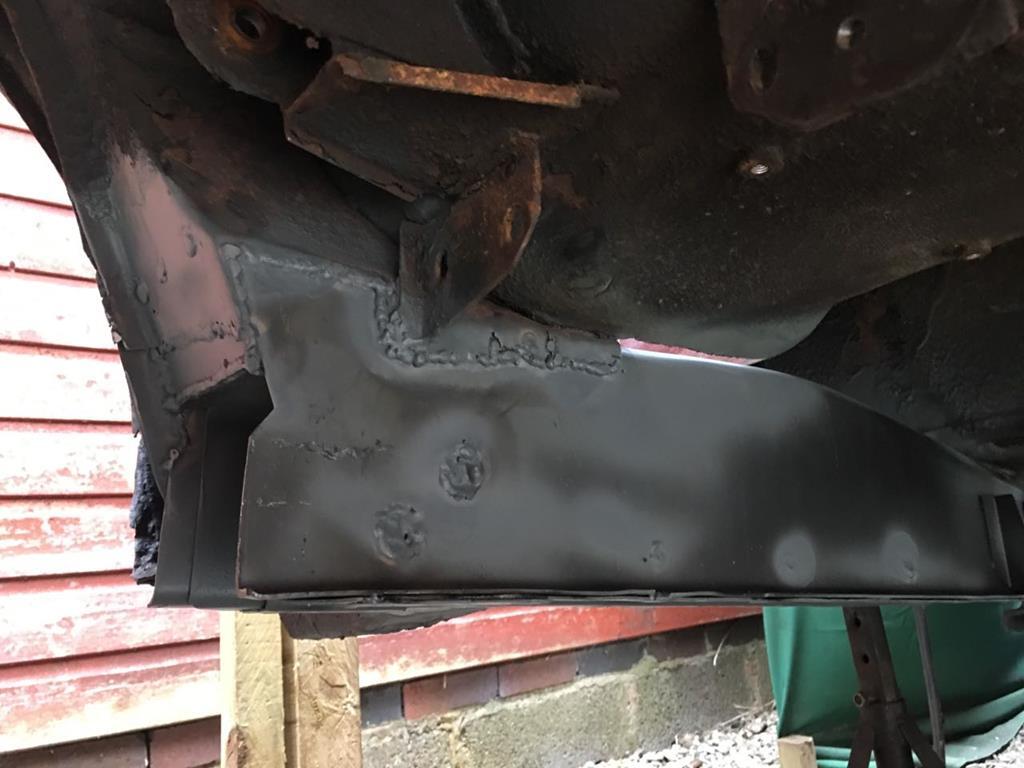 That's a lotta welding, and brings us pretty much up to date. I got the patches cut out, primed and ready to be welded in to repair the passengers seat base, and next time I get out working on the car (tomorrow possibly!) I can get these welded in. 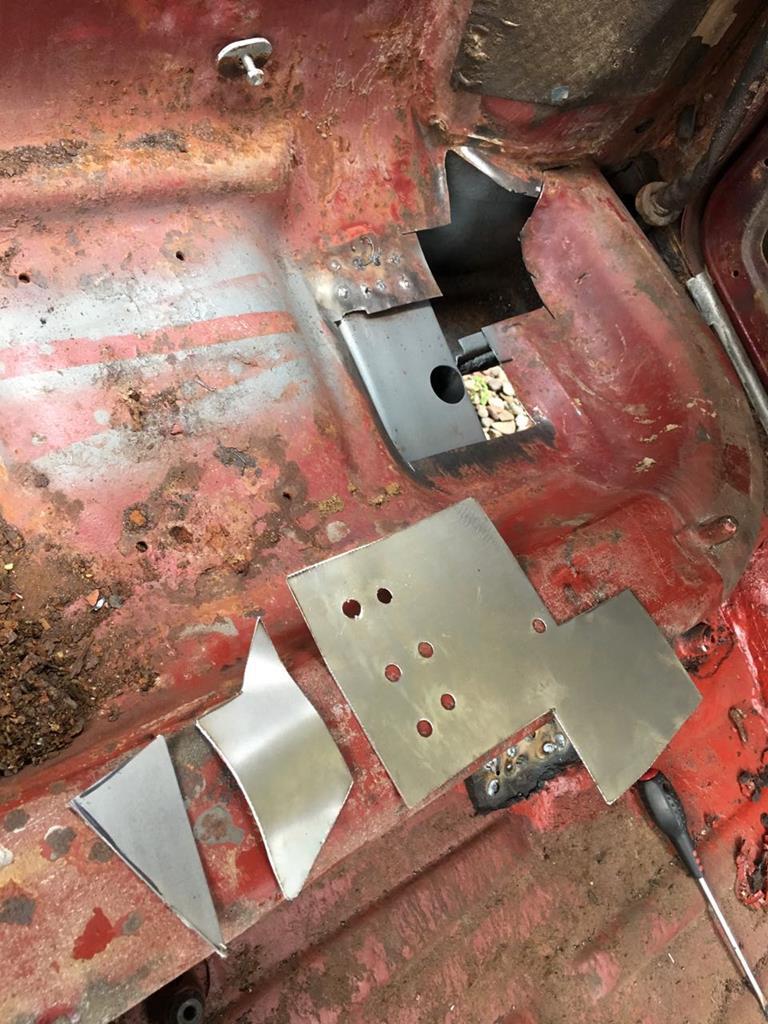 There is very much light at the end of the weldathon tunnel! I've gotta deal with a couple of small holes in the transmission tunnel (which are also on tomorrows list!), the bottom of the passenger front wing as pictured earlier and a small patch to the very left hand edge of the seat base where it meets the sill. Like the bottom of the passengers wing, this will be much easier to deal with once I've turned the car round. So a couple more hours welding, and then I can get back to where I was in early July, starting to clean, paint and refurbish the rear suspension! |
| |
Last Edit: Aug 9, 2019 20:50:41 GMT by goldnrust
|
|
goldnrust
West Midlands
Minimalist
Posts: 1,887
|
|
|
|
Just spotted this thread, I had wondered what had been going on with the Spitfire but this is even cooler, looks like good progress already  Yes sadly the Spitfire had to go in order to make room (physically and financially!) for the Daimler. Went to a young lad locally, and I've seen him out and about in it various times, so it's nice to know it's being enjoyed. In hindsight while I'm glad to have had the Spitfire, and it introduced me to both the good and bad of British cars, I found that once the novelty of having another small raw 2 seater had worn off, it was leaving me wanting a bit. As I discussed on the Spitfire thread, I had all sorts of silly ideas involving v8 swaps and whatever, but I decided that was kinda going against the principles of the car, better to leave it a simple fun little car and for me to try something else. Part of the problem was that it was competing with my motorbike for tha simple and raw and connected to the road experience, and nothing will beat 2 wheels for me in that regard. As a side note, I've now had my 1972 Suzuki T500 for 3.5 years, which is the longest Ive owned any vehicle! After 30+ vehicles in the past 10 years of driving/riding, maybe I've finally found a keeper!  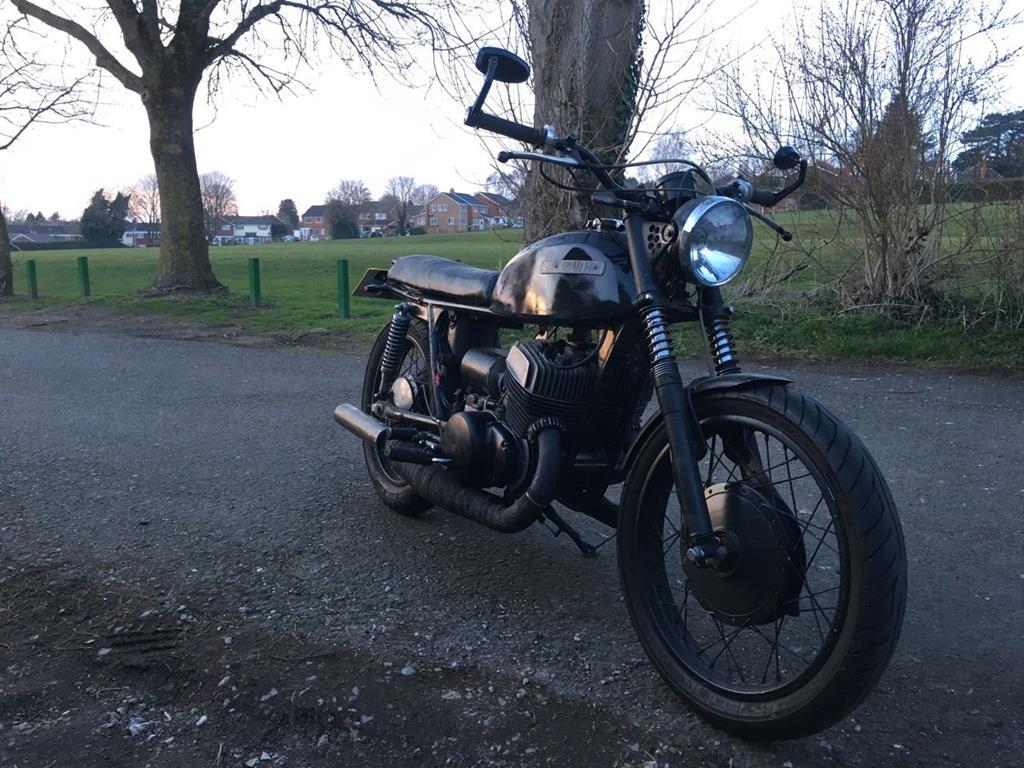 |
| |
|
|
goldnrust
West Midlands
Minimalist
Posts: 1,887
|
|
|
|
Erm £50 and it's yours - seen no road use - was in a grasstrack racer I bought for the engine and was never raced after being rebuilt - also go down to Bromsgrove area regularly so could deliver - If you wish to pay more I will not be offended. 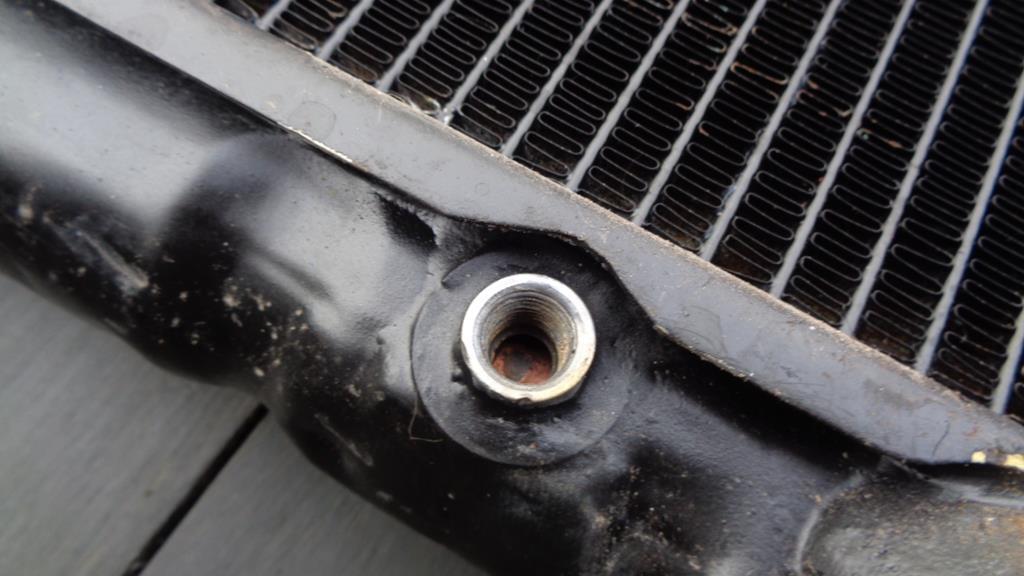 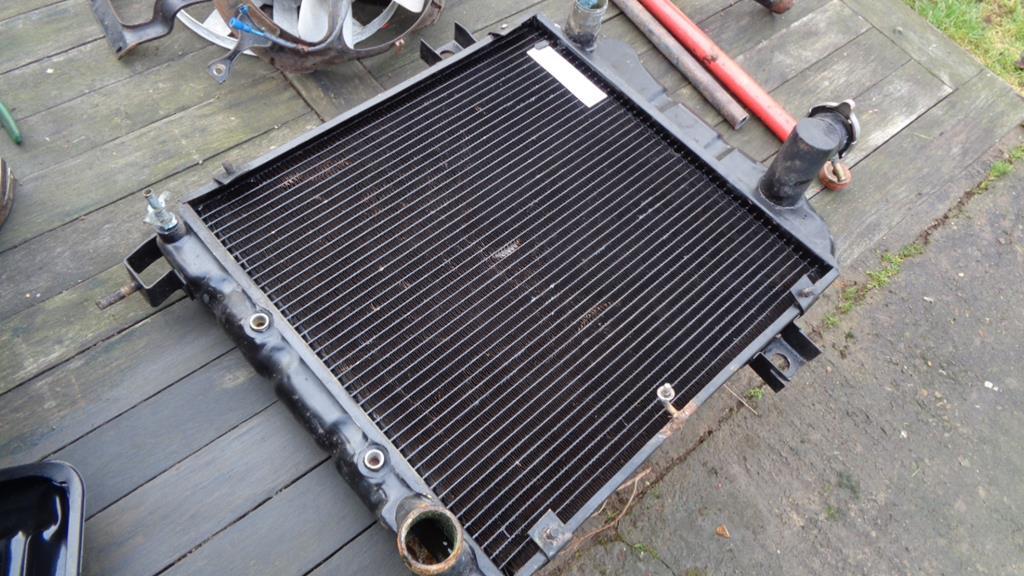 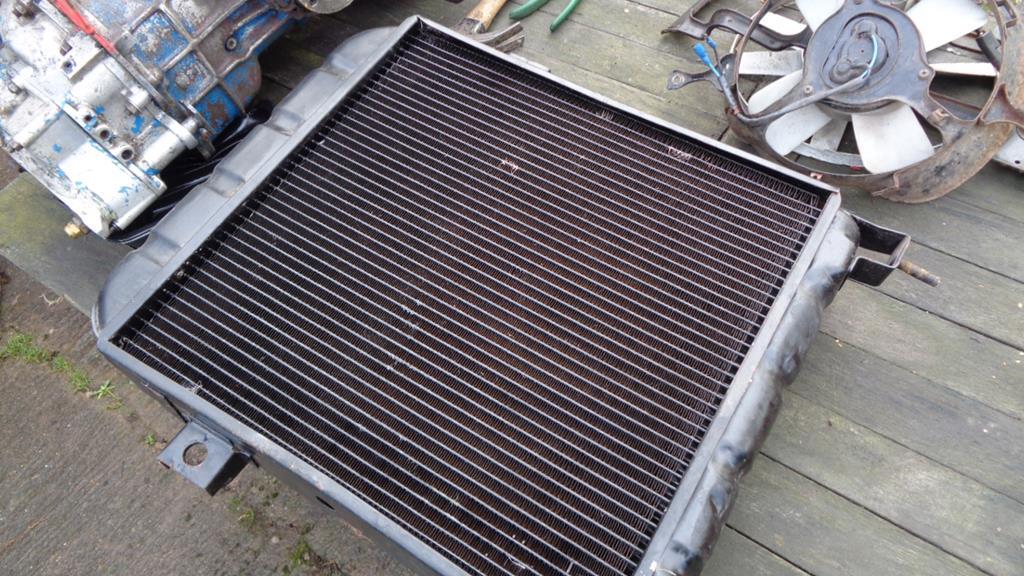 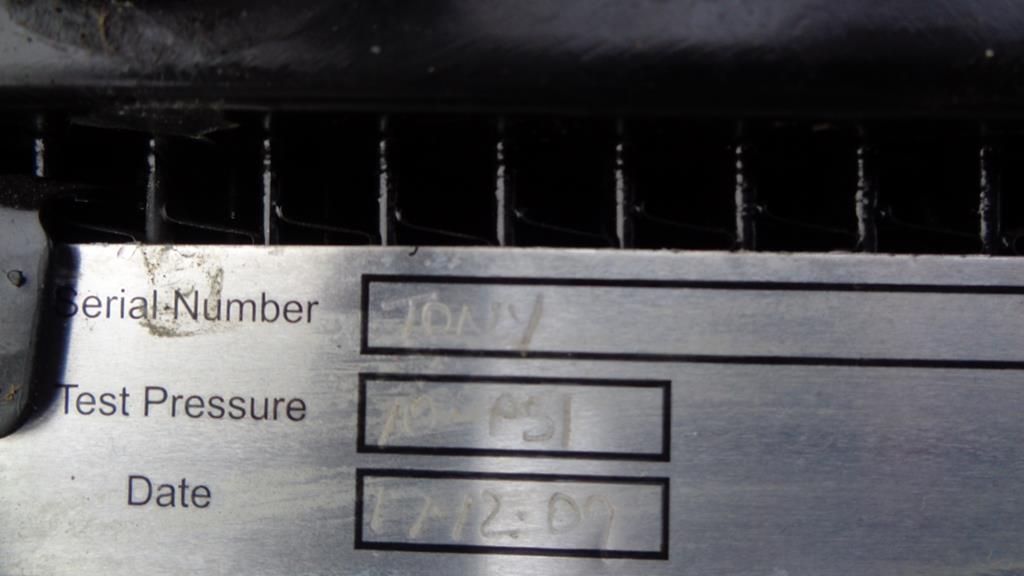 I thinks it's a 250 rad. That certainly looks like a 250 radiator to me  Now that mine has been repaired, and cleaned up I have no reason to believe it wont be fine, so for now I shall pass, but thank you for the kind offer.  |
| |
|
|


 While I was under there the front inner wings got wire brushed back and painted with rust killer/paint/underseal where appropriate. With the front suspension back in, all freshly painted and sorted it was a nice feeling. It meant I could put the car back on the ground and that felt like a good milestone


