gazzam
Part of things
 
Posts: 744 
|
|
|
|
I’ve gone off-piste with this one. Usually I go for simple cars, roll up or even no windows. No exterior door handles is good. Lack of complexity makes it easier to restore/maintain an old car. But I’ve loved XJ6s since I was a teenager. They’re just so gorgeous. And when I saw a picture of one in my preferred colour combo, it was love. So I made plans to drive the 6 hours to look at/buy it. Had a mate teed up to come and drive it home. But then I remembered a car that an old guy had offered me about 5 years ago. An XJ12. And they say you should own a V12 once in your life, so it was easy to justify even more complexity with a lower entry price and a much, much closer pick up. I had to ring and cancel the love at first sight one. So I’ve brought this home. 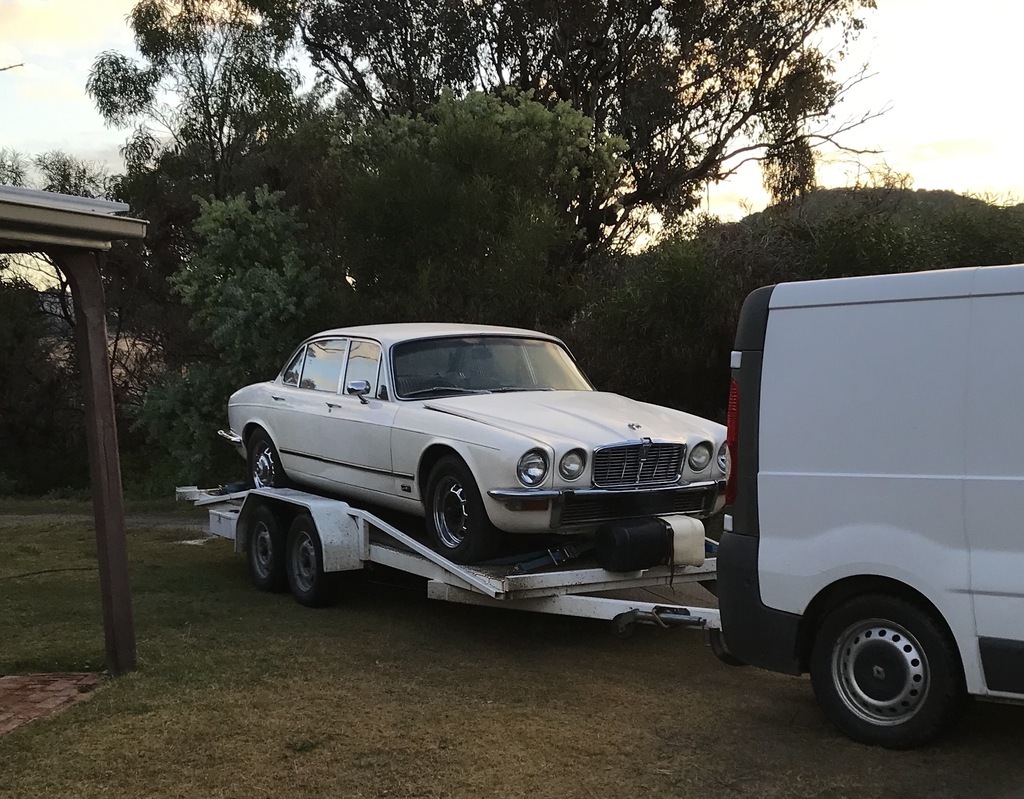 It needs serious recommissioning just to get it drivable. If I can get it past that hurdle, I’ll drive it a bit, and decide if it’s worthwhile doing a more thorough resto. Started with the fuel side of things. It hasn’t run for 5 years or more, so dried up fuel will have to be sorted. The filler neck of both tanks was enough to tell me the tanks would need removing and rust repairs would be just a question of degree. So off with the back bumper and lower rear valence on each side. The valences had been off before, evidenced by the assortment of washers. What do these people do? Throw the fasteners from all jobs in a bucket and then select ones that are 'close enough' when reassembling? It took most of the day to get both tanks out, but I am chuffed with what I’ve found. The tanks will need cleaning but seem to be in excellent condition. As is the rear of the car. No rust found other than a pinhole in the spare tyre well. Hasn’t yet been cleaned in this photo.  The area occupied by the tanks is thankfully rust and damage free, both sides.  One of the tanks. That’s the drain on the bottom left of the photo. About 3 cups of dried up fuel flakes came out of each tank. Not sure how I’ll clean these yet. 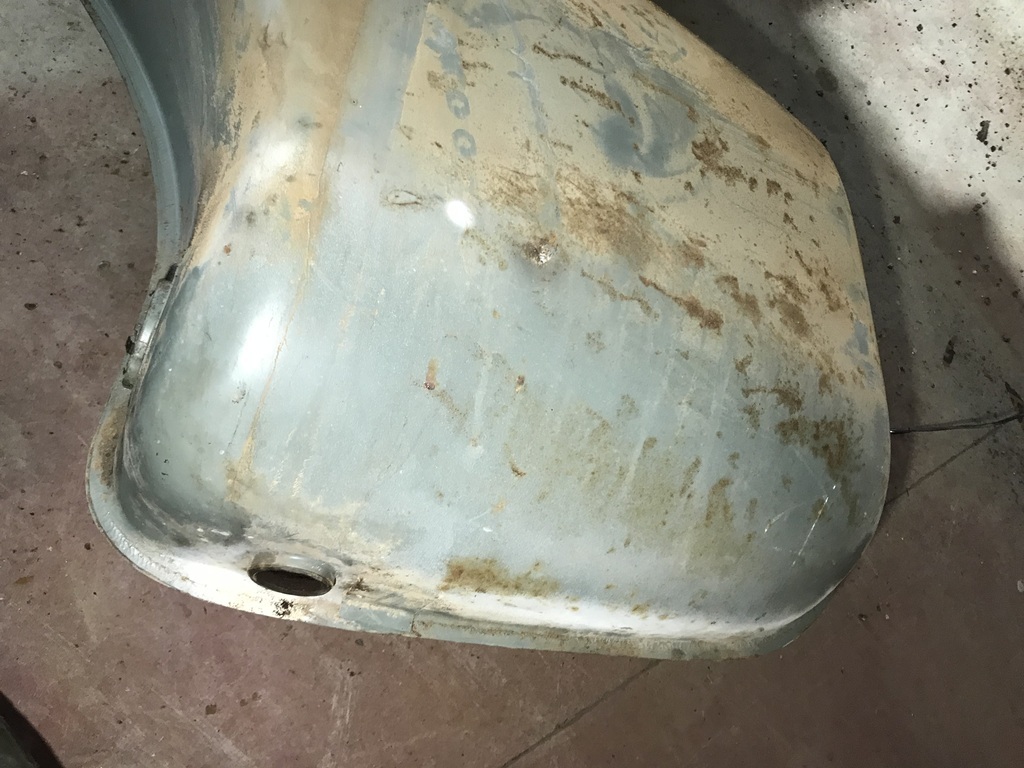 Was also very pleased that all the fasteners came out with no trouble. Nice in a 50 year old car. Next will be to flush the fuel lines an see if the pumps work, then carbs. Thanks in anticipation of advice to come. |
| |
|
|
|
|
|
|
|
|
|
|
Looks great! Will be following this closely.
|
| |
|
|
brachunky
Scotland
Posts: 1,339  Club RR Member Number: 72
|
1974 Jaguar XJ12 brachunky
@brachunky
Club Retro Rides Member 72
|
Jun 19, 2023 10:35:29 GMT
|
A bit of a crazy thought but feed a section of clean medium size chain into the tank and somehow attach it to a concrete mixer if you have one  . I would imagine that would get rid of most loose material ready for a liquid wash of your chosen type. |
| |
|
|
gazzam
Part of things
 
Posts: 744 
|
|
Jun 19, 2023 11:17:14 GMT
|
|
The cement mixer is a good idea. I was cleaning a rusty tank a few days back and thought of attaching it to a tractor wheel, but it all looked too hard. Wish I had thought of the mixer. That would have saved me from having really sore arms…
The problem here isn’t rust so much as fuel varnish, and I’m not sure it’d work for that. It’s sort of sticky, gummy crud.
I’ve got one tank with some molasses in it and evaporust in the other, just as a trial. If I can shift the gum, then the rust will be dealt with.
|
| |
|
|
16grit
Part of things
 
Posts: 215
|
|
Jun 19, 2023 13:28:45 GMT
|
|
|
| |
|
|
gazzam
Part of things
 
Posts: 744 
|
|
|
|
I checked the tanks this morning and it appears the molasses is working. So I plugged all the holes in one tank except the filler neck and topped it up with the magical mix. What can’t this stuff do? My wife even makes a delicious pear and molasses cake! I’ve flushed out the lines around the fuel pumps and tried the pumps by hooking them direct to a battery but no luck. Removed one pump and marked it so I could put it back together.  A parts book and a repair manual came with the car, so I approached this pretty confidently. But forgot to take any progress pics. Pulled it apart and cleaned it. Diaphragms were ok. Had to make a couple of new gaskets and reassembled it. Tried it on the battery and both sides worked. Well the points clicked and the diaphragm moved. So hopefully it will pump fuel. And once reinstalled, and hooked up to a temporary supply, it did. I think the problem was mostly the plunger shaft sticking, there wasn’t any real gumminess in the diaphragm, so I might just take the points cover off the next one. If that works it’ll save me making gaskets.  That’s a pic of the points end of the pump. Which I can’t get to work. I tried it without separating the valve body from the electromagnet end, in order to not disturb the diaphragm. It will pull the plunger in once each time I make contact, but won’t do the make and break thing. So I took those screws out and got one side of it to cycle in and out, but the other side wouldn’t cooperate. All I’ve worked out so far is that one capacitor ( the orange thing ) has no continuity, so I think that’s going to be the problem. Also have to look at the fuel gauge senders. Both of them were seized, which made getting them out of the tanks difficult. They look pretty bad.  Thanks |
| |
|
|
|
|
|
|
|
|
Molasses on the senders for a few days?
|
| |
|
|
gazzam
Part of things
 
Posts: 744 
|
|
|
|
Great minds think alike Mark! Well I got the pump to work. Proving that I don’t understand capacitors. It was the points. Pulled them out and sanded/filed them and all is good. One side of the pump cycles much faster than the other and all I can put that down to is the stiffness of the diaphragms. I’ll keep an eye on them when/if I get the car running. I’m a bit in awe of the complexity of this part of the fuel system. Two tanks, two sender units, two double pumps and two solenoid valves. And about 3 metres of hose plus twenty or more clamps. The spare tyre well after a scrub and the fuel bits mostly back in place. 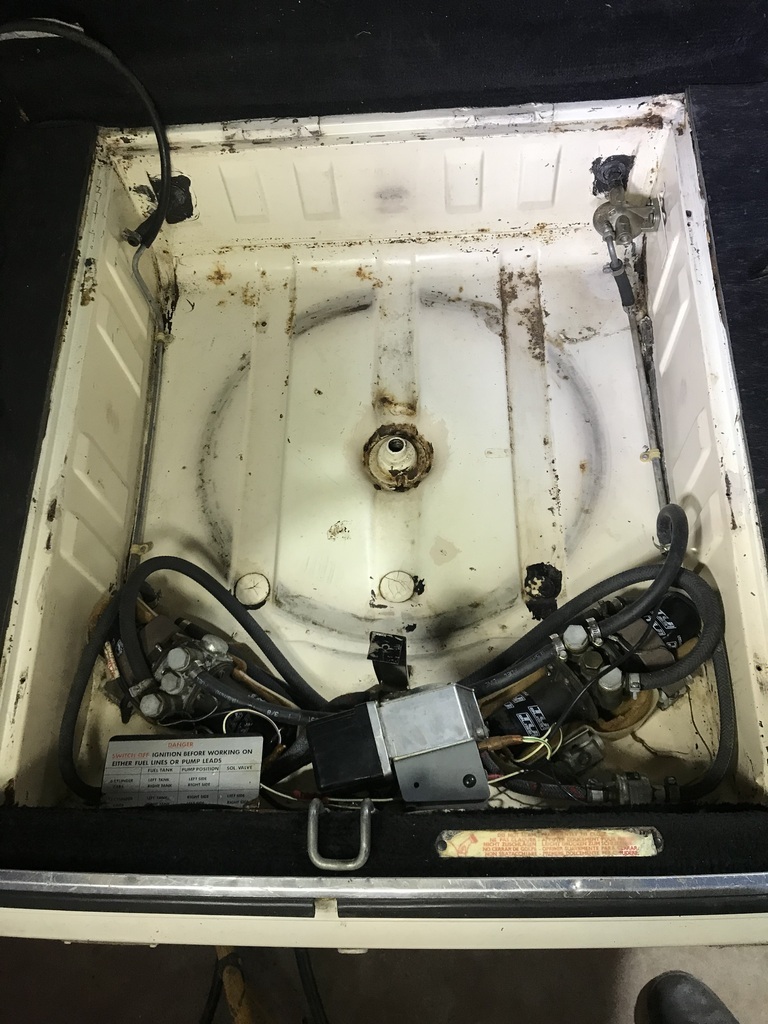 There’s a bit of surface rust and one pinhole. I’m not sure what to use on the rust both here and under the guards where the fuel tanks go. Suggestions very welcome. I’ve ordered some rebuild kits for the carbs. The rotary throttle bizzo on top of the motor ( circled ) won’t turn. 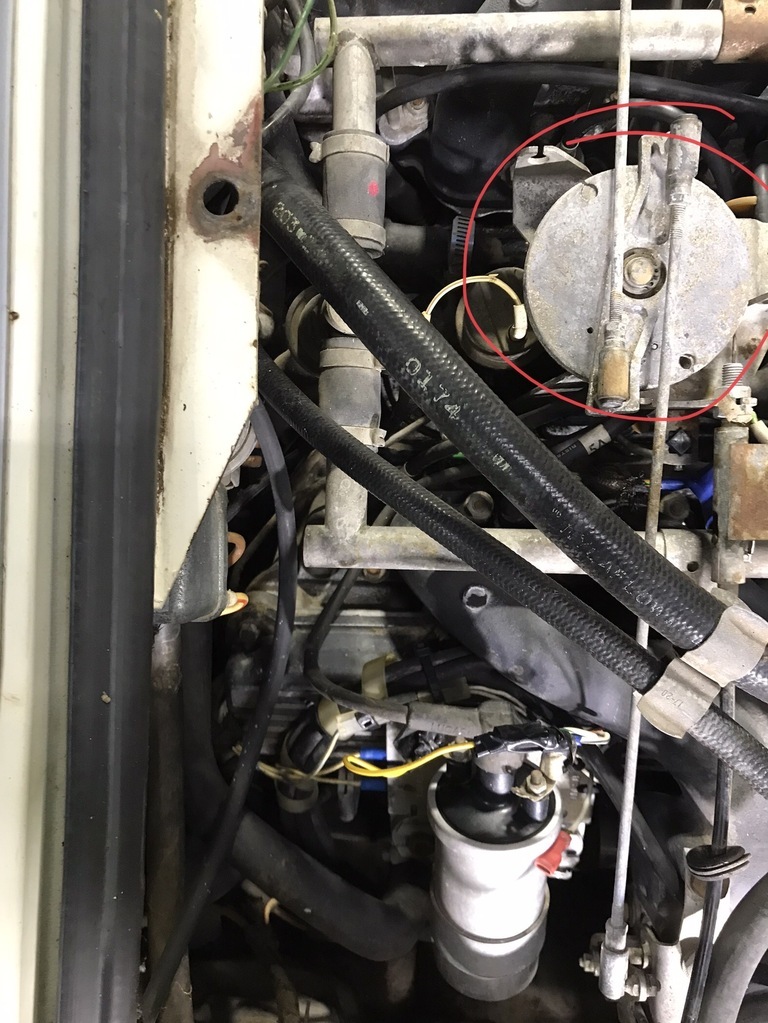 Because the carb butterflies are pretty much locked. The carbs look like this.  Don’t know what that sticky green tinge is. Maybe evaporated fuel? While I wait for the carb kits and the molasses in the tanks, I’ve removed the radiator. First step, remove the bonnet. Quite easy really, half a dozen bolts. 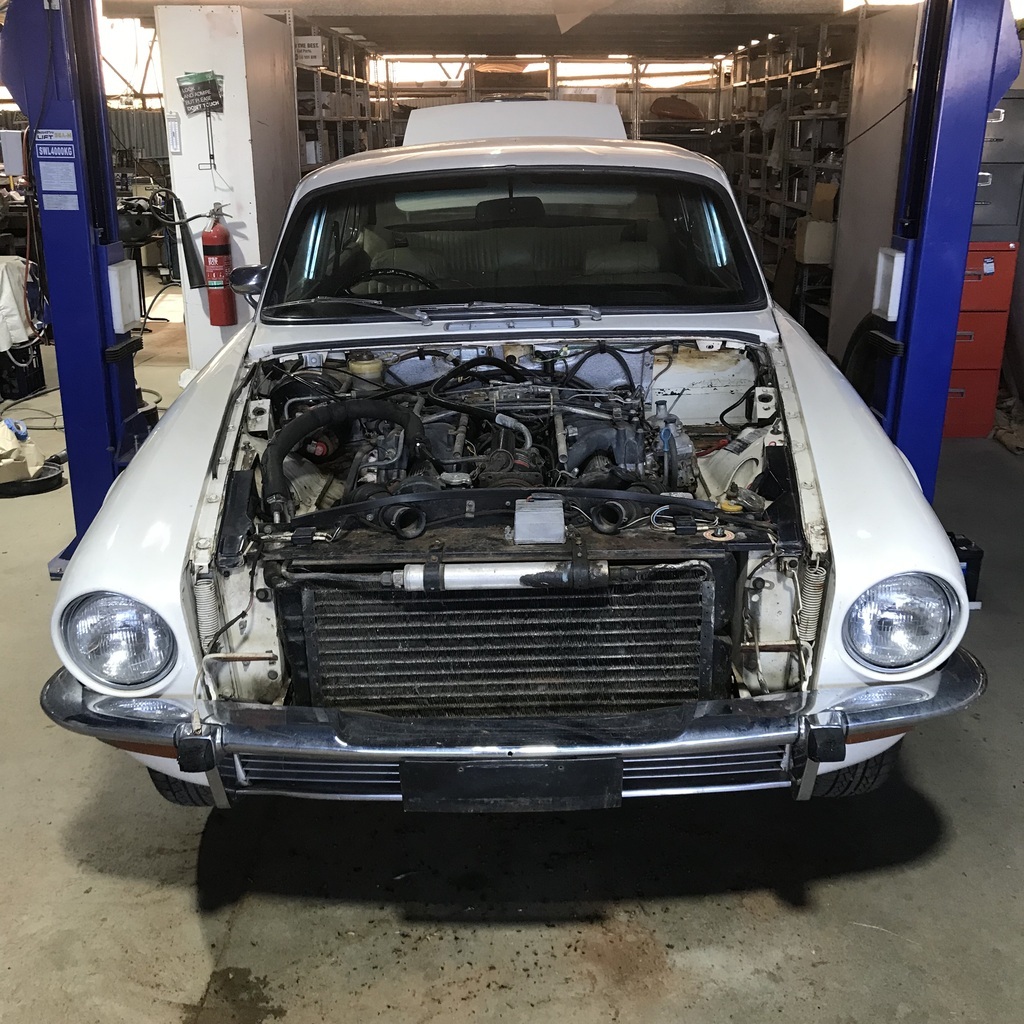 Radiator will go to a specialist for a clean out. It looks to be in good order, and I was pleased to see a touch of green in the coolant that was released. And I put a socket on the crank bolt and was very relieved when it turned. I only moved it about a zillionth of a degree, haven’t put any oil down the bores yet. Just enough to see that it’s not frozen. Thanks |
| |
|
|
|
|
|
Jun 21, 2023 12:21:02 GMT
|
|
Sandblast for the rust?
Some don't like it but Bilt Hamber Hydrate 80 seems to work well.
Jenolite rust eater?
Phosphoric acid?
Molasses?
|
| |
|
|
|
|
|
Jun 21, 2023 12:29:07 GMT
|
|
Fill the tanks with a dilute solution of molasses and ,especially them a few days. The mixture will hold the rust and debris in suspension and make it easy 5o pour away.
|
| |
Last Edit: Jun 21, 2023 12:29:22 GMT by BritBrick
2005 Volvo C70 2.4T Convertible. 40k miles, FVSH, one prior owner. My toy.
2010 Mini JCW Convertible. Wife's toy.
1991 Yamaha FZR600, one of only 20 Kocinski edition models.
MINI Cooper S Electric '3' - My daily scoot.
Peugeot 2008 HDi120 - Dog van.
Polestar 2 - Wife's daily.
Dacia Jogger Extreme hybrid dog van replacement ordered, due Jan '24.
|
|
|
|
|
|
|
Jun 21, 2023 12:38:19 GMT
|
|
Must be one of the few cars where the fuel system got simpler when they went to EFI!
Had a V12 xjs for many years, great cars, only real issues I had were leaking GM gearbox and rust around the trailing arms mount.
|
| |
|
|
gazzam
Part of things
 
Posts: 744 
|
|
|
|
Not much photo worthy today. Degreased the front of the engine. Removed the air pump, which didn’t have a pulley on it. That will get rid of a few pipes/hoses. Also removed the ac compressor and condenser. More hoses gone. The compressor didn’t have a belt on, so I’m assuming it had problems. I can live without ac on this car. Pulled the spark plugs one at a time. Was very careful, blowing any water/crud from around them several times as I unscrewed them. Then cleaned the threads, started them in the hole and blew around them yet again. Then took them back out and lubed the threads. Before screwing them back in, I sprayed some oil in the cylinder using the wand from a spray can of chassis rust treatment. This has a circular atomiser on the end - ensures that the oil gets everywhere. This took an age, with a dozen plugs to do. Then I turned the engine over several times by hand. So I think I’ve appeased the relevant engine gods there. I did take a photo of the fuel tank filler necks that bolt to the body. During the cleaning. Bead blaster is an excellent thing.   Tomorrow I might put a battery in it and spin the engine on the starter and see if it has oil pressure. Thanks. |
| |
|
|
v8ian
Posted a lot
  
Posts: 3,832
|
|
|
|
|
Not sure if this suggestion is relevant or not, PUMP DIAPHRAMS, are they ethanol safe? last thing you want is the diaphragms to split, and your new hoses are ethanol safe?
|
| |
Atmo V8 Power . No slicks , No gas + No bits missing . Doing it in style.
Austin A35van, very different------- but still doing it in style, going to be a funmoble
|
|
foxy99
Posted a lot
  
Posts: 1,455
|
|
|
|
|
Good luck with all this
I also have a '74 V12 (Daimler VDP version) and I think yours will be up and running long before mine.
There is a place in UK which sells rebuild kits for the fuel-pumps (Burlens?).
Also check the metal pipe inside the tank which is directly above the drain plug. The previous owner of my car spent years trying to get a fuelling issue resolved and eventually gave up. When I got the car and removed the tanks I poked a screwdriver up the pipes and a load of dried 'mud' fell out. This would have been wet mud when he was having fuel-pumps and lines swapped out.
I also remember there is a mixture of spanner (wrench?) standards used on the fuel-system. Mostly AF but the nut for the breather-pipe to top of tanks is Whitworth spanner, even on cars made in the late 80s.
|
| |
Last Edit: Jun 22, 2023 10:33:37 GMT by foxy99
1974 Daimler Double-Six VDP
1965/67 Hillman Imp pick-up
1984 VW Polo breadvan
1970s Yamaha Twins (4)
1976 Honda SS50ZK1
|
|
gazzam
Part of things
 
Posts: 744 
|
|
Jun 23, 2023 10:00:59 GMT
|
Didn’t get a battery, so didn’t turn the motor over. Maybe tomorrow. I moved the molasses from one, hopefully clean tank to the other. Then I got the cement mixer out and strapped a couple of pieces of 6x2 on the business end, then strapped the empty tank to that. Easier said than done, I might add. 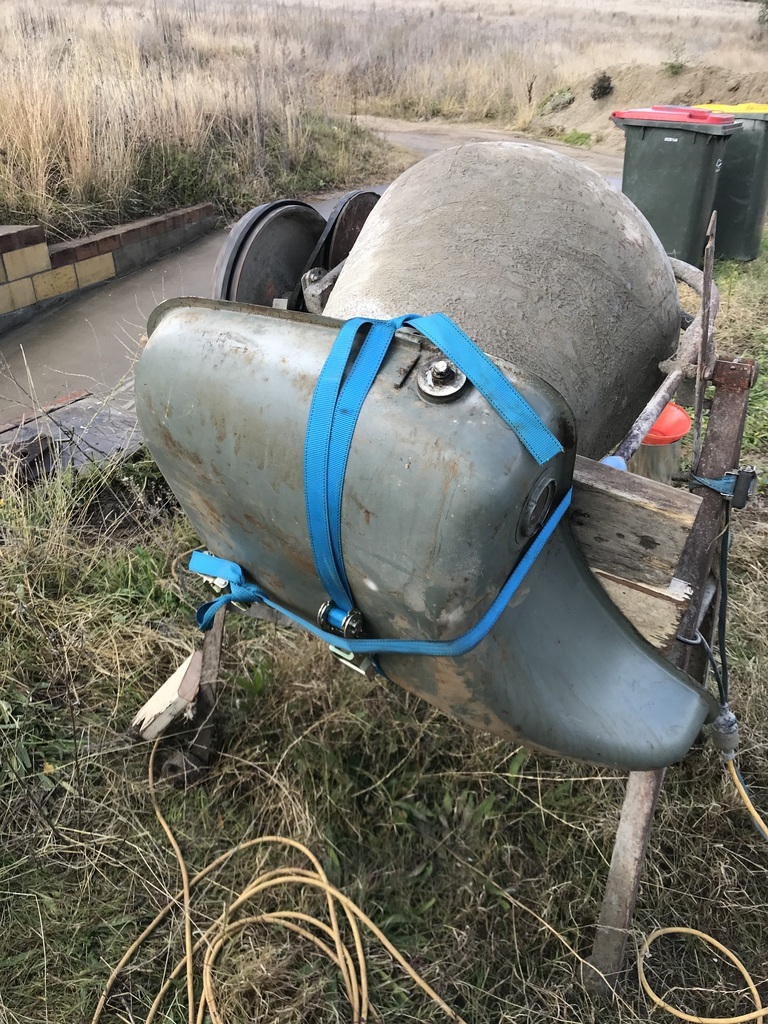 Then emptied a four litre tin of vibrating media ( think pea sized gravel ) into the tank along with about 5 litres of diluted hydrochloric acid and let it spin for probably half an hour. Drained the acid/media and put some soapy water in. There was still some media left in it. Scrubbed up nicely. Once I’d flushed out the soapy water and media, I took it off the machine and put some diluted Deoxit (phosphoric) and sloshed it around. Then dried it with a heat gun, to keep flash rust to a minimum. It was then that I saw there was still some fuel residue in the bottom seam. So now I’ve got it standing up with a few litres of molasses in the bottom, just to get the last of it. The front of the engine is almost clean. I’ve ordered a set of rad hoses, when they arrive and the rad is cleaned, it can all go back together.  A bit closer, still some cleaning to do. 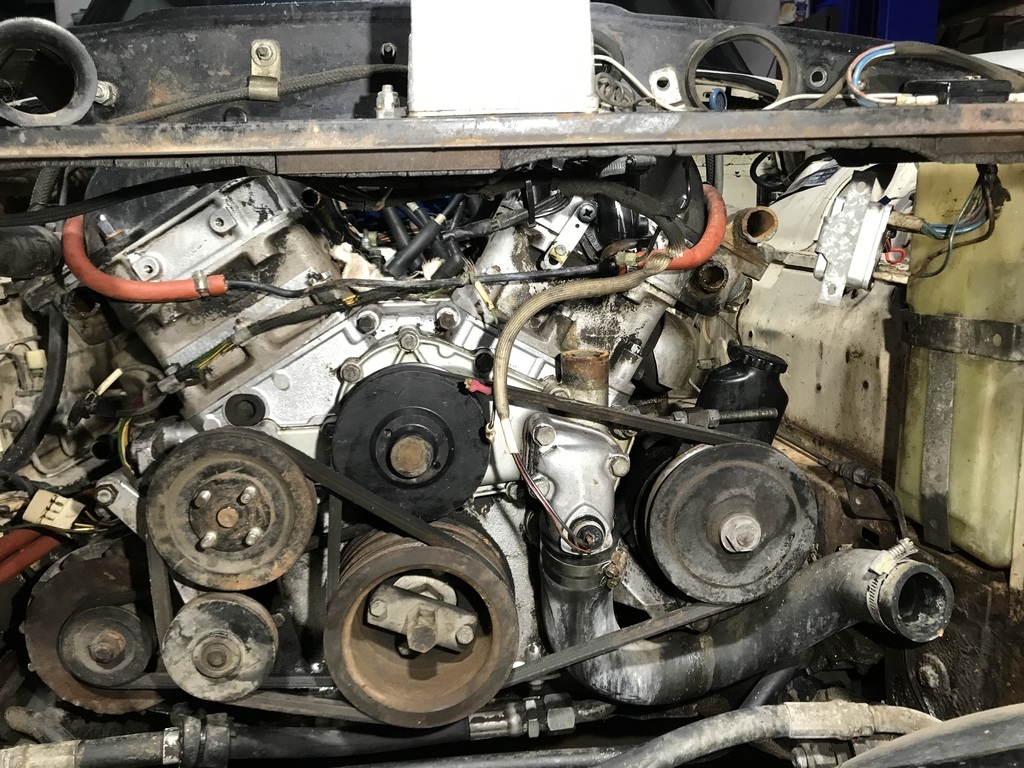 Thanks. |
| |
|
|
jamesd1972
Club Retro Rides Member
Posts: 2,921  Club RR Member Number: 40
|
1974 Jaguar XJ12 jamesd1972
@jamesd1972
Club Retro Rides Member 40
|
Jun 23, 2023 10:09:24 GMT
|
Such a lovely excessive engine. I know its easier and cheaper to go faster with a pushrod V8 but is it this smooth ? And does it say V12 on the boot ? Plus when people say nice XJ6 you can say oh its a 12  Enjoy the updates, keep them coming, thanks for the effort to share. James |
| |
|
|
gazzam
Part of things
 
Posts: 744 
|
|
|
|
Thanks James. Finally put a battery in it and amazingly remembered to take out the rags that I had stuffed in the holes where the carbs normally go. Took the plugs out for about the 5th time and turned the key. It spun over nicely, for probably 4 goes of about 10 seconds each. No oil pressure registered on the gauge. It’s an electric gauge, so I checked the fuse but found nothing wrong. I thought I’d better do some looking into this. A bit if searching and I found that the oil pump is apparently above the oil level in the sump, and they are a bit finicky about picking up at cranking speed. Either overfill the sump or pump some oil into the oil pressure sender unit hole. Didn’t want to add new oil to the existing, so I looked for ways to do the latter. I emptied a grease gun and took the coupler off. This conveniently left the correct ( 1/8 BSP ) thread to screw into the banjo fitting. Put about half a litre of oil into the grease gun and pumped it in. Unscrewed the grease gun and put the sender unit back in. Cranked it again and the pressure gauge moved just a bit. Then went around the front of the car to find a puddle of oil under one of the oil cooler hoses… It wasn’t there from the grease gun exercise, so the oil pump must be pumping. I’ll wait till the rad is back in ( the oil cooler is mounted on brackets on the bottom of the rad ) and repeat the exercise with the hoses tightened up. In other, more satisfying news, the sender units for the fuel gauges are cleaned up and ready to go back in. A day or so in the molasses and then a quick bead blast and it’s like new.  Thanks. |
| |
|
|
|
|
|
Jun 25, 2023 17:25:08 GMT
|
|
Senders came up really well!
|
| |
|
|
gazzam
Part of things
 
Posts: 744 
|
|
|
|
Cheers Mark. Finally finished cleaning out both tanks. A few photos.  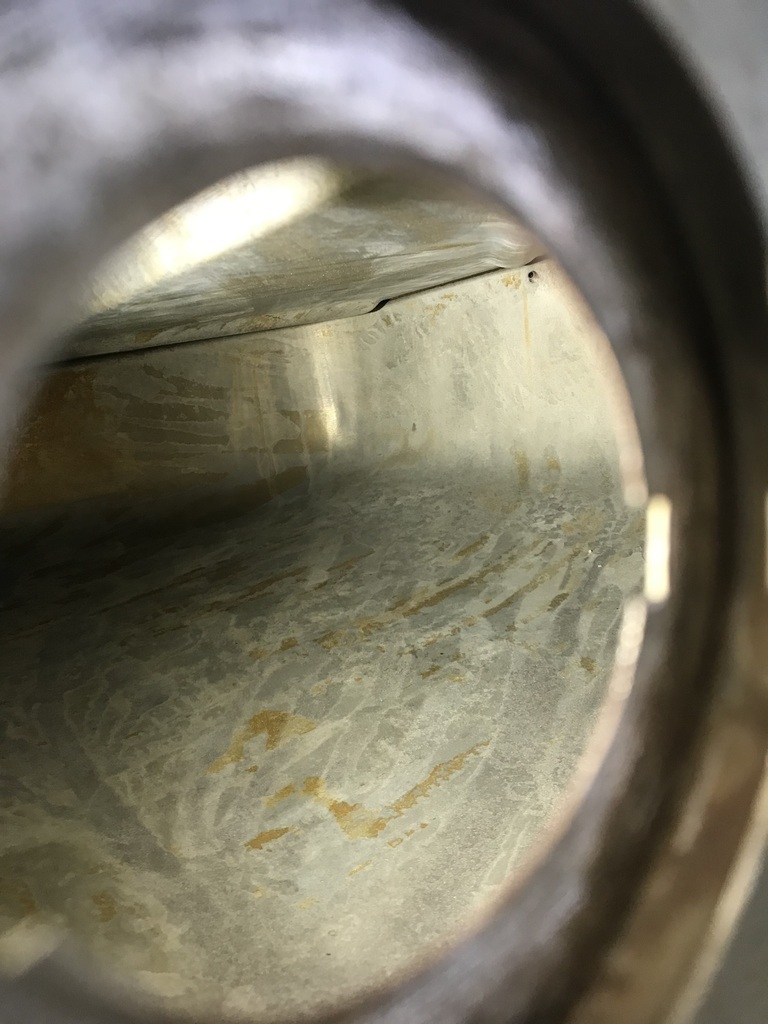 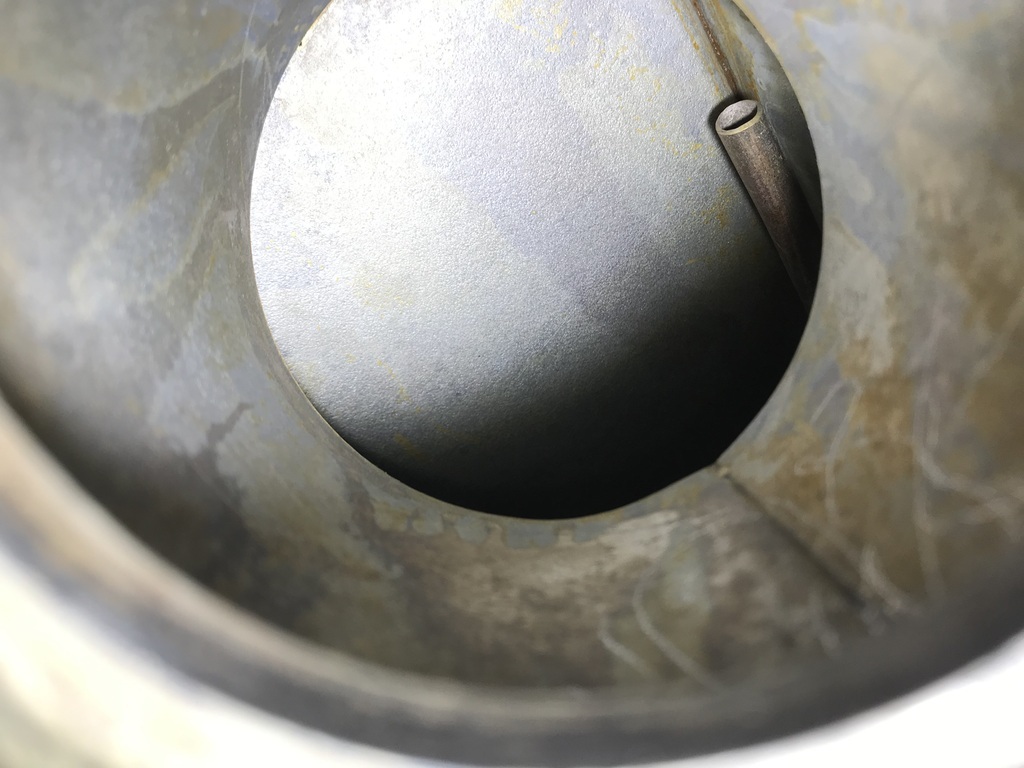 And made new gaskets for the drain plug. 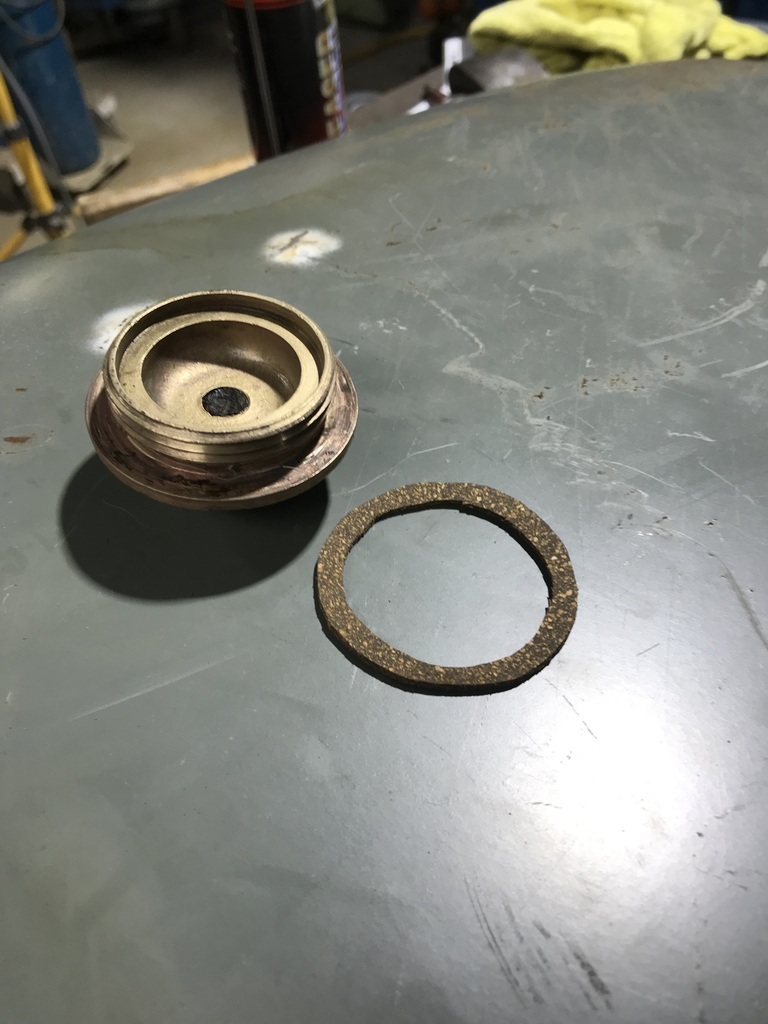 Ready to go back in. Just need to splash some primer on here.   Thanks |
| |
|
|
gazzam
Part of things
 
Posts: 744 
|
|
|
|
Sat the tanks out in the sun to get some heat into them to make sure any water in the seams has the best chance of escaping. Sprayed some DWF into them as well. 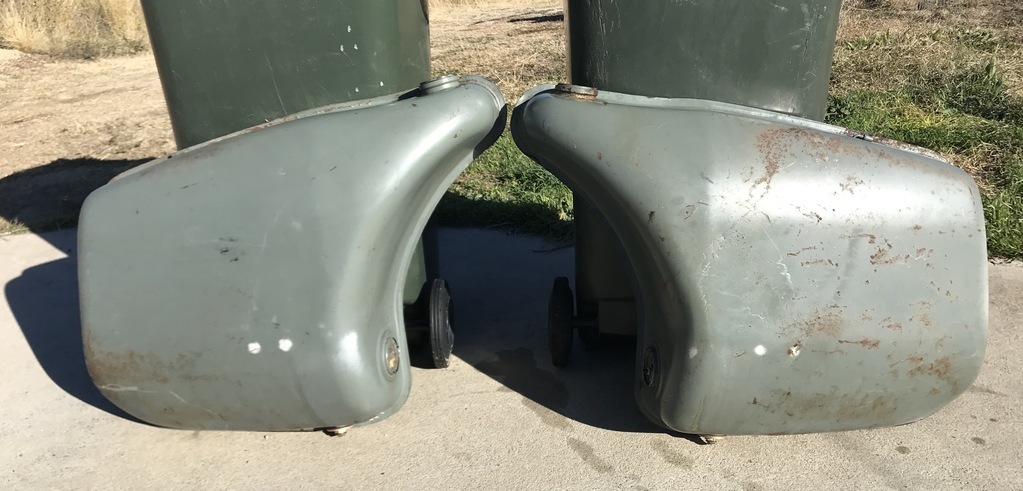 They are in excellent condition. Remarkable considering they’re nearly 50 years old. I’m convinced they’re original because all the fasteners were correct. I call that irrefutable proof. Talking of fasteners, I’ve been amazed that every one of them has come apart with virtually no trouble. Many of them have been undoable with just finger power once they’ve been loosened. It’s enough to make one really like a car! And finally… Tanks are back in!  All buttoned up, hoses connected. Overall a really satisfying job. Challenging at times, but possible. And the IRS is out. 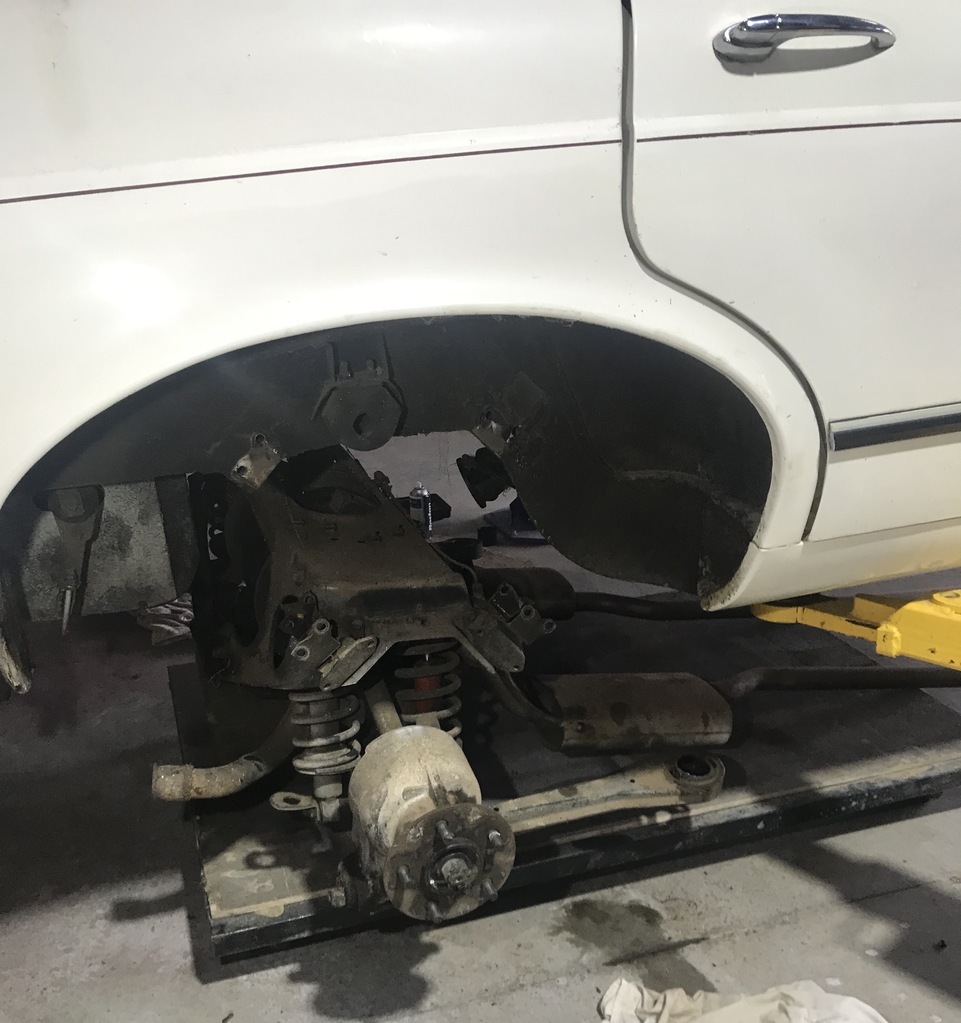 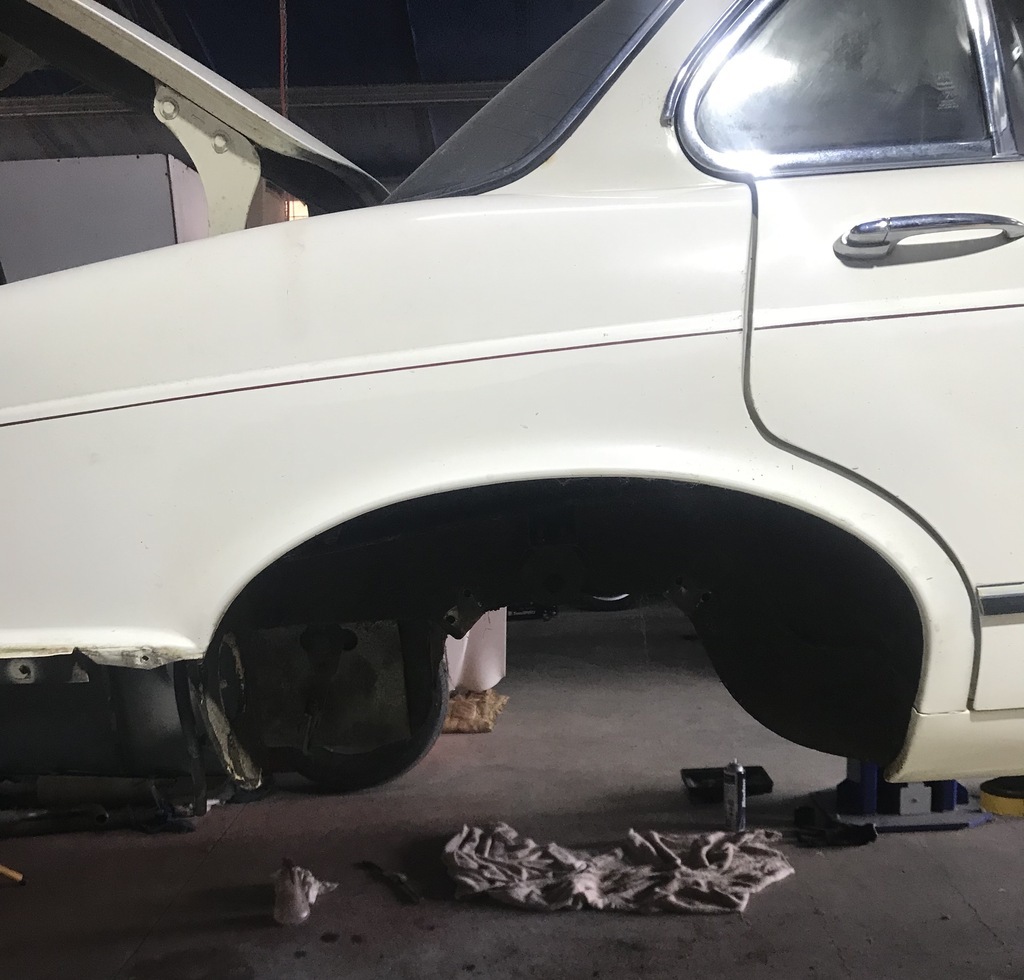 Because the exhausts were fully welded, apart from a flange up the front, I ended up cutting the exhaust on the forward side of the IRS cage ( I’d already cut the back mufflers off to get the tanks out ) So I’ve ordered some flanges to put the system back together in a way that simplifies removal. This should make sure I never have to remove it again. I’m going to degrease the IRS and see what’s going on with the brake calipers. It’ll get a tidy up and go back in. No rabbit holes here hopefully. Thanks |
| |
|
|
|
|


 . I would imagine that would get rid of most loose material ready for a liquid wash of your chosen type.


