|
|
|
|
|
|
Lovely to see one come apart and not be a sculpture made of iron oxide, newspapers from the 80's, chicken wire, mesh, filler and fibreglass.
It's a rare survivor. Thanks for the updates, watching with great enthusiasm.
|
| |
|
|
|
|
|
|
|
Jun 27, 2023 11:58:20 GMT
|
|
Have fun with the handbrake!
|
| |
|
|
brachunky
Scotland
Posts: 1,339  Club RR Member Number: 72
|
1974 Jaguar XJ12 brachunky
@brachunky
Club Retro Rides Member 72
|
Jun 27, 2023 13:04:48 GMT
|
|
Truly a pleasure to read about with both the standard of work and the car. I'm not an expert on corrosion but how about a coating of lanoguard or similar on those inner sections to aid keeping it rust free?
|
| |
|
|
|
|
|
Jun 27, 2023 22:07:00 GMT
|
Have fun with the handbrake! The handbrake is absolutley no problem at all - if you're a triple jointed alien with 12 inch long fingers like long nose pliers! |
| |
|
|
foxy99
Posted a lot
  
Posts: 1,454
|
|
|
|
Have fun with the handbrake! I can't remember any trouble with the handbrake (calipers? cable? mechanism?) but the exhaust-manifolds are almost impossible to get off with the engine in-situ |
| |
1974 Daimler Double-Six VDP
1965/67 Hillman Imp pick-up
1984 VW Polo breadvan
1970s Yamaha Twins (4)
1976 Honda SS50ZK1
|
|
gazzam
Part of things
 
Posts: 740 
|
|
|
|
Started on the rear brakes. The rear wheels were nearly impossible to turn and I was thinking this would be the rear brakes. But I wasn’t sure, so immediately after degreasing and pressure cleaning I got stuck into removing the calipers. Cleaning was only partially successful. But enough to make it a bit better to work on. 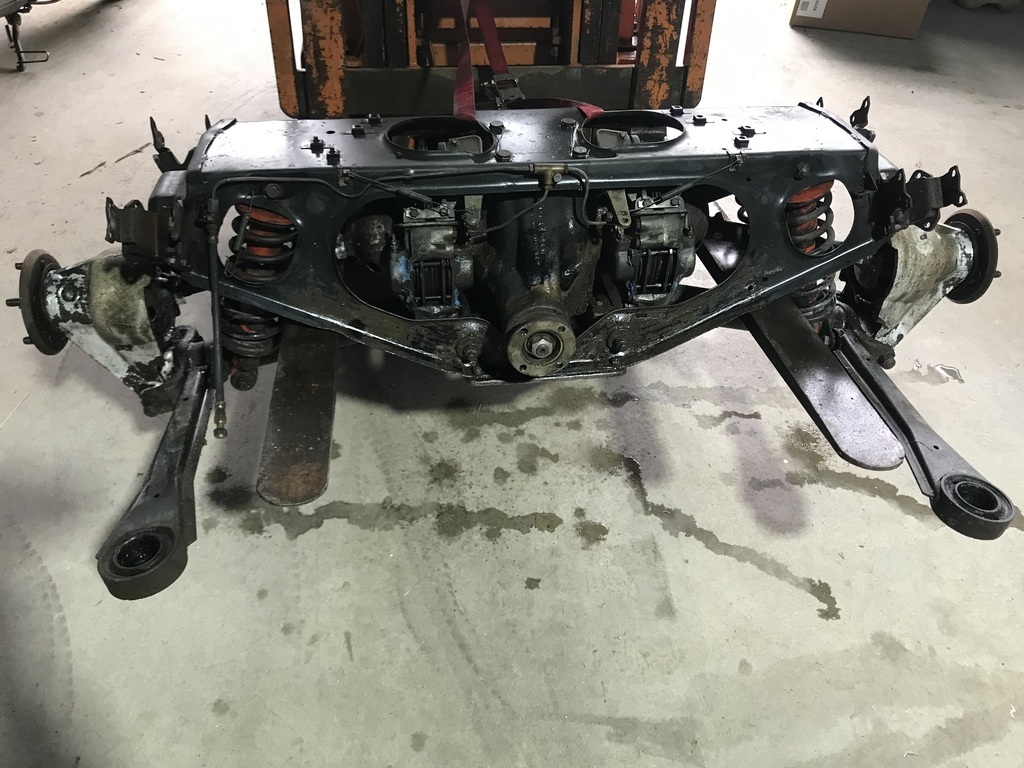 I don’t know for sure whether the calipers can be removed with the subframe in the car, but I am sure it would be a prick of a job. And though this is the first time I’ve pulled out an IRS, I must say it was a breeze. And the calipers were fiddly enough to get out that I’m glad I wasn’t doing it overhead. Calipers out, blue sealant might be someone’s attempt to stop pads rattling.  Once both calipers were off, the axles turned easily. Sigh of relief. The diff is not the problem. Not to say it’s good, but at least it’s not causing this problem. Calipers apart, pistons pushed out with the grease gun, and cleaned up. Pistons unfortunately are cactus. But the bores will be fine with a very light hone. 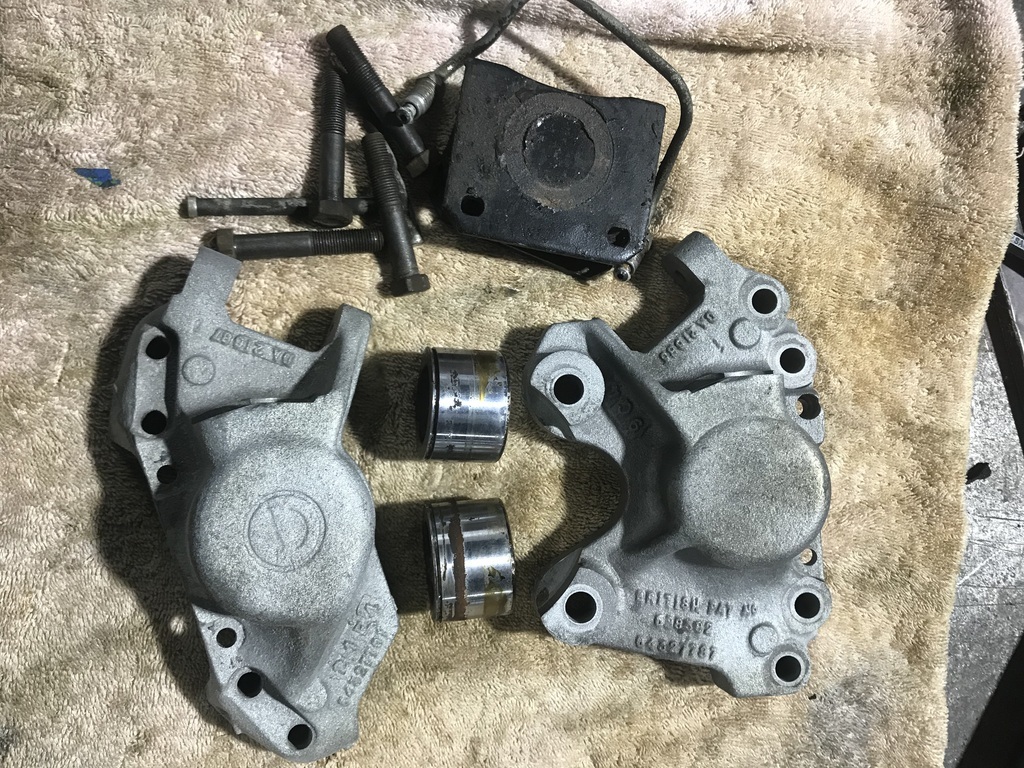 So, four pistons and seal kits it is. Also ordered a seal kit for the master cylinder, though I haven’t pulled it off yet. Thanks |
| |
|
|
gazzam
Part of things
 
Posts: 740 
|
|
|
|
brachunky said Truly a pleasure to read about with both the standard of work and the car. I'm not an expert on corrosion but how about a coating of lanoguard or similar on those inner sections to aid keeping it rust free? Sorry, just noticed this. I used phosphoric and the etch primer. It'll be fine. It’s been ok for nearly 50 years, and I'd wager it will see less water in its next 50. Thanks for the suggestion. I’m a big fan of lanolin stuff.
|
| |
Last Edit: Jun 28, 2023 9:25:18 GMT by gazzam
|
|
oto67
Part of things
 
Posts: 70
|
|
Jun 28, 2023 10:53:42 GMT
|
|
Great stuff, following with interest.
Back when people were almost giving away old v12s my mate acquired one, minus reverse gear, looked bloody
funny when all 4 doors opened an a leg appeared at each to push the curse word back aka 'the ant hill mob'
Anyway these teenage heros perswaded my mate to ''lets see what she'l do'' down the old A120, we figured that being a 5.3
Jag she must do about a million mph at least, the poor ol girl said ***k you an promptly blew a core plug at about 120 and
that was that.
|
| |
|
|
gazzam
Part of things
 
Posts: 740 
|
|
|
|
Removed one of the thermostats, mostly to see what the temperature is ( 74 degrees ) but also to see what the condition of the housing is like. This one is in very good condition - no corrosion problems at all. I don’t think I'll disturb the other side. 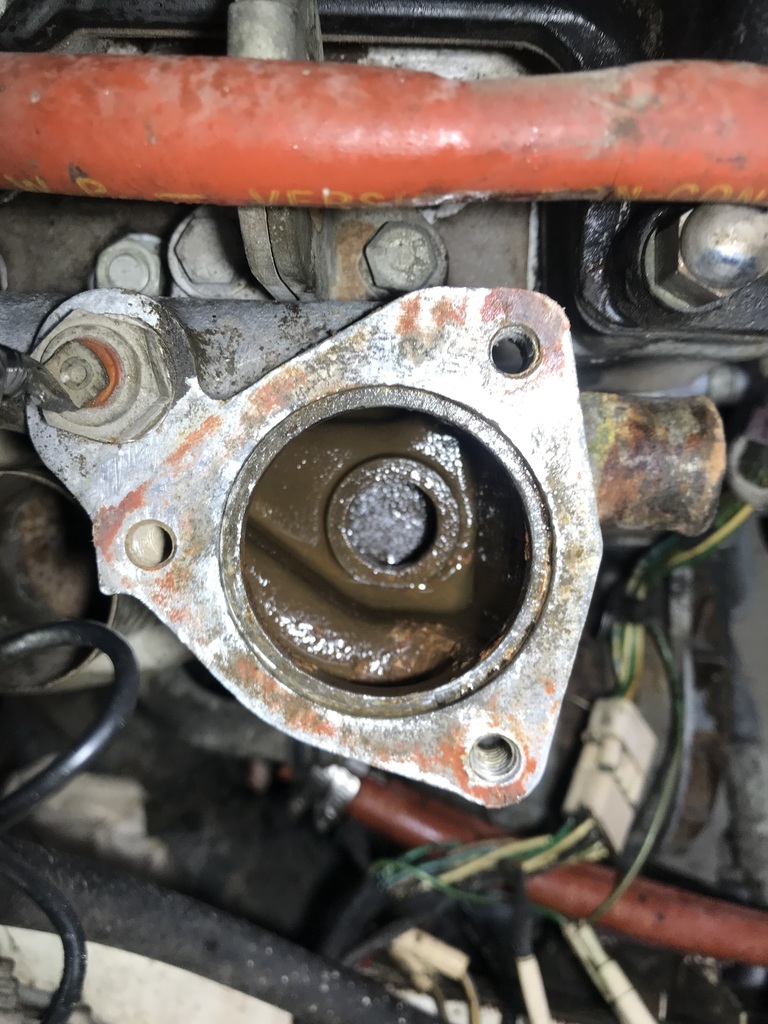 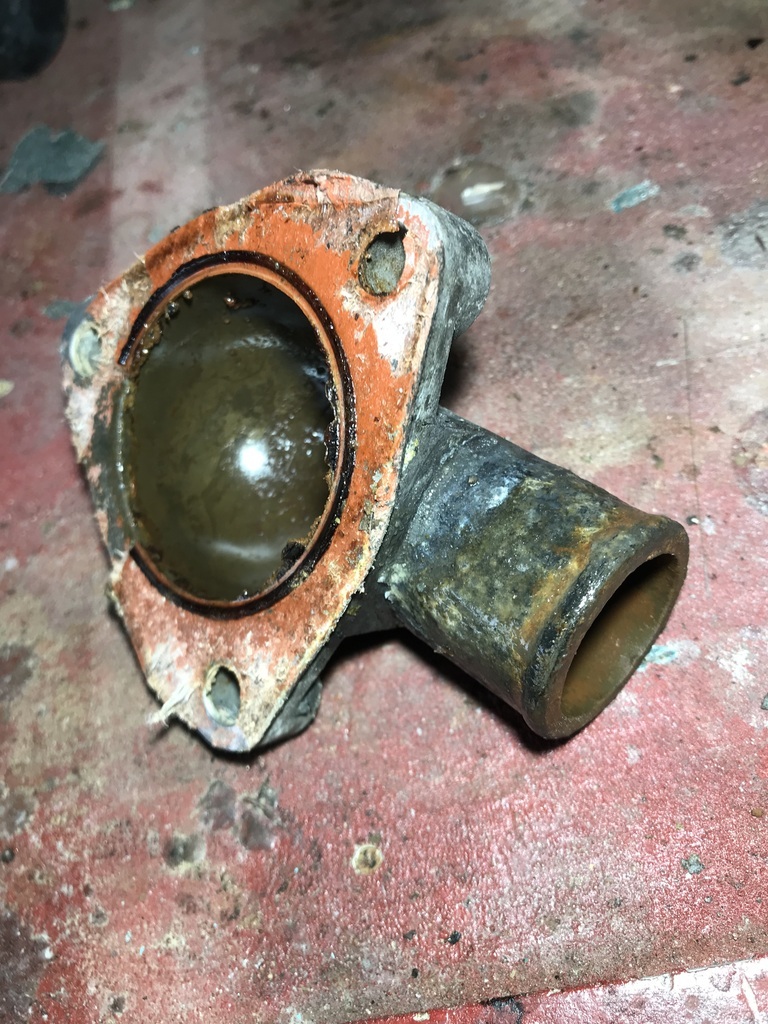 Made a start on the carbs, though I’m still waiting on the rebuild kits. The slide and butterfly freed up after a spray with carb cleaner. But removing the float chamber made it obvious that a bit more thorough clean would be needed. 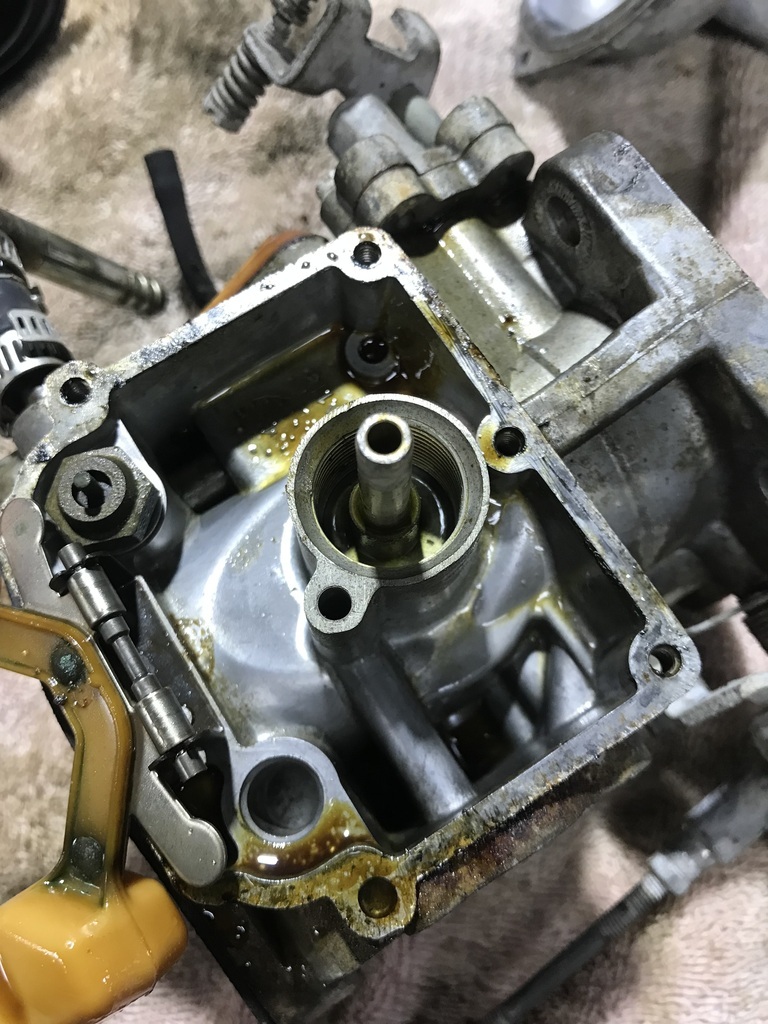  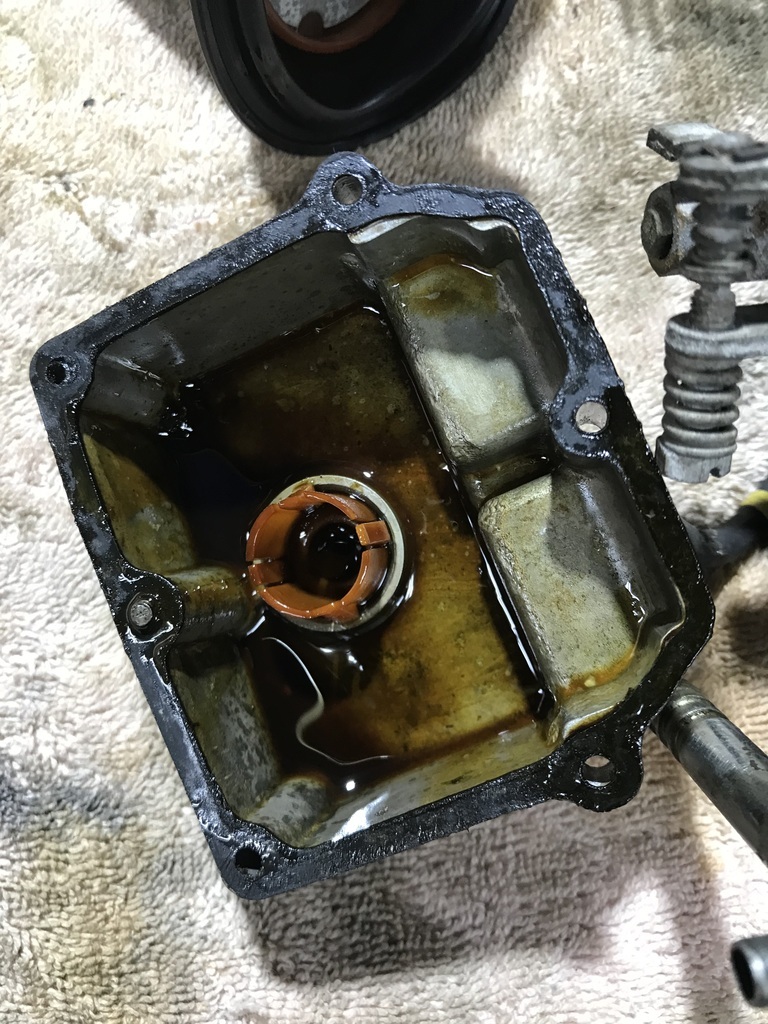 And after washing out the fuel residue. 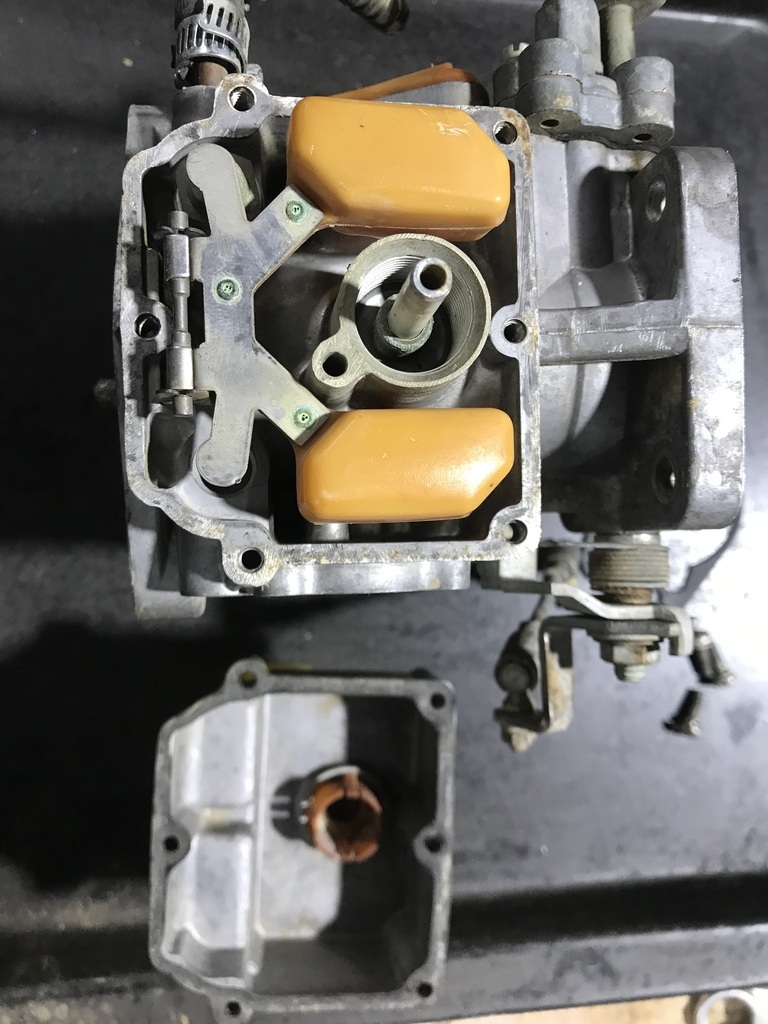 Before I get any further into these, I’ll wait and see what the kit contains. Thanks |
| |
|
|
ToolsnTrack
Posted a lot
   Homebrew Raconteur
Posts: 4,128
Club RR Member Number: 134
|
1974 Jaguar XJ12 ToolsnTrack
@overdrive
Club Retro Rides Member 134
|
|
|
|
Brilliant project, looks like you're on the right path to a sorted Jaaaag by the end of it.
|
| |
|
|
|
|
gazzam
Part of things
 
Posts: 740 
|
|
Jun 30, 2023 10:27:41 GMT
|
Carb kits arrived, so I finished cleaning the carb that I’d partially dismantled. Decided that I was only going to replace the diaphragm, needle and seat and the three main gaskets. That is, not remove the butterfly shaft in order to replace the seals in each side. So in the scheme of things that means it took most of the day to do about 2.75 of the four carbs. The upshot is that they’re very clean on the inside. And all the passages are clear. The outside difference is this.  I also took out the thermostat housing bolts to put some antiseize on the threads. Evidence: 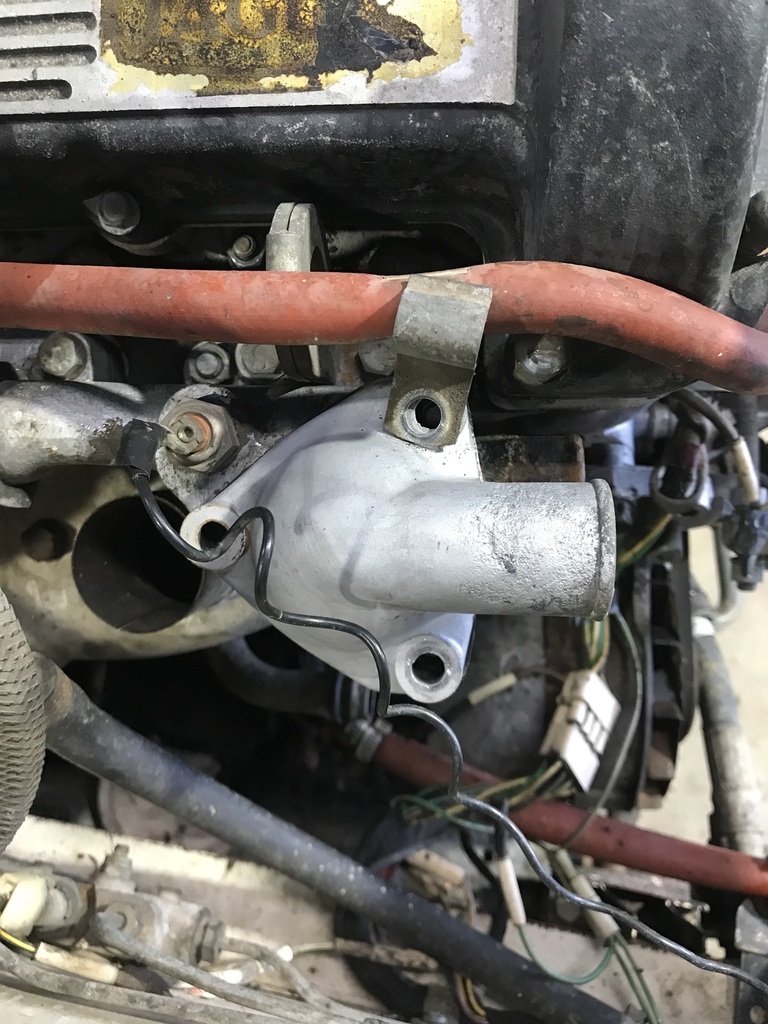 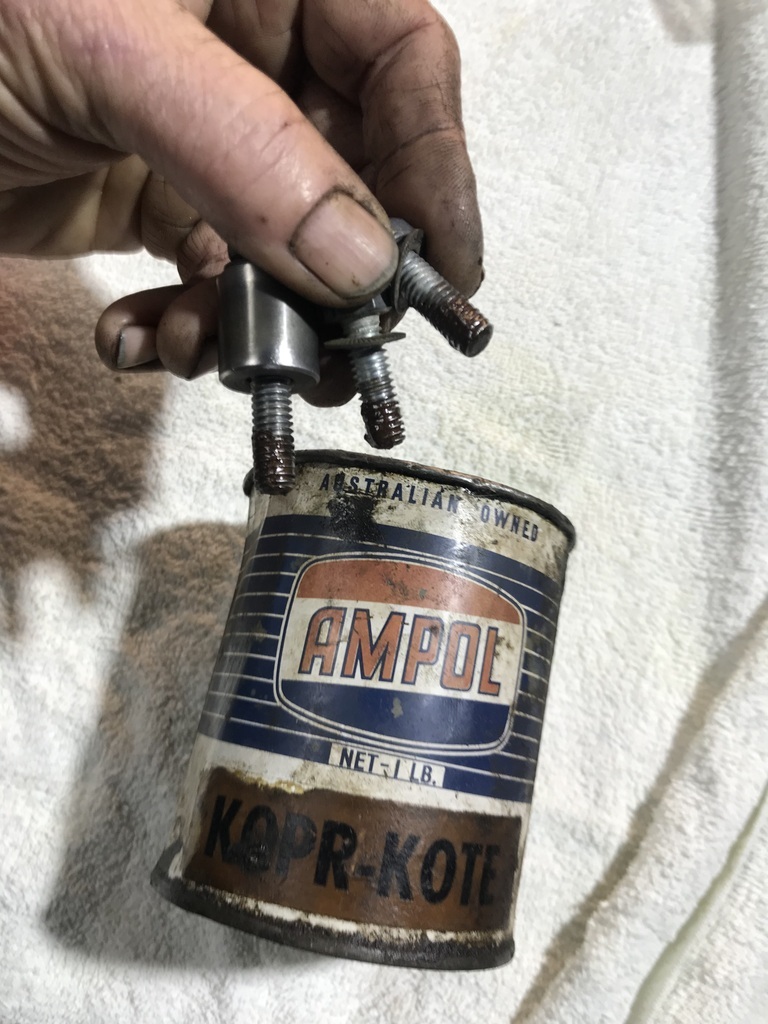 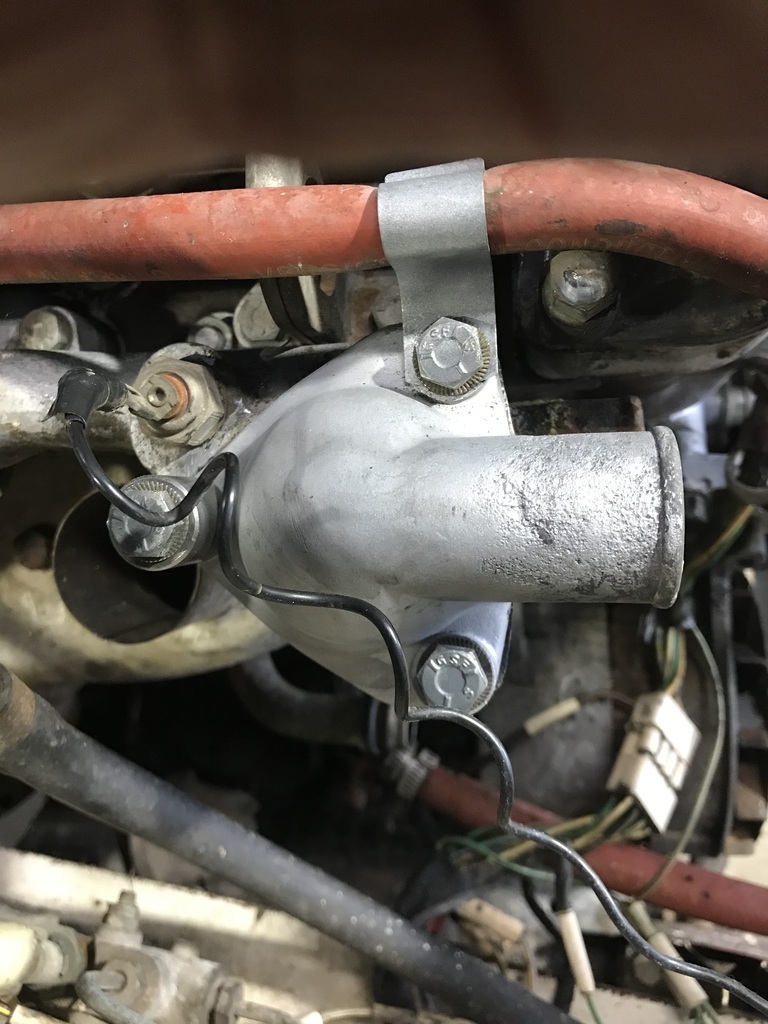 I might add that the tin of 'Kopr-Kote' is older than me. Seriously. It was my father's. Unfortunately it is nearly empty, so I may have to replace it. One day. Finish the carbs and reinstall them tomorrow, hopefully. Thanks. |
| |
|
|
foxy99
Posted a lot
  
Posts: 1,454
|
|
Jun 30, 2023 10:31:46 GMT
|
|
Was just going to say 'how cool is that old tin' and start Googling the product lol.
NB when I rebuilt my carbs I seem to remember there was some part you couldn't get. Something to do with the yellow plastic thing on the side.
|
| |
1974 Daimler Double-Six VDP
1965/67 Hillman Imp pick-up
1984 VW Polo breadvan
1970s Yamaha Twins (4)
1976 Honda SS50ZK1
|
|
gazzam
Part of things
 
Posts: 740 
|
|
Jun 30, 2023 10:55:19 GMT
|
|
Yes, I chose to ignore that yellow plastic thing, along with other screwed on bits that I’m fairly sure are to do with the anti-pollution stuff. There are hoses all over this that have been blocked etc. Don’t know what they all do. Will be trying to get rid of as many as I can.
I only just caught up on your thread, used to read it a few years ago and somehow lost it. Glad you beat those headstuds and hope you can get back to it soon. A good read.
|
| |
|
|
jamesd1972
Club Retro Rides Member
Posts: 2,921  Club RR Member Number: 40
|
1974 Jaguar XJ12 jamesd1972
@jamesd1972
Club Retro Rides Member 40
|
Jun 30, 2023 13:13:47 GMT
|
|
Yeah, think you are going to have to re-fill that tin when the time comes. One thought, if you start adding some now it will always be partly old stuff.
James
|
| |
|
|
|
|
|
Jun 30, 2023 15:45:06 GMT
|
|
not sure about the carb engine but the early efi ones had an incredibly complicated vacuum system feeding the distributor which used thermo switches to switch the vacuum through various restrictors and bleeds such that the timing could be varied through warm up for emissions, I dumped the whole lot and replaced it with one tube from the manifold to the dizzy, seemed to work just fine....
|
| |
|
|
gazzam
Part of things
 
Posts: 740 
|
|
|
|
Thanks Kevin, that might happen here as well. I think I saw a diagram of all the vacuum hoses in the ROM, so will have a look at that and see if there’s any reason not to have a dramatic thinning out. Finished the other 1.25 carbs and realised I hadn’t looked at the choke mechanism. One carb on each side has this and each was seized up with dried fuel gunk. This meant I used two more gaskets for each of those two carbs, so still quite a few left over. As is the way with most gasket sets. This is what I was dealing with, gunge wise.  Once the carbs were all back together, hopefully everything in the right place, it was a not so simple matter of bolting them back on. Access is challenging, to put it mildly. But they are on. Left side. The most photogenic.  And you could say I have skin in the game.  Thanks. |
| |
|
|
|
|
|
|
|
|
Ah, the blood sacrifice is made. Probably the first of many. Very large, knobbly lump in a rather too-small hole….
Enjoying watch your steady progress - keep up the good work!
|
| |
1967 Triumph Vitesse convertible (old friend)
1996 Audi A6 2.5 TDI Avant (still durability testing)
1972 GT6 Mk3 (Restored after loong rest & getting the hang of being a car again)
|
|
|
|
|
|
|
|
I'm enjoying this thread as you do such a good job and explain clearly what and why each time.
I'm glad that I also experienced the joys of a Jag IRS and V12 engine. Mine had fuel injection but then I went old school with 6 x 40 IDF Webers.
|
| |
|
|
gazzam
Part of things
 
Posts: 740 
|
|
|
|
Thanks for the encouragement men. Much appreciated. With the carbs now firmly attached, I decided I’d do something about the plethora of hoses/ clamps on the fuel supply/return side of things. The two carbs on each side are supplied with this setup. 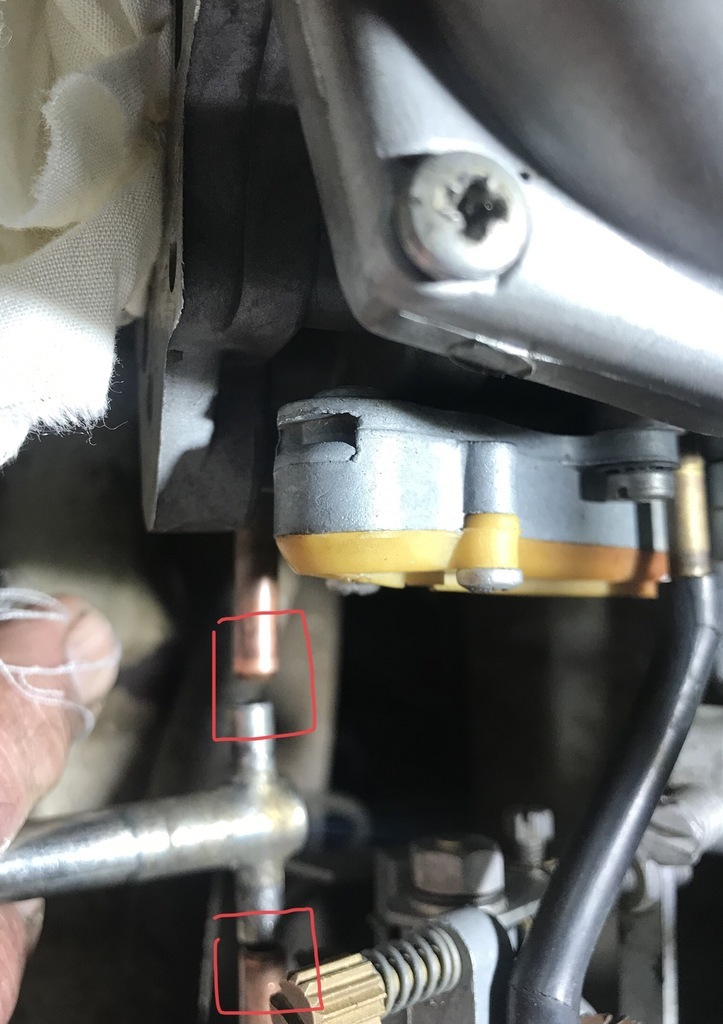 If you can make it out, it’s difficult to get a good pic - the red boxes are where short ( 30mm ) pieces of hose go. And 4 clamps. The hoses are impossible to get in - they must be put in place then the two carbs offered up to the inlet manifold as one. I was determined to make this easier, hopefully better. So I decided to do away with the tee piece that I’m holding. This meant making another fuel supply pipe. Started with a piece of 1/4 inch. Bent up a u shape. 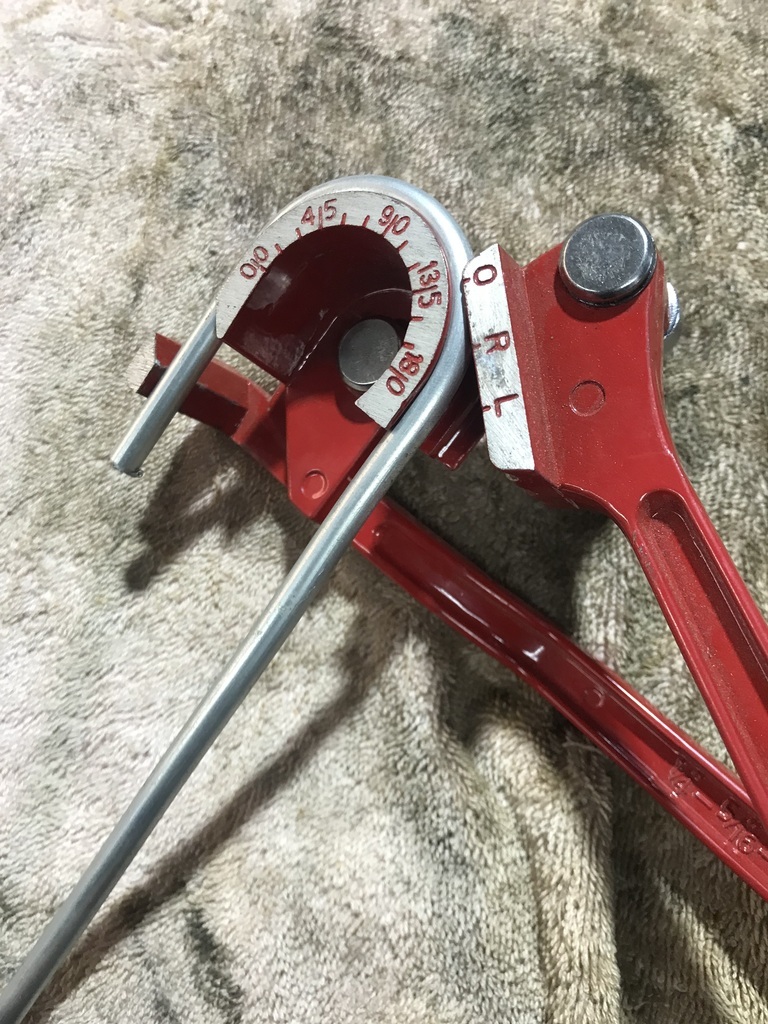 Drilled a hole in it.  Soldered it to a piece of 3/8 tube with the end filed into a half circle. 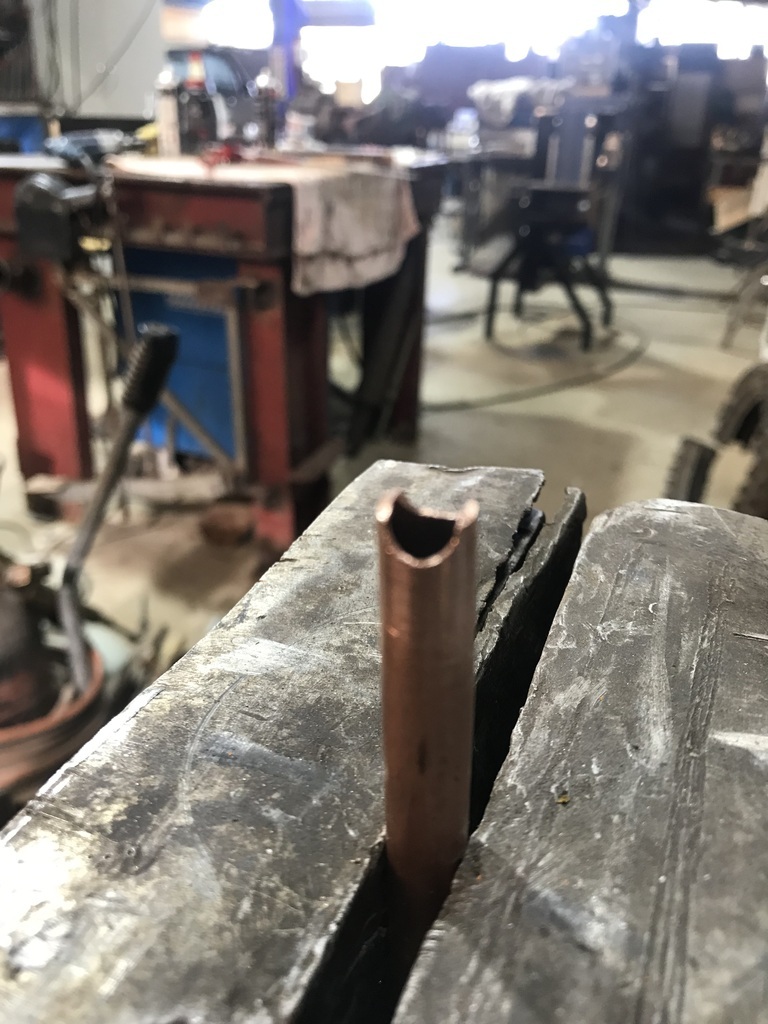 And another piece soldered for the main supply. 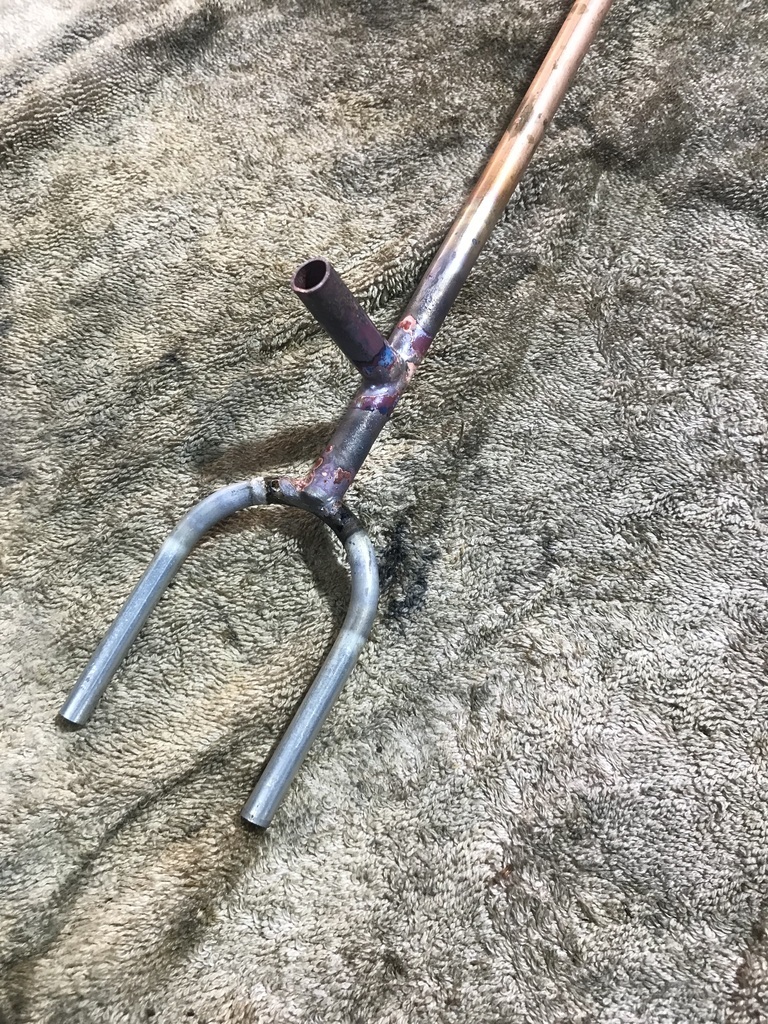 Same at the other end, except this is for the return side. This whole pipe goes across the top of the engine to the lhs bank. Original pipe plus my contraption. Mine still needs a bend at each end, which I probably should have done before soldering on the u shaped bits. 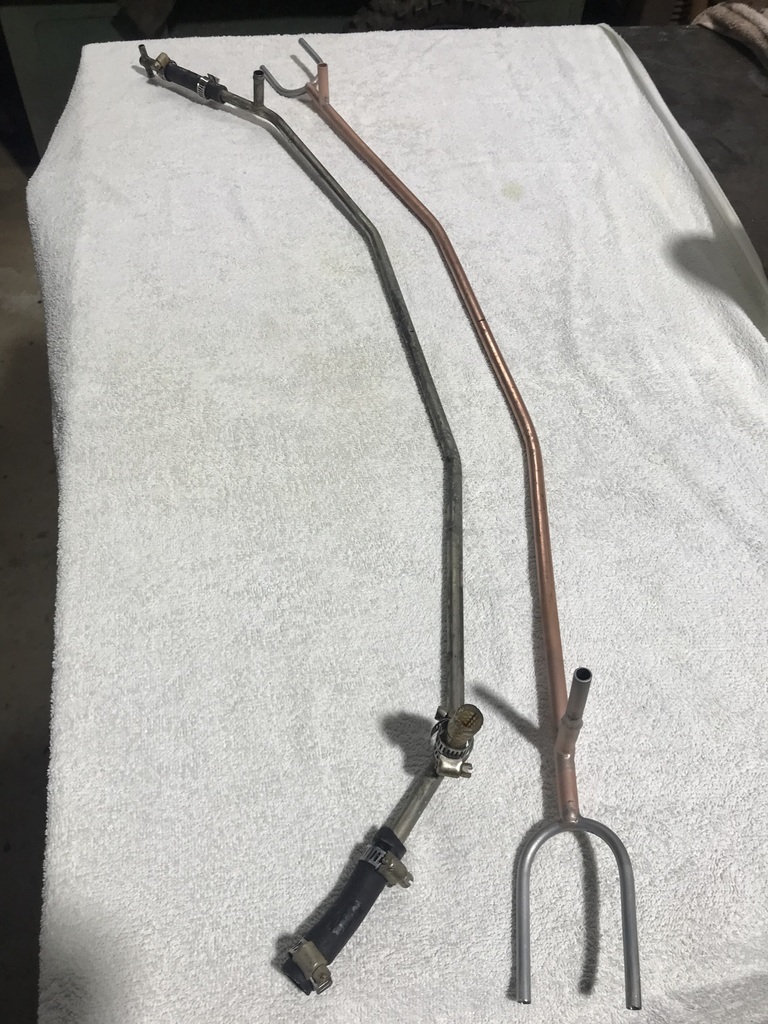 One end, showing the tee that will be eliminated. 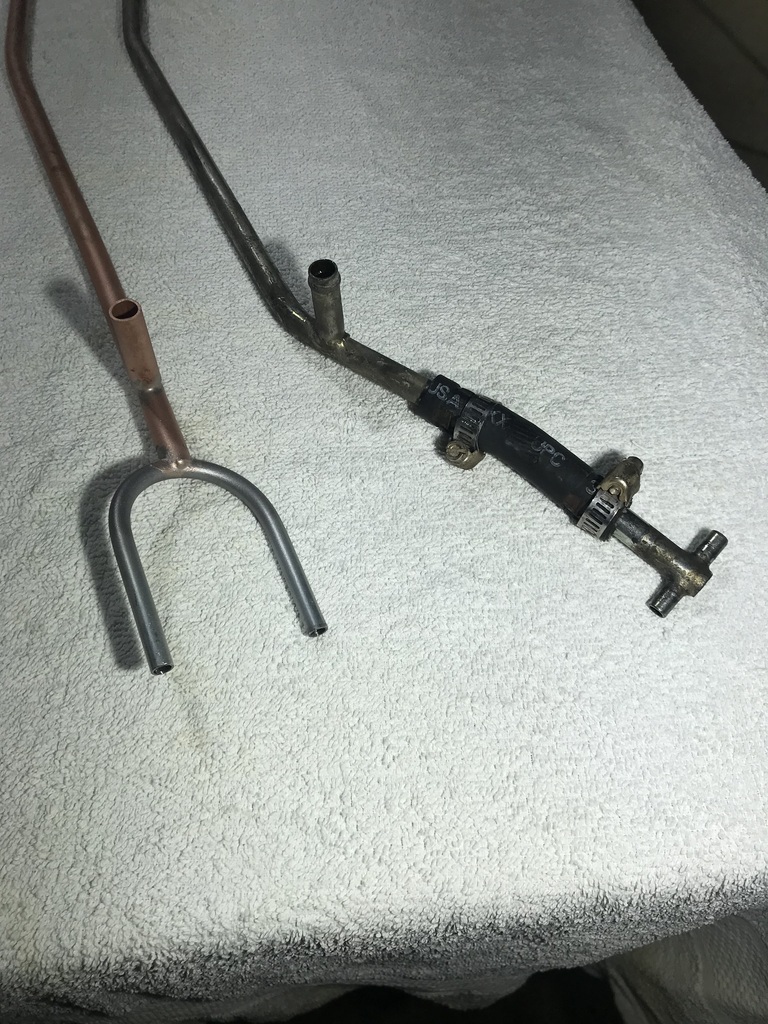 There will now be a longer piece of hose going from each end of the u piece to one of the carbs. So I’m only getting rid of one hose and two clamps per side, but it will be able to be assembled with the carbs in place. And I think it will look less ‘busy’. Thanks |
| |
|
|
gazzam
Part of things
 
Posts: 740 
|
|
|
|
My fuel pipe contraption didn’t work. Couldn’t get the ends right, so they worked out with the hoses. So I bit the bullet and cut the ends off the original, then silver soldered on the reshaped 1/4 inch pieces from my first attempt. End result looks like this. 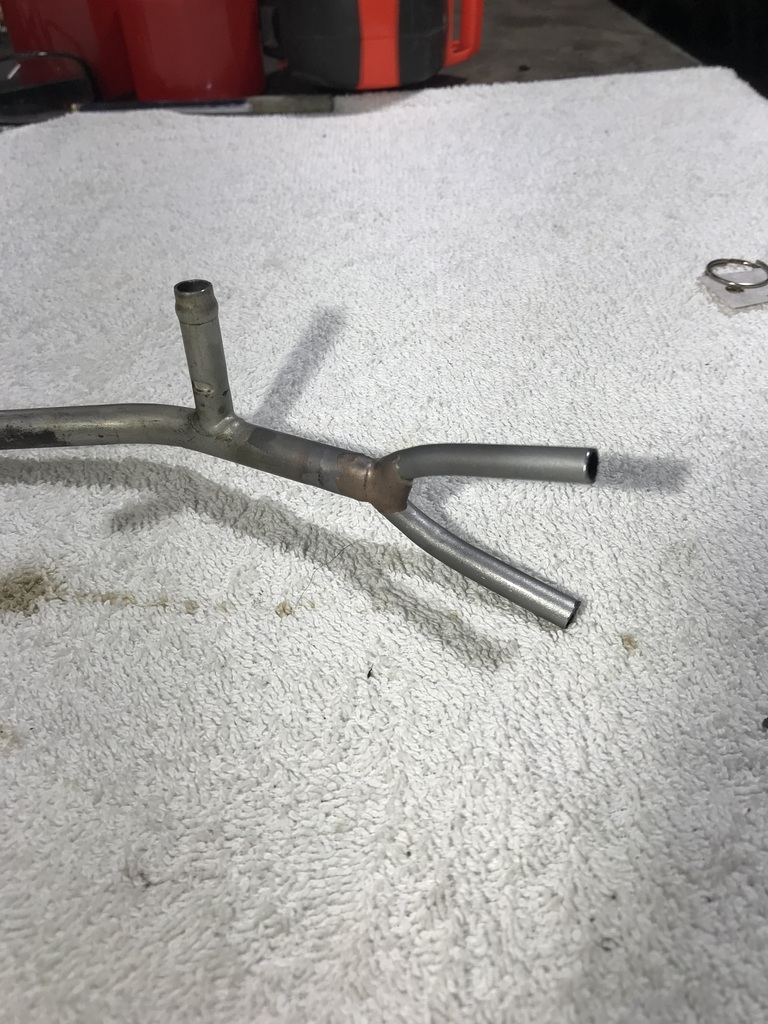 And in position, hoses yet to be clamped.  So it was time to put some fuel in the tanks and see what happens. What happens is the left hand tank leaks. Damn. Both tanks looked excellent inside (and out ) and I was able to get a pretty good look through the sender unit hole. Particularly along the seam in question. Was not expecting any problems. But the lhs one is dripping very slowly from the seam along the bottom. I think I’ll brim both tanks ( only put about 10 litres in this time ) just to see if the seam leaks anywhere else. I have some sealer that I got for the Healey tank, but didn’t use. I’m very dubious about putting any product in a tank. You can’t get it out if it doesn’t work. But in this case I don’t know what else to do. On a more positive note, the fuel pumps worked, and flushed the line to the carbs. But I'd rather be sorting a pump problem than this bloody tank. |
| |
|
|
|
|


