gazzam
Part of things
 
Posts: 740 
|
|
|
|
Thanks for the nice words and encouragement. Much appreciated. Today was one of those days when you’re at it most of the day but don’t feel you’ve achieved much. Finished welding on the last two flanges and reassembled the rhs pipe. Wasted some time taking it back off to fit the heat shield that goes above the front muffler. It had come adrift, 4 pop rivets needed replacing. But I missed it till I was congratulating myself on the fit of the pipe. So it had to come back off. And I can’t fit the lhs pipe till I get the fuel tank back in. I’m dithering about sealing it. I hate the possibility of the product not working. Yoeddynz hasn’t replied and it would be nice to get some positive feedback about the stuff I have. Doesn’t really matter as I’ve still lots to do. Was talking to my radiator guy today and the rad will be ready tomorrow. So that can all go back together. Waiting on some plastic caps to close off all the pipes where I’ve removed vacuum hoses. So that’s holding up attempts to start the motor. After pruning the grapevine, I was able to rebuild the front calipers and get them bolted back on, with new hoses. It took a lot of time to clean the lhs caliper ( after I assembled the rhs one ), it probably would have been quicker to split them and simplify the cleaning. The extra seals were in the kit. Newish looking caliper in place, the other side looks the same…  Thanks. |
| |
|
|
|
|
|
|
|
|
|
|
Loving your posts,and hi from the other side of Aus (WA)..
I've used the KBS tank kit on a TR6 fuel tank and it was fine.
I spent and eternity rotating the tank with the cleaner as more seemed to come out each time.
Take your time, follow the instructions and as someone else has said, unless the fuel tank is huge, you won't need the whole seal paint tin in there, so add (for example) half, see if it coats everywhere and add more if not. You'll only end up having to drain out the excess anyway.
Keep it moving as well to get the best distribution of the sealer whilst it's drying. I just moved it 45 degrees every 30 mins and it came out reasonably even.
Hope it helps and keep up the great content and posting👍
|
| |
Last Edit: Jul 11, 2023 8:11:43 GMT by db7v12
|
|
gazzam
Part of things
 
Posts: 740 
|
|
|
|
|
Thanks for that.
Still got the TR6?
|
| |
|
|
gazzam
Part of things
 
Posts: 740 
|
|
|
|
Started getting the tank ready to seal. So back onto the cement mixer and a spin with truckwash and warm water and some vibratory media. 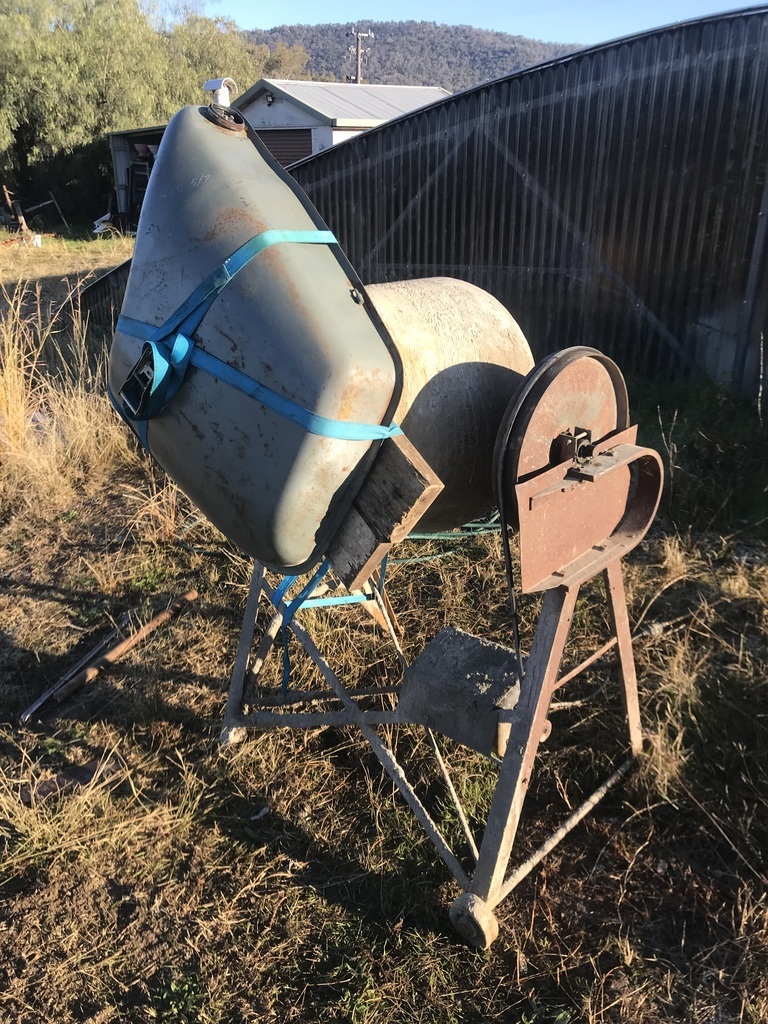 Then the first of the KBS products. This is also a strong detergent, but I put the truckwash through first because I'd used dwf in it previously. After quite a few rinses with water I'd collected off a shadecloth sail (because they say not to use water from an iron roof ), it was suds free. (I collect this rainwater for the lead acid batteries that we use on the house solar system.) Left it to dry while I got on with the brakes. The master cylinder came away without much of a struggle. It’s obviously been off before, as it had two different nuts and washers holding it on. I’m confident it was a professional because the PO had it for many years and didn’t work on it himself. Maybe they came with different nuts and washers, but I would be surprised. Despite looking pretty poor on the outside, it is very good inside. 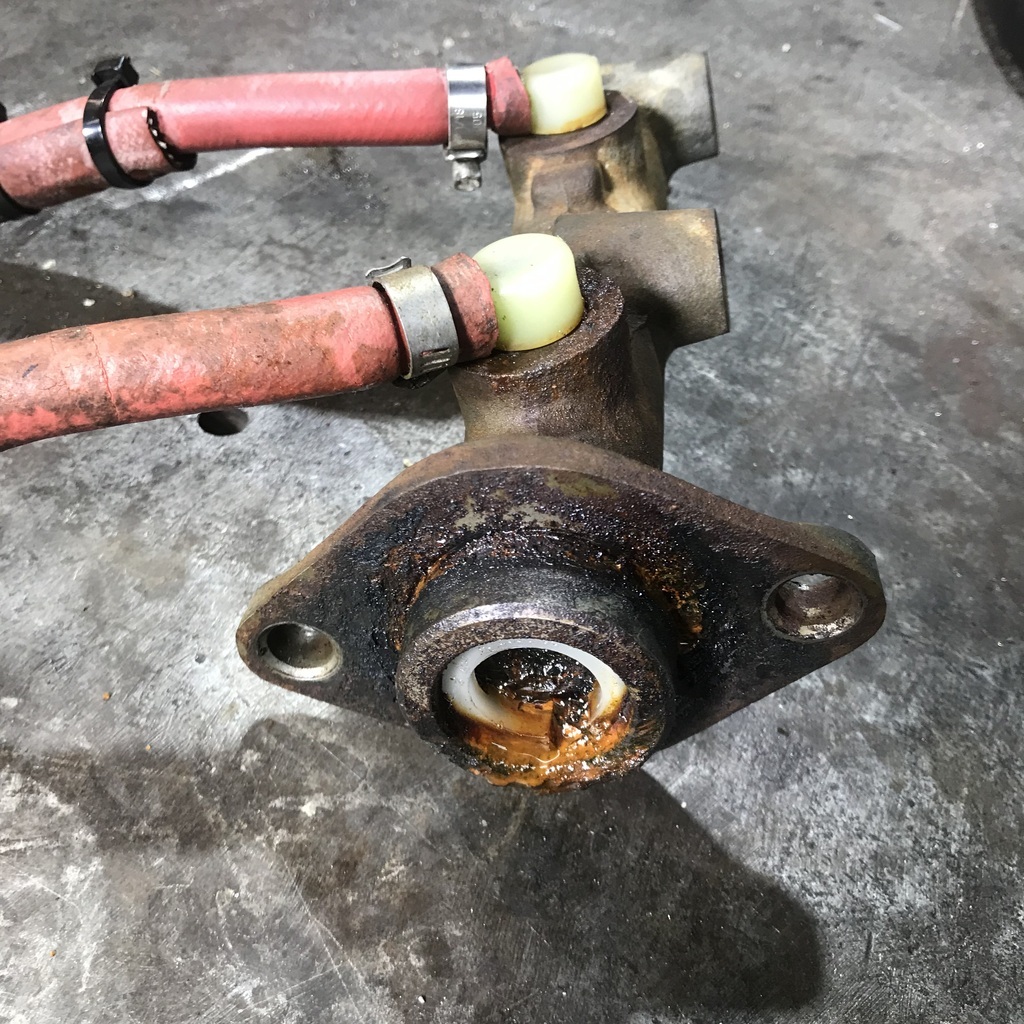 And disassembled. 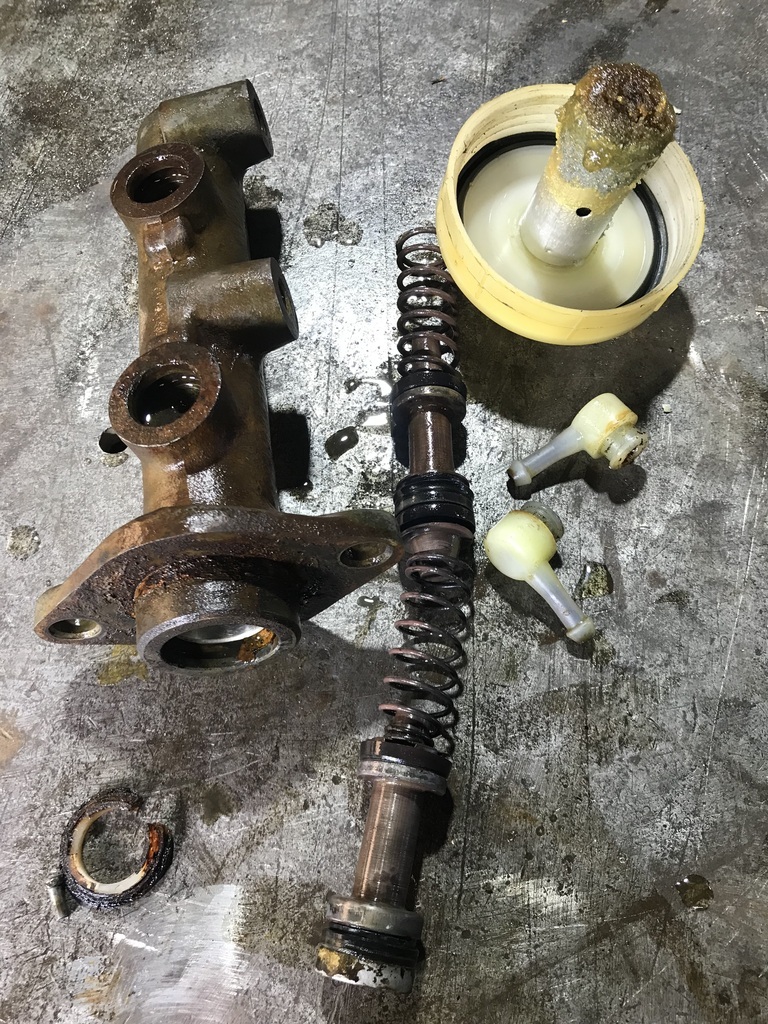 That’s the lid of the reservoir on the upper right. It was full of that gunk with only a shallow layer of liquid brake fluid on the bottom. Cleaned up and new seals throughout.  This will need some repairs. I assume there’s supposed to be some sort of float inside. 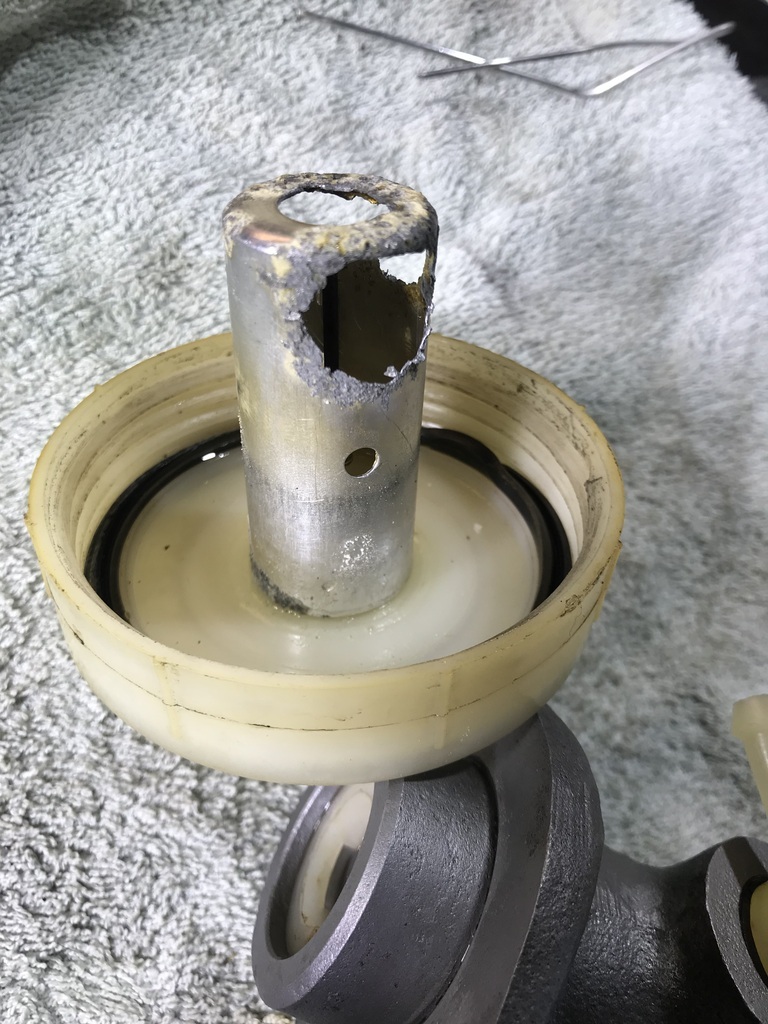 Suggestions on a postcard please… I’m thinking I’ll flush the brake lines with some methylated spirits before I put any brake fluid in. Thanks |
| |
|
|
jamesd1972
Club Retro Rides Member
Posts: 2,921  Club RR Member Number: 40
|
1974 Jaguar XJ12 jamesd1972
@jamesd1972
Club Retro Rides Member 40
|
Jul 12, 2023 10:57:55 GMT
|
|
Suspect you can get a replacement cap off something with a nice new float switch included ?
Almost certainly a non Jag one will fit and not have a Jag tax applied...
James
|
| |
Last Edit: Jul 12, 2023 10:58:10 GMT by jamesd1972
|
|
gazzam
Part of things
 
Posts: 740 
|
|
Jul 12, 2023 11:24:15 GMT
|
|
Any suggestions as to where I’d look?
Thanks
|
| |
|
|
Zagato
Part of things
 
Posts: 80
|
|
Jul 12, 2023 11:50:44 GMT
|
|
|
| |
1959 Abarth Double Bubble resto project
1989 Lotus Esprit LHD
1997 Lotus Eprtit GT3
1996 Jaguar XJ6 Sovereign manual gearbox from factory
Porsche 356A Coupe replica
Formula 27 Super Seven replica Alfa Nord powered
|
|
|
|
|
Jul 12, 2023 22:59:47 GMT
|
I used these; linkAnd how to fit them in your original cap; FLUID RESERVOIR CAP MODIFICATION Our single fluid reservoir #FLRES1 is a great favourite with racers and rally car builders but, without a fluid level warning device, it’s not IVA compliant as a brake reservoir on new car builds. All is not lost however. It can be modified with our #FLCAP. You can probably use a similar procedure to that outlined below to modify other non-float caps. Using a wide blade, flat, screwdriver carefully prise apart the two components. The float and switch mechanism will separate from the screw cap. Locate the centre of the new cap and, using a step hole cutter, drill a 1" (25.4mm) hole in the top of the cap. You may find that the snap-on inner disc that retains the rubber seal may pop off while you’re drilling. Don’t worry - it’ll snap back on again. Just make a hole in it big enough for the float to pass through. Ensure both components are clean and dry. Mix some two-part epoxy adhesive and bond the float assembly into the cap, forming a fillet on both sides. Use a matchstick to spread the adhesive neatly around. The float assembly will not sit dead flush on the cap because of the terminal block but, with the inner disc in place, it should sit fairly level. A blob of adhesive under the terminal block will add to the strength. Sit it on a coffee mug overnight for the adhesive to cure. It is not possible to use the rubber diaphragm with this modification. more options; www.carbuilder.com/uk/brake-fluid-reservoir-cap-71mm-odwww.carbuilder.com/uk/brake-fluid-float-switch |
| |
|
|
gazzam
Part of things
 
Posts: 740 
|
|
|
|
Thanks fellas. I’m going to have a play with this. If I can get it apart I should be able to put some sort of a float in it. A cork would work I think. At last the tank is sealed. Followed the directions to the letter. Hopefully it will work and be forgotten. Very time consuming though. Also flushed the brake lines with metho and compressed air. Discovered that the front brake hoses I'd been sent were incorrect. Apparently there was a change to metric/Jaguar complications/whatever but the correct ones are on the way. Put the new vee belts on, can only imagine what a cow of a job that'd be with the rad in place. Also got the coolant cross pipe installed. 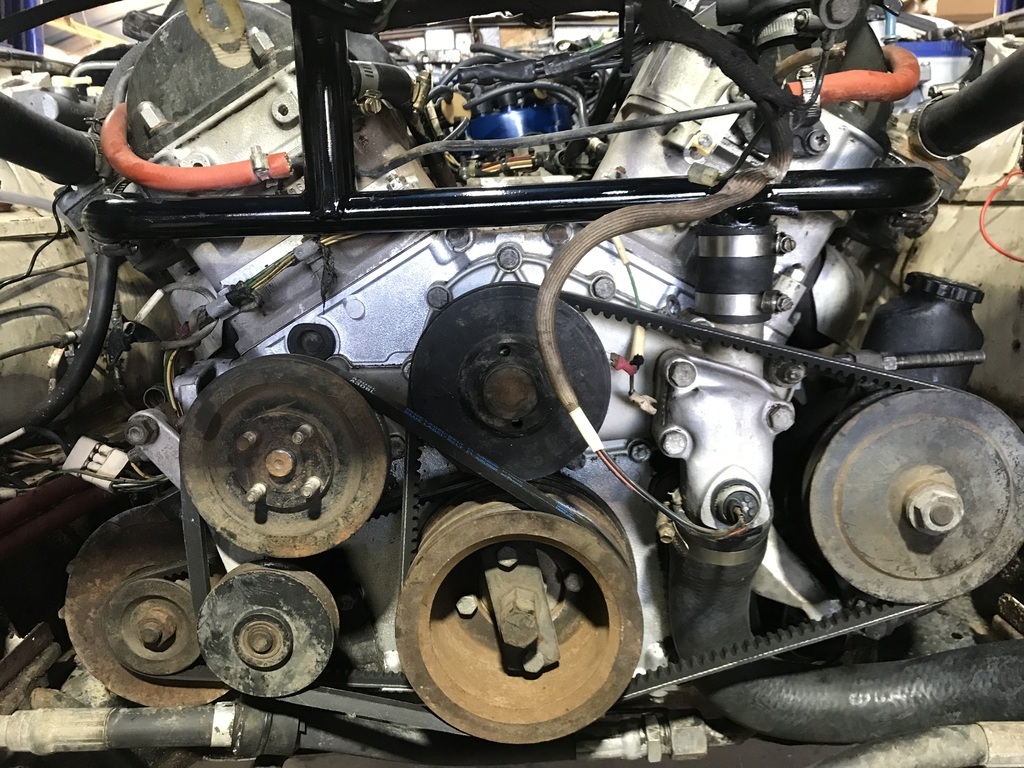 That’s the only photo I took all day. Thanks. |
| |
|
|
gazzam
Part of things
 
Posts: 740 
|
|
|
|
Reinstalled the tank. The sealer certainly looks good. Hope that means it is good. I forgot to clean the plastic funnel that I used and it is really stuck to that, so well prepared steel should be a doddle. Have to leave it another 3 days before it can have fuel, but that’s no problem. As both tanks are now in place I can finish the exhaust system. There was a different support on each side where the pipes go through the IRS cage. One was welded to the pipe that goes through the cage. I had cut that off to make it easier to manoeuvre the pipe through. The other was clamped to the pipe and bolted to the outside of the cage. Did away with it also. But something was needed as there is just a bit too much jiggle in the pipes. I thought of a bracket welded to the flange and attached via some rubber to another bracket on the cage. Punched some holes in a piece of rubber and cut and drilled a piece of stainless. 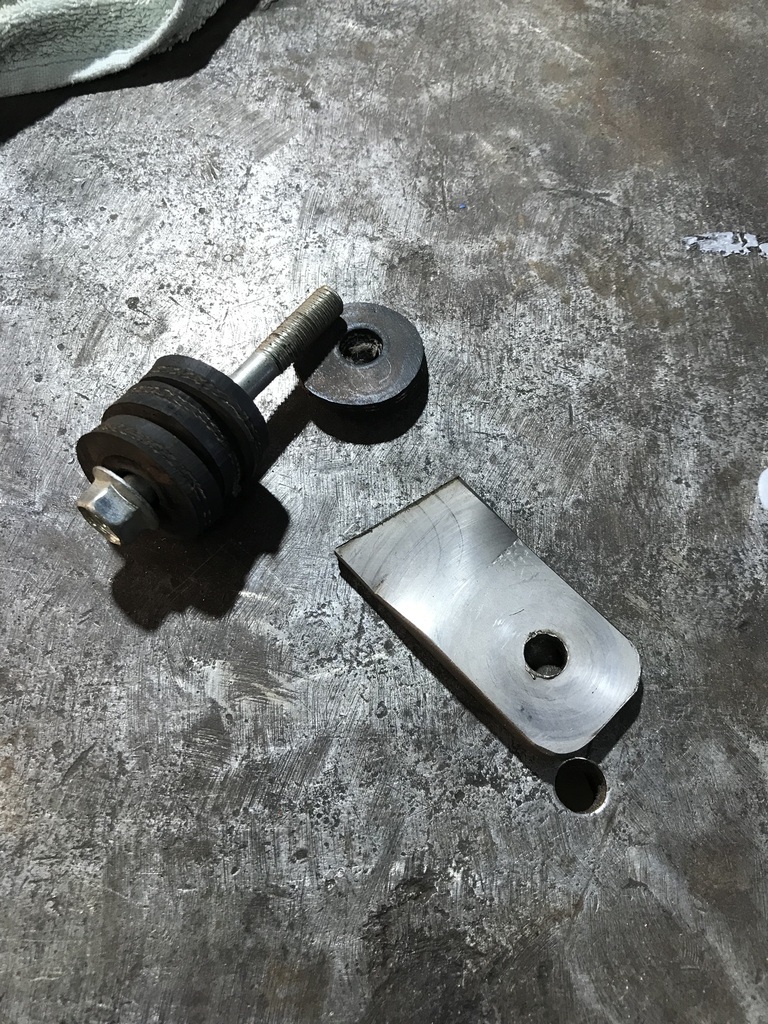 Some cardboard to template the cage bracket. 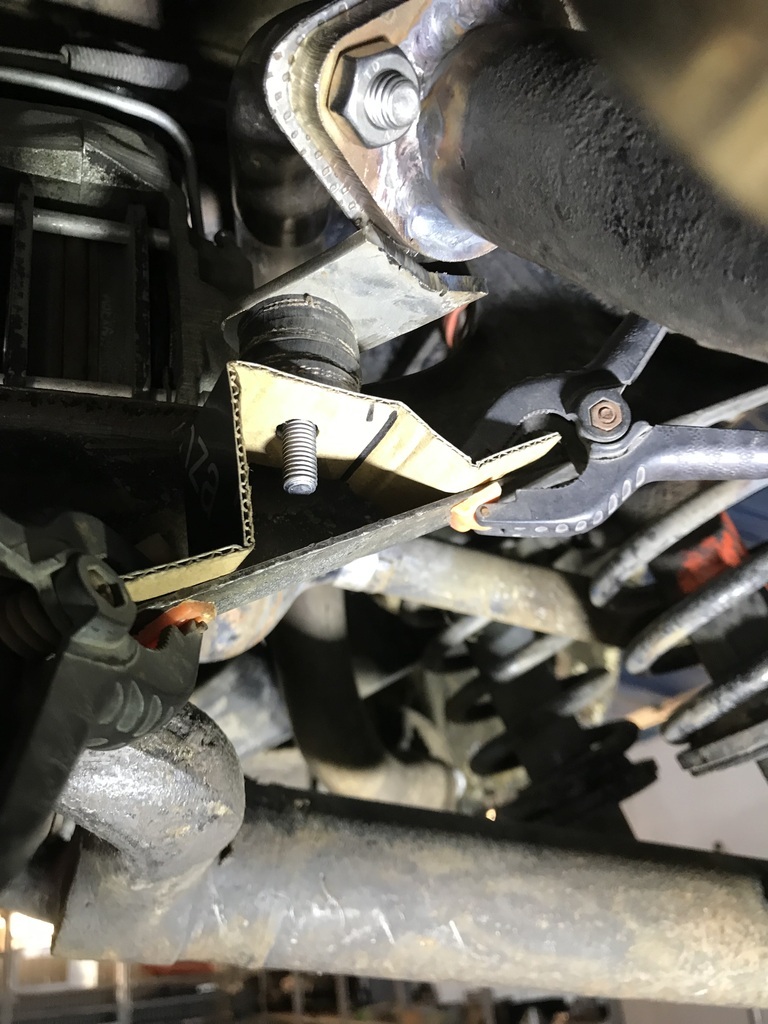 Duplicated in steel. 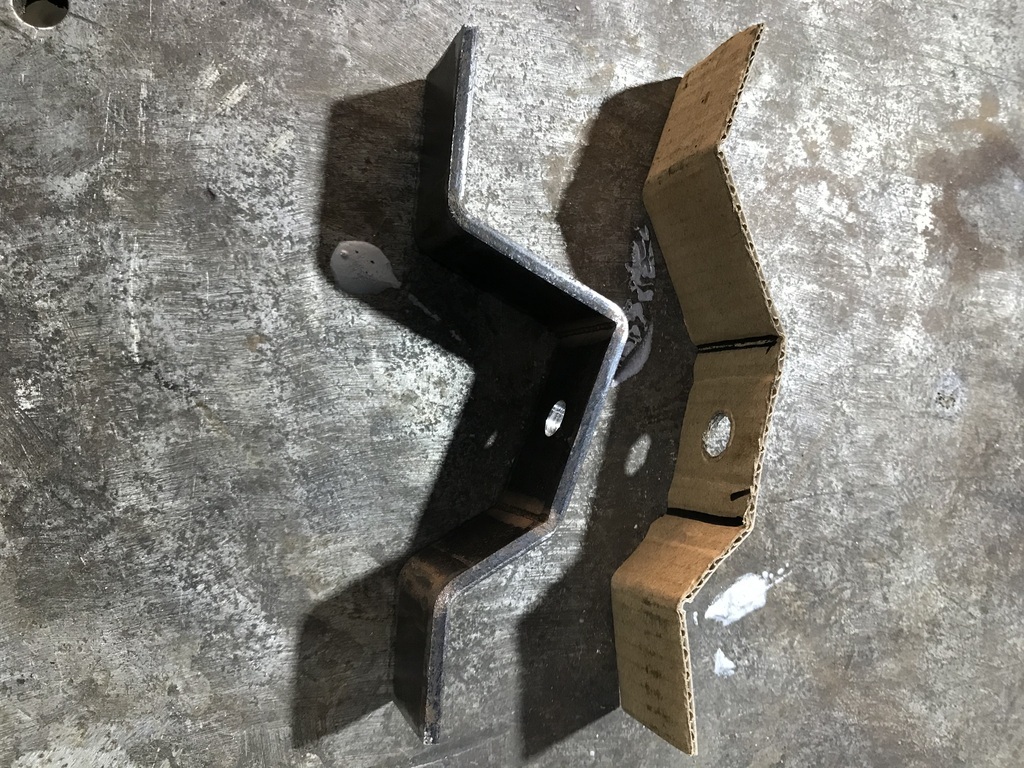 After a bit of fiddling with angles got it to this. 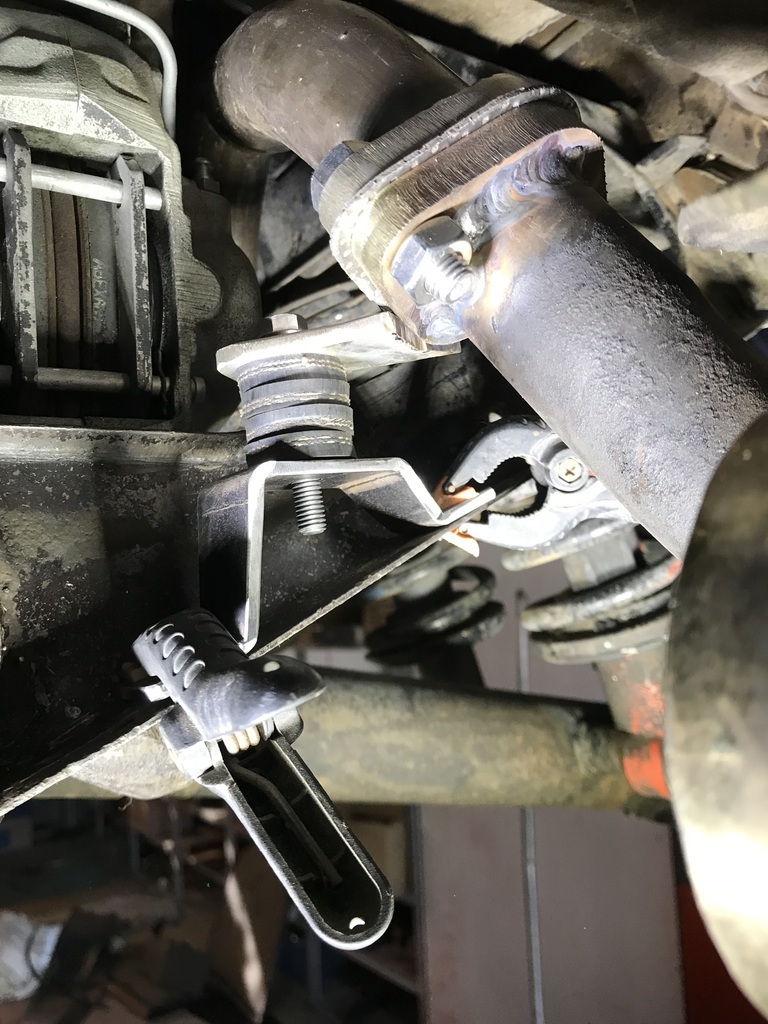 Then tacked the stainless bracket to the flange. Took the pipe off ( again! ) and fully welded it. 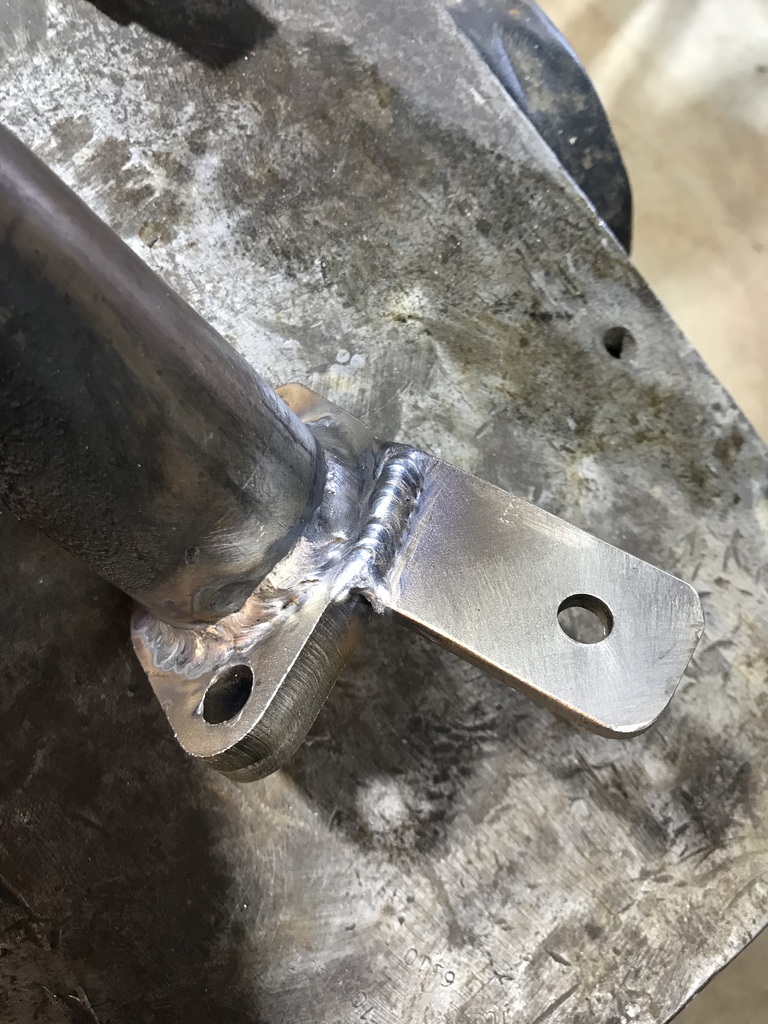 Put it back together and drilled a pair of holes to bolt it on. I think I’ll change the through bolt for a bit longer one so it’s not pulled up so tight. 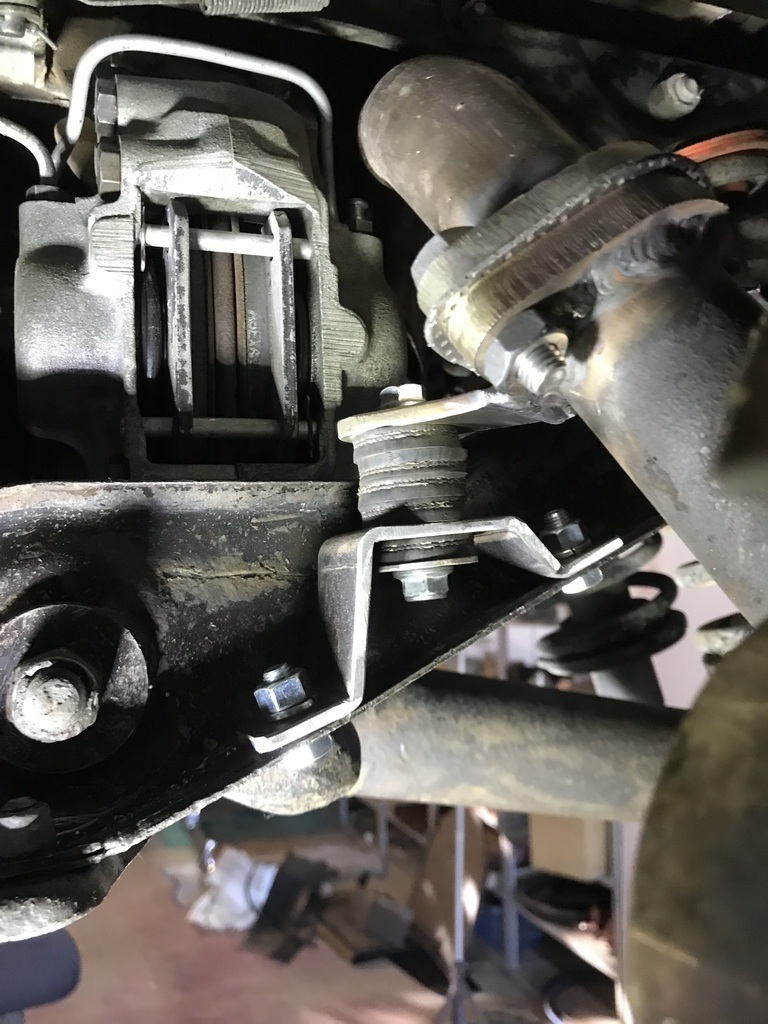 I hope you can make sense of these photos, it’s hard to get goodish shots up under there. Now for the other side… Thanks. |
| |
Last Edit: Jul 14, 2023 9:23:13 GMT by gazzam
|
|
|
|
gazzam
Part of things
 
Posts: 740 
|
|
|
|
Finished the other side exhaust. Hopefully it will be rattle free, but it is close in places. We'll see. Got the rad back from the man. Actually not my rad, but one I was given. The rad man said mine was not much good - evidence of pressure leaks. He said you fix one and another would likely appear nearby. So I said recore it. No point in paying him to do a temporary fix, and then having to recore it a few months down the track. That was on a Friday about a fortnight ago. He said he'd get it organised on the Monday. But over that weekend I was at a car club thing and a guy offered me a radiator he didn’t want. I took it to the rad man on the Monday morning and he said it looked good. Ended up he removed the tanks, found it was good, cleaned it out and I kept my original, probably as scrap. So I took a carton of beer to the chap that gave me the replacement - he saved me much more than that! Anyway the rad is now in place and the system full of a light coolant mix. Hopefully it will still be full tomorrow… Plan is to run it up to temp a few times and then do a flush.  Really not too bad a job remove/replace radiator in these cars. Bonnet is easy to remove, and considering it’s got the grille and lights, reasonably easy to handle. And once you know the couple of tricks, it’s not too bad to get the rad out and back in. I took care to line up the hose clamps to make it easier to get at them in future. Hoses are always busterds to get off, on just about anything. You need a bionic arm/hand. There’s never enough room to get any strength into the twist/pull motion needed to get them to move. I really, really hate hoses. Also had a bit of a play with some T Cut. Fantastic stuff. Dad and I had a gallon tin of it years ago, long gone now. I haven’t seen it available for ages. Original that is. Bought a couple of 500ml bottles of original, not the coloured stuff that’s readily available, after a bit of a search. The paint, where it’s original, comes up very well. There have been some horrific repairs though and they’re the bits that are going to spoil it. But the chrome and glass clean is a joy to behold. Too bad it’s only one door so far. And I can’t wait to get stuck into the interior. It’ll be hard to leave this car to work on that Triumph! Thanks. |
| |
Last Edit: Jul 16, 2023 7:35:36 GMT by gazzam
|
|
gazzam
Part of things
 
Posts: 740 
|
|
|
|
You might remember this. 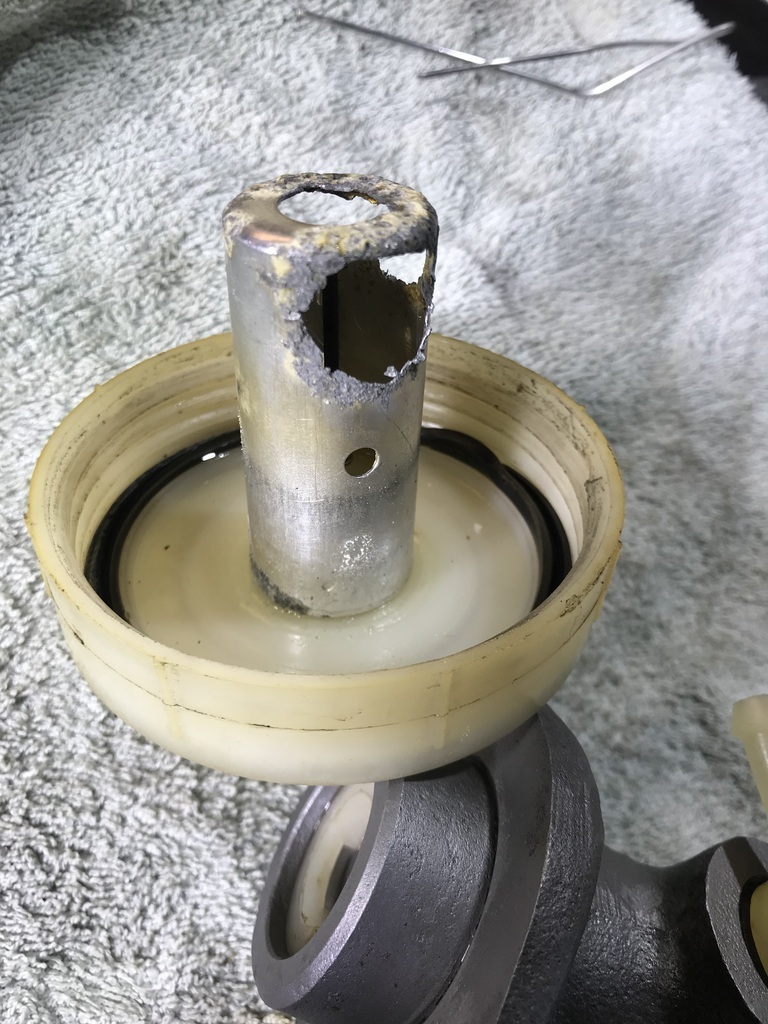 It’s the brake fluid reservoir cap. That ally piece is cactus. It just covers the float that had dissolved. It came off easily. But first I needed a new float. Cork from a bottle of red, (white will not work) mounted in the lathe to drill a hole through the centre.  Then tapped the end of the pin back to round, so I could get the lower brass washer off. 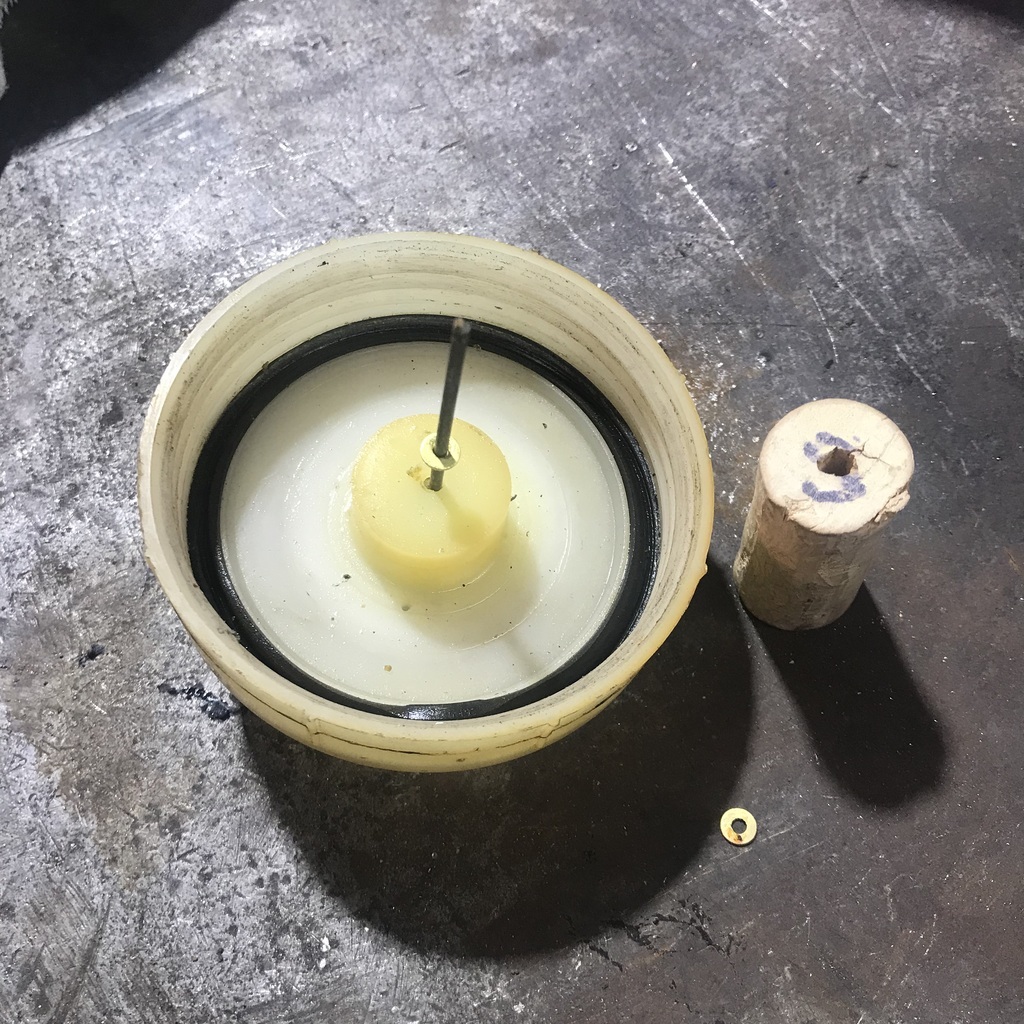 Then the cork goes on, followed by the washer. Finally I tapped the end of the pin so it would all stay together.  I don’t think the ally cover is really necessary. If you know otherwise, please let me know. Maybe it’s a baffle and the warning light will flash on and off under heavy braking, or somesuch. Thanks |
| |
|
|
|
|
|
|
|
|
The small holes in the outer shroud are supposed to damp the response but they only damp sudden changes, our minor is missing the shroud and I look on it as confirmation the level warning is working.
|
| |
|
|
|
|
|
Jul 17, 2023 11:57:42 GMT
|
|
If you do need the sleeve then a suitable peice of plastic tube that fits the lid should suffice?
|
| |
|
|
gazzam
Part of things
 
Posts: 740 
|
|
|
|
|
Thanks Kevin.
Yep Mark, I had thought about a sleeve of plastic or ally, really doesn’t make much difference. Ta.
Received the correct brake hoses in the mail today. Installed them and so now the brake system is ready to fill with fluid and bleed.
And blocked off all the vacuum points where I'd removed various hoses. Quite a few of those, the engine is looking much less cluttered.
With fuel in one tank and no apparent leaks, it was time to have a go at starting the beast.
No luck. It turns over just fine, but won’t fire.
Pulled the plugs and they’re wet, so it’s getting fuel.
Grounded a plug and spun the engine to see if it’s got spark. It has, but not what I'd call healthy.
Cleaned the plugs and checked the gaps. They have a vee cut into the electrode, never seen that before, no filing these.
Put them back in and still no fire, just a very occasional kick.
These things have ( 50 year old ) electronic ignition. And I’m not very good with any type of ignition really.
Found a thread on Jag Lovers with a reply that included a short troubleshooting guide.
And with it I worked out that voltage at the coil was low.
I couldn’t find a reason for that. I checked the battery to body connection. But I can’t find an earth strap to the engine to check.
So I ran a wire from the battery + to the coil + and woohoo. It’s a goer!
Didn’t run it for more than about 10 seconds as I need to reread the instructions on bleeding the coolant system. There are dire warnings in the manual about the consequences of getting that wrong.
As I typed, I realised that if running a positive wire cured it, it’s not an earth problem. Is that right?
If that’s right, what do I look for? A bad connection on the back of the key?
Anyway, it doesn’t matter.
I’ve had it running, so I’m having a beer to celebrate!
Then I might go and put some tools away and have a tidy up. God knows it’s needed.
Cheers!
|
| |
|
|
|
|
|
|
|
Jul 18, 2023 11:57:46 GMT
|
|
Sounds like a poor connection somewhere on the coil feed?
No ballast resistor wire in the circuit?
Check Ign barrel connections for tightness.
|
| |
|
|
|
|
|
Jul 18, 2023 21:18:52 GMT
|
|
Well done on getting it running!
|
| |
|
|
|
|
|
|
|
Great news that it runs, for the ignition I am assuming you have a OPUS system, this link explains how it works. www.jagweb.com/aj6eng/ignition.phpPutting 12 V directly to the coil will give a bigger spark but I'm not sure this is a good idea. I would start by checking you have 12 V at the White wire at the ballast and are getting 12V during crank at the white/blue wire, then check the resistances across the terminals of the ballast resister. ie 1 ohm wu to wg 0 ohm w to br 0.8 ohm wu to w you can ignore the tacho side for now. Next I would check it has the right low impedance coil and it's connected the right way round. it's not shown on the diagram but the amp will need an earth to work (it's switching the -ve side of the coil to earth), this must be through it's case so check this is cleanly earthed. |
| |
Last Edit: Jul 19, 2023 7:00:30 GMT by kevins
|
|
gazzam
Part of things
 
Posts: 740 
|
|
Jul 19, 2023 11:24:14 GMT
|
|
Thanks Kevin,
I'll take some readings tomorrow and let you know.
How can I check that it’s the right coil?
Garry
|
| |
|
|
|
|


