gazzam
Part of things
 
Posts: 741 
|
|
Apr 24, 2022 11:50:32 GMT
|
So 4 to 1 in favour of the easiest option… Not a huge sample, but I might go that way, at least for the time being. As far as start up goes, waiting on battery terminals, been a month now. According to the tracking, they should be here in a couple of days. Liking the idea of the plastic strip, gtviva, just have to find something suitable. I do have some heat shrink that is probably big enough, so that might be the backup. More trimming. It’s nice to have all these bits ready to install. Even though some minor mods have to be made, it means rapid progress. Rear carpet nearly complete in this pic, as well as rear d roll well underway. 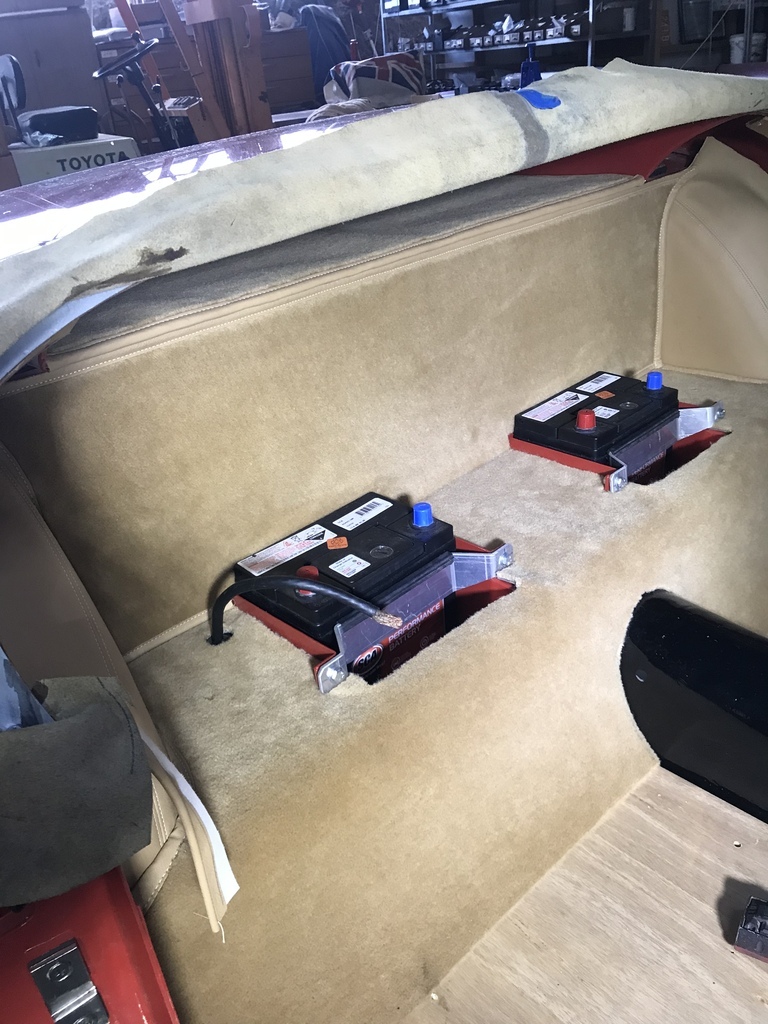 And a couple of hours later, d roll nearly there and carpet is done. 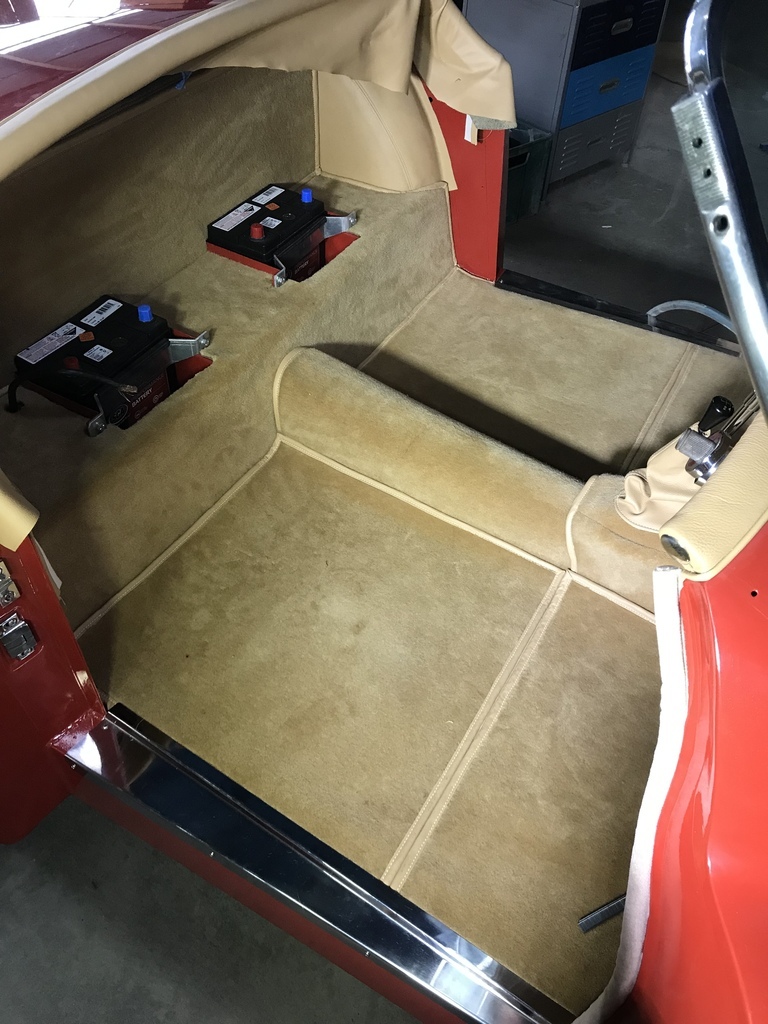 D roll is done and side panels in. 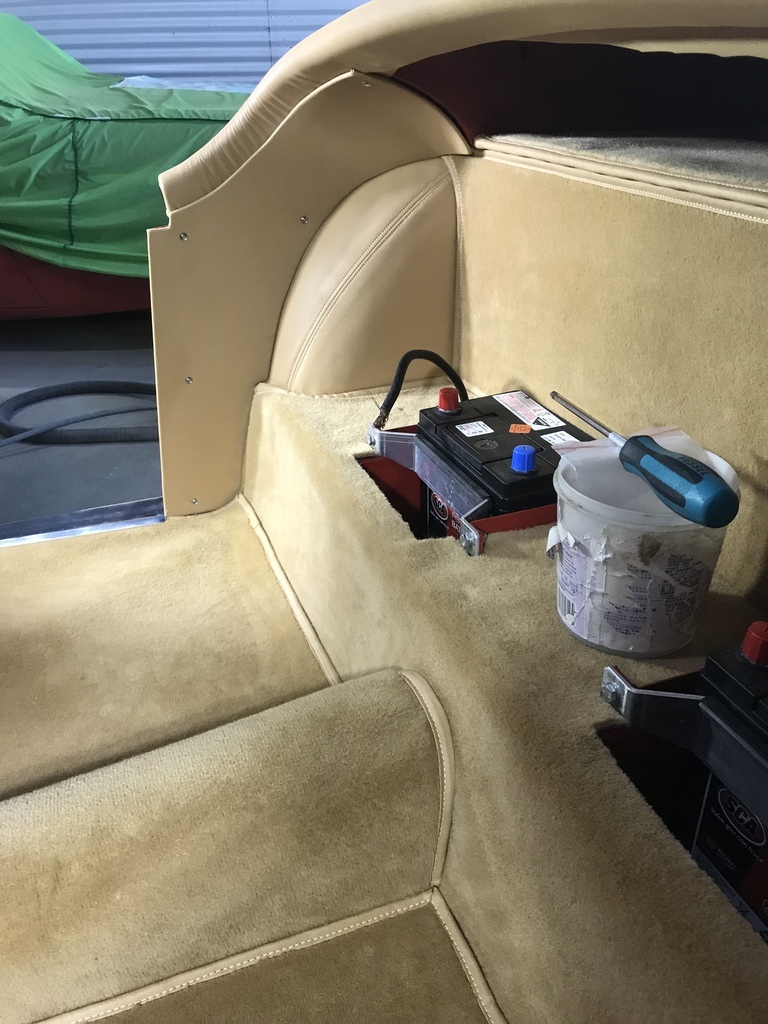 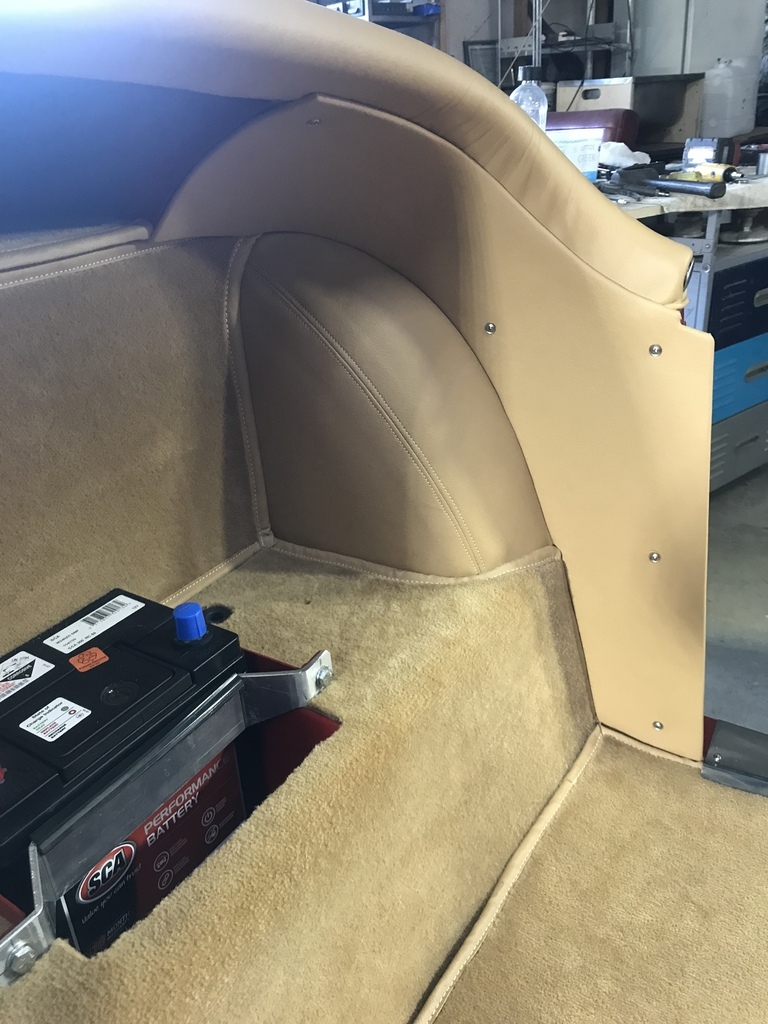 That’s all for now. Thanks |
| |
|
|
|
|
|
|
|
Apr 24, 2022 20:46:46 GMT
|
Well 4-2  I vote for you to install the gearbox oil dipstick access cover. Super impressed by the quality of your work. Keep it up. |
| |
|
|
|
|
|
Apr 24, 2022 20:50:36 GMT
|
|
You could maybe fix the cover to the carpet for looks but not bother cutting the carpet behind it?
|
| |
|
|
|
|
|
Apr 24, 2022 21:23:43 GMT
|
|
Its looking fantastic, you must be really chuffed with it :-)
|
| |
|
|
|
|
|
Apr 24, 2022 21:34:02 GMT
|
You could maybe fix the cover to the carpet for looks but not bother cutting the carpet behind it? My thoughts too! Could potentially be used to hide a USB charging cable or similar, if you want anything like that in the car? |
| |
Last Edit: Apr 24, 2022 21:35:20 GMT by Paul H
|
|
nze12
Part of things
 
Posts: 193
|
|
Apr 24, 2022 22:29:48 GMT
|
You could maybe fix the cover to the carpet for looks but not bother cutting the carpet behind it? Velcro? |
| |
1986 BMW E30 refreshed to original spec
1973 BMW E12 520 converting to Motorsport 530
1982 XJS V12 converting to 5 speed manual
Many landscaping projects overriding above!
Cogito cogito ergo cogito sum!
|
|
gazzam
Part of things
 
Posts: 741 
|
|
|
|
|
Liking the idea of not cutting the carpet, and the Velcro as well.
I’ll be able to keep it in the glovebox and just pop it on when I enter a concours!
Oh wait, I don’t have a glovebox and I won’t be entering any concours…
|
| |
|
|
stealthstylz
Club Retro Rides Member
Posts: 14,960
Club RR Member Number: 174
|
1952 Jaguar XK120 restoration stealthstylz
@stealthstylz
Club Retro Rides Member 174
|
|
|
Liking the idea of not cutting the carpet, and the Velcro as well. I’ll be able to keep it in the glovebox and just pop it on when I enter a concours! Oh wait, I don’t have a glovebox and I won’t be entering any concours… You mean after all this work you're actually going to drive it rather than trailering it to shows for a load of sad acts to pick apart? The JOC will be very disappointed. |
| |
|
|
gazzam
Part of things
 
Posts: 741 
|
|
Apr 26, 2022 10:28:07 GMT
|
|
It’s certainly going to be driven.
The only show it will go in will be our local club show and I doubt I’ll actually enter it for judging, just put it on display.
Our club (Kootingal Motor Club) is fairly small and has everything from stationary engines to tractors and trucks, but not many Jags. It’s more of a Holden/Ford affair in the cars.
|
| |
|
|
iant
Part of things
 
Posts: 155
|
|
Apr 26, 2022 16:41:48 GMT
|
|
I can't imagine there are nicer cars in the club, or in many other places for that matter!
|
| |
|
|
|
|
|
|
|
Apr 26, 2022 18:08:45 GMT
|
|
Lovely to see it all coming together!
|
| |
|
|
gazzam
Part of things
 
Posts: 741 
|
|
Apr 29, 2022 11:24:20 GMT
|
Lots of little jobs, not many photo worthy. Still waiting on battery terminals so I can’t attempt a start. Other than installing the seats, I think I can declare the interior finished. I made a panel (out of my favourite signboard material ) to cover the underside of the cowl. It was a heap of work, particularly as there was nothing there before, just painted ( barely ) metal. So I had no template. Here it is installed. It’s covered in moquette, a sort of wool velour. It makes the interior a nicer place to be. 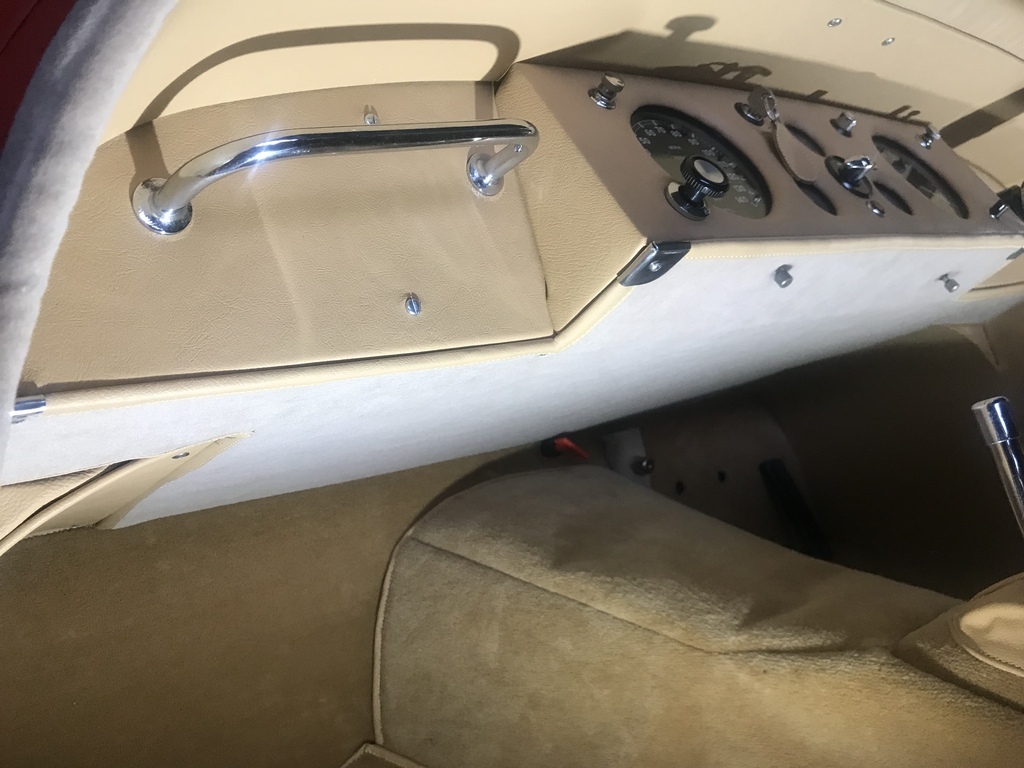 Of course I forgot about the bonnet release so it had to come back out so I could fit a pair of rivnuts. Previously it was mounted with a couple of bolts but unfortunately without captive nuts. Finished. I’m still undecided about the gearbox dipstick cover. 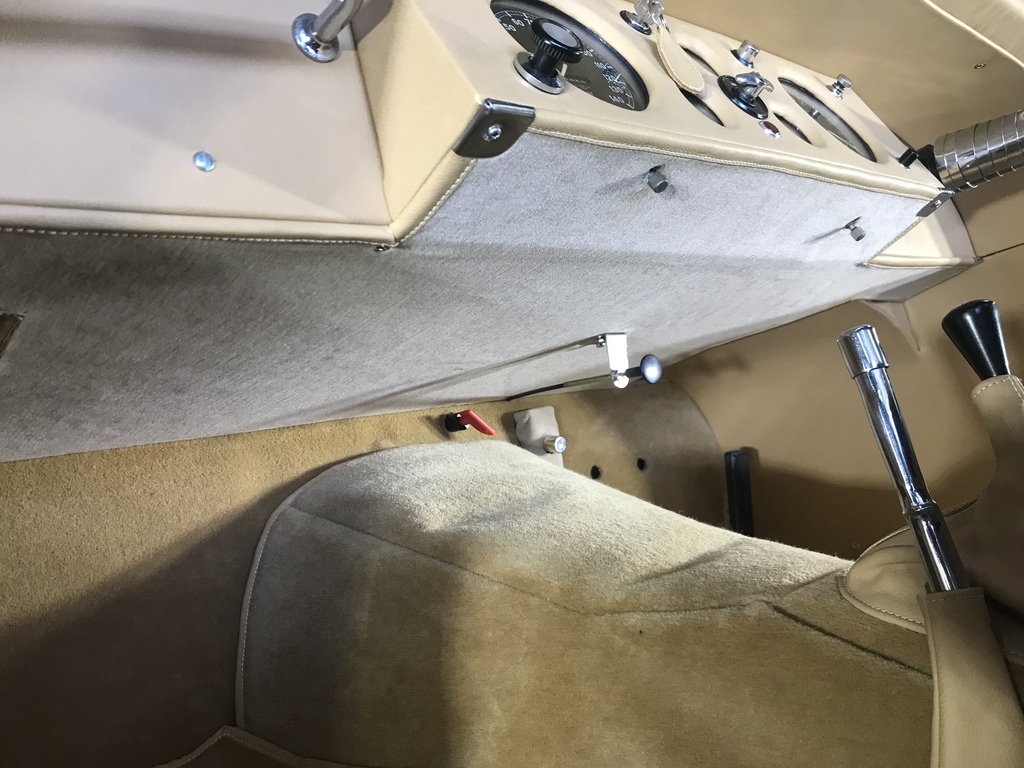 Finally found the cajones to sand and compound the bonnet. It’s all ok, so I put the badge on it. 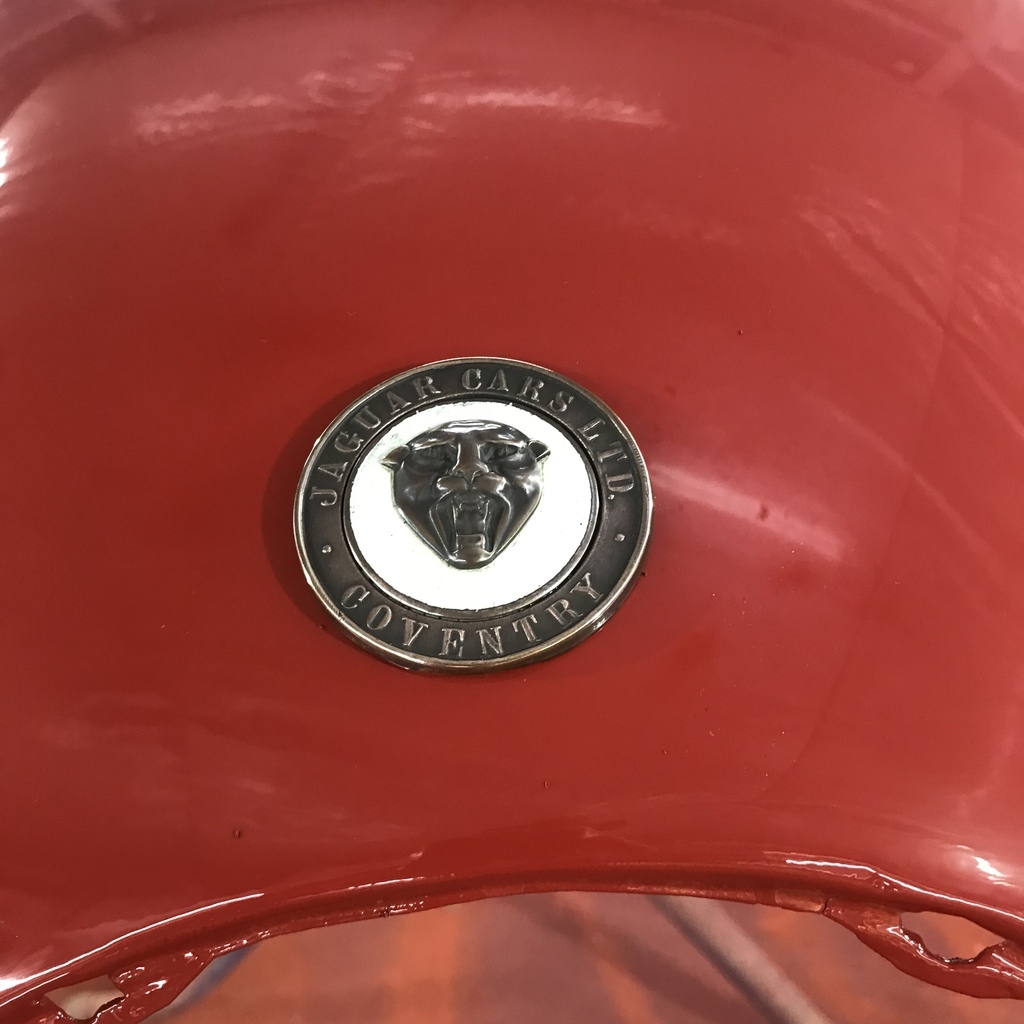 The floors have holes that the jack goes through. In this photo you can see the box section on the chassis that the jack engages with (arrow). The timber on the right is the fill-in piece. I made new retainers ( circled) from some stainless sheet, because I couldn’t find the originals. Thought they’d turn up as soon as I finished the replacements, but no. So they must be really, really lost. Another dimension even. 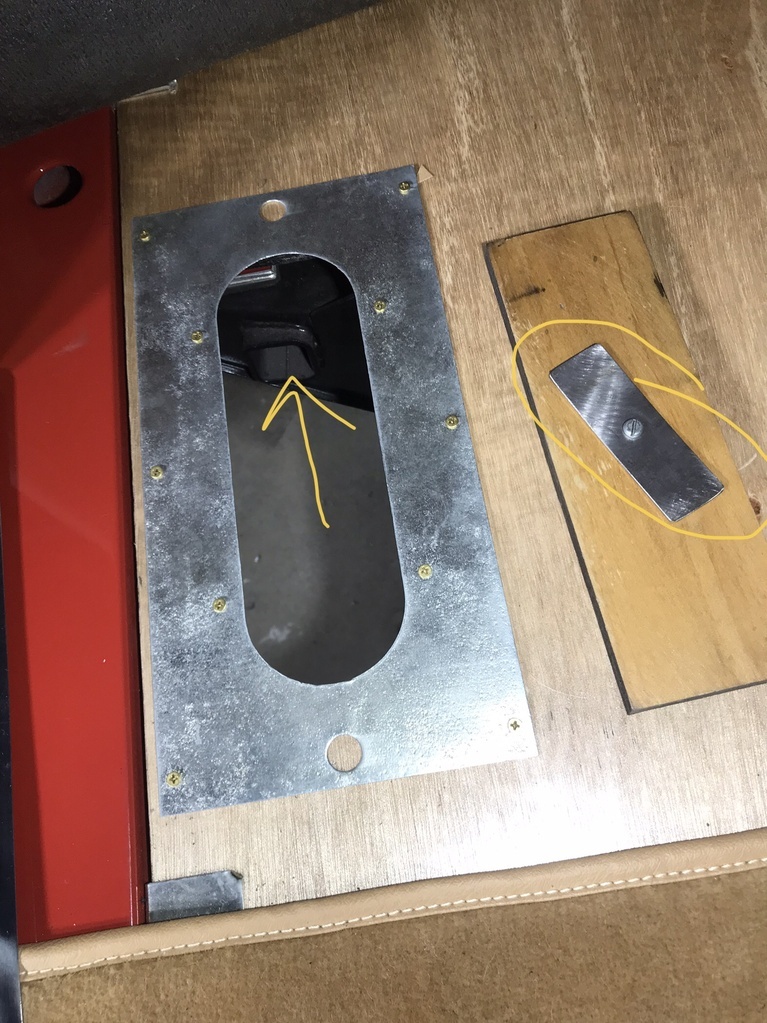 Here’s one in place. 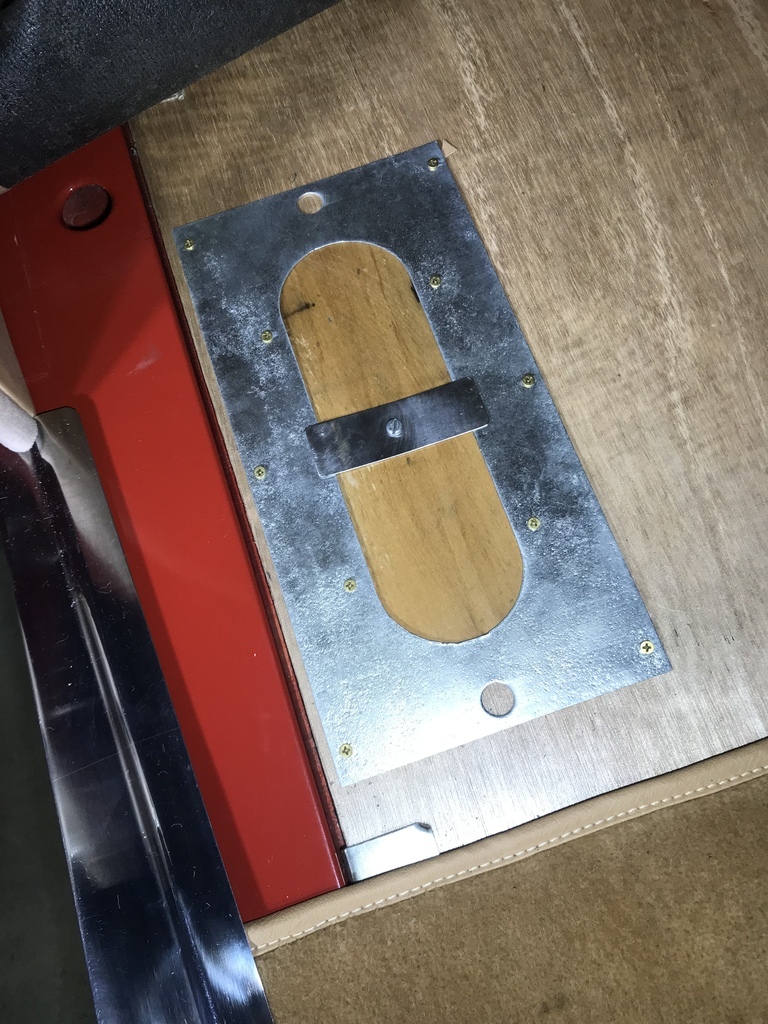 Also installed the fan switch for the yet to be installed electric rad blower. 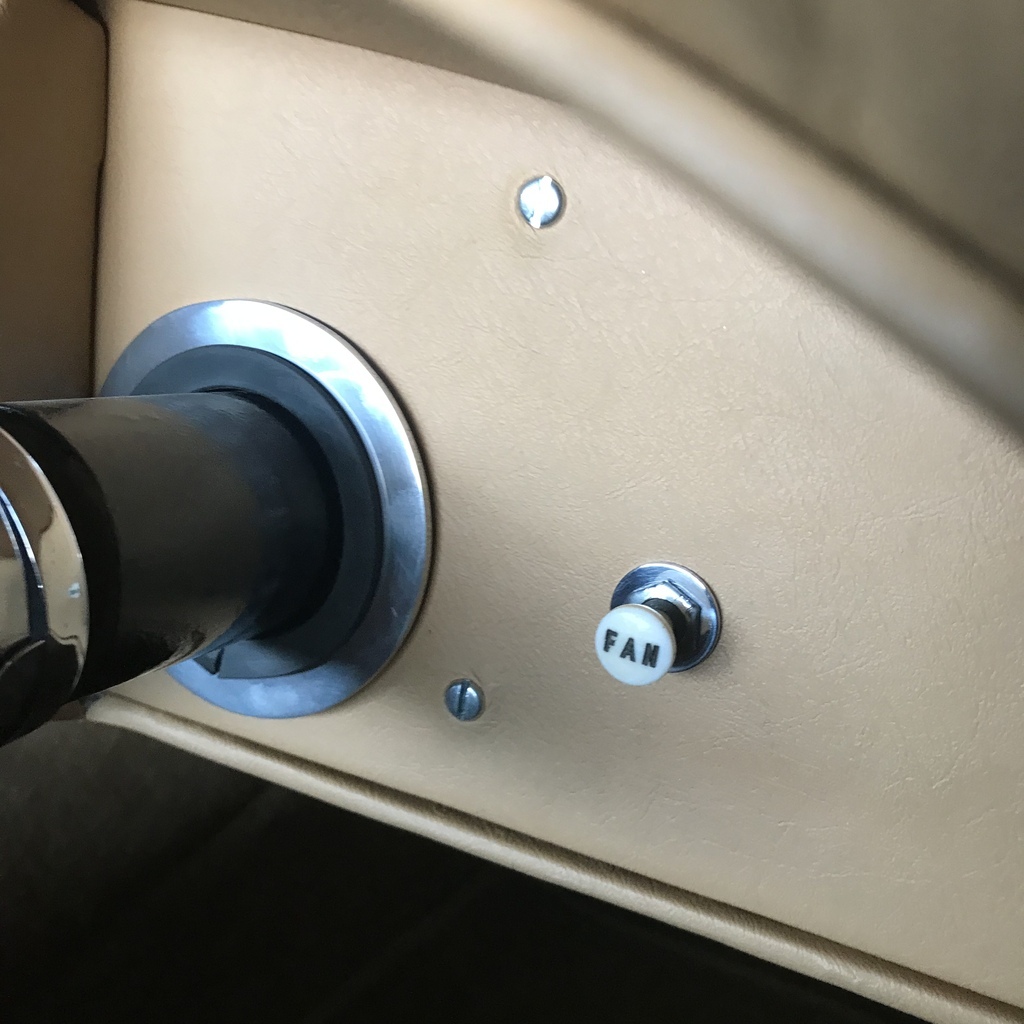 That’s all for now. Cheers |
| |
|
|
|
|
|
Apr 29, 2022 12:12:47 GMT
|
|
Looking very smart.
|
| |
|
|
nze12
Part of things
 
Posts: 193
|
|
Apr 29, 2022 20:53:51 GMT
|
"Still waiting on battery terminals so I can’t attempt a start."I'm surprised you didn't cast your own!    |
| |
1986 BMW E30 refreshed to original spec
1973 BMW E12 520 converting to Motorsport 530
1982 XJS V12 converting to 5 speed manual
Many landscaping projects overriding above!
Cogito cogito ergo cogito sum!
|
|
gazzam
Part of things
 
Posts: 741 
|
|
|
|
Beginning to think I should have cast the battery terminals - tracking shows they’ve not moved in more than two weeks. Put the pedals in. Had to do a little bending of the clutch pedal to get it to clear the hole in the footwell. I had spent a fair bit of time fettling these after getting the holes sorted, but something has obviously changed shape. Brake pedal is fine. No big drama, but just one more wierd thing. Very satisfying putting the new rubbers on. 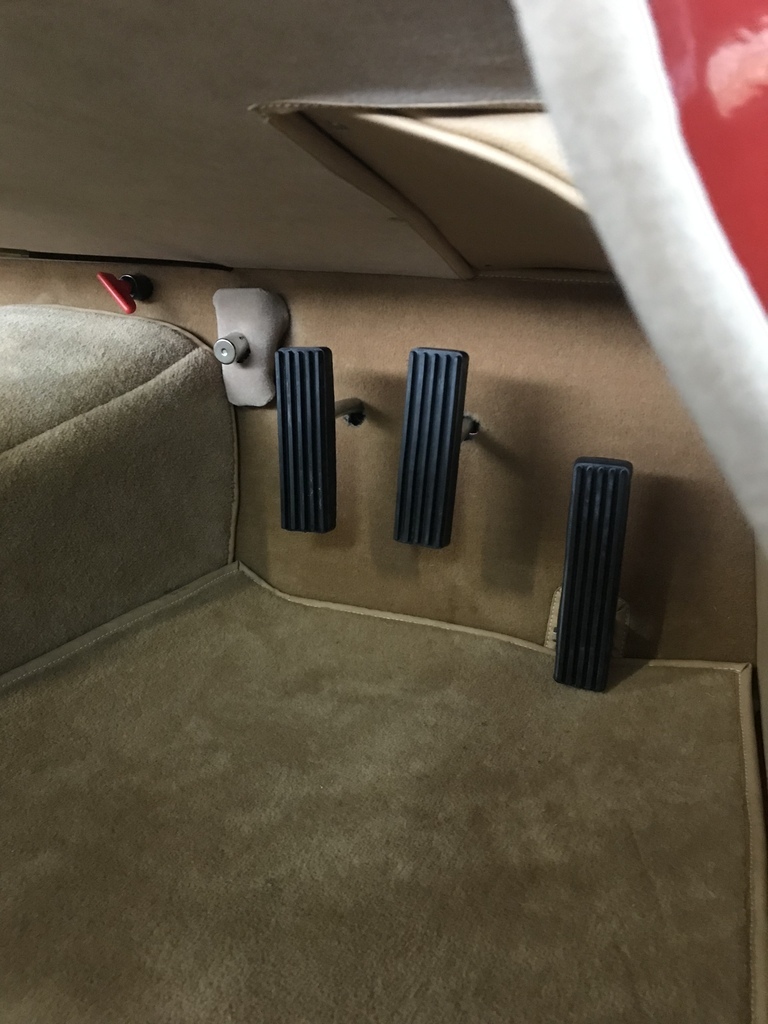 Looks like they’re slightly out of alignment in this shot, but I think it’s the photo. They’ll probably come out again as I’d like to put in some sort of a top hat flange to finish the holes neatly, covering the edge of the carpet. Something like this plastic/rubber thingo. Don’t know what they’re called. Just need to find a pair the right size.  Also started on the steering wheel. It’s steel that looks like it’s been dipped in plastic. There were half a dozen chips in the coating. So I used some body filler on the chips, prior to sanding. 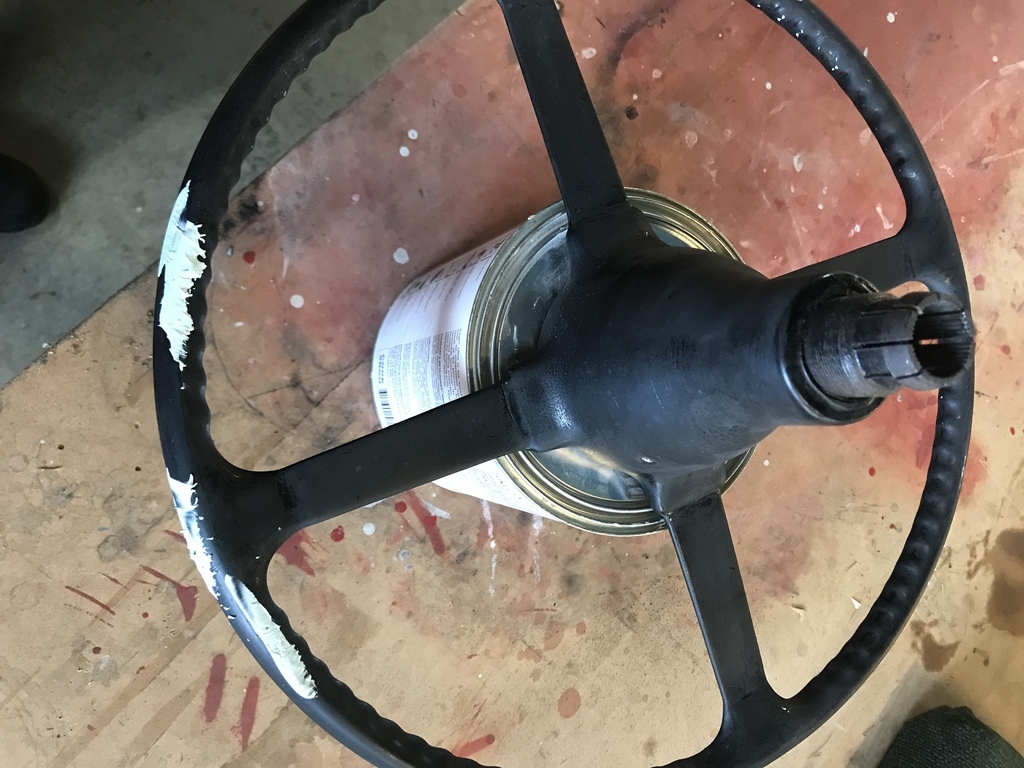 Once it was all sanded, I spot primed the filler in preparation for painting with black two pack. 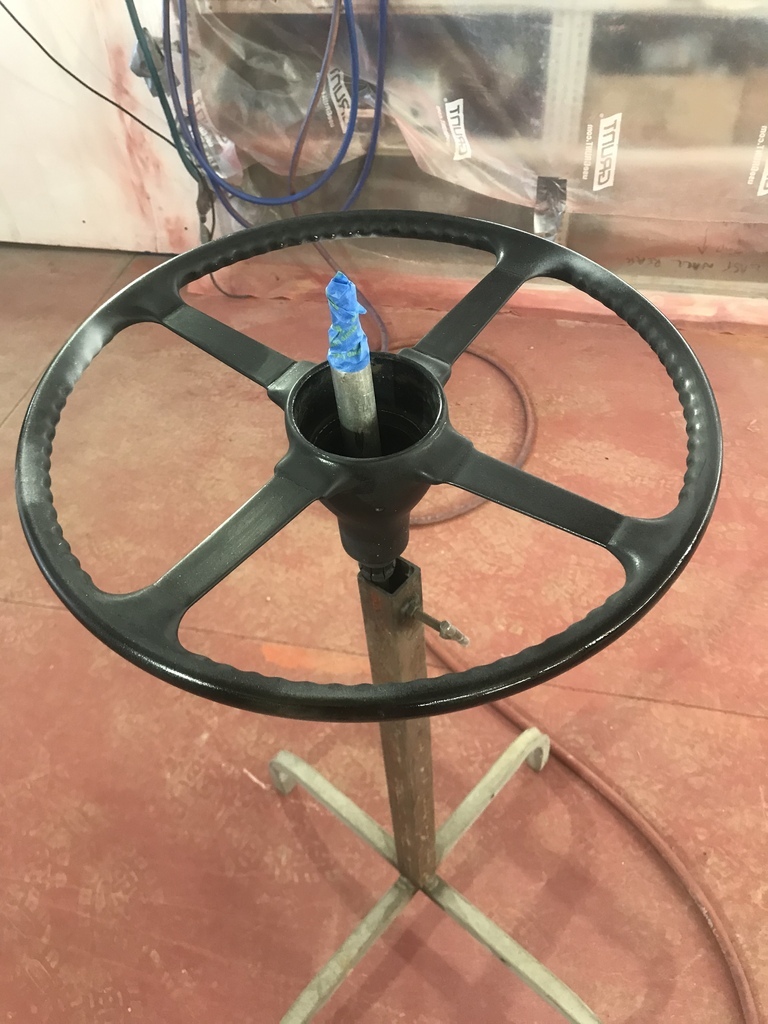 That’s all for now. Comments, suggestions and queries welcome. Cheers. |
| |
|
|
gazzam
Part of things
 
Posts: 741 
|
|
|
|
Got the steering wheel finished and in the car. 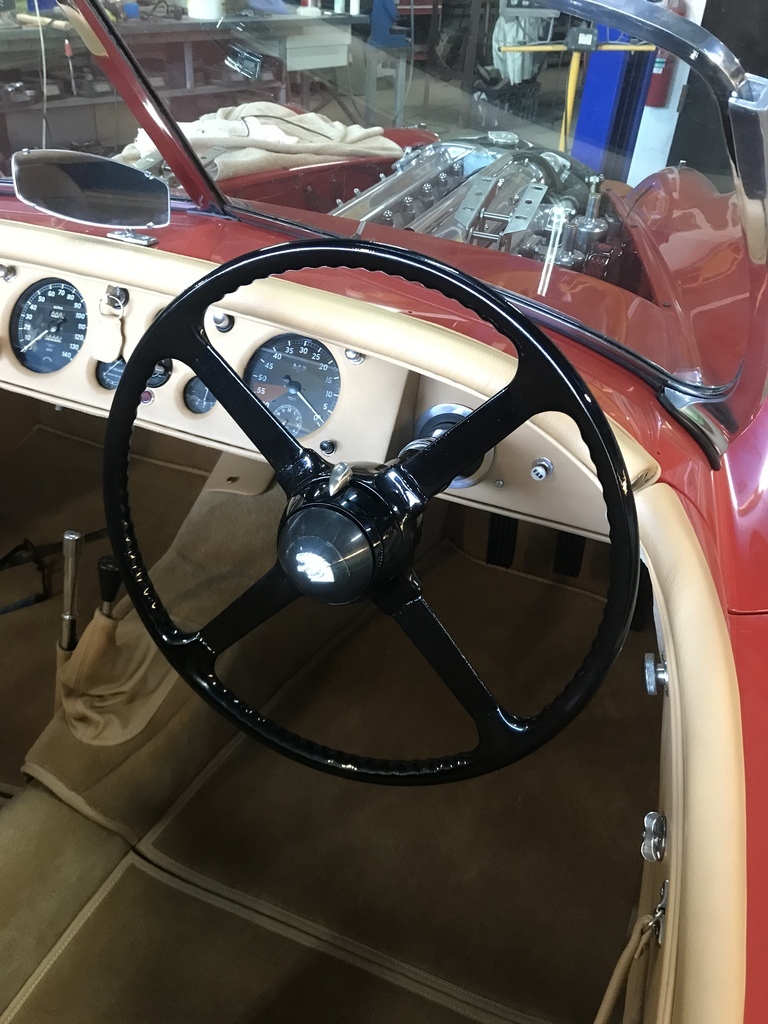 The manette, as it is known, is fairly complicated. It has the indicator switch and horn button. These don’t turn with the wheel. Plus the wheel is adjustable for in and out, though I cannot imagine someone with arms short enough to want it anywhere but as far forward as possible. Which also helps to get the chest piercing horn button a bit further away. I used the assembly from a Mk IV parts car that I have. The internals were very slightly different but in much better order than my originals. It also had the four wires attached and in good order so that saved me some work as that wasn’t part of the new wiring harness. This is it as viewed from the steering wheel side. The chrome outer ring is die cast and in pretty bad condition. I can’t plate die cast so I went with black gloss. I quite like the look. 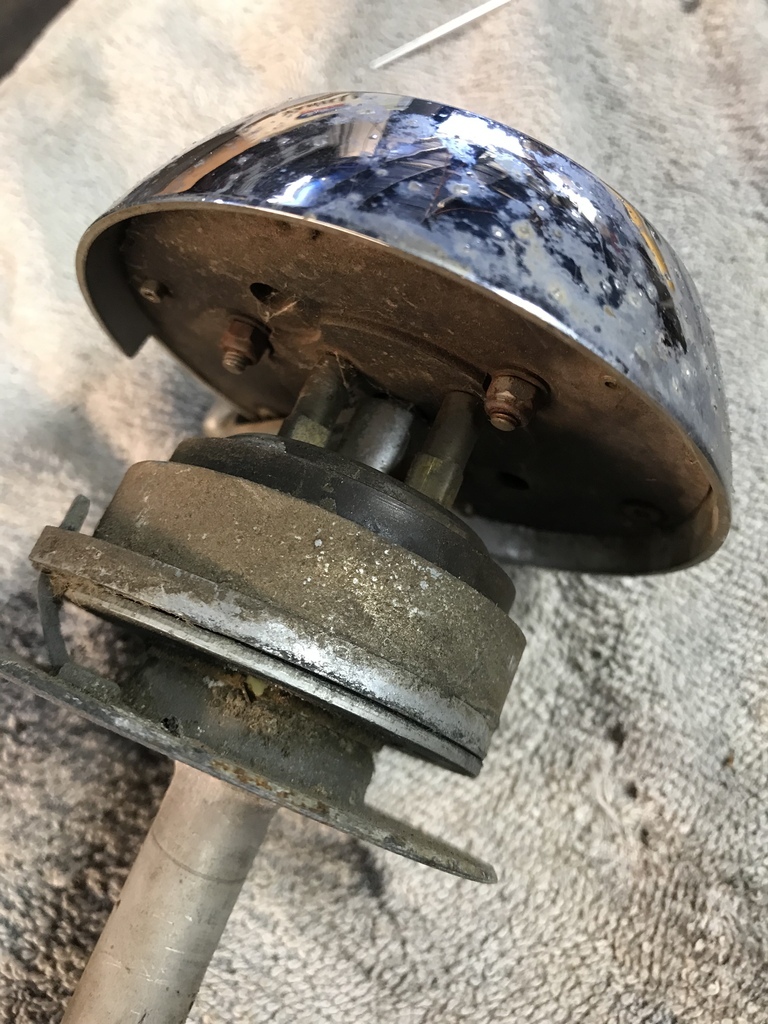 Also made some brackets to mount the electric fan. Folded up some 2.5mm ally and used the leftover black paint from the steering wheel. 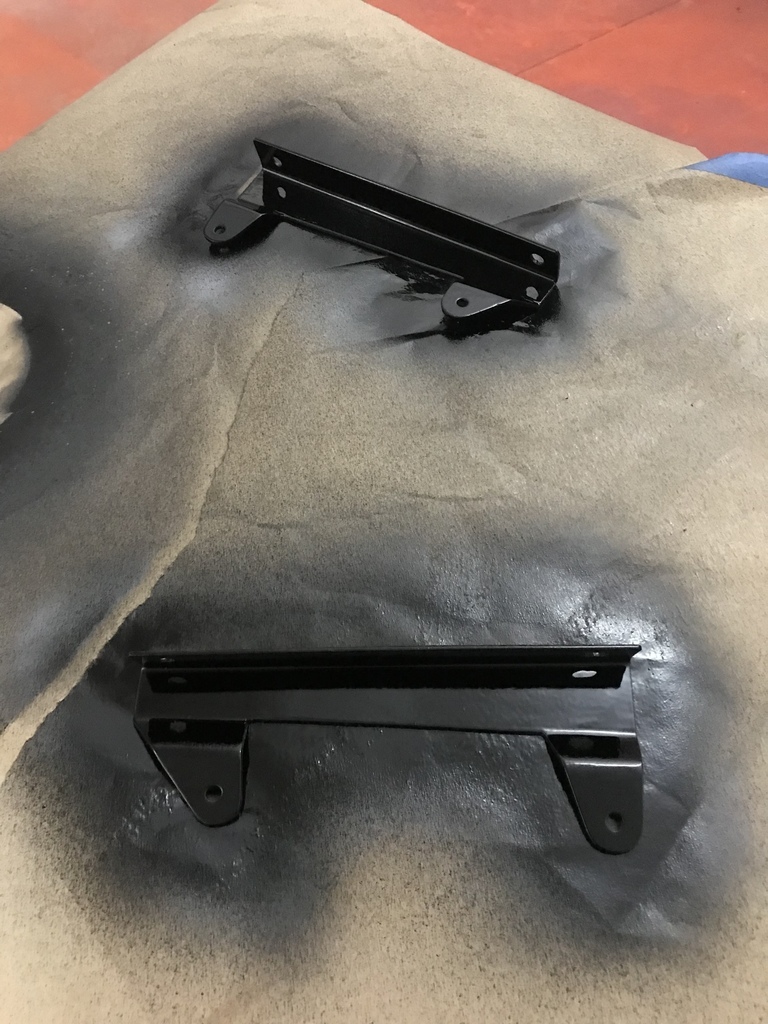 Fan is in and working. 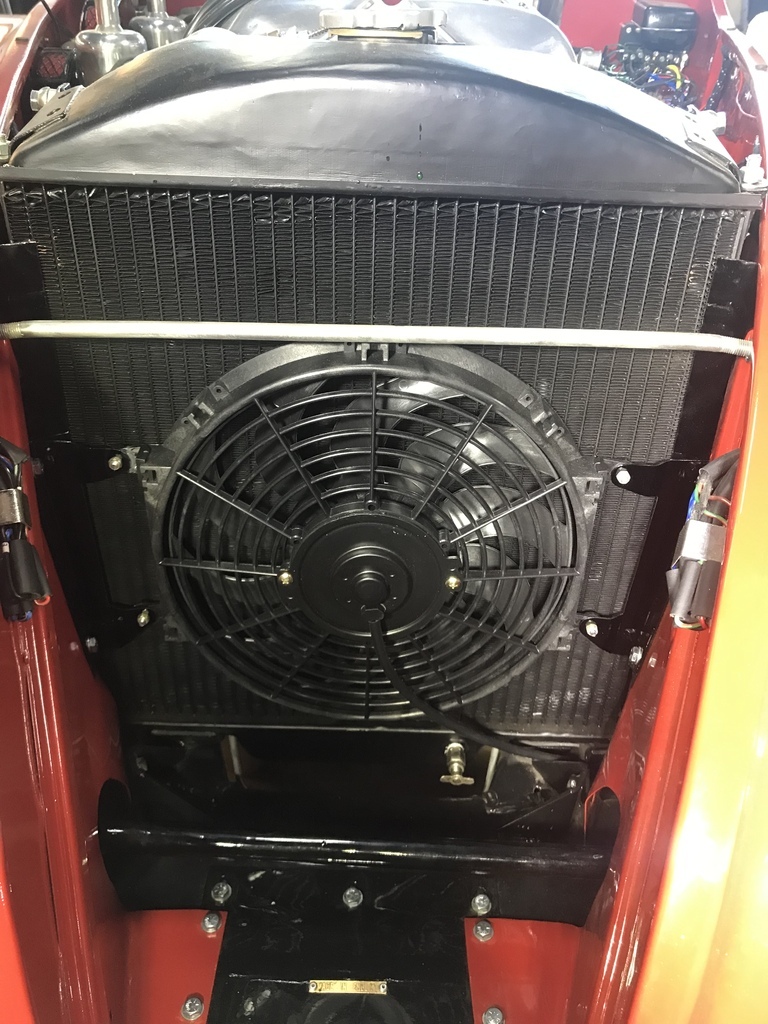 That’s all for now. Cheers |
| |
|
|
|
|
|
|
|
|
What was the original fan setup?
A big pull thru with a shroud?
Or was the shape of the nose of the car effective at drawing thru the whole rad?
Just wondering if you might need a shroud to help the rad out in the unpleasantly warm weather we have..
|
| |
|
|
gazzam
Part of things
 
Posts: 741 
|
|
|
|
This is the original fan, no shroud. Cooling was ok, the electric is just for a bit of help. I don’t drive it on hot days, I don’t like getting cooked! 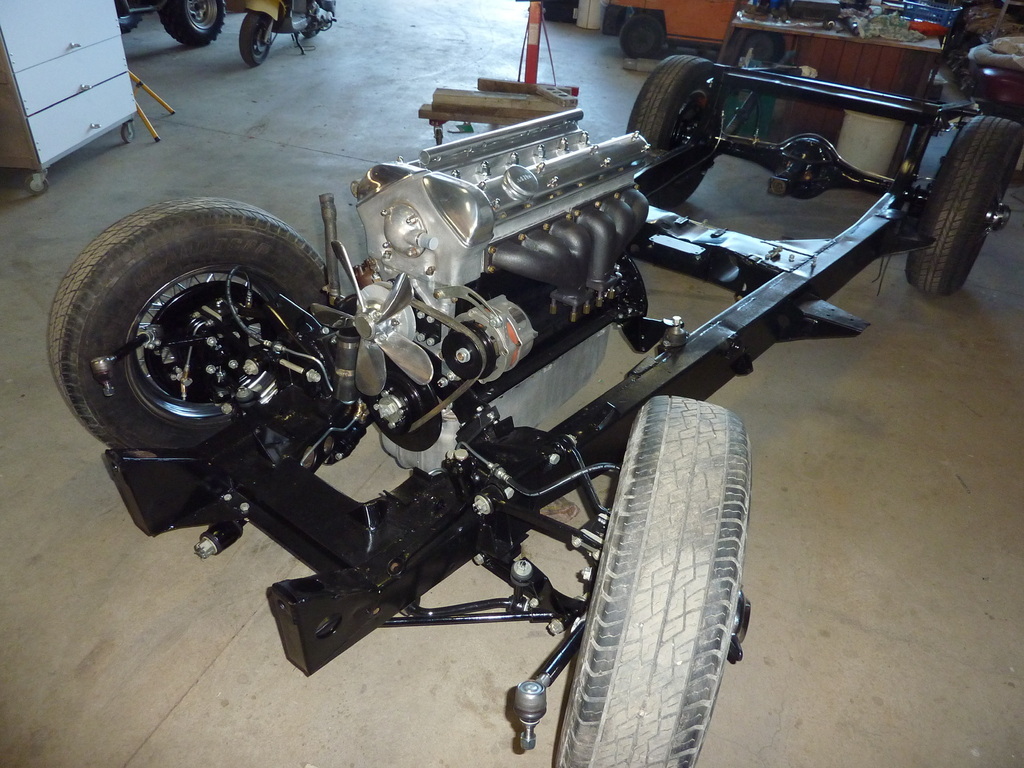 |
| |
|
|
|
|
|
|
|
That tracking looks a bit out   |
| |
|
|
glenanderson
Club Retro Rides Member
Posts: 4,355
Club RR Member Number: 64
Member is Online
|
1952 Jaguar XK120 restoration glenanderson
@glenanderson
Club Retro Rides Member 64
|
|
|
That tracking looks a bit out   I thought that too.  |
| |
My worst worry about dying is my wife selling my stuff for what I told her it cost...
|
|
|
|


 I vote for you to install the gearbox oil dipstick access cover.


