gazzam
Part of things
 
Posts: 741 
|
|
Apr 11, 2021 11:49:34 GMT
|
I thought I would try to do a thread on the rebuild of my early XK so I might have some record of what’s been involved. If others get some enjoyment reading about what’s been done, that’s a double win. I’m not much of a typist and find writing a real chore so am not making any promises. A couple of shots of the car not long after I got it in 2014. 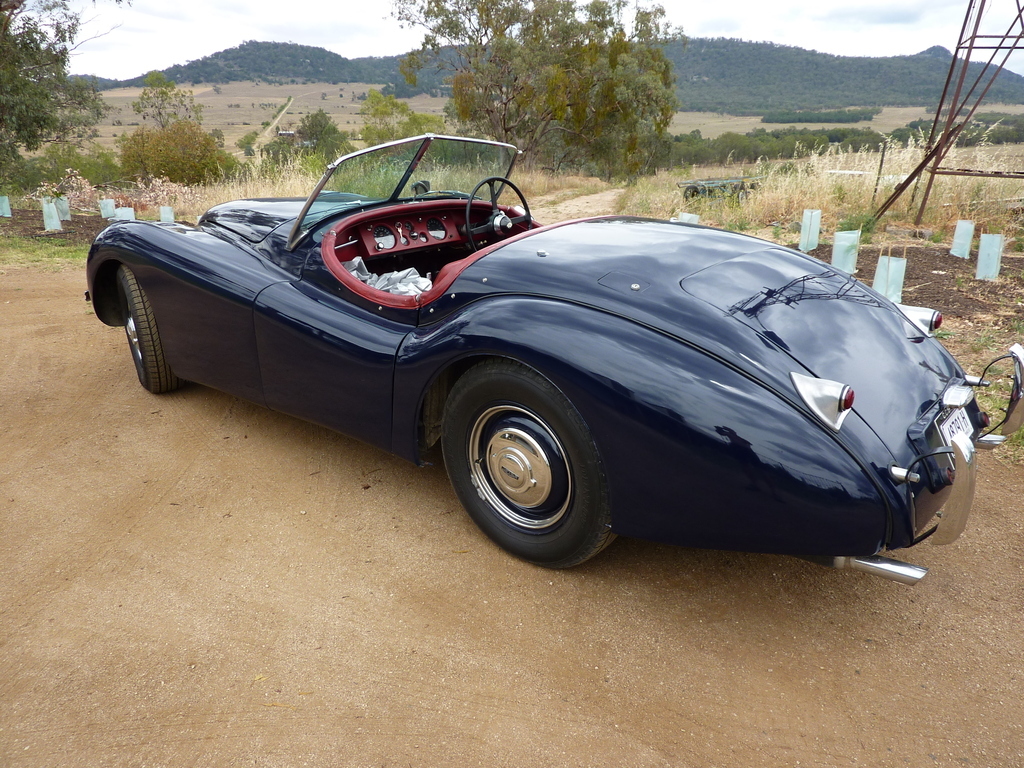 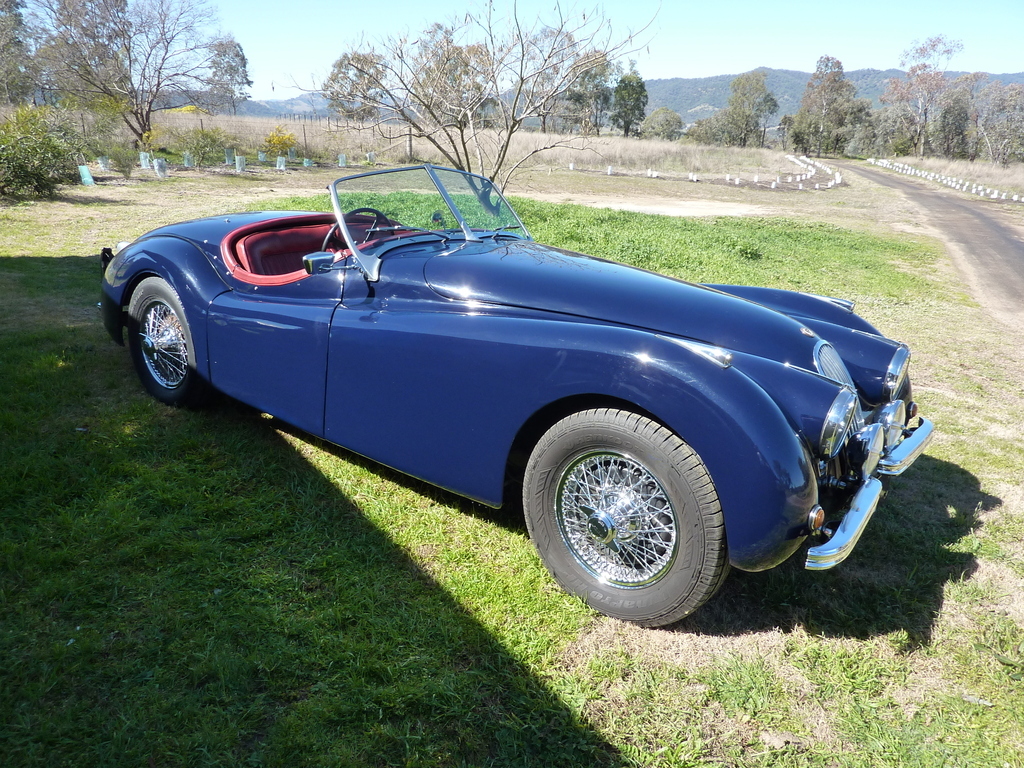 It looks pretty good, eh? Looks can be deceiving. It runs well and seems mechanically pretty sound. Very rough underneath and under the bonnet. About all I'd done to it up until I started the restoration was to put wires on it. I started pulling it apart in May 2020 so I have a bit of catching up to do. It didn’t take long to find that there was going to be more to this than expected. The driver's door was the first thing to be removed and it was pretty rough. 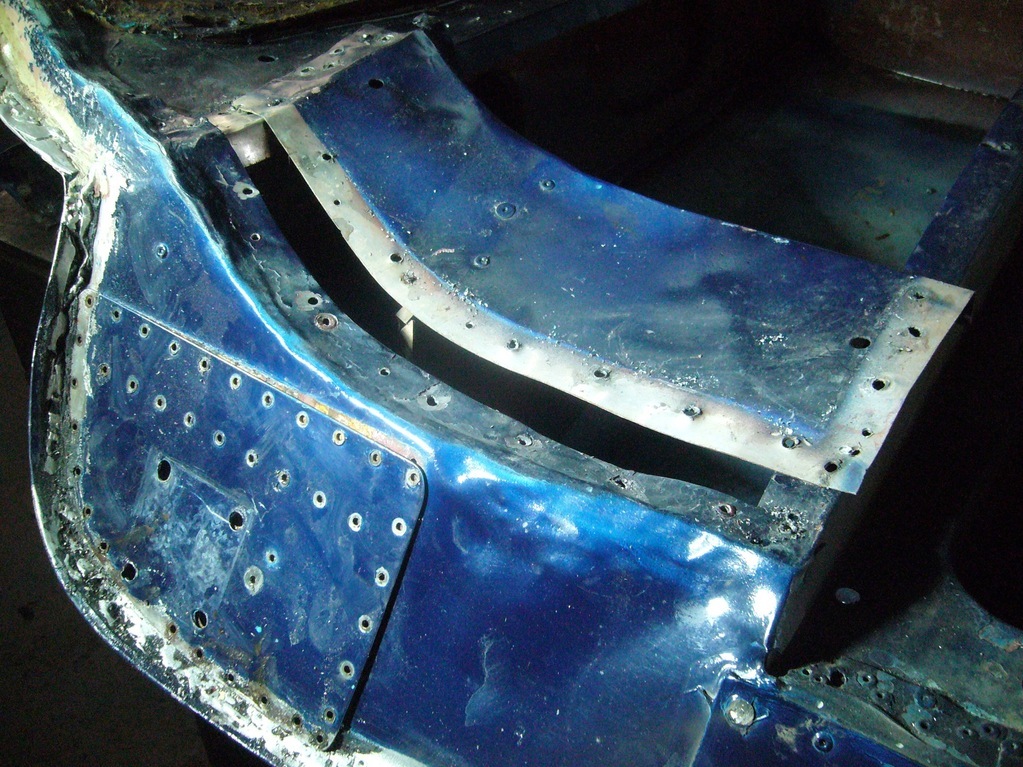 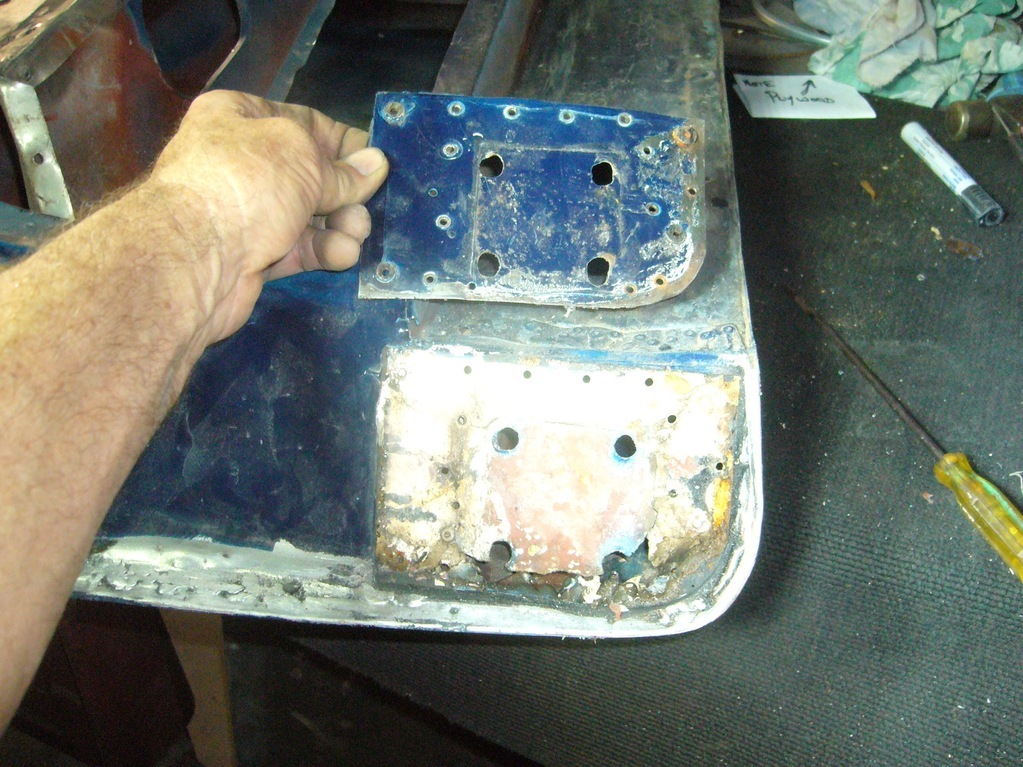 The doors ( and bonnet and boot) are aluminium. The doors are also very light gauge and were very much looking every bit of their almost 70 years. I decided I would have to remake all the door, except for the skin. They are effectively a monocoque structure with folded pieces riveted and spot welded together to form the body to support the skin. They would be relatively easy to make if you had a jig to assemble them in an then fit a new skin over the finished frame. Not so easy to work the other way though. The bits made up as best I could, copying dimensions from the fairly damaged original pieces. 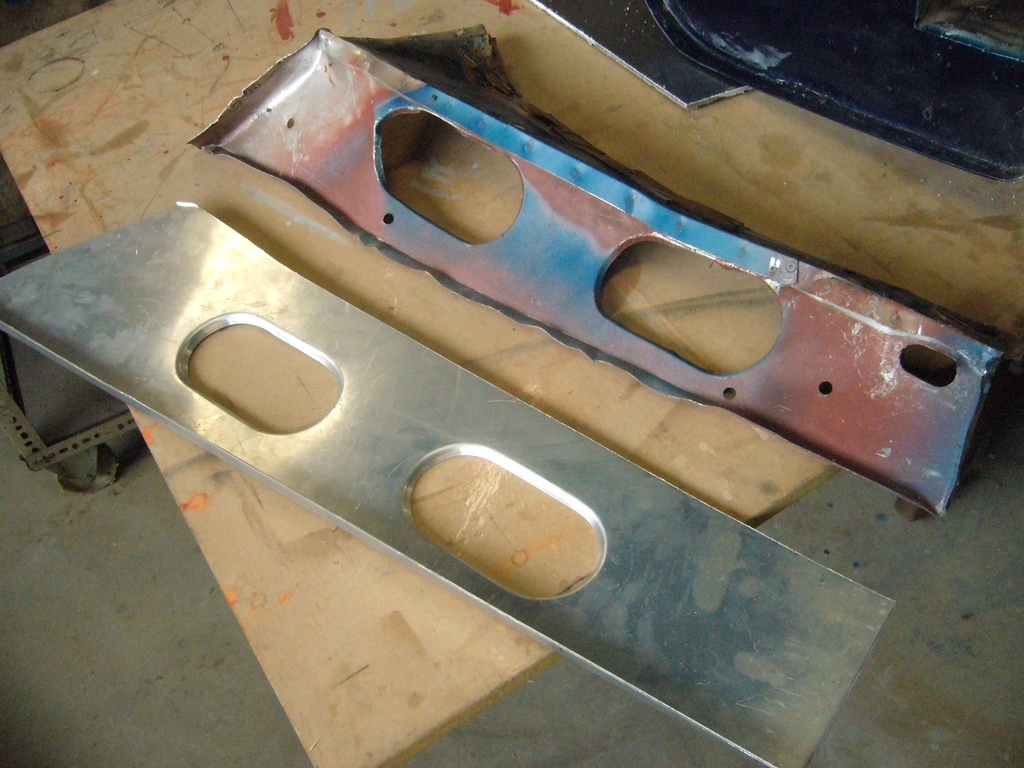 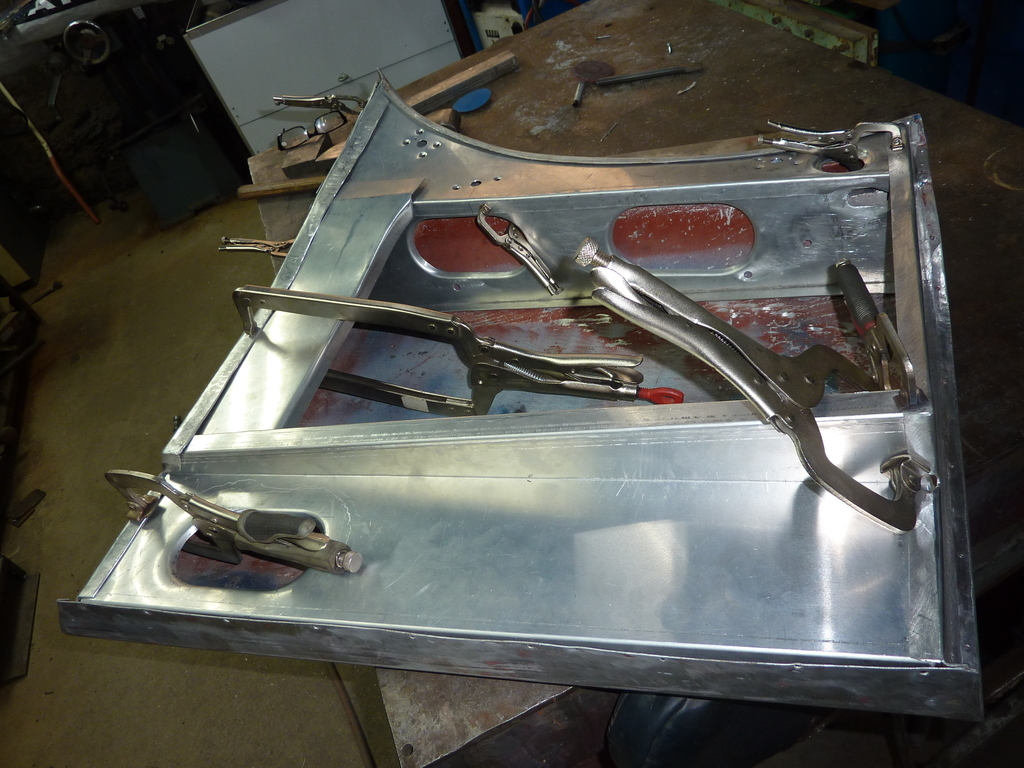 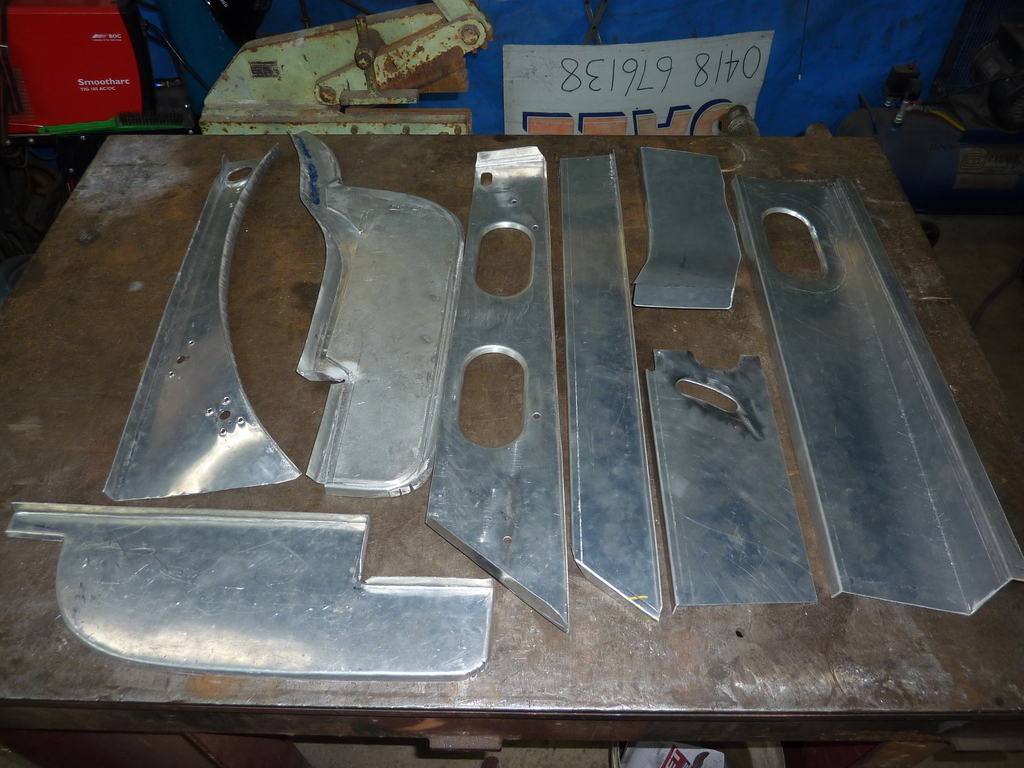 That will have to do for the moment. I'll try to add further posts in order to catch up. Any comments welcomed. Cheers Garry |
| |
Last Edit: Jan 31, 2022 21:07:46 GMT by gazzam
|
|
|
|
|
|
|
|
|
Apr 11, 2021 12:59:03 GMT
|
|
Excellent, rare to see people doing ally work. Looking forward to following this.
I can’t get my head around this being 70 years old though. These were like 30 year old cars when I was growing up!
|
| |
|
|
ChrisT
Club Retro Rides Member
Posts: 1,670
Club RR Member Number: 225
|
1952 Jaguar XK120 restoration ChrisT
@christ
Club Retro Rides Member 225
|
Apr 11, 2021 13:14:03 GMT
|
|
Wow - to both the car and the work you're undertaking.
Also looking forward to the updates.
|
| |
|
|
|
|
|
Apr 11, 2021 15:12:32 GMT
|
|
Nice to see that you are getting it back to original...or as near as! I'm sure some of the "repairs" that have been done over the years will be regarded as proper "bodge jobs".... but it must be remembered that, 5o years ago this was an old banger of a Jag and if it cost too much to keep it on the road then it would have been scrapped! Indeed there was a thread about an ex banger XK racer that has been restored recently.
|
| |
|
|
gazzam
Part of things
 
Posts: 741 
|
|
Apr 12, 2021 11:29:43 GMT
|
Thanks for the replies. So after mucking around with the door, I thought I’d best dig around and see what I would find. Wow. I didn’t know that much bog (bondo) existed. It was half an inch thick over lots of area. They must have trowelled it on. I would not have been shocked to find an MG under it. A huge area on the big flat bit of the front guard was able to be peeled off with a screwdriver. It wasn’t even stuck on - the metal underneath was all covered in surface rust. 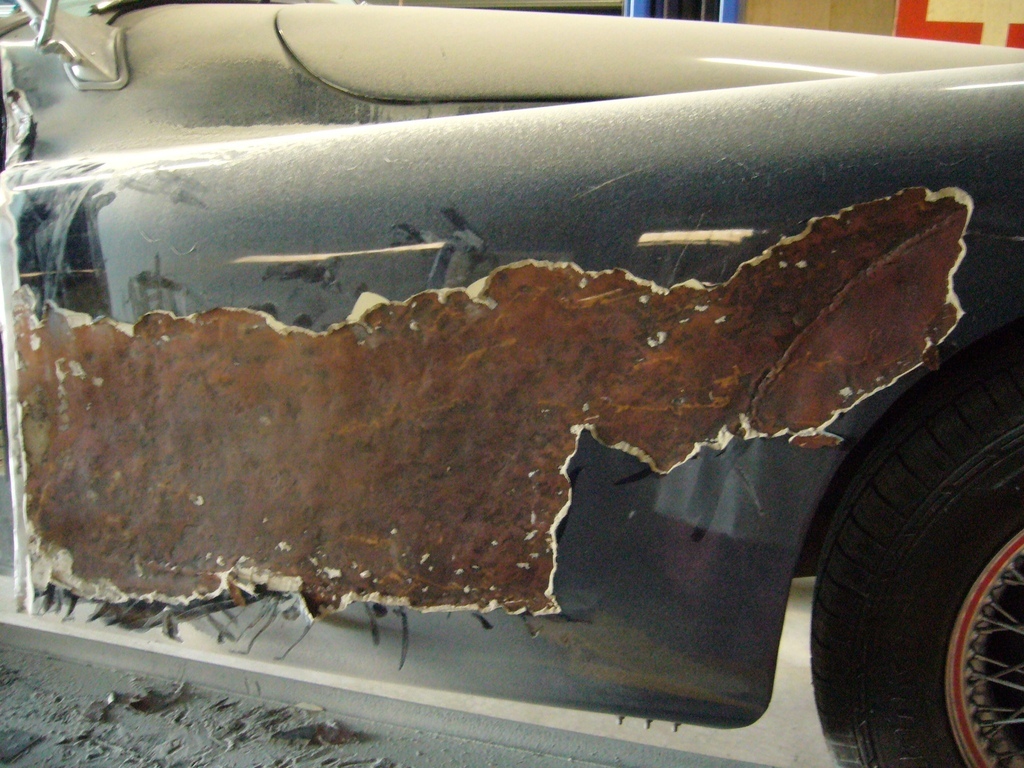 So out with the heat gun and stripit disc on the angle grinder and make a real mess. The driver's side front corner had obviously taken a hit, probably more than once. And as flyingphil noted above, for a long time this was just an old car, to be repaired as cheaply as possible. Mind you there’s cheap and there’s nasty. This had patches welded over patches and then bashed in and paved over. 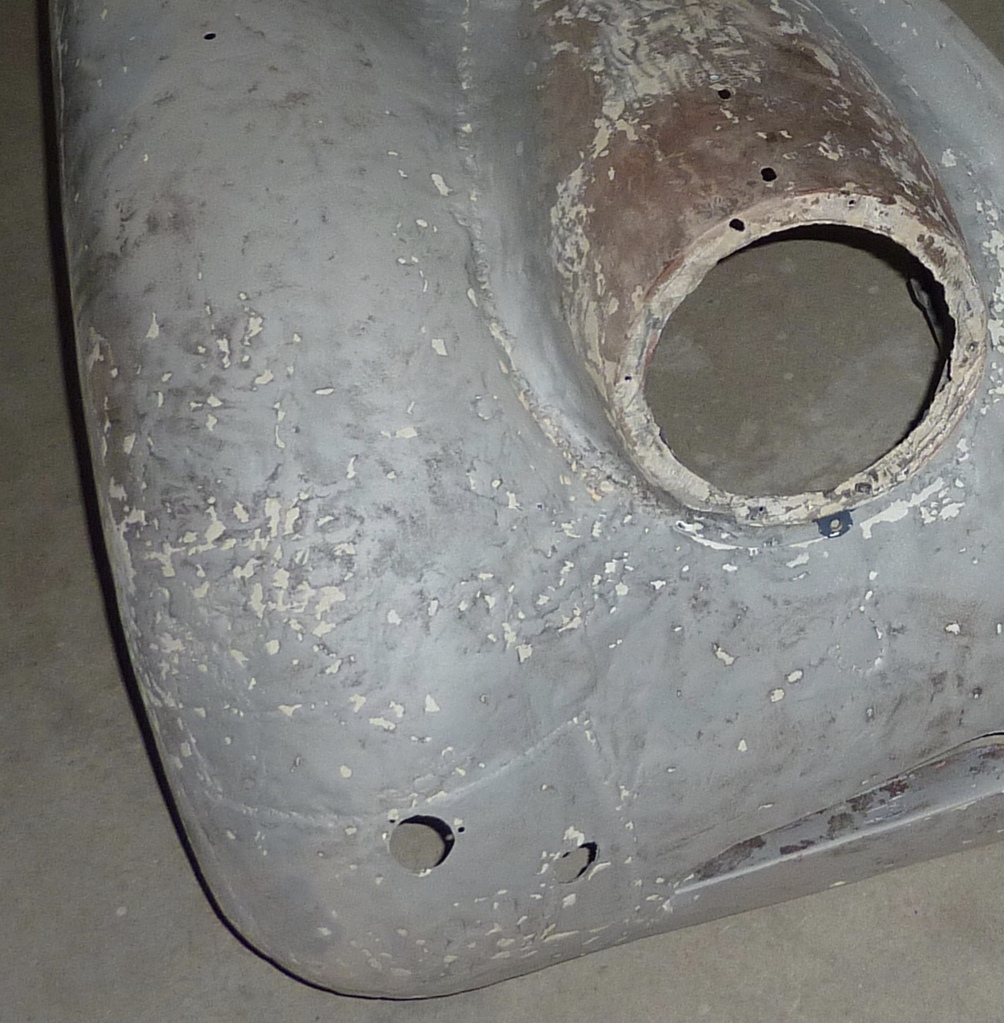 So after exposing the horror of the front rhs, I worrked my way round the back. Both b pillars were pretty nasty: 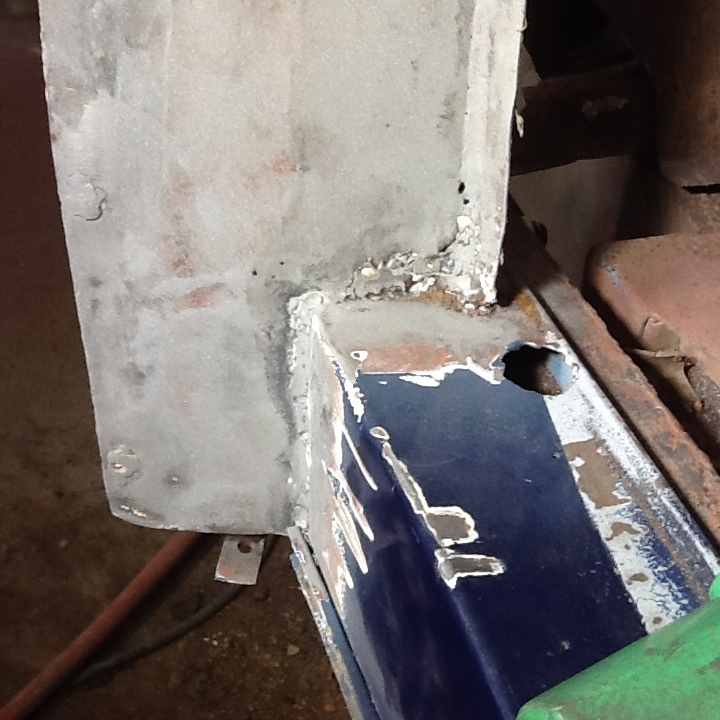 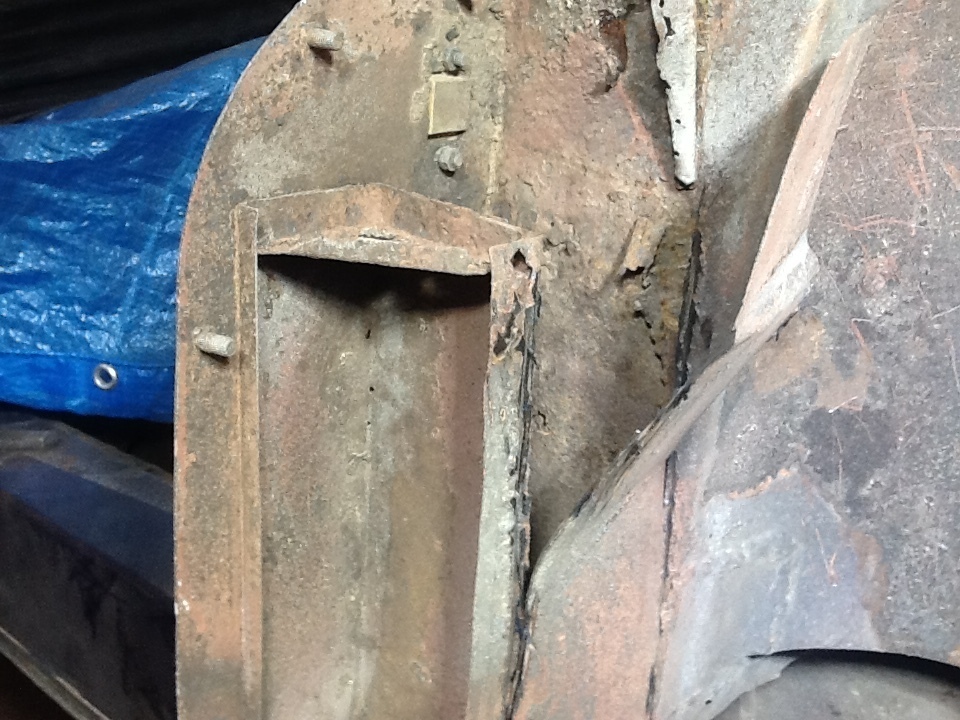 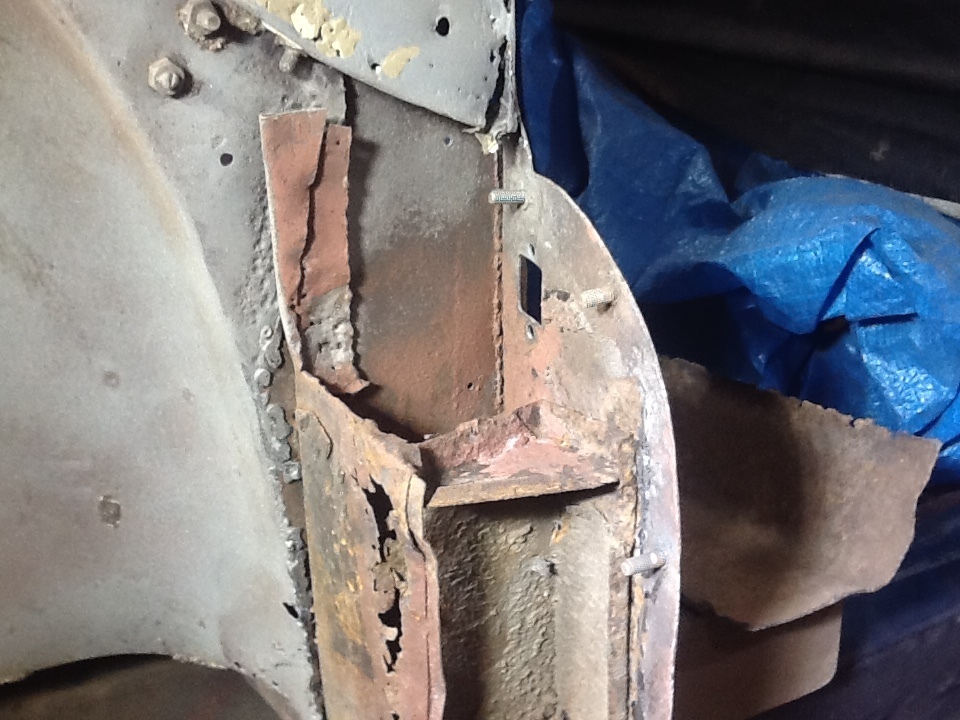 And the sides of the tonneau toward the rear were particularly lacey. 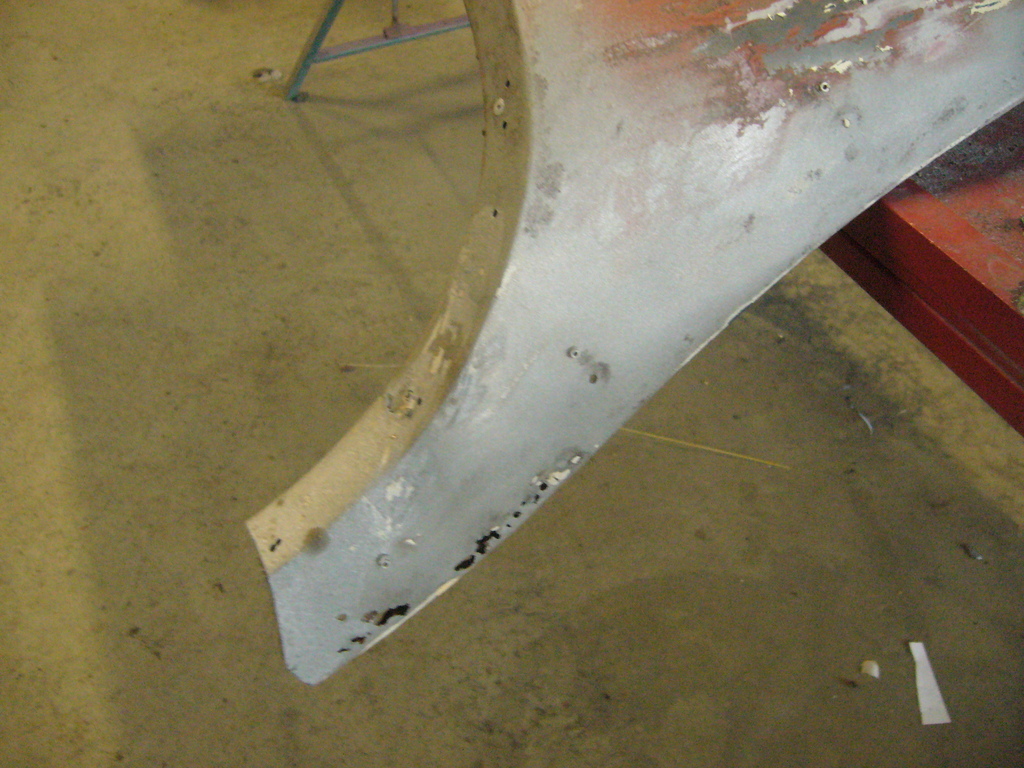 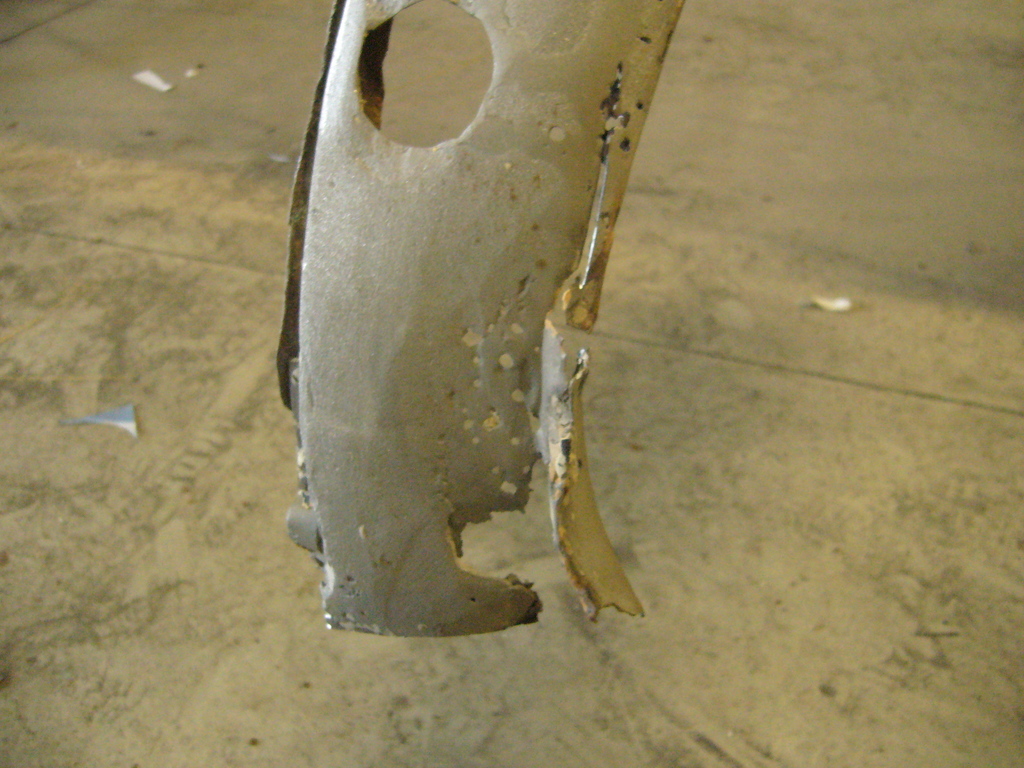 So, while I didn’t really know what I was doing, I could see that there was going to be a serious amount of metalwork to be done. Buying panels from either the UK or the US is horrendously expensive because of the freight. They tend to be big boxes. And pretty much the whole point of this for me is doing it myself so I enrolled in you tube university, department of bodywork. And was easily able to justify buying a few bits of equipment, tools etc. And I do love buying tools. I thought I would start with the boot lid, get it right and then build the legs of the tonneau panel around it. The boot lid was a high point of bodgery. The wooden frame had rotted away at both bottom corners. Someone had made up a couple of steel repair pieces (not even the same side to side - that would be too neat). They fixed these bits with screws through the skin. They were thinkers though - they used countersunk screws so the heads would be easier to bog over. Lovely job that. 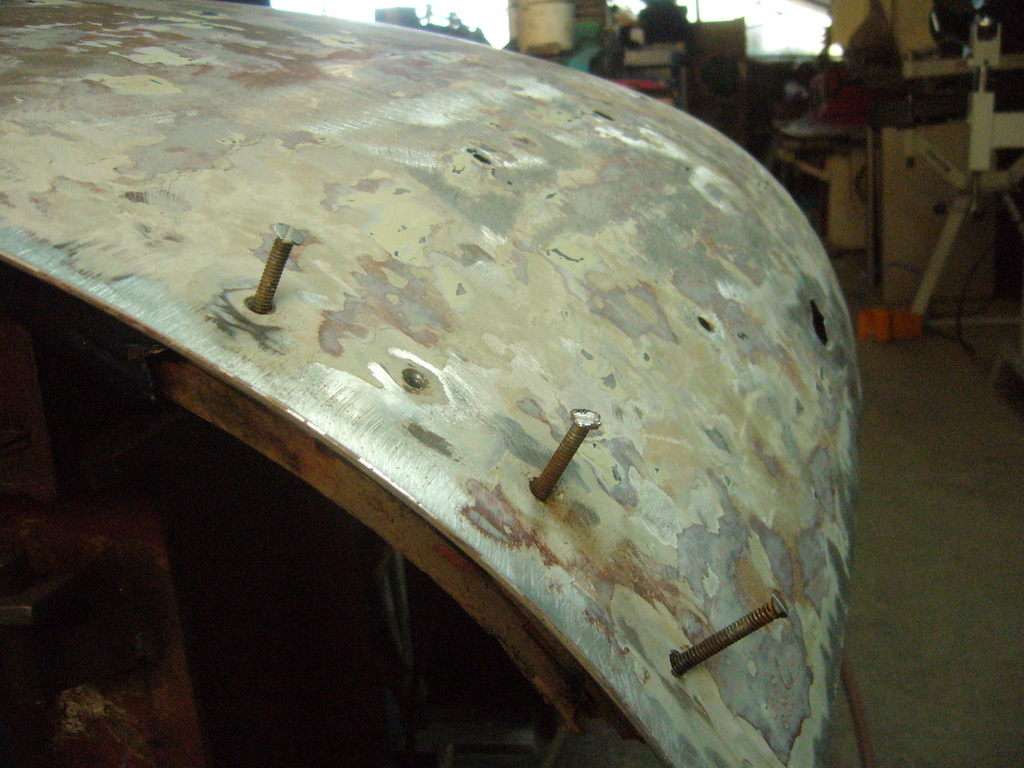 The boot frame was the starting point. Thie rotted timber meant replacing the two sides and the bottom. The sides are laminated so I cut some thin strips and steamed them in an improvised steam chamber. 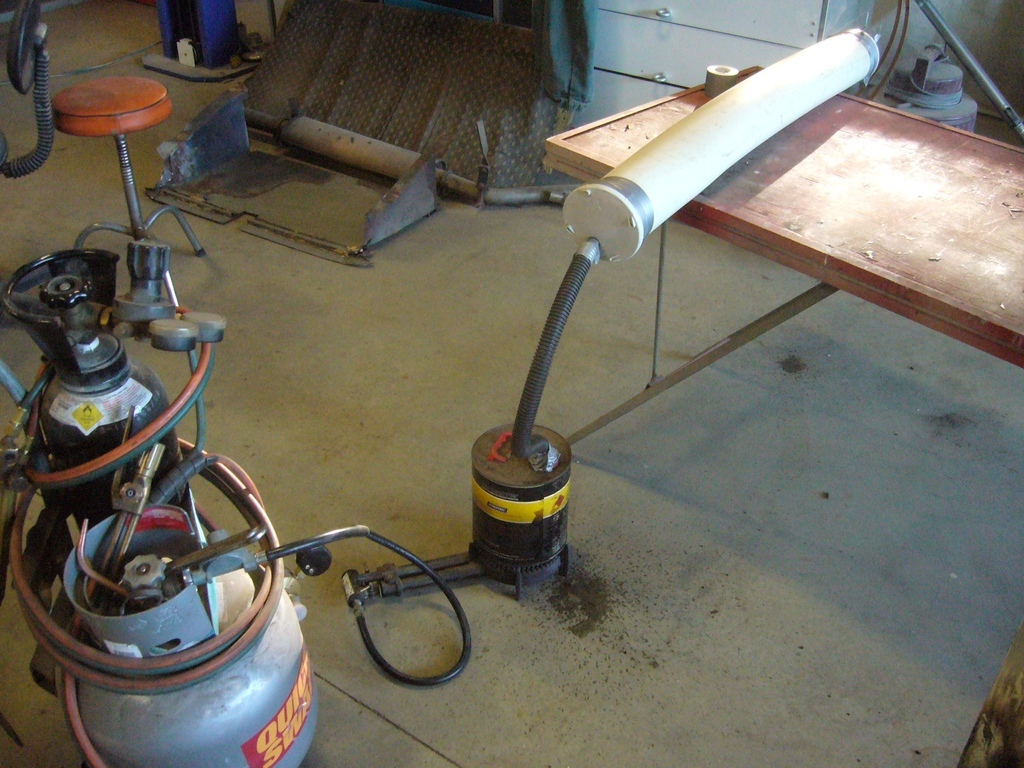 Then glued them together in a jig cut from a piece of ply. The timber came from an old cupboard (that would have gone to the tip) and was surprisingly easy to steam and bend. 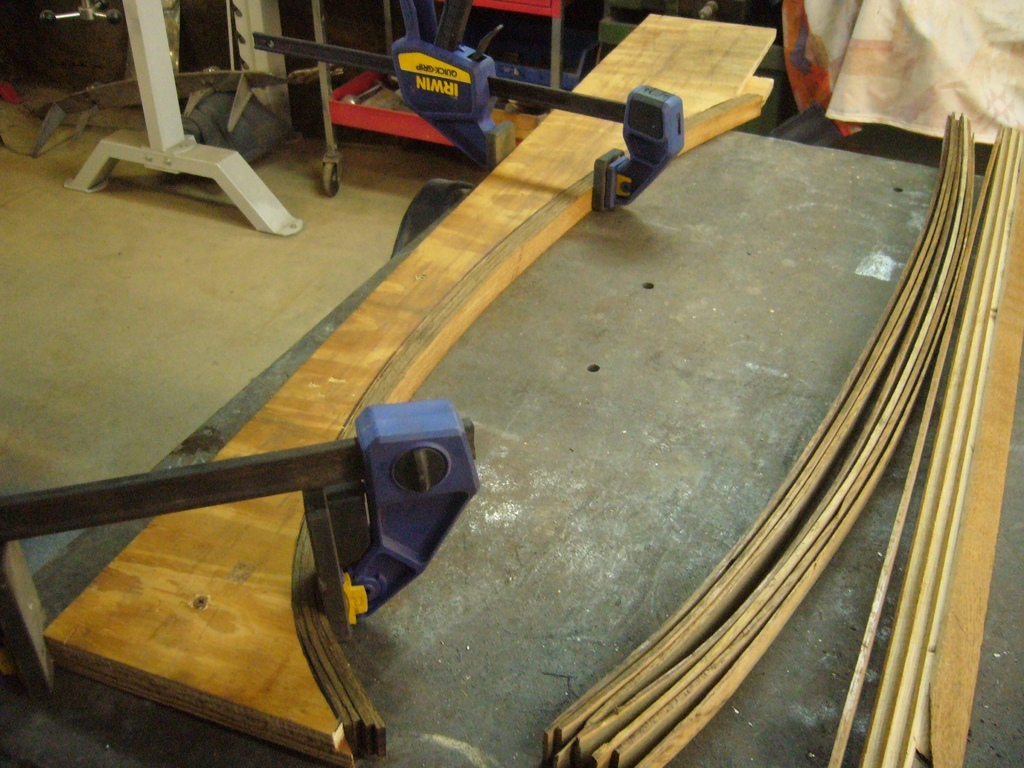 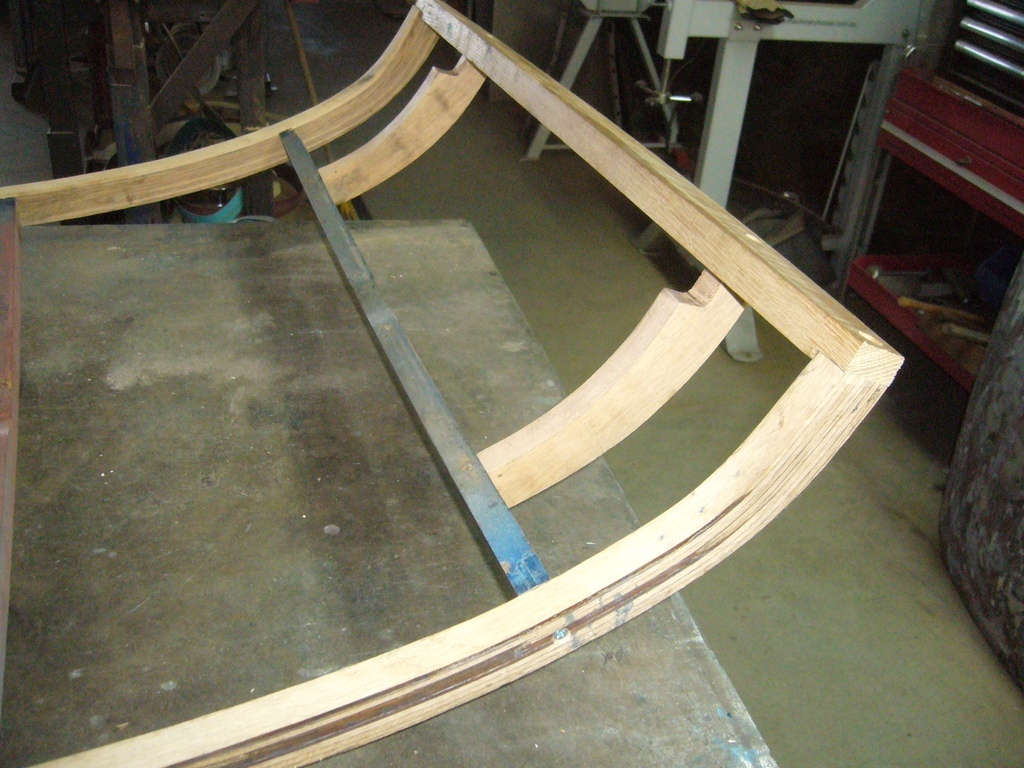 That’s enough for now. Any comments welcome Cheers Garry |
| |
Last Edit: May 6, 2021 22:11:52 GMT by gazzam
|
|
|
|
|
Apr 12, 2021 12:07:56 GMT
|
|
Bookmarked ...
|
| |
|
|
|
|
|
Apr 12, 2021 14:40:09 GMT
|
|
Top work so far.
More please.
|
| |
|
|
tofufi
South West
Posts: 1,462
|
|
Apr 12, 2021 15:33:24 GMT
|
Wow. Top quality work (using materials most people aren't so skilled with!) on a beautiful car. Bookmarked  |
| |
|
|
|
|
|
Apr 12, 2021 15:44:51 GMT
|
 Then glued them together in a jig cut from a piece of ply. The timber came from an old cupboard (that would have gone to the tip) and was surprisingly easy to steam and bend.   That’s enough for now. Any comments welcome Cheers Garry He just casually throws out the toolmaking, improvisation and ingenuity required here lol... Hell of a project and a hell of a can-do attitide. Bookmarked sir! |
| |
|
|
|
|
logicaluk
Posted a lot
   Every days a school day round here
Posts: 1,373
|
|
Apr 12, 2021 16:28:27 GMT
|
|
Bookmarked, I was thinking nice car,and then I didn't really want to look at the next pic, well done sir, many others would have covered it back up and sold it on quickly.
So well done you are in the right place.
Dan
|
| |
Last Edit: Apr 12, 2021 16:32:42 GMT by logicaluk
|
|
gazzam
Part of things
 
Posts: 741 
|
|
Apr 13, 2021 19:35:23 GMT
|
Thanks for the very nice comments, pleased that someone likes the work. So with the boot lid frame sorted it was time to reinstall the skin. I had welded on some new corners where the bolts had been and annealed the edges. But it wasn’t going to work, it split pretty much everywhere as I folded it back over. OK, let’s try to make a new skin. I bought a sheet of ally, enough to have 3 attempts. It’s remarkably cheap, I think it was about £50 for 1200 x 2400 sheet of 1.2mm. I knew that Wray Schelin (on you tube) did a lot with 120 panels so I asked for some tips in the comments section on one of his videos. He kindly replied with some good advice. I was hoping he would say they’re a piece of cake so it was a bit of a worry when he said ‘that’s a tough one” Anyway I had enough sheet for 3 goes so I cut a piece and tried the new English wheel. (I had no problem justifying buying one after I priced a boot skin). I had to get my wife to help as the sheet was too floppy to manage alone. She was an excellent help. Though neither of us knew what we were doing, she was able to spot areas that needed to be raised etc. So after a fair bit of to and froing and wondering how many more sheets of ally I would have to buy, it started to come together. There was a lot of fettling to do, lots of heat shrinks and test fits, but we ended up with a very useable panel. No more than 1 millimeter of filler would be needed anywhere. I can live with that. 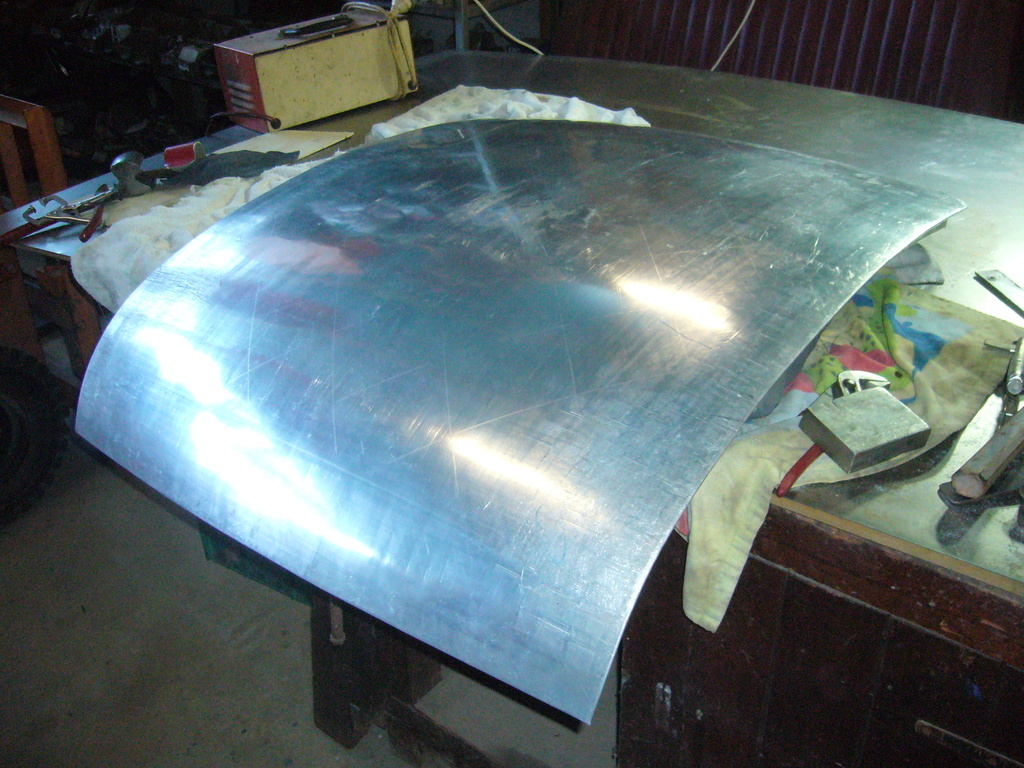 I had removed the tonneau panel, which was a giant step for me. There’s no going back. But it needed to come off to do some rust repairs on the sides of the boot, so out with the cut off wheel. 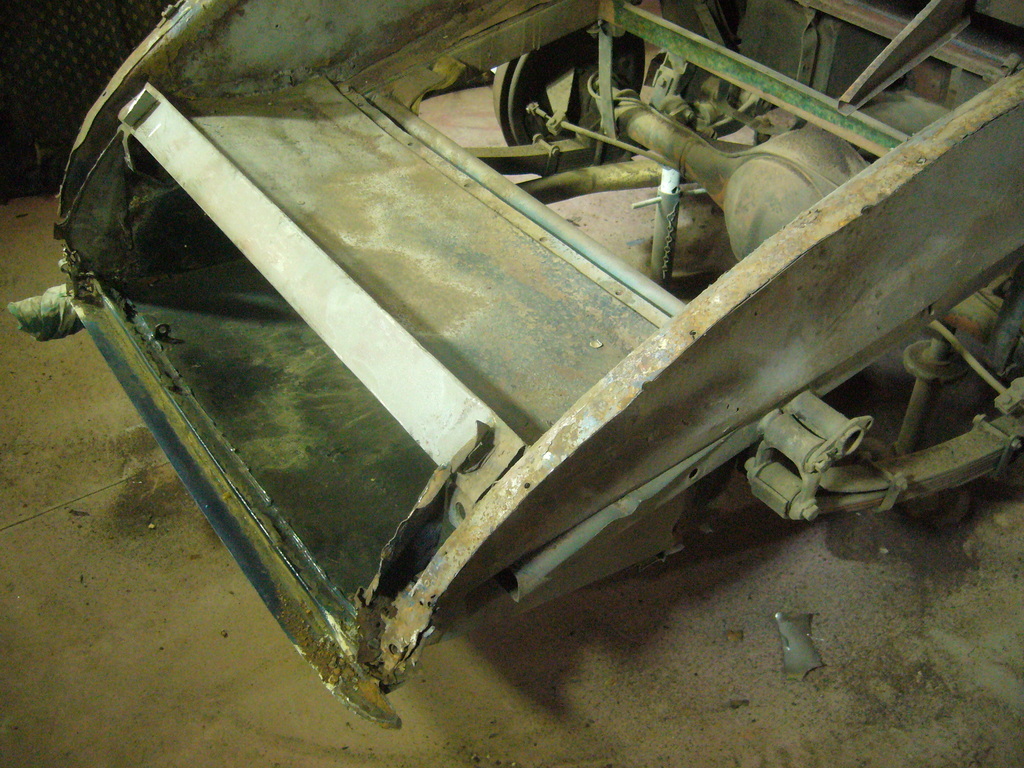 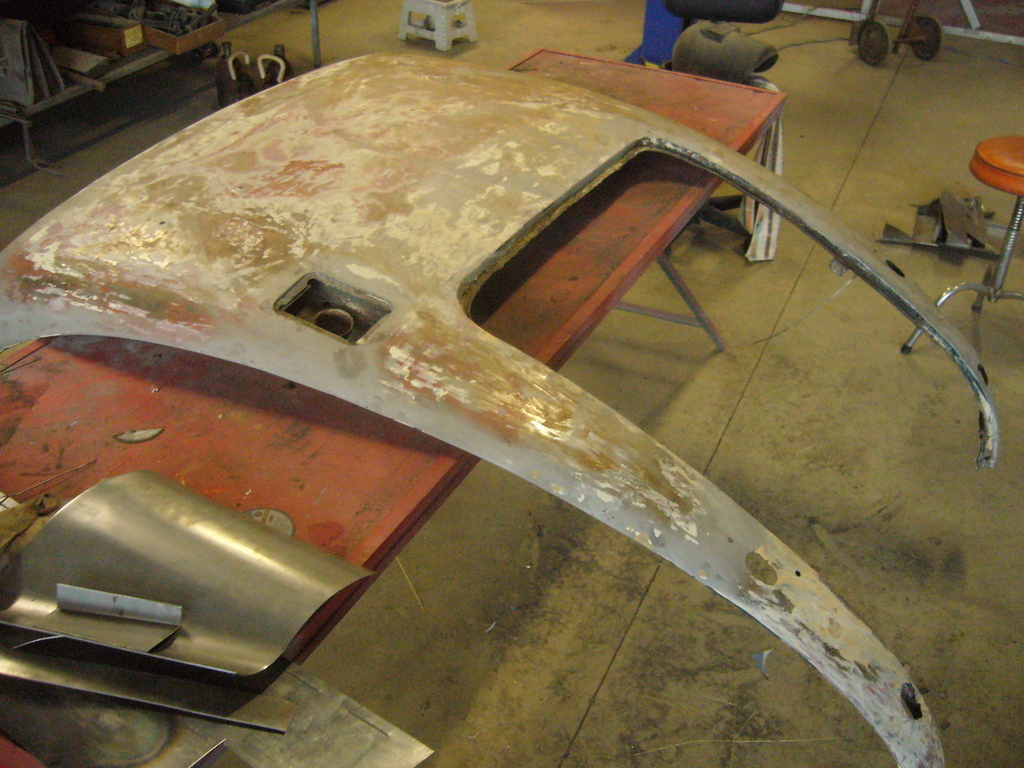 The repairs to the boot walls needed to be done before anything could be started on the tonneau. Cut and fold a piece of 0.95 cold rollled steel. 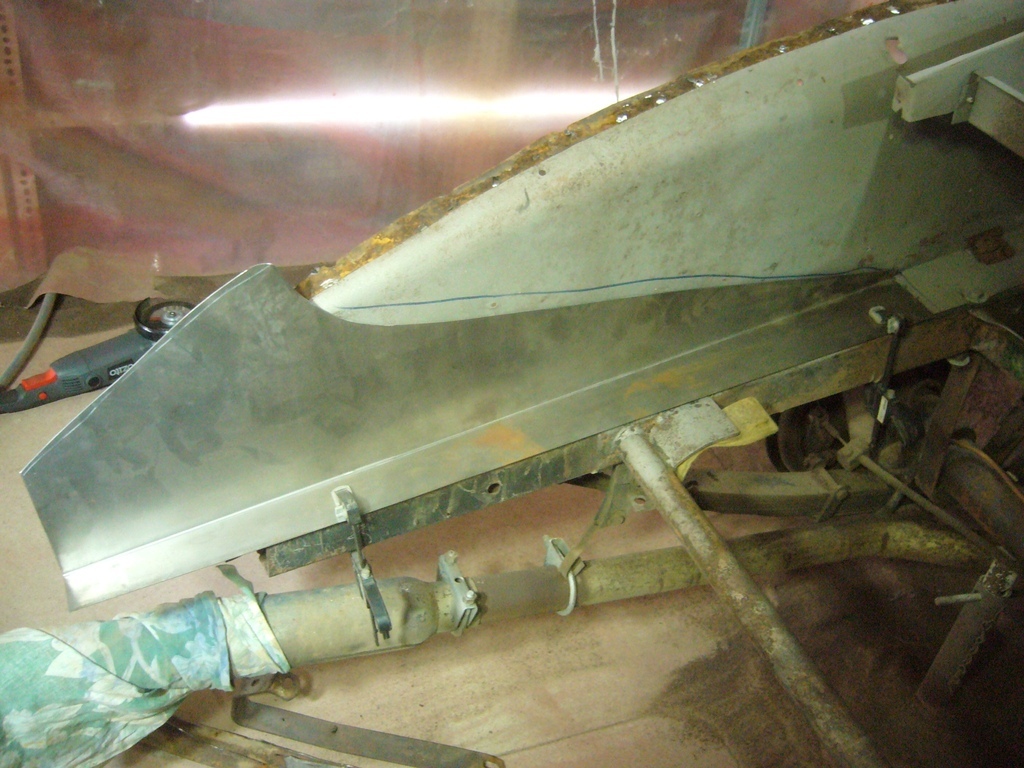 Tack it in, after a few hours of getting it as close to the correct shape as I can. 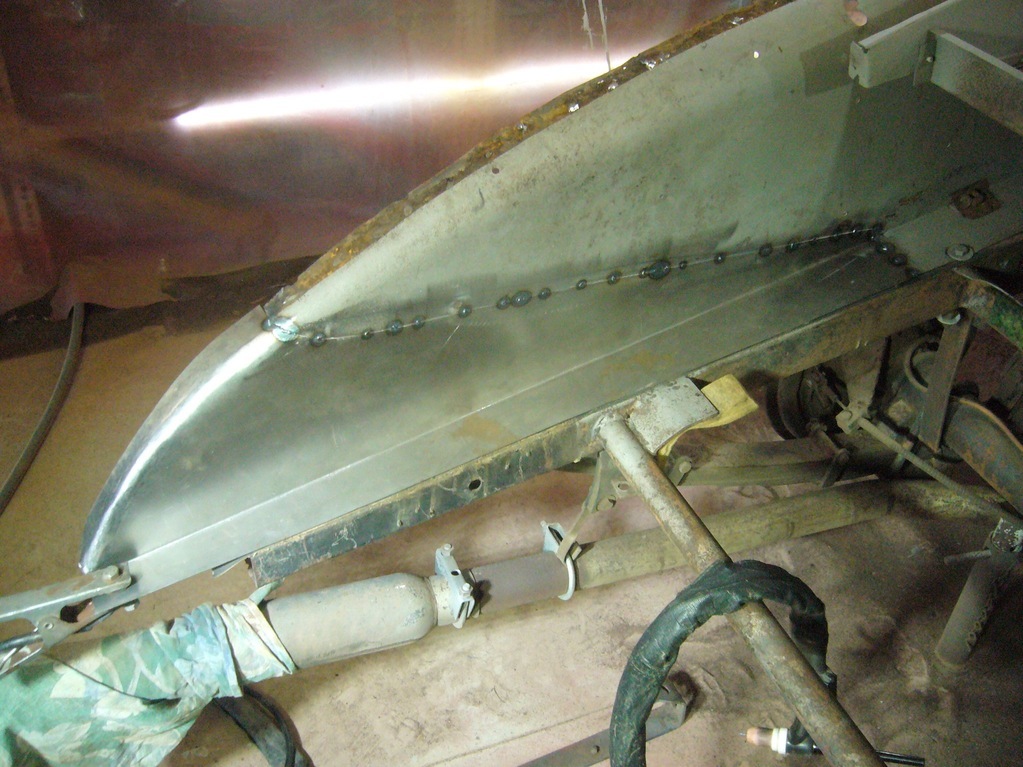 Then fully weld. 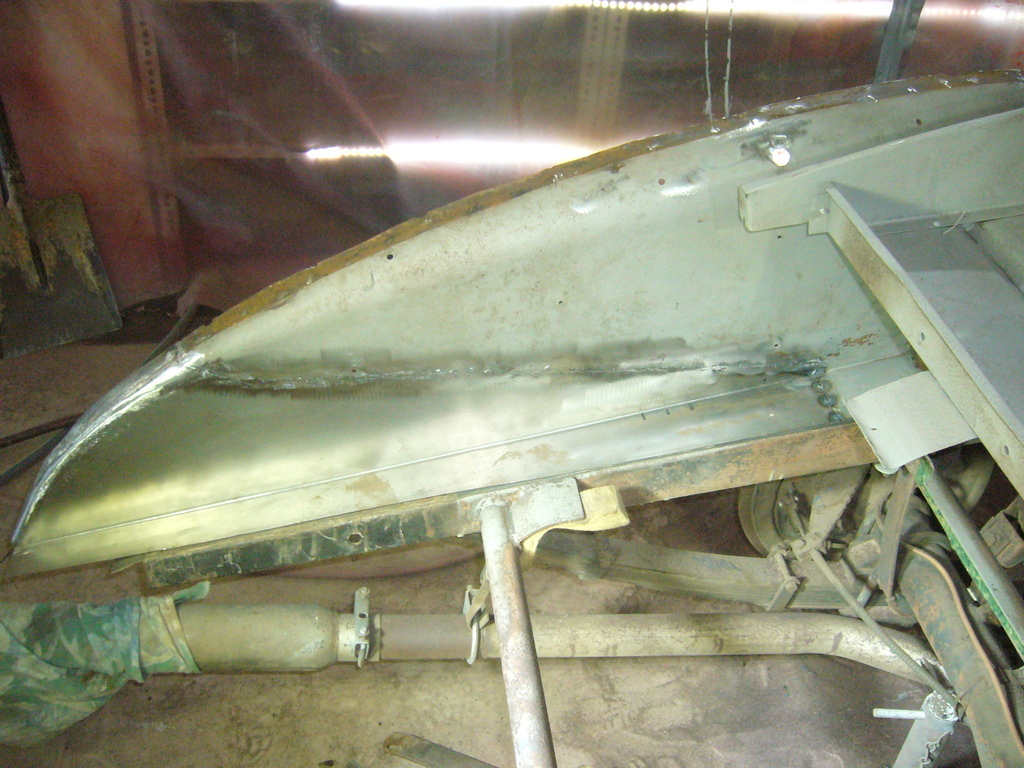 Repeat on the other side. Now work (really I should call it play - there is no money involved) could start on the tonneau. It had quite a bit of damage. Both “legs” were knackered and it was dented very badly in the area immediately forward of the lid. This had been filled with lead. I must have melted 5 kilos out of this area. 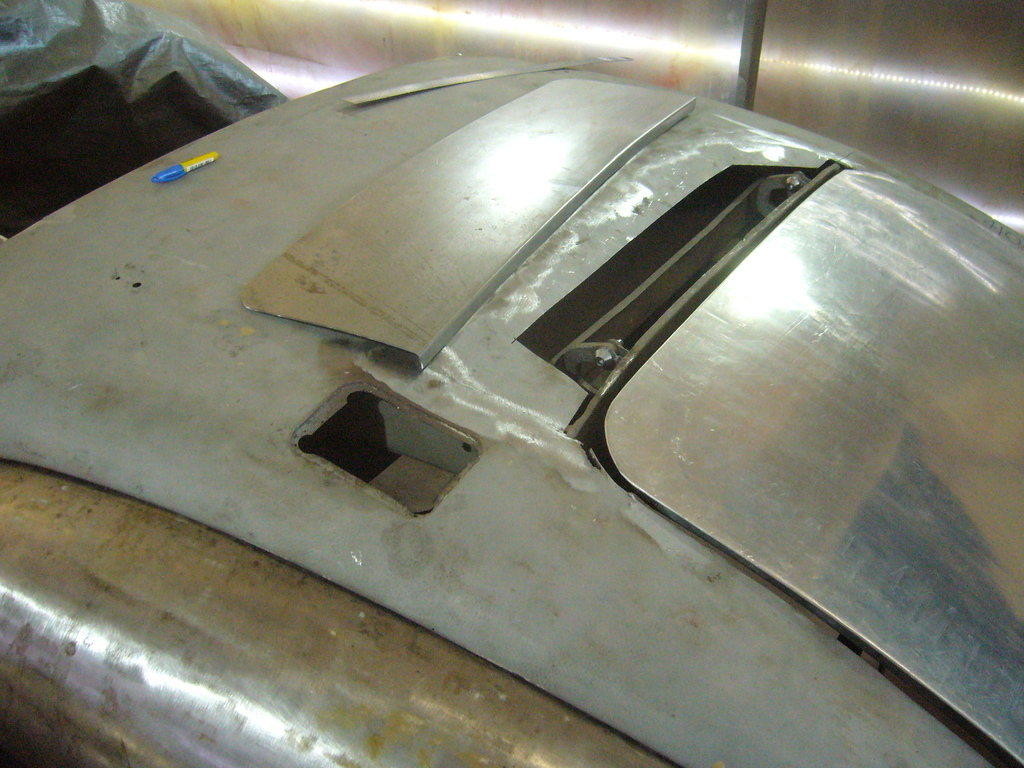 Make a repair piece, tack in and fettle as required. 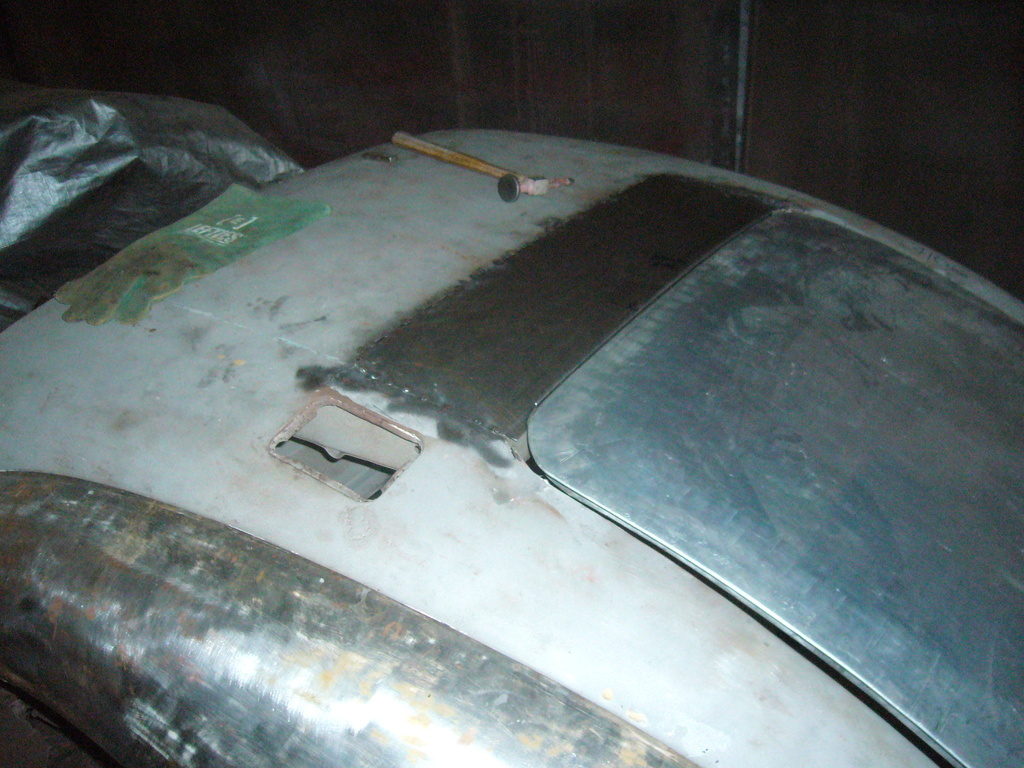 It was time to get the old legs out of the way and fully weld in the repair. 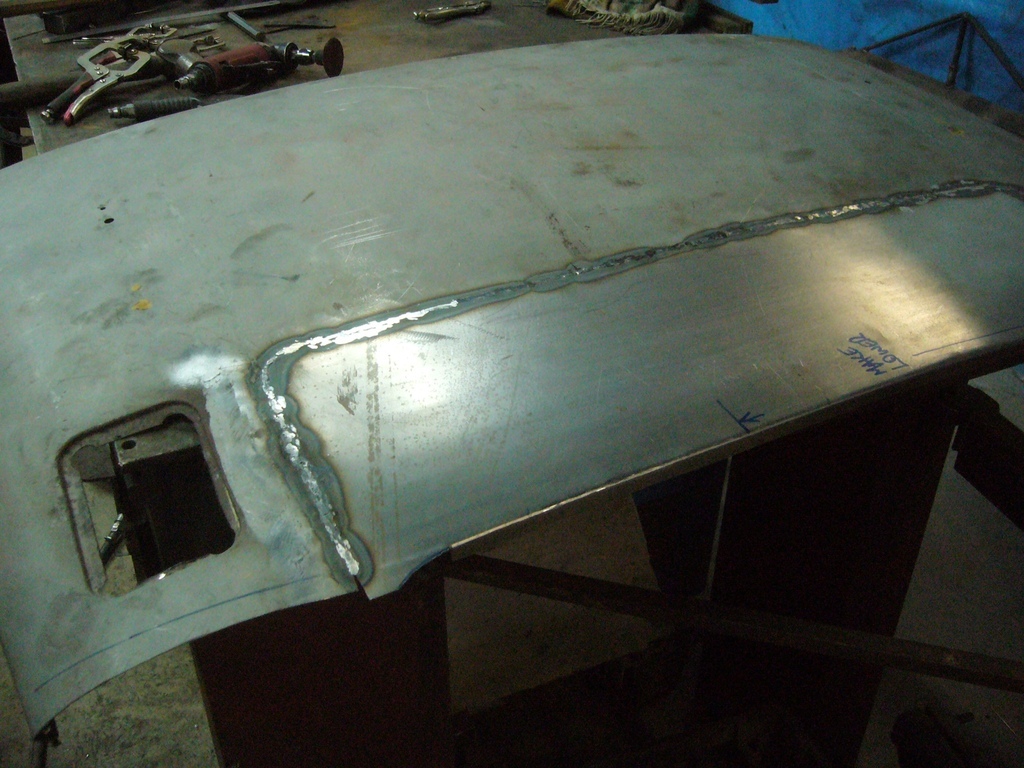 Once that was ok, I started on the legs. This mainly involved shrinking metal. Lots of shrinking. More later. Any comments welcomed. Cheers Garry |
| |
Last Edit: May 6, 2021 22:16:06 GMT by gazzam
|
|
|
|
|
Apr 13, 2021 20:58:53 GMT
|
|
Awesome work gazzam ... bookmarked.
|
| |
Ich habe kein Geld!
|
|
goldnrust
West Midlands
Minimalist
Posts: 1,887
|
|
Apr 13, 2021 21:51:00 GMT
|
|
Now that’s a dream car! I’m looking forward to seeing it come back to life, please keep posting about it.
Also, really good to see a (obviously skilled) DIY approach to it. So many cars of this type just get farmed out to a restorers to put all new panels on at great expense. It doesn’t give those of us with less extensive budgets the same hope as someone putting the hours in to learn the techniques to do it all themselves!
|
| |
|
|
75swb
Beta Tester
Posts: 1,052
Club RR Member Number: 181
|
1952 Jaguar XK120 restoration 75swb
@75swb
Club Retro Rides Member 181
|
Apr 13, 2021 22:10:10 GMT
|
|
That's going to be some resto! Excellent work. Where are you based?
|
| |
|
|
gazzam
Part of things
 
Posts: 741 
|
|
Apr 14, 2021 12:08:33 GMT
|
Again thanks for the kind words. As I said there was lots of shrinking to do on the legs of the tonneau. I have one of those small shrinker/stretchers but it doesn’t have the depth that is needed for this type of panel. So I bought a set of replacement jaws and built a shrinker with a deeper throat. 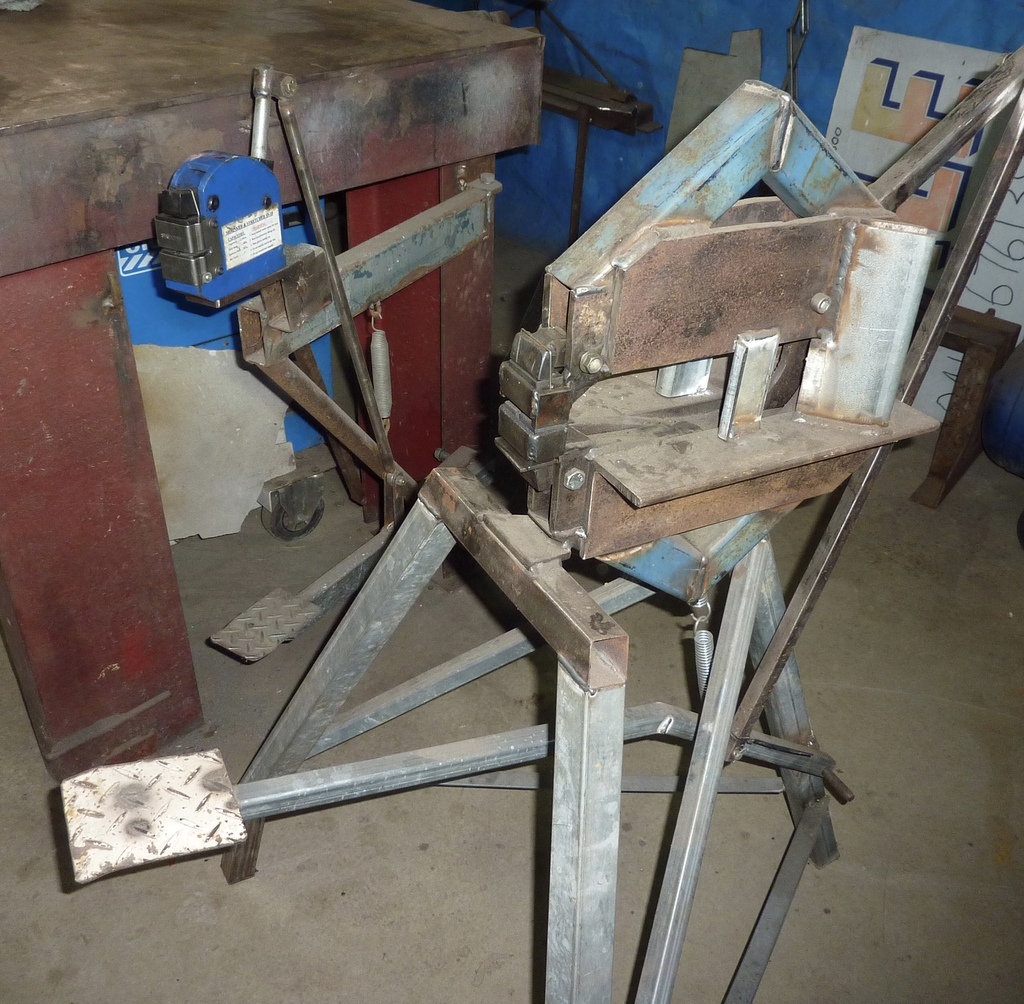 That is not a piece of space junk. It’s my version of a deep throated shrinker (in front of the one that I copied). It did the job but with the amount of time I put into it, I should have just bought one. Anyway it allowed me to make this: 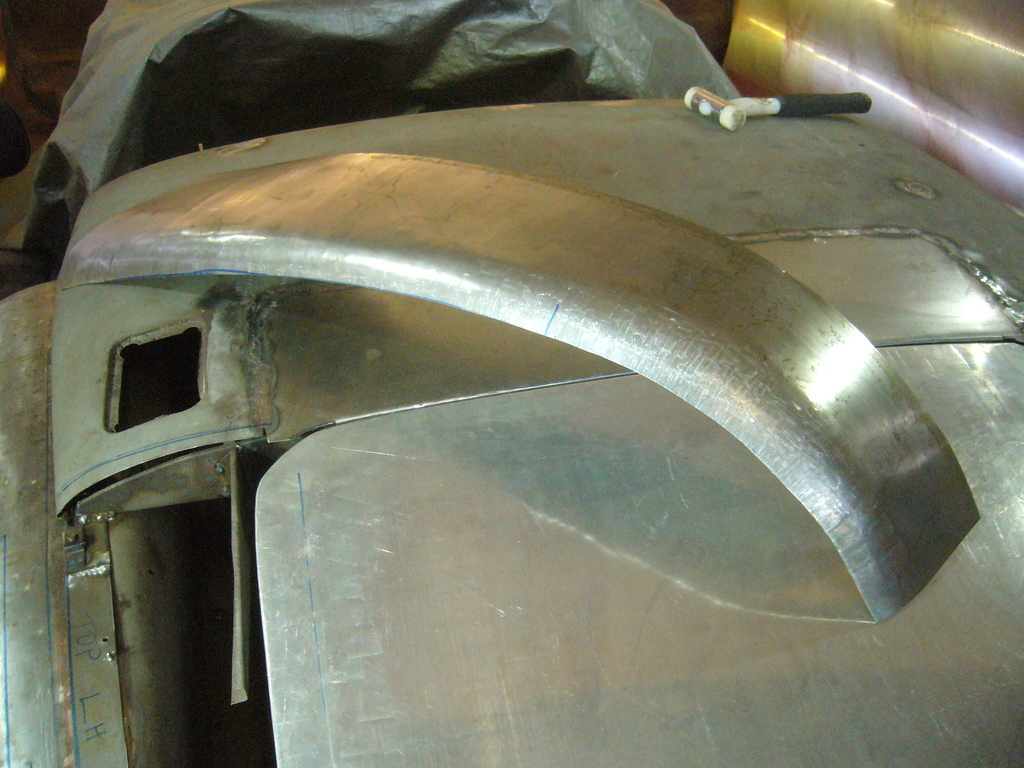 and then tack a narrow strip underneath along the edge. This picture shows the guard in place for a test fit after tacking: 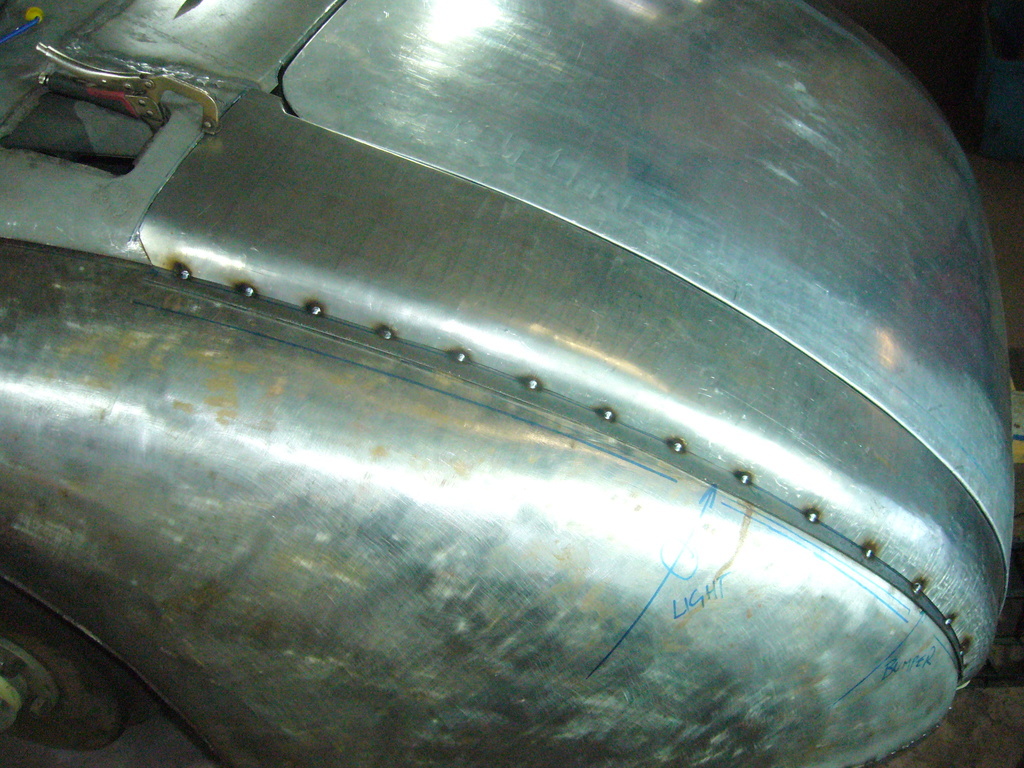 Then repeat on the other side and add some internal corners: 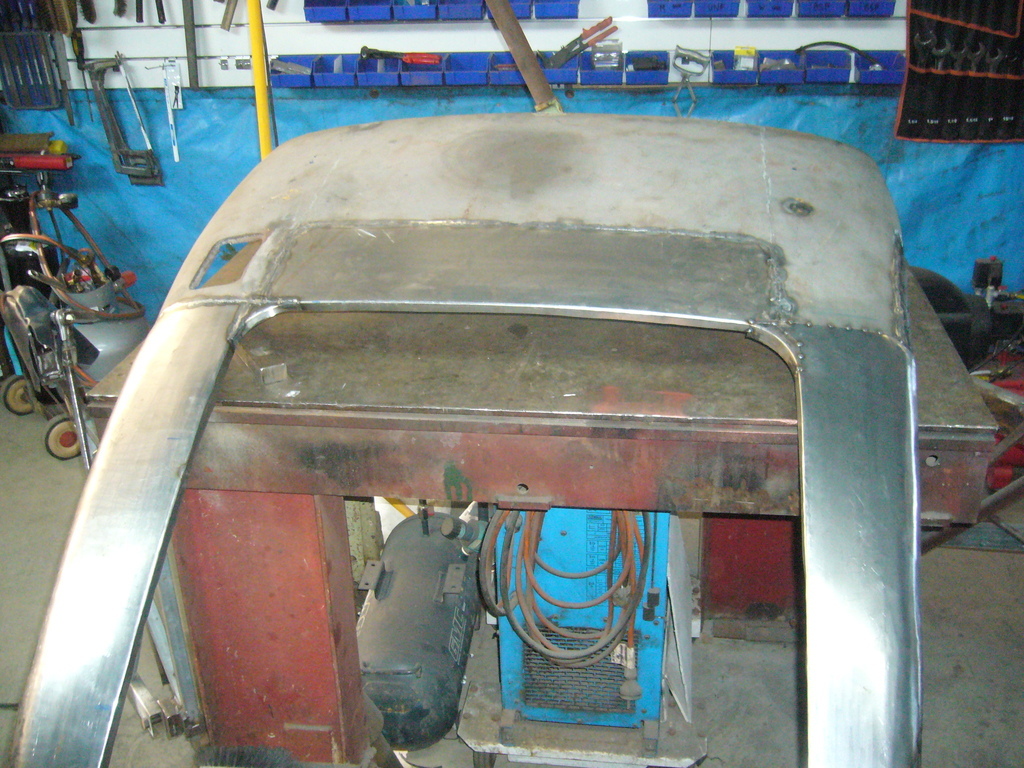 This all sounds so simple. I don’t know why it seemed so hard at the time... Had to remake the fuel filler: 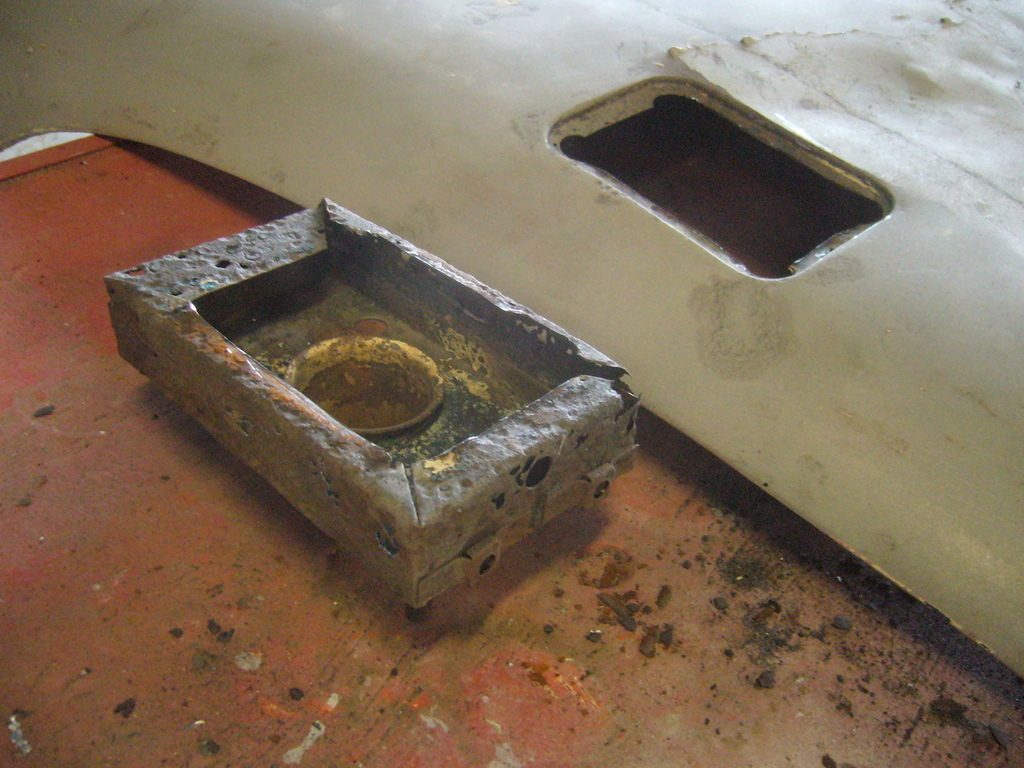 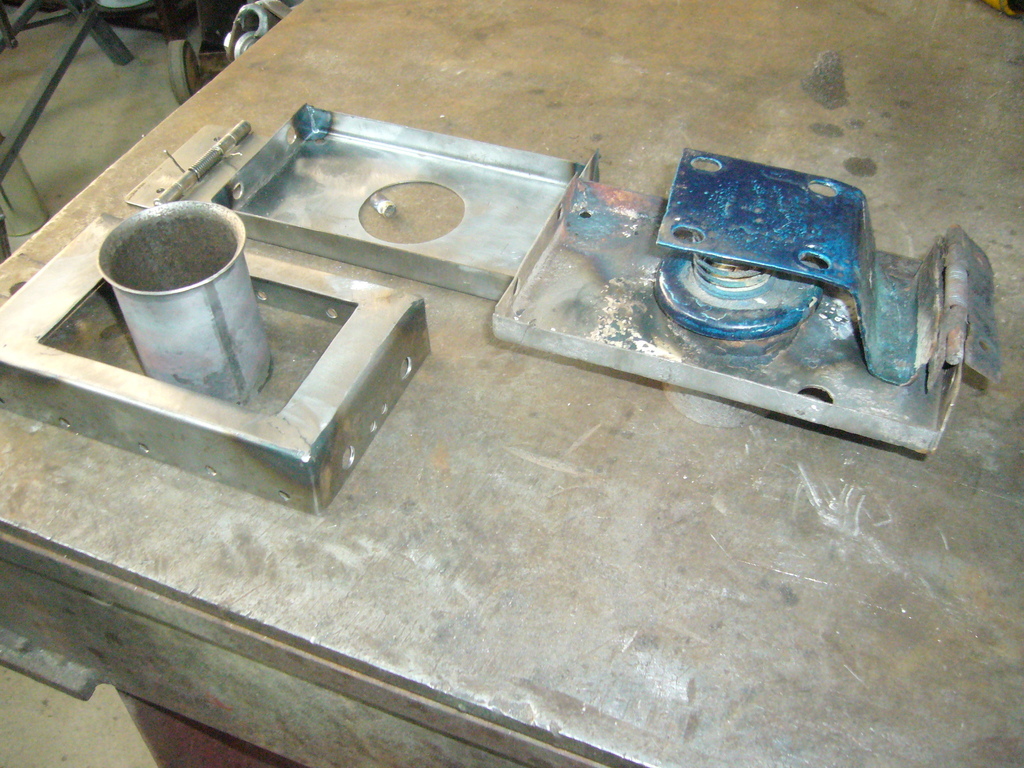 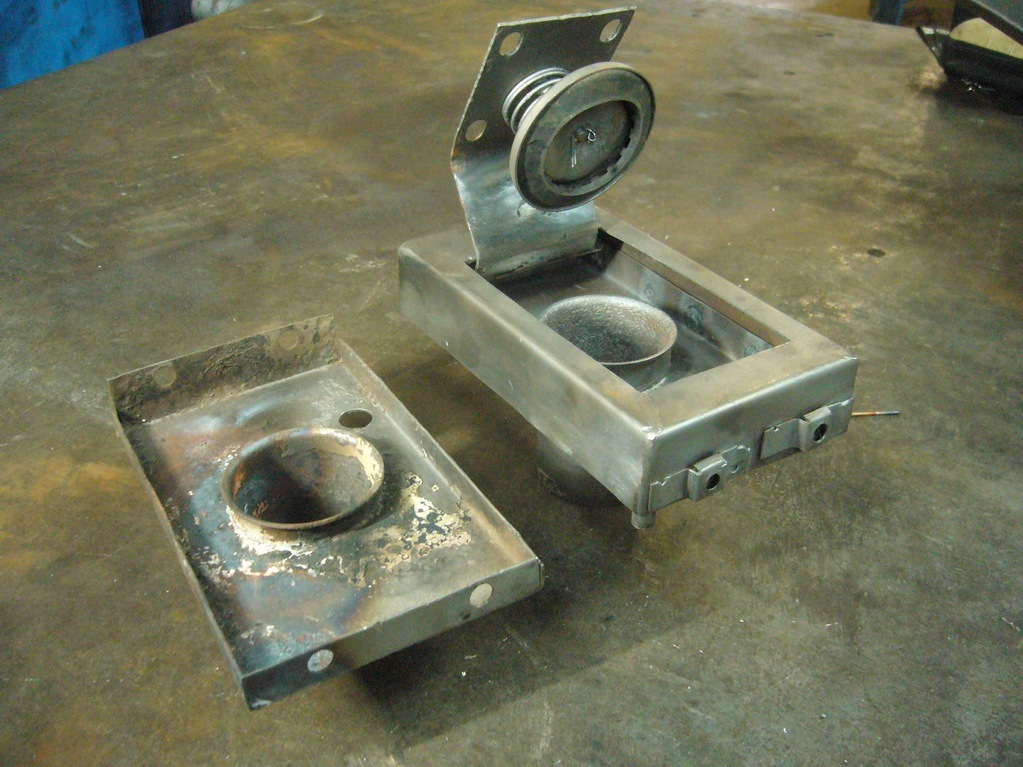 Weld it in and lead wipe around it: 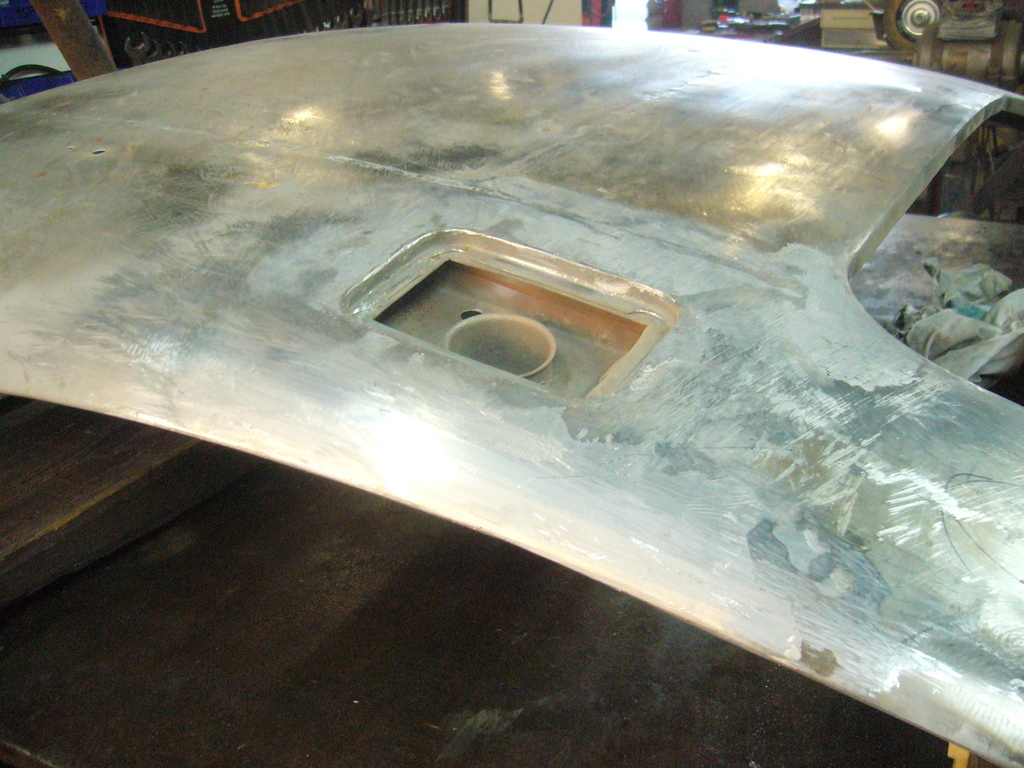 Epoxy prime the underside as it won’t be this accessible again. 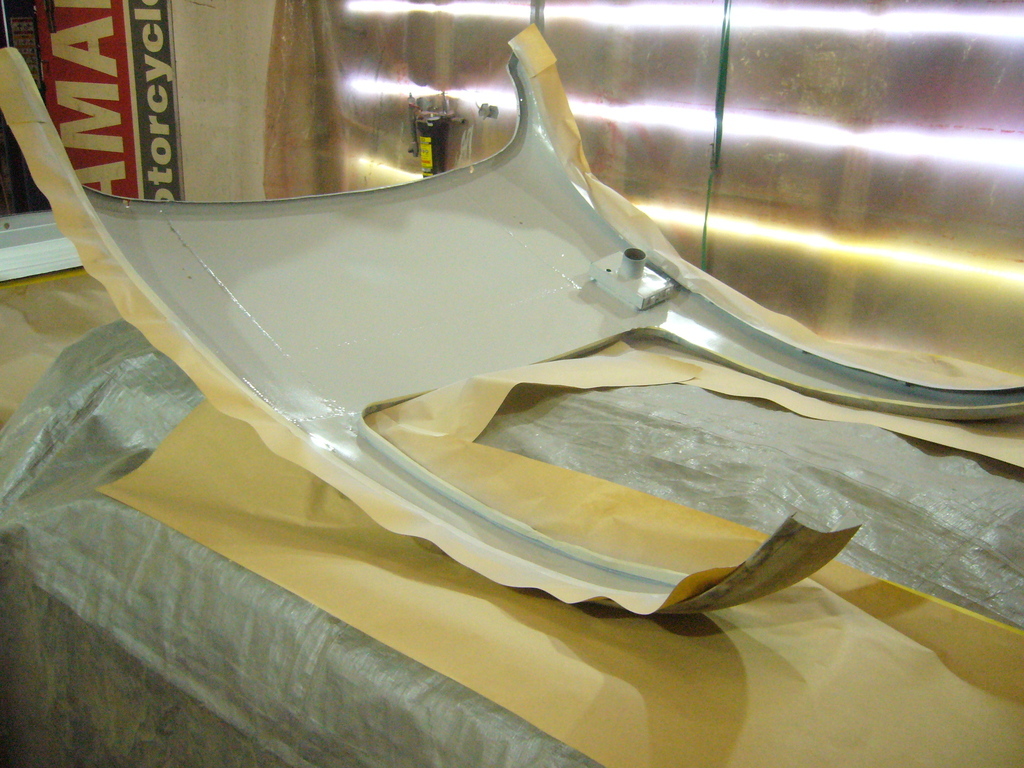 Then a bit of a milestone. 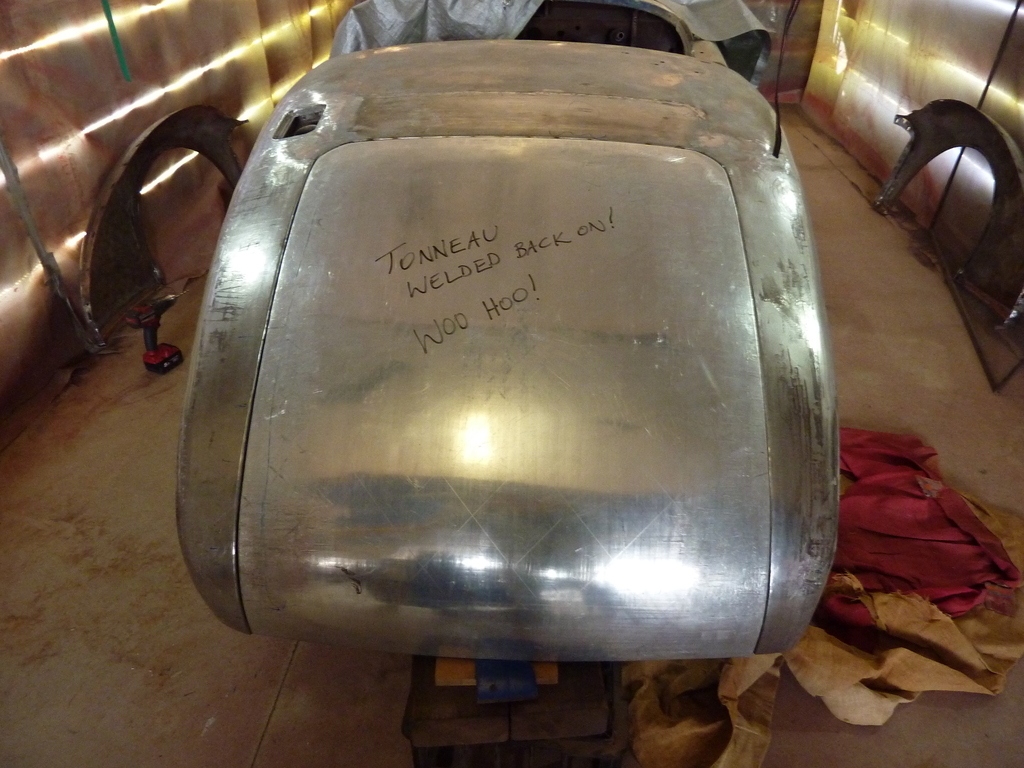 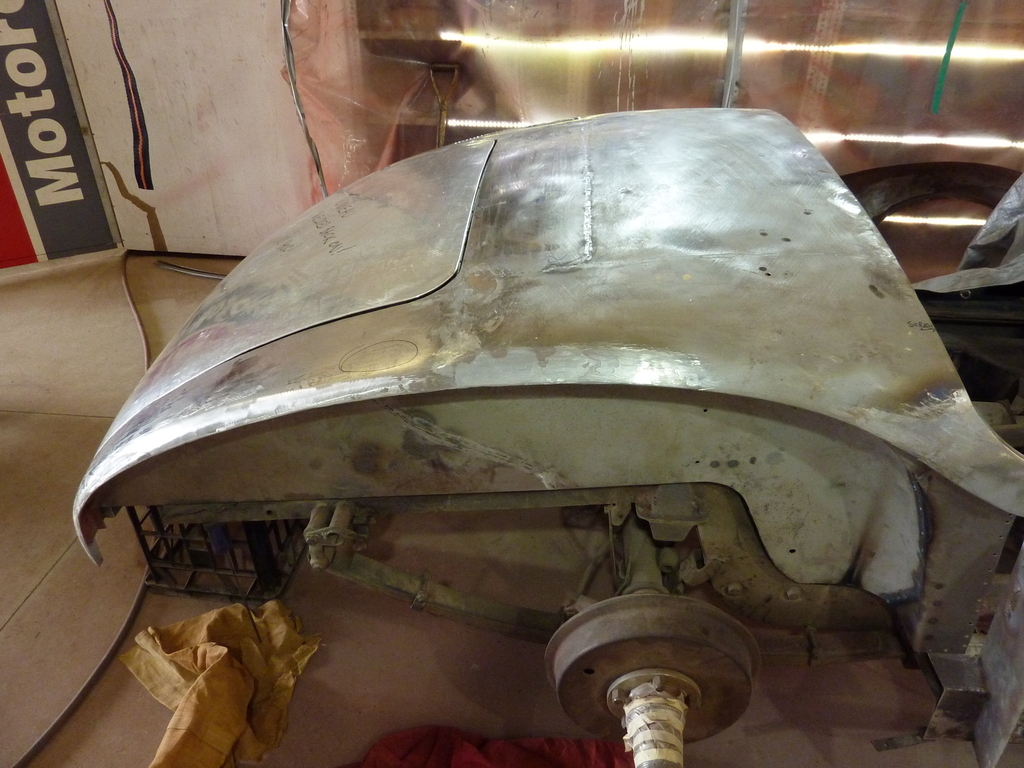 Thanks for looking. I almost forgot - 75swb - I’m in Australia Any comments welcome. cheers Garry |
| |
Last Edit: May 6, 2021 22:19:23 GMT by gazzam
|
|
bstardchild
Club Retro Rides Member
Posts: 14,971
Club RR Member Number: 71
|
1952 Jaguar XK120 restoration bstardchild
@bstardchild
Club Retro Rides Member 71
|
Apr 14, 2021 13:00:49 GMT
|
|
Hat doffed in your direction
"Fan bloody tastic" - bookmarked as I'm pretty sure I'm going to enjoy this one.
|
| |
|
|
|
|
|
|
|
Apr 14, 2021 13:36:03 GMT
|
|
Very impressive, skills and car! Looking forward to this build.
|
| |
|
|
|
|
|
Apr 14, 2021 14:56:09 GMT
|
|
May I join in with the hat doffing?
Superb work on a Jag I prefer more than an E Type.
I will be continuing to follow this build with interest.
😀
|
| |
|
|
|
|


