gazzam
Part of things
 
Posts: 741 
|
|
Apr 17, 2022 11:05:25 GMT
|
Thanks Phil, thought I was off the air for a while there. Good to hear from someone occasionally. Radiator is in, but that area had another trial in store for me. There are these two small pieces of sheet metal, one either side, that are to stop the air coming through the grille from going around the radiator. Each is held on by three 1/4 BSF bolts, into captive nuts. I forgot to run a tap through these, to clear the threads of paint, before I put the rad in. This was a bad blue. This is the piece, with the retaining bolts circled. 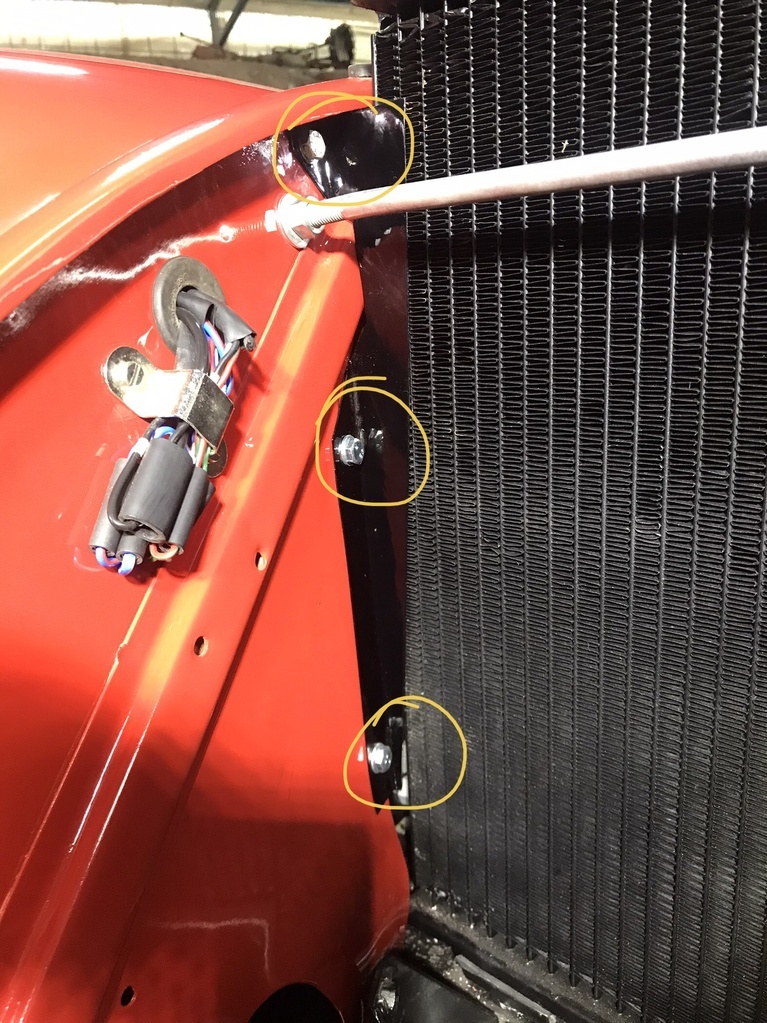 The lower two were no trouble, I could run a tap through from the back side, under the guard. But that wasn’t possible for the top one, it’s too close to the underside of the top of the guard. And the rad makes it impossible to get a tap in from the bolt side. And I really didn’t want to take it out again because of the damnable bottom hose. So I cut a couple of small slots in the end of a short bolt to make a thread chaser. Then it was a matter of fumbling with it ( for ages - both my thumbs are less than 100% remember ) and trying not to wreck the radiator fins. Eventually I got it to run through the captive nuts and clear them of paint, but it turned a five minute job into an hour. I’ve not yet put fuel in it, but it now has fresh oil and coolant, so starting the engine isn’t far off. Also did a rudimentary wheel alignment. I’m sure it’s as good as it was, so unless it behaves really badly on the road, it’ll do. 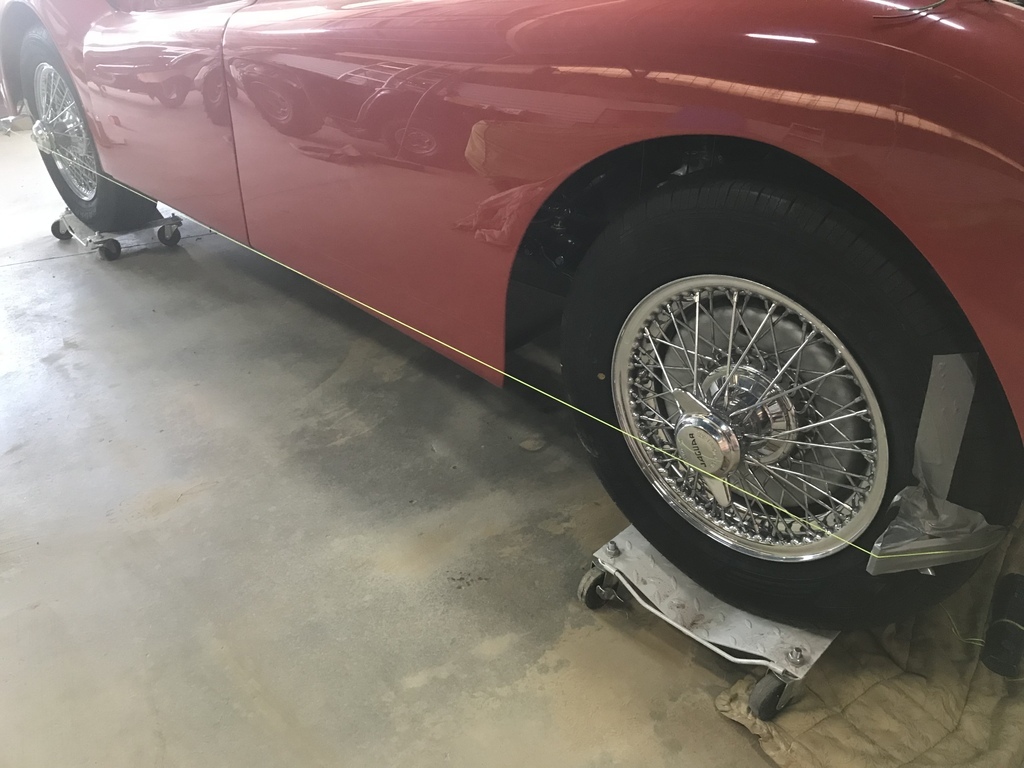 Tightened all the bolts and nuts underneath that I’d been leaving till it was back on it’s wheels. Torsion bars, lower control arms etc. Put the oil filter canister back on ( with a new element). So I think I’m finished crawling underneath it. Glued the leather to the retaining strip on the rear crash roll. I’ve been putting off doing this piece. A, because it’s got the sharpest curves and is therefore the most difficult. And B, because I’ve been waiting on vinyl to make the piping that goes with it. 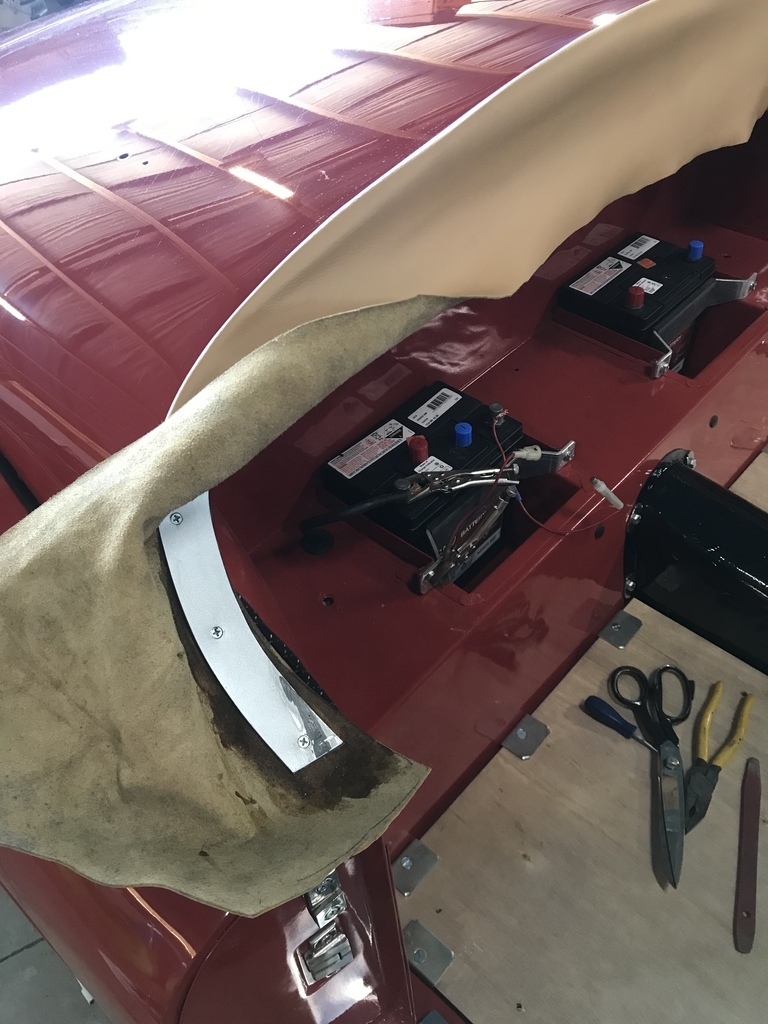 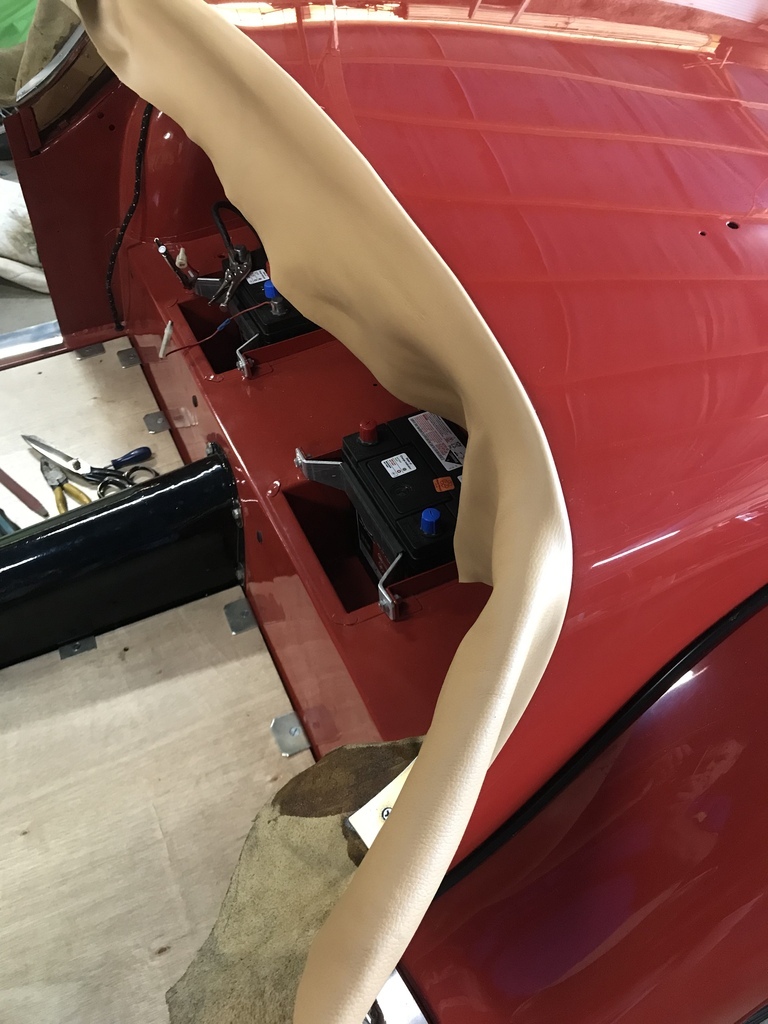 As the vinyl had arrived, I was able to make the piping to go around the door card and get that finished. Only the driver’s so far. I’m pretty chuffed how it’s turned out. 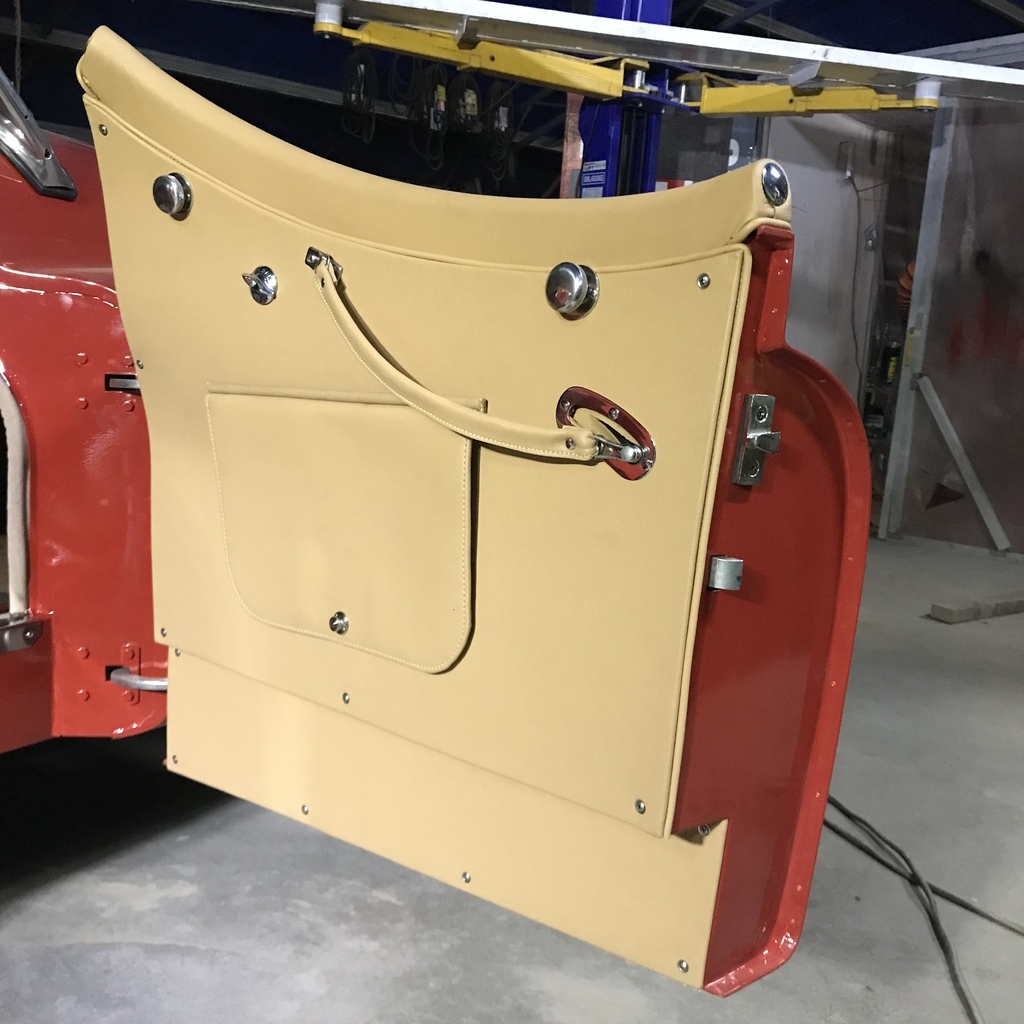 That’s all for now. Cheers. |
| |
|
|
|
|
|
|
|
Apr 17, 2022 11:16:23 GMT
|
Thanks Phil, thought I was off the air for a while there. Good to hear from someone occasionally. I, for one, am just watching in speechless awe. Sure appreciate you sharing though! |
| |
|
|
glenanderson
Club Retro Rides Member
Posts: 4,356
Club RR Member Number: 64
|
1952 Jaguar XK120 restoration glenanderson
@glenanderson
Club Retro Rides Member 64
|
Apr 17, 2022 11:59:28 GMT
|
Thanks Phil, thought I was off the air for a while there. Good to hear from someone occasionally. I, for one, am just watching in speechless awe. Sure appreciate you sharing though! Me too. 😃👍 |
| |
My worst worry about dying is my wife selling my stuff for what I told her it cost...
|
|
|
|
|
Apr 17, 2022 12:03:46 GMT
|
|
What they said!
|
| |
|
|
teaboy
Posted a lot
   Make tea, not war.
Posts: 2,125
|
|
Apr 17, 2022 13:08:31 GMT
|
|
This is incredibly fantastic!
|
| |
|
|
jamesd1972
Club Retro Rides Member
Posts: 2,921  Club RR Member Number: 40
|
1952 Jaguar XK120 restoration jamesd1972
@jamesd1972
Club Retro Rides Member 40
|
Apr 17, 2022 14:16:52 GMT
|
|
“Pretty chuffed”
That’s an understatement !
Amazing job, thanks for sharing.
James
|
| |
|
|
|
|
|
|
|
Apr 17, 2022 21:01:45 GMT
|
|
Once again I’m most impressed with your versatility and attention to detail.
I’ll tackle most things but I’ve not (yet) done any home casting and my trimming skills really suck….
Nick
|
| |
1967 Triumph Vitesse convertible (old friend)
1996 Audi A6 2.5 TDI Avant (still durability testing)
1972 GT6 Mk3 (Restored after loong rest & getting the hang of being a car again)
|
|
v8
Part of things
 
Posts: 312
|
|
Apr 17, 2022 23:07:05 GMT
|
Thanks Phil, thought I was off the air for a while there. Good to hear from someone occasionally I click the like button without often saying anything Keep up the good work mate, there will be loads of us that just look on and quietly appreciate what you're doing  |
| |
|
|
|
|
|
Apr 18, 2022 11:05:11 GMT
|
|
Great work! Please don’t take ‘silence’ as disinterest !!! 😊
|
| |
Last Edit: Apr 18, 2022 14:19:50 GMT by westbay
|
|
|
|
gazzam
Part of things
 
Posts: 741 
|
|
Apr 21, 2022 11:11:41 GMT
|
Thankyou, gentlemen. Nice to know you’re out there and following my progress. Been a bit slow on the Jag lately. I had to get the Trafic back together after a new starter arrived in the mail. Then get a roadworthy inspection done. I did a bit more of the trim work. The internal rear wheel arches needed a vinyl cover. 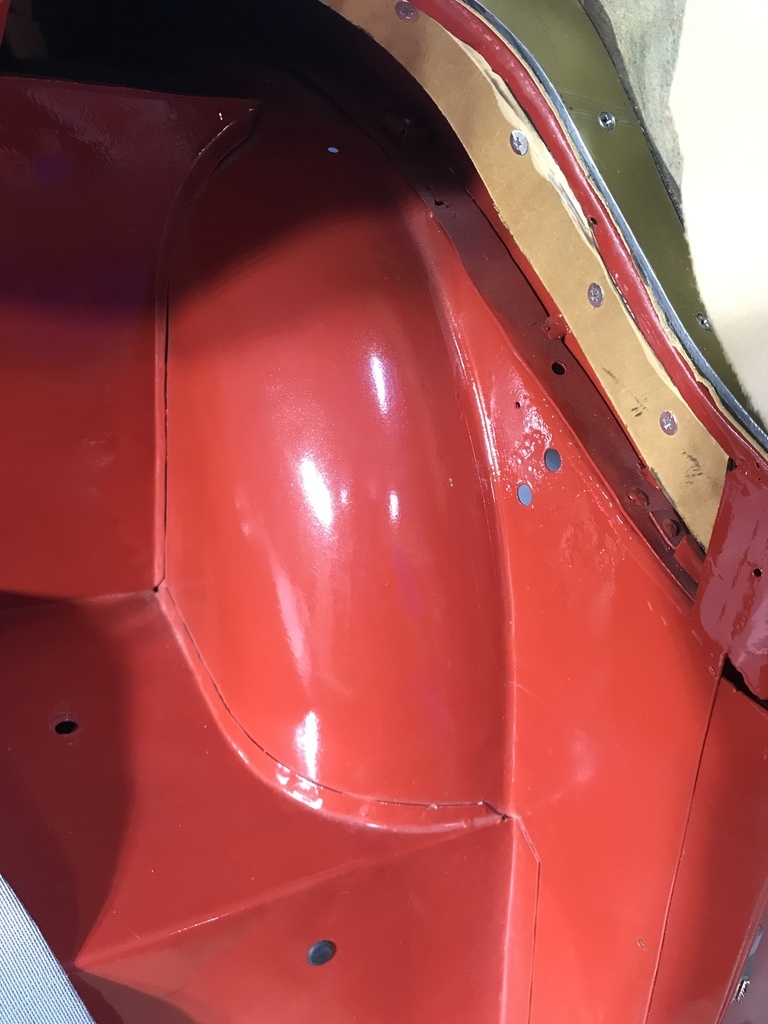 A pretty simple two piece affair was sewn up out of scrap and after a few adjustments I used it as a pattern to make this. 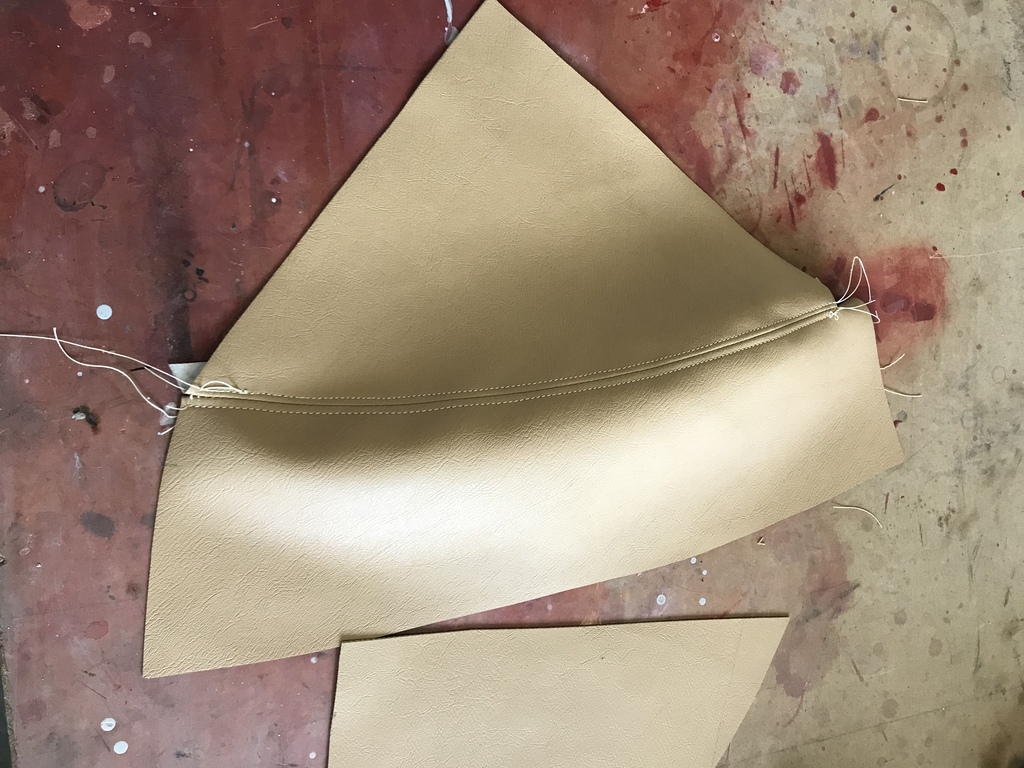 Then cut a piece of foam to shape and masked the area for spray contact adhesive. 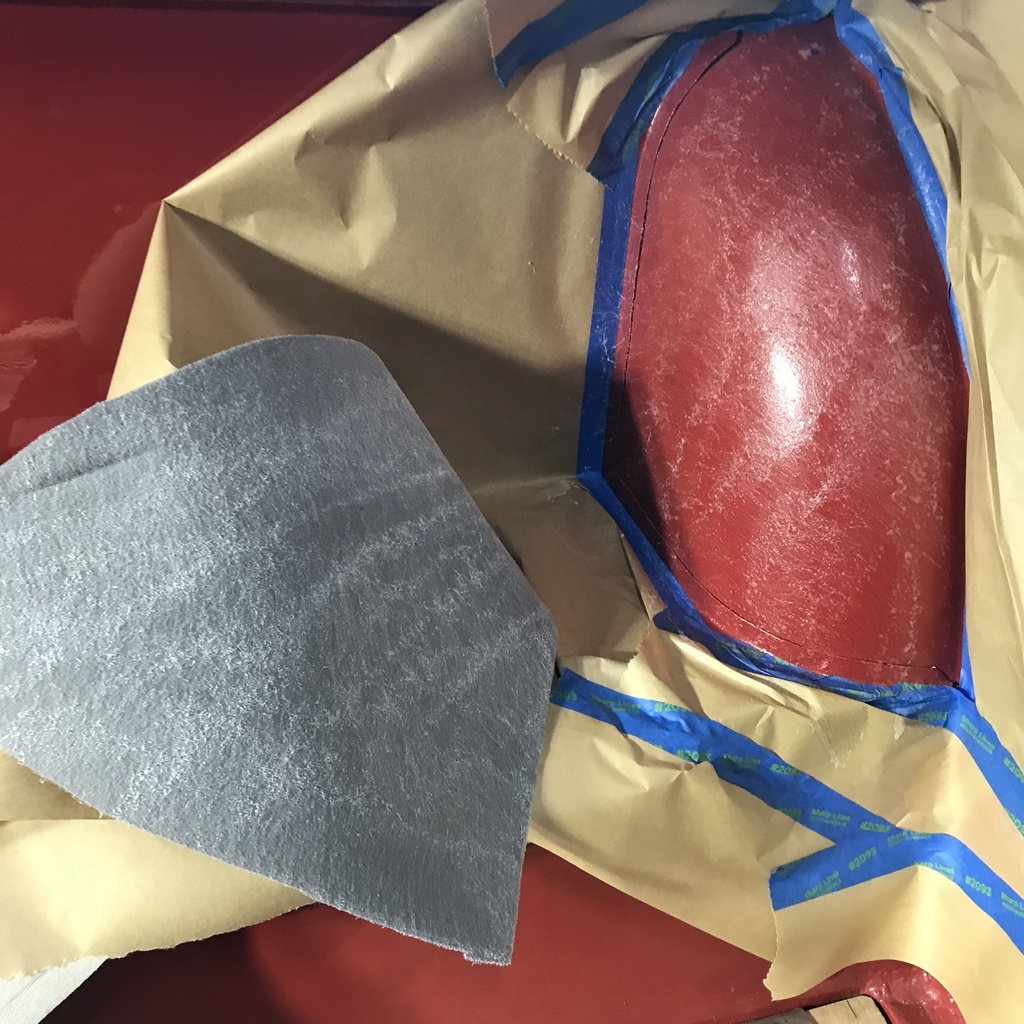 Once adhesive is dry, foam is carefully positioned as it doesn’t like being moved. 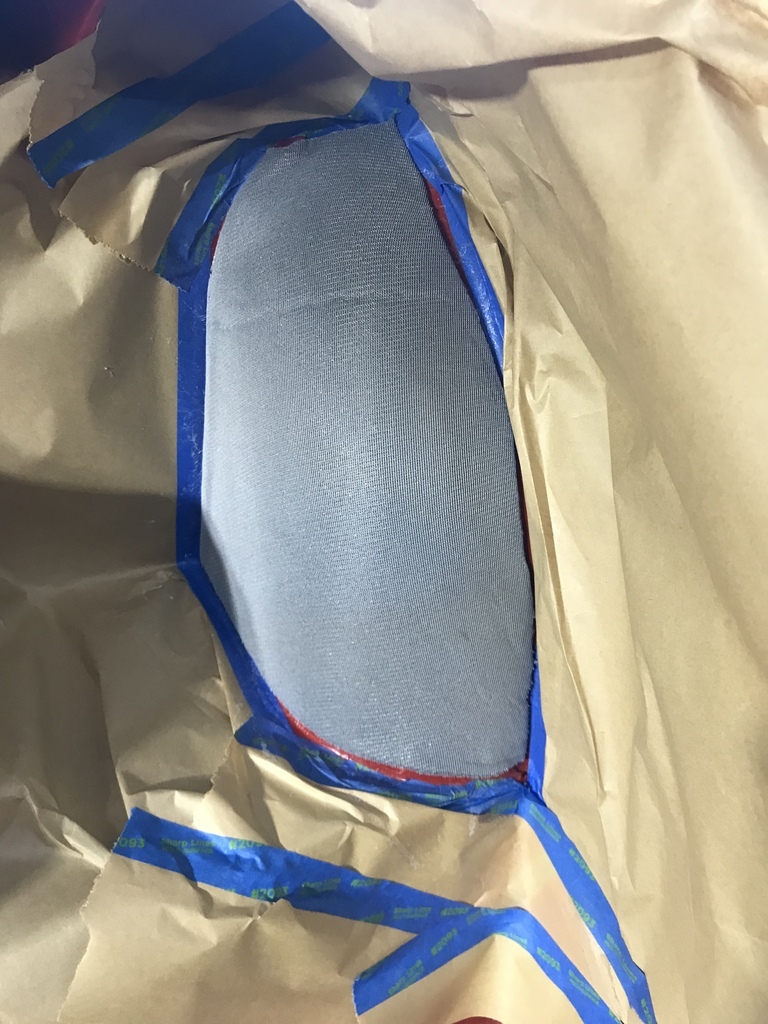 Then sprayed contact on the foam, pulled off the masking and put the vinyl on the wet glue. That means it can be moved as needed. Here it’s in position. 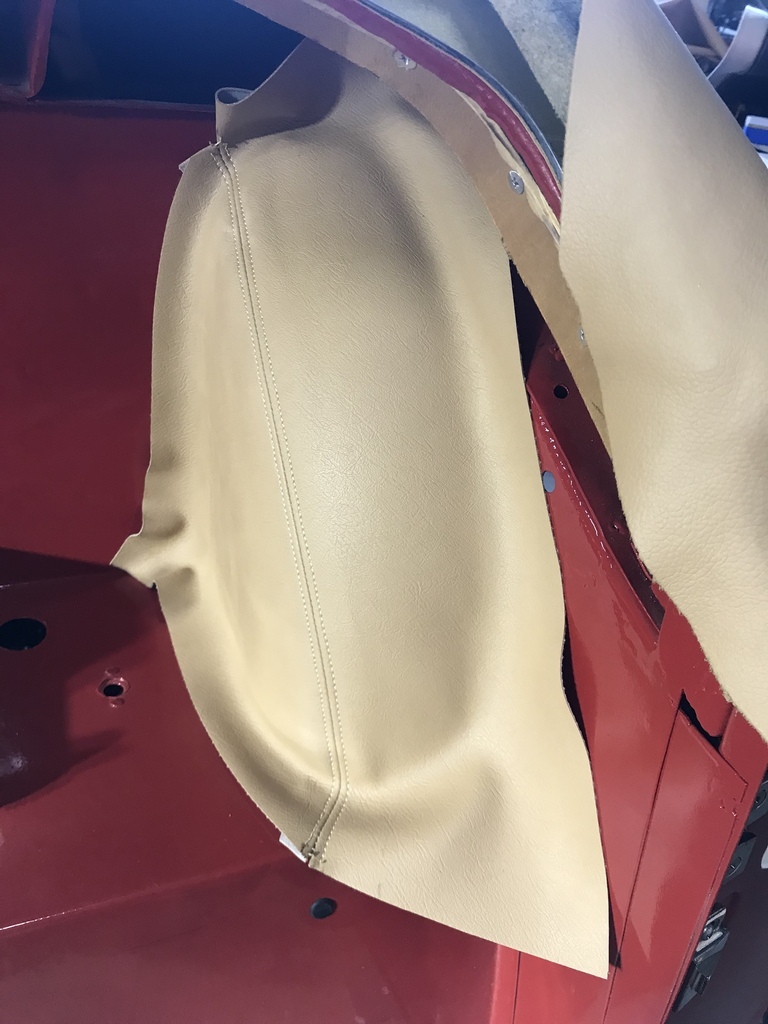 Then the edges are trimmed and glued with brush on contact. 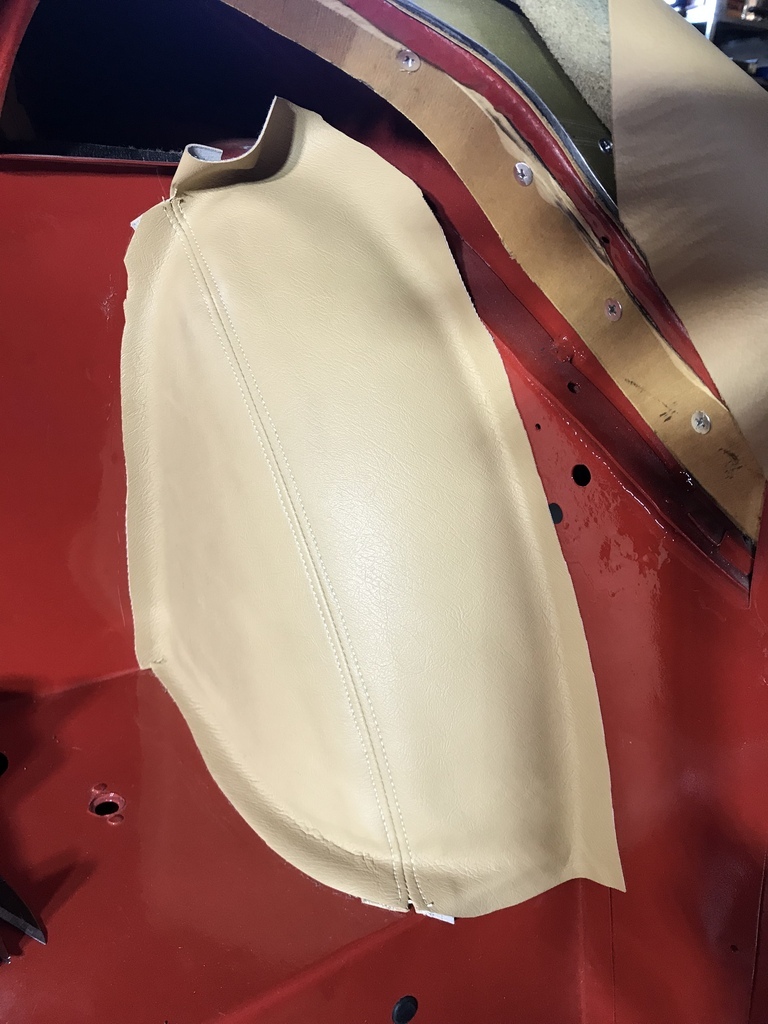 Repeat in mirror image for the other side. That’s all for now. Cheers |
| |
|
|
|
|
|
Apr 21, 2022 13:34:57 GMT
|
|
Looks fabulous, my only question would be going back to the radiator picture where there is a bunch of wires with a steel strap over them, personally I would like some sort of insulation between the wires and the edges of the clip to stop any chaffing, I would hate to see this go up in smoke after all your excellent work!
|
| |
|
|
75swb
Beta Tester
Posts: 1,052
Club RR Member Number: 181
|
1952 Jaguar XK120 restoration 75swb
@75swb
Club Retro Rides Member 181
|
Apr 21, 2022 19:13:20 GMT
|
|
Interesting to see carpet glued down as opposed to trim clipped or moulded, not somwthing I've personally come across before. Is this easier with DIY as opposed to pre-formed, or just how Jag did it back in the day?
|
| |
|
|
gazzam
Part of things
 
Posts: 741 
|
|
Apr 22, 2022 11:09:45 GMT
|
Looks fabulous, my only question would be going back to the radiator picture where there is a bunch of wires with a steel strap over them, personally I would like some sort of insulation between the wires and the edges of the clip to stop any chaffing, I would hate to see this go up in smoke after all your excellent work! Thanks and tbh I’d pretty much forgotten about them. There’s really no way those wires can move but when I put the retainer on it did look like it needed something. Suggestions? I have some plastic tubing in mind, but I’m not 100% happy with it. At least they’re right in front, so unlikely to be forgotten again. 75SWB, that’s not carpet, but vinyl. But there will be carpet glued down in the near future. Now for the trimming news… Footwell area is well underway. First off, I rejigged the dipper switch so it is a little less bulky. This is it previously. 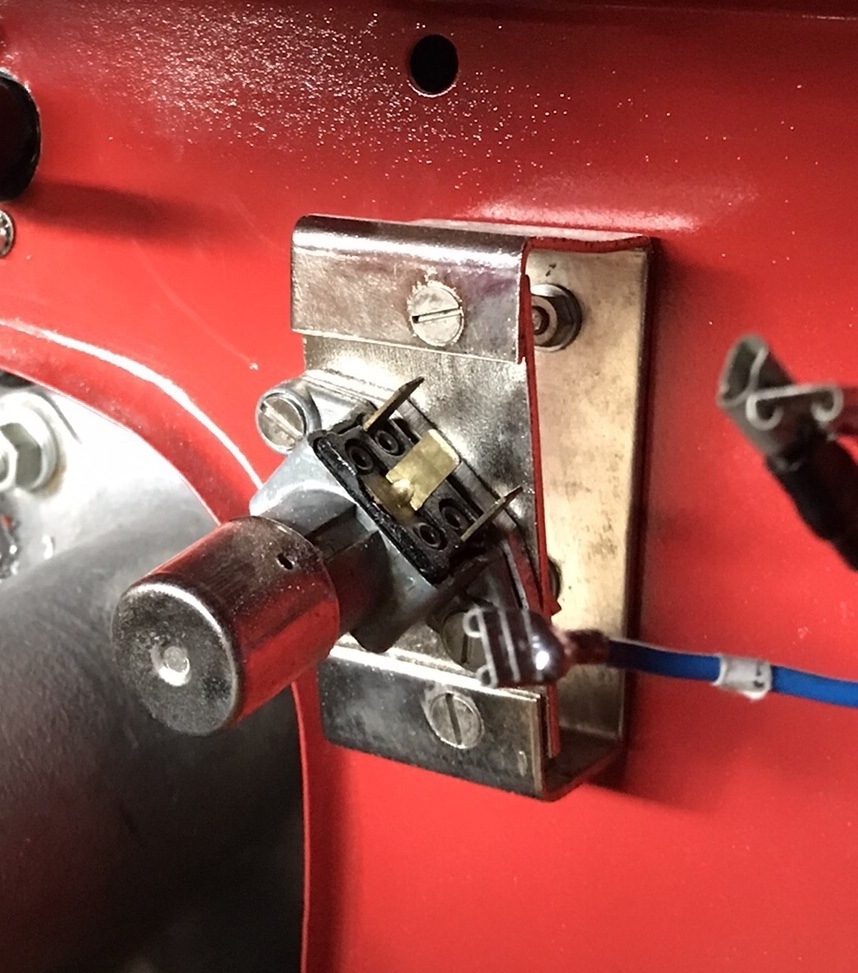 I drilled a hole in the mounting plate that is large enough for the button to pass through. That allowed me to mount the switch with the body behind the plate. 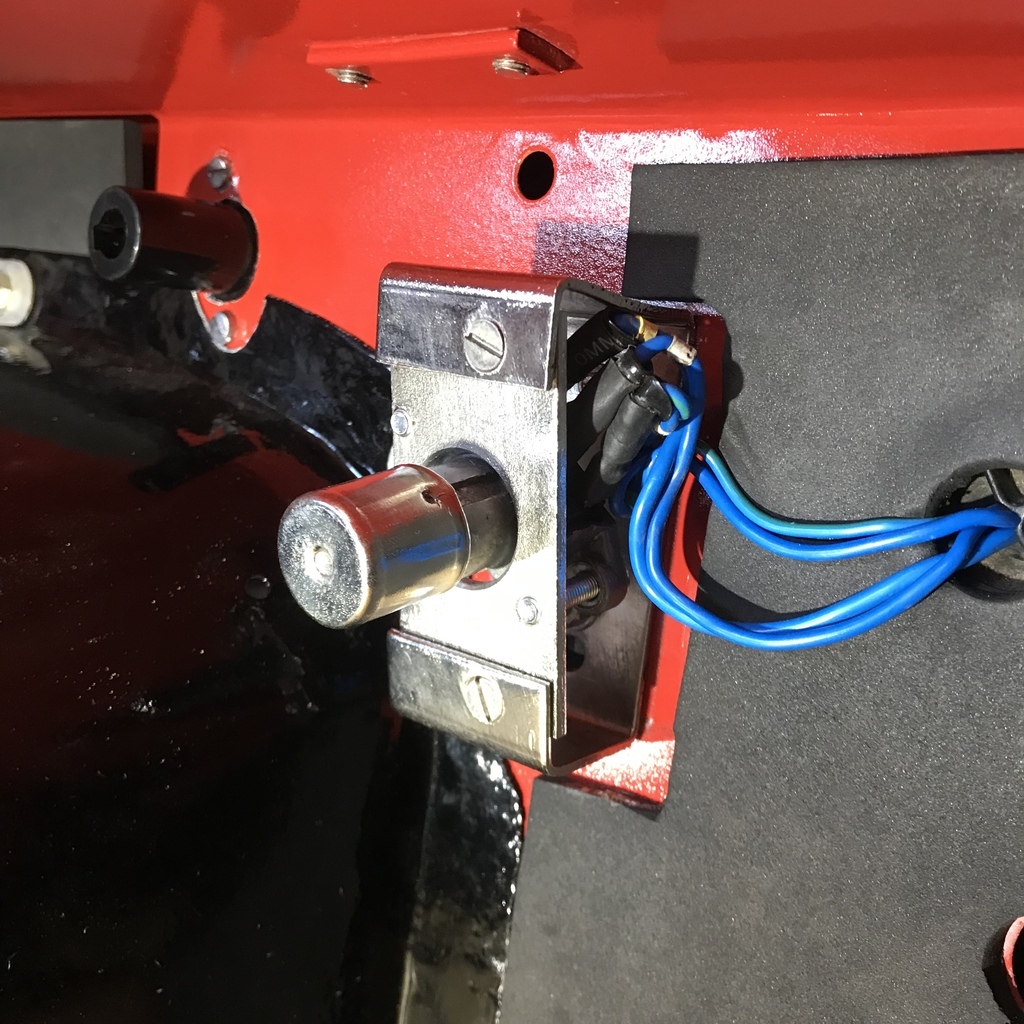 Sewed up a cover from moquette. 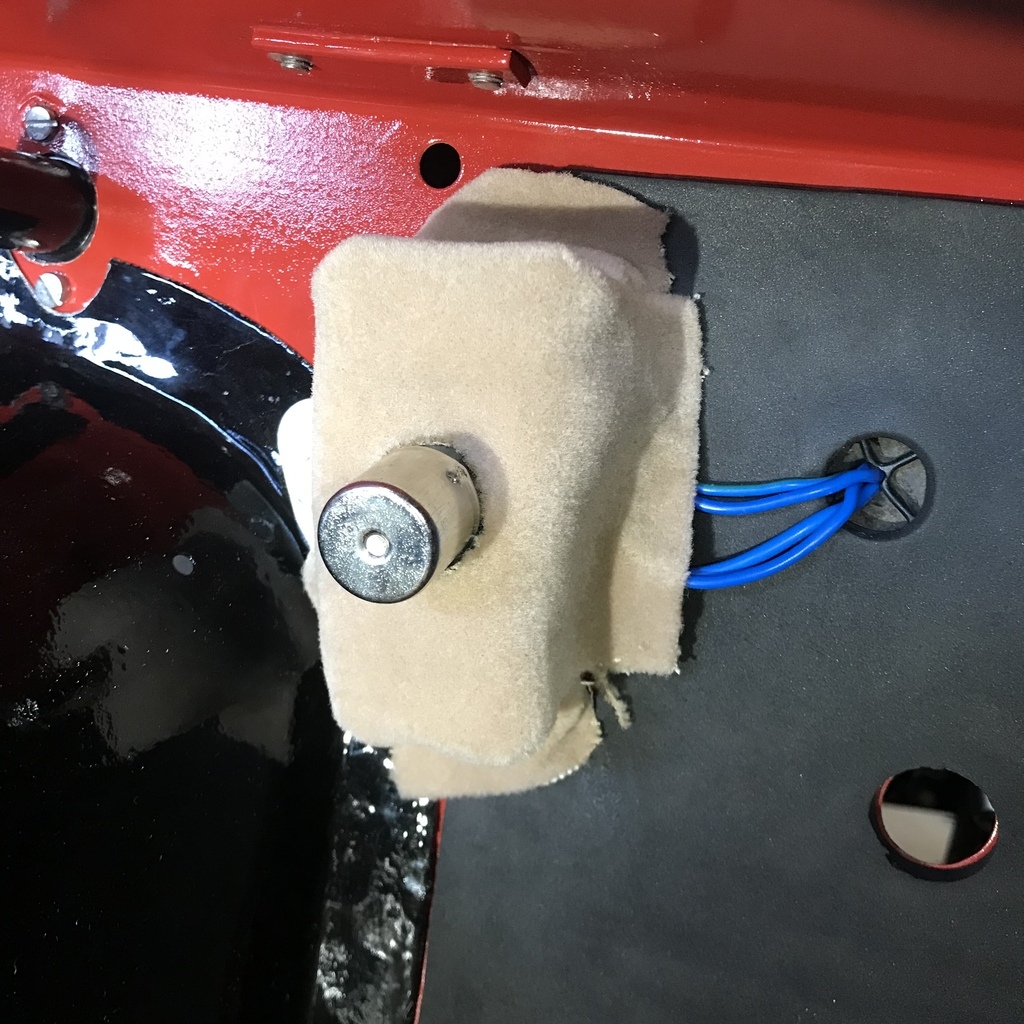 Prior to this I’d glued some dense foam to the bulkhead. It’s only about 8mm thick, but that’s enough to make the overall surface flat so the carpet sits ok. 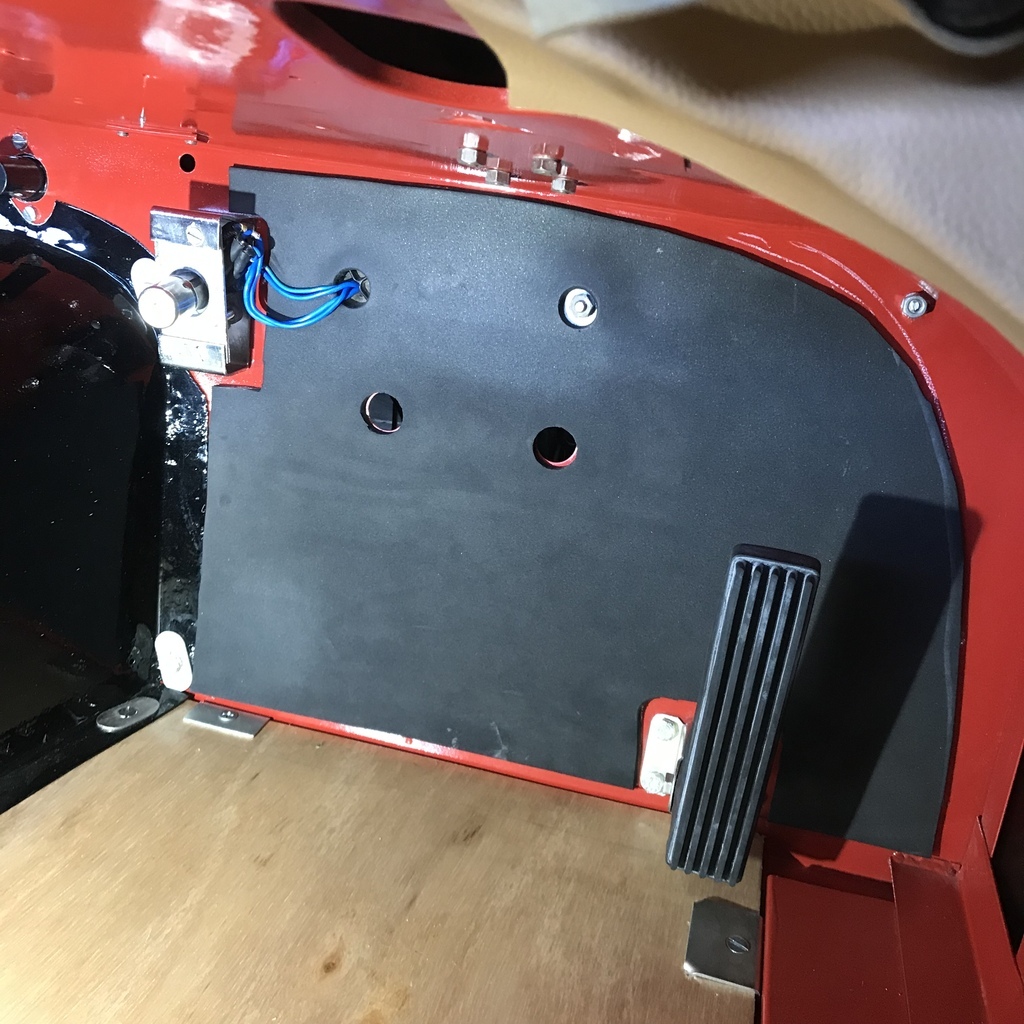 Carpet in place. 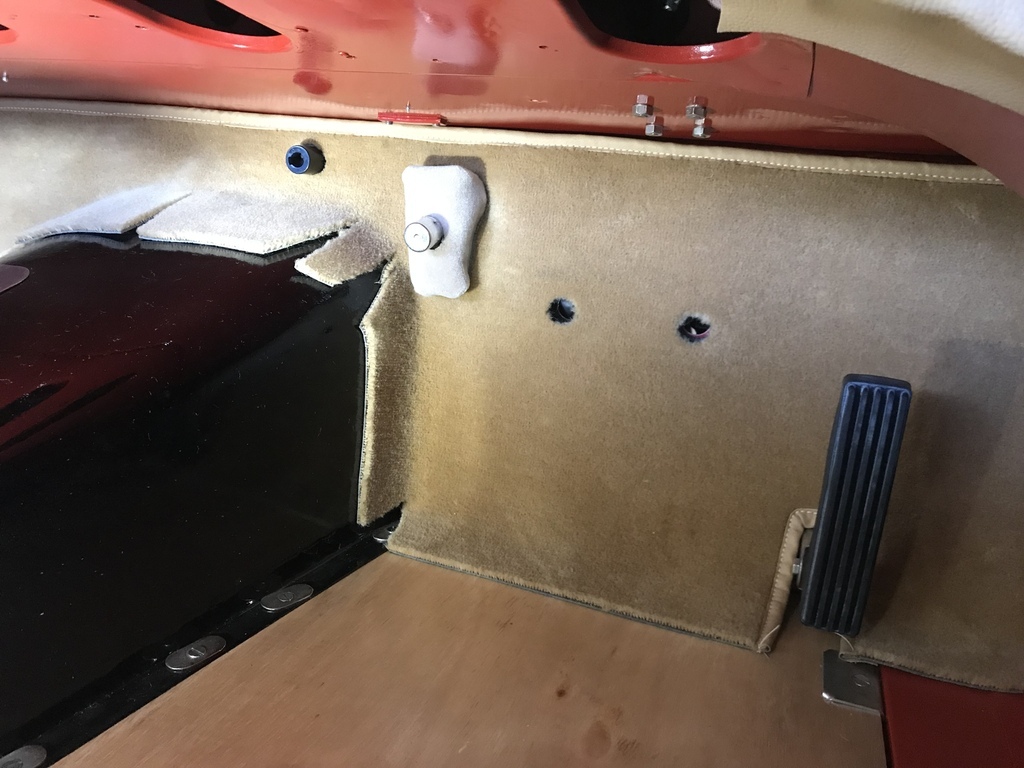 It’s held there by the side panels and the gearbox tunnel carpet. I’ll glue it if it doesn’t stay in place. 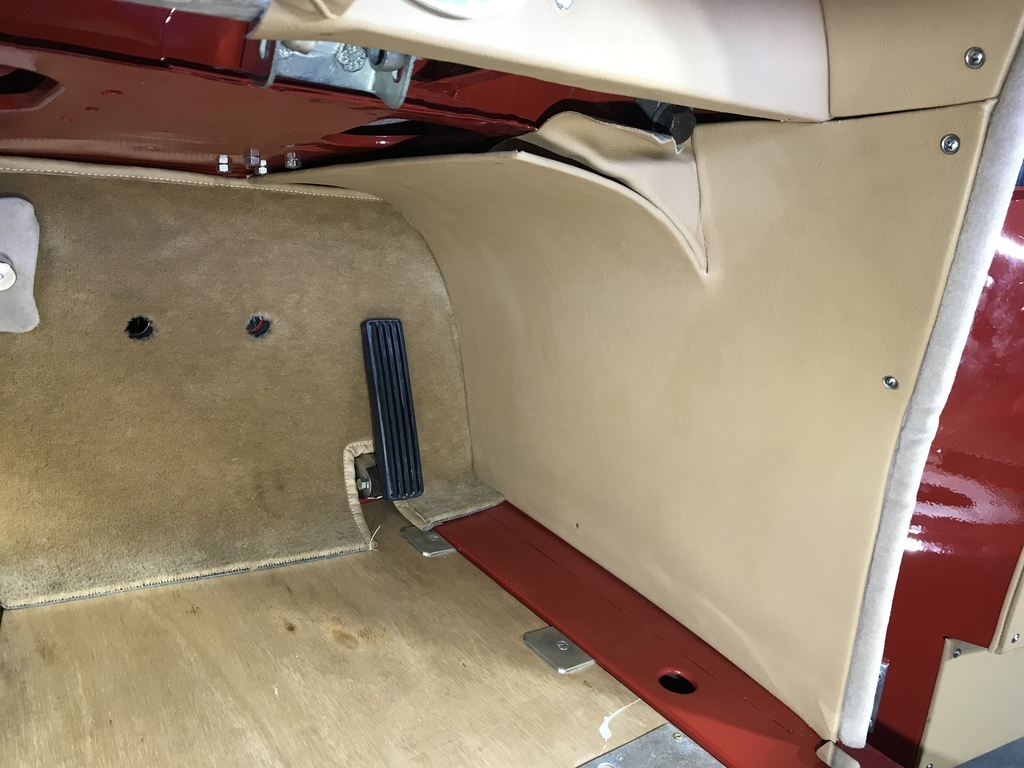 Gearbox tunnel done. 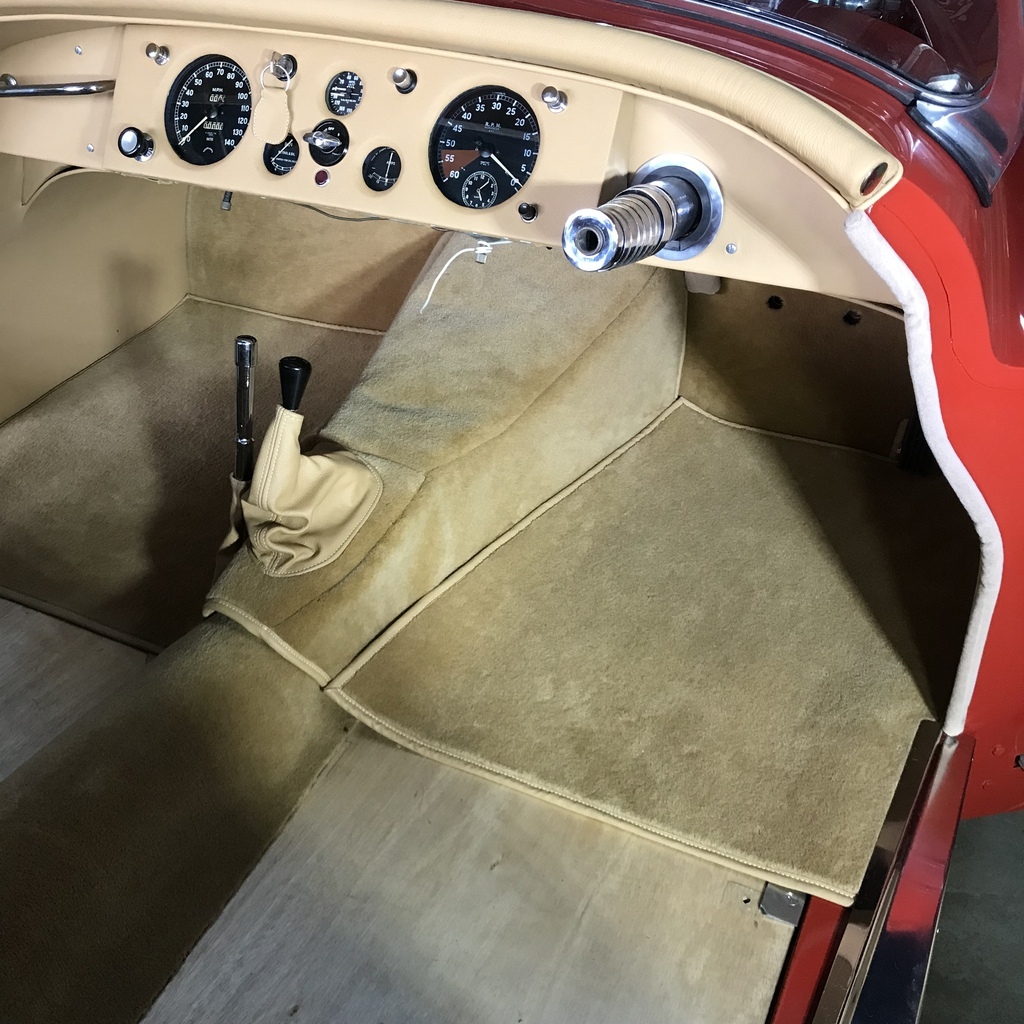 Gearbox carpet is held in place by some Velcro sewn to the carpet and the Velcro hook simply stuck to the painted tunnel. Easy and works like a charm. So much so that I’m undecided whether to install the gearbox oil dipstick access cover. Taking the carpet off to check the oil is just a matter of unscrewing the gear knob. I very much like the “periodness” of it but I also like the clean look without it. With: 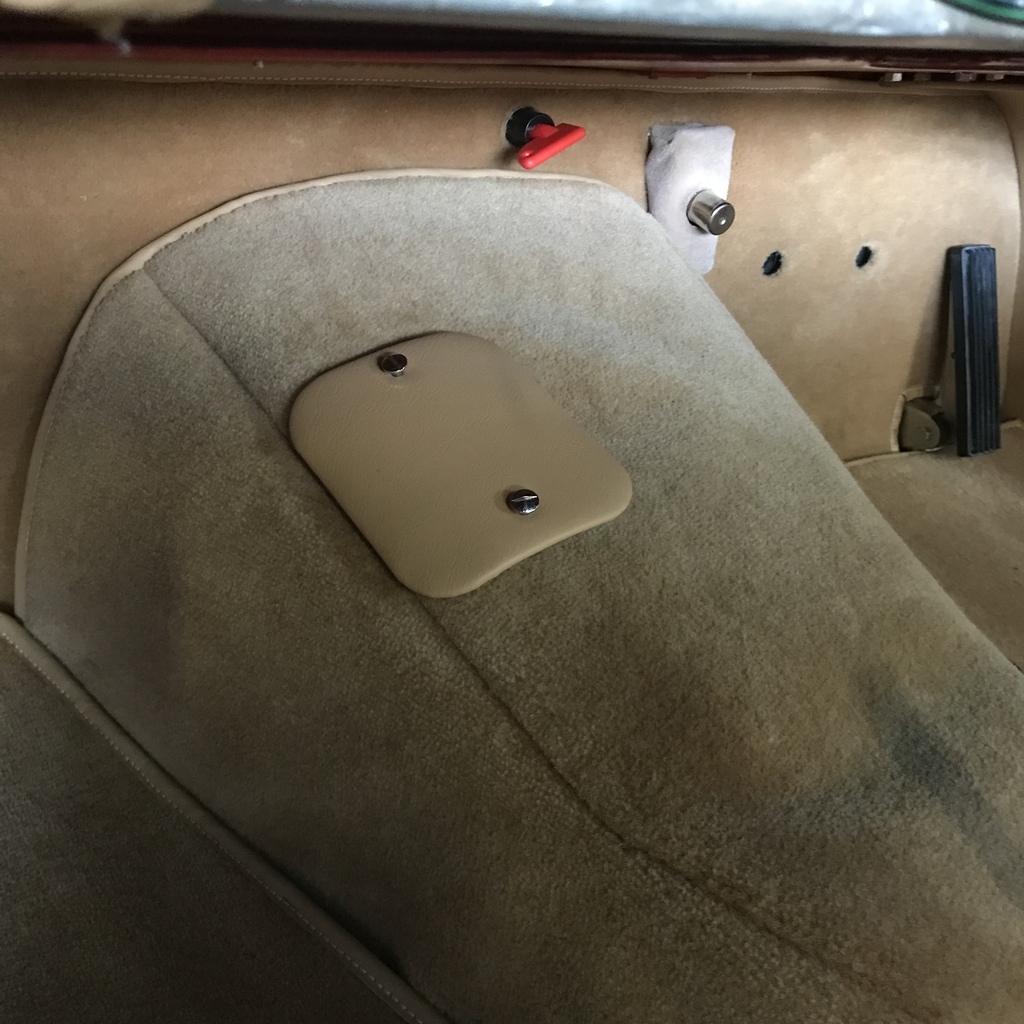 Without: 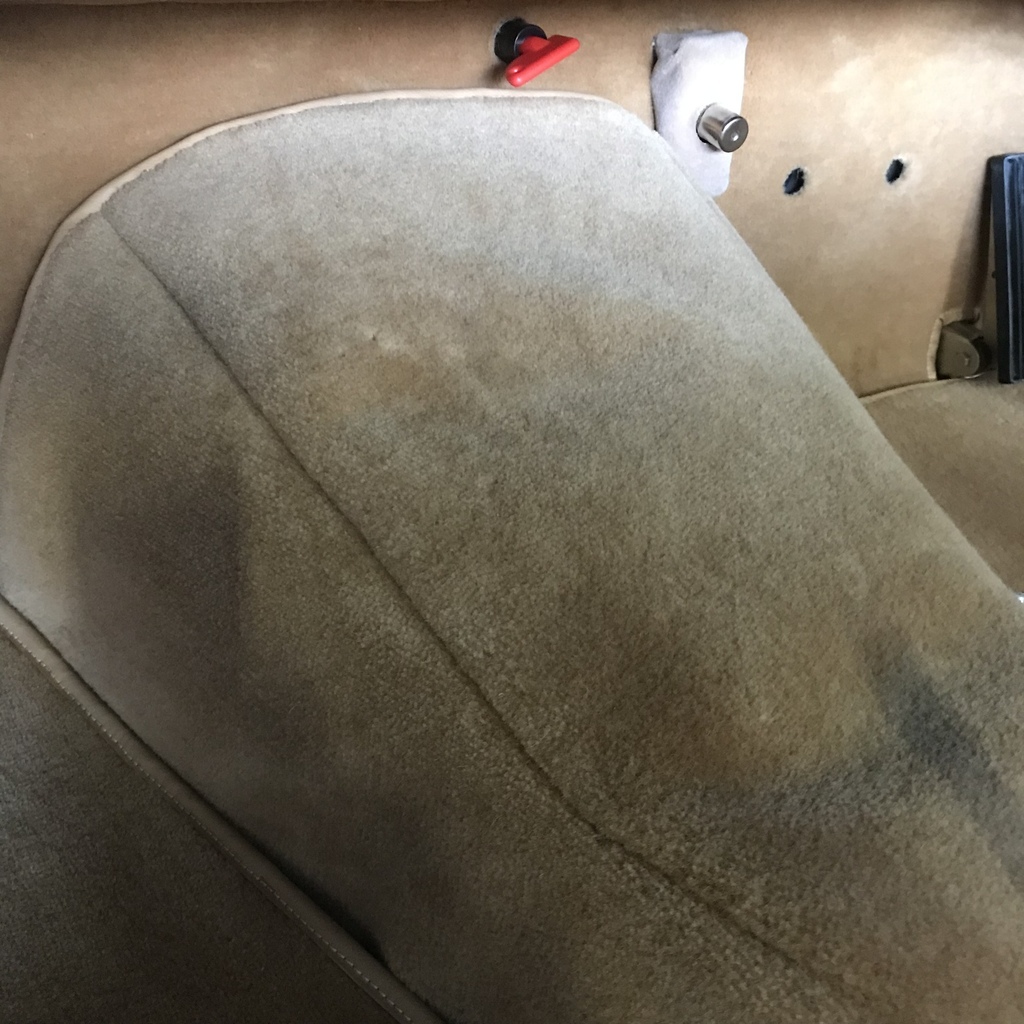 Votes on a postcard to… That’s all for now. Cheers |
| |
|
|
jamesd1972
Club Retro Rides Member
Posts: 2,921  Club RR Member Number: 40
|
1952 Jaguar XK120 restoration jamesd1972
@jamesd1972
Club Retro Rides Member 40
|
Apr 22, 2022 11:49:42 GMT
|
|
With, just because it breaks up the carpet and it has a function, all be it a limited one.
Still enjoying the write ups and detailed work, when is start up ?
James
|
| |
|
|
|
|
|
Apr 22, 2022 12:10:03 GMT
|
|
Without - looks far tidier.
PS. a bit of heat shrink tube over the wires in the clip?
|
| |
|
|
glenanderson
Club Retro Rides Member
Posts: 4,356
Club RR Member Number: 64
|
1952 Jaguar XK120 restoration glenanderson
@glenanderson
Club Retro Rides Member 64
|
Apr 22, 2022 12:34:06 GMT
|
|
I’d second the heatshrink idea for the wires.
As for the dipstick access, well, having made a mess of the new blue Wilton carpet in my P4 the very first time I checked the gearbox oil, I’d suggest taking the carpet out anyway, regardless.
|
| |
My worst worry about dying is my wife selling my stuff for what I told her it cost...
|
|
|
|
|
Apr 22, 2022 15:09:16 GMT
|
|
Without I would say,
Absolutely stunning work as usual,
Nigel
|
| |
BMW E39 525i Sport
BMW E46 320d Sport Touring (now sold on.)
BMW E30 325 Touring (now sold on.)
BMW E30 320 Cabriolet (Project car - currently for sale.)
|
|
iant
Part of things
 
Posts: 155
|
|
Apr 22, 2022 16:19:15 GMT
|
|
Really nice to see these updates, the high standard of work continues. I like the clean look without the cover, although appreciate the work you've put into it all!
|
| |
|
|
|
|
|
|
|
|
With regard to the wires how about a strip of thin rubber to follow the shape of the bracket? for the gearbox tunnel access plate it looks better without but go to any shows and the rivet counters will get you!!
|
| |
|
|
|
|


