gazzam
Part of things
 
Posts: 741 
|
|
Mar 31, 2022 17:54:13 GMT
|
|
Thanks Nigel.
I hadn’t even thought about that..
Even though we are experiencing the wettest couple of years that I can remember!
MDF doesn’t like water at all.
The 3mm stuff in the doors is well covered and could be replaced without much trouble.
But the 18mm lot would be a major headache. Very unlikely given that this car is unlikely to see anything other than dry weather.
But while I can it seems sensible to take precautions.
I think I’ll take it out ( easy ) and give it a good coat of paint to seal it up.
Thanks again for the timely reminder.
|
| |
Last Edit: Mar 31, 2022 17:55:04 GMT by gazzam
|
|
|
|
|
|
|
Mar 31, 2022 19:49:01 GMT
|
|
I was going to say the same about MDF.
I'd replace with hardwood where practical, otherwise varnish the hell out of it.
|
| |
|
|
gazzam
Part of things
 
Posts: 741 
|
|
Mar 31, 2022 21:30:06 GMT
|
I was going to say the same about MDF. I'd replace with hardwood where practical, otherwise varnish the hell out of it. Too much work to duplicate it in hardwood. Really the car would have to be upside down in a ditch for it to get wet. At that point wet mdf will be the least of my worries! |
| |
|
|
jimi
Club Retro Rides Member
Posts: 2,232  Member is Online
|
|
Mar 31, 2022 22:21:50 GMT
|
If you seal the mdf properly with paint it will be fine. This is built mainly from MDF painted with exterior gloss, it's survived many years of my son (and daughter) growing up and being out on many rainy journeys   |
| |
Black is not a colour ! .... Its the absence of colour
|
|
|
|
|
Mar 31, 2022 22:52:32 GMT
|
I did say where practical  MDF has a habit of absorbing damp though. As Jimi says above, as long as it's well sealed with paint or varnish it will be fine. |
| |
|
|
gazzam
Part of things
 
Posts: 741 
|
|
|
|
|
Brushed on 2 coats of acrylic house paint. Nice duck egg blue.
|
| |
|
|
gazzam
Part of things
 
Posts: 741 
|
|
|
|
These crash ( d ) rolls are quite a job. Part of it is the rubber d section itself. The ends are distorted, mostly I suppose because they’re 70 years old. There were short pieces glued onto the end of a few of them. 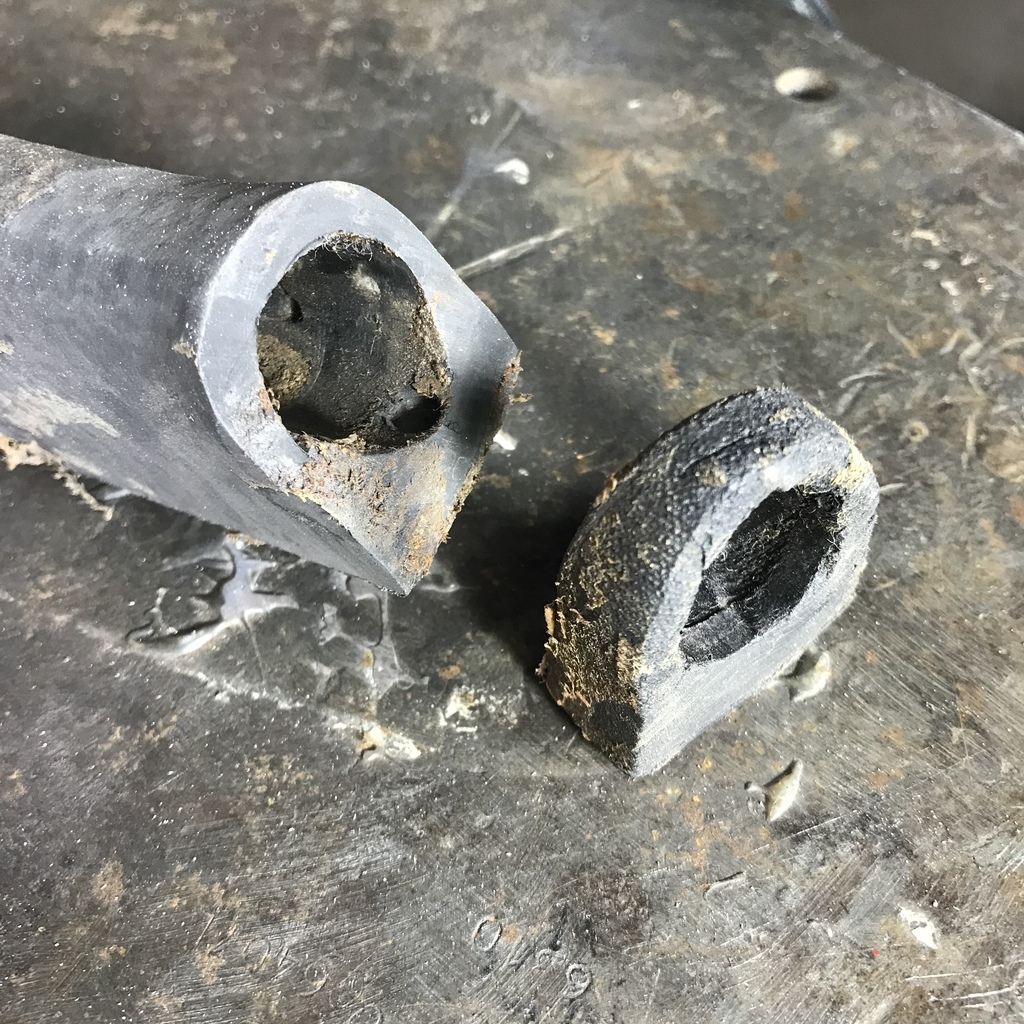 Maybe the original had shrunk ( in length ) and the little bit was added when the car was retrimmed in the past. The ends were mostly flared out, and needed to be brought back to shape. I used Soudal TRex to build up the ends so they could be lengthened and reshaped. 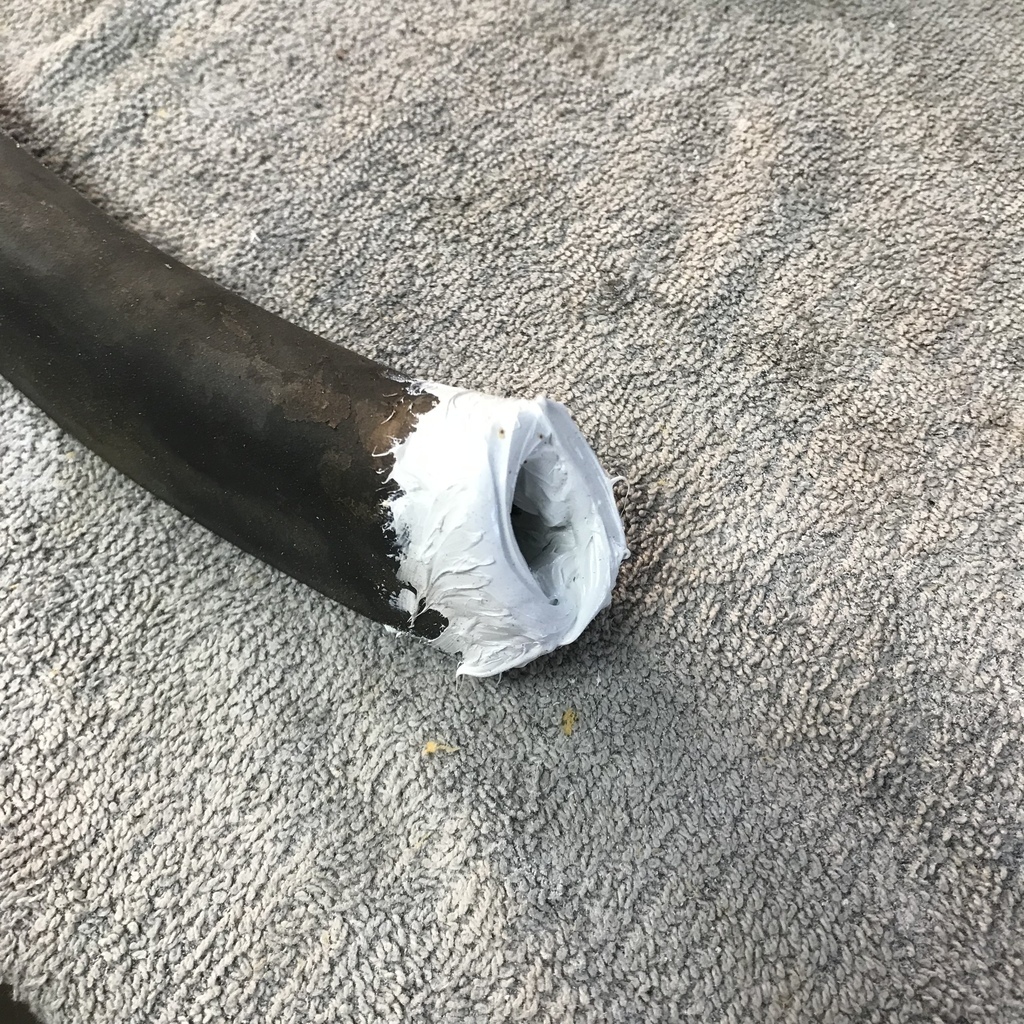 They could then be shaped with a scotchbrite pad on the die grinder. 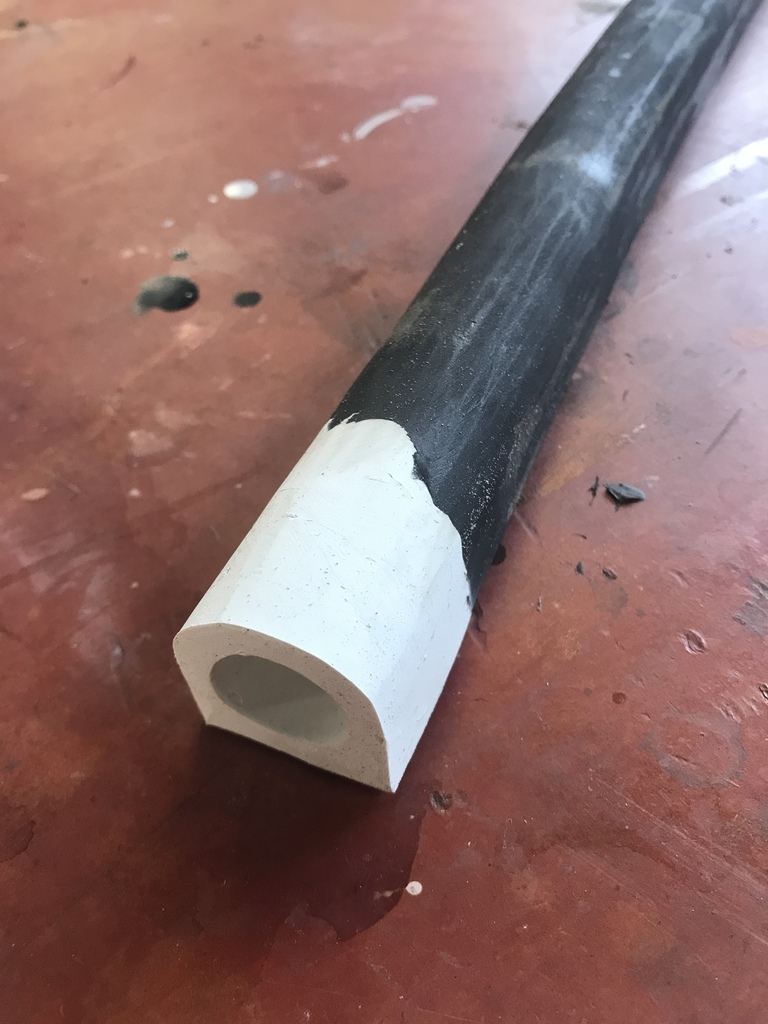 They were then covered in fabric. 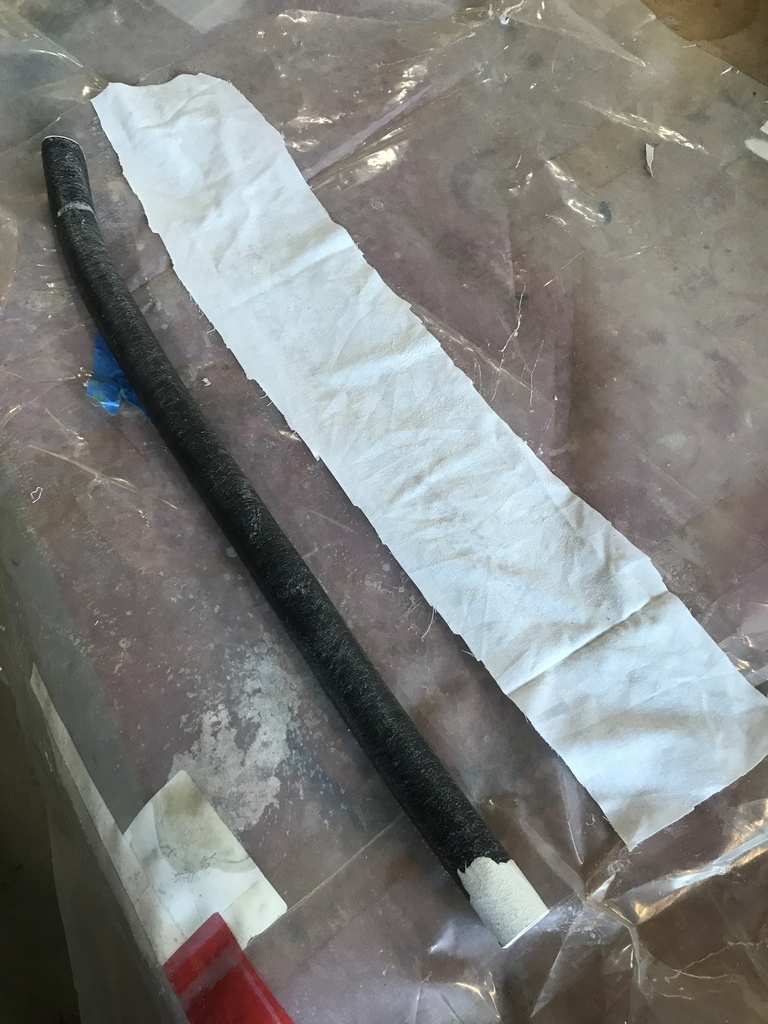 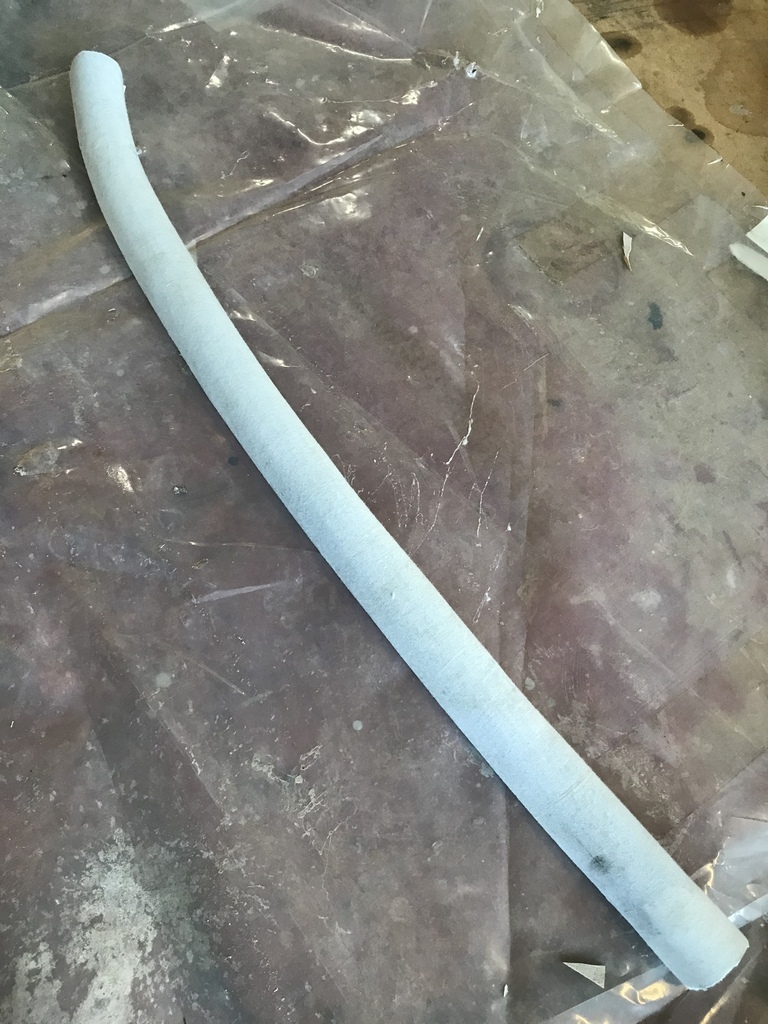 The beading and the leather were glued to form the corner before being screwed onto the door. 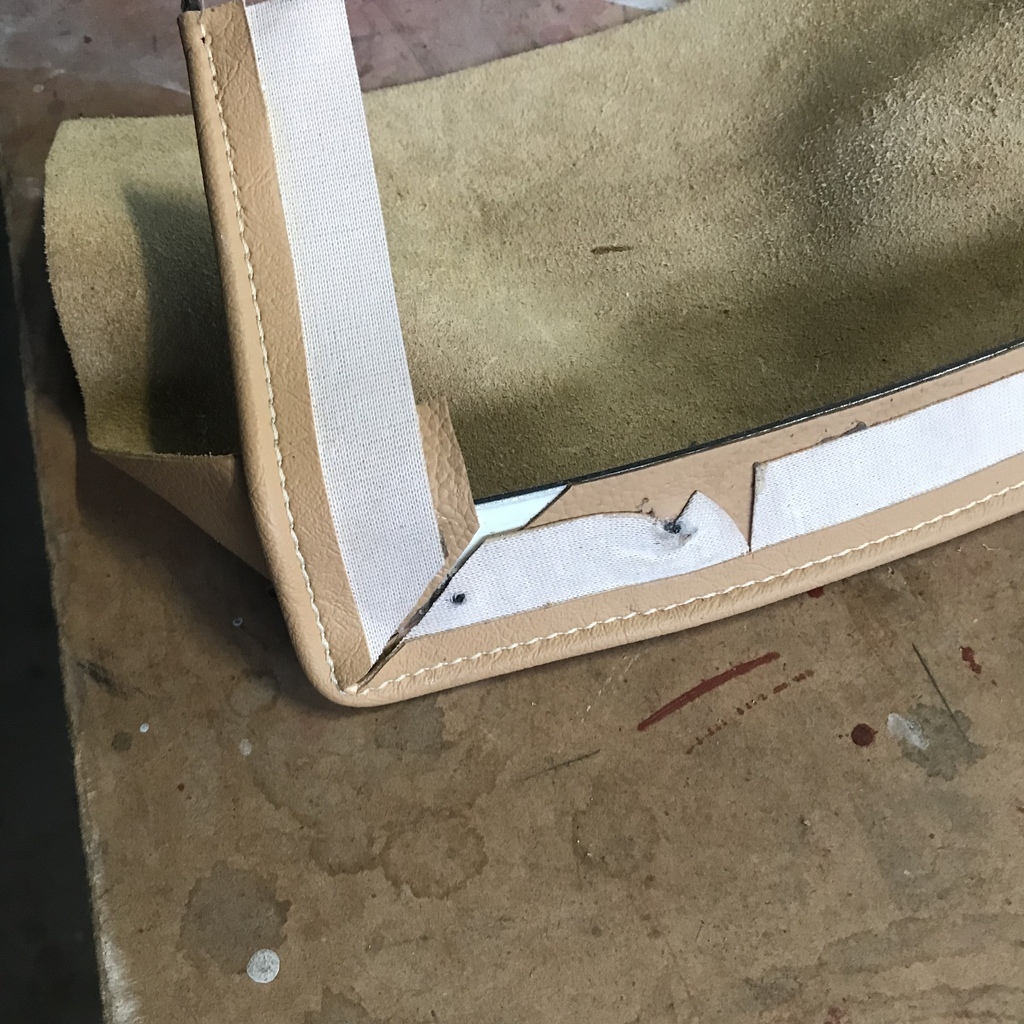 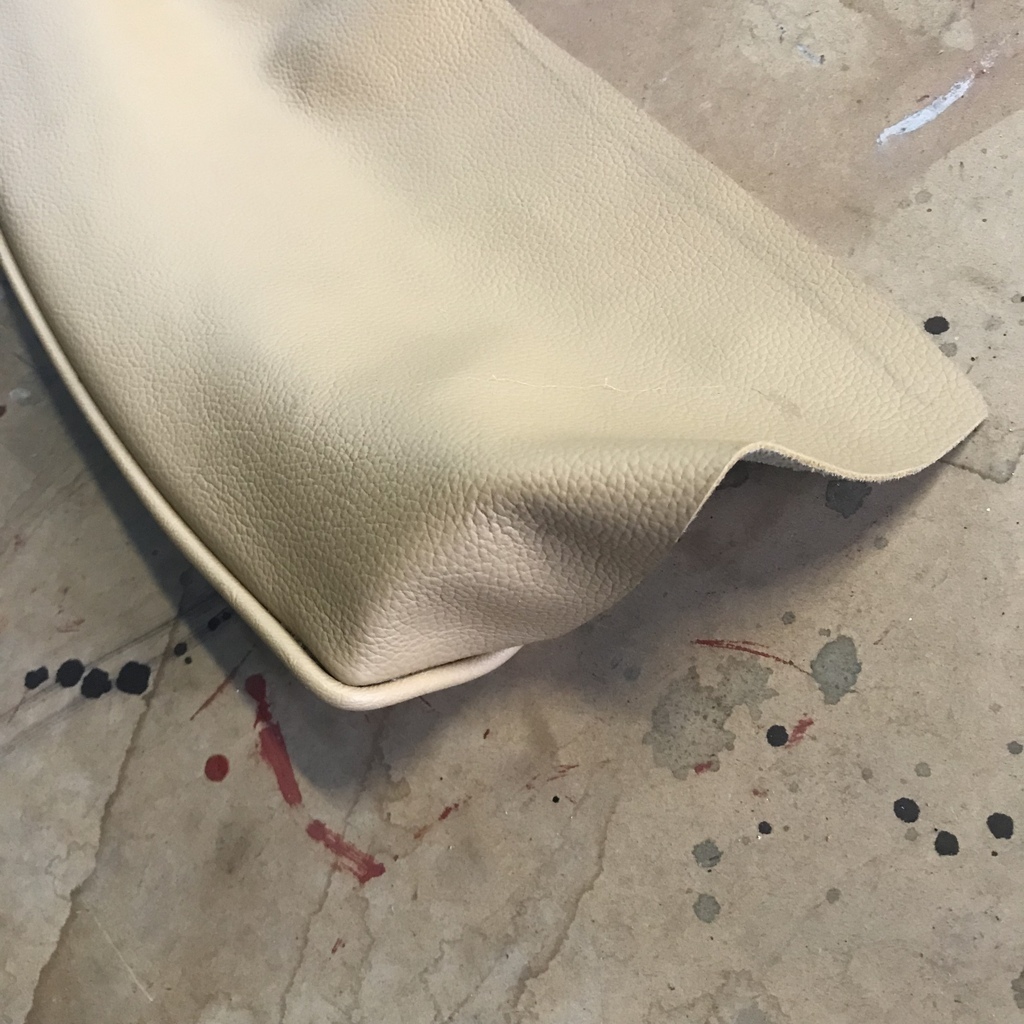 Then the covered d roll is glued in place. 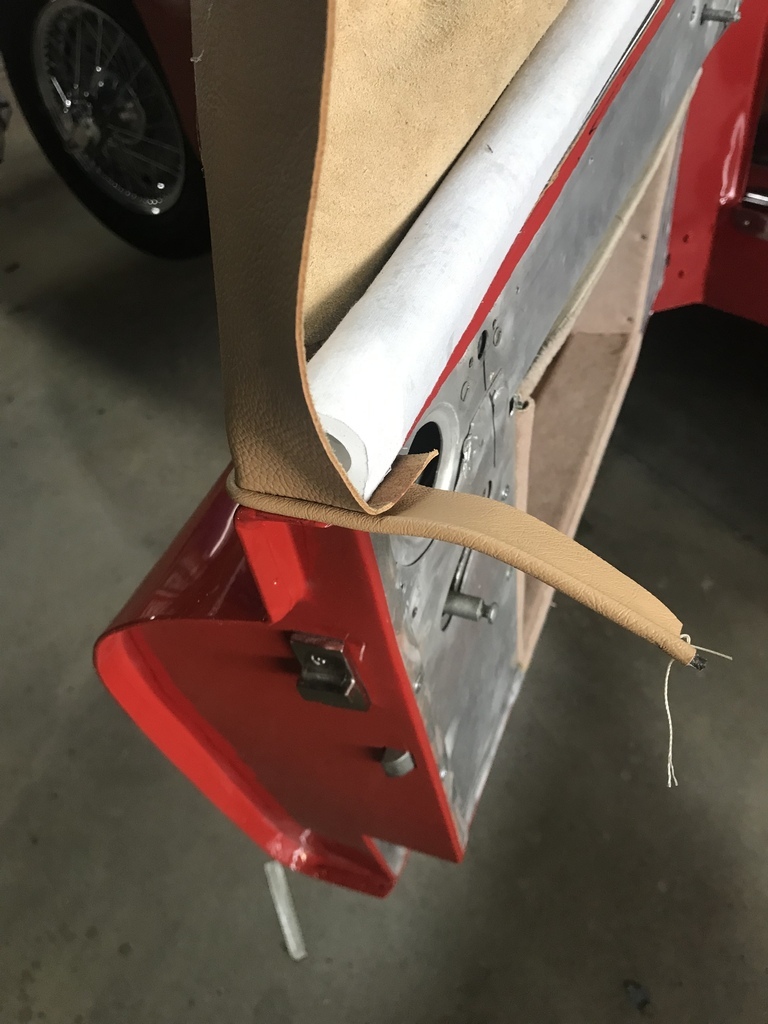 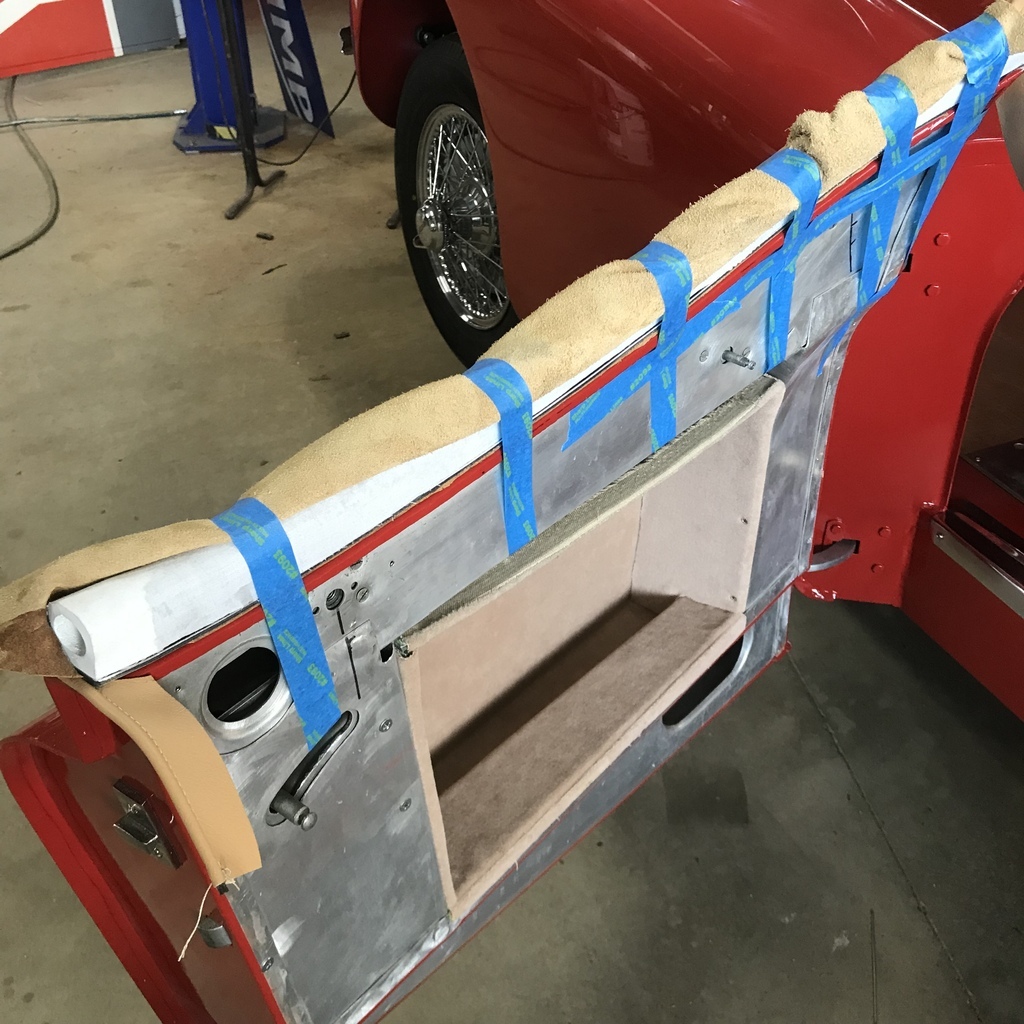 And the ends trimmed and plug pushed in. 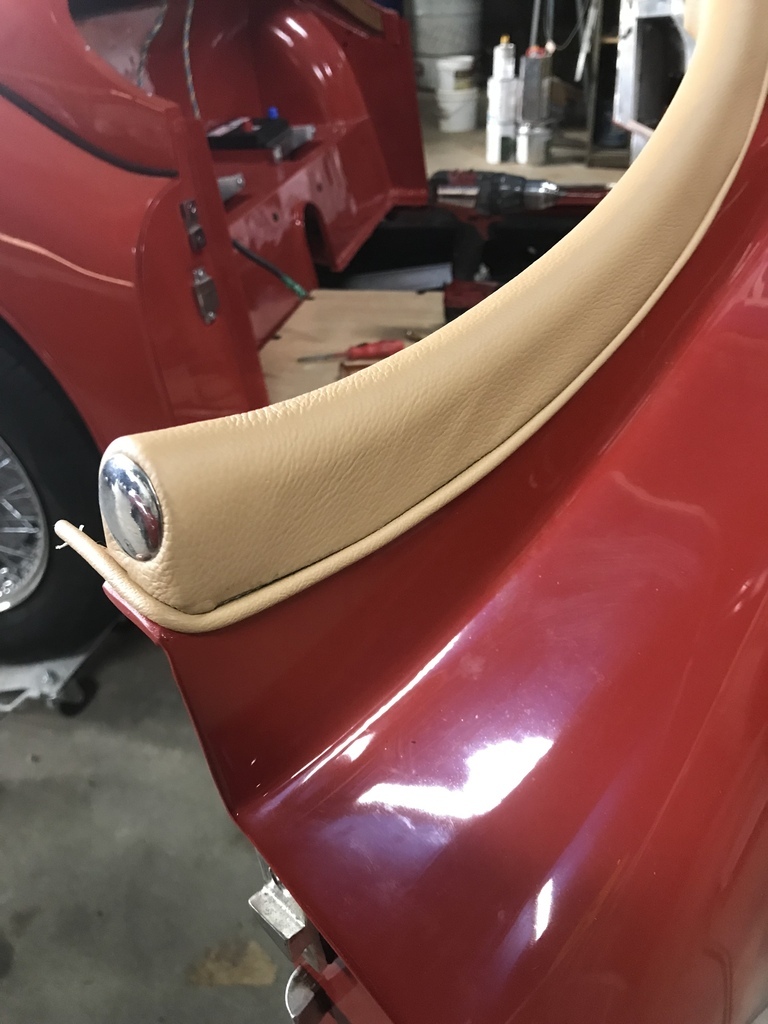 This post is already too long, more exciting trimming soon! That’s all for now. Etc. Cheers |
| |
|
|
gazzam
Part of things
 
Posts: 741 
|
|
|
|
God I hate modern cars. They’re just too complicated. This is the front of my 2008 Renault Trafic van. It has just over 100k (kilometres) and looks like this because I need to fix the starter. 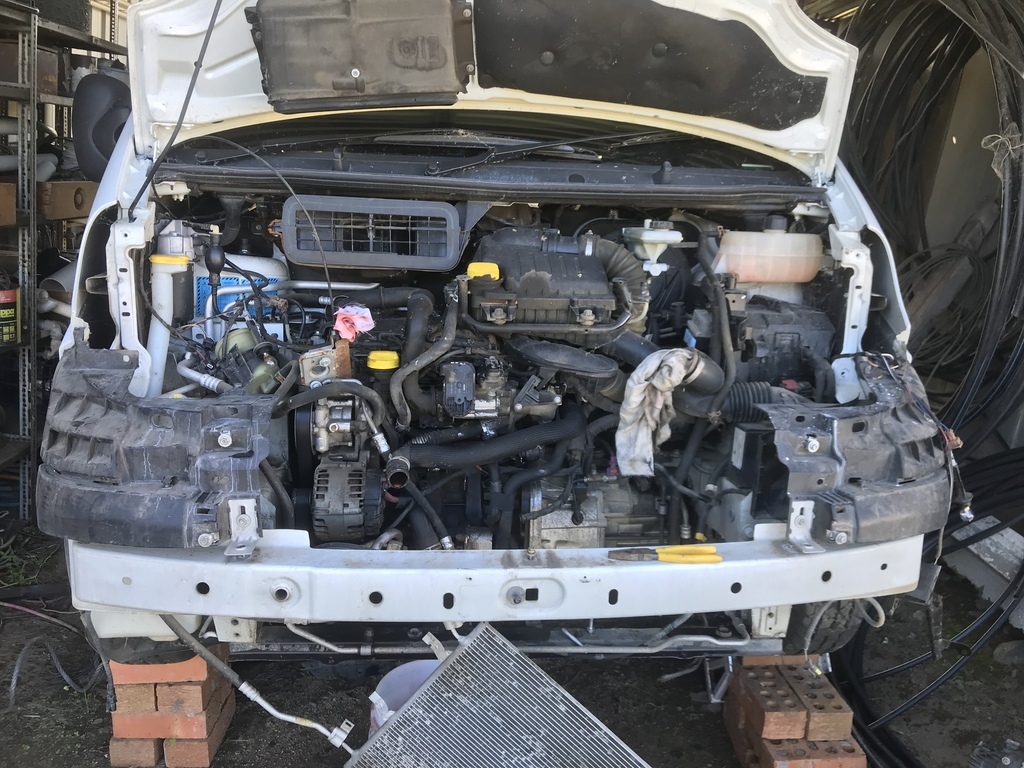 I watched every YouTube video I could find ( just a couple) in order to try to get it apart without breaking all the stupid little plastic doodads that make it easy to assemble, but impossible to pull apart. I read the comments on the videos and some clown reckoned it was possible to get it (the starter ) out without doing all this. I call Bullplop on that, unless he has a matter transporter. I couldn’t see it from above or below. Even after I’d pulled most of the front off. But I was never sure that I was looking at the right video because there are a few engine variants. Apparently it’s a matter of national security that no-one shall know which one is in my van, I couldn’t find it anywhere. It has a dci115 badge on it but that may be it’s security clearance. The entire front has to be dismantled just to get to the starter motor. The radiator has to come out, meaning the coolant has to be drained. But there’s no drain tap, so you have to try and catch because it’s only 12 months old and I’m not wasting it. So you do it by taking off a hose and that’s always fun. And the bloody radiator has more electrical connections than the starter. WHY? IT ISN’T AN ELECTRICAL COMPONENT. And every one of them has some hidden release thingo that won’t release before you break it. Then when you get the starter out and test it on the bench, it works. I suppose I’ll sit it back in place, hook up the wires and see what happens. Then I’ll burn the bloody thing. Thanks for reading my rant. In Jag news, the bonnet is painted for the third and hopefully, last time. 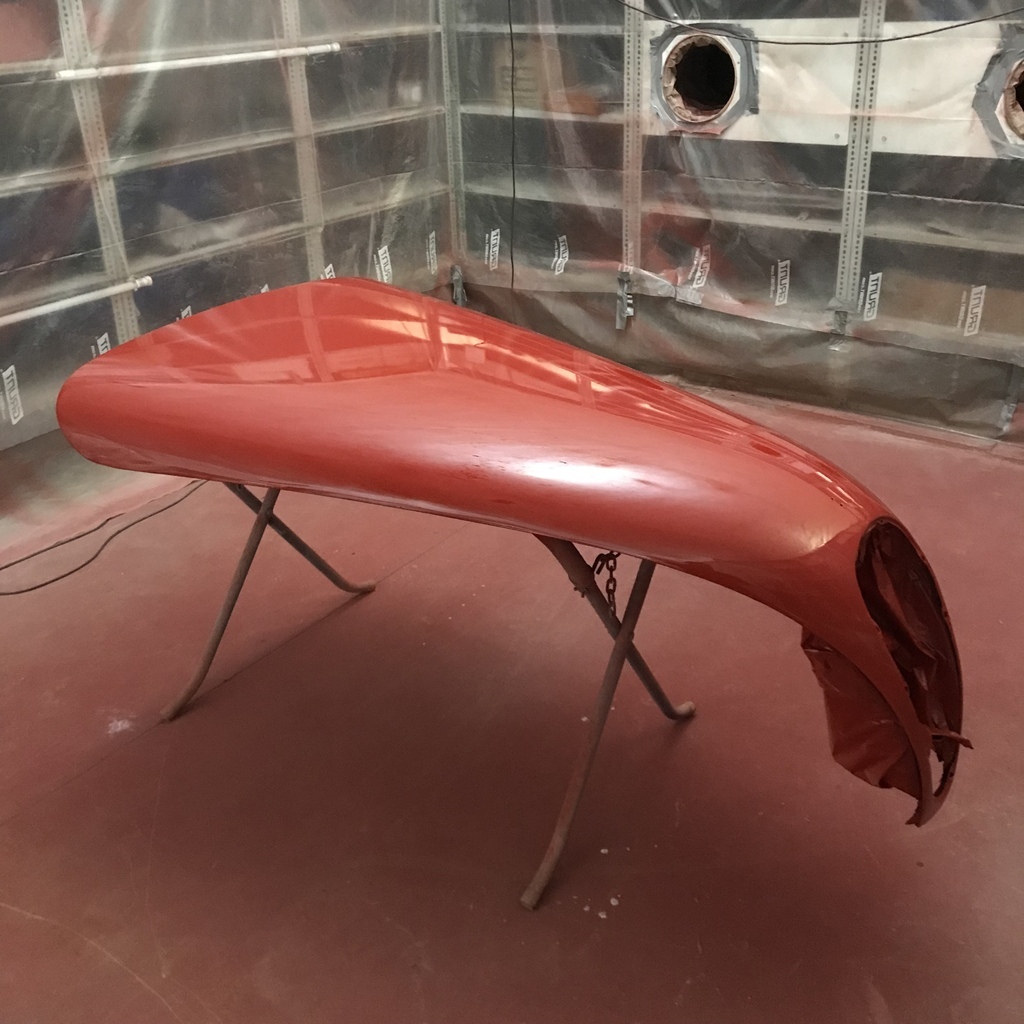 Cheers. |
| |
|
|
|
|
|
|
|
That's why I wont buy anything too modern until I'm forced to  I feel your pain. |
| |
|
|
|
|
|
|
|
|
Hell…. You don’t even have to take the front off to get the starter out of an Audi TT - and that’s a pretty obnoxious thing to work on.
Probably should have gone straight to the “kill it with fire” option.
Jag bonnet looks good though (again)
Nick
|
| |
1967 Triumph Vitesse convertible (old friend)
1996 Audi A6 2.5 TDI Avant (still durability testing)
1972 GT6 Mk3 (Restored after loong rest & getting the hang of being a car again)
|
|
|
|
75swb
Beta Tester
Posts: 1,052
Club RR Member Number: 181
|
1952 Jaguar XK120 restoration 75swb
@75swb
Club Retro Rides Member 181
|
|
|
|
Very relatable. Most of the front of an Audi A3 removed to change a bloody headlight bulb!
Bonnet looks great
|
| |
Last Edit: Apr 6, 2022 0:47:56 GMT by 75swb
|
|
eurogranada
Europe
To tinker or not to tinker, that is the question...
Posts: 2,556
|
|
|
|
|
Just caught up, lovely lovely work once more!
|
| |
|
|
gazzam
Part of things
 
Posts: 741 
|
|
|
|
Windscreen is fitted. The glass is in beautiful condition, barely a mark on it. The chrome surround and central post also cleaned up well enough. The aluminium side posts needed a little work. There were a couple of excess holes in each that I welded up. A few scratches and other patina were sanded out and then they were buffed. 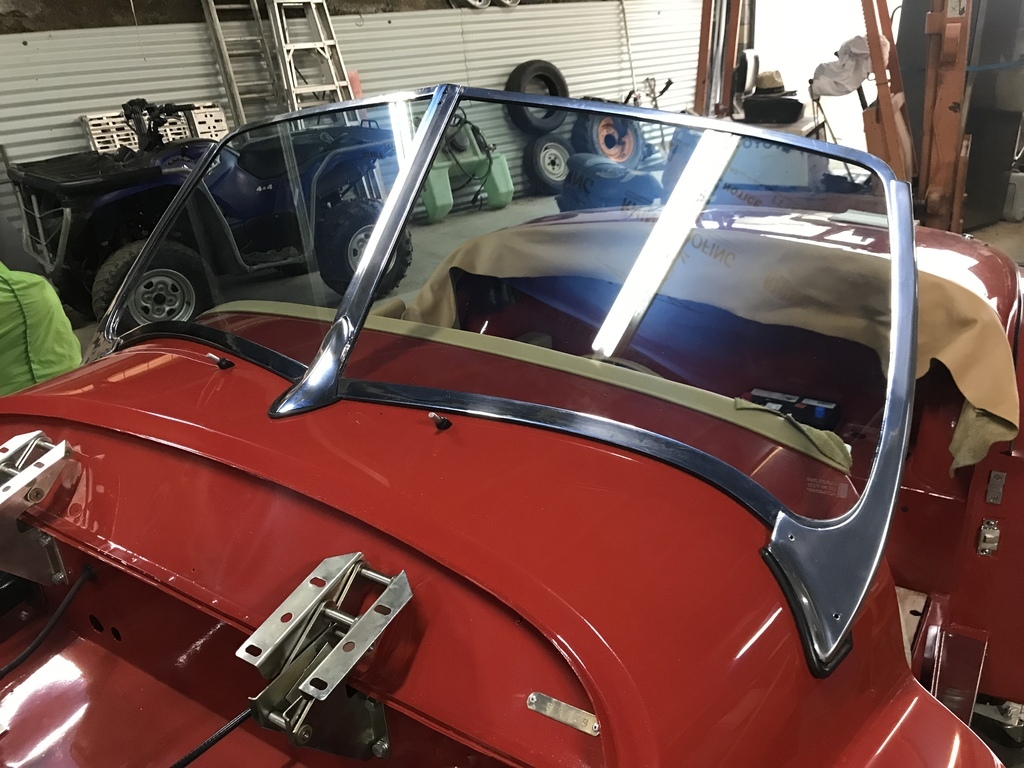 Like many things on this car, it fought me all the way. Each post is fixed to the bulkhead behind the dash, two 1/2 inch bolts per side. The bolts go through the posts into a threaded plate. 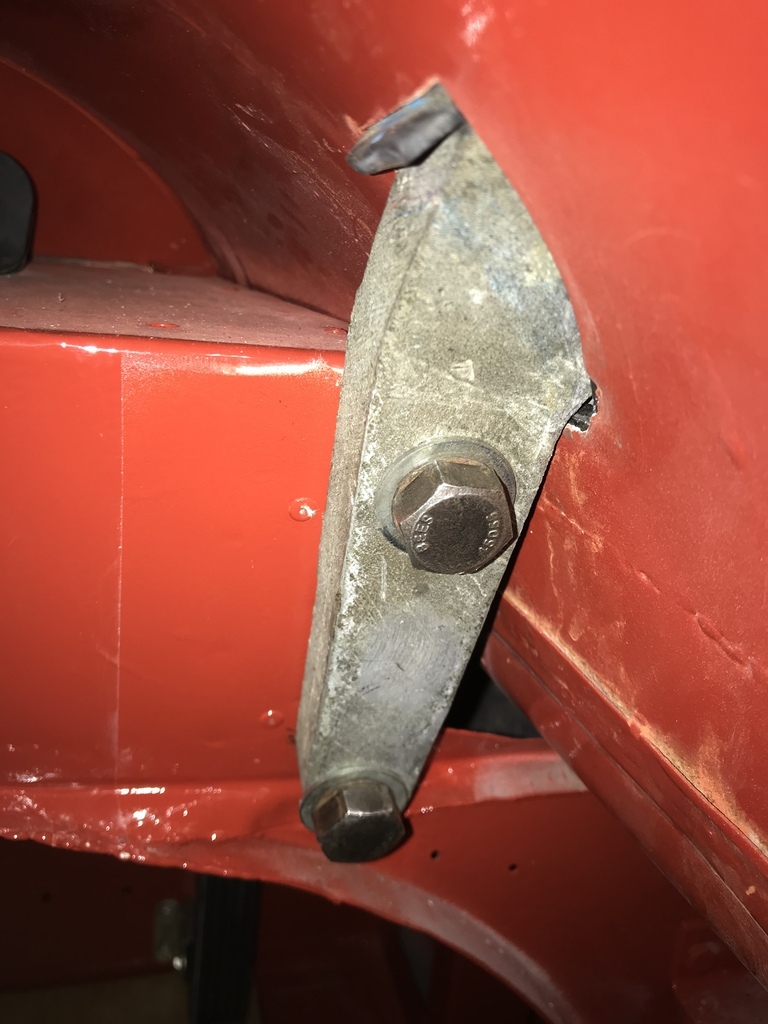 This is one of the plates. 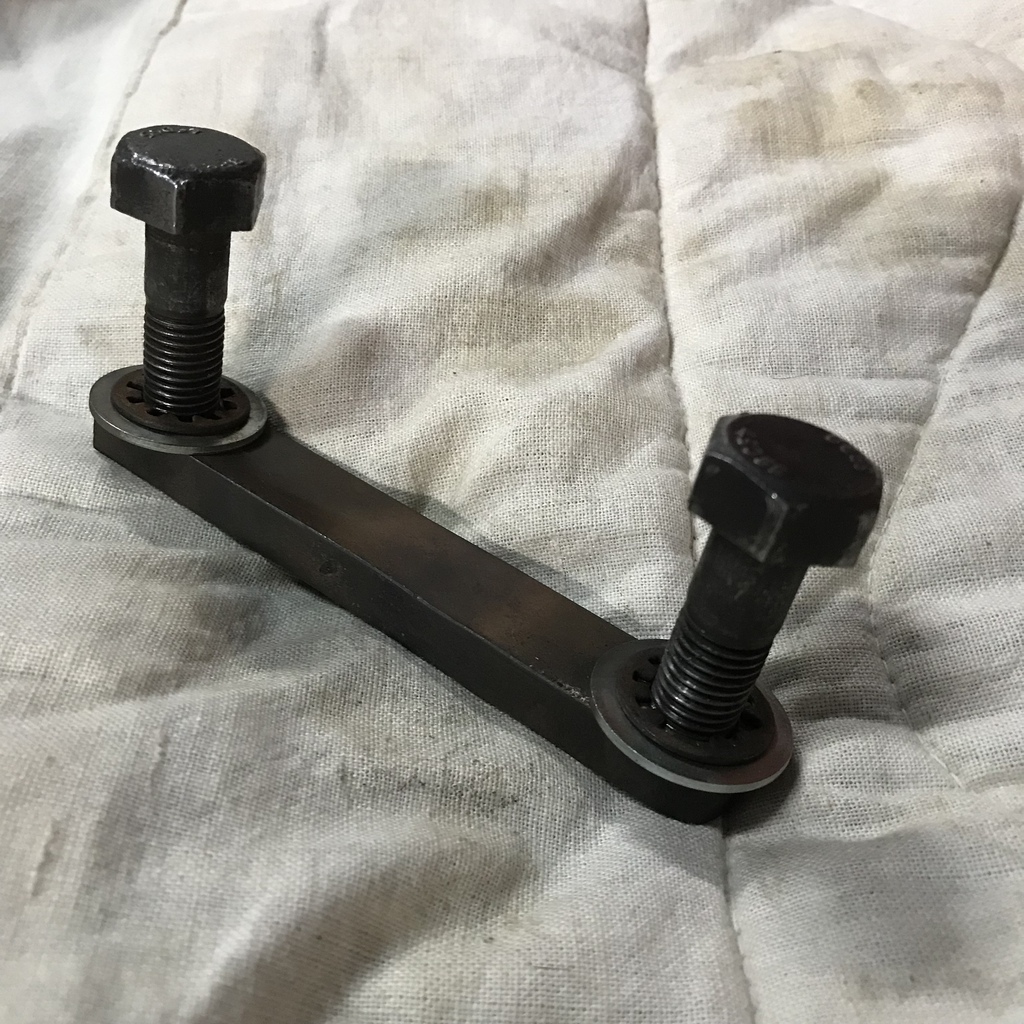 One of the threaded plates was original, with 2 original bolts. The other not, with 2 different bolts. So someone went to the trouble of making a new plate for some reason, but then couldn’t get 2 bolts the same? One bolt is UNC, the other maybe metric. The threads in the plate both UNC. Go figure. And the original plate decided it wanted to play silly buggers. The thread picked up as I was doing it up. So it had to be retapped. I stuffed that up and ended up with the threads in the plate not parallel. So the bolt wouldn’t start. I heated the plate with the oxy and put a slight twist in it to bring the threads back to parallel. Anyway got that all sorted and the screens in place. I’m not totally happy with the fit of the right hand post. 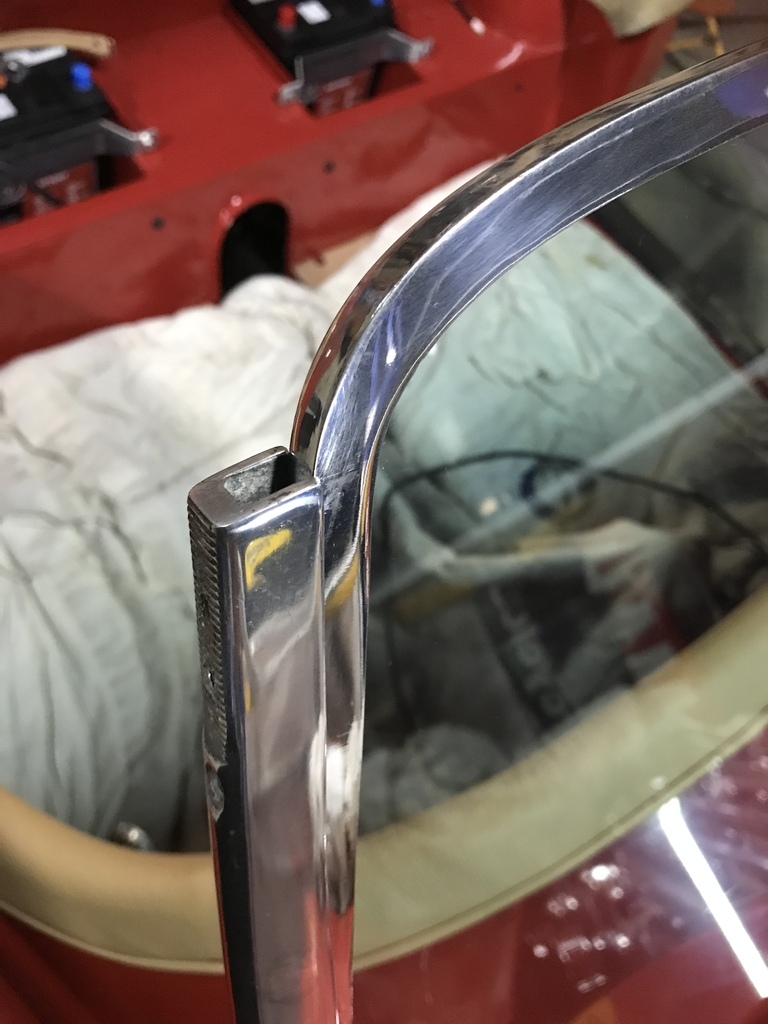 It was like this before I pulled it apart, but it won’t be left like it. A bit of die grinder work on the mounting holes should see it right. The left hand one is fine. 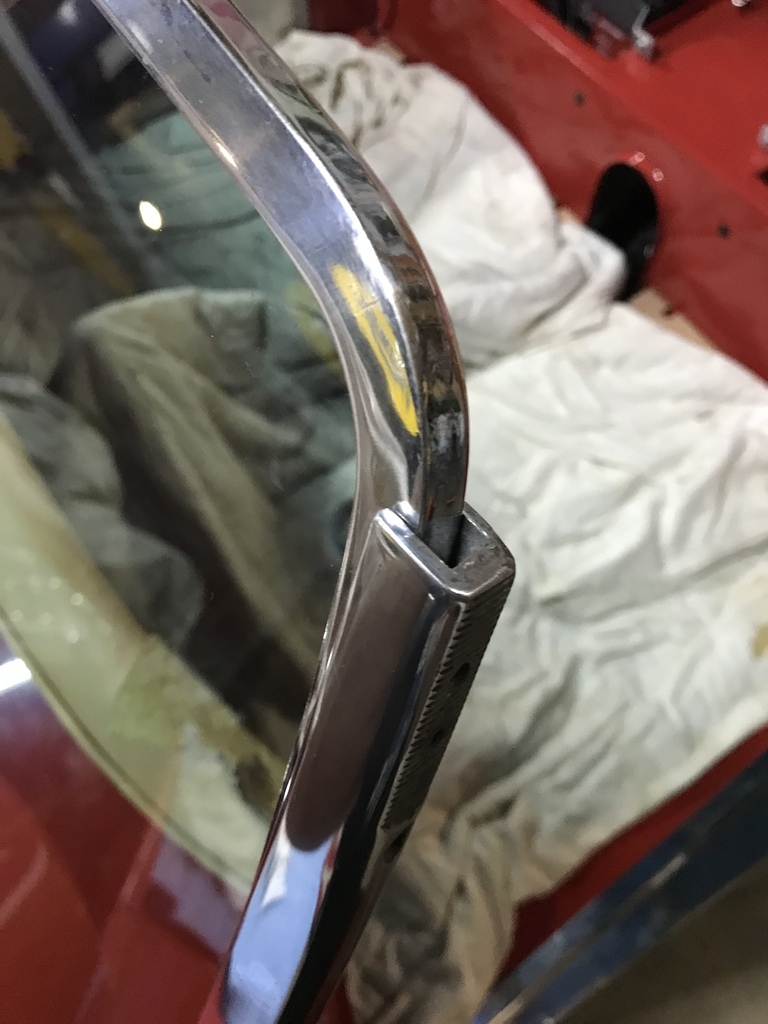 Turns out that when I enlarged the mounting holes, there was too big a gap here. That I didn’t take a photo of. This is after it was sorted. 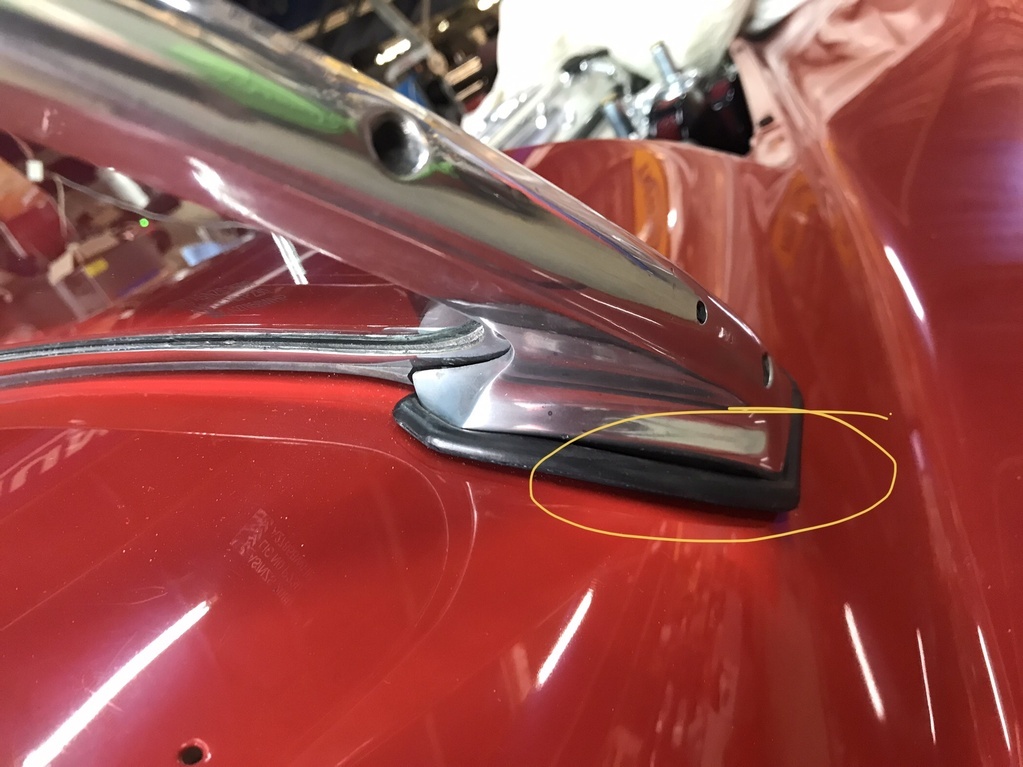 Added some weld along the edge. 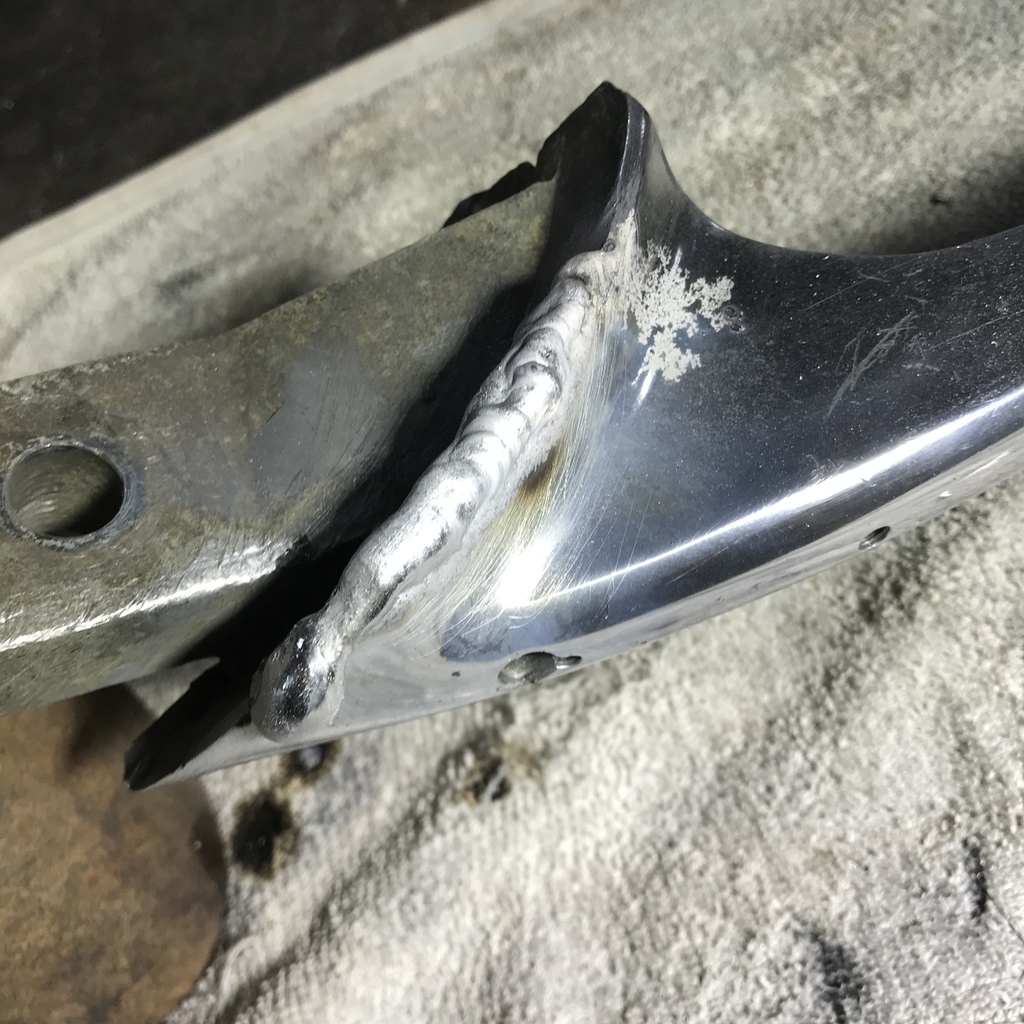 Ground back. 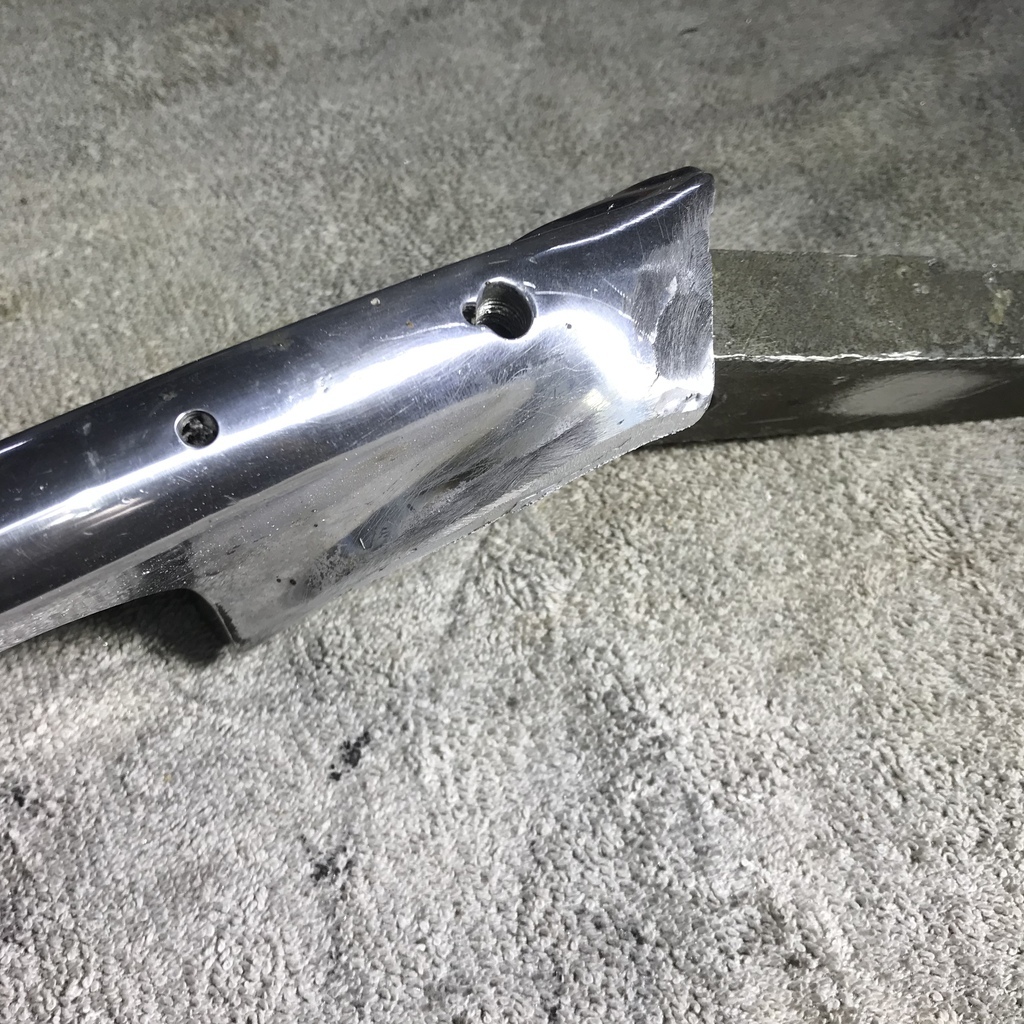 After a bit of extra weld and grinding ,it was just a matter of sanding and polishing to get it across the finish line. That’s all for now. |
| |
Last Edit: Apr 9, 2022 8:20:54 GMT by gazzam
|
|
|
|
|
|
|
|
Nice detail work, must be getting near the end now?
|
| |
|
|
gazzam
Part of things
 
Posts: 741 
|
|
|
|
Thanks, yes the light at the end of the tunnel is there (and hopefully not a train). Lots of ends to be tied up but an engine start is not far off. The dash, a major part of the wiring, is almost complete. 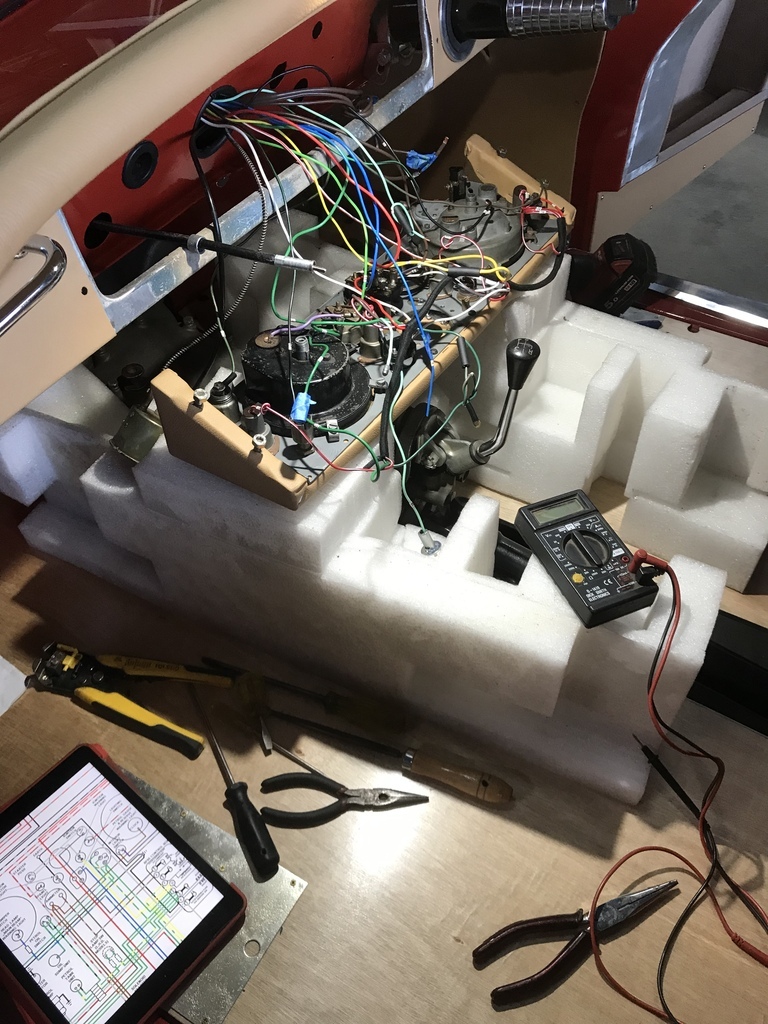 Cheers. |
| |
|
|
gazzam
Part of things
 
Posts: 741 
|
|
Apr 11, 2022 11:42:07 GMT
|
Engine start is closer. Fuel system is complete. Just need to add petrol. Electrical is almost there. Today I finished connecting all the wiring at the dash. It’s now in. 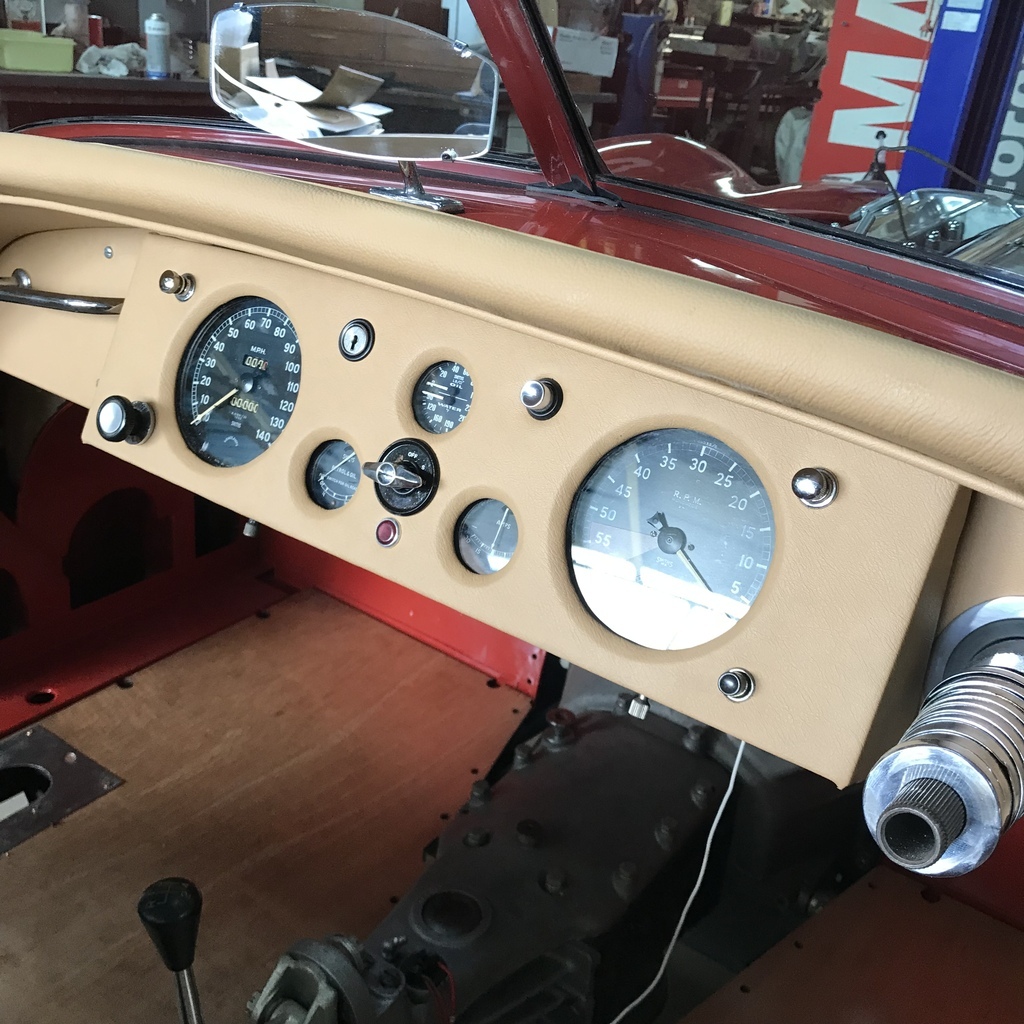 I have to install a switch for the hisser. So called because of the noise the engine makes while turning over. It’s an electric enriching device on one of the carbs (instead of a choke). I think it’s meant to be controlled by a temperature sensor, but previously there was just a switch and I think I’ll stick with that. Added a cutoff switch to the main power supply. 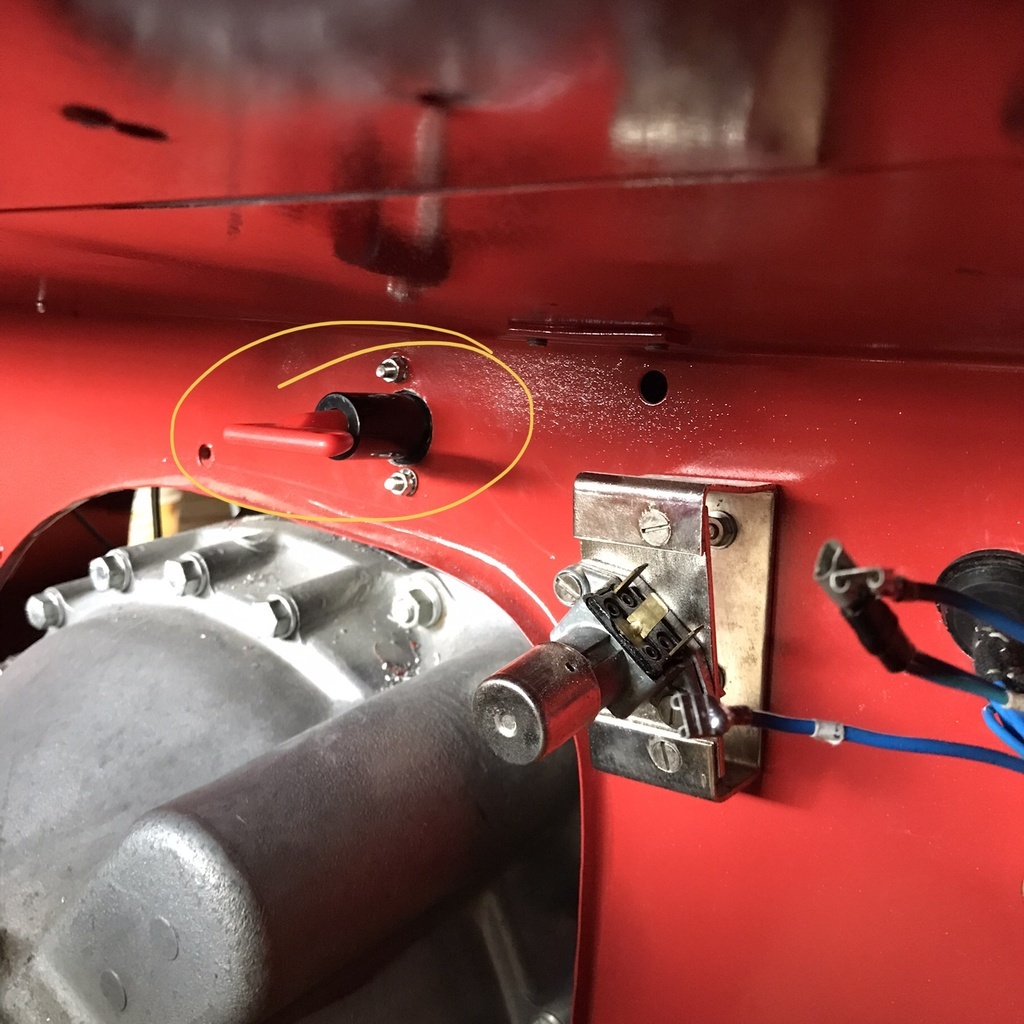 And from the other side. That’s the switch and solenoid circled. It was just a matter of moving the battery lead from the solenoid to the new switch and making up a short cable to go between the two. 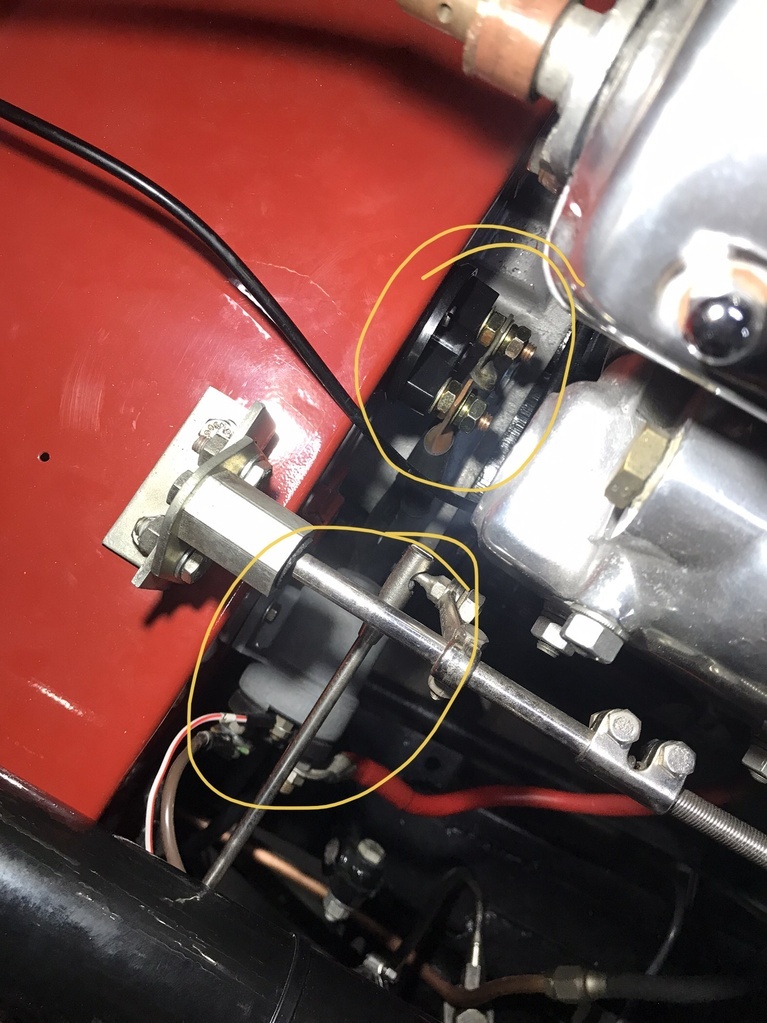 Also finished securing the harness. More p clips. Inside passenger wheel well. 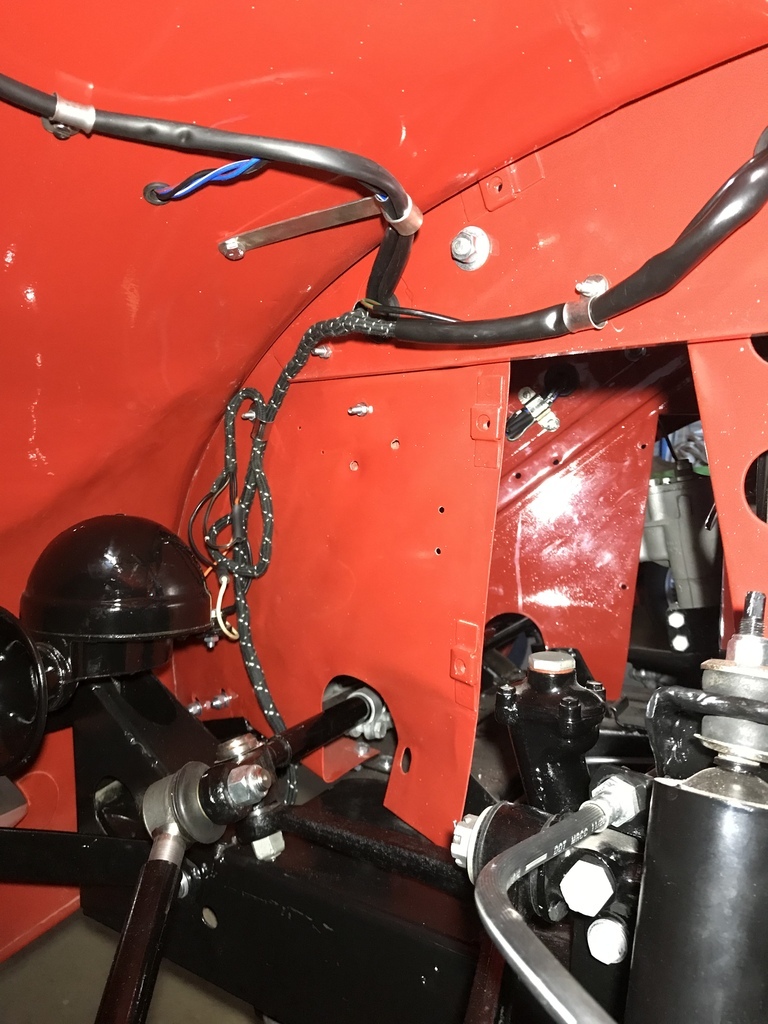 And added a nice heavy earth lead to engine/chassis/body. 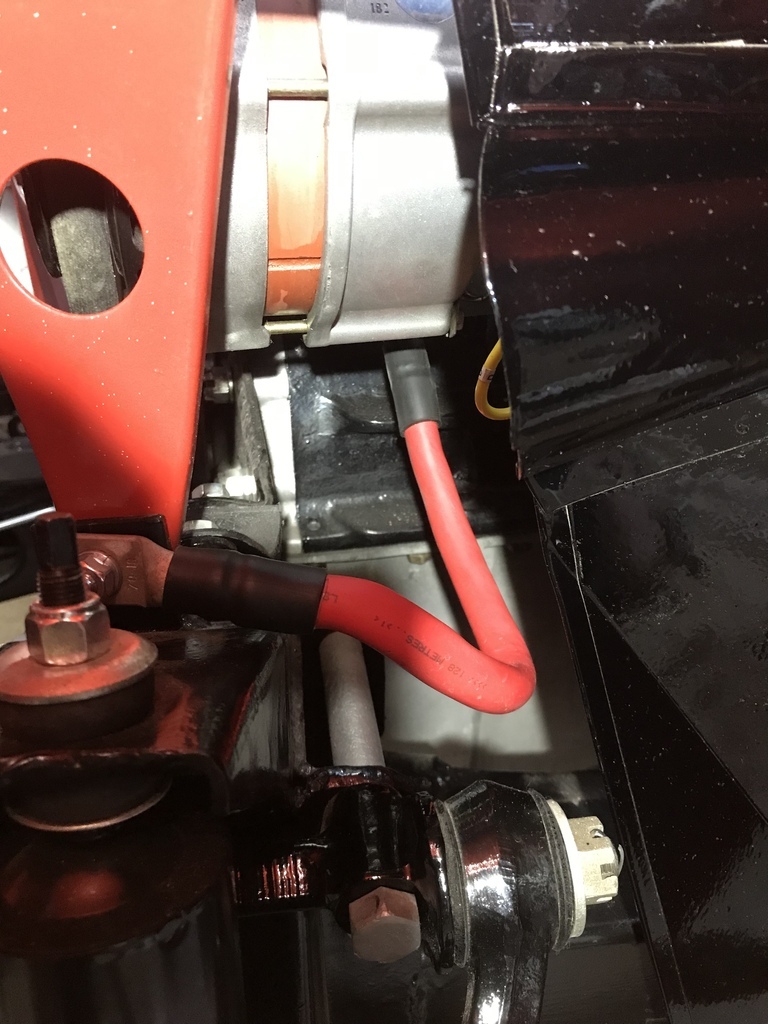 That’s all for now. Comments, suggestions and queries welcome. Cheers. |
| |
|
|
gazzam
Part of things
 
Posts: 741 
|
|
Apr 13, 2022 11:08:59 GMT
|
We have lights. Well most lights. High and low beam, taillights, number plate lights, boot light, instrument lights, high beam indicator. 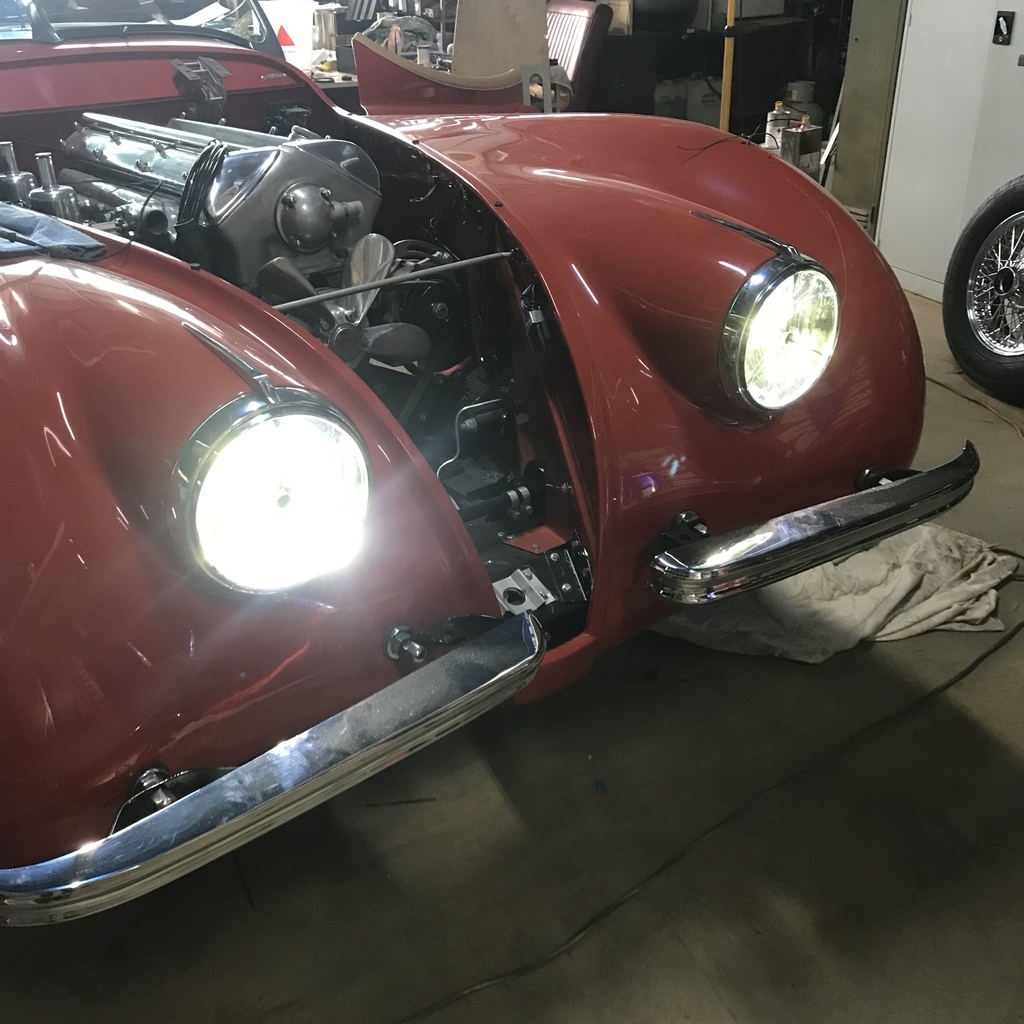 No brake lights - haven’t investigated that yet. Nor wipers, though they worked earlier before the rest of the harness was in. Maybe the switch. Blinkers aren’t yet hooked up. And floors are partially fixed in place. 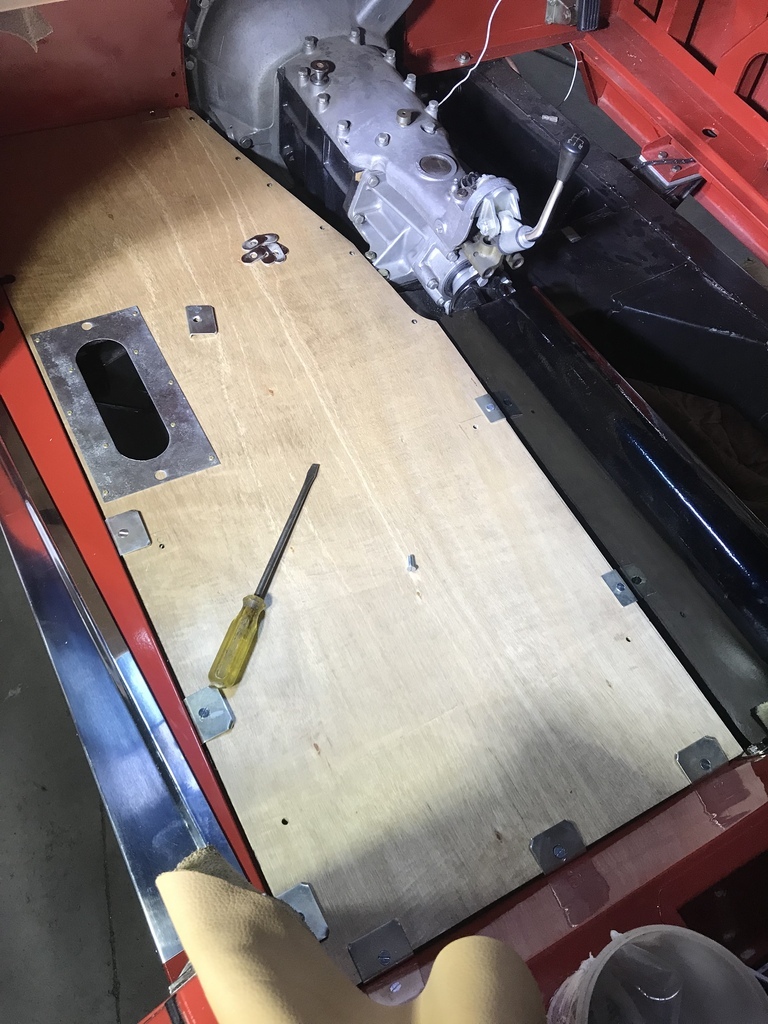 That’s all for now, etc. Cheers |
| |
|
|
|
|
|
Apr 13, 2022 12:06:20 GMT
|
|
It's awake!!!!!!
|
| |
|
|
gazzam
Part of things
 
Posts: 741 
|
|
Apr 15, 2022 10:00:04 GMT
|
Still drowsy unfortunately. Of course the floor had to come back out so I could fit the handbrake lever. 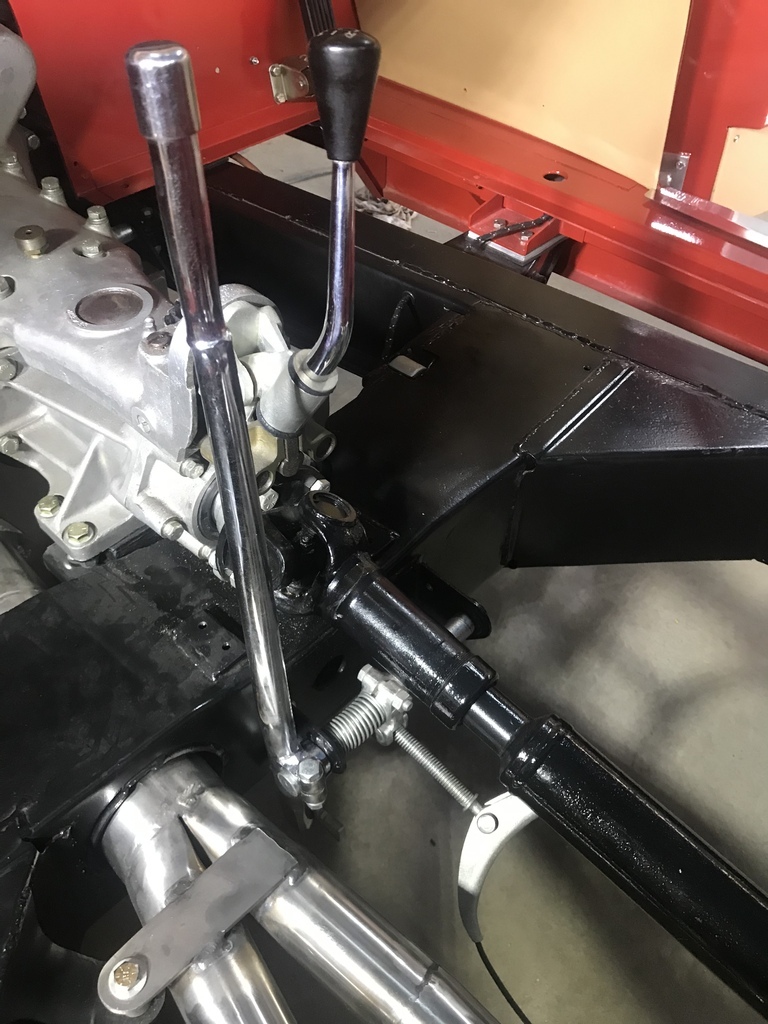 Then the passenger side floorboard needed a relief cut around the handbrake lever, as did the driveshaft tunnel. So plenty of fettling. But finally both floors and tunnels are bolted in. 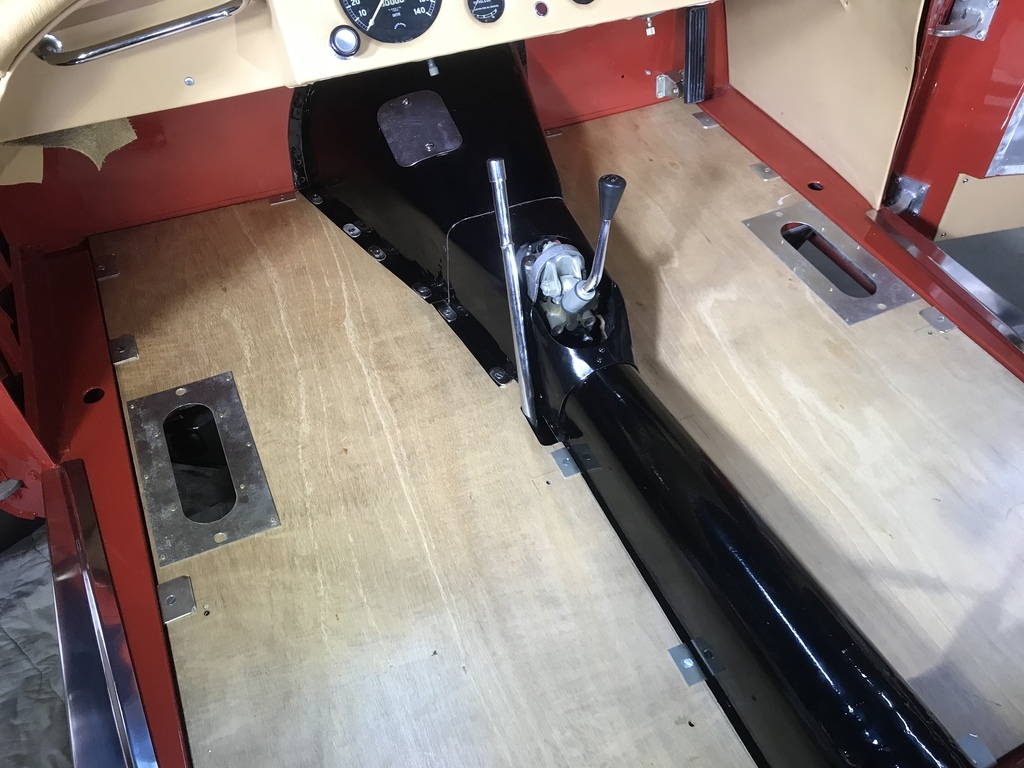 Sorted out the wiring. The wipers and brake lights simply needed a fuse in the regulator. Of course its not as simple as that. One brake light refused to work even though the contact inside had power. So I pulled it out of the housing, moved the contacts a bit, sprayed some WD40 in there. Still wouldn’t work with a bulb that tested ok. So I went through all that again. Eventually it just started working. It was like I’d finally bled all the stale electrons out. Or that I’d put in enough time, and it decided to reward me. Whatever, it was working. The headlights, which I thought were ok, weren’t. My wife pointed out that they didn’t change when I dipped them. They sort of flickered but didn’t actually change. I’d installed LED bulbs to save putting relays in the light circuits ( to lessen the current through the switch). LEDs are strange. I thought I’d cured it when I found that the driver’s side wasn’t actually earthed. Put in an earth wire, no change. Then I read a note in the box they came in, that said it would need the high beam indicator bulb to be replaced with an LED or they may not dip. So that’s still on the to do list. And the radiator is in. Ready to be filled tomorrow. Other than the bottom hose, which is a design disaster, that was pretty straightforward. Pleasant change. 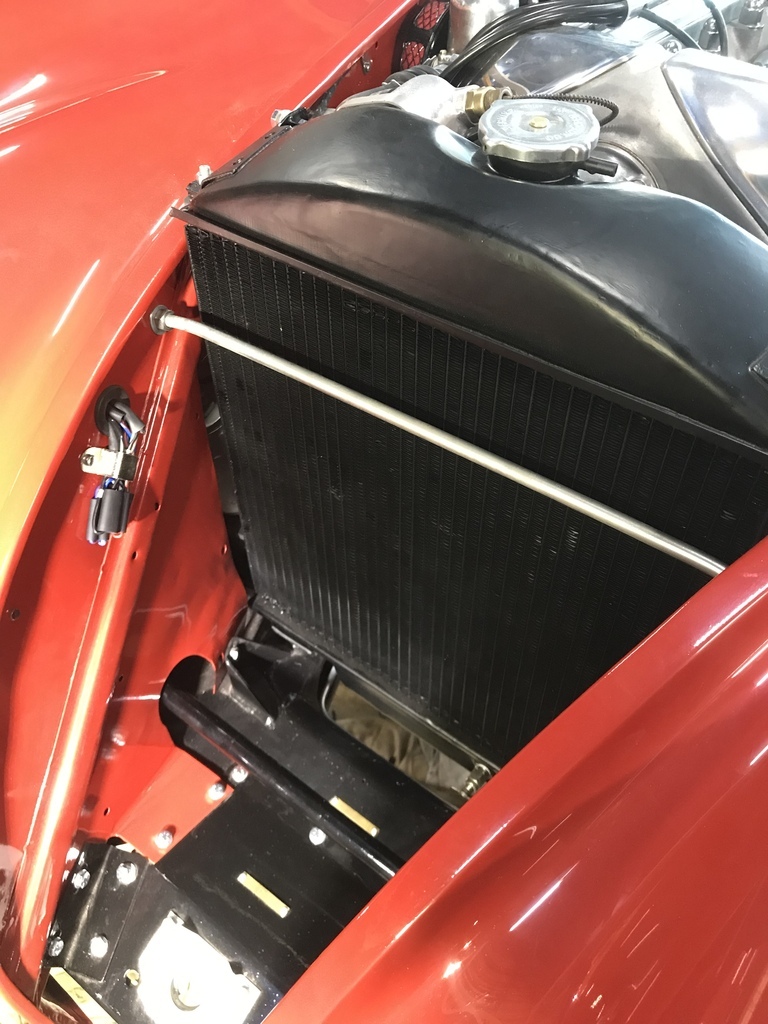 Just waiting on some battery lead clamps now. When batteries are hooked up, it’s ready for a start. That’s all for now. Thanks |
| |
|
|
|
|
|
Apr 16, 2022 10:08:27 GMT
|
|
Exciting Times!!
Seriously well done and thank you again for sharing the highs... and lows!
(I loved the idea of bleeding out stale electrons.)
|
| |
|
|
|
|


