gazzam
Part of things
 
Posts: 741 
|
|
|
|
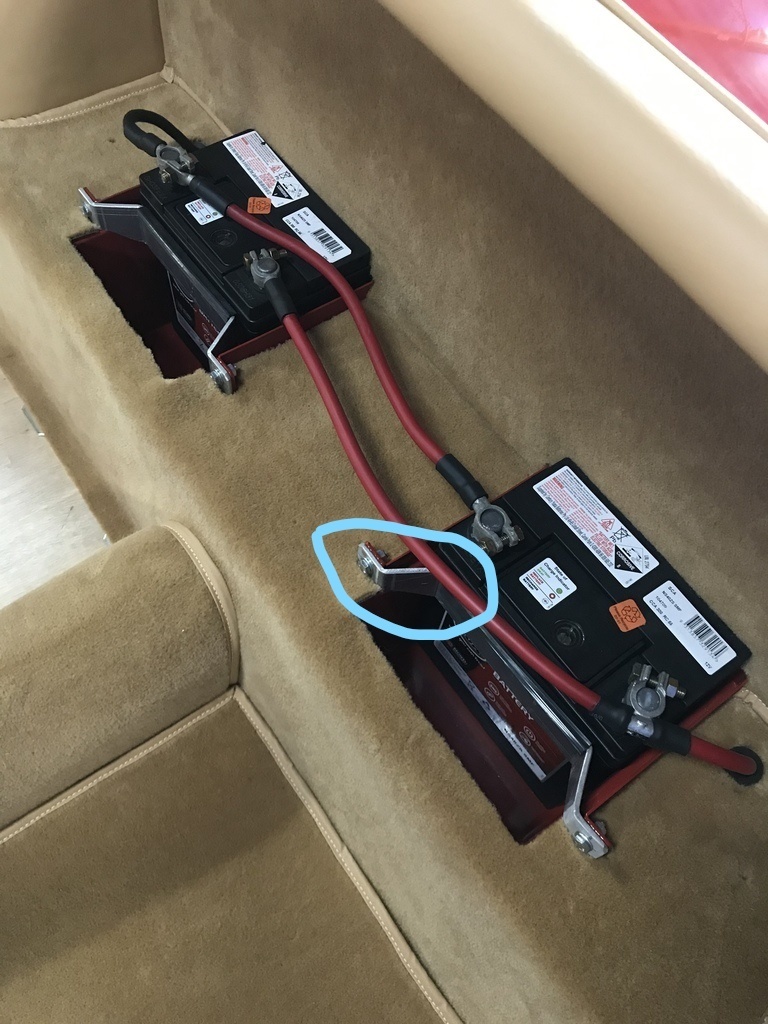
Nah, it’s fine, it’s just the camera. Dodged a bullet with the rear shock links. A disaster of my own making. Somehow I’d assembled the shocks with the link the wrong way round. This is how they are now. 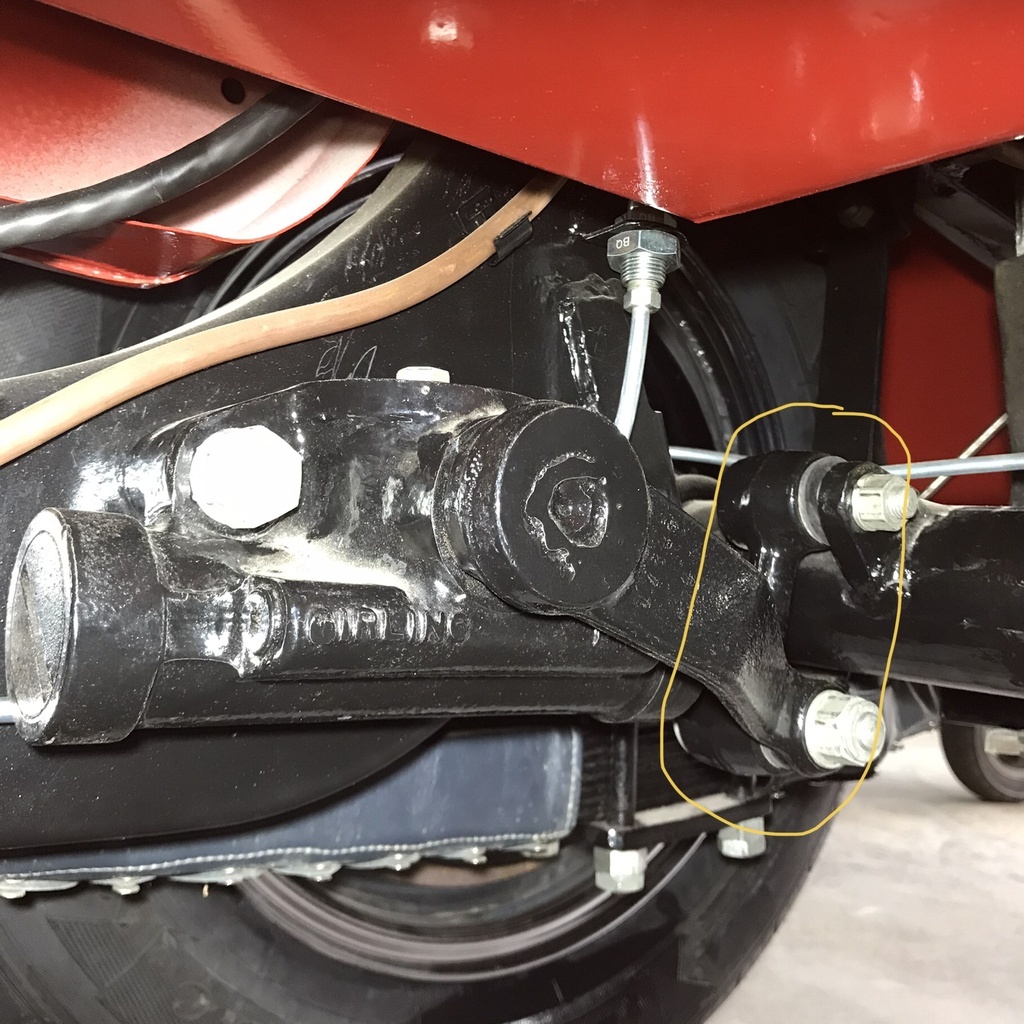 I had the link ( circled ) assembled up from the axle. That meant the shock arms would’ve banged into the battery boxes as the axle went up. I shudder to think of the mess that would have made. When I rebuilt the shocks, I had to position the lever arm on the shaft and, because there was enough movement to simply reverse the link, I must have got that correct. But when I put it all together it was just a bare chassis. I put the links the wrong way round. Up instead of down. Am surprised I didn’t notice as the body was lowered onto the chassis. The shock levers just cleared the battery boxes. I’m just relieved I noticed it before I drove it. So the battery terminals that I’ve been waiting on for weeks showed up. Supposed to be plated copper, but actually pot metal. So couldn’t be soldered. Went to five shops in order to find ones that I could use. This is how it turned out. 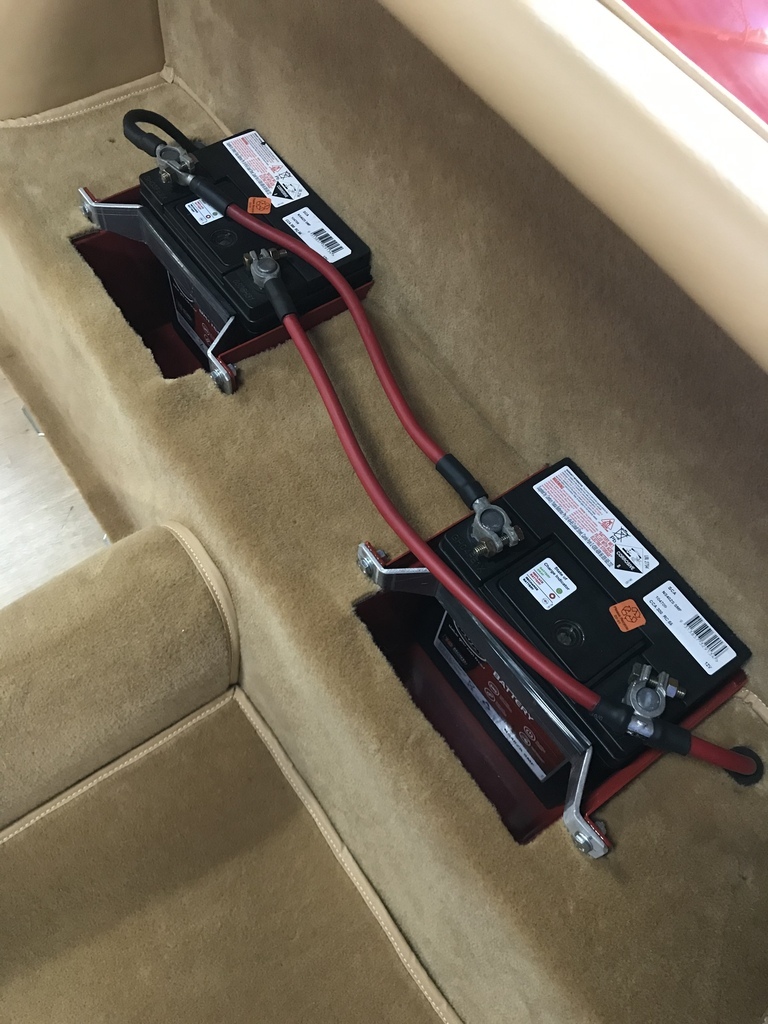 And I could finally put the battery cover in place and install the fasteners that I made all those months ago. 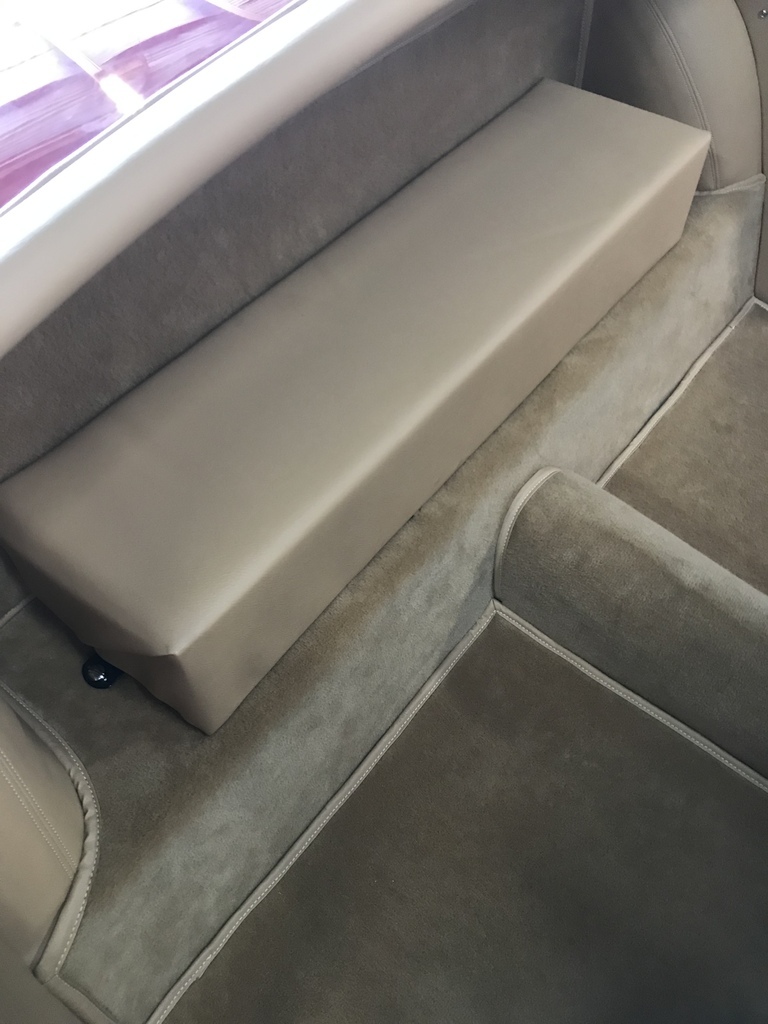 Also added another body to engine ground wire. After reading that the body is the primary current path, a belt and braces approach. This is from the bellhousing to the firewall. 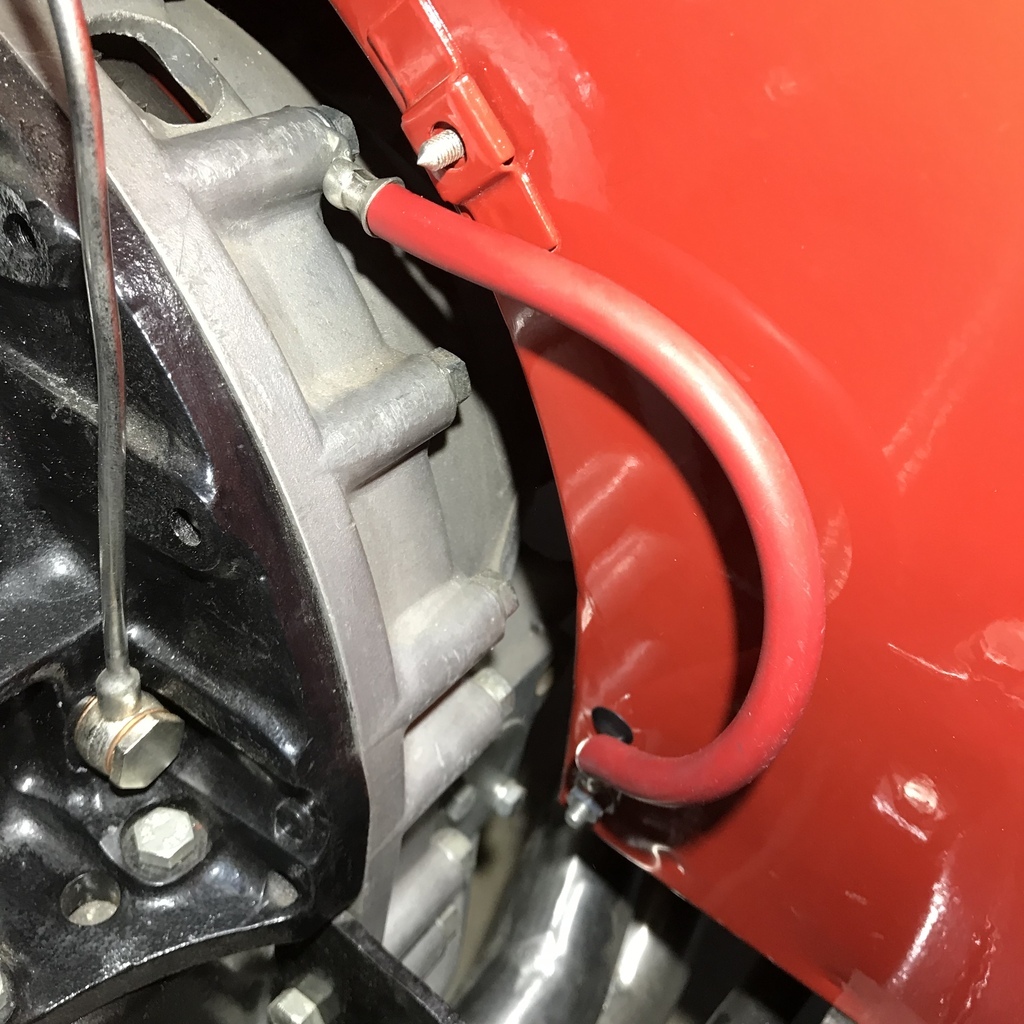 That’s all for now. Cheers |
| |
|
|
|
|
glenanderson
Club Retro Rides Member
Posts: 4,355
Club RR Member Number: 64
Member is Online
|
1952 Jaguar XK120 restoration glenanderson
@glenanderson
Club Retro Rides Member 64
|
|
|
|
In my experience with separate chassis cars, you can never have enough earth leads.
|
| |
My worst worry about dying is my wife selling my stuff for what I told her it cost...
|
|
gazzam
Part of things
 
Posts: 741 
|
|
|
|
|
Painting all the bits and pieces separately doesn’t help. Where the factory would have bolted together two pieces of reasonably clean, bare metal, I’m putting about four coats of paint between them.
|
| |
|
|
Zagato
Part of things
 
Posts: 80
|
|
|
|
In my experience with separate chassis cars, you can never have enough earth leads. Is it just me or is using red wire to make all the battery cables not asking for the wrath of the wiring gods to rain down on you? All cars l have ever worked on have red+ black- Is this neg earth or positive earth btw? Anyway my ocd is well screwed when all wires have a common colour. |
| |
1959 Abarth Double Bubble resto project
1989 Lotus Esprit LHD
1997 Lotus Eprtit GT3
1996 Jaguar XJ6 Sovereign manual gearbox from factory
Porsche 356A Coupe replica
Formula 27 Super Seven replica Alfa Nord powered
|
|
gazzam
Part of things
 
Posts: 741 
|
|
|
|
|
Car is neg earth.
My defence:
The main positive lead is what was in the car and it is good cable, so I reused that. Even though it’s black.
It all goes downhill from here…
For the rest I used a piece of new, good quality cable that was left over from the Healey. I’m slightly comforted by the fact that the (much longer) bit in the Healey is the right colour for positive.
This piece was the right length. (Admittedly the last earth lead shown could have been a wee bit shorter.)
So I used what I had.
The next keeper will just have to figure it out. I’ll be worm food by then.
|
| |
|
|
|
|
|
|
|
In my experience with separate chassis cars, you can never have enough earth leads. it's not just separate chassis cars! Manufacturers were very good at inadequate earths, as some common faults prove - flickering Ford tail lights for example |
| |
|
|
vitesseefi
South West
Posts: 2,300
Member is Online
|
|
|
|
|
You should try fibreglass cars…. Especially kit cars using the loom from a steel bodied car with no earths in it….
Anyhow….. bouncing on the edge of my seat now in anticipation of first start and first drive 🙂
Nick
|
| |
1967 Triumph Vitesse convertible (old friend)
1996 Audi A6 2.5 TDI Avant (still durability testing)
1972 GT6 Mk3 (Restored after loong rest & getting the hang of being a car again)
|
|
gazzam
Part of things
 
Posts: 741 
|
|
|
|
First start is being held up by the Otter switch. It should be here tomorrow, with luck it might happen then. Decided to put the gearbox fill/dipstick cover on. That is cut the hole in the carpet. Well, I’d made the sheet metal cover and upholstered it so I was fairly keen to use it. After I’d taken the plunge and cut a hole I discovered that the retaining pins ( originals I think ) were too short. The underfelt would explain that. So I made some new ones. A bit of experimentation and measuring gave the length required. A piece of scrap angle in the mill vice holds the bolt ( that will become the pin ) and make cutting the grooves easily repeatable. 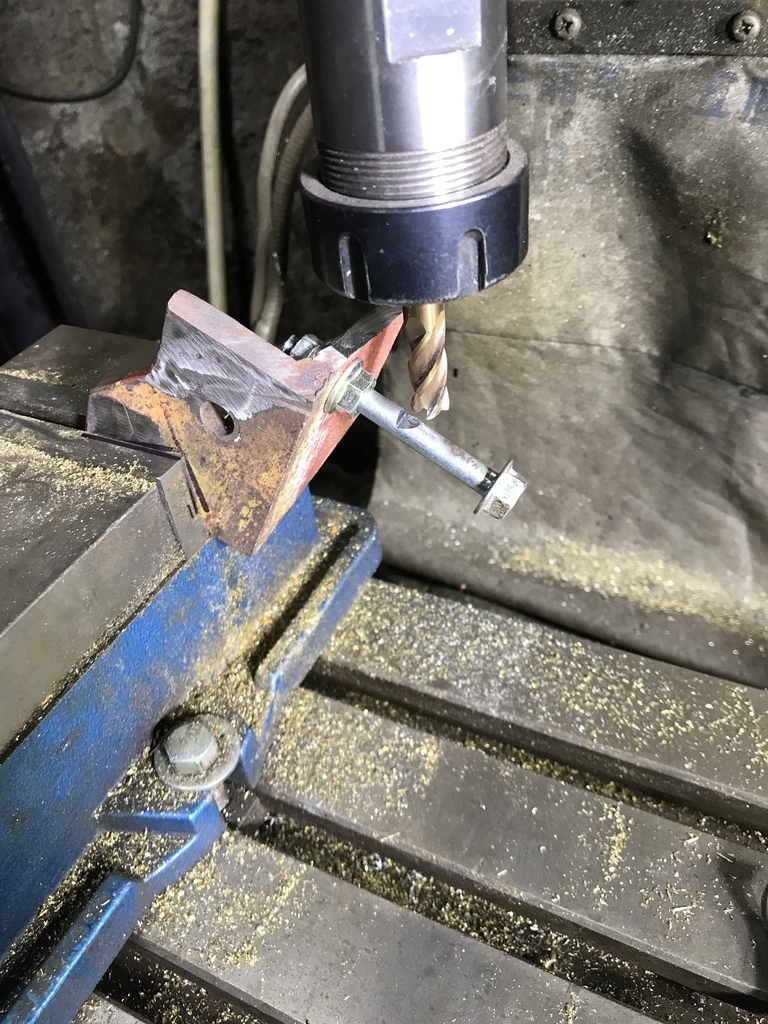 Then a bit of amateur latheing. 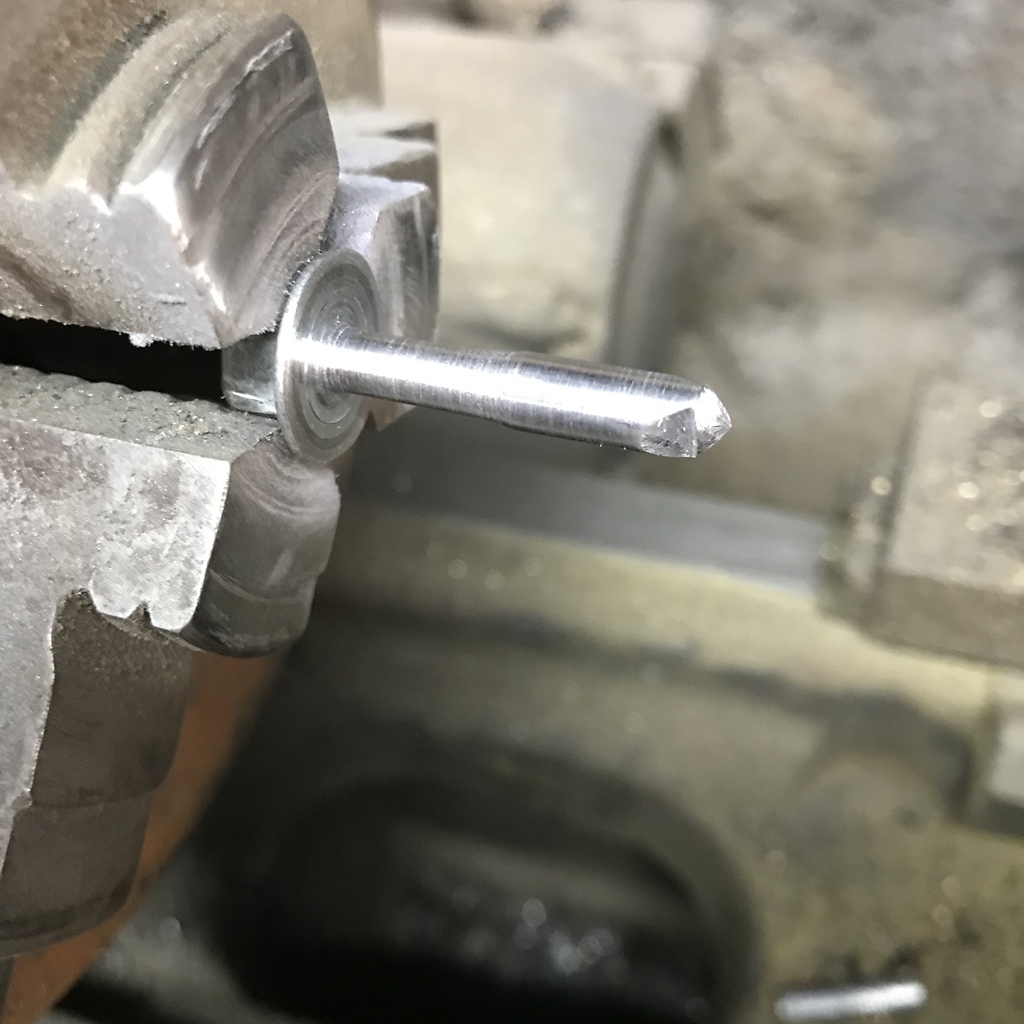 Turn it around and shape the head with the angle grinder, while it’s still in the lathe. Came out like this. 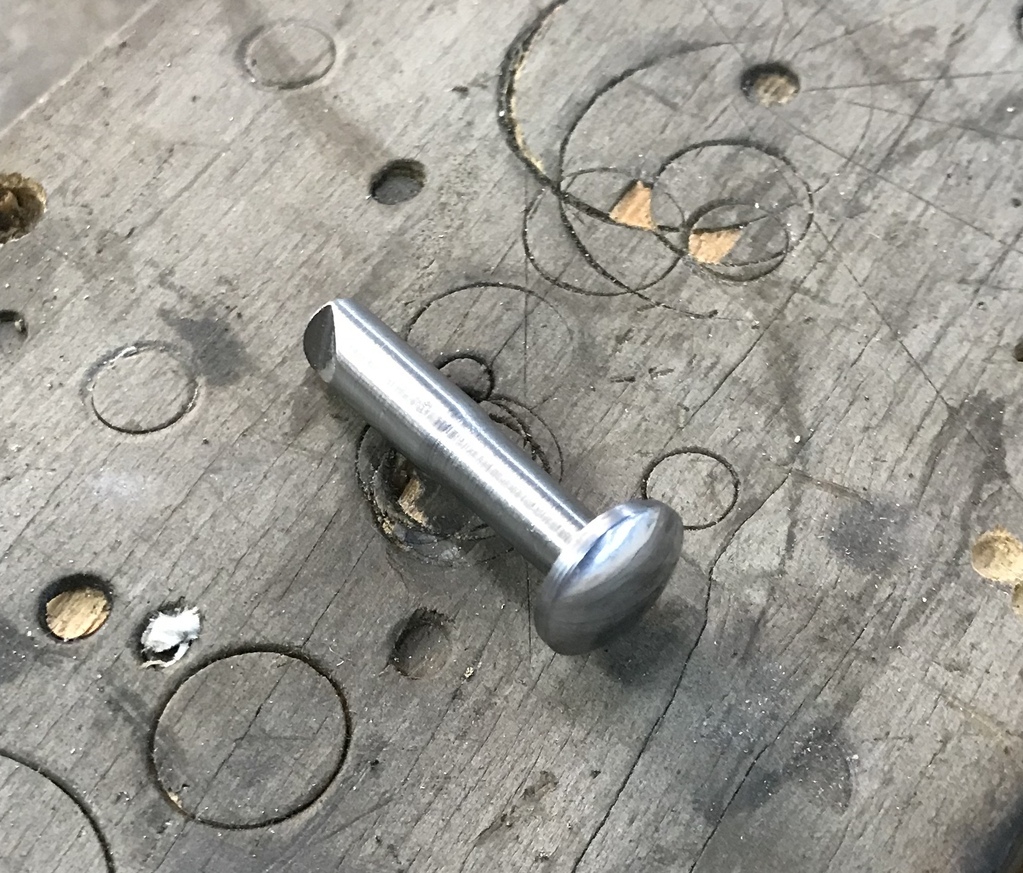 Make another one. Then slot the heads with a very dodgy looking setup in the mill. They’re in an old drill press vice, clamped to a bit of RHS, bolted to the mill table. 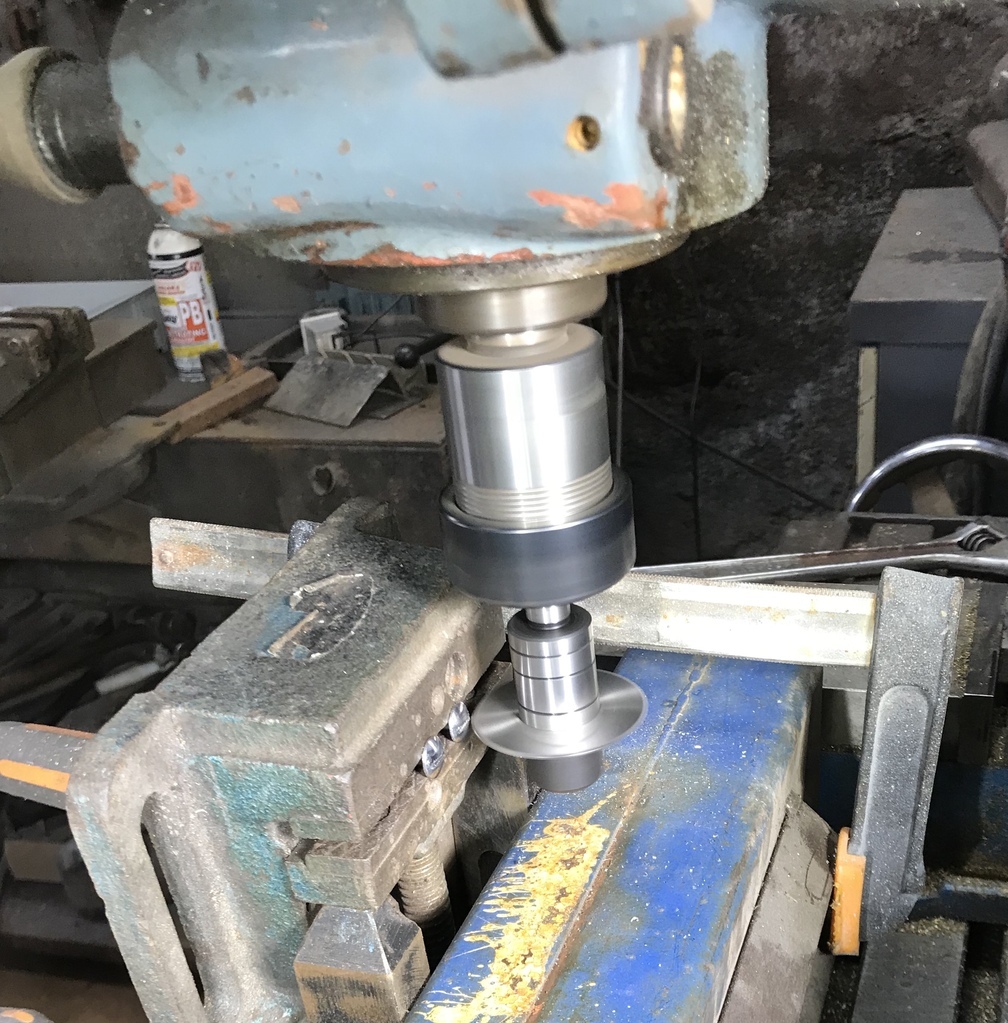 After polishing and plating, they have a home. 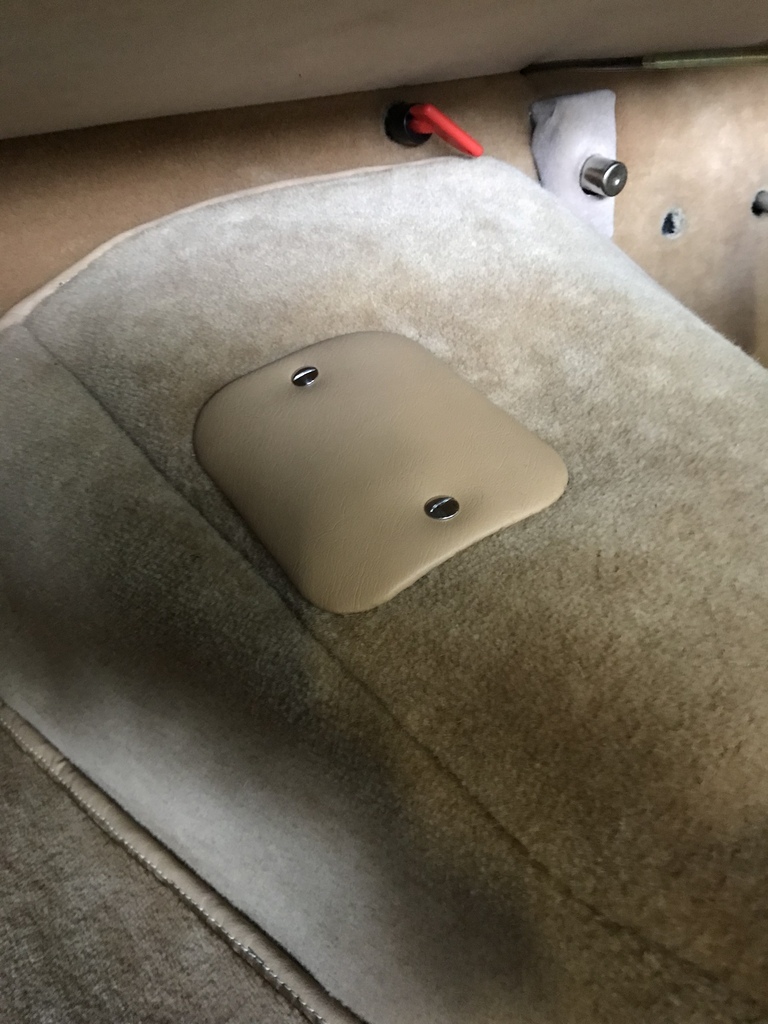 Also needed some finishers for the holes in the carpet where the pedals go through the firewall. This is the solution I came up with. A plastic plumbing fitting and a bit of latheing. 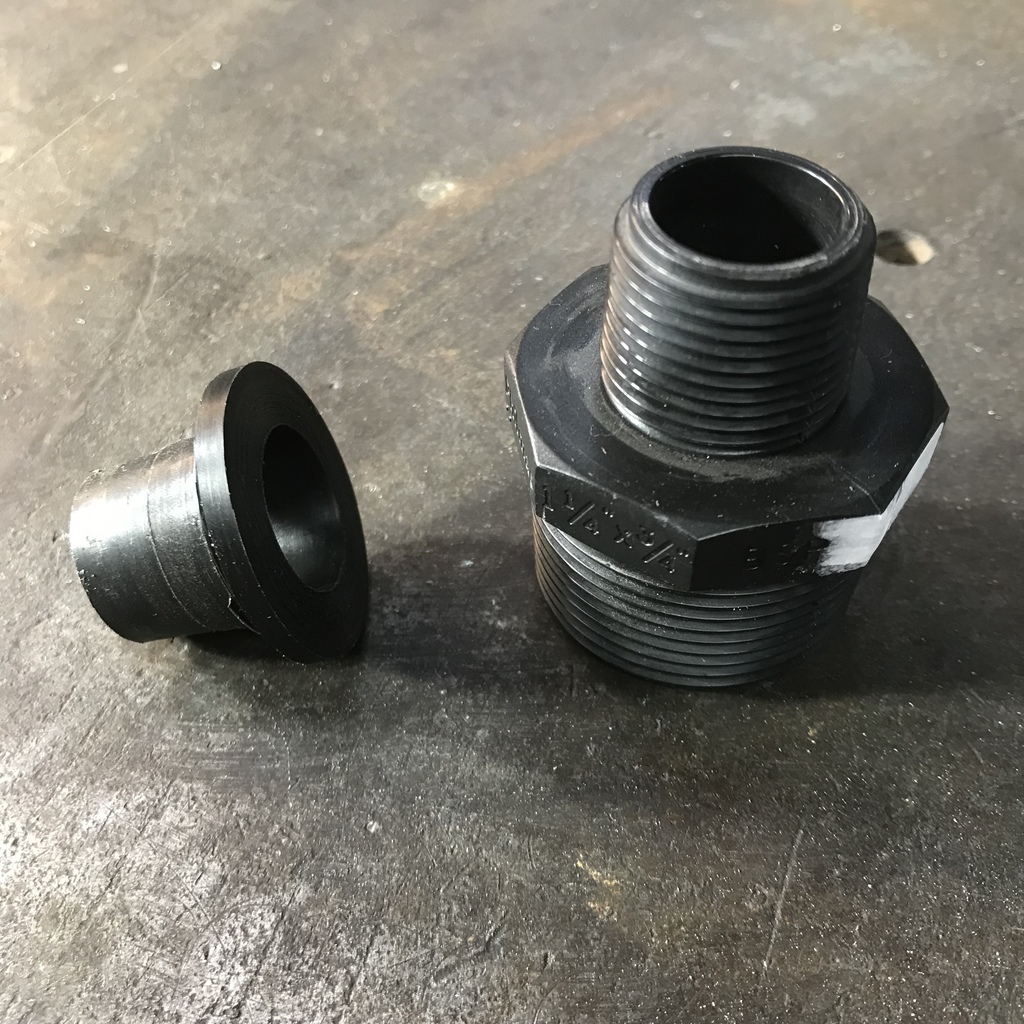 In place. 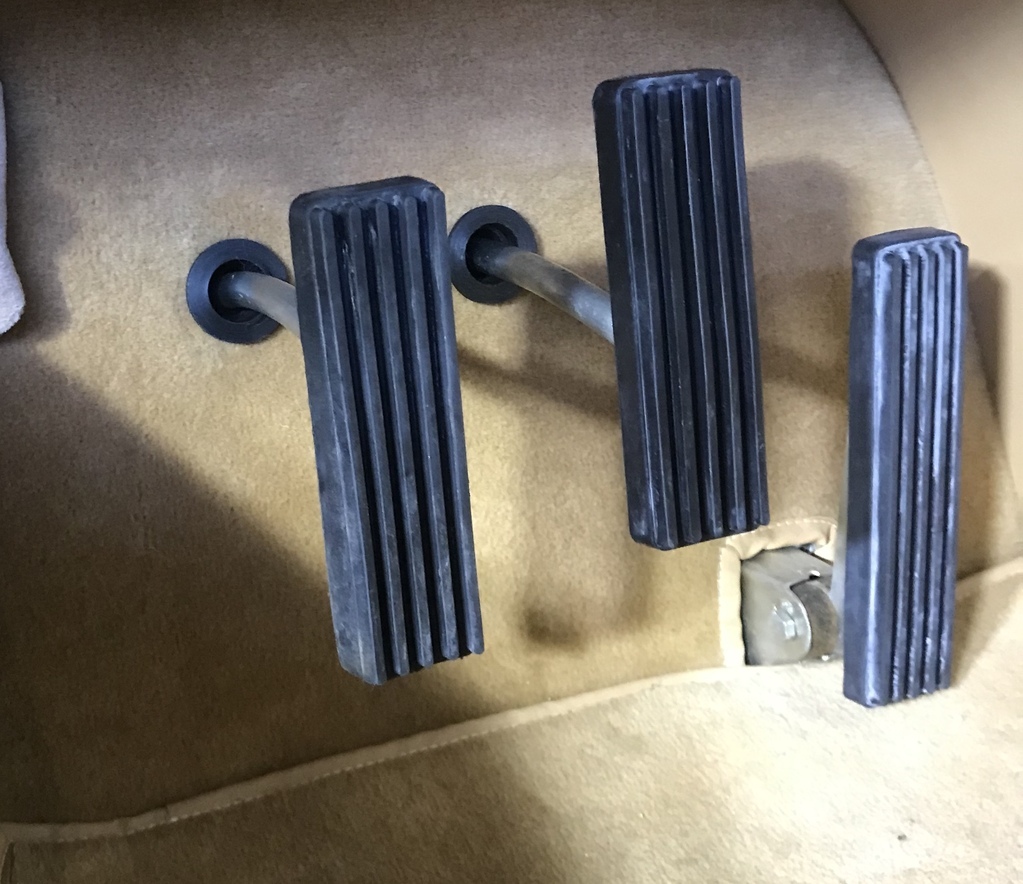 That’s all for now. Cheers |
| |
|
|
|
|
gazzam
Part of things
 
Posts: 741 
|
|
|
|
No, it’s sitting on top of the battery. But it does need support. It’s a fairly heavy cable and shouldn’t be bouncing about. Don’t be concerned about pointing out what might be a problem, I’m always pleased to have another pair of eyes on the job. As seen in my recent post about the rear shocks, it’s easy to miss something. Thanks for paying attention! |
| |
|
|
|
|
gazzam
Part of things
 
Posts: 741 
|
|
May 10, 2022 11:14:19 GMT
|
Seats are in. So I can now sit in it and make brrrm brrrm noises. 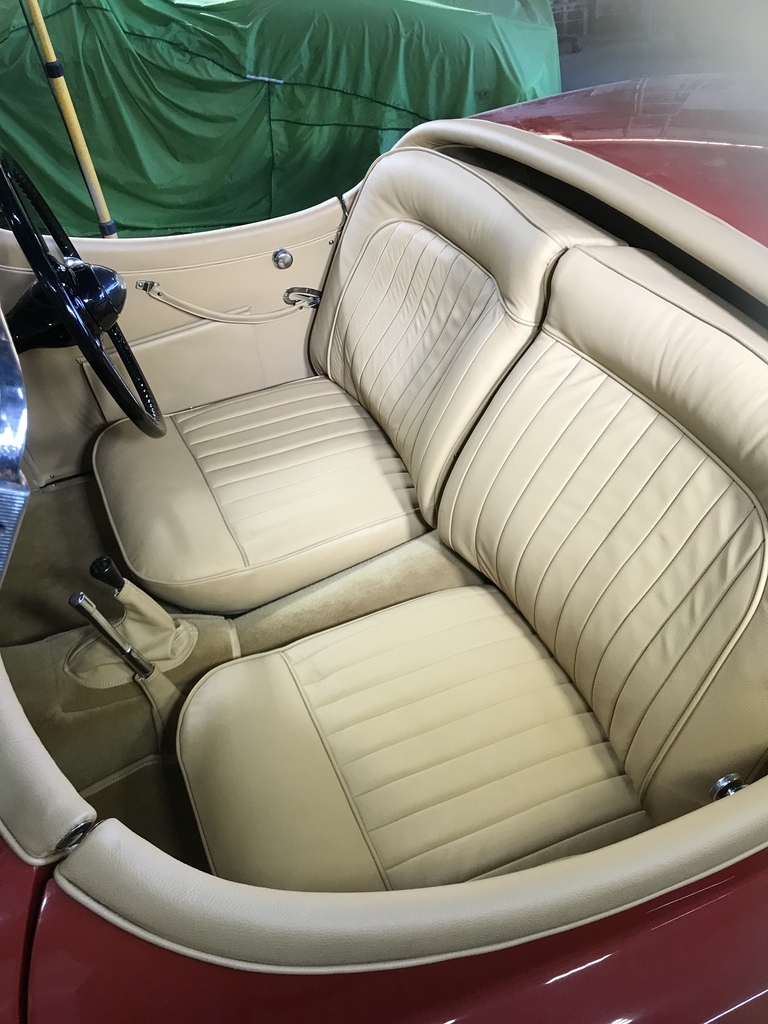 Except I don’t need to. Because… THE MOTOR RUNS. The Otter switch showed up. So I was able to close up the hole and keep the coolant in. While I gave the sealant a bit of time to set, I pulled the plugs and squirted some oil into the cylinders. Turned the engine over a few seconds at a time until it had oil pressure. Bead blasted the plugs and reinstalled them. Put some fuel in and was pleasantly surprised that none ended up on the floor. So I connected the power wire to the fuel pump. No fuel squirting out. So I gave the starter button a push and it burst into life. Wow. It sounds good, was worried about it being too loud, but it seems fine. I didn’t run it for long as I hadn’t topped up the coolant. Just started it several times. Starts beautifully, almost instantly. Not all beer and skittles though, there was a fuel drip from one of the carbs. Once I’d opened up the throat of an old open end spanner so it would fit, I was able to tighten that jet and all was good. I have one question for the electrical brains trust. When the key is turned on, the ignition light comes on, as it should. It goes out when the engine starts, as it should. But when the engine is turned off, the ignition light comes back on, and stays on. Until the cutoff switch is turned off. When the cutoff switch is turned back on, the sequence starts again. No ignition light till key is turned on. Goes off when engine starts. Comes back on when key is turned off. Any suggestions as to what may be wrong will be gratefully looked into. |
| |
|
|
|
|
|
May 10, 2022 14:44:14 GMT
|
|
hmm....it's backfeeding somewhere. Did you get the cutoff switch with the extra connections for the alternator shutdown?
|
| |
|
|
Zagato
Part of things
 
Posts: 80
|
|
May 10, 2022 17:17:54 GMT
|
|
Isn’t this where one of these is needed?
A Zener diode is a special type of diode designed to reliably allow current to flow "backwards" when a certain set reverse voltage, known as the Zener voltage, is reached.
|
| |
1959 Abarth Double Bubble resto project
1989 Lotus Esprit LHD
1997 Lotus Eprtit GT3
1996 Jaguar XJ6 Sovereign manual gearbox from factory
Porsche 356A Coupe replica
Formula 27 Super Seven replica Alfa Nord powered
|
|
glenanderson
Club Retro Rides Member
Posts: 4,355
Club RR Member Number: 64
Member is Online
|
1952 Jaguar XK120 restoration glenanderson
@glenanderson
Club Retro Rides Member 64
|
May 10, 2022 18:28:51 GMT
|
|
Have you got a traditional dynamo and control box? If so, it’ll be one of the internal coils/contacts sticking.
|
| |
My worst worry about dying is my wife selling my stuff for what I told her it cost...
|
|
gazzam
Part of things
 
Posts: 741 
|
|
May 10, 2022 22:26:26 GMT
|
|
Glen’s on the money for this one but thanks to all the competitors…
It was one of the contacts sticking, but not mechanically. It was being held by the coil. So maybe Mark and Zagato deserve an honourable mention.
I had tried spraying some lube to see if that would make it release. No joy.
So I disconnected the earth wire (from the control box) and it clicked open.
Reconnected the earth wire and it’s been behaving itself ever since.
There’s something else weird.
With the key on (engine not running) the left hand blinker makes the fuel pump click in unison. Not the right hand though.
Other than that, I’m really chuffed. It starts instantly, even from cold. And sounds wonderful.
|
| |
|
|
75swb
Beta Tester
Posts: 1,052
Club RR Member Number: 181
|
1952 Jaguar XK120 restoration 75swb
@75swb
Club Retro Rides Member 181
|
May 10, 2022 23:11:46 GMT
|
Except I don’t need to. Because… THE MOTOR RUNS. Excellent decoy, and stoked for you that she runs! I can't help with the fuel pump issue sadly, but my lada had the electric fuel pump taking power from the supply to the indicators. I found this out whilst sat at lights and finding the fuel pump died. Solved with a new power feed and a relay. |
| |
|
|
gazzam
Part of things
 
Posts: 741 
|
|
May 11, 2022 11:55:52 GMT
|
I found that the fuel pump clicks in time with the blinkers on both sides. I can’t explain it, everything seems to be working and there’s no smoke release, so I think I’ll just ignore it. Front parking/indicator lights are now sorted. I started with these. The original lamps ( the lens is not screwed in in this photo) and a couple of old Lucas dual filament bulb holders. 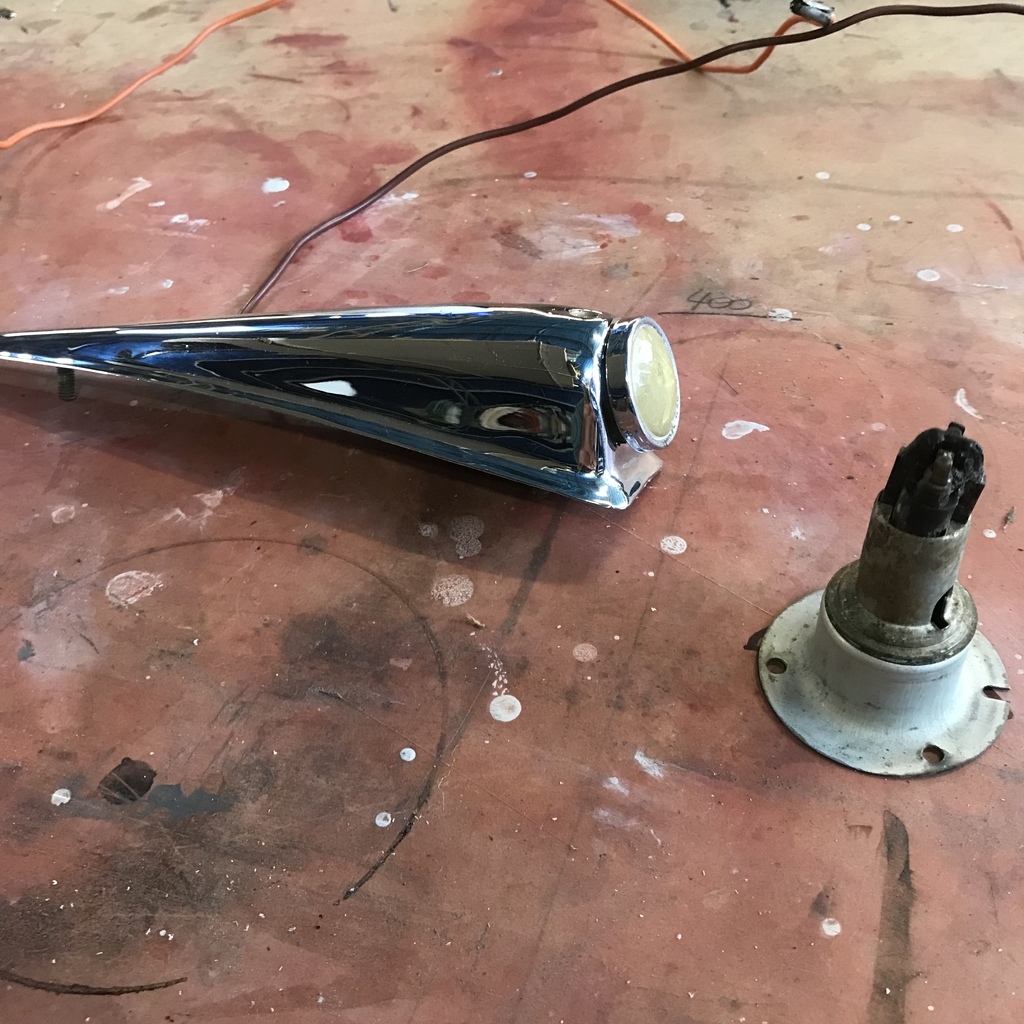 This car didn’t originally have indicators, they were fitted by someone in the past. They had fitted the front ones in holes cut in the guards. I didn’t want to do it like that. It had also had a DIRU fitted. That is a direction indicator relay unit. It’s a nifty relay that cuts the brake circuit to flash a brake light for an indicator. Or a parking light in the front. I didn’t know the DIRU wasn’t original to the car ( poor research ) and ordered a wiring harness to suit. Anyway, to get to the point, I have the DIRU, the wiring and the indicator switch on the steering wheel. I may as well have indicators. This meant I had to do something with the front parking lights if I didn’t want additional lamps. So I bought some LED park/indicator bulbs like these. (Smaller diameter than regular bulbs.) 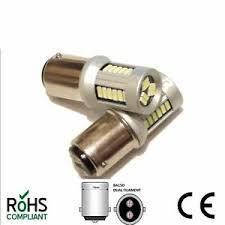 And I needed to fit them in the chrome housing that sits on top of the guards. Not a lot of room. I didn’t want to cut up the original lenses, just in case it didn’t work out and I wanted to go back to standard. So that meant making new ones. Started by supergluing three pieces of 6mm-ish Lexan together. 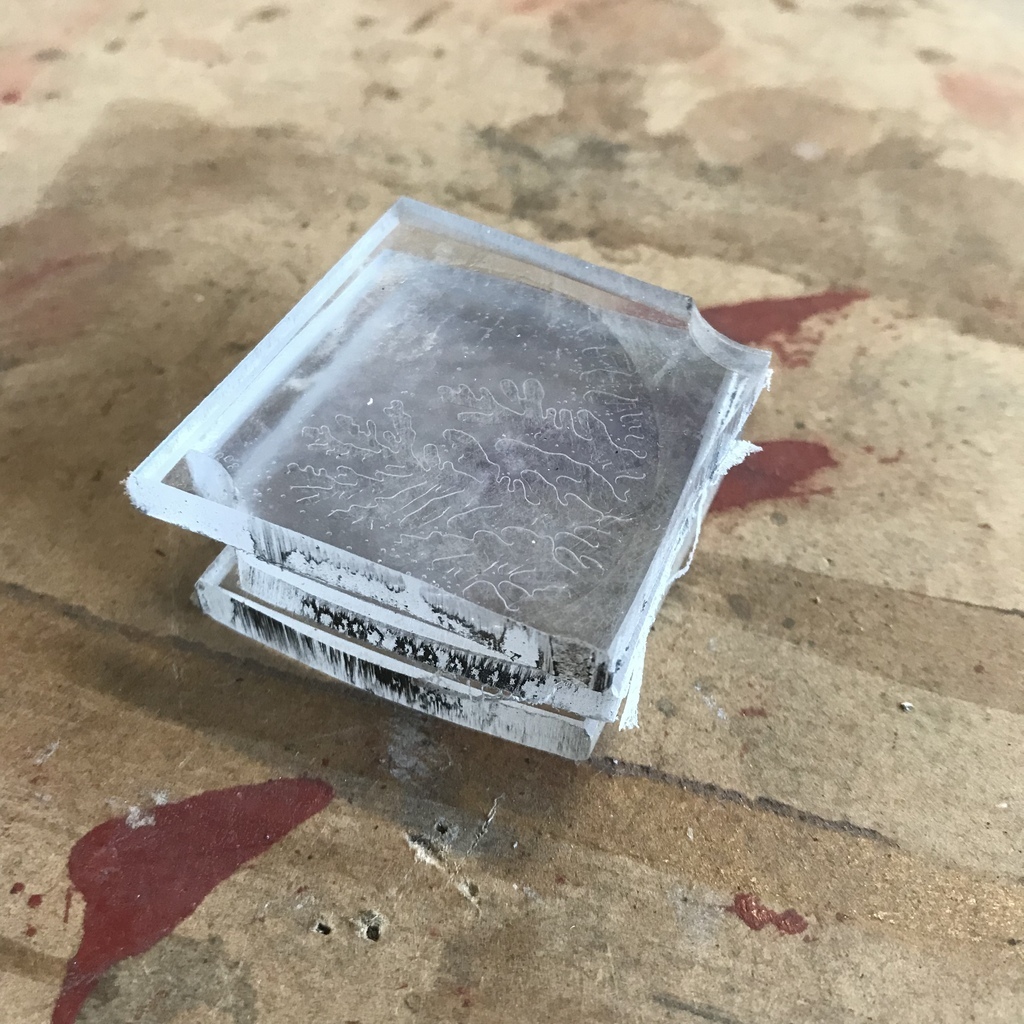 Left them for 24 hours then ground them into a rough cylinder so I could put then in the lathe. 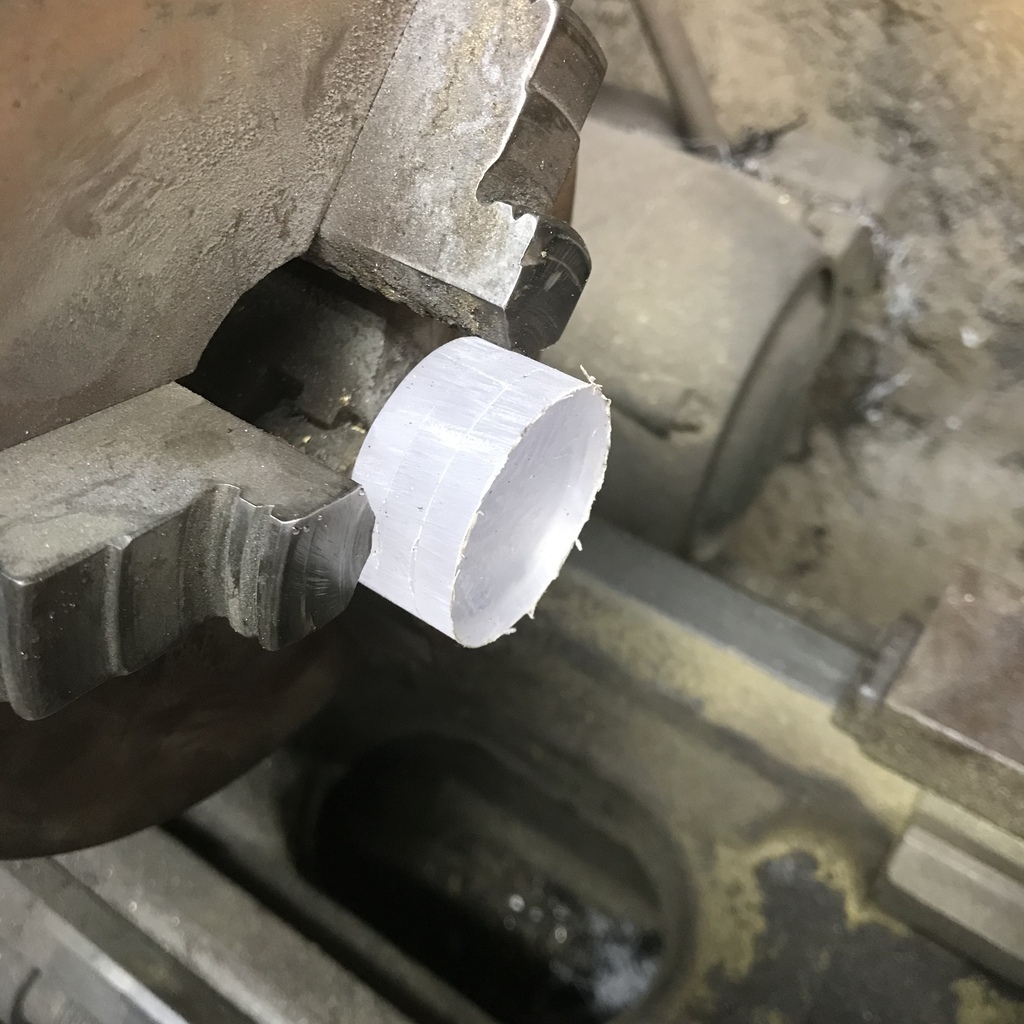 Trued up one end then turned it around. Trued and shaped the end that will go inside the chrome housing. 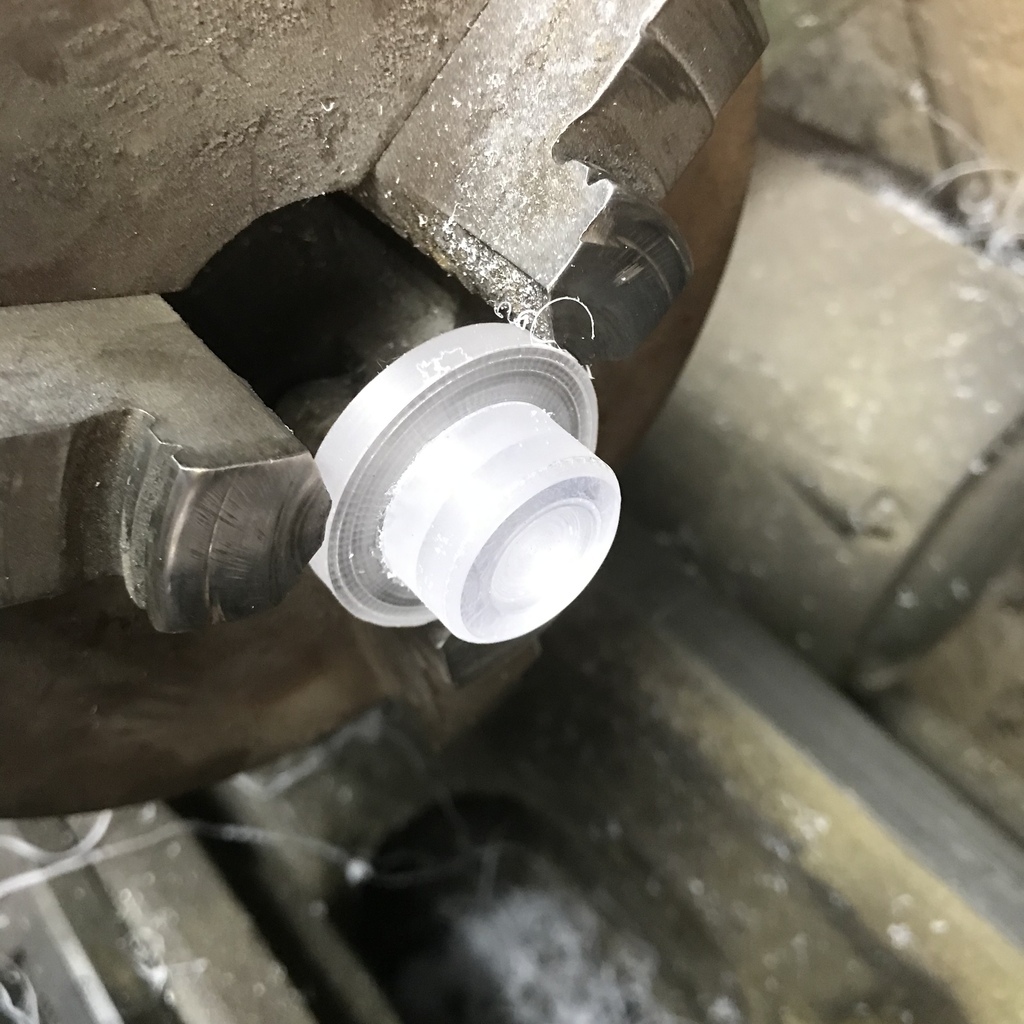 Turned it around again and shaped, sanded and polished the front. 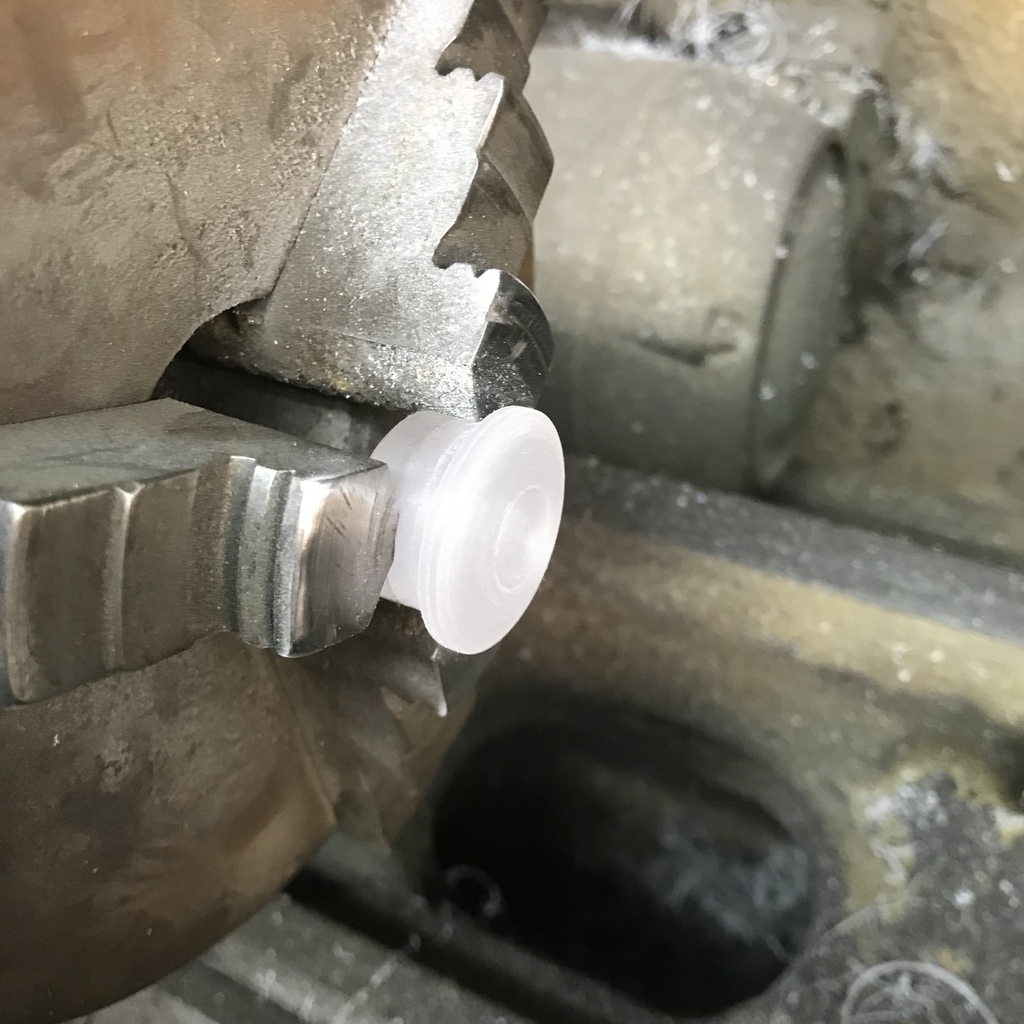 Times two. 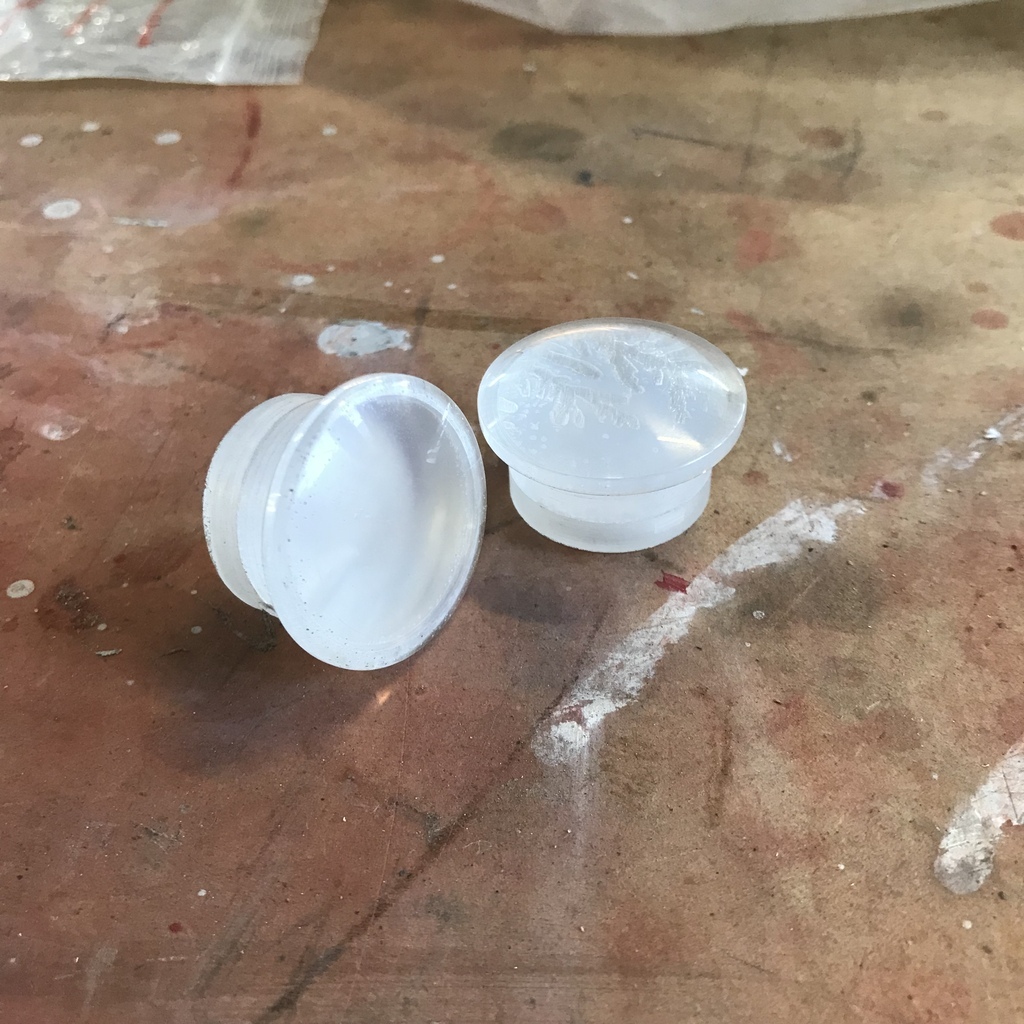 Fitted in housing with a very short self tapper. 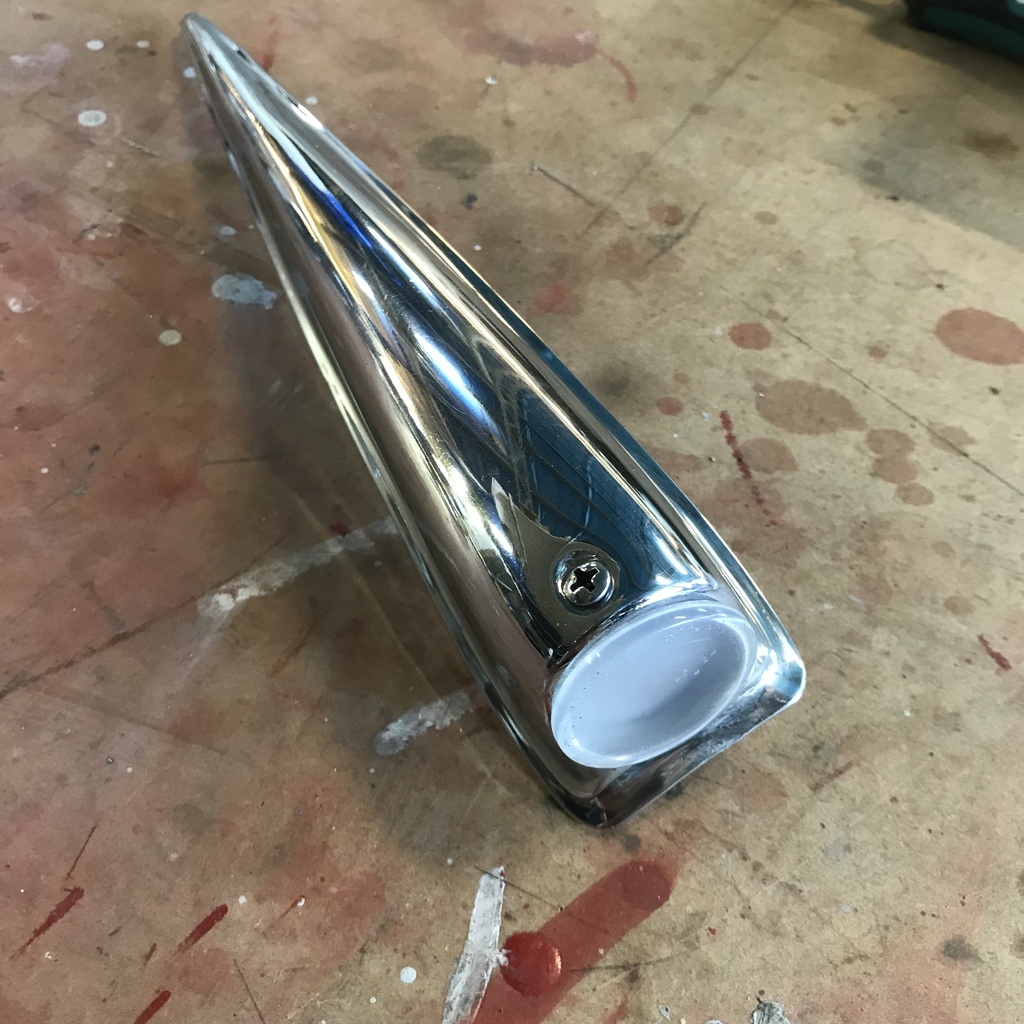 Cut a short piece of brass tube and expanded the end to fit over the Lexan inside the housing. 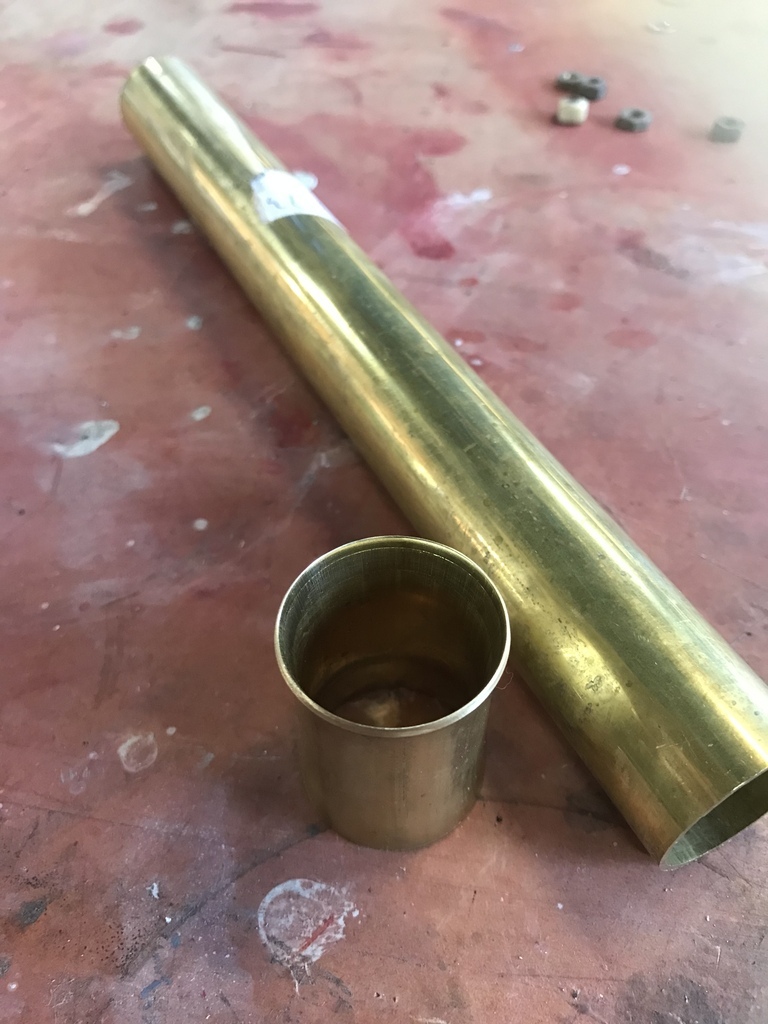 Then cut the flange off the Lucas bulb holder. 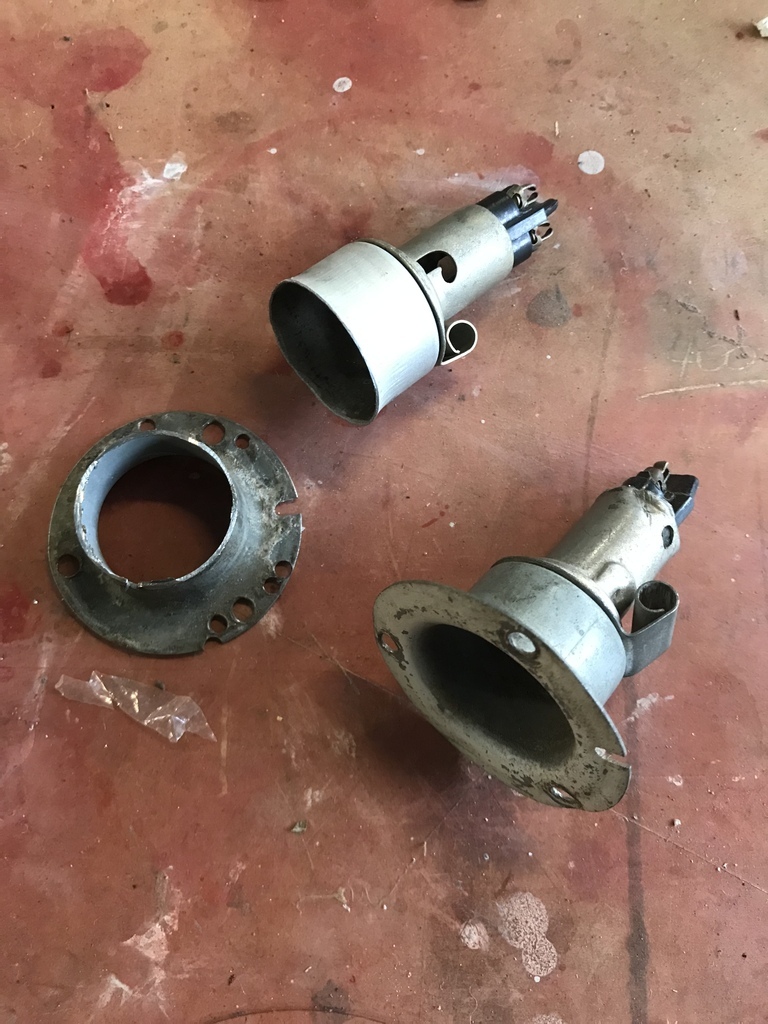 The bulb holder just slides over the brass tube. It’s a nice fit in the housing and really can’t go anywhere. I put some really thick heat shrink on the end where the wires go in. The type with glue in it,so I don’t think it’ll go anywhere. And they work a treat. 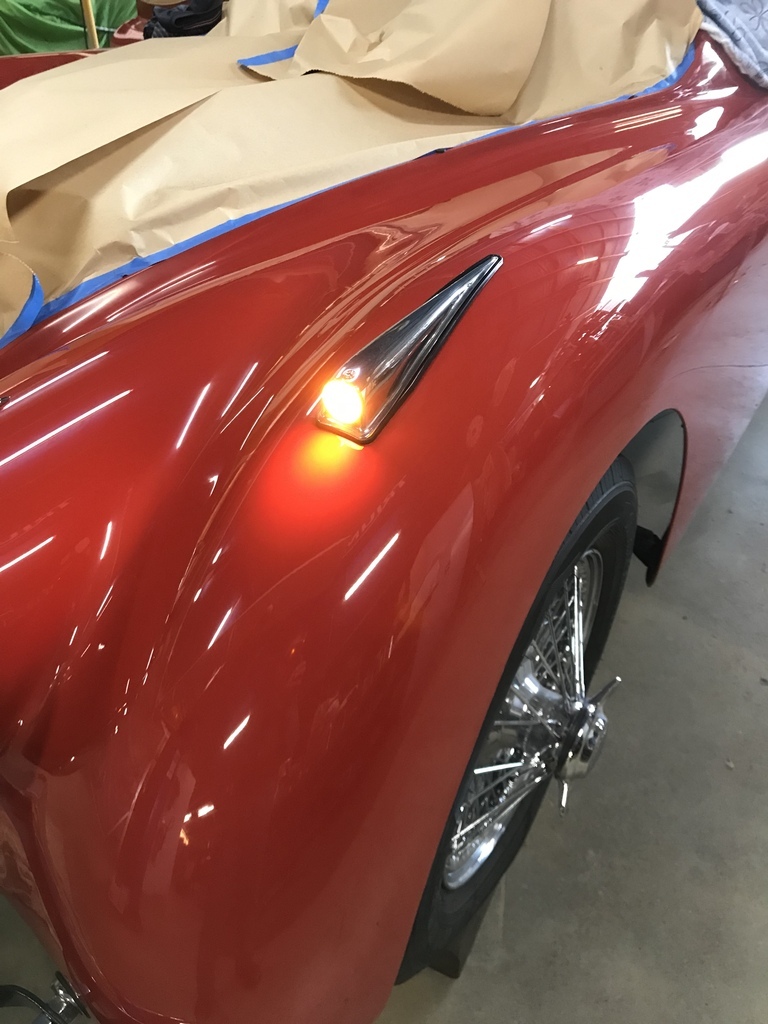 I think that’s the electrical all done. That’s all for now. Cheers |
| |
Last Edit: May 12, 2022 21:57:15 GMT by gazzam
|
|
|
|
|
May 11, 2022 12:07:32 GMT
|
|
That's fantastic!
|
| |
|
|
|
|
|
May 11, 2022 12:25:19 GMT
|
|
Most excellent.
|
| |
|
|
glenanderson
Club Retro Rides Member
Posts: 4,355
Club RR Member Number: 64
Member is Online
|
1952 Jaguar XK120 restoration glenanderson
@glenanderson
Club Retro Rides Member 64
|
May 11, 2022 12:56:21 GMT
|
|
Your “pump in time with the indicators” is likely to be an earthing issue. Particularly if either/both of them use modern electronic relays which are very sensitive. Just the dirty/greasy contacts in my Land-Rover’s indicator switch is enough to give the relay palpitations from time to time.
|
| |
My worst worry about dying is my wife selling my stuff for what I told her it cost...
|
|
|
|


