|
|
|
Nov 24, 2022 22:30:18 GMT
|
|
|
| |
|
|
|
|
|
|
|
Dec 11, 2022 23:40:14 GMT
|
Right, so I've been pushing my CAD skills to the max making a start on my transmission tunnel:   Going to be a complex shape to form in one go so I thought I'd break it up into sections. First one was the main loop going over the gearbox:  After a bit of fettling and a glance with the bead roller we had this:  Which nearly fit  close enough to be getting along with anyway.  I've made the next panel as well which will have an access panel to get to the top bellhousing bolts like so:  And that's where we're up to so far. Will make another access panel to get to the slave cylinder too. Can never have too many access panels  |
| |
|
|
|
|
|
Dec 19, 2022 16:36:16 GMT
|
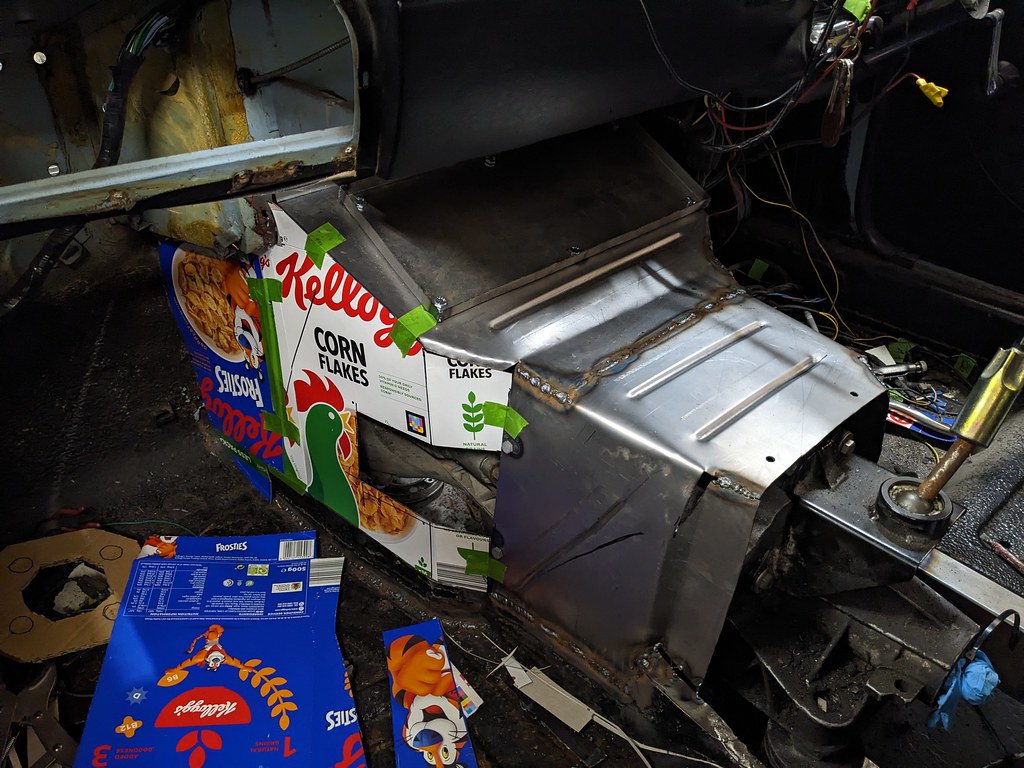
Onwards and upwards with the transmission tunnel. Made a little closing plate to try and keep some vestiges of straightness in the panel as it's welded in place:  Welded that in place and made another CAD template.  Cornflakes for a change. Slightly larger package, material not quite as stiff as Shreddies but still perfectly adequate. In case anyone's making breakfast decisions with car fabrication in mind  Transposed into steel with an access panel cut out for the slave cylinder (spot where I welded a captive nut in the wrong place. Measure once, cut twice and all that.)  Weld that all up and we have a transmission tunnel that looks 90% complete from this particular angle!   |
| |
|
|
|
|
|
Dec 23, 2022 23:05:55 GMT
|
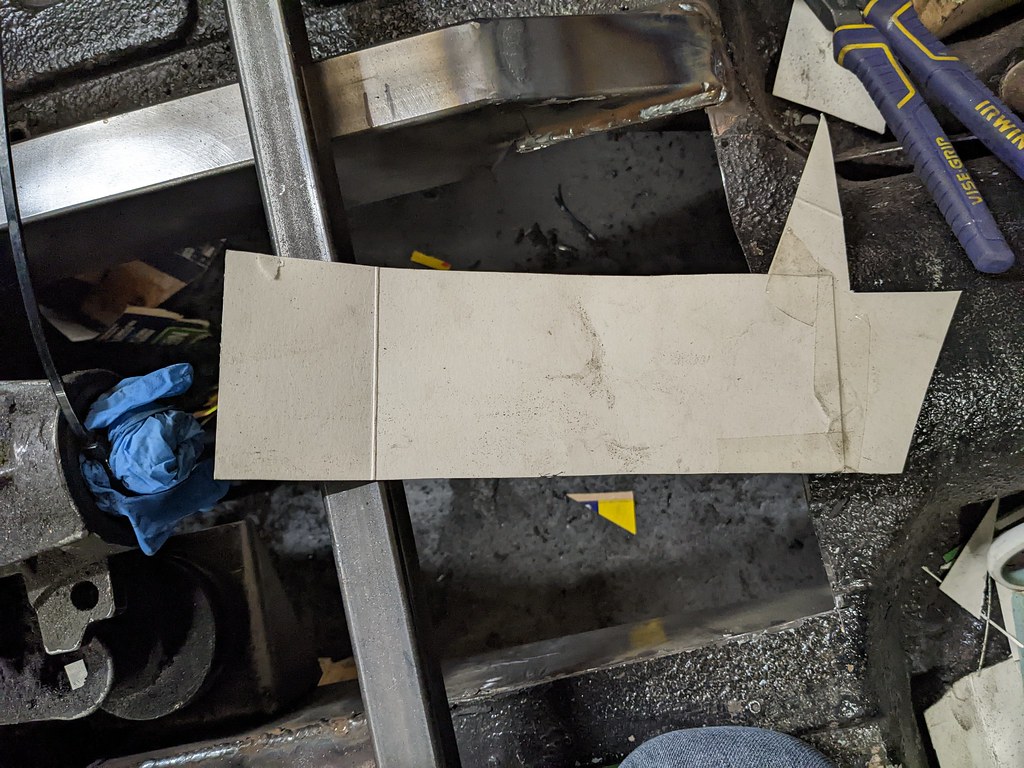
Some more of the same and I've got the other side of the tunnel boxed in   Next I switched ends a little as I've been pondering what to do with the radiator and coolant system. First job of which is to sort some sort of removable slam panel/top mount. Before getting to that I thought I'd make a flat section for it to bolt to at the front. That involved a big girder to try and keep it straight when welded.   For welding to terribly pitted metal I think it went quite well!  1x flat section to bolt a slam panel to   It was about now that I realised I'd forgotten to weld the captive nuts in before welding it in place, so those will have to be sorted upside-down now... Next up was the slam panel itself, which I got as far as a CAD template of before realising that I've got no sheet steel long enough to make it from, and all of the metal merchants had already gone home.  Ah well, shall have to find something else to potter on with over the festive break  |
| |
|
|
|
|
|
|
|
Well, turns out there were plenty of non-Triumph things that needed doing, but I've managed to find some time to get a little more done now  Turned the slam panel CAD template into steel:   I've also drilled some bolt holes on the leading edge. Attached to that are some little welded channels which will locate the radiator. I've ordered some 30x30mm poly rectangular bar from aliexpress to give a bit of vibration isolation. Until those arrive I've used some blocks of wood cut to the right size for test fitting:   There's some on the lower valance as well, which means it all fits together like so   Next up is the heater matrix I think  |
| |
|
|
|
|
|
|
|
Made a little progress on the heater matrix before running out of materials. Initially I'd planned to use a lightweight heater matrix from Rallydesign, which at 1.15kg is very lightweight indeed. However, when I made a cardboard version of it it didn't quite fit how I'd hoped, and I figured for heating up a saloon car maybe trading a little weight for more heat, so I committed to making my own. Spent a while looking for suitable heater matrixes and fans before deciding on an '84 onwards Mini matrix, and a SPAL VA31-A101-46A 5.2" pull fan. So, previously I'd modified the existing intake for the heater like so:   So that exits out into the passenger's footwell, so I set to some more CAD modelling:   The only particularly interesting panel made was the one the fan bolts to. I cut out an undersize hole for the fan and welded some studs in place:  Then, gradually with a ball peen hammer I worked the flange around to make a big bellmouth. Initially knocking it straight, then using a screw with the threads ground off (can you believe, I don't own a single nail at the new place!) as a form to make the curve past 90 deg.   Chuck it all together and you end up with something like this:   For some reason the welds look terrible. Tons of spatter which has been a real pain to get off in such a tight location. The panels are spotlessly clean so it's not contamination. What I think is happening is the knackered old torch I'm using is a bit grippy so the wire speed is wobbling around too much and causing the arc to disconnect and reconnect in rapid succession. Will pick up a new torch and see how that goes. Next up is boxing the fan in and making some ducts to pipe the air where it needs to go. I'm hoping to find some butterfly valves I can use to shut off the footwell vents from the demist and things, but if I can't find any suitable and cheap then I'll just take the weight saving and leave it all connected together. |
| |
|
|
v8ian
Posted a lot
  
Posts: 3,832
|
|
|
|
|
Many years ago I had great success in making some ducting from raw grey/brown card, all stuck together with the odd piece of masking tape, the less tape the better, this, once trial fitted was then covered in polyester/fiberglass resin all the joints were covered in strips wrapping tissue and bonded in too, lightweight and surprisingly rigid,
The Raw card I'm referring too is the sort of stuff you can get in arty shops for model making, its a bit like stiff grey felt, no dressing or finished surface, but absorbs resin nicely
|
| |
Atmo V8 Power . No slicks , No gas + No bits missing . Doing it in style.
Austin A35van, very different------- but still doing it in style, going to be a funmoble
|
|
|
|
|
|
|
Very interesting! Hadn't thought of making the ducts out of fibreglass. Suppose it wouldn't be fibreglass would it... Technically you could call it 'carbon fibre composite' and you wouldn't technically be wrong  Good idea to make it conform to an odd shape which would help with clearance and retaining a little of the glovebox. |
| |
|
|
v8ian
Posted a lot
  
Posts: 3,832
|
|
|
|
Very interesting! Hadn't thought of making the ducts out of fibreglass. Suppose it wouldn't be fibreglass would it... Technically you could call it 'carbon fibre composite' and you wouldn't technically be wrong  Good idea to make it conform to an odd shape which would help with clearance and retaining a little of the glovebox. Not my original Idea, I think I read it in StreetRodder magazine good few years ago. |
| |
Atmo V8 Power . No slicks , No gas + No bits missing . Doing it in style.
Austin A35van, very different------- but still doing it in style, going to be a funmoble
|
|
|
|
|
Mar 11, 2023 11:01:51 GMT
|
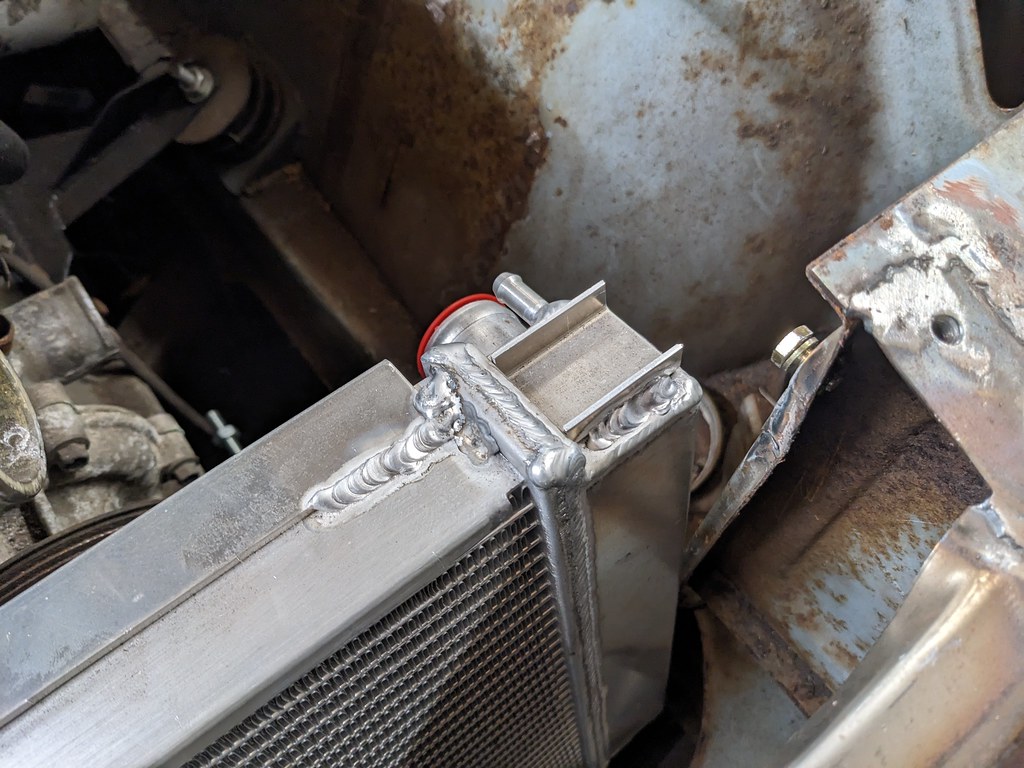
Right! Long time no update! I finished off boxing in the heater fan:   The Triumph heater hoses are 45mm diameter so I matched that on the heater. Turns out that 40mm waste pipe is 40mm ID and 44mm OD so in an effort to lightweight some stuff I made a little manifold out of that to take the air to the dash vents and driver's footwell.  Bit of a miscalculation as there isn't enough space to put the tees above the dash support so the flexible tube had to snake under it:  I think I'll do away with the upper pipe and pop one at the bottom as that'll give me some glovebox space back, but for now it'll do! Next up my Aliexpress 30mm poly bar turned up so I could cut the radiator support rubbers:  They slot into the removable slam panel like so:  ...and locate into the top of the 944 radiator in these channels:  They're a bit tight as they're slightly oversize (31/32mm or so), but I'll file them down until they're a nice snug fit. Went with Shore 40a which I think might actually be a bit stiff, but we'll see. |
| |
|
|
|
|
|
|
|
Mar 11, 2023 11:33:10 GMT
|
The next (and current) big task is sorting out the front subframe and steering rack. The first issue is that to get the engine under the bonnet the sump is resting on the subframe:  Easy enough to sort with a zippy death disc.  Bit of a clean up and paint with zinc primer, and made a new top for it.   Easy peasy. Far more challenging is the steering rack, which is the last major obstacle before everything is just regular swap stuff. Normally it sits above the level of the subframe, right through some important bits of Jag engine. My plan is to drop it down underneath the sump, but space is truly at a premium here. I tacked some bits of angle iron on the bottom of the subframe to act as a level resting place for the rack and started work. Got it to within 1mm of level, so a little shim came in handy.  First obvious issue (which luckily I'd forseen before clearancing the top) is that the crossover pipes of the rack would intersect the subframe as it kicks forwards to clear the Triumph sump. Luckily, a bit of measuring showed that the subframe is in fact completely reversible (bar the rack mounts which are changing anyway). Flip it around and it kicks back, away from the crossover pipes. Just needed some cutting to clear the turret thingy.  What became immediately obvious after getting it into position was that ground clearance was going to be pretty badly effected if the bottom of the rack centre tube was made level with the bottom of the subframe because various gubbins stick out below it. Having the rack as the lowest point of the car by well over an inch is less than ideal. Cue lots and lots of measurement to work out where I can steal a bit of clearance. At its current position there should be 12mm of clearance to the bottom of the sump so most of that can go. Next place to look was in the sump itself.  There's oil pipes running from the front-mounted oil pump back to the sump, but using some oily tissue in lace of play dough I worked out there was some usable space beneath them I could make a cutout with. Cue some more chopping (made less tense by the fact that I have another sump if I mess this one up).  That allowed some more precise measurement showing there was maybe another 9mm I could sneak if I kept the same 4mm thickness of sump.  So I plumped for spacing the rack up by 15mm:  ...which means the lowest immovable point is only 13mm lower than the subframe, which can be protected with a skid plate or something like that.  Next up is mounts! |
| |
Last Edit: Mar 11, 2023 11:49:33 GMT by biturbo228
|
|
|
|
|
Mar 11, 2023 12:36:13 GMT
|
|
Wow, that's some tight fit! Will oil still drain down from the other end of the sump after it's notched out? Loving this build.
|
| |
|
|
|
|
|
Mar 11, 2023 12:41:16 GMT
|
Wow, that's some tight fit! Will oil still drain down from the other end of the sump after it's notched out? Loving this build. Yep that's what I thought when I looked under there the first time!  I'm hoping it will. There's a factory windage tray (love the AJ6) which has a little space between it and the crank so if it pools at the front it should be able to sneak through in places. Might lose some of the benefits of the windage tray, but better that than ripping my rack off on a speed bump! The front of the sump seems to have its own little pool of oil at any rate as the oil pump sits in a depression which was full of oil when I whipped the sump off. |
| |
Last Edit: Mar 11, 2023 12:41:25 GMT by biturbo228
|
|
v8ian
Posted a lot
  
Posts: 3,832
|
|
Mar 11, 2023 13:19:47 GMT
|
Right! Long time no update! I finished off boxing in the heater fan:   The Triumph heater hoses are 45mm diameter so I matched that on the heater. Turns out that 40mm waste pipe is 40mm ID and 44mm OD so in an effort to lightweight some stuff I made a little manifold out of that to take the air to the dash vents and driver's footwell.  Bit of a miscalculation as there isn't enough space to put the tees above the dash support so the flexible tube had to snake under it:  I think I'll do away with the upper pipe and pop one at the bottom as that'll give me some glovebox space back, but for now it'll do! Next up my Aliexpress 30mm poly bar turned up so I could cut the radiator support rubbers:  They slot into the removable slam panel like so:  ...and locate into the top of the 944 radiator in these channels:  They're a bit tight as they're slightly oversize (31/32mm or so), but I'll file them down until they're a nice snug fit. Went with Shore 40a which I think might actually be a bit stiff, but we'll see. Poly bar...... Look very much like cutting sticks or buffers from rotary printing presses.?? |
| |
Atmo V8 Power . No slicks , No gas + No bits missing . Doing it in style.
Austin A35van, very different------- but still doing it in style, going to be a funmoble
|
|
|
|
|
Mar 11, 2023 13:30:10 GMT
|
Poly bar...... Look very much like cutting sticks or buffers from rotary printing presses.?? Intriguing. Took me a while to find squaure stock made from poly. Half of the challenge is knowing what words to search for! Will have a look into rotary printing press stuff. Bet it's the same thing... |
| |
|
|
v8ian
Posted a lot
  
Posts: 3,832
|
|
Mar 11, 2023 15:33:36 GMT
|
Poly bar...... Look very much like cutting sticks or buffers from rotary printing presses.?? Intriguing. Took me a while to find squaure stock made from poly. Half of the challenge is knowing what words to search for! Will have a look into rotary printing press stuff. Bet it's the same thing... Did they come in 24"ish lengths, often they are different colours for different shore hardness, used to keep one under the seat of the car when I was driving thru less salubrious areas of London at obscure hours. www.graphicwebparts.com/part/166878507/16.20422-7001/manroland/folder/cutting_stick_15x15x600_vulkollan_93_shore |
| |
Last Edit: Mar 11, 2023 15:39:00 GMT by v8ian
Atmo V8 Power . No slicks , No gas + No bits missing . Doing it in style.
Austin A35van, very different------- but still doing it in style, going to be a funmoble
|
|
|
|
|
Mar 11, 2023 20:00:43 GMT
|
Poly bar...... Look very much like cutting sticks or buffers from rotary printing presses.?? Intriguing. Took me a while to find squaure stock made from poly. Half of the challenge is knowing what words to search for! Will have a look into rotary printing press stuff. Bet it's the same thing... Looks like useful stuff for many little jobs. Linky to Ali pretty please  |
| |
|
|
|
|
|
Mar 11, 2023 22:14:19 GMT
|
Of course! LinkyIt's listed as '0.5m Solid Polyurethane Square Bar Rubber Block rectangle 20 25 30 35 40 45 50 55 60mm High temperature resistance Beef tendon' which all makes sense up to the 'beef tendon' bit  Edit: turns out searching for 'polyurethane beef tendon' comes up with lots of this sort of thing. Who knew?! |
| |
Last Edit: Mar 11, 2023 22:31:10 GMT by biturbo228
|
|
|
|
|
Mar 11, 2023 22:30:03 GMT
|
Haha I can see it coming in useful in some of the dodgier parts of the world! No-one wants to get beaten round the head by a 24" lump of rubber. No telling what it could be!  |
| |
|
|
v8ian
Posted a lot
  
Posts: 3,832
|
|
|
|
I Looked up "Polyurethane Beef Tendon" with trepidation, and made sure the wife was not about, I'm not sure either I'm relieved or disappointed....  |
| |
Atmo V8 Power . No slicks , No gas + No bits missing . Doing it in style.
Austin A35van, very different------- but still doing it in style, going to be a funmoble
|
|
|
|


