|
|
|
Sept 2, 2020 10:14:51 GMT
|
Managed to pick up a 335d rocker cover, whose primary accolade is that it's managed to make an already spectacularly ugly rocker cover even worse.  It does, however, do away with the integral filter housing which I won't be using due to the bigger turbo. As far as I've measured it should fit with the filter housing, but not having it just means I actually have proper access to the turbo and manifold. The bolts also arrived for my shiny new flywheel so that could go on. This is a solid mass jobby from TTV racing in case anyone was wondering, chosen because it can handle much more torque than the stock dual-mass which tends to overheat and bleed all the rubber out of it. I understand the 530d versions are tougher, but I'm not sure how much by and the ring gear is different so a new starter would be needed. I think the clutch already on the car is the stronger 530d version which is bolt-on and is supposed to be able to take quite a bit of torque.  The input shaft on these is massive so the little universal tool I have was way too small. Had to make up a special tool using a 15/16ths socket, the crush tube of a random pulybush I had lying around and some tape.  Worked on the second attempt so the gearbox is on!  |
| |
Last Edit: Nov 17, 2020 22:20:08 GMT by biturbo228
|
|
|
|
|
|
|
Sept 5, 2020 21:55:16 GMT
|
|
|
| |
Last Edit: Nov 17, 2020 22:14:25 GMT by biturbo228
|
|
|
|
|
Sept 10, 2020 20:12:08 GMT
|
|
|
| |
Last Edit: Nov 17, 2020 22:12:23 GMT by biturbo228
|
|
|
|
|
Sept 17, 2020 12:50:39 GMT
|
Some more jiggery pokery with the engine as I wanted to make sure I could fit and remove the wiper mechanicsm without dislodging the intake manifold. Moved it forwards by about half an inch which sorted it.  At this point I'd lucked into having the engine dead central in the car, angled at 6.4deg and clearing all of the major components nicely so I thought I wouldn't tempt fate and try and raise it to take up the squish in the mounts. Just make them while it's central and sort any issues by shimming the mounts with metal plates (which can later be welded to the underside of the mounts themselves). With that, I started making the mounts! They're not the prettiest, but I went for strength and using materials I had to hand over aesthetics. Nearside...   ...and offside:   Also, someone needs to be kicked in the shins for the upper engine mount bolt placement on the LH side. It's hidden way way up behind loads of tightly packed wiring, and exits directly into a plug that's really difficult to remove so you can't get a socket on it nicely. If they'd moved the mount 10mm forward or down, or the plug 10mm up or either side (or even outward) then it would be fine. It's in there somewhere:  I reckon designers should be made to spend a year working on cars every now and again so they experience these sorts of things! |
| |
Last Edit: Nov 17, 2020 14:36:21 GMT by biturbo228
|
|
|
|
|
Sept 18, 2020 3:31:52 GMT
|
I reckon designers should be made to spend a year working on cars every now and again so they experience these sorts of things! I've said this before and examples like yours don't change my mind!  Great work so far though, designers notwithstanding! |
| |
|
|
|
|
|
Sept 19, 2020 9:03:19 GMT
|
I reckon designers should be made to spend a year working on cars every now and again so they experience these sorts of things! I've said this before and examples like yours don't change my mind!  Great work so far though, designers notwithstanding! Thanks man! Nearly there on the mounts. Hoping to be able to get the gearbox mount done before we head off to Poland on Sunday, but the pickup has surprised me with a failed MoT so I've got that to sort before we go too! |
| |
|
|
|
|
|
Sept 19, 2020 9:23:04 GMT
|
|
Look at from bmw's point of view, the only time you are ever likely to need to take an engine mount bracket off is when you change the engine and then it's all out of the car and stripped of wiring anyway.
|
| |
|
|
|
|
|
Sept 19, 2020 9:47:02 GMT
|
Yeah I understand it, and production cycles these days are so breakneck that even if designers did want to make their cars easy to work on I'm not sure they'd be given time to go over their designs from that standpoint. It's just one more thing that makes me appreciate older cars more  vocal fleet managers and mobilised unions caused a lot of issues, but they did ensure that designers prioritised making cars nicer to work on! |
| |
|
|
|
|
|
|
|
Been a while since an update! Holiday in Poland which was cut short by a day thanks to covid restrictions. Still great though. Did a self-drive tour of Warsaw in a Fiat 126P, and if anyone's wondering where all of the B4 Audi 80s have gone they're all in Poland! Saw a couple of FSO Polonez' as well which was neat. Back to the grindstone though! Sorted the gearbox mount, so now the engine is fully supported within the car   Next up was to rebuild the top of the engine. Starting to look a little less lost in the engine bay now.  Then it was rebuilding the slam panel I'd cut out of the front of the car. It's still unboltable, but the bonent mounts were very crusty so that needed sorting.   That let me test-fit the intercooler which is a very snug fit indeed! Needed to clearance the cross brace, and sort a path for the hoses, but it's in!  |
| |
Last Edit: Nov 17, 2020 14:31:57 GMT by biturbo228
|
|
|
|
|
Nov 16, 2020 13:17:46 GMT
|
Fair few next steps to report on  I've painted the detachable slam panel so that's now bolted in for the final time.  I've also refurbed the big bracket panel that holds the radiators in place, and clearanced it for the boost pipes.  Next step was to mock up all the boost pipes. Unfortunately my aluminium tube for joining the silicone bends together was delayed, but as a substitute I discovered that small halfords rattlecan lids wrapped in a bit of tape made a nice snug fit in 2.25" tubes.  That let me get everything mocked up in place:    After that I could make some brackets to support the lower end of the intercooler...  ...which meant I could close up the front box section I had to clearance to fit the intercooler.   Sadly that's not the last time the intercooler will be mounted as you have to take it off to adjust the bonnet shut lines, but that should be a pretty rare job so not a major problem. Last thing I've finished is supporting the filter-end of the intake pipe and fitting some jubilees.  Unfortunately I've ordered the wrong size mikalor clamps for the boost pipes so I can't sort them out (although I have now cut the aluminium joiners to size). Turns out fitting the ally pipe swells the silicone by a couple of mm which is enough to put it out of the short range of the mikalor clamps I've bought. So they're going back and the next size up is on its way  |
| |
Last Edit: Nov 17, 2020 14:21:14 GMT by biturbo228
|
|
|
|
|
|
|
Nov 27, 2020 12:14:13 GMT
|
So, last week I had the dreaded message that my slightly non-standard image hosting site will now be closing :S This has led to a scramble to save down the 700+ photos in my mega-thread in some sort of order and migrate them over to something a little more stable. As I have to go through my thread replacing all the URLs I thought now would be as good a time as any to split my single thread out into a number of ones for each individual car. I should have followed the advice to do that in the first place as I understand some folks might just like Spitfires, or Fiats, or Jags and sifting through non-relevant posts to get to the car you like isn't the best way to present a thread. So from now on, updates will be in these threads: Spitfire 6 (pending) Fiat X1/9 TurboJaguar Superturbodiesel |
| |
|
|
CaptainSlog
Part of things
 
Posts: 510
Club RR Member Number: 180
|
|
|
|
|
I love the allovertheplaceness of this thread, I find it entertaining and informative, I vote you leave it as it is with the pics restored. Thanks for a great thread.
|
| |
|
|
|
|
|
|
|
I love the allovertheplaceness of this thread, I find it entertaining and informative, I vote you leave it as it is with the pics restored. Thanks for a great thread. Haha drat! I'm already halfway through doing the Jag thread... There's definitely bits and pieces of work that wouldn't fit into the dedicated threads (like picking up the Alfa, or my mate's V8 E36). Is both an option? Not sure! |
| |
|
|
|
|
|
Feb 11, 2021 10:50:34 GMT
|
Seeing as I haven't got an X1/9 thread up yet I'll post this here   Turns out the X1/9 is quite good (and fun) in the snow! Lightweight, narrow tyres, low power off boost to get you moving (but a gob of torque as it comes on to break the rears loose), manual brakes so you can easily apply low amounts of braking, and an LSD. Quite the wintersports combination! |
| |
|
|
|
|
|
Feb 11, 2021 15:05:18 GMT
|
|
Um..... I remember mine being great right up until it wasn't, then biting hard. Only car I've ever managed a double spin in - on tarmac. And front wheel lock-up was a regular issue. Undoubtedly yours is a much better sorted example but... watch yourself!
Nick
|
| |
1967 Triumph Vitesse convertible (old friend)
1996 Audi A6 2.5 TDI Avant (still durability testing)
1972 GT6 Mk3 (Restored after loong rest & getting the hang of being a car again)
|
|
duncanmartin
Club Retro Rides Member
Out of retro ownership
Posts: 1,320
Club RR Member Number: 70
|
|
Feb 11, 2021 15:43:25 GMT
|
I loved my X1/9 in the snow, but that was a standard 1500 and fairly knackered, so it didn't have enough power to do any damage. Winding the headlights up was a real pain though!  |
| |
|
|
|
|
|
Feb 13, 2021 22:41:40 GMT
|
Um..... I remember mine being great right up until it wasn't, then biting hard. Only car I've ever managed a double spin in - on tarmac. And front wheel lock-up was a regular issue. Undoubtedly yours is a much better sorted example but... watch yourself! Nick Yeah I think there's something to with the heavier engine at the back that makes mine less snappy. They're uprated spring of some variety, but I expect they've got the same balance. So effectively softer at the rear, so more comparative grip there. You're absolutely right about the fronts locking though. That was part of the reason I had my little off roading excursion in Wales as the fronts locked (although a lot of that was due to me chasing a BRZ with a nutter behind the wheel...). Mine has Uno Turbo front discs which made it even worse! I've since fixed that with Beta Montecarlo rear caliper which have a bigger piston and fix the ratio, although at the cost of a slightly softer pedal. I loved my X1/9 in the snow, but that was a standard 1500 and fairly knackered, so it didn't have enough power to do any damage. Winding the headlights up was a real pain though!  Luckily my headlights seem alright! Although the relays are a little tired so sometimes it seems like it's just woken up and can't keep its eyes open  |
| |
|
|
|
|
|
|
|
Well it's been yonks since I've done anything on the Spitfire, but flitting between my place and my folk's place for childcare has afforded the opportunity to give it a bit of attention. I'd picked up a Sure-Trac Subaru R160 quite some time ago, but they all come in too high of a ratio for my needs, so the plan was to swap the LSD centre into a 3.54 open diff:  Normally this is really quite a straight forward job as Subaru's manufacturing tolerances are usually good enough that you can just keep the shims and bearings together and swap things over. However, I noticed that some of the welds on the LSD core had cracked:  Apparently this is quite a common thing. So I pulled the bearing off that end (wrecking it in the process as it was super tight), and vee'd out the welds ready for repair. At this point I read a little more about how the LSD is constructed, and I don't actually think any of that is necessary. The end cap is screwed into the centre tube and the welds are just there to stop it coming undone. There's limited force on the welds as the threaded portion takes the majority of the load from the pawls inside, and the cracks probably occurred due to differential cooling rather than application of force while driving. Oh well, too late now. So I pinched a bearing off the open diff core, actually took some time to set up the backlash properly, and now have a diff that is very nearly in spec (0.21mm backlash where the spec is 0.1-0.2mm).  I've ordered some more shims to just sneak it over the line. Next up is making up the hybrid Rover 100/Subaru driveshafts to connect to the uprights I've had machined for MGF bearings. Then the car should be rolling again (though I'll need a different prop again). |
| |
|
|
|
|
|
Apr 29, 2024 12:24:15 GMT
|
Inching forwards on the rear suspension. Popped some polybushes in the rear housing (had to get some new ones as I sold the last set with my old diff).  I'd also read that, if you're driving them really hard (e.g. as a club racer), the conversion plate spring mount can tweak side to side slightly. I doubt I'll ever get anything like that amount of g-force in my car, but adding some gussets felt like a good safety precaution:   I also took the opportunity to get some more shims and actually tweak the backlash down into spec. Didn't measure it this time, but as it was at 0.21 and the top of the spec is 0.2, just bumping it 0.05mm in one direction should be fine. Just waiting on the right thread nyloc nuts and it can go in the car! |
| |
|
|
|
|
|
Jun 28, 2024 21:55:57 GMT
|
While I was waiting for parts for the pickup so I can continue with the garage build I thought I'd tinker on the Spitfire a bit. First thing is I sorted out the shimming of the R160, but that highlighted a tight spot around the rotation which is unfortunate. I'm hoping I just didn't clean the back of the CROWNwheel well enough when fitting it, which is a possibility as I had it on and off a few times in quick succession cleaning the threads. The other possibility is that the tiny but of (turns out unnecessary) welding done had warped the flange ever so slightly. Would be no issue if I had the lathe up and running, but I do not have the lathe up and running... In more exciting news I've been working on a rear disc brake conversion. I know people have used MGF calipers and Peugeot 106/Citroen Saxo calipers before so I started with those. I found that if you redrill a 278mm rear disc from an 06-11 Yaris then you can just bolt a flat plate onto the rotoflex upright and have it set at the right height for the MGF calipers, but ideally I'd prefer a disc that doesn't need machining (it also needs the centrebore taking out). I like the Peugeot calipers from a weight perspective, so I bought a set to do some mocking up. Took some measurements using an MGF 240mm disc and came up with this: 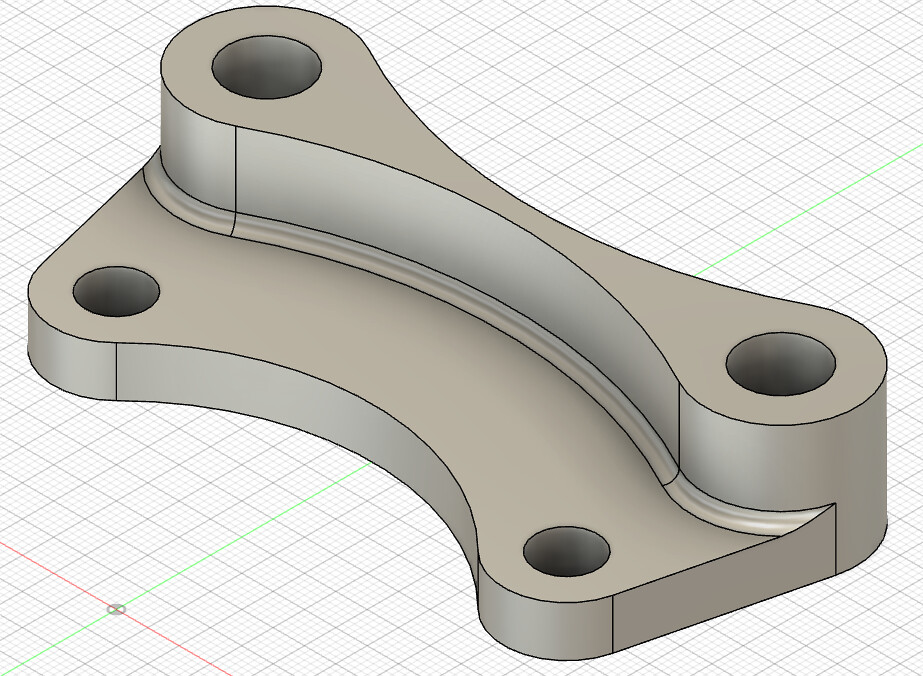 ...but when making a mockup in MDF I discovered a couple of potential issues. The top bolt fits in ok, but the bottom of the caliper clashes on the locating boss for the radius arm: 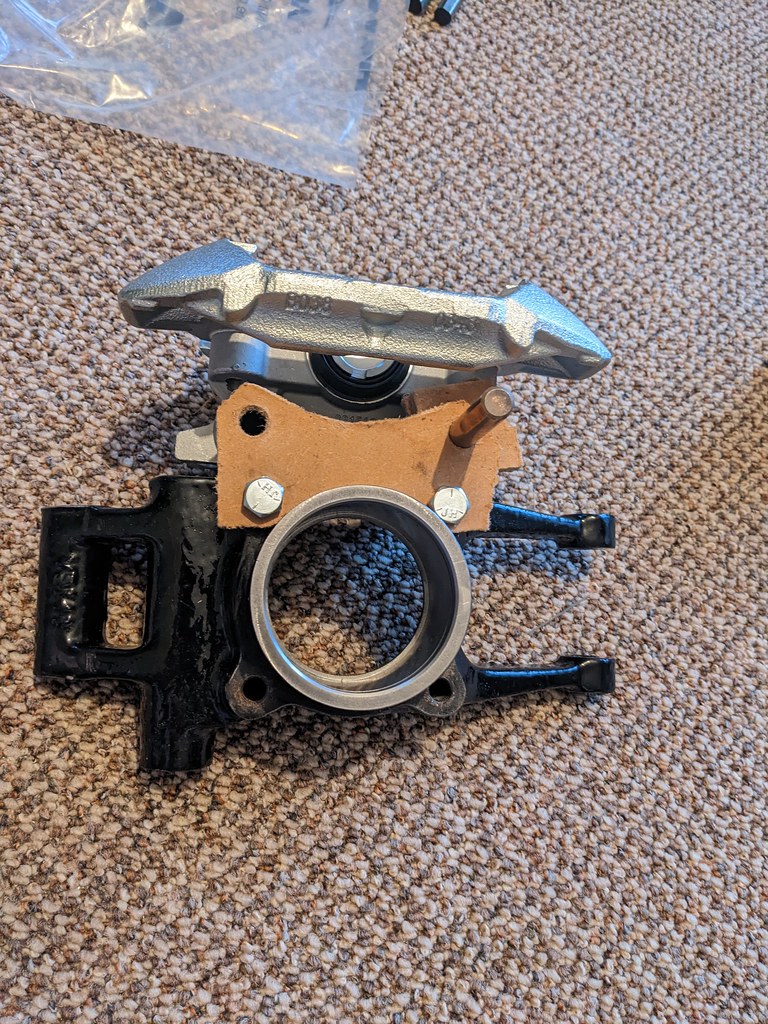 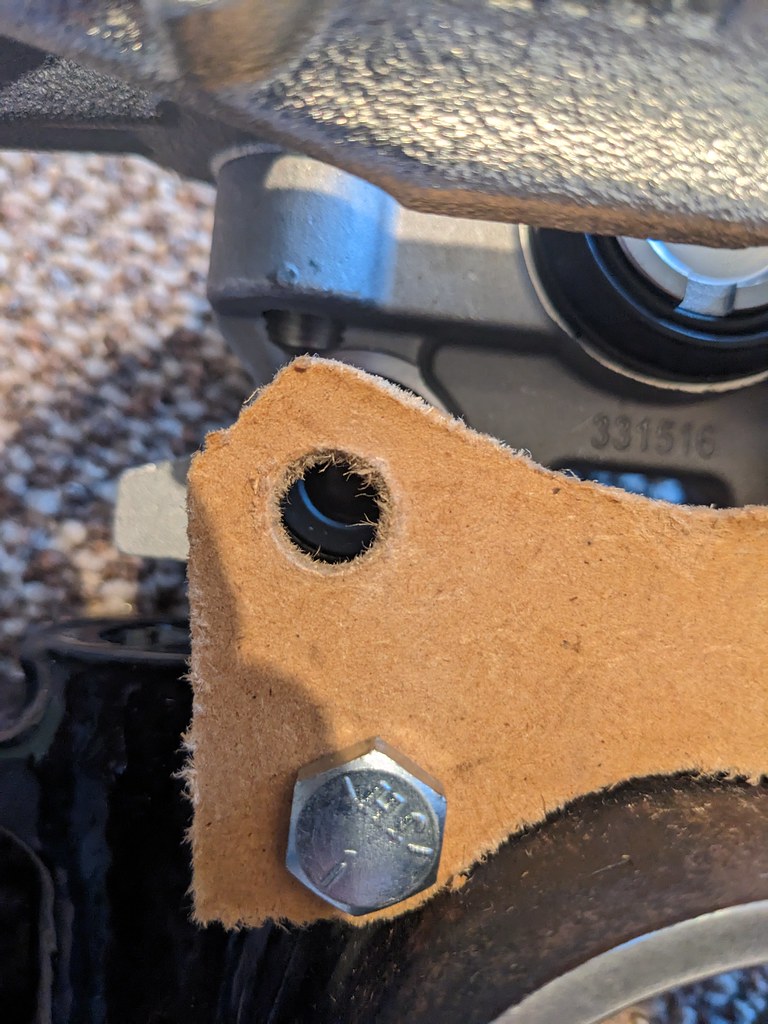 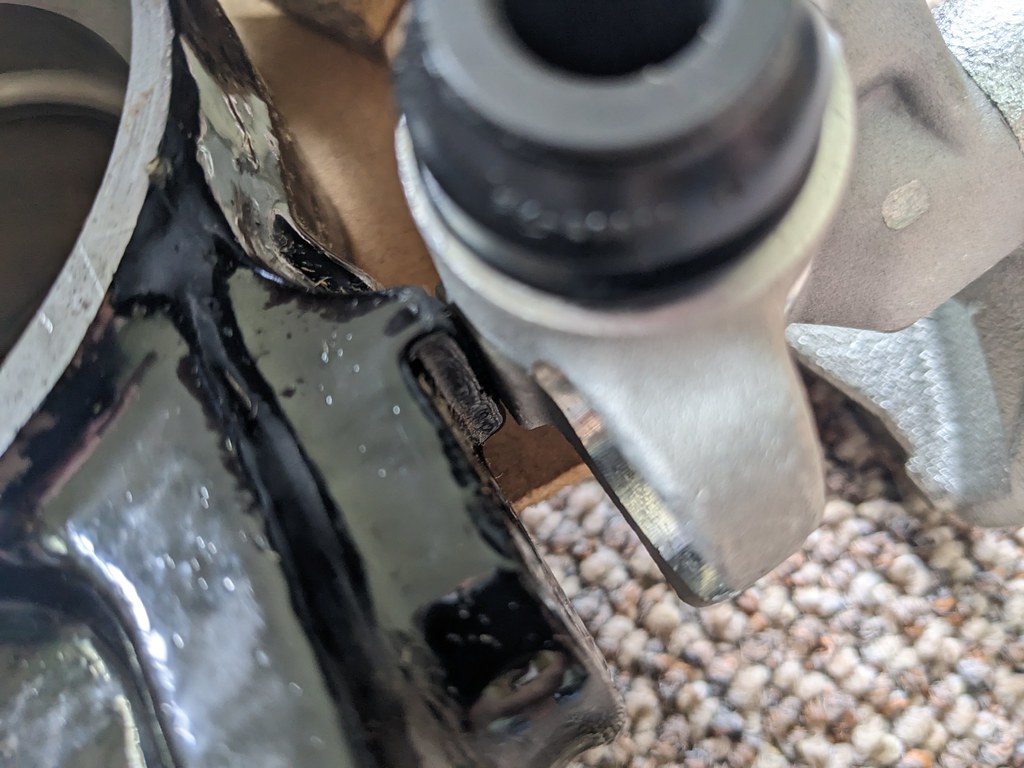 It's not a dealbreaker as I can grid that bit off (I'm not using radius arms), but it's all looking mightily close. So I thought of trying the 247mm disc the Peugeot comes with (or, rather, a front axle one from a 205 as they've got the same 66mm centrebore as the MGF disc so should make redrilling easier). They looks something like this: 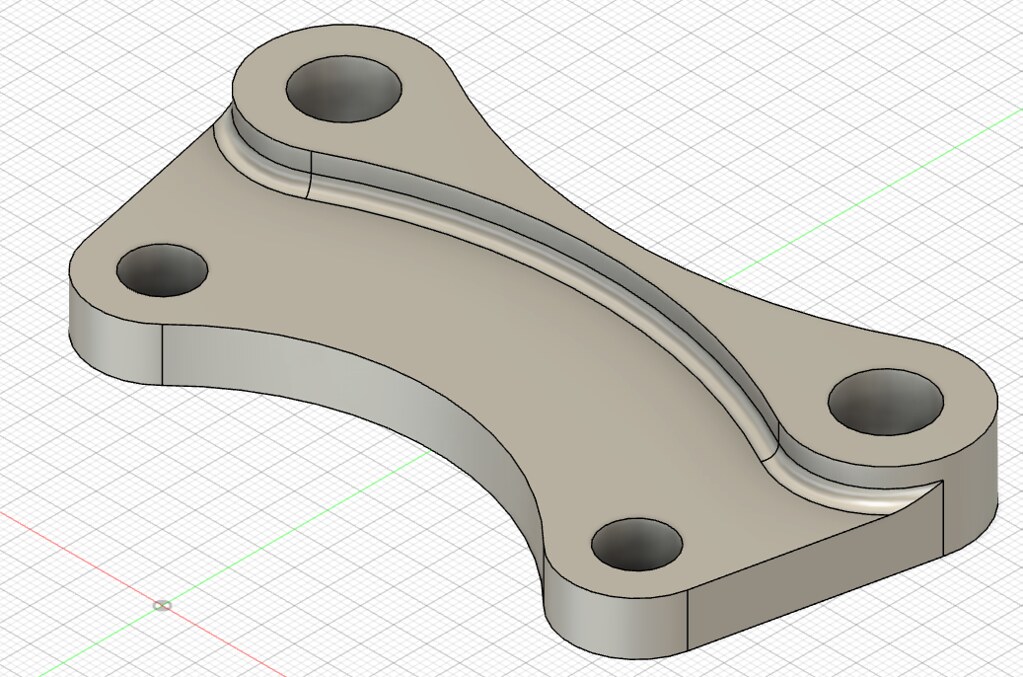 While the extra 7mm diameter on the disc makes upright clearance a bit better, the shorter height of the disc makes the second problem I've encountered worse: 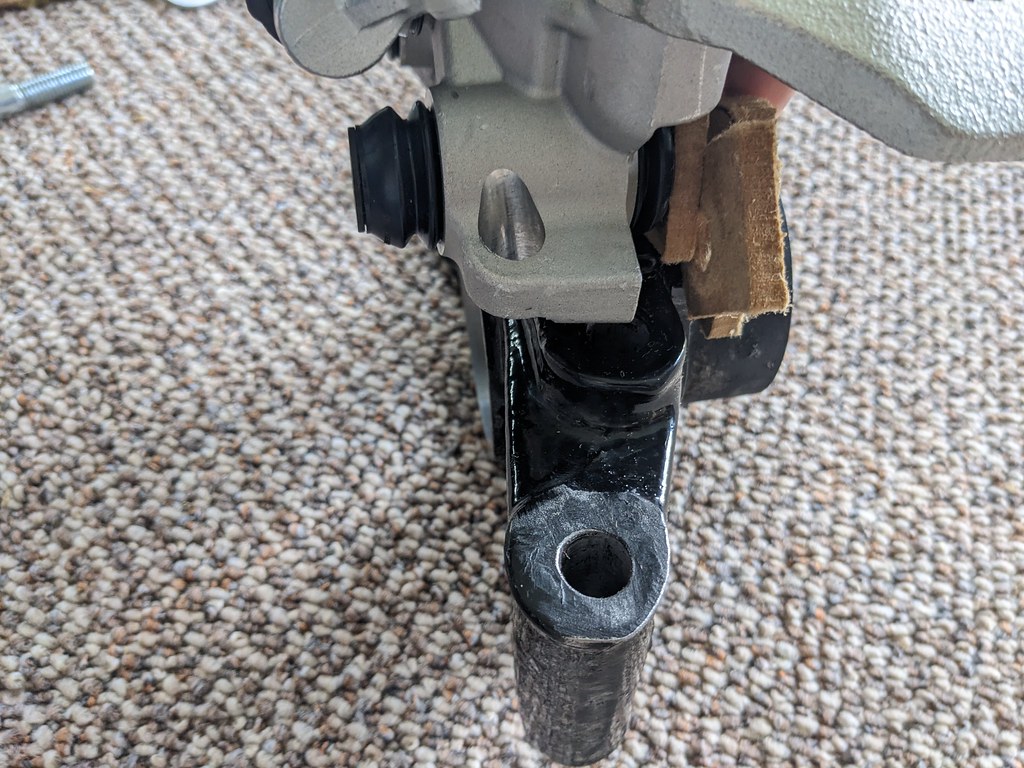 The handbrake cable wants to exit directly into the upright. The above pic is with the MGF disc, and the Peugeot disc makes it worse. At this point it occurred to me that I knew these had been fitted before but I hadn't actually looked at how. Found a pic of a chap called GT6M's iteration of the Peugeot caliper (same guy who pioneered all the lower wishbone geometry stuff I've done). Looked like he welded his own arm onto the Peugeot one, though from what I gather the handbrake never worked well (had to crank up the cable so tight it binds to have any usable handbrake), and he ended up using Nissan calipers instead: 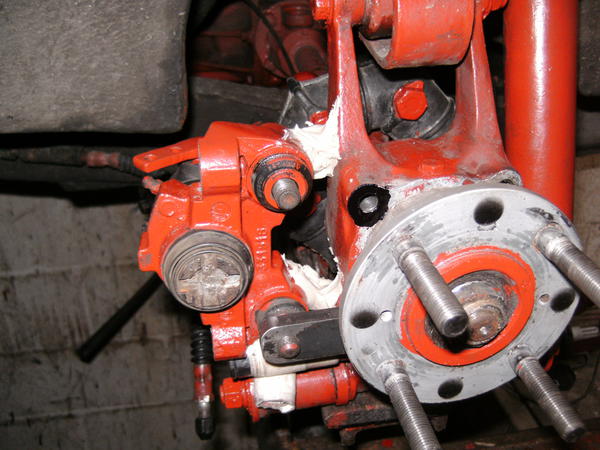 |
| |
|
|
|
|


