|
|
|
Apr 29, 2020 12:21:47 GMT
|
Not a great deal of progress recently I'm afraid. The slight disruption to postage times has played havoc with the flow of work, although all told I think I'm still well ahead of where I'd be if the world was running as normal. Have managed to get the main suspension unit bolted together with new bolts. Felt wrong putting it back together with crusty old bolts, but at the same time Jag uses some weird thread pitches that makes it tricky to get good yellow-passivated fixings. Who used M11 nuts? Ridiculous.  I also welded on some exhaust hangers above the axle. As standard Jag attached the exhausts to the suspension subframe, and I can see why as it stops the movement of the subframe from fouling on the exhausts in the tight space available. However, it's one of the things that's always irked me when dropping the rear suspension so I figured I'd do away with them. As the suspension is now much more stiffly located with the polybush fronts and X308 triangulated rear brace I should be fine   Current work is around treating the rust on the underside (done) and the area behind the fuel tank before that can be fitted  |
| |
Last Edit: Apr 29, 2020 12:29:31 GMT by biturbo228
|
|
|
|
|
|
|
|
|
Gah! Rust! 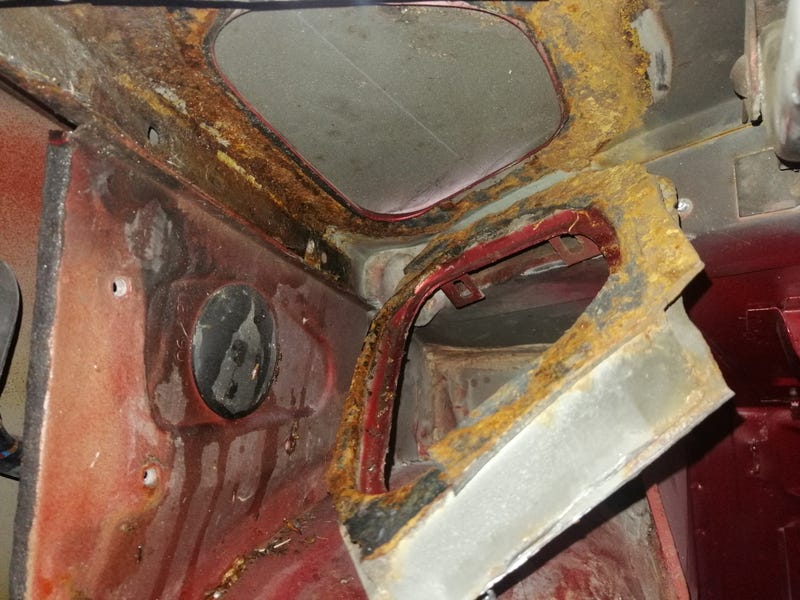 This is a notorious rust spot on these cars. The fuel filler cap is recessed into a horizontal surface so it collects water easily. There's a drain, but it often gets clogged with leaves and other detritus so it just holds water. The bit you see hanging down is normally attached to the bottom of the outside skin with some mastic which inevitably gets old and loses its seal, letting water capillary action under the whole panel. This and the aerial hole are the main culprits for soggy boots on these old Jags. Complex panel to replace, and depending on how far it goes back it can be very close to the rear window. At the very least I'll have to remvoe the outer seal, but the glass is bonded in so hopefully that won't have to come out! Still, I've been contenting myself with de-rusting the also complex pressing that bonds to the underside. 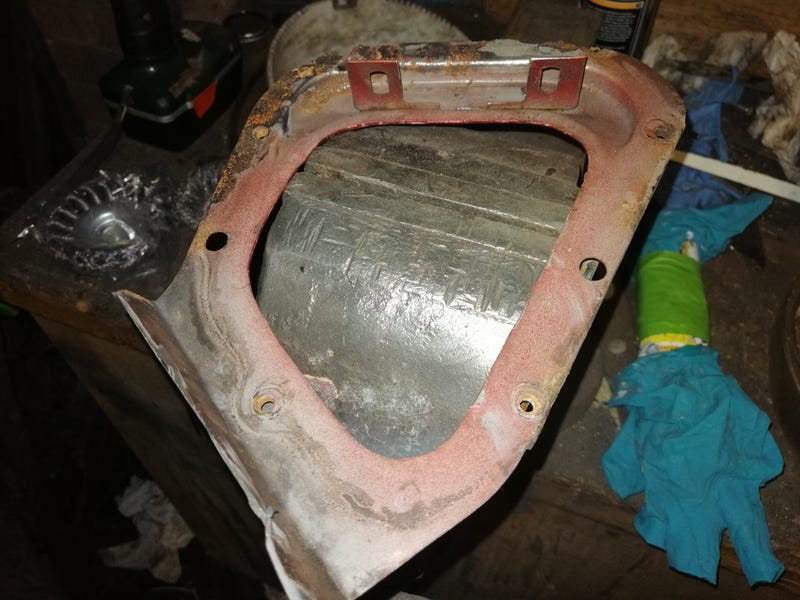  All-in it's not actually that bad (especially compared to the body), but any corrosion that continues on any of the mating surfaces will let water in and start the process all over again so I'm going belt and braces, replacing anything that looks even vaguely textured. 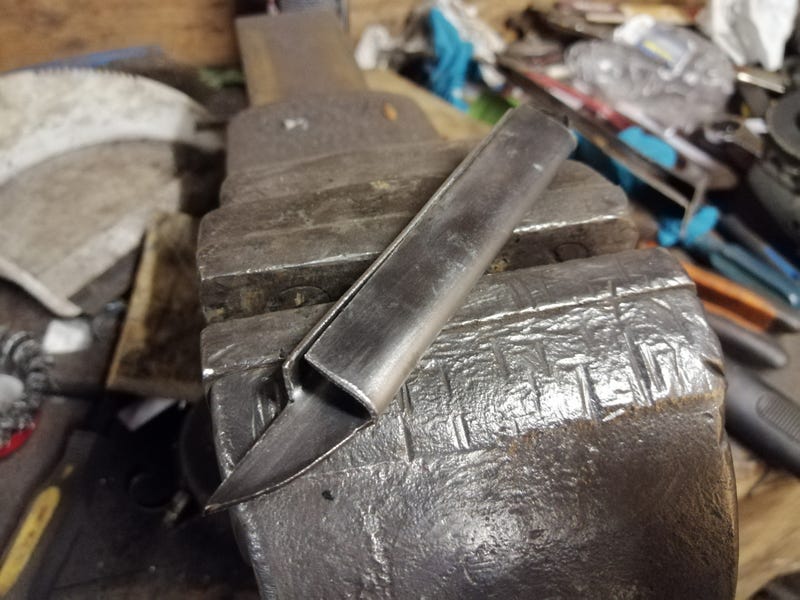 Only way I can tackle it is to divide it up into sections that I can reproduce and put it together as a patchwork. 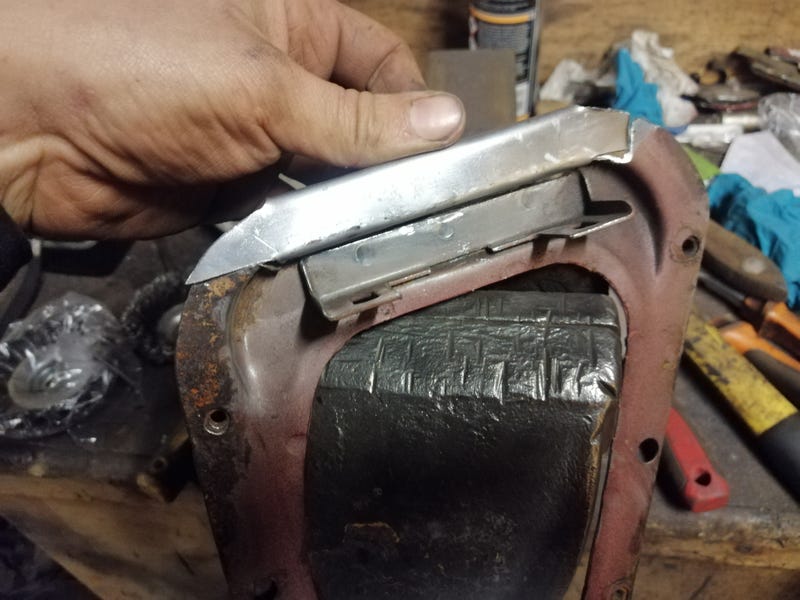 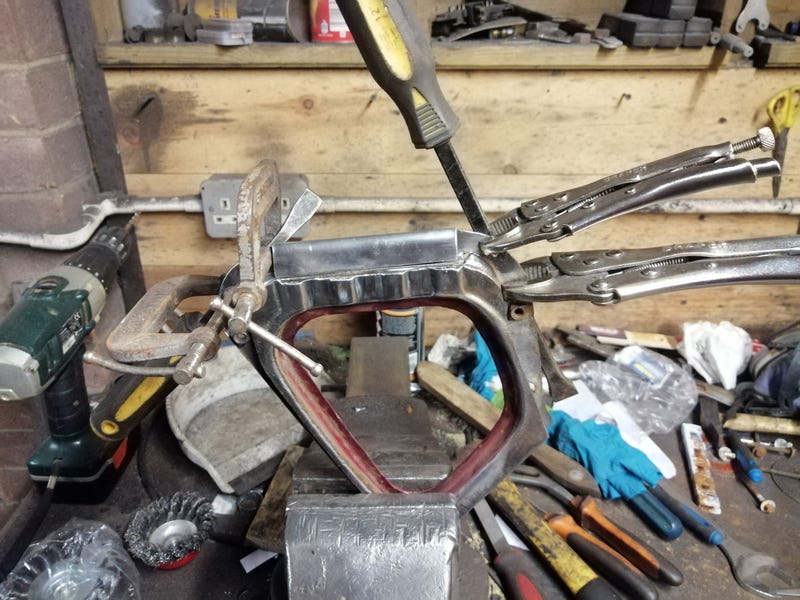 I've done most of the sections so far so should be finished today. Then it's working out what to do with the outside... 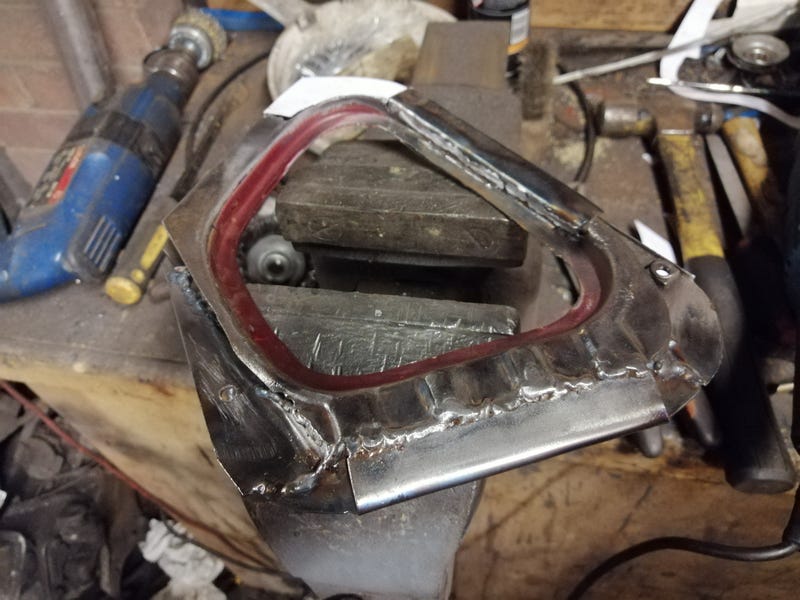 |
| |
|
|
|
|
|
|
|
Bit more progress this weekend  Took the plunge and chopped out the rusted fuel filler area. Figured out I could just get away with not removing the rear window for now, meaning I could still do it outside. 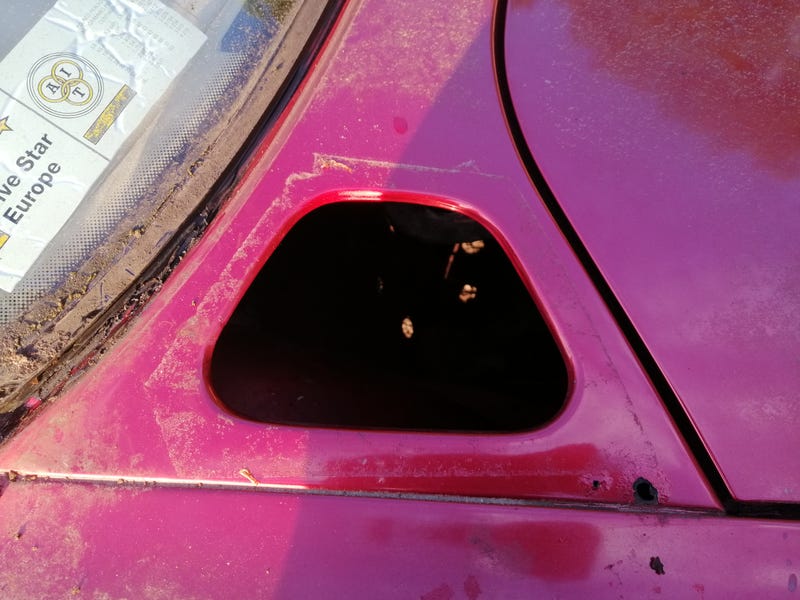 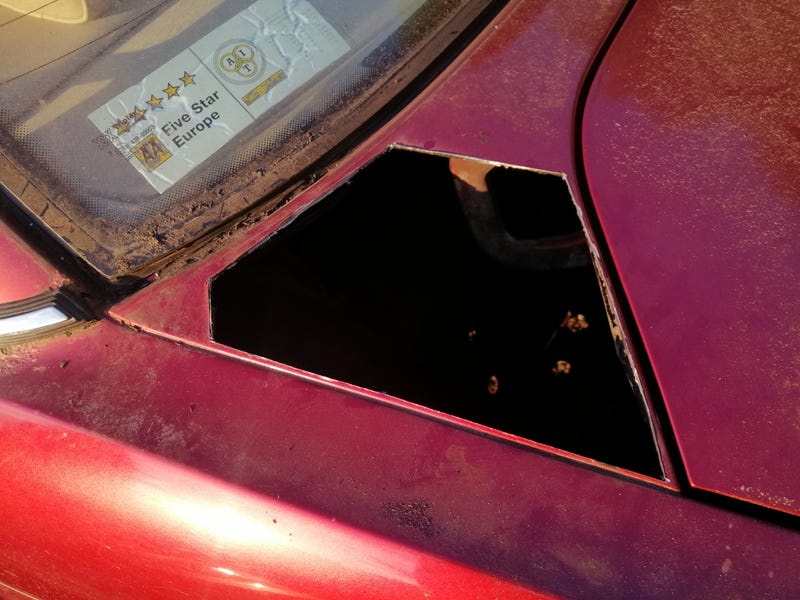 Also finished re-making my pressed bracket thing (which I've since discovered are still available for £16...). 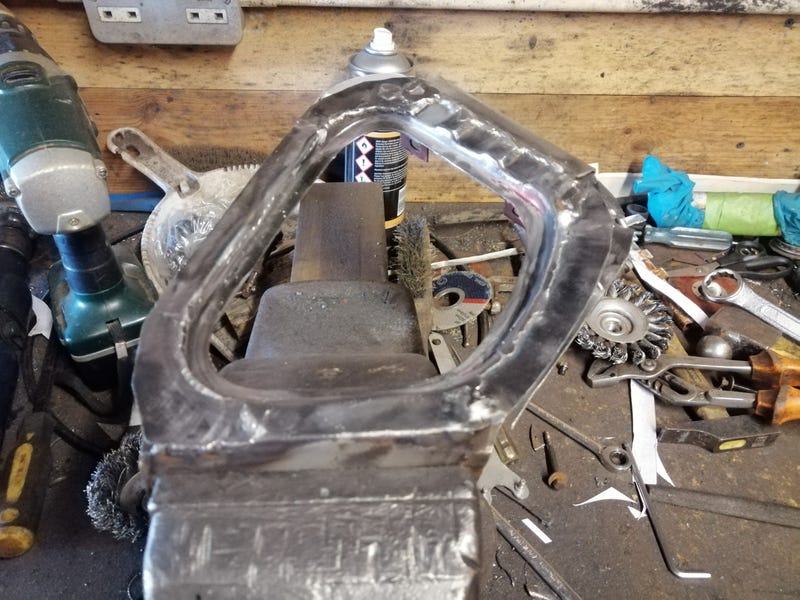 Next up was making a replacement panel for the body. Was thinking this was going to be tricky, but in all honesty some 1mm steel and a ball-peen hammer had it made surprisingly easily.  Tacked it in place very, very slowly with clamps all the way. Welding outside actually had some benefits here. When there's gust of wind it blows your shielding gas away so you have to wait for lulls which stops me getting impatient and rushing! Connected up all the tacks and very carefully sandy-flap wheeled it flush. It's slightly below the level of the panel so there's some space to filler it flat. 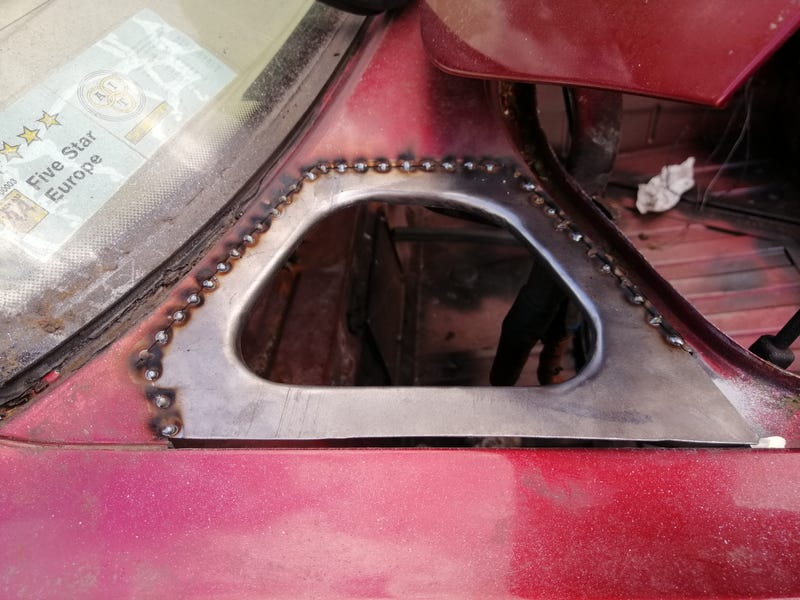 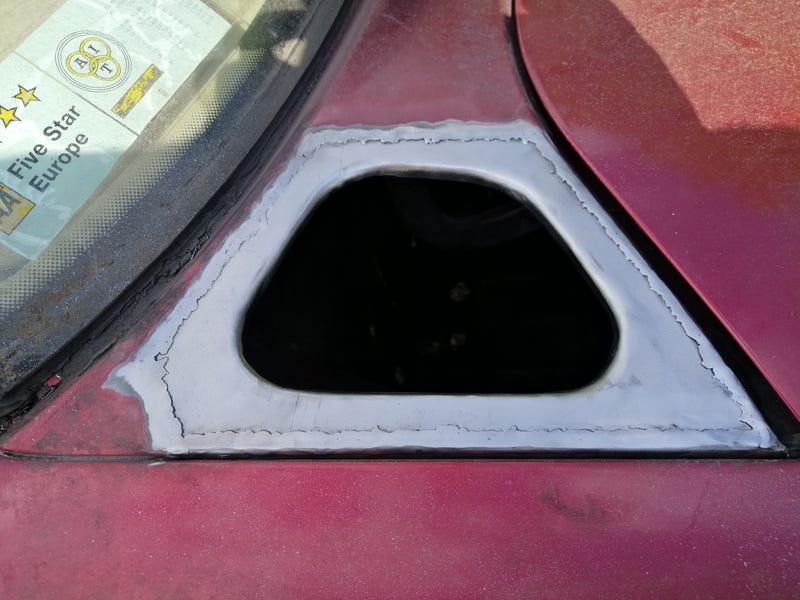 Once the paint was dry on the underside (and the pressed panel) it got bonded in place with copious amounts of tigerseal. I also redid the seam that runs up to the c-piller as that had worked loose. Getting the tank in was a bit of a struggle. Not sure if I got the tank in slightly slanted or all the little errors adding up with the panel replacements meaning it's slightly off. It fits, but it's tight at the filler neck. 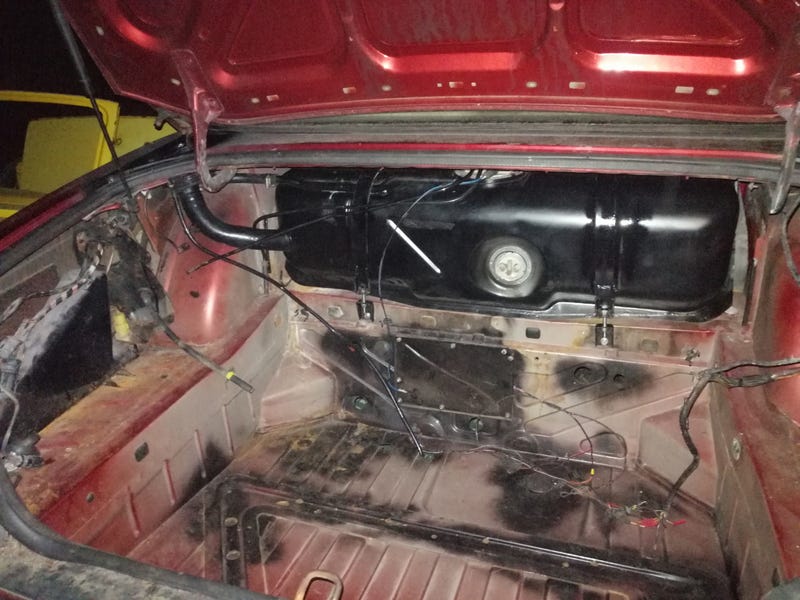 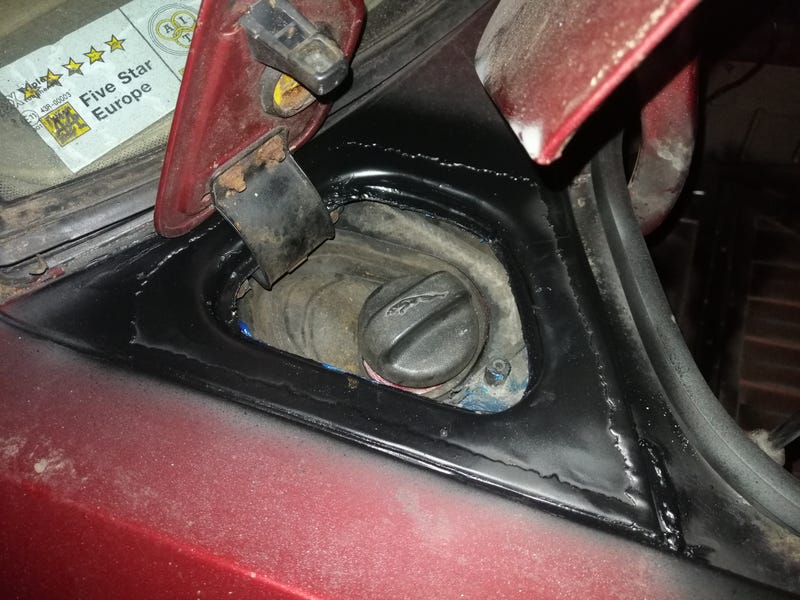 Still, it's in and sealed up with hylomar blue and a coat of halford's best pending a respray. Will fettle the position a bit later. Oh, and while I was waiting for various paints to dry I remade the rear brake pipes in kunifer (including the long fore-aft pipe not pictured here). Just as well as the original steel ones cracked as I removed them... 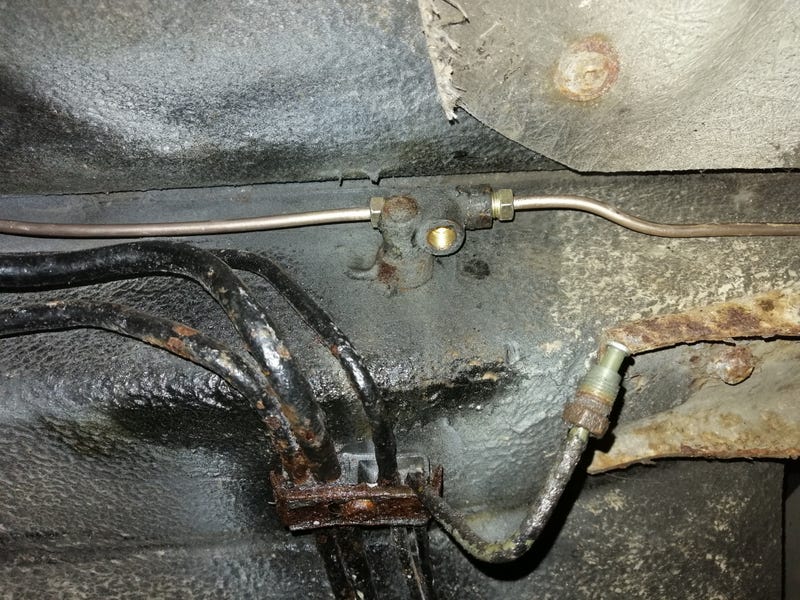 The list is getting shorter! Not much shorter, but still pleased with progress  |
| |
|
|
|
|
|
|
|
Got the IRS in this weekend  much lighter half built up. 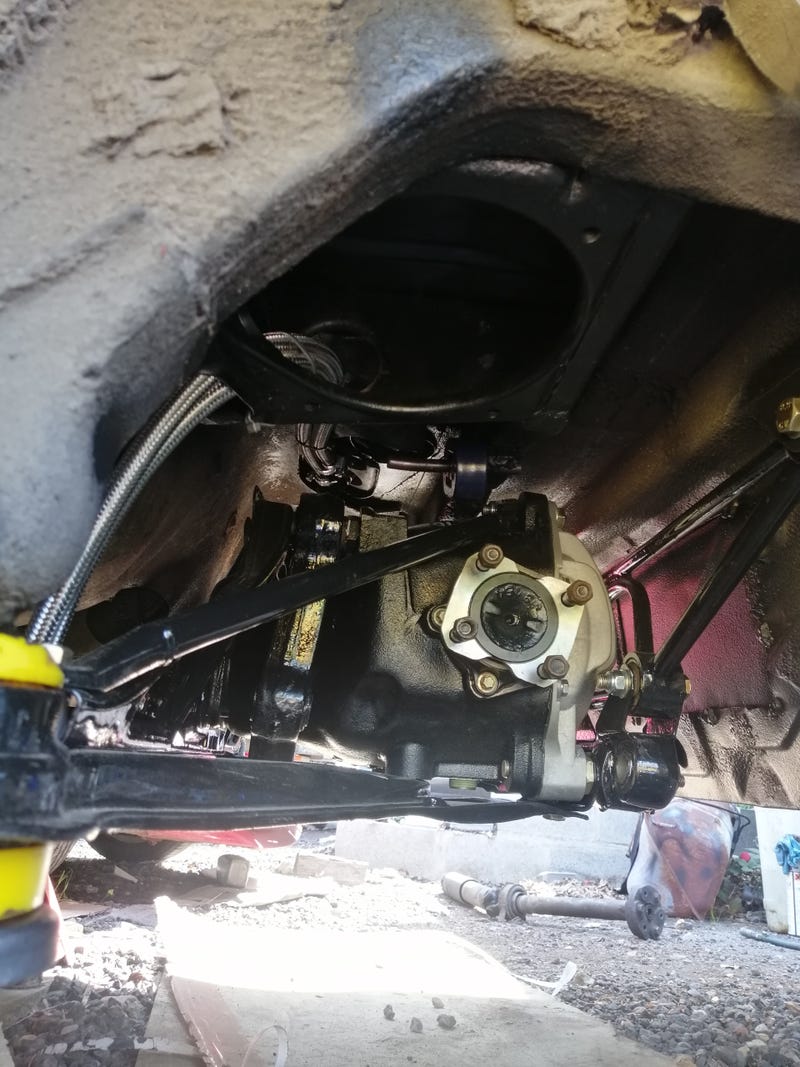 Little access hatch is already coming in useful. Forgot to bolt the bracket for the speedo sensor before getting it in place, which would normally be a pain but with the panel off it's no problem  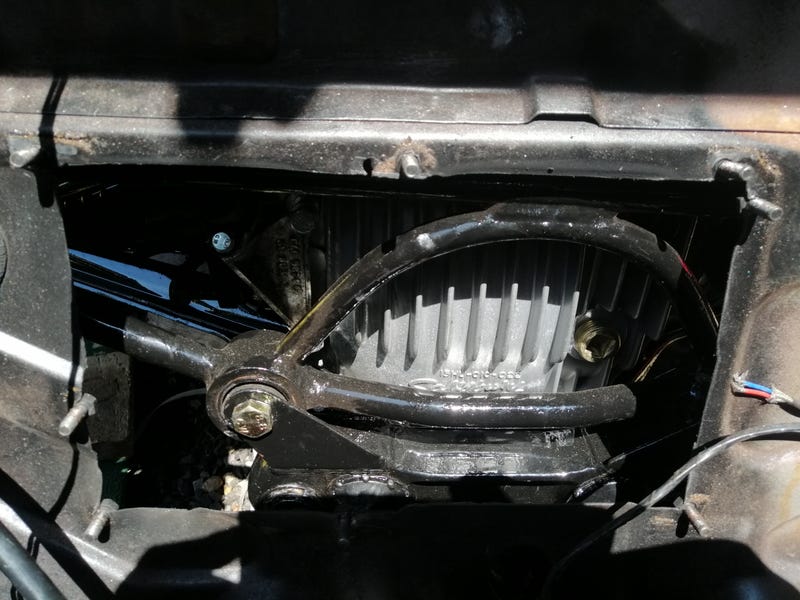 Also sorted my fuel flexi lines which run above the suspension unit. 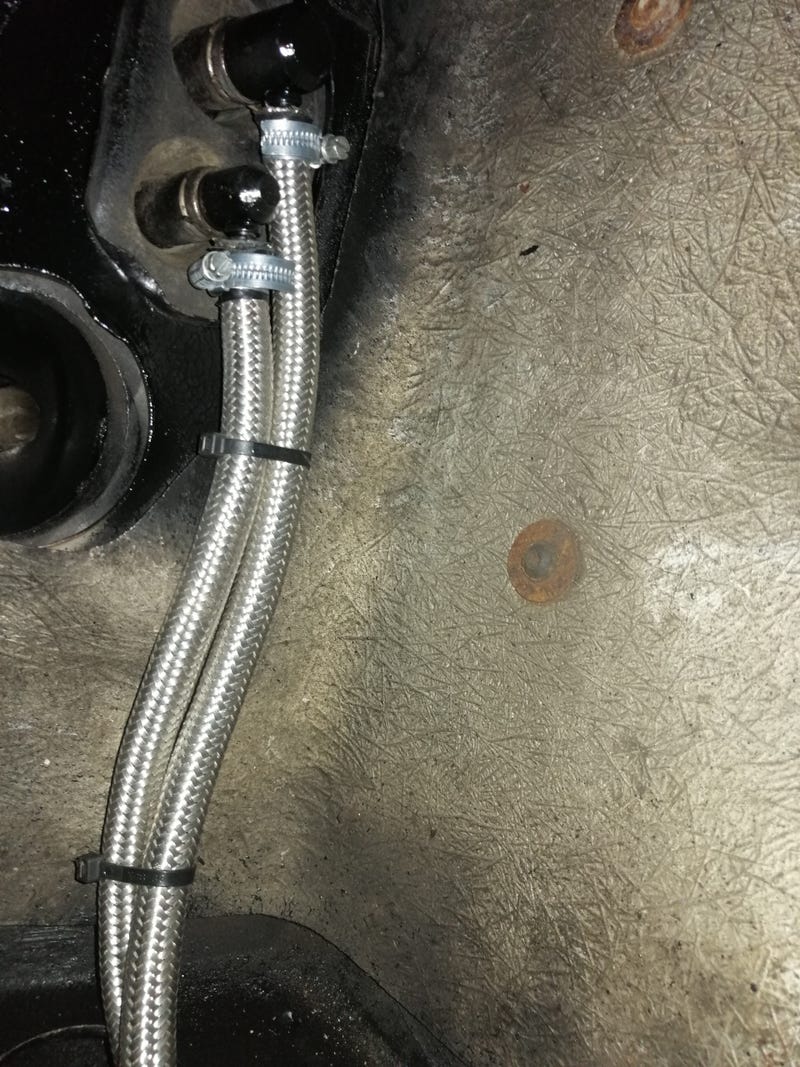 All of the various bits for the IRS are bolted up now. I've left the driveshafts and various bits untouched as the bearings and UJs are good (or at least good enough). When one of them goes I'll do the lot, but for now it's onto the next job  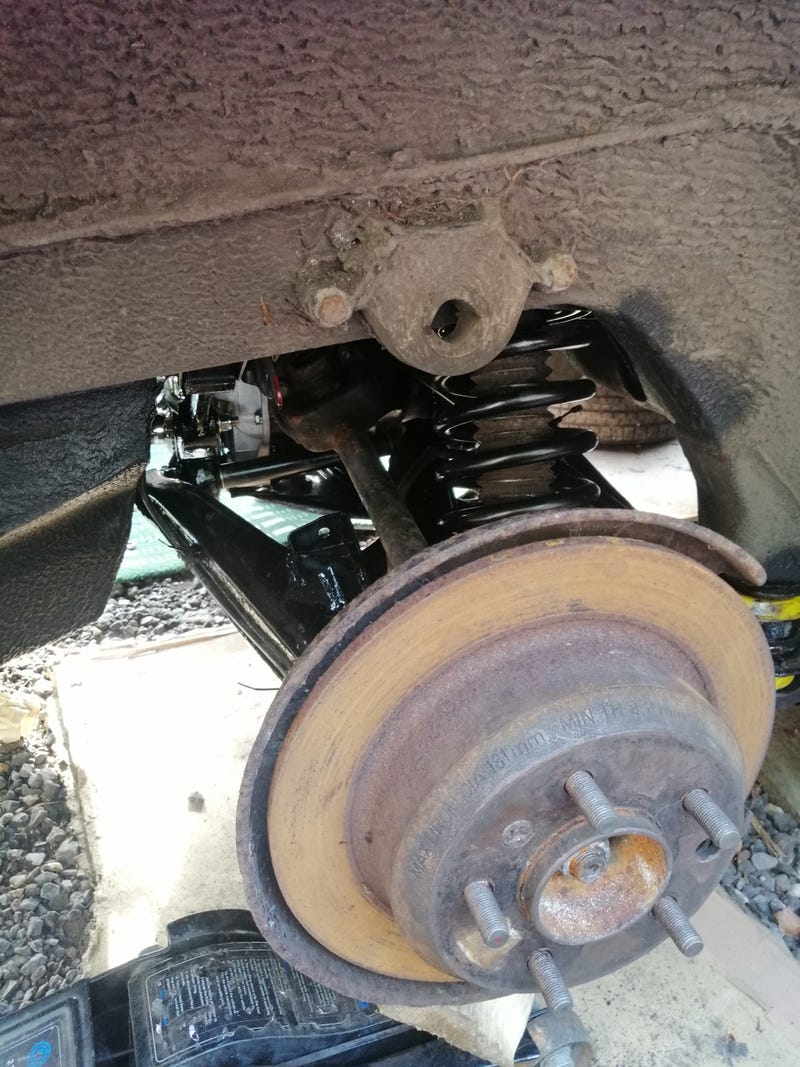 |
| |
|
|
|
|
|
|
|
Everything torqued up and the ARB fitted  now that I can tell the rough ride height it was easy to see the ARB links were a little long. Cut them down by 20mm and it sits much nicer. 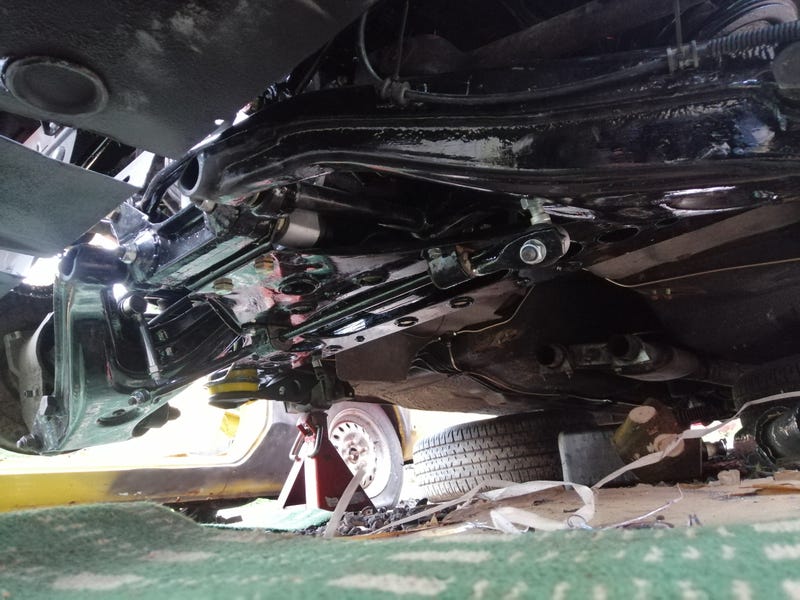 You might notice the new holes in the boot as well. Decided I was fed up with having to drop the rear of the suspension unit to get a socket onto the rear of the long through bolt for the wishbones so I'll weld some bits of tube to scallop the boot so you should be able to remove everything in situ if needed. Also worked out a plan to get the engines in and out without having to drag it up into the garage which is a bonus. Will mean it's all done outside, but that's no major issue really. |
| |
|
|
|
|
|
May 11, 2020 10:46:33 GMT
|
|
Coming along a treat now.
|
| |
|
|
|
|
|
May 11, 2020 20:12:55 GMT
|
Thanks man  yeah it's definitely coming along. The to do list is down to one page now which is a good morale booster  |
| |
|
|
|
|
|
May 18, 2020 13:07:33 GMT
|
Next on the list, the front driver's sill. 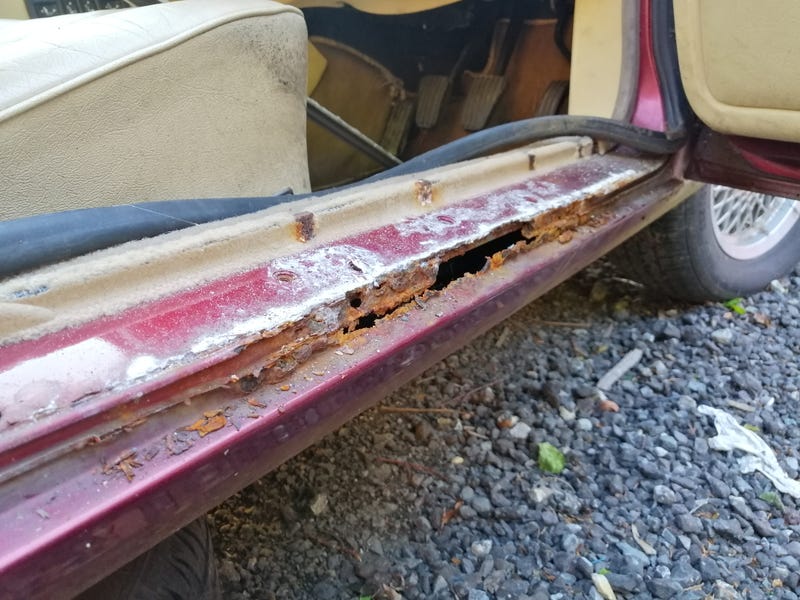 Bit crustier than the others! 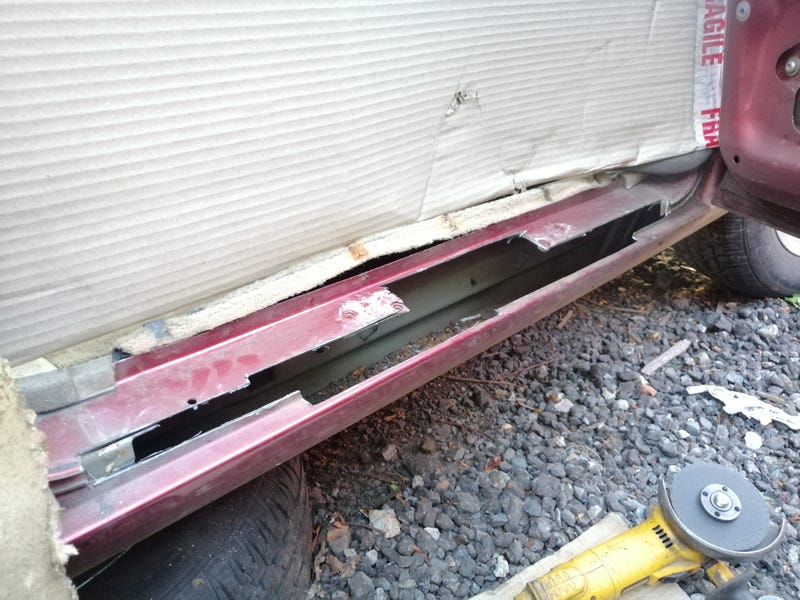 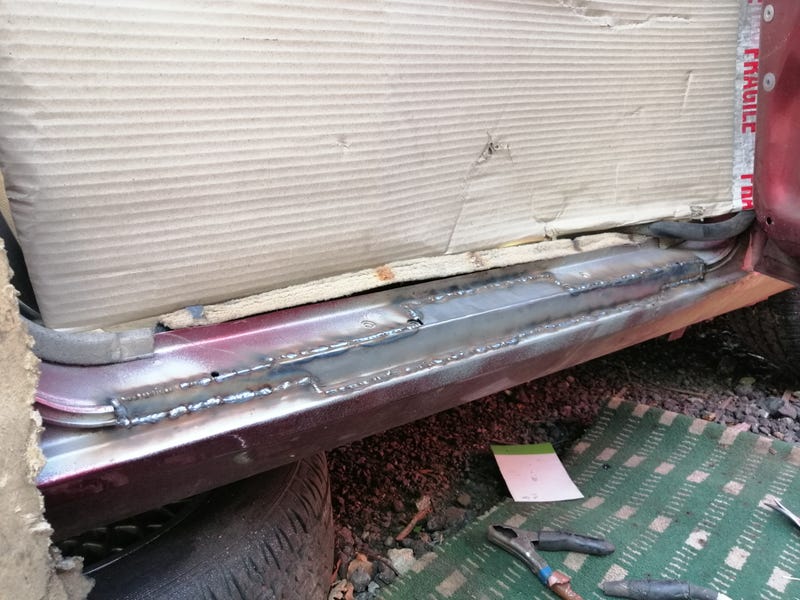 Had to adapt my channel-making method as this stretch was too long to fit a screwdriver down. Think this used to be a tent peg, but it's now doing stirling duty as a form. 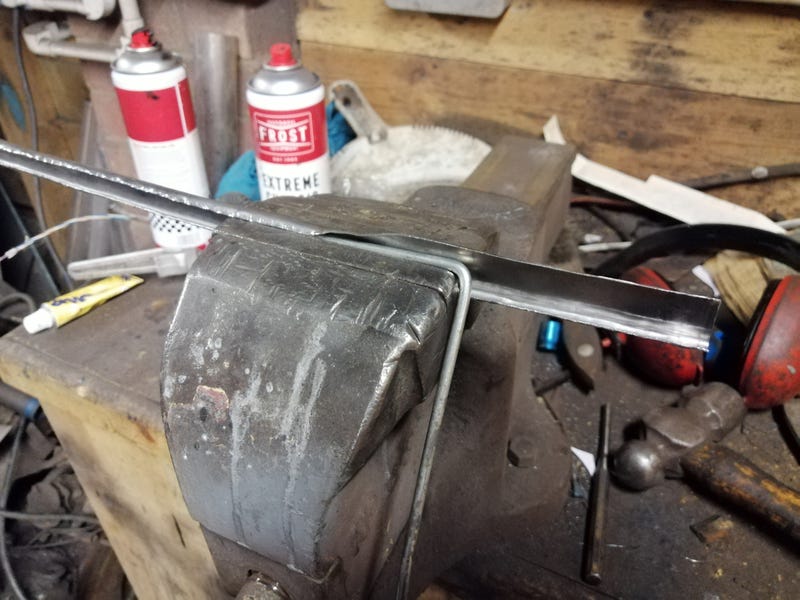 Worked though so all patched up   Also, I think I've found out why they seem to go in this particular place. On the inside of the channel it's seam-sealed quite nicely. However, on the outside there's no seam-sealant which would allow water to capillary-action up behind the channel and rot out around the spot welds.   Definitely worth seam-sealing there if anyone wants to protect an area of rust-prone-ness on these cars  I've also sorted the handbrake cables as those were shot. I think the Haynes is on an early car as it's missing a couple of steps (including taking the handbrake mechanism apart). Still, one more bit sorted  |
| |
|
|
neil79
Part of things
 
Posts: 141 
|
|
May 18, 2020 13:53:52 GMT
|
Also, my mate who helped out with the press idea has had some success with his E36 V8. ..and still no starting. What it actually turned out to be was a cracked fuse! Not blown, but the little element within it had cracked but was still touching. If there was the smallest amount of pressure on the wires beneath it though the crack would open and the car would cut out. Very strange! Also decided to swap the wheels around a little. Admittedly poor picture, but E36 then: 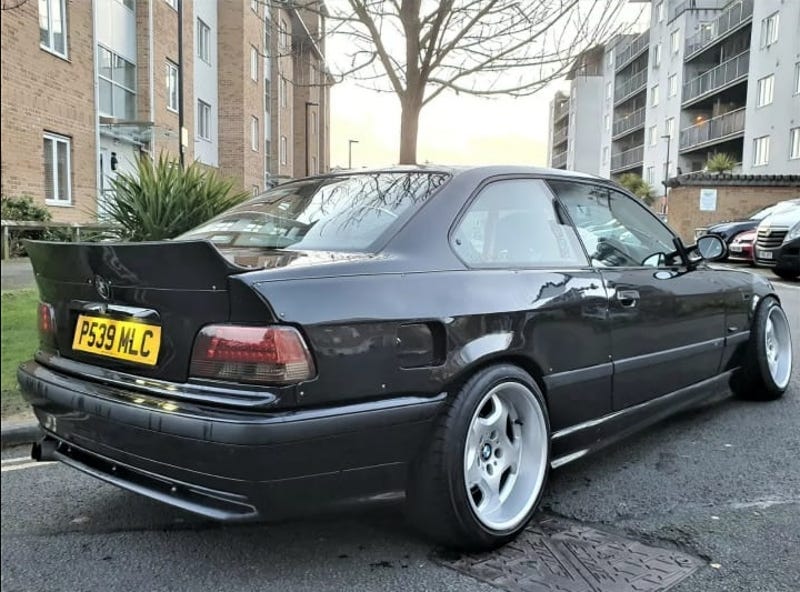 Tell me there is a thread for this somewhere!? |
| |
|
|
|
|
|
May 18, 2020 14:58:39 GMT
|
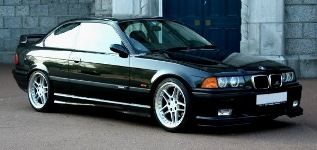
Also, my mate who helped out with the press idea has had some success with his E36 V8. ..and still no starting. What it actually turned out to be was a cracked fuse! Not blown, but the little element within it had cracked but was still touching. If there was the smallest amount of pressure on the wires beneath it though the crack would open and the car would cut out. Very strange! Also decided to swap the wheels around a little. Admittedly poor picture, but E36 then:  Tell me there is a thread for this somewhere!? It's an awesome thing isn't it  I've mentioned starting a thread, but I'm not sure he feels there's enough progress to justify one! There have been some bits and pieces going on with it though. First off it's getting a new radiator as the existing one has sprung a leak. 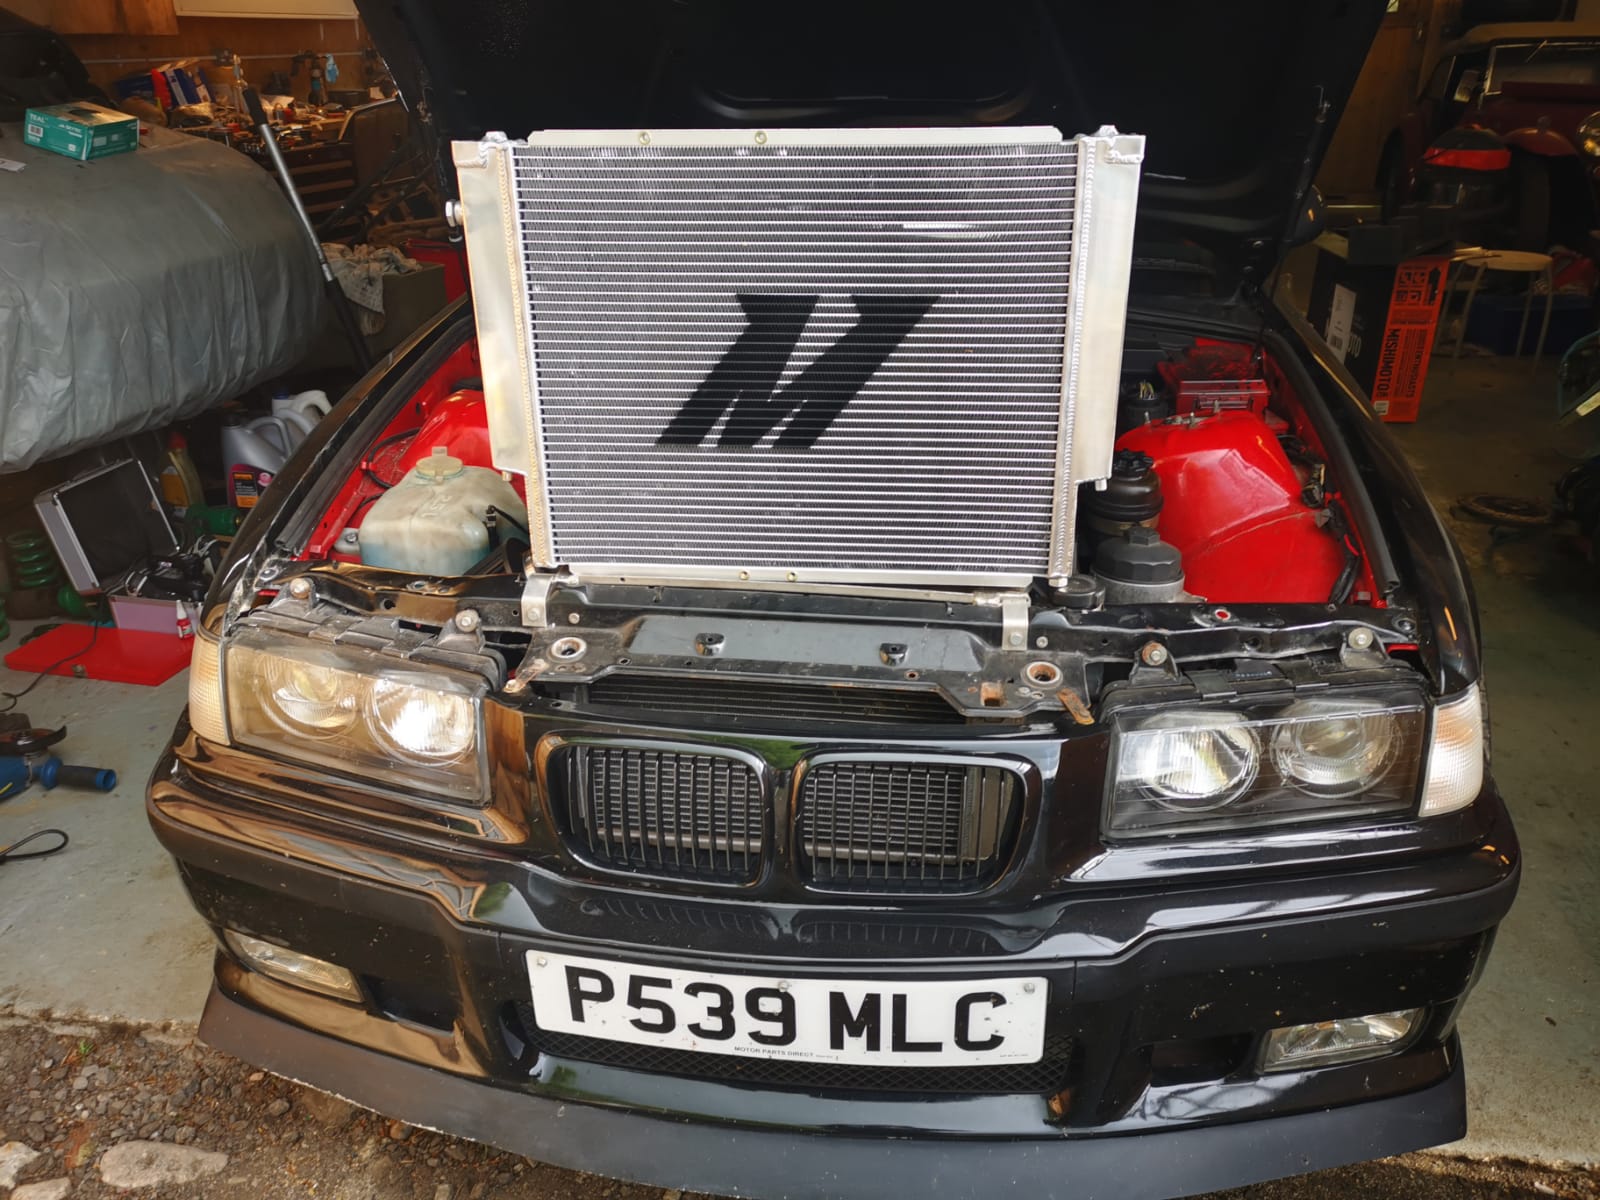 There was a fair bit of de-rusting done on in the wheel-wells as well. 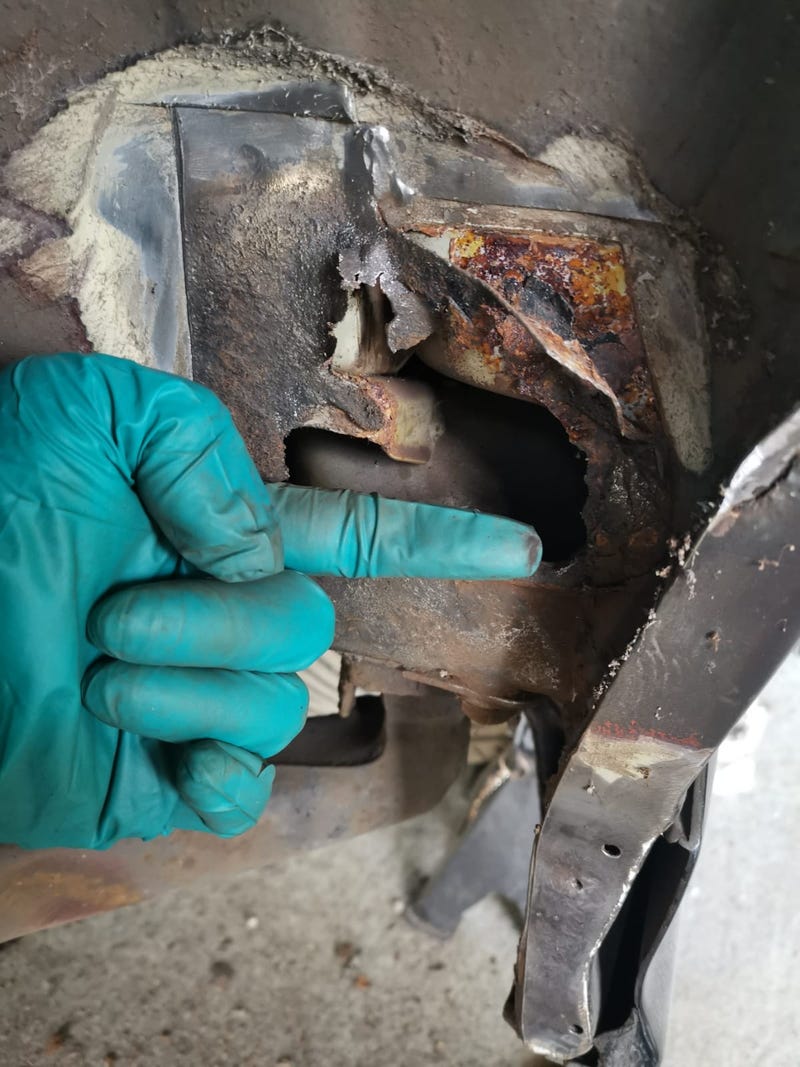 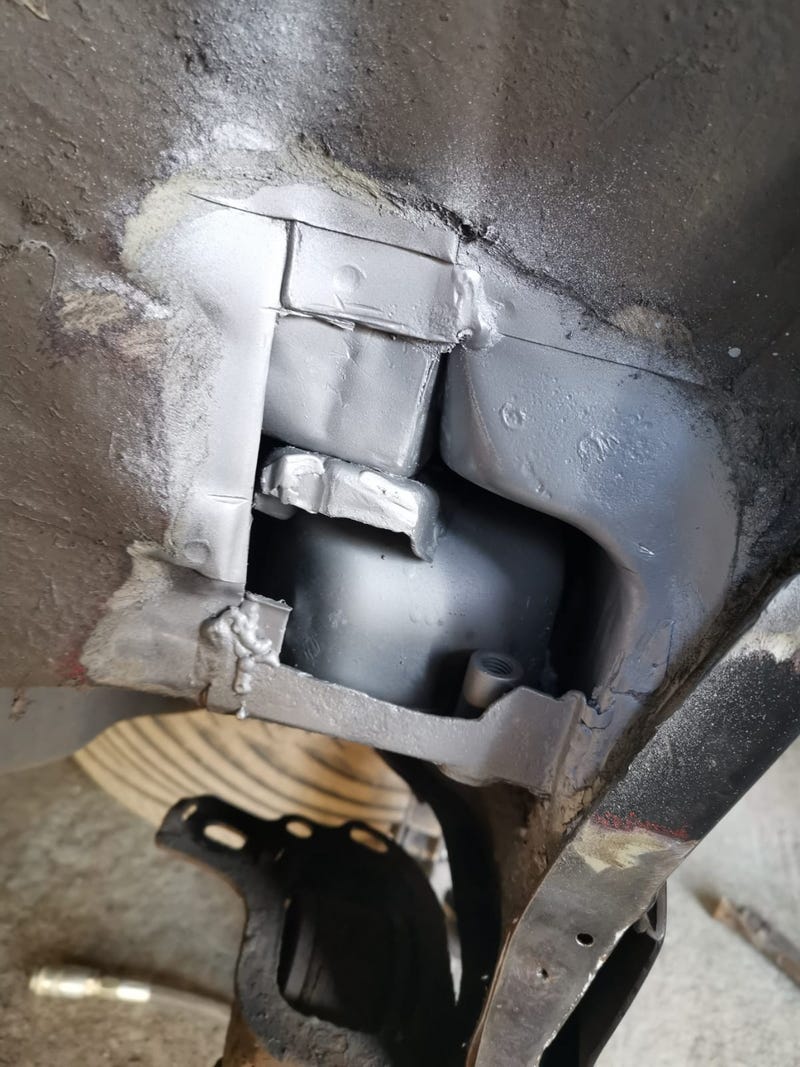 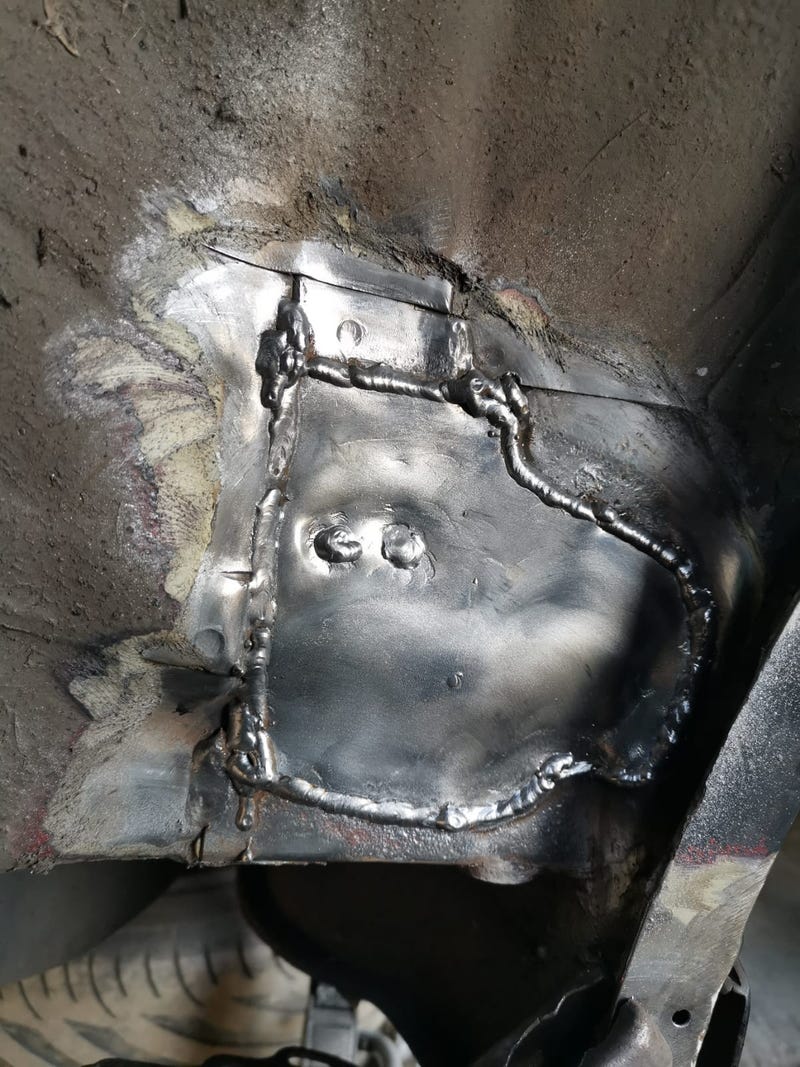 Left to fix is some odd clutch action (clunks every now and again, feels like something might be loose), and some odd tracking which is scrubbing the tyres at an alarming rate. Oh, and re-routing the fuel lines so they don't go through the cabin. We really need to do a proper photoshoot with it, and get some pulls on video as it sounds awesome. |
| |
|
|
|
|
neil79
Part of things
 
Posts: 141 
|
|
May 18, 2020 15:09:30 GMT
|
|
Would love to see more!!!
|
| |
|
|
village
Part of things
  Always carries a toolbox. Because Volkswagen.......
Posts: 567
|
|
May 19, 2020 14:00:13 GMT
|
|
I know it's probably a way further on down your jobs list at the moment, but can I make a request for an absolute minimum in the way of silencers in the exhaust? Preferably zero.....
|
| |
"The White Van is strong with this one...."
Chris "Chesney" Allen 1976-2005 RIP
|
|
|
|
|
May 19, 2020 14:12:58 GMT
|
On the V8? If so, it's got butterflies in the exhaust so you can open it up to a straight pipe  Yeah it's awesome  I mentioned getting some footage and he said hell yeah, but wanted to sort the clutch issue first (and an odd misfire at high revs). Want to be able to really wind it out  |
| |
|
|
|
|
|
May 23, 2020 23:28:49 GMT
|
Right, so since I've been over at the GF's last week and away from the Jag I've turned my head to some thought experiments around the Alfa 75. 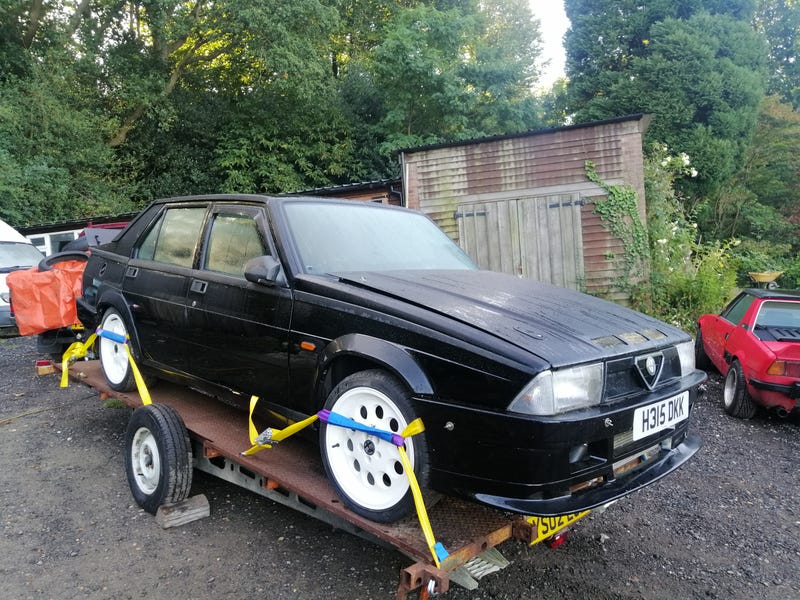 So, one of the issues on these cars is the curse word shift quality. It's a combination of dodgy synchros and high rotational weight in the driveline (they've got two flywheels, front and rear, and the propshaft spins with the engine as well). There's a bunch of people who have machined the standard flywheels, a big old gap in the market where you'd expect lightweight steel flywheels to be, and then big bucks alloy ones and carbon fibre propshafts for racers. Surely there has to be a decent solution to this that doesn't cost megabucks. 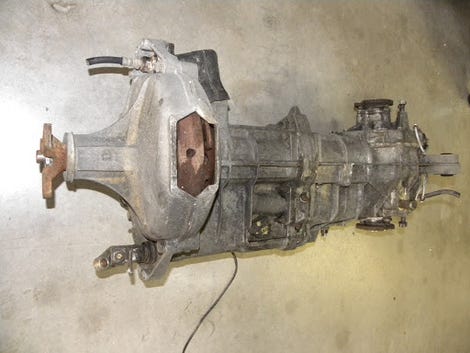 You can see the second flywheel and clutch at the front of the transaxle You can see the second flywheel and clutch at the front of the transaxleEventually, I got to thinking 'why bother having two flywheels at all, if the propshaft would connect one of them and act as a flywheel itself'?  Cinematic recreation of the moment Cinematic recreation of the momentNow I know that engines need a certain weight of flywheel to keep spinning past their compression cycles, and the effectiveness of this franken-propshaft/flywheel will be impacted by it transmitting its inertia through rubber doughnuts, but it's worth an experiment and we can be a bit cautious on the weights required. 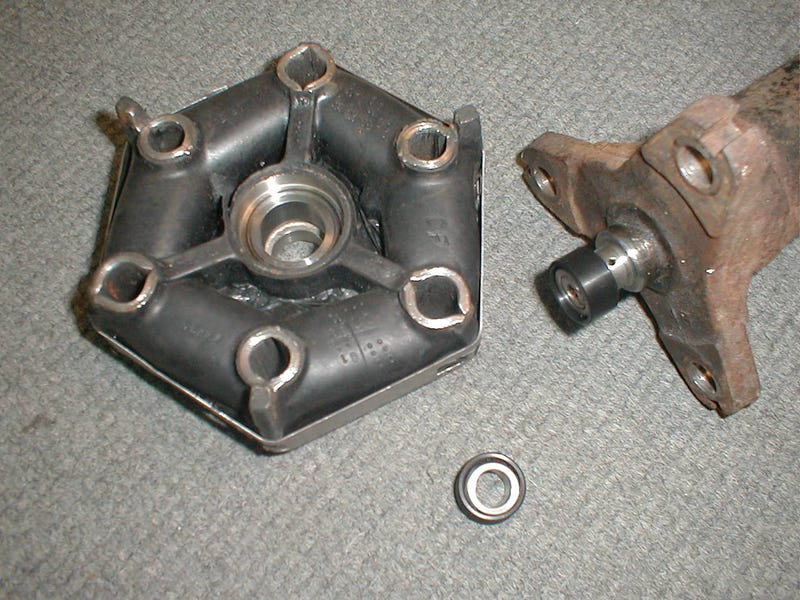 Propshaft guibo. The Alfa prop has three of these. Propshaft guibo. The Alfa prop has three of these.While I want to get the Jag sorted (and the Spitfire progressed) before diving into the Alfa, I do have a load of 75 drivetrain bits sitting around just waiting to be measured and weighed. So I can see whether this idea might actually have some legs or not. The maths is a but crude as I've had to just assume most of the bits are simple cylinders with evenly distributed masses, but it should give some good ballpark figures. Oh, and there's no clutch baskets in all this as I don't have any of those about (but for argument's sake, let's assume they're all equal even though they're not). For comparison, I've estimated some flywheels from different cars: - The standard TR6 2.5l flywheel weighs 12.3kg, and has an estimated rotational inertia of 138g/m². The general consensus is that these are pretty heavy flywheels for the application.
- The lightweight TR6 2.5l flywheel weighs 6.3kg, and has an estimated rotational inertia of 71g/m².
- The 24v 3.0l FWD solid flywheel weighs 7.9kg, and has an estimated rotational inertia of 89g/m². This accounts for the added inertia from the offset counterweight (offset weights have more inertia than evenly distributed ones).
We'll use these as baselines for what to expect for a high, mid and low flywheel weight for 6-cyl even fire engines. Next step was to add up the various bits in the Alfa drivetrain which came to this: - Front flywheel weighs 11.1kg, and has an estimated rotational inertia of 124g/m².
- Propshaft combined weighs 12.1kg, and has an inertia of 13g/m². This one will be less accurate as there was a lot of estimation in the weighing and calculating of the propshaft bits (although I did break it down into sections). Should only be out by a little though.
- Rear flywheel weighs 5.9kg (I think), and has an inertia of 52g/m².
- So, combined, the Alfa flywheel and prop setup weighs 29.1kg and has an inertia of 189g/m². Quite a heavy rotating assembly! No wonder the synchros struggle. Estimated that this would be equivalent to having a 17.2kg standard 24v flywheel on a FWD V6.
Next step was to work out some of the lightweighting options. Lots found from this thread, and others around the web. - One conservatively machined lightweight front flywheel (no holes drilled) weighs 9kg, and has an estimated rotational inertia of 101g/m². This will be a bit out as most of the weight was taken from the outside edge, but it's a decent indication.
- Another standard flywheel with holes poked in it weighs 5.45kg, and has an inertia of 63g/m².
- An alloy front flywheel from performatek weighs 4.7kg, and has an inertia of 54g/m².
- One conservatively machined rear flywheel weighs 4kg, and has an inertia of 35g/m².
- A more aggressively lightweighted one weighs 2.7kg, and has an inertia of 24g/m².
- A lightweight 24v flywheel I found was 6.5kg, and has an inertia of 74g/m².
So, adding them into the equation in various combinations gave this: - Standard rotating assembly: 189g/m².
- Conservative lightweight front flywheel: 166g/m².
- Conservative lightweight front and rear flywheels: 149g/m².
- Alloy front flywheel and conservative lightened rear flywheel: 102g/m².
- Deleted rear flywheel and standard 24v front flywheel: 102g/m².
- Deleted rear flywheel and lightweight 24v front flywheel: 87g/m².
- Deleted front flywheel and standard rear: 69g/m².
tl;drI think this confirms a few things that seem to be accepted in 75-land. - The standard rotating assembly has a lot of inertia, which hinders the synchros working well.
- Machining the stock front flywheel is useful, the rear one is less useful but still worth it, but this still leaves everything a bit heavy.
- Expensive alloy flywheels and lightened rears start to bring things back to a reasonable level, but still not what I'd call lightweight (or even what a standard FWD flywheel is).
- If you add in an even more expensive carbon prop then you can probably drop down into respectable figures, but even if it completely eliminated propshaft inertia you'd equal the standard 24v flywheel (although realistically you'd be slightly over).
However, it does look like there might be some legs in trying to delete either the front or rear flywheel. If we aim for the standard 24v flywheel weight as a good conservative figure then we can get there by deleting the rear flywheel and using a lightweight 24v front-mounted flywheel. Or, we can get there by having a minimal front flywheel and keeping the rear flywheel standard. Deleting the rear flywheel would be a case of sorting out a coupling shaft arrangement between a standard FWD 24v flywheel/clutch and the propshaft, probably by butchering the bellhousing from a FWD V6 gearbox. Deleting the front flywheel would probably involve machining the rear flywheel to accept a ring gear from another car's flywheel and a mount for the starter on the transaxle, as well as machining an adapter to bolt the propshaft to the crankshaft with either no or a minimal flywheel (I was hoping that auto Alfa V6s had a flex plate but they seem to have substantial flywheels as well). Next question I suppose is whether it's possible to do all of that for a cheaper price than an alloy front flywheel, carbon prop and machining of the rear flywheel, and making sure that the engine still runs alright through its power pulses. It'll have to wait for the current project to finish for the 75 to start, but it sounds exciting to me so I'll get to it sooner or later... Oh, and for getting through that wall of text and numbers here's a video I found of a 600whp Alfa 75 drift car: |
| |
Last Edit: May 23, 2020 23:32:33 GMT by biturbo228
|
|
|
|
|
|
|
This weekend's work on the Jag saw the rear brakes rebuilt... 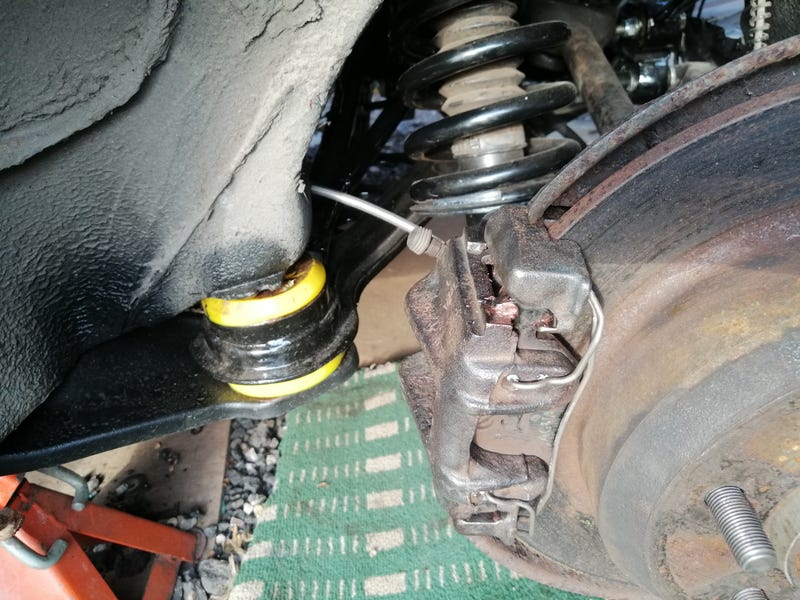 ...and the centre prop bearing support stripped and painted. 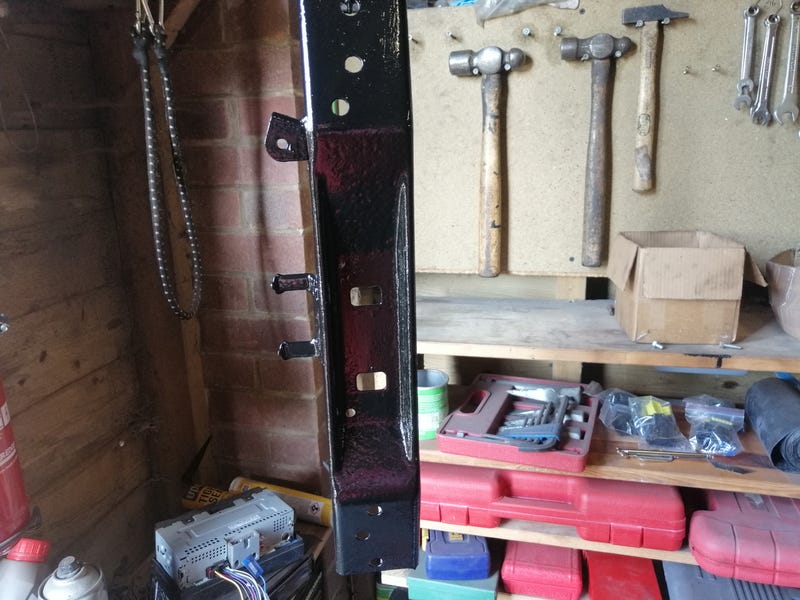 Once the handbrake goes in then the car will be rollable. I've found a suitable patch of flat-ish tarmac at the front of the house to drag it to and do the engine swap. Just need to wait for my dad to get his transit-camper conversion project movable then we can shuffle that along and I can start pulling bits off the BMW. Oh, and I keep coming across bits on the XJ40 that remind me it was the equivalent of an £82,000 car when new, and is engineered like one. This is the inside of the handbrake lever arm that attaches to the centre bearing mount: 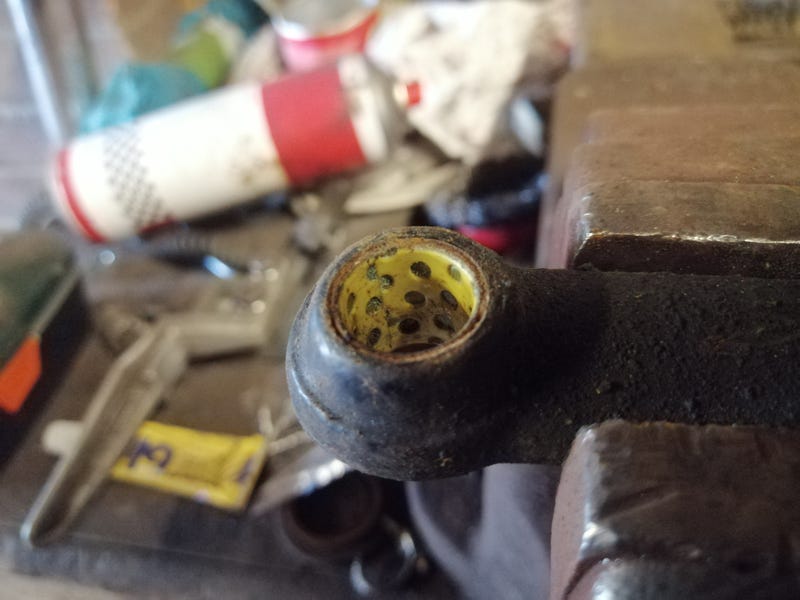 Completely unnecessary, but great that they've put it in as the arm still moves nice and smoothly without any wear on the components. Compared to my cheapy Fiat (£22k in today's money), Spitfire (£12k) and even Alfa (£39k) it's nice to have a car without any major engineering faults  I also patched up some holes in the boot floor, including some scallops to allow access to the wishbone through bolts without dropping the suspension.   Lastly, my 2-way vent valves arrived so I fitted one to the Jag and the other to the Spitfire. 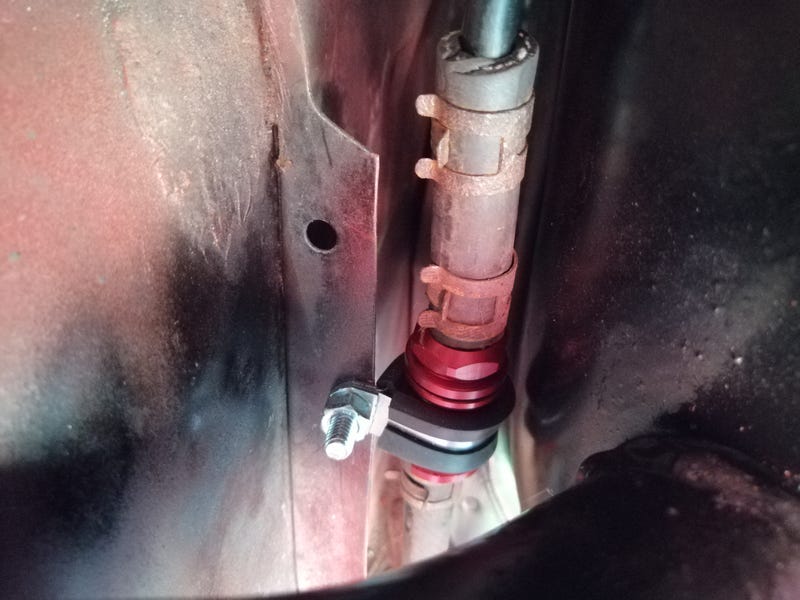 The stock system on the Jag has a vacuum line that runs all the way from the intake via a charcoal canister to pull vapour from the tank. Didn't feel like supplying boost to my fuel tank so this is just a regular vent to replace all of that gubbins. |
| |
|
|
village
Part of things
  Always carries a toolbox. Because Volkswagen.......
Posts: 567
|
|
May 26, 2020 10:08:47 GMT
|
Nope, the Jag. the turbo is a pretty effective silencer, but will still let out plenty of the lovely straight 6 diesel purr. |
| |
"The White Van is strong with this one...."
Chris "Chesney" Allen 1976-2005 RIP
|
|
|
|
|
May 26, 2020 10:46:10 GMT
|
|
Ah I see! Yeah I'm hoping it'll sound pretty good! The E46 has a great noise, mix of straight six howl at higher rpm and the grunt of a higher-power diesel at idle.
If anything the Jag will probably sound a bit more on the 6-cyl side as it'll have twin smaller-diameter pipes compared to the single 3" on the E46.
|
| |
|
|
|
|
|
|
|
Haha so it turns out something went a little awry with the lowering springs I bought half a decade ago. It's a little slammed! This is with my mate in the boot simulating 90 litres of fuel and it's on the bumpstops! If anyone can recommend a good set of lowering springs I'm all ears.  Still, it's rollable which means the BMW can come out of long term storage   The front end of these comes apart in no time. 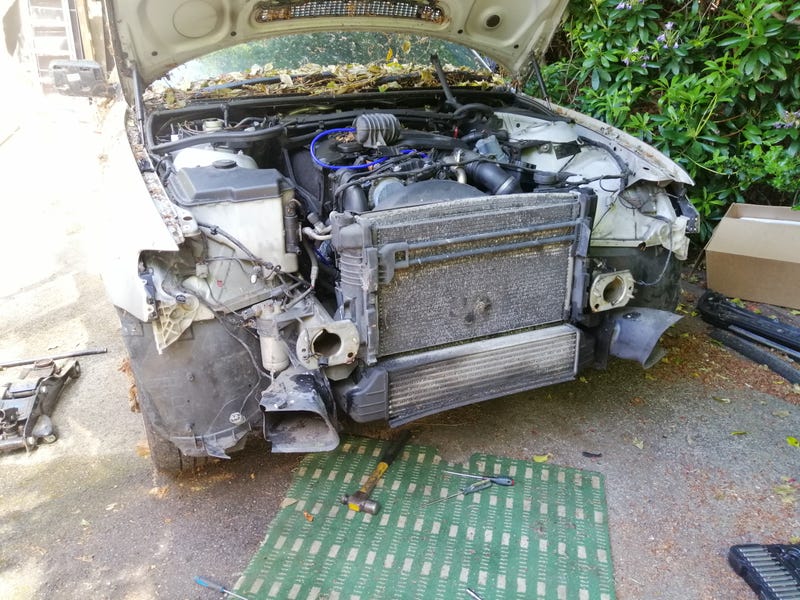  Only took about a day or so to get the engine out, and at a pretty leasurely pace as well. 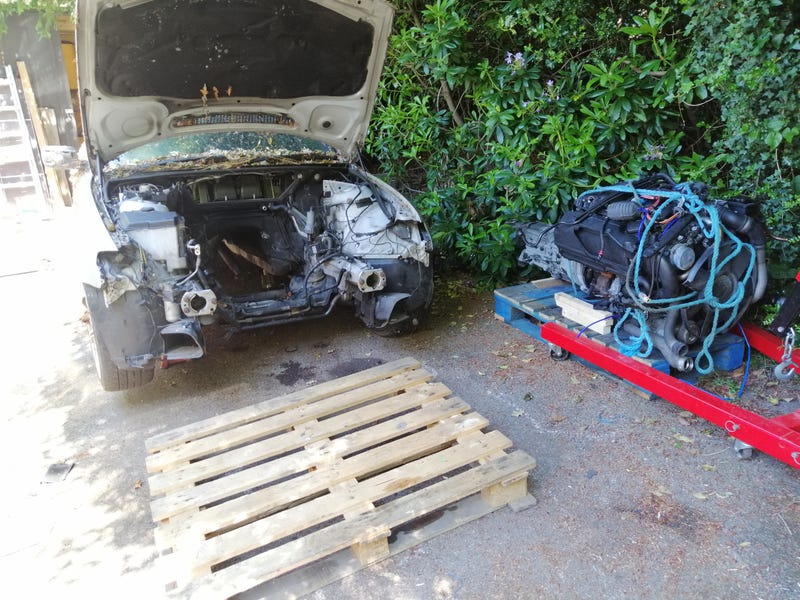 Pulled out most of the electrics I'll need, and some spare stock for wiring other cars. Taken the ECU, the EWS immobiliser module and the electrocin throttle so I can get at the sensor. I'll also need the reluctor ring from the steering column just in case. Planning an EWS delete to simplify things, but if all else fails I'll have the bits needed to make sure the modern electronics are happy. 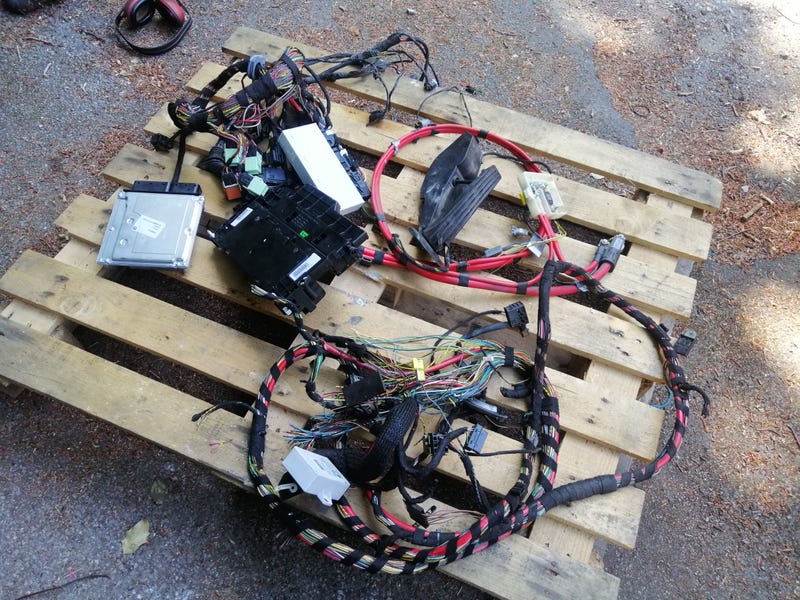 They also come with a rather nifty splitter in the boot with a sodding great 250a fuse and another 100a fuse which is useful to know for anyone planning to put a battery in the boot of another car. With that sorted over a weekend and the BMW back in its place, the Jag could be dragged out front ready for surgery  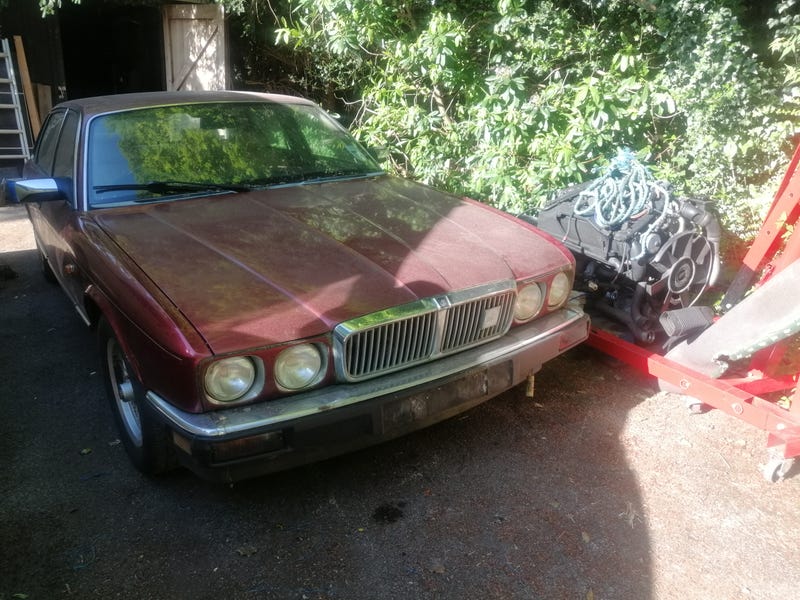 |
| |
|
|
|
|
|
|
|
Getting the Jag engine out isn't quite as simple as the BMW one as the front end is solidly attached. I've read that you need to get these engines at quite the angle for them to come out with the gearbox still attached, so figured a bit of modification would help. 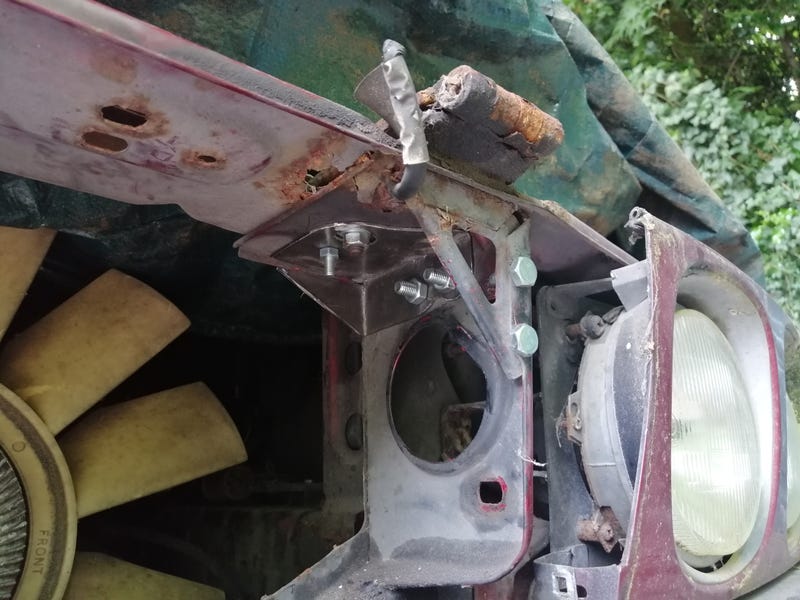 Sorted out some bracketry which means that the centre part of the slam panel is detachable: 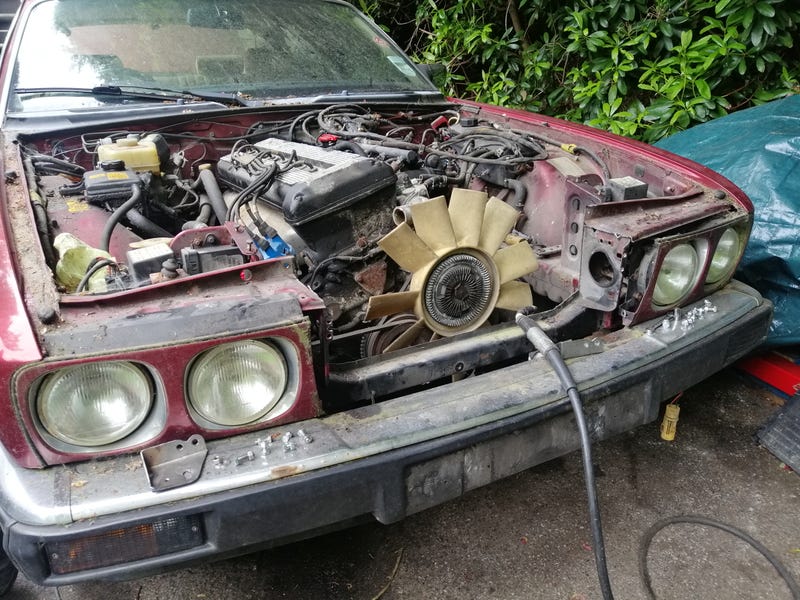 Plenty of room for the engine to come out  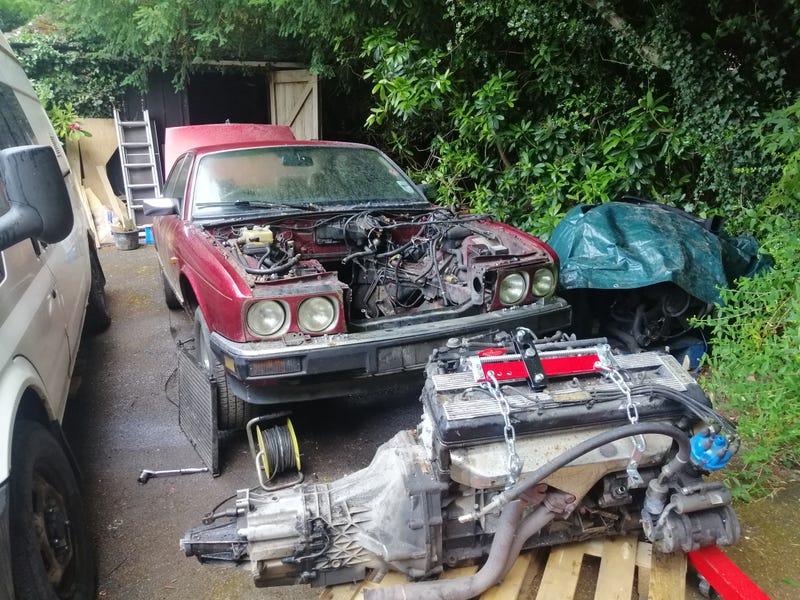 Also, the scope of the project may have crept up a little. Mate of mine sent me a link to a bit of a larger turbo at a very good price so now it's sitting on my shelf... 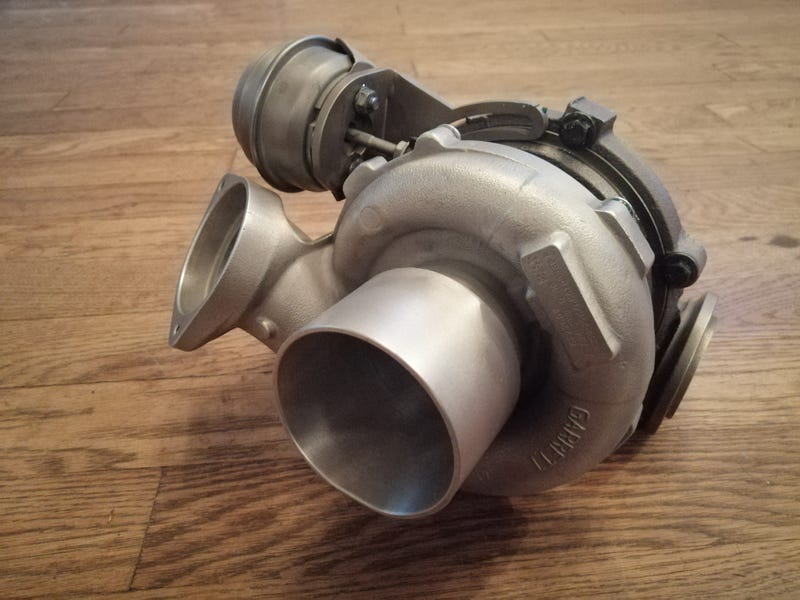 Apparently the PO was running this with 410bhp/664lb-ft! Rather like the idea of a monster turbodiesel Jag... |
| |
|
|
|
|
|
|
|
Not a great deal more progress, but got the engine bay emptied a little and hoovered. 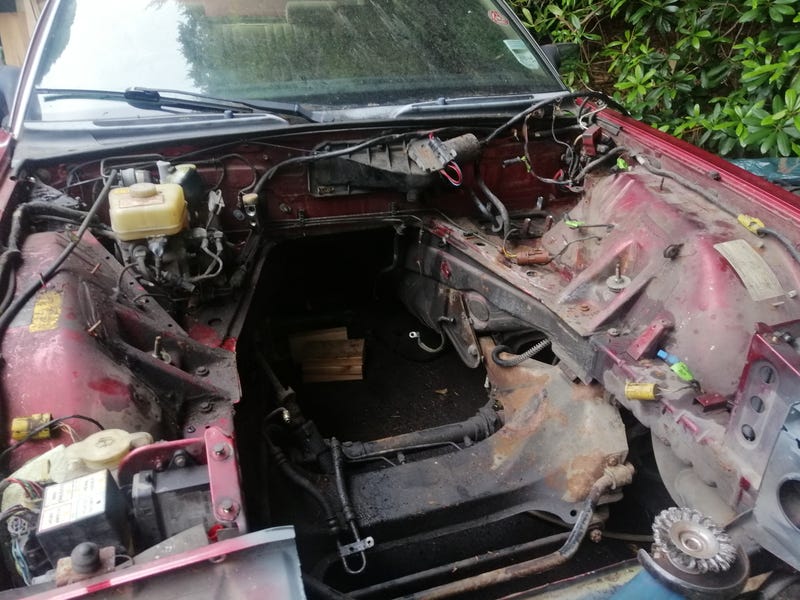 Took some measurements of both of the engines and the BMW is smaller in all dimensions except width at the back due to the integral air filter housing so that will probably need to go. Oh, and the BMW aircon pump is very low down so might foul on the ARB, but there's nothing on the left of the engine so I can probably offset it to give more clearance for that and the downpipe too. |
| |
|
|
|
|


 I've mentioned starting a thread, but I'm not sure he feels there's enough progress to justify one! There have been some bits and pieces going on with it though. First off it's getting a new radiator as the existing one has sprung a leak.


