|
|
|
Jan 11, 2020 15:24:30 GMT
|
|
You have a talent for keeping at it when us lesser men fall by the wayside and give up or pay to resolve car woes LOL
Good to see the Spit back.
Any progress or decisions on the Alfa?
|
| |
|
|
|
|
|
|
|
Jan 12, 2020 17:46:57 GMT
|
Lesser men?! I think not  I think enjoying the process helps, and not just dreaming of the endgame. Probably doesn't do much for timescales though  No progress as yet with the Alfa, but I've been researching bits and pieces for the swap. I think most of the stuff has been done already. Smaller brake servo from a t-spark, sump modifications, coolant pipe fittings on the block. All done. Only thing that needs doing swap-wise I can see is rebalancing the RWD flywheel  It's on the list this year! Need something to chase my mate's BMW around in  |
| |
|
|
|
|
|
Jan 27, 2020 13:56:58 GMT
|
Next few inches forward  Spit6 Spit6Thought I'd have a go at the boot next on the Spitfire. The plan is to replace the external lock and latch mechanism with a pull-cable from an NA MX-5. Having the MGF's boot release on the ignition key has been a bit irritating if you want to grab something from the boot while the engine's running so thought I'd do away with that and smooth the exterior a bit as well (plus, less lumpy bits means more IVA friendly). Grabbed some bits from the scrapyard. Went to fit the boot using the original hinges...and it won't open. Maxing out the adjustment on the standard hinges and it still clips the trailing edge of the deck panel. Drat. Could fettle the original holes so there's more adjustment, but why do that when I can make it harder for myself? Bought a set of double-hinged Porsche Boxster boot hinges which open upwards and out at the same time, similar to my BMW E60 bonnet hinges. In a stroke of amazing luck, they bolt on to the Spit boot with only a little slotting of one of the holes! 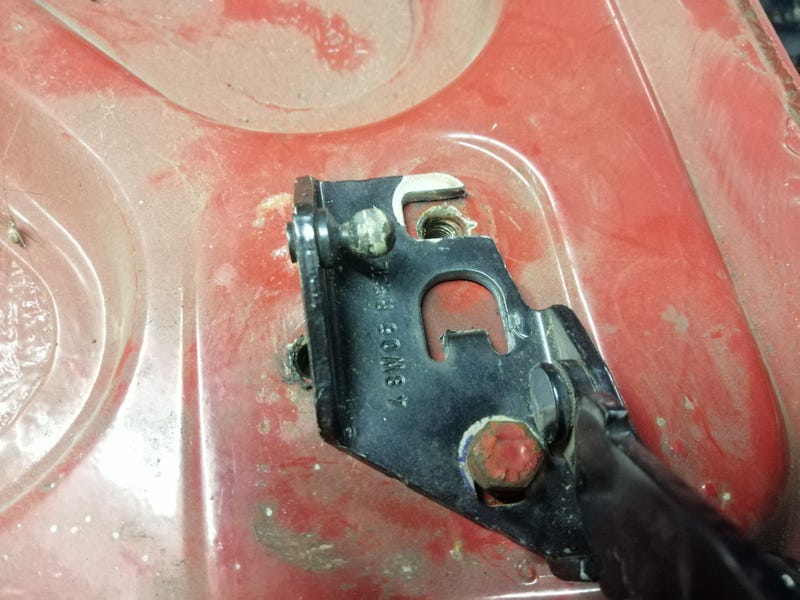 Pretty much everything else isn't right, but it's nice when bits bolt on without lots of fabrication  the car-side mounts needed bending into the right plane to be bolted on at 90-deg to the boot so things won't bind up if I have to adjust them up-down or fore-aft. You can see the difference between right (bent into shape) and left (not bent yet) here: 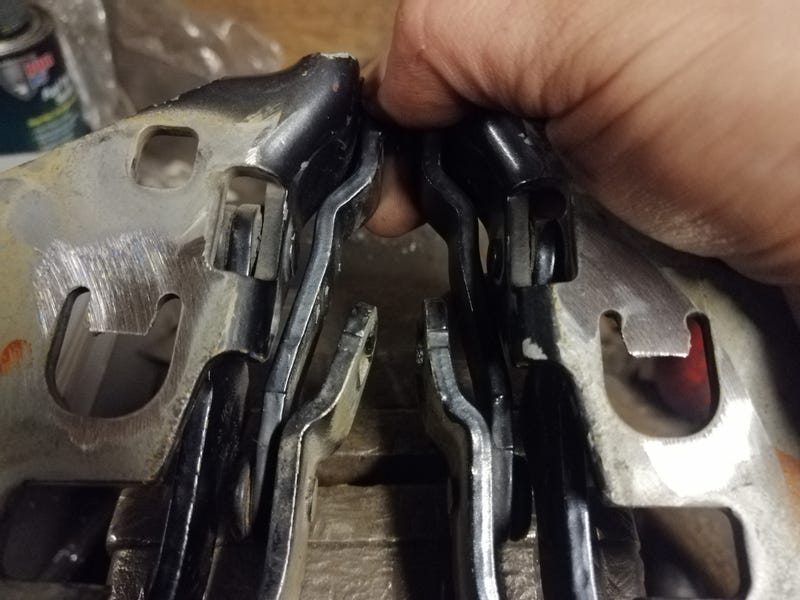 Spent a good half hour making sure they were bolted on parallel to each other then tacked a piece of box on to hold them in place when I take them off. The next step (welding on mounts in the right place) would have been a lot easier if some pillock hadn't welded a bulkhead in the way, but you live and learn  lots of measuring and trial and error in my future I think... Also, I've been searching around for a good system for my electrics. Bought a couple of fusebox/relay modules to trial fit but they're all too bulky for the space I have available. Luckily though, on a trip to the scrapyard I came across these: 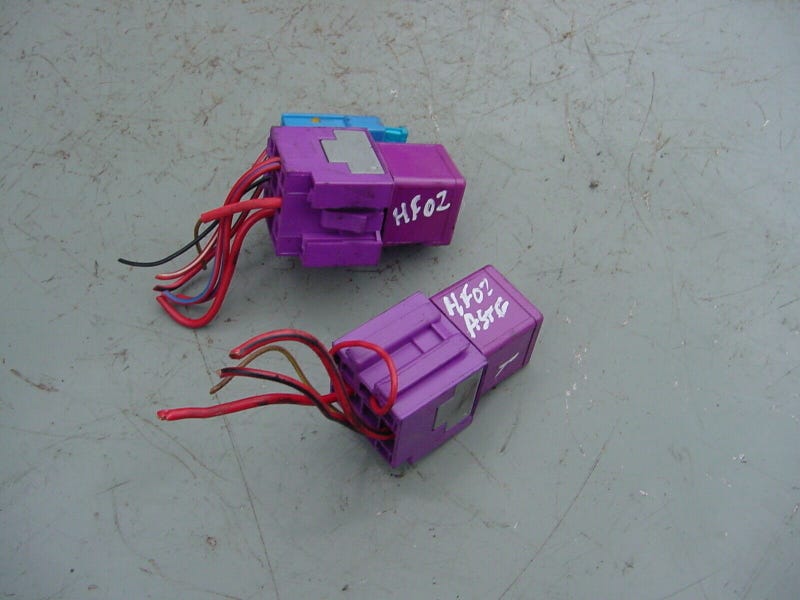 They're little modular relay holders from late 90s/early 00s Vauxhalls. Purple ones have big terminals, and other colours have regular size ones. Clip them together and make a bracket and you can have whatever shape you like with a minimum of excess bulk  pillaged a handful of Astras, Zafiras and a Senator so now I've got nearly 30 of the things! Thought that might be a useful find for anyone doing their own electrics  The plan is, for the most part, to combine these with fused relays like this so I can do away with separate relay and fuse boxes: 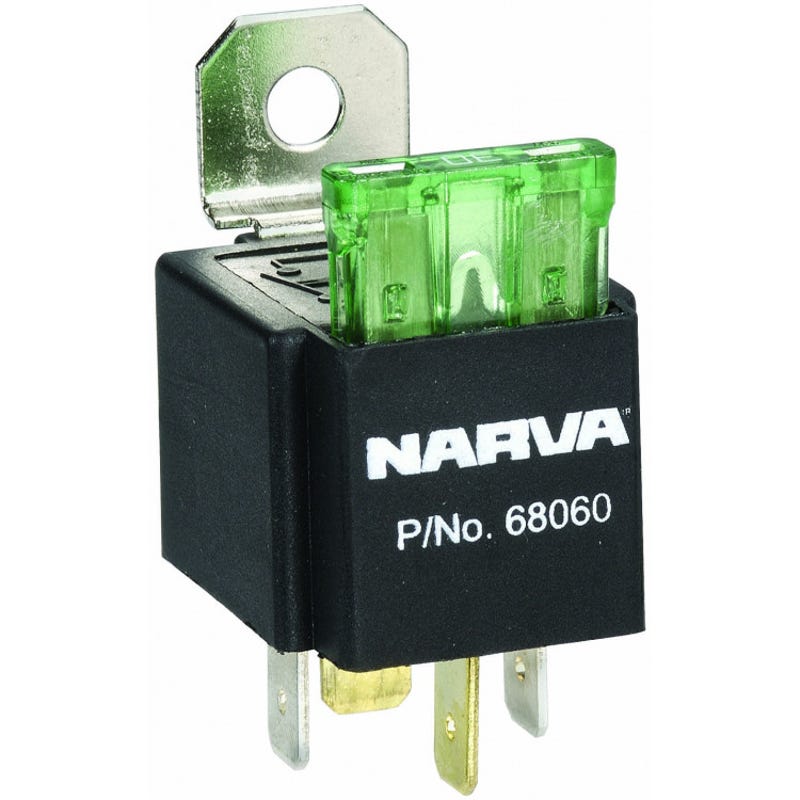 Unless anyone can think of a reason not to... FiatSo the Fiat's back on the road again! It had been leaking quite a bit of oil from the oil pressure sender so I'd taken it off the road. Had bought a replacement last year when I noticed it weeping, but managed to lose that somewhere in the mass of parts I have lying around. 5 months later and I've decided it's lost to the world so just bought another. Man I've missed driving something cool and retro around  Didn't last long mind as this little fella decided to die: 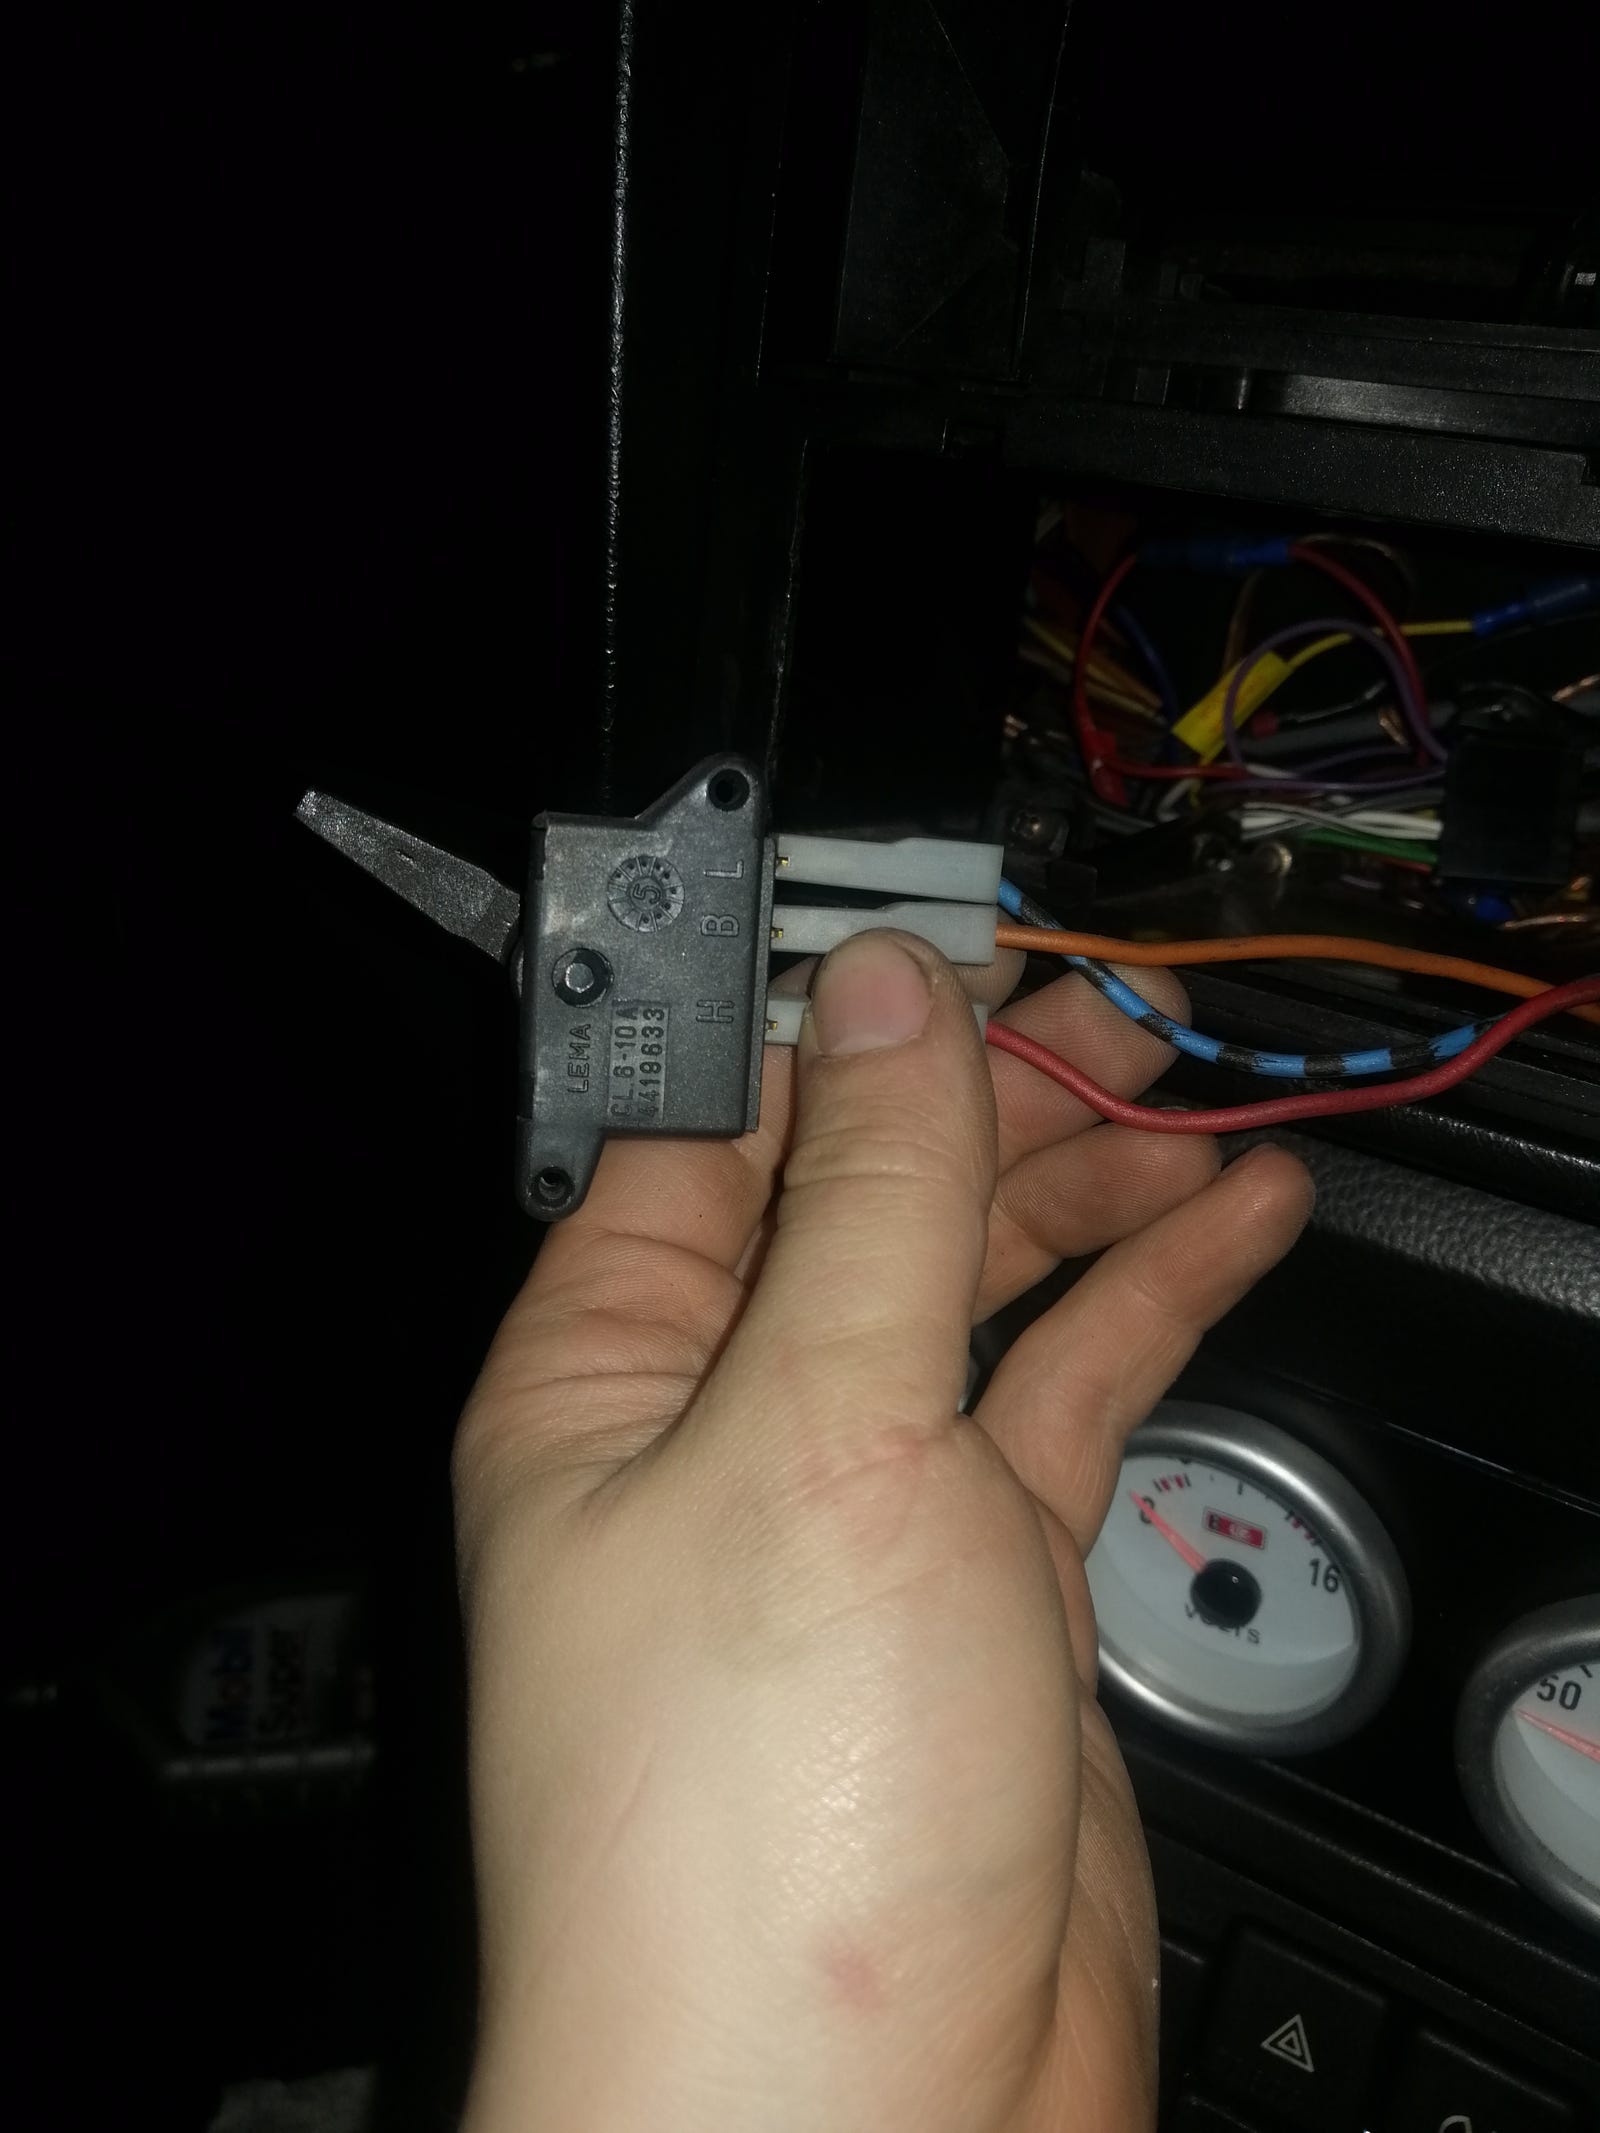 That's the switch for the blower motor, meaning I can't effectively demist the windscreen leading to a hairy moment last night when it fogged up. Bought a replacement, but until that arrives my GF had the idea of using one of making up a small section of wire to bridge the switch and have at least some fan action going  General GeneralLastly, was doing some roofing the other day and grabbed this shot of the parking area  getting a bit crowded at the moment! 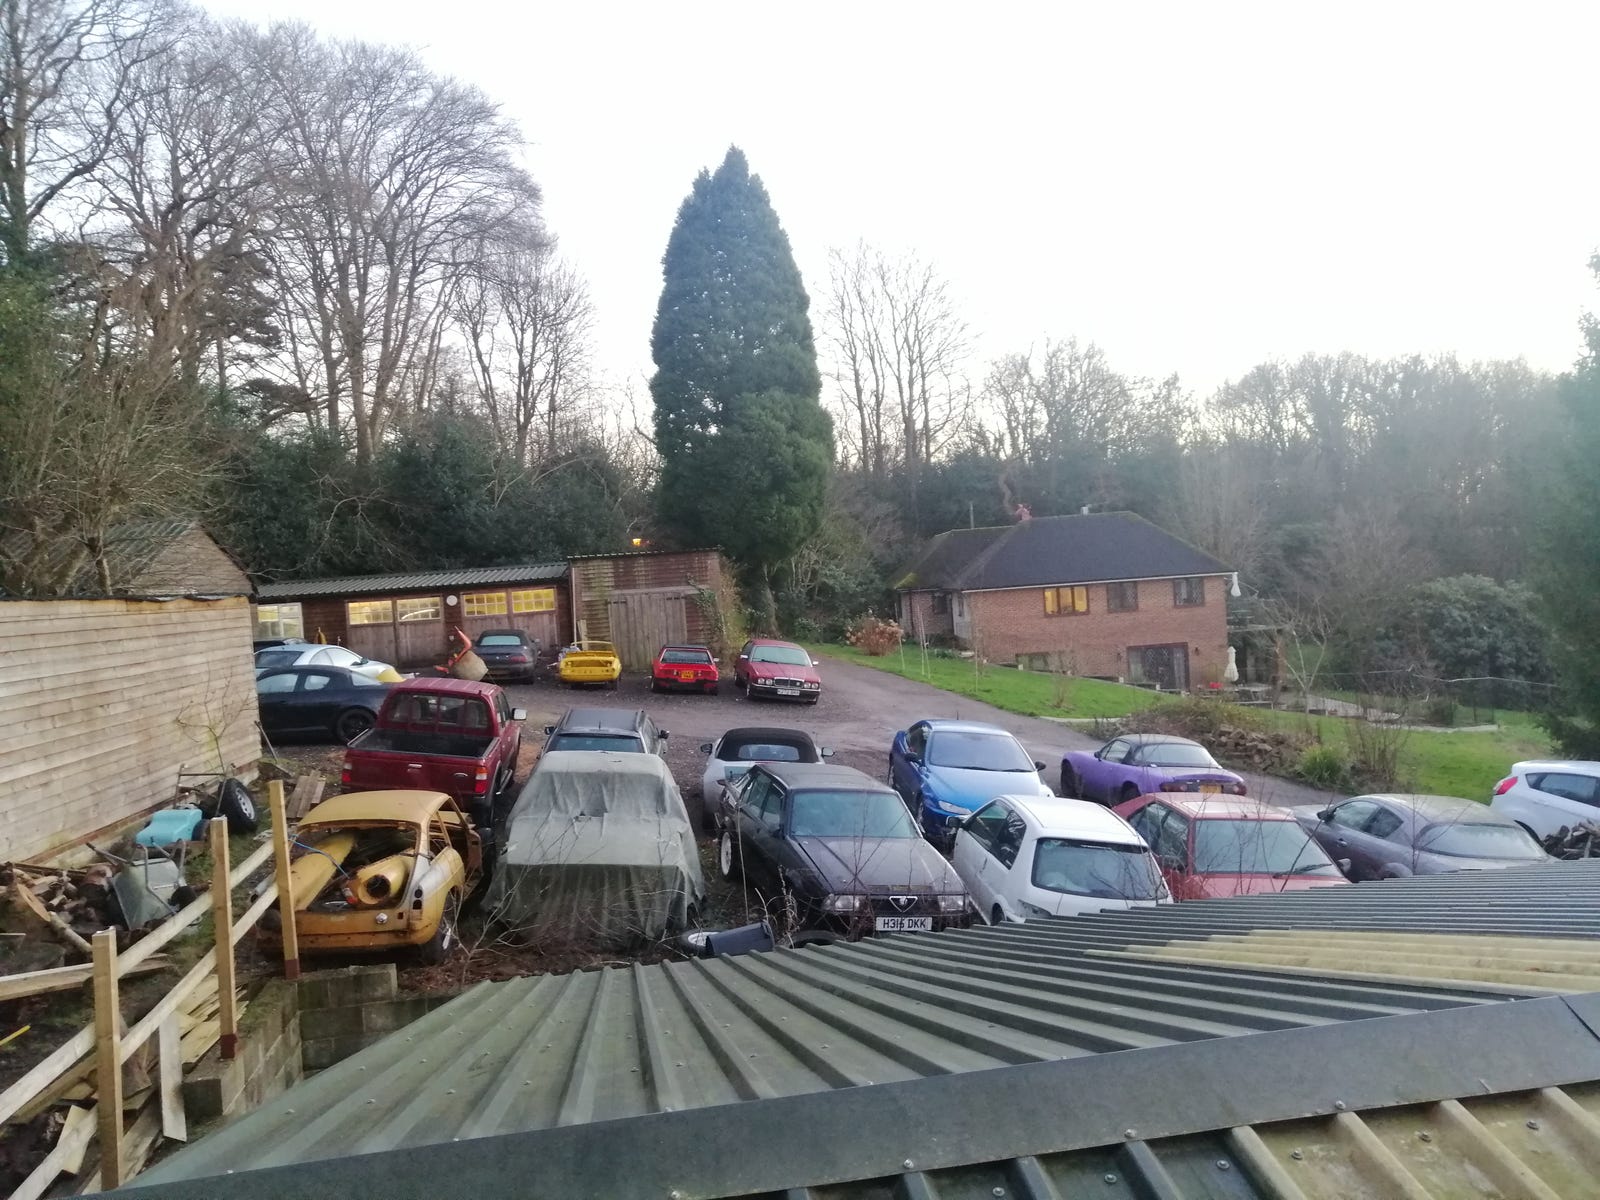 |
| |
Last Edit: Jan 27, 2020 13:58:23 GMT by biturbo228
|
|
|
|
|
|
|
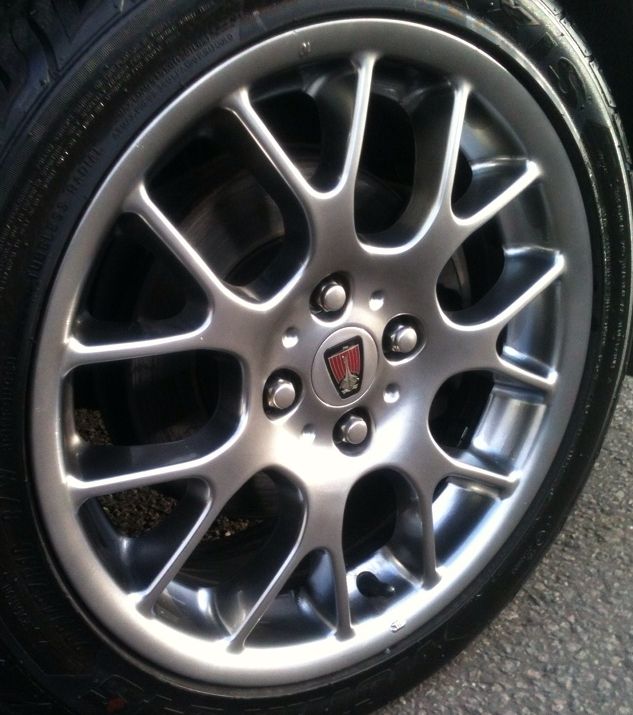
Next few steps forwards  Spit6 Spit6[/u] Hinges aligned and a piece of thin box welded on to keep them square... 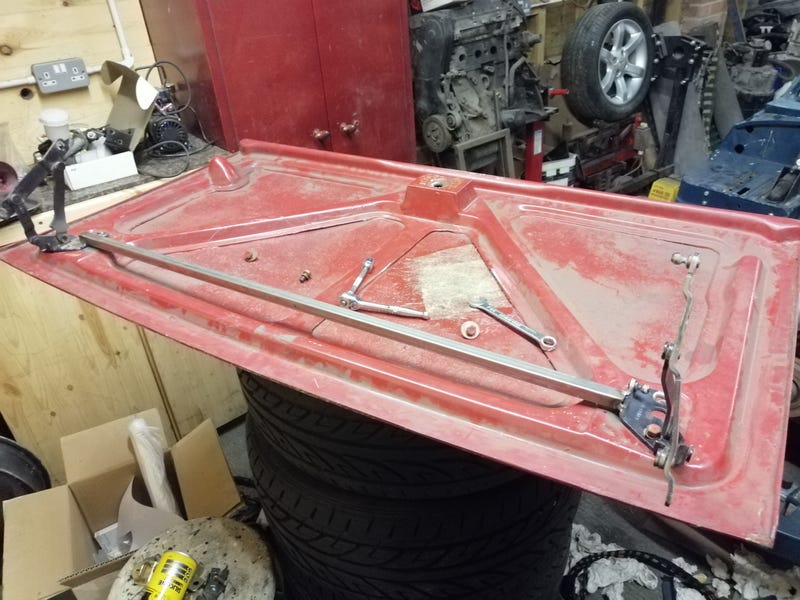 ...and lots of fettling to get them in the right place on the car. Would have been 10x easier if I had done it before welding in the bulkhead, but hey ho! 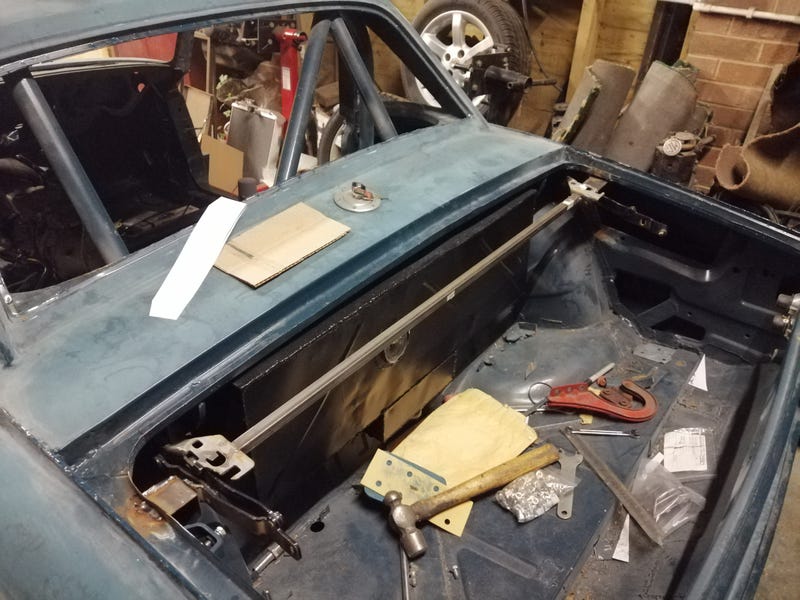 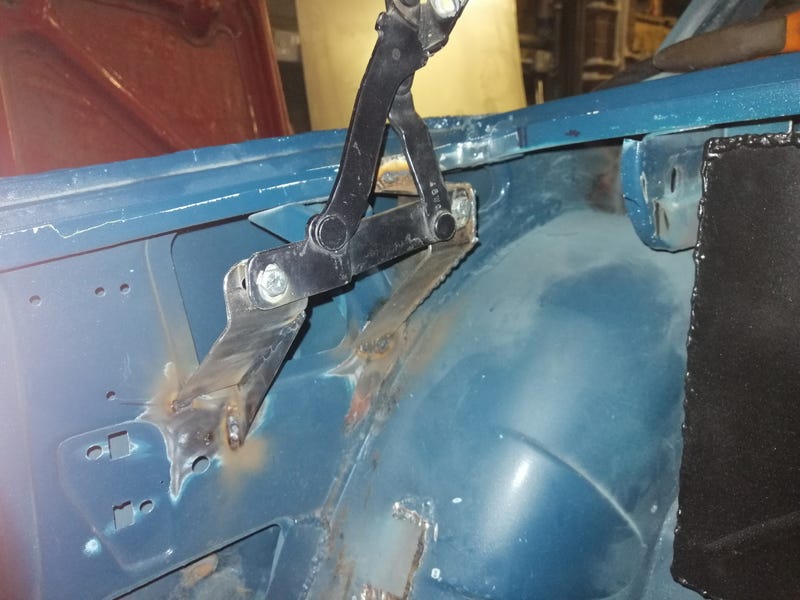 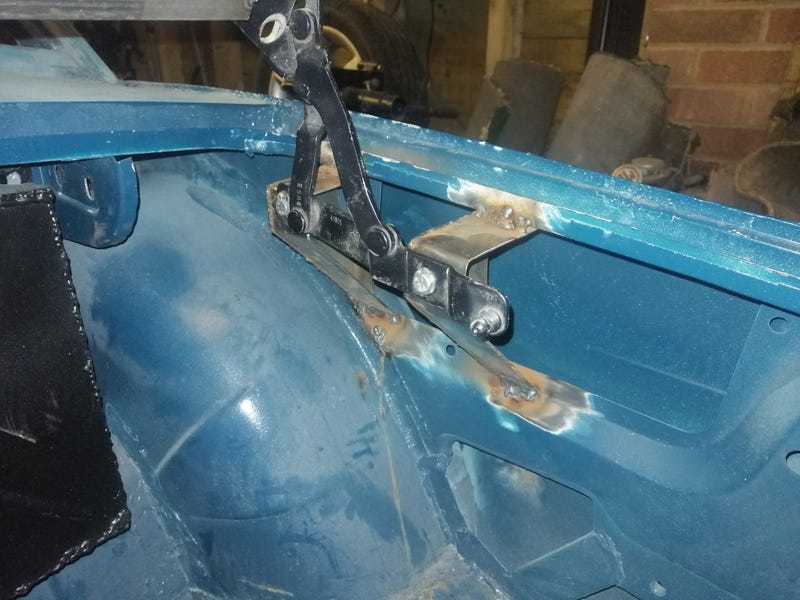 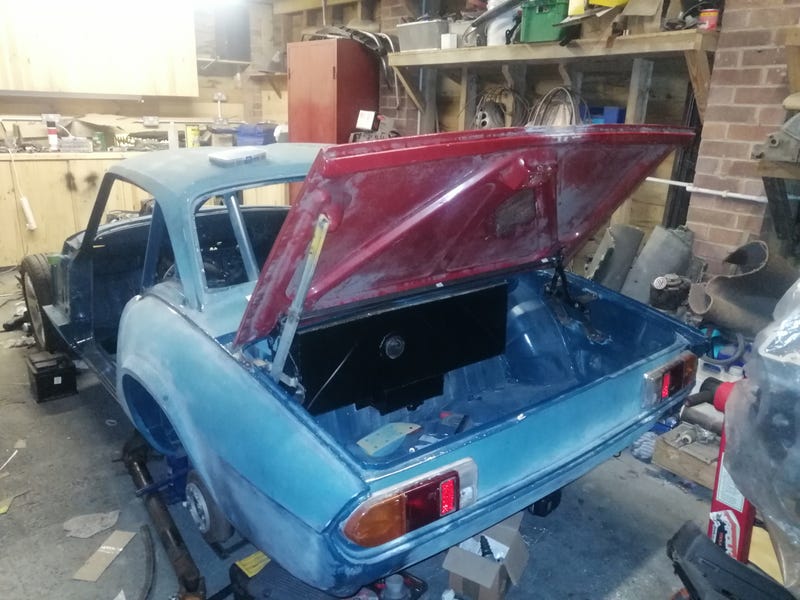 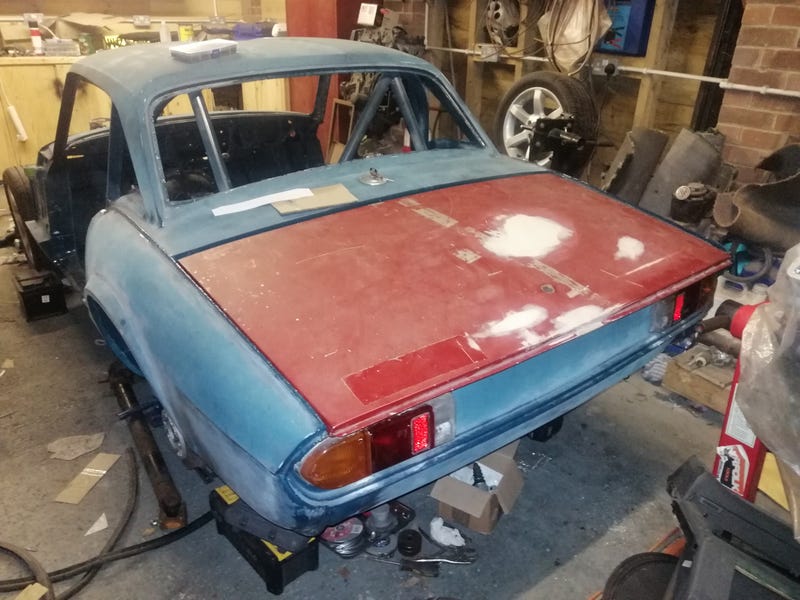 Fiat FiatSo far so good! Took her down for the first long-distance run to my GF's in Margate and she performed admirably! Pictorial proof: 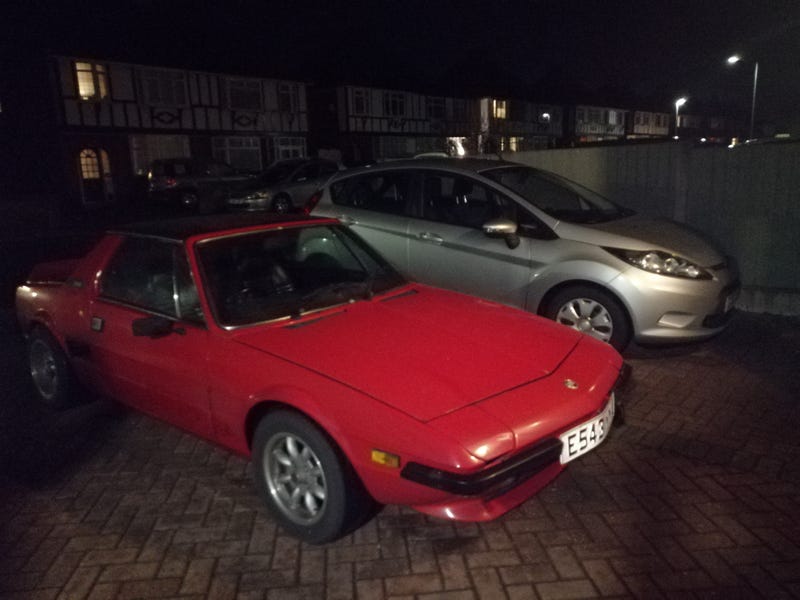 Tyre troubles Tyre troublesOther than that, not been having a great deal of luck. Especially on the tyre front. First off was a drive down to a ski holiday in my mate's 330d. We'd bought a second-hand set of wheels and tyres as the ones on it wouldn't clear with chains on. Began thinking that they were just out of balance, but about halfway down it started getting really bad. Pulled over to the side and this is what we found... 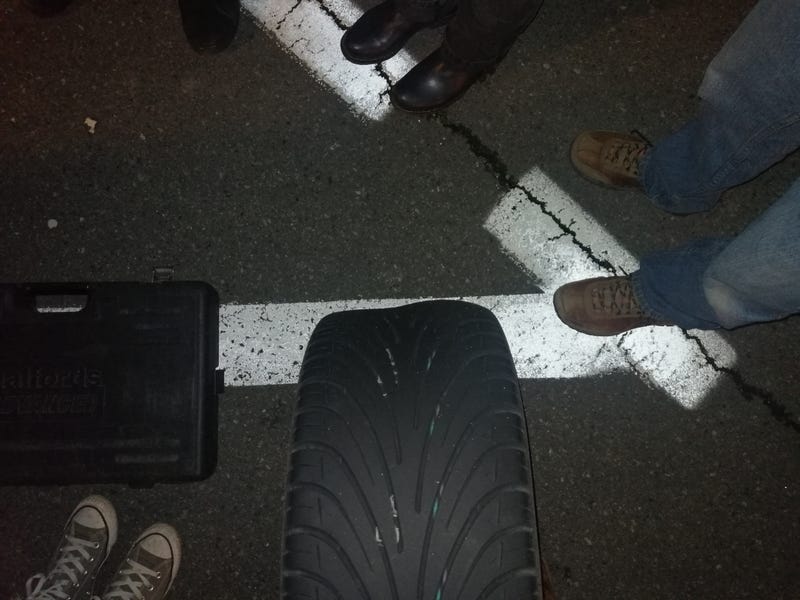 Yeah. That would do it! Limped on with the space saver to our hotel and got a new set fitted the next morning  The other development is I managed to hit a hidden pothole in the MGF recently. This month of non-stop rain has really done a number on the roads around here, and this guy was hidden underneath a puddle when I went through it. 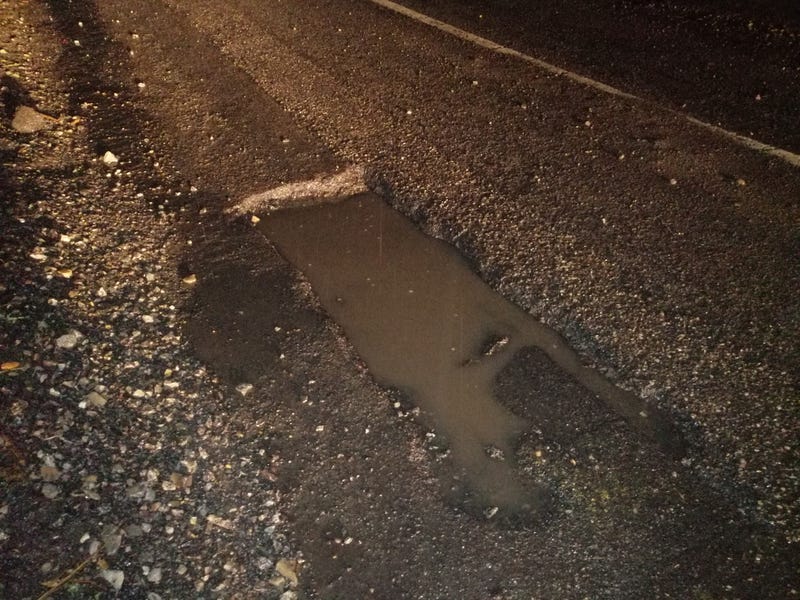 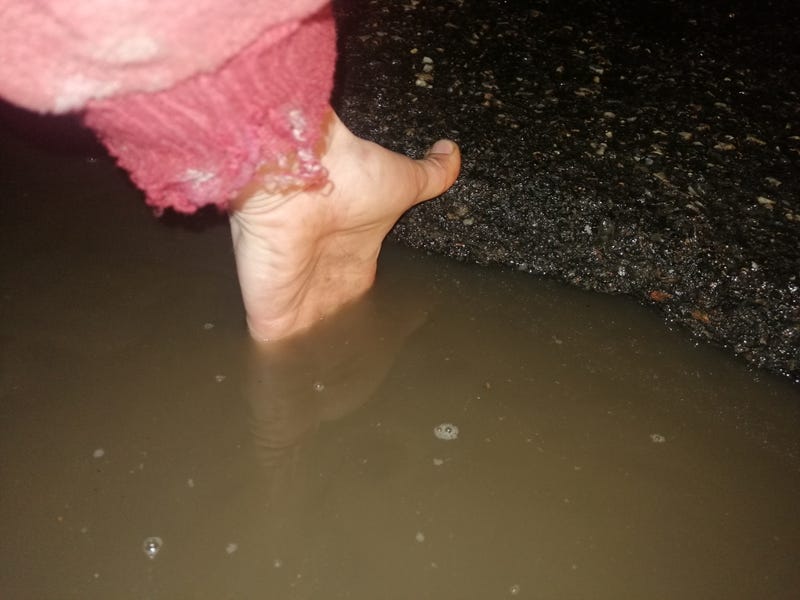 Precision 6" measurement there. Wheel didn't like that at all... 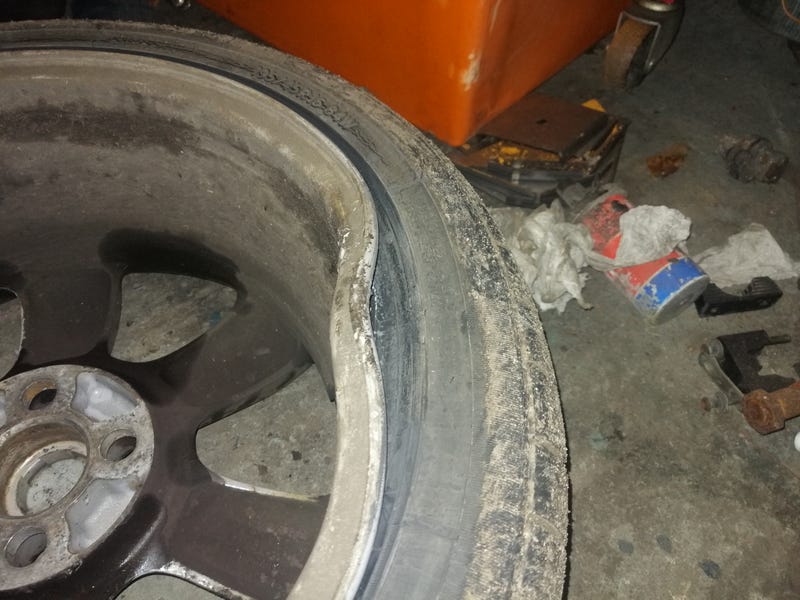 So now I've got a shiny new one and a tweaked near-side front suspension to sort out. Hoping it's just knocked the subframe out of joint. but with that amount of force it may well have bent the wishbones slightly. All fun and games... Not the end of the updates though! Have an exciting saga to tell... |
| |
|
|
|
|
|
|
|
JaaaaaaaaagLastly, as this weekend was the first one in about two months that has been dry, I've made a start on the XJ40. The story with this is that way back when I was 19 or so my uncle mentioned that he had an old Jag in his garden, and asked whether I wanted it. £60 later and I had my first ever project car!  It was a bit rough, but not too bad really. Early 3.6 non-sunroof but with dead power steering (my uncle was a powerlifter and just drove the thing with no power steering), no working doorhandles (there was a pieces of string tied to the locking mechanism and fed up through the window seal), and a gearbox that definitely wasn't happy. This was the fleet at the time:  Decided to go for a manual swap once we'd got it running, and got about halfway through that before this happened: 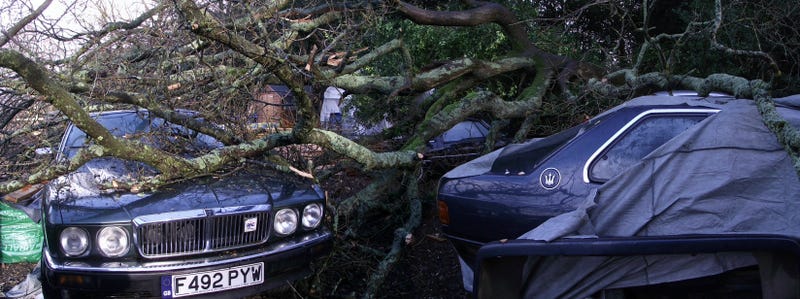 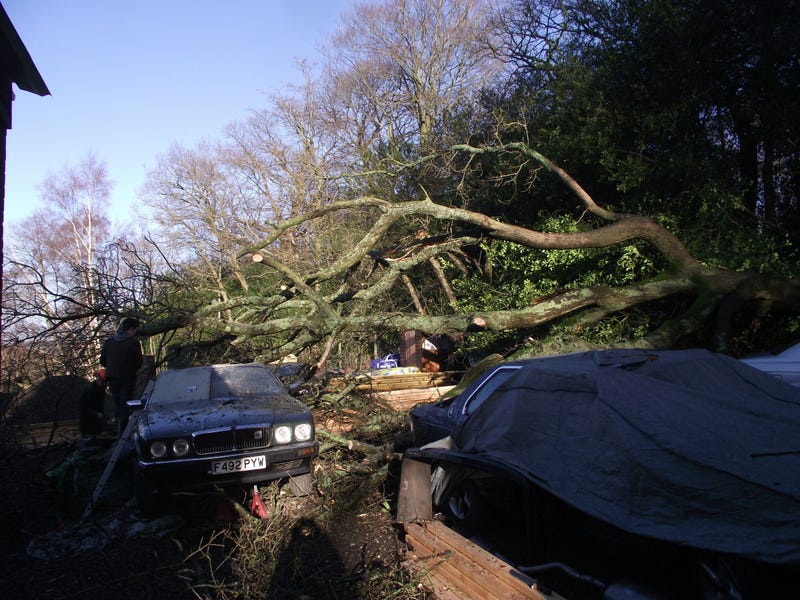 Not a great christmas present (was xmas 2014 I think). Doesn't look too bad in these photos, but there wasn't a single panel on it that wasn't heavily dented, and some bits of the suspension had been twisted as it came down from the axle stands. Ended up selling the manual conversion bits and using the rest as a parts car for a while. Was a bit bummed by the whole ordeal, but as luck would have it this popped up for sale shortly afterwards:  Very nearly a goldilocks car. Later 4.0 5-speed, but still with the early-style thin-spoked steering wheel in a bloody lovely colour. The only thing letting it down is that it's a sunroof model (bloody hate sunrooves, all they do is let in rust). 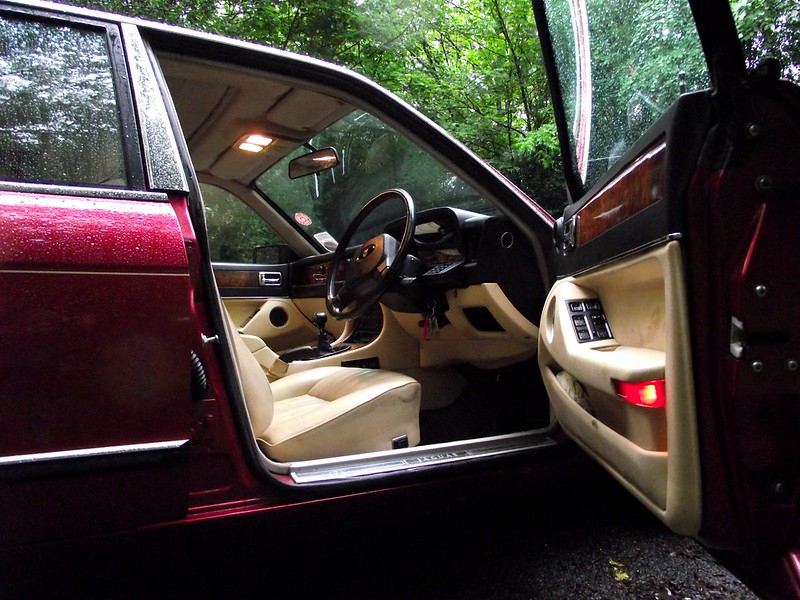 Happily drove that around for a fair few years, including a long roadtrip to central France.   Fantastic car, if a little financially ruinous for someone in their early 20s with an NHS payroll. Used to manage mid 25s on a run with around 20-21 regularly...which reduced somewhat after I fitted the LSD. Sadly, it's had a few unfortunate years recently (wholly caused by my own stupid decisions). The first misfortune happened when I left it running at one point to charge the battery and blow out the cobwebs after a winter laid up. Unfortunately, it decided that this was a good time to blow a coolant hose and 10 minutes later I discovered this fact after observing the billowing cloud of white smoke coming over the garage roof. Running it afterwards it was clear that it had rod knock. Some months later I'd managed to find another 4.0 to swap in, but found it wouldn't start to shift it about. Narrowed it down to water ingress into the fuel tank, so set about draining the tank. The drain plug is rather inaccessible so thought I'd do it from the level sensor on the back. That started filling the boot up with water so clever old me thought he'd drill a drain hole in the bottom...with an electric drill. Turns out the fuel tank wasn't just full of water. There was probably somewhere around 20l of fuel still left in it. Drill stops, brushes spark and WHOOF! Up it goes, big towering pillar of flame right where I was crouching. I leap out and promptly freeze in panic. Luckily my mate was nearby and grabbed a fire extinguisher, at which point my brain catches up and sprints for the other one we have which just about puts it out. Luckily, the damage wasn't too bad. Lots of melted wiring and burnt carpet, all the galv taken off the fuel tank, and a bit of paint damaged on the wing. Oh, and a bit of a crispy face and no eyebrows. Also a newfound respect for the flammability of petrol and four new fire extinguishers bought. After all this I was rather dejected with the whole thing and moved onto other projects. Up until the point my mate bought this: 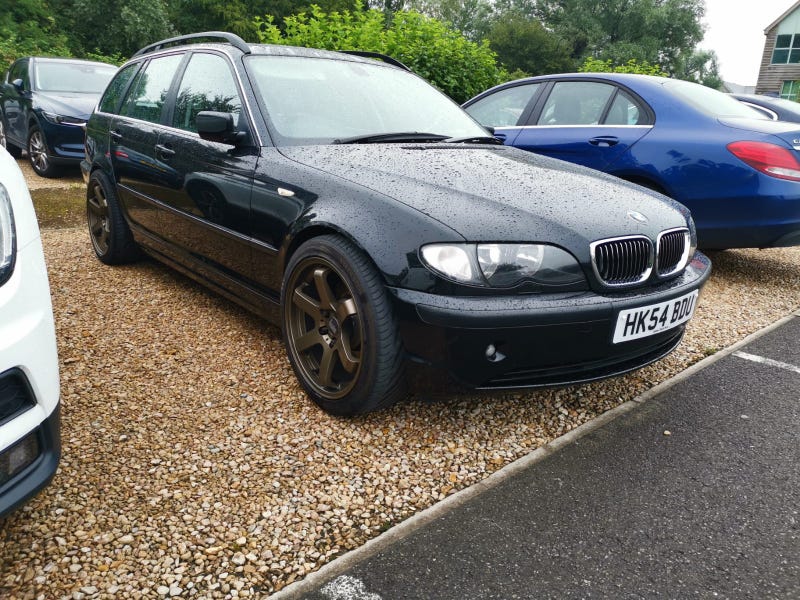 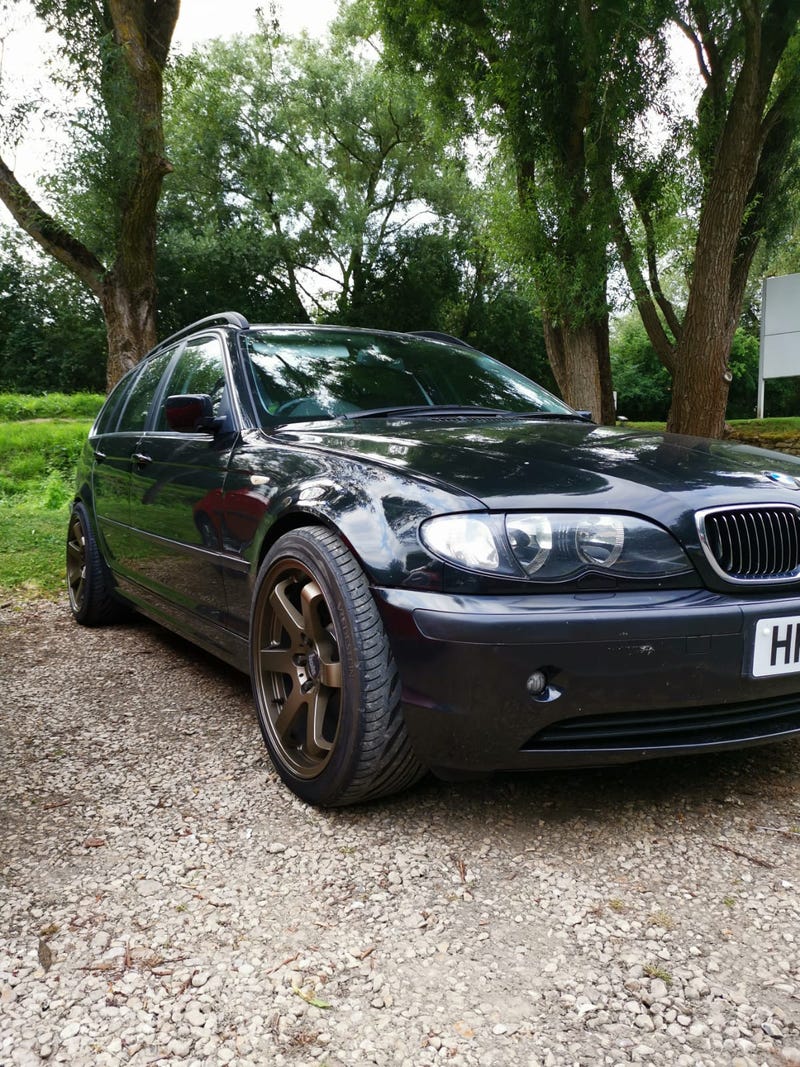 BMW E46 330d, which didn't last long before being remapped. I was really rather impressed by the 250bhp/370lb-ft or so, coupled with nearly 40mpg. Not overly difficult to get it up nearer 350bhp and 500lb-ft either. Suddenly I had an idea for the Jag that seemed workable! I'm currently missing a mile-eating cruiser in my stable, and a TD-swapped Jag would cover that very nicely indeed. Bought a cheap, rough 330d that's already been remapped and that's where it's sat for a little while. 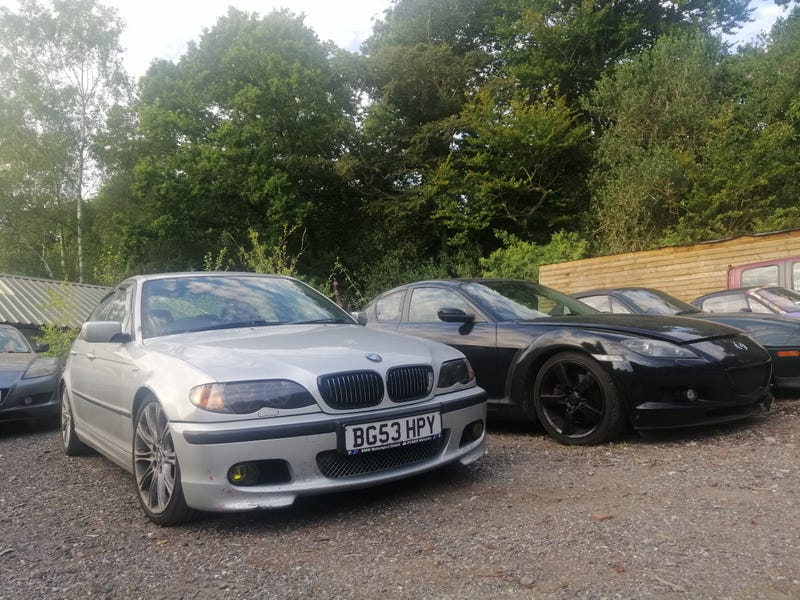 However, now with the nicer weather I've got started  first step has been to clean up the boot of all the corrosive fire extinguisher powder and start removing the tank and the burnt wiring. Here's a before picture, but got rained off before I could get an after. You'll just have to trust me that it's much better! 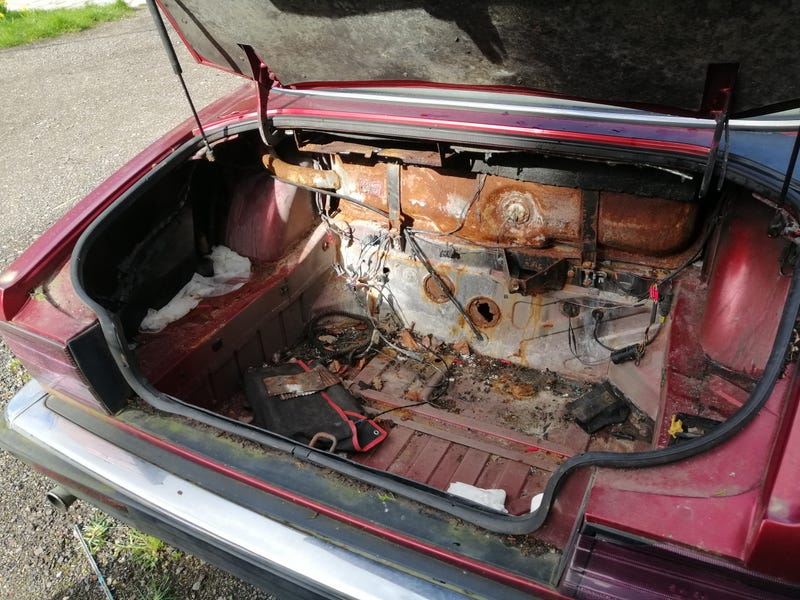 Haven't yet got the tank out as the fuel lines are putting up a fight underneath. Think I'll have to drop the rear diff to get to them properly. Have however sourced another fuel tank, another wiring loom rear of the bulkhead, a radiator and electric fan setup from an X308, some manual seat rails to drop some weight, and a 2.88 LSD from a Series XJ12. Still some pieces of the swap to come together, like making the 2.88 CROWNwheel play nice with the later-style diff, mating up the two propshafts and working out how to mash together the BMW management system with the Jag loom. However, it's dead exciting  might not be to everyone's taste, but in lieu of suddenly coming into a large fortune, it's the best way to get a usable Jag for me and fill a much-needed gap in my lineup  hopefully won't take too long either (he says...)
|
| |
|
|
|
|
|
Mar 24, 2020 12:07:00 GMT
|
Been pottering about on various things without making a lot of progress (mainly cleaning my tip of a garage), but the sunny weather and time indoors due to the plague has promoted some activity  First step was to rearrange the area outside my garage. Can't fit the Jag inside at the moment so the majority of work will need to be done outside. It was on a bit of a precarious sloping footing so I've shifted it directly in front of the garage. 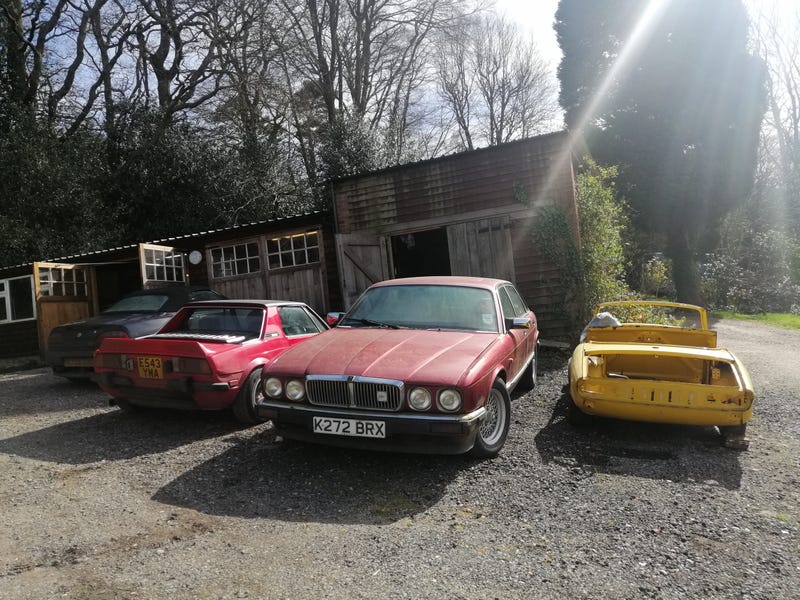 It's still a bit sloping which I'm not 100% happy about, but a belt and braces approach to jacking seems to help. Axle stands on wooden boards to spread the load, wheels underneath to catch it if it does fall, and an extra jack supporting it any time I'm underneath. Next was to drop the rear suspension. It's quite a simple job really, and having done in 3-4 times now it all came back to me pretty well. As did the sheer heft of the thing when dragging it into the garage... 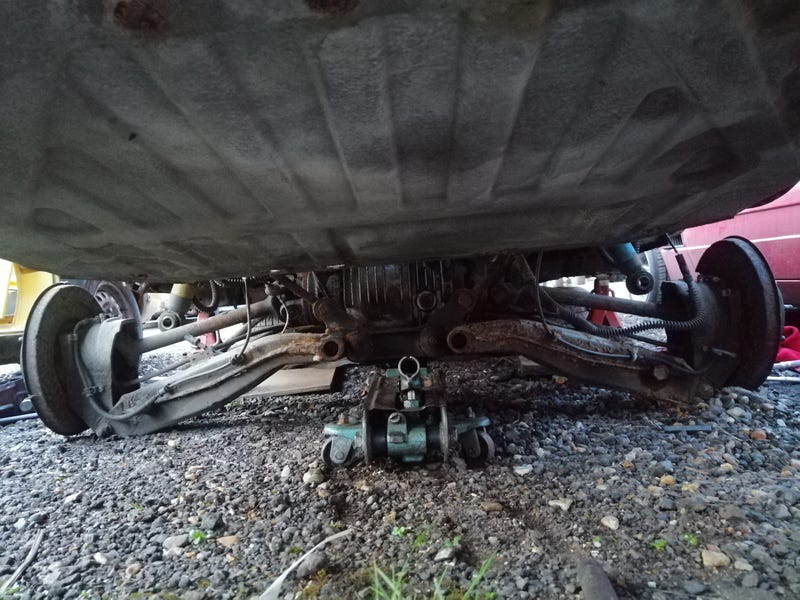 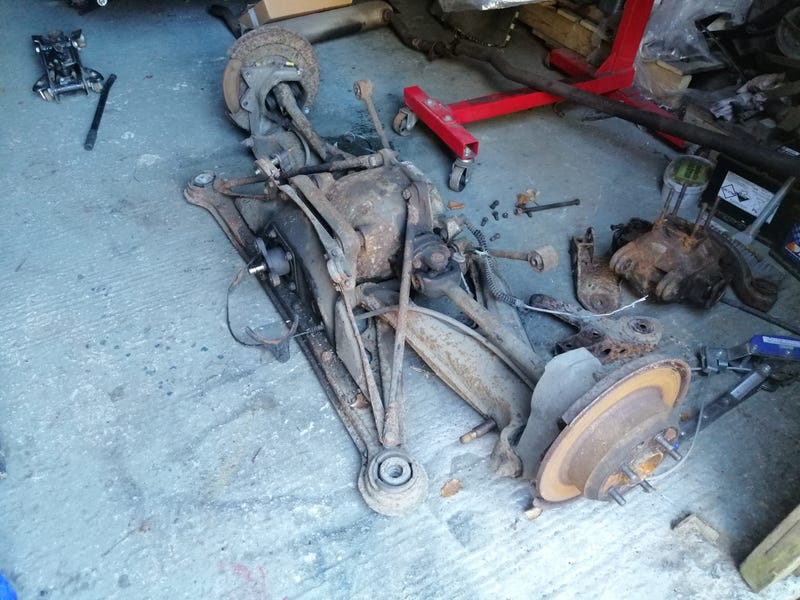 That allowed access to these guys: 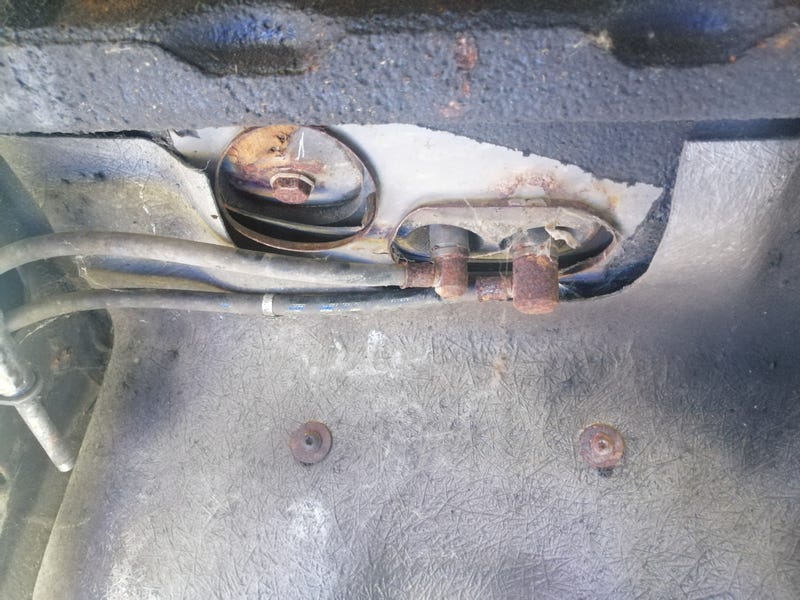 Drained the fuel tank of what remaining fuel it had, and managed to work the fuel fittings loose. I'll need new ones anyway as the metal on the other end is well past its best. But it means I can get the old fuel tank out! 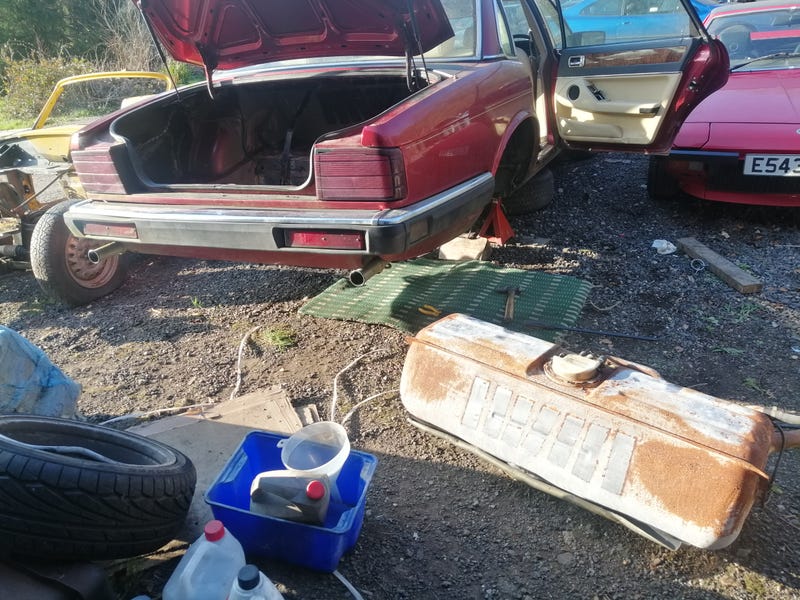 Last job I sorted was to strip the rear suspension unit down. It's all a bit crusty back there, and I've ordered various polybushes to fit once it's rebuilt and repainted. There's some other bits and pieces to stiffen it up, like the braced rear mount you can see at the back of this picture which replaces the two dogbone links on the XJ40: 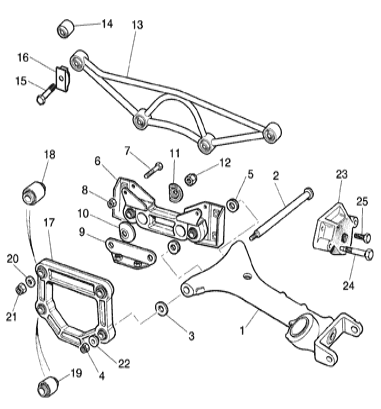 Also, if you want to see the difference between a diff that struggles at 200bhp compared to one that will take pretty much anything you throw at it, just stick a Spitfire diff next to an XJ40 one  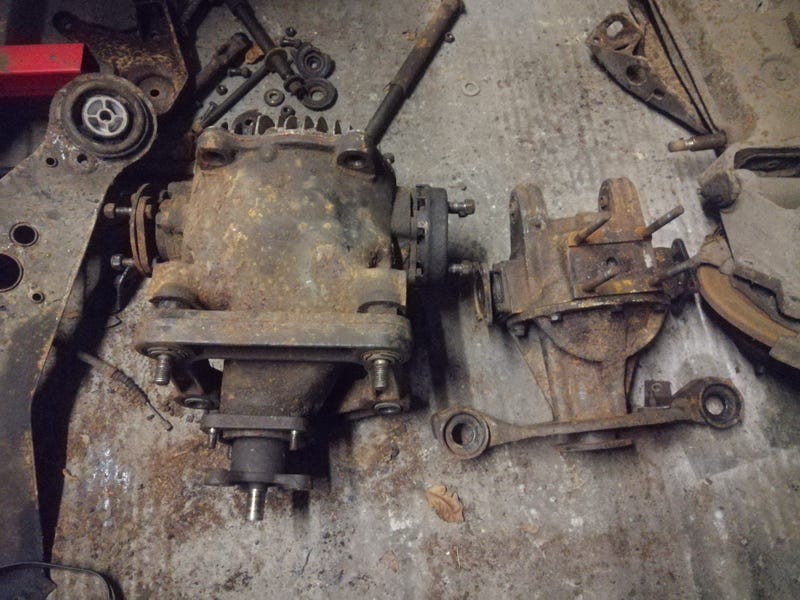 |
| |
|
|
|
|
|
Mar 31, 2020 12:01:10 GMT
|
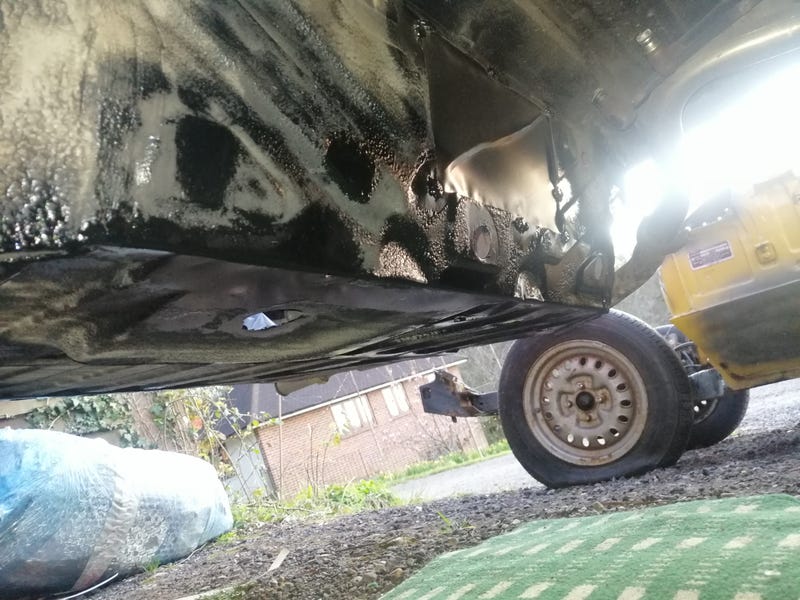
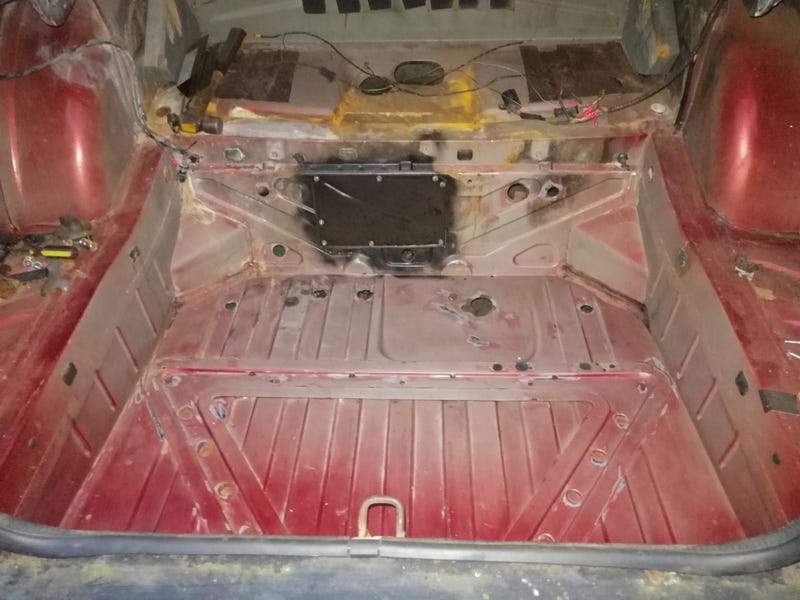
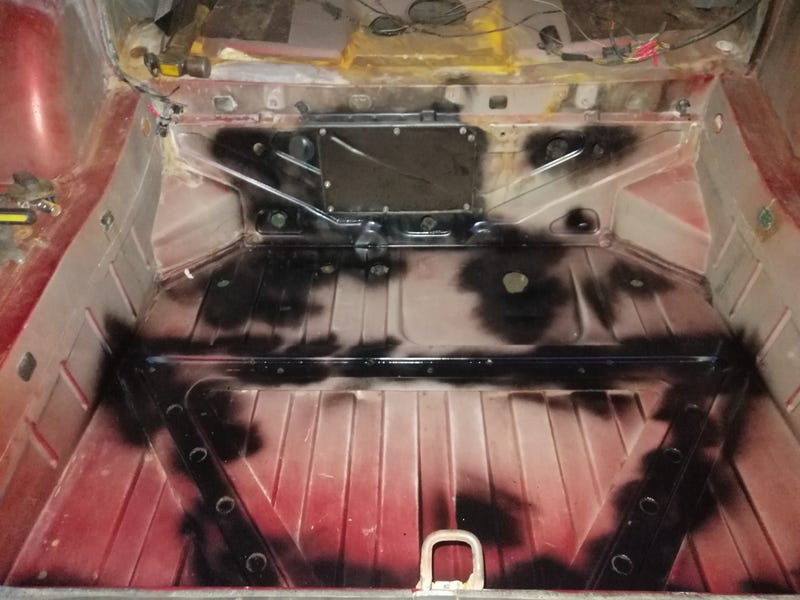
The brief spell of good weather we had here gave me a chance to start tackling some of the rust at the back of the car. First off was this mangy set of plugs at the front of the boot. 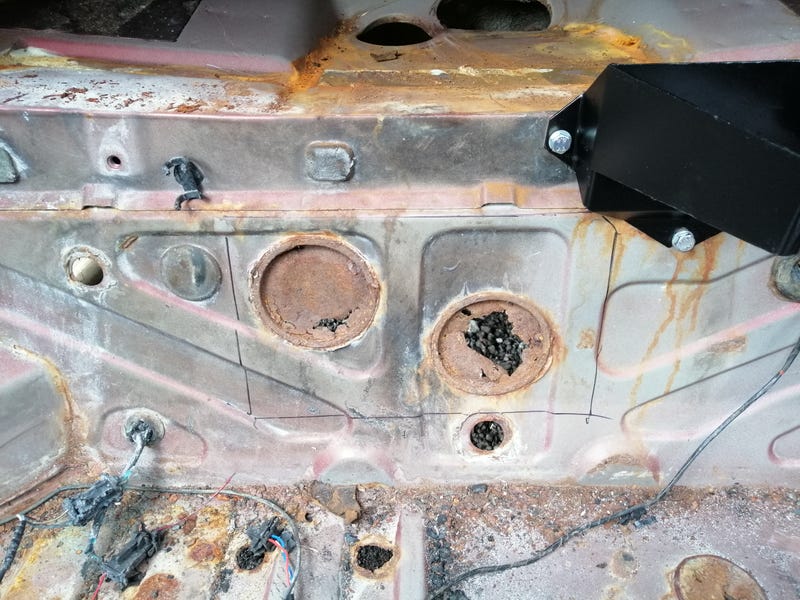 Last time I'd replaced the diff I'd forgotten to fill it with oil before fitting, which then involved much contortion to get the oil into it while everything's in place. So I took the opportunity afforded by the rust to make a little access panel. Choppy choppy... 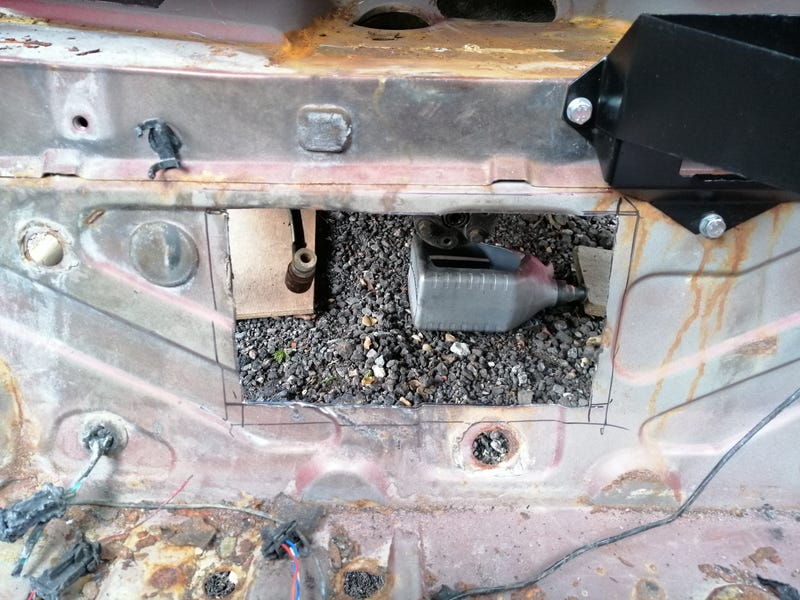 ...bendy bendy... 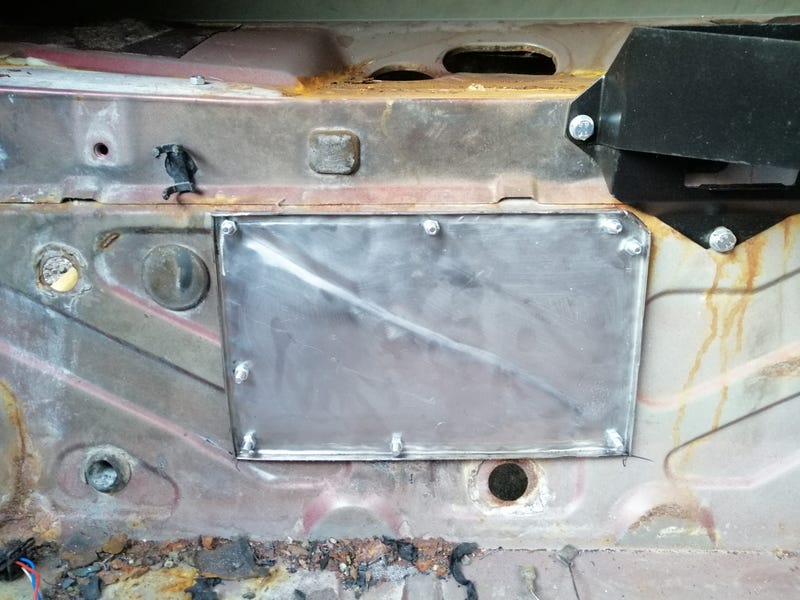 ...painty painty. 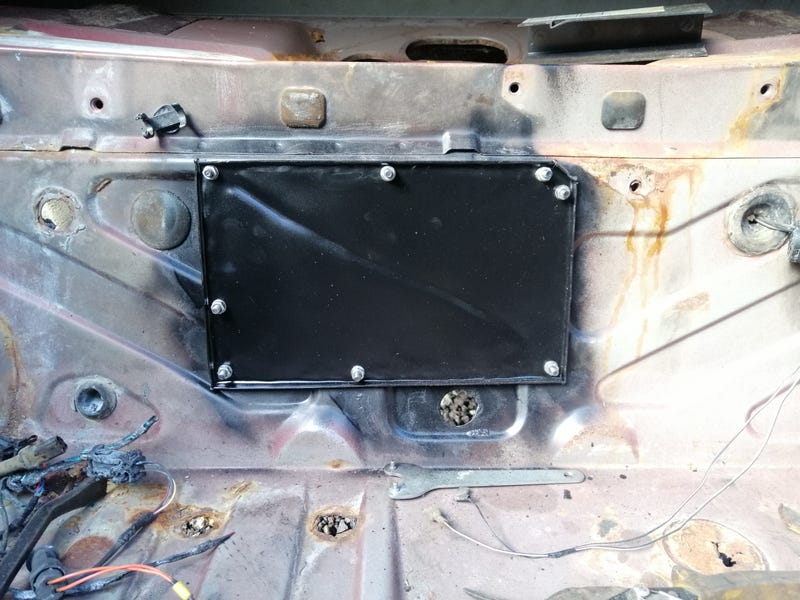 I've welded the studs to the body so I don't have the other end spinning, and having them point into the boot means there's no exposed threads under the car. I've also refurbed the rear coilovers a bit. From this... 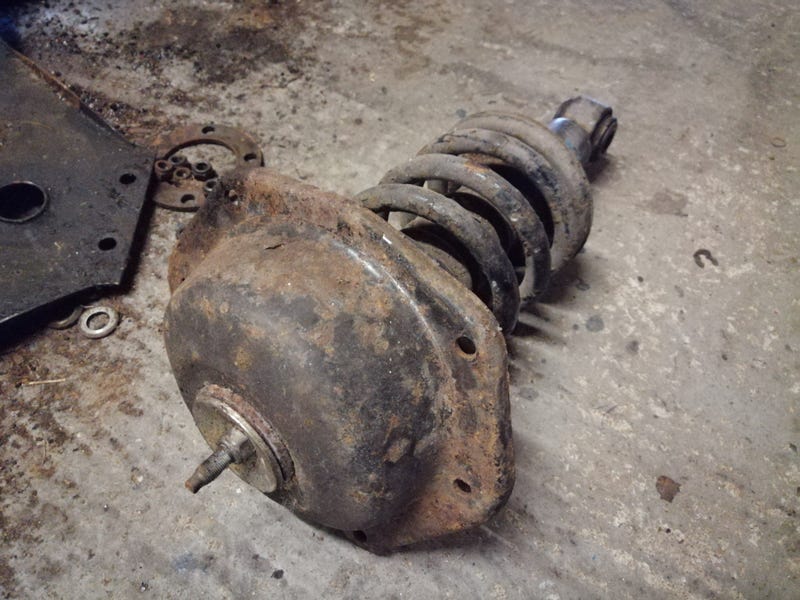 ...to this! 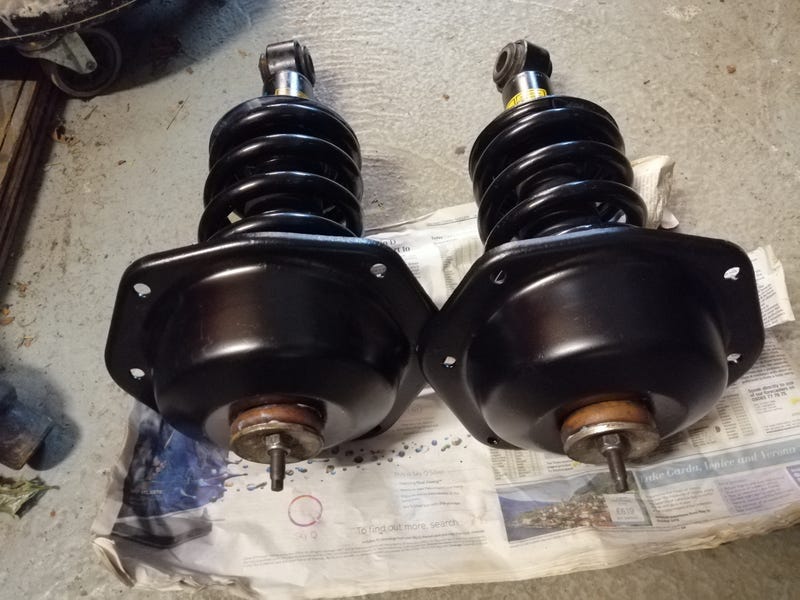 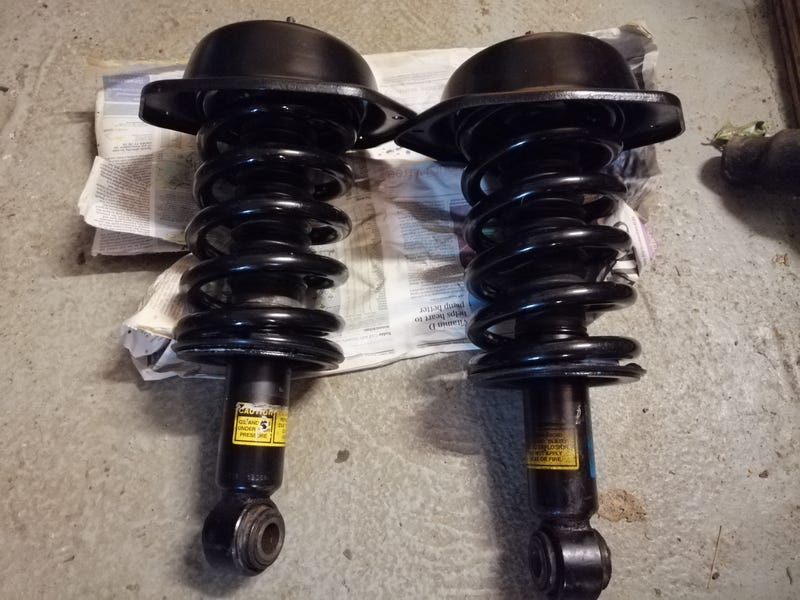 The shocks have only covered about 3000 miles since I fitted them so they stayed, as did the shockingly good condition original spring pan bushes and bumpstops. I don't know what environmentally toxic processes they used to use to make rubber but older stuff really does have so much more longevity than new rubber. Especially bumpstops seem to disintegrate in ~5 years. I've also fitted a set of 35mm lower 25% stiffer springs I bought ages ago from Coilsprings.co.uk. The company's very good, but I ordered them when I had much less of a clue what I was doing generally with cars so we'll see how well they turn out! The XJ8 subframe brace has turned up as well, as modelled by one of the cats: 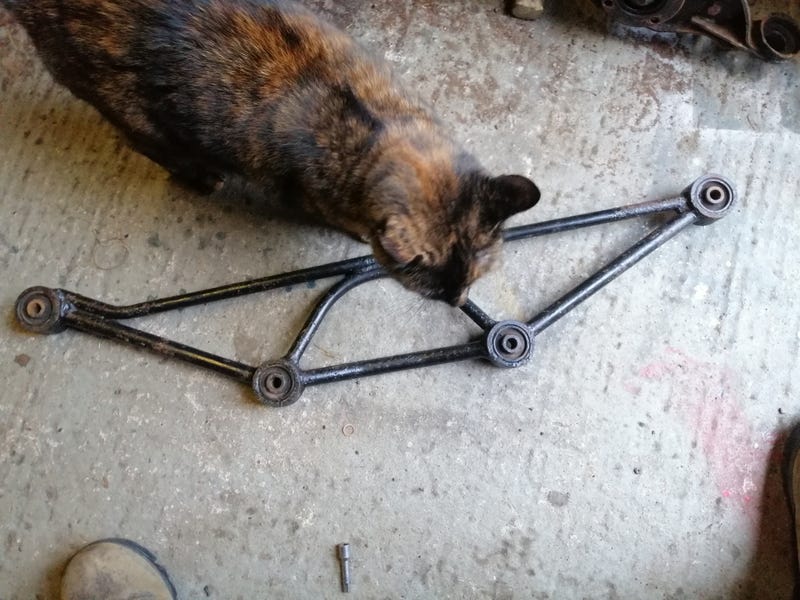 Lastly, I've found a solution to the low-ratio diff issue. Here's an outline of the problem. I've worked out that with a 2.88 diff ratio and the Jag's slightly larger wheels, the gearing should be within a couple of mph of what it is in the 330d with its 2.47 diff. That should mean 2096rpm when cruising at 70, and a nicely overdrive 6th stretching to 183mph (vs 1941rpm and 198mph in the BMW). There are plenty of 2.88 Jag diffs about, and the majority of them come from XJS' so are fitted with an LSD (and the better of the two varieties of Jag LSD to boot). Unfortunately, to fit the physically larger 2.88 gearset those diff casings are slightly different, being machined wider and having a ring gear mounting flange with more offset. There are two types of Jag diff, early and late. Early ones are fitted to pre-XJ40 cars, so XJS and back. New types are fitted to XJ40s, X300s, X308s and 4.0/42 XK8s. There were 2.88 diffs made in the newer casing, but these are very rare indeed. As far as I can tell, they were only fitted to early 3.6 USA-bound cars. All of the Jag's rear suspension hangs off the diff, and the early and late types are significantly different enough to make fabrication a PITA. This left me in a bit of a pickle. The next longest Jag diff ratio is 3.07, which would probably still be workable and has the regular offset. 2234rpm at 70, and 178mph top. However, I already have the 2.88 LSD and want to do this properly. I was put onto SimplyPerformance in Dorking who are well rated in the Jag world. I emailed about making a hybrid and they said 'yeah sure, we've done a few of these already'. Result! Diffs are with them now  |
| |
Last Edit: Mar 31, 2020 12:02:48 GMT by biturbo228
|
|
|
|
|
|
|
|
|
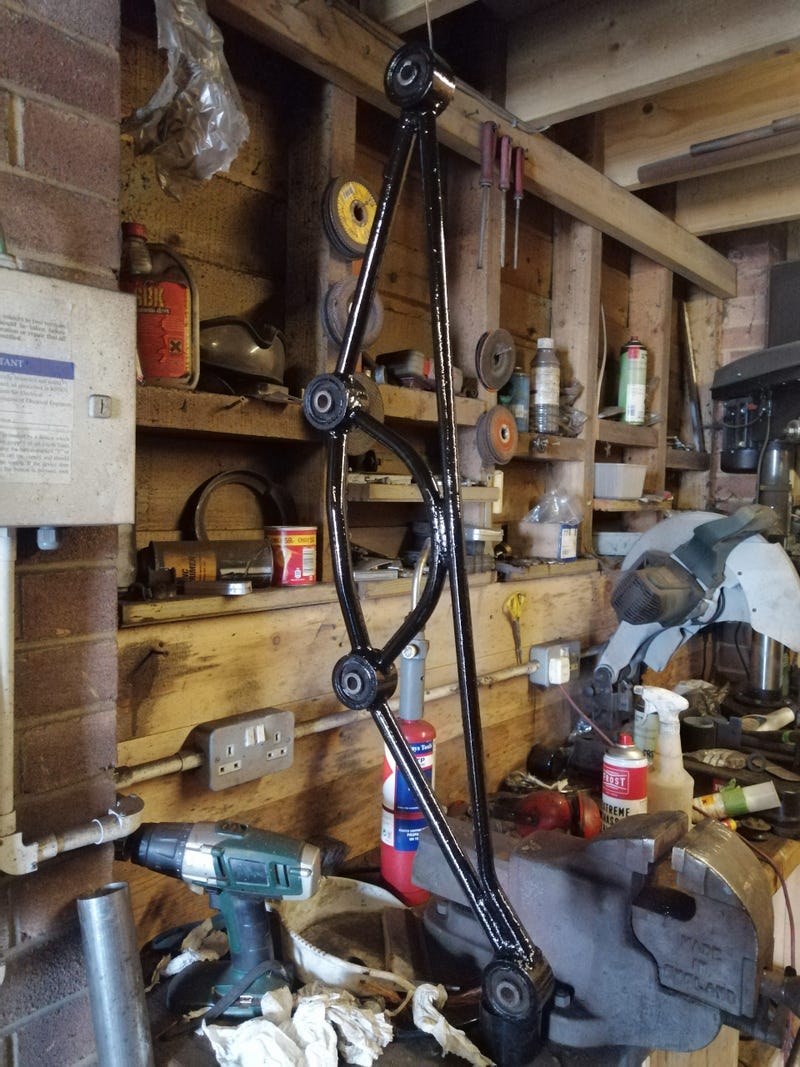
The weekend's been spent wire-wheeling, pickling and painting all the various bits of the Jag suspension. Started off as this mess: 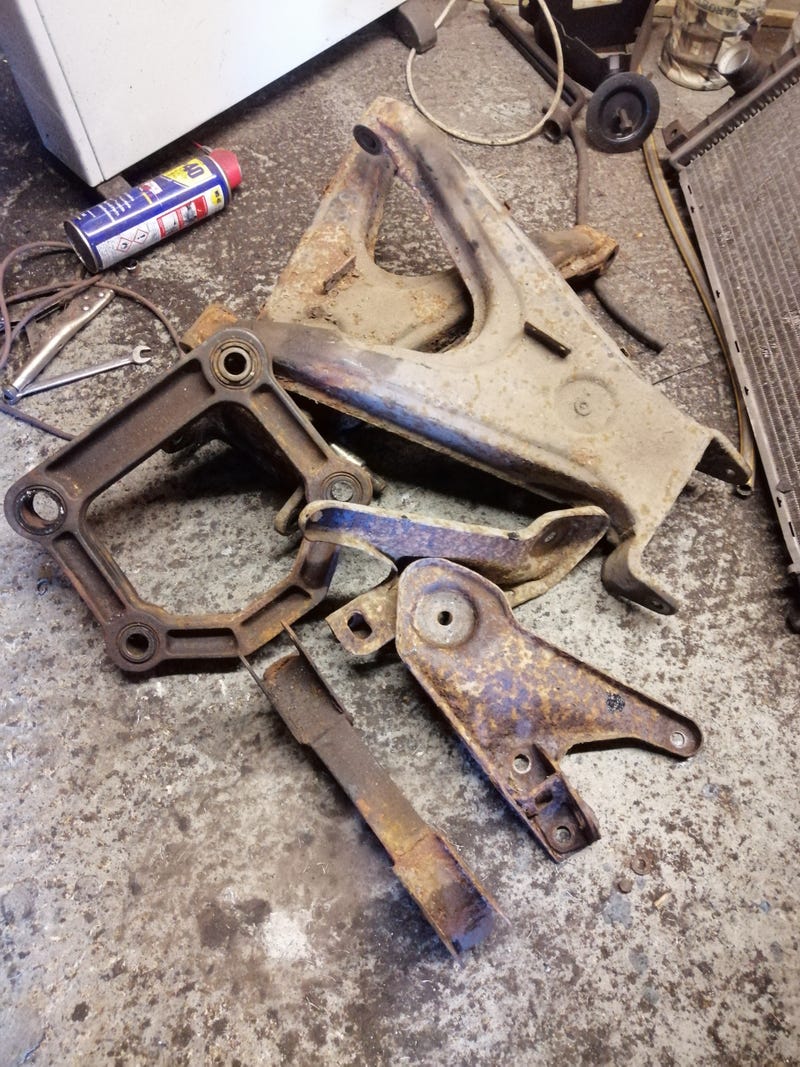 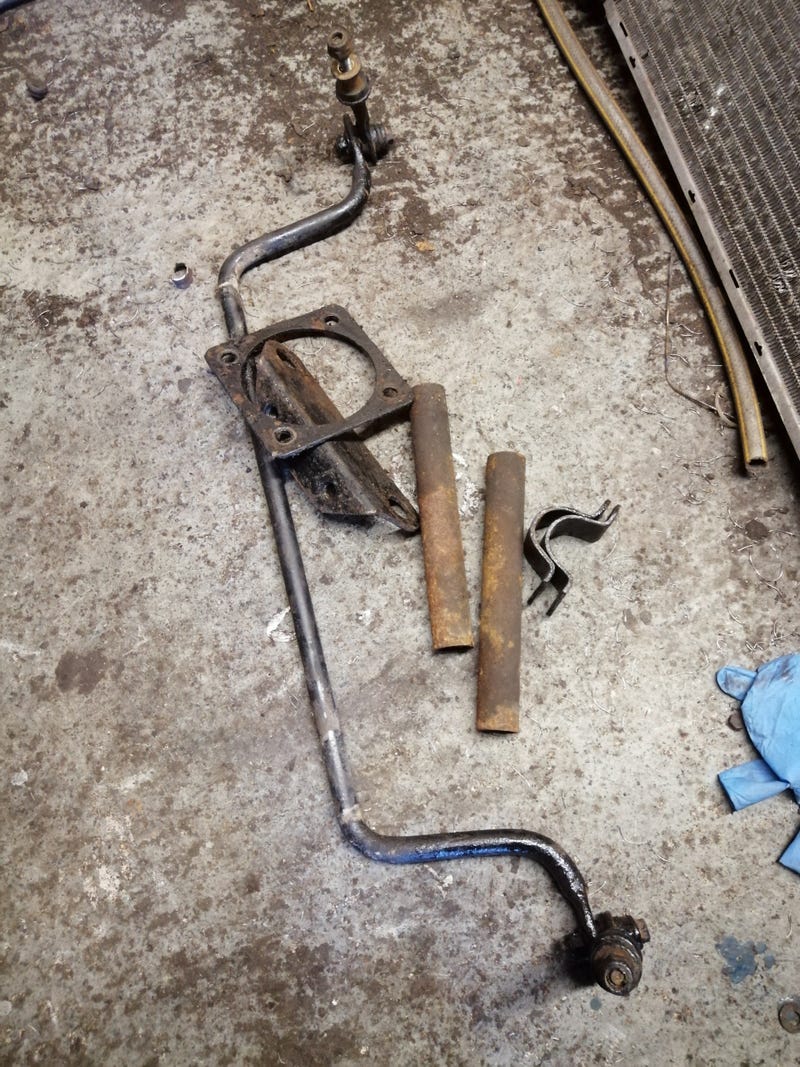 ...went through various stages of de-rusting... 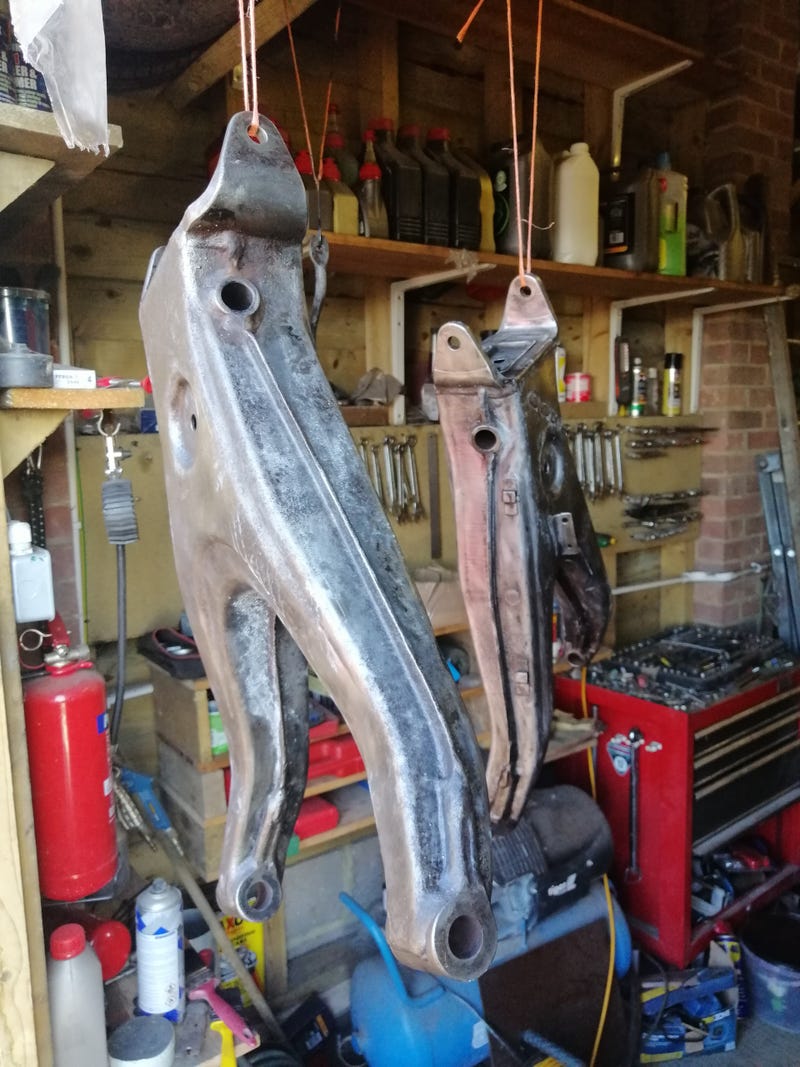 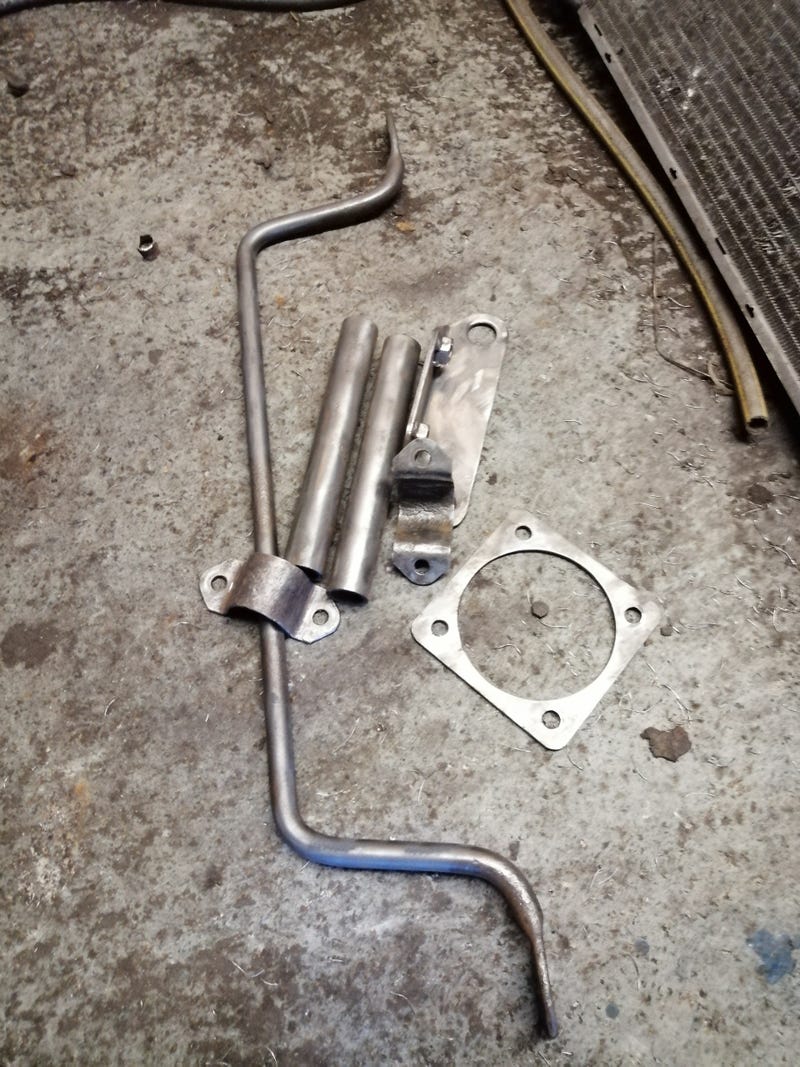 ...until finally they were painted and baked in front of our stove  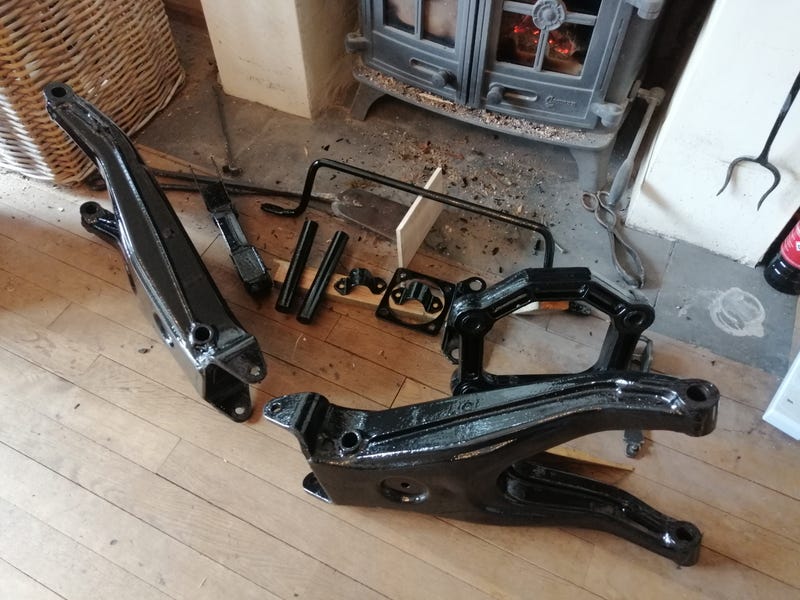 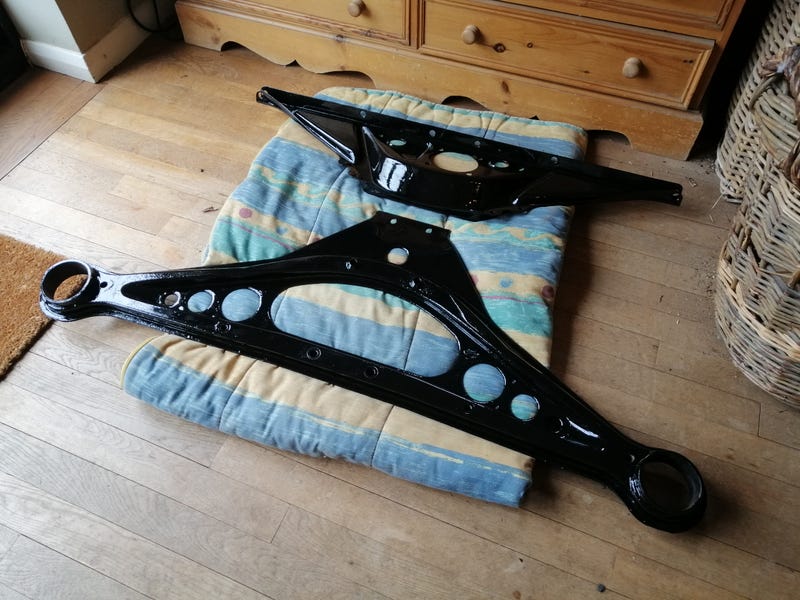 There were some casualties unfortunately. These brackets that stop the subframe dropping off its bushes are a little worse for wear so some new ones will need to be sourced. 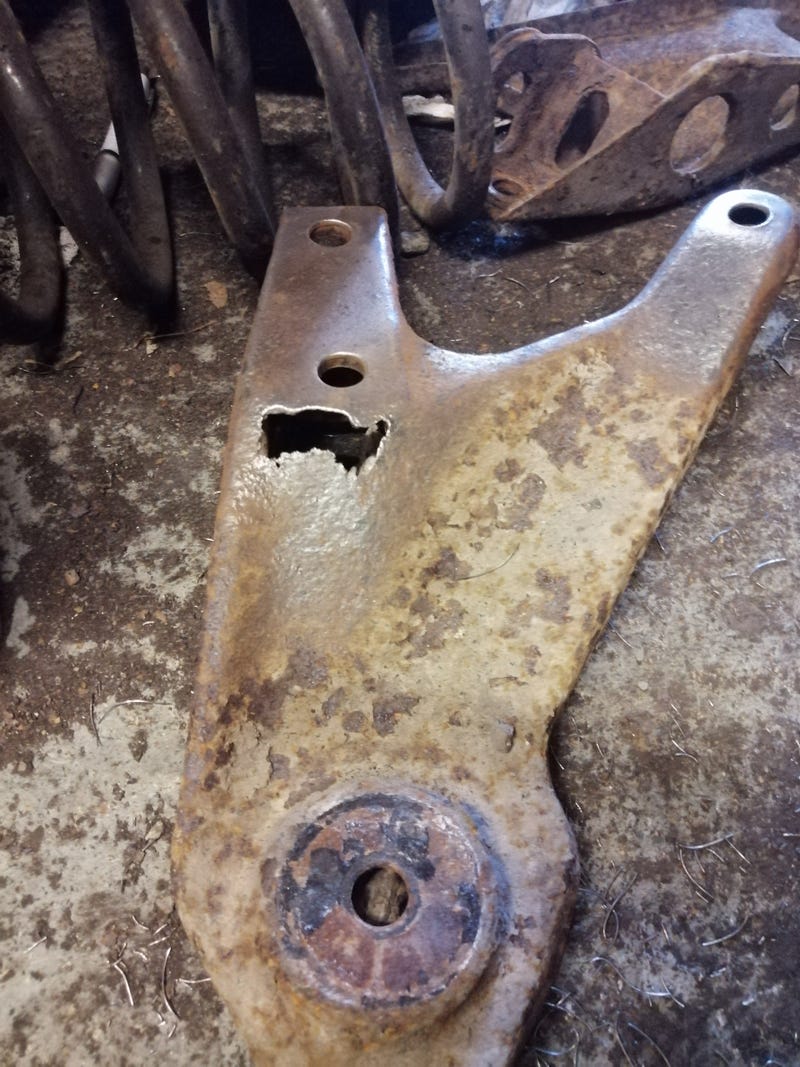 One of the wishbones put up a real fight as well. The rear coilovers on all but the very late XJ40s mount on a sodding great inch-diameter through bolt in the wishbones. One side came out easily, but the other was stuck solid. I'd tried soaking it in penetrating fluid for a couple of days, heating it with a blowtorch and then impacting it out, but no luck. Tried a breaker bar with a 3 metre scaffold pole on the end but to no avail. Then my mate suggested pressing it out. Took a bit of fenangling to get it to press nicely. Added a spacer tube to bolt the nut to so the force is distributed to the main shaft and not just the threads, and chopped up a piece of box section so it would sit square to the press as the through-bolt is at an angle in the wishbone. Here's the contraption: 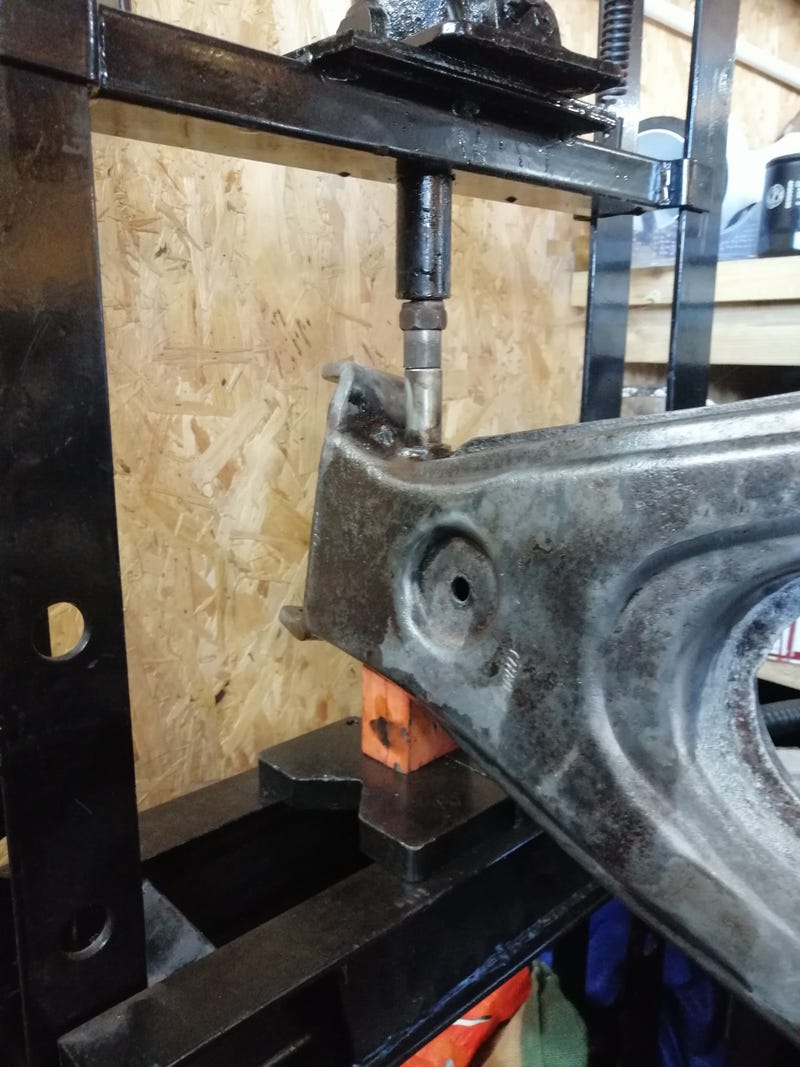 Nearly 10 tons of force and a lot of blowtorching later and it went! Had to press it out inch by inch as it would only slip about 5-10mm at a time, but eventually got it out. 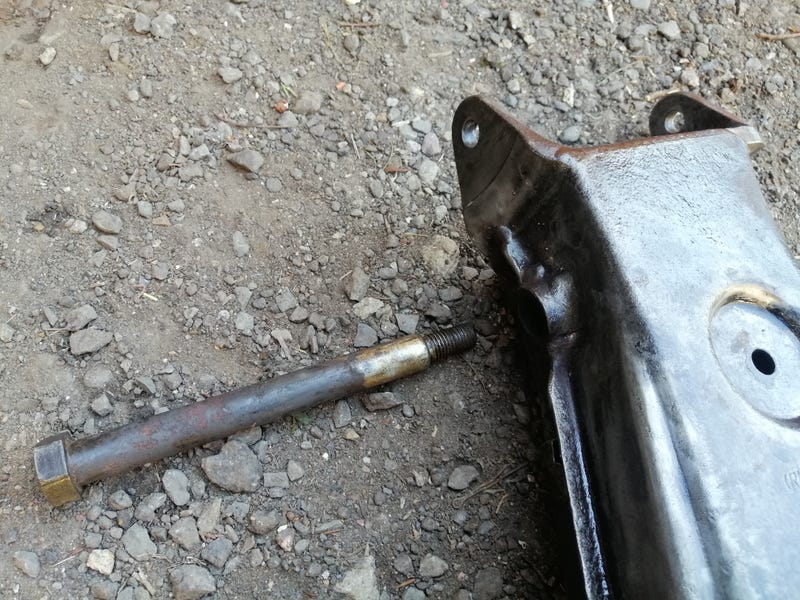 I can see why it was so stuck now! Still, slips in nicely now after a bit of a clean up, and will be going back in with plenty of aluminium grease to stop it seizing again  |
| |
|
|
|
|
|
|
|
Also, my mate who helped out with the press idea has had some success with his E36 V8. Had an issue where it wouldn't start intermittently. Tracked it down to a bunch of relays that sit next to the ECU and control the injectors. Wiggling them around would let it start, but get them in the wrong position and it would just cut out. So, rewired the whole area as it was a bit messy anyway... 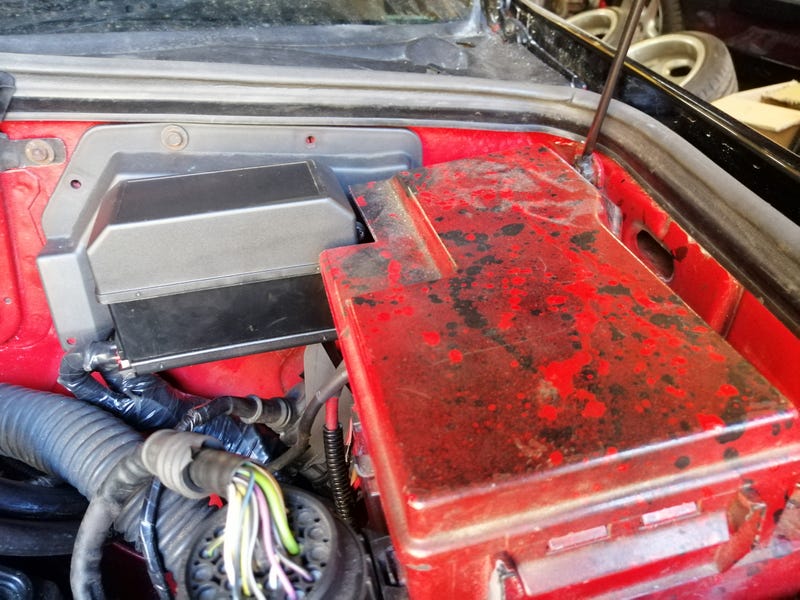 ...and still no starting. What it actually turned out to be was a cracked fuse! Not blown, but the little element within it had cracked but was still touching. If there was the smallest amount of pressure on the wires beneath it though the crack would open and the car would cut out. Very strange! Also decided to swap the wheels around a little. Admittedly poor picture, but E36 then: 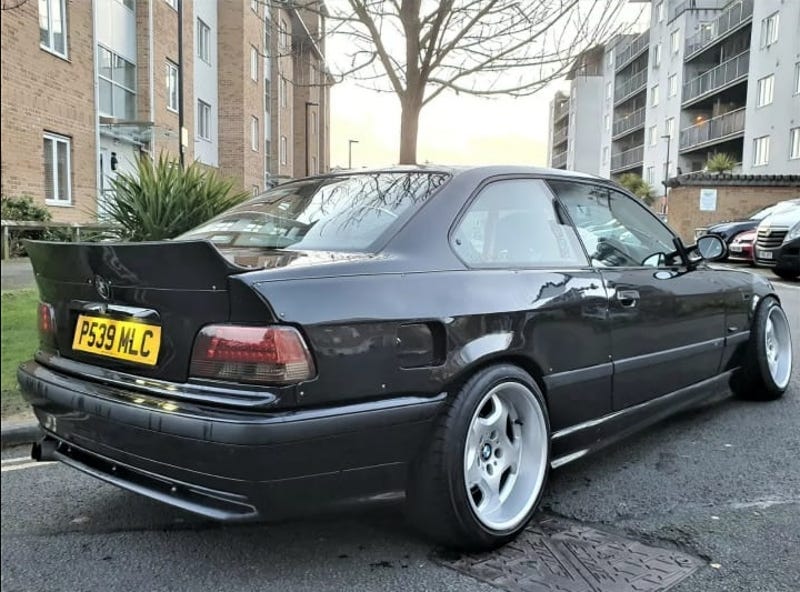 ...and E36 now. We think the 18s are probably a little big, but the idea is more track-spec than drift-spec. What do people think? 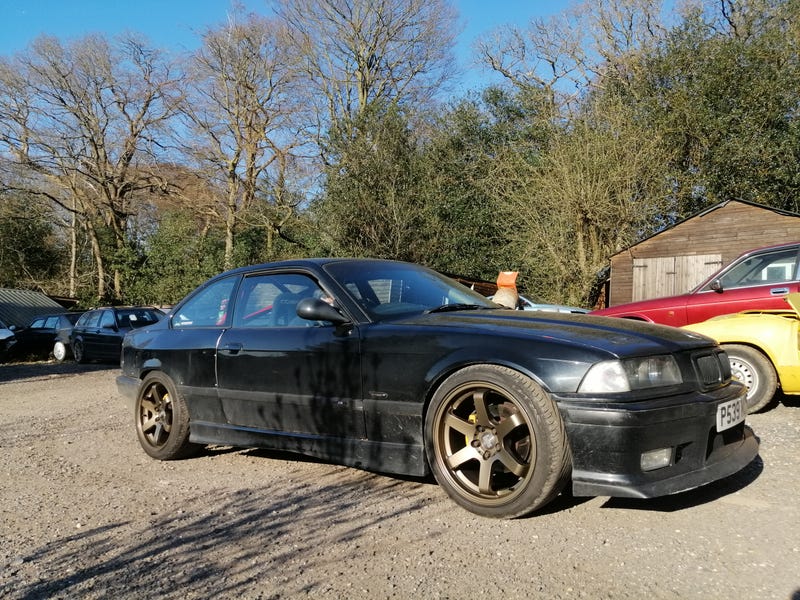 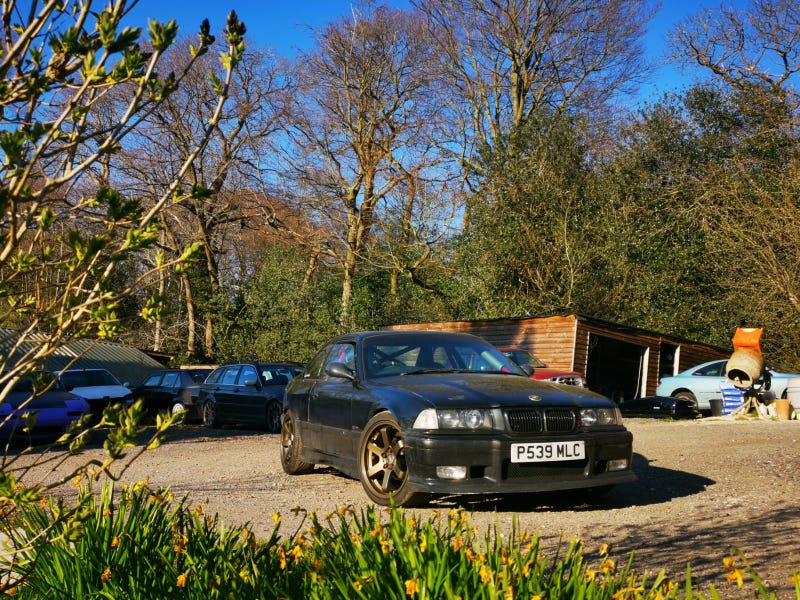 Also, the wheels from the E36 work rather well on his 330d we think... 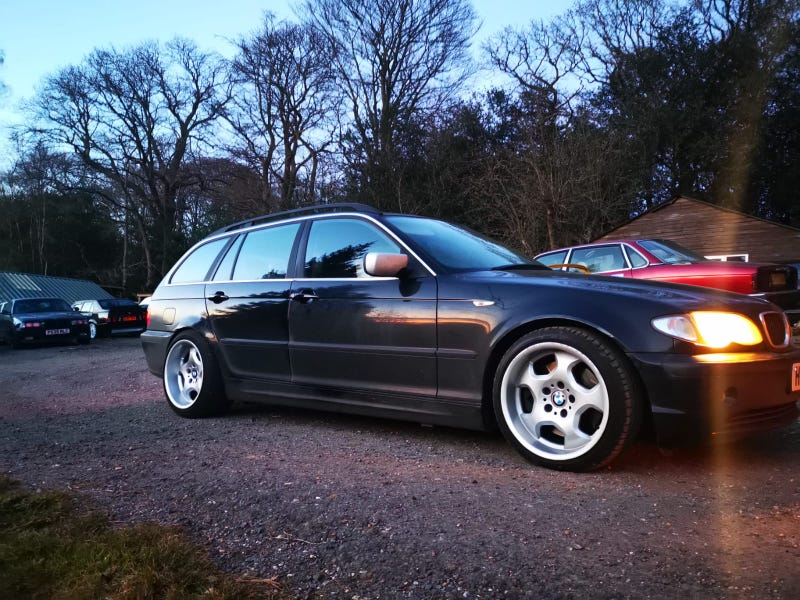 |
| |
|
|
|
|
goldnrust
West Midlands
Minimalist
Posts: 1,887
|
|
|
|
Such a pain when you get seized bolts like that, at least you got the right tools to get it free.  I always think it's a horrible job stripping and painting all the fiddly bits of suspension, and underbody parts, but it does make it so much nicer working under the car afterwards, well worth it in the long run. |
| |
Last Edit: Apr 6, 2020 12:41:14 GMT by goldnrust
|
|
|
|
|
|
|
Thanks man  yeah without the press I'd be completely stuck. We'd been using a decent snap-on impact wrench that hasn't failed with anything before this. That's what I was thinking! The Jag suspension is such a heavy beast I figured I'd much rather only need to take it out the once. I'll be leaving the driveshafts unpainted, but only because I don't want to disturb the bearings. As each of them wears out I'll sort bits like that  |
| |
|
|
|
|
|
|
|
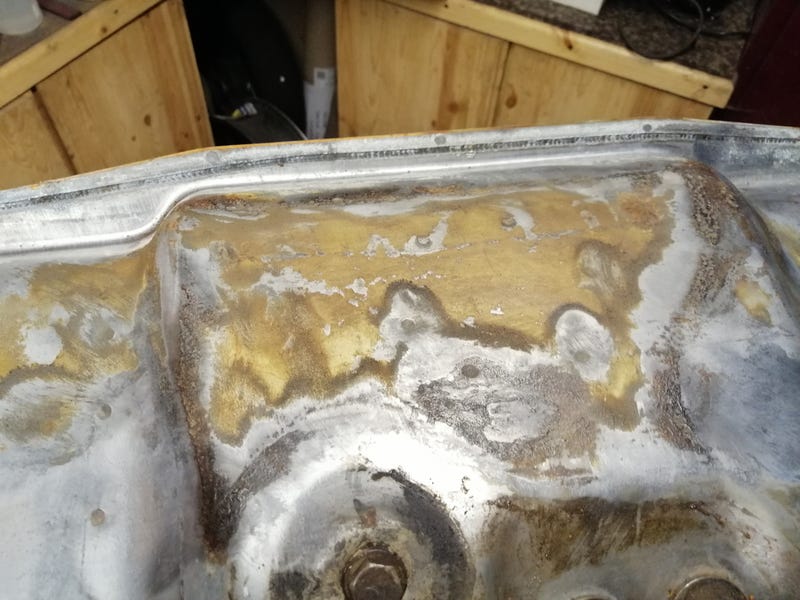
So, in this strange environment work on the Jag is proceeding depending largely on which bits have turned up in the post soonest. Learnt a lot in the past couple of days and my brain's hurting, so figured I'd list it out before it all tumbles down the memory-hole. First off, the excellent people at Simply Performance have sorted my diff and it's bloody lovely. Apparently there's more to be done to fit the 2.88 centre to the newer type casings. The later stub-shafts have an oil thrower which fouls on the early-type LSD cores. SP get round this by machining the cores to retain the oil throwers, rather than remove the oil throwers. 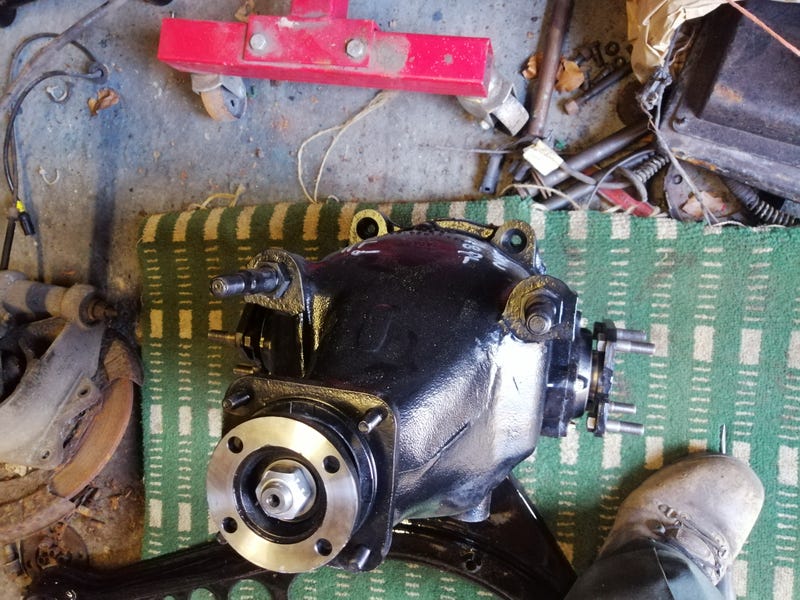 Anti-roll bar Anti-roll barNext, a simple brain teaser  '94 final year XJ40s had the X300 suspension fitted, alongside an anti-roll bar. Differences are they used different shaped cast wishbones and a different shock/spring setup. The wishbones and ARB look something like this: 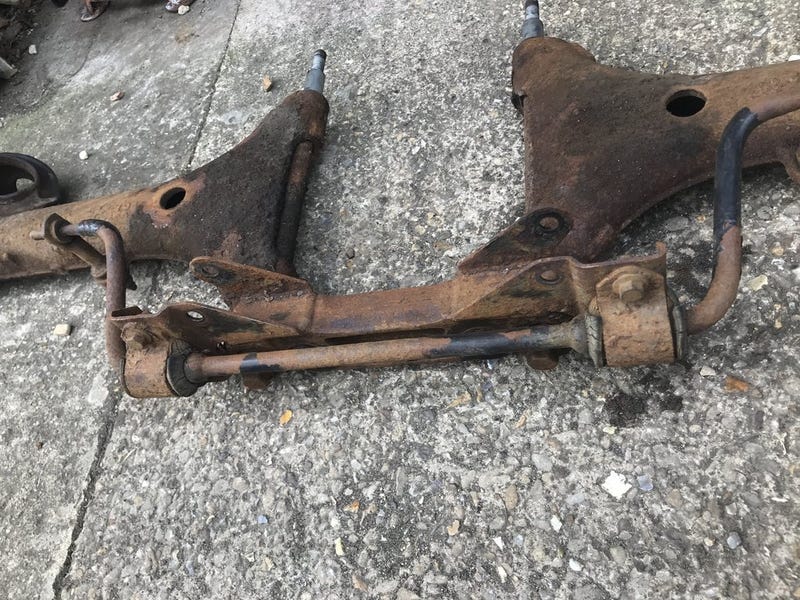 They're interchangeable with the earlier XJ40 wishbones so long as you bring the shocks and springs along for the ride too. That's the typical way of getting ARBs into most XJ40s, and improves the rear-end handling no end. However, despite them being plenty good enough for the 322bhp/378lb-ft XJR, I've never really liked the wishbone design. To my eyes, the more triangulated early wishbone design seems stronger. The issue is that they poke out behind the suspension unit and foul on the later ARB arrangement: 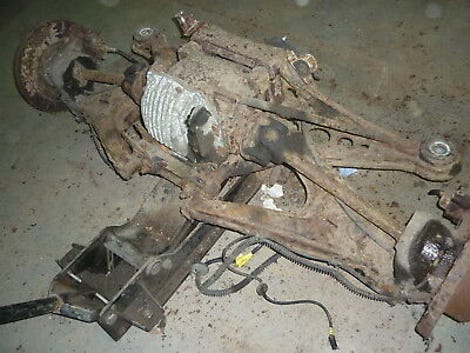 So, I decided to combine the two. Welded some captive nuts onto the a-frame so I can bolt the ARB underneath. It'll need some pretty short droplinks, but the overall suspension travel is pretty small on XJ40s so shouldn't be a major problem  just awaiting adjustable droplinks in the post  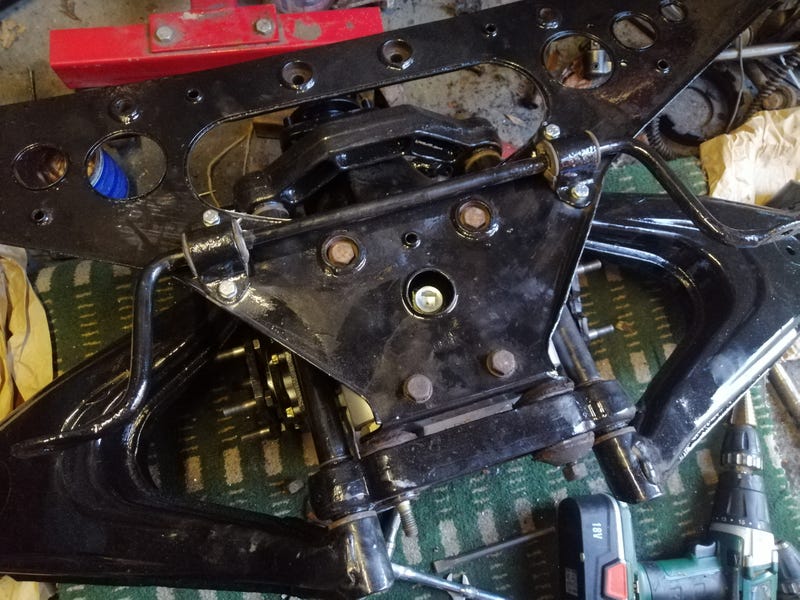 So far so good  Fuel pumps Fuel pumpsNext up was the fuel pump setup. Early cars use an external fuel pump mounted on the suspension subframe which would make the whole thing much easier. Later cars like mine have a little sump in the fuel tank and an in-tank pump. Pulled that out and took it apart and it looks like this: 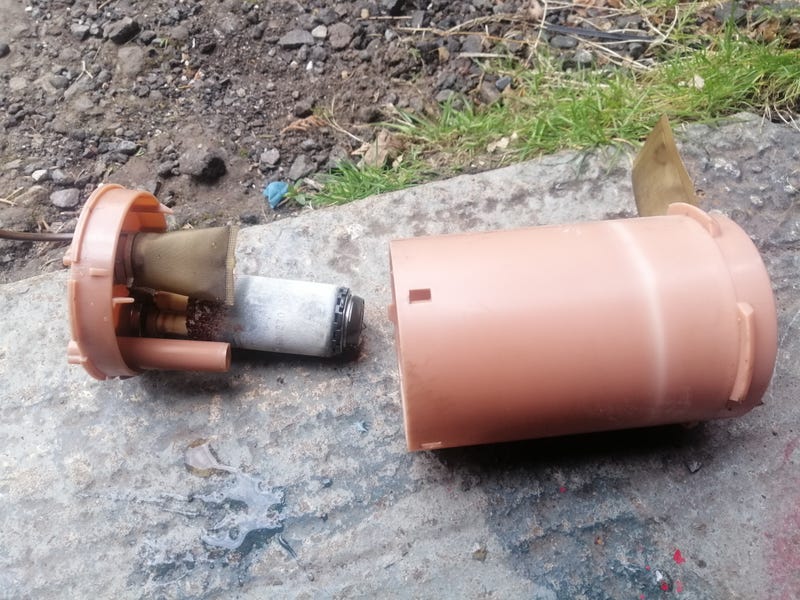 ![]() i.kinja-img.com/gawker-media/image/upload/c_scale i.kinja-img.com/gawker-media/image/upload/c_scale,f_auto,fl_progressive,q_80,w_800/vmij8atqp6p9b3azjuns.jpg[/ig] It's got a little walbro sitting inside it. 'That looks near enough to a walbro 255' I thought. It's got a 6mm outlet, but I bored out the little rubber seal it sits in and test-fitted an 8mm rod. Seemed to work fine so I ordered a pump. Turns out the 255 is a little larger than the stock pump, so there was a bit of experimentation to get it to fit. 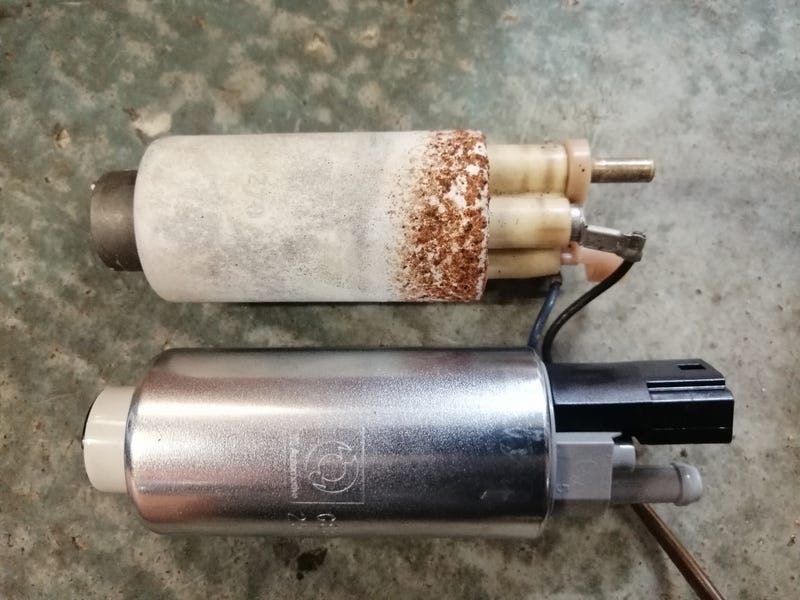 Here's a rough outline of what I did to make it fit. It's very snug, but it does clip closed (although it could probably do with a strap of some variety to stop the top popping off). I'm hoping cutting the one-way valve out won't be an issue as there's a one-way valve fitted behind the brass outlet on the sump body. 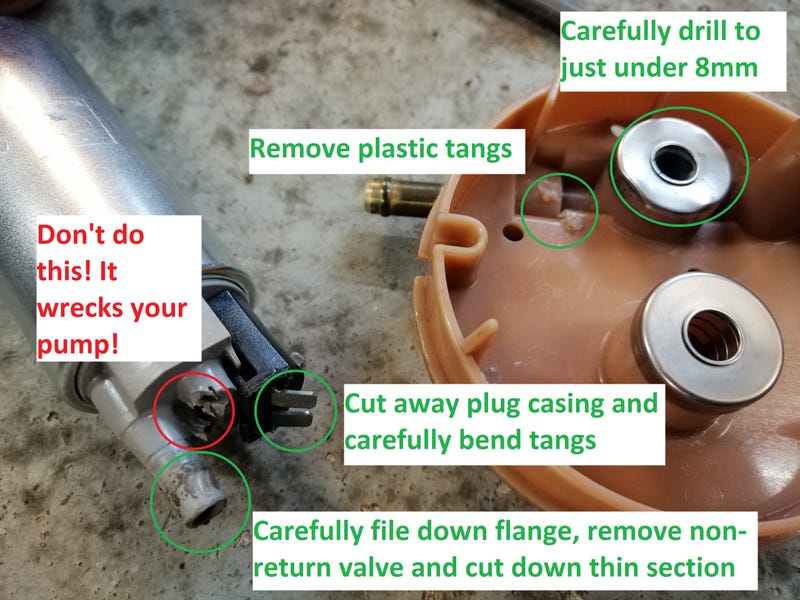 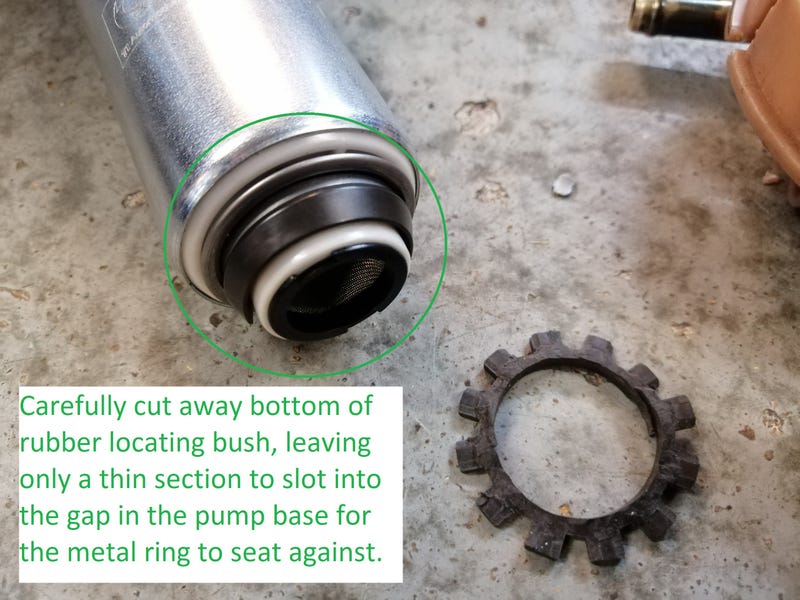 The reason for all of this is that the Jags stock fuel pump flows about 162l/hr at 3 bar. Higher performance versions like the supercharged XJR and the V12 used two of these little pumps to provide enough flow, which seems like a decent solution back in the day but you can get a lot more flow out of just the one pump nowadays. BMW 330ds have two feeder pumps, one low-pressure lift pump in the tank, and then a higher pressure pump under the car feeding the injection pump. The high pressure pump flows about 175l/hr at what I think is 3 bar. However, that pump runs at a constant 4 bar, so I need to drop the numbers across the board. What's lucky is that it seems that as far as I can tell, the vast majority of automotive petrol pumps will work with diesel no problem. What I can't find for love nor money is a comparison of flow rates between petrol and diesel. I'm presuming diesel will flow less as it's more viscous and higher density, but nothing I can find publishes both so I can compare. Closest I've found is a rough approximation that 1lb/hr of petrol is 9.95cc/min, and 1lb/hr of diesel is 9.05cc/min. Haven't got it straight in my head whether that comparison works, but that indicates a potential 10% lower flow rate (maybe). So, that puts the Jag pump at about 146l/hr at 3 bar, minus whatever it loses for working at 4 bar pressure. Can't seem to find reliable info on what the BMW injectors flow, but that's starting to look a little marginal. Hence the over-specced walbro 255 to act as a single lift pump and make sure it will always get as much fuel as it needs. That's if diesel is actually pumped at a lower rate than petrol by positive displacement pumps. Haven't come across anywhere that says that, just assuming. If anyone knows I'm all ears! The quandryUnfortunately, I can't seem to work out what would be the best option to go with. There are a few different setups I can think of: Walbro->injection pump Jag pump->injection pump Jag pump at 1 bar->BMW pump->injection pump Honestly can't work out what would be best... |
| |
|
|
|
|
|
|
|
Angst over, I think I've cracked it  In my 3-day search for the vernier calipers I came across the old walbro from the Fiat. Lo and behold, it's ever so slightly different. The Fiat's pump is a genuine walbro, whereas the one I bought for the Jag is a TI Automotive pump. From what I gather one of TI Automotive and walbro owns the other, and yet the pumps are subtly different. 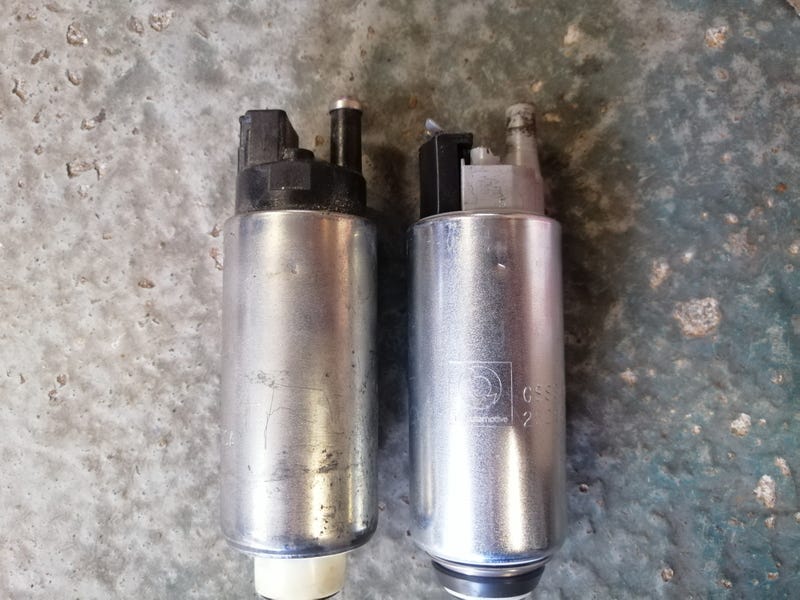 The bodies are the same, but the pins for the genuine walbro plug are deeper set, the non-return valve is held in by a metal sleeve, and the other bits on the top are generally a lower profile. These subtle changes add up to it being simpler to fit inside the Jag sump, and the lid clicks down without any issue. Here's the procedure: 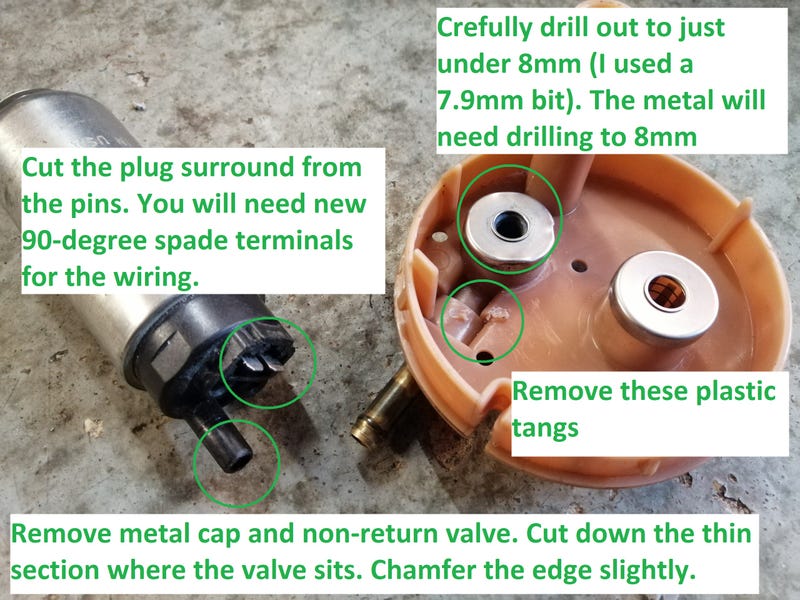  I'm not even sure the cutting of the lower rubber bit is necessary with this one, will test that one later. I'm also not sure about the drilling of the seal that the pump fits into. It's a snug fit, but there are scores in the side of it. If I end up getting another sump I might just see if I can get the 8mm outlet to fit into the seal unadulterated. So, the plan is now in-tank walbro directly to the BMW high pressure injection pump  one more thing planned out! |
| |
|
|
|
|
|
Apr 14, 2020 13:15:32 GMT
|
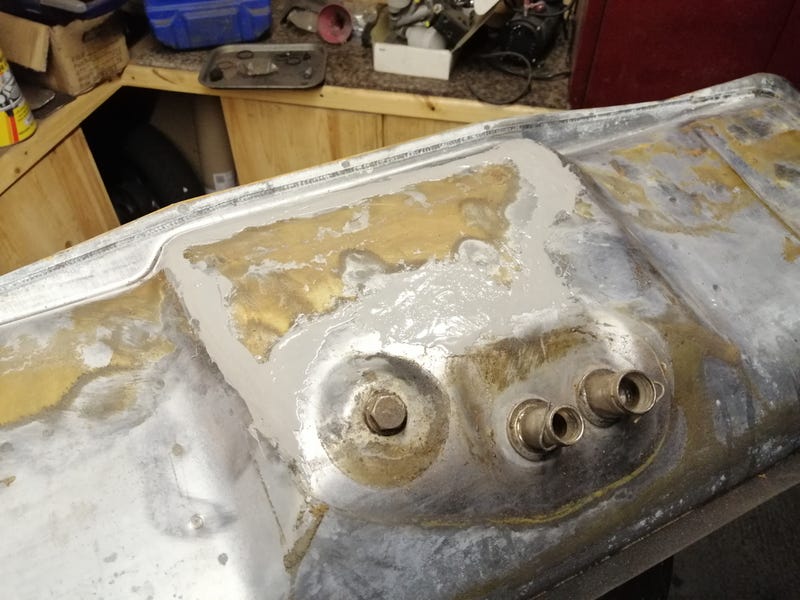
Couple of steps forwards on the Jag  Adjustable droplinks arrived for the ARB so got to making some brackets. Tested it out through a range of motion on the wishbones it seemed to be alright. The lower balljoint does bind at full suspension droop, but the shocks should stop the wishbones before they hit the a-frame when it's all bolted up so it should be good. 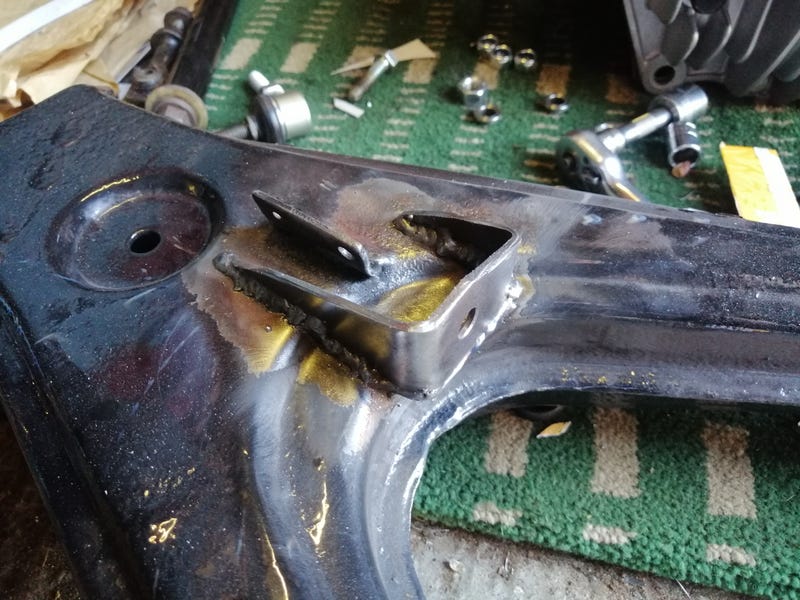 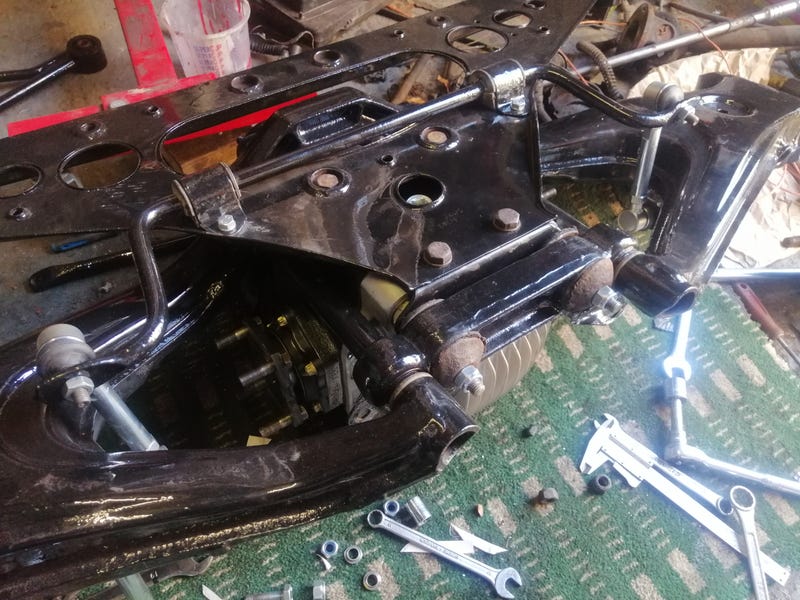 Next up were the crusty compliance buffers on the wishbone tie at the back. They're little metal cones which in XJ40s and X300s have a rubber bush on the back and help locate the wishbones and the rear subframe mount. Unfortunately they're NLA and mine were a bit worse for wear. The X308s replaced them with solid mountings, and you can buy solid spacers as replacements which are both annoyingly pricey options. A bit of measuring showed the compressed rubber on mine was 1.6mm, so some 1.5mm steel shims to replace the rubber should work (with the extra difference being made up by the rubber wishbone bushes). 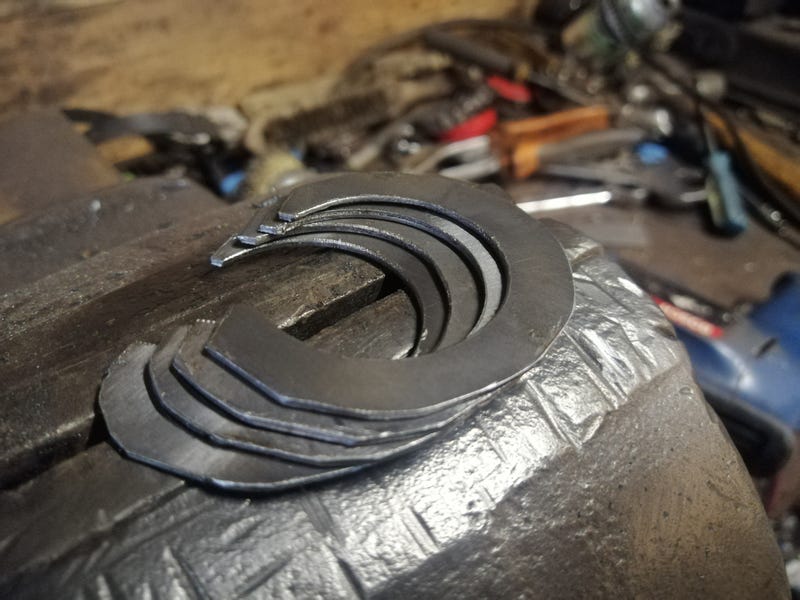 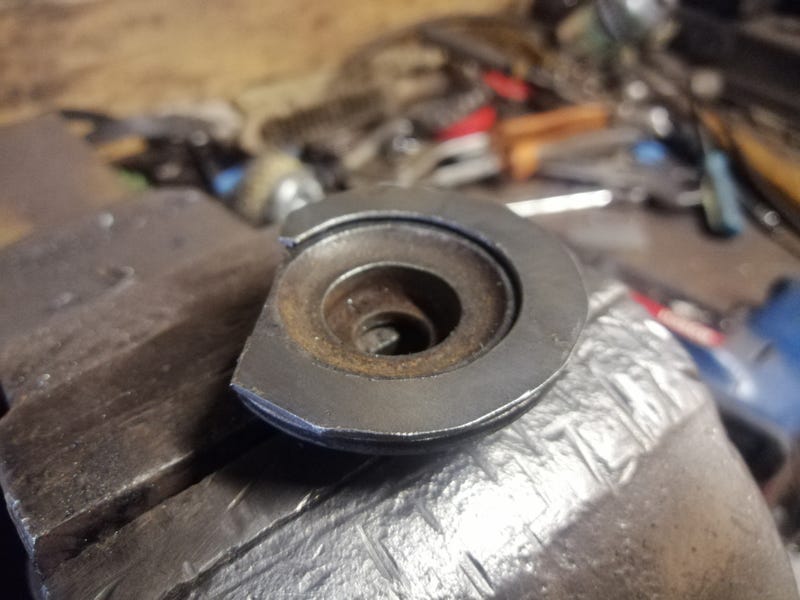 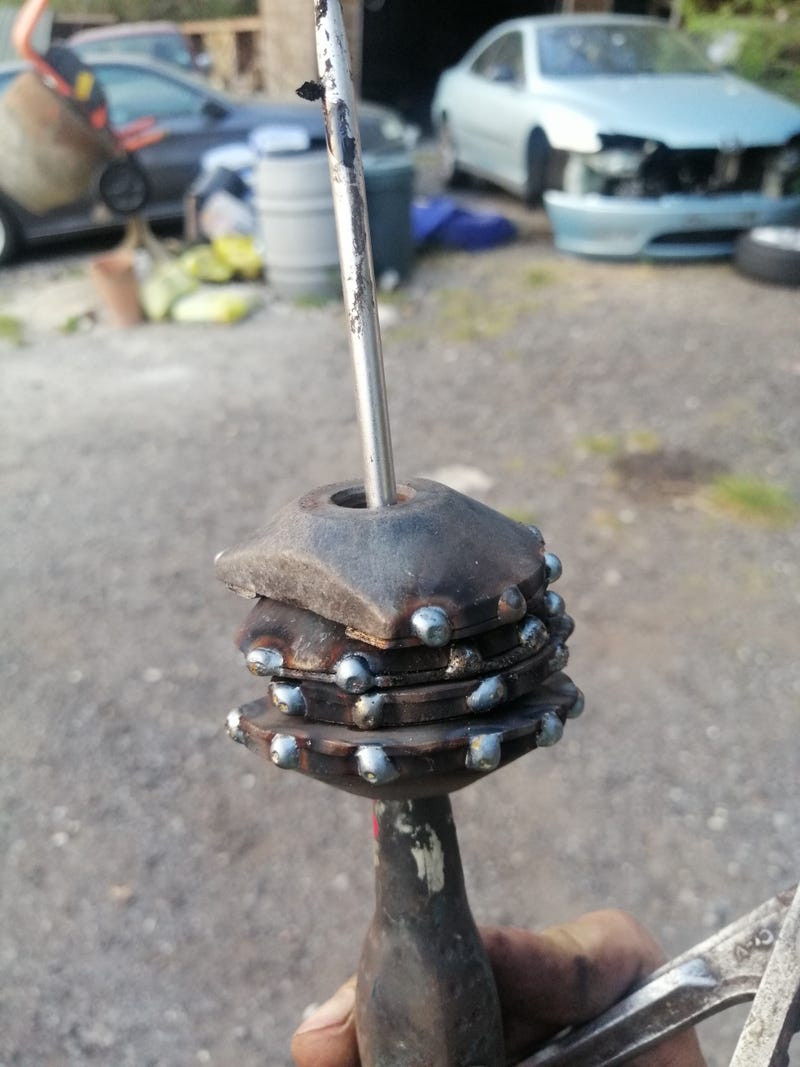 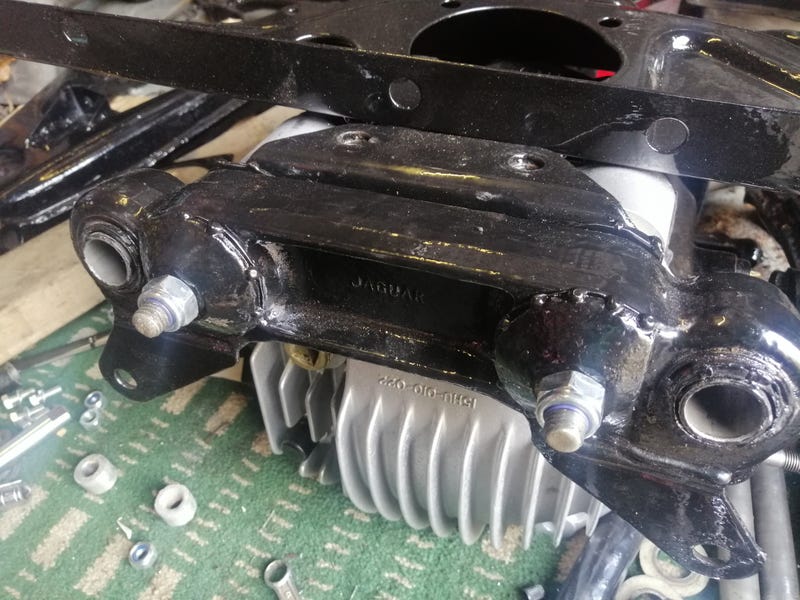 I'll check to make sure everything's still going to plan at the back after some driving, but seems good to me  if anything does look funky, I had an idea to get some solid bushes machined that can be pressed into place. Have most of the measurements for that if anyone wants to test it out. Was thinking a stepped tube with these dimensions: Overall length: 52mm ID: 20.5mm Inner step OD: 36.8mm Outer step OD: 55mm (with one side cut off, a la the original buffers) Outer step length: 11.5mm On another note... 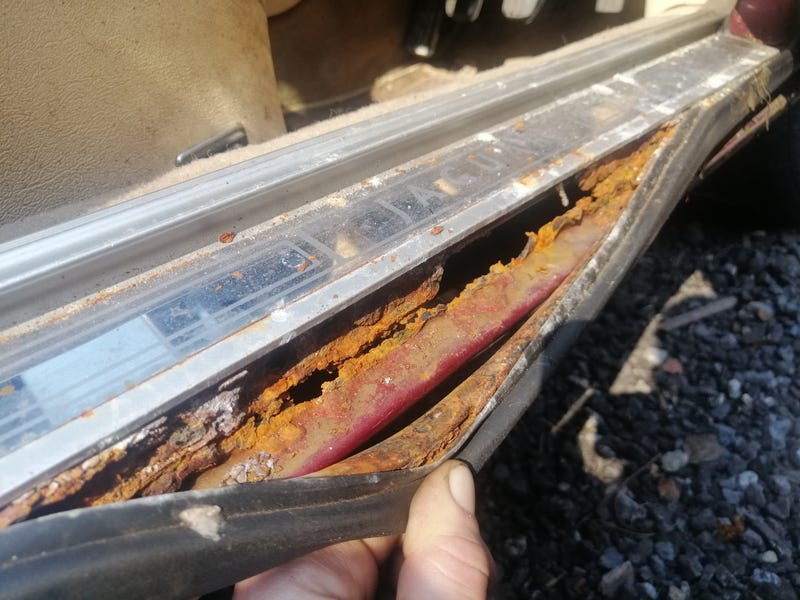 ...aah what's that?! Turns out a little poke with a screwdriver at a bubbly bit of paint has exposed quite the rusty sill. 3/4 door shuts seem to have disintegrated a bit, but the rest seems in good nick. One done so far: 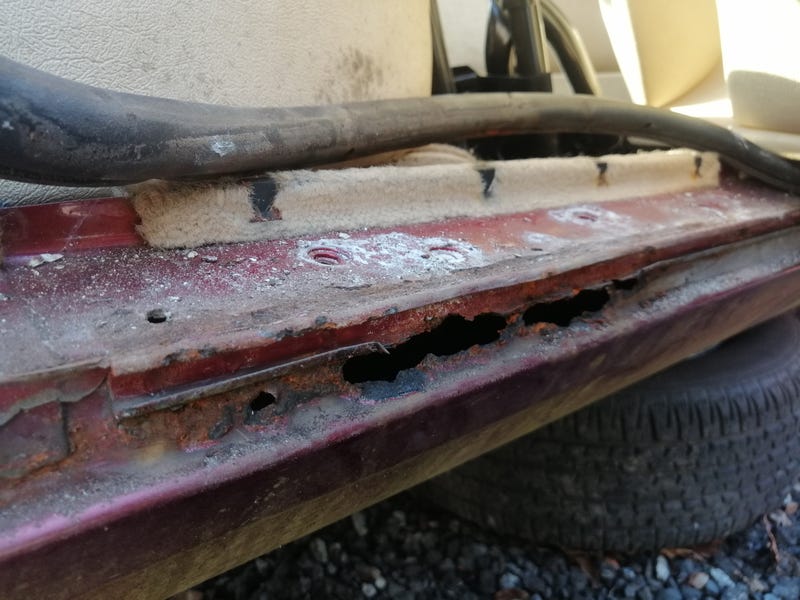 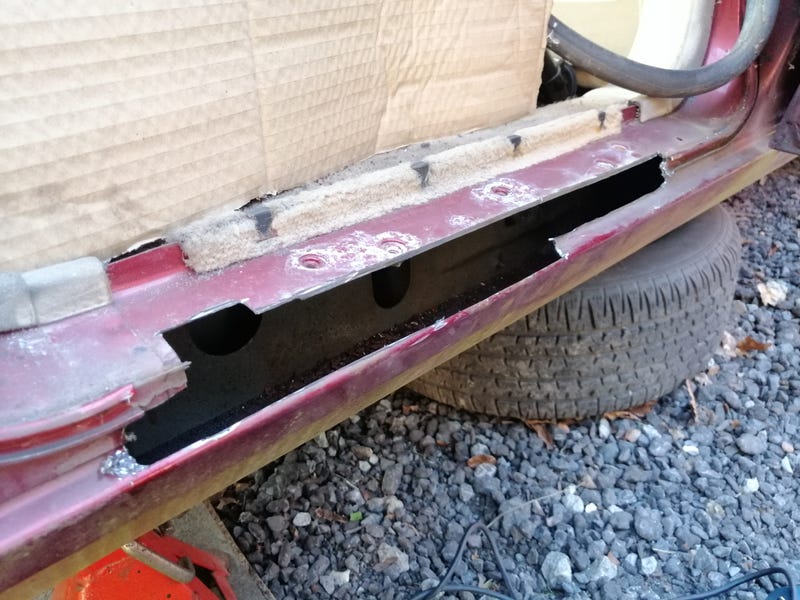 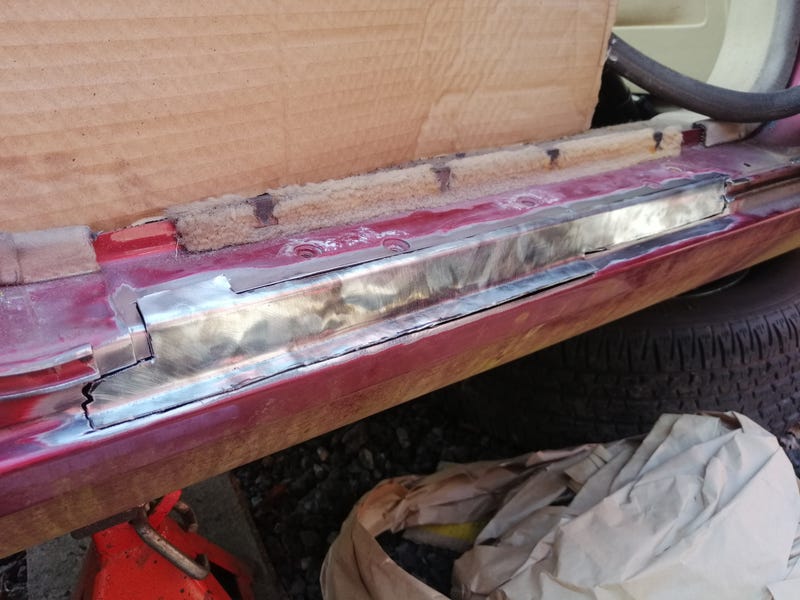 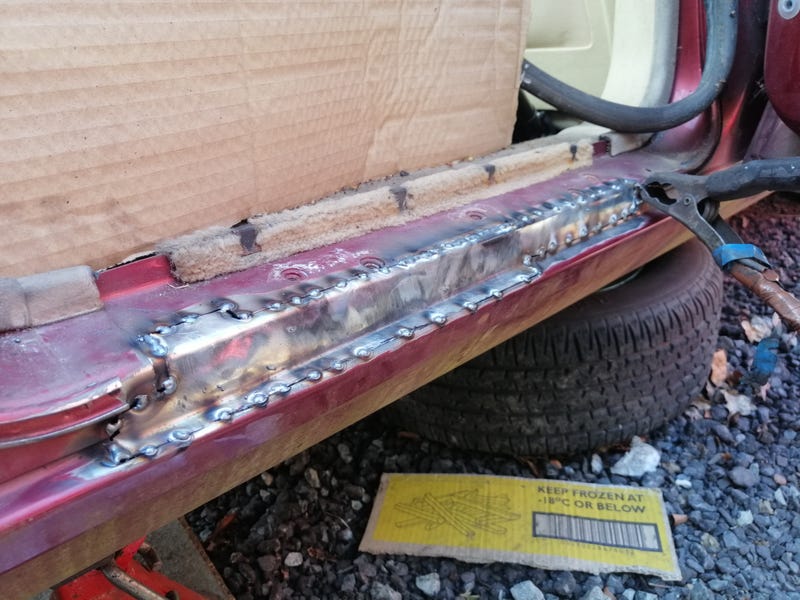 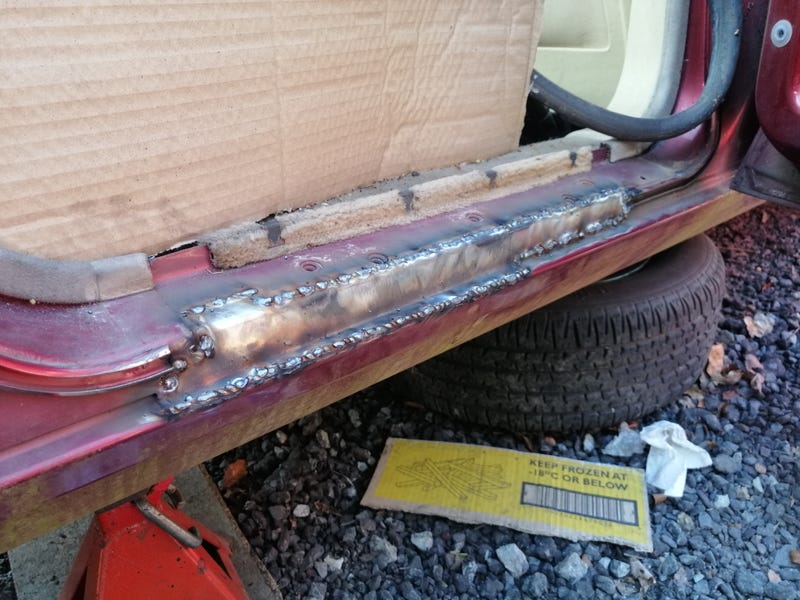 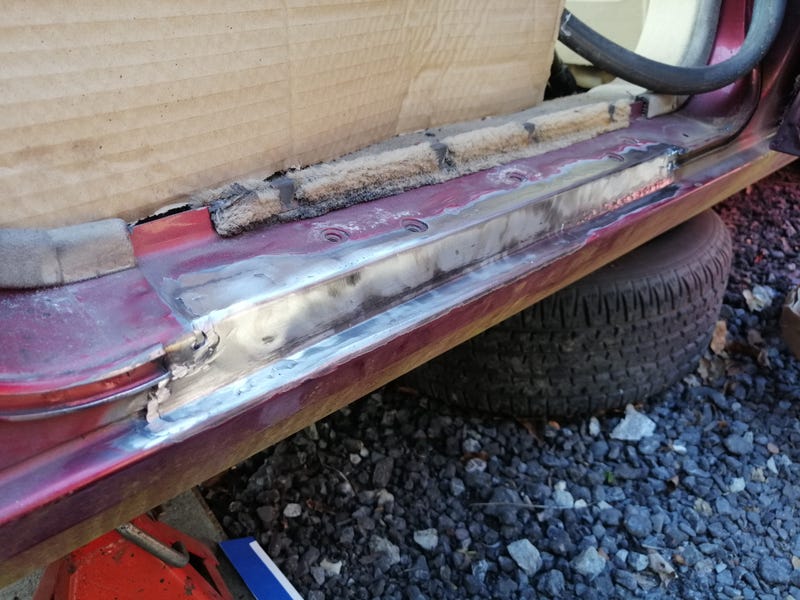 Also had to re-make the little channel that the door seal sits in, which involved beating a strip of metal over some conveniently sized screwdrivers  spot-welded in place and sealed with seam sealant to hopefully prevent something similar happening again (I reckon water capillary-actions up behind the channel and rots it out from there). 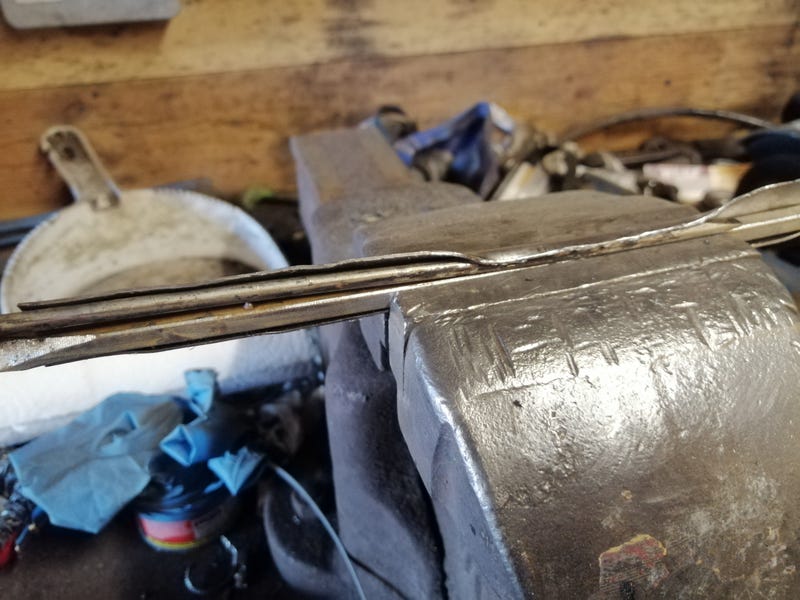 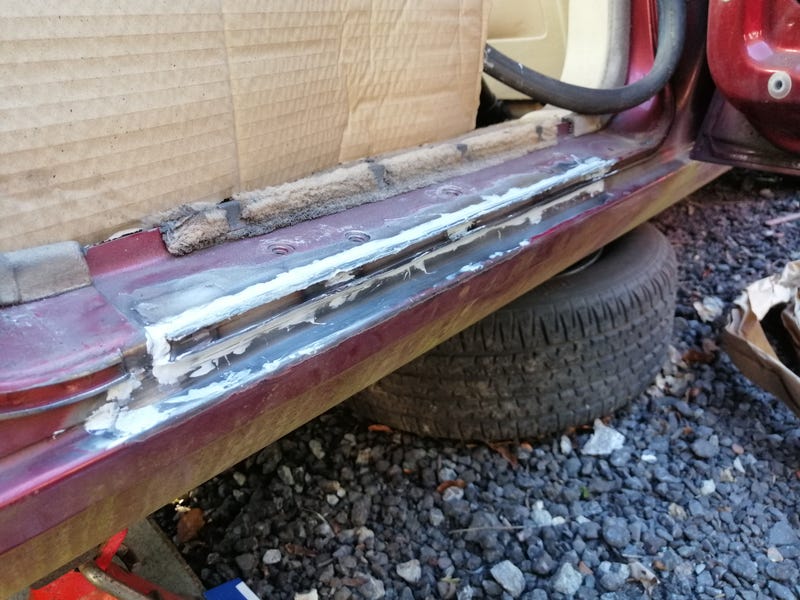 Oh, and painted a fuel tank  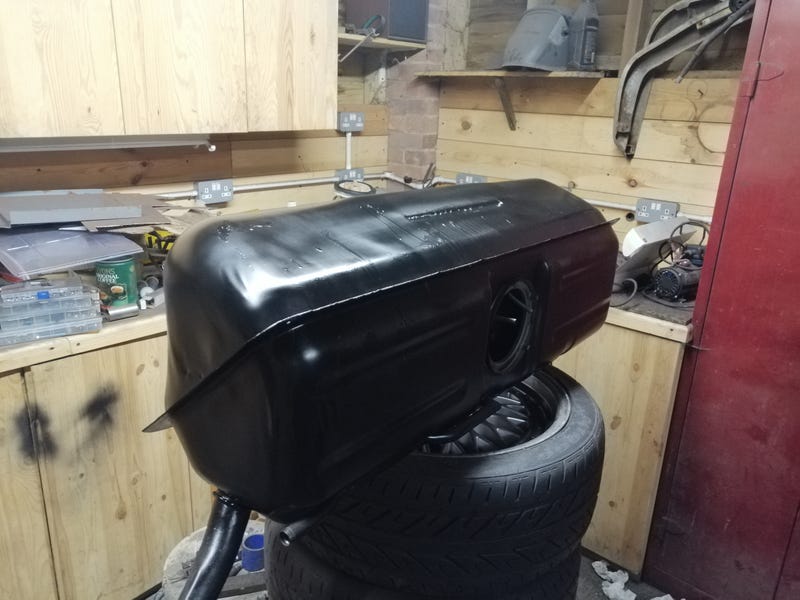 It's been a productive bank-holiday weekend  |
| |
Last Edit: Apr 14, 2020 13:42:19 GMT by biturbo228
|
|
goldnrust
West Midlands
Minimalist
Posts: 1,887
|
|
Apr 14, 2020 18:07:59 GMT
|
|
I was worried for you when I saw that rust picture! Seemed to make light work of it though! Seems unusual to have an isolated spot of rust just there?
|
| |
|
|
|
|
|
Apr 14, 2020 21:57:54 GMT
|
Thanks  yeah it is an odd place to get rust. By and large these cars are good, but they seem to have some real rust traps. Nearly all of the door shuts have gone really badly in isolated areas, and there's a piece of trim at the base of the c pillar that always goes on these. Wasn't too tricky of a replacement panel, so hope the rest are similar  |
| |
|
|
|
|
|
Apr 20, 2020 10:15:09 GMT
|
Not a great deal of progress recently, but the bits arrived to sort the fuel pump wiring. Put two 90-degree low-profile terminals on as the standard wiring has one that's a bit bulky and another that's a small-sized terminal. Had to isolate them with some fuel-resistant heatshrink as they're a little close together, but went ok  Also added some hylomar blue into the rubber seal to take up the space where the drill had scored the rubber. Probably not necessary, but I was regretting drilling out the rubber. Still, all fits together neatly enough  interested to see if it works! 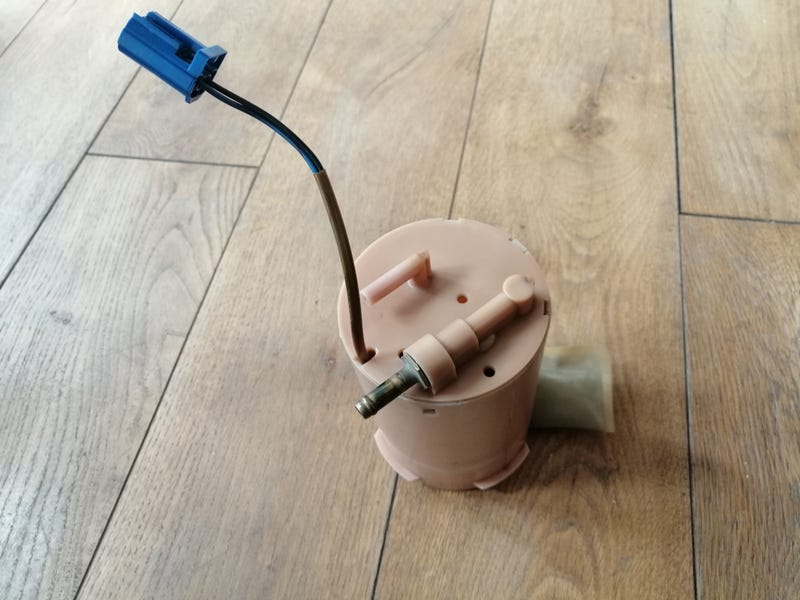 |
| |
|
|
smart
Part of things
 
Posts: 134
|
|
Apr 20, 2020 12:13:44 GMT
|
|
Love what you are doing to the XJ40! Think you maybe creating my perfect car? keep up the good work
|
| |

1998 Rover 400 Derv |
|
|
|
|
Apr 20, 2020 18:01:10 GMT
|
Thanks man! I was thinking it would make a hell of a combination. Eventual power goals of ~350bhp, but 40ish mpg so it should cruise like no other Jag from its era. With its 89l tank it should have an average range of nearly 800 miles, plus enough torque to lift tarmac  Current plan is get the engine in and get it running, hopefully with the existing remap. Then I'll start looking into bigger power  |
| |
|
|
|
|


