mk2cossie
Club Retro Rides Member
Posts: 3,060  Club RR Member Number: 77
|
|
Oct 25, 2019 16:27:44 GMT
|
biturbo228 if it's any help, my fuel setup only has only got the fuel tank feeding straight into a Bosch high pressure fuel pump. That has been fine for me for god knows how many years now, and the fuel starvation issues from turning left have been cured with decent baffles and o e way valves in the tank itself 
|
| |
|
|
|
|
ndg
Part of things
 
Posts: 109
|
|
Oct 25, 2019 20:13:04 GMT
|
|
In my GT6 I had a small (maybe 0.5l) swirl pot upstream of the pump with no lift pump. That was running PI mechanical injection and drank like a fish so I think you'll be all right.
Bear in mind that if your using fuel at a significant rate the pump will lower the pressure in your sump/pot and pull fuel down as well as relying on gravity. You need to ensure that there's enough volume for a long bend (1.4l seems like more than enough) and I'd look at how the TR6/2.5PI are plumbed as I remember there being a separate house to bleed air from the swirl pot back to the tank on my system.
|
| |
|
|
scimjim
Club Retro Rides Member
Posts: 1,503
Club RR Member Number: 8
|
|
Oct 27, 2019 18:28:05 GMT
|
|
|
| |
Last Edit: Oct 28, 2019 19:17:51 GMT by scimjim
|
|
|
|
|
Oct 28, 2019 16:09:31 GMT
|
Thanks guys, been doing some more thinking about the fuel tank. Might have identified a place for a low pressure pump to sit tucked out of the way, but I've also done a bit of measurement of the space I have for a tank. Rough calculations, but if I make good use of the space I reckon I could fit a good 45l tank in there which would be plenty enough to have an in-tank setup for at least a low pressure pump. Now I just have to decide if I think it's necessary for the weight it adds. Probably, but worth some thinking! Oh, and scimjim I think the link to the 126 tank's not working... |
| |
|
|
scimjim
Club Retro Rides Member
Posts: 1,503
Club RR Member Number: 8
|
|
Oct 28, 2019 19:19:18 GMT
|
Oh, and scimjim I think the link to the 126 tank's not working... not sure why, but I’ve edited it to leave the raw link - bottom of page 6. |
| |
|
|
|
|
|
Oct 29, 2019 13:43:20 GMT
|
Thanks man  can see it now. Very interesting. Doubly so because I've found out my current setup still won't fit, even with banjos feeding and exiting the walbro pump. So, I've been looking at designs for in-tank baffles and sumps as I think there's some unused space between the bottom of the fuel tank and the chassis for a bit of a triangular one. I'll likely keep the fuel pump and filter down under the car, but removing the sump should give me enough space for them both. Swapping to a sytec pump should also help with the feed situation as they've got 15mm inlets rather than the 10mm inlet of the walbro which I reckon is a cause of some of their issues with requiring lift pumps. |
| |
|
|
|
|
|
Oct 29, 2019 17:32:44 GMT
|
|
If you use a production pump/ sender / swirl pot I don't think you will need any baffles, the one I am familiar with is a transit, they have a massive flat tank with the sender assy placed in the centre, the swirl pot holds about a litre of fuel.
|
| |
|
|
Darkspeed
Club Retro Rides Member
Posts: 4,878
Club RR Member Number: 39
|
|
Oct 29, 2019 17:53:11 GMT
|
|
It may be worth having a look on ebay at "in tank fuel pump assembly" and choose one for your potential rated output - although most have a generic pump with more capacity than most engines require - many of these assemblies can be adjusted to suit different tank depths or buying one and having a look at OEM designs that have to work even when run on a few litres splashing about in the bottom of a tank.
|
| |
Last Edit: Oct 29, 2019 17:53:31 GMT by Darkspeed
|
|
|
|
|
|
|
Thanks guys  I think due to the weird shape of the tank to clear the access hole for the transverse leaf studs a production in-tank pump assembly is out. I could put it on one side of the tank I suppose, but if I'm making my own tank I've been coming round to the idea of gated baffles and a small sump at the bottom of the tank. Here's a quick CAD mockup of something that should clear the roll hoop, but makes good use of the space apart from that. 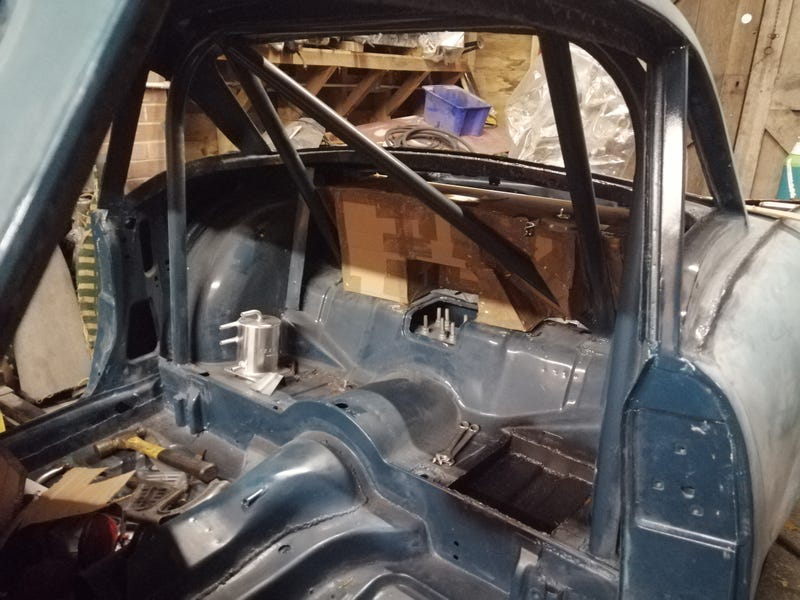 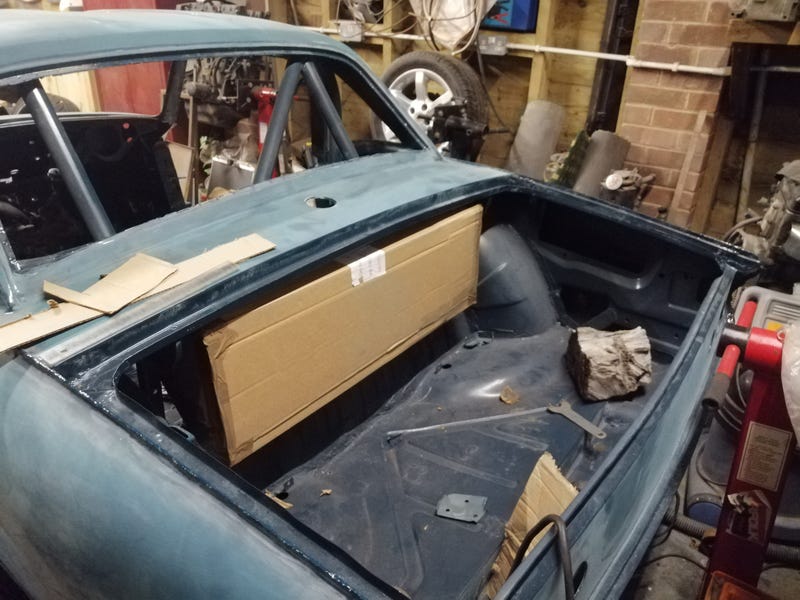 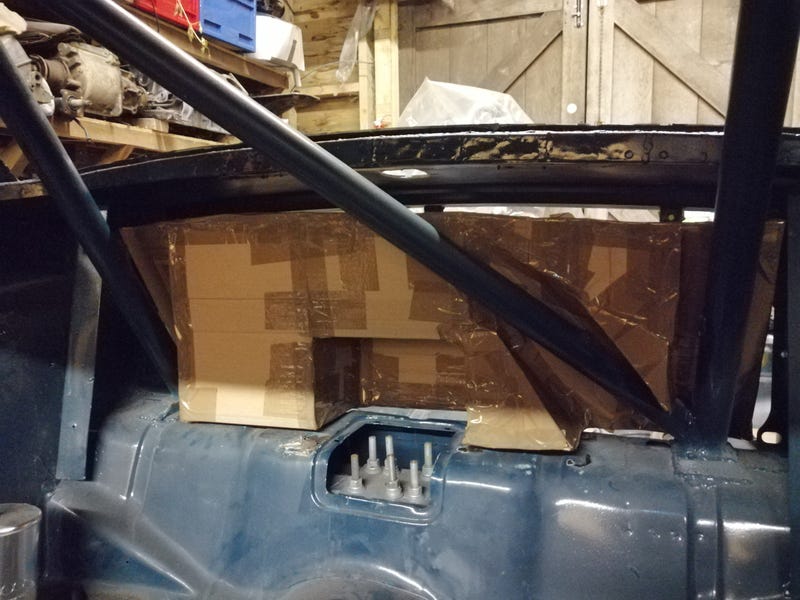 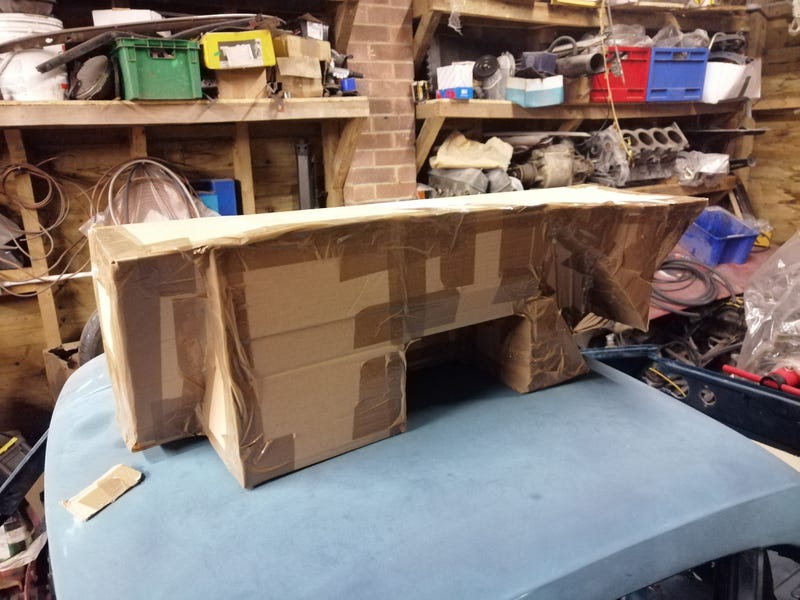 Some quick calculations show it's about 43 litres, plus however much ends up in the sump. Decently bigger than both the stock Spitfire tank and the GT6 tank (both around 33 litres). Should keep up with whatever thirst the 2.5l ends up with a bit better  Any ideas about design before I start making it out of 0.9mm steel? Ally would be nice, but still don't have an AC TIG setup so the first version will need to be in steel. |
| |
|
|
|
|
|
Nov 25, 2019 12:19:04 GMT
|
Spitfire updateSo, I've started making the fuel tank but not a great deal of progress. Bought an eBay bead roller which works a treat but bends to a worrying degree in use so will need some reinforcement. Will grab some pics when it looks like a bit more than a flat sheet of metal with some creases in it  X1/9 update X1/9 updateSo, leakdown tester arrived. Tried it out but didn't read the instructions so managed to junk the bellows (dolt). Luckily, my aircraft mechanic mate came to the rescue and lent me a set they use to test piston engined aircraft (with firm direction to read the instructions!). Put 80psi into the cylinders and got 76psi (cyl 1), 68psi (cyl 2), 66psi (cyl 3) and 78psi (cyl 4). So leakdown percentages of 95%, 89%, 83% and 98% respectively. Apparently while they wouldn't necessarily be happy with the spread between 98 and 83, the absolute figures would still be airworthy. No particularly loud hisses from the inlet or exhaust, and couldn't hear any bubbling from the coolant tank so don't think it's valves or headgasket to the water jacket. Did sound pretty hissy from the crankcase so best bet is rings. Also tried listening to the sparkplug hole in the adjacent cylinders but decided it wasn't really possible to distinguish between two sets of leaky rings and one dead headgasket. Any other ideas for testing if the headgasket has gone between the two? If I can work out it's alright I'll probably run it on slightly worn rings for a while until I've saved up for rebuild stuff  Next job was to look at the overheating after a long run on the motorway. While it might still be a leaky headgasket, another idea I had was that the water pump end-clearance might be off with gasket+sealant+manufacturing tolerances. If that's the case that might explain why it can keep cool with the revs up but overheats when idling. Pulled the pump off and found the clearance was probably a bit big. Difficult to measure as the surface is curved, but the Haynes states 0.8-1.3mm and it was between 1 and 1.5ish depending on which vane I was measuring. 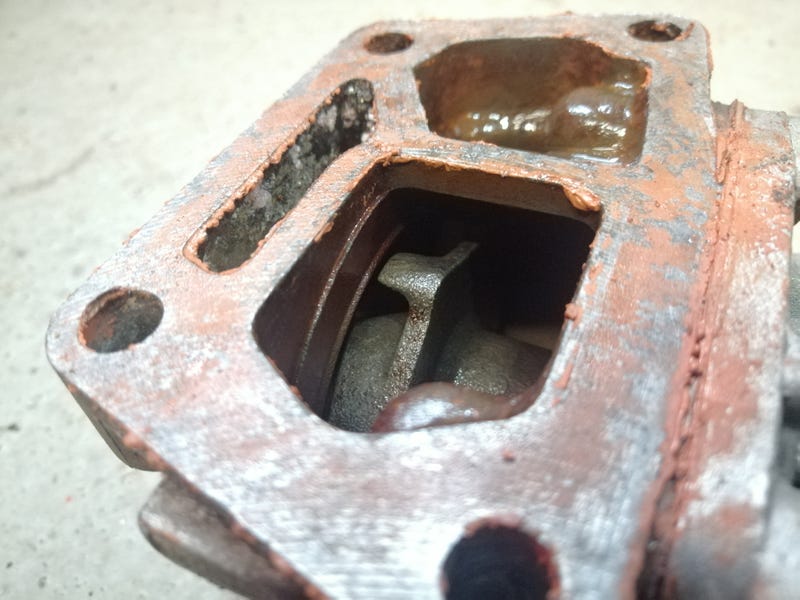 So, did away with the gasket and went for just sealant, and ground the vanes until there was a 0.5mm clearance on all of them (there's a good 0.6mm difference between the biggest and smallest vanes). 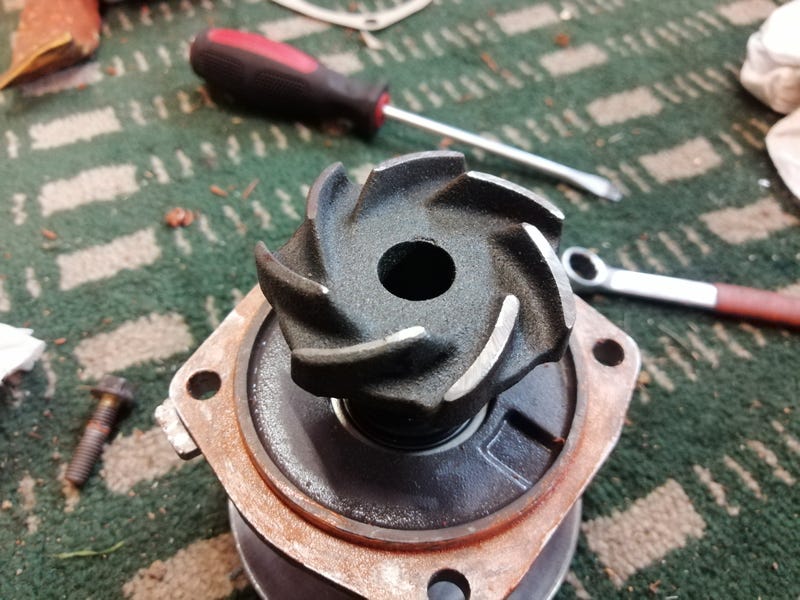 Might be a little tight even with the sliver of sealant spacing it out, but it doesn't touch even when hot. Quick test run seems to show an improvement, but without a long motorway run I can't be sure if it's worked 100%. Still, one possible cause crossed off the list 
|
| |
Last Edit: Nov 25, 2019 12:19:42 GMT by biturbo228
|
|
|
|
|
|
|
Nov 29, 2019 15:44:25 GMT
|
Next scattergun approach to projects, back to the Spitfire! Pieced together a few more panels for the fuel tank to test if it still fits. Bead roller works fine even without reinforcement as it doesn't seem to bend past its elasticity. Could still do with some angle-iron welding on though. 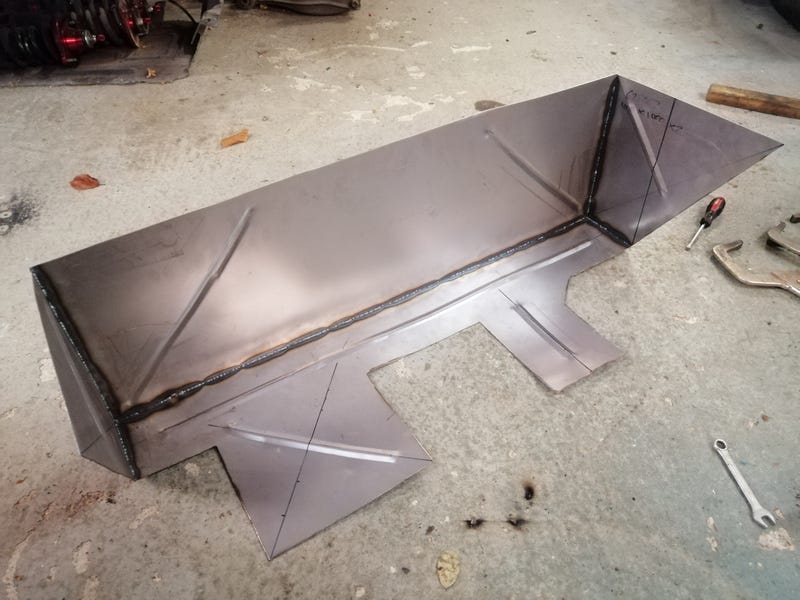 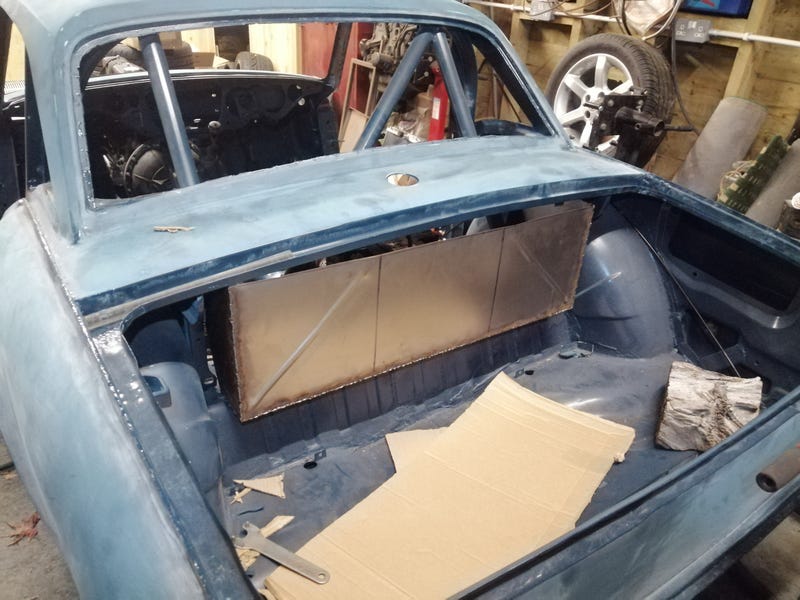 Next up, convoluted front panel. Then I can test to make sure I can get my hand in above it to do up the filler hose before I make the top panel. Also to make: baffles, trapdoors, sump, mounting points, level sender hole, inlet tube, vent tube and earth strap. Oh, in terms of IVA requirements, does anyone know whether I'll need a proper steel bulkhead welding between the tank and the passenger compartment? One option was to make up a removable aluminium panel, but that would probably need to be in a few parts to work around the roll hoop which makes a weld-on bulkhead a bit more appealing. |
| |
|
|
|
|
|
Dec 13, 2019 11:17:02 GMT
|
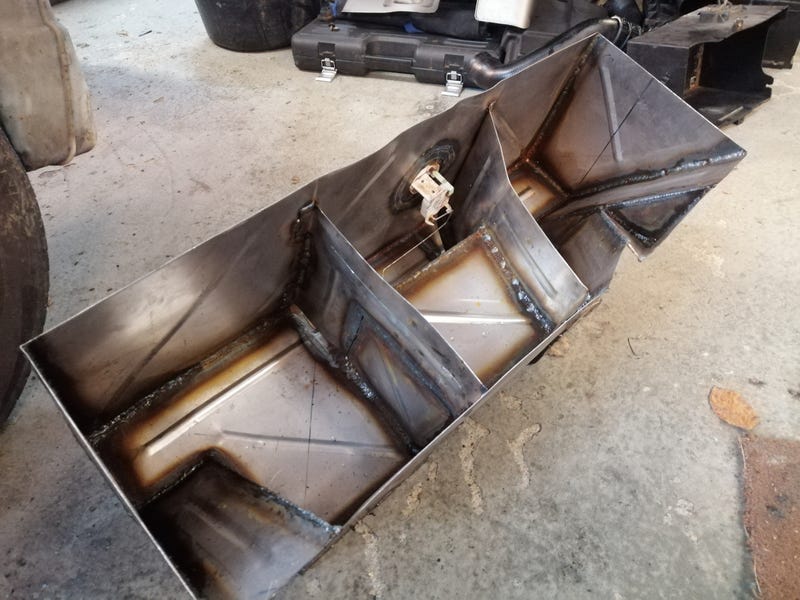
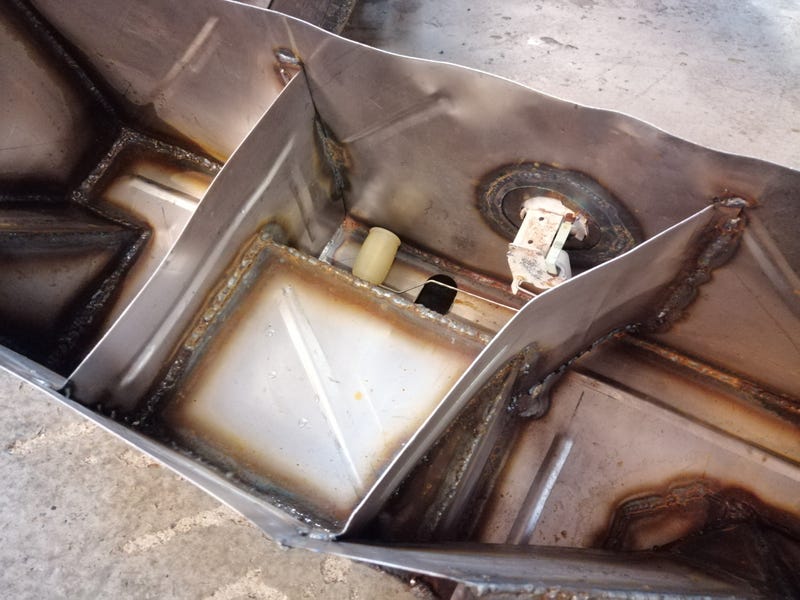
Been chipping away at the convoluted fuel tank and got to the point where I've got the lower tub sorted. 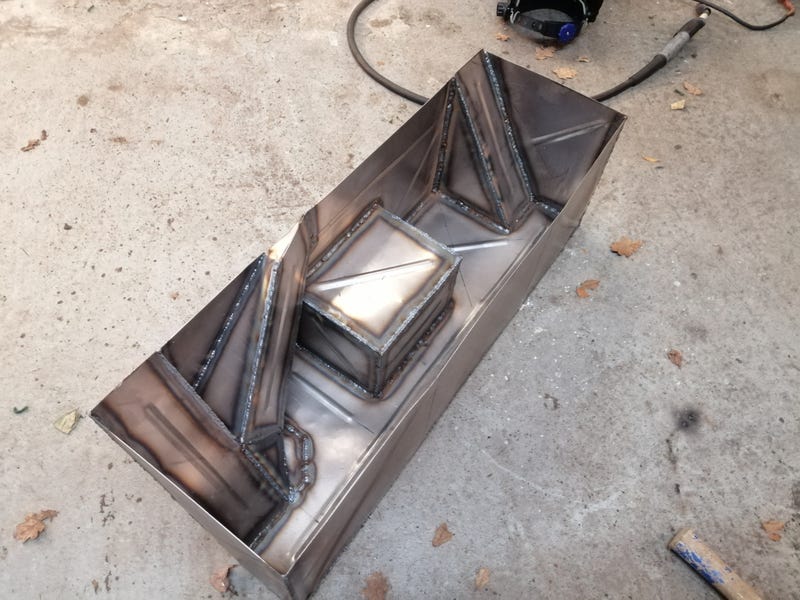 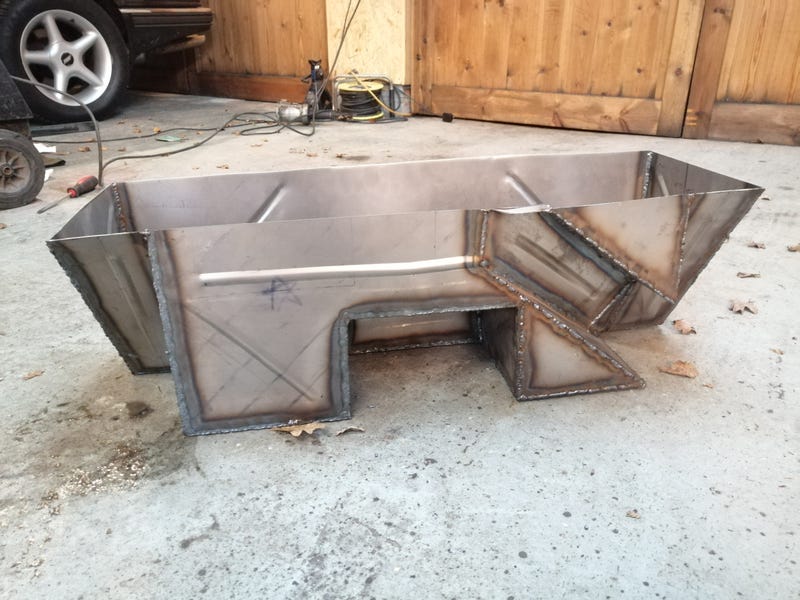 Leaks like a sieve at this point, but will steadily patch up all the holes in the lower section. Still to make: gated baffles, sump, hole for fuel sender, top panel, inlet, vent, and mounting brackets. |
| |
|
|
|
|
|
Dec 17, 2019 16:14:06 GMT
|
|
|
| |
|
|
|
|
|
Dec 17, 2019 17:29:46 GMT
|
|
That's quite a construction. I'm impressed. I'll be way beyond impressed if you can get it leak-tight with MIG with that much weld-length...… And water-tight is definitely not the same as petrol-tight...….
Watching with interest - may the Force be with you!
Nick
|
| |
1967 Triumph Vitesse convertible (old friend)
1996 Audi A6 2.5 TDI Avant (still durability testing)
1972 GT6 Mk3 (Restored after loong rest & getting the hang of being a car again)
|
|
|
|
|
Dec 17, 2019 22:31:12 GMT
|
You and me both on the leak-tightness. It's been much more of a challenge than I'd thought. I'd put it down to the butted construction and thin sheet meaning it's tricky to run a continuous seam. Perhaps it's easier with TIG as you can gloss back over with the torch and melt everything together afterwards. Still, will be sealing the inside of the tank with some POR-15 fuel tank sealer I've got knocking about, and there's always PRC if that fails  Currently awaiting some banjo fittings so I can do the feed and return pipes, then I think it's ready for paint and sealing up  |
| |
|
|
|
|
|
Dec 31, 2019 11:24:56 GMT
|
Latest updates  Welded on some mild steel banjo fittings to the bottom of my tank. Had some packaging issues with the original plan of just having barbed fittings poking out of the side (exited directly into the spring), so I thought I could fit some banjos pointing sideways which will run into some bulkhead fittings and then off under the car. Should make it a little easier to remove the fuel tank in future. Thought about welding some threaded bungs in to bolt the banjos on, but figured one fewer place for leaks was worth it. Also welded up some mounts  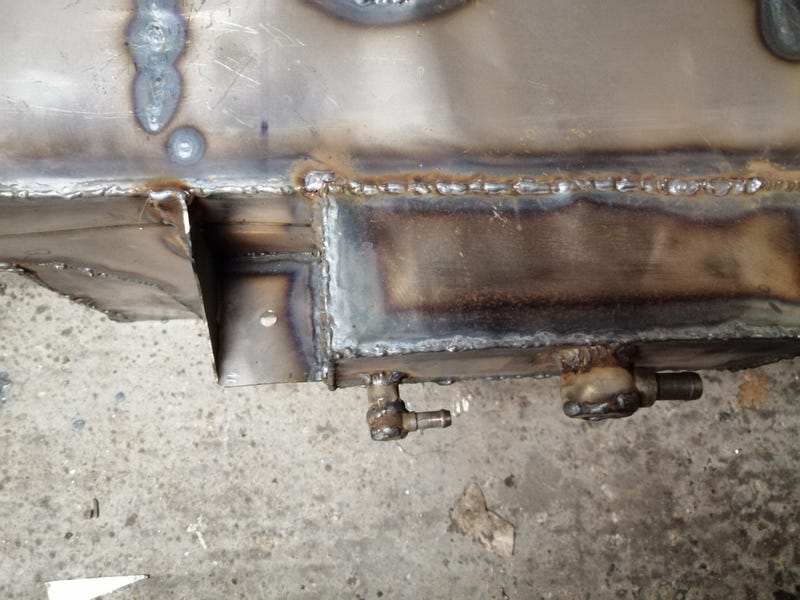 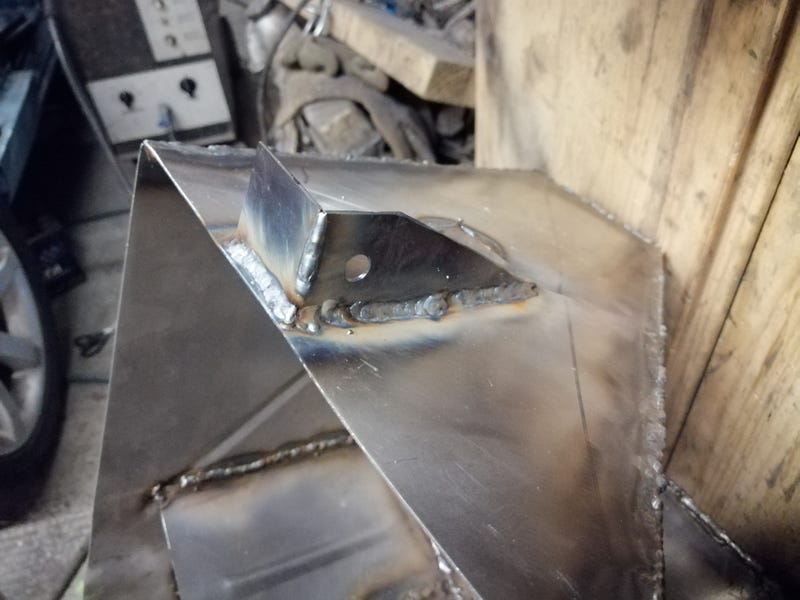 Next step was to sort the fuel filler. I wasn't convinced the stock filler would pass IVA so I came across an IVA-friendly aero-style fuel filler. Clearance is pretty tight above the tank so it needed cutting down to about half the barbed length, and the cap will probably need to be removed to get the tank out. There's also probably not enough space to get a hand and a spanner in to hold the teeny tiny M3 nuts once the bulkhead is in place (and the thought of dropping them while trying to do them up gives me nightmares!). If I hadn't already fillered the rear deck panel I'd just weld captive nuts in, but decided to go for a little captive nut ring which works quite neatly  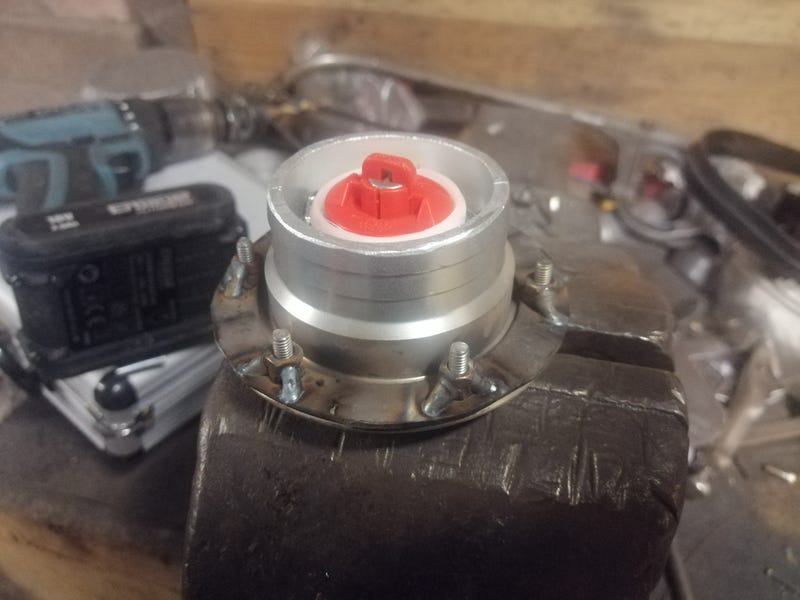 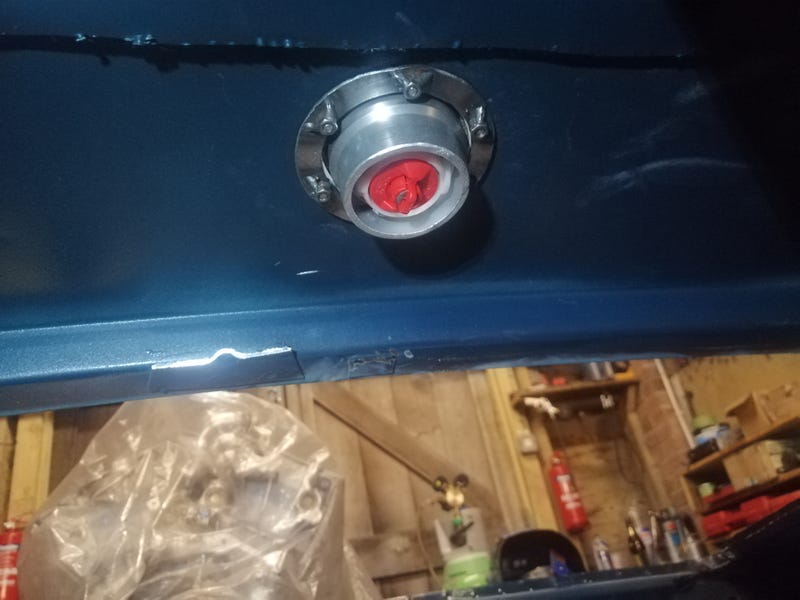 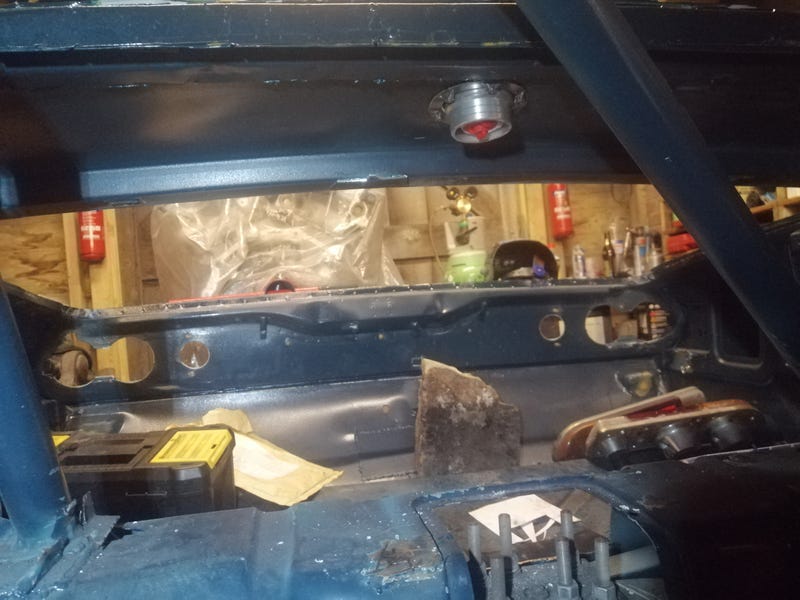 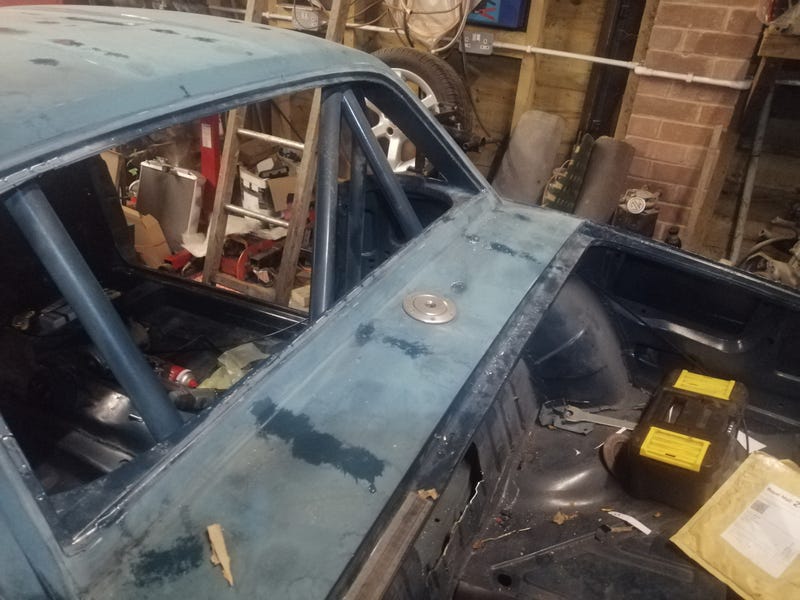 Lastly, my mate's bought a car and I'm dead jealous (not least because it actually works at the moment!). Some pics from the eBay listing: 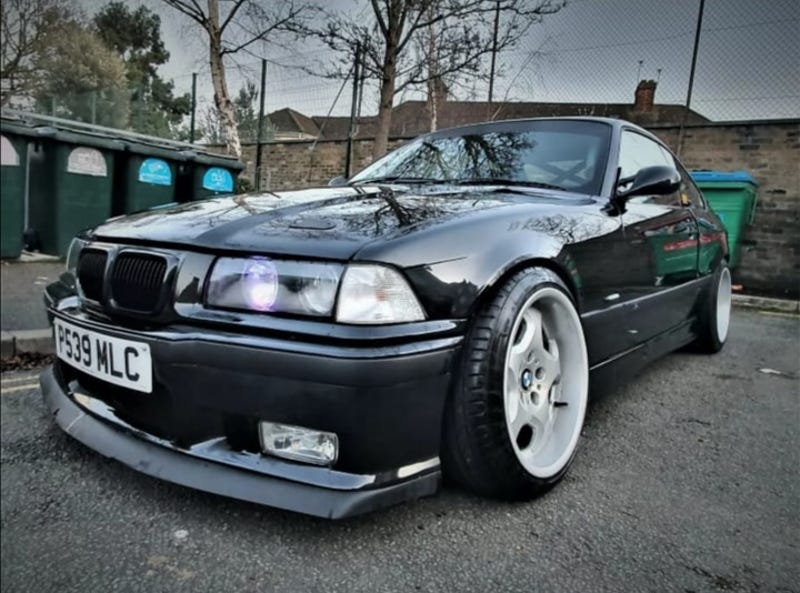 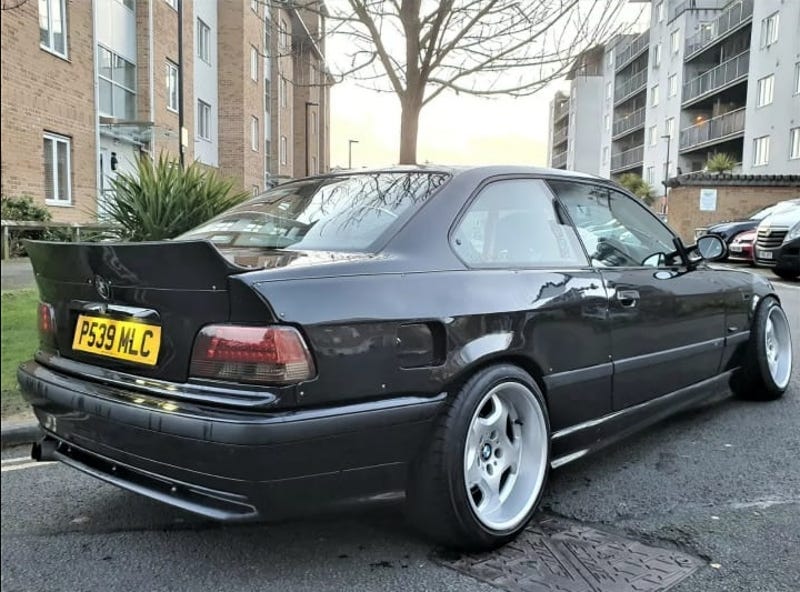 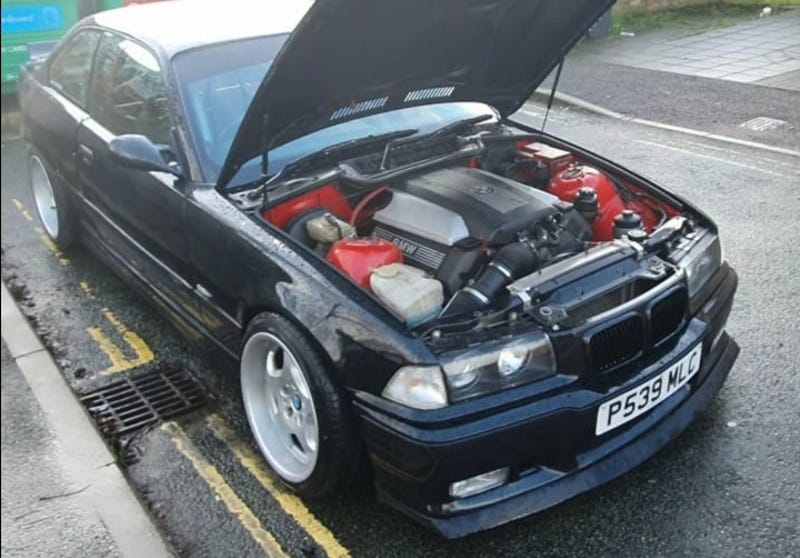 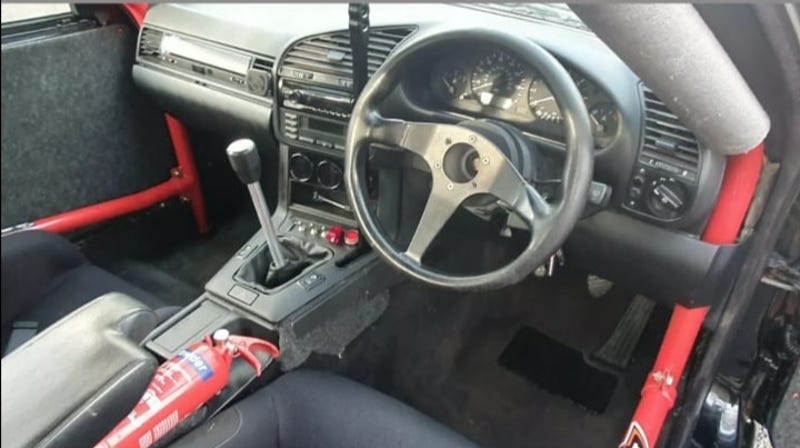 E36 coupe with an M62B44 swap, stripped (but trimmed) interior, nice coilovers, nice wheels and stone cold awesome arch flares on the back. Pictures don't do the arches justice, they're kickass. Oh, and an exhaust cutout valve  sounds awesome It's a bit drifty for our tastes, but all the bits are there for a proper track/backroads weapon. Work so far has been taking out what's left of the interior to have a look underneath and adjust the seating position. Found two of the studs were missing so I welded some more in for him. 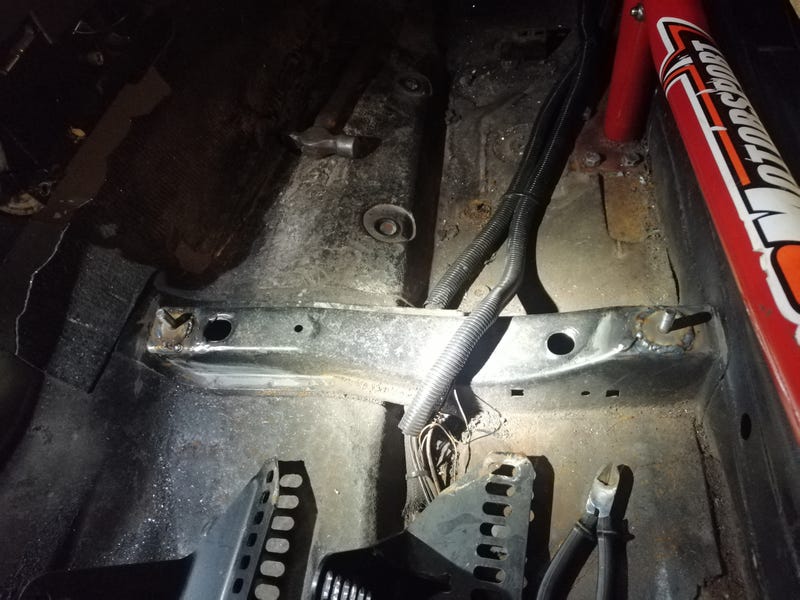 In the process of removing the hydraulic handbrake (nothing against it really, but it's not the greatest install). Will also de-camber the front a little and raise it up, and soften the coilovers from max-hard. Beyond that and some tidying of the wiring, and replacing the welded diff with an LSD, it's all good. Jealous. |
| |
|
|
|
|
|
Dec 31, 2019 17:19:02 GMT
|
|
Good bit of progress. When I made the fuel tank for my van I tig welded it together. I think I used 1.2mm steel to reduce warping, and it was very minimal if at all. More due to luck than my skillage I think. From memory I only had a pin hole on the neck where I mig welded it. I think I just went over it with the tig torch to sort it.
|
| |
|
|
|
|
|
|
|
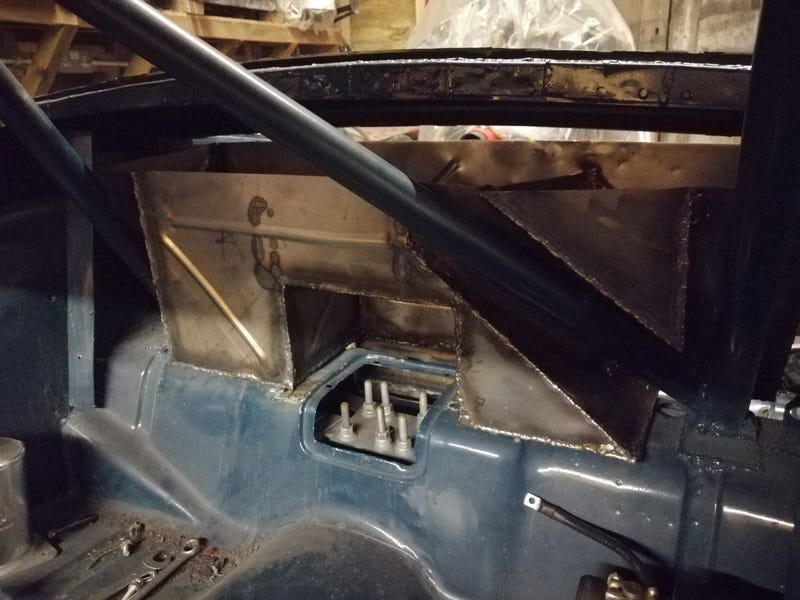
Thanks man  TIG and 1.2mm steel would have made it a lot easier. Mine's 0.9mm to cut down on weight and I've had to use the rest of the structure to pull bits back into shape after welding (you can easily see it on the middle of the trailing edge in the photos above). Worthwhile for me at least as it's about 2.5kg lighter than it would have been in 1.5mm. Still heavier than the old one (8.7kg vs 5.6kg), but that's to be expected as it's a lot more complicated. TIG torch to gloss over and melt everything back together sounds like a dead useful thing. Wonder if that would work on MIG welds... Yesterday's progress was in the bulkhead area. The IVA states that fuel tanks can't be in the passenger compartment, or any compartment that's open to the passenger compartment. The Spitfire had a trimmed MDF panel between the two which I'm not certain would fly. Could have rigged up something bolt-in, but it was much simpler to weld one in. Did some testing with CAD to begin with, and make sure I can still get to various components. 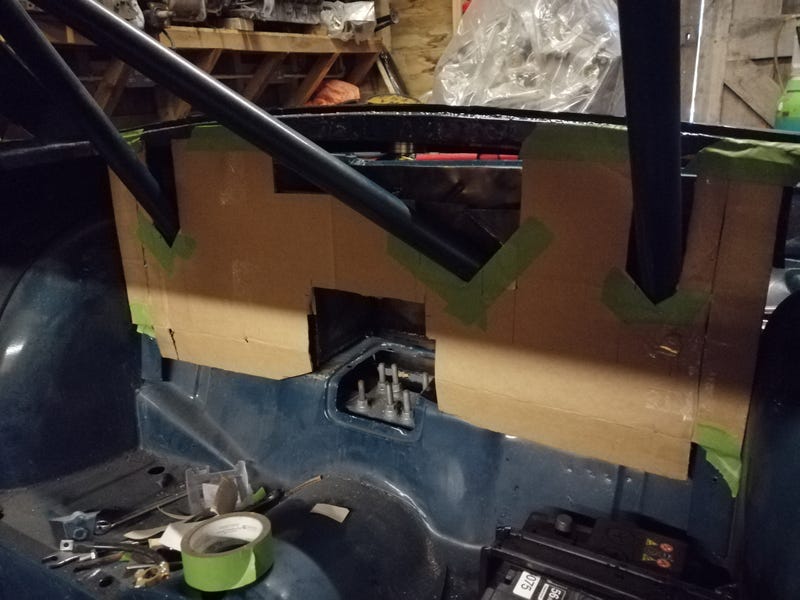 Then made it up in some leftover 0.9mm steel from the fuel tank to keep the weight as low as possible as that area is stiff enough already. 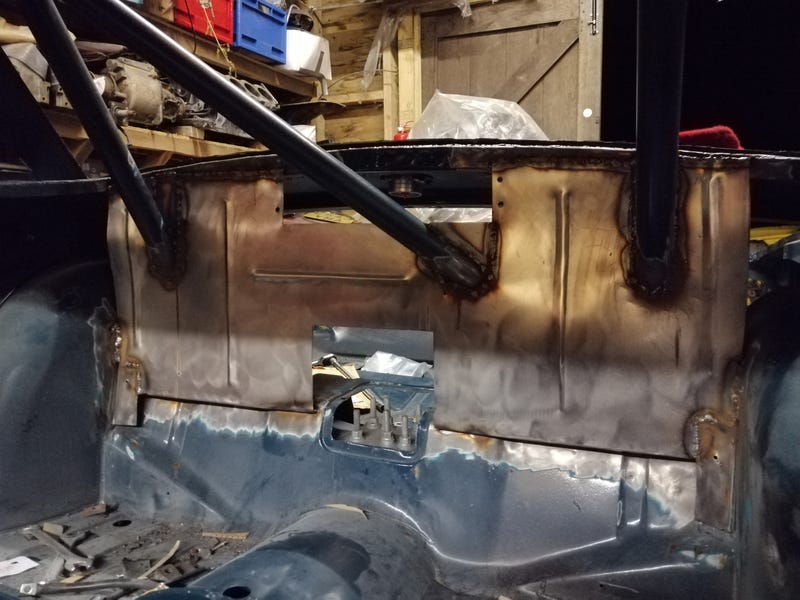 I've still got to box in the area above the diff access panel, put plates above the wheelarches with holes for the wiring loom and an MX5 boot release cable, and make a little access panel to close in the top where the filler cap is, but after that it's done! |
| |
|
|
|
|
|
|
|
Also, I'm not sure about others but one of the things that bugs me on a number of forums (but nonexistent here!) is the whole 'why bother' attitude towards incremental modifications like weight reduction or NA engine tuning. Stuff like 'why bother saving 200g when you can just go for a dump in the morning?'  Well! I've just done a little exercise adding up how much I've saved over all my weight reduction. I've excluded anything that I'd have done anyway just for the swap and only included things I didn't really need to have done but did anyway. I've weighed or at least estimated ~97% of the car so it should be pretty accurate by now (although there's always room for error with estimations). We're currently looking at roughly 778kg for the car after the swap, unibody conversion, roll hoop, bigger wheels and better suspension. That's an increase of about 35kg from the book weight of a stock Spitfire MkIV. However, if I hadn't paid attention to weight savings wherever practical it would be a whole 71kg heavier than that! That's nearly 10% of the car! That would drop my projected power-to-weight down from around a TT-RS to an F-Type V6 (including accounting for the industry standard 75kg driver). Whether it was worth the time, effort and money is another question  |
| |
|
|
|
|
|
Jan 10, 2020 11:51:52 GMT
|
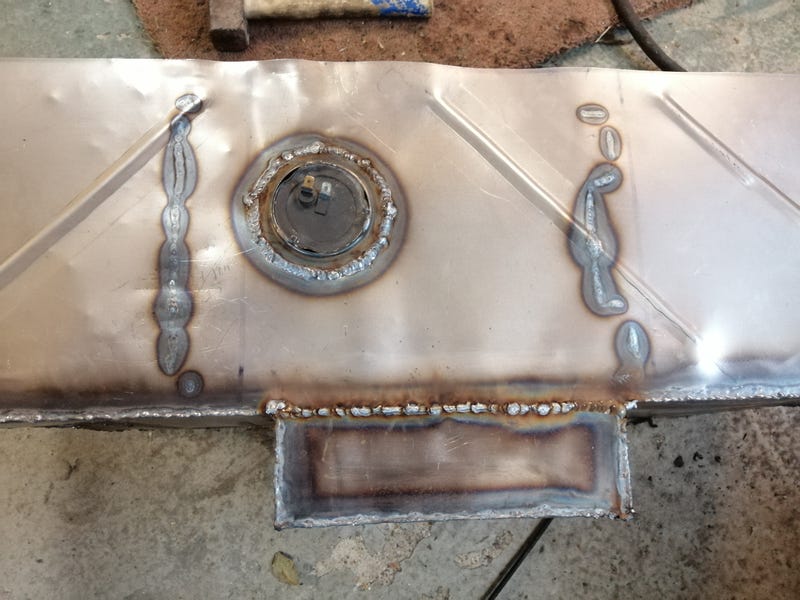
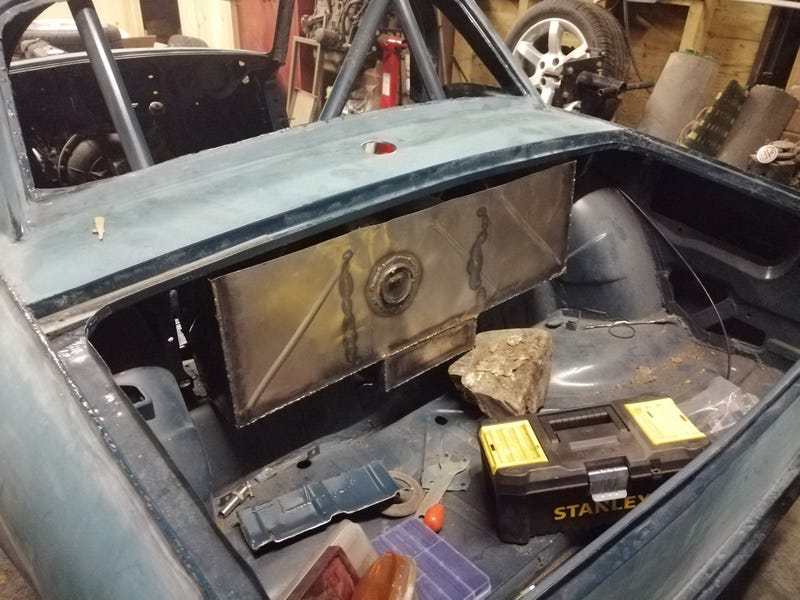
More work on the fuel tank and bulkhead situation  Boxed in the areas above the spring mount access panel and above the roll hoop tubes: 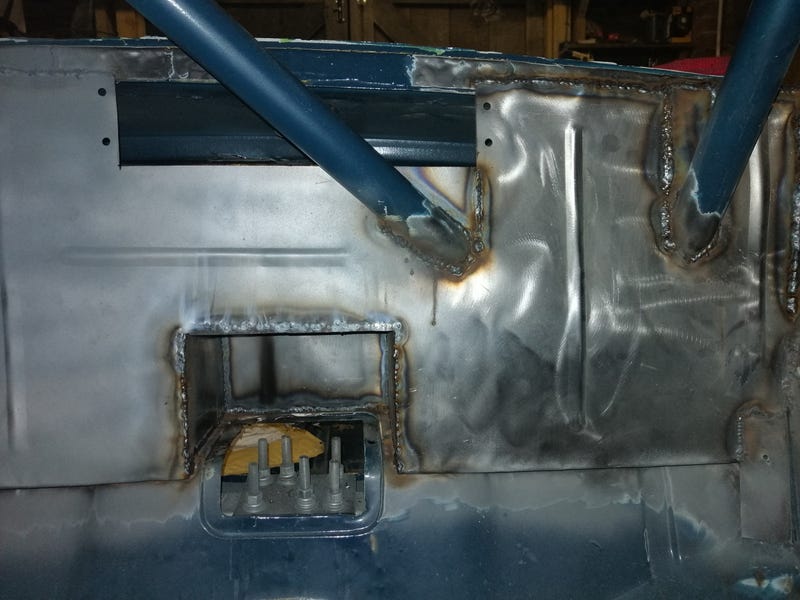 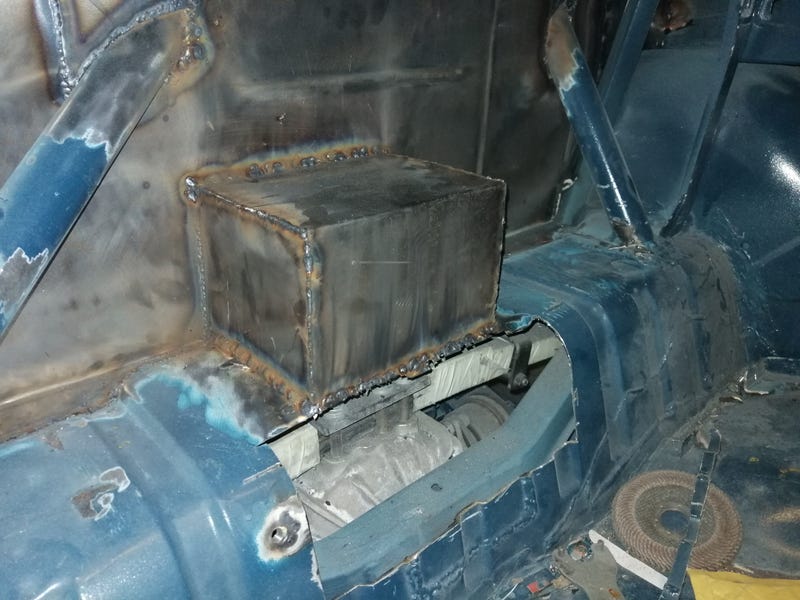 Also sorted the areas above the wheelarches. As it's an area below filler I've just tacked it in place and will seal it properly with seam sealer. 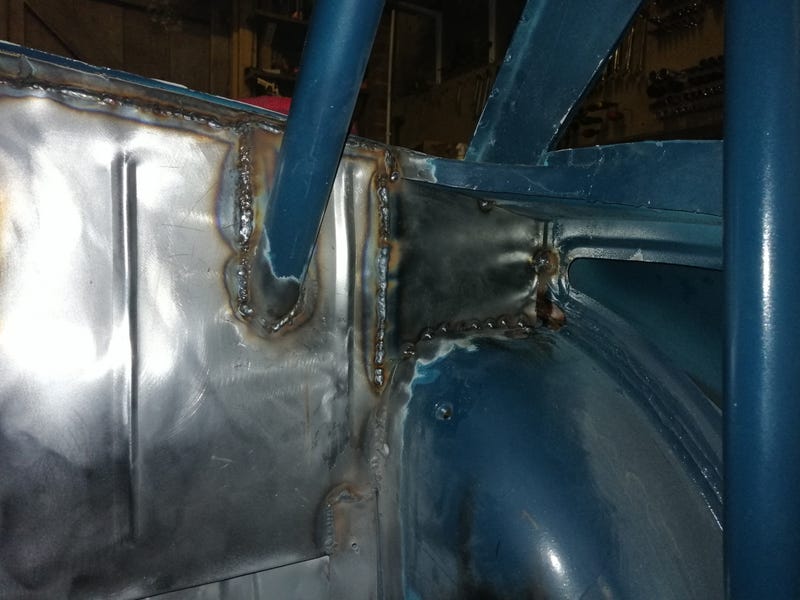 Top of the fuel tank is on and the inside painted with proper fuel tank paint. I've added some little straps to cable-tie the breather in place, and a little stop in the filler neck so the pump will sit nicely at the right level. I've also inset the filler neck by 2cm or so which should give me about 4 litres of air gap at the top of the tank to allow for expansion. Did a fair bit of searching around for how much of an air gap you need, but in the absence of any information I guessed 10% and we'll see if it works  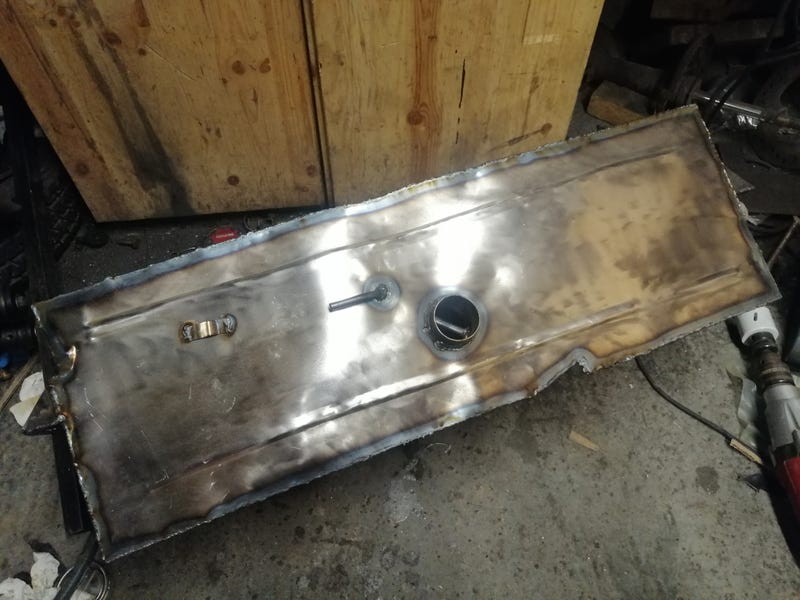 Pretty much everything lines up nicely with the rest of the car. The rear sticks proud a little of the boot which wasn't strictly intentional, but without that I'd lose about 5 litres of capacity. Currently it should have about 44 litres total capacity including the sump. With the 4 litre air gap I should have about 40 litres which is a bit more generous than the 33 litre stock tank  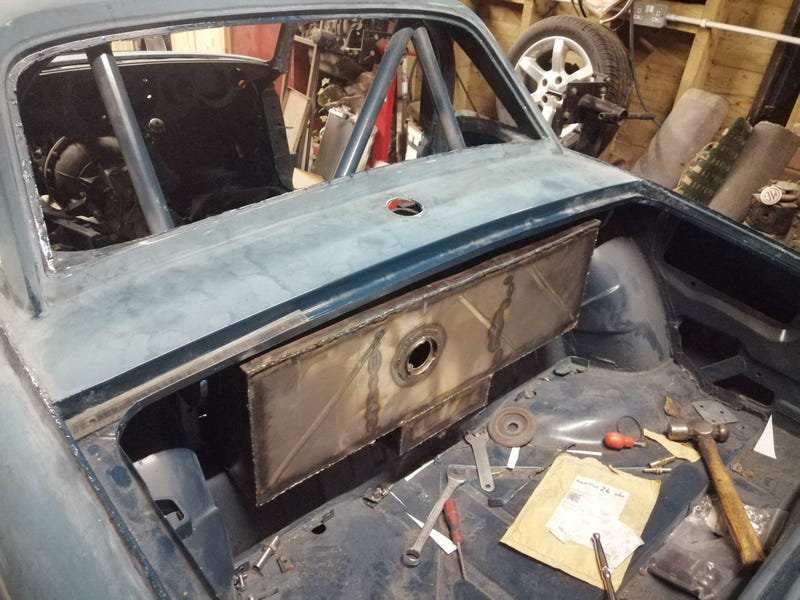 Next I boxed in the area around the sump, including a place of the bulkhead fittings. 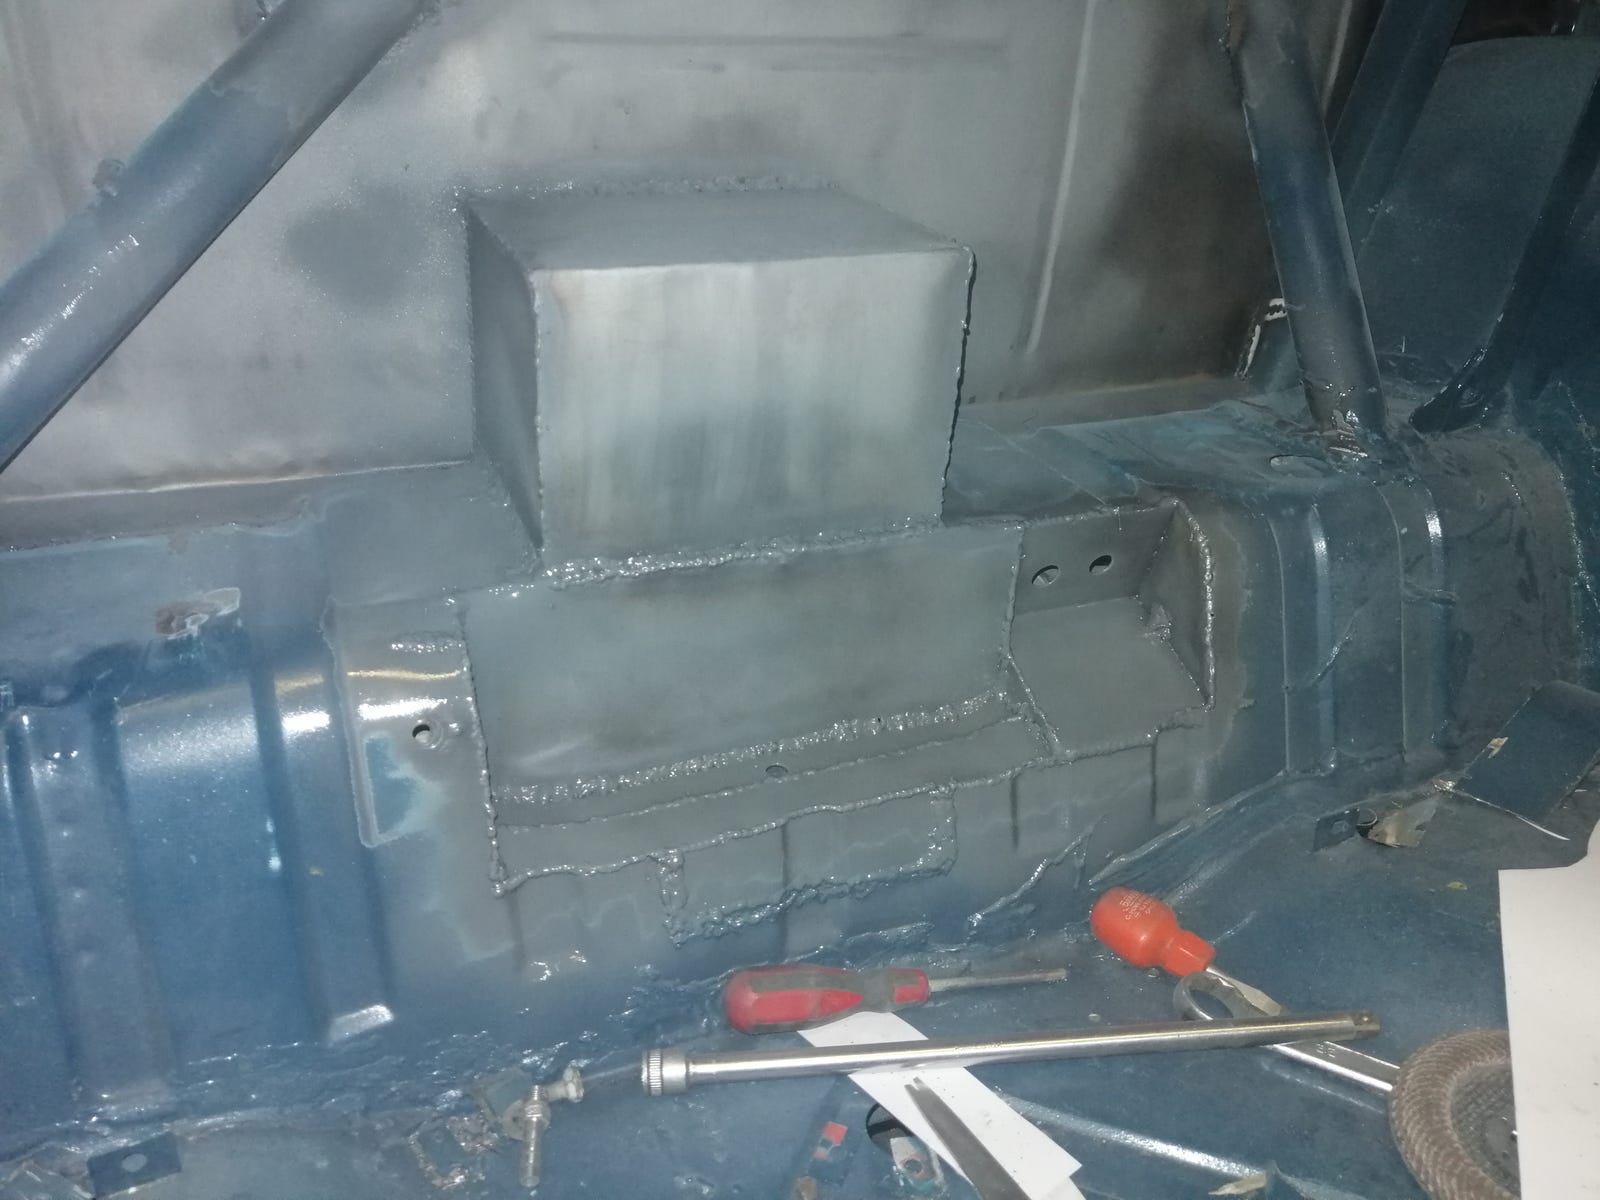 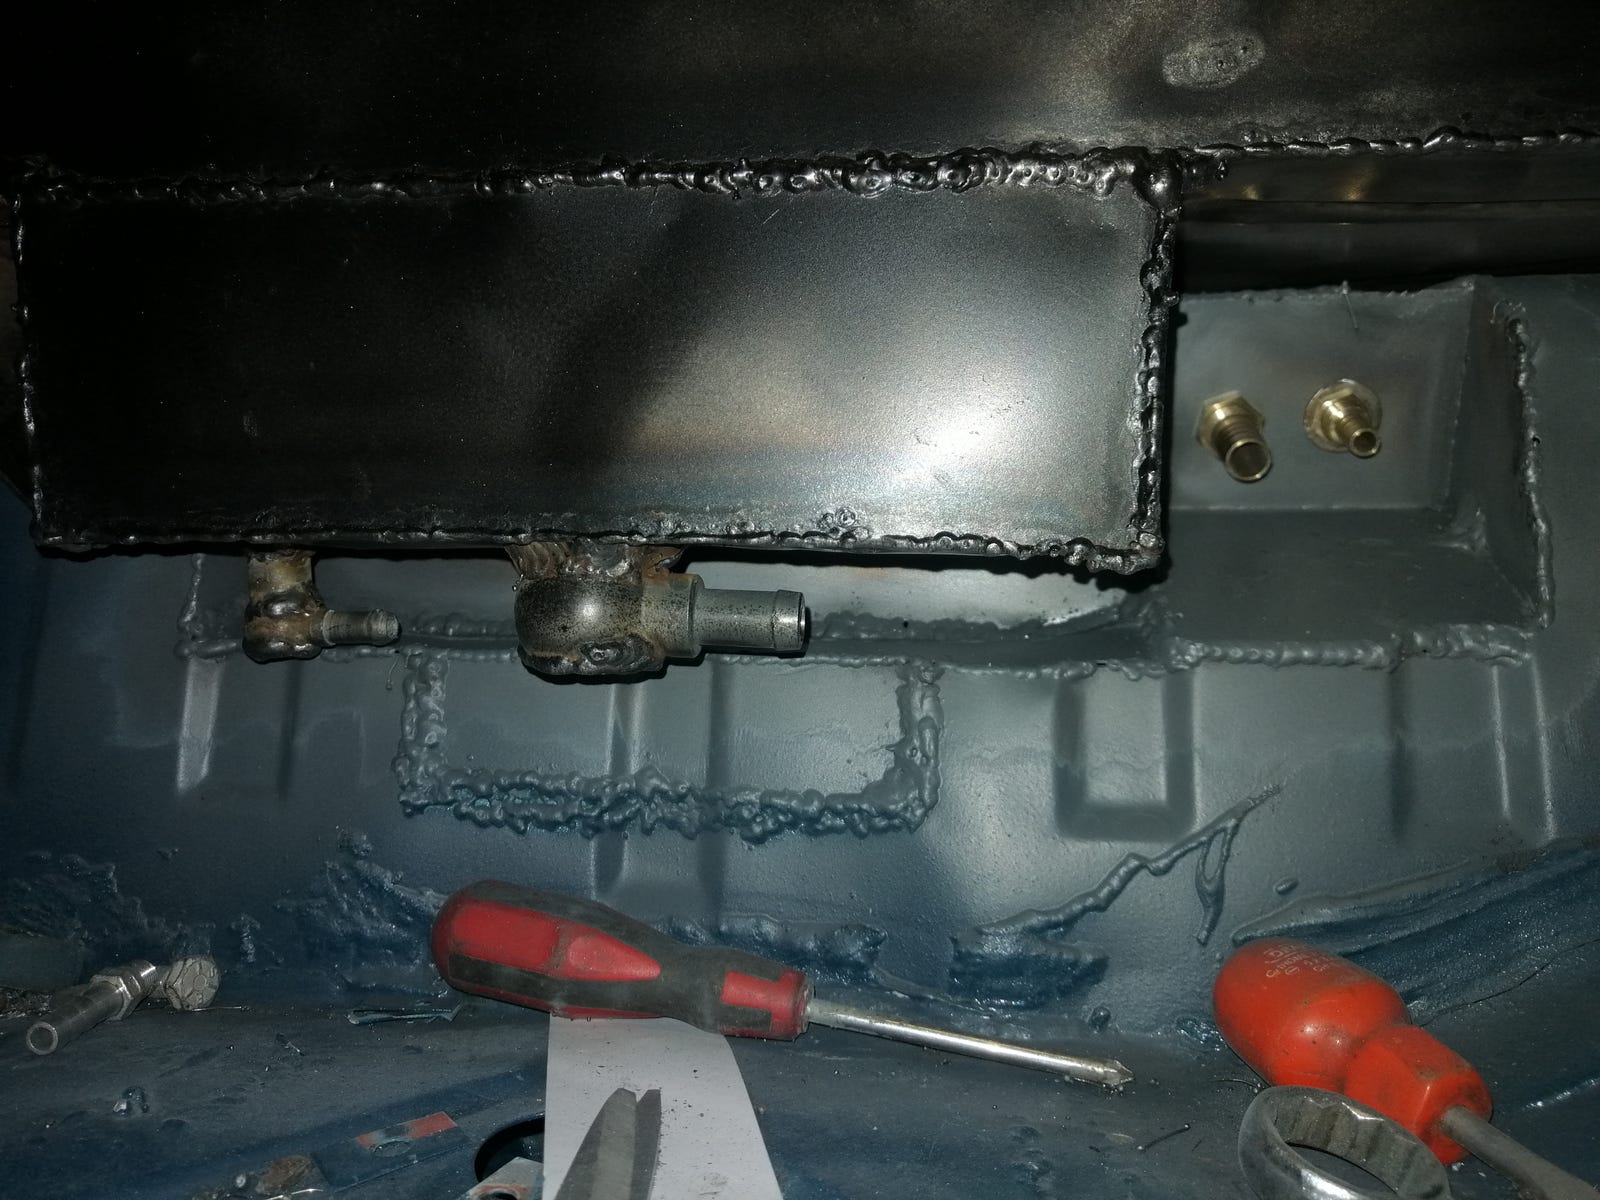 The plan is to run short sections of hose from the tank to the bulkhead fittings for easy removal, and then more pipes running over the top of the spring and down to the filter and pump under the car. Once those pipes are in then that's the last piece of fuel tank work left inside the car! |
| |
|
|
|
|


 can see it now. Very interesting.


