|
|
|
Jun 15, 2020 11:14:43 GMT
|
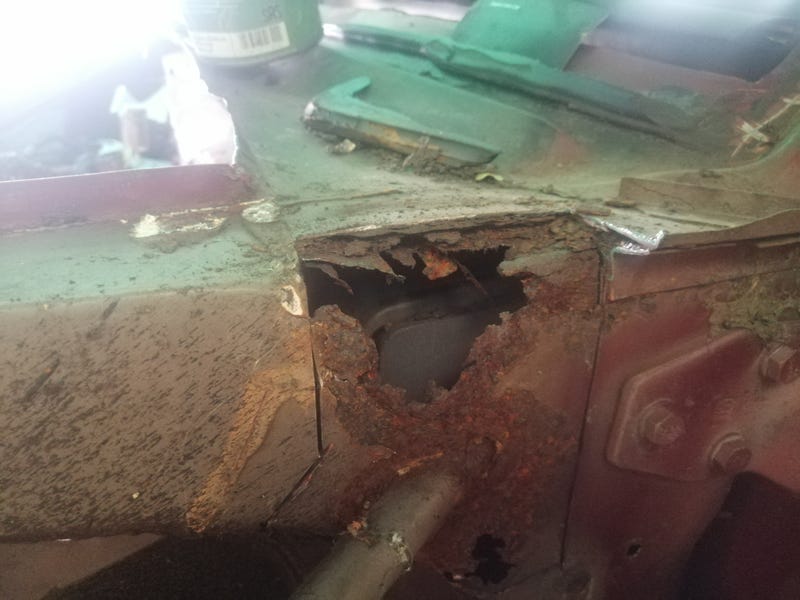
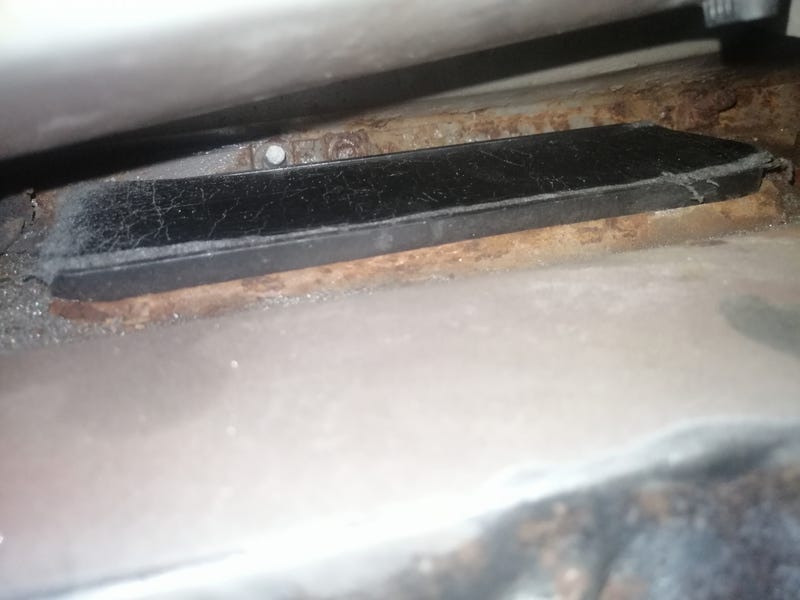
Latest progress is the engine bay's pretty much stripped. Decided that it'll be much easier to chase the rust in the engine bay without all the junk in it. Especially at the bulkhead. 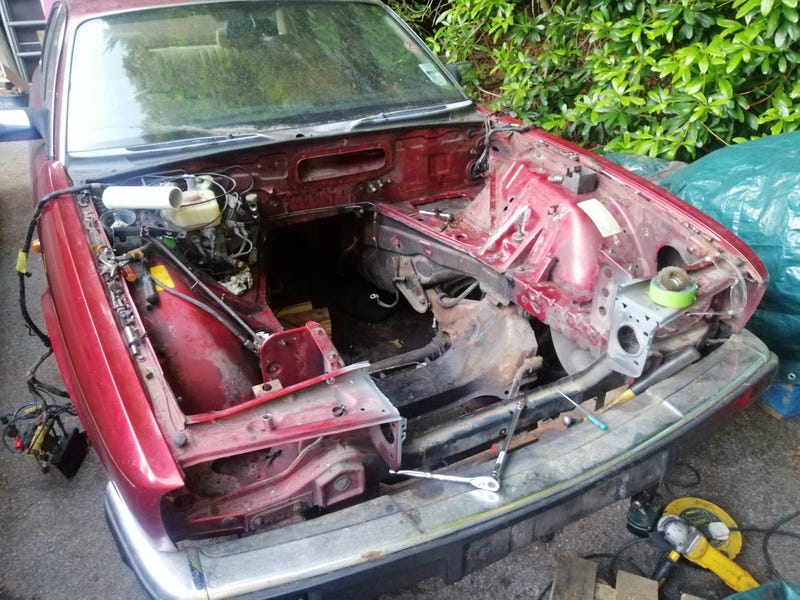 These cars are by and large pretty good with general rust. Lots of good quality seam sealer shows that they were really trying to fight the 'rusty British cars' stigma. It worked pretty well given that they're better than every E46 I've ever owned, but unfortunately they've got a few real rust traps which tend to show themselves as they age. One of those is at the base of the windscreen: 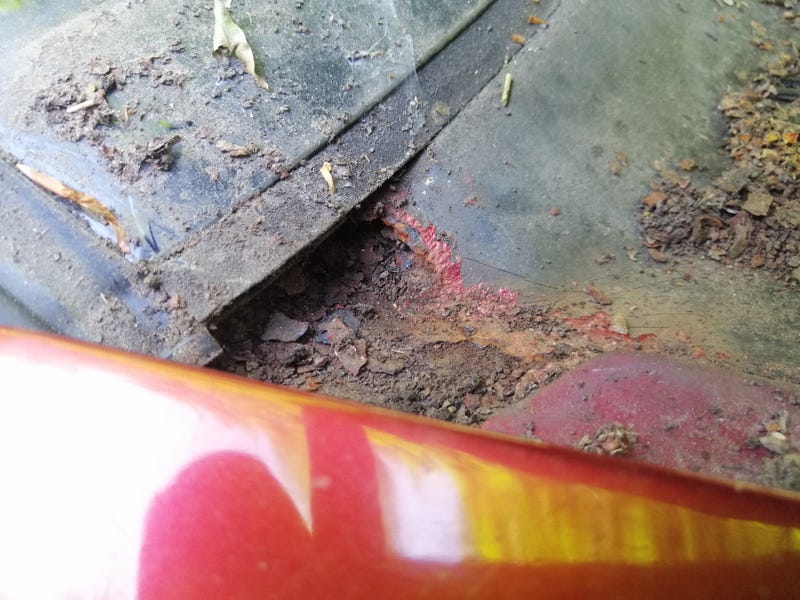 If this goes, it soaks the insulation behind the dash and rusts out the bulkhead along one of its seams. Bits like this are a dead giveaway: 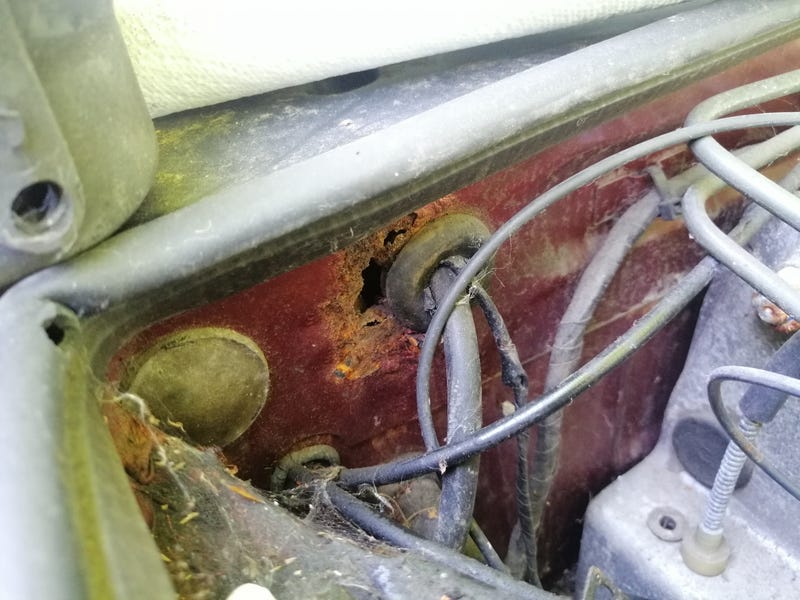 Unfortunately it's a dash-out job to fix so that's on the cards over the next few weeks (and likely a windscreen out at some point soon too), but for now it's on with the engine swap as it'll need to be movable to get it under cover for the windscreen job. |
| |
|
|
|
|
|
|
|
Jun 15, 2020 22:37:55 GMT
|
That's it! Last bit out of the engine bay  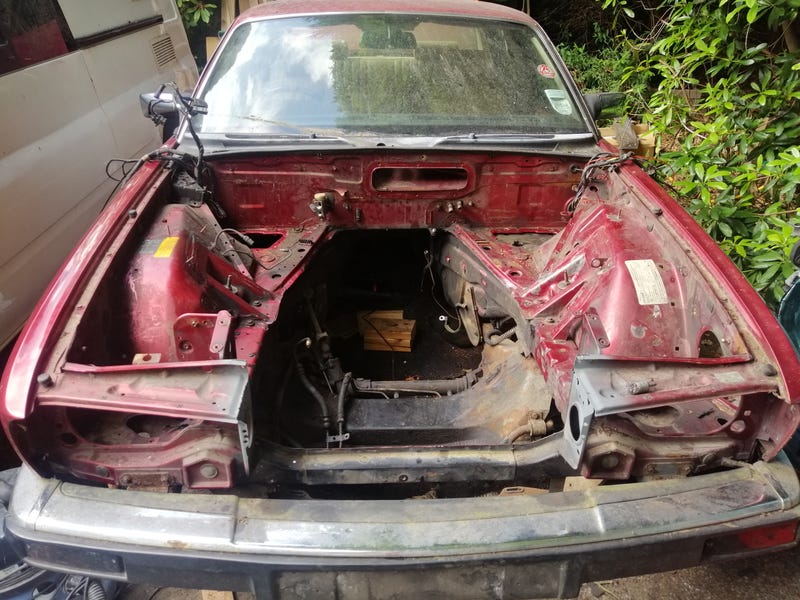 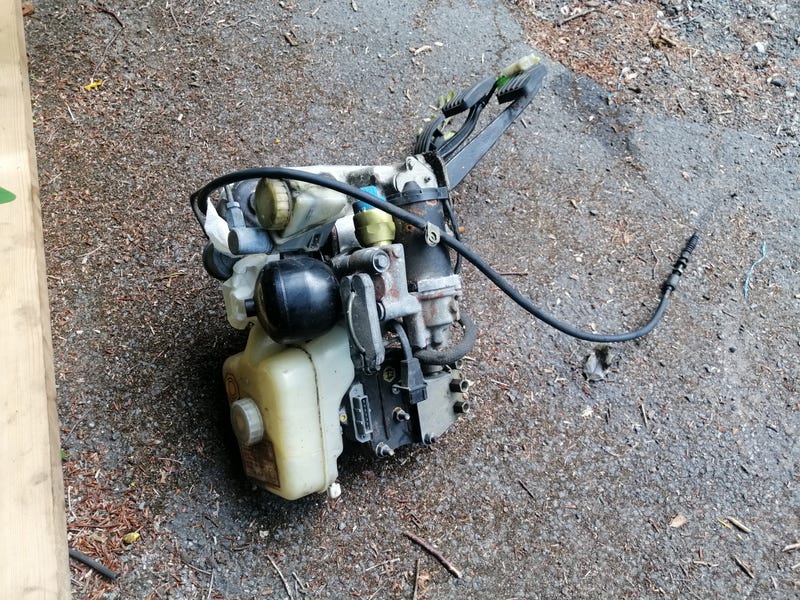 Turns out the pedal box comes out as a unit, avoiding splitting master cylinders and the like. Now onto de-rusting and spraying most of it before contemplating a dashboard remove... |
| |
|
|
|
|
|
Jun 19, 2020 23:41:24 GMT
|
Next couple of steps on the Jag. Got the engine bay rust wire wheeled, treated and primed. 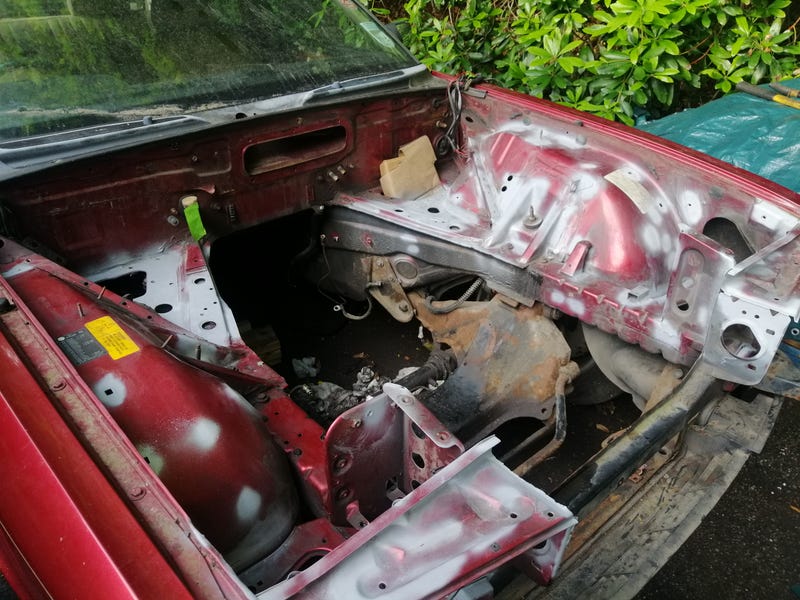 By and large this isn't a particularly rusty car, but it's amazing how many little bubbles there are where paint's been chipped away or not covered for whatever reason. That was yesterday, and managed to get the basecoat on today. 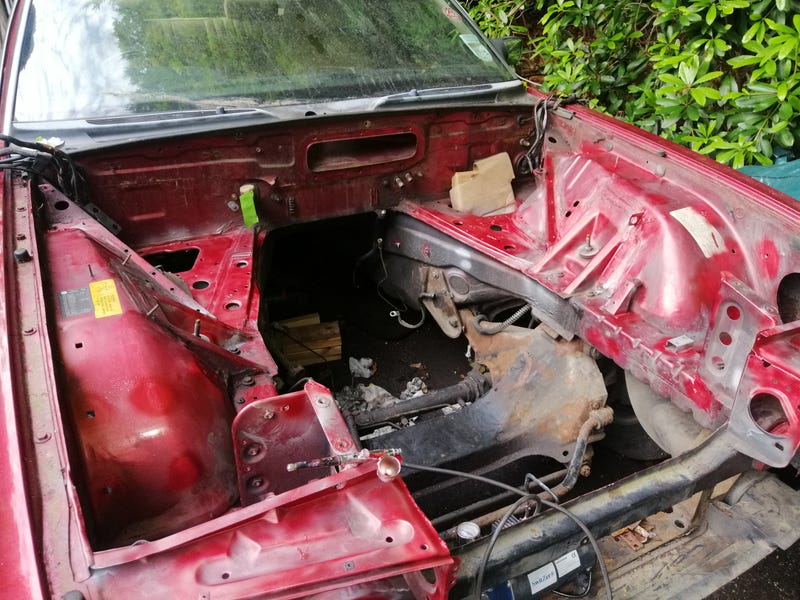 I've been using my airbrush which is brilliant for little touchup jobs, but I'm not sure it's quite cut out for this scale of job. The poor motor was getting quite hot by the end of each coat. I'm also not convinced it will give a nice even fade, even with some blending out, thanks to the mica paint the Jag has. Not that it's overly bothering me as this'll be a daily driver and the engine bay's bound to get mucky. Still, good for making sure unseen bits don't rust. |
| |
|
|
|
|
|
Jun 21, 2020 10:24:20 GMT
|
Aand the paint's done. Lots of learning on this one, but luckily it'll be hidden by diesel engine bay dirt :S needs more colour coats than I did with 1k base to cover the colour of the primer. Really with an airbrush it needs blending into the paint underneath, which again would be easier with straight 2k rather than clear over base. Still, it's hopefully stopped most of the rust from progressing and that's the main thing. 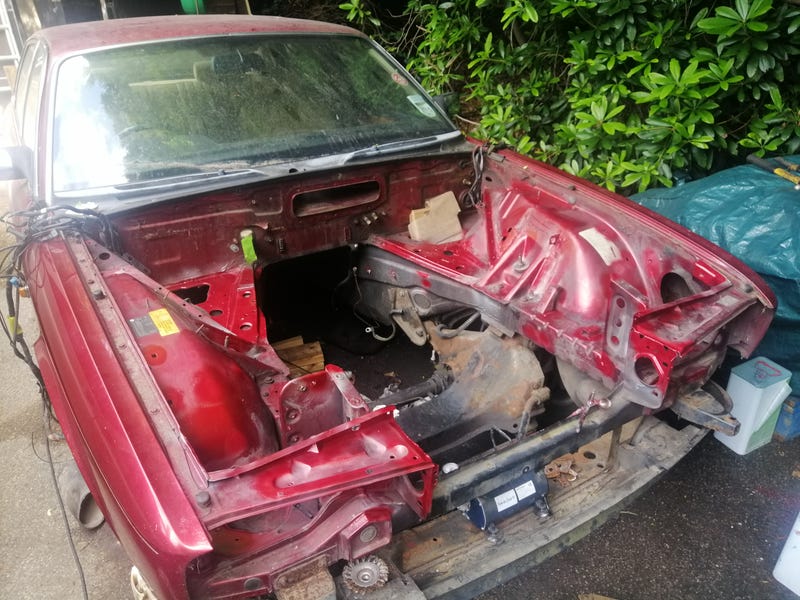 I still have the bulkhead panel to fix so the engine can't go in yet, but I thought I'd have a look at brakes. In stock form, the brakes on an XJ40 are very good. Thanks to the hydraulic gubbins in the previous posts you get a lot of braking force to stop the car without having a squishy pedal. Their only real issue is that they tend to fade under hard use, so a bigger disc for better heat capacity would be useful. As standard, the later 40s like mine have a 291mm disc at the front. People have fitted the 298mm front discs and twin-pot calipers from early XJ81 V12s (the V12 version of the XJ40), but parts are getting a bit thin on the ground these days. There are also megabuck 4-pot caliper/massive disc solutions which the racers tend to go for. I then got looking into later versions of the '40 chassis. X300s have bigger rears (and vented) but the same fronts. X308s have the same, but the XJR8 has beefy 325mm fronts and 326mm rears. The fronts even use the same standard calipers as an XJ40. Bingo! Rears will come later, but I bought discs and caliper carriers for the front. They're noticeably bigger, and thicker too (1mm thicker, but also less venting space). 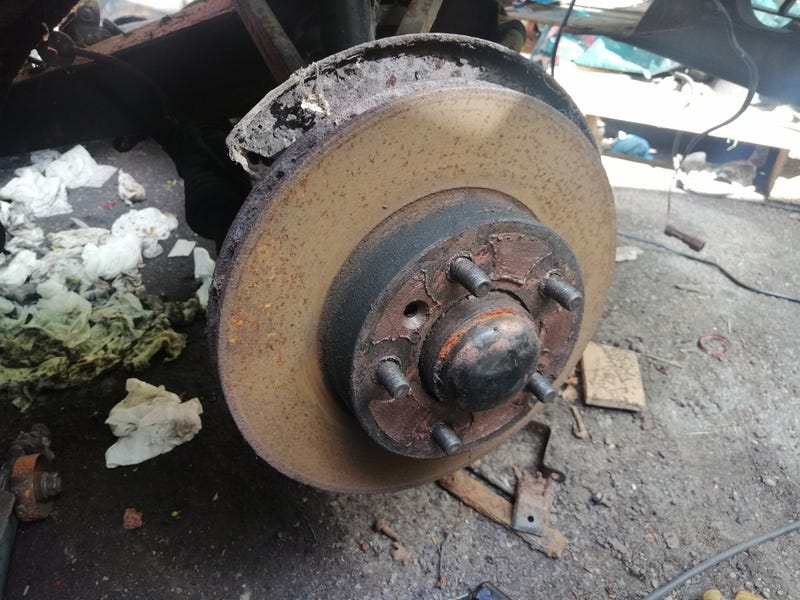 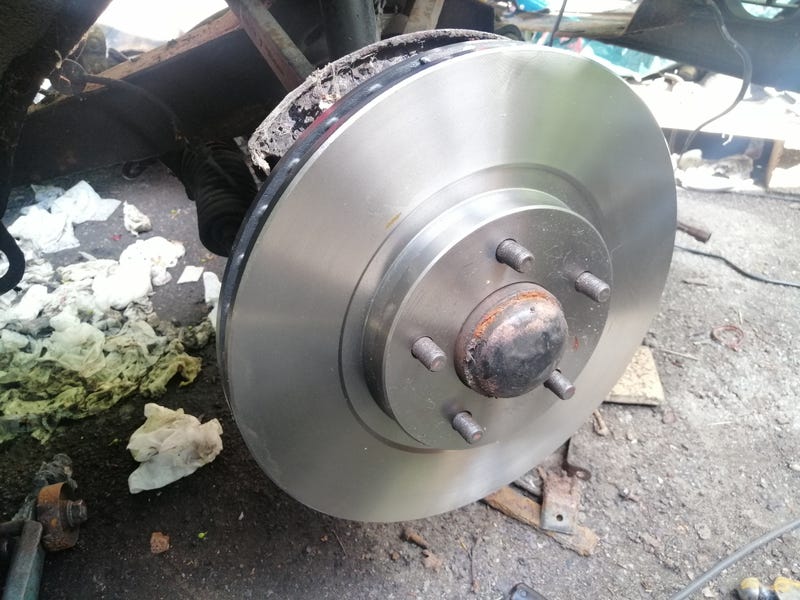 Couple of issues though. Turns out Jag changed the hubs and vertical links for the X308. There's a little step on the XJ40 hub that locates the disc which isn't present on the X308, so the centre-bore of the discs will need boring out. 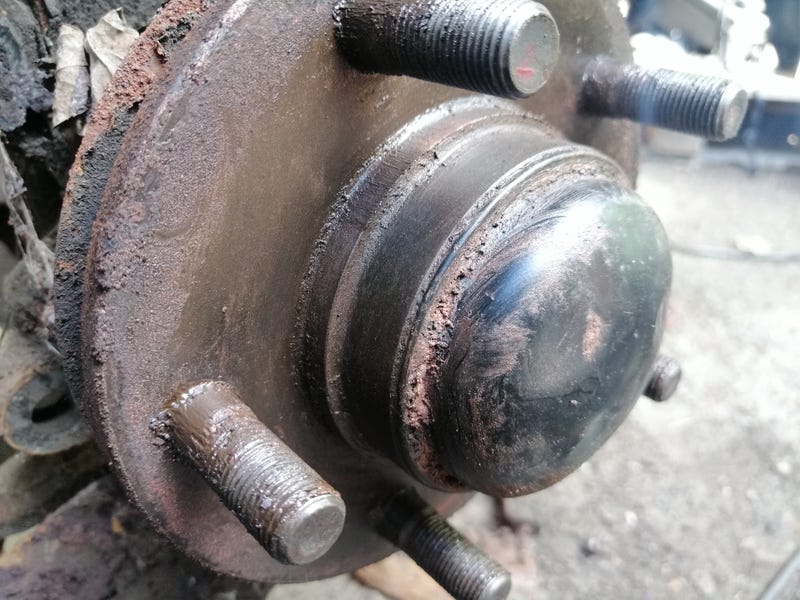 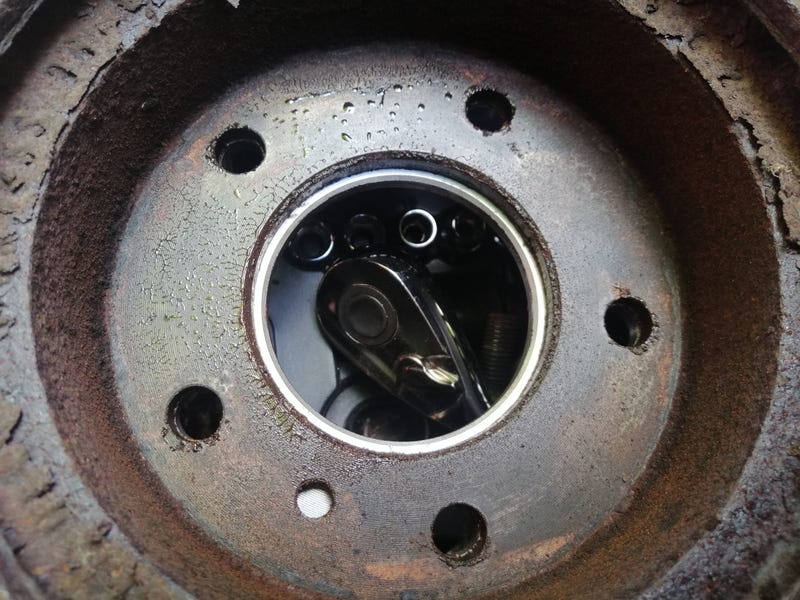 Also, the new discs have a smaller hat so the disc sits physically further forward on the V8 car. Turns out they did this by changing the mounting lugs on the vertical link, not the caliper carrier. Did some measuring and found that I'd need a 16.5mm spacer to get the disc central. Luckily, I've been hoarding little bits of metal that look useful for years so I had a piece of box section that was 16.4mm in diameter. 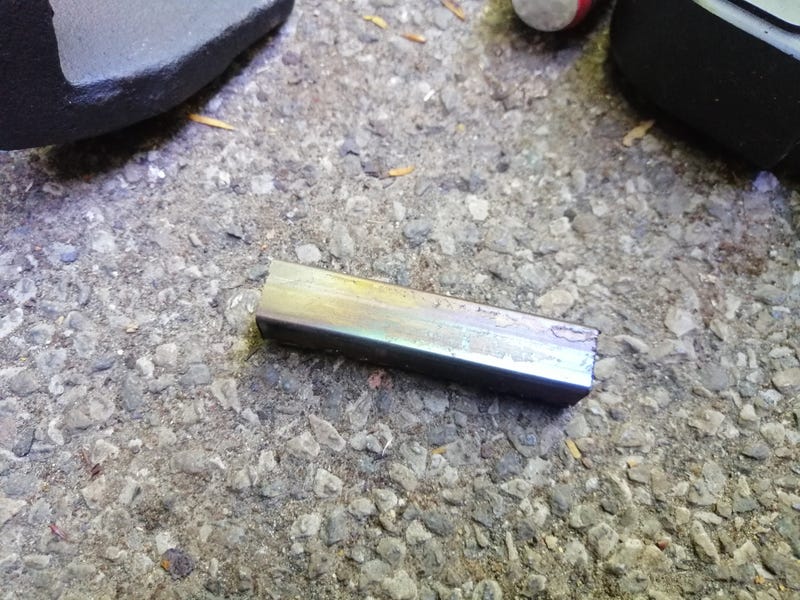 Some further testing showed you need to take a sliver off the hub-side of the carrier to clear the metal dust/heat shield. Couple of mm at an angle should do. 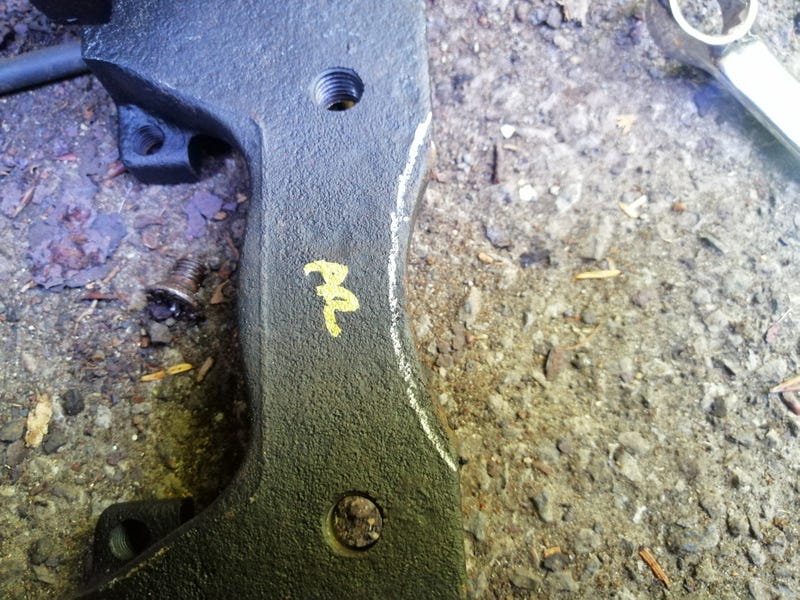 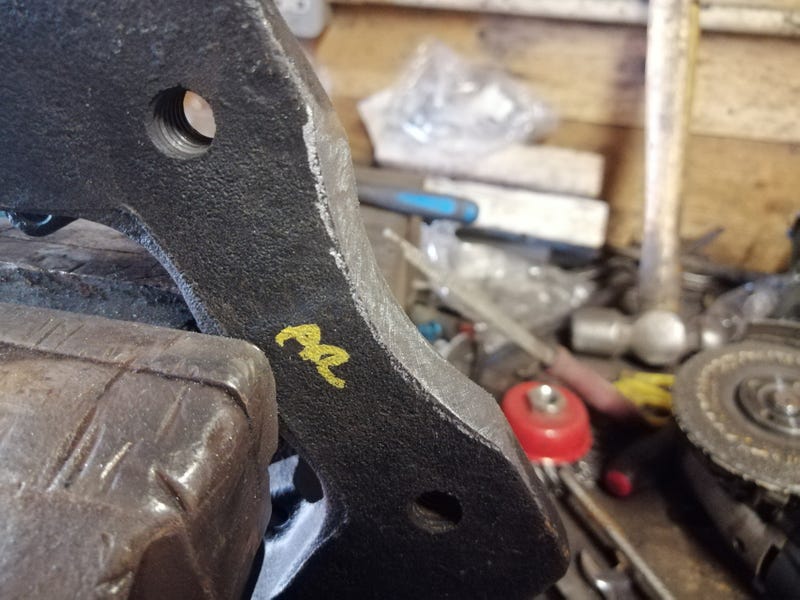 With that I could get everything mounted in place to check it clears on my wheels (Japan Racing JR9s, 17x7.5 ET20). It's less the OD that's the issue, but the space between the caliper and the face of the wheel. Luckily, it does! 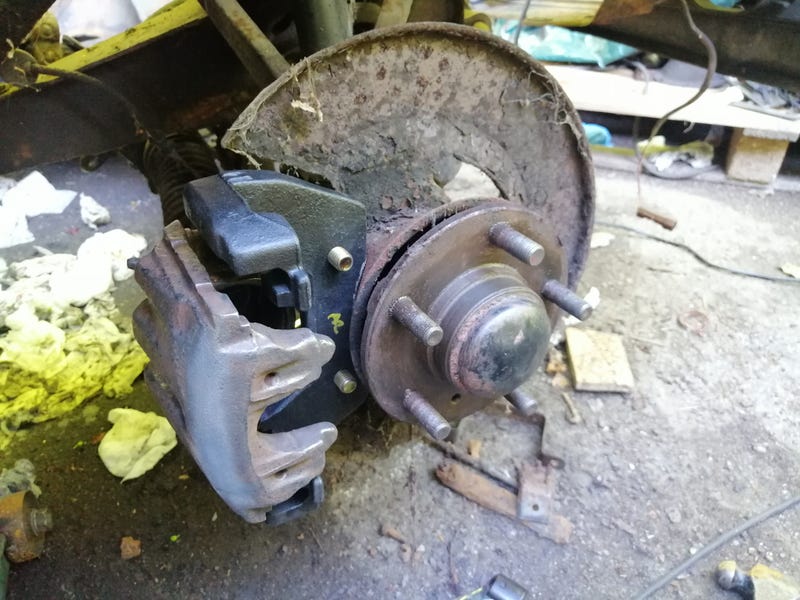 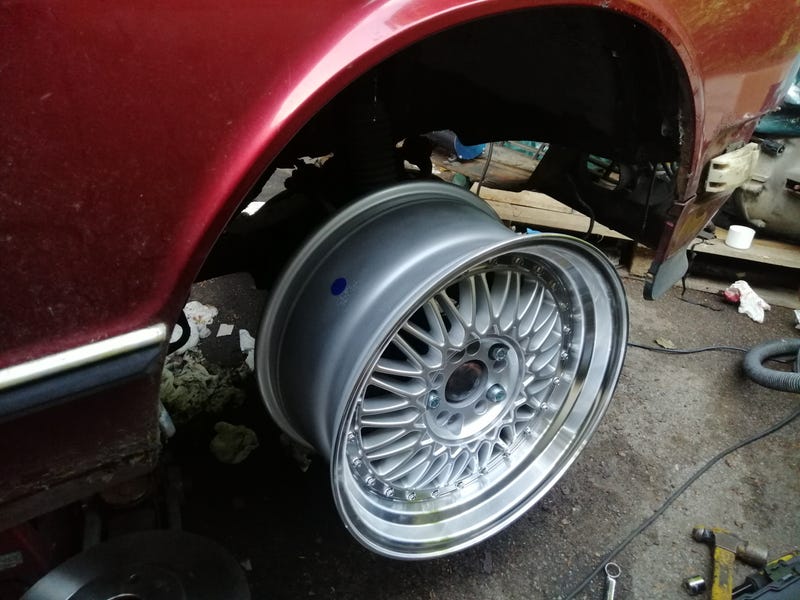 I can say they definitely don't clear the stock 15" wheels (caliper hits the outside), but I don't have any 16" ones around to test. If they do it'll be a close run thing. Oh, and if anyone wants dimensions for the spacer here they are (as yet untested, but will see how they work): 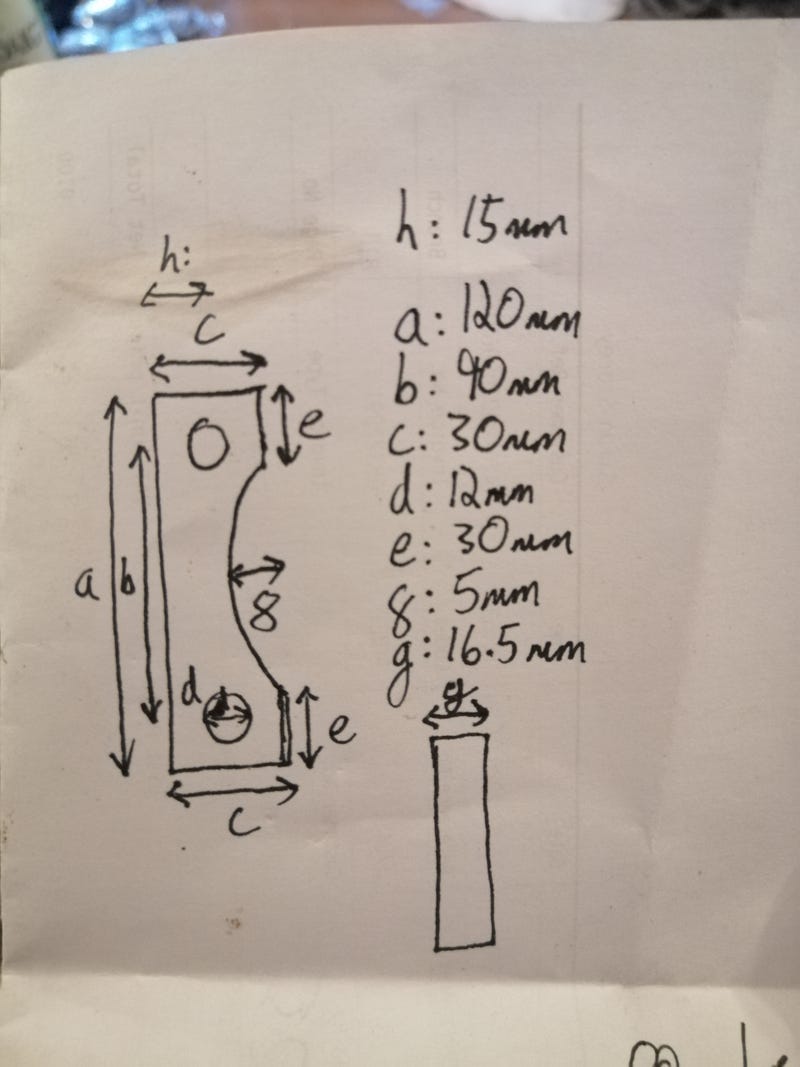 I was originally looking at getting one machined, but it turns out you can quite readily get 30x16 bright steel bar stock so I've ordered some of that and will have a go at making my own (there's 2.5mm of clearance either side of the disc so there's a bit of leeway). There's a chance it might turn out to be 5/8" (15.875mm), which should still work and can always shim it out slightly if it doesn't  |
| |
Last Edit: Jun 22, 2020 10:01:16 GMT by biturbo228
|
|
|
|
|
Jun 29, 2020 11:55:52 GMT
|
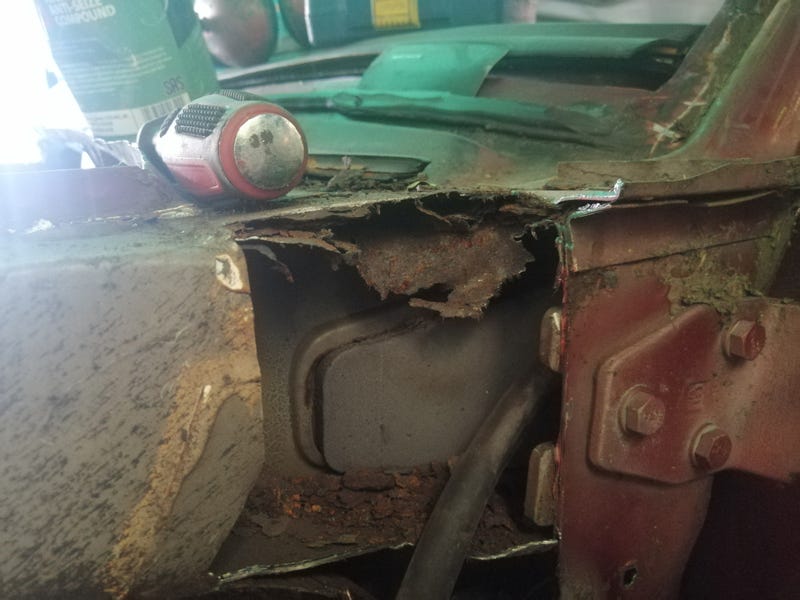
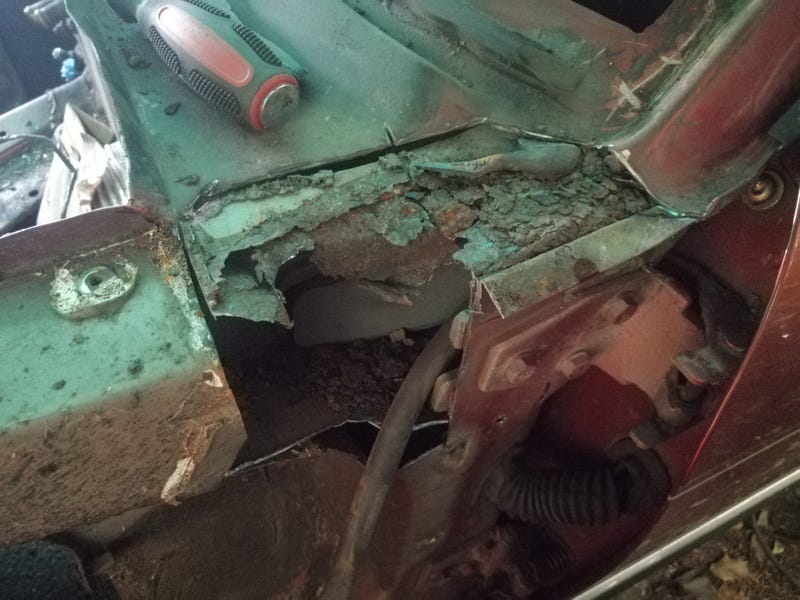
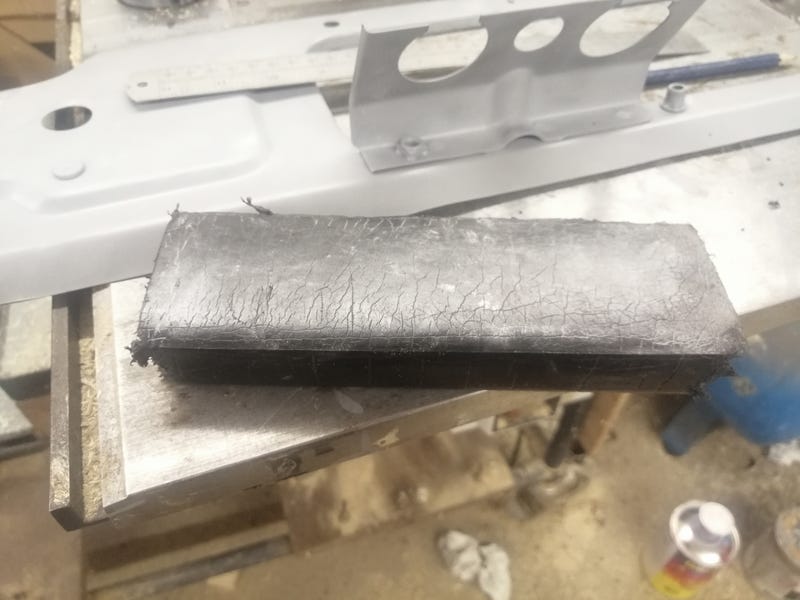
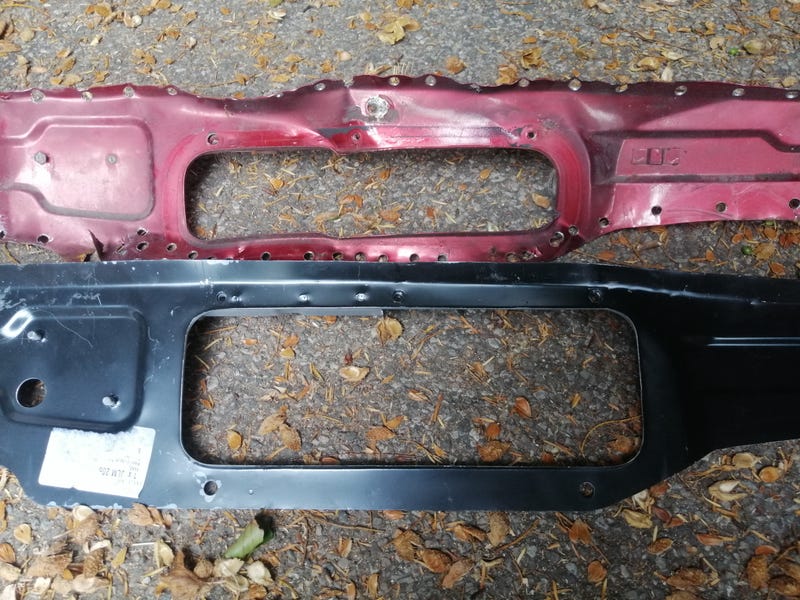
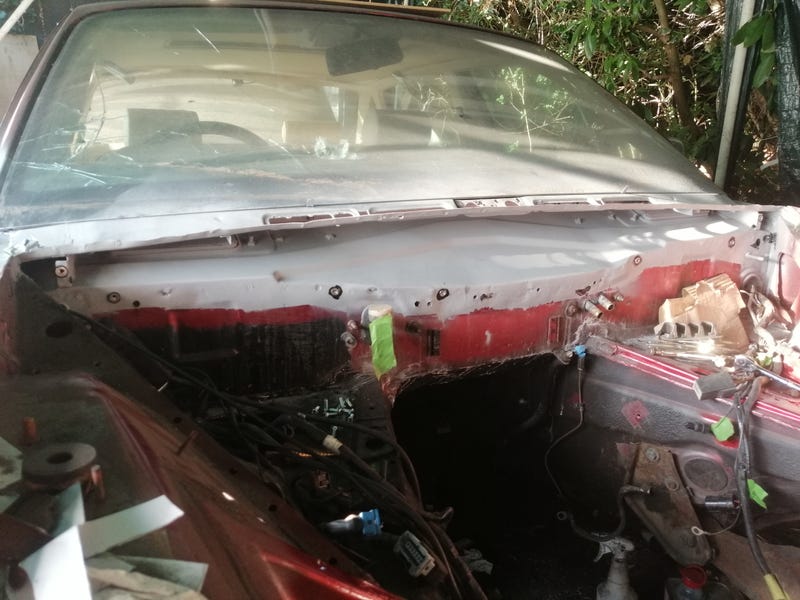
Next steps on the Jag are arond sorting the bulkhead area rust. There's some crustyness peeking out from the seam running along the top panel you can see here: 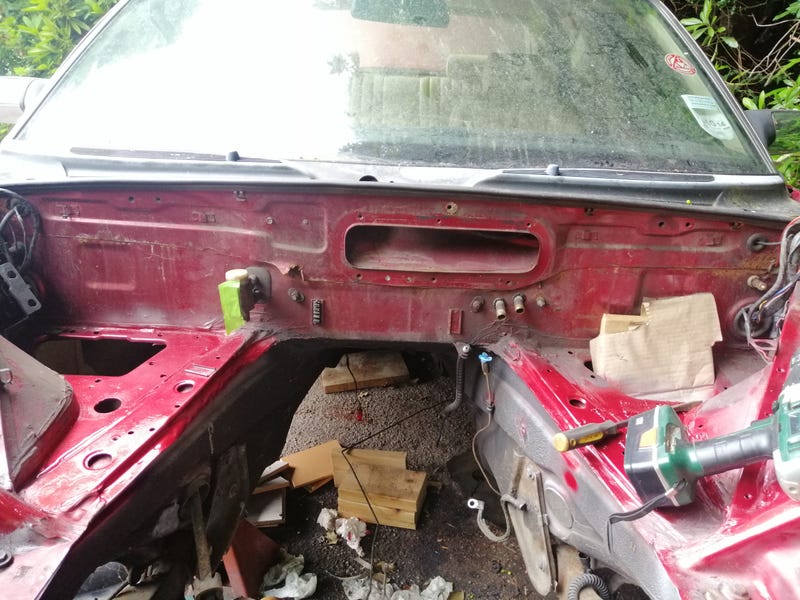 Turns out the spot-weld guy was definitely keen to make an impression as there's a billion of them. Makes a nice change from earlier British cars where the relationship with the construction workforce was diabolical, but it does make removing the panel a bit of a task. 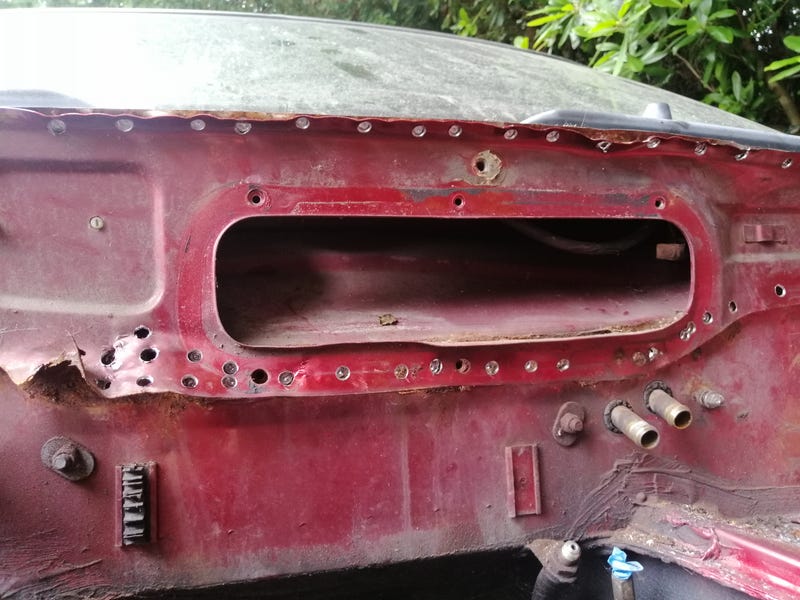 In doing so I've made a rather interesting discovery. These cars like to rust at the bottom corner of the windscreen, seemingly from the inside out. Turns out, there's a little closed box section sitting just beneath that corner which is filled with this weird silicone gel foam. 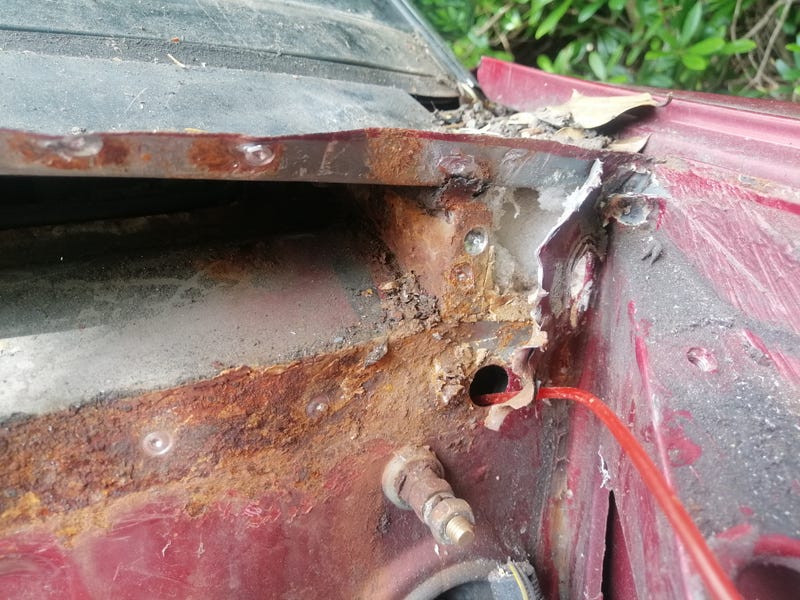 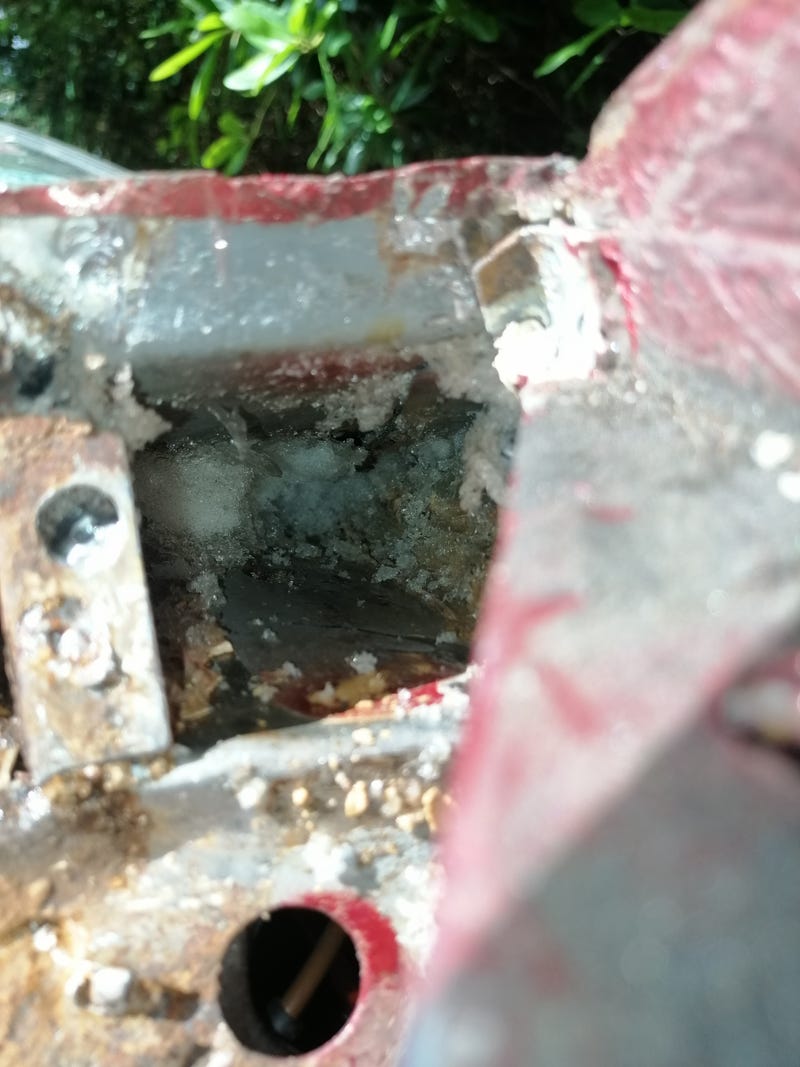 There's then a dividing panel between the two which is sealed to the upper and lower panels, isolating the little box section bit off (except for a grommet into the engine bay). When I took the grommet out of both sides, water poured out despite the rest of the car being dry. 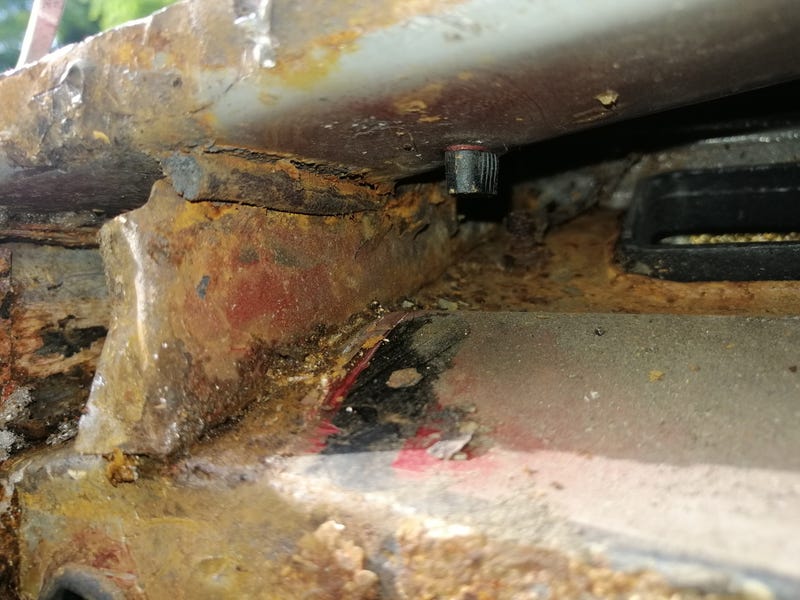 Everywhere I look on this car it seems like the designers and construction staff were hell-bent on making sure that they didn't rust. Damn near every exposed seam is sealed. The entire floor pan is thoroughly stonechipped. Even things like the wheelarch liners are sealed onto the body along the edge so they don't let water and grit creep behind them (if they're intact). I think this is another of those 'paranoid about rust protection' things, that just happens to have created an issue rather than fixed one. The panel beneath it dips down in the corners slightly, which I reckon they thought would trap water. So they sealed it off and filled it with silicone, which would work all the while the sealant holds but as soon as it cracks would let moisture in that couldn't escape. Hey presto, rusted screen corners (as has happened on the driver's side). 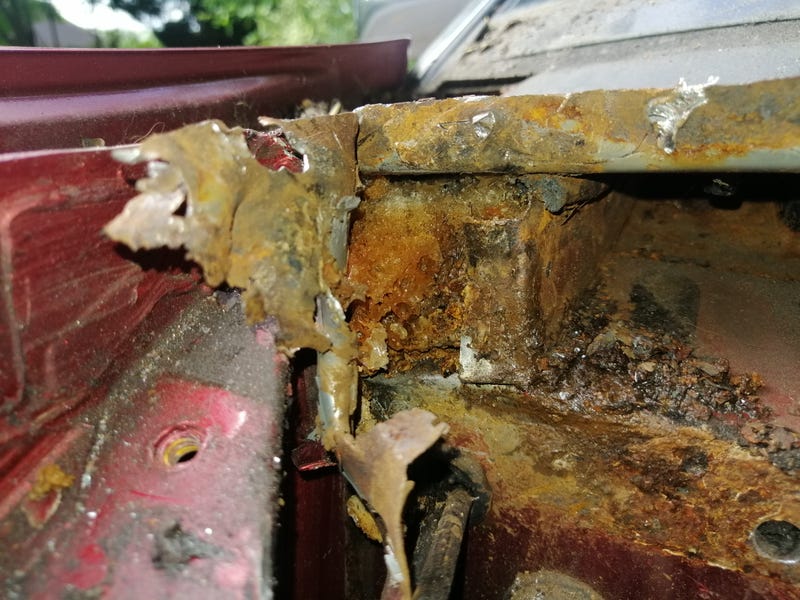 That also lets water capillary-action all the way along the seam on the bulkhead panel, rusting behind it. 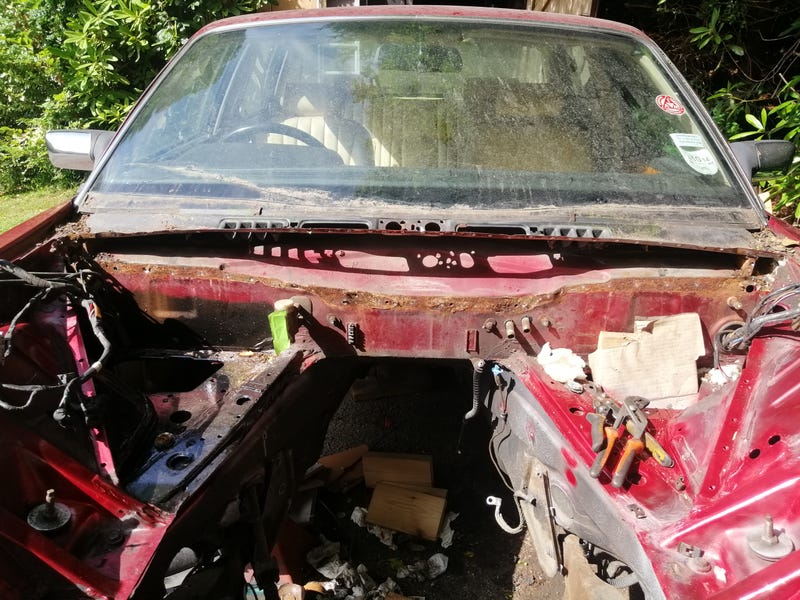 I can see what they were trying to do, but it would definitely have been better to leave the box open to let water drain out as the car corners. Luckily, I reckon anyone who's got one of these can fix the problem by drilling a drain hole right here: 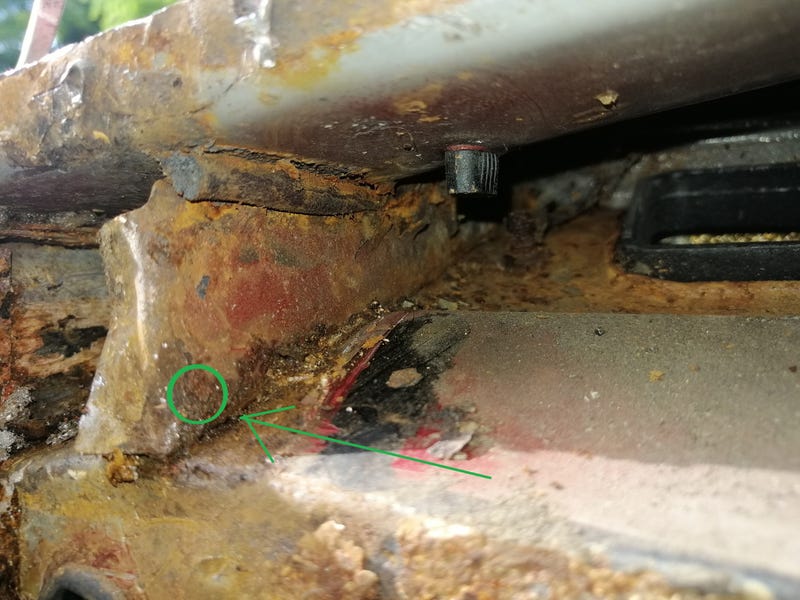 You'll have to drill a hole through the main bulkhead panel just to the right of the two vertical spot welds that hold the little blocking panel in place. Then, using that hole as a guide, drill at a diagonal through the bottom corner of the blocking panel. You can then excavate the foam through the grommet, and any water that gets in there now has a route to get out through the new drain hole. It's not a cure if the process has already started, but if you have a good car then it would prevent it from happening in the future. |
| |
|
|
|
|
|
Jun 29, 2020 12:10:07 GMT
|
|
Sealing the corner off and filling it like that is most likely a noise suppression measure to stop noise getting into the A pillar area, you will find many modern cars have what looks like bits of sponge in a polythene bag stuffed is a similar area.
|
| |
|
|
|
|
|
Jun 29, 2020 12:38:19 GMT
|
|
Ah I see. Well it was a bloody stupid idea in 1988 and it's a bloody stupid idea now (from a rust prevention perspective anyway, good idea for an initial sale). Pull it all out before it rots out your windscreen!
At the very least make sure there's a drain hole so water can escape.
I might do a bit of a search for it on some of my other cars too. The Spitfire doesn't have it, but that was a pretty rattly basic thing anyway. Fiat and Alfa might (which seems like playing with fire given their rusty reputation).
Thanks for the heads up!
|
| |
Last Edit: Jun 29, 2020 14:13:18 GMT by biturbo228
|
|
|
|
|
|
|
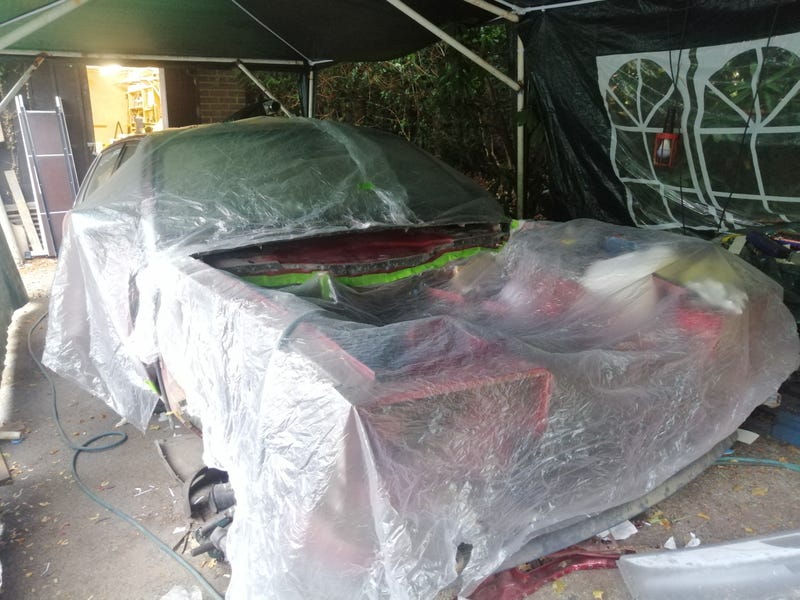
Well the screen's out! Needed more muscle-power than I'd have guessed, and I can see why people often leave it to the professionals (it's very easy to nick the paint around the screen, and I managed to crack the screen even further than it was previously). Might get someone in to do the rear screen as that isn't cracked yet! 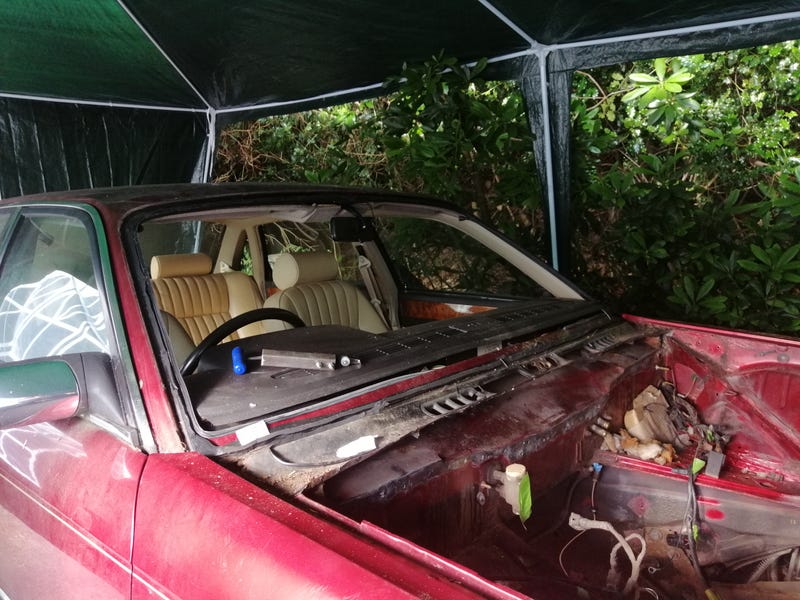 Also, put up a marquee to keep the rain out of the interior. Chose one that said 'HEAVY DUTY' on the description but it was just as flimsy as every other marquee I've ever seen. Will have to work fast so it doesn't blow down before I'm done! |
| |
|
|
|
|
|
|
|
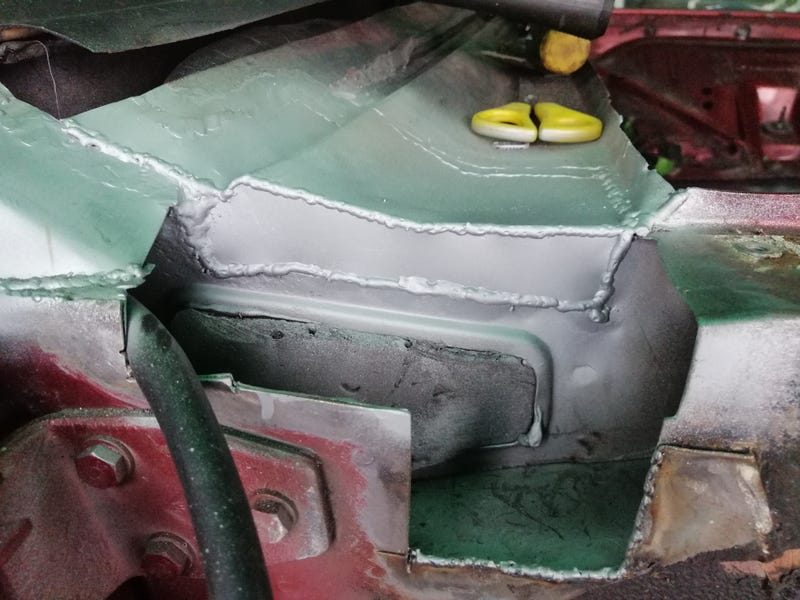
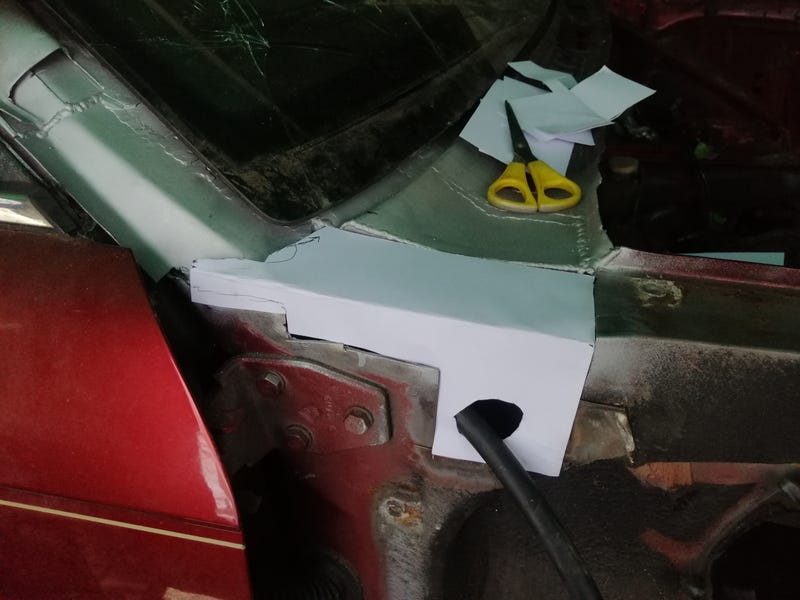
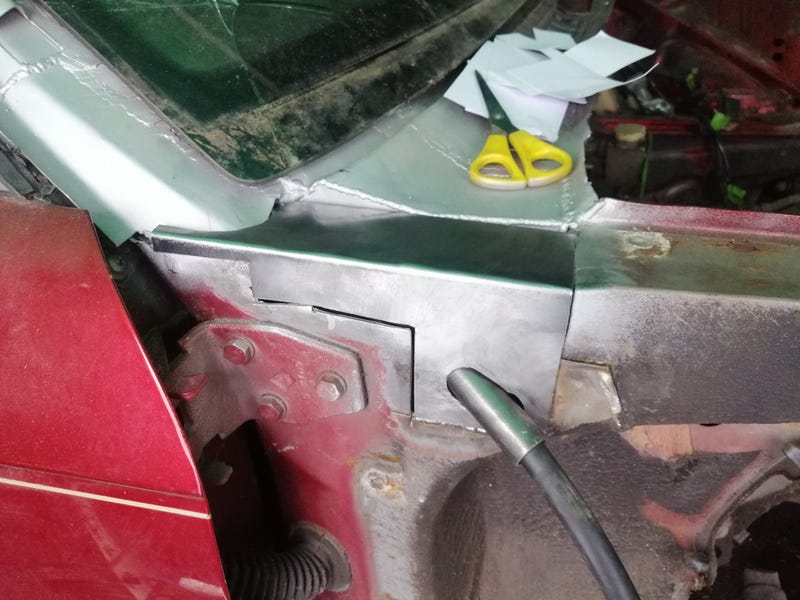
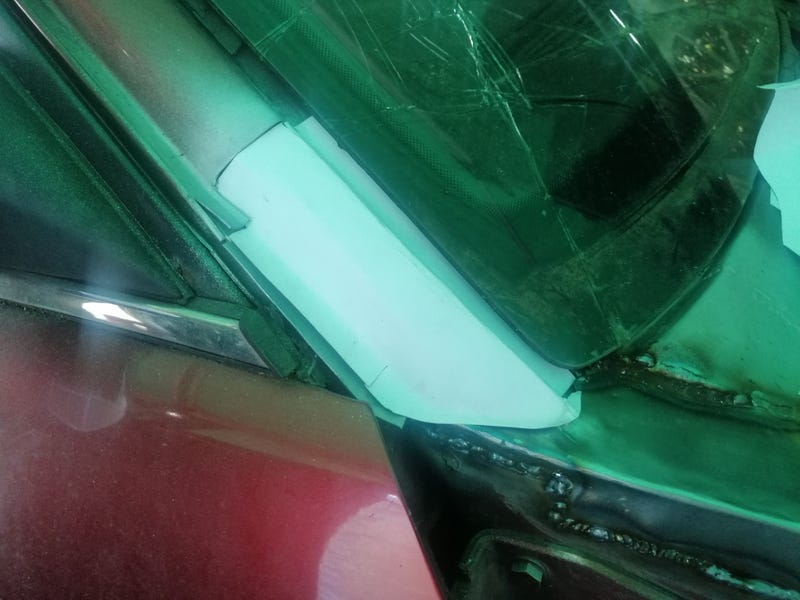
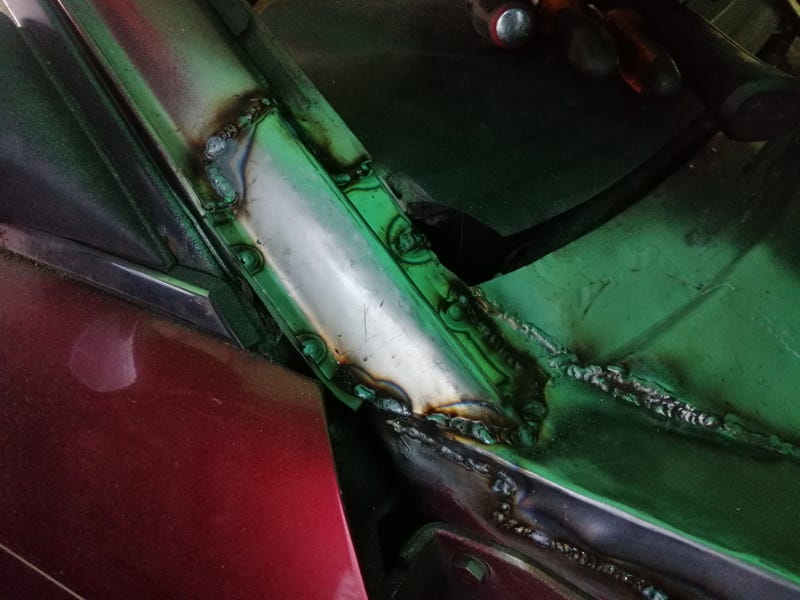
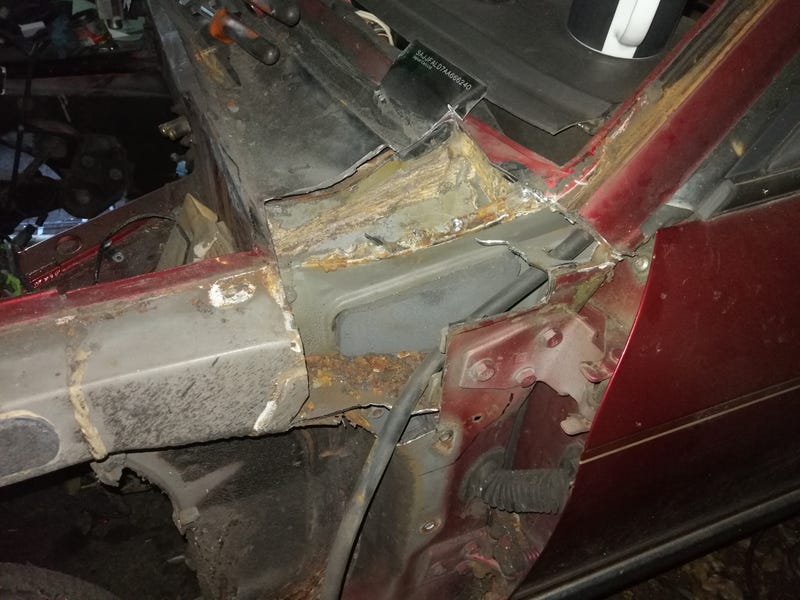
So this is what greeted me underneath the right-hand wing. Not a brilliant start, but about as expected. 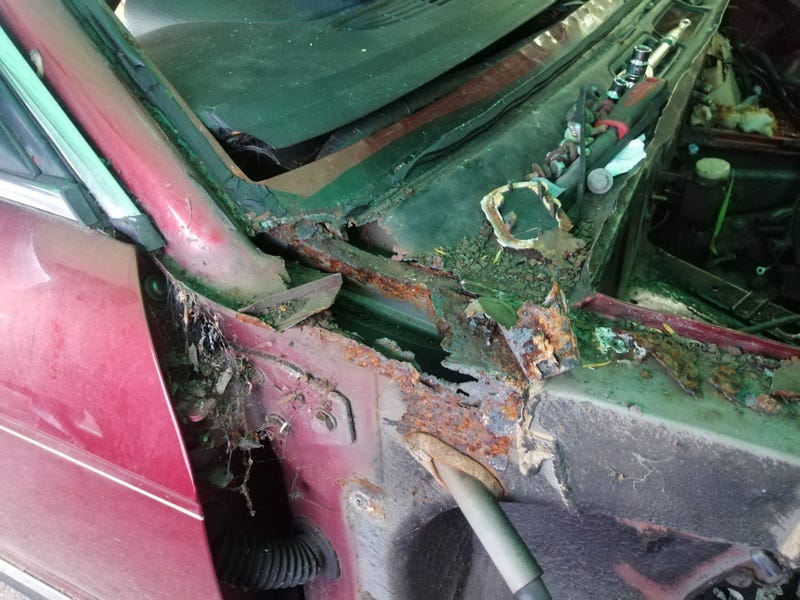 Some further investigation showed that it had tracked quite a way up the a-piller, but not very far towards the centre of the car. 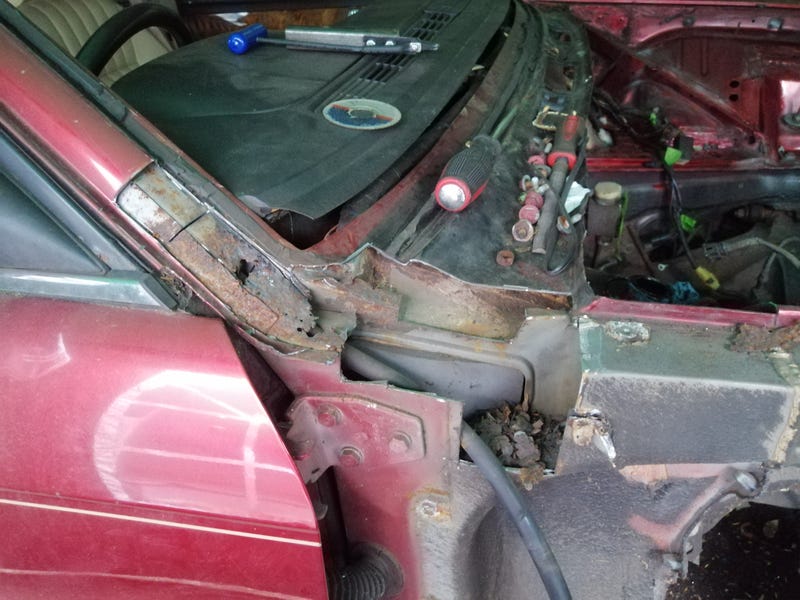 It's going to be a tricky little bit to repair as there's so many different pressings involved (5 in the a-pillar alone!). Still, tackle it piecemeal and it all comes together. You can see how water got into the little foam-filled box section as the mastic isolating it wasn't complete. I wonder if the other side (which has fared a bit better) is a bit more thorough. 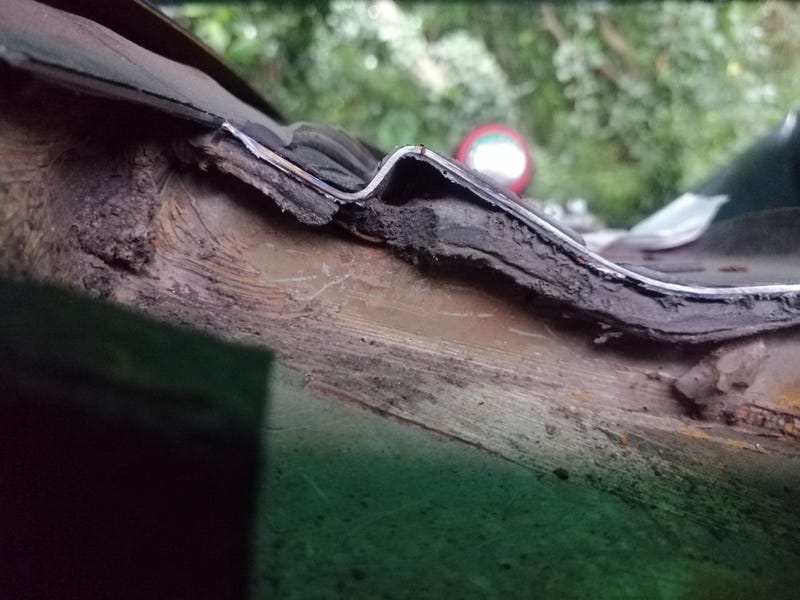 Decided to do away with the sealant and just weld the little vertical panel to the scuttle. Sometimes it's easier (and less prone to trapping water) to change the designs of panels a little when rebuilding complex sandwiched areas. 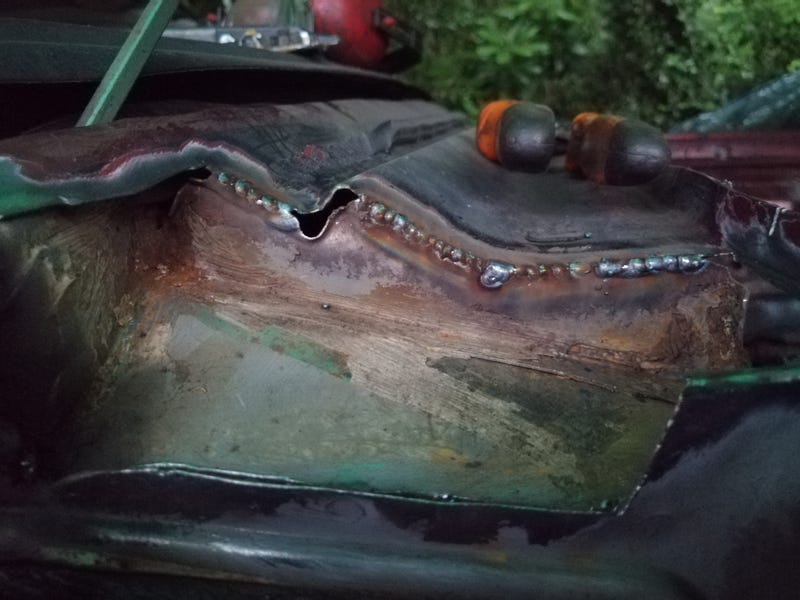 So here's all the rot excised... 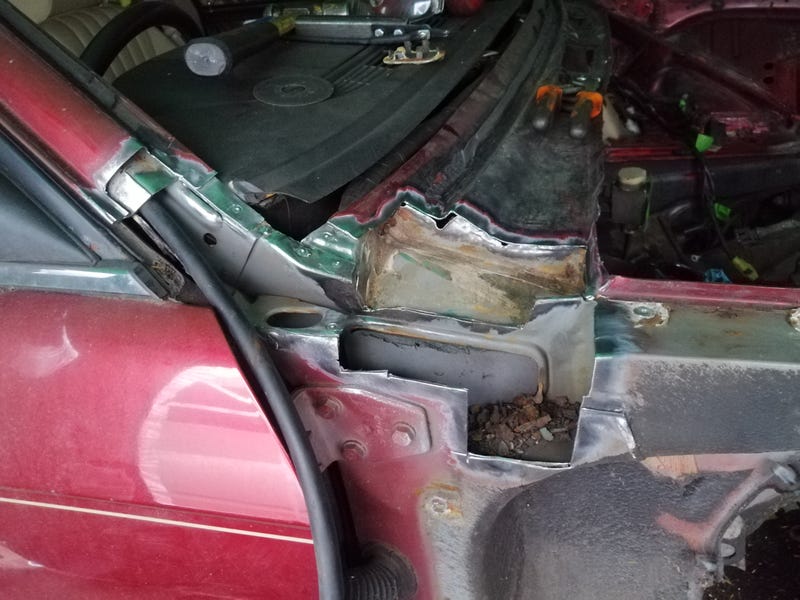 ...rust treated, and sprayed with zinc-rich primer. 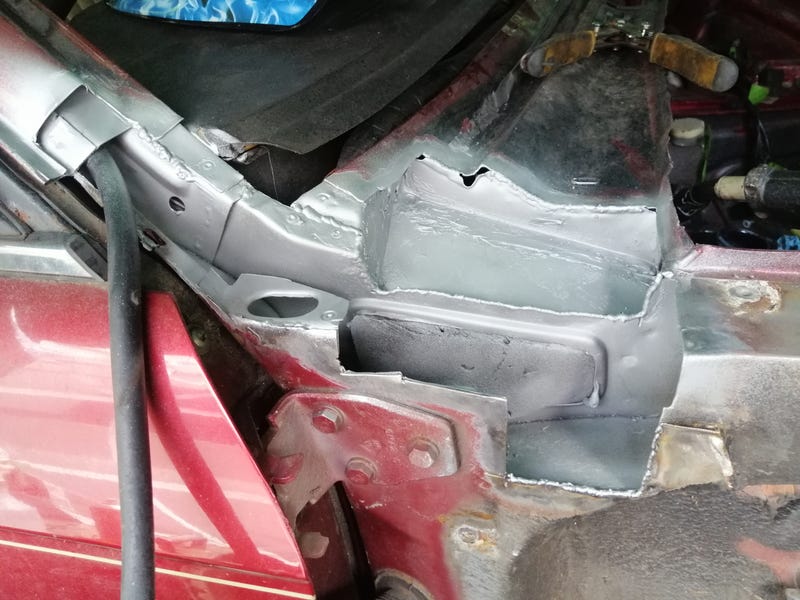 It was at this point that my 'heavy duty' marquee collapsed under the moderate breeze that was blowing. When the wind blew the bent section would get pressed against the roof and move around a bit against the paint. Luckily it's plastic so no major damage (and it's getting a respray anyway), but still. Not ideal. 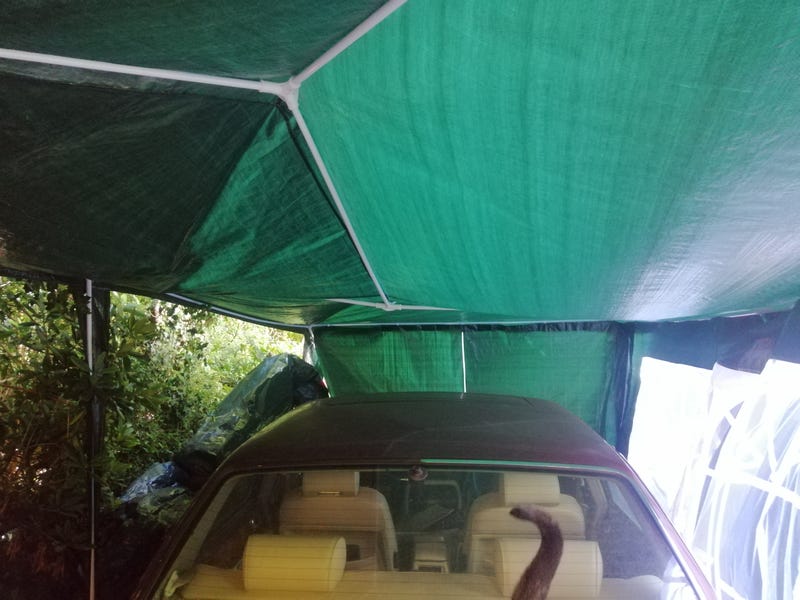 So the rest of the day was spent starting construction on a bit of a beefier shelter using the original flimsy marquee as a jig. Had some old tubing from an actual heavy duty marquee that got blown down years ago (in an actual storm) so I thought I'd repurpose that to make some triangulated frames which can go together with slip-joints along the length of the marquee letting the whole thing collapse down into flat-ish sections. 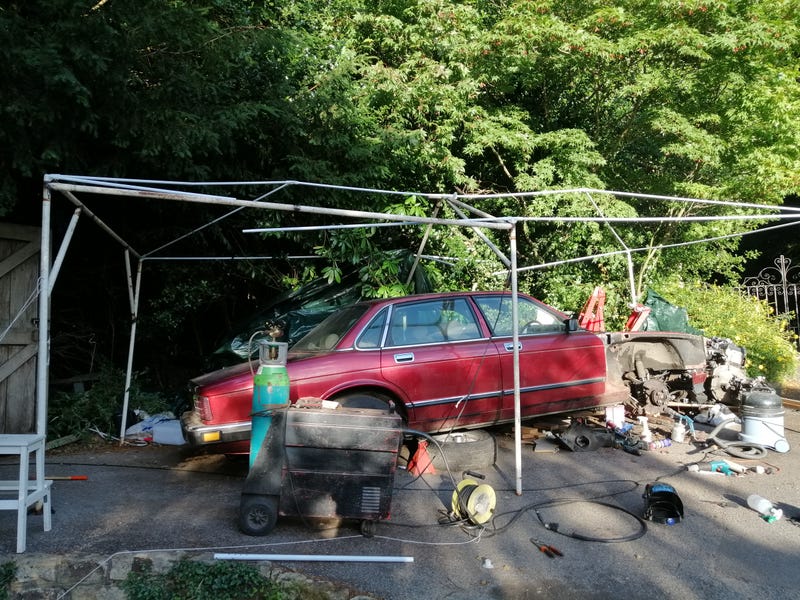 Would rather be fixing the Jag, but needs must! |
| |
|
|
|
|
|
|
|
So managed to get the marquee sound enough to be usable. Not a moment too soon as it chucked it down that very night! 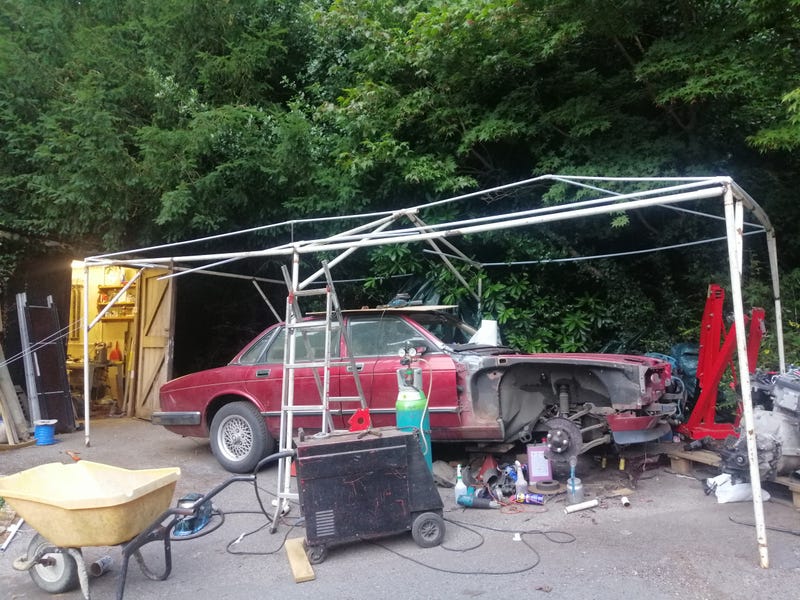 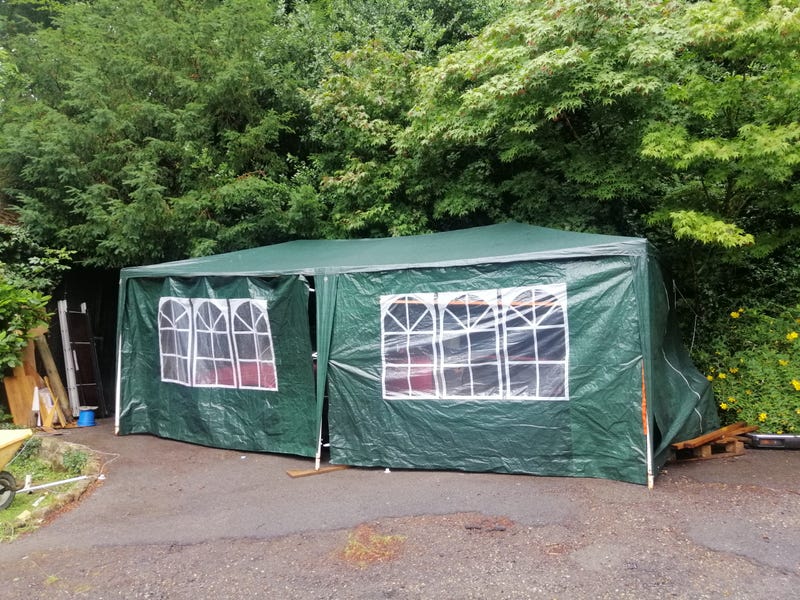 Still up in the morning! With a bit of finishing off I reckon this thing will be quite useful. Can stick it up out the front of my garage over winter and start tinkering with the 75 (inbetween Spitfire progress of course). I've also managed to get the BMW engine mostly inside it which is useful as now's the time to get the injectors out in part-exchange for some 535d pre-LCI ones. These engines really are ugly things under the covers (although I expect I've just been spoilt with Bussos and the pretty AJ6 cam covers). 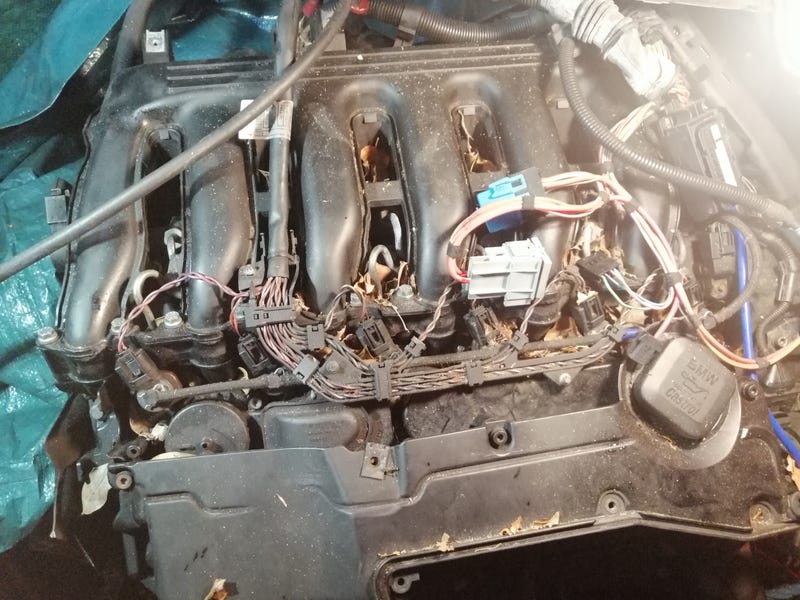 In all honesty, really easy job. Aside from some odd nut sizes (who uses 11mm nuts?), they came out without much effort at all. 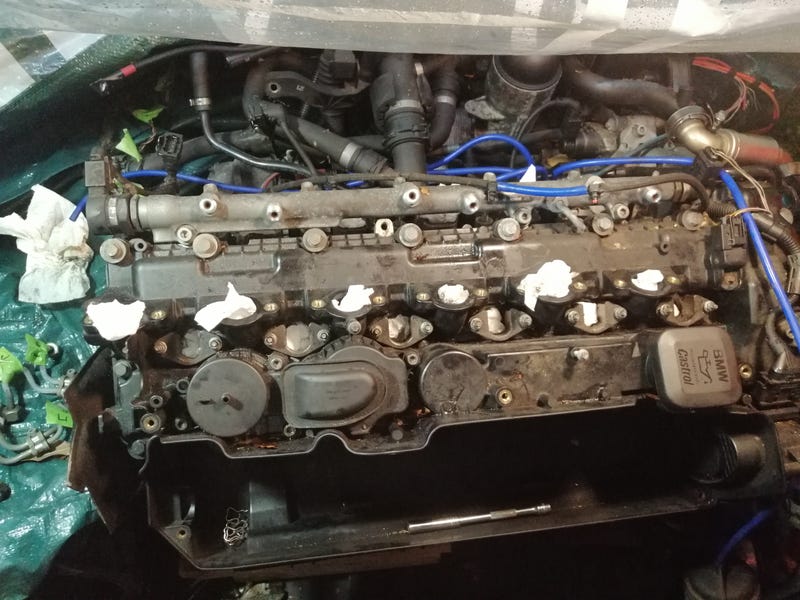 I've also removed some of the gubbins from the engine I won't be needing. Some of it will get replaced (electric fans for viscous etc), but this whole lot comes to 5kg  there's more to come off as well as I get rid of the cast-in air filter lower housing  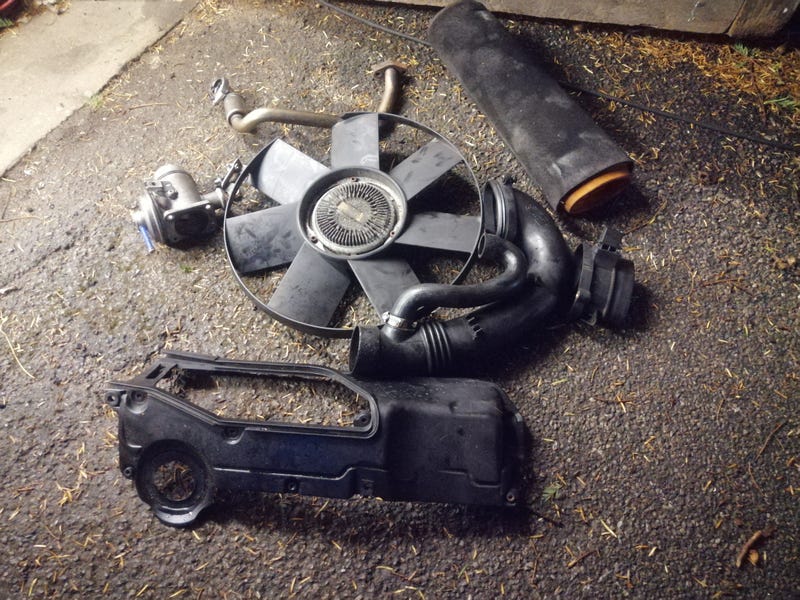 I think I've decided I'd like this car to weight around the 1700kg mark (down from the standard 1800kg). Hopefully doable without impacting any of the nice cruising nature of the '40  |
| |
|
|
|
|
|
|
|
|
|
These engines really are ugly things under the covers (although I expect I've just been spoilt with Bussos and the pretty AJ6 cam covers). See what you mean! |
| |
|
|
|
|
|
|
|
|
Yeah I'm hoping I can at least tidy it up a little bit to make it fitting for the car. Engine covers have made designers really lazy!
I'm thinking put all of the wiring into a proper loom and at least paint the raised lines on the intake manifold silver. I might have to get some sort of cover over the weird boxy gubbins littering the cam cover on the bottom side though (even though I'm pretty much allergic to superfluous covers you have to remove to get to things).
|
| |
|
|
|
|
|
Jul 11, 2020 22:05:34 GMT
|
|
|
| |
Last Edit: Jul 11, 2020 22:16:30 GMT by biturbo228
|
|
|
|
|
Jul 16, 2020 21:46:01 GMT
|
Not a great deal of progress so far this week as the GF and I are off on a little short break to the West Country now that we're allowed to move about a bit more. I have however whipped the other wing off to check for rust and there is some crustyness underneath it, but not as much as the other side so that's good  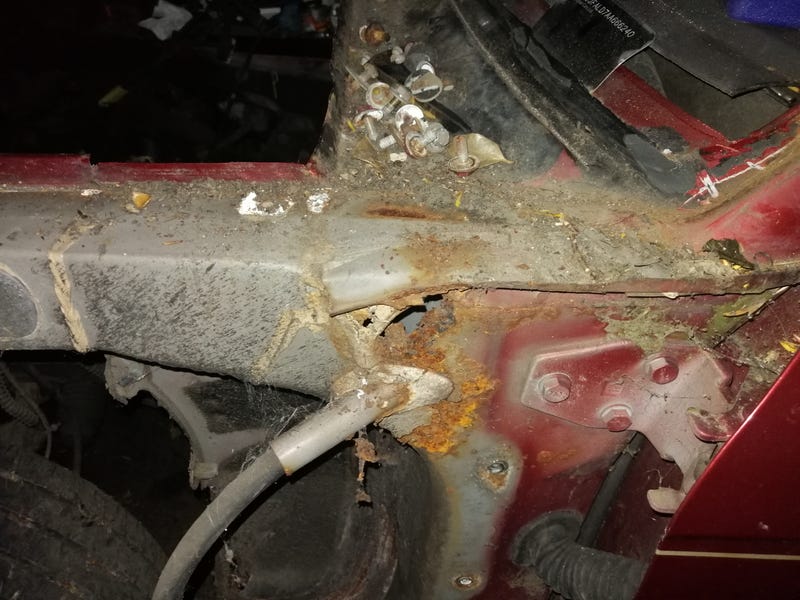 I've also come back to all sorts of goodies in the post. An 1" front ARB from an XJR6, a very nice single mass flywheel for the BMW engine, and a honking great intercooler (500x350x76). It's very snug indeed, but it does look like it'll fit! 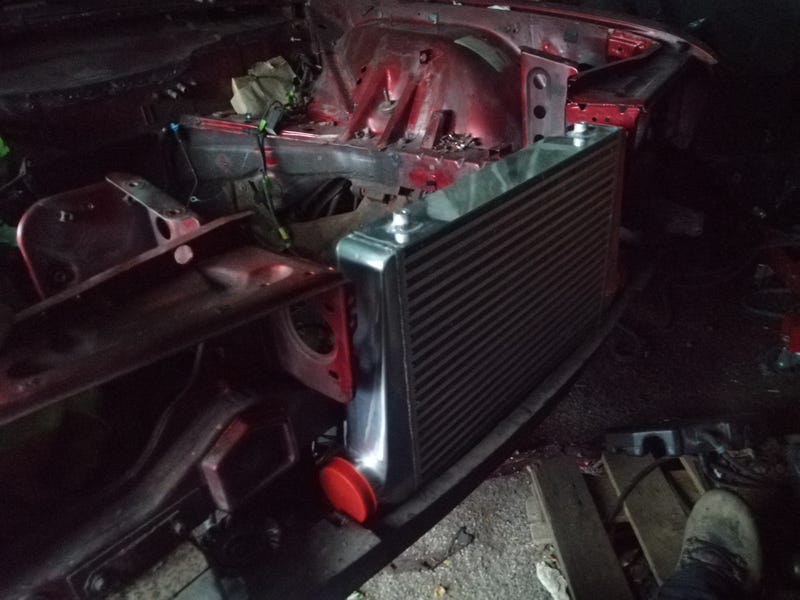 |
| |
|
|
|
|
|
Jul 22, 2020 19:53:31 GMT
|
|
|
| |
|
|
|
|
|
Jul 26, 2020 23:36:59 GMT
|
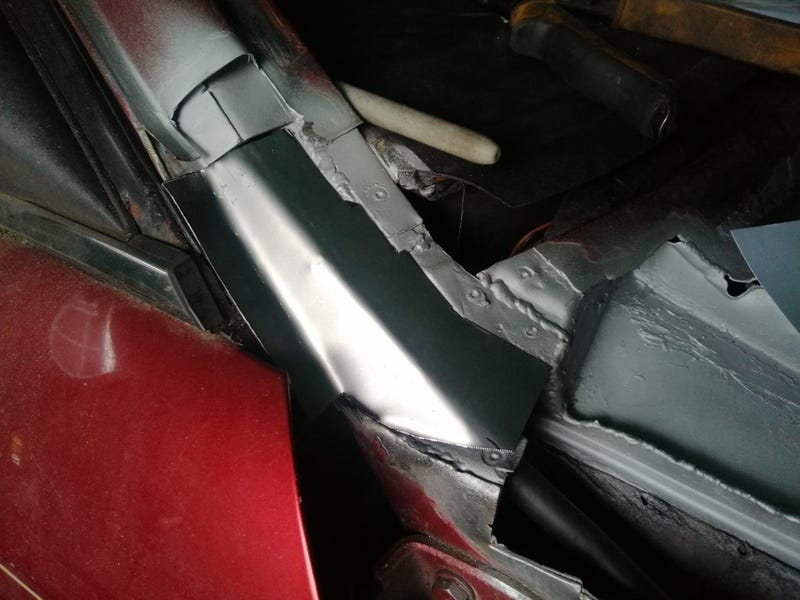
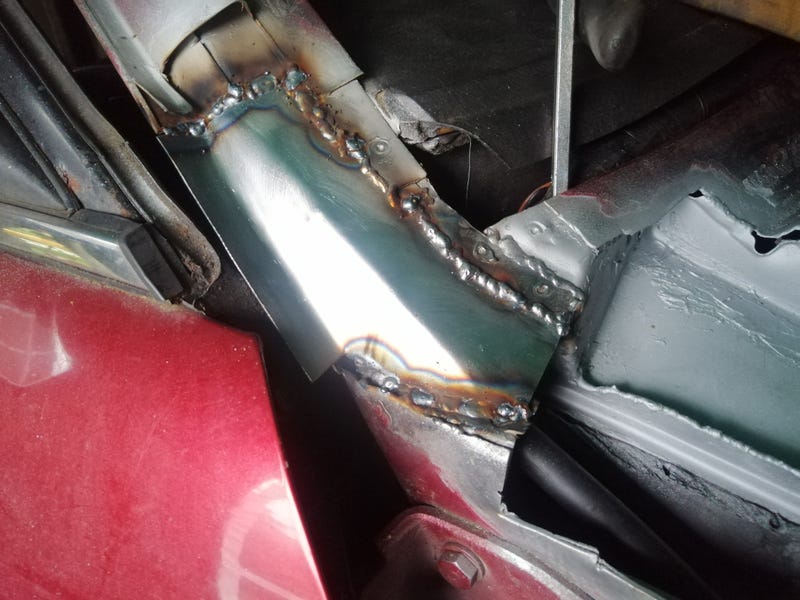
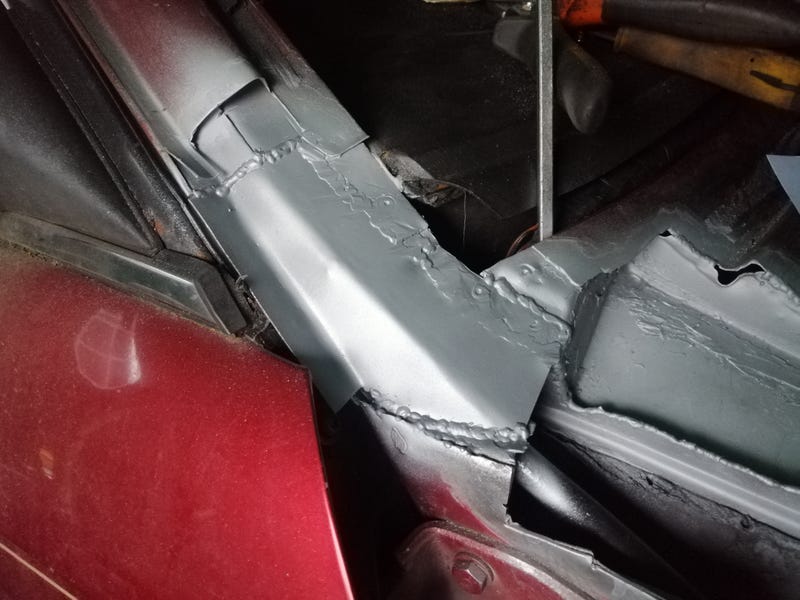
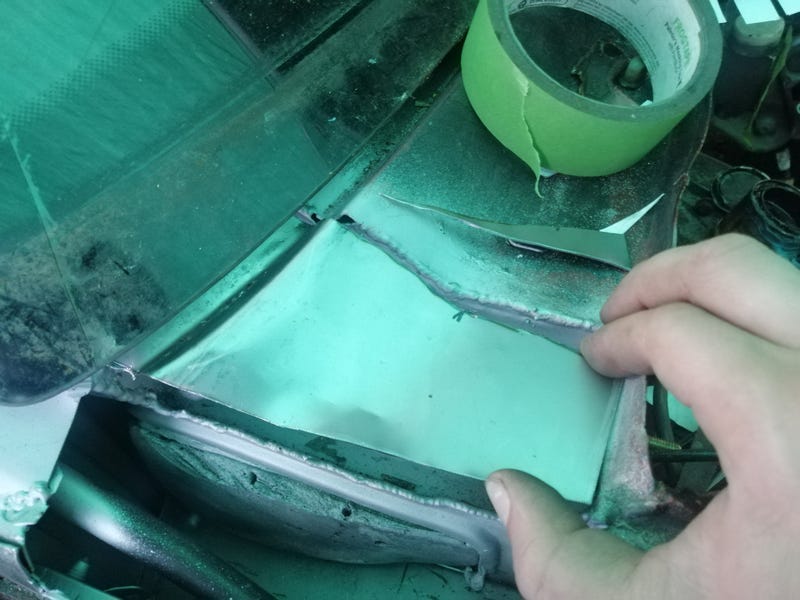
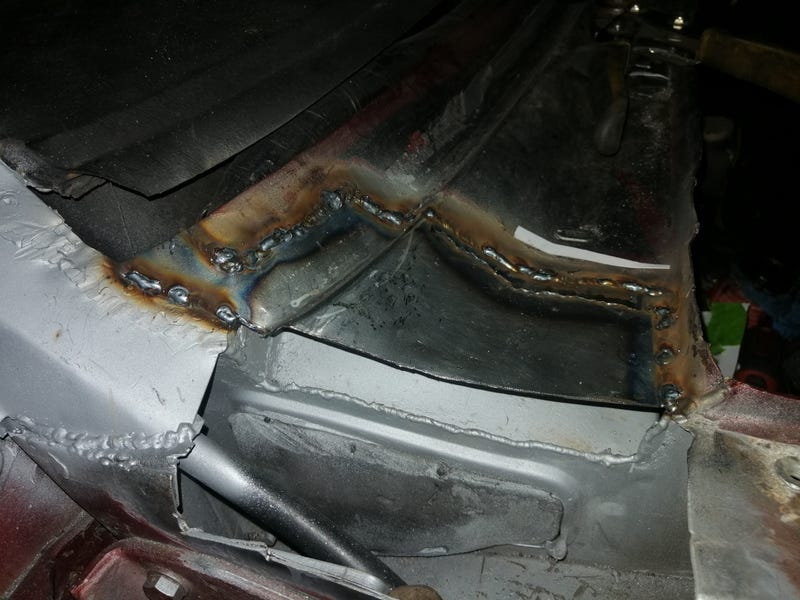
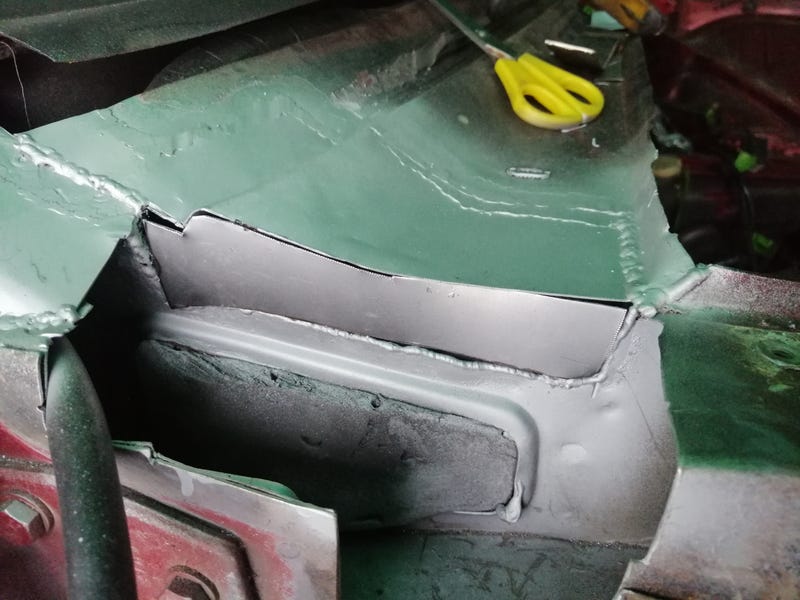
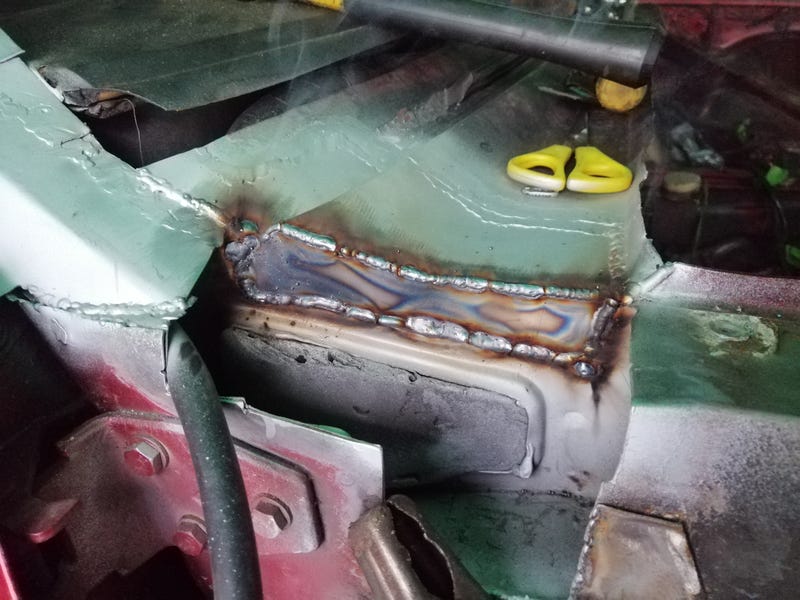
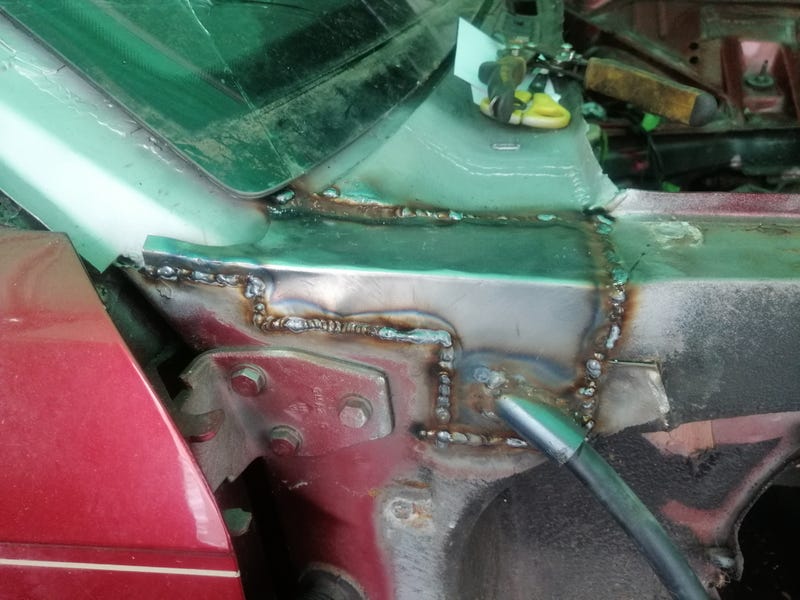
Buttoned up the passenger's a-pillar  wasn't too tricky in the end as I could salvage the complicated pressed bit as it wasn't rusty on this side. 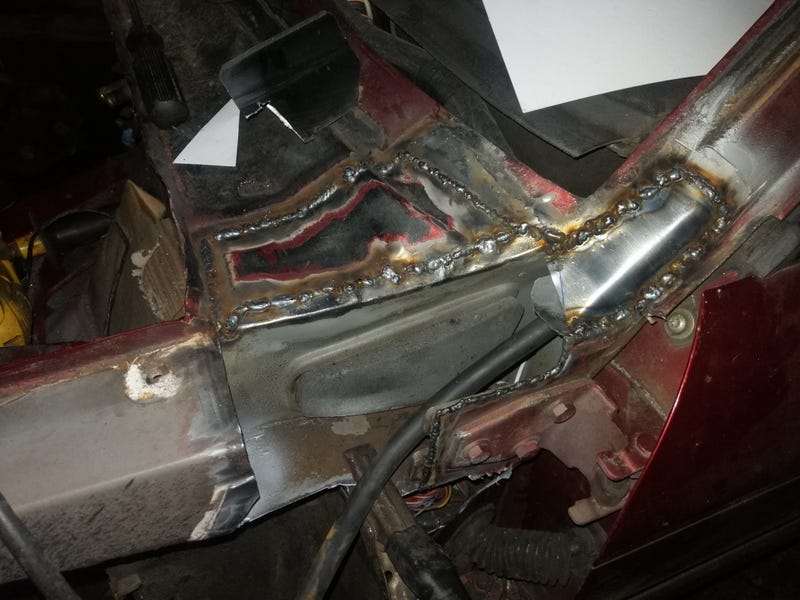 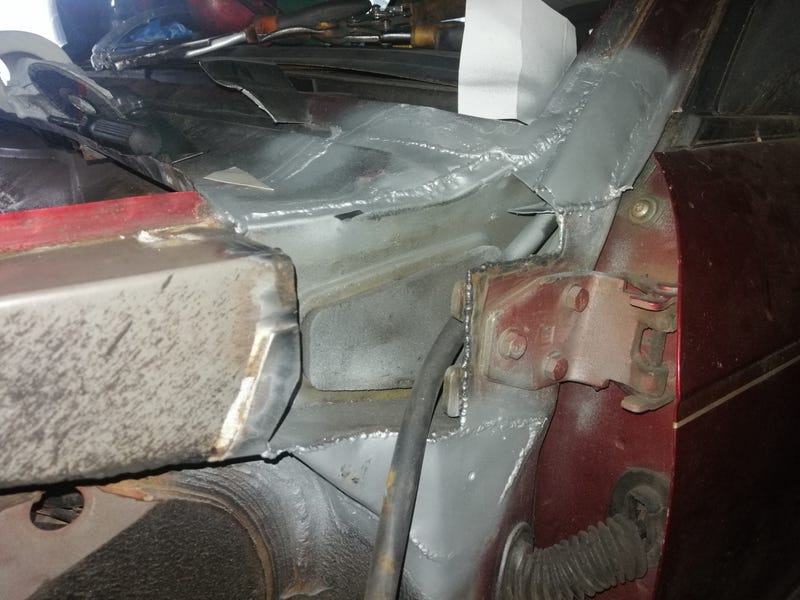 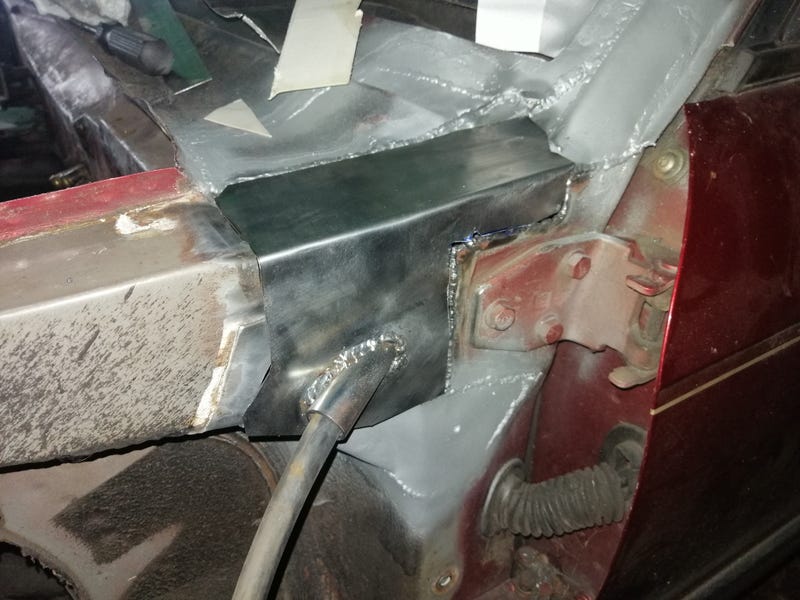 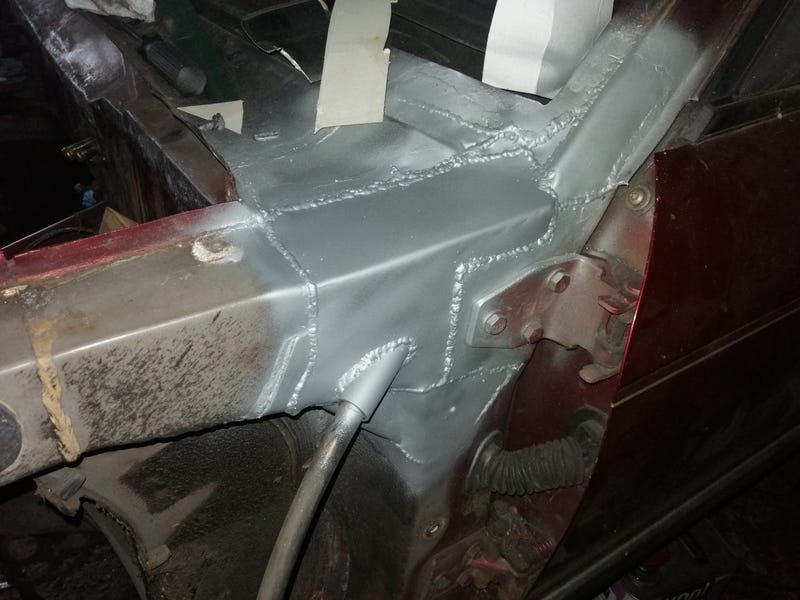 I've also done a little work on the Fiat. It hasn't driven right since it had its little off-roading expedition, feeling vague on right-hand bends so I figured there must be more bent bits that I haven't straightened yet. To recap, the front suspension of an X1/9 looks like this. There's a beefy cast lateral link, then a forward tie rod to control toe. Upper location is with the strut. 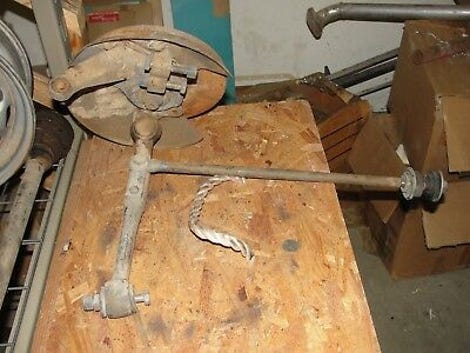 So far in crash damage to this corner I've: 1. Replaced a tie rod that was bent to 30deg or so, 2. Noticed the lateral link was tweaked slightly so put it in the press and tweaked it back, 3. Noticed the damper was loose in the strut and the top nut wouldn't tighten as it had stretched the threaded section, so managed to shrink it back down with a hammer and the vice. Recenty, I've noticed that the strut tops seem to be pointing in slightly different directions so I figured there must be damage to the tie rod affecting the caster setting. Would explain my vague right turns. Turns out my suspicions were right! Measured the caster and it was 1.5deg different between sides. 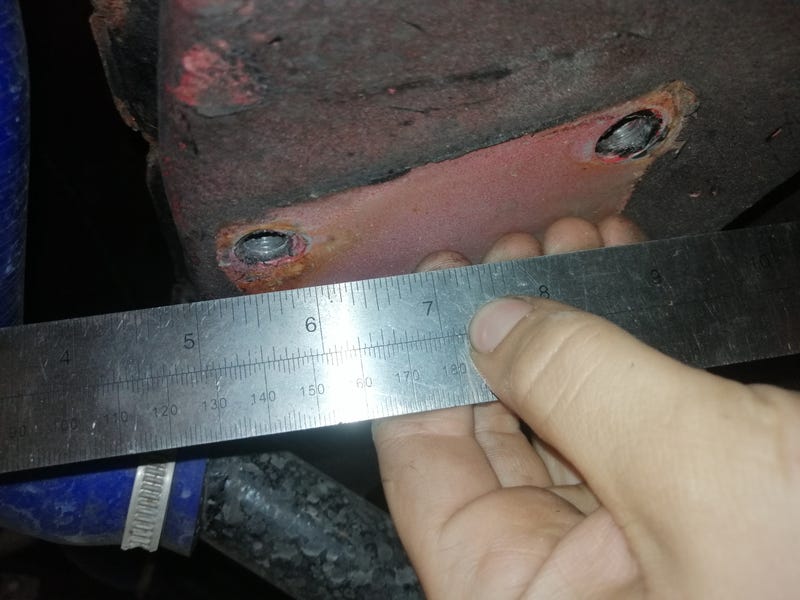 This is the bit where the tie rod bolts to the body. The gap where you can see my fingers isn't supposed to be there! Turns out the force of the impact pulled the mounting point up and backwards as it rotated around. Had to slit the metal around it to lever it downwards, and welding it up was a royal pain as there was cavity wax in the box section above. Grateful for it slowing the rust, but it isn't half a pain to weld around. Not my proudest work. 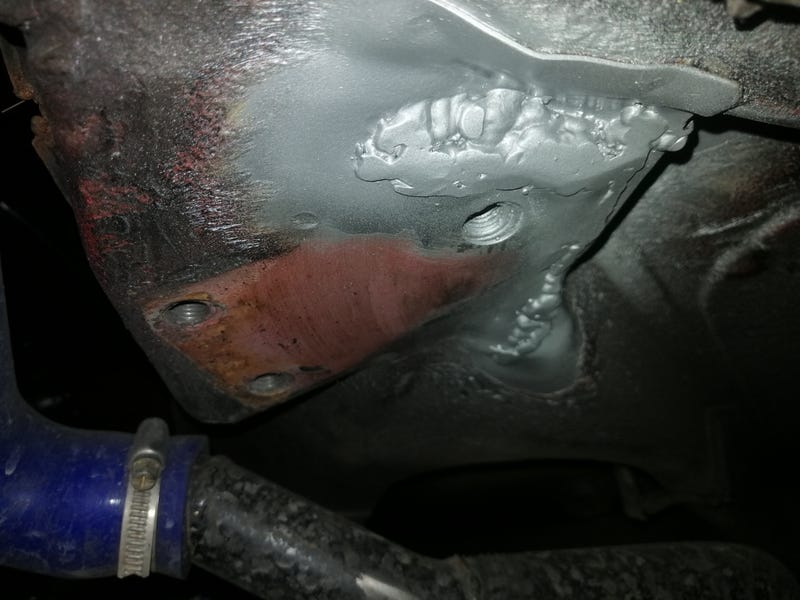 As it's a suspension point I thought I'd reinforce it with another layer over the top, just in case any of my welding beneath was too contaminated (although I did manage to get it to work ok). 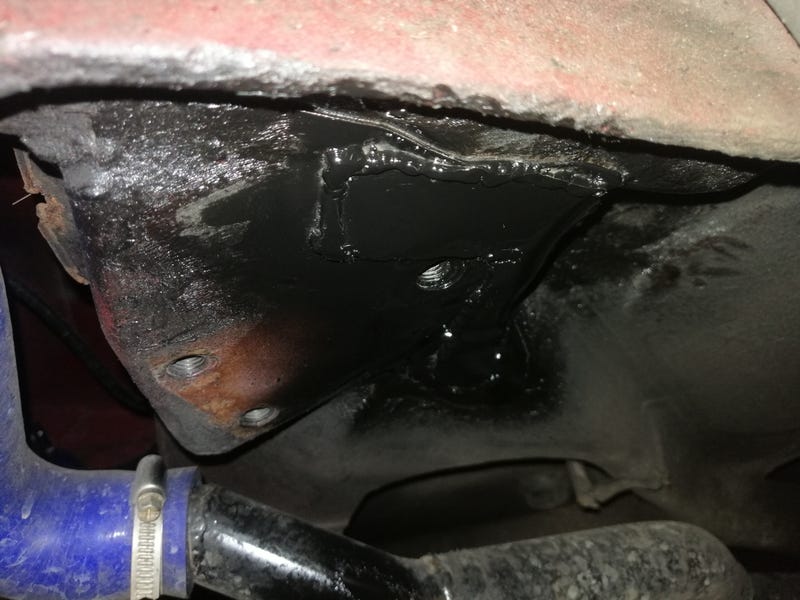 That gained my half a degree of caster so I was getting closer but not there yet. Had a bit of a closer look at the tie rods themselves for damage and found this: 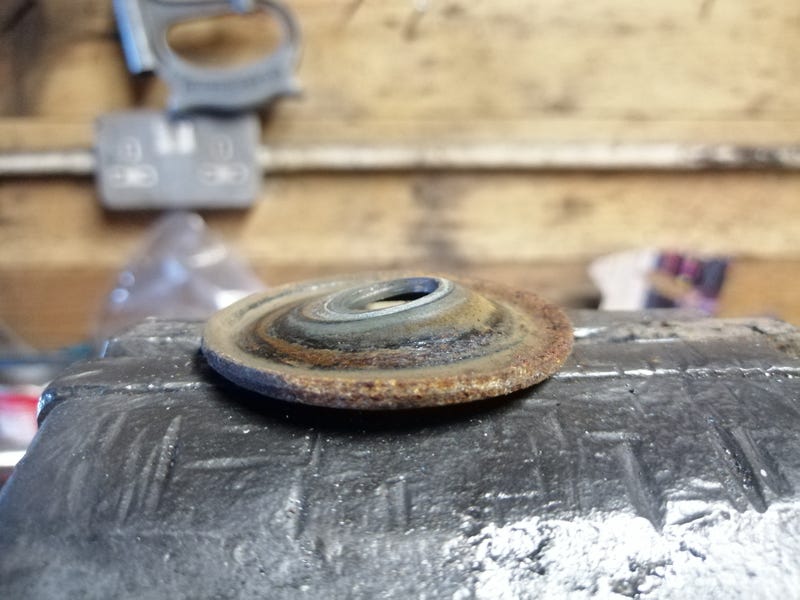 This is the little end-washer that the bush bears on. The other side is flat! So I pressed it back into some sort of shape with a couple of sockets and fitted a beefy washer behind it to help give it some strength back. Also took the opportunity to replace the tired bushes. 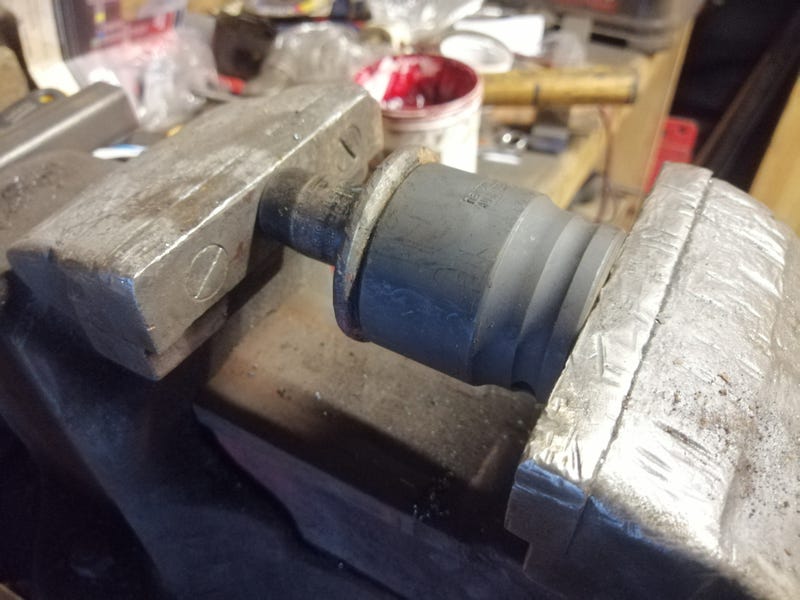 With all of that done I'm down to a 0.4deg difference in caster between sides, which is well within the (fairly generous) factory tolerances. As I'm not 100% convinced how even the floor is and the struts aren't perfectly vertical I'm calling that a success and seeing how it drives. Eventually I'll make some adjustable tie rods so if it's near enough I can tweak it until it's right  |
| |
Last Edit: Jul 26, 2020 23:37:39 GMT by biturbo228
|
|
|
|
|
|
|
Fiat updatesSo, I went to test the Fiat after its suspension repairs and I noticed that the gearstick was behaving strangely. It was returning to centre in different places depending on what gear it had come out of. Initially I thought the cable was slipping in the end I crimped on. Took everything apart and crimped it again in a different place, but that didn't change it at all so something else must have been happening. Eventually, after I'd taken everything apart and poked around I found out what was happening. The steel wire that reinforces the rubber outer lining of the cable was migrating inside the sheath! You can see it poking out here. 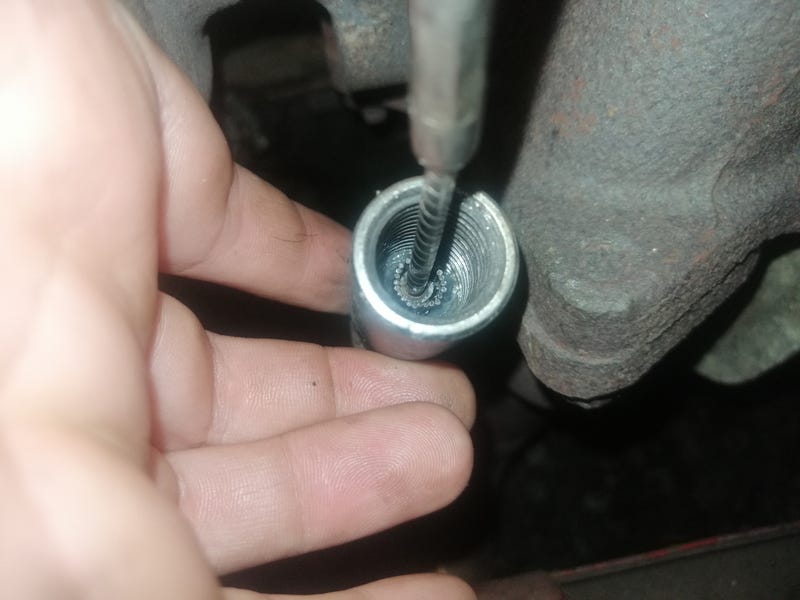 That would explain the worsening shift quality. Also, because I assume it's been trying to force a gear in when it's just outside of its gate, the linkage housing has bent as well. Not surprising seeing as I've chopped so much out of it. 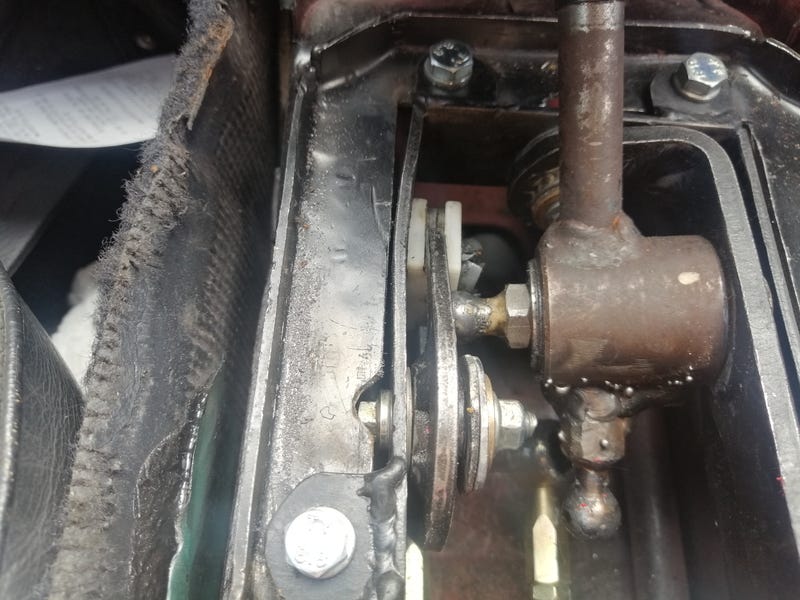 So, I did a bit of reinforcing to stop any flex in the housing. 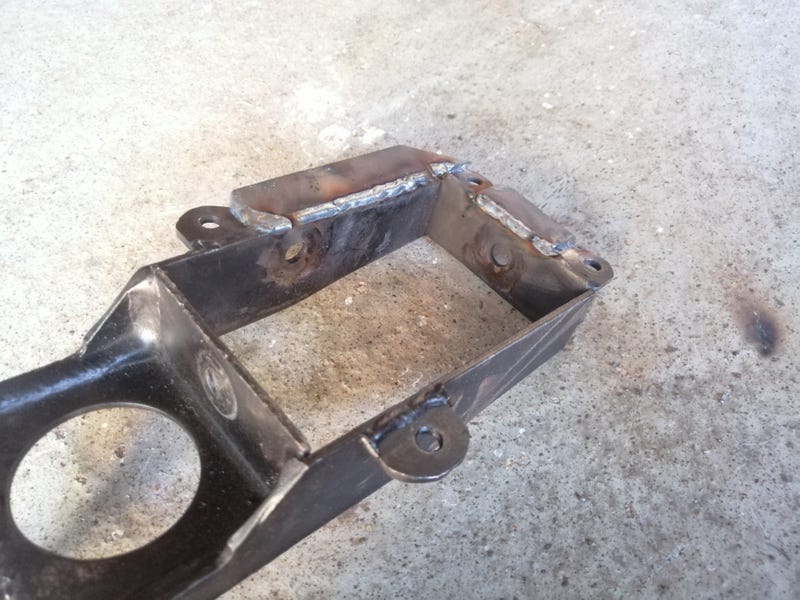 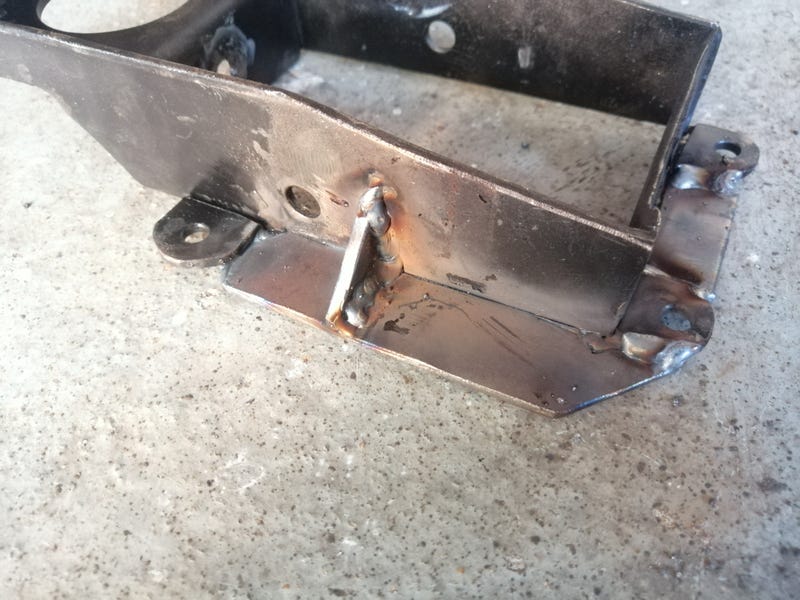 I also pinched the smaller lever arm from a spare set of linkages I have as I'd shaved down the other one to fit properly and tried to shim it out to fit the little bronze bush. As I don't have a lathe the shims were never perfectly the right size so there was additional play that wouldn't have helped. Turns out the whole exercise was unnecessary as it works perfectly fine without the modification. 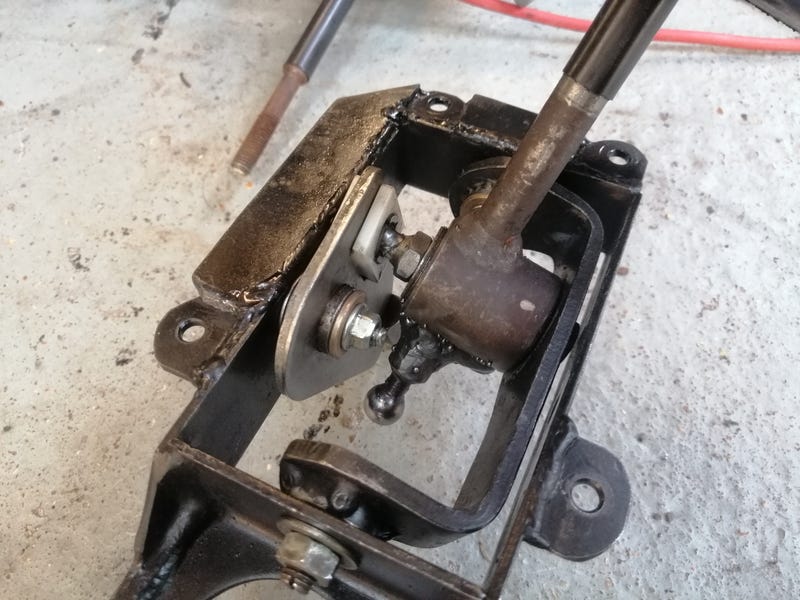 I also found that the linkage was catching on itself when getting into reverse, so I clearanced that a little. 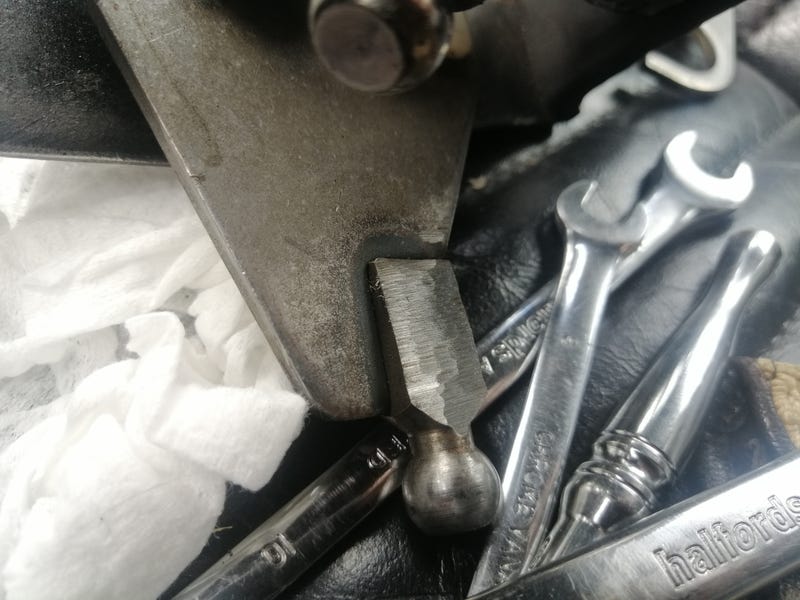 For the cables I figured that the standard MG cable ends must have an end-stop inside them. Initially I thought of a spacer to bolt down against the wire reinforcement, but that would involve precise measuring and cutting. Then I found you can get M16 grub screws so I can bolt those down against the cable ends, then use the actual bolt to clamp the cable end to the bracket. Like so: 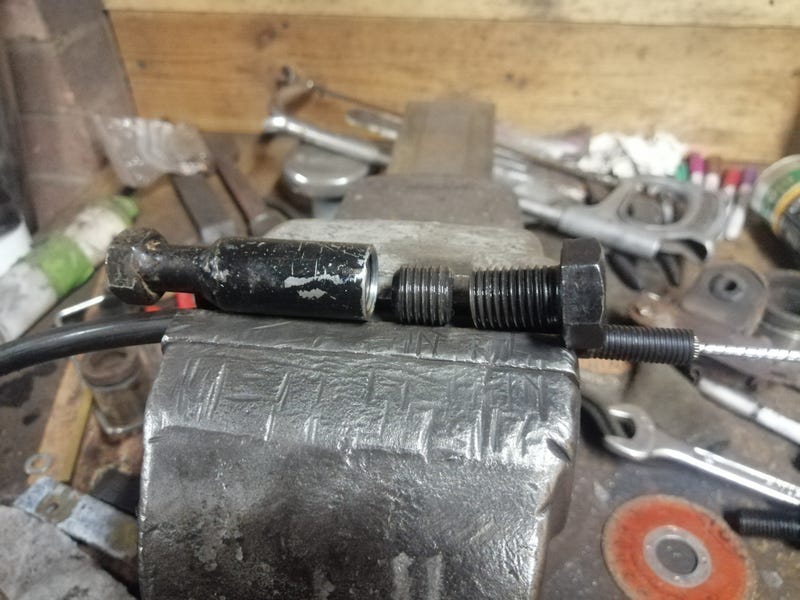 Had a couple of iterations drilling through the grub screws. Initially drilled a 7mm hole so the cables could draw all the way back, but it turns out that was too wide to act on the wire reinforcements. Drilled a smaller hole through, but that meant I didn't have enough travel. So what I ended up with was drilling a big hole for 4mm depth, and then a smaller one for the remaining 2.5mm (the one on the left). 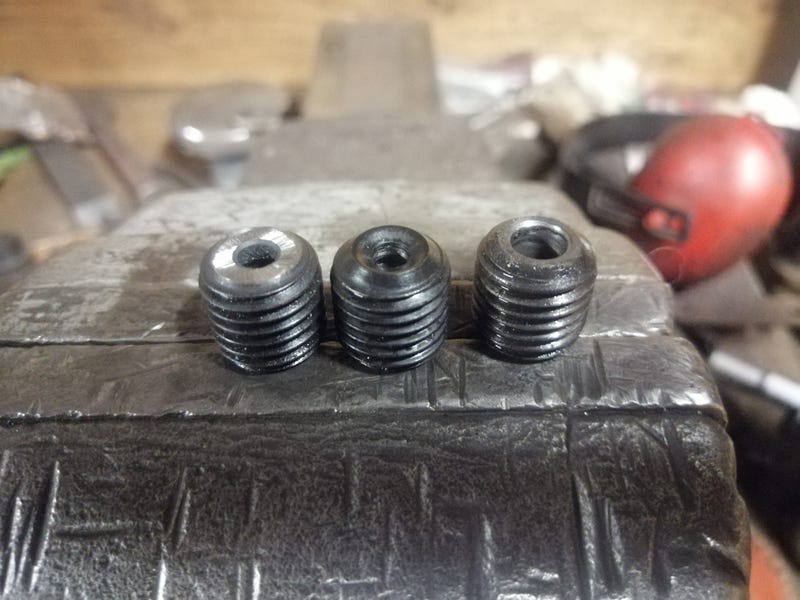 I also took the opportunity to try and drill the centre-hole through the bolts a bit straighter using a method I'd seen on youtube with two chucks on a pillar drill. Worked quite nicely, although there was still runout. Having a short starting drill bit would help, as would having a good drill press that you don't need to shim quite so much to get everything square. 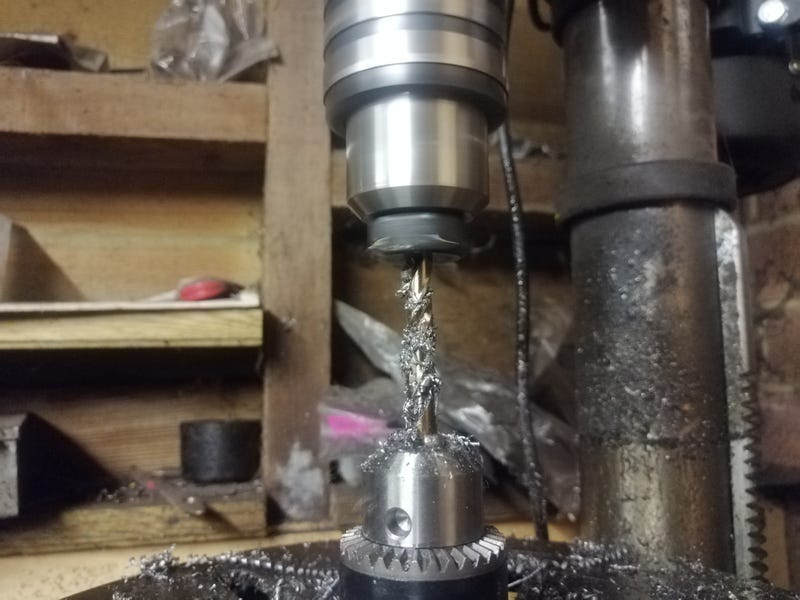 Lastly I lengthened the lever-arm on the gearbox-side so there's a bit more side-to-side travel which should lessen the force on the cable a little. With all of that done I now have a linkage that works again properly! Just a cracked coolant hose to replace then the Fiat's roadworthy again  Jag updates Jag updatesNot much moved fowards with the Jag, but I did make a trek up to Lincolnshire to pick up a secondhand windscreen to replace my cracked one. Only just managed to fit it in with both rear windows down the whole way back! 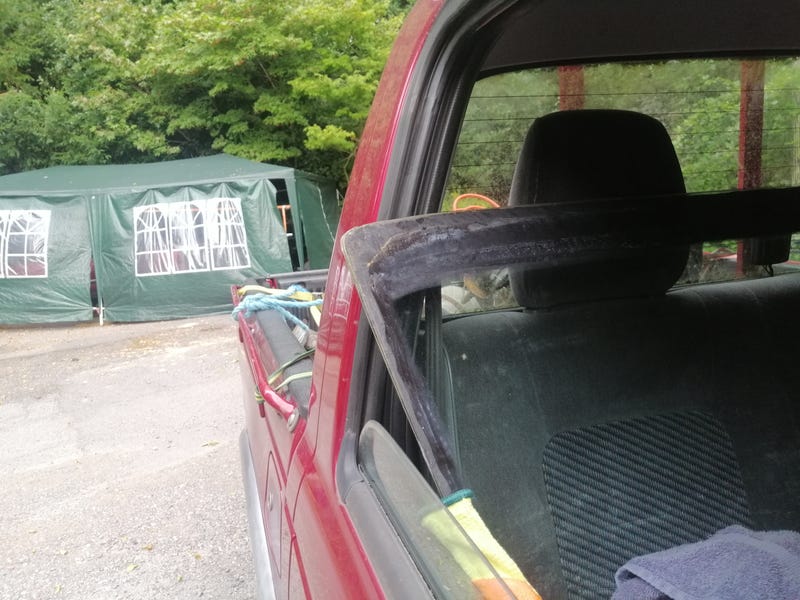 Also stopped on the way to grab another Rover 2600 engine. The eventual plan with these is to build a hot one to put in the Spitfire after the 2500PI lump. Reason they're getting bought now is that they're getting a bit thin on the ground so bargain ones are harder to come by. Its also tricky to get parts for them so having spares should pay dividends  it also comes with an LT77 gearbox which is a bit beefier than the Triumph saloon box on the Spit at the moment. 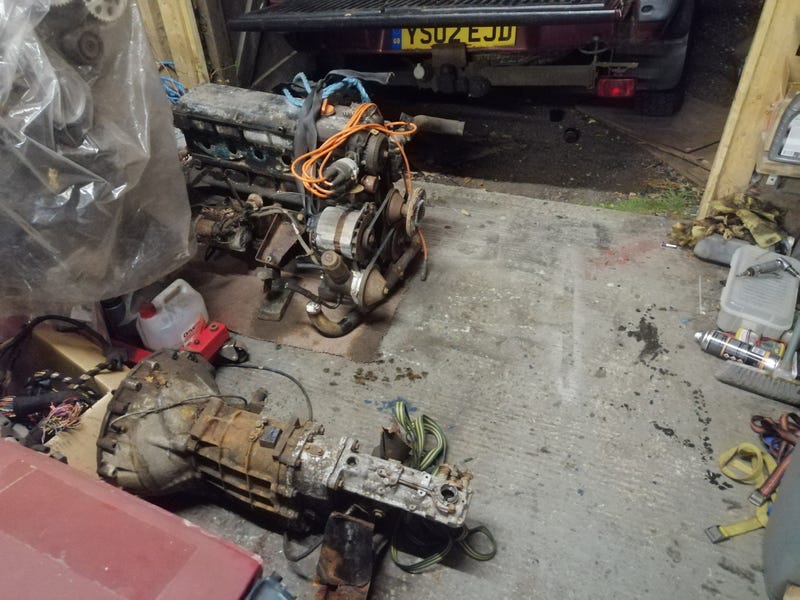 Garage is a bit full at the moment though! 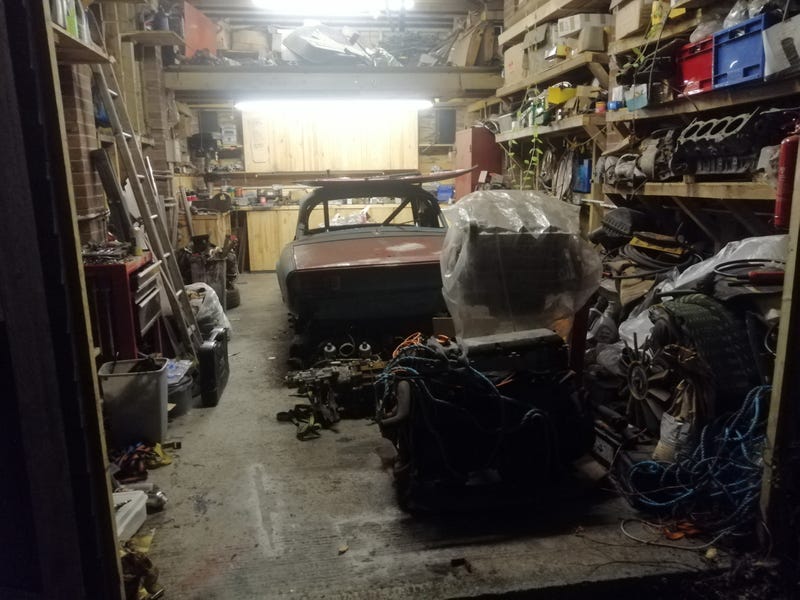
|
| |
|
|
|
|
|
Aug 18, 2020 22:10:33 GMT
|
|
|
| |
Last Edit: Aug 19, 2020 22:59:30 GMT by biturbo228
|
|
|
|
|
Aug 24, 2020 14:17:29 GMT
|
It's stuck! 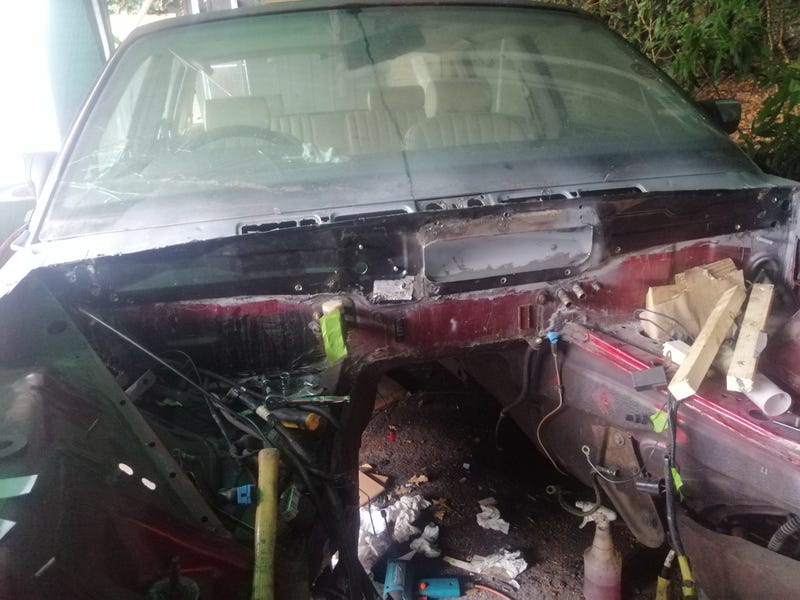 Next steps are to clean everything, do a leak check and patch up any holes, and then get some paint on it. Haven't quite got round to that yet as I was helping my mate out with his V8 E36. Ever since he bought it it's had some slightly odd rattling noises coming from the clutch area. There's also some other rather ropey aspects of the build that, while we can see why they were done, we'd rather redo a little better. All of that added up to pulling the engine, which came out about a week ago. 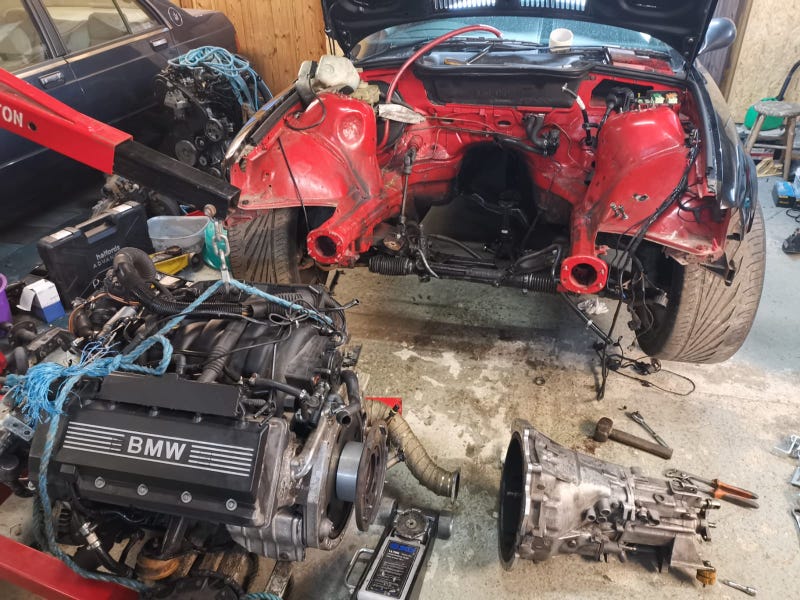 What we were concerned about was a bolt for the clutch adaptor kit working its way loose and ejecting the flywheel out of the bellhousing. Luckily all of that was tight, but we did find the spigot bearing just loose in the hole in the adapter. That was probably the rattling sound! The only thing we can think is that it wasn't fitted properly as it was a snug fit in the flex plate. My mate had also sorted a radiator mounting to fit the new M3 rad as the old one was leaking (and a little small). 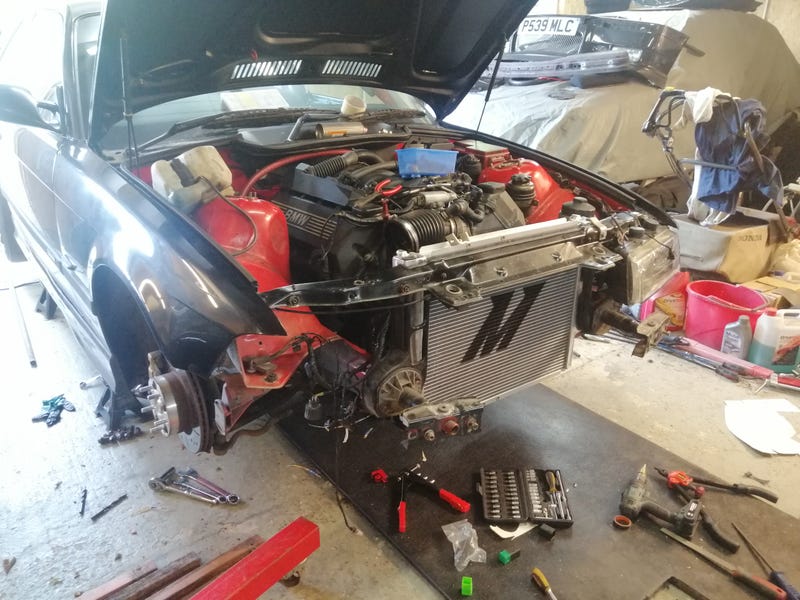 Everything was coming along relatively well, and on the Sunday just been there was a little socially distanced car meetup we were going to. We looked at how much there was left to do and thought 'I reckon we can make that'. Cue some solid working on Friday evening and all through Saturday! Job 1 was to remake the fuel lines as previously they'd been run in rubber hose all the way through the cabin. We can see why as there's practically no space between the headers and the chassis rail for fuel lines, but it's not exactly the safest setup. First off my mate drilled a hole through the chassis rail and welded in an offcut of my Spit's rollcage tubing for the fuel lines to pass through. 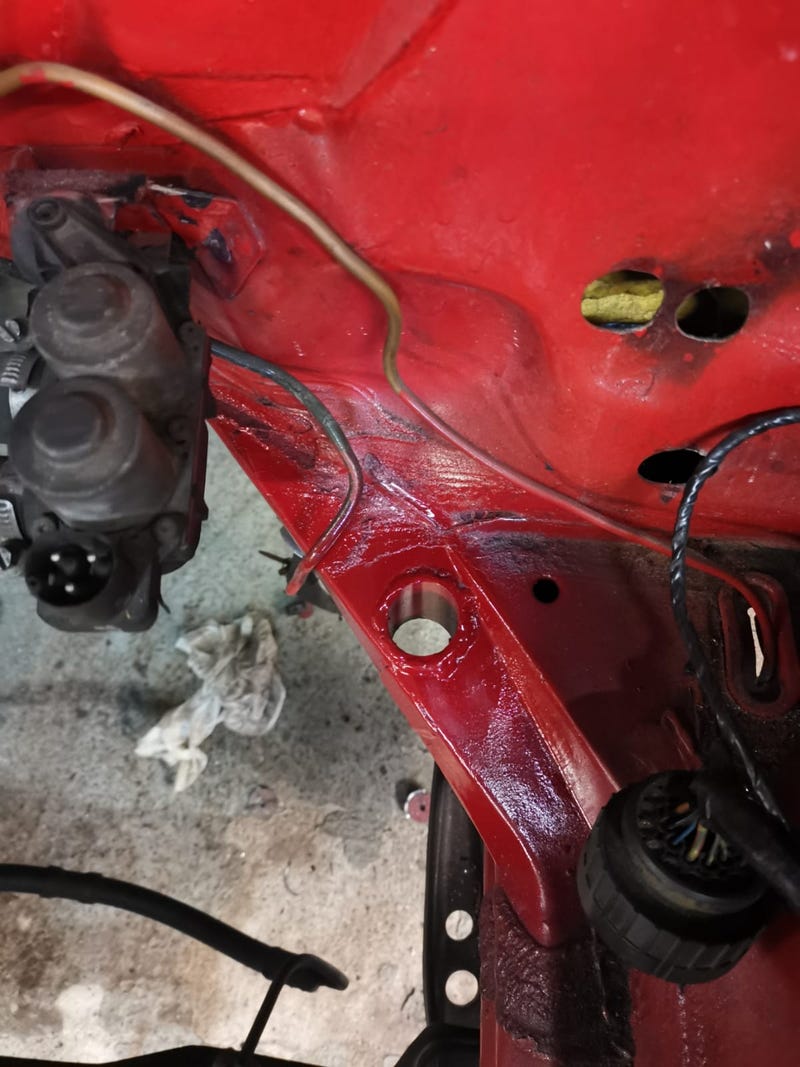 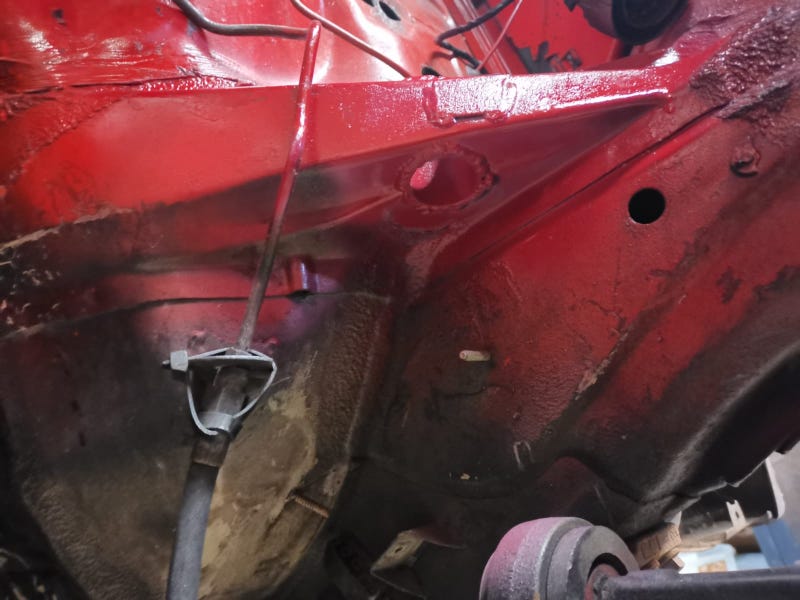 Then we made up some fuel lines in the stock position. They still got rather close to the headers so I made up a little heatshield to try and prevent heat soak during traffic. 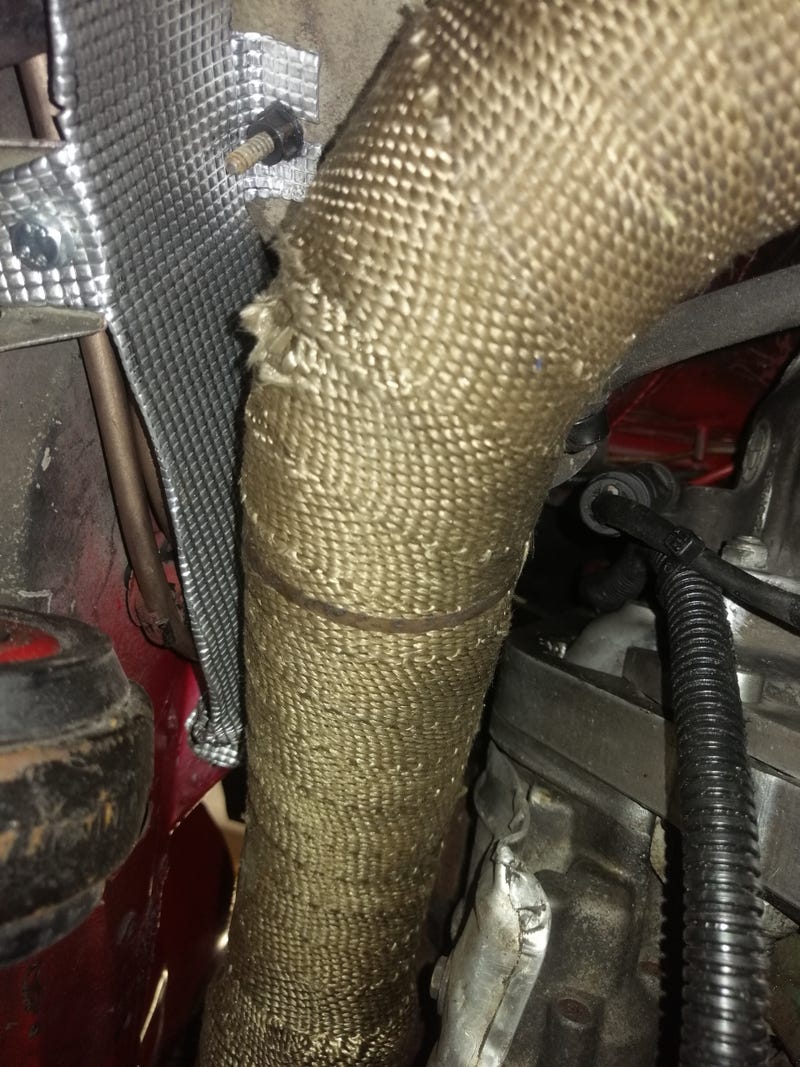 Engine was back in by the Friday night, which we thought was pretty good going! 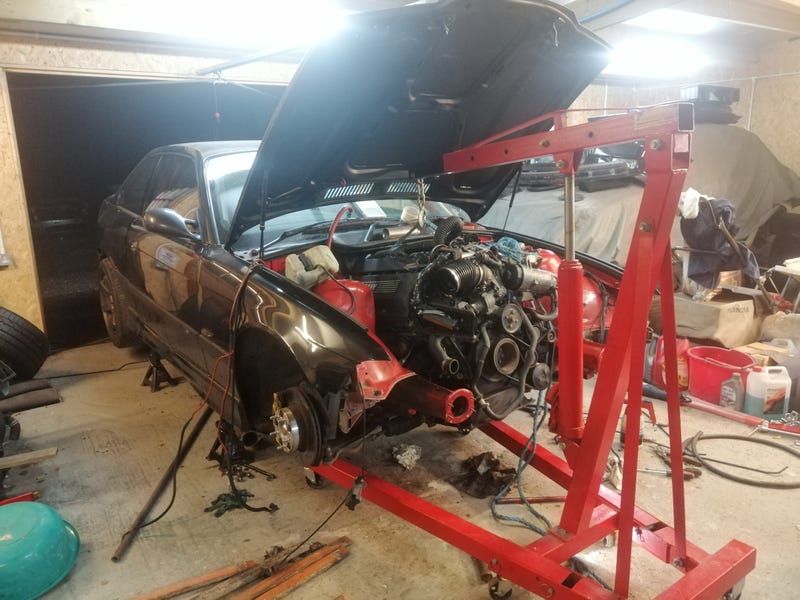 Turns out there was still a massive amount to do. Had to re-route and re-make power steering lines, plumb coolant lines, fit the fan using home-made clips. Got us to this point: 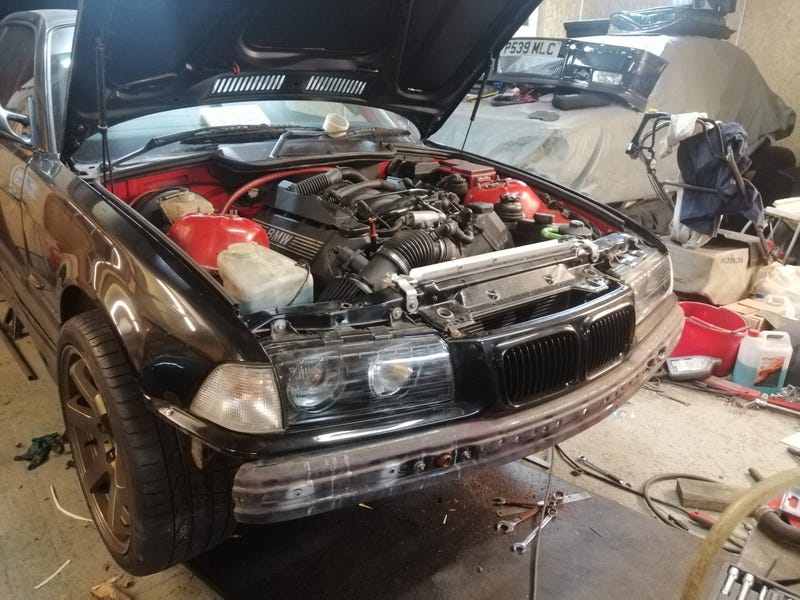 That took until about 11pm on the Saturday, where we were reminded that the 540i expansion tank we had really didn't fit anywhere in the engine bay. Some creative clearancing with the angle grinder, a bit of welding and relocating the PS reservoire and remote oil filter and we just about managed to sandwich it in! Some finest cable tie engineering held it down and we were done! Down on its wheels for tracking at 2am (which luckily was pretty much bang on). Some light work on the Fiat tweaking up some coolant pipe clamps and checking its tracking and we were done by 3am :S 5 hours sleep and we were off to Hayling Island, meeting up with a chap with a Supra, two turbocharged MX5s and an NA one. Believe it or not our just put back together E36 and not known for reliability Fiat got down there with no issues at all! For once it was someone else. One of our mates' turbo MX5s started running on 3 cylinders while we were down there which was a bit galling for him as he's just rebuilt it from having a cracked piston :S Luckily, it was just a loose wire on the no1 ignition coil. Fixed on site using the crimpin pliers another very well prepared person had brought with them! 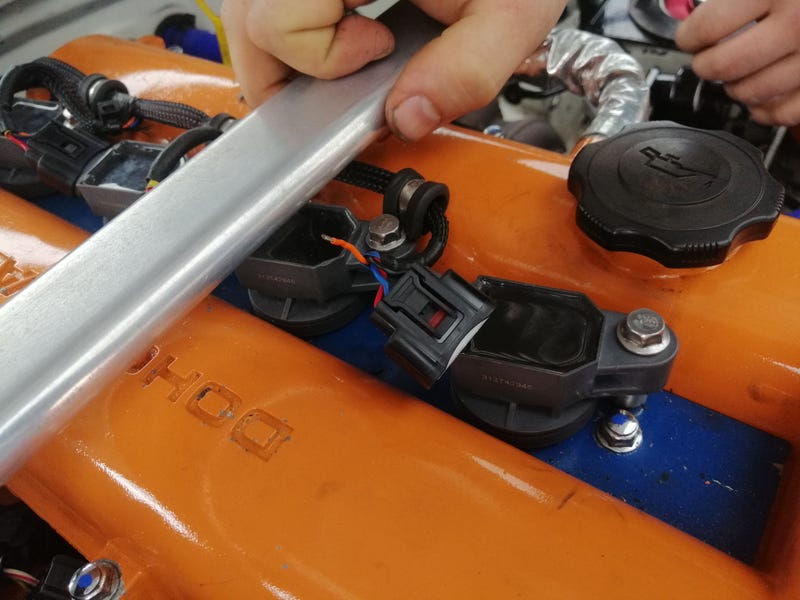 All in all a very successful and fun little trip. We won't mention the minor leak in the Fiat's clutch slave causing the gears to get trickier to get on the journey back, or that causing the linkage to pop off the gearstick in a moment of panic at a set of lights  we won't mention that at all! |
| |
Last Edit: Aug 25, 2020 11:18:58 GMT by biturbo228
|
|
|
|
|
Aug 31, 2020 21:24:29 GMT
|
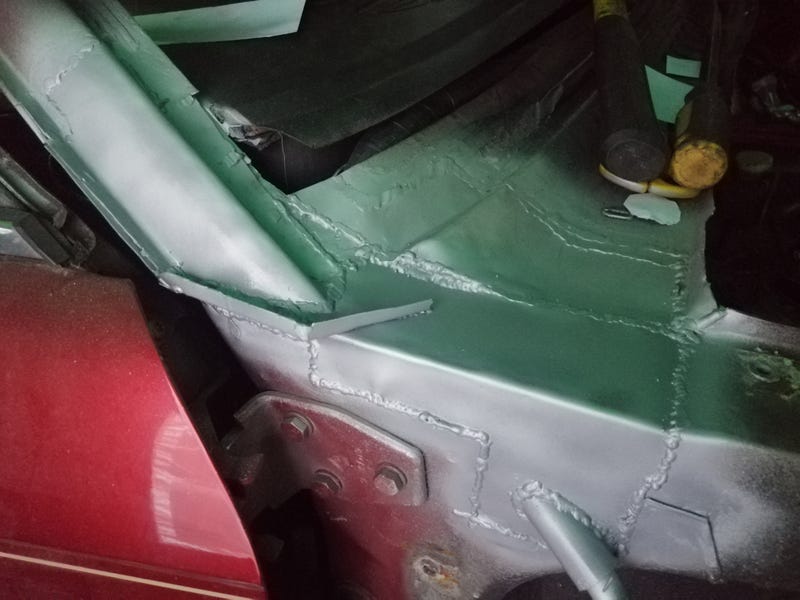
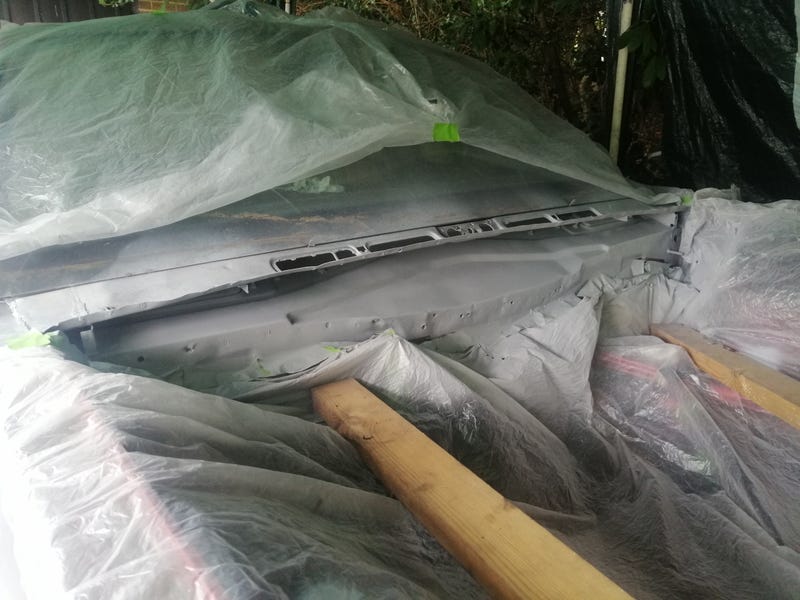
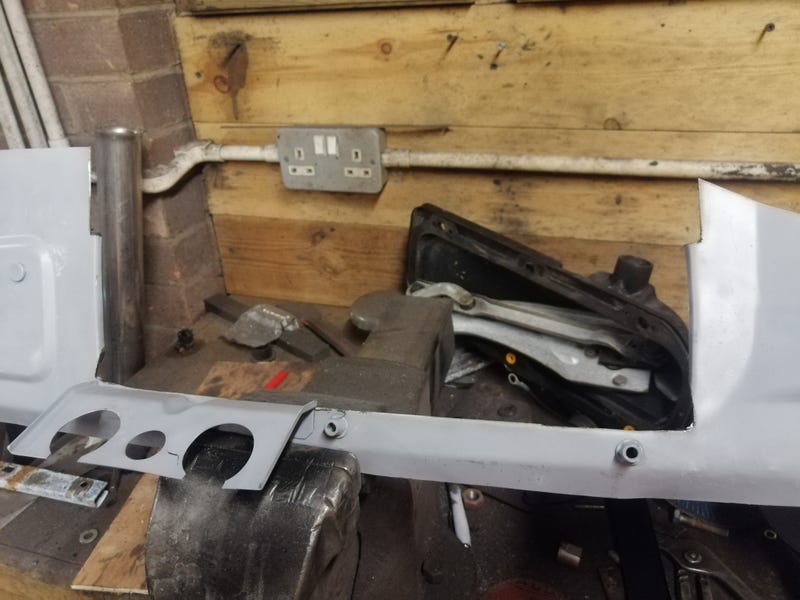
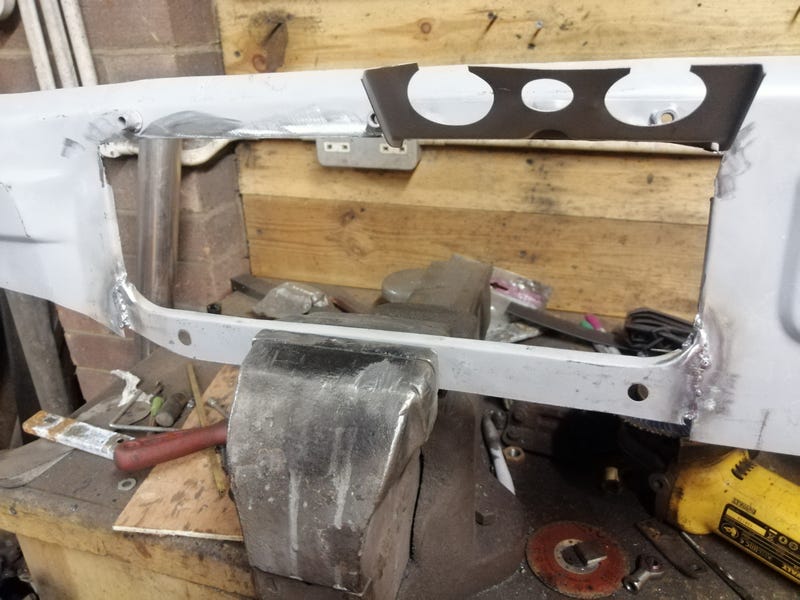
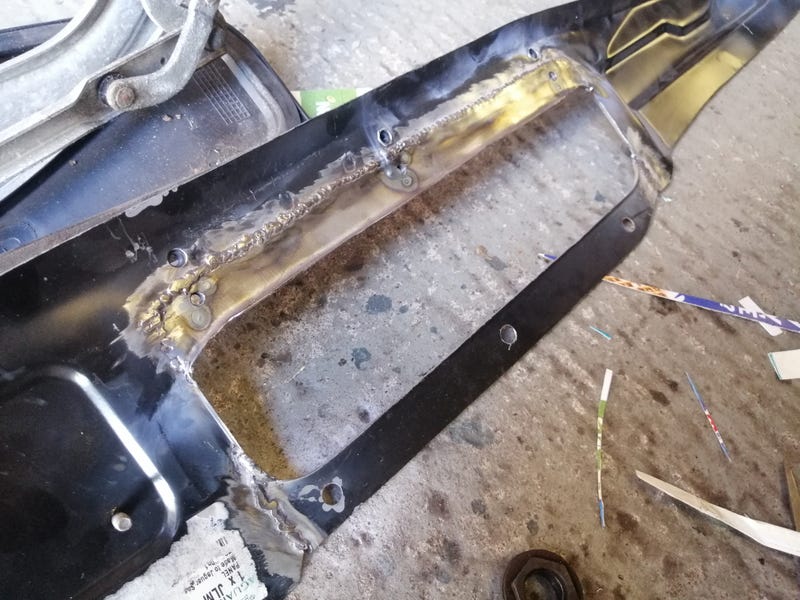
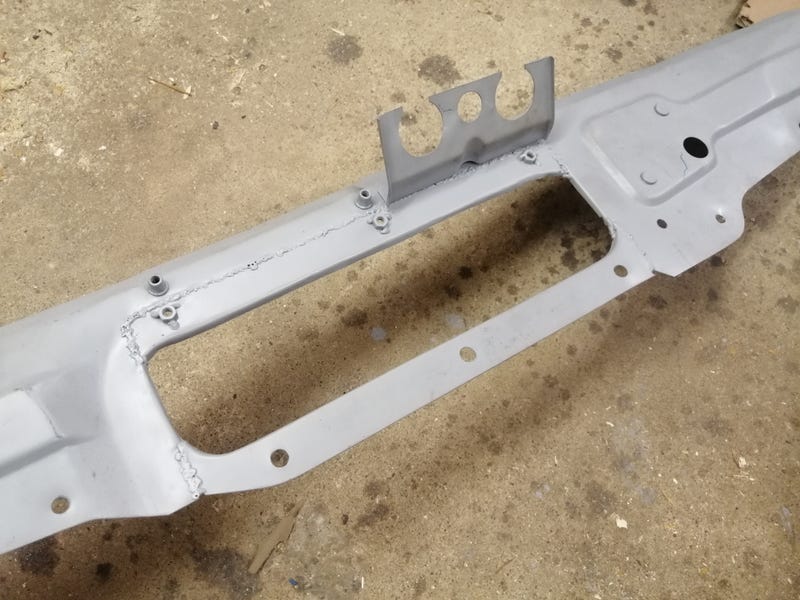
Managed to get the bulkhead prepped and painted this weekend  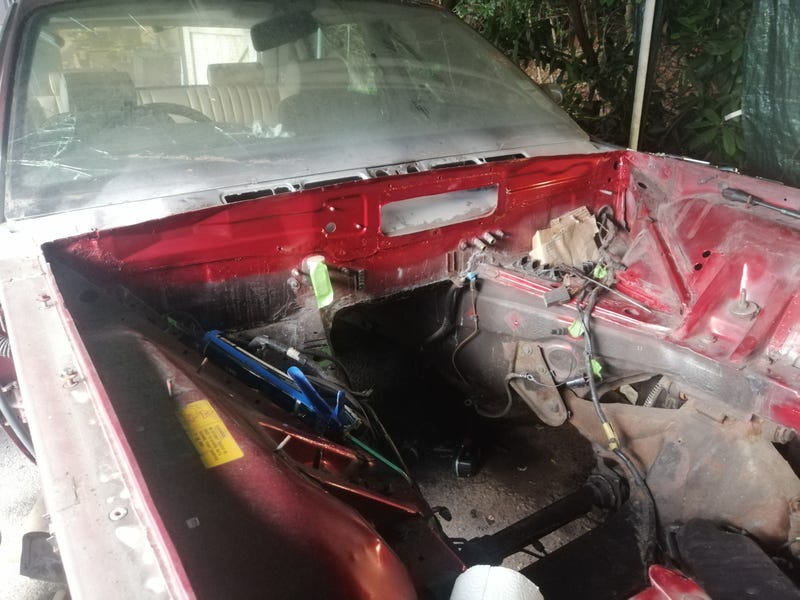 ...and starting filling the engine bay again. 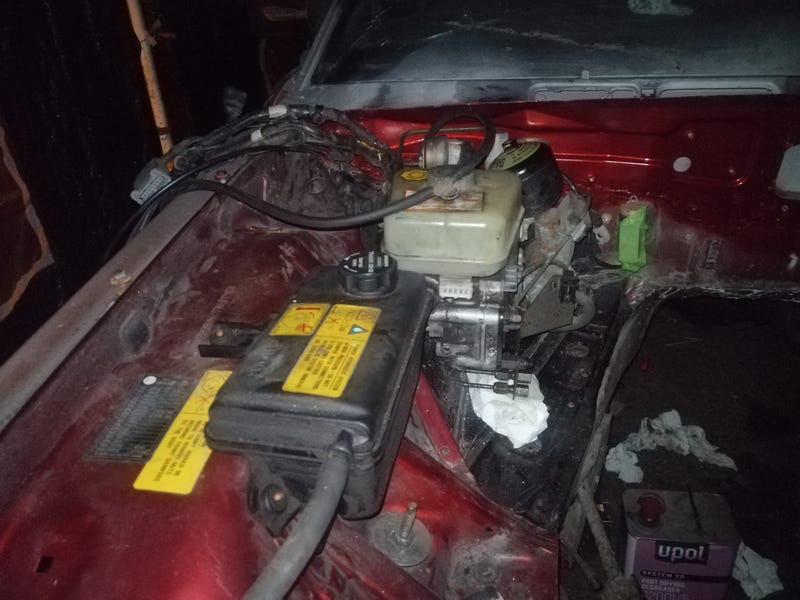 I had hoped to get the flywheel on and the gearbox back together this weekend too, but a delay in posting of the flywheel bolts means I'll have to wait! |
| |
|
|
|
|








 we won't mention that at all!
