RobinJI
Posted a lot
   "Driven by the irony that only being shackled to the road could ever I be free"
Posts: 2,995
|
|
|
|
Hi, A few of you may remember that I used to be a pretty regular poster on here. I moved a little while back and got out of the habit of browsing the web and forums much, so I've barely been on here since. At the time I had my 20vt converted mk2 Scirocco as my daily, and an MX-5 that I was building to use as a track toy. Here's a quick recap of my car-life since my posting on here died off (around September 2014): Dec '14 - I find structural rust found in the Scirocco, so I take it off the road, to be dealt with "when I'm in a position to do that much welding." Feb '15 - 406 HDI estate bought for £250 with a fresh ticket. Jul '15 - I give up on the MX-5. I had no motivation to work on it, and decided to buy something more interesting that was already on the road, so being the sensible chap I am, I bought a cheap Porsche... The idea was for it to be an 'on the road project' to keep it practical, and keep easy motivation. Sep '15 - The Porsche is thoroughly buggered, so comes off the road. (Yep, it worked for all of 2 months...) Dec '15 - The trusty 406 has some brake issues, and doesn't have much test left. So I buy a friends immaculate e61 525D touring. Sep '16 - I've been hopeless and barely touched either retro, but I get offered space in a unit shared with a few friends, so can finally work on them regardless of the weather/daylight. Jan '17 - The 525D's sold to a friend, as it's too nice to be throwing mountain bikes/steel/tools/car parts in, and I'm getting a bit fed up of piloting something the size of a cruise liner down small country roads. I by a tatty e36 318tds touring as a replacement daily, which is awesome so far! That brings us up to the situation I'm in today; tooling around in a 318tds touring, working on getting a 924 fixed, while casting guilty looks at the Scirocco that's tucked in the corner under a pile of parts. As this is all quite boring without pictures, here's a couple of shots to get things started, I'm running out of lunch break, so I'll add some more later: This is the 924 when I first bought it. it's an '82 2.0l NA, with a few nice early touches, and on closer inspection, a few dodgy previous owners: 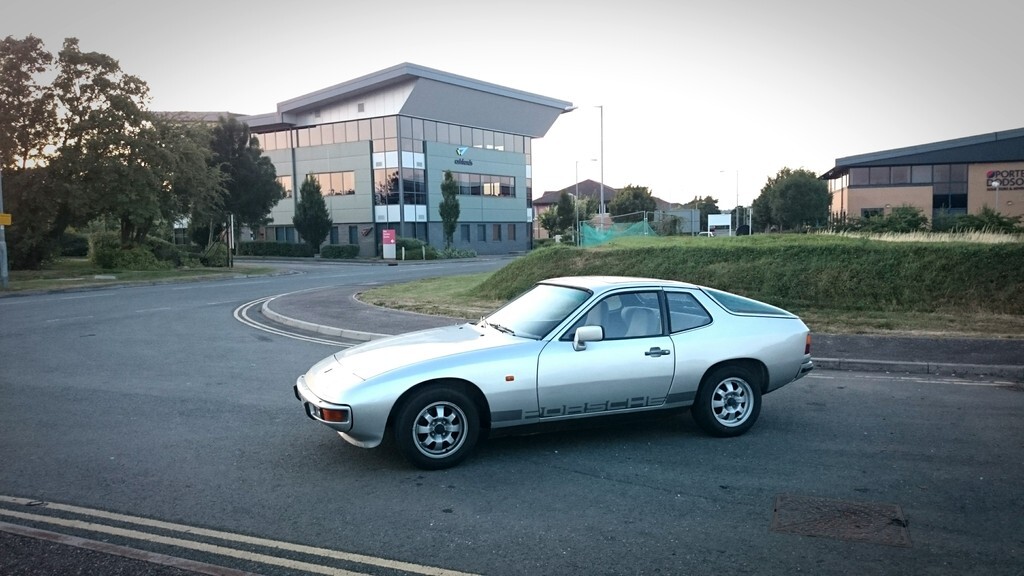 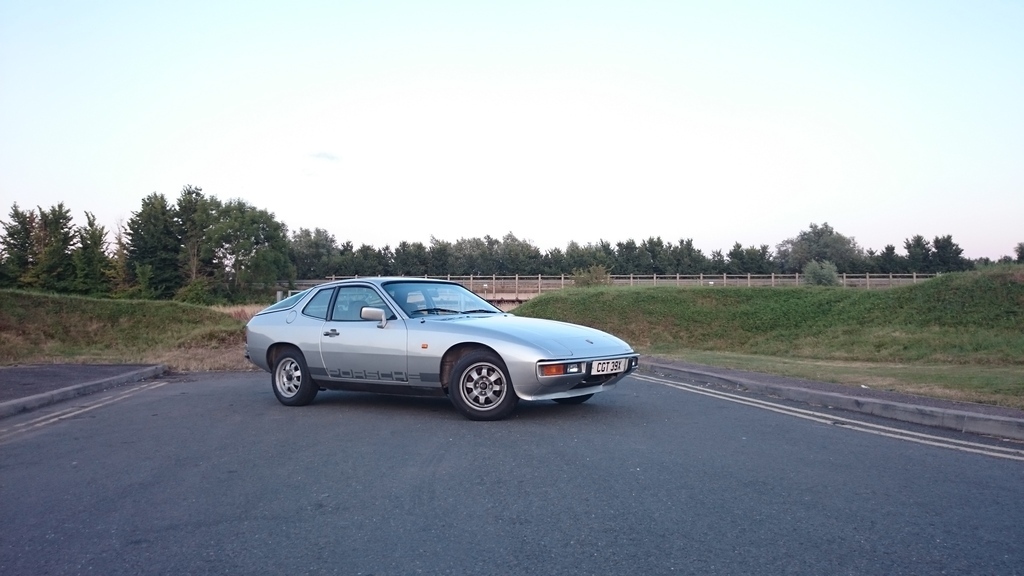 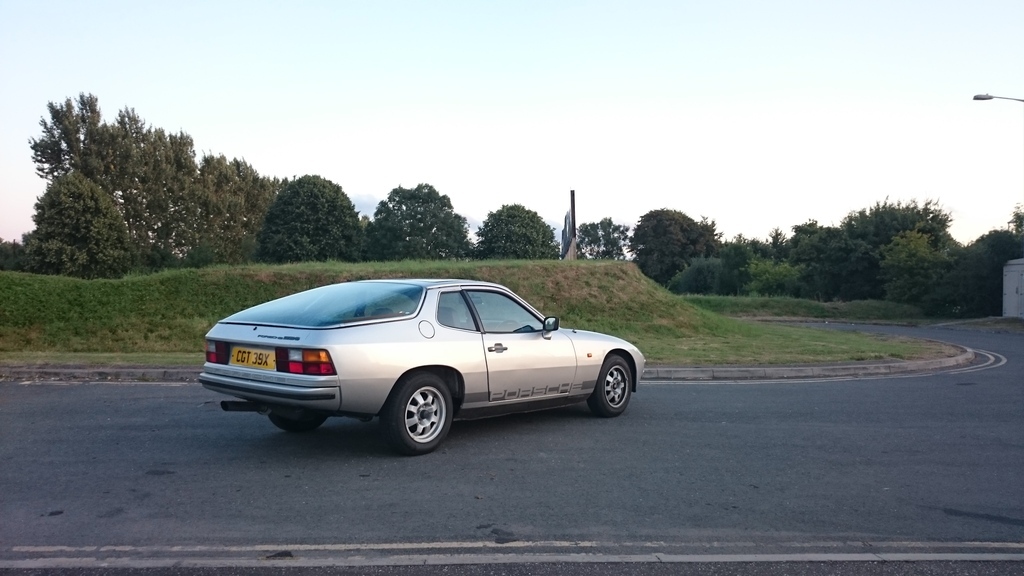 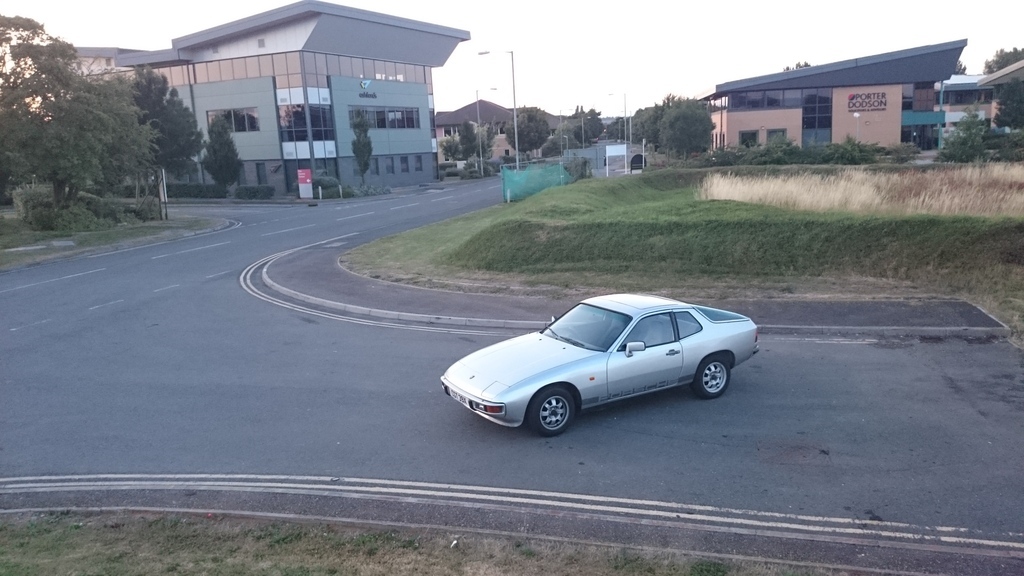 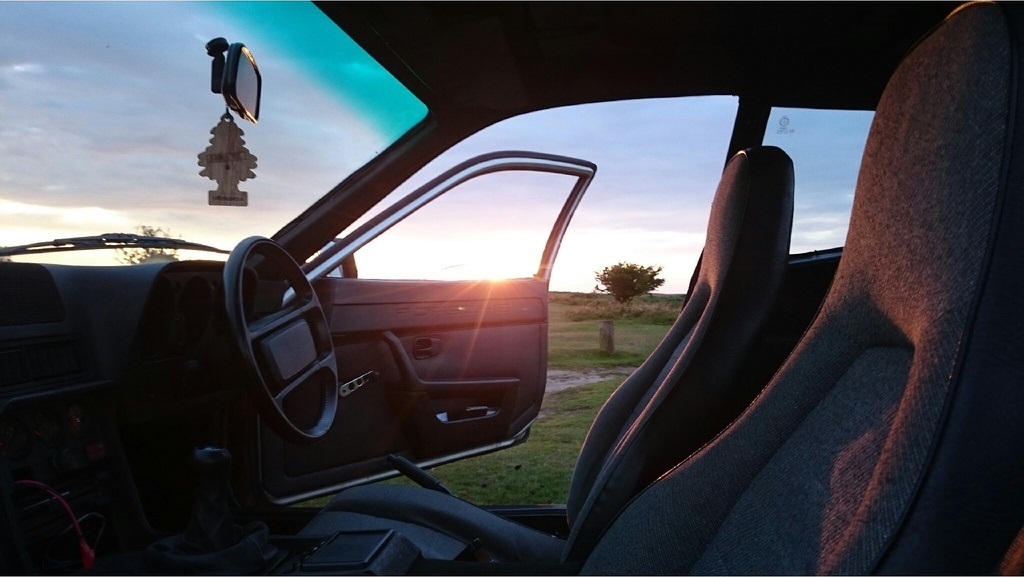 And it's current state... yeah, the whole 'on the road project' thing went out the window a while ago, and I seem to be getting a little carried away: 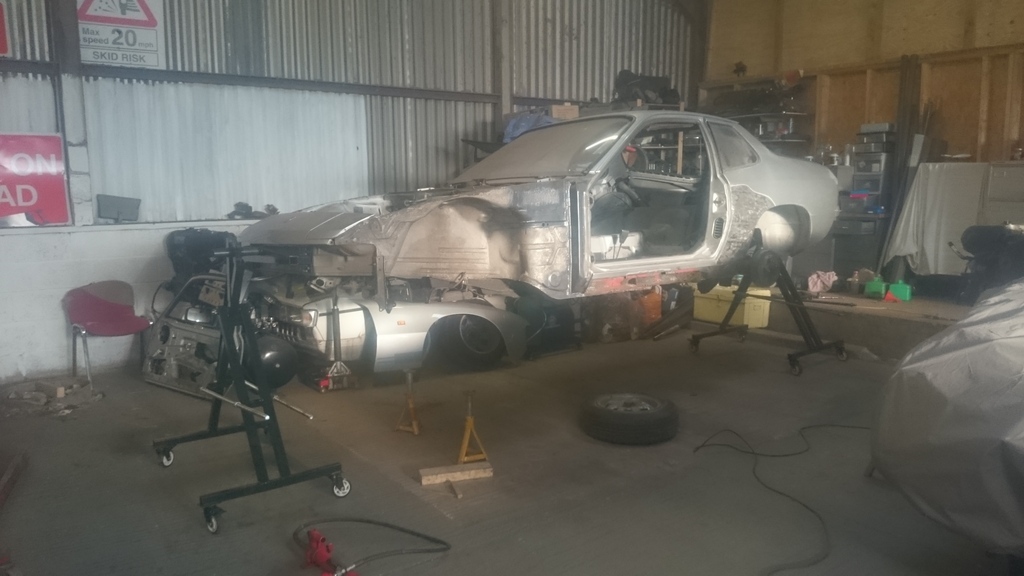 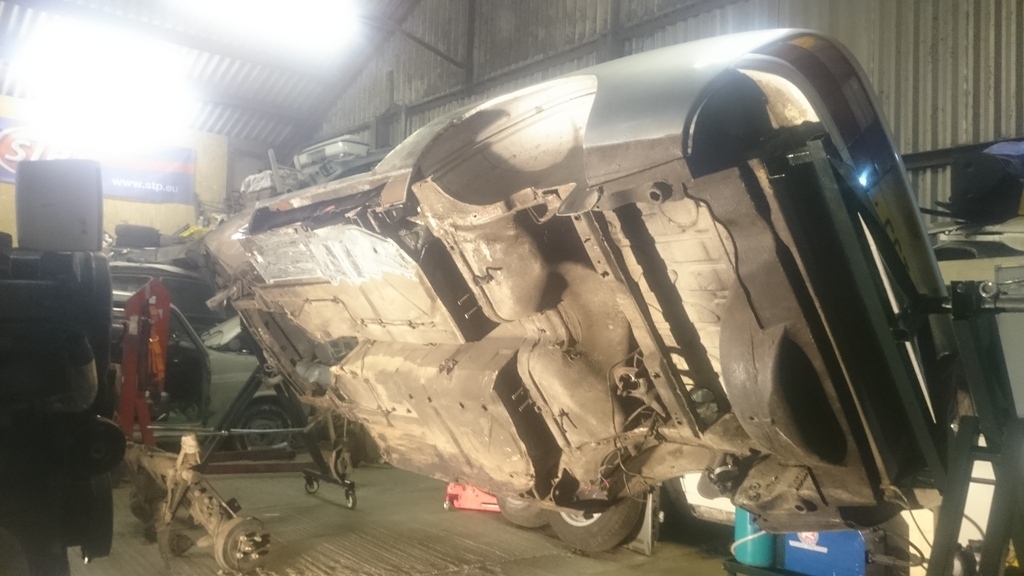 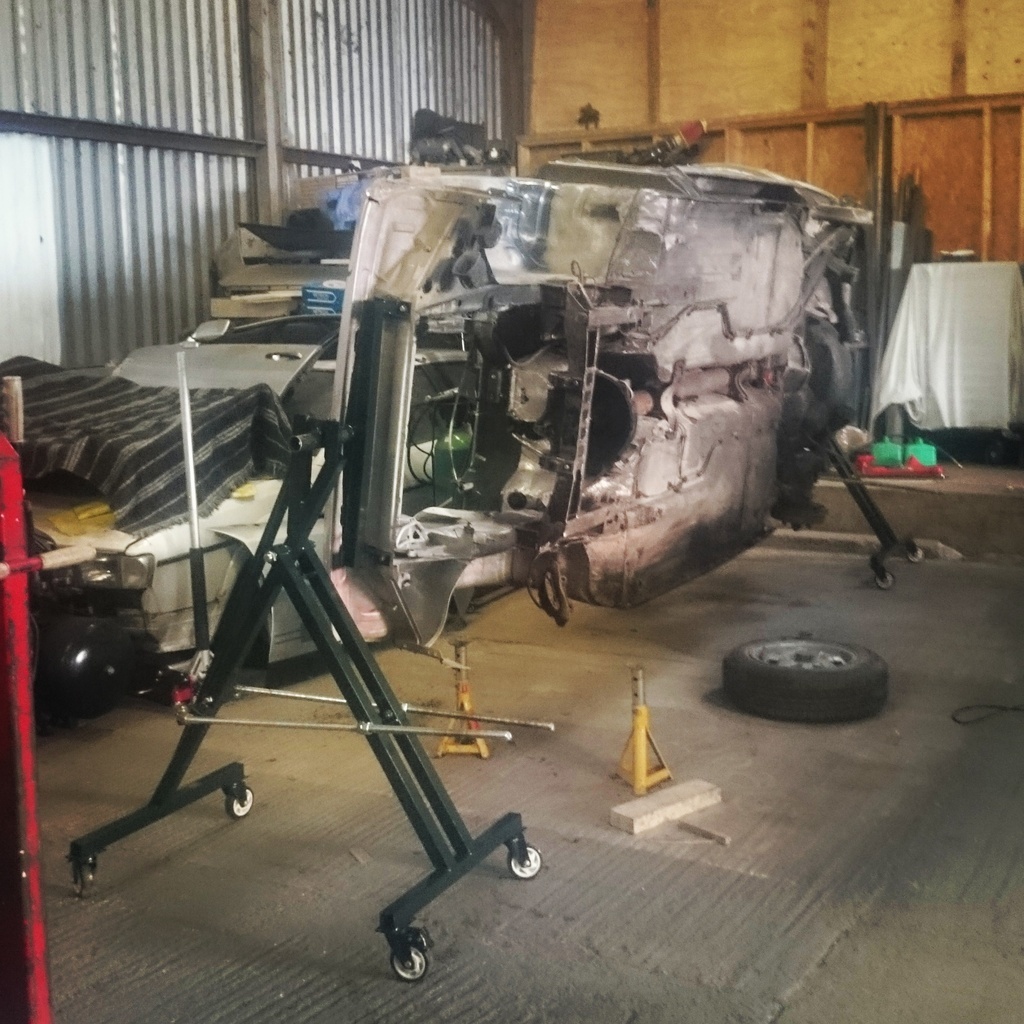 I'll expand on this later and try to explain what's happened in between these stages, as well as an idea where I'm heading with it, but for now, there it is; one clapped out old Porsche, not quite the right way up. |
| |
Last Edit: Aug 14, 2019 13:03:02 GMT by RobinJI
|
|
|
|
Davey
Posted a lot
   Resident Tyre Nerd.
Posts: 2,350
|
|
|
|
|
Good to see you back on here Robin after all those years following you around Trials forum and then here! Haha
|
| |
K11 Micra x3 - Mk3 astra - Seat Marbella - Mk6 Escort estate - B5 Passat - Alfa 156 estate - E36 compact
Mk2 MR2 T-bar - E46 328i - Skoda Superb - Fiat seicento - 6n2 Polo - 6n polo 1.6 - Mk1 GS300
EU8 civic type S - MG ZT cdti - R56 MINI Cooper S - Audi A3 8p - Jaguar XF (X250) - FN2 Civic Type R - Mk2 2.0i Ford Focus - Mercedes W212 E250
|
|
ZXRob
Europe
Posts: 1,200 
|
|
|
|
|
Looking forward to keeping up to date with this. I used to read your Scirocco thread when it was on here. Wasn't your MX the red one from MM?
|
| |
|
|
|
|
|
|
|
|
wow...yeah, so much for "on the road"......great looking work so far...
I like the rotisserie units you have there.... they look nice and compact.
JP
|
| |
I know its spelled Norman Luxury Yacht, but its pronounced Throat Wobbler Mangrove!
|
|
RobinJI
Posted a lot
   "Driven by the irony that only being shackled to the road could ever I be free"
Posts: 2,995
|
|
|
|
Thanks guys. Yeah, my MX-5 was Bruce's (Mystery Machine) original 'Teenage Dirtbag' car. I'd sold it a while ago, then ended up buying it back as an off-the-road project with a few trick bits and a coat of satin orange paint added. I just didn't have any enthusiasm for it though, MX-5's are great cars, and I like them as a daily runaround, but they're that little bit too sensible for me to stay passionate about. Lilredwagon, thanks, those rotisseries were my little project for the last couple of weekends. I'm absolutely loving having the car up in the air and so much easier to work on. Last night was spent scraping underseal off the floorpans, which is an infinitely more pleasant job with the rotisserie! I also managed to poke a few holes in what was the 'good' side. Luckily I've got a pair of replacement outer sills, a welder and some sheet steel, so should be able to get cracking with sorting out the sills soon. The progress with scraping the sealant off, I don't think I'll be doing the whole floor, I'm happy that once you come in from the sills a little eveything's sound (thank you galvanizing!) 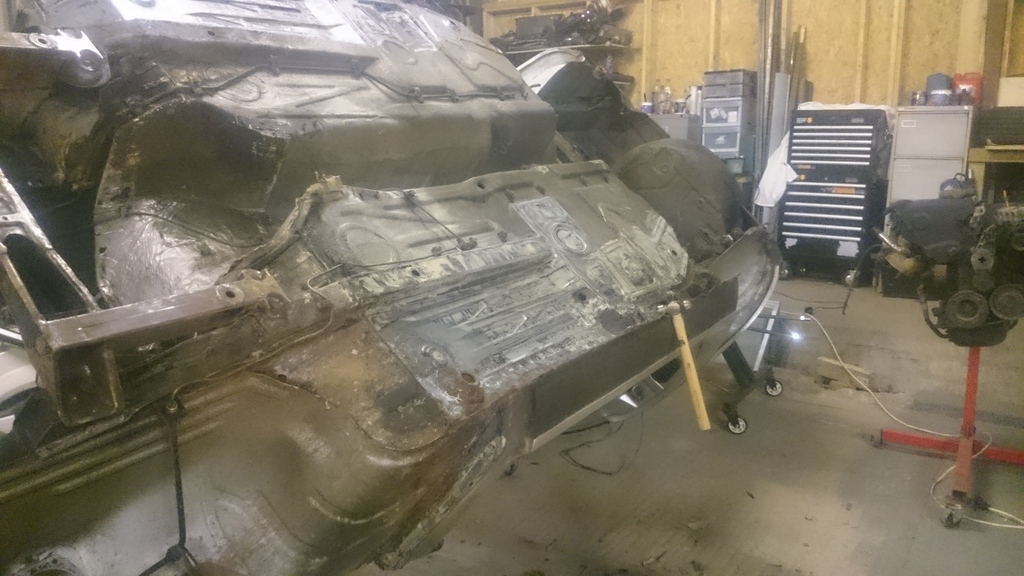 A lovely previous repair: 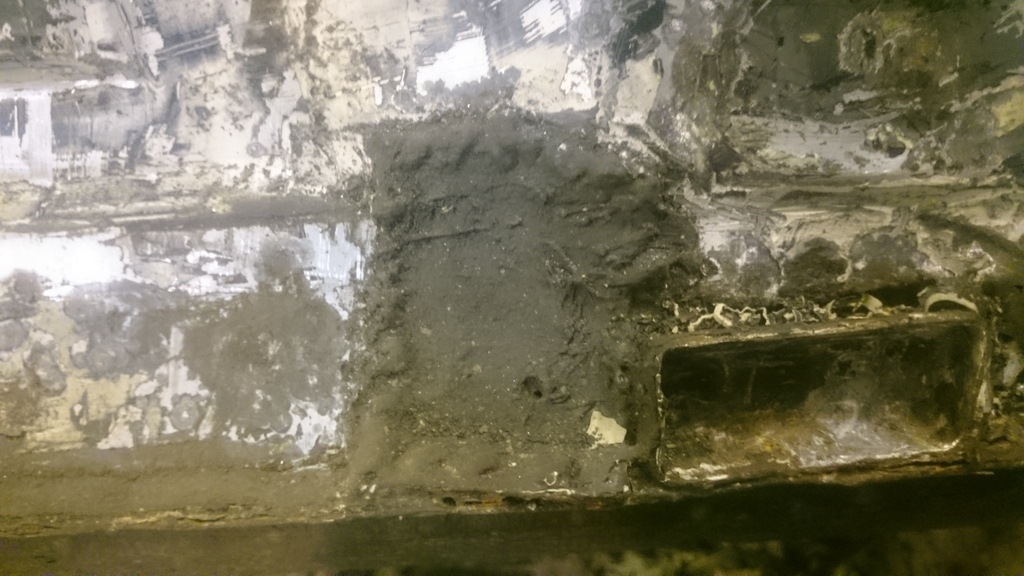 And some lovely grot (covered over with sealant by someone in the past): 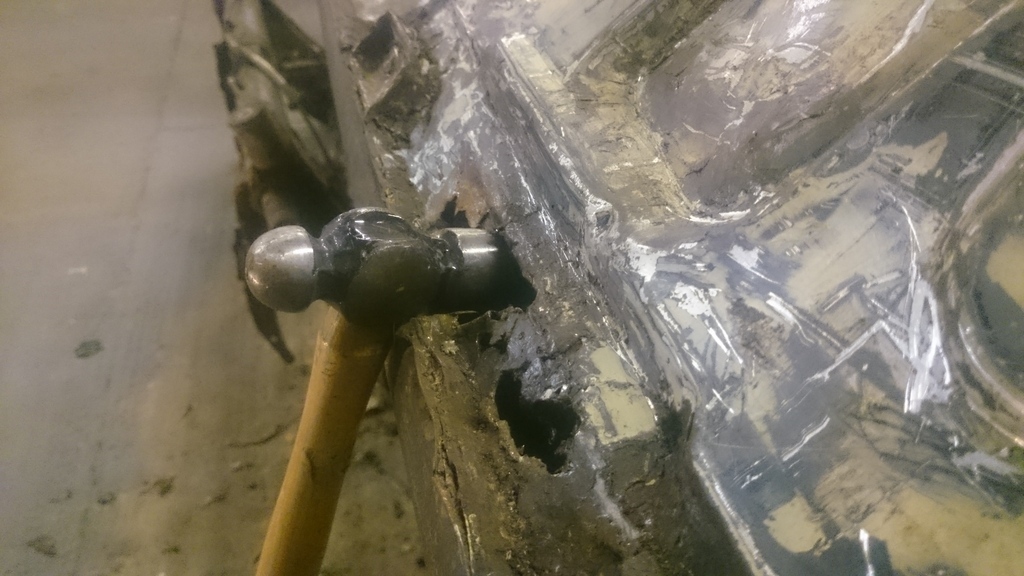 I'll give the scraped area a once over with a knot wheel to get the last of the underseal off (as I have on the passenger side already) then move onto the welding. |
| |
Last Edit: Sept 19, 2017 12:22:14 GMT by RobinJI
|
|
stevek
Yorkshire and The Humber
Posts: 728
|
|
|
|
|
Welcome back. Impressive work so far on the 924 and that rotisserie looks brilliant.
-Steve-
|
| |
|
|
RobinJI
Posted a lot
   "Driven by the irony that only being shackled to the road could ever I be free"
Posts: 2,995
|
|
|
|
Thanks Steve. I seem to remember your 924 from RRG '15, but can't remember if I chatted to you at all (my memory's a complete sieve sometimes!). I've lurked in your ones thread a little, it's a good read. I managed a good stint out at the workshop yesterday. I was hoping to make a really good start on the passenger sill, but after trying to bend up with first repair piece (a nice simple 'L' shaped bit,) I wasn't happy with the fold I was getting hammering it over in the vice. There was too much stretching of the metal, causing it to curve. The fix was to spend most of the morning making up a basic sheet metal brake out of some chunky bits of steel I had lying around. (Sorry about the awful picture quality, my phones camera's been getting pretty terrible recently.) 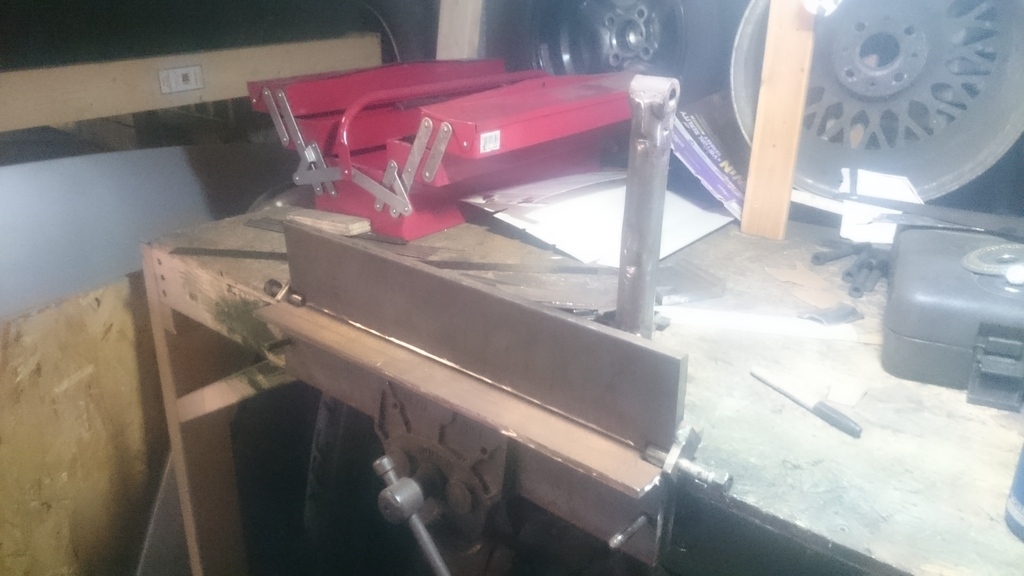 Despite being very quickly thrown together, it works nicely, and gives a bend radius very similar to one typical on the factory pressed panels. This should make knocking up repair pieces a lot easier! That let me make a start on rebuilding the inner-front section of the sill: 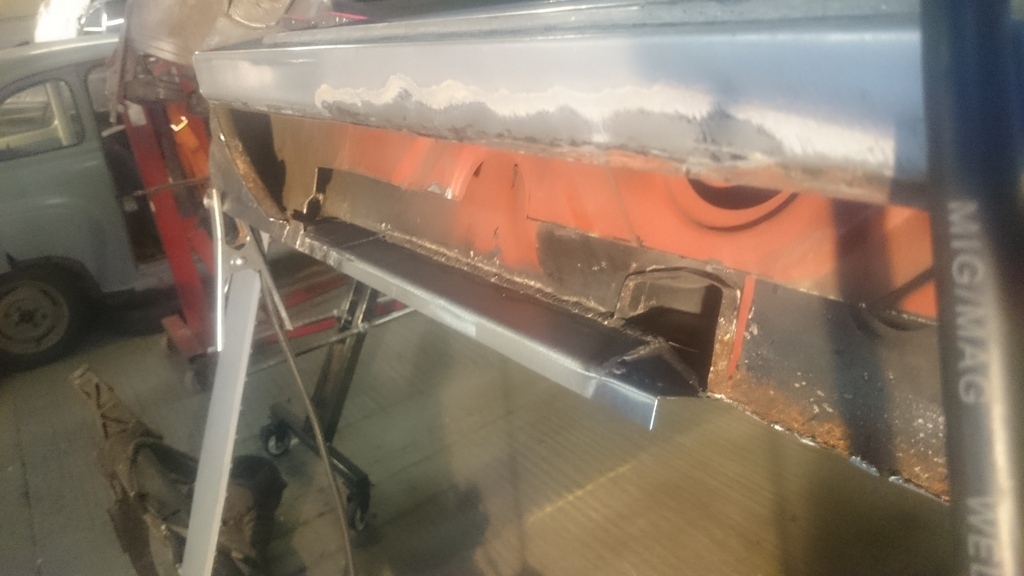 This is the first sheet metal I've welded with a new welder I bought in December, I'm impressed with the welder, but I'm still getting used to the settings (and reminding my self what sheet-metal's like!) so the welds aren't quite as neat as I'd like in places. They're all stuck well though, or I'd be cutting it out to try again! Although I'd cut it back to a straight line for access, luckily a lot of the contoured sections of the centre-sill panel (is that what it's called?) are re-usable, so I made a start on welding back in any salvagable bits with fresh metal in-between. Before: 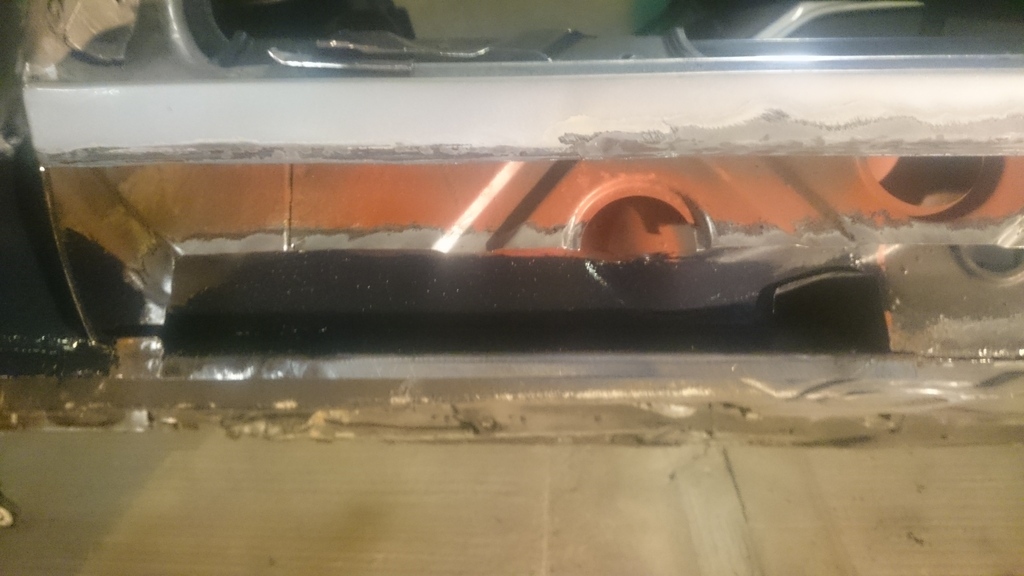 After: 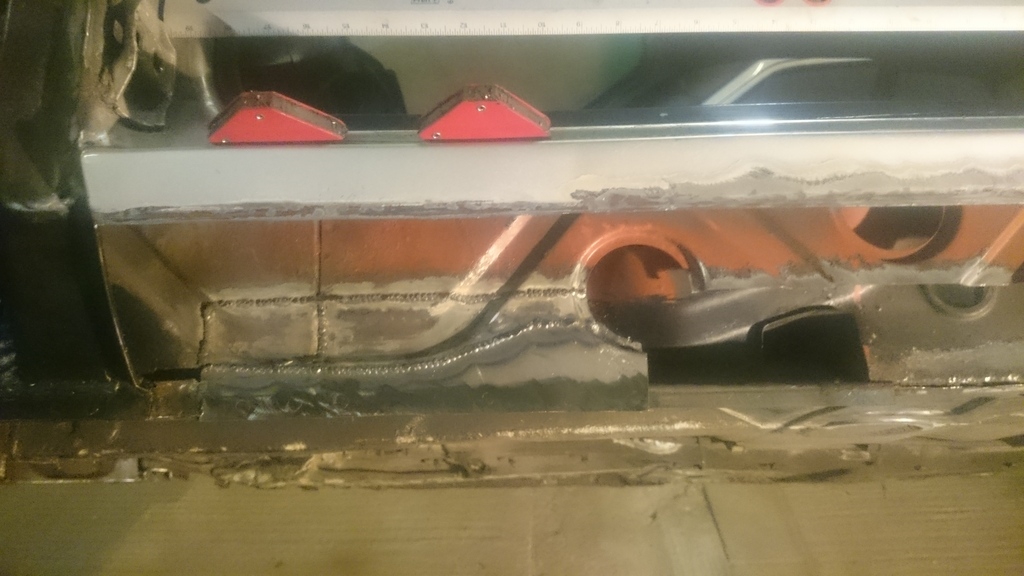 By this point I was getting bloody hungry, so I called it a day, leaving the sill looking like this: 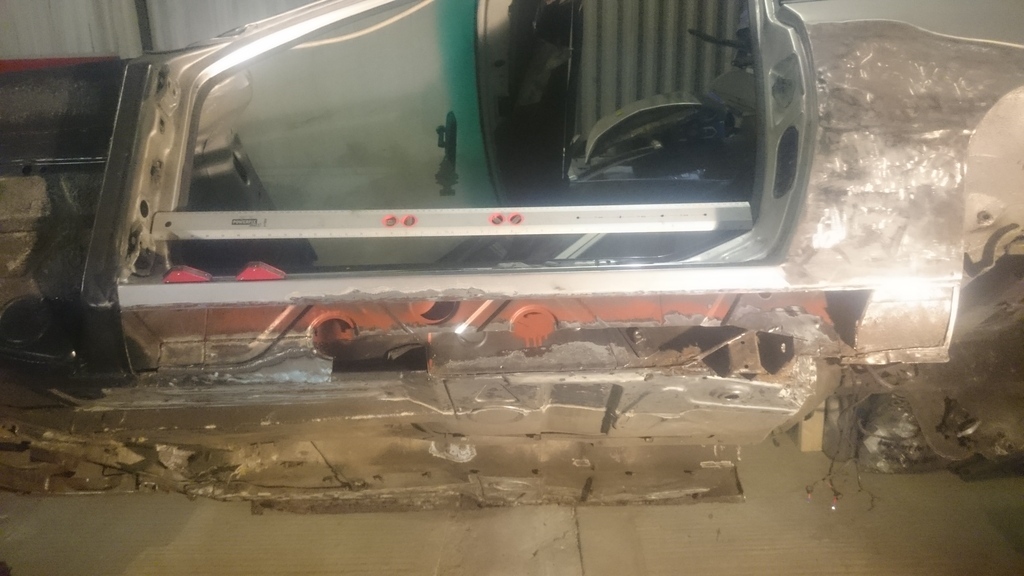 It's nice to start getting some metal back into it, but sadly there's more to be removed before I can keep working my way rearwards. I've got a feeling I'm going to have to cut off an uncomfortably large chunk of car around the rear axle mounts. Although it's not thhhaatt rotten, there's just no access. I can see myself cutting out a large section and repairing it on the bench before welding it back in. |
| |
Last Edit: Sept 13, 2017 14:25:37 GMT by RobinJI
|
|
RobinJI
Posted a lot
   "Driven by the irony that only being shackled to the road could ever I be free"
Posts: 2,995
|
|
Mar 12, 2017 22:42:23 GMT
|
I will get around to fleshing out the first post one day.. honestly. I will... For now though: I managed to get out to the unit and crack on with the Porsche again this afternoon. I spent a good while trying to surgically remove the rusty rear beam mount and jacking point in front of it. Annoyingly I didn't get any good before shots, but these sit in a deep recess between the outer sill and the floorpan, making them a nightmare to get the grinder into. Eventually I was left with this: 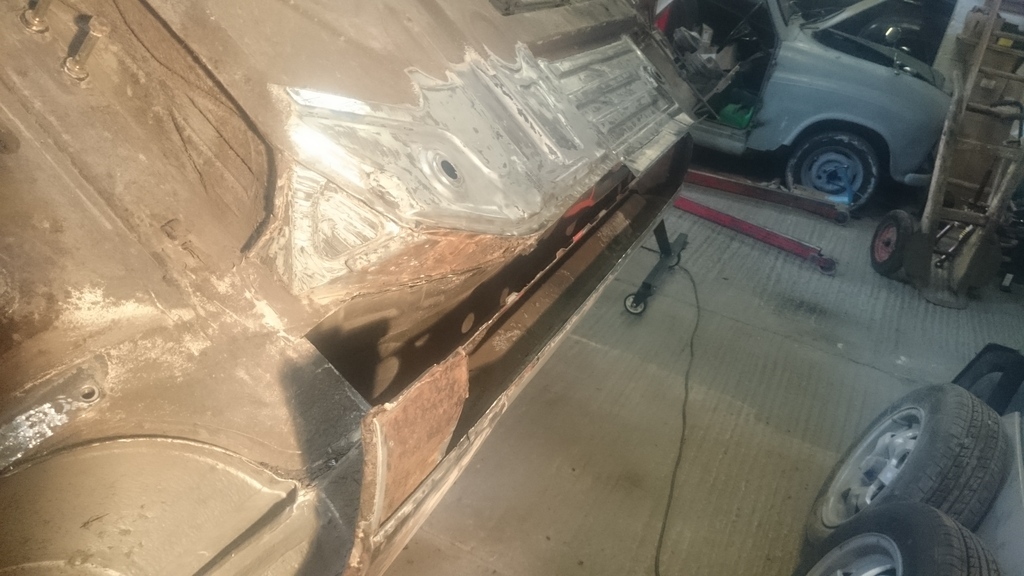 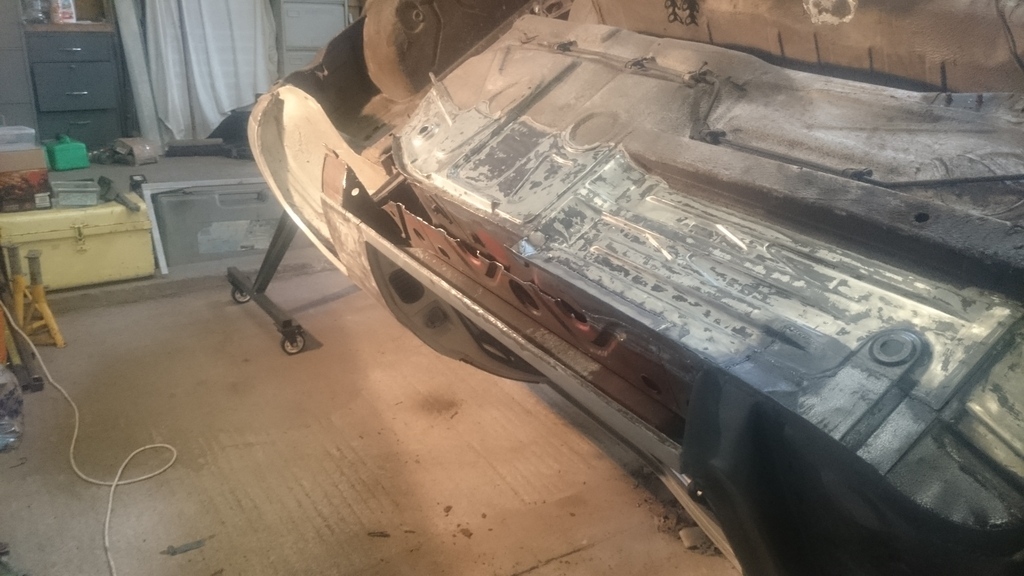 It's a scary amount of the car to have had to cut out, especially given that there wasn't actually any holes, but I wasn't at all happy with the state of what was there. More metal's going to have to come out unfortunately, but I want to get the hole a bit smaller first so I don't loose all my datums. Speaking of which, when I'm cutting this much metal out of a car, I've taken to making little marks around it to keep track of where everything should be, and make sure things haven't moved: 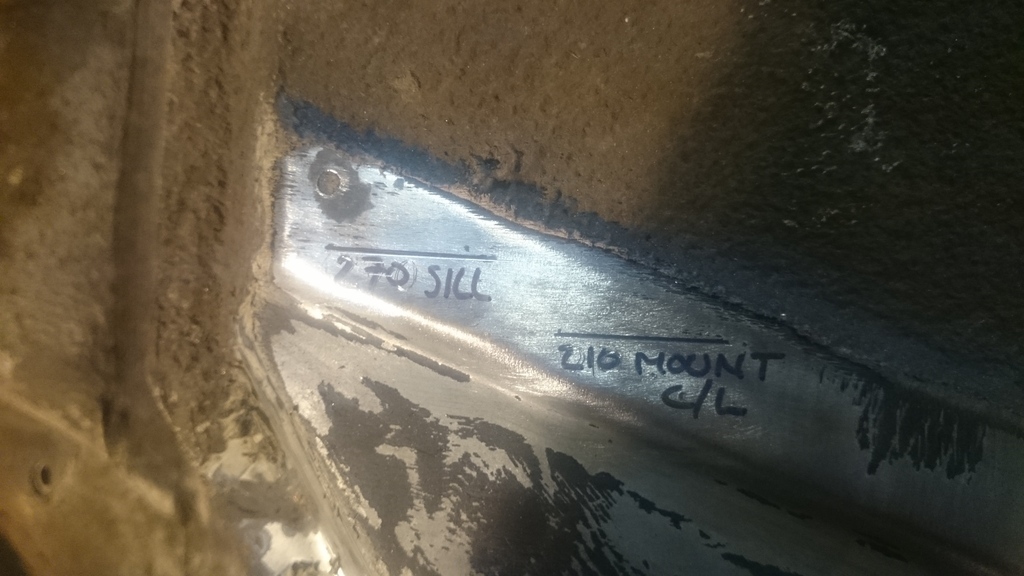 Knowing the final extent of what I need to replace, I got on with welding some metal back in. Another little slit to get rid of a rusty seam: 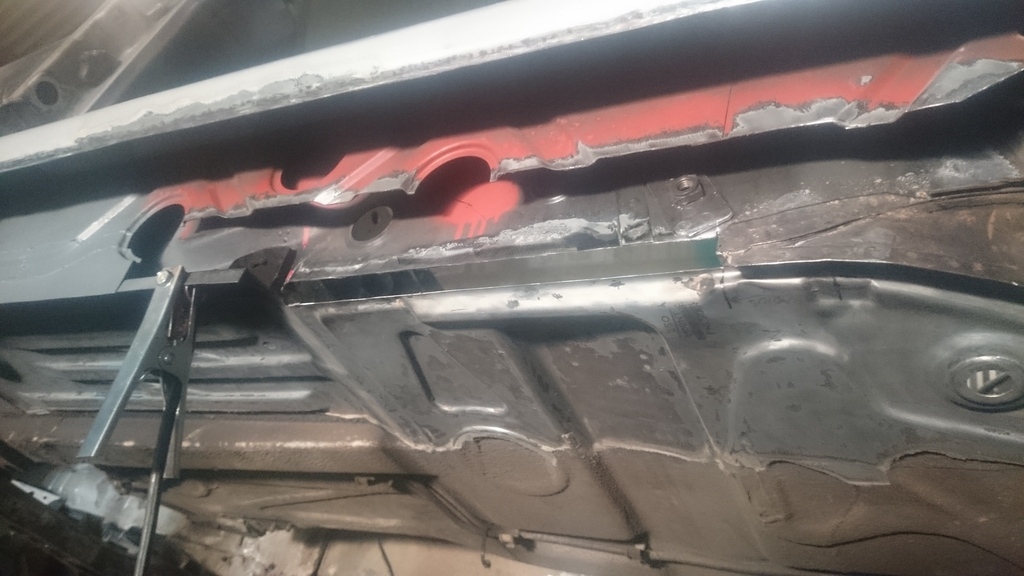 And replaced (you can still see a slither of light under it because the return lip will be plug welded to the outer edge of the floorpan. Once the outer edge of the floor pan stops not existing that is): 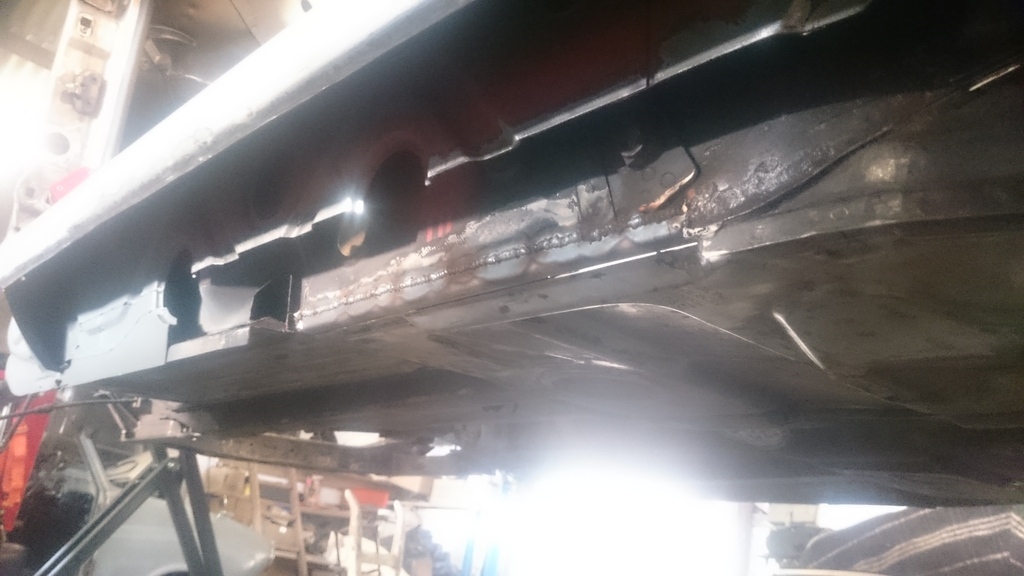 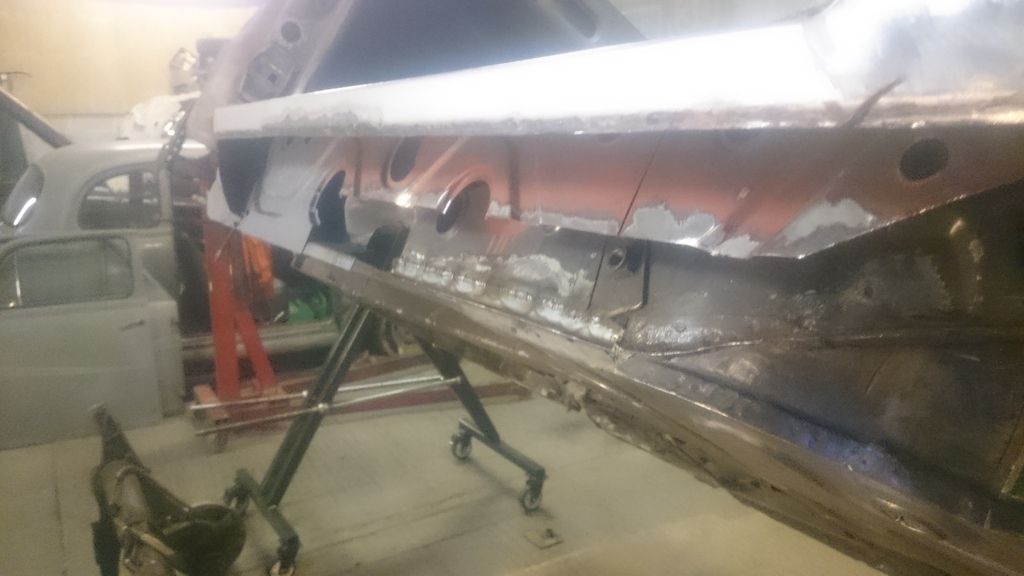 Then as I'd had to chip some of it away to weld in that last strip, and discovered it came up reasonably easily, I got on with removing the bitumen sound deadening from the passenger side floor. A welcome quiet job before packing up and heading home. |
| |
Last Edit: Sept 13, 2017 14:29:03 GMT by RobinJI
|
|
|
|
|
Mar 12, 2017 22:51:22 GMT
|
|
Some excellent work! Awesome Jig which looks like it'll get its money's worth for you fixing the bodges in it.
What a lot of people forget when taking photos is that if the phone camera lens has any grease or oils on it, the images come out really blurred. Give it a good clean with an appropriate cloth and you might be surprised by the difference.
|
| |
I have a Jaguar XJS - RARRGHH! She is called Lily, and she is my best friend! goo.gl/bT3ASP <-- video of her  |
|
RobinJI
Posted a lot
   "Driven by the irony that only being shackled to the road could ever I be free"
Posts: 2,995
|
|
Mar 13, 2017 10:33:39 GMT
|
|
Thanks DrSebWilkes. You're probably right about the lens, it's more than likely perpetually in need of a clean! Looking at it, it's pretty well scratched up too though, which certainly won't be helping. I'll see if I can polish some if it out, but I may just dig out an old digital camera to take out to the unit with me.
|
| |
|
|
|
|
RobinJI
Posted a lot
   "Driven by the irony that only being shackled to the road could ever I be free"
Posts: 2,995
|
|
Mar 18, 2017 20:51:33 GMT
|
I've managed to get some more time in on the 924 over the last week or so. The passenger sill's nearly ready to have the outer sill put back on now. The rear half of the outer edge of the floorpan build back out to the inner sill: 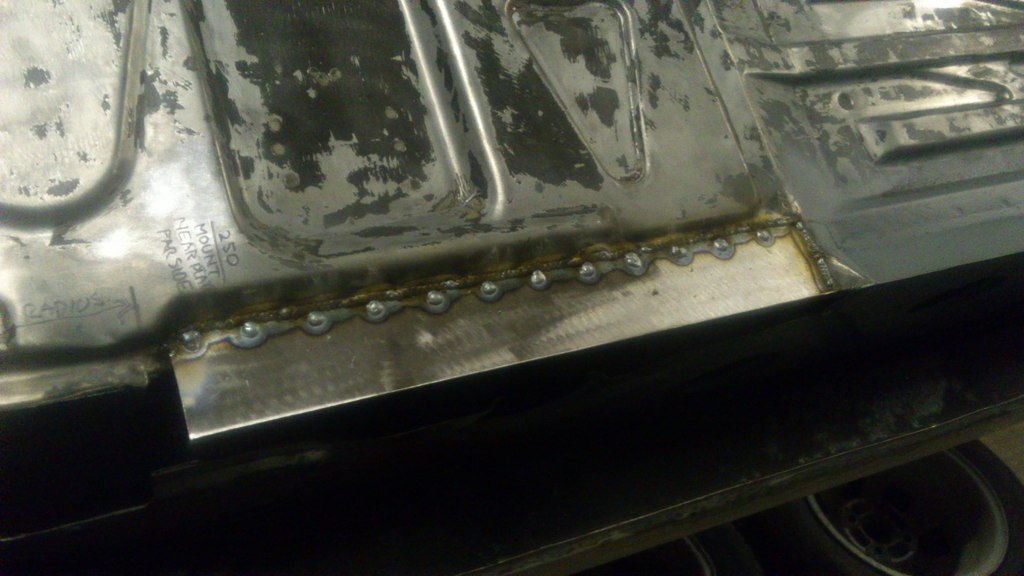 And a few more bits of the patchwork inner sill brought down to meet it: 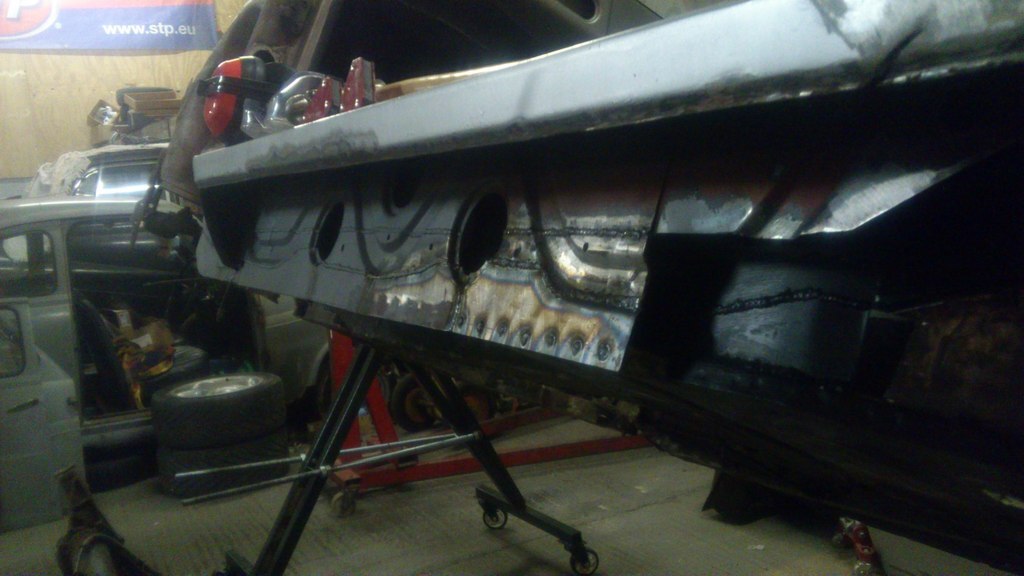 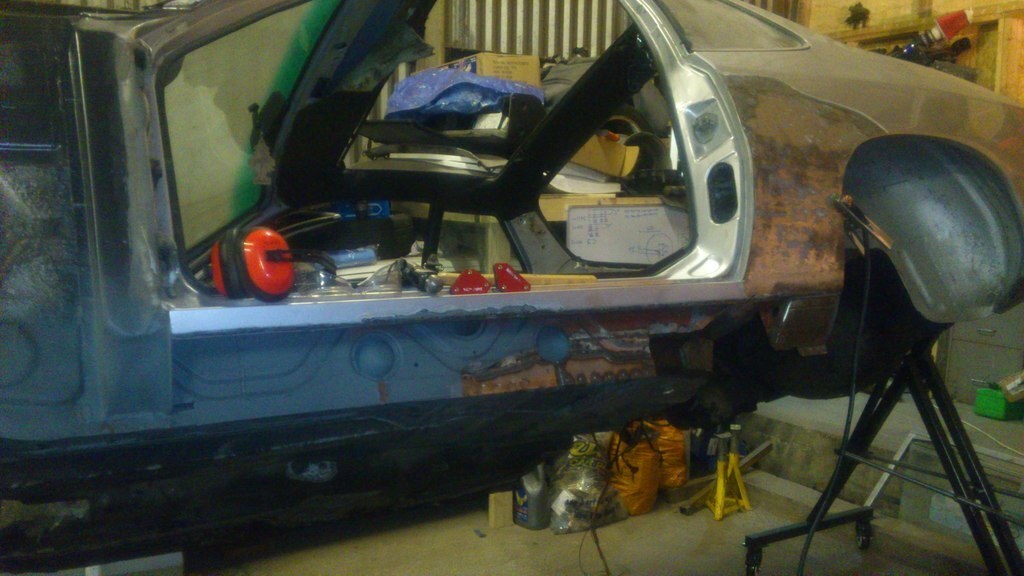 And a heavily pitted section of the rear bench upstand/inner sill kind of bit: 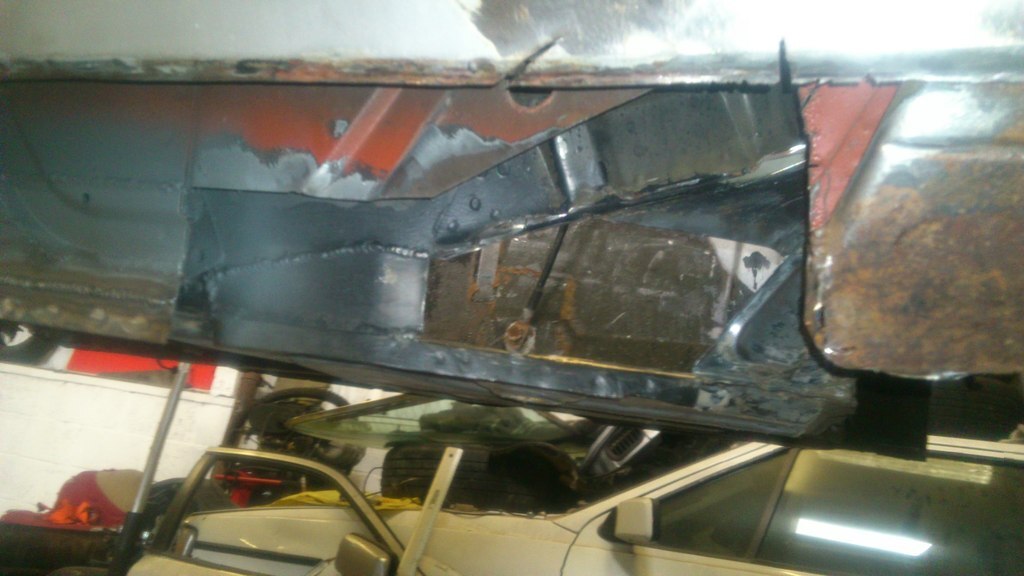 Welded back up (starting to be happier with my welding again): 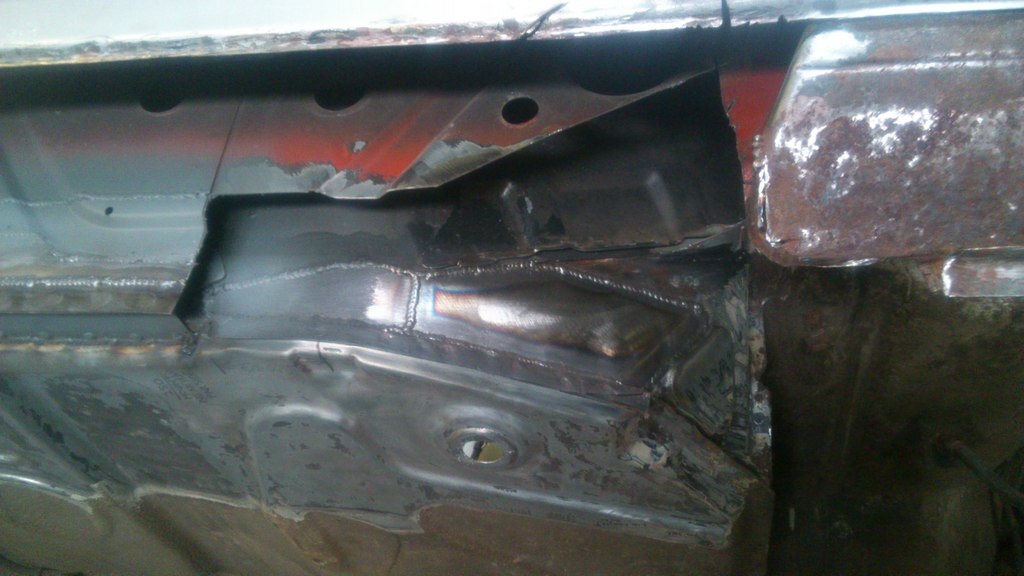 And from the inside:  And I started filling back in the big hole in the channel where the rear axle-mount used to sit. This needs doing before I weld the final piece of inner sill back in (which you can see cut-out and waiting to go in in the top right of the picture): 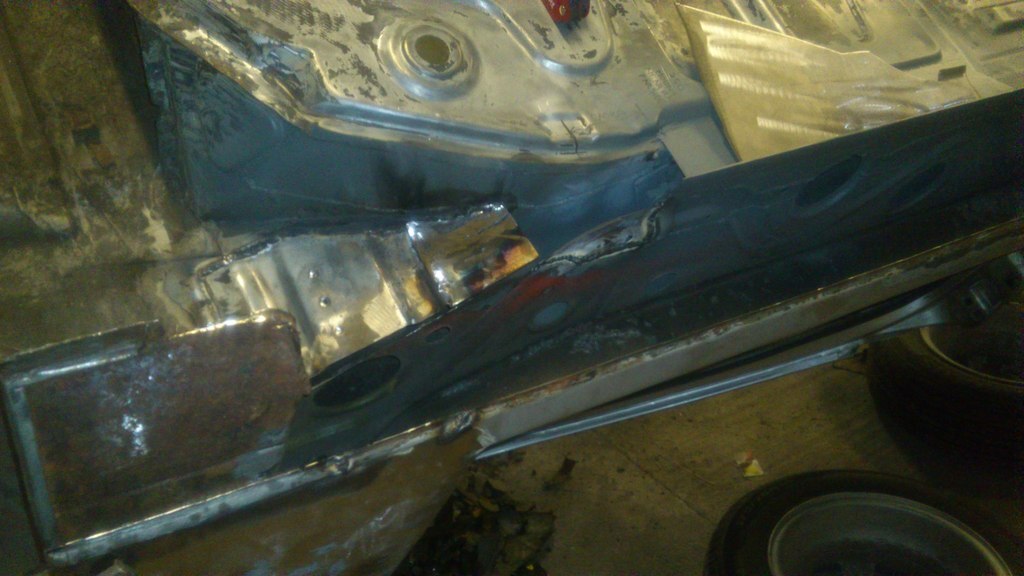 Once that final piece of inner sill is in I can cut off the rear end of the sill that I'd left in place as a datum to build towards, replace it and pop the outer sill on. Hopefully I'll get a good way through that lot tomorrow. Then it's just time to do it all again on the other side! |
| |
Last Edit: Sept 14, 2017 12:27:46 GMT by RobinJI
|
|
RobinJI
Posted a lot
   "Driven by the irony that only being shackled to the road could ever I be free"
Posts: 2,995
|
|
Mar 19, 2017 19:16:24 GMT
|
I had a productive feeling day out at the unit earlier. The passenger side's now all but ready for the outer sill to go on. I wasn't so good with the camera though, and pretty much only remembered to take photos when I was packing up. This is the only one from earlier in the day, you can see the last large chunk of inner sill's in now, and the little quarter-panel return I'd left in place as a datum to build the sill back to is now cut off: 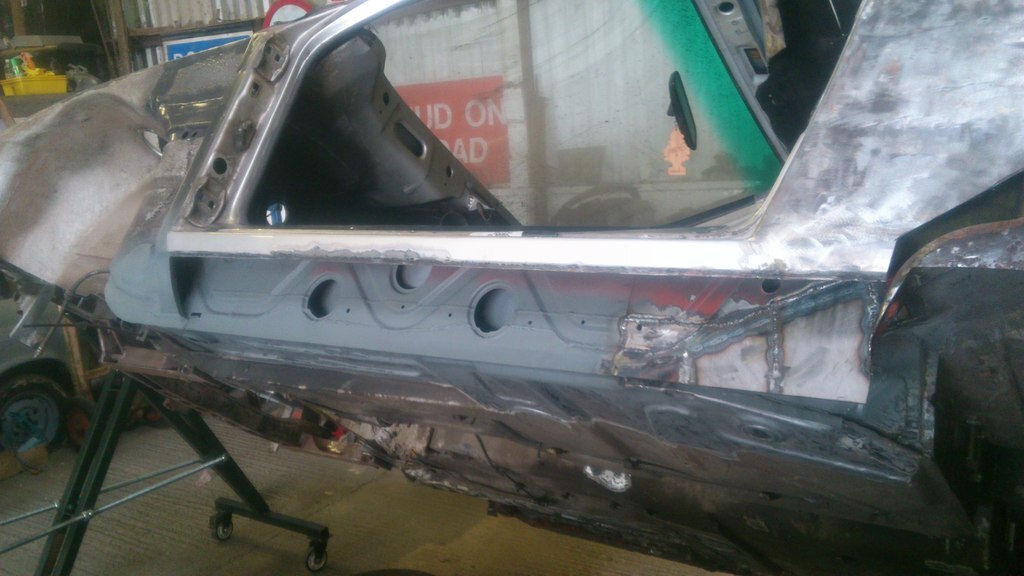 And as I left it, with the return at the back edge also replaced. At this point, the inner lower ~50mm of the inner sill, and the outer ~50mm of the floor pan has been replaced the entire length of the car. Bloody seams rotting out! I'm going to give all the cavities a liberal dose of dinitrol before the car goes near a road! 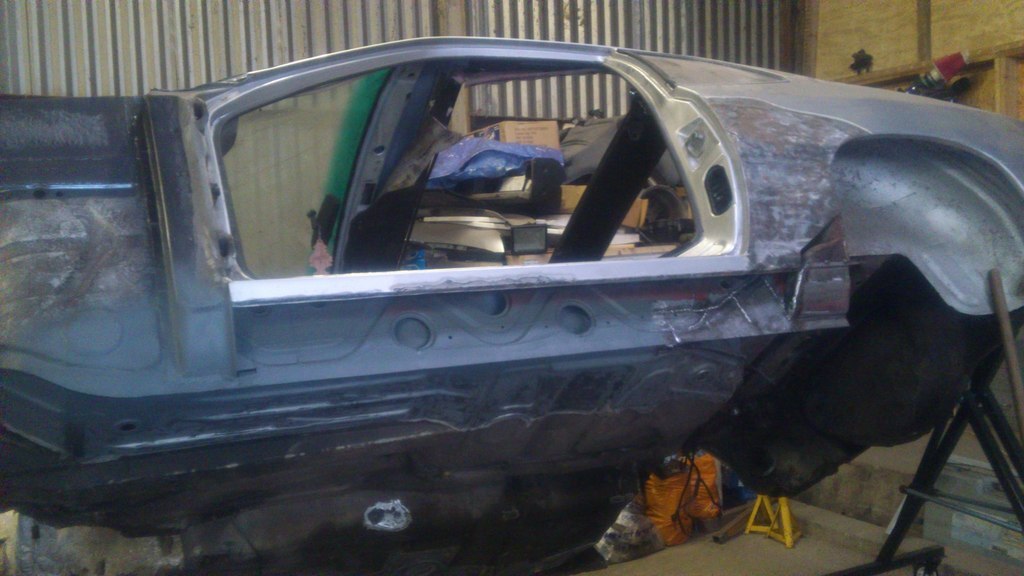 And a view up the tunnel/channel where the rear axle mount used to reside: 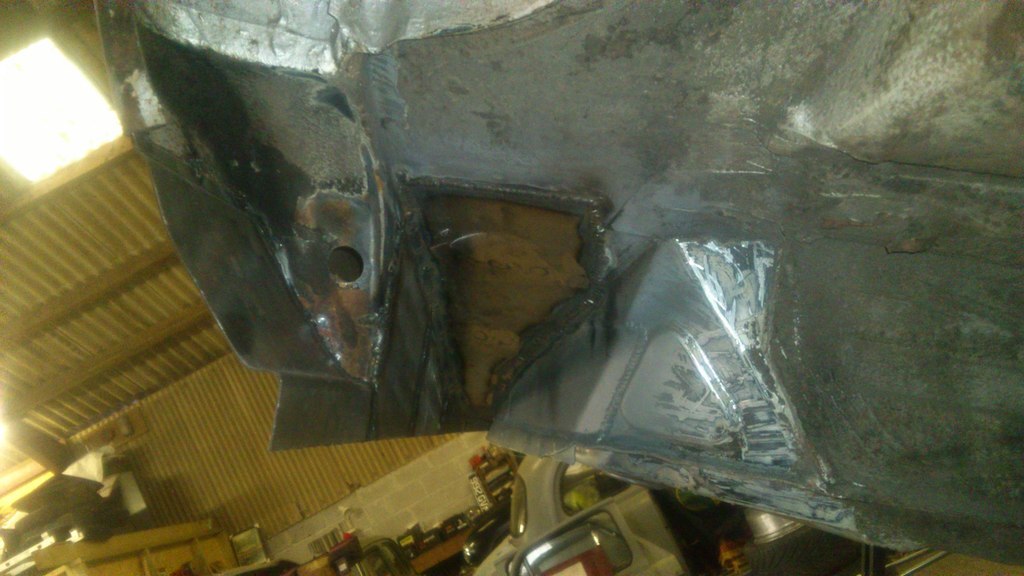 I need to weld in some sill-stand tubes before I close it up with the outer sill, and the fact I've deliberately left the rear axle mount off is a hint to the next stage of this build. I'll be wanting access to that area to weld in the spreader-plates for the roll cage's main hoop.  |
| |
Last Edit: Sept 14, 2017 12:30:37 GMT by RobinJI
|
|
RobinJI
Posted a lot
   "Driven by the irony that only being shackled to the road could ever I be free"
Posts: 2,995
|
|
Mar 22, 2017 13:28:20 GMT
|
I got the outer sill ready to go on last night. Sill-stand tubes welded in and a good thick coat of zinc paint on everything before it gets sealed up for good. Sill-stands tubes: 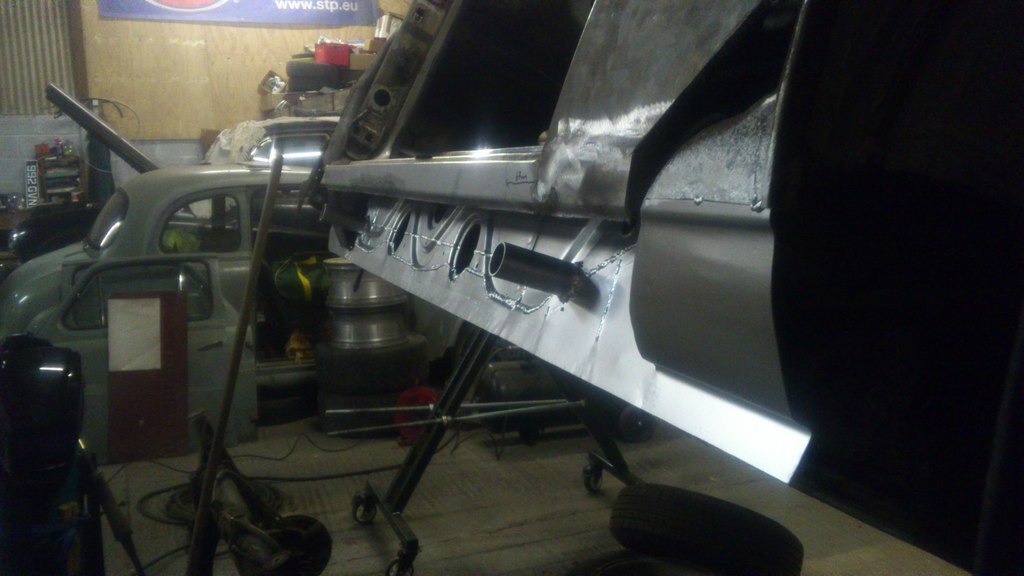 These are to accept specific axle stands that I'll make once the car's down on the ground (so I can get a better idea of the height my jack will get it up to). Something along these lines:  Sadly when it came to drilling the outer sills to slot over them I missed a little.  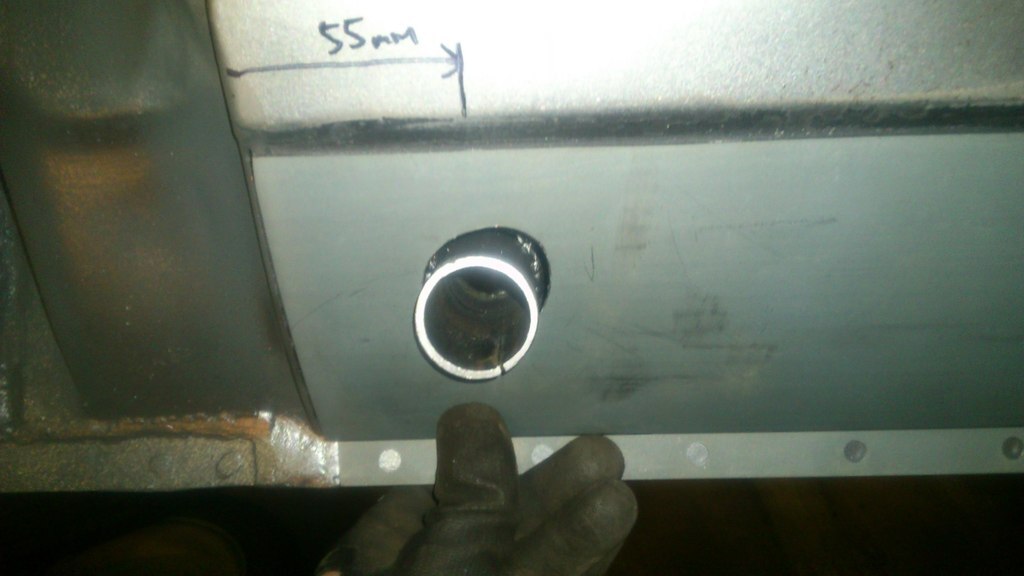 Luckily this should be covered by a little spreader plate I'll be adding once the sill's in place. |
| |
Last Edit: Sept 14, 2017 12:32:16 GMT by RobinJI
|
|
|
|
|
Mar 22, 2017 17:17:41 GMT
|
|
wow...very inspiring!
if it werent so cold and windy this afternoon, I would put some time in on my sills...
great metal and welding work....
JP
|
| |
I know its spelled Norman Luxury Yacht, but its pronounced Throat Wobbler Mangrove!
|
|
RobinJI
Posted a lot
   "Driven by the irony that only being shackled to the road could ever I be free"
Posts: 2,995
|
|
Mar 24, 2017 10:36:43 GMT
|
Thanks JP. I'm certainly greatful to have the unit I'm in at the moment, there's no way I'd find the enthusiasm to go out and work on it outside in poor weather. (Not to mention the issues with welding gas.) The sill's now on, as are the spreader plates for the sill-stand tubes. I'm fairly happy with how it's come out. It's not 100% perfect, but with some high-build and stone chip on there I think it'll look good. I haven't closed up the rear return on the sill as I'm not sure what's going on with the wheel arches (or the buggered rear quarter panel) at the moment, so don't want to finish them off only to cut it out later anyway. (There's a reasonable chance this car will get a Carrera GT kit, which will mean cutting a lot out of the rear arches.) Photos: Welded on: 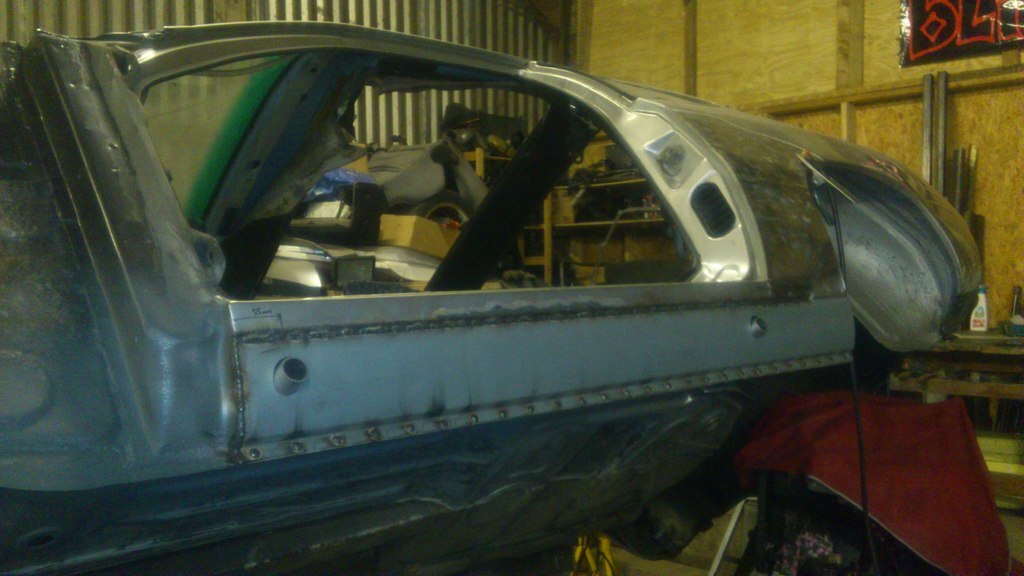 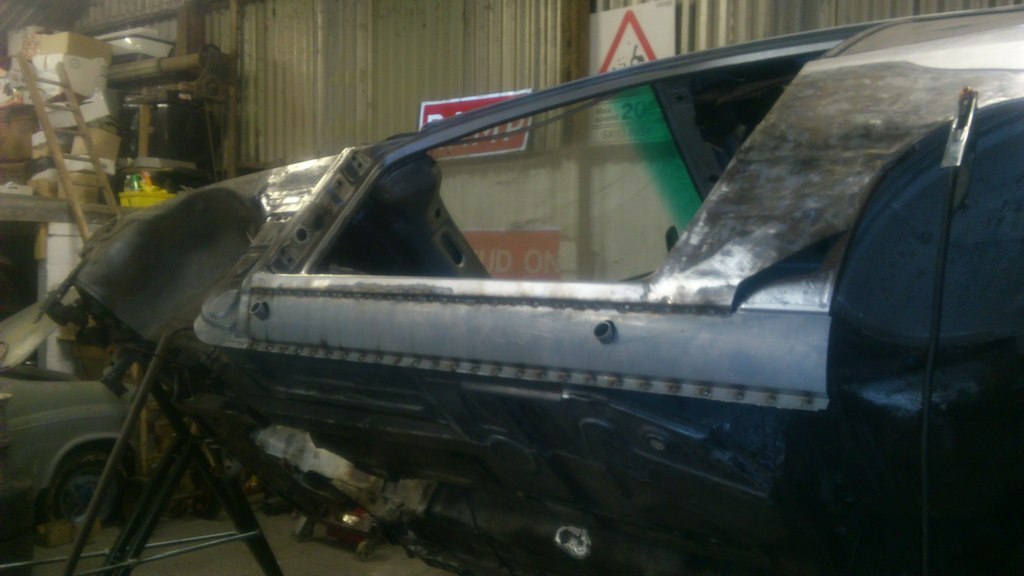 And ground back with the spreader plates added: 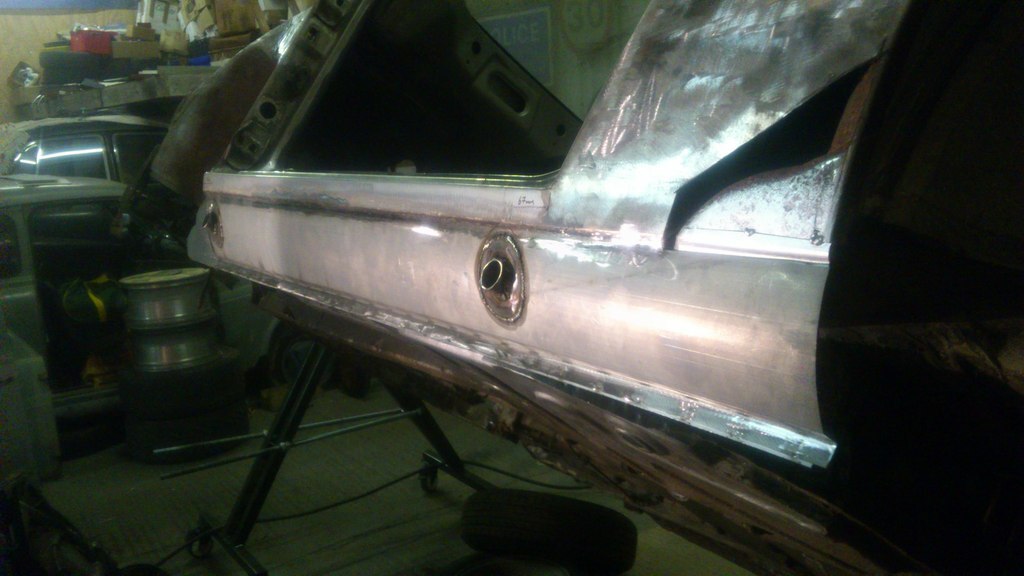 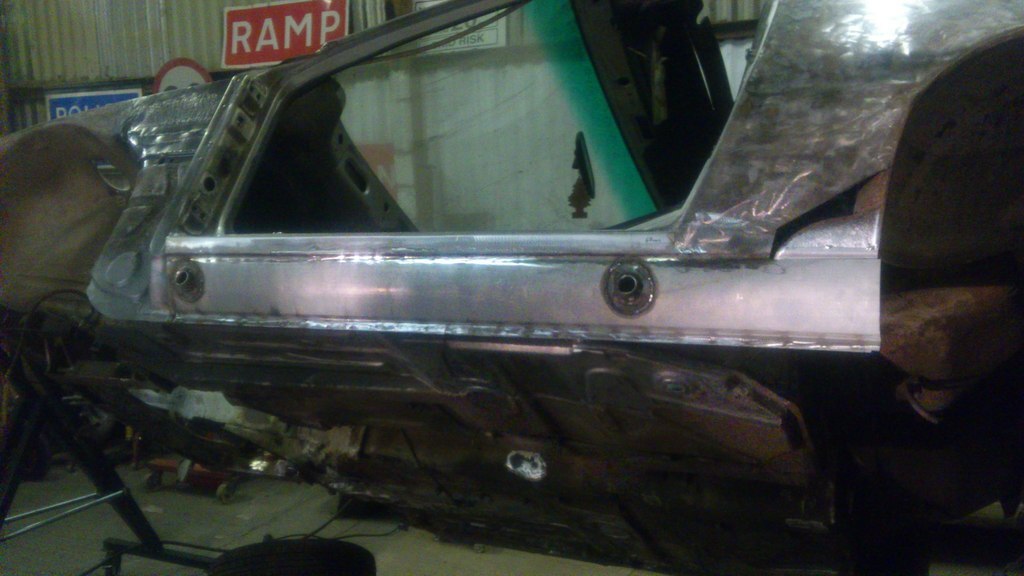  |
| |
Last Edit: Sept 19, 2017 12:26:16 GMT by RobinJI
|
|
|
|
|
Mar 24, 2017 12:59:27 GMT
|
|
That must be a great feeling to see that all closed up and solid again!
well done...
Carrera GT body kit, you say?....mmmmm sounds tasty!
JP
|
| |
I know its spelled Norman Luxury Yacht, but its pronounced Throat Wobbler Mangrove!
|
|
|
|
|
|
|
|
Nice work. Also interested in what this Carrera GT kit consists of?
|
| |
1988 740 Turbo, 1998 V90, 1991 Eunos Roadster.
|
|
RobinJI
Posted a lot
   "Driven by the irony that only being shackled to the road could ever I be free"
Posts: 2,995
|
|
Mar 26, 2017 22:03:19 GMT
|
Thanks guys. Pete, it's the kit Porsche fitted to the 924 Carrera GT homologation models. (well, a replica of it!). It consists of a pair of front wings and front bumper that look a lot like 944 items (the Carrera GT came out a couple of years before the 944) and a pair of rear over-arches to bring the width out to match the front, As well as a bonnet scoop. 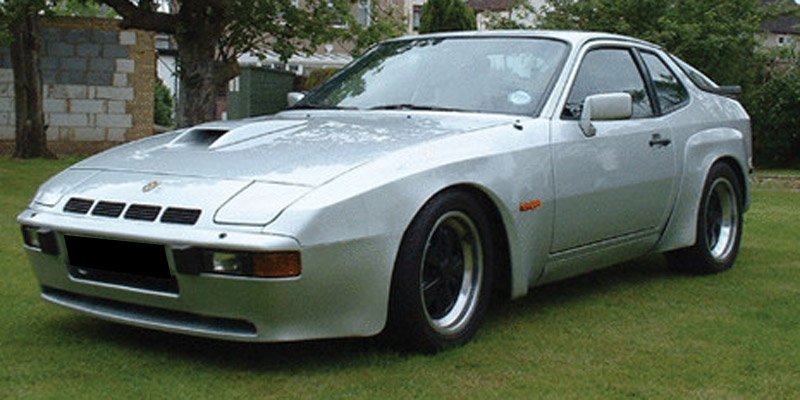 However..... That's not happening anymore  . Part of the reason I haven't gone over my plans much here is that they keep changing. I keep bouncing between leaving the car fairly true to it's beginnings, or going a bit mental with it, and it's fast getting to a point where I need to nail down a plan of attack and stick to it. Well this weekend I've not done any work on it, due to mothersday and the daily needing a little TLC. I did however make use of the times when paint was drying on the daily to level it out and (using a work-mate to simulate the planned ride height,) offer up the closest 15" wheel to hand. To explain a little... I intend to remake all the suspension, a decision which has left a big question, and it's knock-on questions floating around my head, and I need some answers very soon so progress doesn't stall. What wheel size I should use? what PCD would give the best choice of wheels in that size, and are things going to have to get a little bit wider to accommodate those wheels? The wheel I happened to grab between coats of paint yesterday was a Mazdaspeed/Rays Engineering MS01r, with a tatty coat of black paint and a 195/50R15 tyre on it. I've had these kicking around since I got rid of my MX-5, and the idea of using them on the Porsche hadn't even slightly crossed my mind. I assumed they'd look completely wrong. Boy was I wrong. With one offered up in the arch I was amazed how good it looked. Then my housemate and another friend turned up and immediately pointed out that it looked great on there. So even though I didn't actually do any work on the car its self, some good progress was made in organising the cluttered mess of ideas floating around my mind: 15x7", 4 x 100 & standard arches. Helpfully, this keeps the work and budget down. I've already got 6 of these wheels, as well as a few others wheels in a similar fitment, so I won't have to buy any wheels, plus it means I can use the hilariously cheap 195/50R15 tyre size. The only real downside is less ultimate grip than with larger sizes, but I'm building this car to put a grin on my face and learn to drive on track, not set lap records, so that actually appeals to me. With the wheels being a common PCD and a fairly 'weak' offset and width, there's always the option of some more aggressive wheels later if I do feel the need for silly arches.  With that decision made, the formation of cunning plans can truly get underway, and hopefully by the time I finish the major work on the shell the parts and plans will be waiting to be attacked with some momentum. |
| |
|
|
qwerty
Club Retro Rides Member
Posts: 2,421
Club RR Member Number: 52
|
|
|
|
|
Good to see you back, especially with this!
Keep up the good work, looks like it's going to be a great build!
Tom
|
| |
|
|
|
|
|
Mar 27, 2017 12:42:10 GMT
|
|
This looks really good, and you seem to be putting a Herculean effort into getting it back on the road. I've long been a fan of the 924, I actually prefer them to the 944, so I'll be watching this with interest... please continue!
|
| |
|
|
|
|


