RobinJI
Posted a lot
   "Driven by the irony that only being shackled to the road could ever I be free"
Posts: 2,995
|
|
Mar 29, 2017 20:22:47 GMT
|
Thanks guys. Pistonpopper, I know what you mean about them compared to the 944. I do really like the 944, Porsche did a great job of updating the design, but I like the purity of the 924s design, I think it's a prettier car and looks a bit less try-hard than the 944. The 944's very cool in its own way though. I haven't touched it since the weekend as I've only managed to get out to the unit briefly and that was to continue chasing an annoying rattle I'd noticed the daily had. I finally traced it to being a warn rear brake carrier letting the pad rattle around, so with that sorted last night I'll be back onto the 924 next time I head out there. I may have a go at repairing the rear quarter and arch now I know its not being covered up by a GT kit. I did take these while working on the daily though, because everyone loves pictures, and everyone loves wheels: 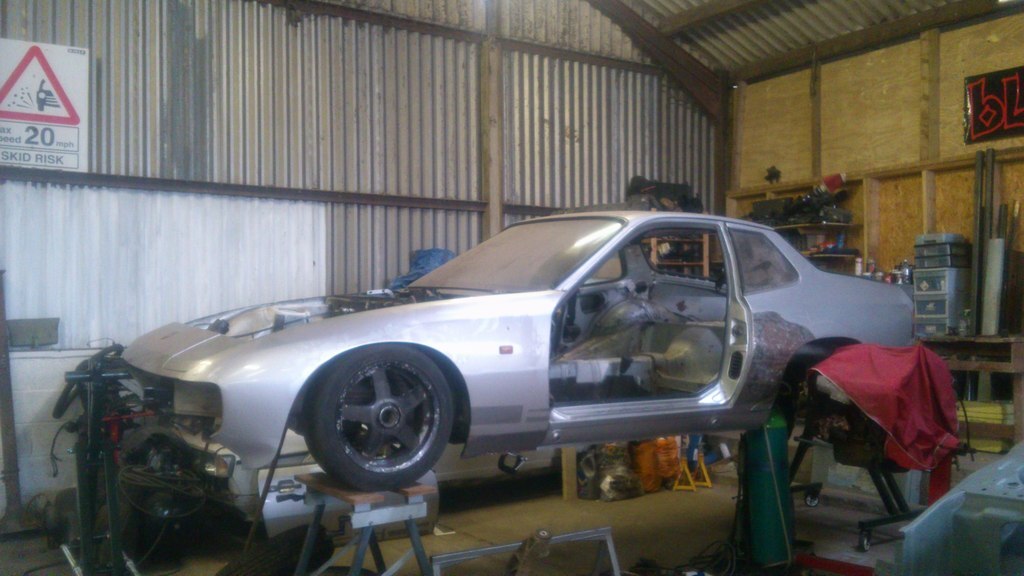 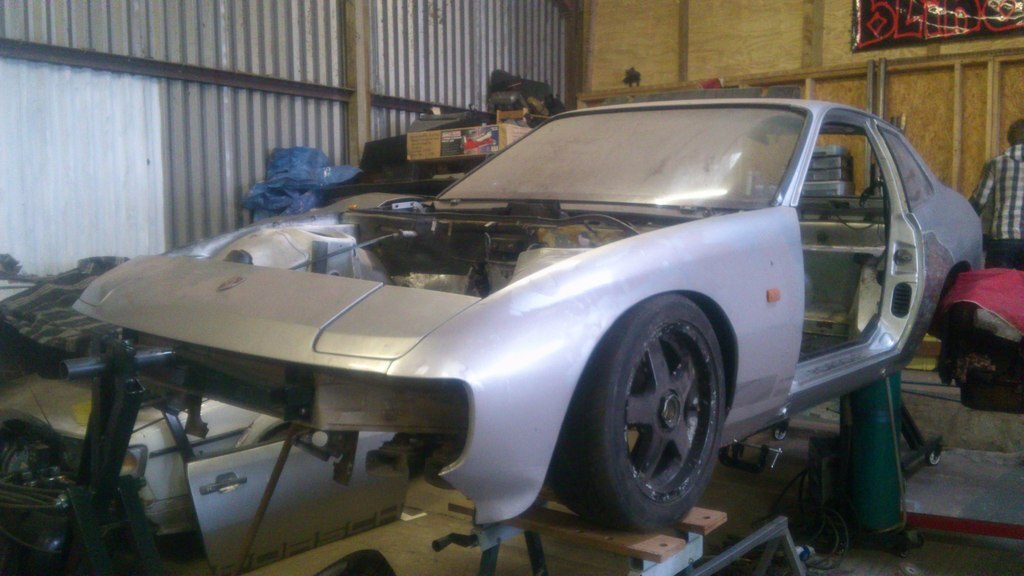 That's the planned ride height. I'm determined to get it both sitting at that height, but more importantly, handling properly at that height. |
| |
Last Edit: Sept 19, 2017 12:27:56 GMT by RobinJI
|
|
|
|
MiataMark
Club Retro Rides Member
Posts: 2,971
Club RR Member Number: 29
|
|
Mar 29, 2017 21:28:24 GMT
|
I got the outer sill ready to go on last night. Sill-stand tubes welded in and a good thick coat of zinc paint on everything before it gets sealed up for good. Sill-stands tubes:  These are to accept specific axle stands that I'll make once the car's down on the ground (so I can get a better idea of the height my jack will get it up to). Something along these lines: 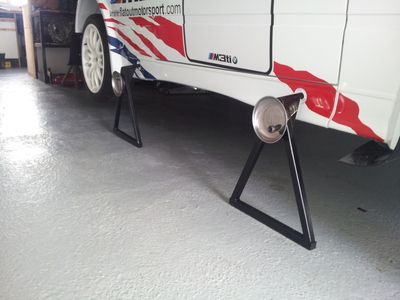 Sadly when it came to drilling the outer sills to slot over them I missed a little.   Luckily this should be covered by a little spreader plate I'll be adding once the sill's in place. I don't normally like to quote a whole lot of photos but in this case it refers to further back in the thread. Really like this idea, in fact I was thinking about it after reading through the Rally Design catalogue, they do a kit including the stands link. If I ever get round to sorting out the bodywork on my MX5 I may consider incorporating this. Great work! |
| |
1990 Mazda MX-52012 BMW 118i (170bhp) - white appliance 2011 Land Rover Freelander 2 TD4 2003 Land Rover Discovery II TD52007 Alfa Romeo 159 Sportwagon JTDm
|
|
RobinJI
Posted a lot
   "Driven by the irony that only being shackled to the road could ever I be free"
Posts: 2,995
|
|
|
|
MiataMark, I used to do some co-driving and still help the guy who I did it for with the car, so speaking from experience, they really are a godsend. It's so much more convenient and confidence inspiring being able to securely slot some stands in than it is to have to mess around hoping you get it safe on normal axle stands. Hence why I've included them in this build. I've done a little more over the last week: Modified/replaced jacking point on the passenger side, made from 3mm steel to suit a flat headed trolley jack, because I'll never be using the factory jack: 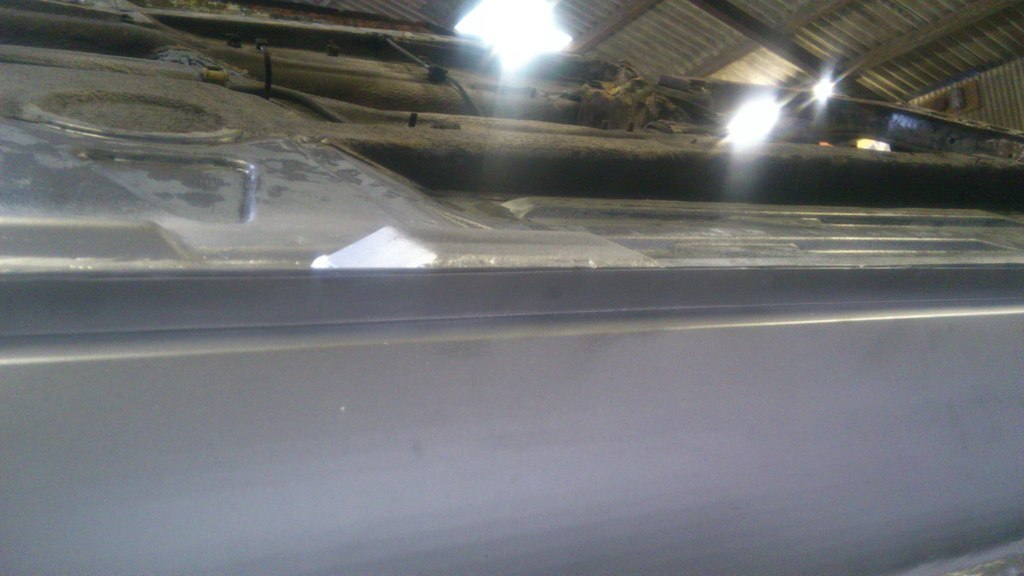 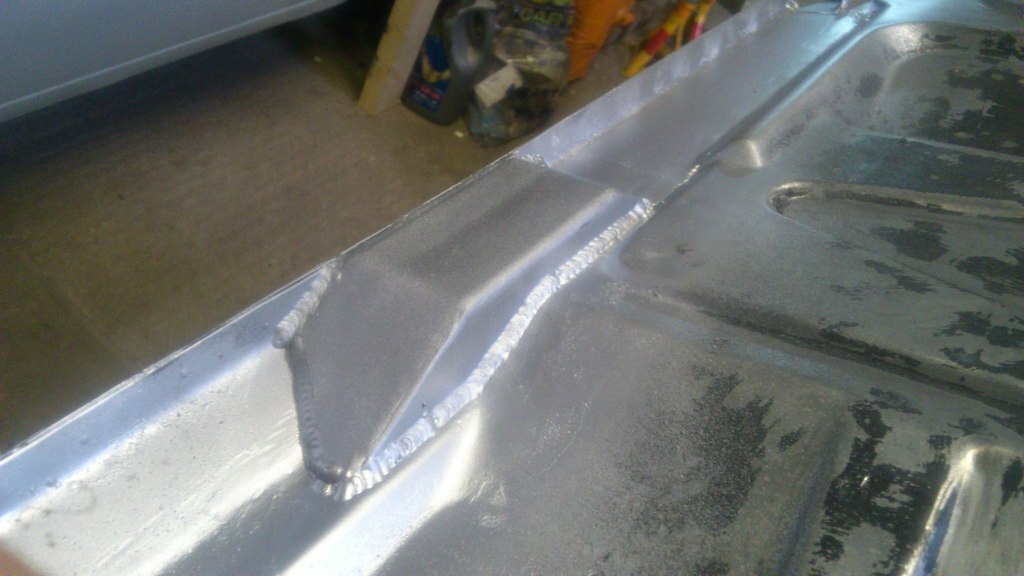 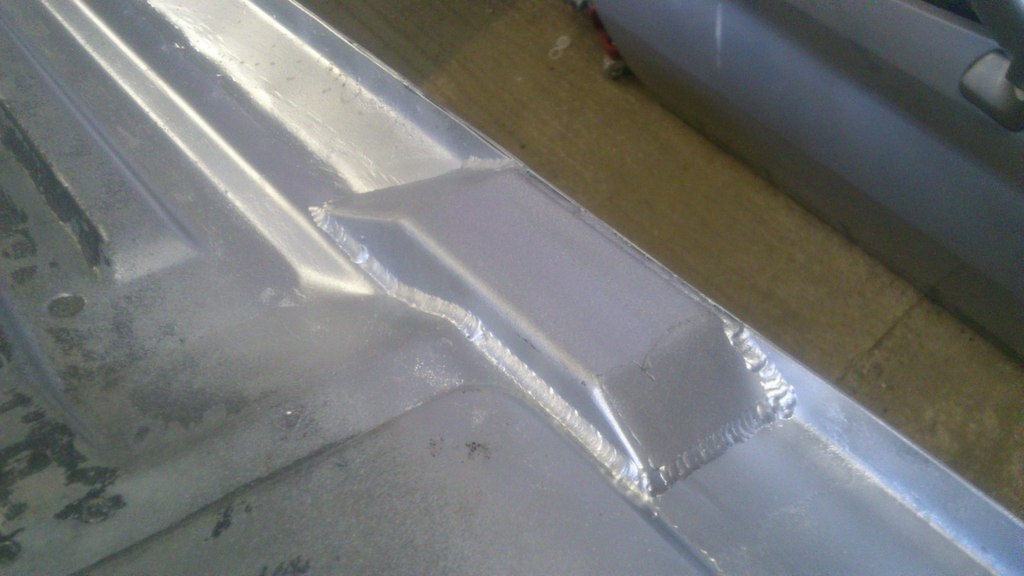 Underseal knocked back and outer sill cut off the drivers side, it's safe to say that wont t-cut out: 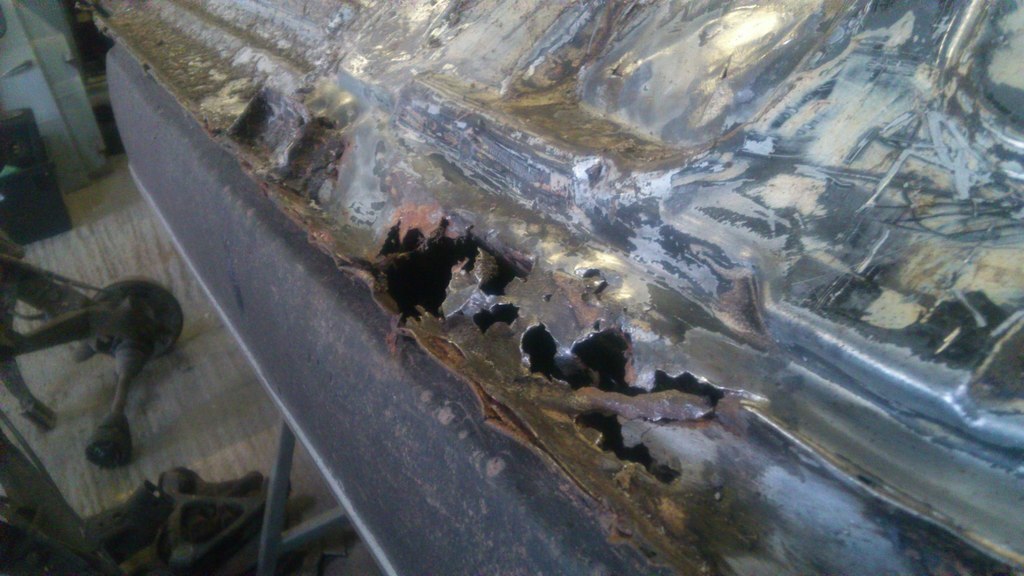 Mid jacking point: 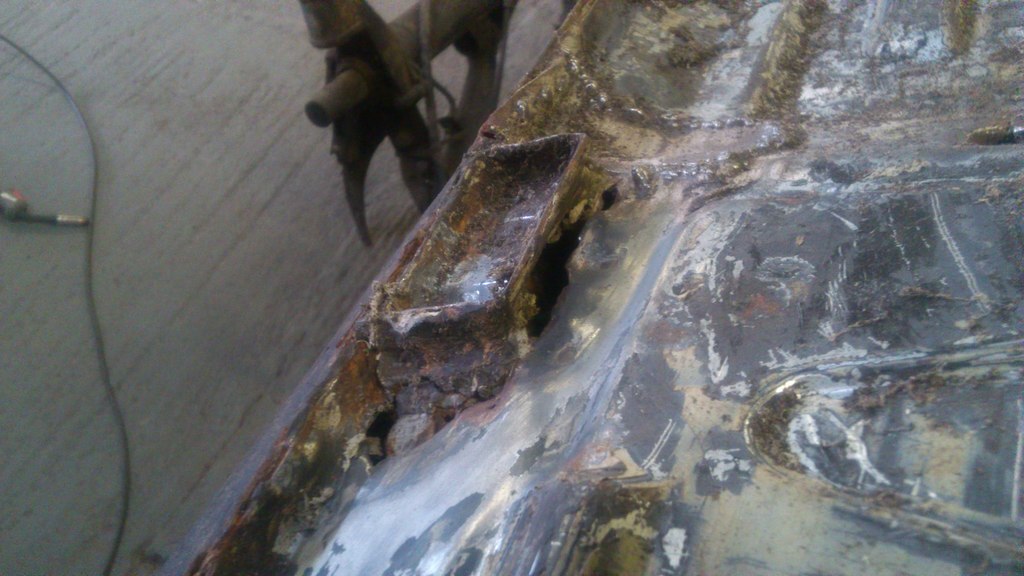 Rear jacking point: 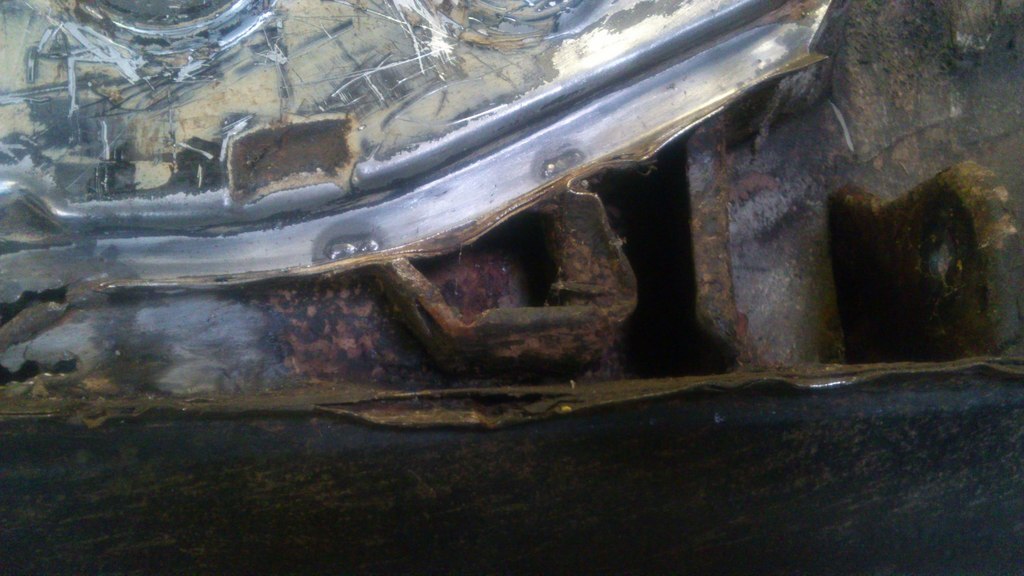 Front corner: 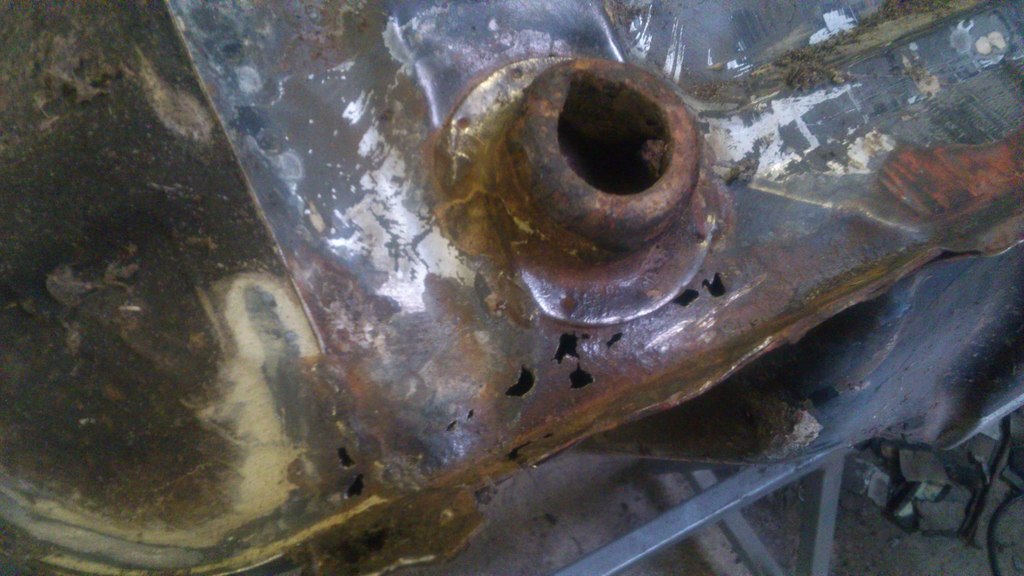 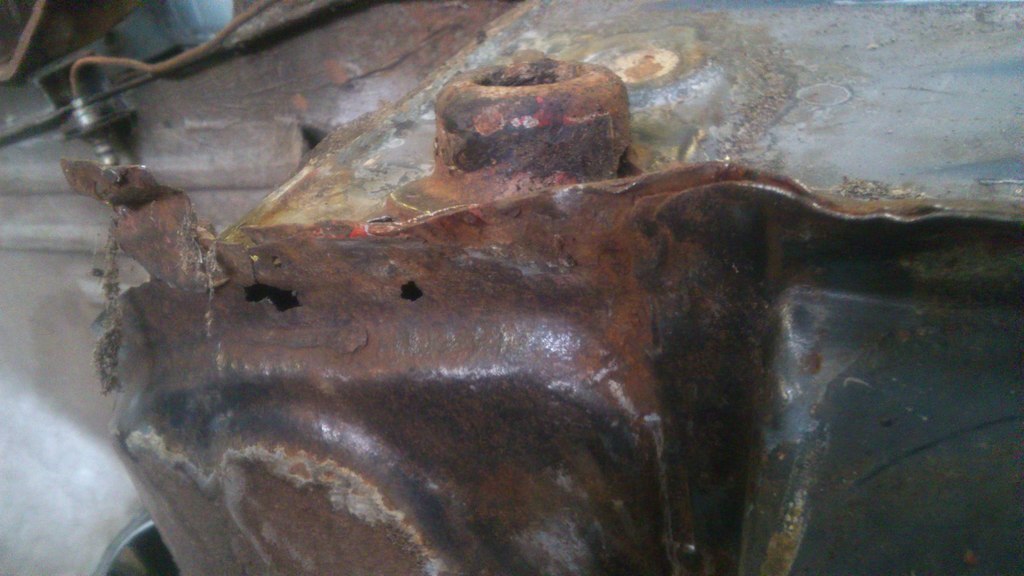 Outer sill cut off to see what horrors lie within: 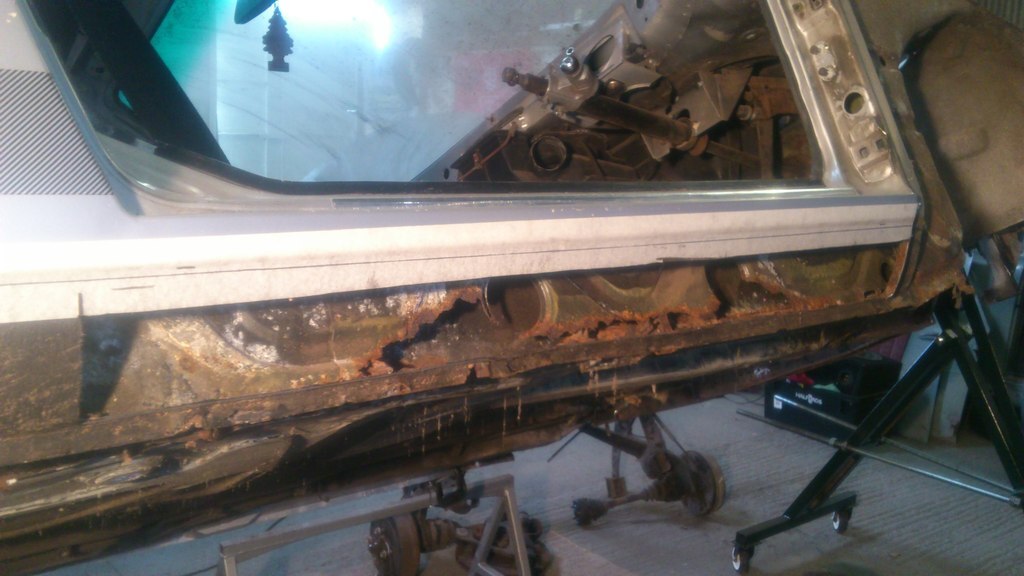 Front corner rebuilt (what a fiddly little prick of a section to rebuild!): 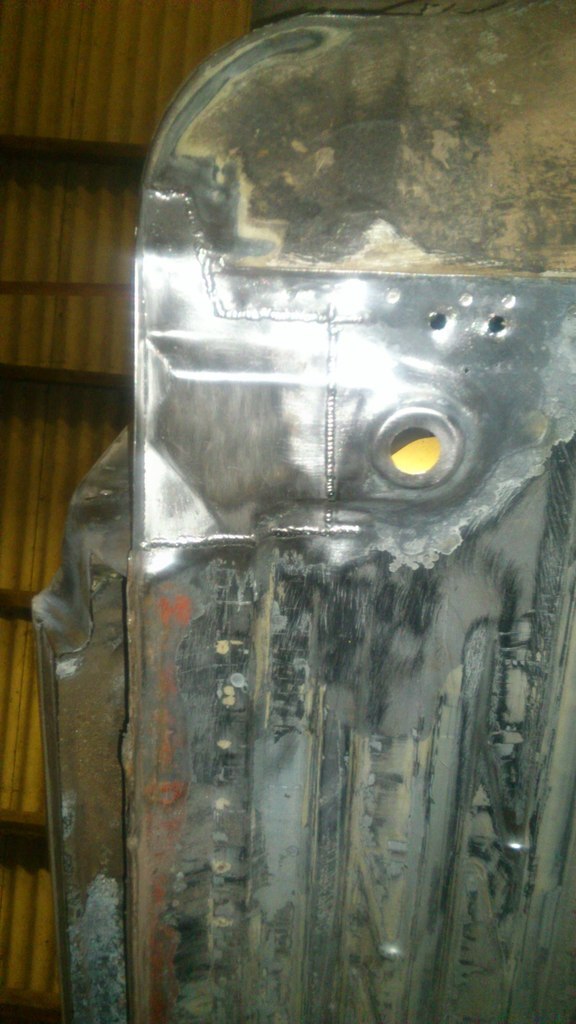 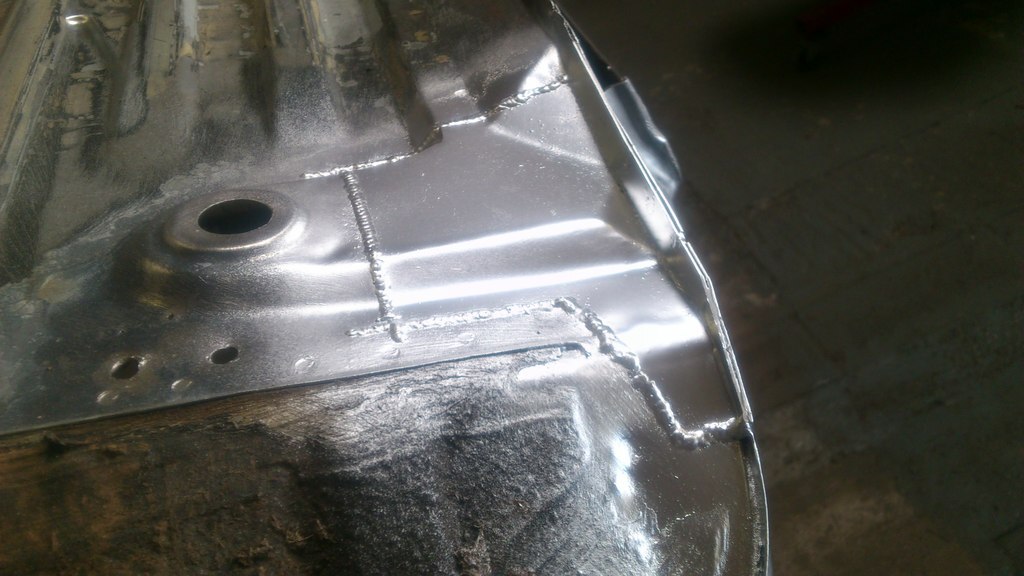 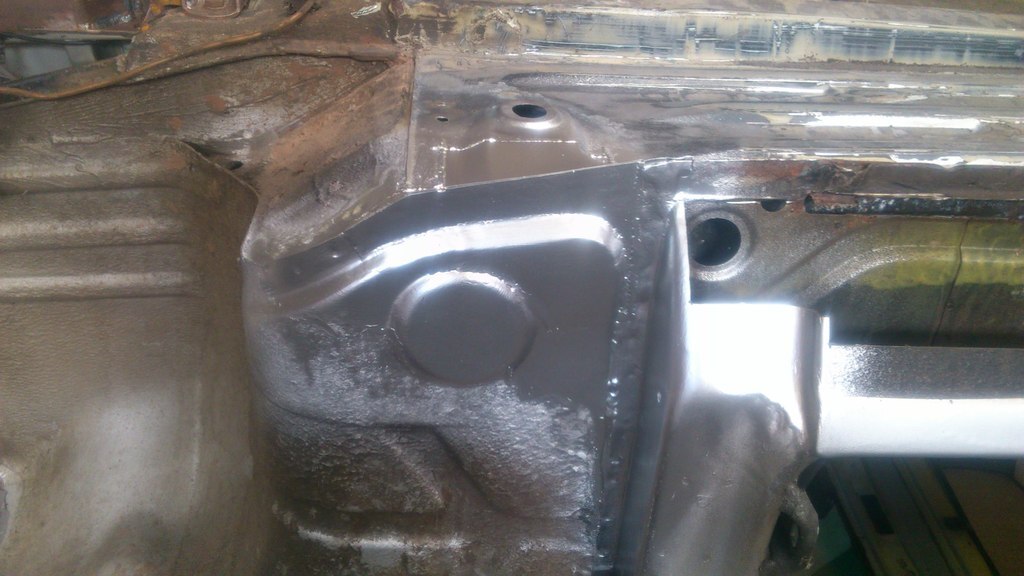 And that's back up to date. |
| |
Last Edit: Sept 19, 2017 12:32:30 GMT by RobinJI
|
|
mattiwagon
Part of things
  Just got a work truck
Posts: 445 
|
|
|
|
|
That is some lovely fabrication work chap! Awesome project
|
| |
If they cant be nice f**k em!
84 low t25 panel 1.9td beige and rust combo
97 Goped Bigfoot G260RC with clutch conversion
97 Impreza turbo 2000 builders wagon 76k sold
04 Fabia vRs 50mpg pocket rocket
04 battered T5 pickup in blue!
Chainsaws lotsa Chainsaws
|
|
|
|
|
|
|
|
wow, the welding and fab are very nicely done. Ive never seen such straight welds...how do you do it?...straight edge!?
JP
|
| |
I know its spelled Norman Luxury Yacht, but its pronounced Throat Wobbler Mangrove!
|
|
|
|
|
|
|
curse of the dreaded sunroof drains ? bookmarked this thread at the start, but only just replied. enjoying the updates  |
| |
|
|
RobinJI
Posted a lot
   "Driven by the irony that only being shackled to the road could ever I be free"
Posts: 2,995
|
|
|
|
Thanks guys. It's always a nice motivation boost to have compliments on my work! I think I can get overly critical of my own work sometimes, so having other peoples views definitely helps. JP, Thanks, but there's no trick other than fussy panel fit and practice. I've found 0.6mm welding wire helps a fair bit as you don't have to rush as much on thin metal as you do with standard 0.8. Darren, you could well be right about the sunroof drains. I'm not sure what I'll do with them in the long run, some may need a little re-routing when the cage goes in. I popped out to the unit last night, but there's no Porsche progress as a friend came over so we could make up a subframe to mount the tombstones out of this into his mk1 Jetta. 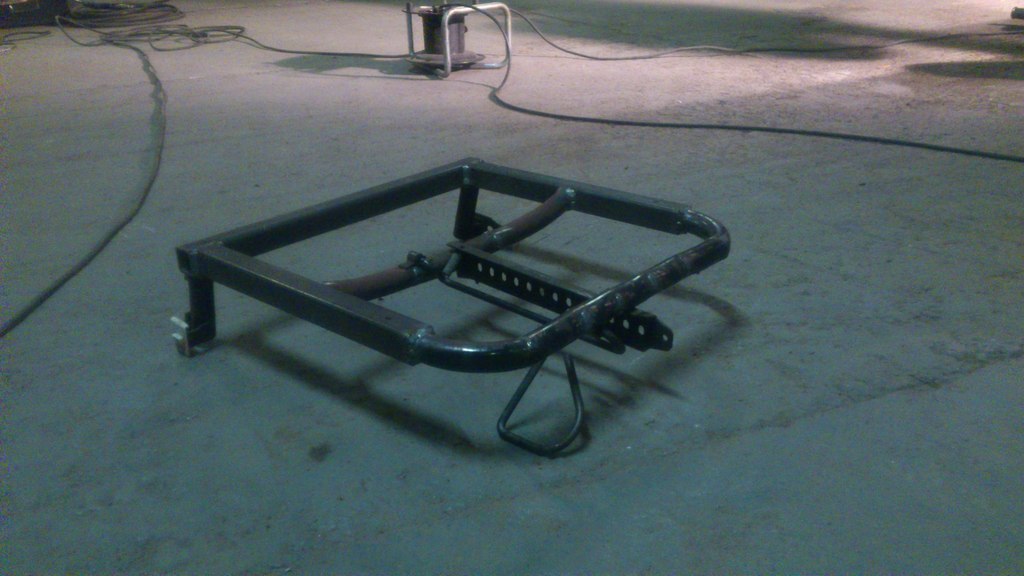 |
| |
Last Edit: Sept 19, 2017 14:21:12 GMT by RobinJI
|
|
BT
Posted a lot
  
Posts: 1,772
|
|
|
|
|
Hello robin.
I have been reading your thread quite regularly when you update it, however I've never really had anything worthwhile to add... Still don't really but I thought I would chime in with another "well done".
I recognise your name, did you ever ride trials years ago? Have a mini? Possibly a clubman? Perhaps I am well off the mark, it wouldn't be the first time.
Your standard of work looks phenomenal and I suspect it's a process I will have to go through with my 944 in the next few years unfortunately. I think where these transverse Porsches because cheap a few years ago corners were cut to keep up with cheap motoring costs which is unfortunate. I've certainly found a few in mine.
Personally I think a Carrera GT style would be fantastic. There seems to be a few poorly executed examples out there, however ypive clearly shown your standard of work is very good, and I think the Carrera GT style would work very well. However if you was to go that route it would be rude not to give it a bit of get up and go!
|
| |
|
|
RobinJI
Posted a lot
   "Driven by the irony that only being shackled to the road could ever I be free"
Posts: 2,995
|
|
|
|
Hi BT, Thanks for the kind words. It sounds like you're thinking of the right person! I did used to ride trials yeah, and I did used to have a clubman estate project. I'm still friends with a lot of the guys I met through trials and occasionally post in the car thread on trials-forum. I started working my way along the frilly outer edge of the floorpan last night. I'll be doing chunks about this size all the way along, as I don't want to cut too much structure out of the car at once. The return of the inner sill (which the plug welds you can see are connecting to) was replaced too: 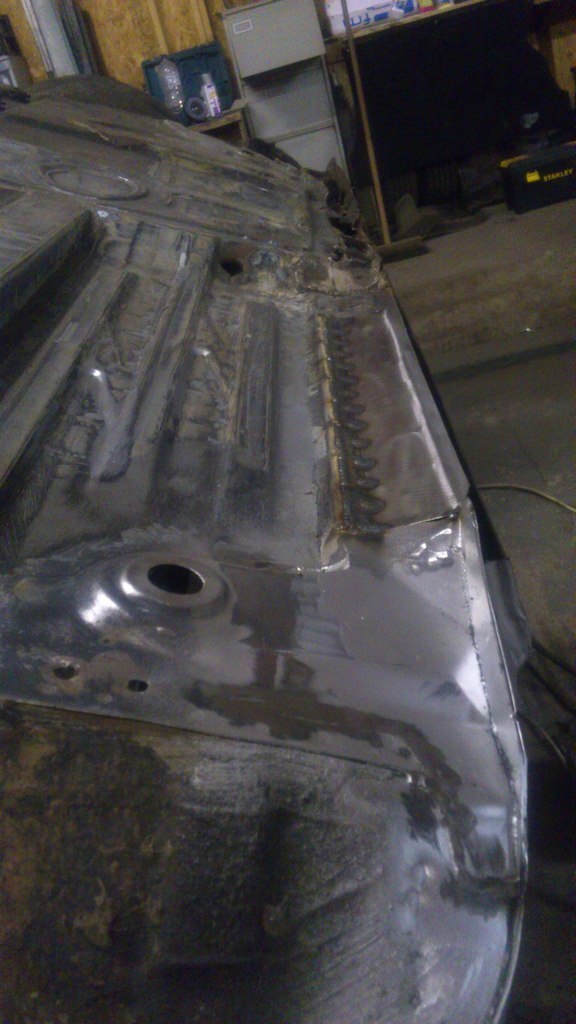 |
| |
Last Edit: Sept 19, 2017 14:21:52 GMT by RobinJI
|
|
RobinJI
Posted a lot
   "Driven by the irony that only being shackled to the road could ever I be free"
Posts: 2,995
|
|
|
|
Another bit patched in earlier: 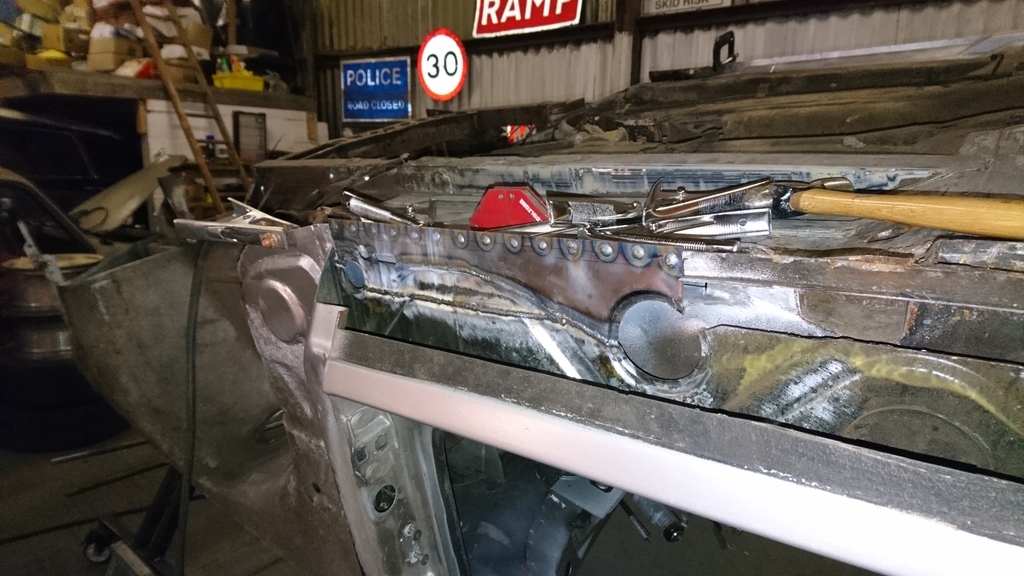 |
| |
Last Edit: Sept 19, 2017 14:22:27 GMT by RobinJI
|
|
|
|
RobinJI
Posted a lot
   "Driven by the irony that only being shackled to the road could ever I be free"
Posts: 2,995
|
|
|
|
Managed to a hide myself away for a few hours amongst a busy weekend to carry on with the fiddly bits of the drivers sill: The centre area cut back to the nearest good metal: 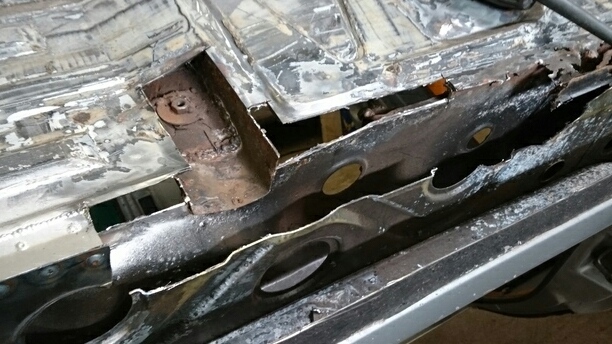 This showed up a rear view of the spectacularly messily welded in repairs someone had done to the captive nuts in the seat mounting rails. I guess at least they got full penetration! I'll deal with these from above when the sills are done. 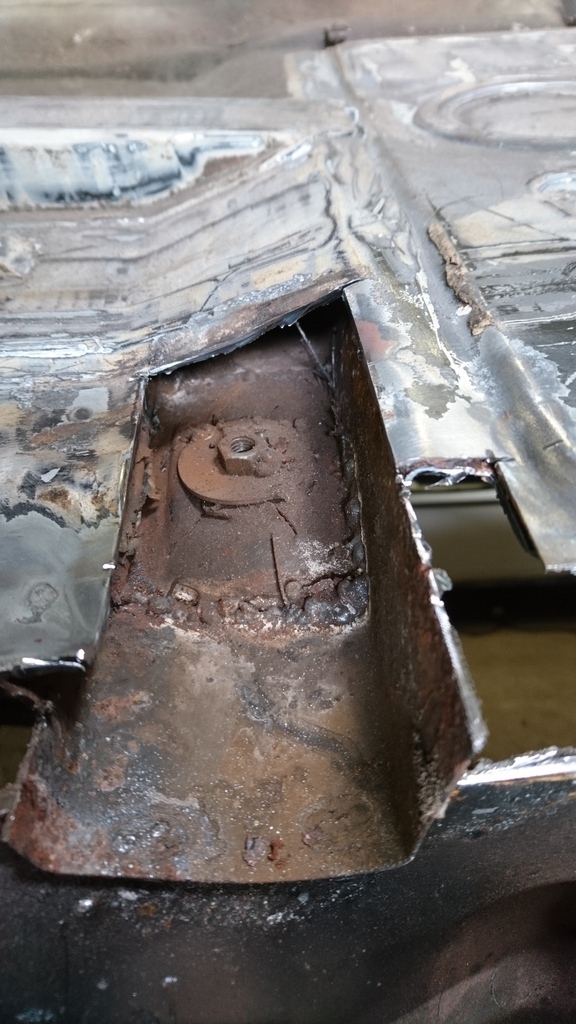 Then a friend popped over to borrow a rivet gun and we got chatting so I only got as far as replacing the fiddly downstands and their returns: 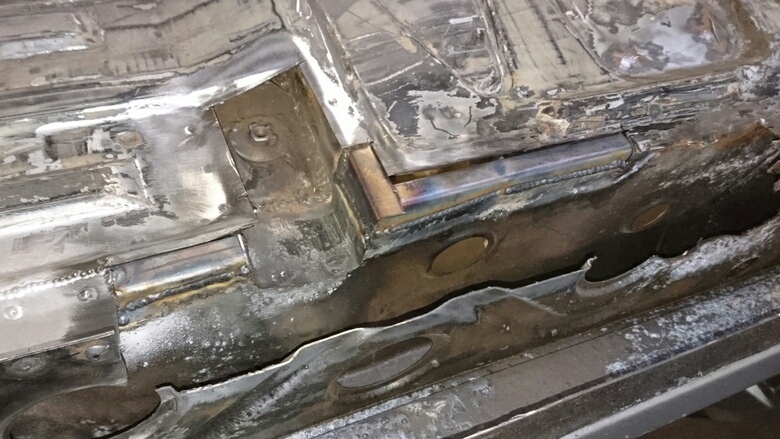 Oh, also, I broke my phone and got a new one, so the pictures in this thread should loose that 'lens that's seen 3 years of abuse' quality. |
| |
Last Edit: Sept 19, 2017 14:23:58 GMT by RobinJI
|
|
RobinJI
Posted a lot
   "Driven by the irony that only being shackled to the road could ever I be free"
Posts: 2,995
|
|
|
|
Following on from the area I was rebuilding in the last post: 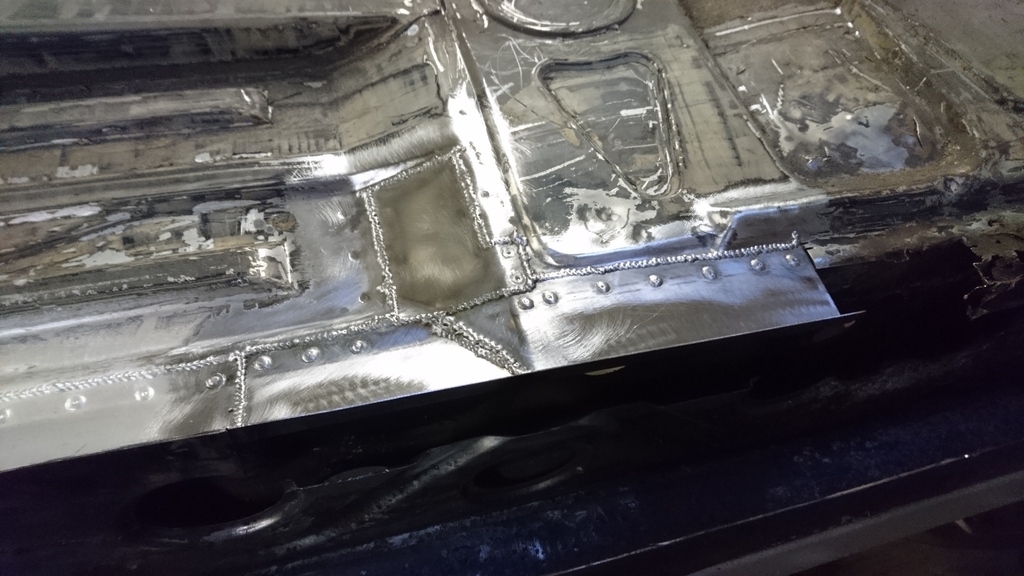 The weldings not my neatest, but this will all be ground back, and it looks good from the inside with consistant full penetration. |
| |
Last Edit: Sept 19, 2017 14:24:54 GMT by RobinJI
|
|
|
|
|
|
|
aagh that is one of the single biggest thing that winds me up, when the welding wire finds a 1mm gap and you fire 2 inches of welding wire perfectly through without touching the sides once, then bzzzp, you get a tooth pick inside the chassis   excellent work so far |
| |
Last Edit: Apr 14, 2017 8:23:08 GMT by darrenh
|
|
RobinJI
Posted a lot
   "Driven by the irony that only being shackled to the road could ever I be free"
Posts: 2,995
|
|
Apr 23, 2017 18:29:39 GMT
|
The improvement in weather, and the longer evenings has lead to me hiding away at the unit less recently, so progress has slowed a bit. I've still got a bit done though. Since my last update I have... Ground back the patches I put in last time: 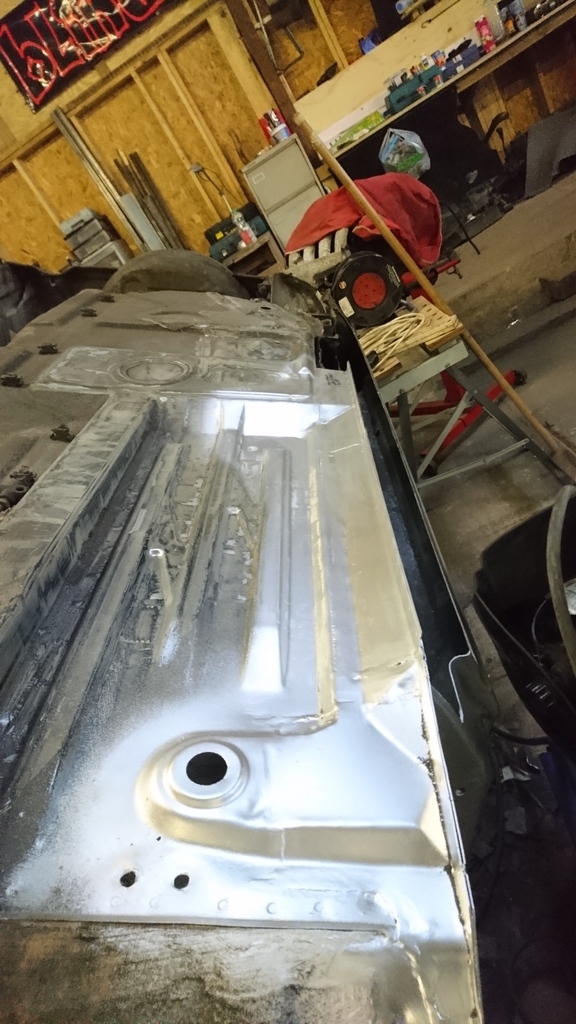 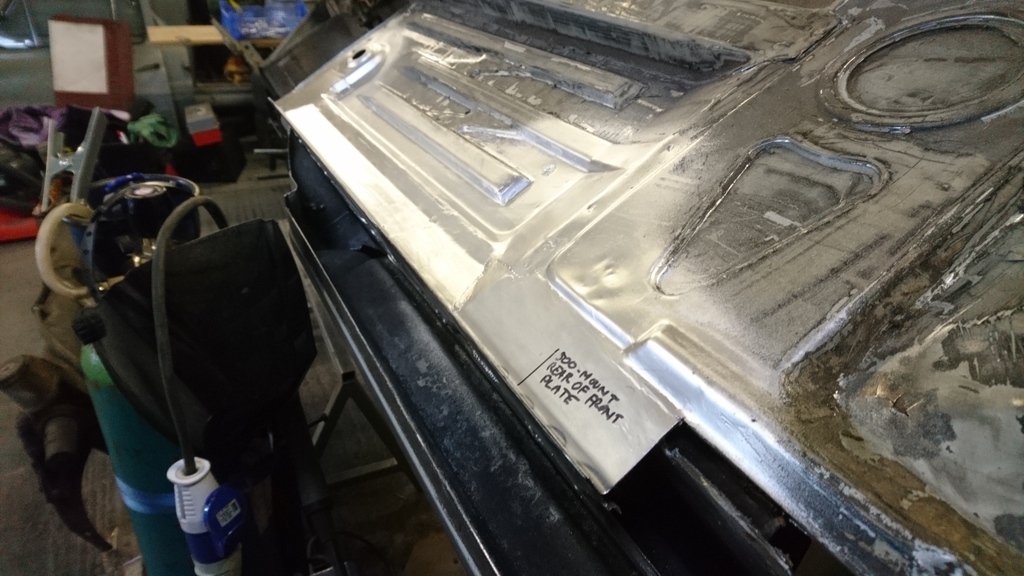 Made a bigger hole: 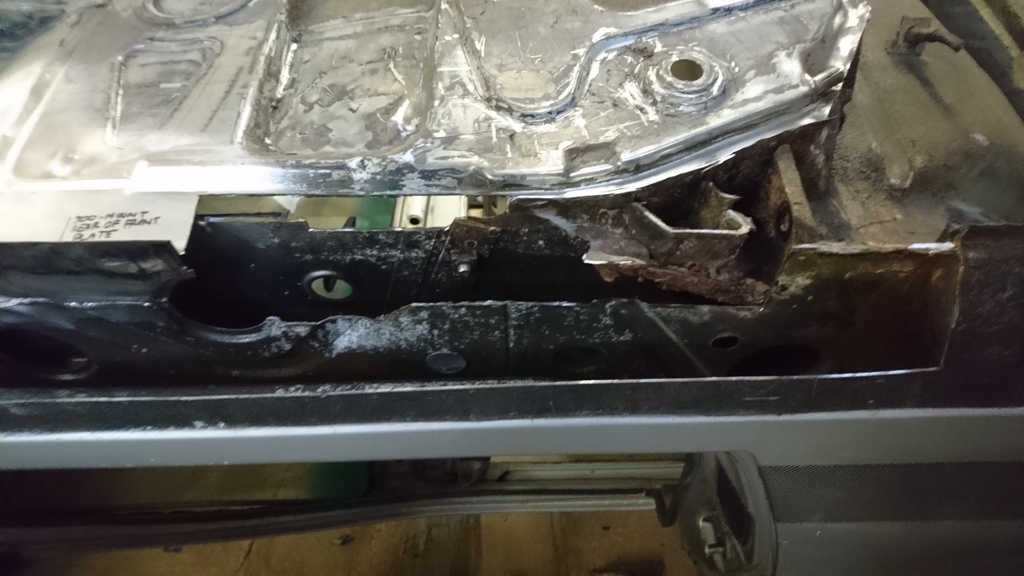 Patched the downstand: 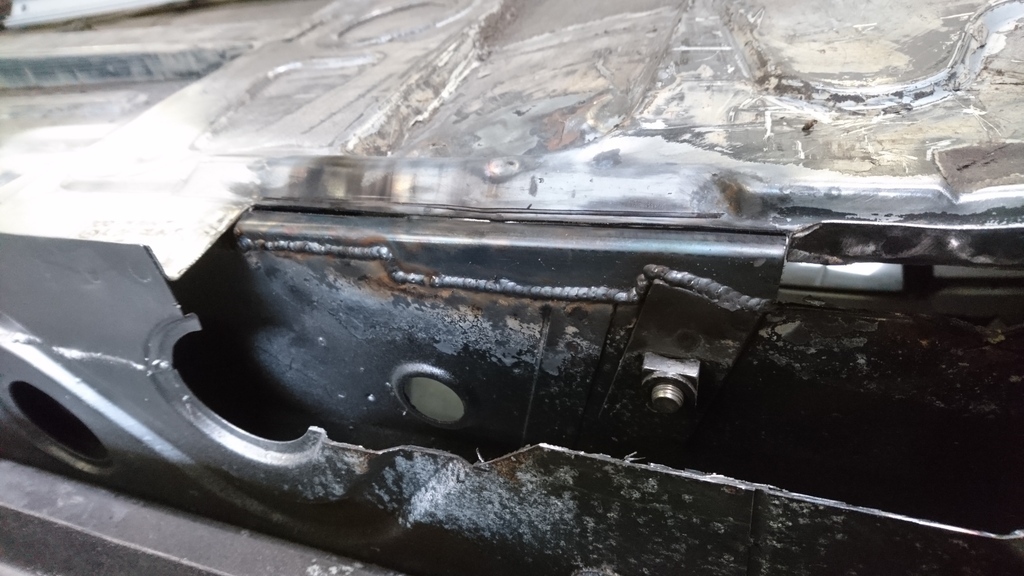 Made an even bigger hole: 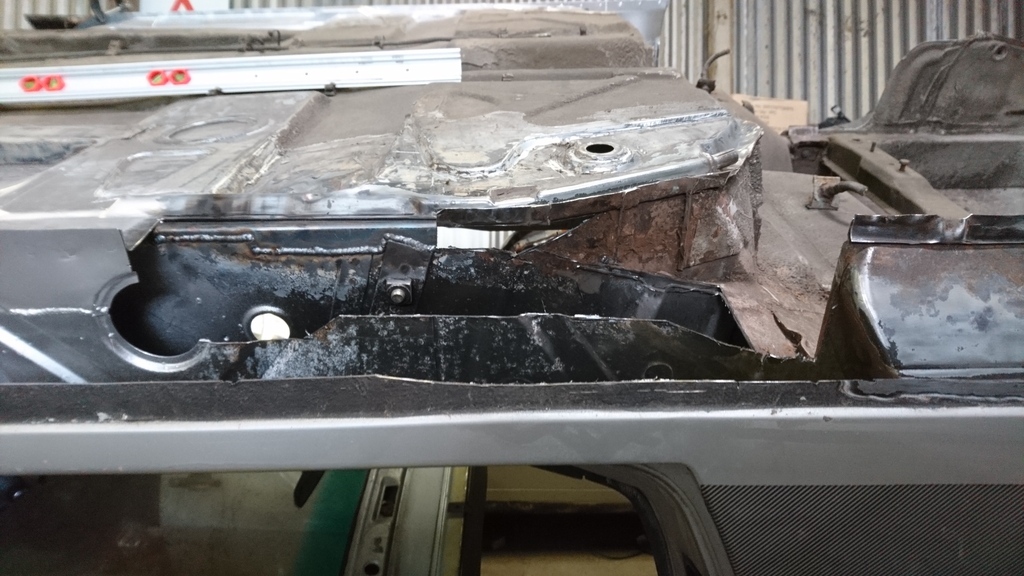 And finally, rebuilt the edge of the floor: 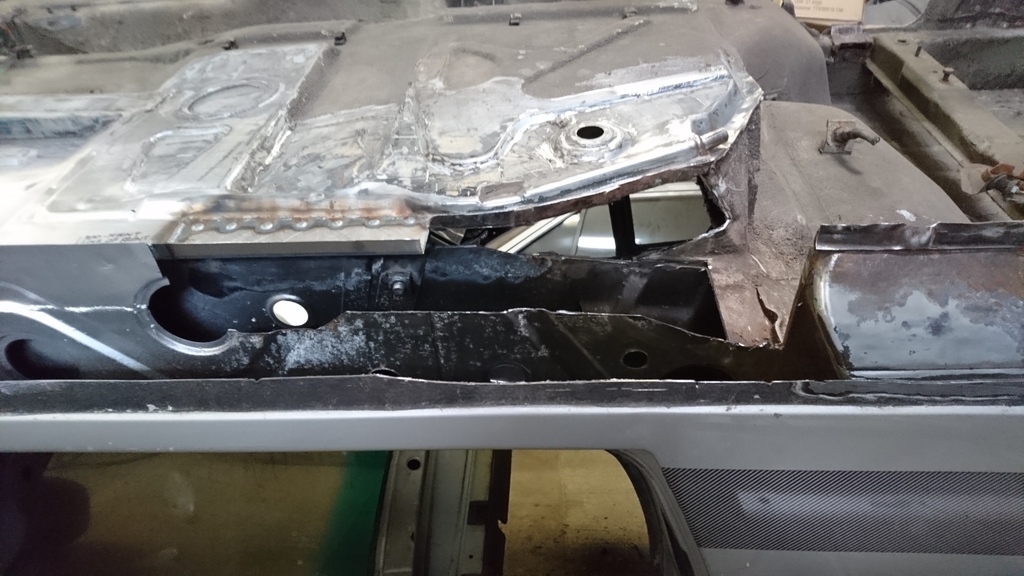 I've also removed a load more sound deadening from inside and cleaned up and treated some surface rust on the drivers floor pan, but didn't take any photos as it seemed even more dull than yet more welding. The ends of the rust repairs are finally in sight, so I've also been making a real start on the suspension plans. Plans only so far though. |
| |
Last Edit: Sept 19, 2017 14:27:36 GMT by RobinJI
|
|
RobinJI
Posted a lot
   "Driven by the irony that only being shackled to the road could ever I be free"
Posts: 2,995
|
|
May 12, 2017 15:42:17 GMT
|
Things have slowed down a little, mostly due to the start of summer making me a bit busier with social stuff, but also because the dailies MOT was due. Its all through now after a small patch of welding on each rear jacking point and some coilovers to replace a leaky front shock Back the the Porsche, the last few evenings I've managed to get back on it and keep rebuilding the drivers sill. First up some thick plate to replace the internal reinforcement: 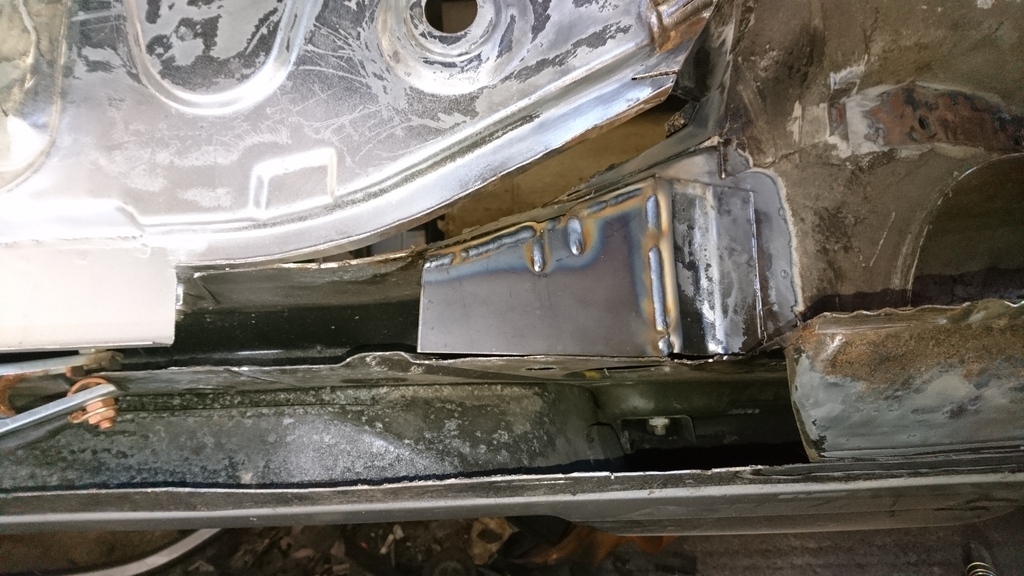 Then some metal in the side of the floor pans upstand: 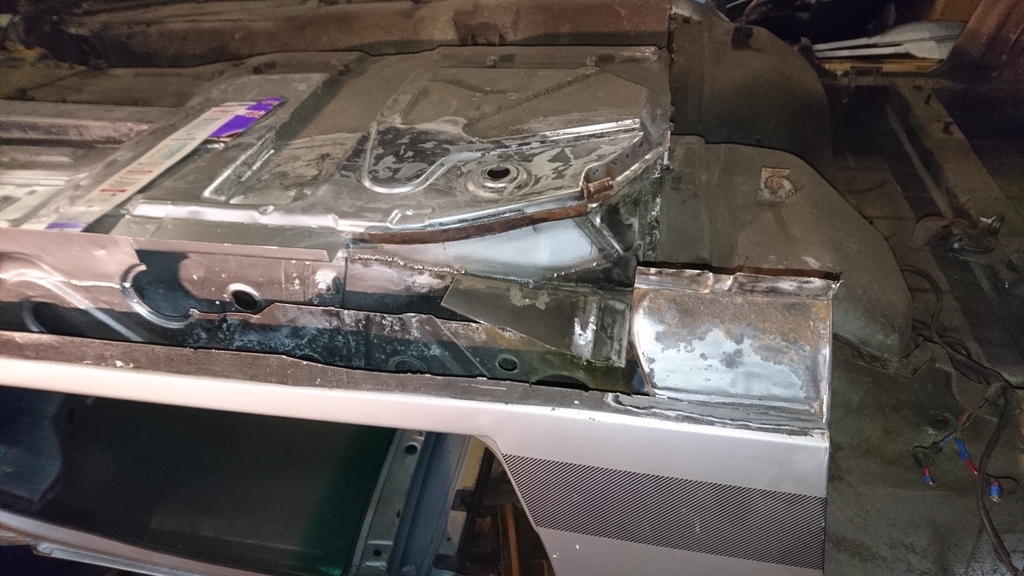 Then some metal to join the rear chassis bits to the floor: 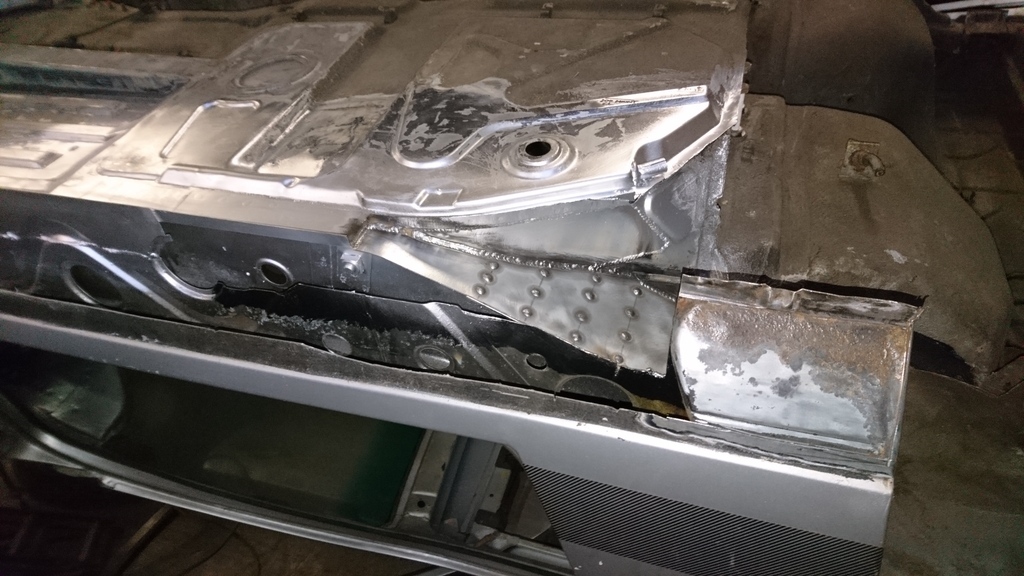 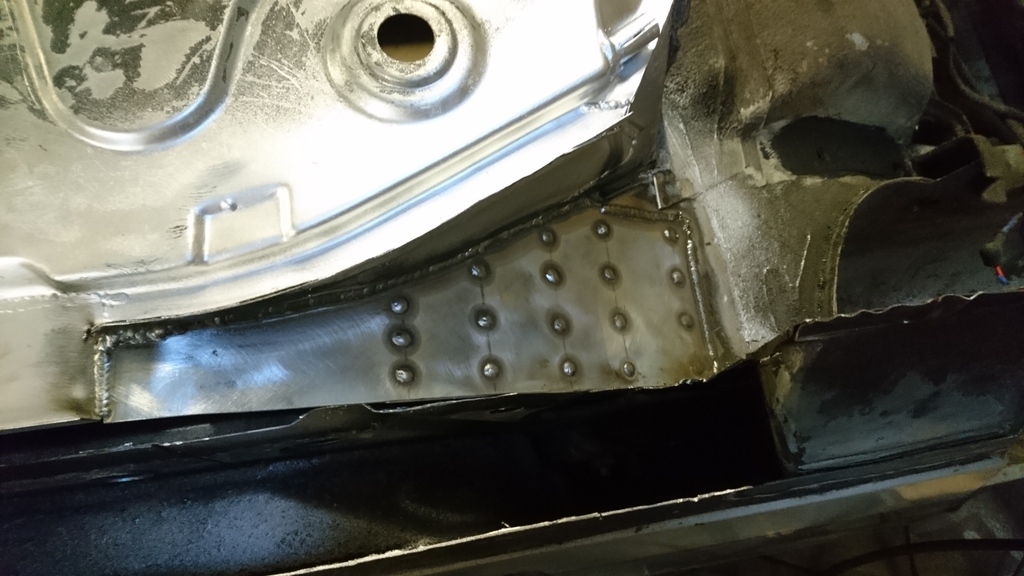 Then a fiddly bit in the inner sill: 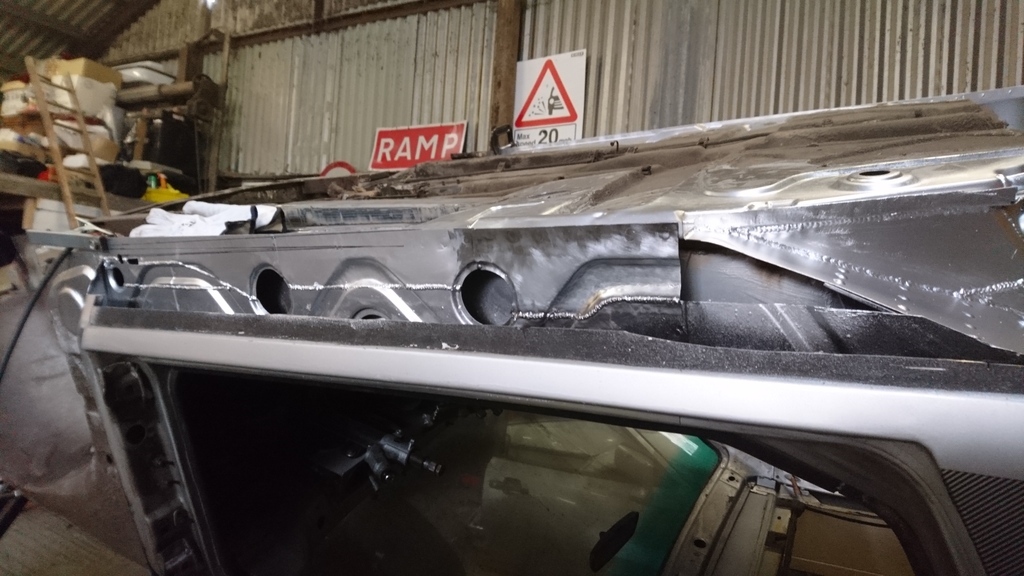 Which leaves things looking like this, and brings us up to date: 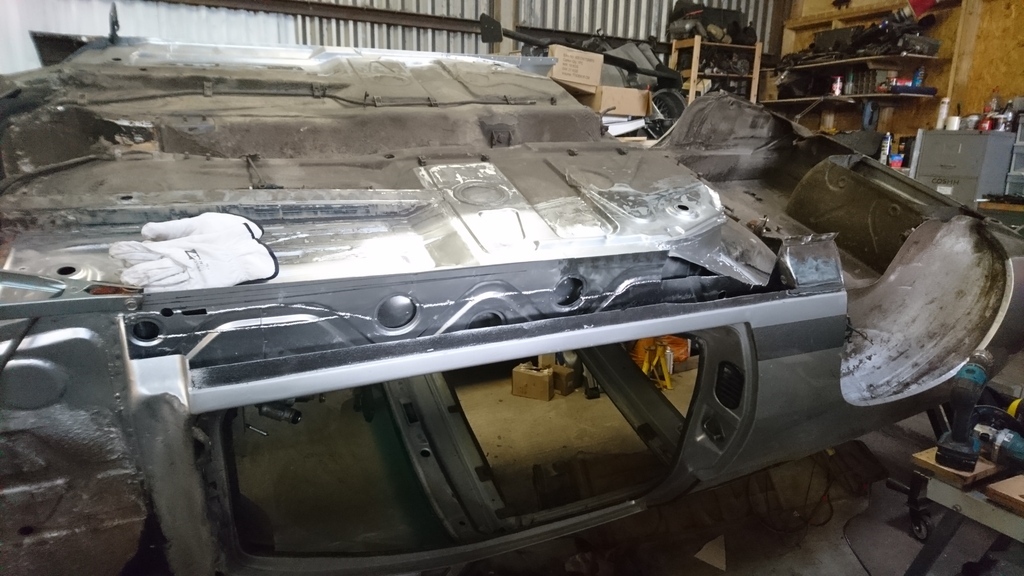 Hopefully the updates will get a bit more interesting once the shell's solid and I can start on the oily go-faster bits! |
| |
Last Edit: Sept 19, 2017 14:29:47 GMT by RobinJI
|
|
RobinJI
Posted a lot
   "Driven by the irony that only being shackled to the road could ever I be free"
Posts: 2,995
|
|
May 20, 2017 21:48:59 GMT
|
After a busy but enjoyable weekend pausing any progress last week, I've managed another couple of evenings on the 924 this week. I really should be dealing with the daily driver, what with it having half a set of coilovers and a slipping clutch, but I was feeling a lot more motivated to play with old interesting cars, than 'modern' (1999) diesel cars. If you're a Bristol local you may have caught a glimpse of me at the Queens Square meet last Sunday. I managed to jump in as the passenger in my friend Ollys stunning 240z. He's just finished a serious rebuild of it after it was imported from Texas 2 years ago and Sunday was it's first drive outside the local area. (This has nothing to do with the 924, I just really like this car!) 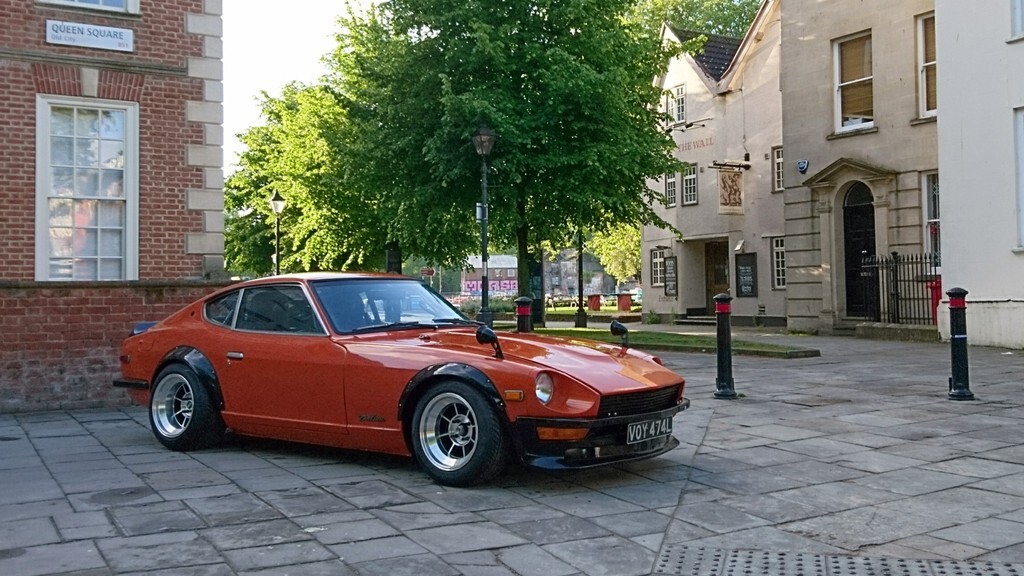 Back to my considerably shonkier car... Earlier in the week I managed a quick trip out. In between helping a friend trying to find a knock his e36 has developed I managed to plate up the last gap in the inner sill: 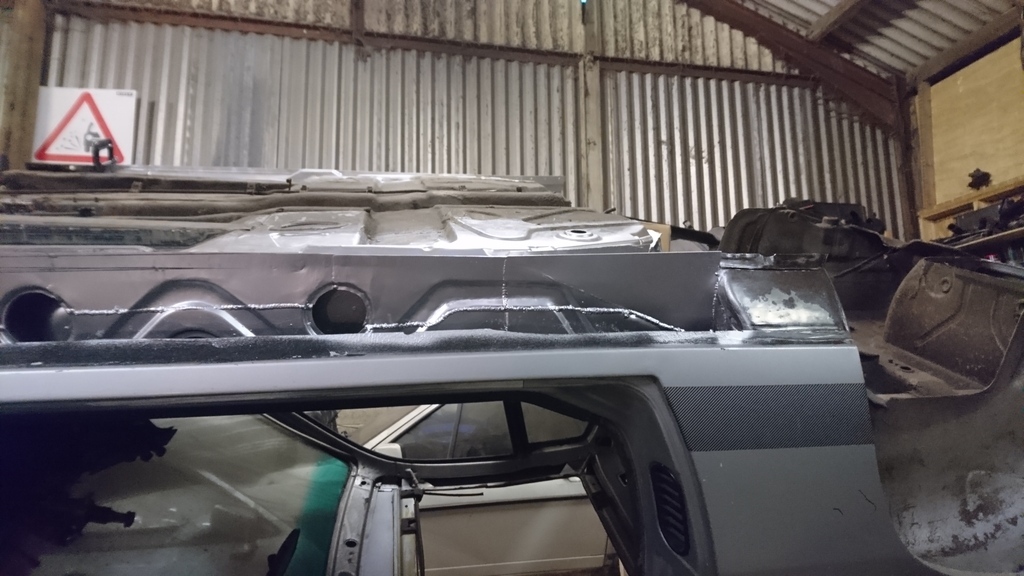 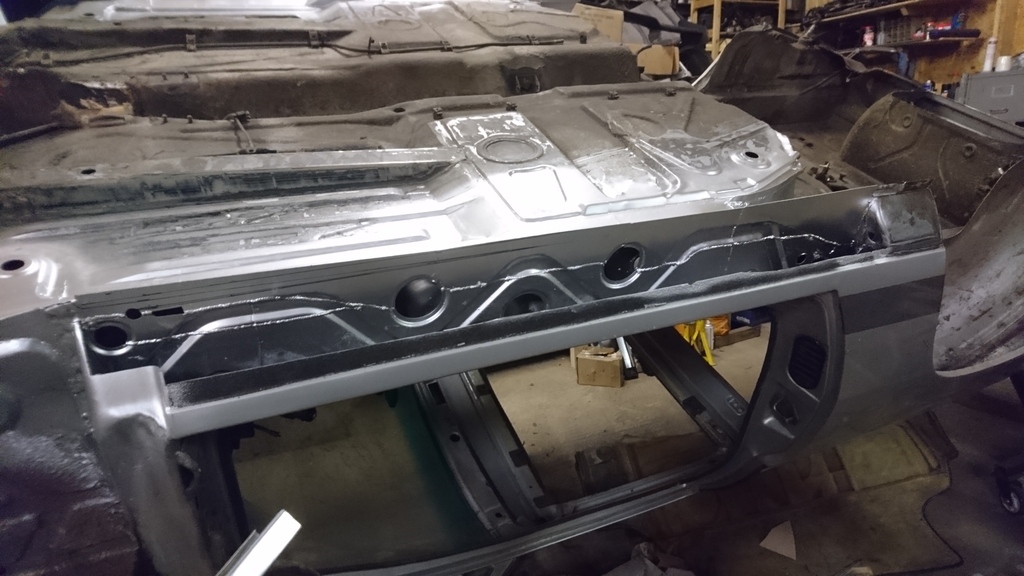 Then I offered up the outer sill and highlighted a mistake I'd made earlier on.  the front ~3rd of the inner sill was noticeably too deep to suit the outer sill panel, despite the panel being identical to the opposite side that I've already done with no issue. Balls. A little measuring later and my heart rate calmed down a lot when I worked out that the floor was definitely in the right place. I'd just over-done the downward slope at the edge that keeps the flange the same length in-front of the step below the seat. Over-done it to the tune of 4mm to be exact. So this afternoon when I got out to the unit, my first job was to slice a tapered chunk out of my nice fresh metal, squeeze it closed, re-measure everything and run a ~400mm weld down the inner sill to close it back up again. Happily, with that done everything measured up as being nice and symmetrical and the outer panel lined up well again. Phew! With my mistake fixed up, I got on with making a bit more progress in the fight against the orange curse word (rust, not that chap on the other side of the pond). I patched up the section missing from the bottom of the a-pillar, then cut out the heavily pitted lower portion of the rear edge of the inner sill. Happily, besides closing it all up with the outer sill, that's the end of the 'repair' welding on this side! With that done, I got the hole saw and die grinder out to crack on with putting the sill stand tubes in. I was a little worried how I'd ensure they had the same slight slope that the passenger side ones did. This would be essential to make sure that when I make the stands, they stand upright on any corner of the car. Fortunately, I'd cut up some VW seat bases to make subframes for the 924s seats in their new home (a friends mk1 jetta) and by pure chance, the tubing they'd left behind in the scrap bin was a perfect fit for the inside of the sill stand tubes! Welded to a length of box section placed accross the full width of the floor, they made a slightly Heath robbinson, but perfectly functional jig to hold the tubes in place while I welded them in. I got the front one in, and the hole drilled for the rear one before deciding to call it a day. The patched up A-pillar and front sill stand tube. The long, horizontal, mostly ground back weld running along the top of the inner sill's the result of my little cock-up: 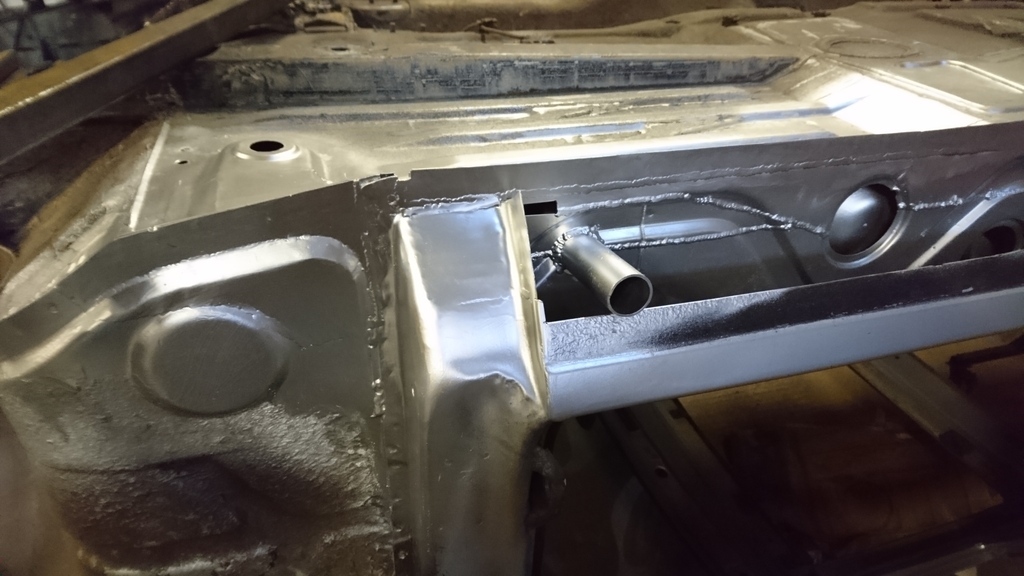 The 'jig' showing how it located the tube: 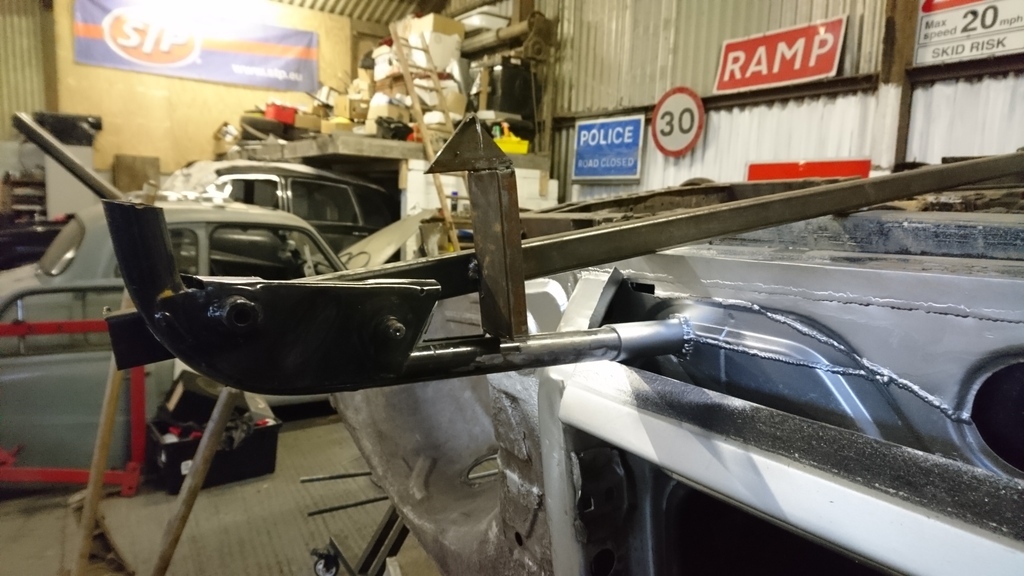 And an overview of how it stands now: 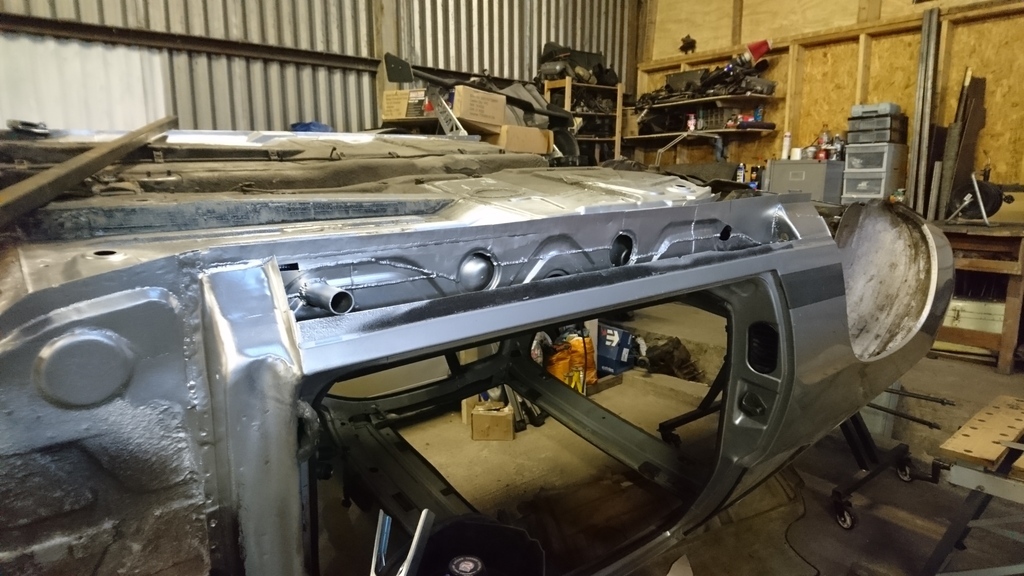 As I was leaving, I thought it might be fun to see if any of you lot could guess what the 924s neighbor is: 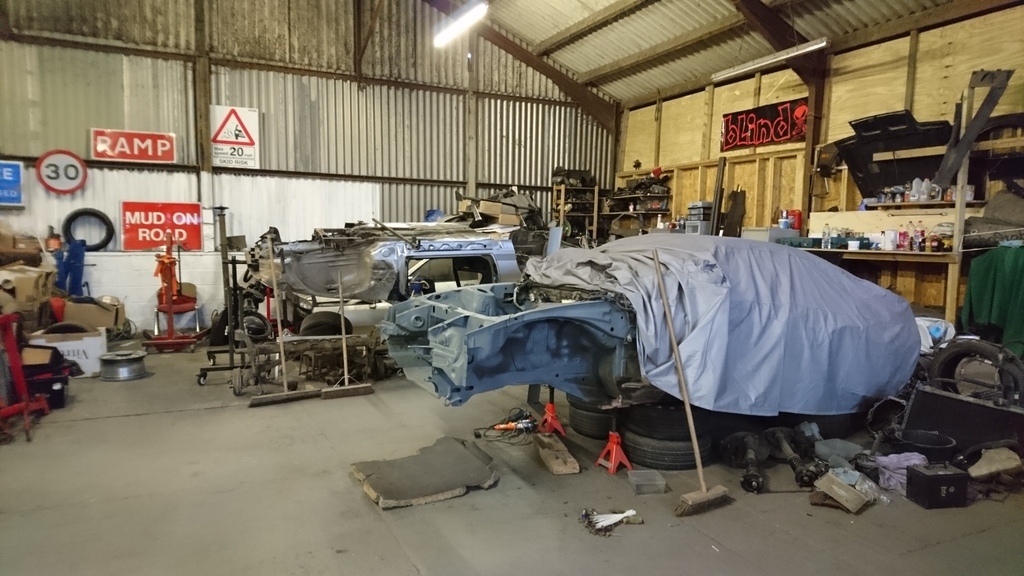 It belongs to my housemate, and as I realise there's not a huge amount to go of, I'll give you a clue: Its a rare (in this country) variation of a fairly rare Japanese car, built a couple of years after the 924. |
| |
Last Edit: Sept 19, 2017 14:32:44 GMT by RobinJI
|
|
RobinJI
Posted a lot
   "Driven by the irony that only being shackled to the road could ever I be free"
Posts: 2,995
|
|
May 21, 2017 18:04:53 GMT
|
I managed a productive afternoon on the 924 earlier. I started by putting the rear sill stand tube in with the jig I'd made, then started on the outer sill. First measuring where the sill stands would poke through and hole sawing a clearance hole each end. Able to offer the sill up properly I cut it roughly down to length then profiled the front edge to fit into the metalwork there. A final coat of zinc spray on the inside of the sill and the back face of the new panel and it was time to get melting metal. Well, after a quick sandwich and coffee while I let the zinc spray dry. A lot of sparks later I had this! 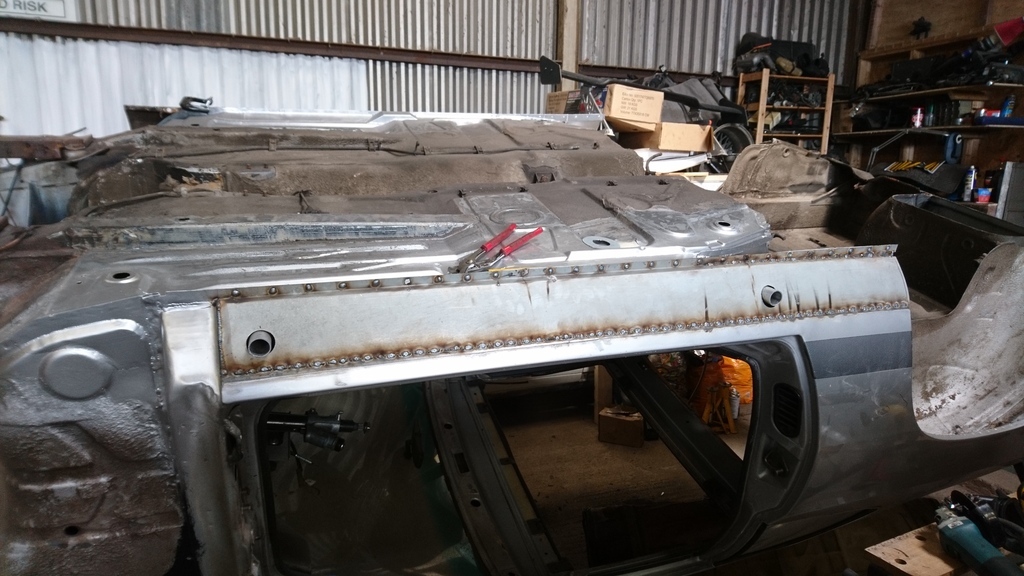 It's not the best photo to show it, but one job I did on this side, which I'm yet to do on the other was to taper the rear end of the sill properly. The panels I'm using were the only ones I could find, and they're not quite a true representation of the factory sills. They were very well priced from Brickwerks.co.uk, but they're just a constant profile folded sheet, rather than a full pressing. While for this car I'm not bothered about the finer details like the marking for the jacking point, I did want to address the back end of them. On the factory sills, the horizontal shelf at the bottom tapers to nearly nothing over the last section of the sill, giving the sill a steeper slope to match the rear quarter. Without this, the one I've fitted already looks rather odd as the sill kicks out at the bottom of the quarter panel. A long tapered slit was made in the rear of the horizontal portion and the sill was pulled in at the bottom then welded back up. I'm happy with the result and it looks much more at home than the passenger side currently does without the taper to it, so I'll be repeating it on the passenger side soon. I should have taken more pictures, as I'm not sure that really came across in that rambling paragraph. TLDR: Budget panels need modifying to work nicely. With that all buzzed up I welded on the sill stand tubes spreader plates. Rear: 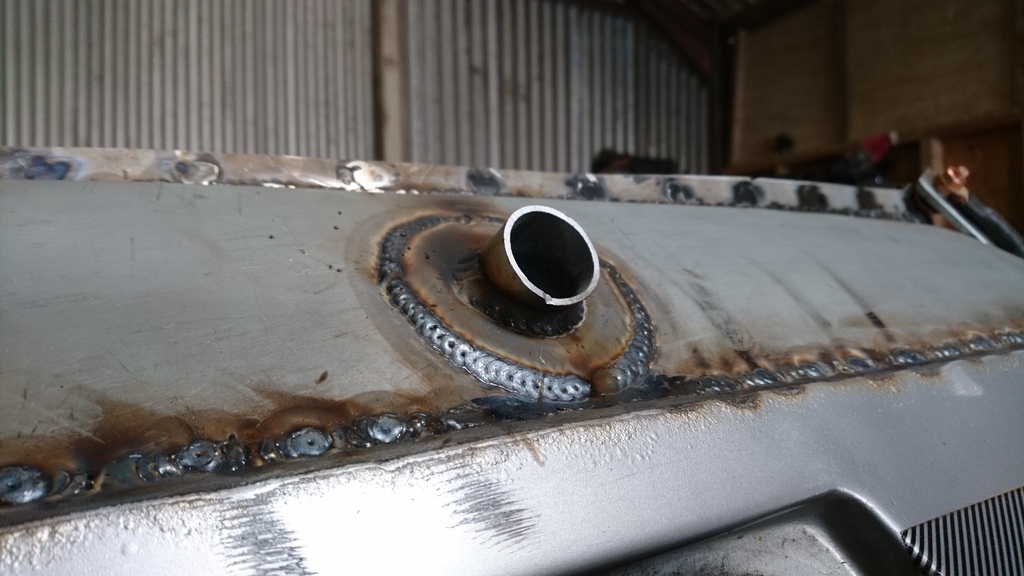 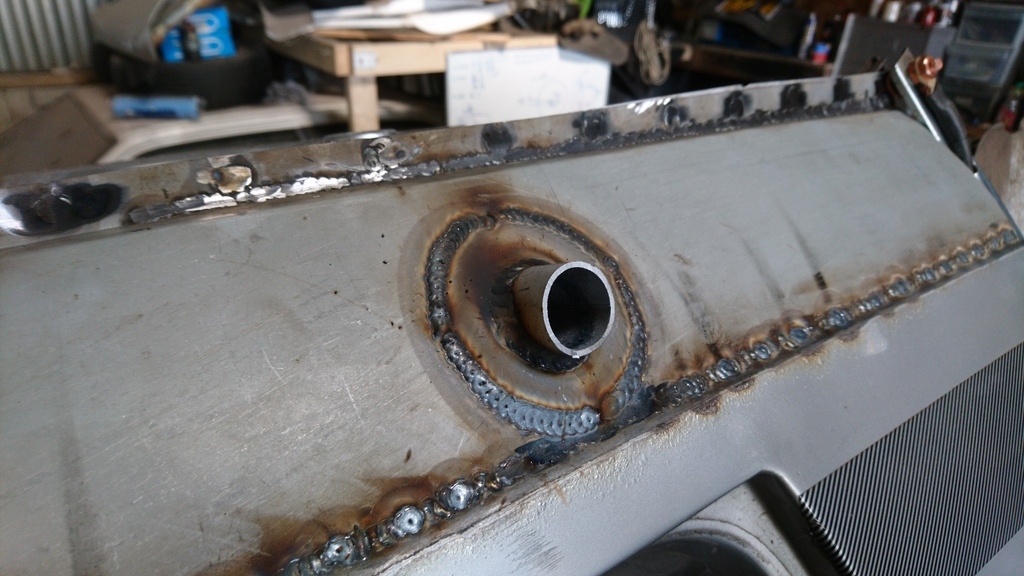 Front: 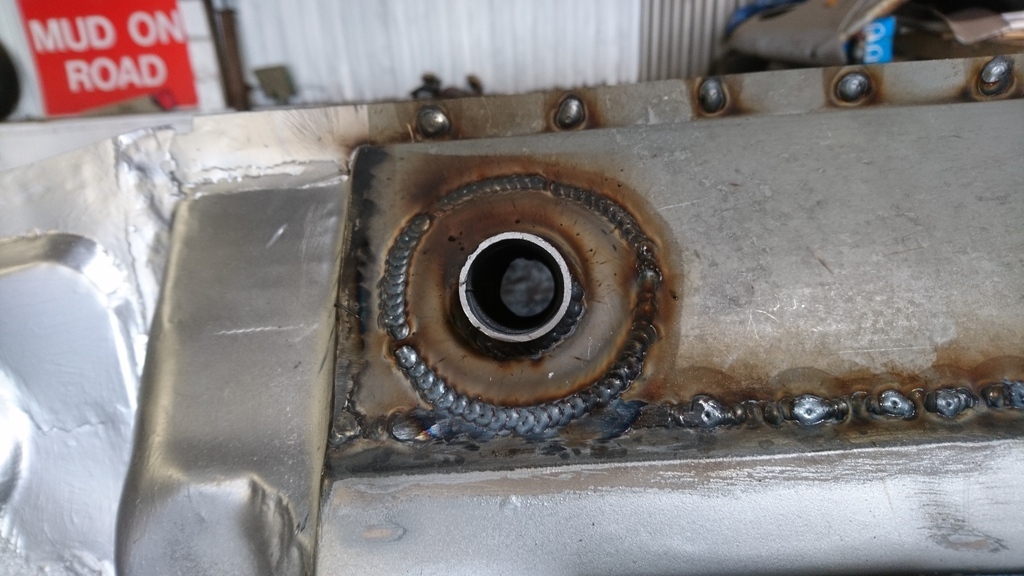 Unfortunately I should have slowed up a little as the rear quarter didn't take well to the heat from welding the rear one on, and has pulled in very slightly. That may need a strategic slit, pull and weld to get back to the right shape. Next I replaced the missing lower section the the wheel arch return: 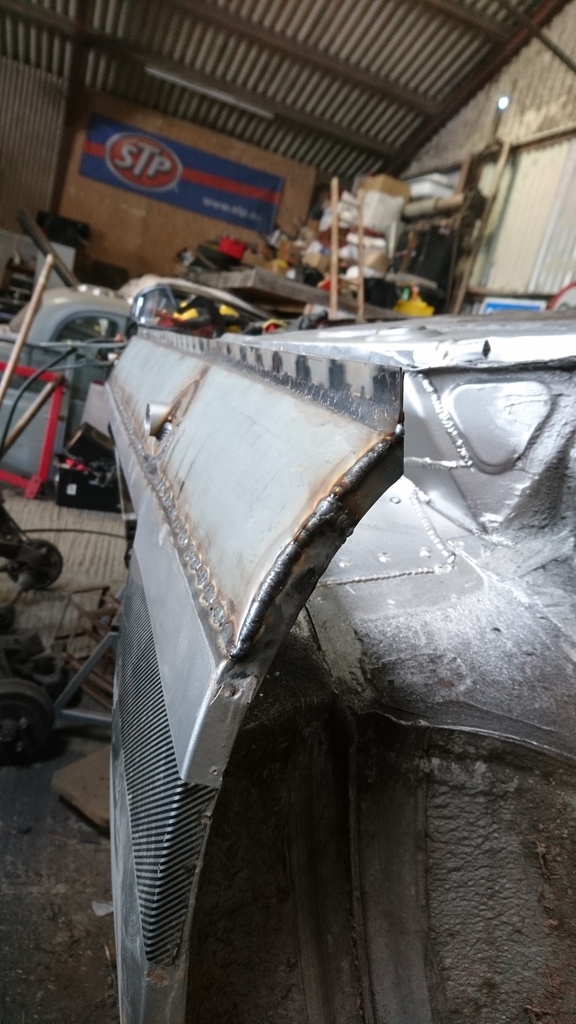 And ground it back before tidying up and heading home: 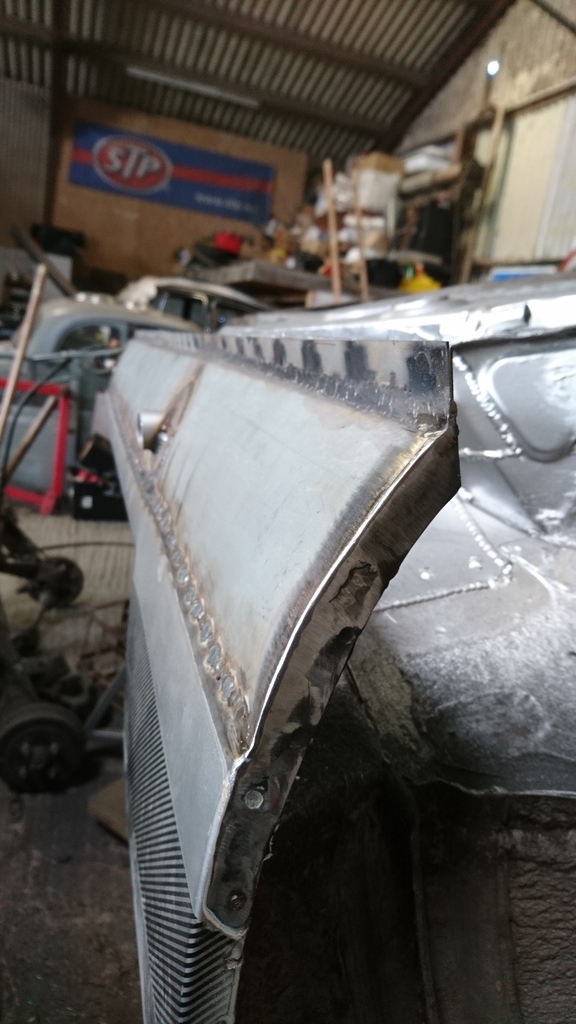 I'm not looking farward to grinding back the full length weld at the top of the sill! |
| |
Last Edit: Sept 20, 2017 12:24:51 GMT by RobinJI
|
|
Rich
Club Retro Rides Member
Posts: 6,341  Club RR Member Number: 160
|
|
May 21, 2017 18:11:17 GMT
|
Some lovely work you are doing it it Robin, fantastic welding and attention to detail (as always  ) |
| |
|
|
|
|
|
May 21, 2017 18:37:56 GMT
|
a real red letter day ! loads of hard work to get to this point love the mig dime stacking round the sill stands too  |
| |
|
|
qwerty
Club Retro Rides Member
Posts: 2,421
Club RR Member Number: 52
|
|
|
|
|
Gotta echo the above comments. That welding is great!
Tom
|
| |
|
|
|
|


 the front ~3rd of the inner sill was noticeably too deep to suit the outer sill panel, despite the panel being identical to the opposite side that I've already done with no issue. Balls.


 )
)