RobinJI
Posted a lot
   "Driven by the irony that only being shackled to the road could ever I be free"
Posts: 2,995
|
|
May 22, 2017 10:55:20 GMT
|
Thanks for the kind words guys. Although there's some little welding still to do, its certainly nice seeing it with the gaping holes closed up. I wasn't sure whether pulse welding or a continuous bead would be better on those sill stand spreaders, but as its such thin metal I figured that the stronger HAZ pulse welding can result in was probably more important than the risk of pin-holes. I'm happy with the result visually as well.  I've messaged a breakers earlier about a rear quarter panel, which would save a lot of messing around on the other side, so hopefully they've got one and don't want my right leg for it. They've got a silver door too, which I'll probably buy either way, as my passenger one's definitely not worth repairing for what 2nd hand straight ones cost! |
| |
|
|
|
|
|
|
|
May 22, 2017 11:46:48 GMT
|
|
Man, you have earned your results! love following this thread. very inspiring!
keep at it...looks great!
JP
|
| |
I know its spelled Norman Luxury Yacht, but its pronounced Throat Wobbler Mangrove!
|
|
|
|
|
May 22, 2017 12:29:44 GMT
|
|
Really nice work!
I had a frustrating problem when I replaced the sills on an old 924 I had. I plug welded along the flange, just like you have, but the MOT tester failed as a 'patch repair without a continuous weld'. I think I would have got away with it on a properly painted and finished care though so I am sure yours will be fine.
|
| |
67 VW Split bus
69 Beetle Cab
96 Jeep Cherokee XJ Sport
|
|
RobinJI
Posted a lot
   "Driven by the irony that only being shackled to the road could ever I be free"
Posts: 2,995
|
|
May 22, 2017 15:47:06 GMT
|
Thanks Discostew. I know what you mean, my old work had a few identical issues with putting new sills on classic minis. I was always of the opinion that it was a misinterpretation of the rules by the MOT tester, the wording was quite unclear. I only did one there myself, and I seam welded them as the guy wasn't local and I didn't want the risk of an angry phone call should it fail. I just had a look to remind my self how it was worded and happily it appears to have been changed since I last read it, and now seems quite inarguable that what I've done would be fine. To quote the manual on the gov.uk site: I think the words I highlighted are new, or have been changed to make it less ambiguous. I'm hopeful that I won't have any issues with it, and with any luck by the time there's under-seal and paint on there, they'll have no reason beyond suspicion to think it's been replaced anyway.  |
| |
Last Edit: May 22, 2017 16:16:41 GMT by RobinJI
|
|
RobinJI
Posted a lot
   "Driven by the irony that only being shackled to the road could ever I be free"
Posts: 2,995
|
|
May 22, 2017 16:24:06 GMT
|
|
I meant to say, it did occur to me that it could help to have seam welded them on this with its intended track abuse, but there's not really a nice way of doing it on a flange like this. Welding the tips together does little for stiffness, as the weld would be completely unstressed until after the plug welds had failed. Cutting one flange off and fillet welding into the bottom of the remaining one would be strong, but would leave a single skinned flange that'd get bent in a strong wind. 924's sills are a deap section, and given the amount of roll cage I intend to put in this, I didn't think it necessary.
I did make sure to partly drill through the flange behind each hole in the outer sill's flange though, to make sure the weld burned right through all 3 panels.
|
| |
|
|
|
|
|
May 22, 2017 21:11:55 GMT
|
|
Fantastic work here, really impressed with the welds too. Nice to see you taking the time this deserves and it shows.
|
| |
|
|
RobinJI
Posted a lot
   "Driven by the irony that only being shackled to the road could ever I be free"
Posts: 2,995
|
|
May 23, 2017 20:38:37 GMT
|
Thanks Tickman. I'm not sure this particular car really deserved much time or effort given how little a much better example cost at the time, but it's what I've got, and I kind of enjoy polishing a turd.  I popped out and did a couple of hours earlier. I wasn't in the mood to spend ages grinding away the welds from Sunday, so I sorted out the taper at the back of the other sill, then decided to start the engine bay stirch welding. Sill cut, curved in then welded back up: 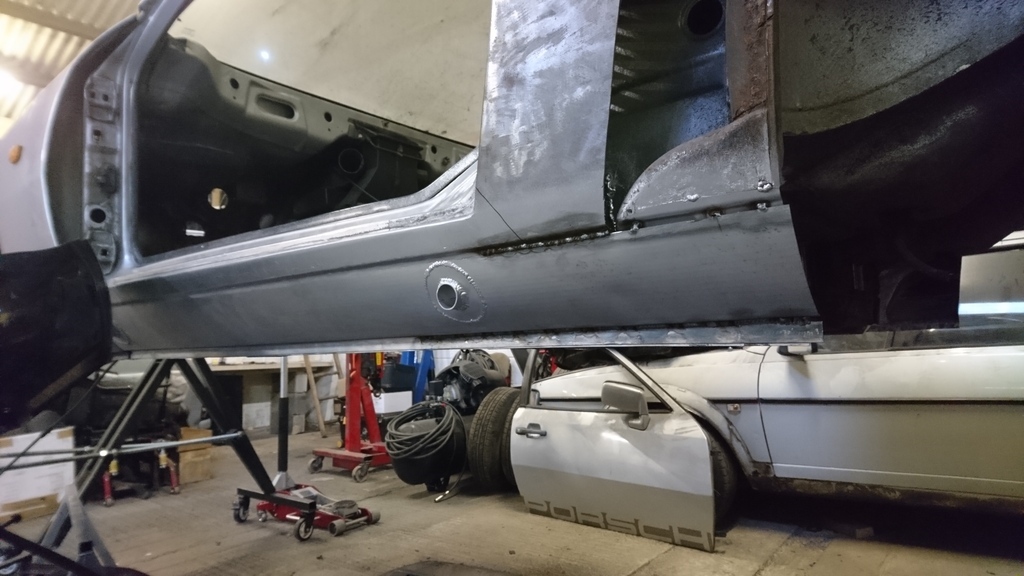 The shape of the rear edge matches the shape of the quarter panel much better now: 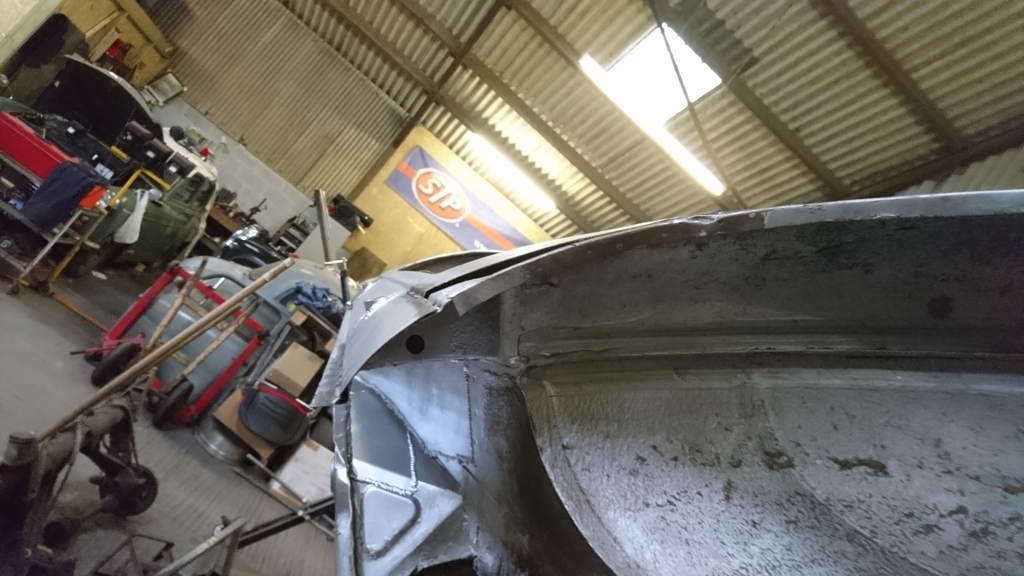 One stitch welded turret, 25mm stitches with 25mm gaps: 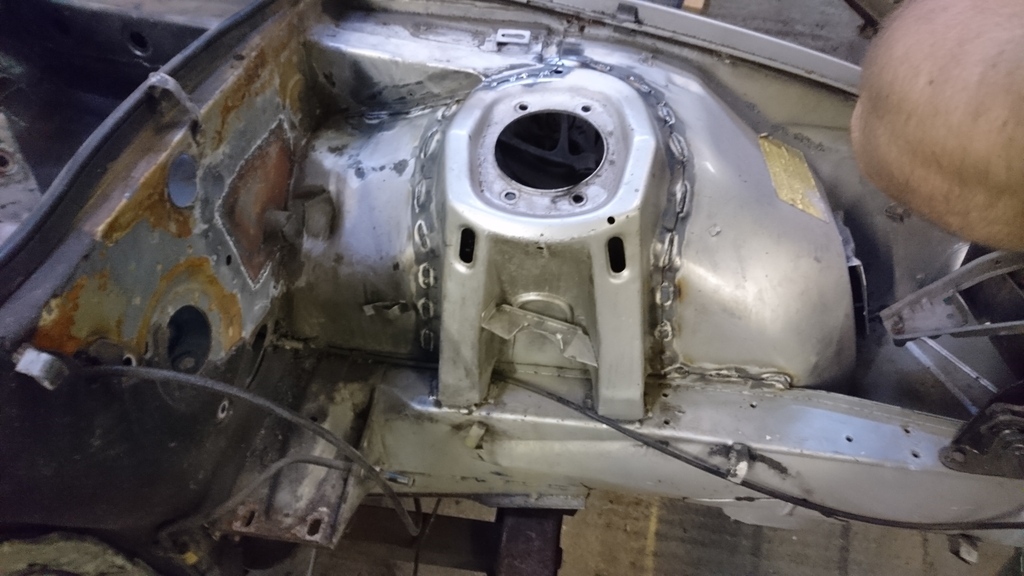 And as I've still not got around to explaining how or why this car ended up stripped down and in the air, here's some shots of the mess that I found under some filler in the passenger side quarter panel. That side of the car's clearly been scraped down something at some point. The doors as bad as this too, but luckily can be binned and a new one bolted on. A hole punched in the inner arch so they could try and push the damage out of the quarter panel: 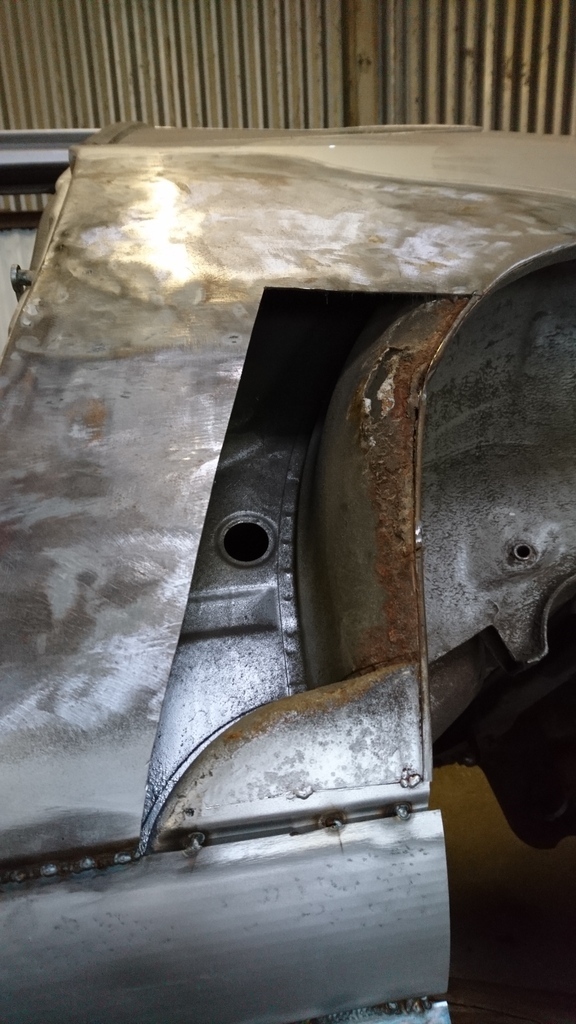 And one rippled mess that was under the filler: 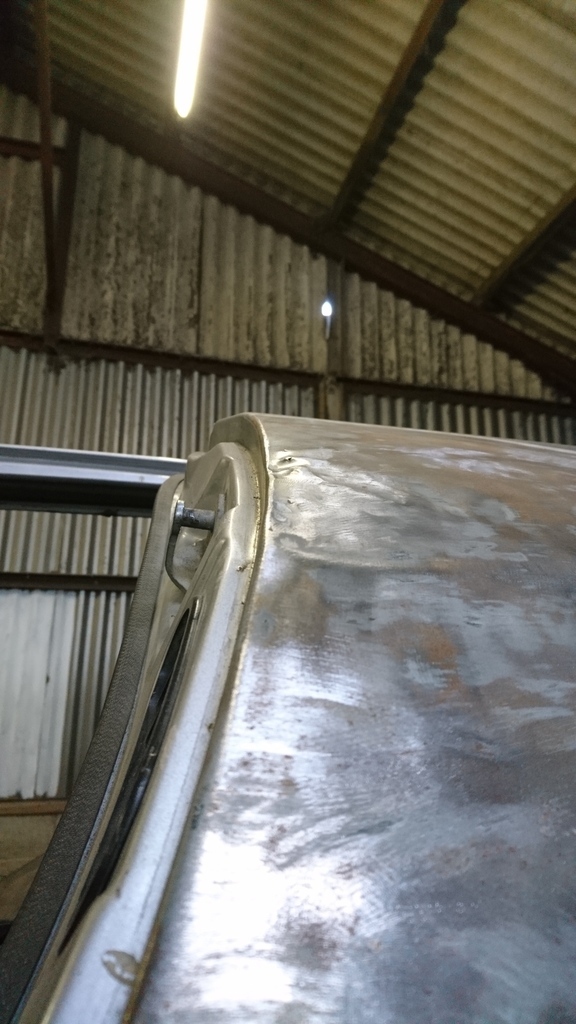 As a result, I'm on the look out for a solid and straight quarter panel I can replace the front half of this one with. Luckily this can be sorted out at pretty much any point in the build, so I can get on with the go faster bits while I'm looking for one. |
| |
Last Edit: Sept 20, 2017 12:27:36 GMT by RobinJI
|
|
stevek
Yorkshire and The Humber
Posts: 728
|
|
May 24, 2017 10:37:59 GMT
|
Love the work your putting into this, those sill repairs were works of art in my eyes. I'm following your thread with interest and to maybe pickup some ideas for my 924.  As for your little quiz question, is the 924's Japanese neighbor a MA61 Celica Supra? -Steve- PS: Thanks for quoting the updated info regarding repair patches and the MOT. Its nice to see they've made a sensible change to the rules. |
| |
|
|
RobinJI
Posted a lot
   "Driven by the irony that only being shackled to the road could ever I be free"
Posts: 2,995
|
|
|
|
Thanks.  As for the 924s neighbour, it's not a Toyota, but it would have been a close competitor to the celica supra. I did a little grinding back last night, which came out way better than I expected: 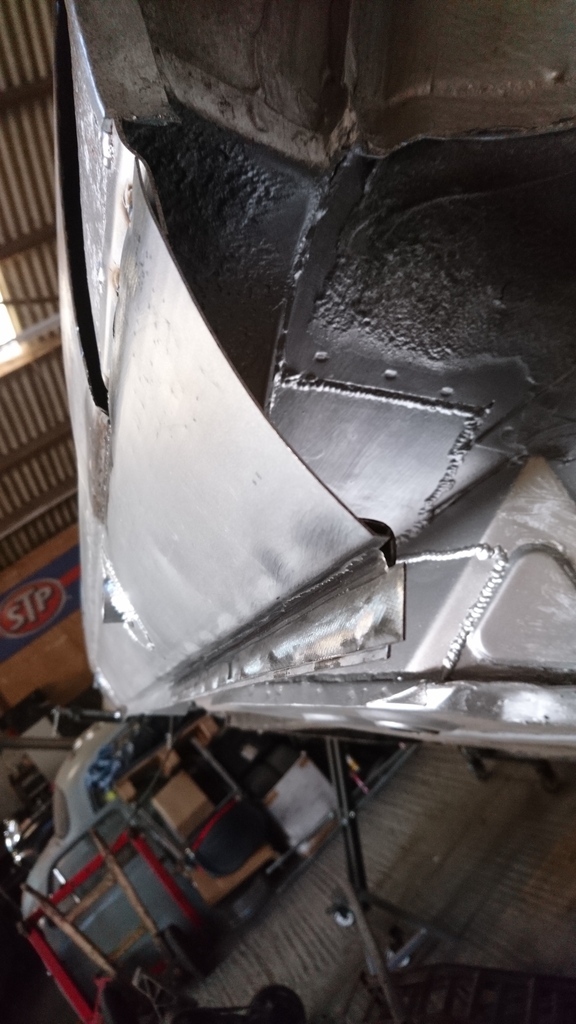 And with some temporary paint thrown on it to keep it from going crusty before I'm ready to paint it: 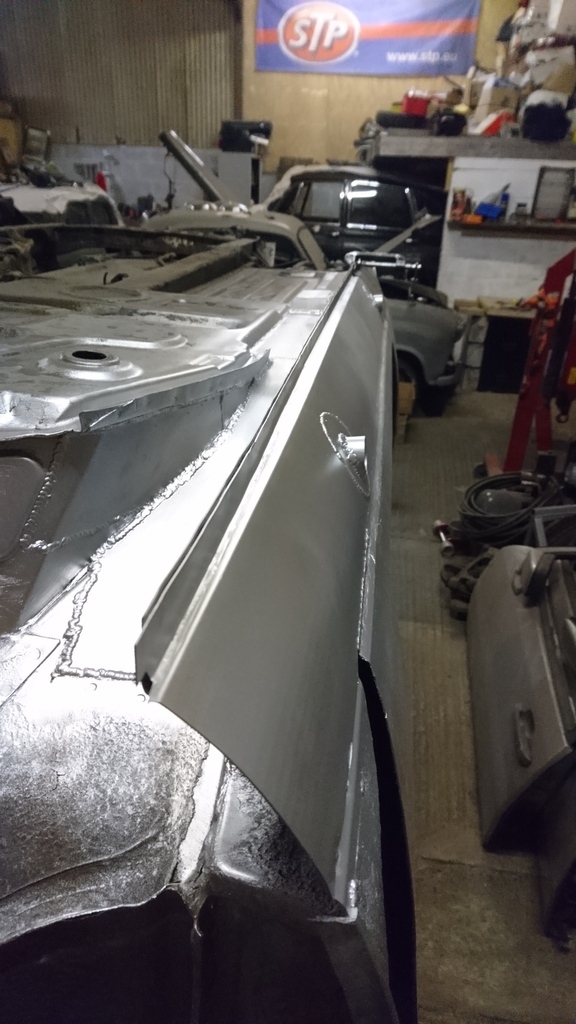 You can see the taper I introduced well in this shot: 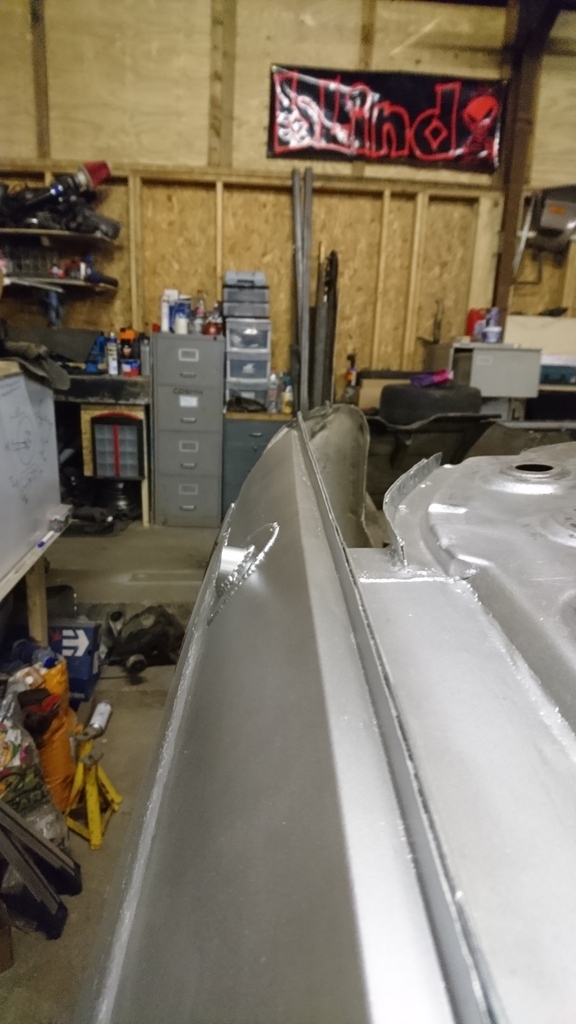 I'm very happy with that. I wasn't expecting to get the radius in the the corner of the flange looking quite so small or neat. Sadly I've still got a whole lot more grinding to go on the other side :/ |
| |
Last Edit: Sept 20, 2017 12:29:52 GMT by RobinJI
|
|
RobinJI
Posted a lot
   "Driven by the irony that only being shackled to the road could ever I be free"
Posts: 2,995
|
|
May 30, 2017 14:32:29 GMT
|
I did do some work on the 924 over this long weekend, but it's all been the kind that doesn't give you much to photograph. There's now no sounds bitumen sound deadening inside the car (still a little to get rid of from the scuttle tray area.) and the interior's looking a fair bit cleaner and closer to being ready for some paint. I also ground back the welds on the drivers side sill. It's not perfect, but with a little high build it'll look good I think. 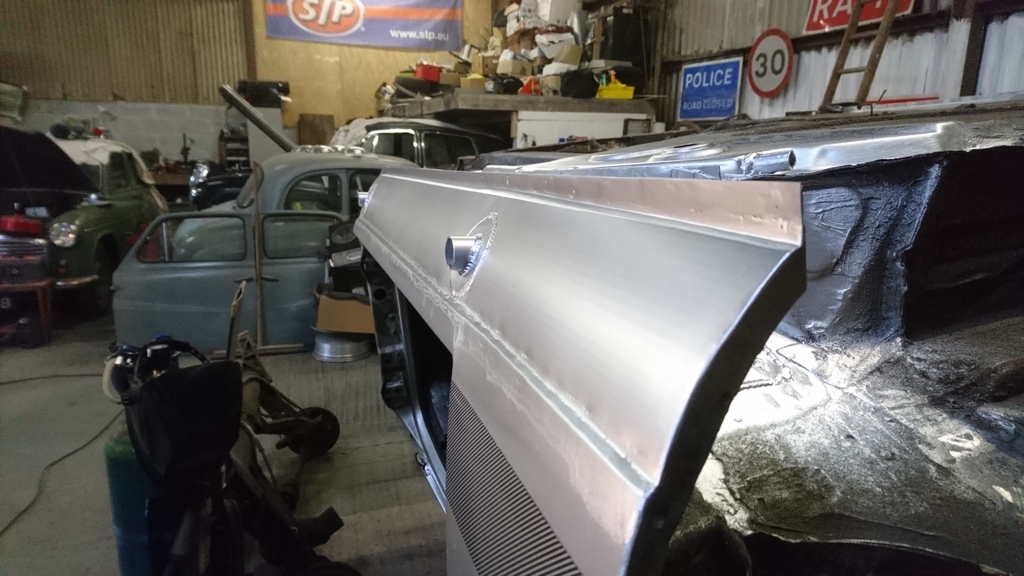 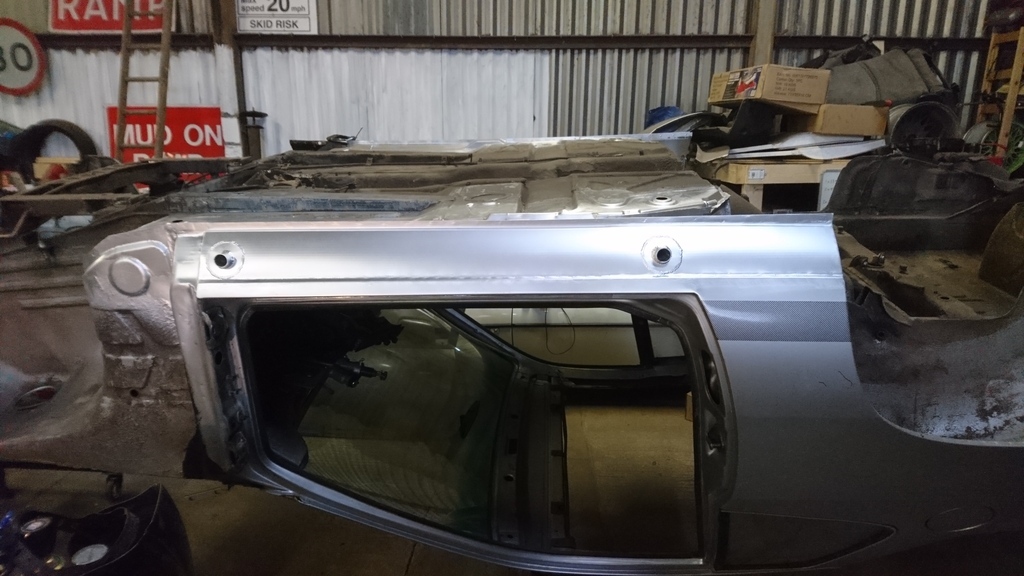 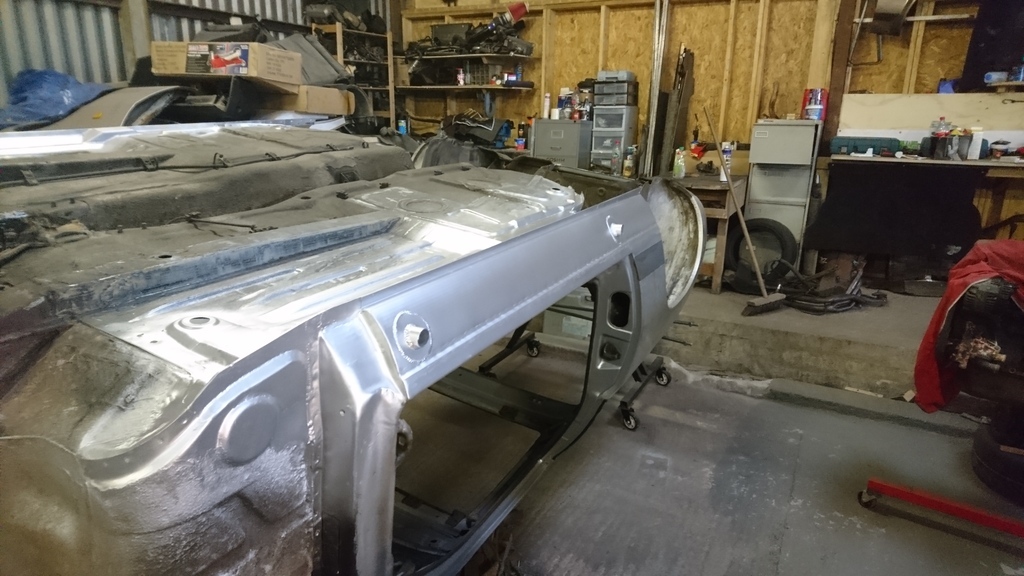 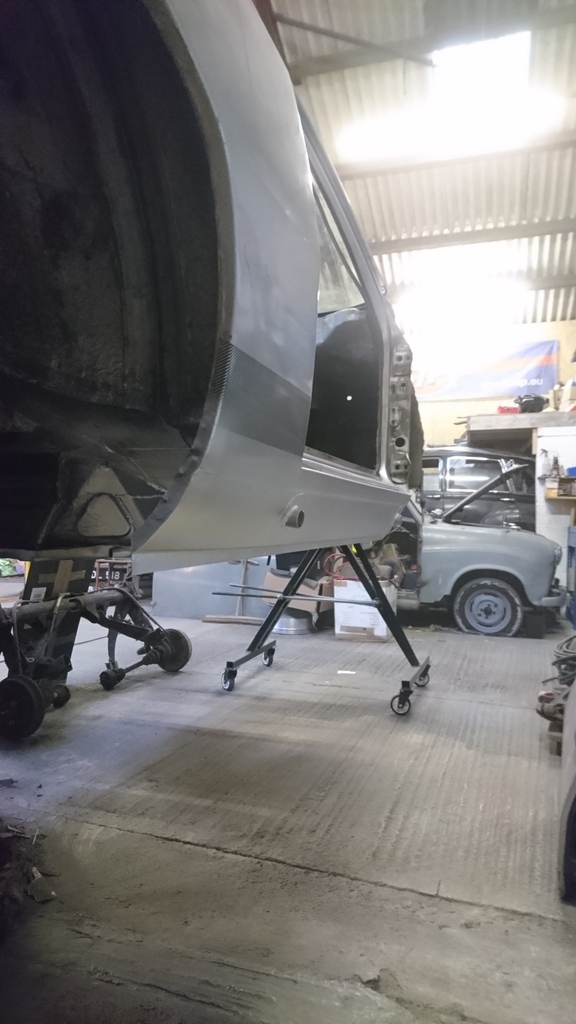 This lot on the floor's just from grinding back those welds! 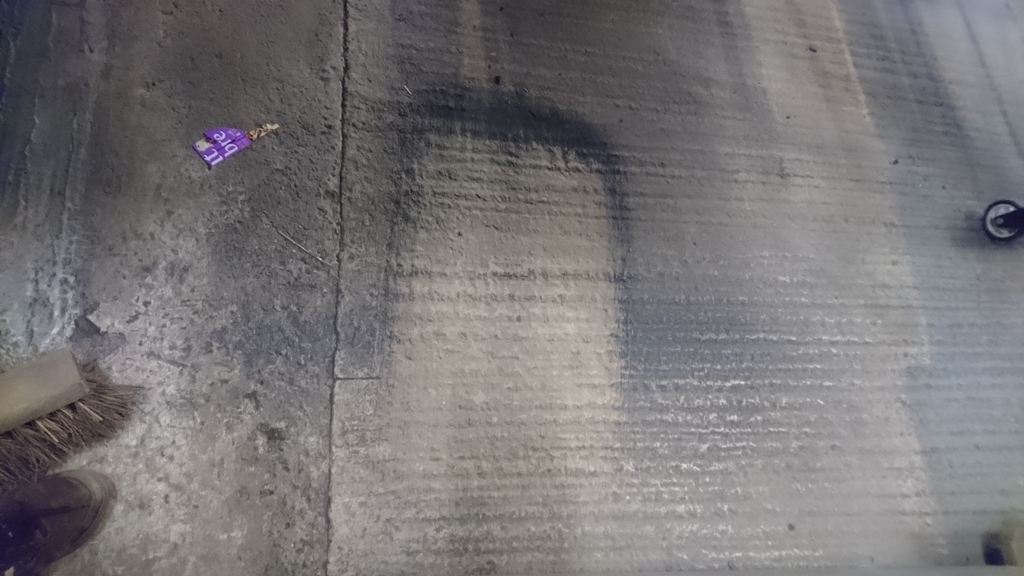 I thought it was about time for a quick shot of the car as it stands too, it's nice to take a step back occationally: 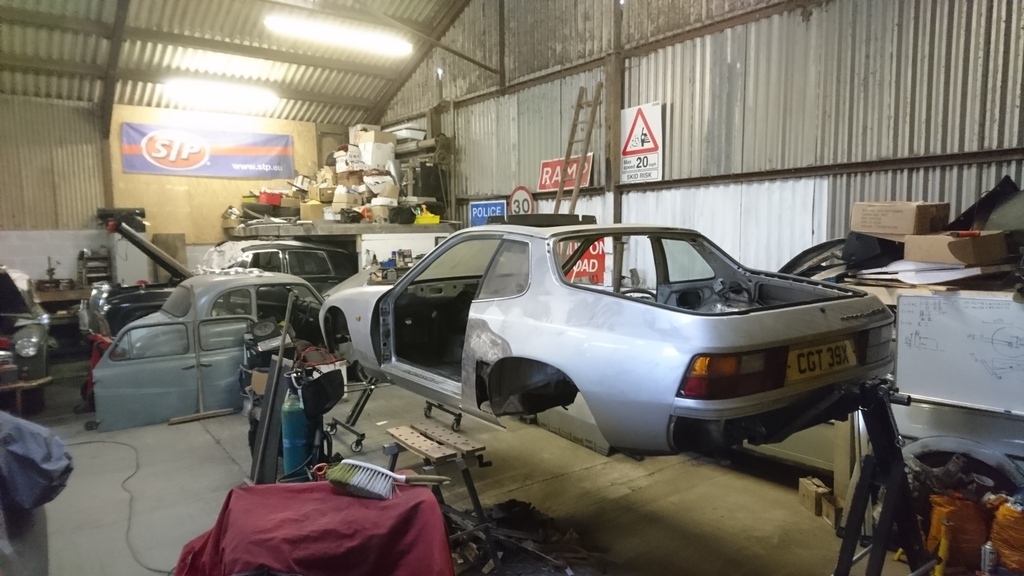 I'll take some photos of the inside when I get a bit further with cleaning it up. Cleaning up the inside is working towards getting a seat in there to finalise the driving position, as that needs doing before I go mounting the pedal box and start building the cage. I doubt it'll be much different to standard, but I was to check all the same. |
| |
Last Edit: Sept 20, 2017 12:32:34 GMT by RobinJI
|
|
|
|
|
|
|
|
|
|
Fantastic work, it's truly inspiring seeing work like this.
Is the 924's neighbour a Mazda RX7 ?
|
| |
|
|
RobinJI
Posted a lot
   "Driven by the irony that only being shackled to the road could ever I be free"
Posts: 2,995
|
|
|
|
Thanks carpartsgopher. It's neighbour's not an RX7. People don't seem to be guessing much, so to save it going on forever, and because he took the cover off to turn it around a couple of days ago: It's a Datsun/Nissan Z31 300ZX, and I say its very rare in this country because it's a short wheelbase 2 seater, not the 2+2 that was sold in this country: 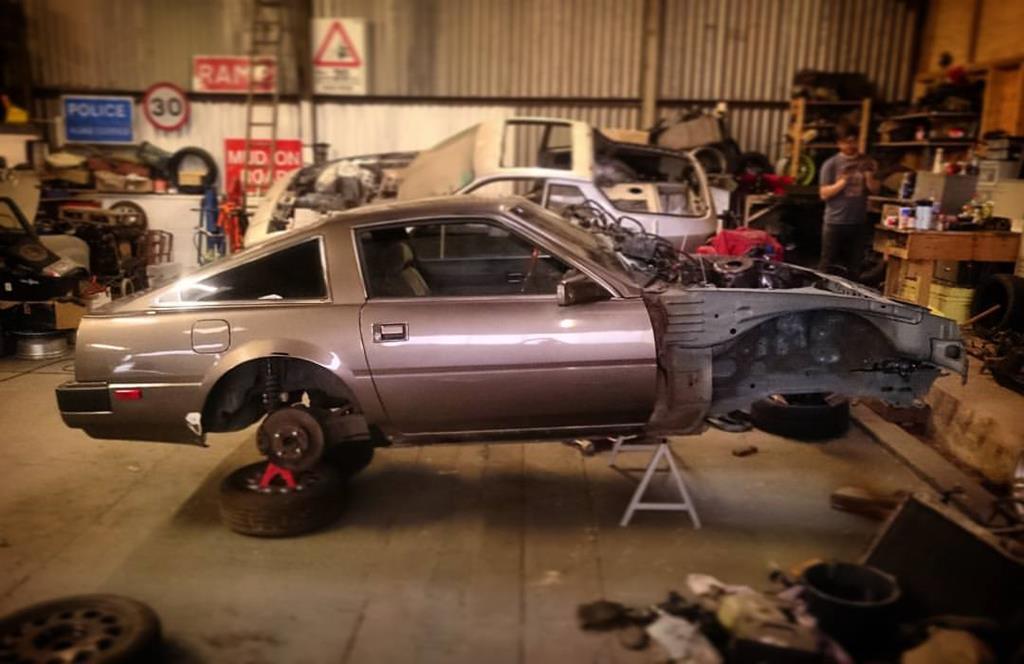 I expect it'll be finished around the same time as the Porsche, or maybe a little after, as he's planning to borrow my roll-over jig once the Porsche has some wheels/suspensions on it. |
| |
Last Edit: Sept 20, 2017 12:34:13 GMT by RobinJI
|
|
RobinJI
Posted a lot
   "Driven by the irony that only being shackled to the road could ever I be free"
Posts: 2,995
|
|
|
|
This weekends busy with social and family stuff, so no significant progress, but I stole away for a couple of evenings in the week to continue cleaning up the interior and try the driver's seat in the car. Porsche really went to town with bitumen sound deadening when they assembled the car, it covered the entire floor and half way up the tunnel, as well as patches in the scuttle tray and boot. I'm aiming to loose as much weight from this car as possible, so it's all got to go. I found a heat gun and sharpened wallpaper scraper took it off quite easily, but I was still left with a bit of a mess. 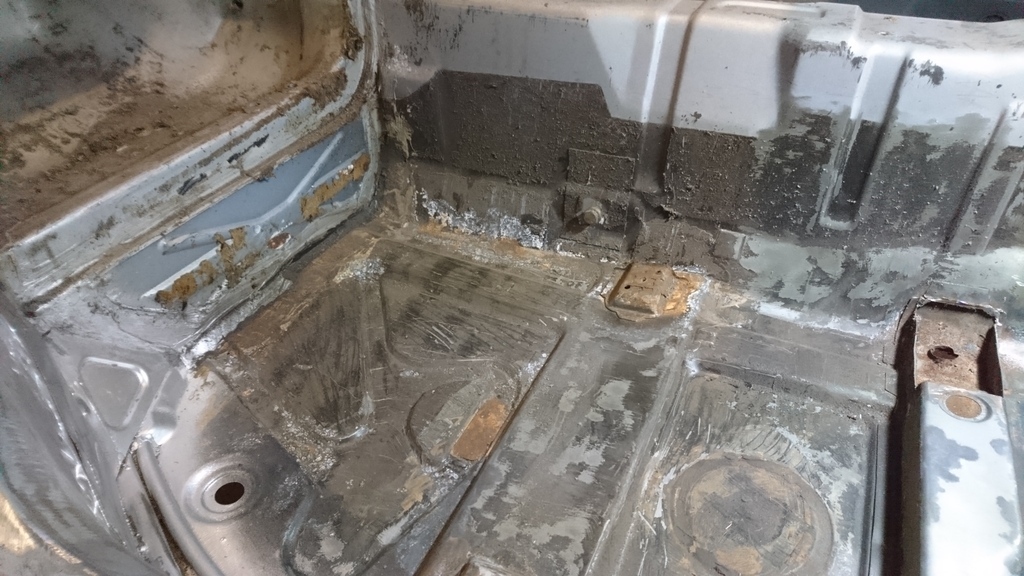 After a little knot-wheel action it was coming up alright: 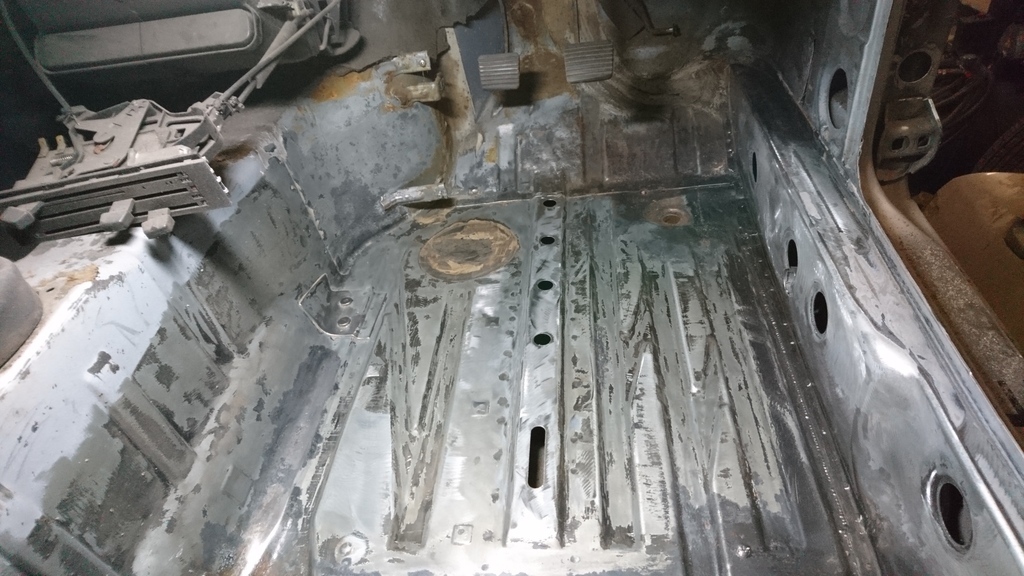 Annoyingly there's some rust on the bulkhead I need to deal with. It's not actually rusted through, but it's pitted to the point I that I don't trust it structurally. So with that looking a little cleaner I thought I'd try the driver's seat in, so I could get thinking about how to make the seat mounts, and see how far back the main hoop of the roll cage needs to go. This is where the roll-over jigs height adjustment becomes very handy. I wound it down until I could throw some axle stands under the driver's side: 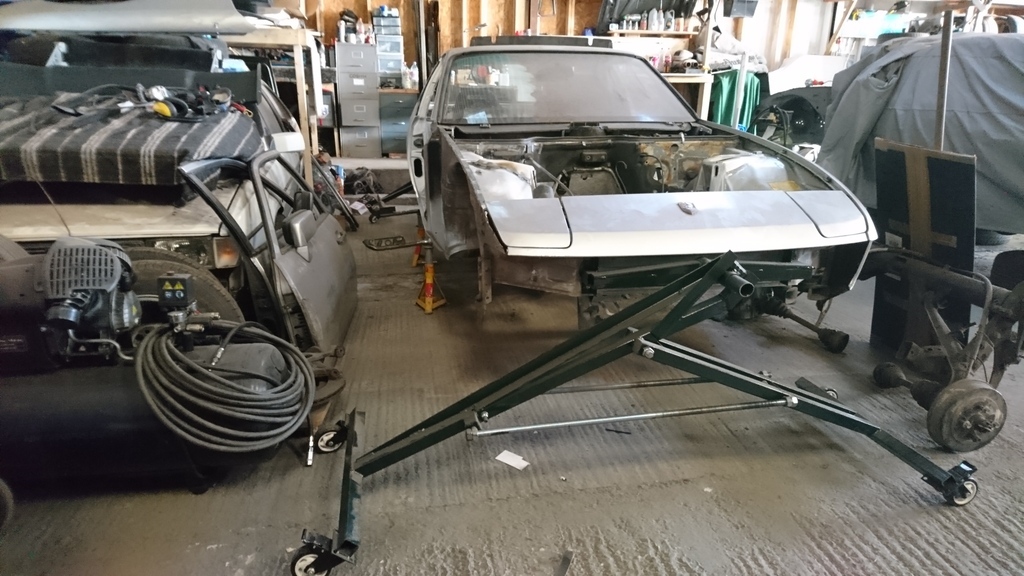 I loosely bolted on a steering wheel and sat in the car doing my best racing driver impression until I was happy with the position. 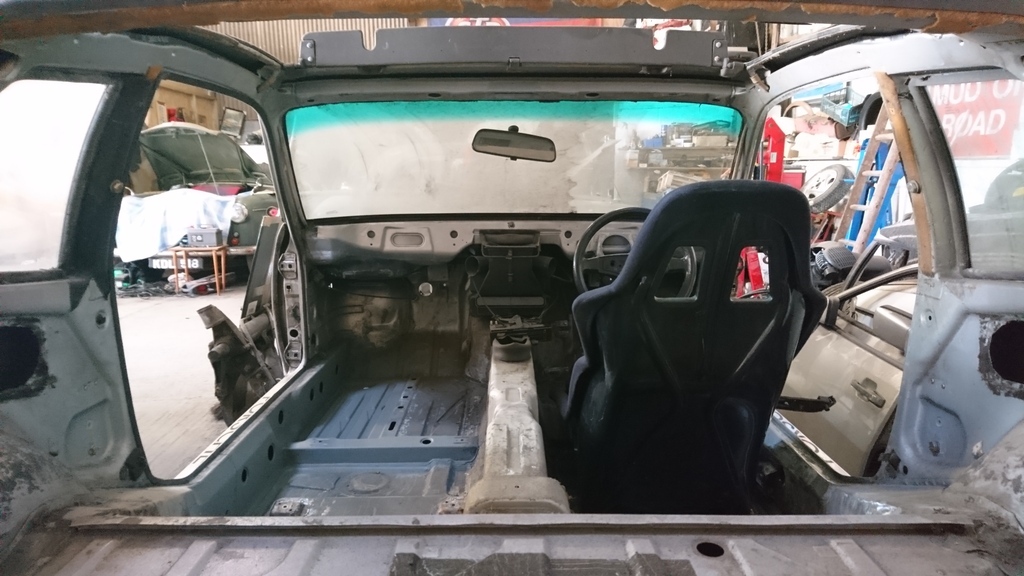 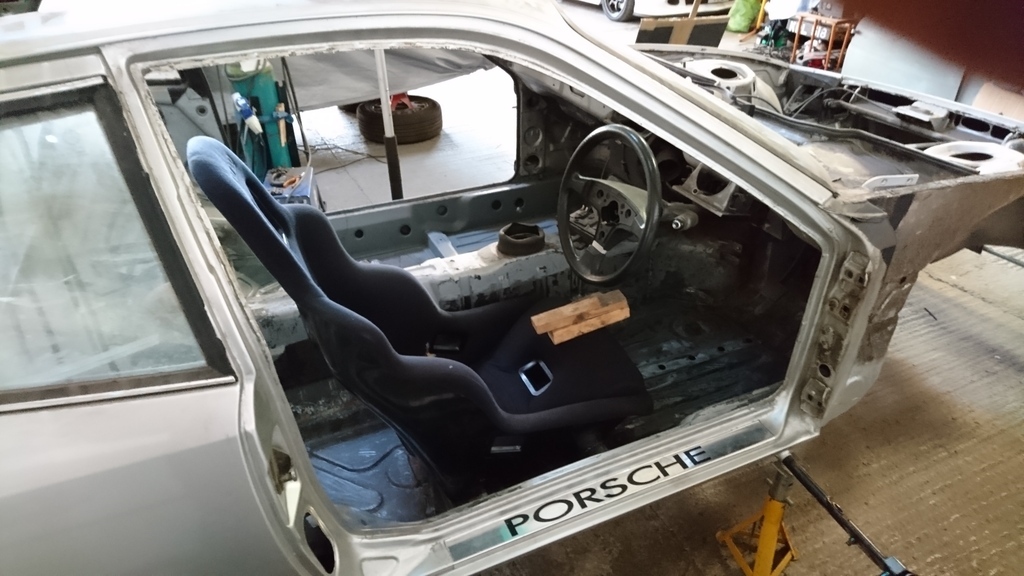 Annoyingly, the seat needs to be lower than I expected. I'd thought the seat mounts would be quite easy, as I knew I didn't want to sit any lower than the standard seating position. Sadly I hadn't realised just how thin based the standard seats must be, as with the bucket seat sat directly on the factory rear mounts, and actually sat down into cutouts in the front mount, I felt about right. This means that the box section mounts I intend to make will have to be cut into the floor, not above or on top of it as I'd hoped. The pedal box also looks like it'll cause some headaches. No off the shelf pedal boxes seem like they'll fit without more shell butchering than I'd like to do. I don't want to move the seat back, as these cars already have a weight bias to the rear, and I don't want my heals higher than my backside, so that's both types of floor mounted pedal box out of the running. So it'll probably have to be a top swing one, but most seem like they'll clash with the steering column from the measurements I've found, meaning I'll probably have to make or modify something. With that done I wound the jigs back up to full height and carried on cleaning up the floor-pan, before giving it a coat of rust curing paint, and that's the point I'm at as I write this: 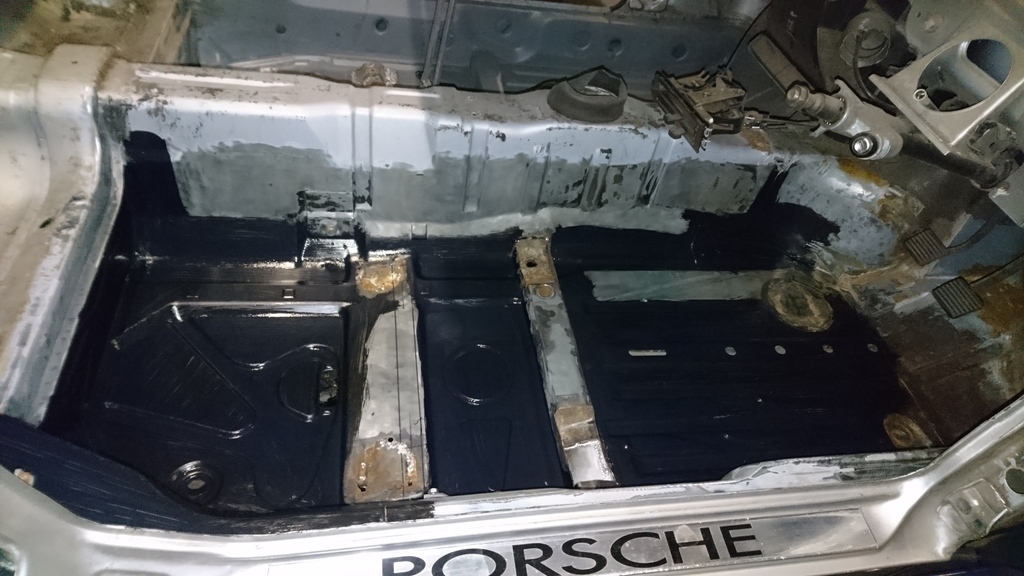 It'll get a coat of zinc primer next time I'm there, then it's a cast of repeating it all on the passenger side. |
| |
Last Edit: Sept 20, 2017 14:21:53 GMT by RobinJI
|
|
RobinJI
Posted a lot
   "Driven by the irony that only being shackled to the road could ever I be free"
Posts: 2,995
|
|
Jun 13, 2017 22:51:37 GMT
|
Seat mounts time. Last time I mentioned that the seats were going to need to be mounted lower than I'd realised, so this has to start by making a big slot with a 3mm spreader plate at one end: 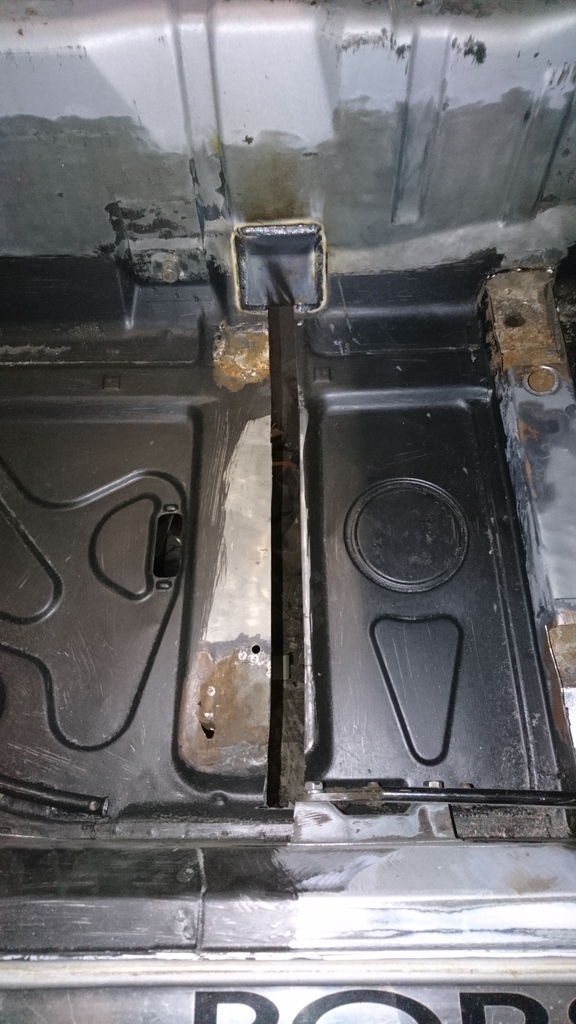 Then make one of these: 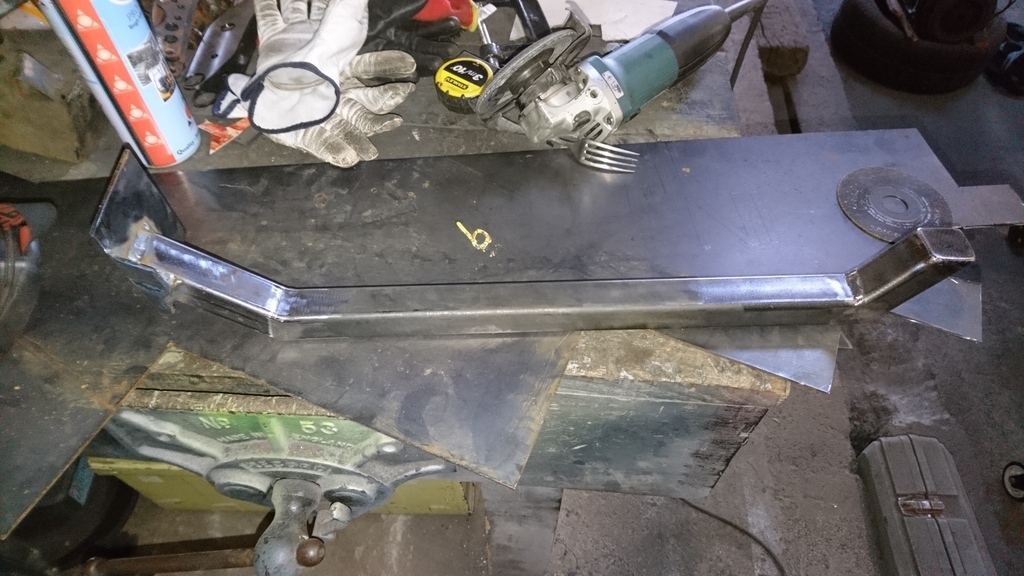 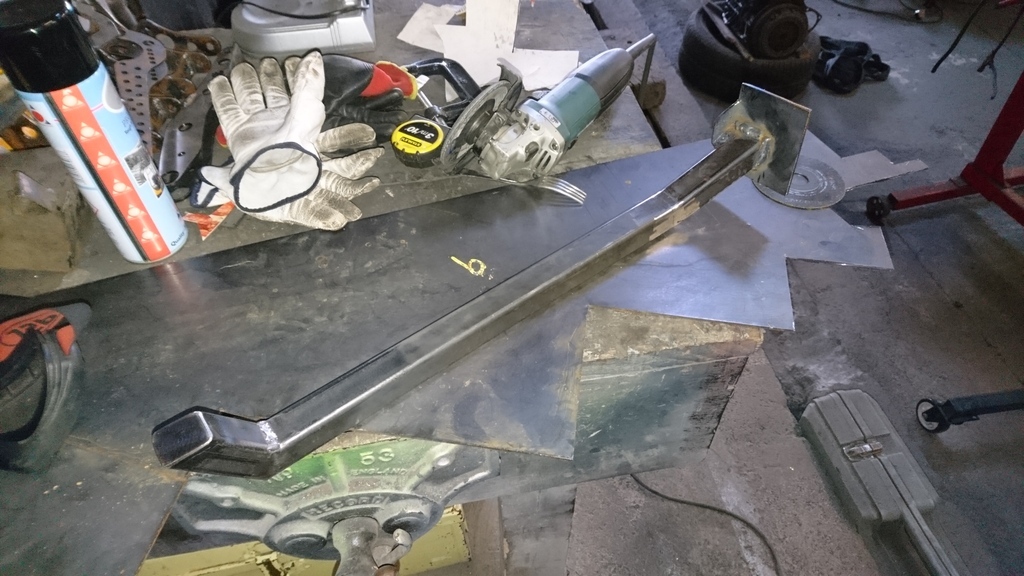 To drop in the slot and weld up: 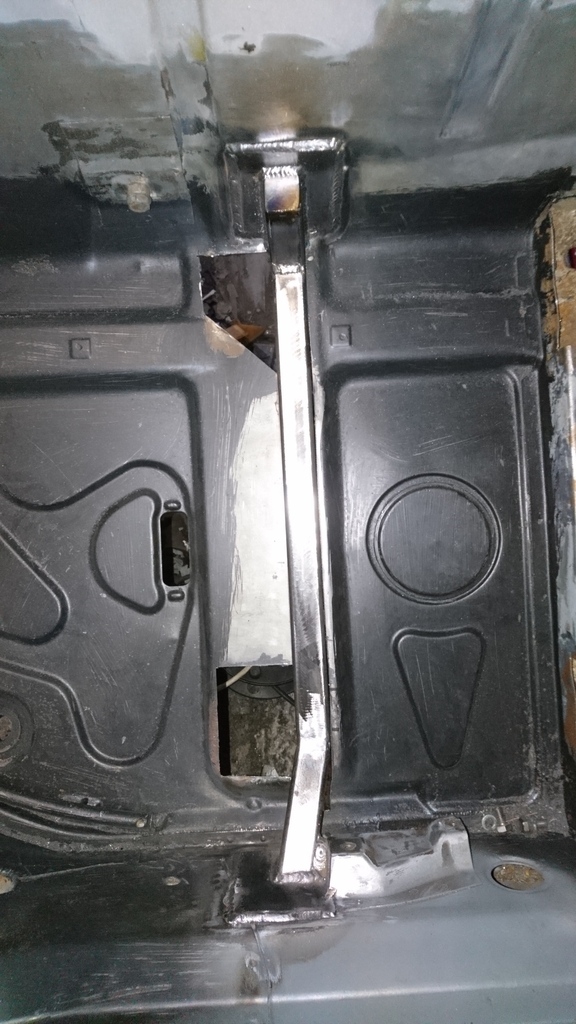 (the slot got a bit wider to loose the mangled and cracked areas the original seat mounts were on) The kick up at the sill end is to pass over the handbrake cable, (the handbrake's on the driver side sill in 924s): 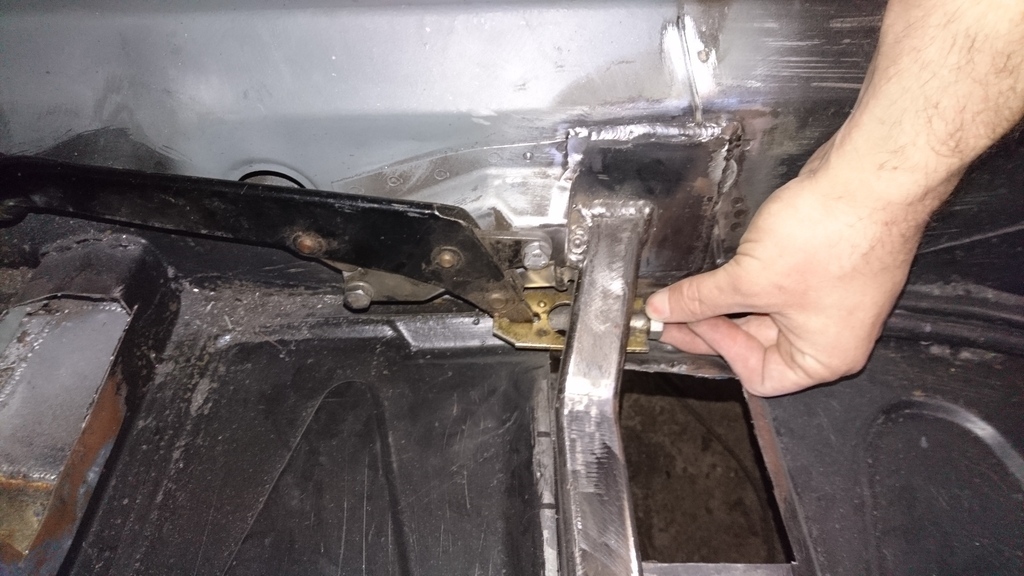 Then stitched to the floor and covered in primer: 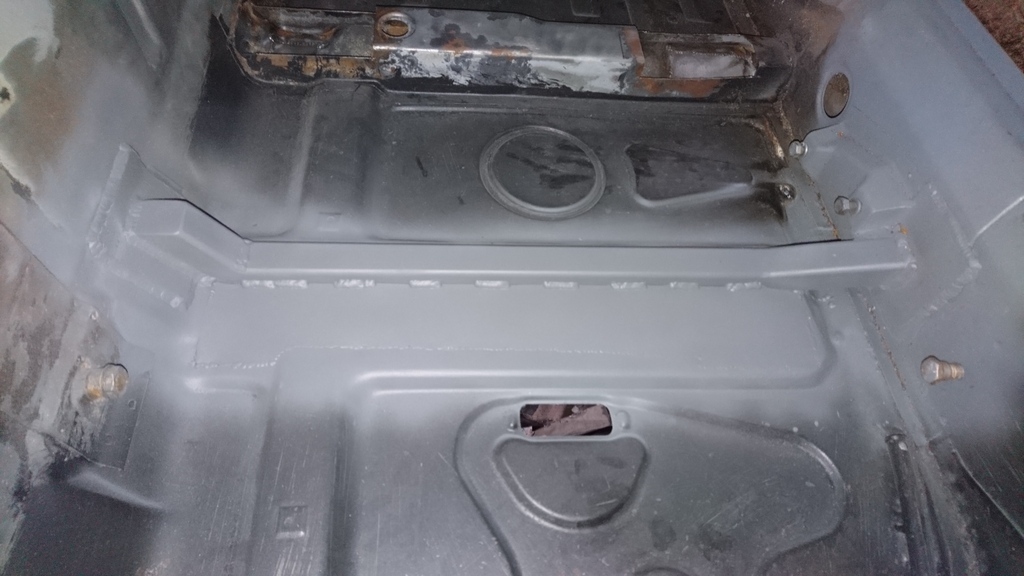 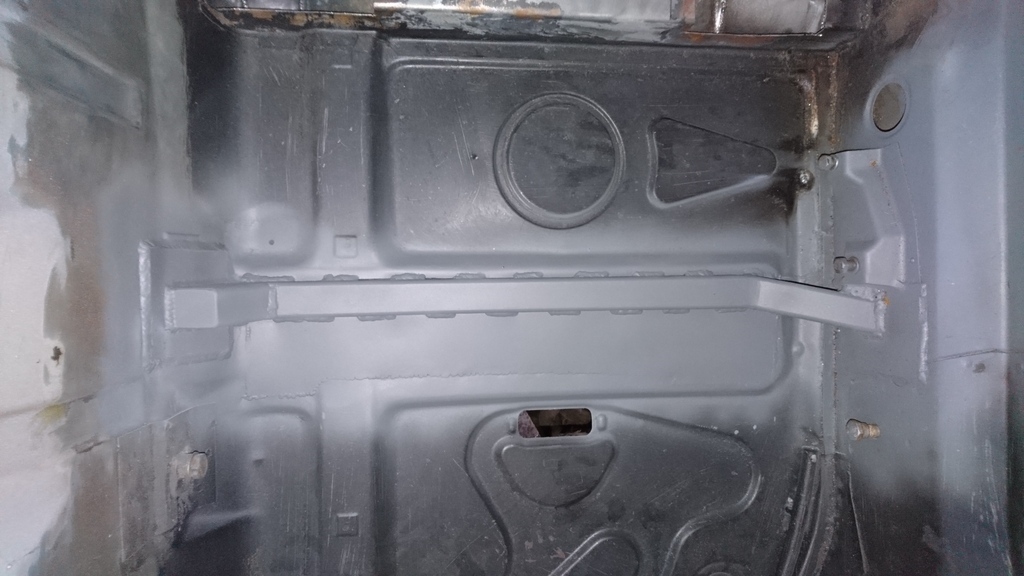 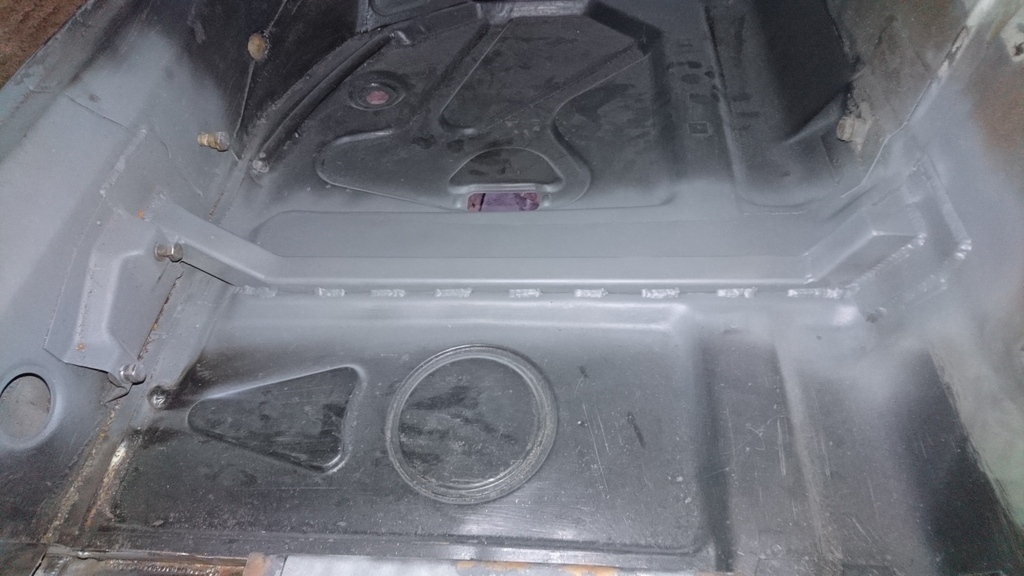 And from the outside: 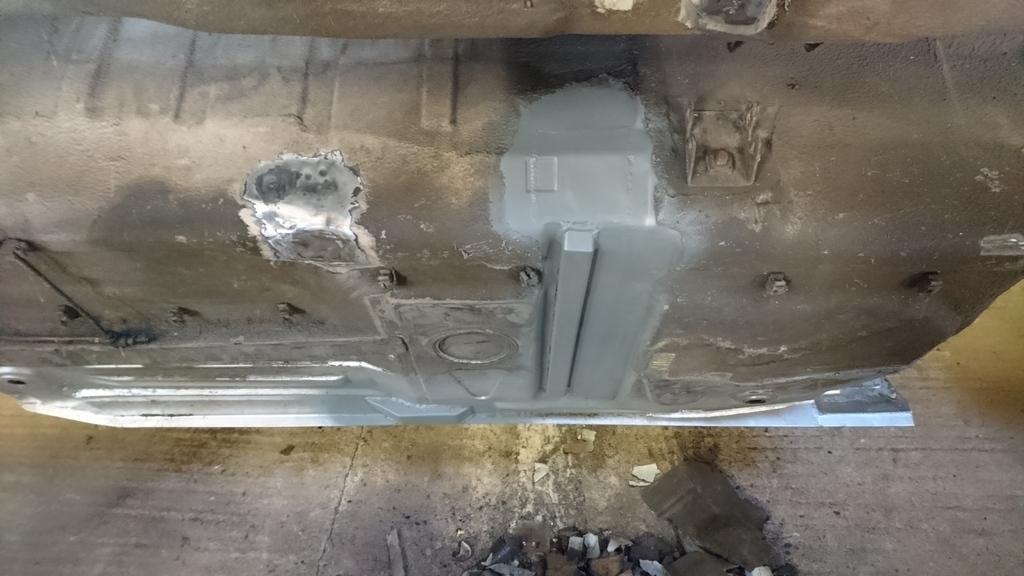 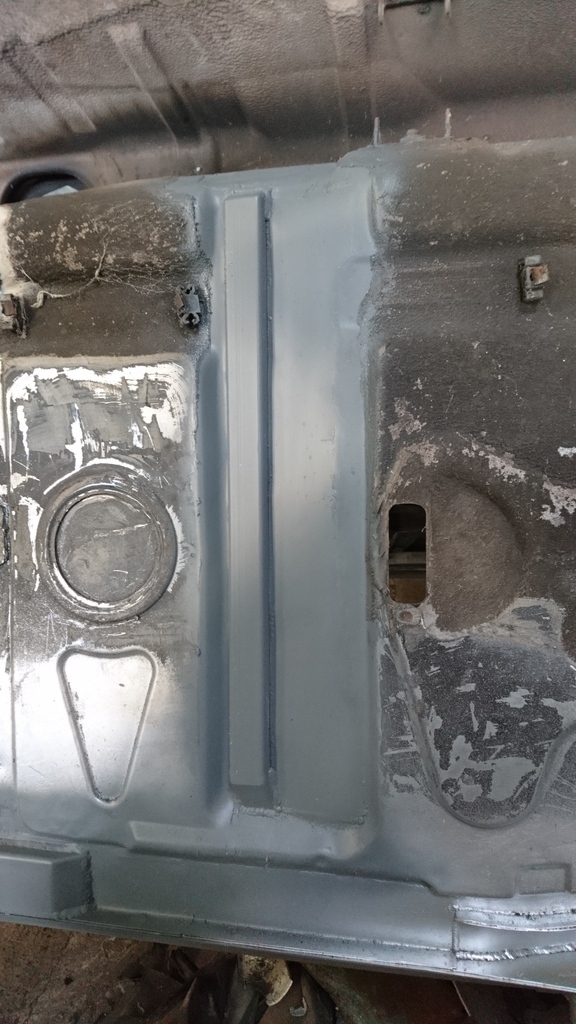 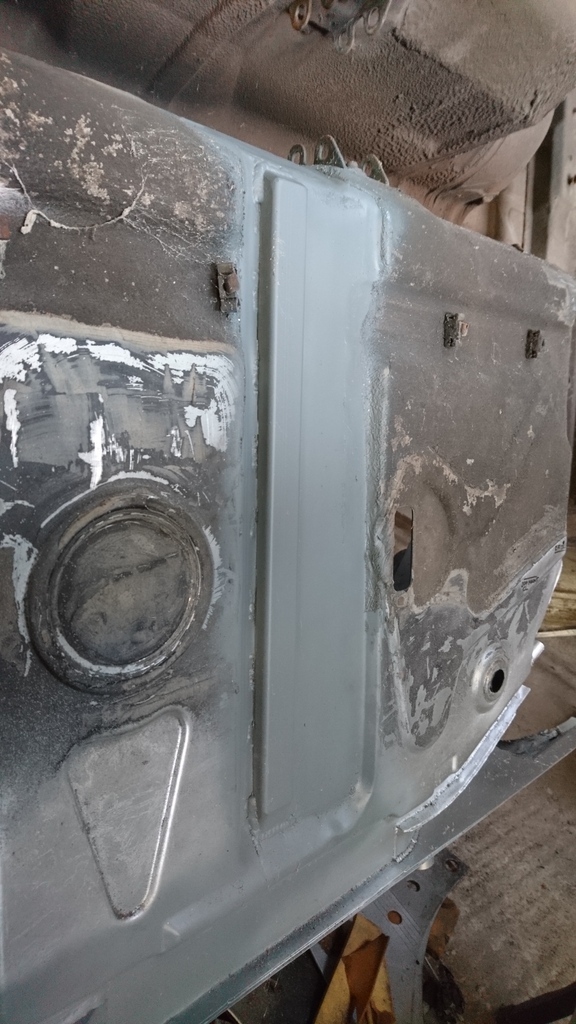 It doesn't actually protrude any lower than most of the floor, it's only cut in as there's a high spot where it is: 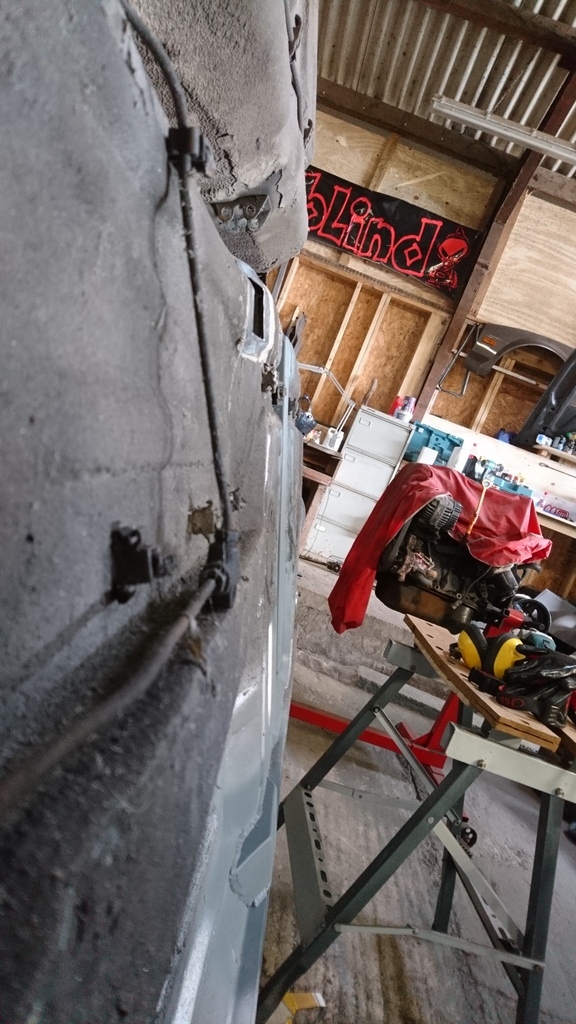 Happy with that, I got the second sides jacking point ticked off the to do list: 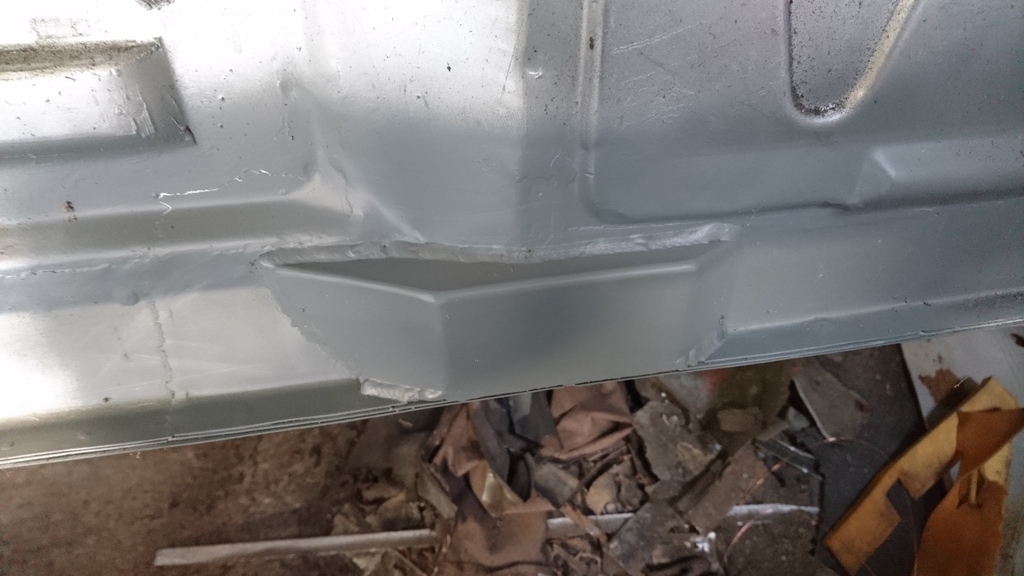 Then squared off and buzzed up a messy hole a previous owner had made in the floor to get at a captive nut: 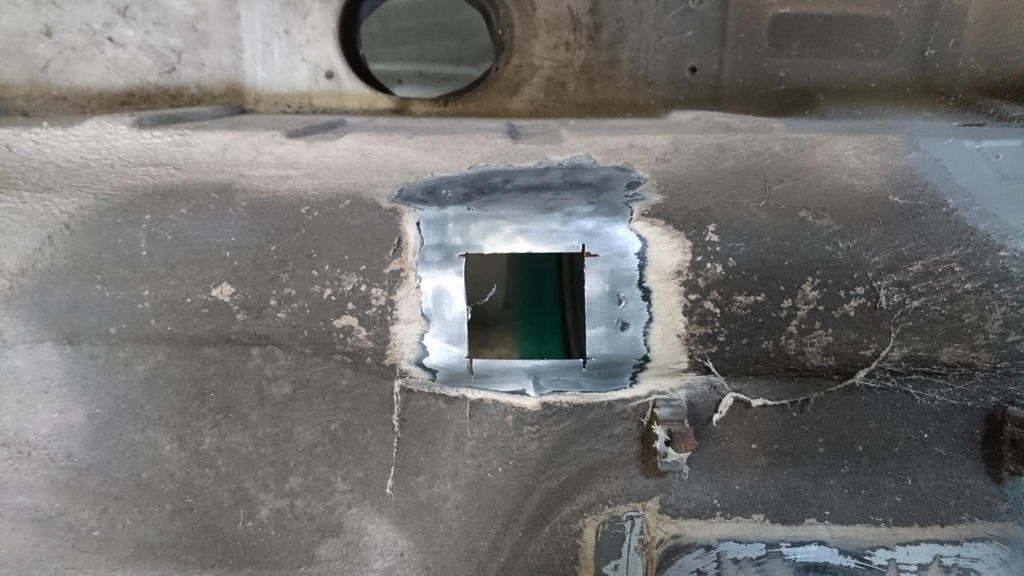 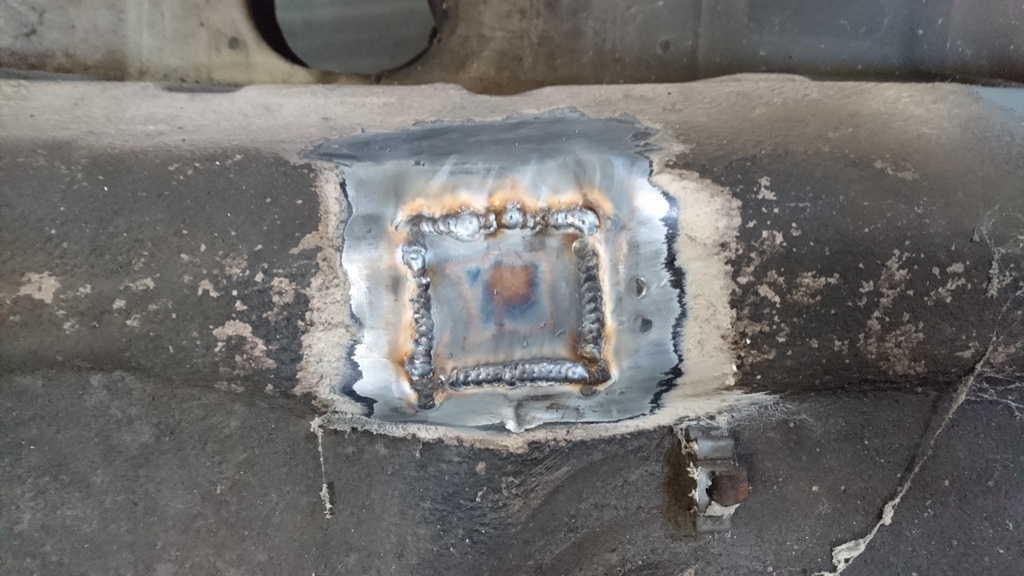 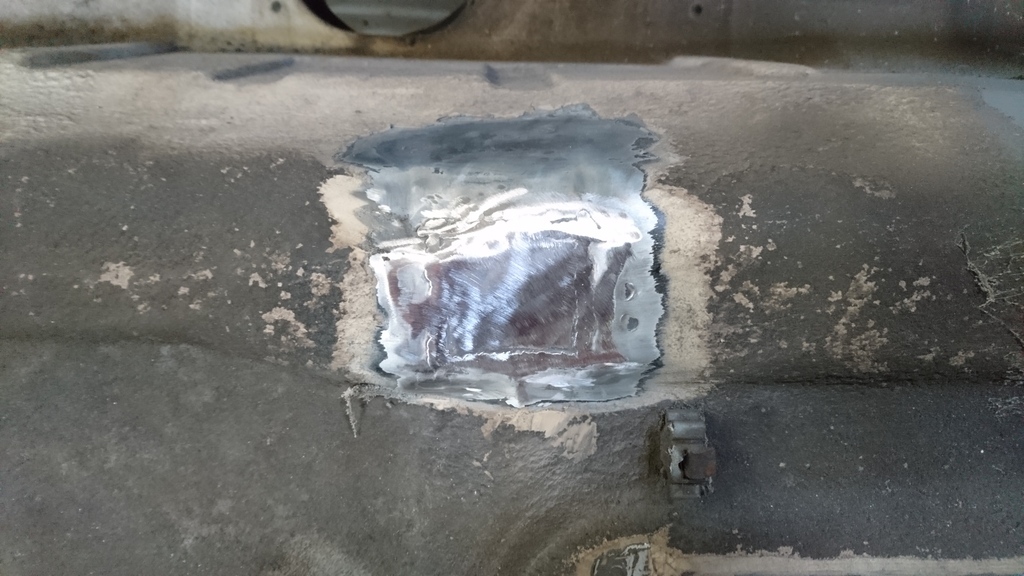 Which brings us up to date. |
| |
Last Edit: Sept 20, 2017 14:27:18 GMT by RobinJI
|
|
RobinJI
Posted a lot
   "Driven by the irony that only being shackled to the road could ever I be free"
Posts: 2,995
|
|
Jun 26, 2017 20:05:38 GMT
|
A tiny update on this due to having been busy enjoying the weather, including a trip to players classic and some fun messing around in the sea in Cornwall. Between that all I've managed is a couple of tiny patches one evening to get the a-post solid: 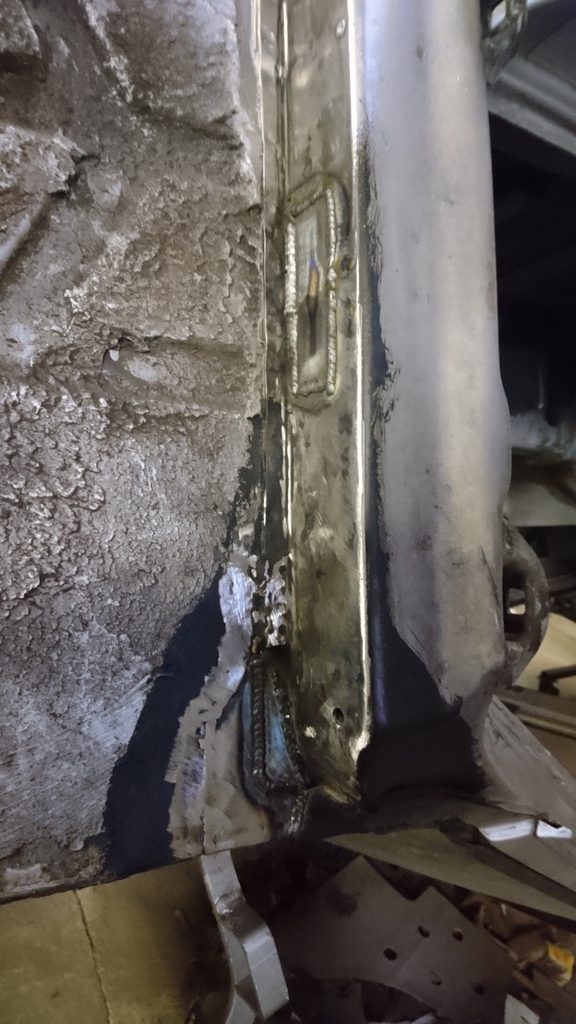 |
| |
Last Edit: Sept 20, 2017 14:28:08 GMT by RobinJI
|
|
RobinJI
Posted a lot
   "Driven by the irony that only being shackled to the road could ever I be free"
Posts: 2,995
|
|
Jul 17, 2017 14:30:29 GMT
|
Well it looks like photobucket have broken my thread too, along with about 50% of forum threads on the internet at the moment. Fixed now!  I'll try and find time to update the old photos, but for now, here's a little progress. Things have slowed down due to social commitments over the summer, but I've managed a little tinkering still. I've plated over the spare wheel-well. I've always hated the way they hang below the rear valance in full view, so it had to go. I'll need to fill in the gap in the rear valance at some point, but I may leave it until I know where the exhaust's going to live. I had a go at 'bead rolling' it by just putting a pair of 45 degree folds in then bending it straight again, which has worked reasonably well.   I only cut off what's below the valance, so it's still a good size cubby-hole in the boot:  The passenger side seats rear mount's in now too, but I still need to stitch the floorpan to it on each side:   Spreader plates each end to MSA regs:  |
| |
Last Edit: Sept 20, 2017 14:29:00 GMT by RobinJI
|
|
RobinJI
Posted a lot
   "Driven by the irony that only being shackled to the road could ever I be free"
Posts: 2,995
|
|
Sept 11, 2017 12:32:54 GMT
|
Well it's been a little while. Summer, combined with my mum moving house (for the first time since I lived with her, so loads old my old stuff to sort out!) has taken it's toll on the time I can spare out at the unit, but now things are winding down again socially I've been able to make a little more progress again. I've hammered straight(ish) and welded up a torn hole in one of the rear inner arches (where someone had punch through it to try and hammer out the rear quarter panel). I've also spent a lot of time with a knot wheel cleaning up the interior, grinding back and treating any surface rust and getting a coat of zinc primer on it. I'm pleased to say it's actually starting to look respectable in there now. In the process I found some deep pitting in the drivers side footwell, I guess you'd call it a kick panel, but it's the sloped panel behind the pedals. As this is the quite a structural part of the shell, I thought I'd better replace it even though it hadn't quite gone right through. One hole: 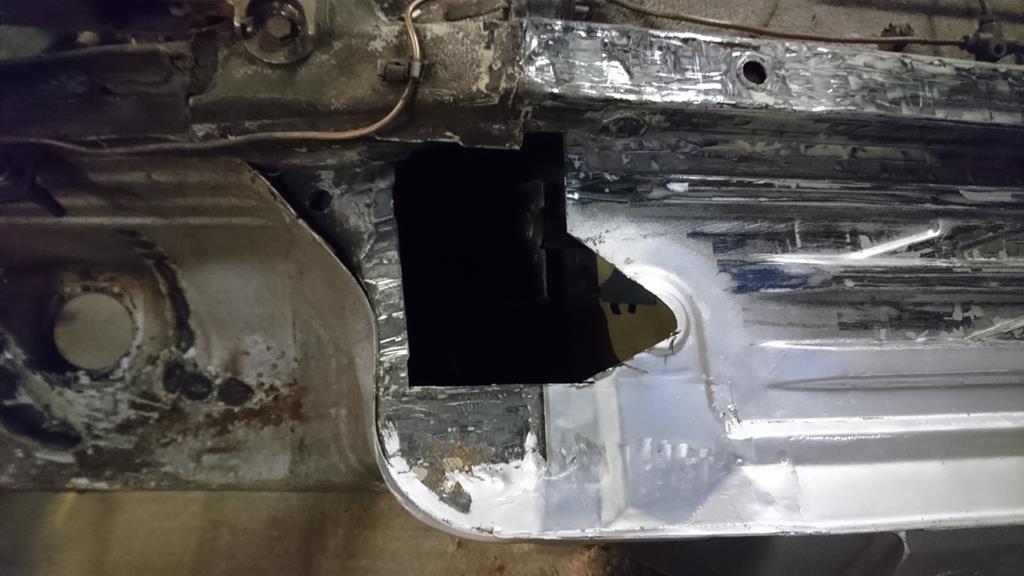 One panel: 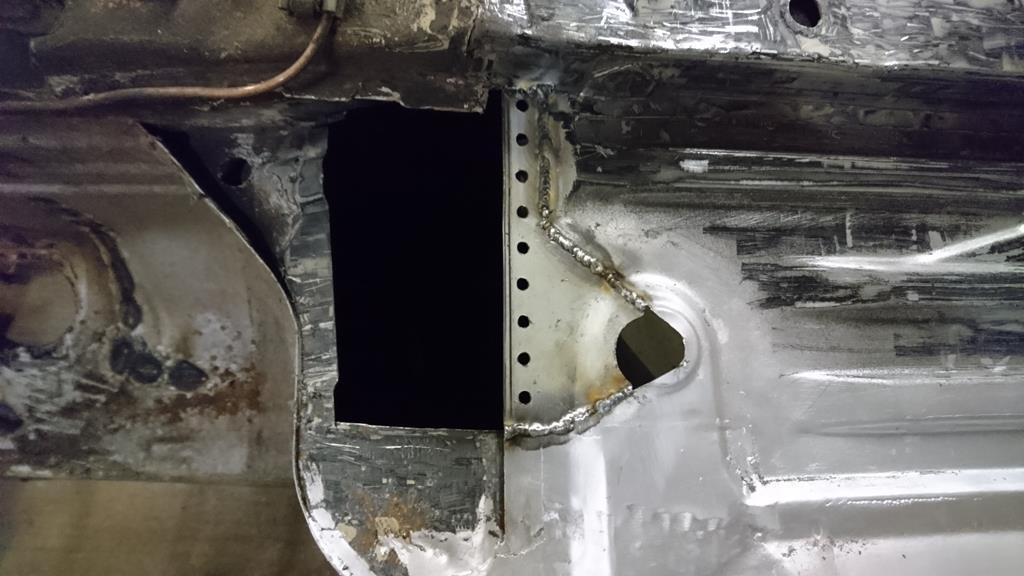 Two panels: 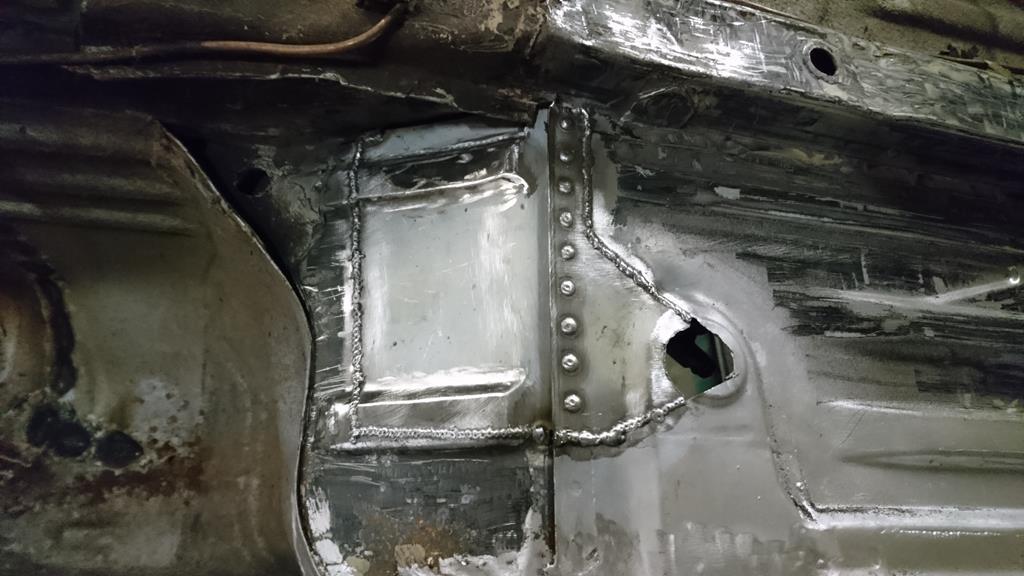 It's a little messy, but it's not a spot that anyone will be looking closely at. All finished off and cleaned back: 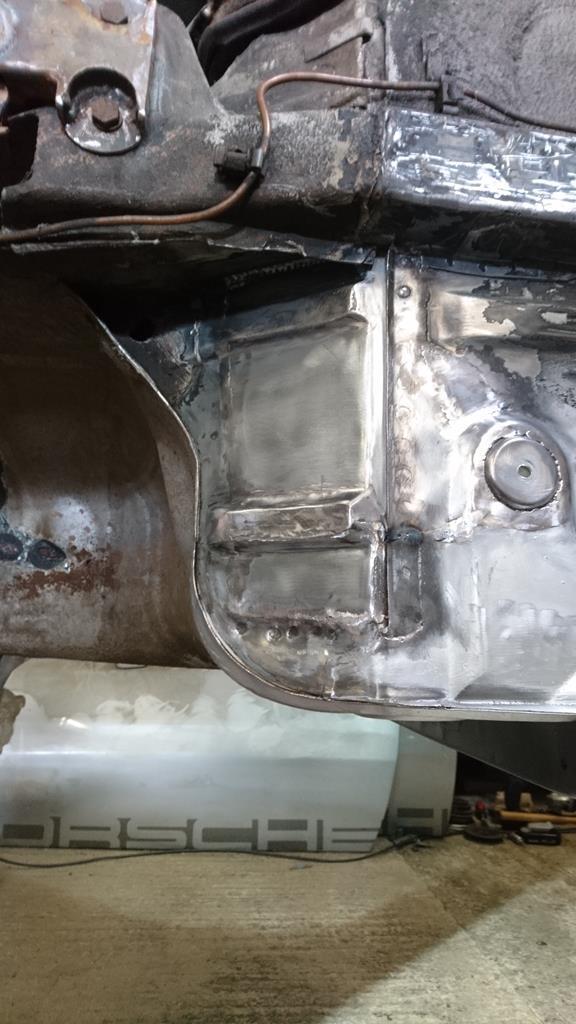 And from the inside with a little primer on it: 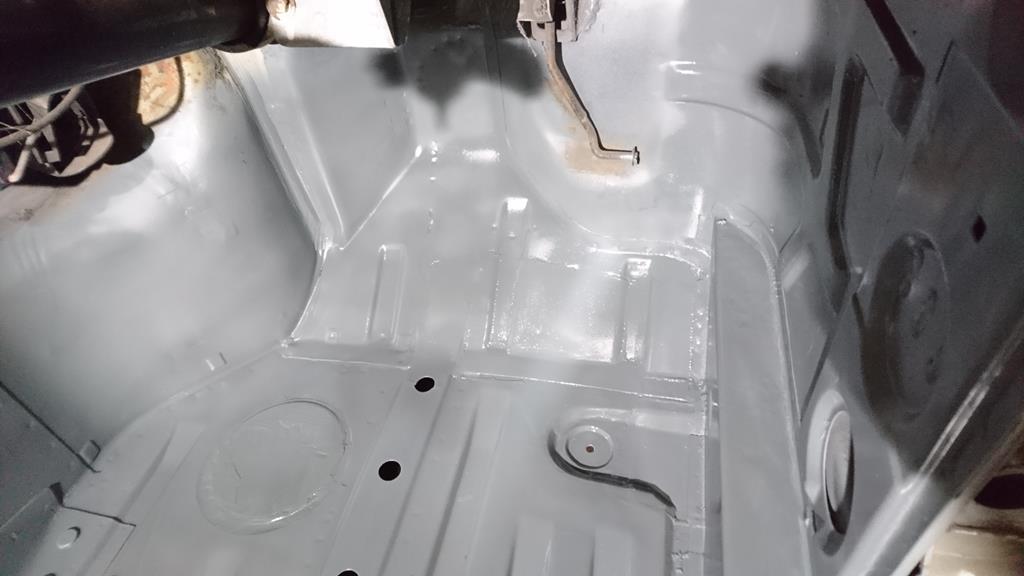 |
| |
|
|
|
|
|
Sept 11, 2017 13:53:26 GMT
|
|
That is really coming together nicely.....the welds look fantastic....
great work
JP
|
| |
I know its spelled Norman Luxury Yacht, but its pronounced Throat Wobbler Mangrove!
|
|
RobinJI
Posted a lot
   "Driven by the irony that only being shackled to the road could ever I be free"
Posts: 2,995
|
|
Sept 11, 2017 14:28:39 GMT
|
|
Thanks JP
I meant to say before I ran out of lunch break, that last plate in the bulkhead marks a nice milestone, as it means the cabin's now completely rust free, meaning it's time for me to move onto the engine bay.
The bay needs one plate in the drivers side chassis leg where the exhaust's killed the paint over the years, otherwise it's a case of tackling the slam panel and radiator mounts, which I'm more than likely going to be heavily modifying anyway, so may not take much in the way of repairing.
It does mean I need to pull my finger out and sort out a roll cage and maybe even buy an engine soon! One headache that's been playing on my mind will be what to do about an LSD.
|
| |
|
|
|
|
|
Sept 11, 2017 19:21:15 GMT
|
|
FU Photobucket. Bookmarked anyway as I'm looking forward to updates.
|
| |
Still learning...still spending...still breaking things!
|
|
|
|


