|
|
|
|
|
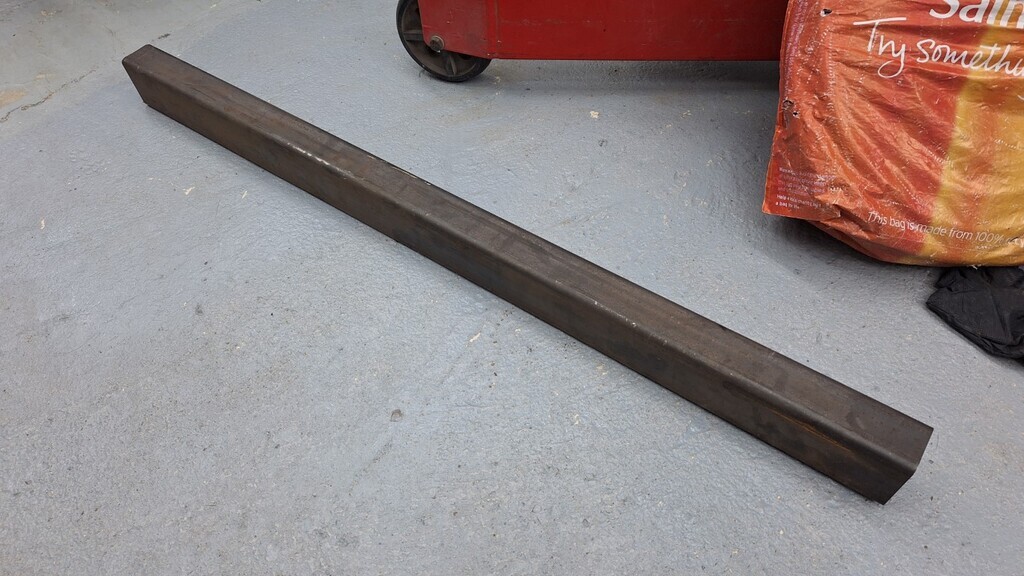
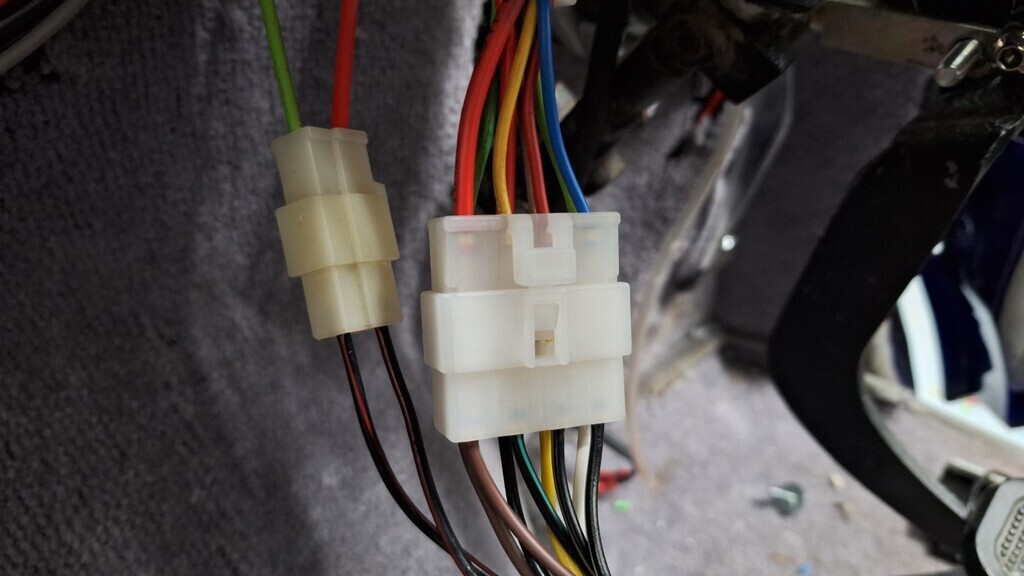
Today after work some parts arrived so I could make a start on some of the wiring. The column switch had half a connector on it  with crimped wires shoved in the other side; Which when disturbed started to fall out  (did I mention I hate insulated crimp connectors?) the black covered wires should be fixed to the blue connector...... This is what a proper crimped connector should look like - one of the new fixings I am putting on. The new plugs with proper connectors now fitted; Checking the circuits I could not understand why the drivers side indicators did not work, I triple checked my wiring to see if I'd mixed up a connector, but no....I traced it to.....yes you guessed it.......another 8loody wire had fallen out of a insulated crimp connector on the flasher relay. Really, this car would have been constantly breaking down as wire after wire would have been detaching itself with road vibration  I have a load of new connectors on order so I'll replace every one on the entire car. . . . . . . . . . . . . . . . . . . Anyway............ . . . . . . . . . . .in other news, what all of you lovely people generously donated money for, the new suspension is now here, yay!  And jolly nice it is too. It's in a tack welded cradle set at the correct ride height, with centrepunch marks for the dead centre for easy alignment to the car centreline. Wayne has made ally shock spacers where the exact ride height should be when the springs are settled, so I can compare this when the real ones are fitted to see if the springs are too soft/hard. It comes with comprehensive instructions on how to set it all up correctly, which Wayne was insistant I read BEFORE I try to fit it all up . It also comes with a full kit of bolts, with assembly lube, nyloc nuts (non nylocs supplied for ease of initial setup) and proper ground washers for the correct bushing clearance & support. It's a very professional bit of kit. 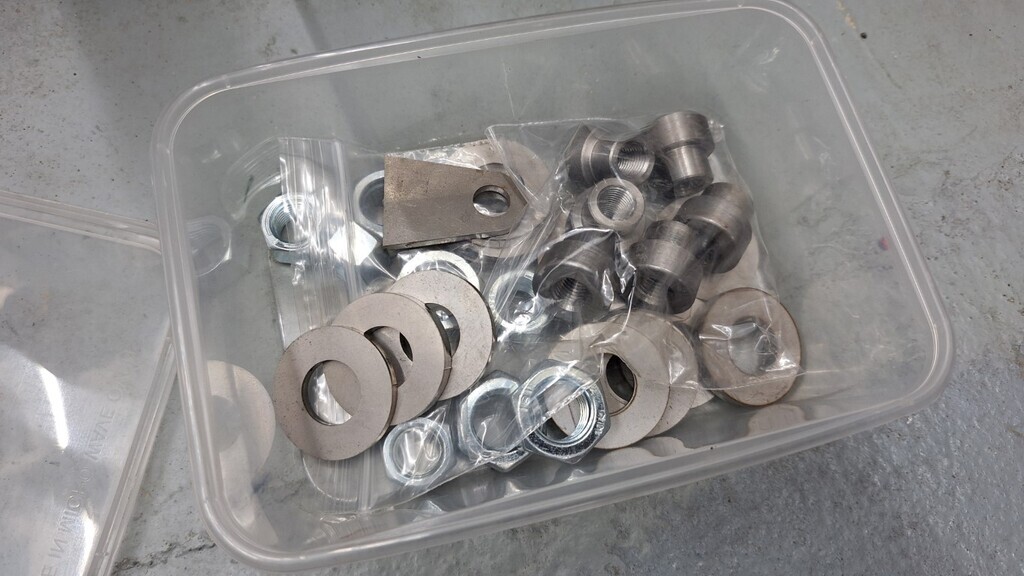  He also supplied me with a length of chassis rail for making the new front of the chassis.
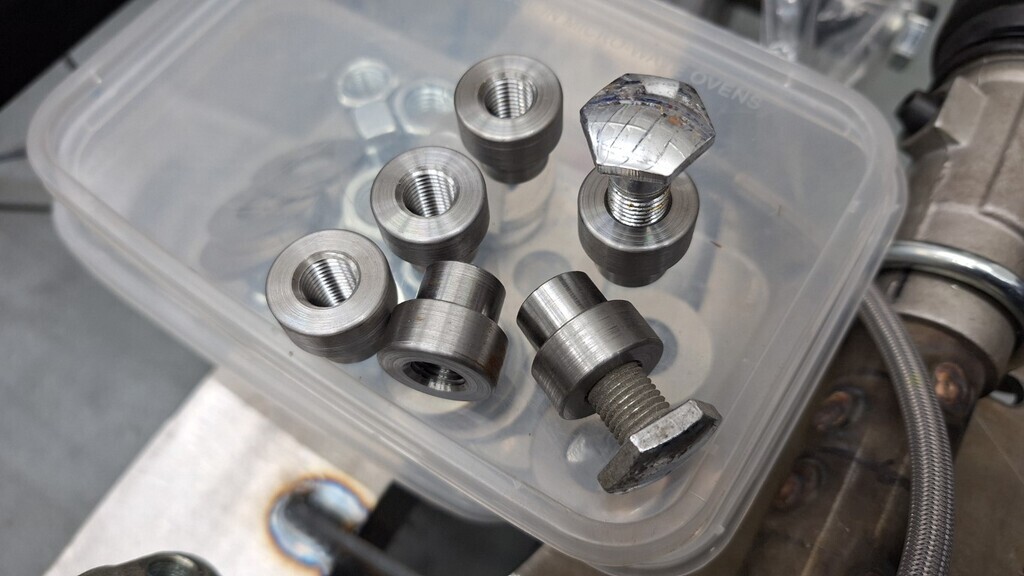
 While I was there I bought a few other parts that Wayne makes, 7/16UNF bungs for making the seatbelt mounts to replace the rubbish belts that are fitted to the car.
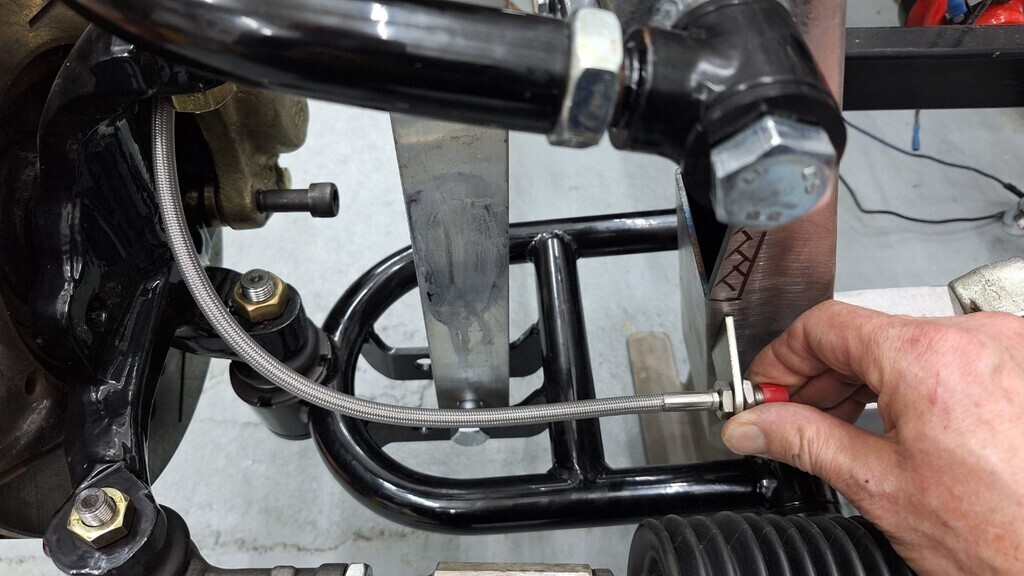
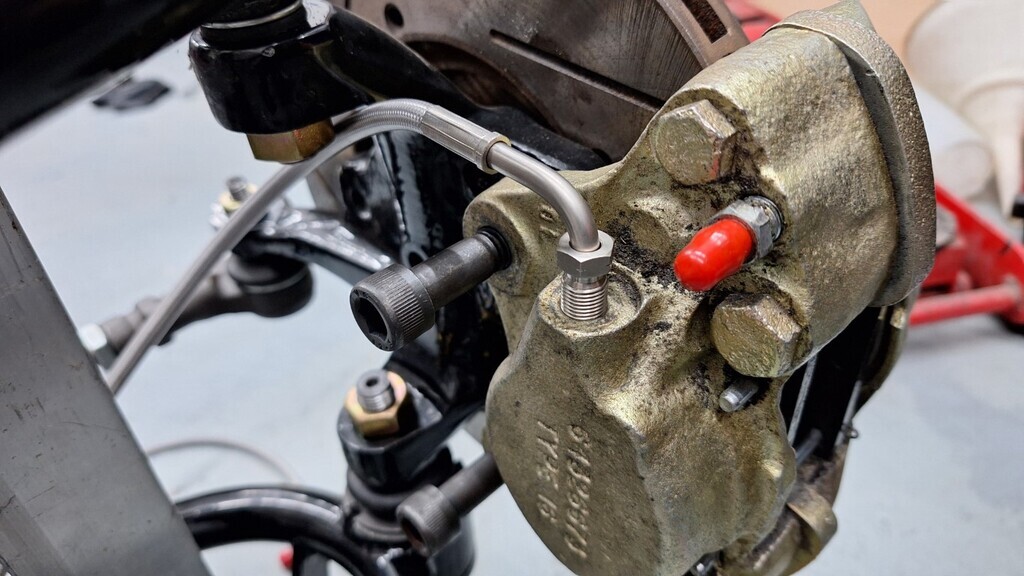
 These are the 'seatbelts' (I use the word very loosely) that are currently fitted - I think they are probably child seat retaining belts as they are thin, cheap & nasty.  Another bit that will save me a lot of effort, Wayne supplies these nice brake lines with a 90 degree outlet for the caliper & tabs for welding to the chassis. This will save me a lot of time as I had not worked out a solution the the bit of angle iron under the caliper fixing bolt that originally supported the rubber hoses (which are too short and needed replacing as well). Thanks to everyone's generosity, there is enough in the pot to cover these bits and the seatbelts as well, so thankyou all again for being so fantastic.
 More progress soon.
|
| |
|
|
|
|
|
|
|
|
|
|
Uncovered and drive it regularly.
Driving it gets the stored water to drain out and the wind dries everything off. Also all the brake/rubber/clutch parts like to be used - they deteroirate relly fast if left unused.
|
| |
|
|
|
|
|
|
|
|
The ally plate in the oil pump will wear as its too soft, don't mess around, just buy a new pump. Far cheaper then a new engine.
Personally I'd drop the crank and fit new shells as well, no point in doing half a job on something so important.
Normally you don't prime rover pumps, you pack them with vaseline as they don't have the suction to draw oil otherwise.
|
| |
|
|
|
|
|
Apr 30, 2024 13:05:44 GMT
|
|
|
| |
|
|
|
|
|
Apr 30, 2024 12:30:35 GMT
|
|
Hi Matty,
Welding a new support to the chassis would be even less access as it fits between 2 rails.
At the end of the day, I'm making it safe - not rebuilding it. I have to not go too far.
|
| |
|
|
|
|
|
Apr 29, 2024 21:32:39 GMT
|
|
And all outside as well! Love the little hand grinding wheel on your table.
|
| |
|
|
|
|
|
Apr 28, 2024 21:25:22 GMT
|
|
|
| |
|
|
|
|
|
Apr 28, 2024 20:56:57 GMT
|
|
You make it look so easy, lol.
|
| |
|
|
|
|
|
Apr 27, 2024 22:44:26 GMT
|
Not many progress photos, but progress is being made. The lower steering bearing mount is finished & welded up, not the prettiest of welds as it was difficult access but it's never going to fall off. Steering now spins easily with a light touch. 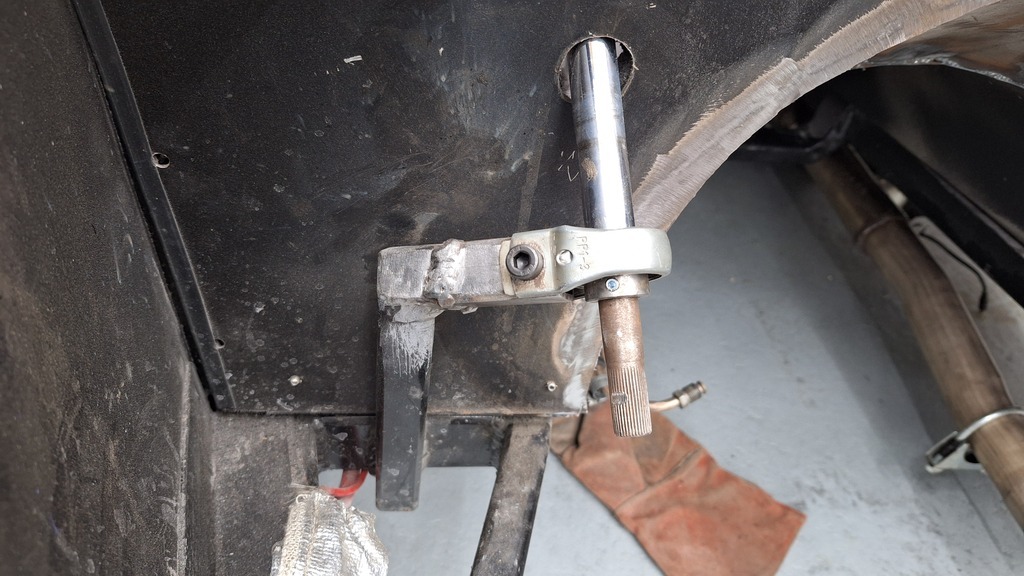 Tunnel has been tidied up on the edges and fully seam sealed ready for paint. Today I spent a few hours working out the wiring, I had serious thoughts about stripping it all out & rewiring it during the week, but it's not actually wired too bad - just a bit ill thought out and not the neatest installation. My main bugbear with it is the poor insulated crimp connectors - I hate them as half of them the wires just fall out as the crimps don't work very well. I will go through every connector & fit new proper crimped connectors with shrink wrap covers. The other bit is the wires (four) across the roof are not in conduit, not much I can do about that as the (extremely nice) headlining is all glued in. Fortunately it's all low power circuits and all are fused so it is what it is. I did manage to peel back the headlining from the screen upper area, and strip out some of the redundant wiring (looks like the wiring was started by one person then done again (better) by another?) This clarified the wiring for me as there is a black wire that is the power feed to the main electrics relay (slightly odd as the 'ign' switch is actually only a power feed to a big relay that then powers up the whole car) I've now put red shrink wrap over it so it's more obvious it's a power wire and not an earth. I've now added some wiring (properly sheathed) so the fuel pump & coil feed are now operated by a second switch rather that the power relay (which is what Andy wanted) and I've added some wiring so the ign light will actually work off the alternator as this was not wired in. Hoping to get Andy over this weekend to go through a few bits with him to make sure that the ideas I have will work for him with his limited hand movments. |
| |
|
|
|
|
|
Apr 26, 2024 21:58:27 GMT
|
|
I'm hoping to catch up with John the sparky as well. Look for the mad pop with the rear wing.
|
| |
|
|
|
|
|
Apr 26, 2024 21:54:53 GMT
|
And here's a photo showing how far out the coilover mounts were.  |
| |
|
|
|
|
|
Apr 26, 2024 21:15:26 GMT
|
|
|
| |
|
|
|
|
|
Apr 26, 2024 21:10:36 GMT
|
I hear what you are saying metalshapes but this sort of thing is totally unacceptable in any situation whatsoever. This is the steering rack input shaft, welded in 2 places. |
| |
|
|
|
|
|
Apr 26, 2024 16:43:43 GMT
|
Glen, that's too easy, I'm posting photos of it chopped up with my plasma cutter |
| |
|
|
|
|
|
Apr 26, 2024 16:17:09 GMT
|
|
I expect it to be safe, maybe not finished too well, and some cost cutting here and there, but not literally a dangerous car that would possibly kill them or others.
|
| |
|
|
|
|
|
|
|
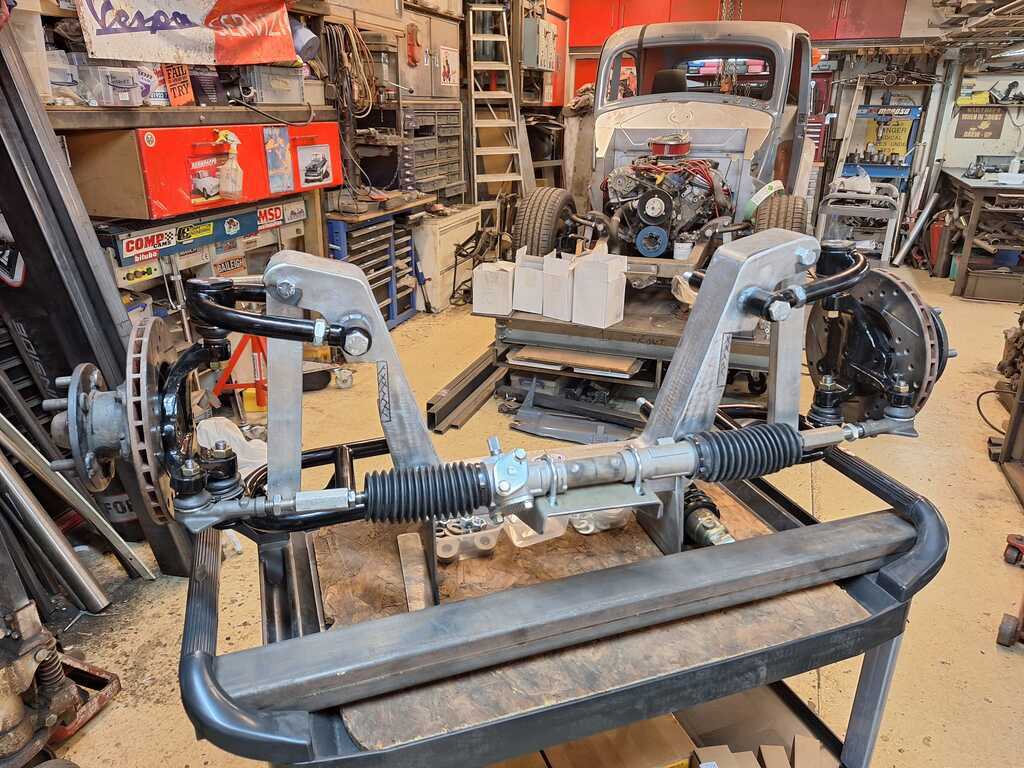
He does indeed. If anyone needs suspension bits or even a whole car built, give him a call on 07759 374128. The suspension arms are back ready for assembly.  |
| |
|
|
|
|
|
Apr 25, 2024 11:55:01 GMT
|
Wayne has already built the crossmember  The stand it's sitting on is for me to just put on the floor so it's set at ride height - that will make building the new chassis rails so much easier. 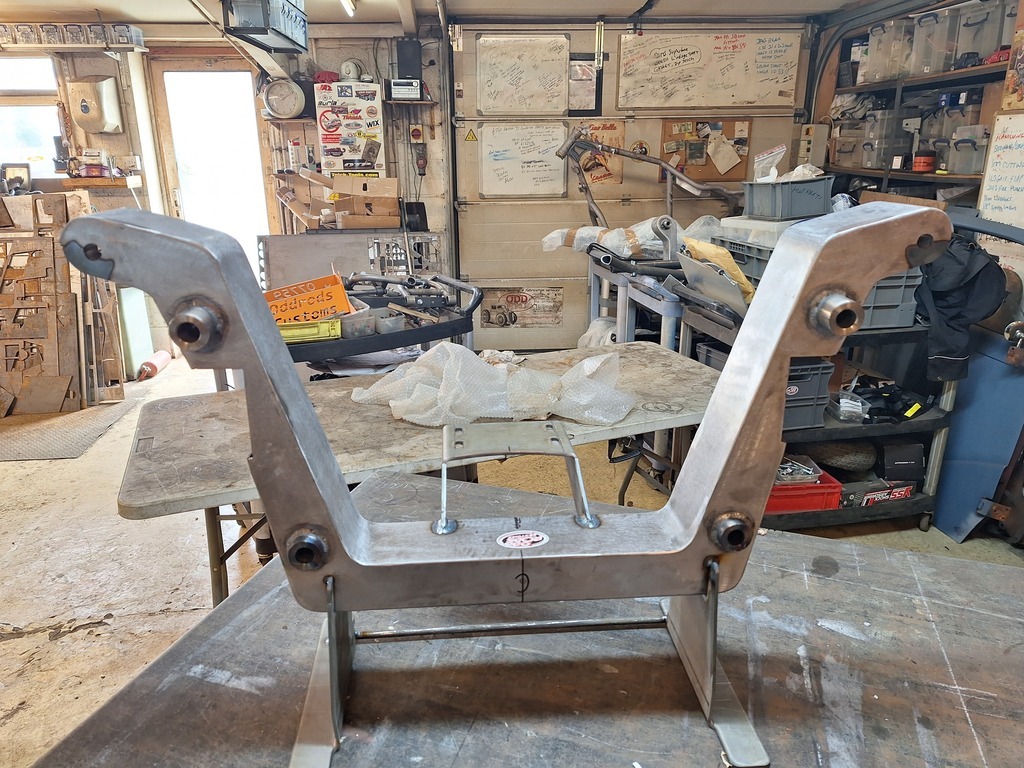 |
| |
|
|
|
|
|
Apr 25, 2024 11:53:28 GMT
|
For a light car a remote servo on the front circuit only works well, but a simpler option which gives some warning of an issue is to fit a float in the cap of the reservoir and a warning light. (Car builders solutuons sell the parts). Already on the 'to do list'  |
| |
|
|
|
|
|
|
|
|
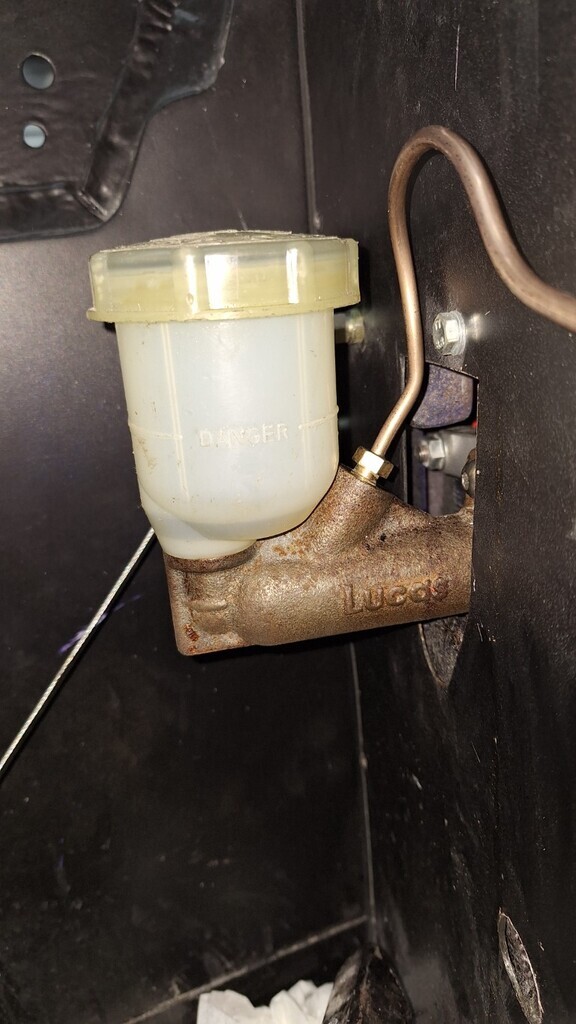
Dual circuit not really practical as ir has a remote brake servo.
Paul, bulkhead is only sheet steel, plus I'd need to extend the M/C pushrod.
Asking for the bits back is downright criminal. I will chop them up with my plasma cutter so they can never see a car again.
|
| |
|
|
|
|
|
Apr 24, 2024 23:13:37 GMT
|
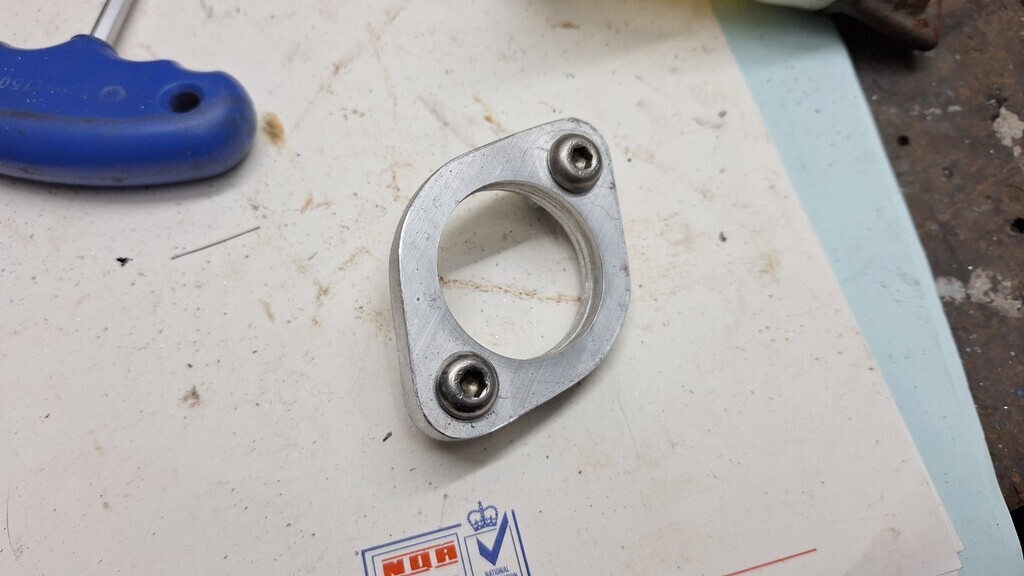
Casn you believe it??? Thr builder of the front suspension contacted Andy's wife tonight and asked for all of the front suspension back if we were not using it anymore as he took it off another car and wants to use it!! Told her to give him my number and ask me   Bit more progress tonight, take some ally and turn it into swarf; 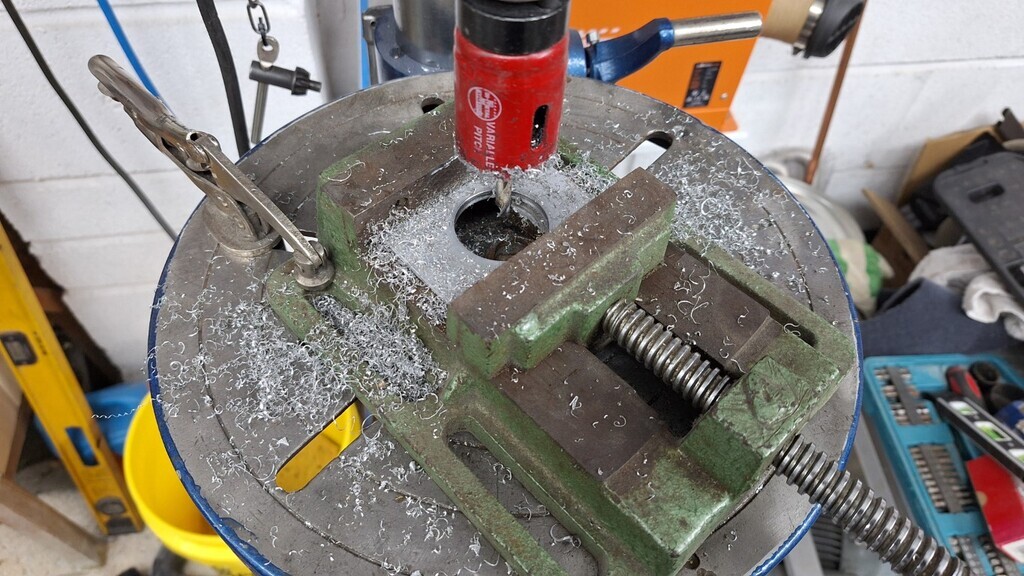
cut, cut, cut, file, file file, sand ,sand.... and we have this.
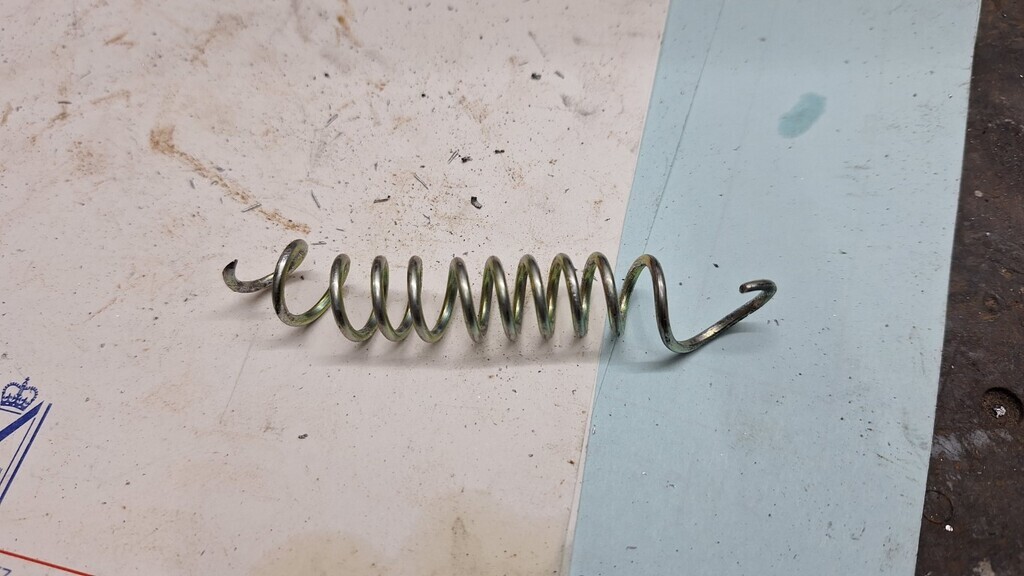
remove the spring(?) off the brake pedal and throw it in the bin. (thats about 15mm diameter for scale)
And mock it all back up again with the spacers fitted and a decent spring fitted. I'll get some clevis pins for the spring and brake rod pivots, and proper bolts for the M/C.
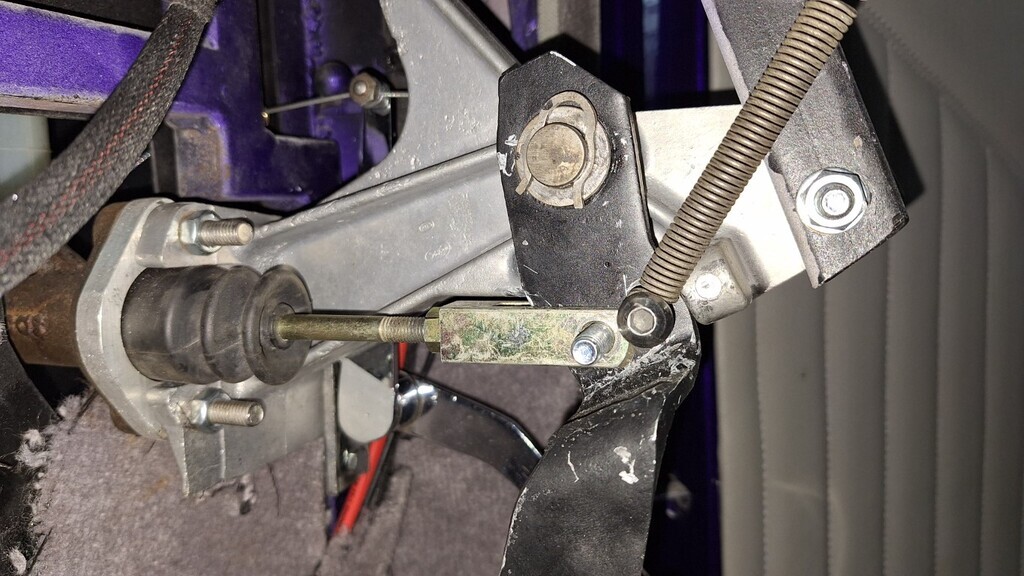
It all fits so much better now with room for the brake pipe to exit outside the passenger compartment. It will be easy to close this off properly now. That a temp bit of brake pipe chopped off the original to test the room and angle.
Started on the new mount for the steering column lower bearing.
 |
| |
|
|


 with crimped wires shoved in the other side;
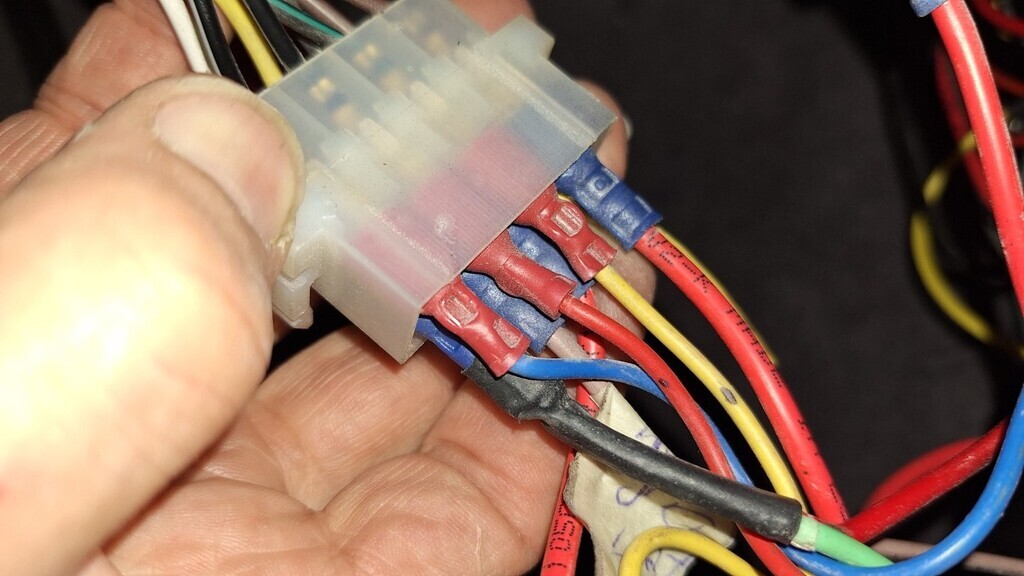
 (did I mention I hate insulated crimp connectors?) the black covered wires should be fixed to the blue connector......

 I have a load of new connectors on order so I'll replace every one on the entire car.
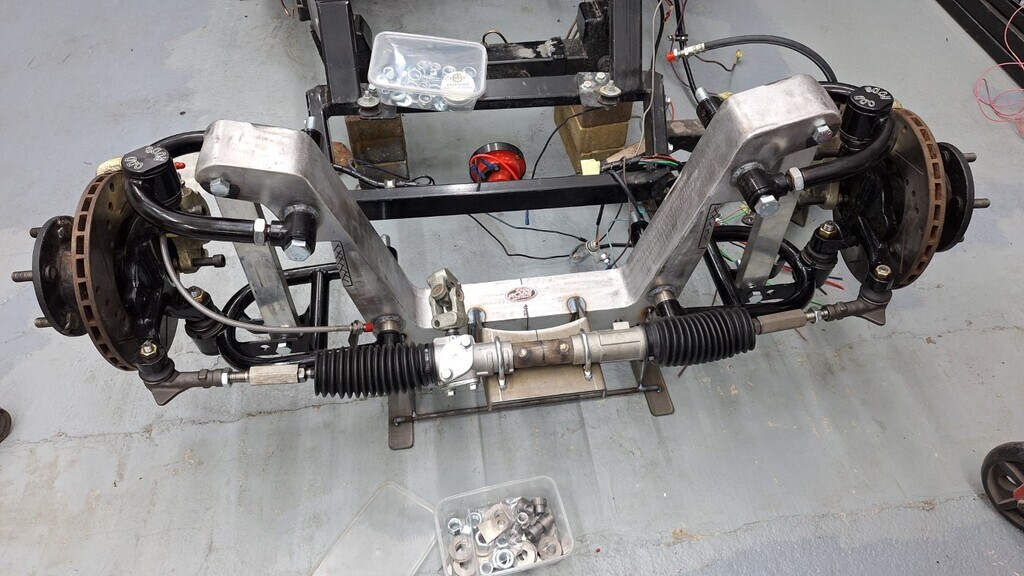

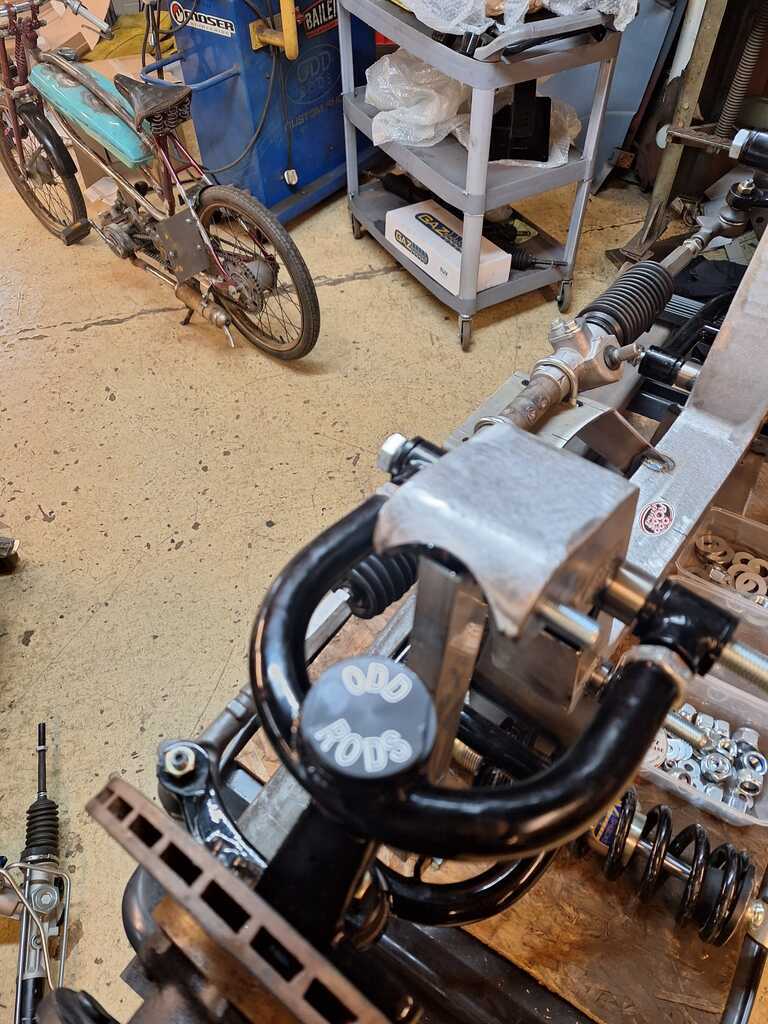
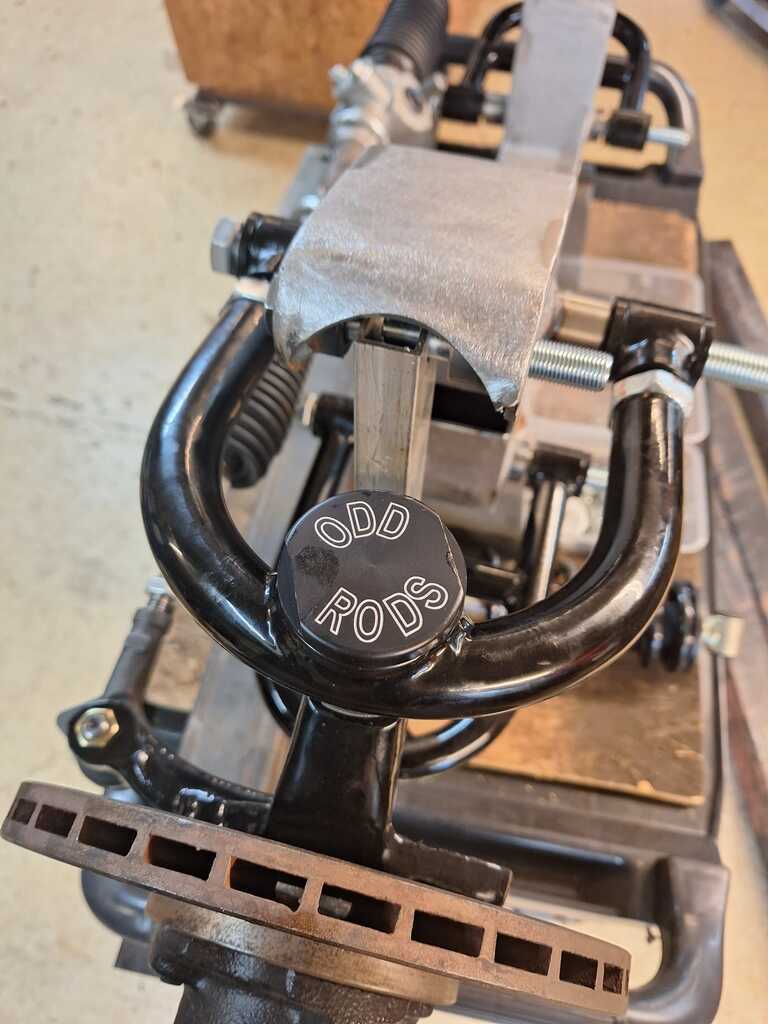
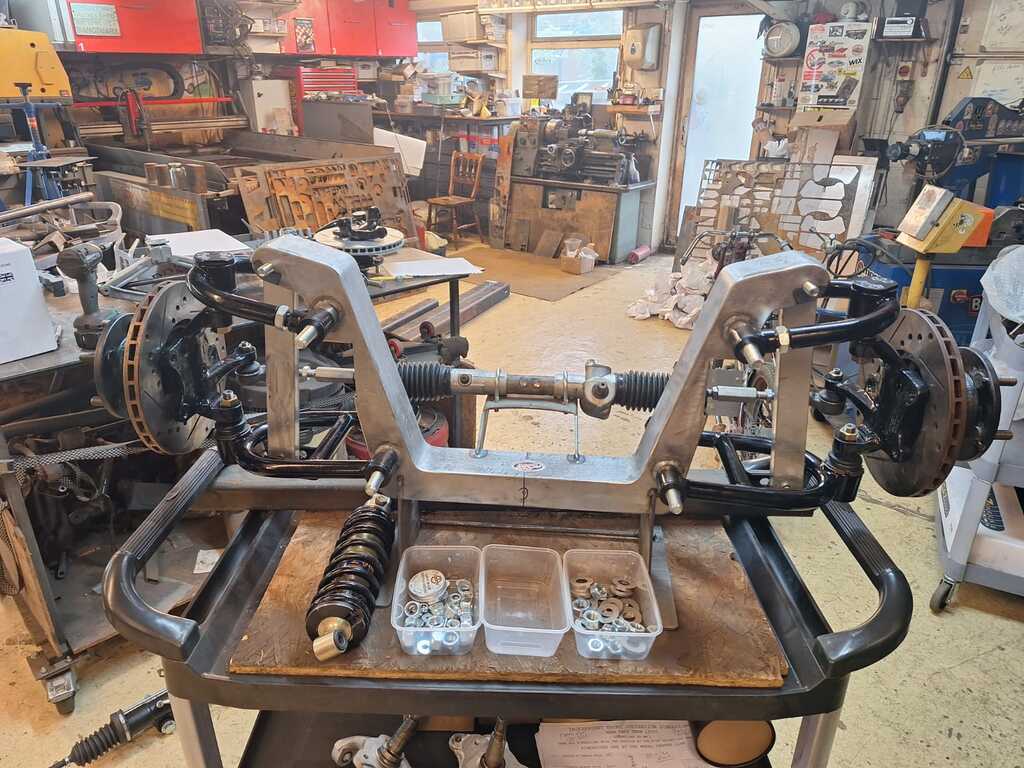
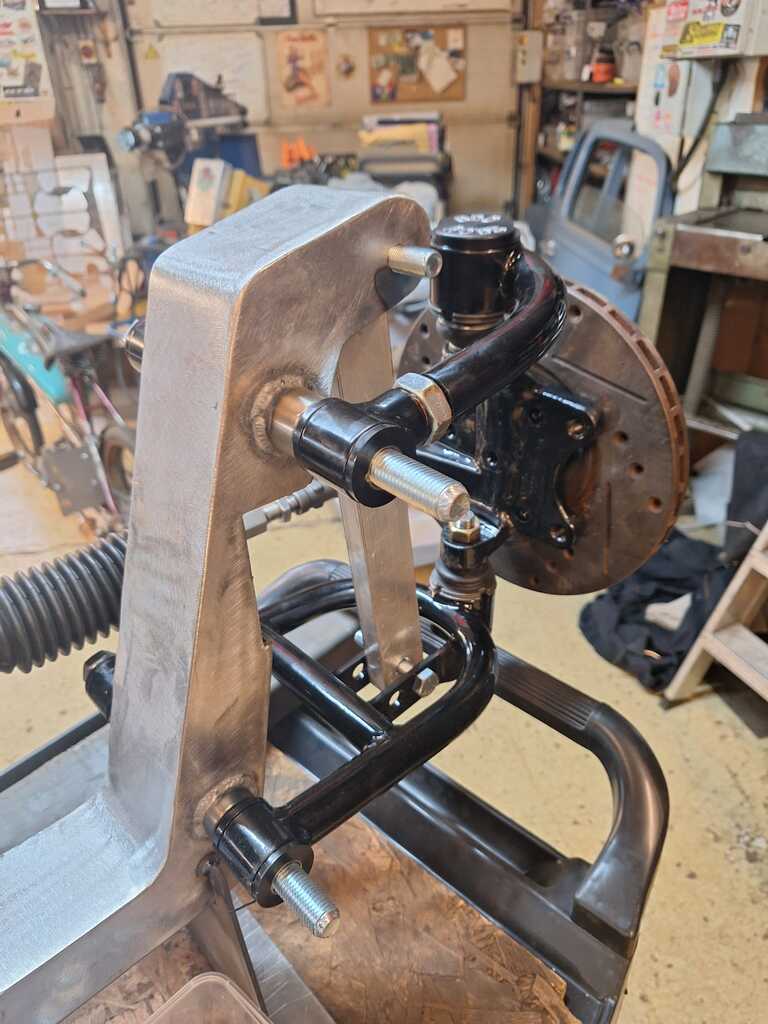


 The stand it's sitting on is for me to just put on the floor so it's set at ride height - that will make building the new chassis rails so much easier.


