|
|
|
|
|
Just had some great news, I have ordered a new screen rubber, stainless bonnet stays and stainless stay fixing kit, some door stop rubbers and a bit of spare bonnet welting from Pop Browns and he has donated all of it for free as his part of the contributions for Andy. It's a bit overwhelming how generous everyone is being, I'm a little choked up  |
| |
|
|
|
|
|
|
|
|
|
coming along nicely, small oil filter only really means it will need changing more often, Can't imagine it's going to do a high annual mileage anyway though. The filter is a Renault 5 one aparrently. Rovers rely on a bigger filter for keeping oil pressure high, so the little filter may be restrictive according to the rover forums. |
| |
|
|
|
|
|
|
|
|
I'm coming down as part of the NSRA stand, I've got no details yet but want to arrive on friday evening. Do I need a pass or anything as I have no ticket so far.
Is it the same setup as when I came a few years ago?
|
| |
|
|
|
|
|
|
|
Thanks  |
| |
|
|
|
|
|
|
|
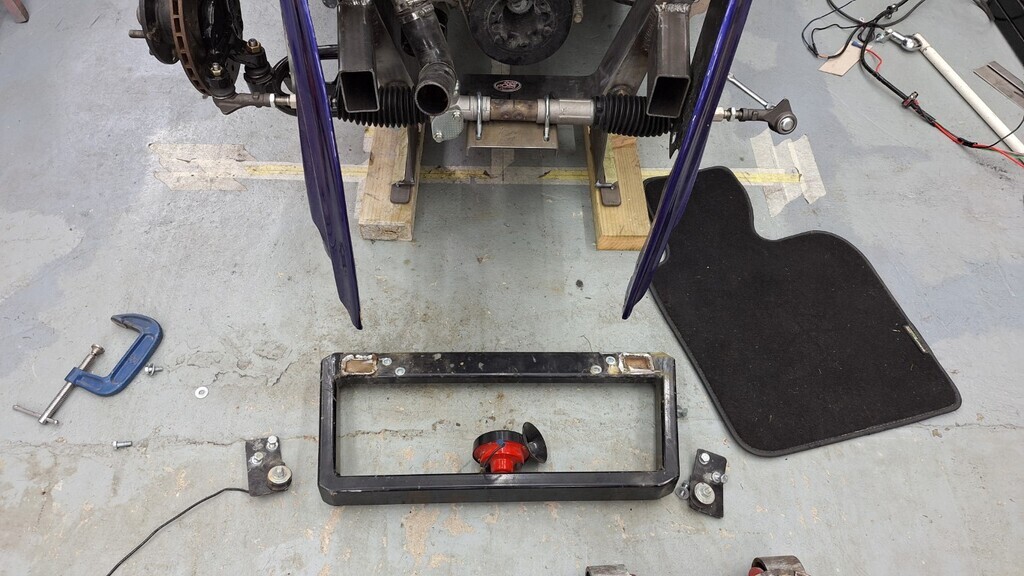
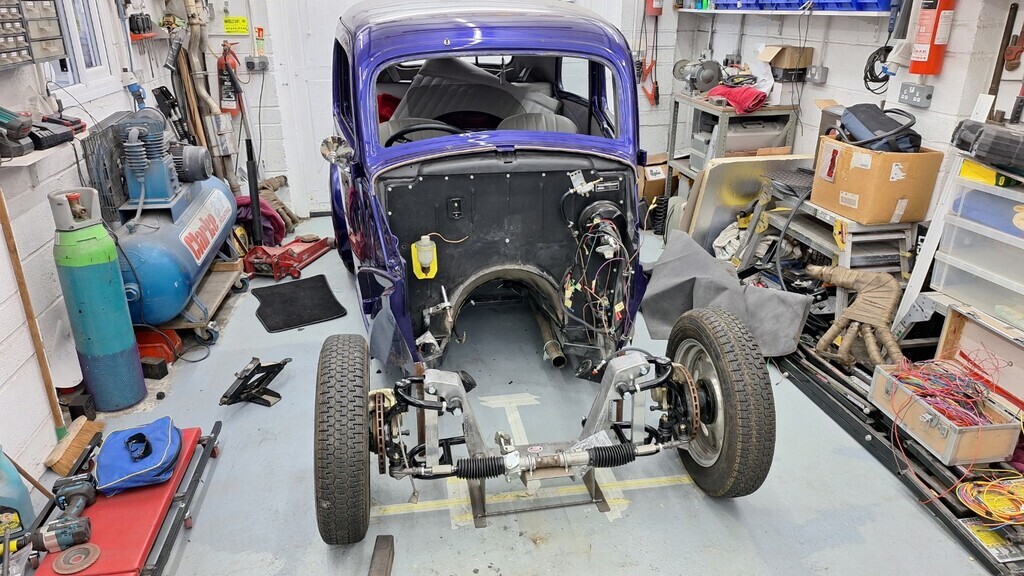
Another busy day on it but less to show for the effort. This is a photo of the bottom of the grill, its already been scraped badly as the car was too low, I have since added filler to this for sorting later on.  Today's job was refitting the frame that was built for the nose & radiator support as seen below. It's pretty heavy duty as its made of 50 x 20 x 3mm box section and is quite heavy.
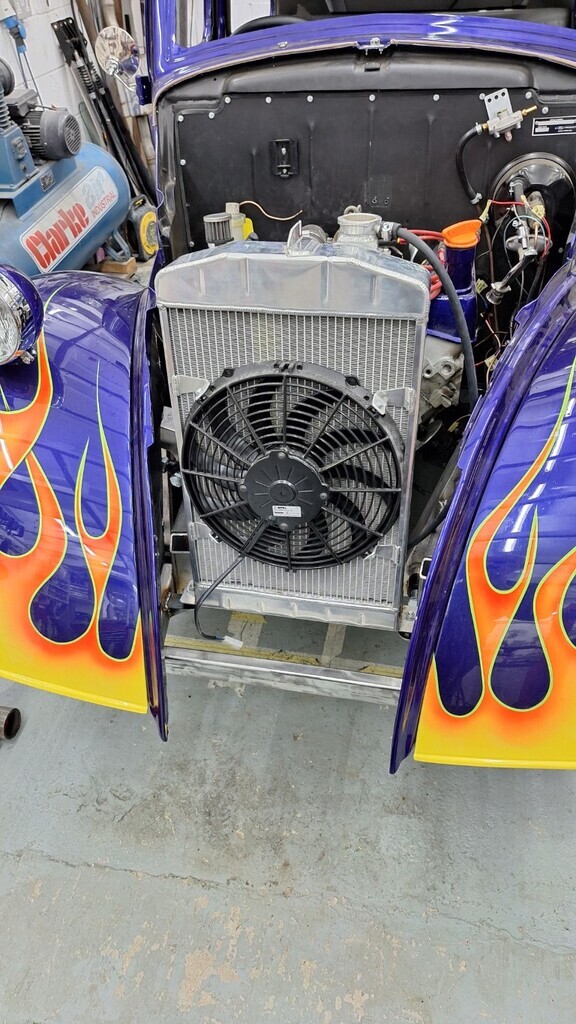
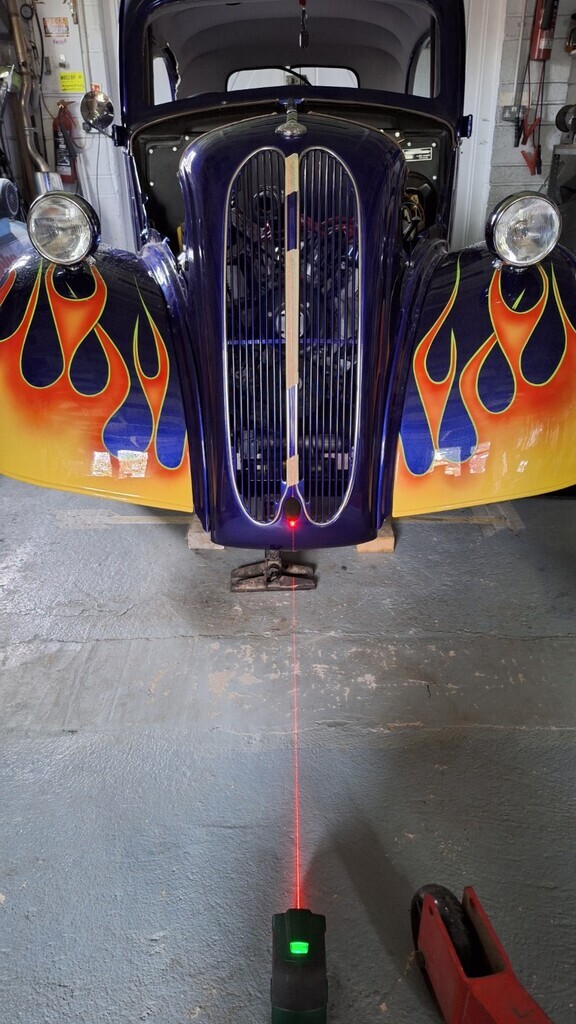
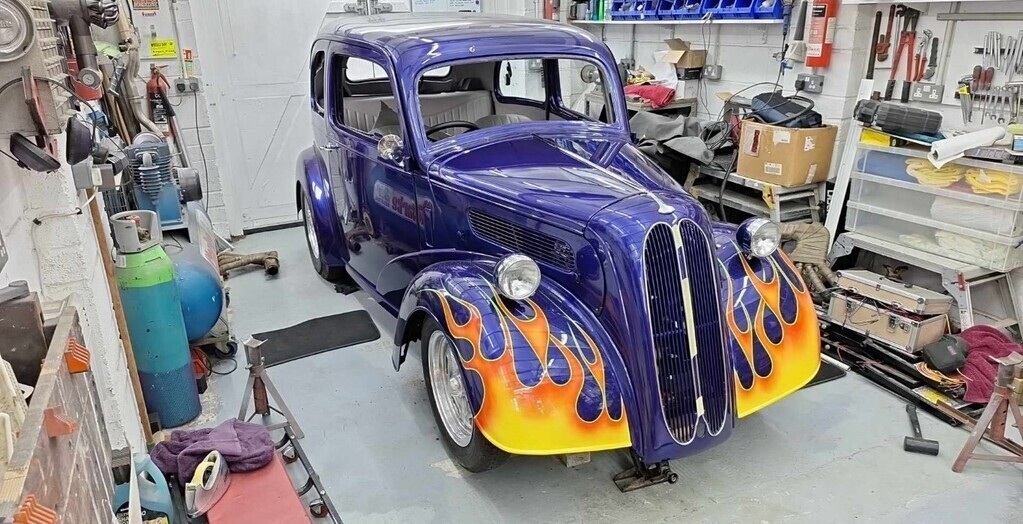
 To do this I had to put the front panels back on to see if everything fitted ok, quite a time consuming job on my own making sure not to chip any paint. Although its on stands this is the ride height of the front tyres now - I think it looks good. Also good is that the tyres do not foul anywhere even on full lock  With the nose back on I reset all the panels to get the nose upright (car sos had left it leaning to the right)
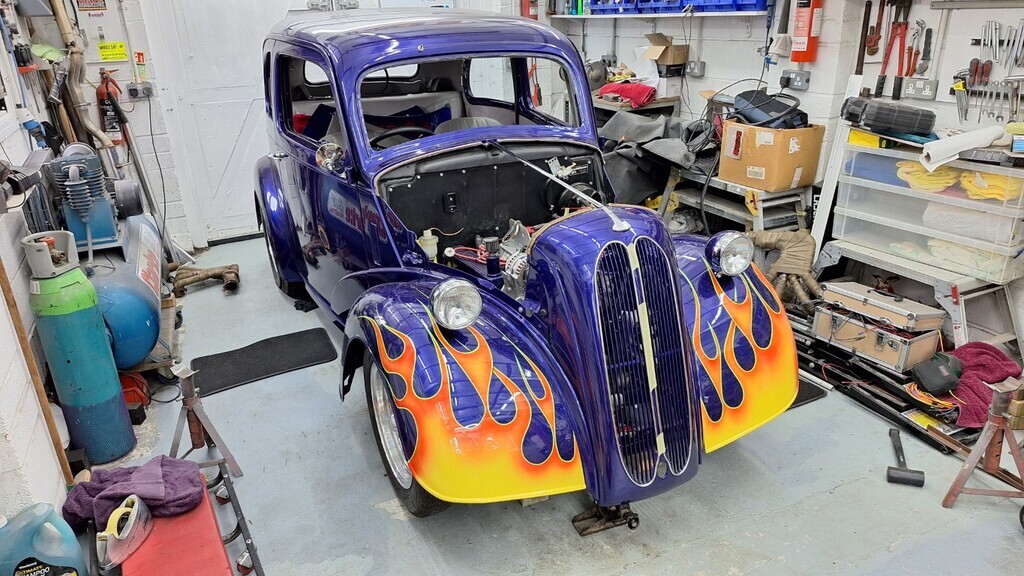 With the laser level on it its almost perfectly straight - which is good enough as these cars were never built perfect. The bonnet also fits properly now, it fouled in several places when Andy was given it back with a resulting loss of paint. I will fix all the chips on it before reassembly. The bonnet now fits with decent panels gaps again.
It will come as no suprise to find the front frame I was going to refit was not even remotely square. As such it got chopped up and put on a diet. Part of it got used for the drop sections, and part of it was re-used for the inner wing side rails. They are just tacked in here and I've yet to make the closing peices for the ends. 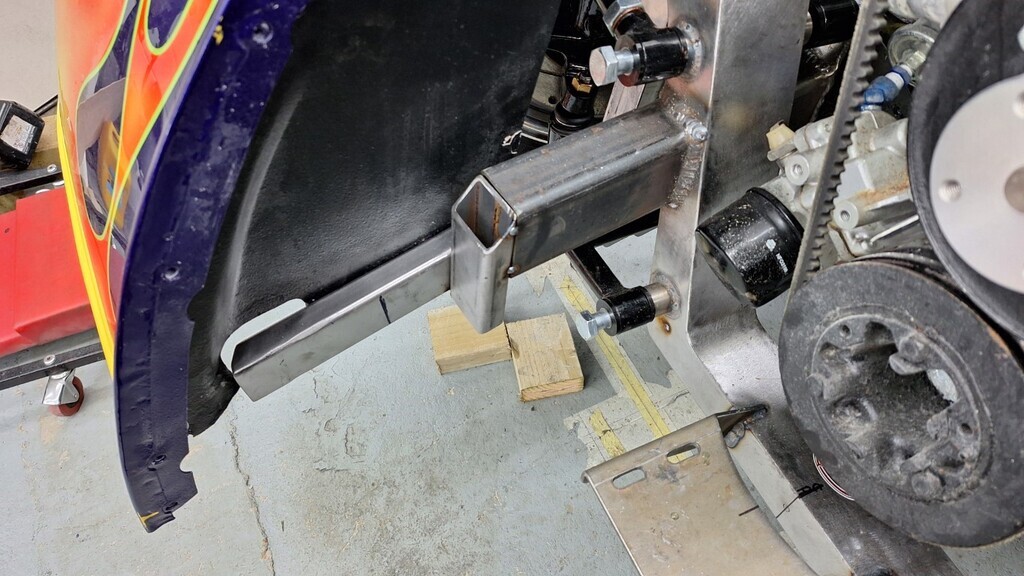 For the radiator I made some new tabs from 40 x 3mm flat bar with a gusset added. *no sniggering because I said gusset 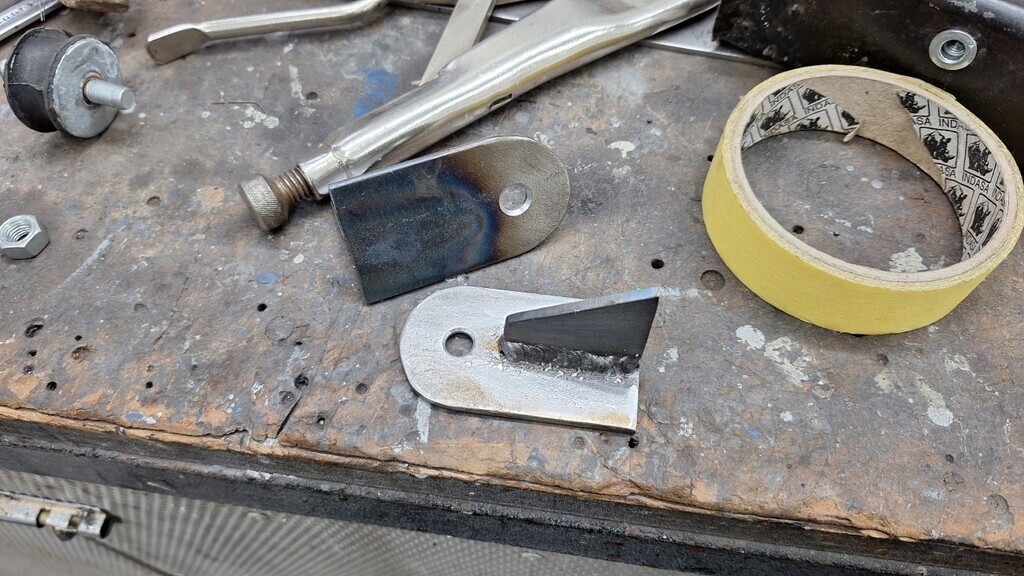 I have moved the radiator forwards into the nose a bit more which may allow a bigger oil filter to be fitted, its about 30mm forward from its previous placing. This also leaves the nose area more open for better access for servicing etc. It's all tacked in here, I'll remove all the front panels for finish welding. Radiator now fitted back in on its new mounts. It is central, just the camera angle makes it look off.
 Progress will be a bit slower now as I need to do a bit of work on mine as I'll be at the Retro Rides weekend at Goodwood on Friday. Come over and say hello. |
| |
|
|
|
|
|
|
|
|
Wow, all that space!
Apart from the sheer cost of doing them up thats brilliant. How many acres do you own as well? (not jealous at all!)
|
| |
|
|
|
|
|
|
|
|
John,
Looking at your frame again, I'd think about putting in a diagonal bar between the 2 new bars you added. This will hugely strengthen the assembly and take all the stress out of the welds for any sideways movement.
|
| |
|
|
|
|
|
|
|
Following on from my earlier post, the chassis rails are almost done. I still have to make some fishplates to weld over the top of the joints for extra strength. As the angles were tight it was easier to make the new bits in individual plates. I had a couple of sheets of 3mm plate steel so they were perfect to cut them from. The first bits are tacked in here; 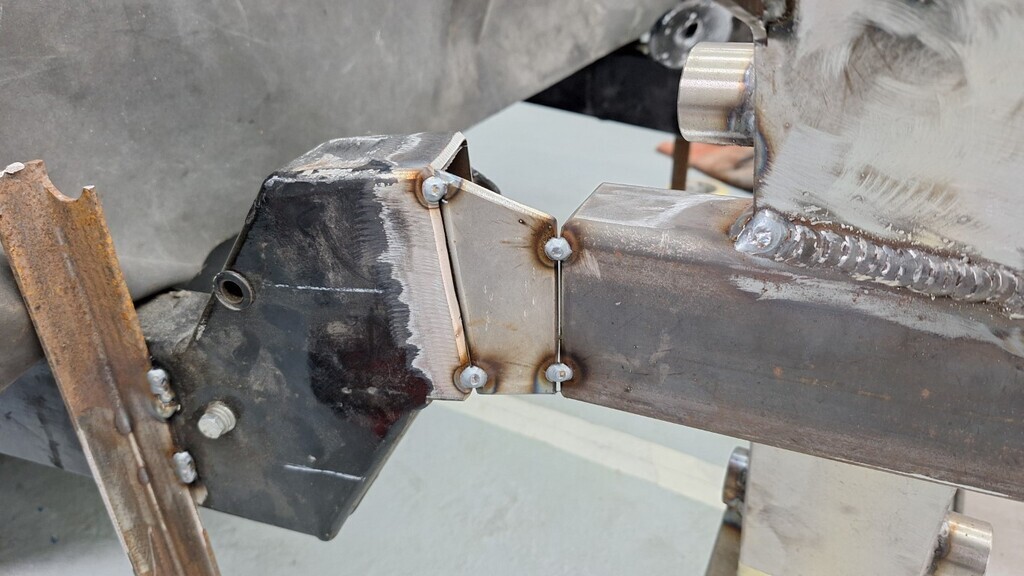 A bit of cardboard aided design to make each bit worked well;  All fully welded and it only pulled about 1mm towards the back of the car, so very happy with that as the level and castor are still at the perfect angle. Perfectly central still as the laser level shows;
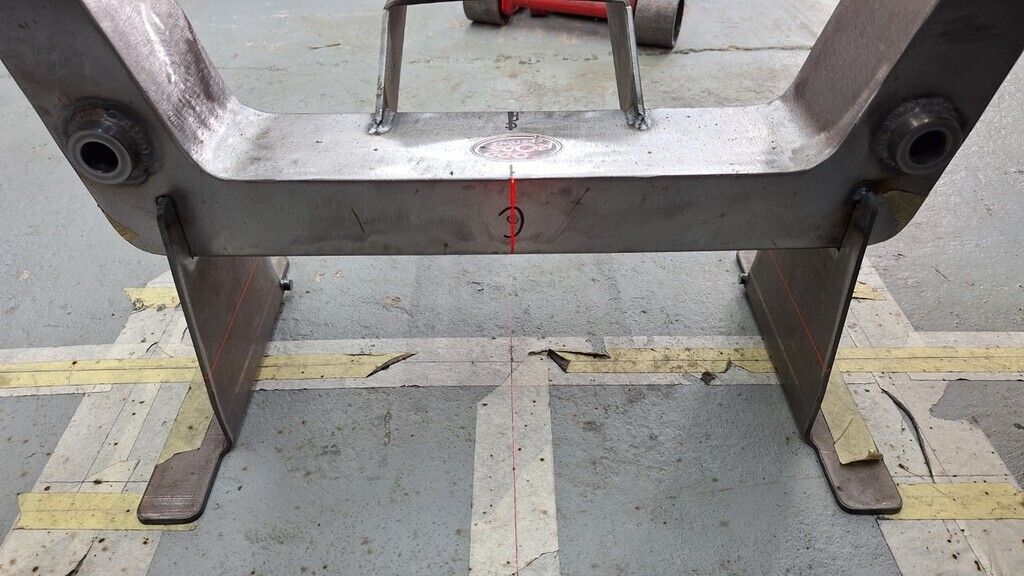 And still nearly perfectly aligned on the floor markings. 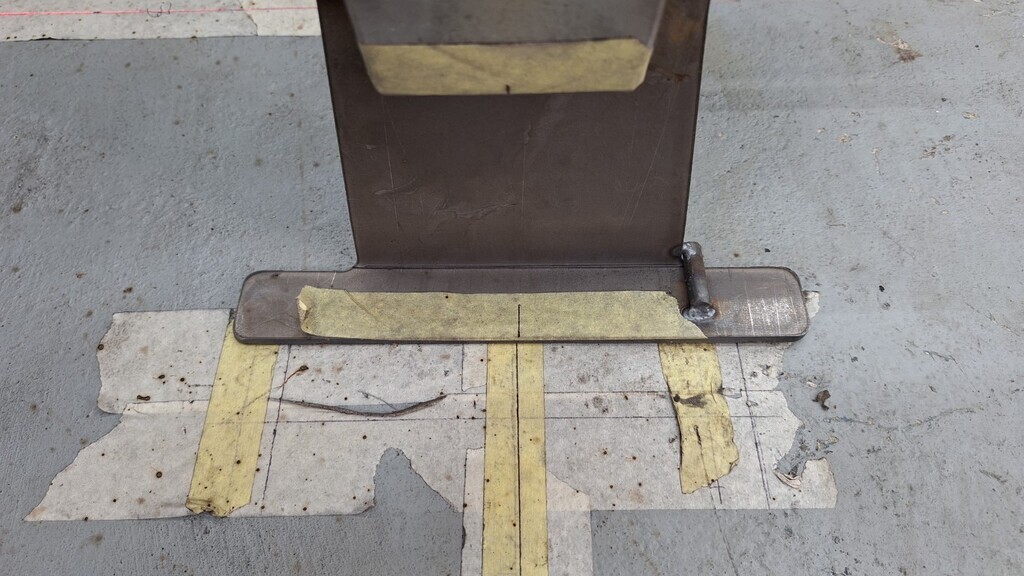 
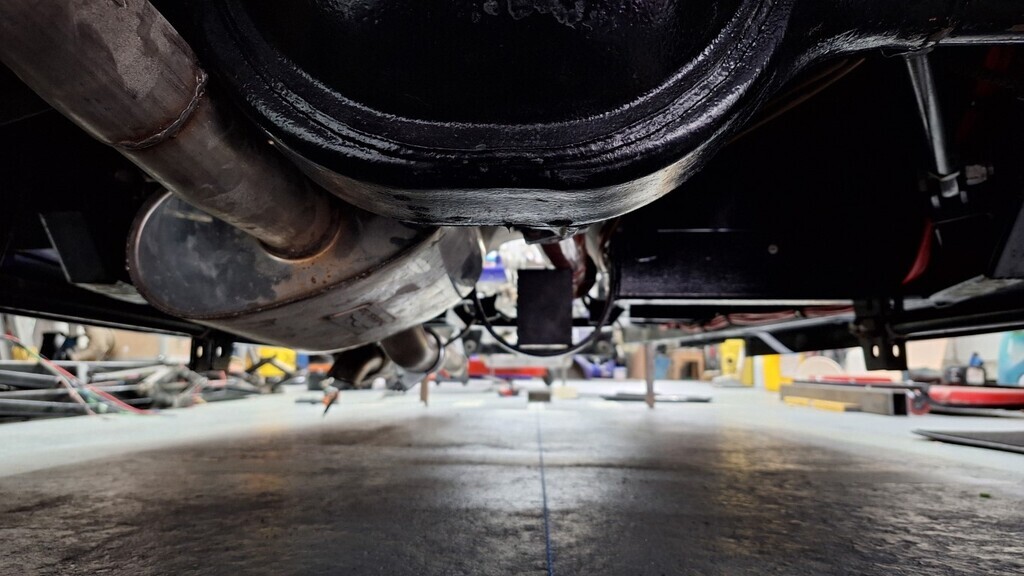
I dropped the engine back in to check clearances, the steering UJ is pretty close to the oil filter but it does clear so thats good. Maybe a remote oil filter might be on Andy's shopping list in the future as that's a pretty tiny filter. The filter is marked as I removed it to get the engine out, it will be replaced before the engine is next started.
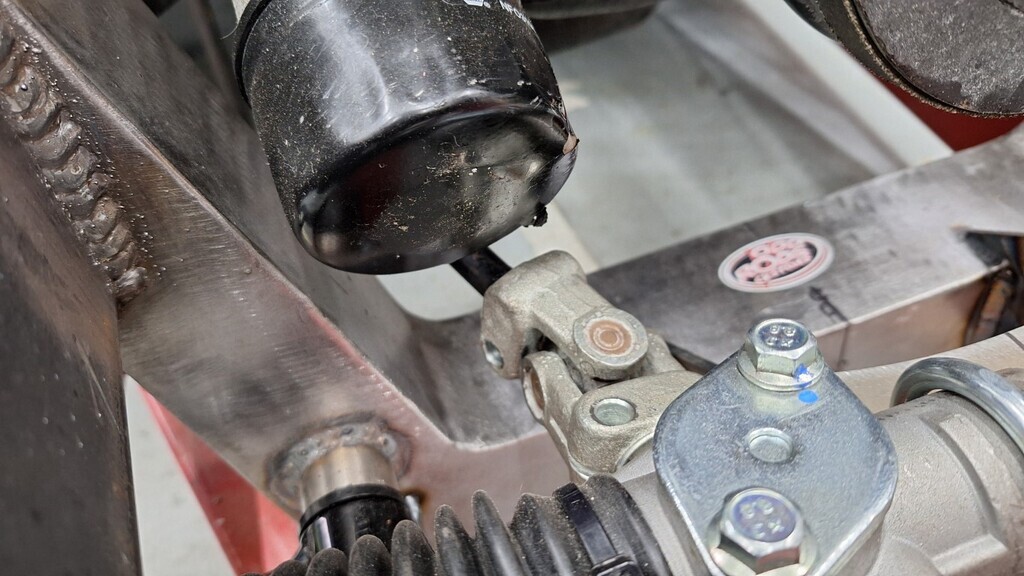 Where I have moved the steering bearing it is now very close the the exhaust port bolt, (probably why it was bent out of the way before) but I think it will fit ok - I've trimmed the bolt flange on the headers, but I'll have to trial fit them to make sure.
One issue is the steering shaft now wants to go through the engine mount - so I'll have to move the mount upwards to clear that - a pain, bot not a massive problem. I might look at raising the engine just a little bit, even 3 or 4mm might make a big difference to the clearances.
  |
| |
|
|
|
|
|
|
|
Hi Jonny, It is the chassis rails. It's where they were notched inwards to clear the coilovers. God knows what on earth the bits of scrap were there for when a bit of 3mm plate folded to fit would have been so much better. And this is a well known hot rod shops work  |
| |
|
|
|
|
|
|
|
A nice easy transition to do there Mark. I expect to see pictures of the finished chassis rails by tea time  Depending on your tea time Paul, it's all done now 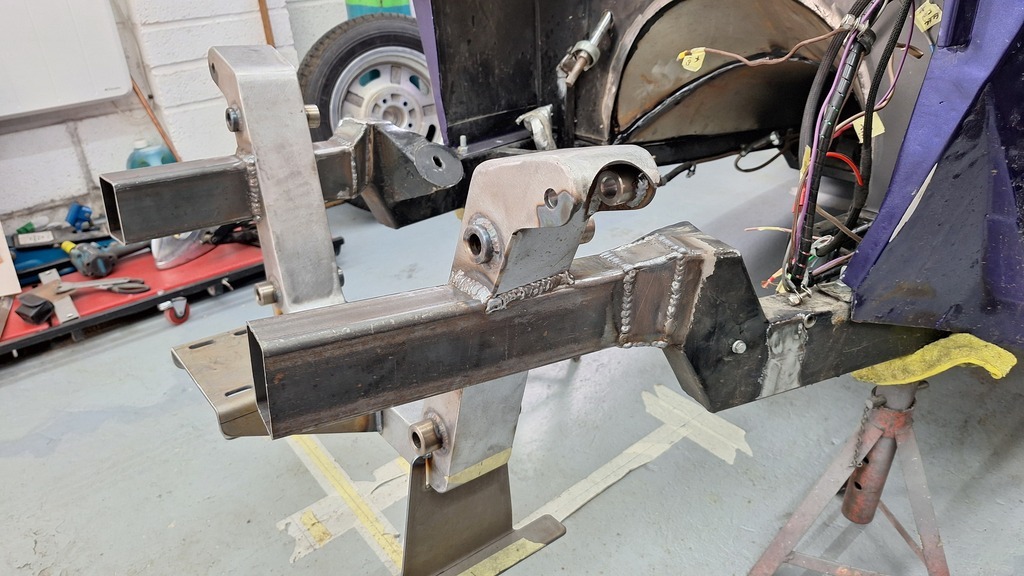 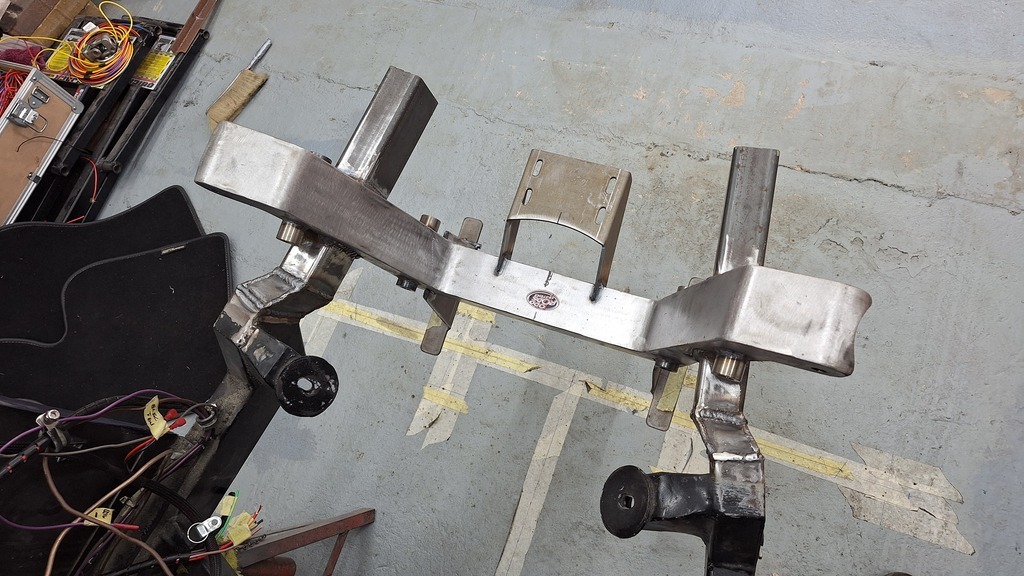  |
| |
|
|
|
|
|
|
|
|
Looking awesome as usual 😎
|
| |
|
|
|
|
|
|
|
|
It's not boring Robert, we love watching your progress. Just how many buildings do you have?
It looks a full time job keeping on top of nature though. Roses are pretty hard to kill and primroses are great to have in the garden.
|
| |
|
|
|
|
|
|
|
James, it's only metal. I was taught that by Wayne years ago. If something is wrong you just cut it out and put new metal in. Its only scary to think about, it's quite easy to do |
| |
|
|
|
|
|
|
|
A productive few hours in the workshop this afternoon. Chassis rails cut and fully welded to the crossmember, they are never going to come undone there is 20 inches of weld each side!  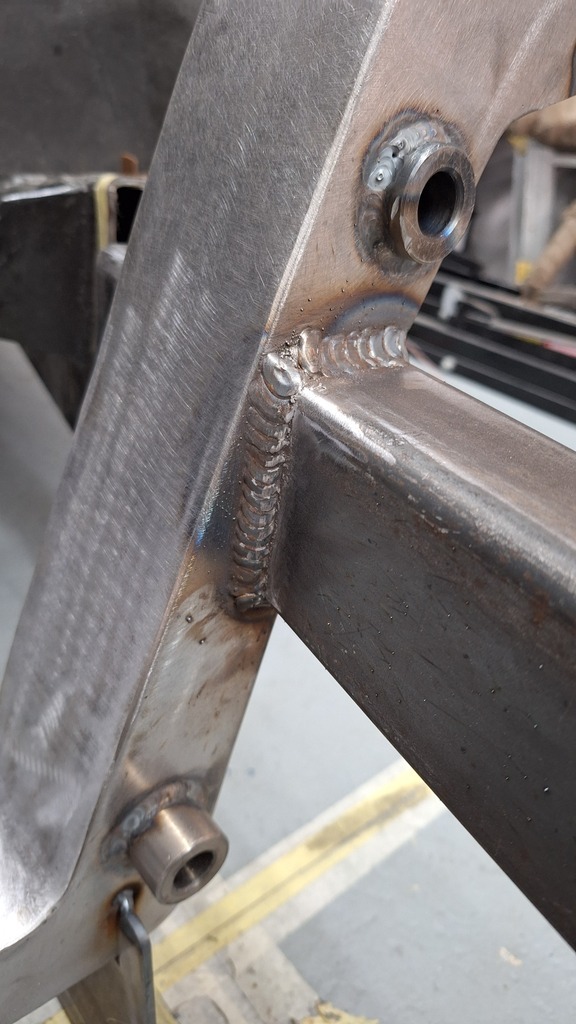 Just these gaps to fill and it will all be done. It might take a little longer to do than to type though! 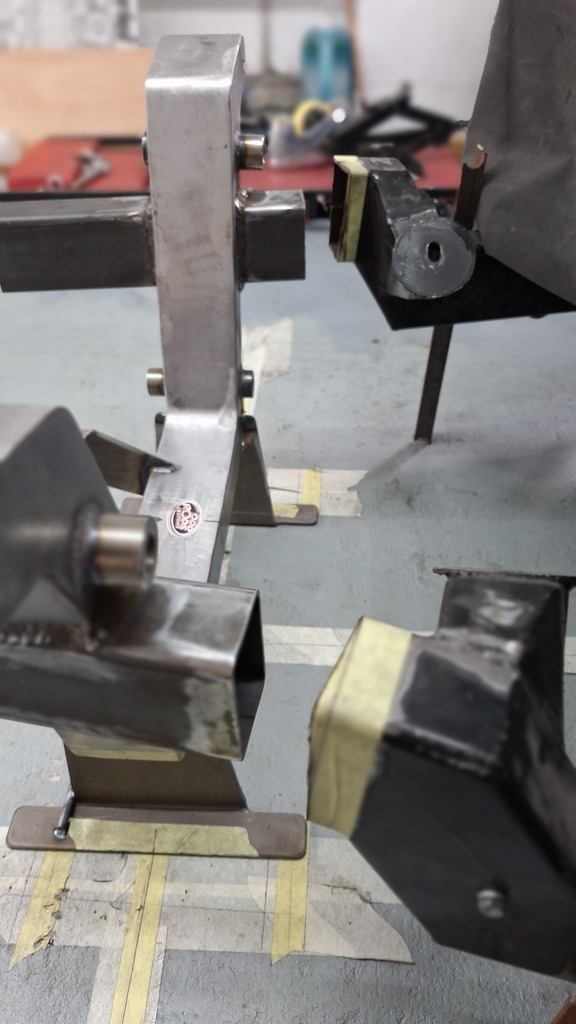 |
| |
|
|
|
|
|
|
|
|
Thanks Norman, I look forward to when you finally get back on yours.
|
| |
|
|
|
|
|
|
|
A quick bit of work done this morning while waiting for mrs blackpop to have her hair done. New chassis rails cut and slotted to slide over the front crossmember rails. 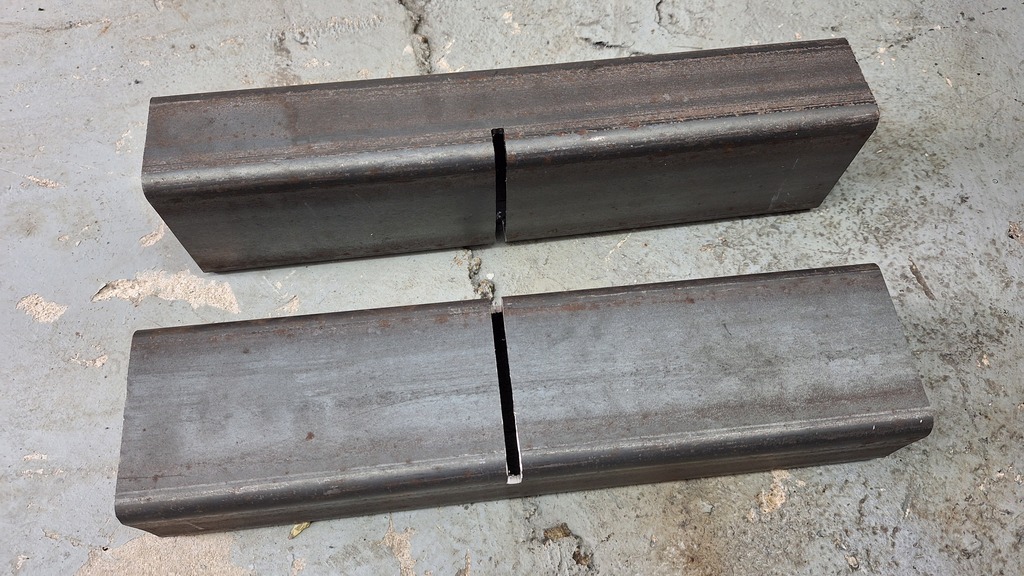 The rails are not too far out so should not be too difficult to join up.  And the old crossmember chopped up. 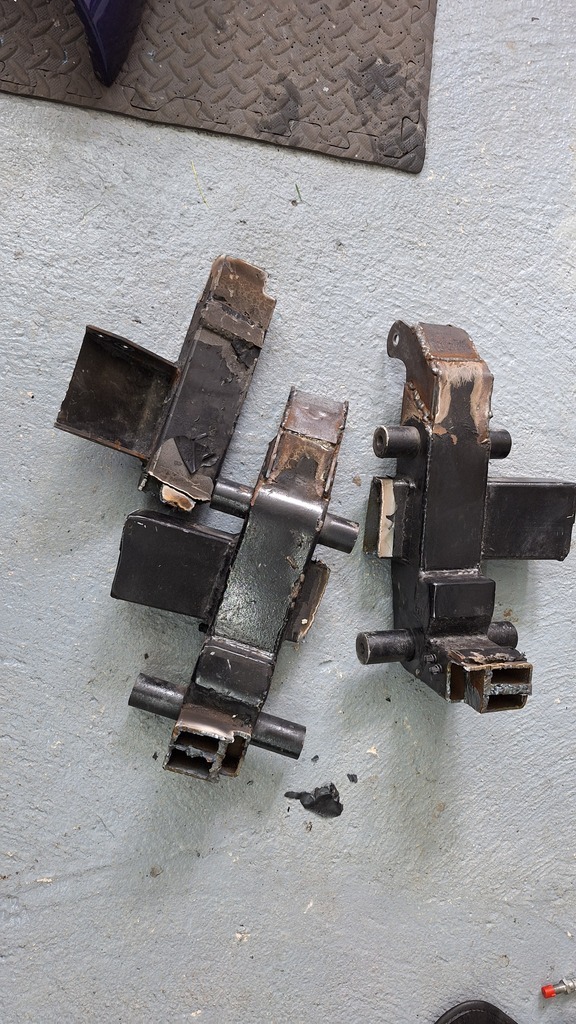 |
| |
|
|
|
|
|
|
|
|
|
|
|
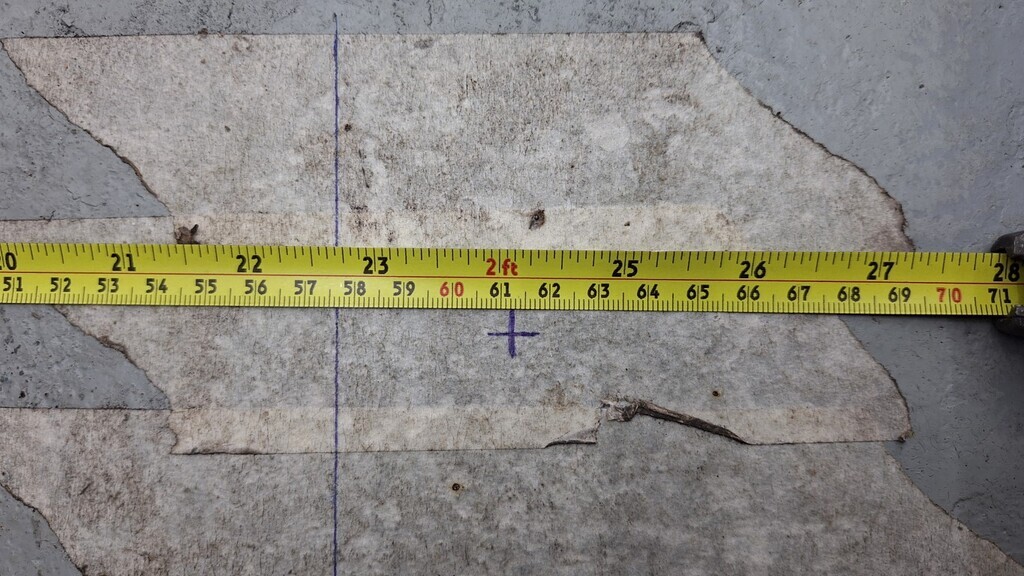
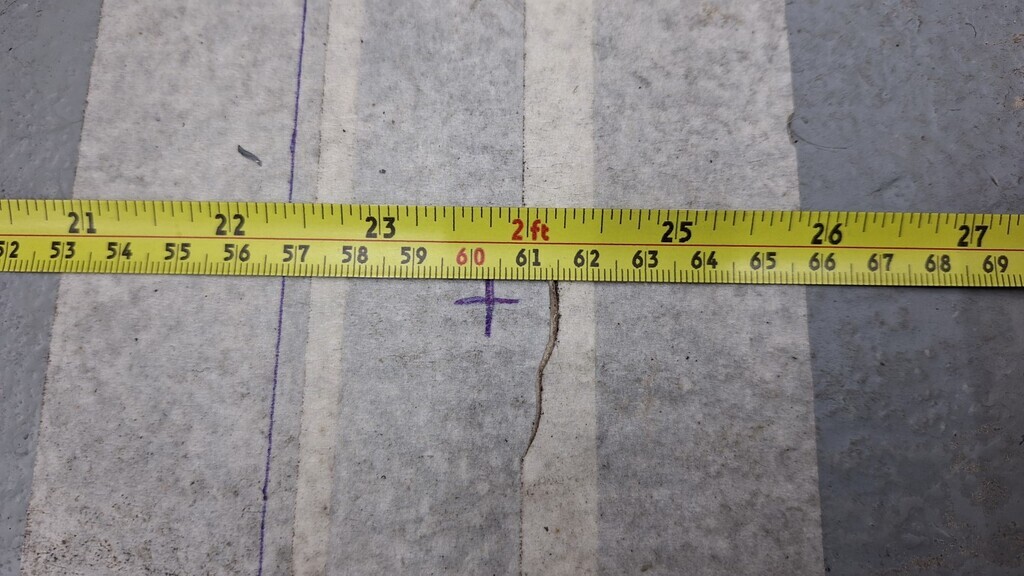
A very productive few hours after work today, I spent some time crawling around under the car plumblining off the rear axle and the front suspension to get datum points and find the cars centreline. I had to search out my close up glasses so I could mark the floor accurately as I was trying to mark it only inches from my face as it was not jacked up off the floor. I'm getting too old for doing this now, lol.
Good news though, whoever built the rolling shell that car sos bought had done a good job, everything is dead square and it only took about an hour to have it all marked out and triangulated to find out all was exactly as it should be - even the body is dead centre to the centreline. I had marked out the centres of the wheels at the outer point of the bearing dustcaps before I stripped off the old suspension..........hmmmm.........passenger side was 603 from the centreline and the drivers side 613mm!! This was all due to the different sized wishbones as the crossmember points are all correct.
All the issues have arisen from their decision to ditch the (perfectly good) original front wishbones and to notch the chassis for the coilovers and make those hideous new arms. The crossmember was perfectly square (but just set for the car to sit too low).
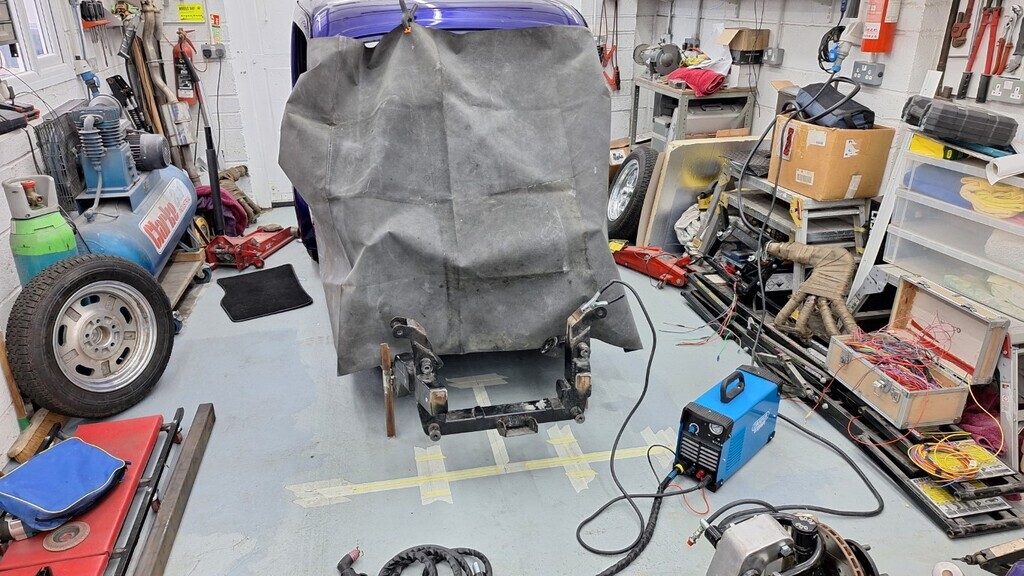
  With everything checked and the floor marked properly the car was set up for surgery. My spark blanket was draped over it to save the paintwork.
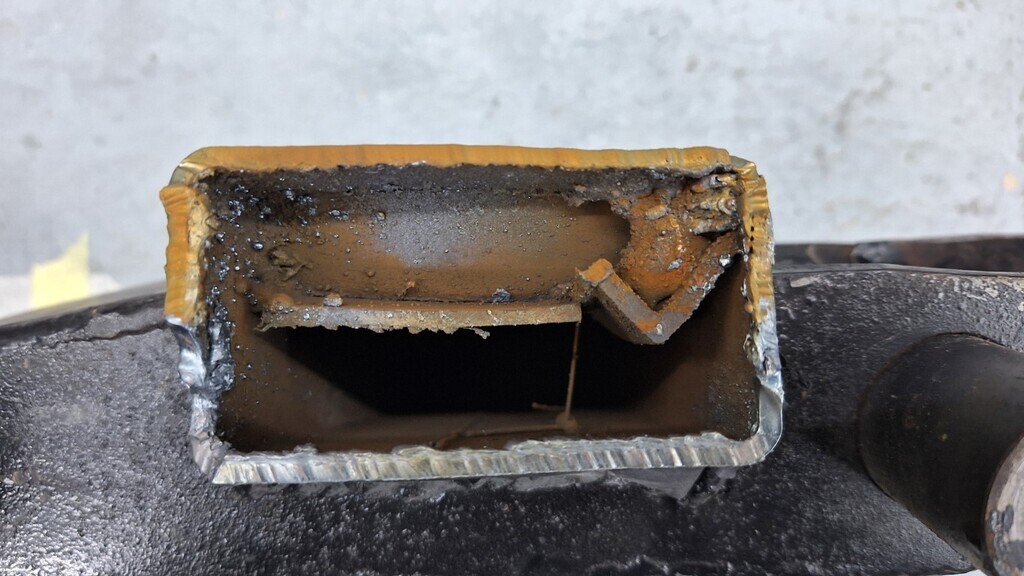
and then a bit fell off Apologies to Darkspeed for the next photos, I know he will sleep badly after seeing them  This is the utter bodgery where the 'pro hot rod shop builder' had 'notched' the chassis for the coilovers  I mean, FFS could he have made a worse job?? 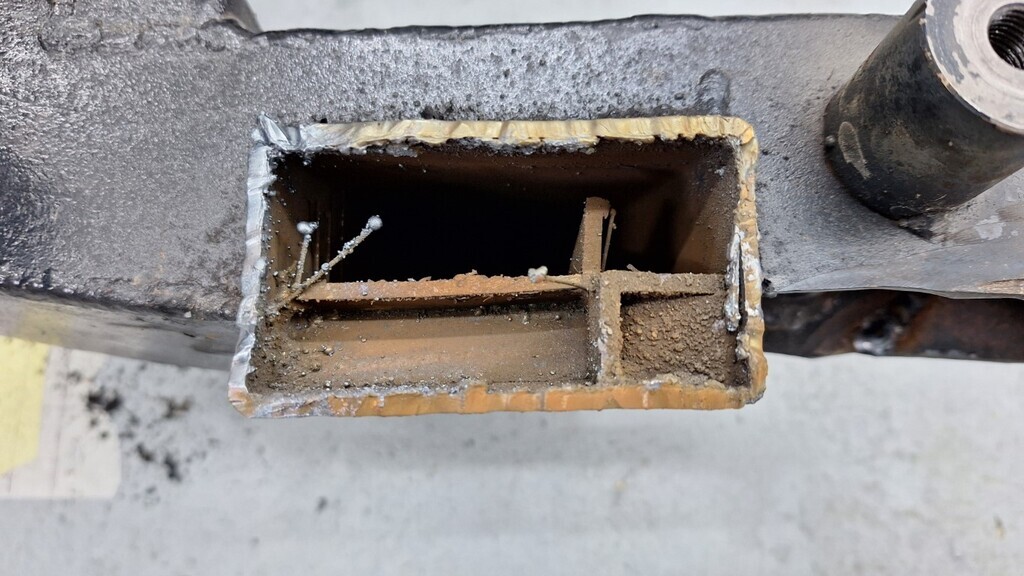 At least that abortion bit of fabrication is no longer part of the car. With that cut off, the new suspension was slid up to approx where it will fit, some more trimming of the chassis rails is needed but it looks to be a much simpler job to fit the new chassis rails than I thought, so thats a big win there. I'm hoping to have it all fitted and welded up up by the end of the weekend. (Tyres are just resting againt the hubs to get an overview)
 |
| |
|
|
|
|
|
|
|
That was an easy fix, added a locknut to the 90 degree fitting. 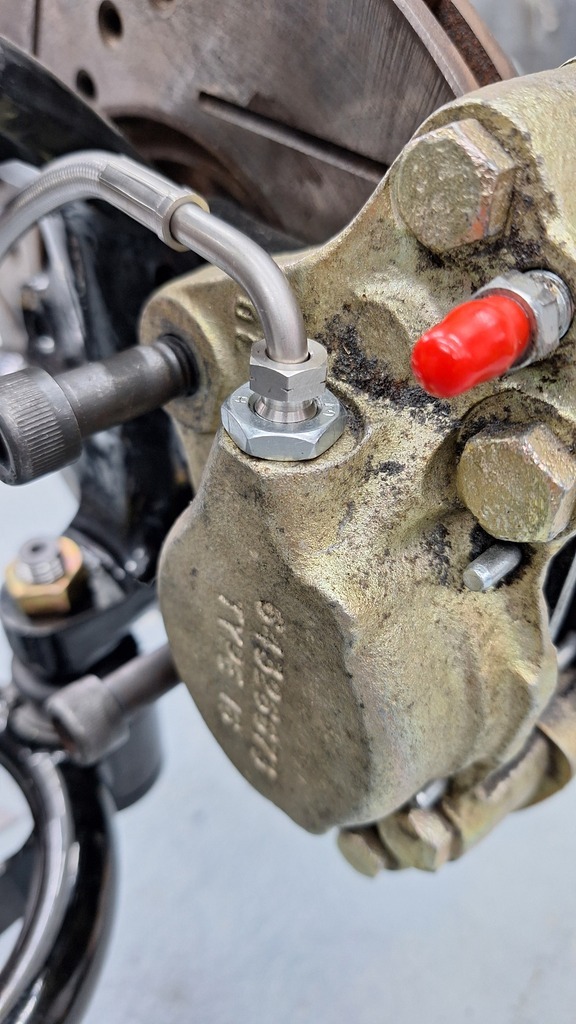 |
| |
|
|


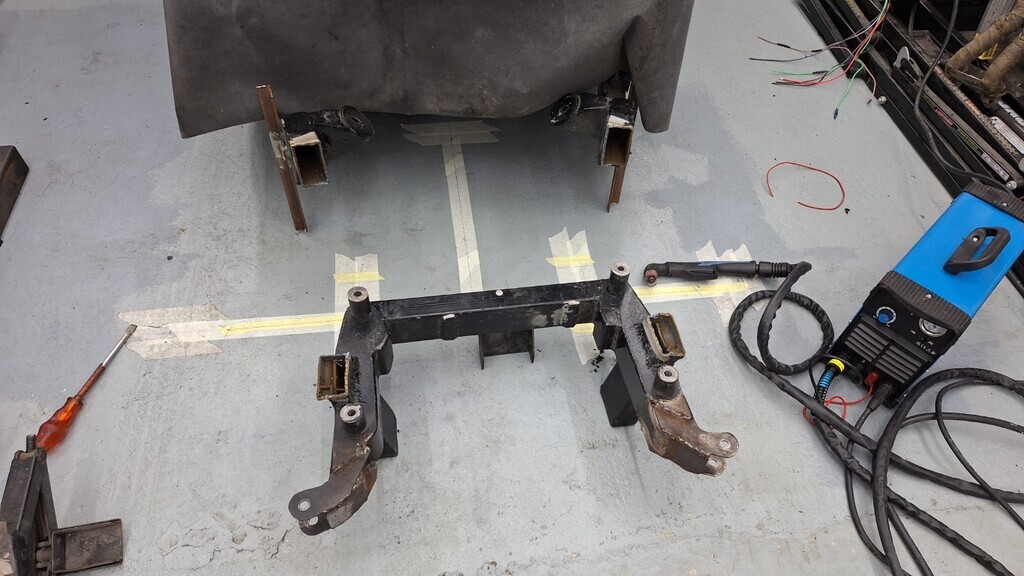
 This is the utter bodgery where the 'pro hot rod shop builder' had 'notched' the chassis for the coilovers
  I mean, FFS could he have made a worse job??