Seth
South East
MorrisOxford TriumphMirald HillmanMinx BorgwardIsabellaCombi
Posts: 15,543
|
|
|
|
Continuing where I left off, both rings were turned with a step so that the dishes would sit nicely on them and they were soldered together. 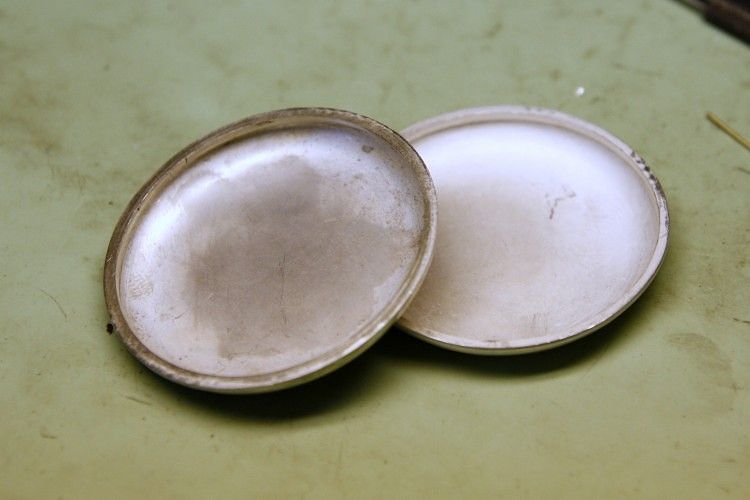 The back cover, the one on top here, has been turned at its edge to smooth off the join and radius the profile of the remaining section of the ring. The front cover has a note written on it to make sure I remembered to cut the hole in it before starting on its hinge which would make holding it more difficult.... 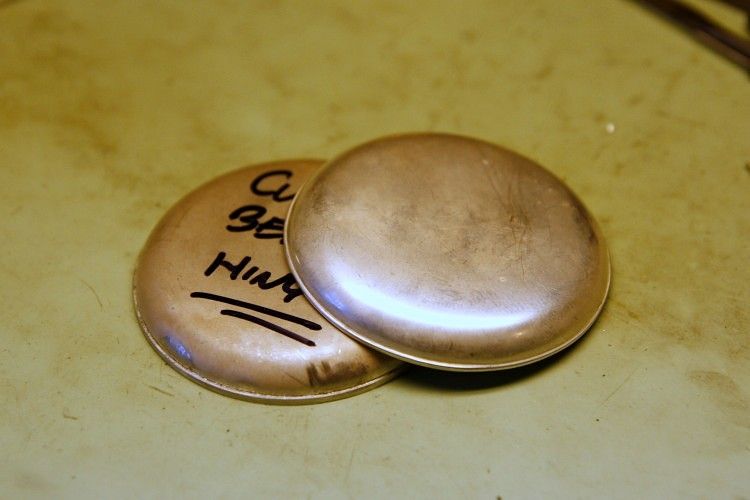 So that;s what I did next. The hour hand of this movement had a double head, indicating that it was originally in a half hunter case which is why that's the style of case I'm making. Full hunter cases have a hinged cover over the dial, half hunters have a hole in this cover so that the inner part of the hands can be seen without opening the cover. With the cover in the lathe to smooth off the outer band area I marked the centre and then used the hour hand as a guide to the scribe the size of the hole to cut out. 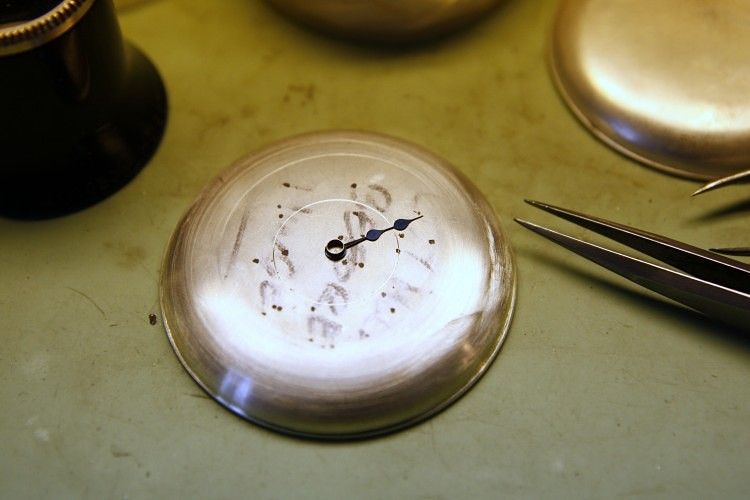 Then with it back in the lathe I cut the middle out. Then a slight recess was made with a small undercut to it to accept a glass. 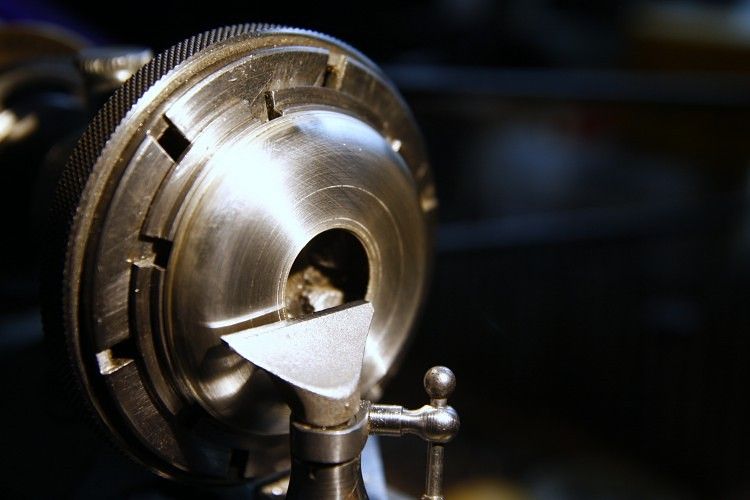 Half hunter cases normally have an inner chapter ring of minute marks and then the hour numbers engraved (and filled with a blue substance). I'm no engraver, and I'm not sure whether this case will end up getting these but now was also the time to at least mark the rings which could be deepened at a later date. Its probably easier to see them in this photo after a quicky polish. 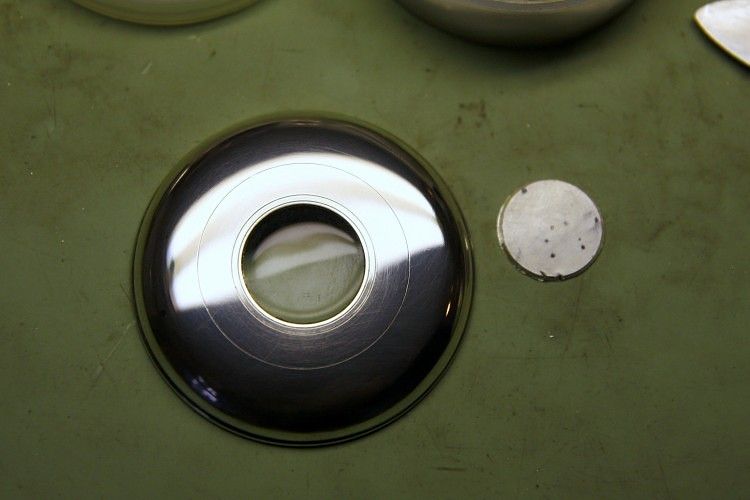 I've already done the hinging of the rear covers but didn't photograph it so will do that when I do the front cover. |
| |

Follow your dreams or you might as well be a vegetable. |
|
|
|
|
|
goldnrust
West Midlands
Minimalist
Posts: 1,889
|
|
|
|
This thread is awesome  Really love reading about all the engineering on this scale. Looking forward to seeing the finished watch case! |
| |
|
|
Seth
South East
MorrisOxford TriumphMirald HillmanMinx BorgwardIsabellaCombi
Posts: 15,543
|
|
|
|
Ta chaps. Over the holiday period I've been cracking on with thi to try and get it finished so it stops distracting me from paid work.... Here's how the hinging works. A groove is filed in both the cover and the central band so that they exactly match one another on position. Prior to this a small piece called the bearer is soldered in to the cover to support where the hinge will go. (I will be honest and say that the bearer is something I didn't really get right and later improved after the hinge was done on the front cover. I have since come up with a much better plan to make a really good fitting bearer but that will have to wait for case #2...)) 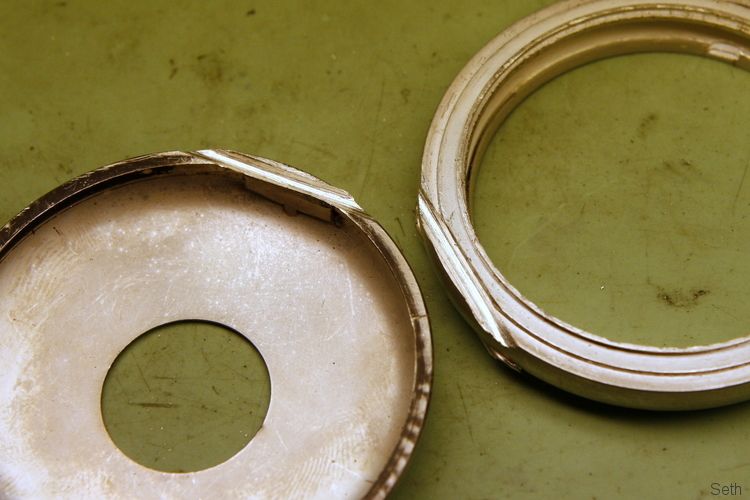 Two pieces of tube are made and positioned in the groove in the band for soldering. There is a traditional way of making jointing tube by forming it from a strip of sheet and progressively drawing it through dies to reach the right diameter. This is a very economic way of saving material but I do not have the drawing equipment nor is material cost significant unless I end up making loads of this sort of thing, so to make the tube I drilled pieces of wire. I found it possible to drill half way through from each end to give a good result. Drilling right through from one end was more prone to result in the drill wandering and give a rather eccentric tube. This is a 0.8mm hole through about 9 or 10mm length so a long small hole. The steel wire put through the two tubes allowed me to rest something on its exposed centre portion when soldering and make sure that the tubes stayed flat and in position. 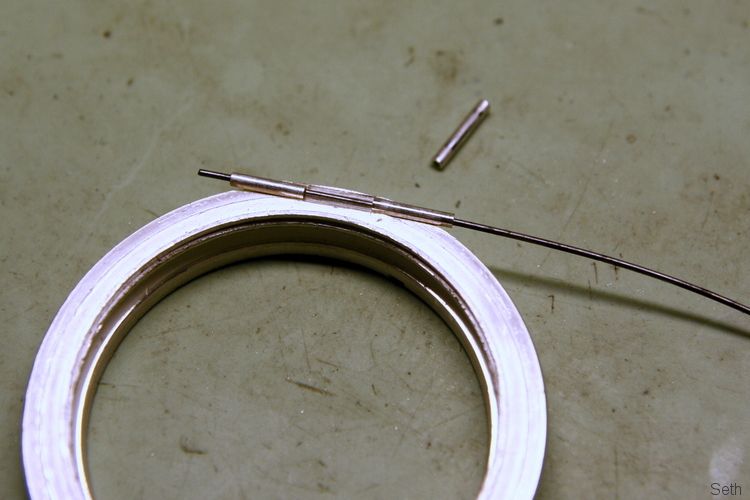 With those soldered, the centre tube of the joint could be made to length to fit snuggly between the other two. The position this had to occupy on the cover was carefully marked so that once it was soldered in place the cover would close properly. 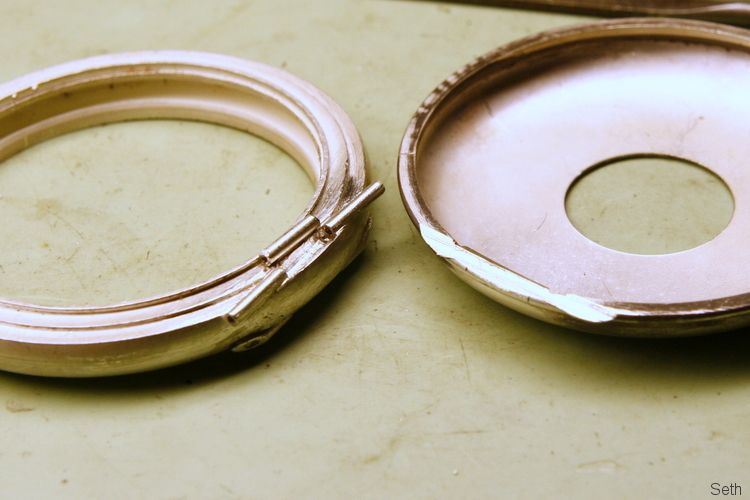 Photos are a bit scarce I'm afriad but here's what it looked like once both front and back cover hinges were done and the exposed ends of the tubes filed off and shaped. The hinge pins are temporary at the moment. 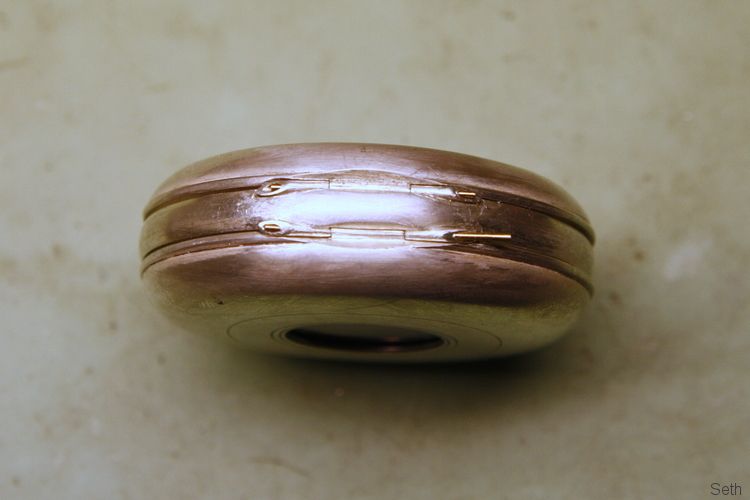 As can be seen in that /\ photo, both band and cover need some material removing to allow the cover to open. 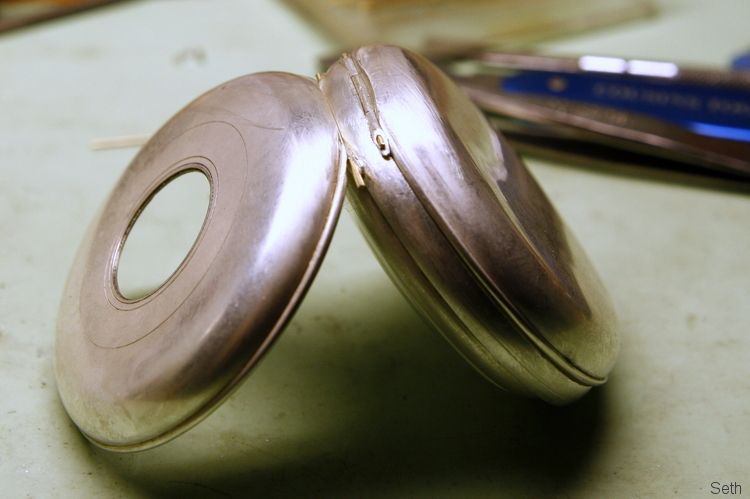 And front and back should open to the same angle, a little less than 90 degrees. I've been a bit conservative and may remove a smidgen more at some point to let them open a bit wider. 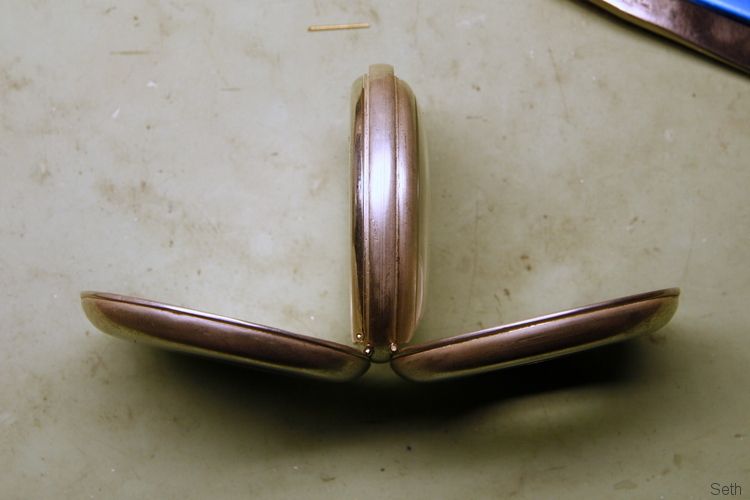 It was a big relief to get all the hinges done (there was the inner back too) without disturbing any while soldering the next. Now it felt like I was on to final details really. A hole was drilled in the band to line up with the winding wheels of the movement. A little to the right of where the winding stem will go into the movement you can see a small steel pin sticking down. This pin, when pressed, allows the stem to set the hands rather than wind the watch. This was a common method of hand setting earlier on with keyless watches before the more modern method of the stem clicking out to a setting position become universal. Obviously this pin needs something in the case band to activate it. Its position is marked on the case band. 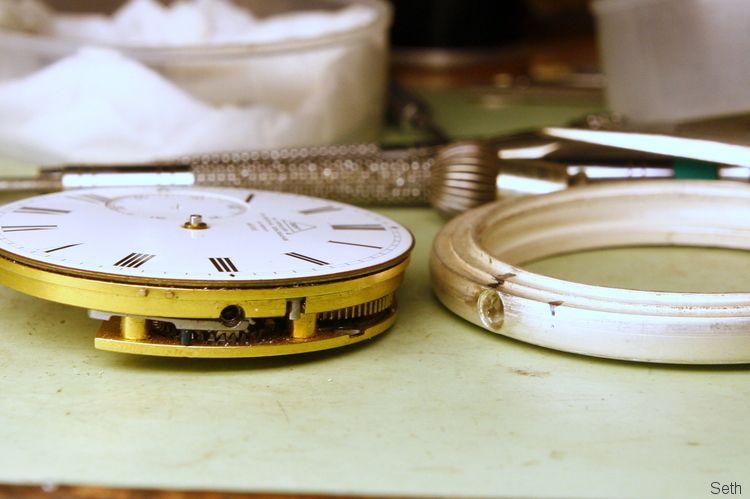 On the left of this next photo are the bits for the hand set pin coming together, the pin, a small tube and a D shape with a hole through it to accept the tube. (I was using remnants from the same wire as the bow was to be made from so I also bent that to shape so I had the left overs to work with.) 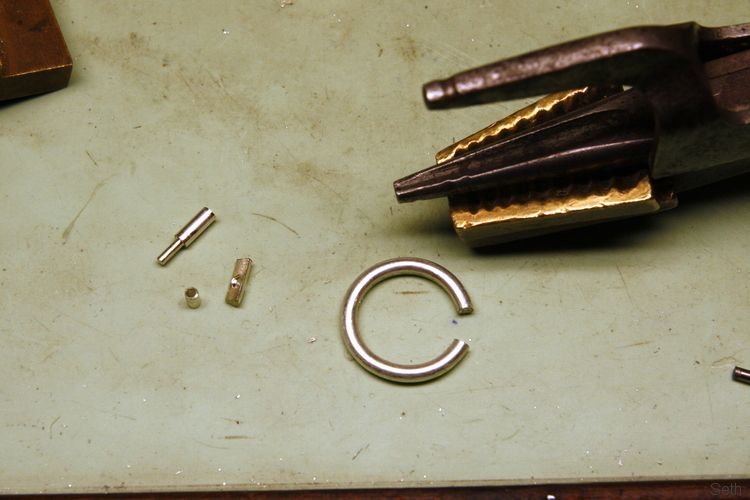 The small tube was soldered into the D shape and this was then turned in the lathe to the right sort of shape and a hole drilled into the case band. 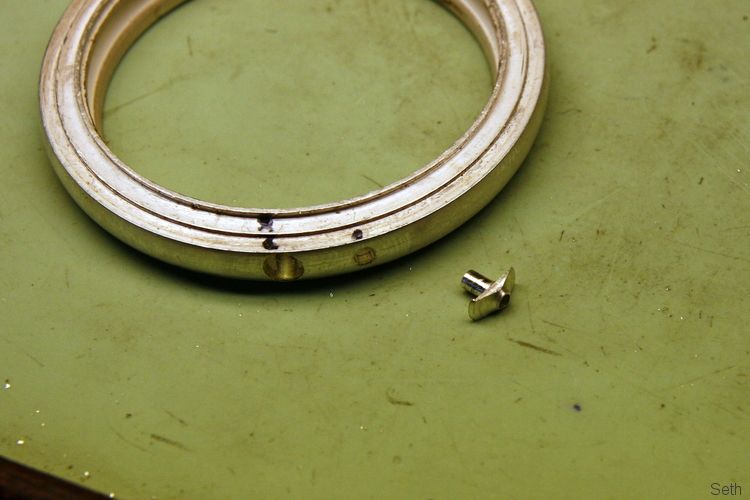 With it soldered in to place and tidied up a bit. 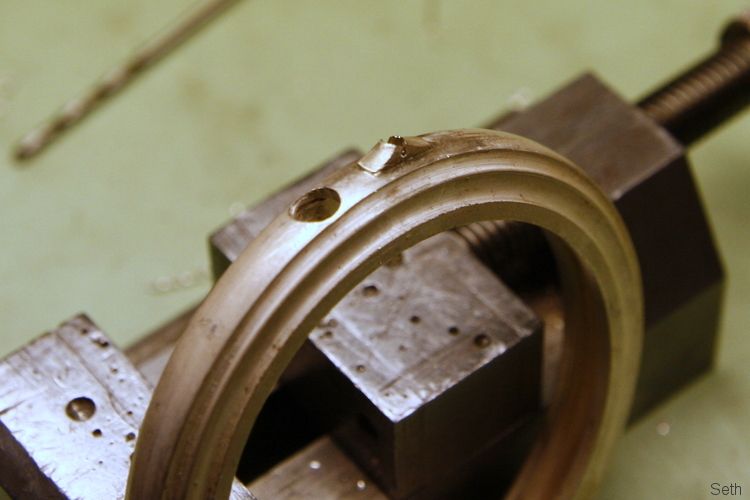 Having made a start on the bow I also started on the stem to which it fits. 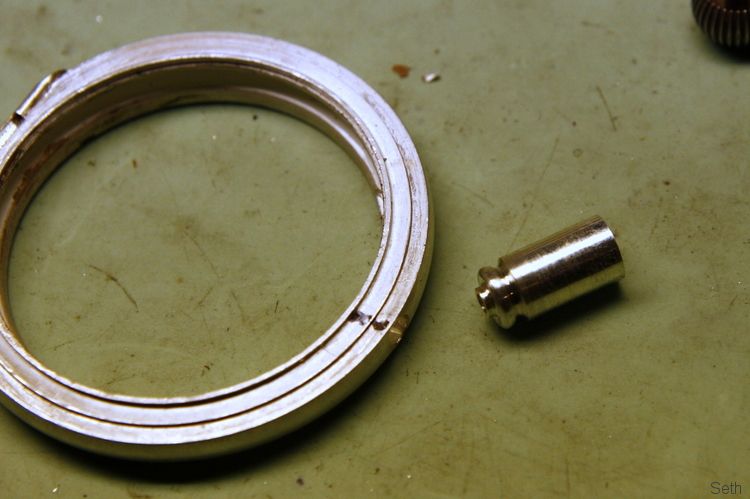 The ends of the bow were milled in a little device I think I've show once before. The stem was then marked for the holes which will accept these ends. 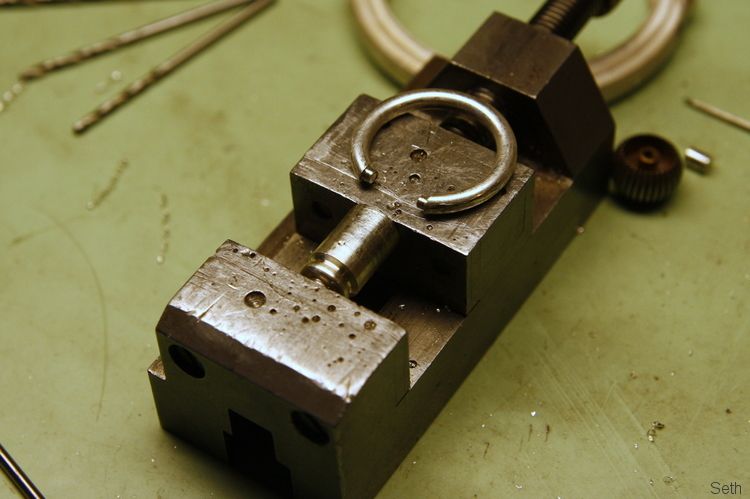 And that's where the photos run out... |
| |

Follow your dreams or you might as well be a vegetable. |
|
|
|
|
|
|
And that's where the photos run out... What? You can't leave us hanging like that! Have a heart, man.  |
| |
Last Edit: Jan 5, 2014 22:19:54 GMT by georgeb
|
|
Seth
South East
MorrisOxford TriumphMirald HillmanMinx BorgwardIsabellaCombi
Posts: 15,543
|
|
Jan 11, 2014 21:21:46 GMT
|
Sorry George! Cliffhanger not intended. Having already drilled the sides of the stem for the bow it was important it was fitted to the band in the right orientation so I used a brass 10BA screw and made a small sleeve nut sort of thing to be able to bolt it in place for soldering. 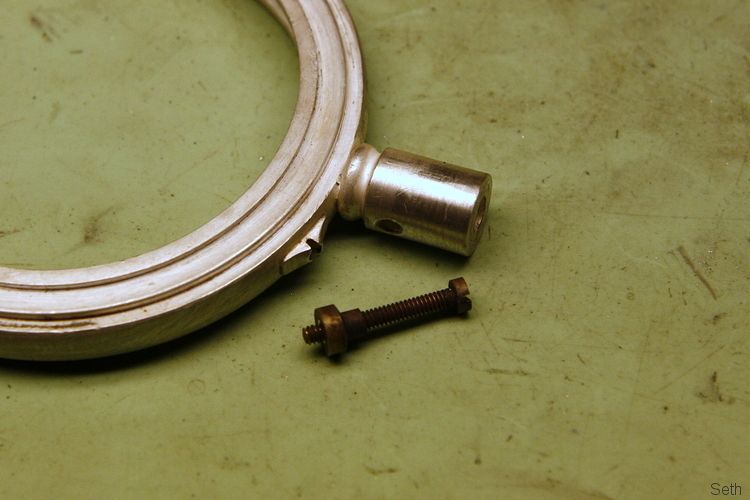 I also had to make the winding stem itself, to suit the parts in the movement and the case. The button is an old one from my parts stash. 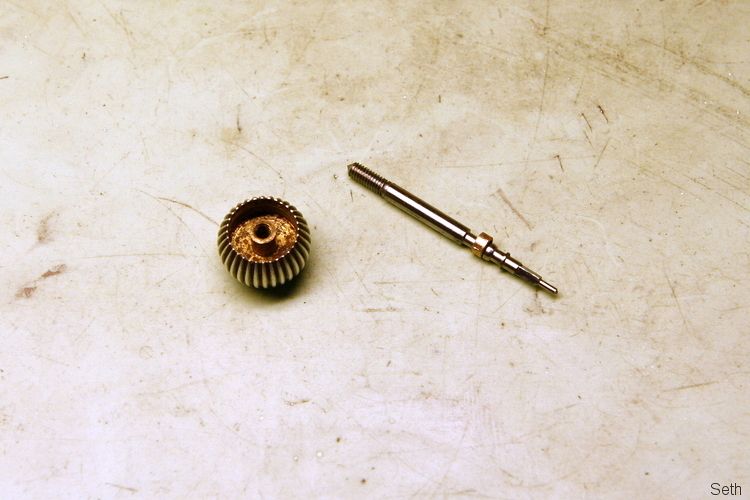 So pretty much the final thing to do was make the two springs that fit inside the band. One of these acts as a catch to hold the front cover shut and the other is the fly springs that pings the cover open when the button is pushed down. Both start out as a bit of steel. 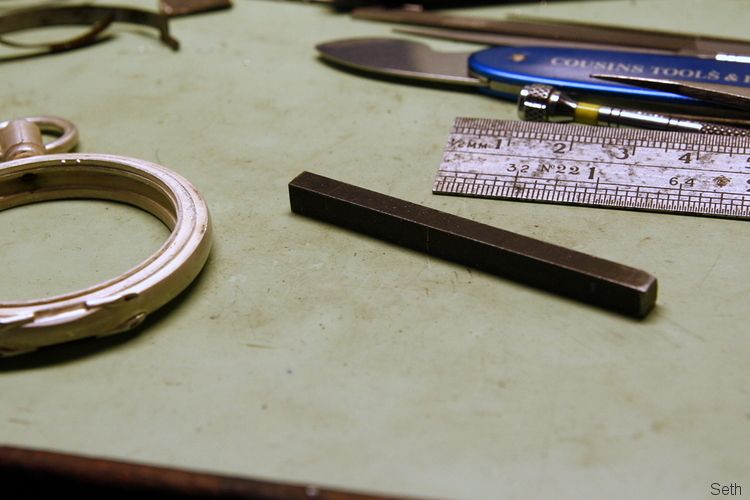 This is the catch, after initial filing. 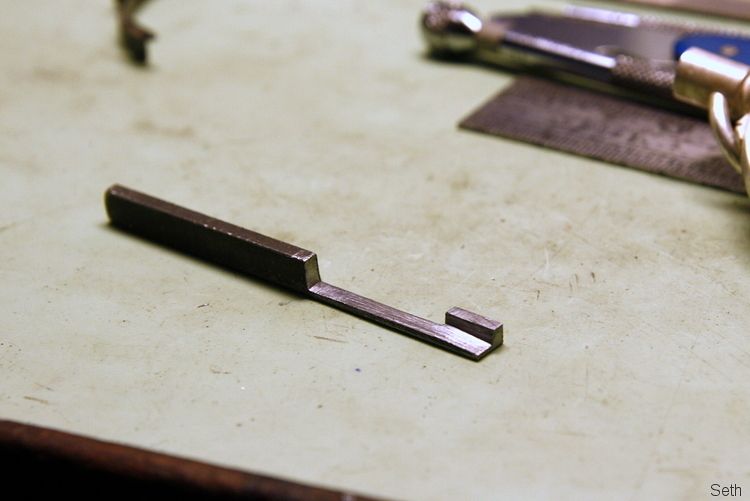 And the fly spring also once filed to shape. 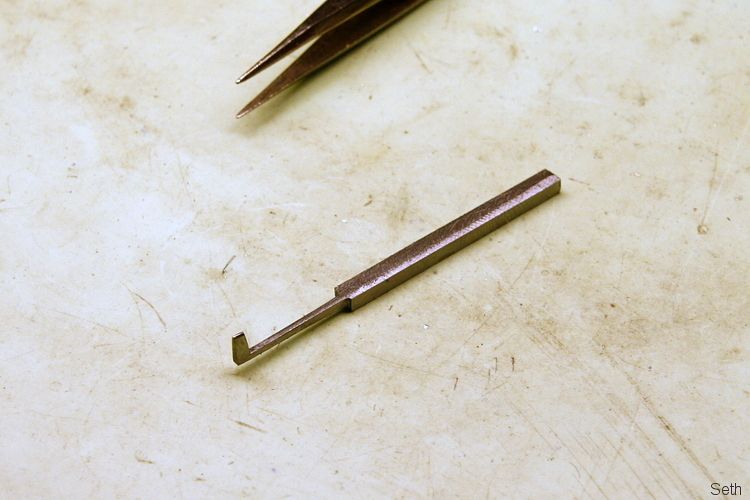 They both need to be curved to shape (I find this involves a lot of trial fitting and more filing here and there as necessary) then hardened and tempered. The colour is used ans in indication of temperature when tempering. 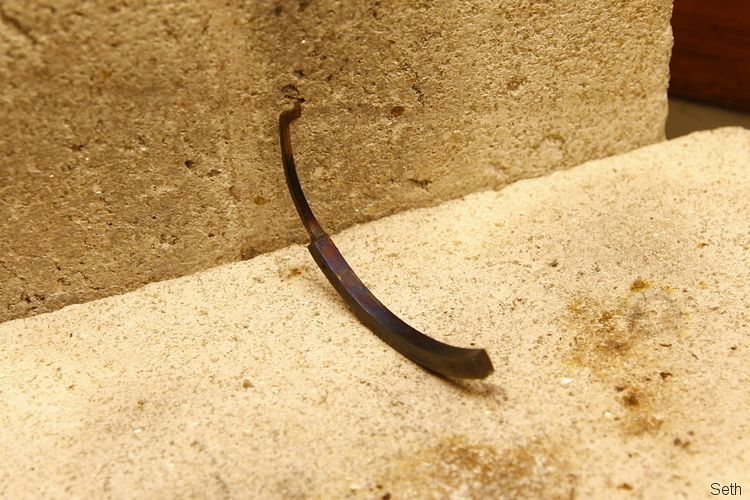 Here's both of them finished. They are retained in the case by a single screw each, the hole for which needed tapping before the heat treatment. 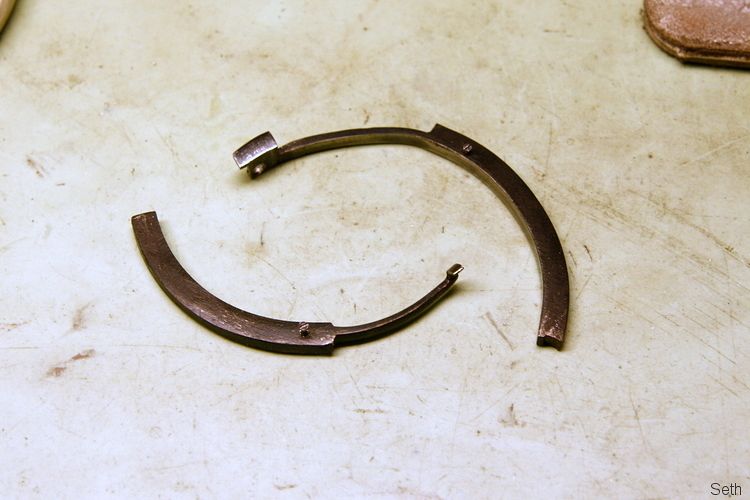 Clearance notches have to be made in the case band and the bezel to clear the springs. The catch is in place and the fly spring pokes out of the little cut out close to the hinge and acts on the bearer soldered in to the cover when doing the hinges. 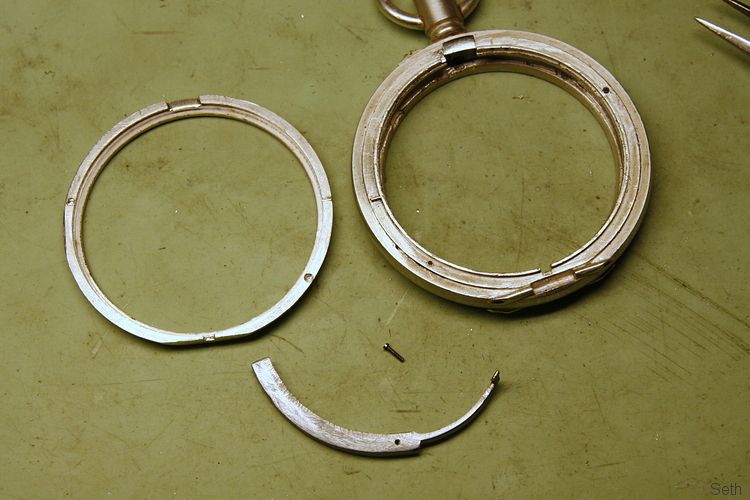 So I eventually ended up with this collection of parts needing polishing. 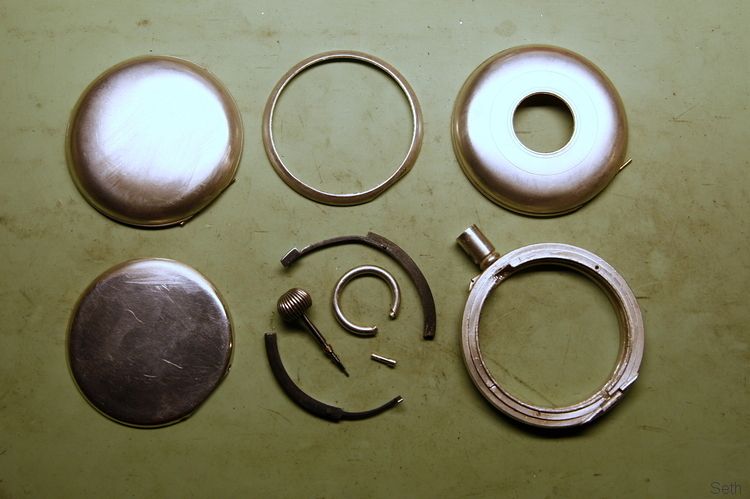 And after some polish and fixing together (still with temporary hinge pins until I do a proper final assembly) 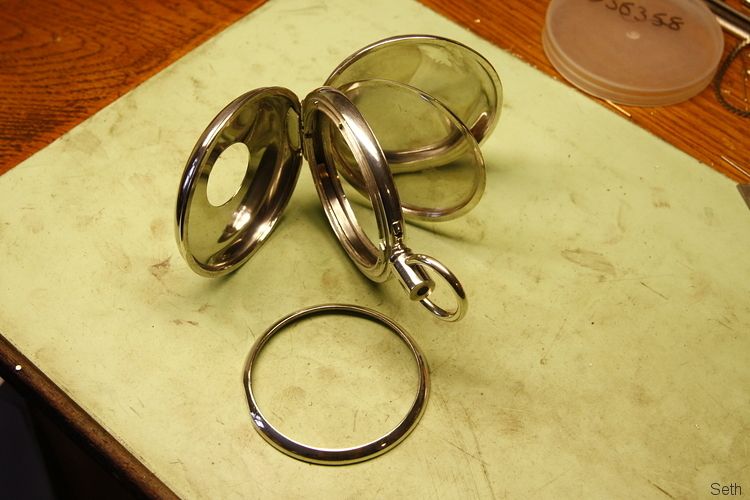 Finally I stripped and cleaned the movement as repetitive handling while trial fitting things had got it a bit grubby before putting it all together as a functioning watch. 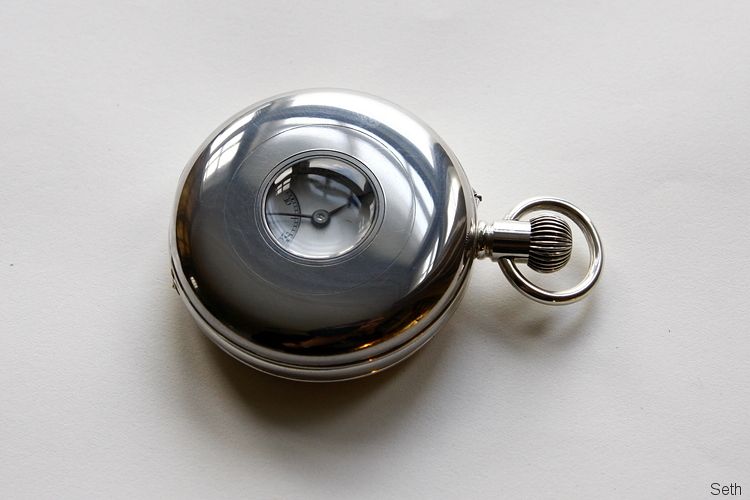 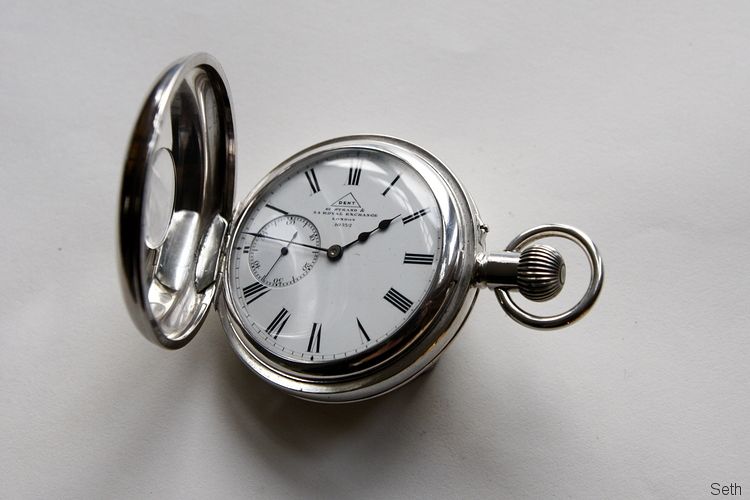 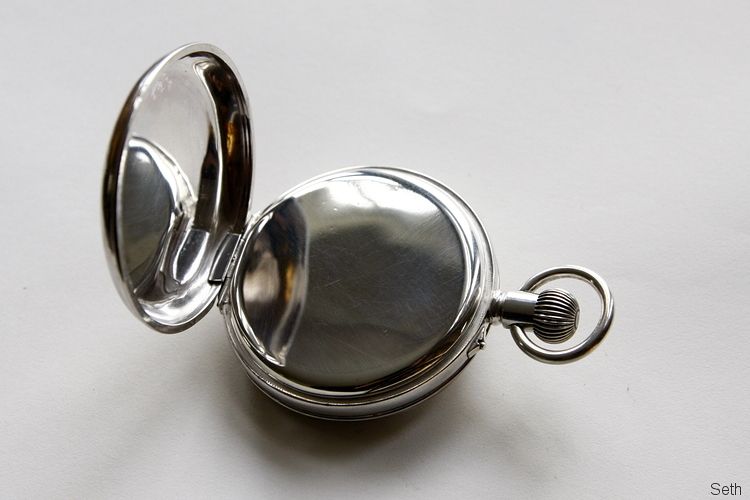 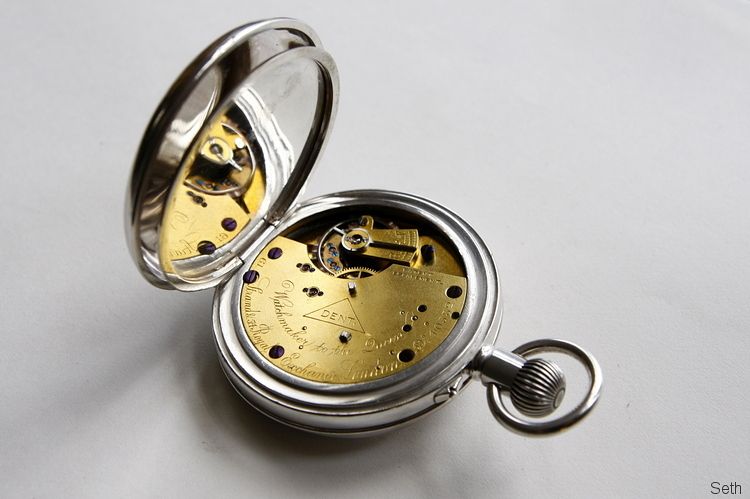 There are some things I am not 100% happy with but the main purpose of this exercise was to come up with and prove various methods that might be adaptable to making other types of cases. Overall though I am dead chuffed at how it has turned out especially as it was a first attempt. As a bonus, after only very minor adjustment, the movement (which dates from around 1895-1900) is keeping time to within a few seconds a day too. |
| |

Follow your dreams or you might as well be a vegetable. |
|
jamesv
Part of things
 
Posts: 207
|
|
Jan 11, 2014 23:35:00 GMT
|
|
truly impressive stuff, I have been considering building myself a watch recently, I bought a well known Swiss brand with some inheritance I had, and adore it, but would like another alternative to wear, though when I say build, I mean screw together commercially available parts, not hand make them! Once again, stunning, inspirational stuff...
|
| |
James,
Mk1 Golf 16v ITB'd, RS's, TT interior - in bits
Affalterbach tweaked CLK - commuter mobile
And a couple of GSXR's
|
|
|
|
|
|
|
Seth, that thing looks incredible!!  Well done that man! What metal were the cases made from again? In a lot of the shots they had a goldy kinda colour but the polished silvery look at the end is gorgeous. I think the shape is really nice as well. AWESOME |
| |
|
|
|
|
|
|
|
|
|
|
|
Jan 12, 2014 16:24:30 GMT
|
Lost for words at your skills...  |
| |
Ich habe kein Geld!
|
|
|
|
|
Jan 12, 2014 19:09:30 GMT
|
What he said. And him. A truly beautiful piece of work. |
| |
1989 Peugeot 205. You know, the one that was parked in a ditch on the campsite at RRG'17... the glass is always full. but the ratio of air to water may vary. |
|
Seth
South East
MorrisOxford TriumphMirald HillmanMinx BorgwardIsabellaCombi
Posts: 15,543
|
|
Jan 12, 2014 20:24:56 GMT
|
|
Thanks all.
Brunotheuno, it's all silver - there's no way I could afford to do it out of gold! And no point doing it out of any cheaper 'base' material as the finished item would not be as special - I'm intending to get it hallmarked. I've probably spent around £60-70 on materials. Even just 9K gold is around 20 times as expensive and 18k gold is twice as much again.
|
| |

Follow your dreams or you might as well be a vegetable. |
|
|
|
|
Jan 13, 2014 11:29:34 GMT
|
I though that was the case. Its amazing the difference in the colour of the metal when its all polished. Thats a proper heirloom you've made there.  Awesome work.  |
| |
|
|
dw1603
Part of things
 
Posts: 591
|
|
Jan 13, 2014 17:40:43 GMT
|
|
Usually when I'm following a build thread there is a vague sort of "I can do that" thing going on in the back of my mind, hopelessly optimistic I know, but theoretically feasible. In this case I am totally awestruck, I'd love to possess just one tenth of your skills, but I know it is never going to happen, I definitely belong to the Bigger Hammer school of engineering. Doesn't stop me admiring the hell out of your talents though.
Regards, Dave
|
| |
|
|
Seth
South East
MorrisOxford TriumphMirald HillmanMinx BorgwardIsabellaCombi
Posts: 15,543
|
|
|
|
Thanks Dave. There are plenty of other threads on here tackling stuff I'd never dream of attempting. Also thanks to people that voted for this thread in the awards. I'm glad you find this stuff interesting to follow.  |
| |

Follow your dreams or you might as well be a vegetable. |
|
toreno
Part of things
 
Posts: 385
|
|
|
|
|
beautifull watch really nice wish i had your skill
|
| |
|
|
|
|
|
Jan 15, 2014 20:23:30 GMT
|
|
I've been quite rubbish over the last couple of years and not really read or posted much on here. But after the awards last night I thought I'd hunt the winning thread down and have a read. I'm blown away Seth, that is a phenomenal talent you have there. The watch case you've just built is amazing, you look at the last picture and think "its just a couple of bits of domed metal" but the process before is amazing. A real insight into a highly skill craftsman. Bookmarked for the future.
|
| |
|
|
|
|
|
Jan 16, 2014 22:02:39 GMT
|
Having worked in mechanical engineering for over 20 years and just reading and enjoying the last 5 pages of this thread I now feel .... well , a bit rubbish really !  lol Absolutely amazing stuff Seth , I don't know what else to say  |
| |
You've been telling me you were a genius since you were seventeen ... in all the time I've known you I still don't know what you mean !
|
|
Seth
South East
MorrisOxford TriumphMirald HillmanMinx BorgwardIsabellaCombi
Posts: 15,543
|
|
Jan 25, 2014 22:55:42 GMT
|
Thanks everyone. I am lucky in that I enjoy what I do and while it is rather specialist, figure that others with a mechanical bent might also find it interesting. Earlier in the thread I showed how I replaced a hole jewel in a watch, the jewels essentially being low friction bearings and better than steel pivots running in plain drilled holes. Jewels are also used where there is a sliding action, again to limit frictional losses. A little while ago I had to make such a jewel of this sort. It was to be shaped as a right angle triangle in cross section and is fitted and wedged into a round hole so that the longest face is essentially the diameter of the hole, as so. In this case the hole is 0.5mm diameter.  I started off by gluing the rough stone (a small sapphire) to a brass rod with shellac, and holding it by hand against the grinding disc I'd bought for the job. The foam make-up applicator was used to apply water to the disc to help with the cutting without making a mess! 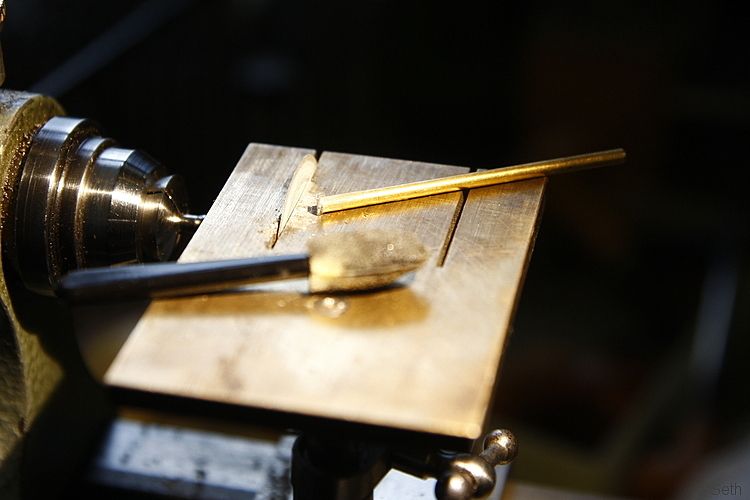 This worked fine for chopping the stone up but I was struggling to reliable hold the stone flat when shaping and polishing and was suffering from chipping on the corners so had to come up with a better way. I decided to make a small adjustable jig using some brass angle and strip I had. 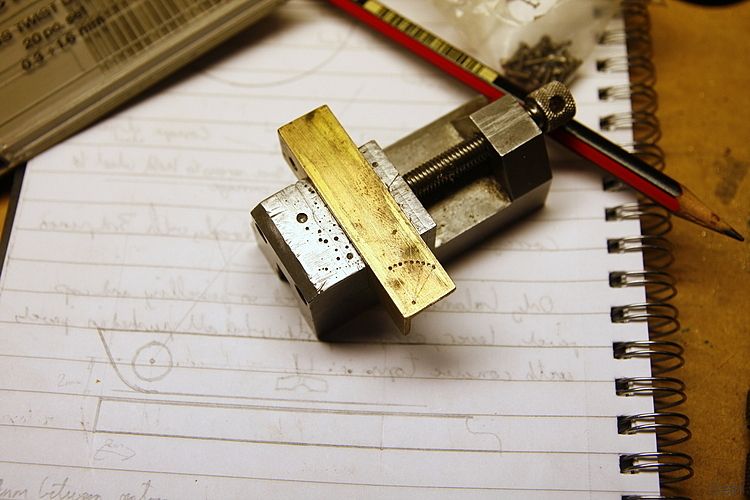 I was going to file all those small holes in to a slot but then decided that for this job I only needed particular angles so only drilled out the 15, 30, 45 and 60 degree holes to suit the screw. I can always open up the slot at a later date which would allow me to set any angle with a protractor. 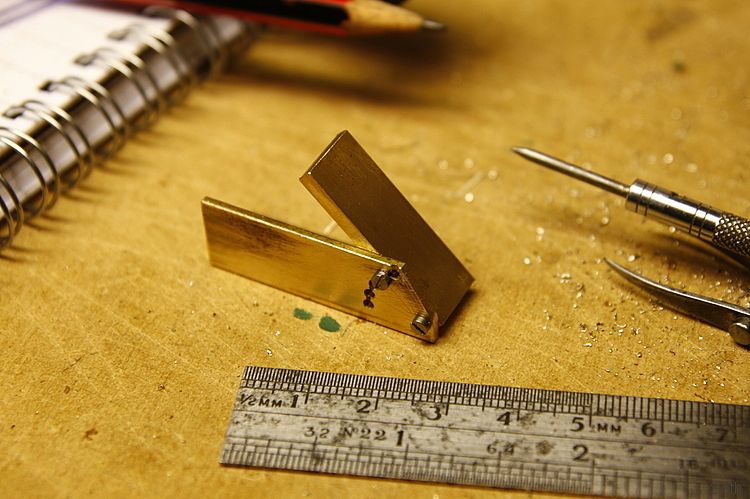 So, the jewel can now be shellac'd to the edge of the adjustable plate.... 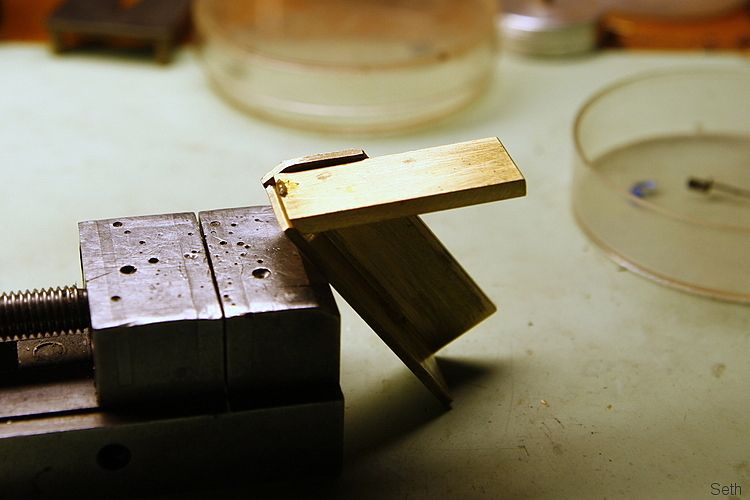 ..so that it sits flat and square and just overhangs the edge. 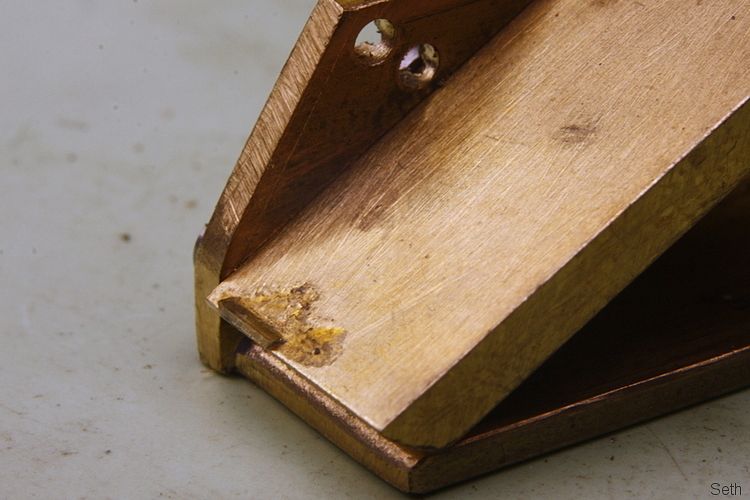 Here it is with that final back edge (the short side of the triangle) being polished. I made up a couple of brass discs that could be chucked in the lathe and polishing paste of different grades applied to each. 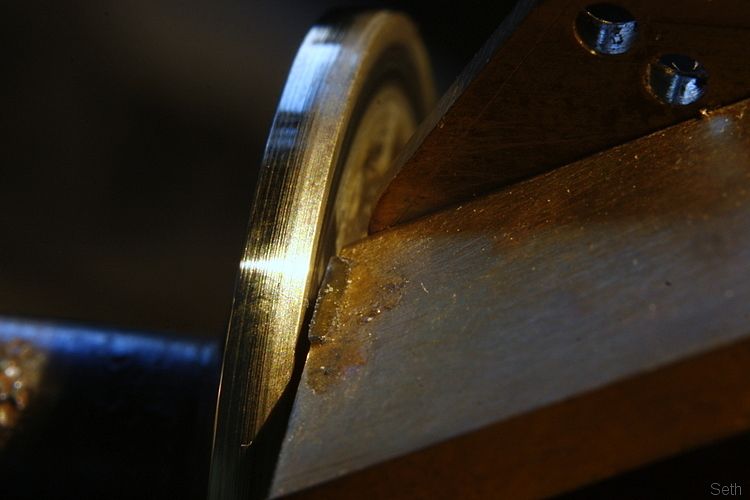 With the triangle shape finished the jig was set 'flat' and the ends gently tidied up. 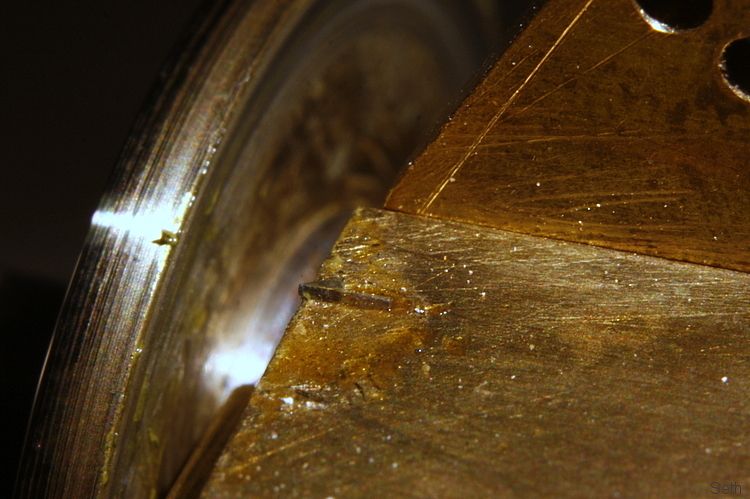 Here's a first trial fit in the hole with a small wedge. Excuse all the dirt and curse word but this is about the best image I managed to get showing the triangular section. Anyway, this enabled me to prove its function in the watch 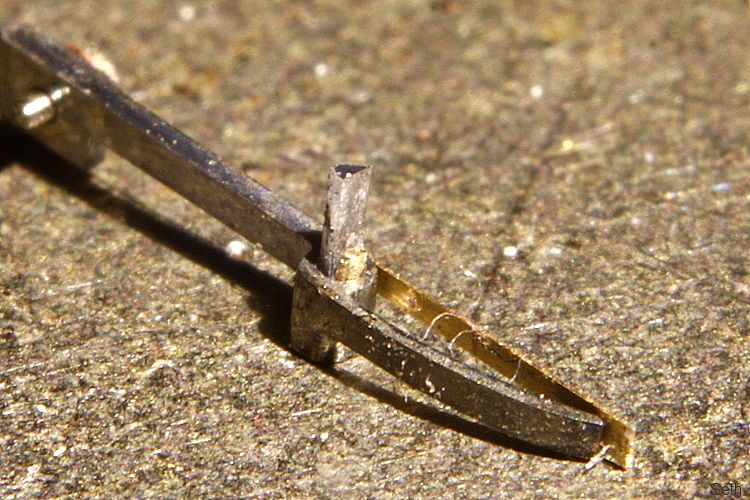 Now knowing that it would work OK I set to arranging its proper fitting. It was positioned in the hole at the right angle and a longer taper pin was filed flat to act as a wedge pushed in from the top. I then put the component upside down in a pair of self closing tweezers and placed a tiny chip of shellac on the bottom of the hole by the wedge, as can be seen in this next photo. Heat was applied to the tweezers so that it would be conducted on to the delicate watch part and melt the shellac which flowed in to the hole and glued everything in place. 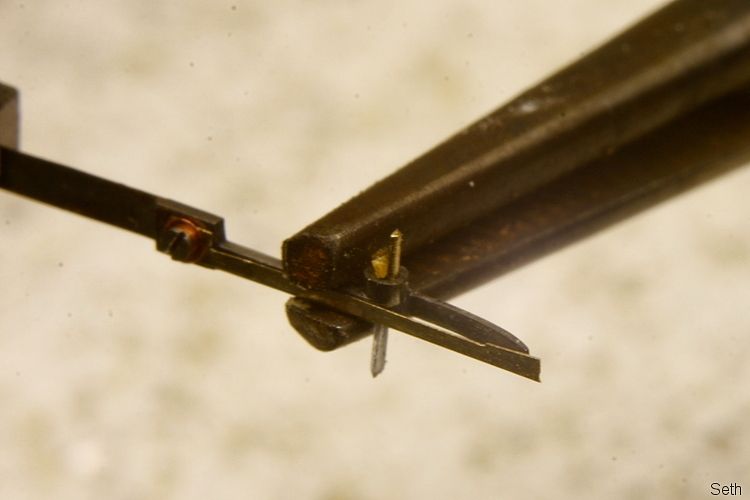 The excess length of wedge was then trimmed and filed off flush with the main component so as not to interfere with anything. And here it is doing its job (actually this is when I mocked it up with the temporary wedge - the final wedge was neater....) 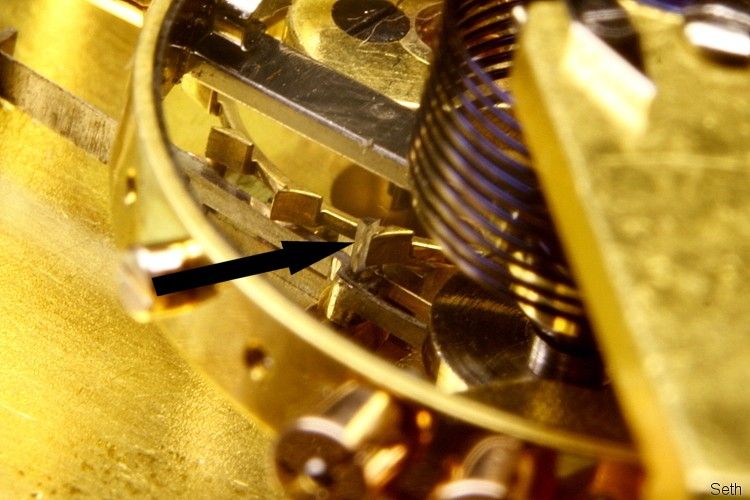 The jewel prevents that toothed wheel from rotating by standing in the way of the tooth. When the correct moment comes it is moved sideways, sliding along the face of the tooth until the tooth is free to carry on its way. At that moment the jewel is sprung back to its rest position and the next tooth comes round and rests against it. This happens 5 times every two seconds in this type of watch. The angle between the tooth and the jewel is set such that when at rest the force being applied by the tooth on the jewel is helping to keep them engaged such that as the jewel is moved sideways to 'unlock', the wheel will actually recoil by a barely perceptible amount. In watch terms this is called 'draw' and helps prevent the unlocking to occur at the wrong moment if the watch gets knocked. |
| |

Follow your dreams or you might as well be a vegetable. |
|
|
|


 Really love reading about all the engineering on this scale. Looking forward to seeing the finished watch case!


