Up early this morning to get started on the other door and shut.
Had the door off quickly and started prepping the metal.

I used one of the vinyl brushes that I think TonyBMW recommended on here to strip the paint back to bare metal.

I realise now this is what I should have done with the other door, but too late. POR15 rust killer spray jobby was liberally applied to one of the corners as it was a little crusty after a cleanup. It doesn't hurt to apply it just in case as their is some oxidation starting.

Perfect example was the door shut, which had some rust veins cob webbing around a little as the paint was removed. A pillar was perfect tho.

Etch primer went on loads better this time. I'm getting the hang of the spray gun now, and very glad I decided to do this myself rather than paying a body shop!


Colour coat went on smoooothly

and I even remembered to do the front of the hinge plates this time too! I hadn't quite given them enough colour coats on the other side so the colour/metallic was a little light.

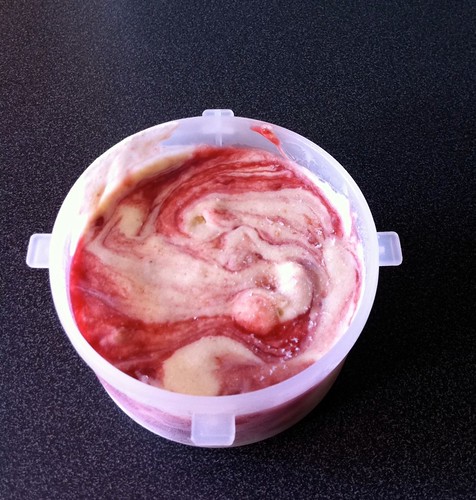
While all the lacquer was curing, beautiful warm day for that, I popped the wheels out to get them all to the same stage ready for a coat of black paint behind the spokes. Hadn't really eaten much today so got a tub of the strawberry cheesecake ice cream I had made last night out in the sun.

And my nephew came out to admire the car too!

I'm going to make him a little car in a few months, hoping to get an electric drill for the motor


And yes that ice cream is damn nice!

I picked up 10 aluminium oxide bevel brushes recently so started off with number one on the wheels. I found that if you're gentle and very slow you can really make them last!
So... four wheels in various states of polish, angle grinder, pair of gloves cos the alu oxide gets eeeverywhere, and the 10pads!

Slowly did all the outer dish and as the brush had worn a little, started to get into the centre. The brushes are excellent in that you can wear them down carefully to a shape you need for a particular area. The centre was just such a spot.
After one brush, they looked pretty good!

As you can see, the centre came up well with some gentle encouragement.
With the last remnants of the brush I ran round the main dish again. Far easier with the wheel vertical! Looking good.

The brush, however, wasn't looking so good! Haha!

Time for number two!

I did the second level of the dish with a new brush as I needed the reach, and then gave everything a slow once over again taking care to get the lip as good as I could!
Here's all four!


I'm thinking it's probably best, now that they're all at the same stage, to spray what's needed black and then give them all a final polish with the mop and wax!
Impressed tho.
One thing that is worrying me, are the sleeves in the stud holes.

Most are in pretty bad shape. One's even hexagonal! Are these easy to whack out and replace and if so where do you find replacements?
With the wheels done I had one of those moments where I turned round and noticed something I'd forgotten staring right at me!
Damn!

Fuel filler hasn't been painted! No time to waste!

Wouldn't be needing the lock as have cunning plan involving magnets for the cap, so that came off and thanks to some inspiration from the one and only MysteryMachine in his
Teenage Dirtbag thread I filed the hole out to fit an appropriately sized washer (thanks Bruce)

Filler hose unscrewed and prepped for primer.


Through colour coat

...and lacquer

I've been amazed since buying those zinc yellow bolts just how many parts on the Galant seem to be zinc yellow finish!


It'd be nice to see if I could get original replacement parts for these as cleaning them up to original standard seems to be impossible. The zinc yellow just doesn't want to clean up. Might see if the guys in New Zealand might be able to source some

That's all for now! I've got to try to find some suitable calipers for my brake discs before the next Area52 Play weekend so we can get some measurements and hopefully Grunty can machine some caliper mounting brackets for me!
Until next time

Chris!


 [*]
[*] [*]
[*]


