bstardchild
Club Retro Rides Member
Posts: 14,965
Club RR Member Number: 71
Member is Online
|
|
Feb 28, 2008 11:39:04 GMT
|
Just been doing some catching up and bloody hell these things rust like 60´s and 70´s stuff. They do unfortunately - and it's never helped by the patch on patch approach that has frequently been used to get the cars thro an MOT. Some cars seem to suffer more than others - but I guess that's not uncommon for any marque Another ABS member has picked up a 3.0E recently and he was prepared for a weldathon as he bought it unseen from ebay as a non runner to be used for a track car project. It's now stripped down to a rollingshell and everything is perfect with just two tiny areas that need a quick cut out and section replaced!!!!! The car cosmeticaly is a shed with poor paint and interior but none of that matters as it's going to be caged and will get a repaint..... What Roddy took on was probably a very poor shell to start with but I'm glad he's sticking with it even though he could have taken other options |
| |
|
|
|
|
|
|
|
Feb 28, 2008 12:18:42 GMT
|
I understand completely OB and you've more or less read my mind. My garage is strewn with the bits I've cut out so far for referrence, paper templates and off cuts of steel and cardboard!!  I do like your idea about the box section in the sill though, I think I might just do that. Gonna tackle the front end first though and work my way back. The (slightly) annoying thing is that I'm going to have to do everything twice as the other side of the car's in the same state all the way from front to rear!!  Know what you mean, i thought it was only me. i love getting stuck into stuff like this but when i have to do it again on the other side i tend to slow down a bit. MRJ´s doing a Passat in similar condition, and i spent best part of four years welding up a rotten Splittie and we keep getting asked whether we are sane or not... I just smile and get the angle grinder going... oh and i´m sure you´ll sort it all out! ;D |
| |
|
|
mrj
Posted a lot
  
Posts: 1,662
|
|
Feb 28, 2008 19:44:22 GMT
|
MRJ´s doing a Passat in similar condition, and I spent best part of four years welding up a rotten Splittie and we keep getting asked whether we are sane or not... I just smile and get the angle grinder going... oh and i´m sure you´ll sort it all out! ;D and this is it for me; people telling me to scrap it was the start of the project with the passat; a friend of me who has a body shop and is used to work on stuff like 300 SLs told me after 30 seconds that i shouldn't do it. Of course it really doesn't make sense, but this is the challenge for me. It would have been much easier to buy a better car of this period for a fraction of the money it will cost to put the Passat back together, but that's boring in my opinion... |
| |
- 1971 VW 1600 TL Fastback
- 1978 Passat GLS Variant
- 1980 Audi 100 5E
- 1981 VW aircooled panel van (sold)
- 1983 VW Jetta Mk.I
- 1984 VW Polo Coupé
- 1984 VW Passat hatchback
- 1987 VW Passat Variant
- 1987 VW Passat hatchback
- 1988 VW T25
|
|
bigrod
Posted a lot
  
Posts: 1,654
|
|
|
|
After another bit of a layup due to work commitments over the last couple of weeks, I got a little more done last night. I had a revolutionary idea!!!! Cardboard inner wings!!!!   ;D 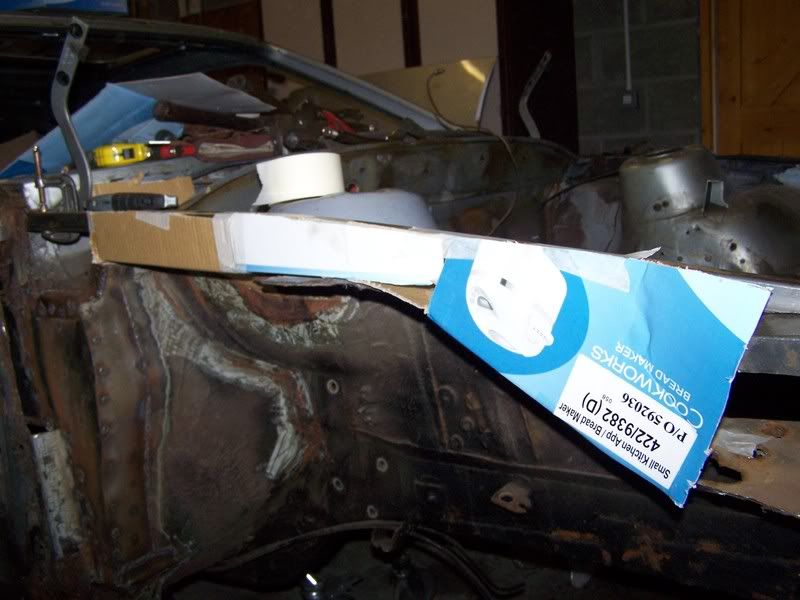 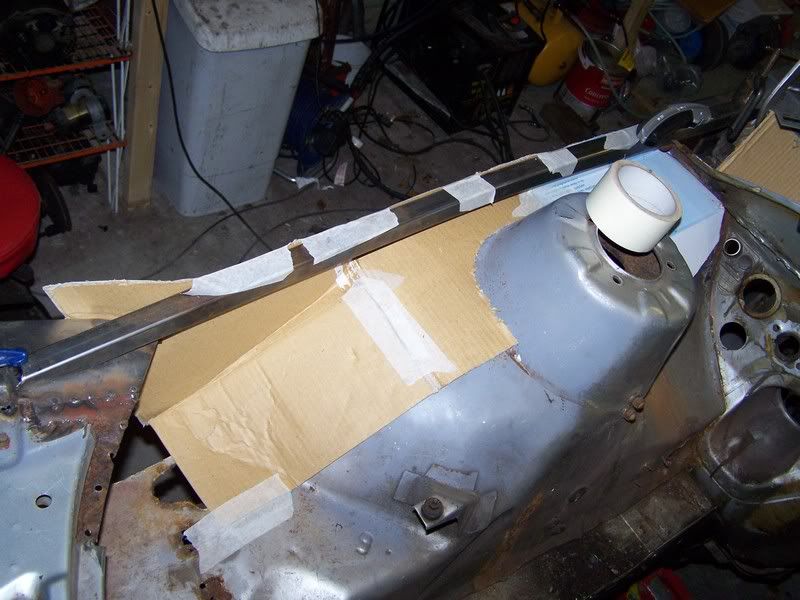 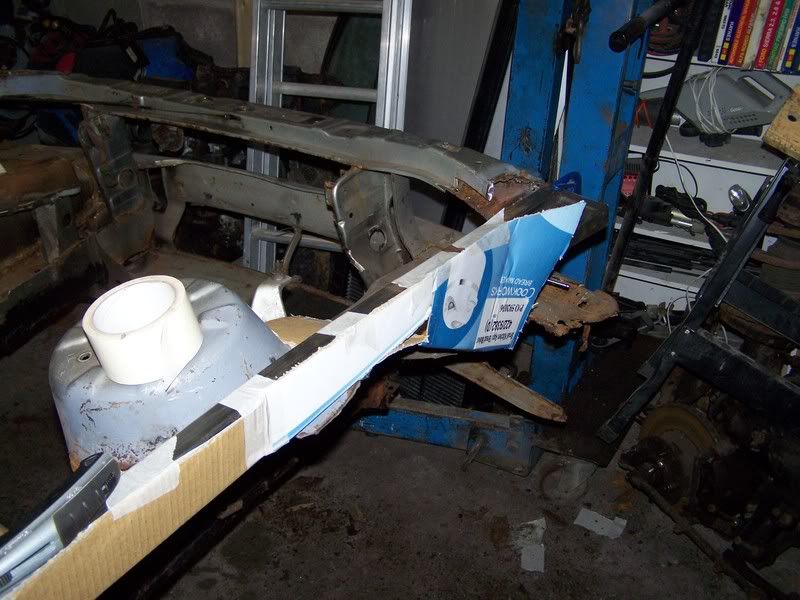 Much easier to replace than the standard items and probably just as durable!!! ;D The offside strut top is as near as dammit in the right position judging by the measurements I got from PheonixC's post on another forum, but the nearside one's going to need a bit of persuation when it comes time!  I had hoped I might be able to make the repair out of one continuous piece, but I reckon it's going to have to be done in at least three sections!  Anyways, I'm mindful that getting the panels aligned wehn it comes time will, shall we say, be a challenge. So I thought it prudent to offer up the wing and bonnet to check how they fit so far. (Bearing in mind nothing's permanently fixed yet.), Is that a normal sized gap between the top of the light unit and the leading edge of the wing/bonnet? (The bonnet's not sitting right as the trailing edge was perched on a 'G' clamp holding the box section in place.) 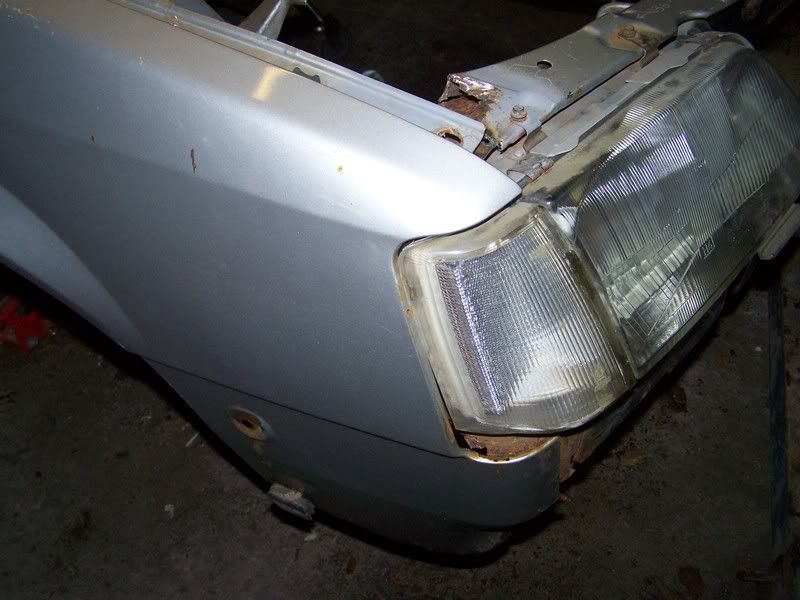 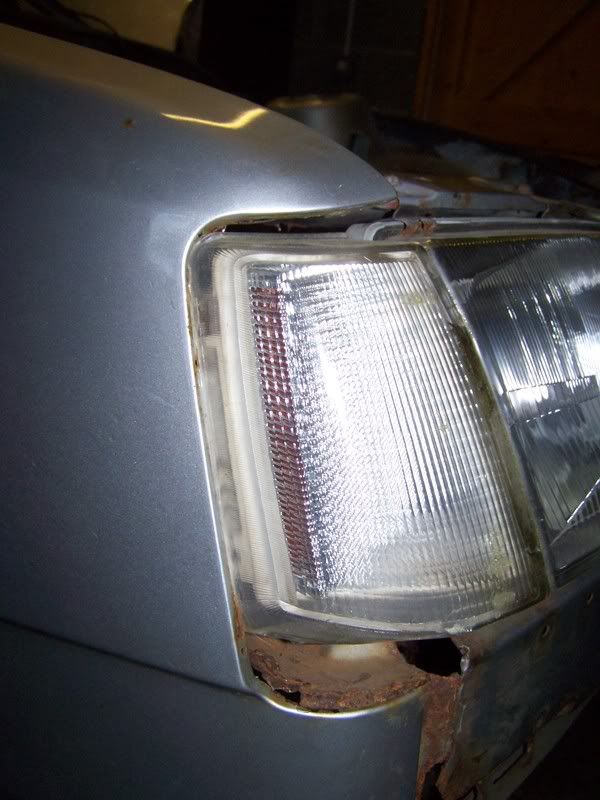 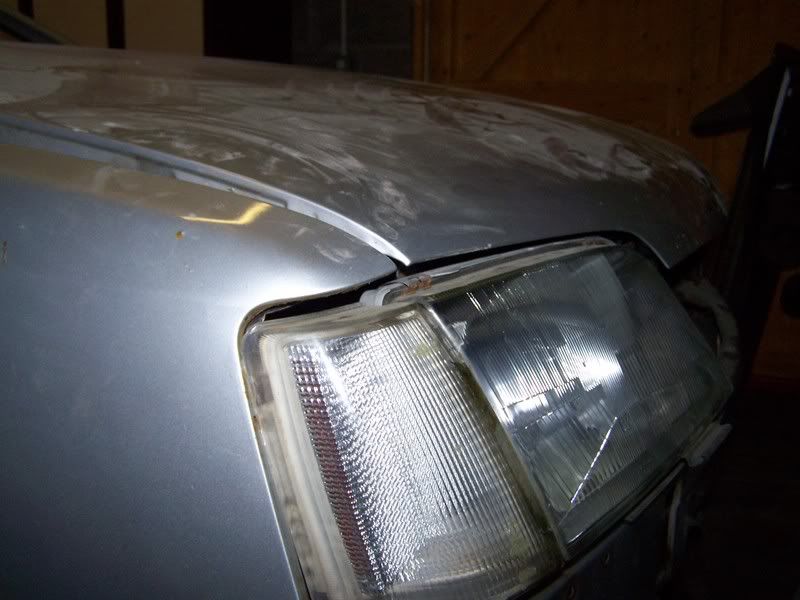 And finally, a little panel I fabbed just before I went to bed. (Note the little chamfer at the bottom to allow water to drain!!) 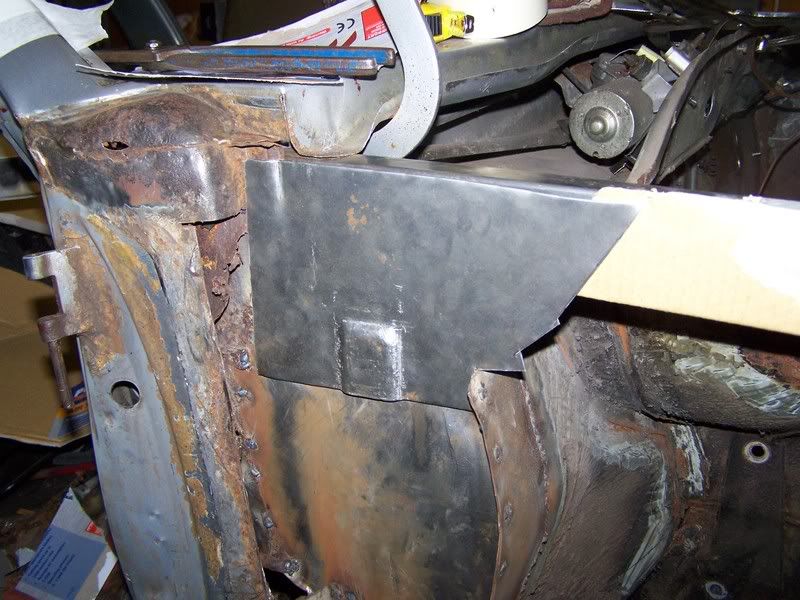 Tonight using my recently acquired airsaw I'll be mostly cutting out and beating the pattern for my inner wing repairs and maybe making a start to welding it all in. |
| |
If I have to explain, you won't understand.
Maximum signature image height = 80 pixels
|
|
bstardchild
Club Retro Rides Member
Posts: 14,965
Club RR Member Number: 71
Member is Online
|
|
Mar 12, 2008 11:45:42 GMT
|
I had a revolutionary idea!!!! Cardboard inner wings!!!!   ;D They come with that std - I know it looks like steel and rusts like steel but really it's tinfoil coated cardboard Keep going with it - just keep thinking when it's welded I can put some wheels on it ;D |
| |
|
|
bigrod
Posted a lot
  
Posts: 1,654
|
|
Mar 12, 2008 11:49:33 GMT
|
Keep going with it - just keep thinking when it's welded I can put some wheels on it ;D LOL! Actually, the wheels will be going on long before I finish the welding!! BTW BC, what's your opinion on the gap above the light cluster in the pics with the wing on? Does it look too big to you? Can't see how it can be any other way though and the marks on the flange of the wing match up to the light lens too but it just looked huge to me. Comparing with this original pic', it does look OK though........ 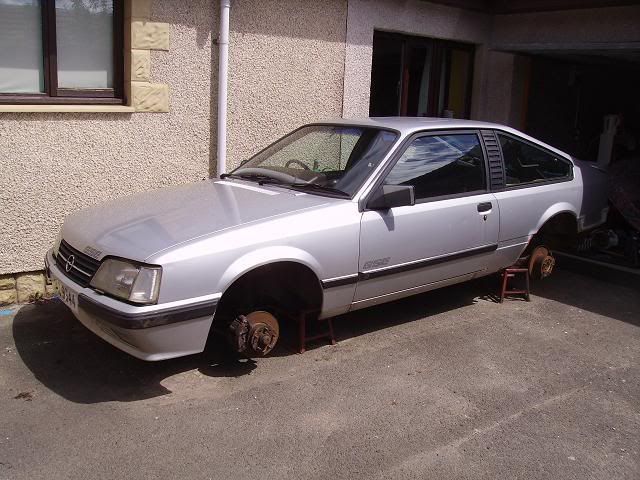 Funny, just looking at those pictures again, it dawns on me that I've done that last panel slightly wrong. Not a big deal, all it'll involve is a little persuasion with a hammer and suitable dolly and the 'letting in' of some more metal before I tack that one in place.  |
| |
Last Edit: Mar 12, 2008 11:53:43 GMT by bigrod
If I have to explain, you won't understand.
Maximum signature image height = 80 pixels
|
|
bstardchild
Club Retro Rides Member
Posts: 14,965
Club RR Member Number: 71
Member is Online
|
|
Mar 12, 2008 18:24:28 GMT
|
Keep going with it - just keep thinking when it's welded I can put some wheels on it ;D LOL! Actually, the wheels will be going on long before I finish the welding!! Yeah I know BTW BC, what's your opinion on the gap above the light cluster in the pics with the wing on? Does it look too big to you? Can't see how it can be any other way though and the marks on the flange of the wing match up to the light lens too but it just looked huge to me. Comparing with this original pic', it does look OK though........  it's been bugging me all day cos it doesn't look right - they I realised you probably don't have the two plastic wedges under the headlights ;D |
| |
|
|
street
Posted a lot
   6.2 ft/lbs of talk
Posts: 4,662
|
|
Mar 12, 2008 19:17:35 GMT
|
 ^^^^ That, is awesome  I love attention to detail like that. Good to see your still making good progress with it despite your work commitments, keep up the great work  |
| |
|
|
|
|
|
Mar 12, 2008 20:30:37 GMT
|
|
All a step in the right direction, and I like your idea of recycling cardboard! Like Street says keep up the good work.
|
| |
205 GTi Mi16
205 XS - Now in filmidget's signature
Clio dci 80
I've found in life if someone is an idiot, they generally stay and idiot.
|
|
bigrod
Posted a lot
  
Posts: 1,654
|
|
Mar 13, 2008 10:05:05 GMT
|
I'm really disappointed with last night's efforts!!!  Bit of a saga this, but let me furnish you with the details of my attempts to move forward. A bit of background first. My nights in the garage usually coincide with SWMBO being out of an evening, usually the gym. What happens is, she goes out, I put the rugrats to bed, wait on them settling then go out to the garage taking their respective monitors with me and then cut and beat lumps out of bits of metal to my heart's content. I've seldom had a problem doing this even though the garage is attached to the house next to the kid's bedrooms. Last night SWMBO decided to give the gym a miss. No problem, but I'm still going into the garage as I'd an airsaw to trial. I mentioned that I'd be using my compressor and airsaw to SWMBO and if it was too noisy she should call me on my phone and I'd try to be a bit quieter. So I sets about making a template to fill a gap in the 'A' pillar and cut out the appropriate pattern To cut a long story short, the airsaw was rubbish! The first blade blunted and when using hte second blade, it kept stalling and the compressor couldn't keep up with it's CFM capacity. Dejected, I resorted to my jigsaw and had the cut out in less than a minute. I'd used 2mm sheet for this as I'd measured the thickness using a set of micrometers which made it quite difficult to bend, but some hefty swipes with a suitable hammer saw the flat piece of steel start to take shape. Once I'd put a right angle along the length of the piece, it was only then I realised I'd folded it the wrong way!!!  So rather than cut out a new piece, I reckoned it'd be easier to straighten the original piece. Much battering ensued. Cue phone ringing!! Our boy couldn't get to sleep. 'OK', I said, 'I'll try and be a bit quieter.' So that kind'a left me high and dry! So I stared at the hole in the side of my car and deliberated what to do next. Then I realised that the piece of steel I'd measured was in fact double skinned and wasn't as thick as I'd originally thought. This meant that it was 1mm thick and would be easier to cut and bend!! Yay!!  So I cut out the 1mm patern and bent it to shape, (the right way this time!!), using the slightest of blows from my hammer. Cue ringing phone! Boy still can't sleep! I never have this trouble when SWMBO's at the gym, so why tonight?  By this time, I've got the pattern bent into shape anyway, so I can now set about welding it into place!!  After it's tacked in place, I ran out of welding wire!! :roll: I had new stuff, but it's 0.1mm thicker than the stuff I'd been using so wasn't sure if it'd fit, but it did. I'll tell you what! that 0.1mm makes a helluva difference to the settings on your welder!!! knocked the wire speed and power settings all to cock, so I had to be continually resetting them while I worked to get them set properly. Result, some absolutely sh!t welding, (It is still sound, it just looks rubbish!!), and a very dejected me!!! Here's the pictures.................... 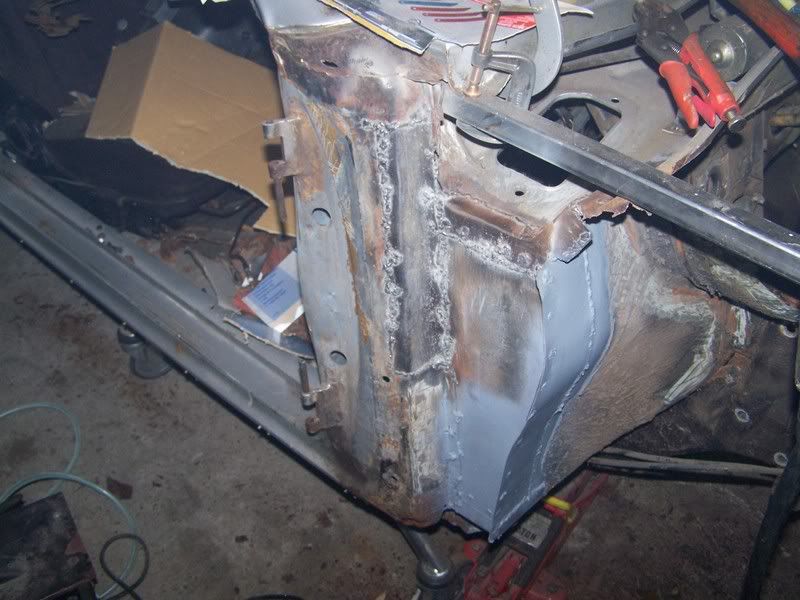 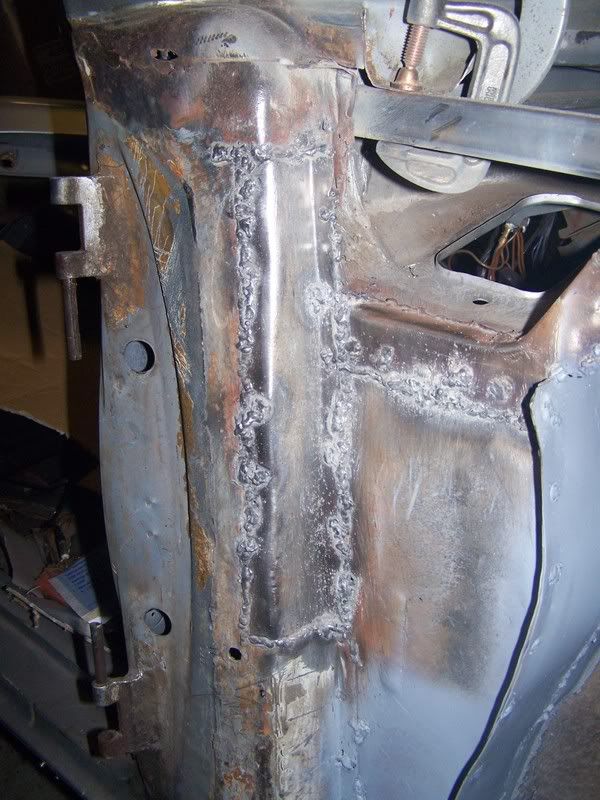 Then I thought it'd look better with some zinc primer on it!! (!) It doesn't!!!  Grider's going to be busy methinks!!!  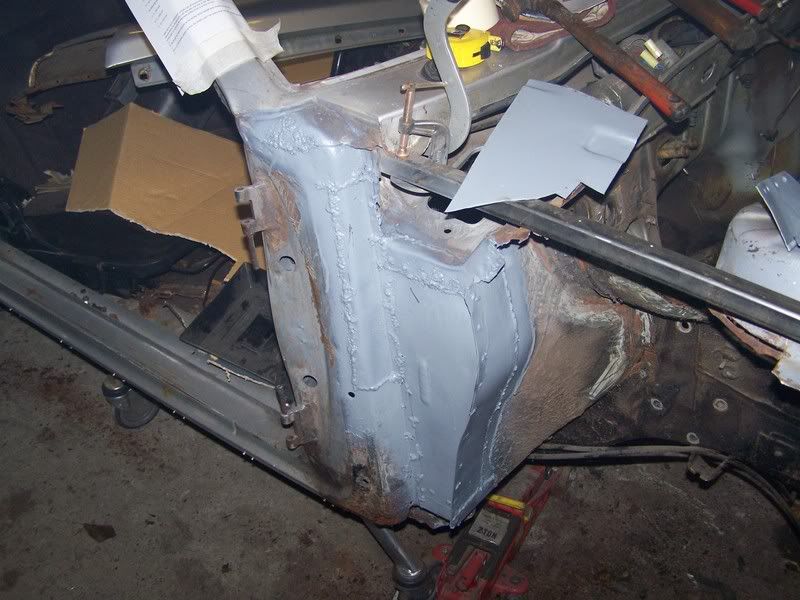 On a slightly different note, the local Co-op was having a refit a couple of weeks ago and I saw these in the skip outside.......... [scavenge_mode]  [/scavenge_mode] So I 'ad 'em!! They're ferrous in some way shape or form as they're rusting. I had designs on using them for roll cage extensions, but not sure. Still they're better in my possession than in the skip eh? |
| |
Last Edit: Mar 13, 2008 10:30:21 GMT by bigrod
If I have to explain, you won't understand.
Maximum signature image height = 80 pixels
|
|
|
|
mrj
Posted a lot
  
Posts: 1,662
|
|
Mar 13, 2008 11:29:10 GMT
|
|
hey that looks good.... even the welding will be invisible once there is the front wing fitted.... and dark primer makes them almost invisible, too ;D i don't have the SWMBO problem so far, she only shakes her head everytime she sees the wreck...
|
| |
- 1971 VW 1600 TL Fastback
- 1978 Passat GLS Variant
- 1980 Audi 100 5E
- 1981 VW aircooled panel van (sold)
- 1983 VW Jetta Mk.I
- 1984 VW Polo Coupé
- 1984 VW Passat hatchback
- 1987 VW Passat Variant
- 1987 VW Passat hatchback
- 1988 VW T25
|
|
|
|
|
Mar 13, 2008 18:56:51 GMT
|
don't use that tube for roll cage! Roll cage should only be made of CDSII tubing of at least 2.5mm wall thickness. Tough work you are doing there, it so much easier to chop it all out and make a new chassis for the body to sit over, but what would be the fun in that, lol  |
| |
|
|
|
|
|
Mar 13, 2008 19:45:30 GMT
|
|
You think you had a bad time yesterday, I got dragged to Ikea.
|
| |
205 GTi Mi16
205 XS - Now in filmidget's signature
Clio dci 80
I've found in life if someone is an idiot, they generally stay and idiot.
|
|
bstardchild
Club Retro Rides Member
Posts: 14,965
Club RR Member Number: 71
Member is Online
|
|
Mar 13, 2008 19:53:22 GMT
|
don't use that tube for roll cage! Roll cage should only be made of CDSII tubing of at least 2.5mm wall thickness. JFI Roddys cage dates from late 70's early 80's and is Alloy ;D |
| |
|
|
bigrod
Posted a lot
  
Posts: 1,654
|
|
Mar 13, 2008 21:08:35 GMT
|
don't use that tube for roll cage! Roll cage should only be made of CDSII tubing of at least 2.5mm wall thickness. JFI Roddys cage dates from late 70's early 80's and is Alloy ;D what 'e says. ^ It's not going to be used in any proper FIA approved racing, (well not in the foreseeable future at least!), so the material it's made from won't matter too much. If I was going to do that I'd have a better cage built and/or get a more suitable car!! ;D |
| |
If I have to explain, you won't understand.
Maximum signature image height = 80 pixels
|
|
|
|
|
|
|
|
Not being funny, but if its not really necessary as you wont race it, why bother putting one in then?
If you are going to have one, it might as well do the job (you could get away with std gas pipe to save money).
The stuff you found will be zinc or galvanised, both produce dangerous fumes when being welded, so its a bit of a no-no imho.
|
| |
|
|
bigrod
Posted a lot
  
Posts: 1,654
|
|
|
|
Not being funny, but if its not really necessary as you wont race it, why bother putting one in then? If you are going to have one, it might as well do the job (you could get away with std gas pipe to save money). The stuff you found will be zinc or galvanised, both produce dangerous fumes when being welded, so its a bit of a no-no imho. It's primarily to be used as a track slag, not for proper racing. If I did go for proper racing then I'd have to get a steel cage. The alloy cage I have will 'plug' straight in so I'm as well using it and can use the same mounts and pattern if I do decide to do something more ambitious with it. I wasn't intending welding the tubing, (But thanks for the tip on the zinc!!). The rest of the cage is clamped so I'd just be clamping it together. The only bits I might be interested in extending would be out to the front turrets, (but given how I'm repairing the inner wings, that might not be necessary), and across the door appertures as there's only one side bar for the driver's side. |
| |
If I have to explain, you won't understand.
Maximum signature image height = 80 pixels
|
|
djmatt
Part of things
 
Posts: 200
|
|
Mar 14, 2008 13:04:17 GMT
|
|
Really wound'nt use that gate for even extensions mate - it'll bend like a goodun in no time, and won't give you any rigidity at all, let alone safety.
I think the idea behind the cage blackpop is to simply add structural rigidity to the car - monzas work very well and handle like a dream when they have a cage in them because it stiffens up the whole car no end. Like he says, it doesn't have to ever pass any MSA standards or scrutineering at any point so it's just there to do one job.
|
| |
|
|
|
|
|
Mar 14, 2008 19:47:51 GMT
|
|
Fair enough if its for chassis stiffening, but as djmatt says, its probably no good anyway.
Best just get decent steel for the job, its cheap(ish) enough if you shop in the right places, (proper metal factors~not B&Q or metal supermarkets).
|
| |
|
|
bigrod
Posted a lot
  
Posts: 1,654
|
|
Apr 15, 2008 10:27:50 GMT
|
Righty-ho! As some of you'll know, work, family, other commitments and general life have been getting in the way of any progress on the Jaz front. However, Last Thursday while I was on annual leave, SWMBO suggested that as she was busy all day with the rugrats I spend the day in the garage! Cue RoadRunner type spinny legs disappearing in a cloud of dust!! So as it was during the day it meant I could make as much noise as I liked!!! <Bliss!> I'd previously measured the thickness of the inner wings and my digital micrometer told me it was 2mm thick, (14 guage I believe!), so I'd bought a big sheet of 2mm thick steel only to find out that it was almost unworkable using my rudimentary fabrication techniques, (read big hammer and vice!) I wasn't looking forward to fab'ing anything using it so thought it prudent to measure it again. Guess what? 1mm thick!!!  Don't know how I made the mistake, but off I trotted to buy a sheet of 20 guage!  That done I then cut some more of the original inner wing off.......... 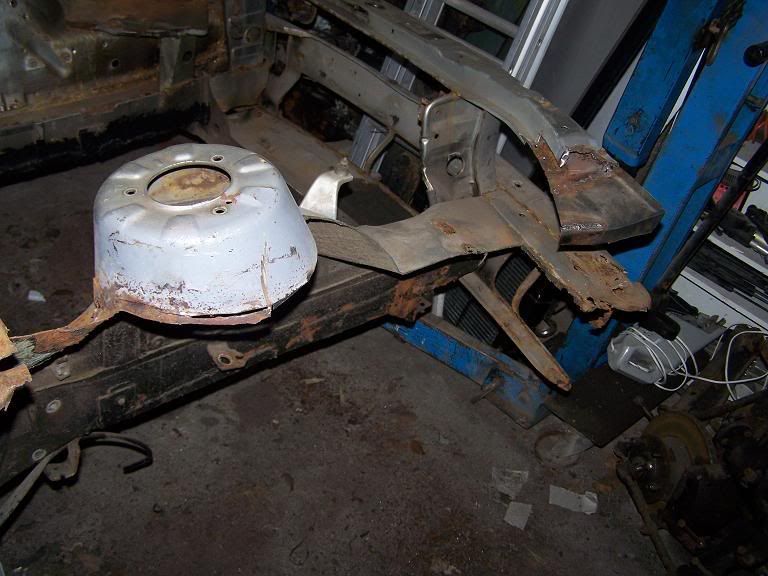 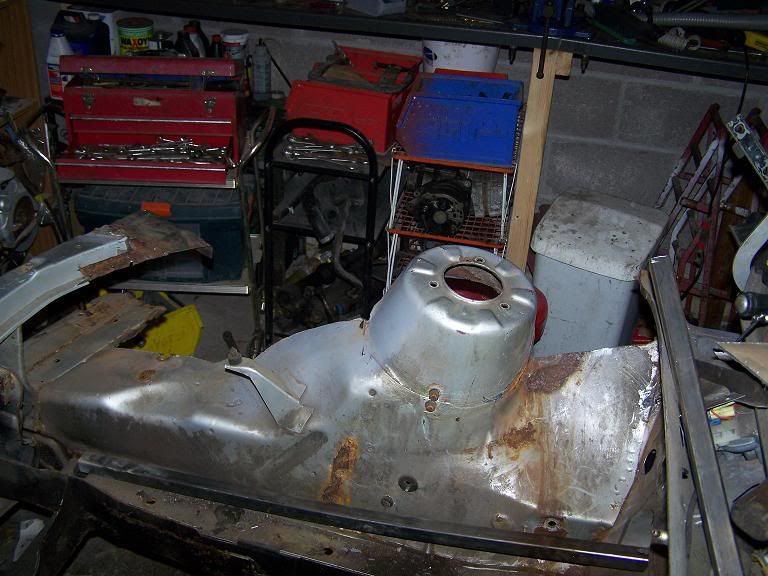 Then I grafted in a flange to mate the turret to the new piece of steel.............. 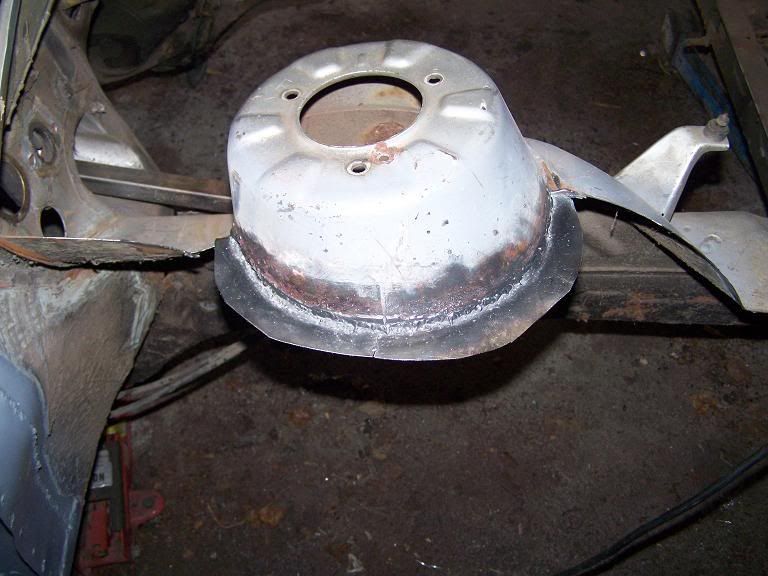 And offered it all up to fit.............. 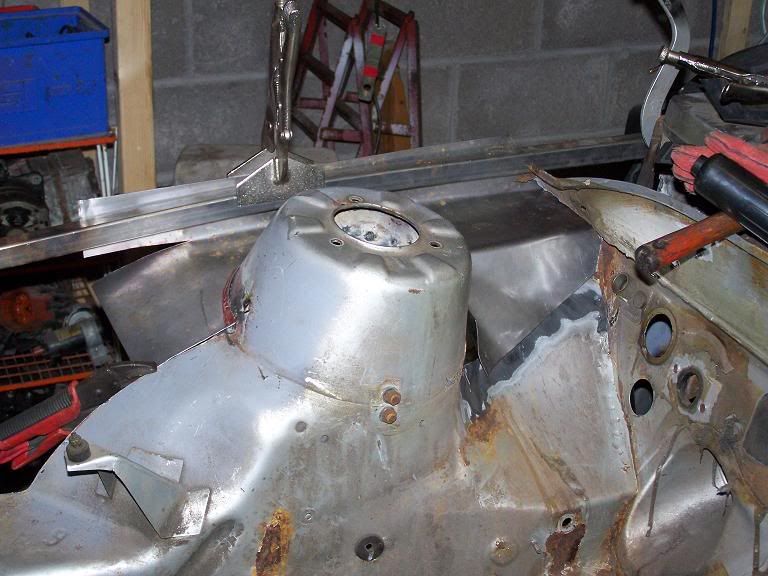 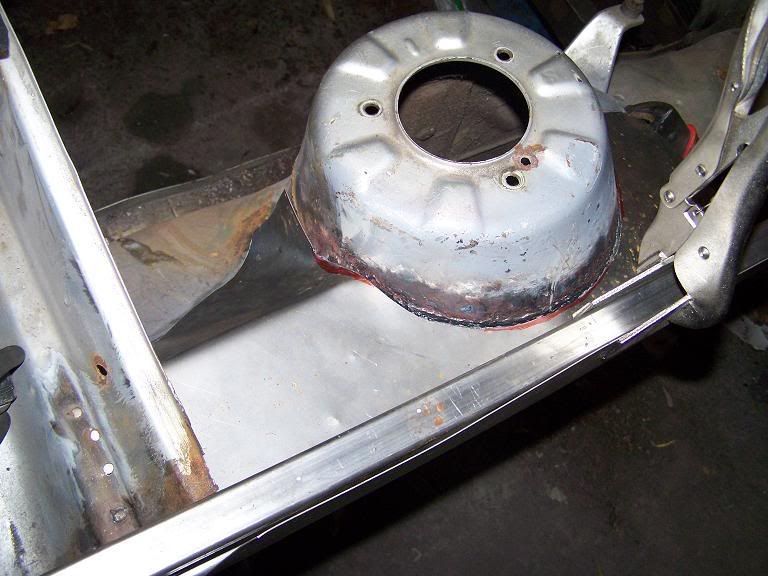 Made a slight faux-pas with this. The flange and the new panel don't quite match up.   I'm not proud of this, but I wasn't about to cut out the new piece of metal, so fortunately I managed to persuade it to make contact. I don't think it looks too bad.............  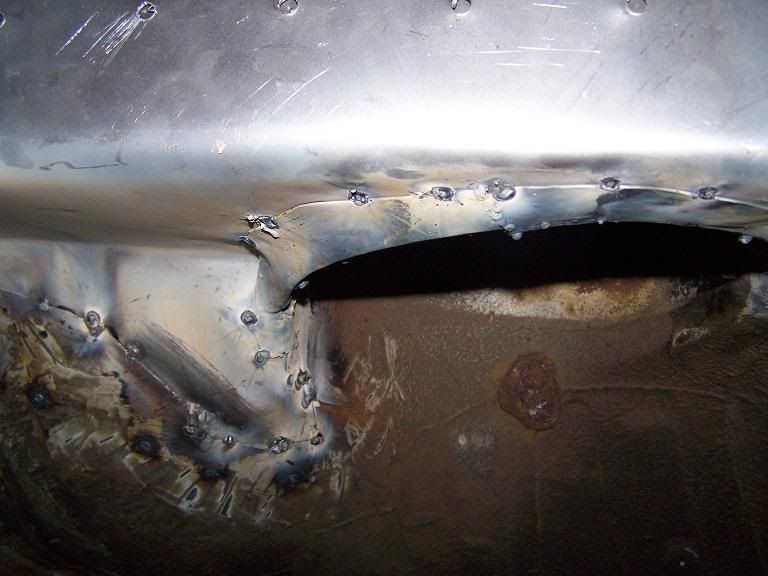 So a fair bit of welding ensued............. 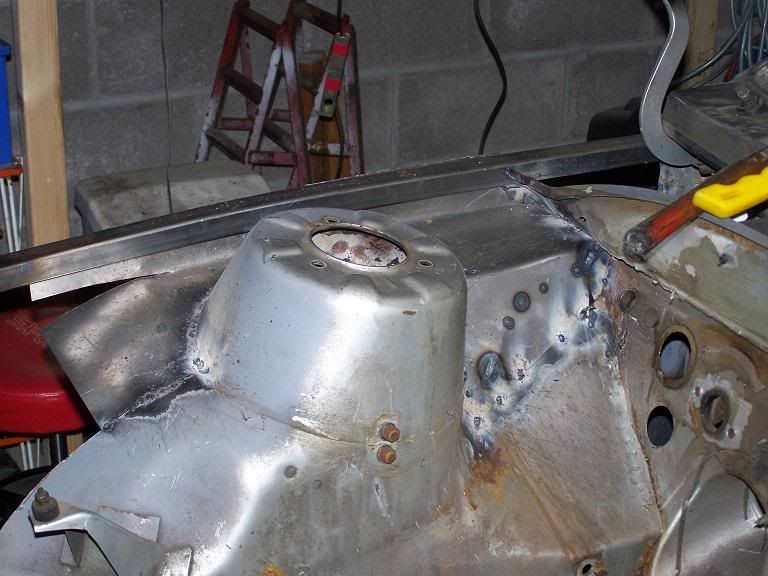 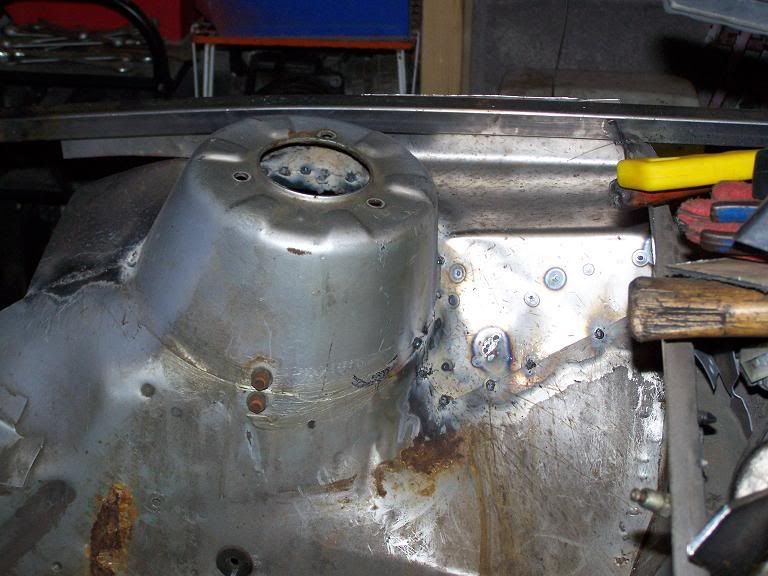 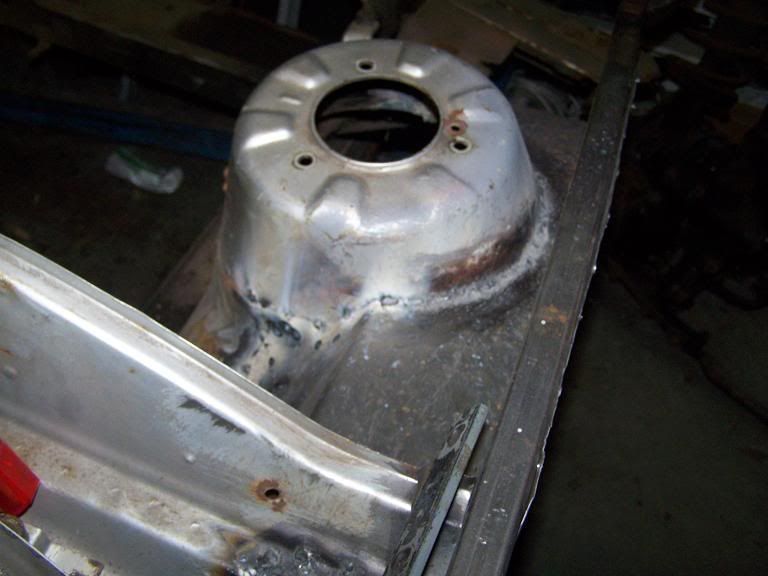 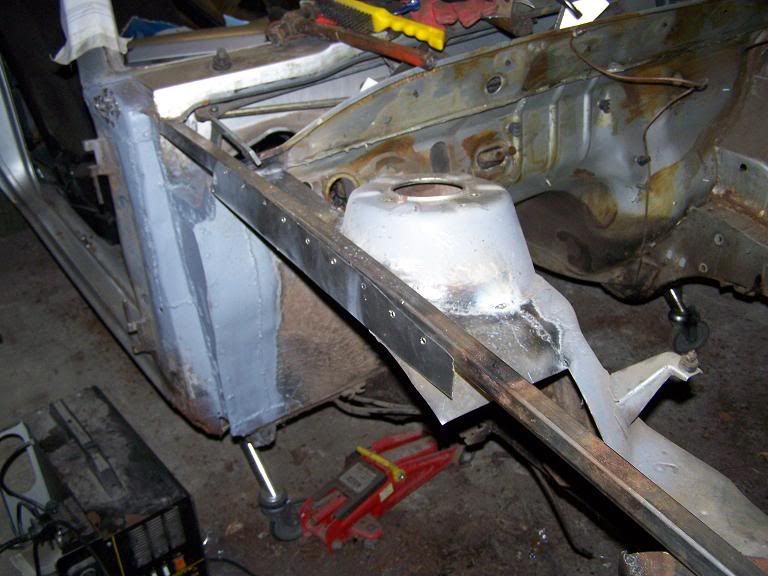 I've come to two conclusions. 1) I'm going to make the switch to weldiing with gas. I don't know if the gasless stuff I'm using is of bad quality, but I know I can weld better than the results shown!! 2) Remeber that little panel I made up for the end of the scuttle?  Well, I've decided it serves no purpose other than to trap water, so I'm not using it. And to finish! Here's what's left of the original inner wing.  That's all for now folks! |
| |
Last Edit: Apr 15, 2008 10:29:07 GMT by bigrod
If I have to explain, you won't understand.
Maximum signature image height = 80 pixels
|
|
|
|


 ;D
;D 


 I love attention to detail like that.


 So rather than cut out a new piece, I reckoned it'd be easier to straighten the original piece. Much battering ensued. Cue phone ringing!! Our boy couldn't get to sleep. 'OK', I said, 'I'll try and be a bit quieter.'


