|
|
|
|
|
|
Well spotted BC, it's at GM6. This sort of work is out of my league so I will leave it to A.N.Other to keep the car on the road for me and my 20 year Monza fetish going.
Thread hijack over now and good luck with the car Rod.
|
| |
|
|
|
|
bigrod
Posted a lot
  
Posts: 1,654
|
|
|
|
Well, last night I started adding some weight! Sod's law! The camera battery ran out before I could take any more pictures, so the low quality one's off my phone. I don't proffess to having fab'ing skills like Street, I'm trying to take things easy to start with to get back into it again as it's been a looooong toime since I've done anything like this. It's all just tacked on for now until I'm happy it all fits, then it'll be welded proper. Sod's second law!! I measured about a dozen times and cut once! and cut it about 4mm too short!! Never mind, I'll stick a patch in and it'll be as good as new. Sod's third law. Since it's not been used for ages, I had to give my welder a service before it complied with my requests. Pics................. Inner sill repair. 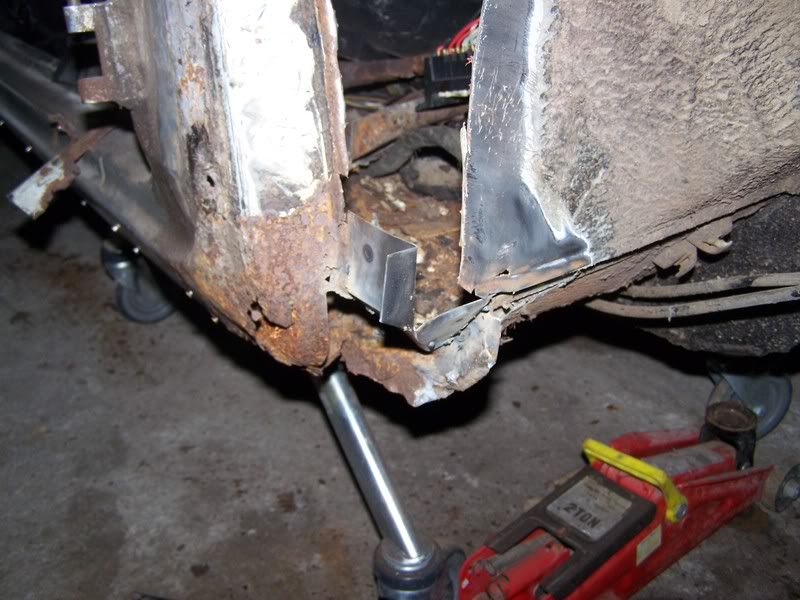 Bulkhead repair. 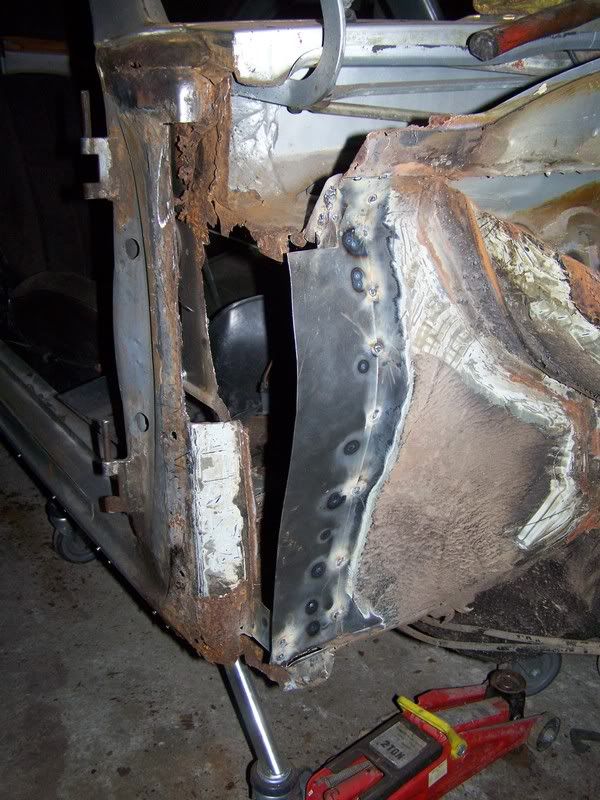 Can't remember the name of this bit, but repaired the frilly edge. 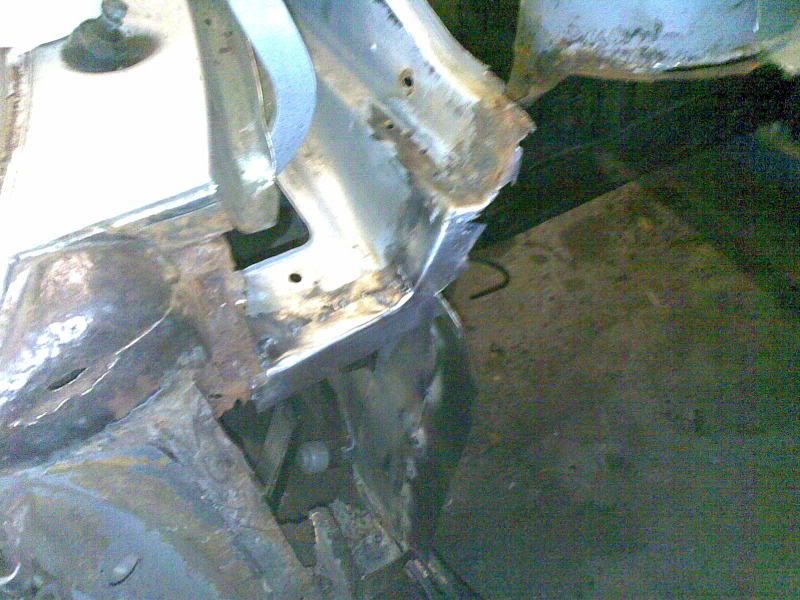 Something dawned on me while doing the last bit that it'll be a bit of a water trap, so the 'A' panel repair won't be like factory. I'll be doing it in two pieces so as to let water out from the gulley and restrict water ingression into the cabin. That is all for now! I'm charging the camera batteries for tonight's efforts! |
| |
Last Edit: Feb 13, 2008 9:51:37 GMT by bigrod
If I have to explain, you won't understand.
Maximum signature image height = 80 pixels
|
|
bstardchild
Club Retro Rides Member
Posts: 14,965
Club RR Member Number: 71
Member is Online
|
|
Feb 13, 2008 18:01:25 GMT
|
Progress in any shape or form is exactly that  |
| |
|
|
|
|
|
Feb 13, 2008 22:52:38 GMT
|
Ah, putting new metal in means that half the battle is won! Top man for not being scared off!  |
| |
|
|
bigrod
Posted a lot
  
Posts: 1,654
|
|
Feb 13, 2008 23:44:32 GMT
|
Ah, putting new metal in means that half the battle is won! Top man for not being scared off!  He-he! There's time yet!!  |
| |
If I have to explain, you won't understand.
Maximum signature image height = 80 pixels
|
|
bigrod
Posted a lot
  
Posts: 1,654
|
|
|
|
Got some more done on her last night!! 8) Hole! 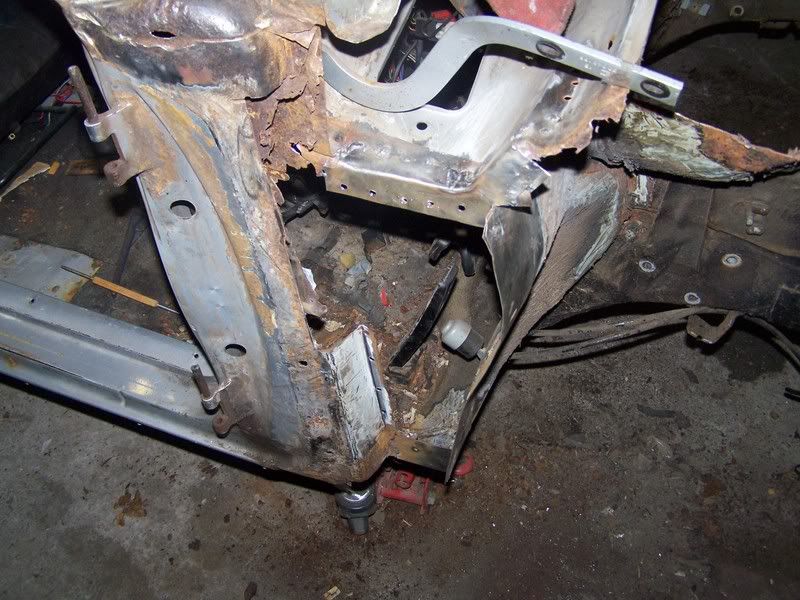 Panel fettled by Big Rod's own fair hand! (Notice the cleft in the middle to add rigidity!!) 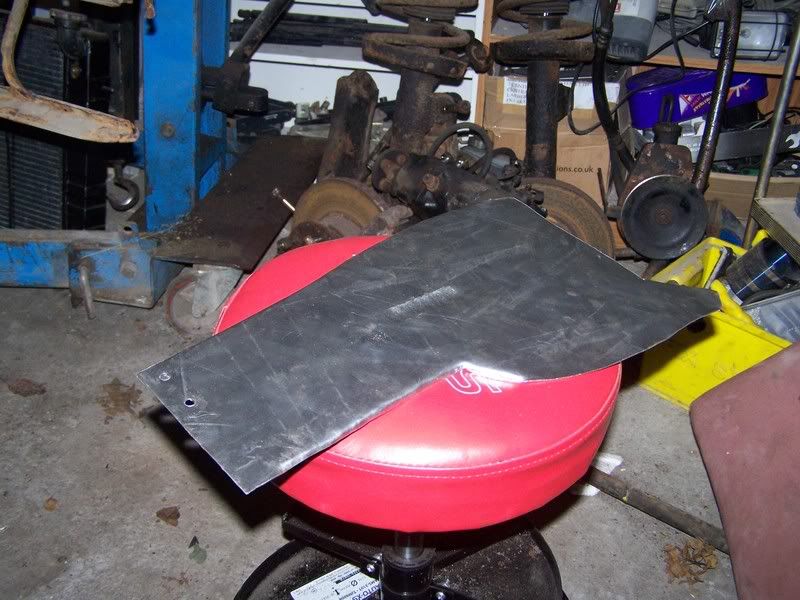 No hole. (OK, a bit less of a hole!!) 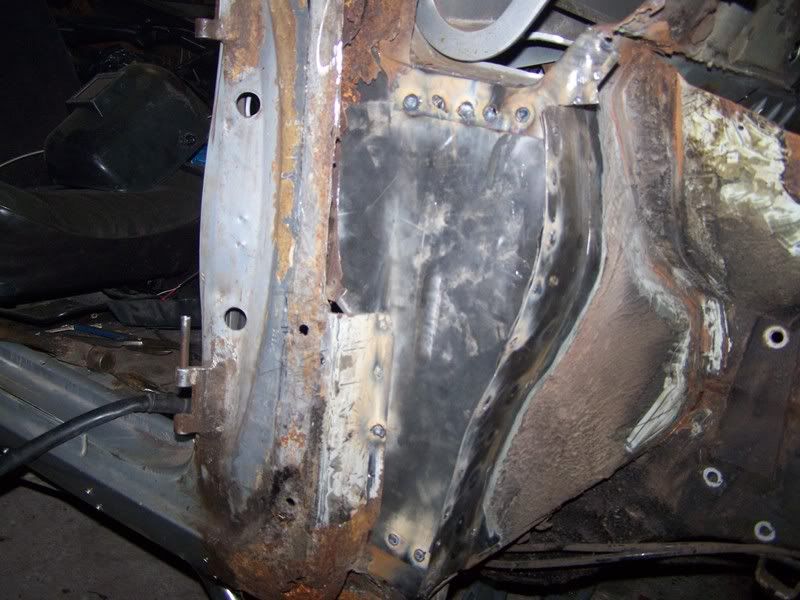 Starting to weld the seams. (Sorry, but many pigeons were abused during the fabrication process!) I think I'm going to have to get myself a new welder actually. It's difficult to get a good continuous feed off it. Hey it was a real cheapy I bought about 6 years ago in an emergency, so I guess it's earned it's keep. Also I'm using gasless wire. I know, I know, I'd get better results from using shielding gas, but we've had this conversation already!! 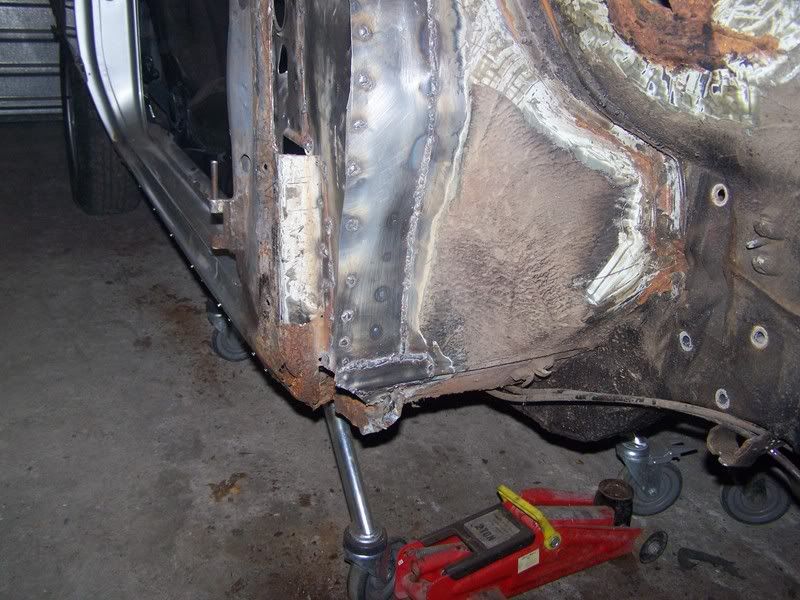 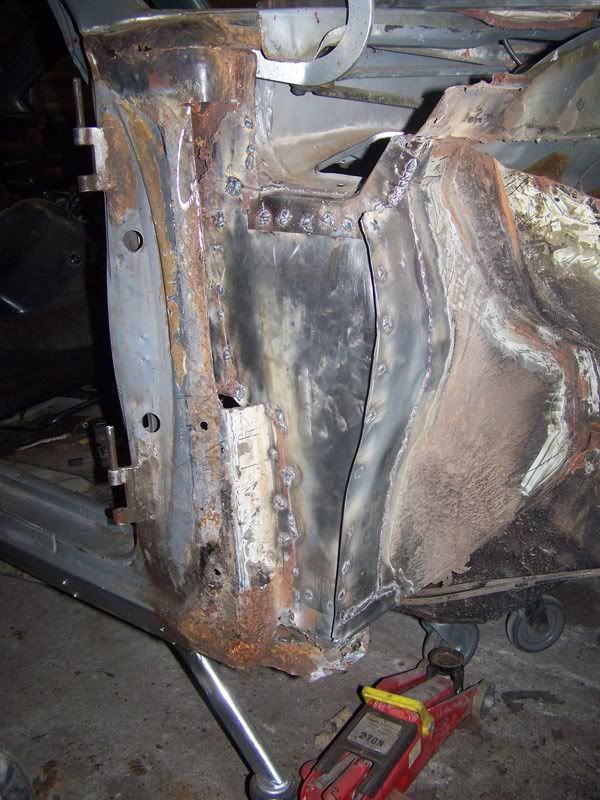 I'm going to have to think very carefully about how I go about fixing this bit. It can wait until I have the front of the car finished though. I started with the intention of starting at the front and moving back, so I should stick to it. It will mean getting the car rolled over or very high at the front though. Not quite sure how I'll manage it, but I'm sure I'll figure something out. 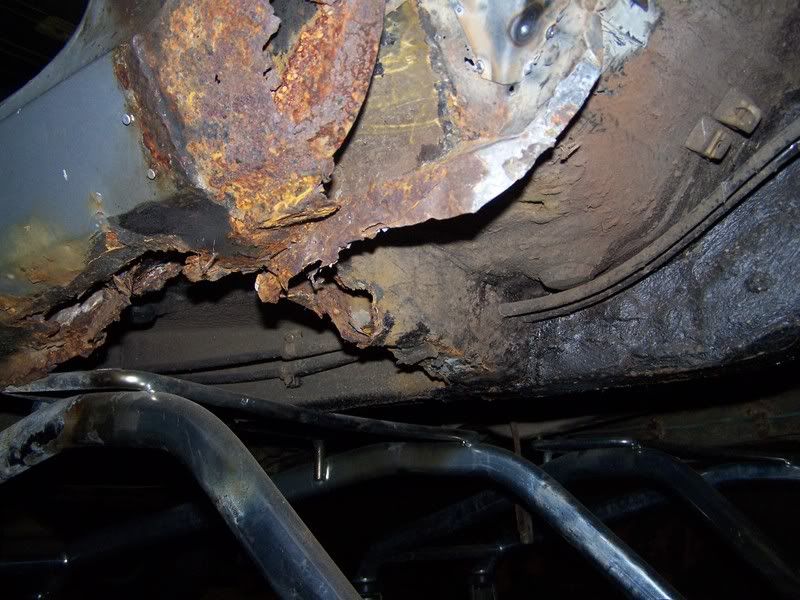 Now this is how I'm going to go about (a) repairing the inner wings/wing mounting strip and (b) bracing the turrets. I need to think long and hard about what order I do it in and how I'm going to join the lot together, but I think it's a goer. The section you can see will be braced against the currently non-existent 'A' pillar with a triangulated section and I'll use some more box section to brace the turrets on to it too. 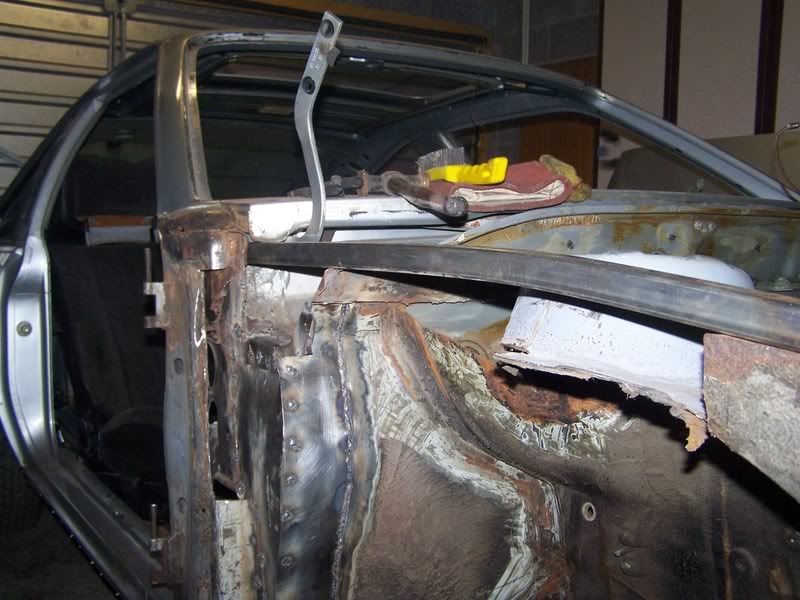 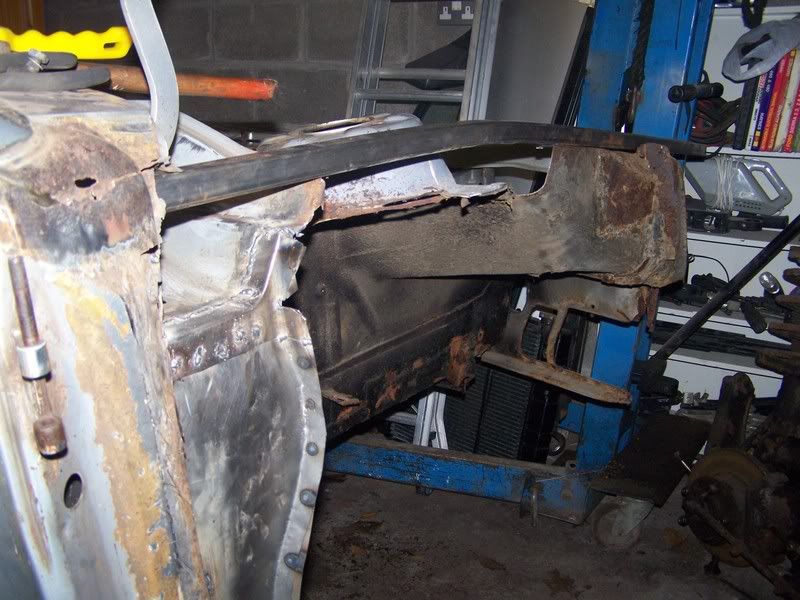 See how it's curved? Well, I spent about an hour last week with my blow torch and vice trying to do it gently and got nowhere! Last night, I elevated one end, rested the other end on the floor and jumped on it a couple of times. Result; A near perfect curve!!! Also in hindsight, I actually think I've done the 'A' panel/bulkhead join wrong, but as long as the wing fits on, I'm going to do the other side to match!! |
| |
Last Edit: Feb 14, 2008 9:40:47 GMT by bigrod
If I have to explain, you won't understand.
Maximum signature image height = 80 pixels
|
|
|
|
|
Feb 14, 2008 15:38:38 GMT
|
Thats a hell of a task! Good on you for taking it on, love seeing projects like this  |
| |
1997 TVR Chimaera
2009 Westfield Megabusa
|
|
street
Posted a lot
   6.2 ft/lbs of talk
Posts: 4,662
|
|
Feb 14, 2008 17:11:09 GMT
|
Brilliant progress! Really looking good now, quality workmanship!  That bracing technique seems to be the way to go with these Monzas aswell, should be mega strong when it's finished  |
| |
|
|
bigrod
Posted a lot
  
Posts: 1,654
|
|
|
|
Well, after a couple of weeks inactivity, I dragged myself into the garage last night. I didn't enjoy it. Here's why................ 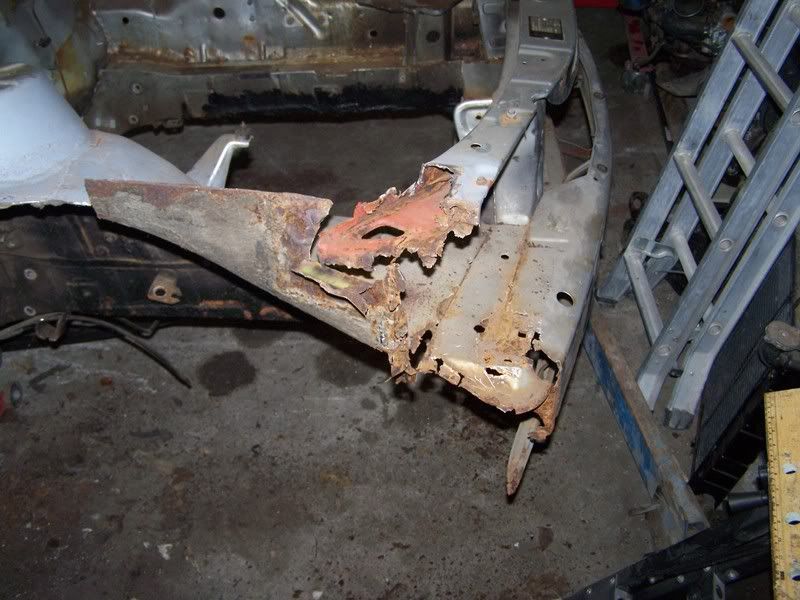 It doesn't look as bad in the picture as it did last night, but that's a really complicated area to build up and fab' panels for. Couple that with the fact that most of the inner wing's going to have to be cut out, I'm left wondering how I'm going to go about it. I'm still gobsmacked at the amount of repairs this car's had! It would appear that it's had a Mig weided on it for every MOT since the dawn of time! And it's not all easy stuff either, a lot of it's quite complicated! I started thinking about doing away with the inner wings altogether and building a tube/box section frame or even maybe trying to modify another set of inner wings to suit. Can you still get Senator 'B' inner wings? I'm open to suggestions. (And I don't mean 'weigh it in' either!!) |
| |
If I have to explain, you won't understand.
Maximum signature image height = 80 pixels
|
|
|
|
|
Feb 27, 2008 10:43:52 GMT
|
I doff my cap to you for persevering! That section does look a little complicated... I think (and I can't see everything from that pic) I'd do it in three or four sections. The main inner wing piece which seems like its just a right-angled bend. Then I'd do the lower part of the front panel. Then the end of the slam panel which looks as if it welds to the inner wing end. That slam panel piece looks the trickiest piece to do as it's all curves and bends... might need to make that in numerous bits! I might be over-simplifying it as I can't see the full extent of the rust, and the amount of curves and shapes in that area. I like your idea of getting inner wings from something else and adapting them - could do away with having to form compound curves and the like! Hadrian only list sills for the HA, HB and HC Vivas. They do slam panels for stuff like Mk2 Cavaliers and Carltons which might be adapted to fit? Might be easier to get a donor or hack the inner wings off on down the scrapyard? Although I don't know a) where you'd find one and b) isn't rotten... I don't know! Keep at it Rod!  |
| |
|
|
|
|
|
|
|
Feb 27, 2008 11:09:24 GMT
|
|
Gotta agree with Benzboy, inspiring stuff. I can't believe the amount of work you've already put in to this. I know where there's one but its in similar condition to your own so I'm no help but in the fan club!!
|
| |
Club Retro Rides Member
|
|
|
|
|
Feb 27, 2008 18:44:00 GMT
|
|
You have my total admiration for taking this project on, and for not giving up. At least every time you venture into the garage it gets a step nearer. Keep up the good work.
And there's me worrying that my rear spoiler on the 205 has lifted on one corner and doesn't fit as i'd like
|
| |
205 GTi Mi16
205 XS - Now in filmidget's signature
Clio dci 80
I've found in life if someone is an idiot, they generally stay and idiot.
|
|
mrj
Posted a lot
  
Posts: 1,662
|
|
Feb 27, 2008 20:14:20 GMT
|
good work, don't give up. It can be worse, looking at my Passat, so you'll manage it.  |
| |
- 1971 VW 1600 TL Fastback
- 1978 Passat GLS Variant
- 1980 Audi 100 5E
- 1981 VW aircooled panel van (sold)
- 1983 VW Jetta Mk.I
- 1984 VW Polo Coupé
- 1984 VW Passat hatchback
- 1987 VW Passat Variant
- 1987 VW Passat hatchback
- 1988 VW T25
|
|
bigrod
Posted a lot
  
Posts: 1,654
|
|
|
|
Thanks for the encouragement guys, it really helps to keep my enthusiasm up! (It beats the cr@p out of some of the less than supportive comments I get some other places!) Tell me if you get bored with this guys wontchya!! It just seems like I'm updating you with every last little thing I do. (I just don't want you to think I'm slacking or giving up you see!) Anyway, to last night's developments.......... I sat for long enough the previous night staring at it and thinking how to go about repairing it whilst accomodating my modification(s). Tonight, I thought, 'Let's fire up the grinder!' So It went from this...............  To this in a short space of time............. 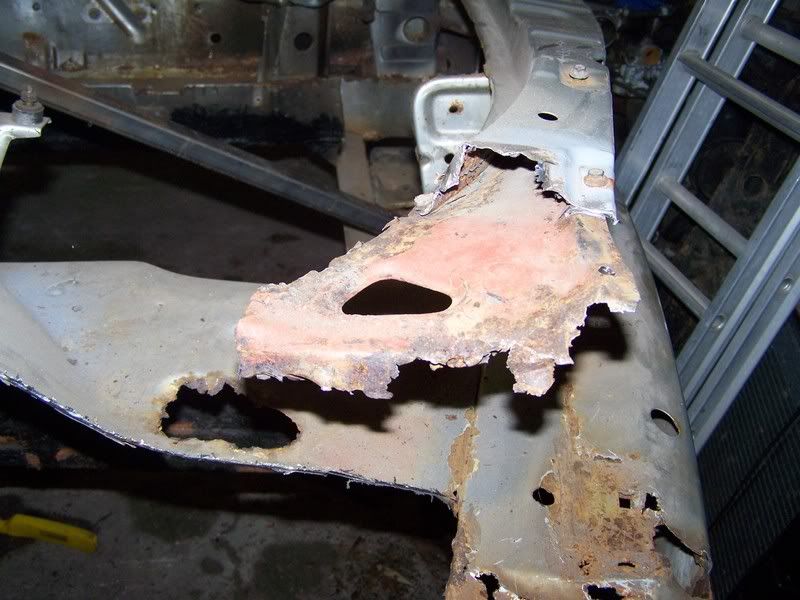 Which in turn turned into this.............. 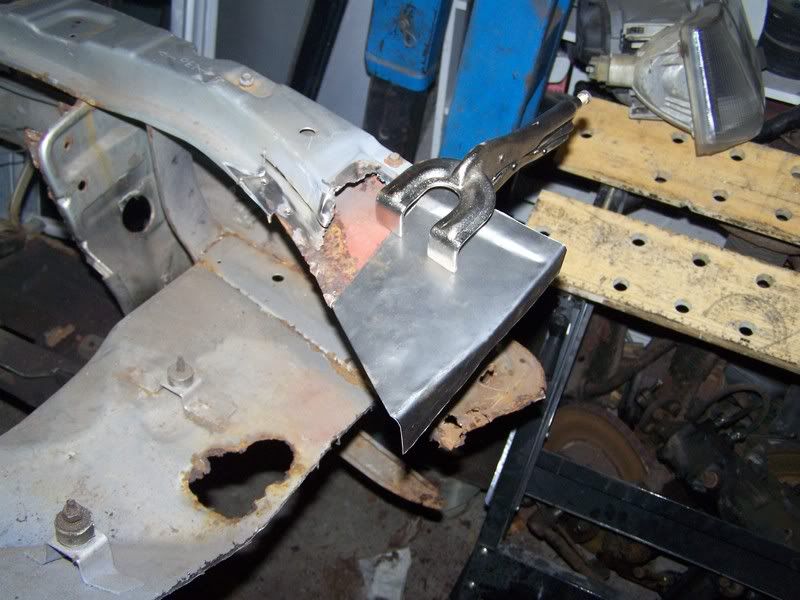 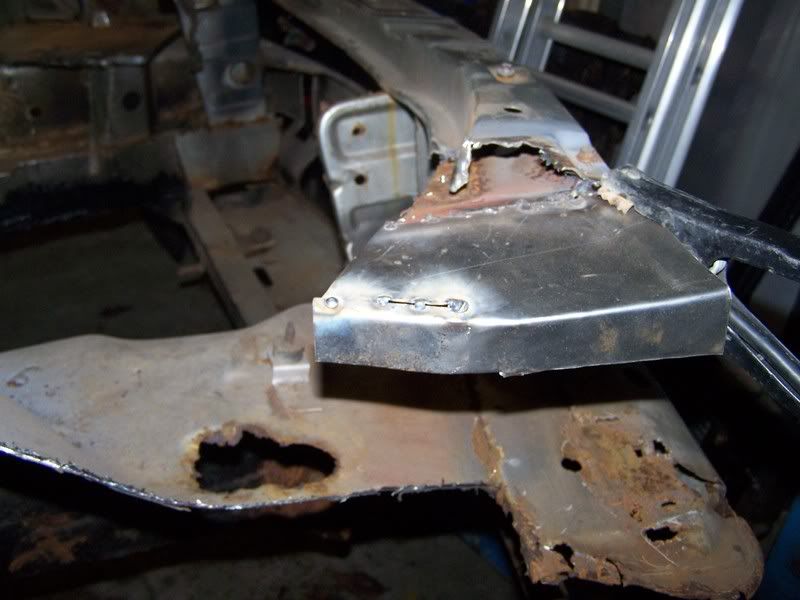 Then having carefully measured where the wing mounting flange would run to and from, added this............... 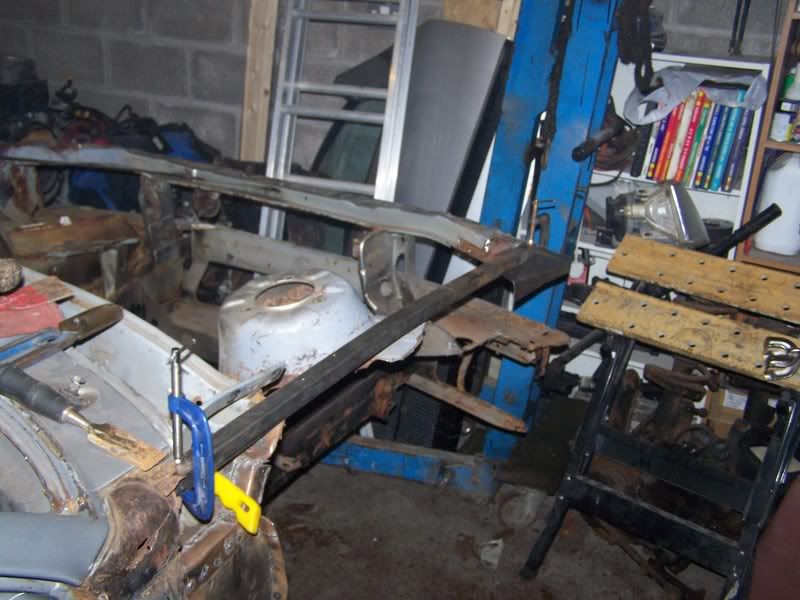 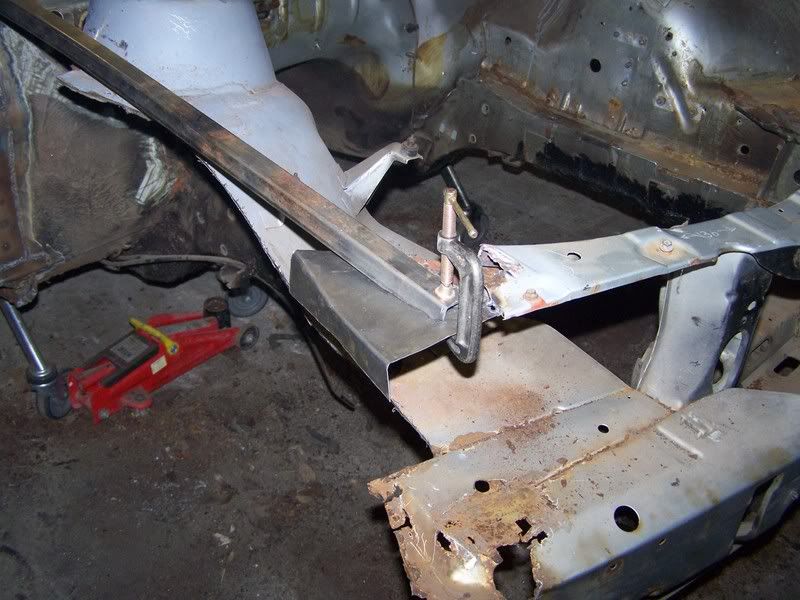 To which I was able to cut and paste a couple more little panels to fill the gaps............ 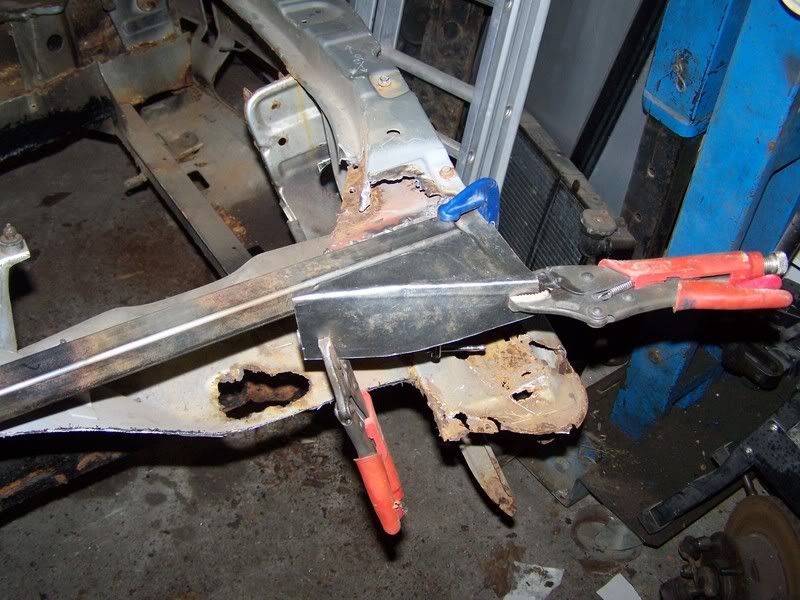 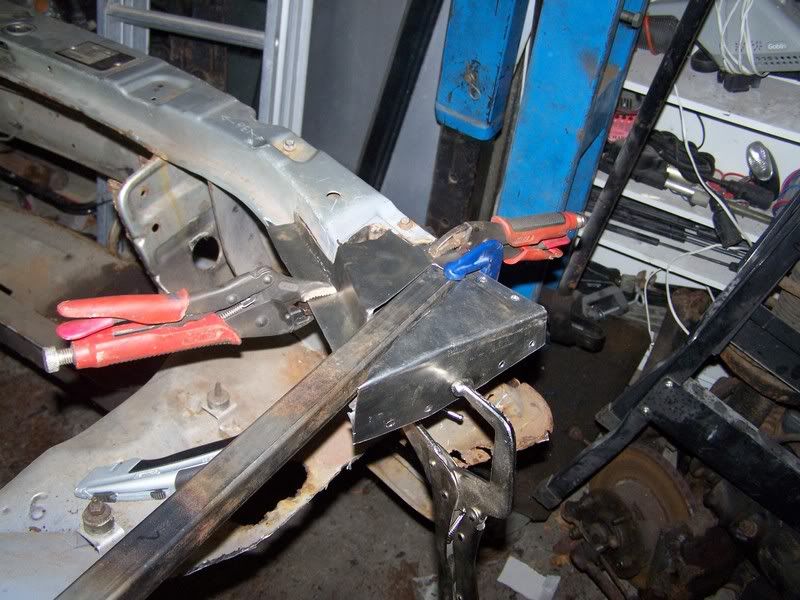 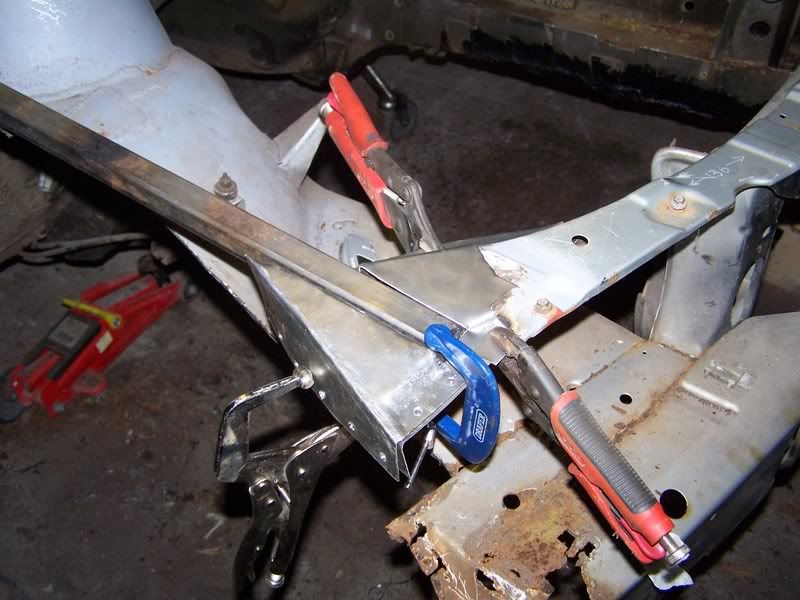 It's all 'mocked up' just now 'cos I'll have to fix the inner wing before I weld that little lot in place in very strict order, but I'm fairly pleased with what I achieved last night. Won't be much progress for a week or so as tonight's Torchwood and Ashes to Ashes and then I'll be away next week again. So tune in the next time you see some new posts!! |
| |
Last Edit: Feb 28, 2008 9:42:02 GMT by bigrod
If I have to explain, you won't understand.
Maximum signature image height = 80 pixels
|
|
bstardchild
Club Retro Rides Member
Posts: 14,965
Club RR Member Number: 71
Member is Online
|
|
|
|
Thanks for the encouragement guys, it really helps to keep my enthusiasm up! (It beats the cr@p out of some of the less than supportive comments I get some other places!)   - some people will never understand Roddy Tonight, I thought, 'Let's fire up the grinder!' Thats the spirit  Really miffs me you aren't closer - cos we still have a scrap shell that has donated sections of panels and floor to fix several cars - it's looking a bit like a tea bag but it's still got some usefull sections on it - like the slam panel!!! |
| |
|
|
bigrod
Posted a lot
  
Posts: 1,654
|
|
|
|
Really miffs me you aren't closer - cos we still have a scrap shell that has donated sections of panels and floor to fix several cars - it's looking a bit like a tea bag but it's still got some usefull sections on it - like the slam panel!!! Yeah, I know, but considering the point in case I'd've had to chop it to bits to put it all back together the way I want to anyway, so again, it's a bit of a blessing that the ends are so shot anyway. Thanks for the thoughts though. (Pssssst! y'got any inner wings?  ) |
| |
If I have to explain, you won't understand.
Maximum signature image height = 80 pixels
|
|
bstardchild
Club Retro Rides Member
Posts: 14,965
Club RR Member Number: 71
Member is Online
|
|
Feb 28, 2008 10:09:36 GMT
|
Really miffs me you aren't closer - cos we still have a scrap shell that has donated sections of panels and floor to fix several cars - it's looking a bit like a tea bag but it's still got some usefull sections on it - like the slam panel!!! Yeah, I know, but considering the point in case I'd've had to chop it to bits to put it all back together the way I want to anyway, so again, it's a bit of a blessing that the ends are so shot anyway. Thanks for the thoughts though. (Pssssst! y'got any inner wings?  ) Ha ha ha   |
| |
|
|
|
|
|
Feb 28, 2008 10:12:08 GMT
|
Just been doing some catching up and bloody hell these things rust like 60´s and 70´s stuff. I thought my mates one was a one off as his rear arches/innerwings- doorsteps -A-B-C Posts wings , floor just dissolved..i spent ages trying to get it through a MOT for him... Not sure if this is a help but if this was mine.....  i´d go at it in the following order... make a paper template of the outer sill and the crossmember. You´ll have to start building up this corner from the inner sill out. Cut off the outside sill in one piece and don´t throw it too far away. Before you cut out the rot from the inner sill try and make a papertemplate of that too. You could always use a bit of box section put inside the sill to strengthen the whole lot up a bit. I´d then replace the bottom of the A post, then the inner sill. You´ll probably have to do part of the floor next, then i´d whip out the fuel lines and replace that crossmember. Last job would be to replace the outer sill. I find what helps me (i´m only an interested amateur) is to try and rebuild it in the reverse order as was originally built, if you know what i mean. Whatever you do don´t just cut out all the rot in one go, otherwise you´ll have a big hole and no reference points for measuring. I´d love to give you a hand mate but i live just a bit too far away. Hope you can understand my waffle and keep up the great work. ;D |
| |
|
|
bigrod
Posted a lot
  
Posts: 1,654
|
|
Feb 28, 2008 10:55:52 GMT
|
I understand completely OB and you've more or less read my mind. My garage is strewn with the bits I've cut out so far for referrence, paper templates and off cuts of steel and cardboard!!  I do like your idea about the box section in the sill though, I think I might just do that. Gonna tackle the front end first though and work my way back. The (slightly) annoying thing is that I'm going to have to do everything twice as the other side of the car's in the same state all the way from front to rear!!  |
| |
If I have to explain, you won't understand.
Maximum signature image height = 80 pixels
|
|
|
|
|
Feb 28, 2008 11:23:48 GMT
|
Great stuff Rod, the way I see it: It's only steel. Cut rotten stuff out, put shiny stuff in.  My weldathon has had to take a back seat too, due to work. |
| |
|
|
|
|


 )
)
