|
|
|
|
|
It’s been some time since I posted any updates, I’ve not slackened I’ve been on. My garage but at a slower pace due to the cold and dark nights Thank you for this information kevins, I’ve now opted for the opal  To bring it up to date I’m powering the Chinese diesel heater with mains power, as these heaters can’t just be switched off, they need the fan to keep going after powering down so (like others) I’m using a 12v battery for backup if there is a power cut This rely with cut in and power the heater with the 12v battery if mains power is cut while running   Initially my thoughts where that that the 5Kw Chinese diesel heater wasn’t going to be enough to heat the 5.5 x 5.5 garage so with the help of an EGR I was planing on using the exhaust heat to heat up a a rad with a fix3ed fan to pump out extra heat So I bought the EGR and rad & fan and plumed them in     The heat it produced was minimal to the effort made to fit it, so once painting is finished the and the heater is fitted back I’ll not bother with the EGR, in passing there was a good price on one of those all in one so I bought it as backup so could always use that together if it ever gets that cold, (it’s that little red box on the bottom of the photo  Looks a right mess round the heater, I’ll have to sort this out better  As I started painting the walls and ceiling with white primer I took down the heater   I’ve decided to reposition the heater further up so I can make use of the wall at heat hight   This was the layout when I was still planing on using the EGR   The Polycarbonate Sheet’s come in lengths of 5M so on the skylights I’ve had to shorten the opening by around 1.3M, this will give me wiggle room for fixing Polycarbonate Sheet to the ceiling  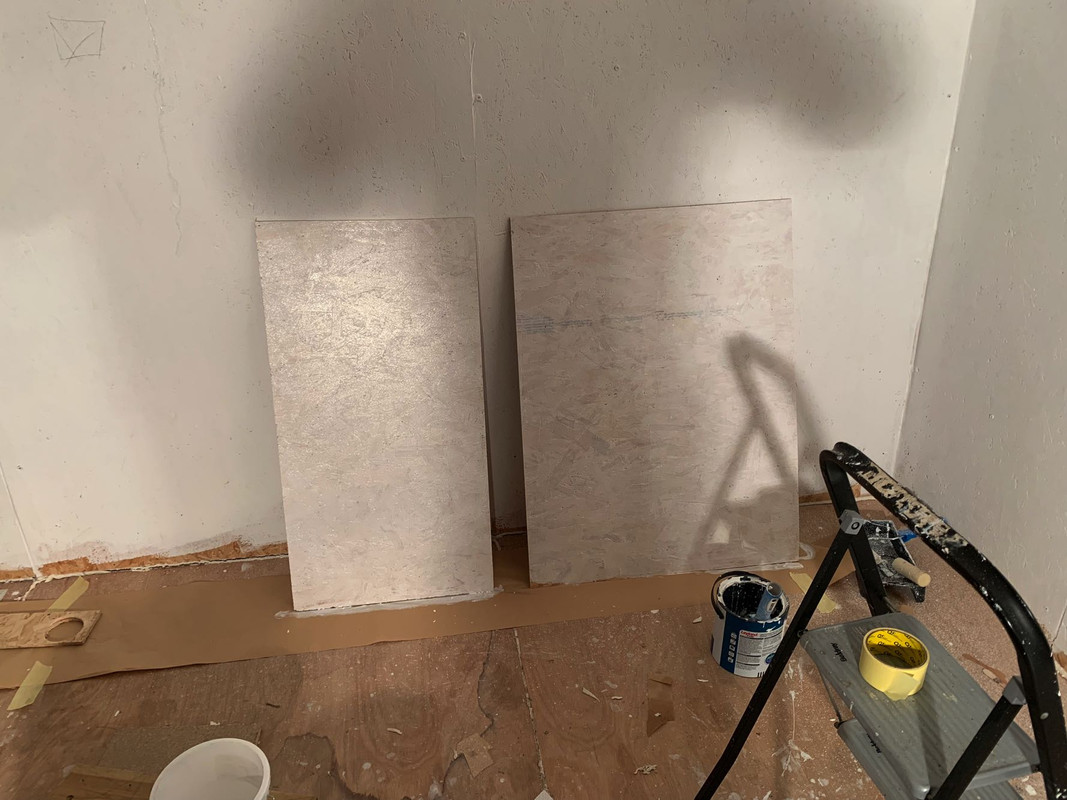 Framing for the blanking sheets of OSB  With the two tags on either side of the skylight I would slide in the blanking OSB sheet without having to have an extra pair of hands       Time to mark out where I’m fitting my LED T5 lights   I bought some extra torches form Aliexpress as I was always misplacing them  My Barrina LED T5 4ft arrived 20 watts, Lumens 2200, Super Bright White-6500k and soon fitted these ti the ceiling    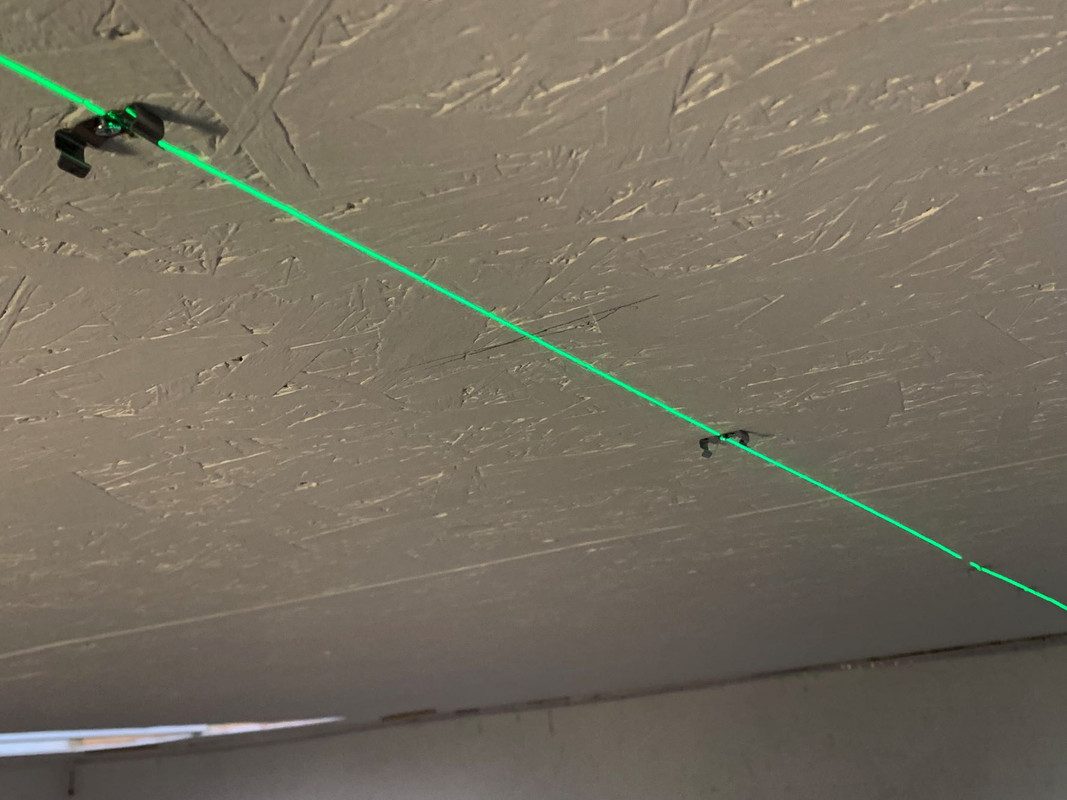       These Barrina LED 4ft lights commonly come in sets of 6 or 8 so I first bought a set of 6 to see if I needed more and how many if I did, these made a huge difference but I still needed a few more to even out the ceiling light so I bought an extra set of 8 and after discovering two LED strips under the mezzanine wasn’t enough I bought an extra set of 6 Mt set of 8 Barrina LED arrived and soon fitted      All the stranded wires had ferrule’s attached  Lidl had a fire extinguisher so bought one  Just before painting the walls I worked out where I wanted the wall sockets and test fitted them, then before painting I took the boxes out but left the screws in place so I would not need to fumble about and make hols in the new paint   The new location of the heater and sundries  I ended up with 15 LED strips on the ceiling   Under the mezzanine I was planning on only having two strip lights one each end, but discovered this wasn’t bright enough so ended up fitting 5   I ended up going for a duckegg colour for the walls this is only the first coat           Fitting five LED strips under the mezzanine was a good choice    Tidying up the wires  Making a start on my workbench       Corner posts had more cuts for the cross members    Workbench top is made up of 2x 250mm x 50mm x 3.6M planks, I joined this together with M12 x 1M rod’s, I counter sunk these holes so I could add washes and also not have the nuts protruding out and cut these rods to 500mm     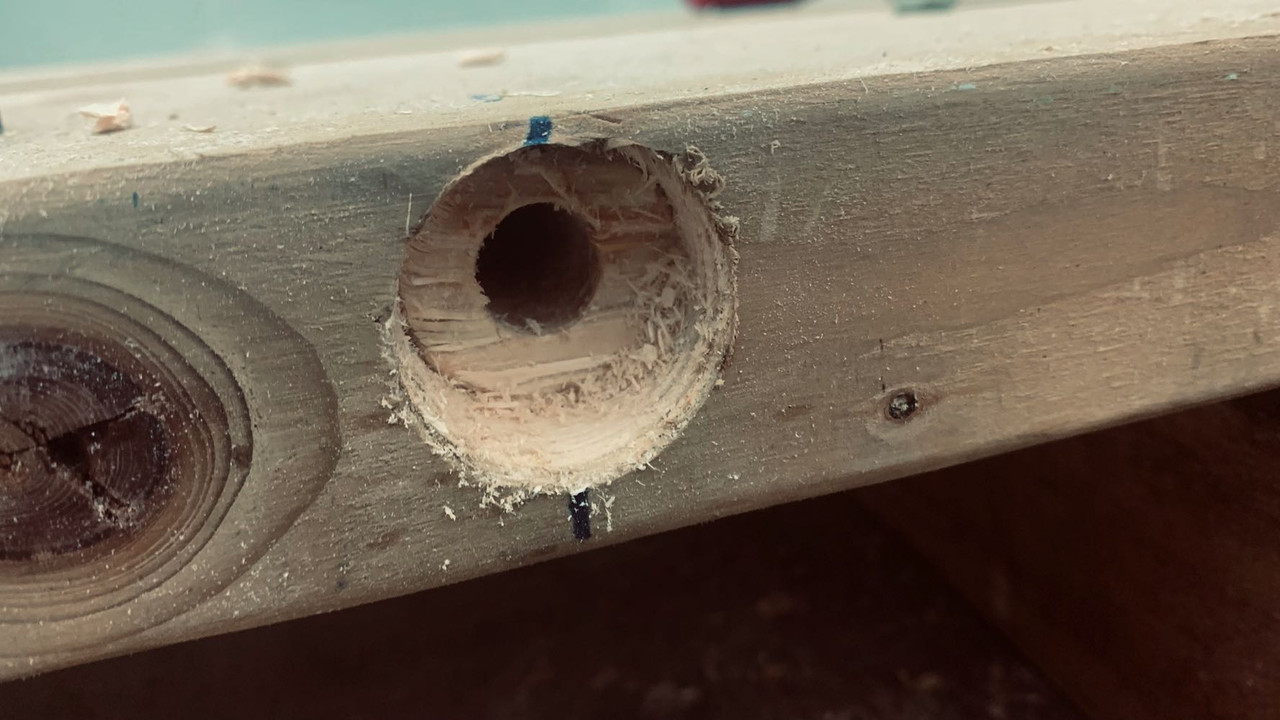 Trying to get the drill bit as true as I could before drilling       Then onto the frame, I am having 6 legs, these coach bolts are also counter sunk and pr drilled            Smoothing off the edges of the legs top to bottom  Fitting the cross members and the braces      This is a test fit as I still need to fit a sheet of MDF to the back of the one side of the workbench to hang tools on   I’m rather pleased with the lights above the bench, these two images were taken with only the lights above the bench switched on   I wanted to have a low key LED strip along the edge where the walls meet the ceiling so bought a strip of LED lights and tried them out    One of my bad ideas, they’ve been bind |
| |
|
|
|
|
|
|
|
|
|
|
Excellent !!
I'd love a garage / workshop like this, (& Mrs. Alpina99 would love it even more, she'd never see me !! 😁😁)
Certainly a lot of thought and planning gone in to great results,
Have to agree though, I'm not a fan of the "nightclub" led's,,
Please keep the updates coming,
Nigel
|
| |
BMW E39 525i Sport
BMW E46 320d Sport Touring (now sold on.)
BMW E30 325 Touring (now sold on.)
BMW E30 320 Cabriolet (Project car - currently for sale.)
|
|
|
|
|
|
|
|
how do ypu plan on filling that fuel tank away up in the gods?
does the radiator system work ok?
I have on of those in my office and have often thought of scavenging the exhaust heat
I run mine from a 12v switched mode power supply and have it hooded up to a small UPS to allow me to shutdown if the leccy goes off
|
| |
|
|
|
|
|
|
|
At the moment I’m using a 12v DC oil/diesel pump to extract diesel from the 205Lt drum of diesel out side the garage when the inside small tank gets low I’m doing it this way as the heater’s pump will burn out very soon if it had to be pumping/sucking diesel over 8 meters from from the barrel to the heater  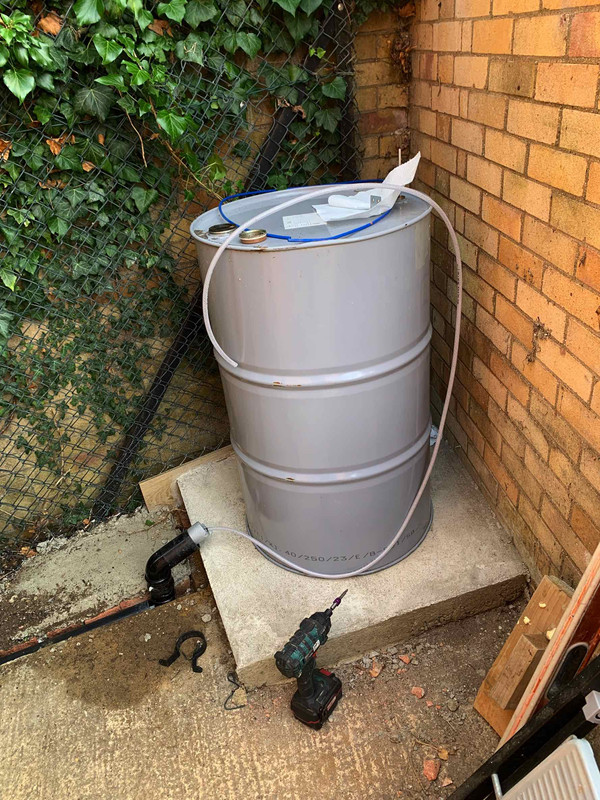 The pump as was before taking it down for painting  When I fit the heater permanently in the new location, the 12v DC pump will also be fitted, I missed it out on my diagram as the pump will sit on a shelf next to the tank where the 12DC battery, the 240 to 12v DC transformer will sit, it wasn’t placed on the shelf before as the shelf was not long enough to place the pump on it but the new shelf will ne made long enough  |
| |
Last Edit: Feb 6, 2024 18:22:12 GMT by mollydog1
|
|
|
|
|
|
|
|
Ah ha, makes sense
I think those pumps can pump to a head of 8m but you need to move the pump close to the drum.
I run mine on heating oil out of a 20l drum, but lifting the drum up a ladder to my office roof is a pest, I think I will do something like you have set up there.
|
| |
|
|
|
|
|
|
|
|
Does it heat your unit ok?
|
| |
|
|
|
|
|
|
|
Well I finished my work bench last night, I noticed little to no LED fluttering in the video clip, from the Barrina LED strips The bench took me approx 12 hours over a few evenings, cost of the materials was approximately £270, the materials used so far 2x 250mm x 50 x 3.6M planks 1x 2400 x 1200 MDF sheet 1x 2400 x 1200 9mm ply sheet 4x 100 x 100 x 3M posts 5x 50mm x 100mm x 3.6M timber used for brace 50 x M10 x 70mm coach bolts, 5x M12 x 1M threaded rods, nuts & washers 8 x Pieces Levelling Feet Excluding a few M5x 60 and M5 x 120mm wood screws you might just hear the rain in the background, Fitting the feet leveller and the back board to hang tools from Fitting the feet levellers          Then trying to get the MDF sheet round to the garage, it was just too heavy to carry it, lucky last week Lidl had these wheel trollies on offer and I had bought one of each, with help from my wife we placed the sheet on to the trollies and wheeled it round the back to where I cut it down to size, this made it manageable for me to take it in to the garage  Ready to cut the MDF  Cutting the 100mm x 100mm posts to size to attach the MDF to   I’m fitting these MDF supports 10mm/20mm off the floor   I needed to get out the big drill to drill through 200mm of timber, the cordless drills just weren’t up to it    The M12 threaded rods were also counter sunk at the back,  I couldn’t get the drill between the legs on the inside so used the larger washers on the inside  I used this contraption to round off the ends of the rods I’d cut to make it easy to fit the nuts on them     Then screw down the work top to the bench frame    I used M5 x 120mm screws for the bench   I had the worktop overhand 60mm at the front and 70mm on the right hand side so I can use clamps I’m rather pleased with the tool board, as I used 100mm x 100mm post to hold up the MDF, the bench is 100mm further away from the wall, it’s OK where the MDF sheet is but at the other end I will need attach a 100mm wide timber strip to close the gap, not an issue, just a bit more work    It must have been raining that hard that I had a guest pop in sheltering from the rain   This image was taken with just the LED’s above the workbench switched on  henspeed henspeed, Takes around 20 minutes to bring the temp from 6c to 22c at full power (5.5M x 5.5M internal size) then down to lowest power to keep it at around 18c - 20c these measurements were taken when outside temp was around 4c over Christmas, the garage is well insulated but I’ve not yet fitted the acrylic sheet under the skylight and have no door yet, only a tarpaulin on the 4M x 1.950M opening so that is letting in some cold air for sure |
| |
|
|
|
|
|
|
|
|
Impressive how well your wood working has come on. Bench lights are great.
|
| |
|
|
|
|
|
|
|
Widening the L brackets to take M6 screws for the timber I’ m using to fill the gap behind the bench where the tools board isn’t covering, making good use of the lip on the bench using the clamps to hole both the sacrificial timber and the L bracket itself    I’m using an offcut of one of the 100x100 posts as a filler, just the job  Not only using the L brackets but also 200mm screws, this should be more than enough to hold it in place    Then fitting a boarder to the bench, hopefully this will stop things rolling off the bench at the back   Then time to cut and screw in place the bottom shelves to the bench     Fixing L brackets to shelf parapet      A few months back I bought a couple of wall screw boxes from Lidl and thought now is the time to put them up, as the mounting holes are too far back for an ordinary drill attachment I had to use this extender    Then fitted the other  I had ordered a pack of square hooks to hang tools from, two different sizes, the 100 pack are 18mm shoulder and 40mm long (18mm of this is threaded)  Then for the larger breaker bars and ratchets I’ve ordered (not here yet) 18mm shoulder - 70mm long (26mm of this is threaded) At the moment I’ve made a test strip before I make any holes in the board itself   My late father (bless his soul) in the early 70’s bough himself a vice to use at the back of his one car garage, and on his passing his car tools came to me, all his sockets and ring spanners are imperial so don’t get much if any use but this vice and his trolly jack get lots of use from me, I’m planning on fixing the vice either on the corner (as shown in this image below) or what I thing might be a better location, in the middle of the work bench above the middle leg so the leg can take any hammering I do on the vice  With all the rain we had last night I need to go on the roof and look at some of the bolts holding down the corrugated sheets as a couple of rubber washers on a couple of bolts are not performing as they should as I have a couple of drips coming in Today or later this week I’ll be on the roof and silicon all round all the bolts just to be sure I’ve got the one not performing |
| |
|
|
|
|
|
Feb 11, 2024 20:20:35 GMT
|
|
That garage / workshop is really coming on brilliantly,
So jealous lol,
One day, one day,
Nigel
|
| |
BMW E39 525i Sport
BMW E46 320d Sport Touring (now sold on.)
BMW E30 325 Touring (now sold on.)
BMW E30 320 Cabriolet (Project car - currently for sale.)
|
|
|
|
|
|
|
Feb 12, 2024 11:18:47 GMT
|
You are making a really solid work bench. I have done something similar, but on a smaller scale. Some questions / thoughts, and apologies if i'm telling you how to suck eggs. On the bench, the threaded feet seem very small / lightweight in proportion to the construction. Did you consider bolting the bench to the the wall and floor? On the vice position, on the end will be better as having it in the centre will hinder you if you ever want to put long items on the bench. Make sure the jaws overhand the front edge of the bench so you can hold long items vertically if you need to. I have a multiplug just under the bench so you can plug in power tools and use them on items held in the vice without the power cords trailing across the bench. On the tool board, I used white faced melamine so you don't have to paint it. I just knocked nails in to suit the tool position, very easy to change the layout and sometimes tools are difficult to pull off from a L hook. Cheers 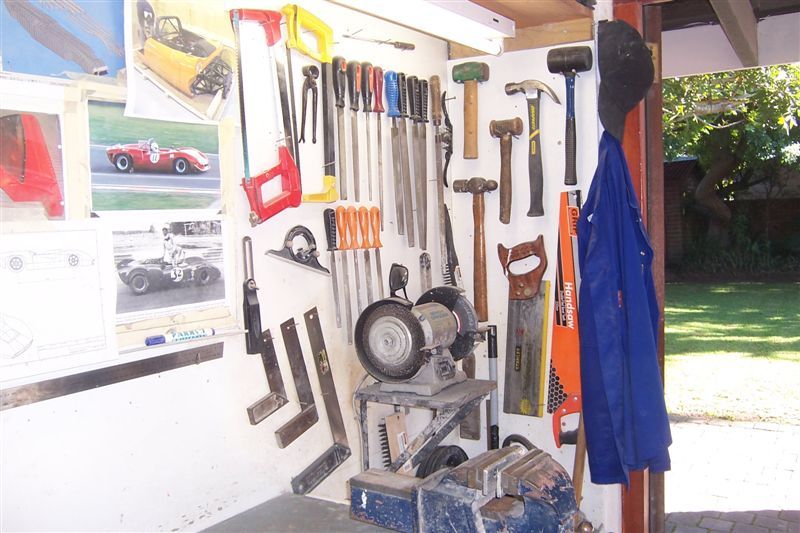 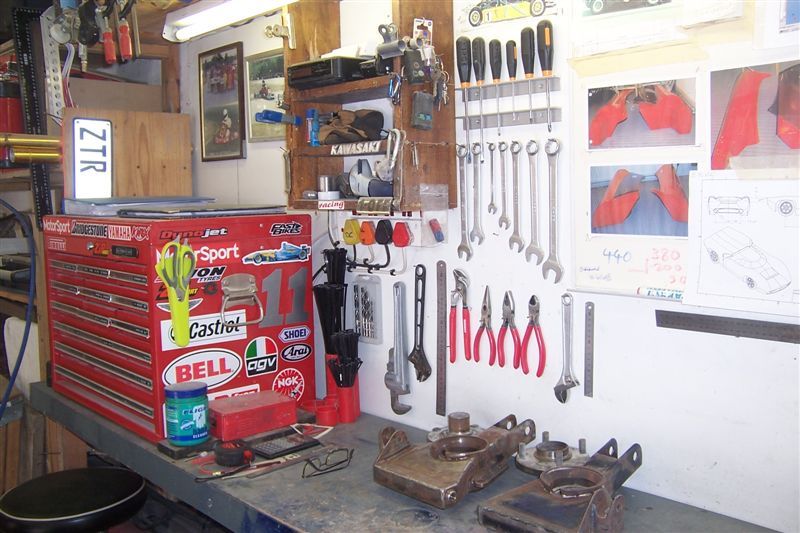 |
| |
Last Edit: Feb 12, 2024 11:31:04 GMT by Fred W B
|
|
|
|
|
Feb 12, 2024 20:35:41 GMT
|
I’ve started filling in these wall boxes  so thought I’d make a start on populating the tools board, I first got my first line using the laser level  then from there on, I used the spirit level to give me the varied straight lines to hang tools on with the L hooks and magnet strips I bought from Aldi   You may not recognise this whistle,  18 years ago a TV presenter (Victoria Stillwell) popped round to teach us how to control our rather large dogs, she with her TV crew were here for one week just before Christmas 2006, then a further week just after Christmas, and she forgot her whistle here With out two Inuit dogs (sadly they have long passed away now)  I haven’t enough room on the tool board for many of my hand tools, I’ve even filled in the mezzanine brace to give me more hanging space  While going through my shed collecting some of the tools as I went along I was surprised just how many screwdrivers I’ve collected over the years and these aren't all of them, I’ll admits a punch has sneaked in the frame and top right in yellow they are hex and bottom right yellow ones they are trim picks  if my wife ever gets to come in to the garage and see where our money has gone, To paraphrase Captain Lawrence Edward Grace, I’ll just be going off line, I may be some time  I’m running out of space  fred fred W B Thank you for your information, I’ll take any advice and opinions given as to be honest I’m working things out as I go along and for sure I’m very please for your advice, I would of liked wider threaded feet, but on eBay and Amazon these 50mm wide feet were at a reasonable price (£20 Amazon have some threaded feet that are between 80mm and 150mm wide but these are priced at just under £130 for four,. So for now I took the cheapest option, the bench is screwed to the 100mmx100mm posts, the corner post showing, the middle 100mm x 100mm post is behinds the OSB   Behind the image of the vice I plan on having 4x double sockets, before painting I went round marking fixing the sockets  Then when I got round to painting I took them off the wall leaving just the screws in the wall so I get to place them back in the right location  |
| |
Last Edit: Feb 13, 2024 3:46:42 GMT by mollydog1
|
|
glenanderson
Club Retro Rides Member
Posts: 4,352
Club RR Member Number: 64
Member is Online
|
|
Feb 21, 2024 12:48:57 GMT
|
|
The impulse pumps supplied with those diesel heaters will easily pump 10 metres or more. We would use them to pump from the main diesel tank on a double decker bus to a heater on the other end of the top deck. As long as they’re mounted near the tank, and below the running level of the fuel in it so they don’t lose their prime, they’ll work indefinitely. They’re designed to push though, not to pull. Stick the pump outside near the oil drum, and remember to use the thin hard line to connect it to the heater. It’s also really important to use that thin hard line, as bigger diameter and/or flexible hose will absorb the pulses of fuel and the heater won’t run well.
Personally, I’d mount the heater near the floor with an outlet where you’re going to be working as heat rises. I have mine behind where I stand at the bench, just off the floor where it can blow the heated air out in my general direction.
|
| |
My worst worry about dying is my wife selling my stuff for what I told her it cost...
|
|
|
|
|
Feb 23, 2024 16:40:02 GMT
|
glenanderson good idea about placing it near where I'll be working at the bench, nothing is set in stone so might do that +++++ One thing has been constant with my garage build, change of plans I start with what I think is a good idea but once I implement the plan I find I need to alter something, this time I have discovered I just don’t have enough space for my tools on the one wall board  so I’ve expanded the wall board to to the left to accommodate the extra tools Off to the timber merchant and bought more materials to make the extra tools board,      No time spared to fill up the board    I decided to use tent pegs for the screwdrivers and a few other tools so bought them from Go-Outdoors and cut them to size    Much better for the screwdrivers than the L hooks I was using   Well still not enough wall room for my tools so made a start on the back wall   Fixed a couple of L brackets to manages fitting the MDF board on my own    Made a start on filling up the board   Once I got out my drill press, grinding stone & sander, there just wasn’t enough space for these tools let alone if I also placed my vice there Not opened till now since I bought it a couple of years back    
I found there just wasn’t enough room to work comfortably with my bench tools in the location I had planed, so bought extra timber for an extension to the work top   I fitted the worktop a little lower then the main one making it more comfortable to work on it    This is more spacious now, also moved the wall boxes  These past few weeks we’ve been getting torrential rain and sadly I had a rain water dripping in in two spots, the first stop in the rain, up on the roof I went and placed a dollop of silicon on all the screws holding down the sheets, these bolts are made for this purpose and come with rubber washers to stop water but maybe with timber shrinkage or movements some of the screws needed re screwing and some of the rubber washers weren’t doing their job  I took no chance and checked all the screws and a dollop of silicon on all of them to be sure 
|
| |
Last Edit: Feb 23, 2024 16:48:53 GMT by mollydog1
|
|
|
|
|
|
|
|
Excellent work here,
Love organisation,
Also a massive help in avoiding losing tools,
Nigel
|
| |
BMW E39 525i Sport
BMW E46 320d Sport Touring (now sold on.)
BMW E30 325 Touring (now sold on.)
BMW E30 320 Cabriolet (Project car - currently for sale.)
|
|
|
|
|
|
|
You’ll notice at the bottom of the post I’ve layer a strip of 18mm thick MDF  I’ve does this to all the posts, this is so as when I fit 18mm ply wood on top of the present 12mm OSB I only need be trimming the odd bit of post and the new 18mm ply with (hopefully) just slide under the posts |
| |
|
|
|
|
|
|
|
I’ve not stopped working on the garage, just changed direction for a few weeks, I’ve been finishing placing most (not enough room for all of them) tools on the garage wall  |
| |
|
|
|
|
|
|
|
Your setup with the Chinese diesel heater sounds clever, especially with the backup 12v battery solution. It's all about those little hacks to keep things running smoothly, right? And hey, I'm loving the photos you've shared – really helps to visualize the progress. That EGR and rad & fan setup seemed like a solid plan at first, but it's great that you're honest about its effectiveness. Sometimes DIY experiments don't pan out the way we hope, but that's all part of the fun and learning process. Looking forward to seeing more updates from you as you continue with your Corner Summer Houses workshop project! And hey, since you mentioned corner summerhouses, do you have any tips for incorporating one into a garden space? |
| |
|
|
|
|
|
|
|
Thank you for your complements  I do need to update this thread but for now I’ll show what I’ve just finished doing As I plan on occasions having the car engine running and don’t want to be keeping the garage doors open I had long planed on having an extractor fan fitted, I started this a couple of weeks back, I bought 2x 1.5M x 20mm x 20mm hollow metal rods, and then cut one to use as a brace, as I don’t own a welder I had to screw the parts together, then I sprayed brake cleaner liberally on the rods, wiped it up and after half an hour I sprayed etching paint on it, gave it a couple of coats then when that was dried I gave it a couple of coats of yellow paint           I wasn’t sure which way to have the fan, I thought this looked good  after some trial I came up with this, as I planed on having the ducting move from one side of the garage to the other I thought this was a better solution  Then set about cutting a hole through the timber wall for the vent       Then on to spraying the etching paint               Used these these Heavy Duty Metal Cavity Wall FIXINGS Anchors Plugs for both the shelf and gantry, I wasn’t going to trust wood screws through the OSB to hold up the gantry  My original plan was to attach the ducting to the gantry with cable ties (as shown in a few images) I wasn’t happy with this arrangement as when I moved the gantry from one side of the other, the cable ties would pull and restrict the ducting from any light movement and I could see in time this would/might rip the ducting So I went looking for U shaped brackets, I ended up with 150mm gutted end caps, I took off the holding clip on the end caps and used them as the ducting cradle     It’s a fancy extractor fan can do more than just expel air and can work with a phone app too, here is the wall mounted control   www.amazon.co.uk/dp/B0CCTLKLXX?psc=1&ref=ppx_yo2ov_dt_b_product_details www.amazon.co.uk/dp/B0CCTLKLXX?psc=1&ref=ppx_yo2ov_dt_b_product_detailsAs for the Chinese diesel heater, the final location and setup is as shown, I gave up on the EGR cooler for the extra heat as I discovered the amount of faffing around for that bit of extra free heat, for me it wasn’t worth the lost wall space   I’m having a professional electrician coming on Monday to give me a price to wire up the garage |
| |
|
|
|
|
|
Apr 11, 2024 15:24:37 GMT
|
I should of mentioned, to this present 150mm diameter ducting I’ll be connecting a reducer    And to this reducer I’ll be attaching an aluminium flexi ducting that will be placed to the exhaust  This way as 99% of the time the extractor fan will be used to extract air/heat out of the garage, it will be fixed as shown, the very few times its used to extract exhaust fumes I’ll attach the aluminium tubing to the reducer,(I haven’t yet bought the aluminium tubing) |
| |
|
|
|
|


