|
|
|
|
|
we’ve had a couple of dry days so this afternoon I went and finished off the dwarf wall, this is the side the garage doors fit, for the return I made a pillar and added brick ties to the pillars and corner for extra strength 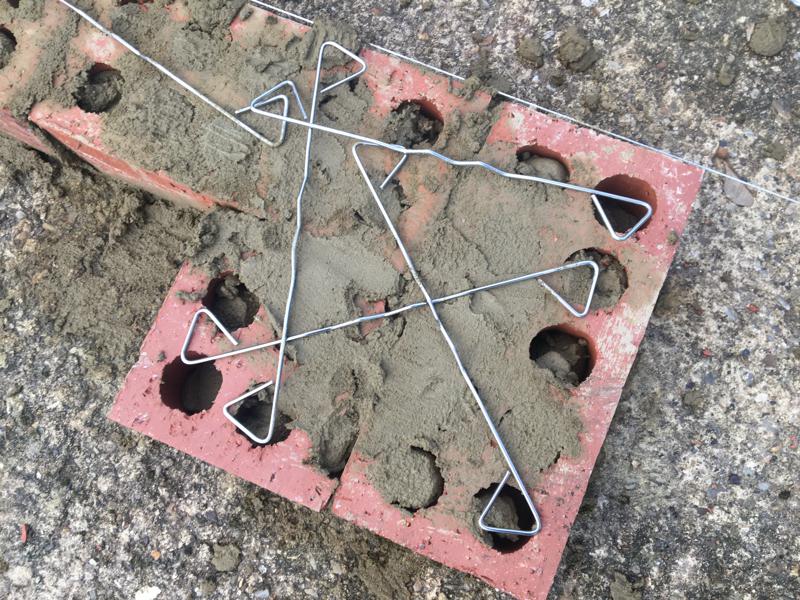 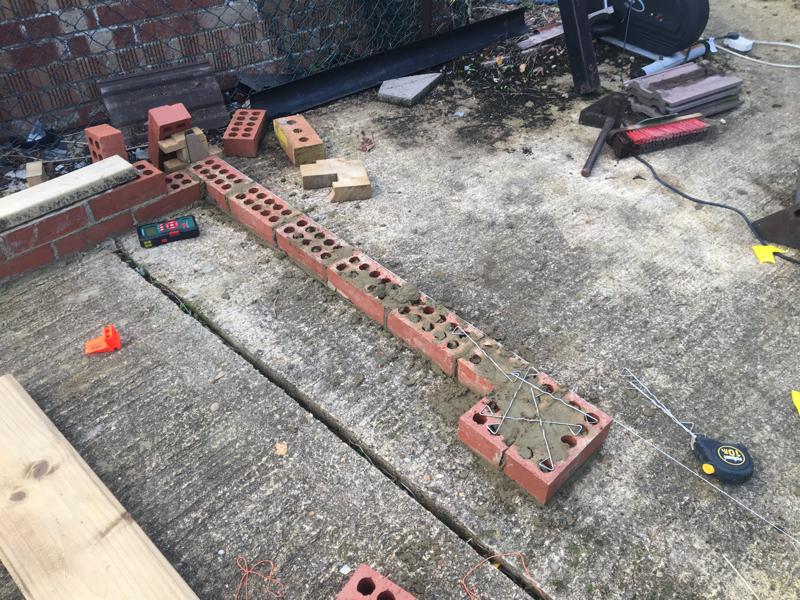 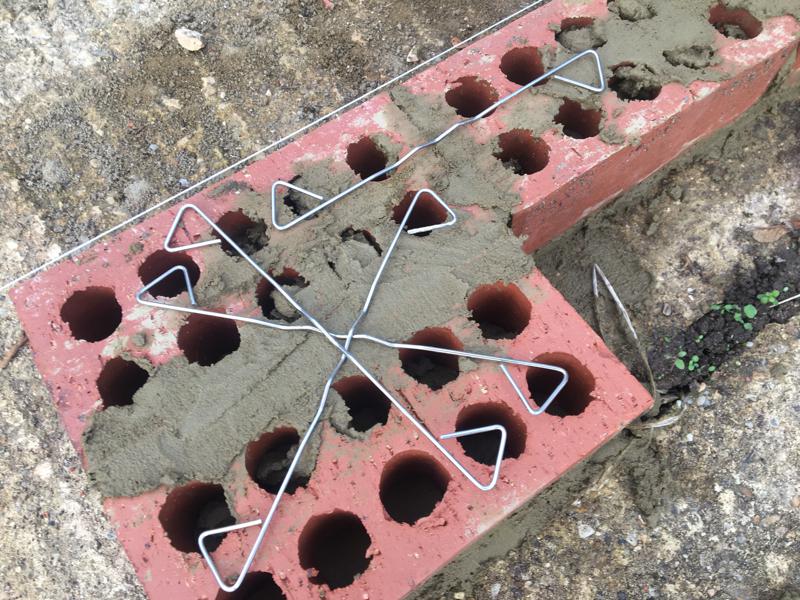 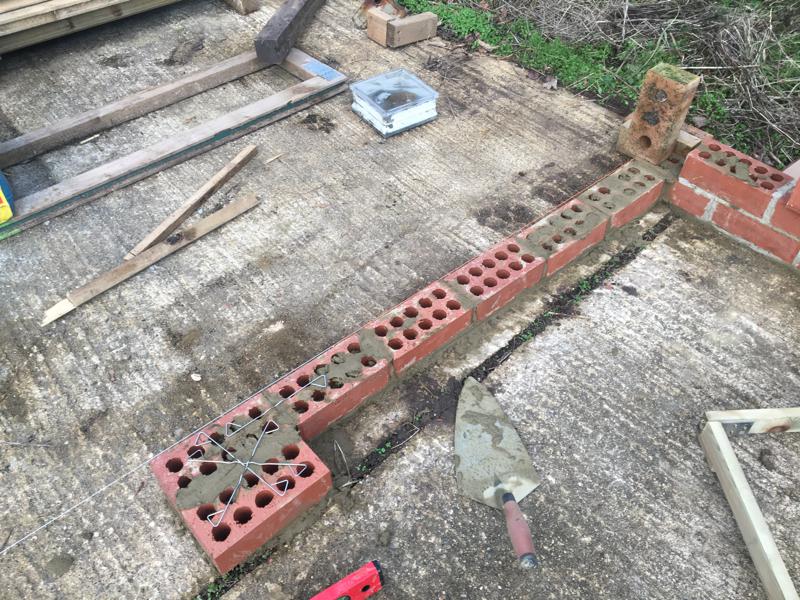  I’ve gone with having the door opening of 3M, at this point I’m not sure whether to have two opening barn doors or to have a sliding (concertina) type door(s), this will be one of the last things I’ll be fitting so still have time to think which to go for, any opinions or suggestions on garage doors? this didn’t take long, I think it took longer mixing the sand & cement 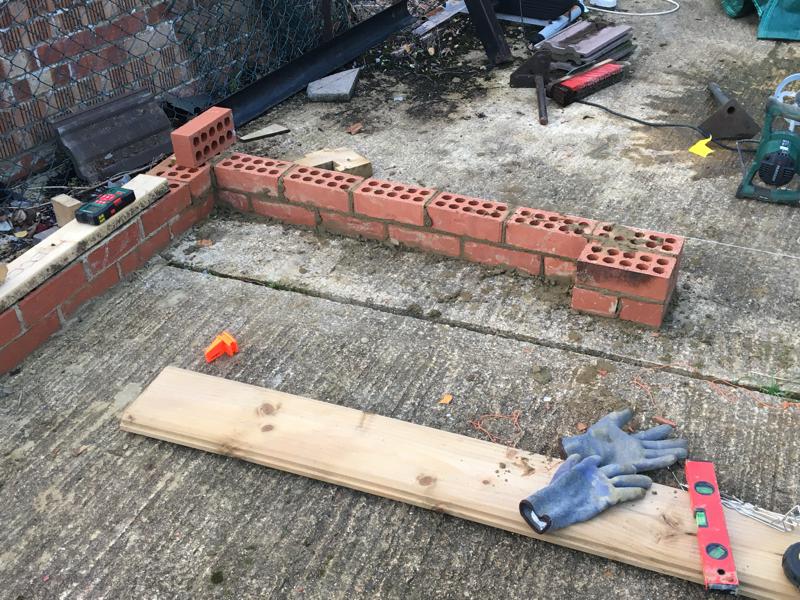 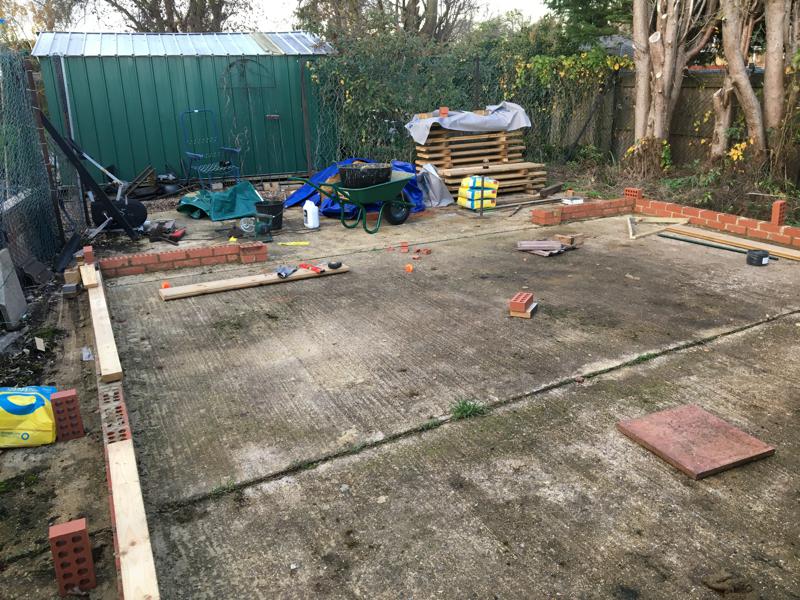  I’m very pleased with how square (defiantly more luck than judgement) I managed to get the dwarf wall 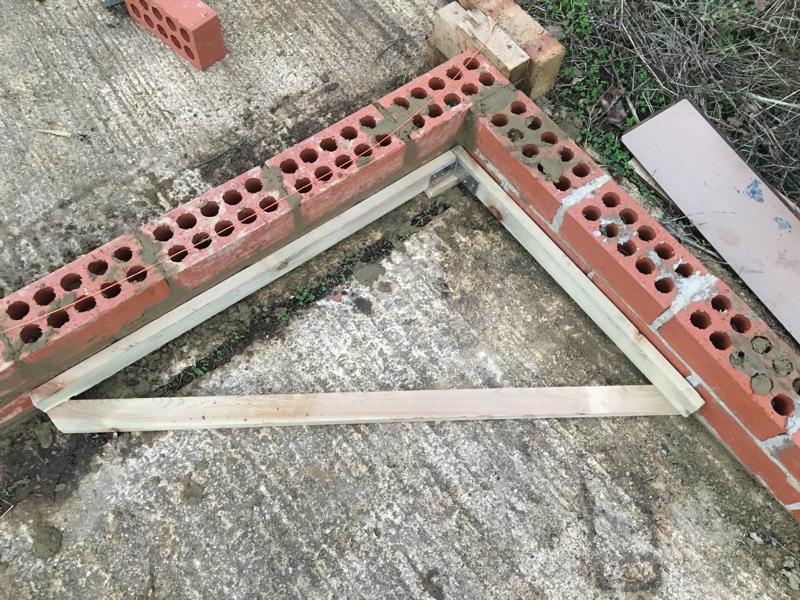 corner to corner using the digital laser measure I was only 1mm out using these end stops to get a precise reading 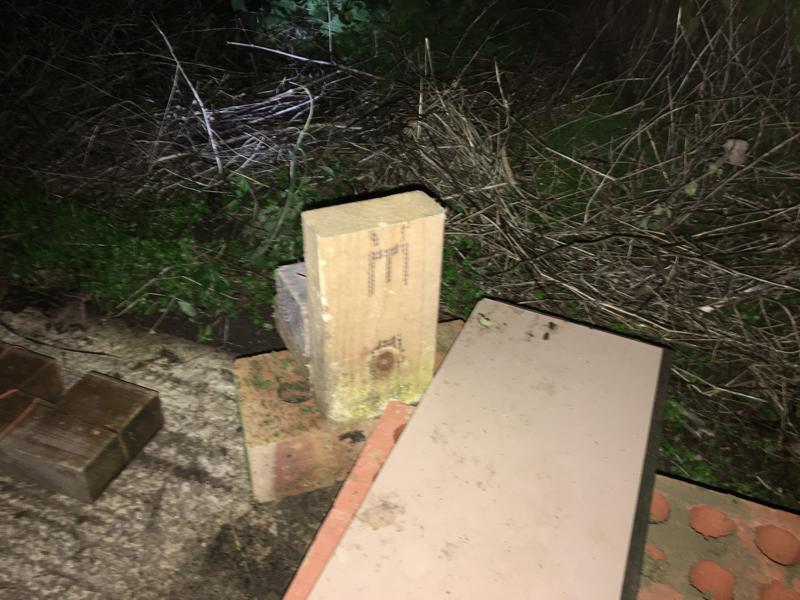 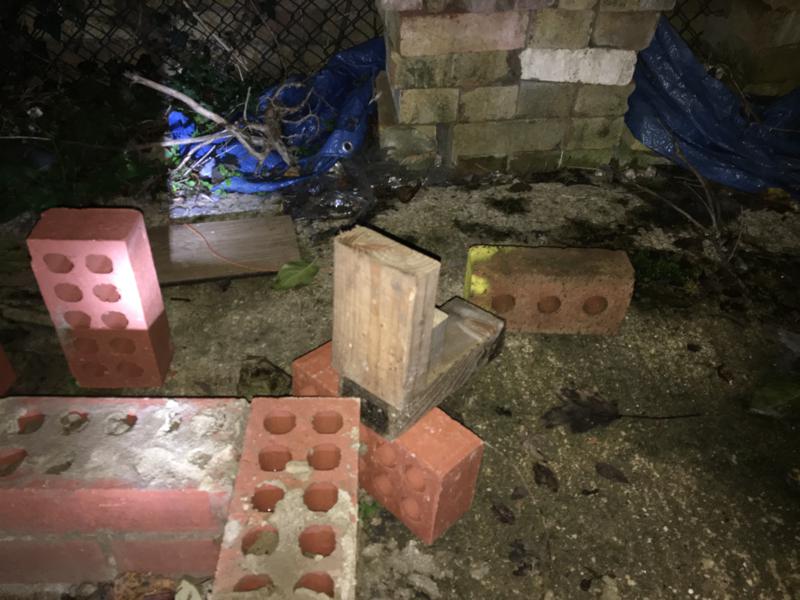 not one for boasting, but I’d call this spot on  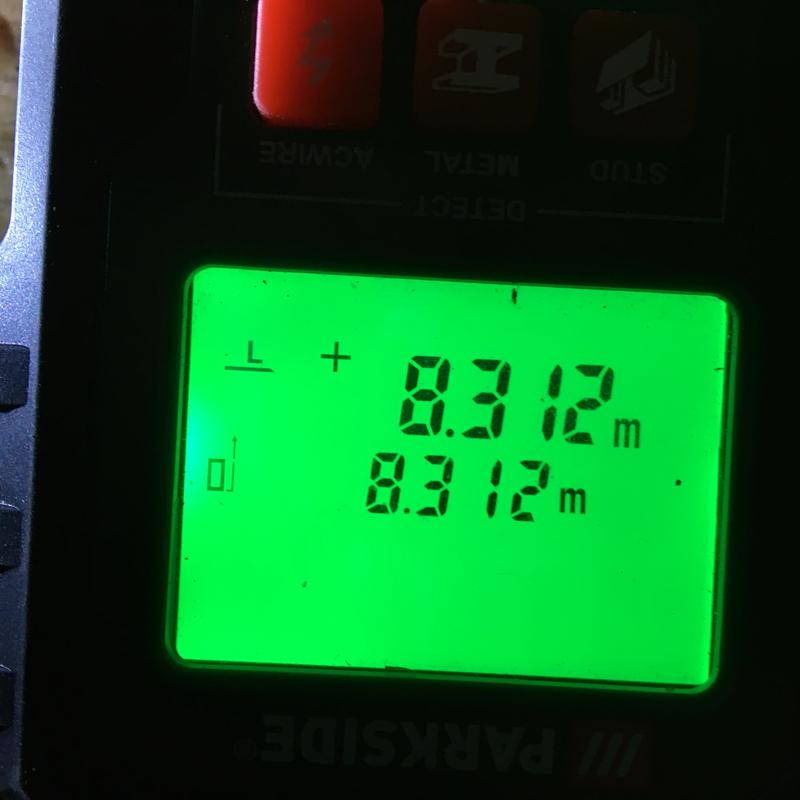 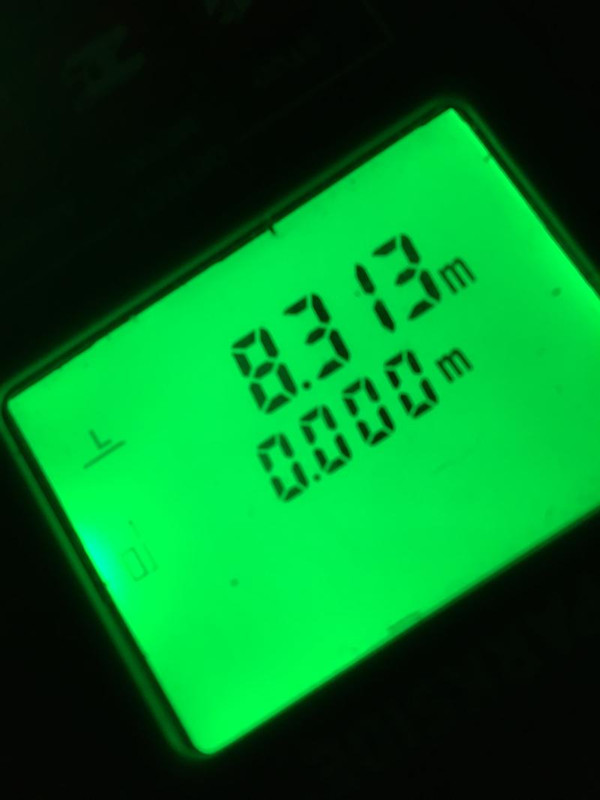 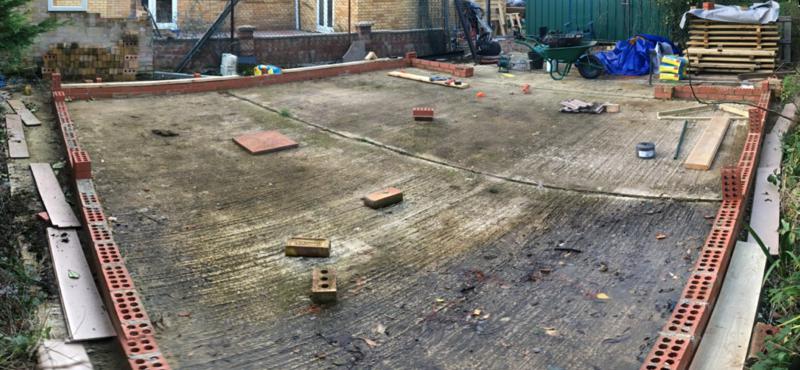 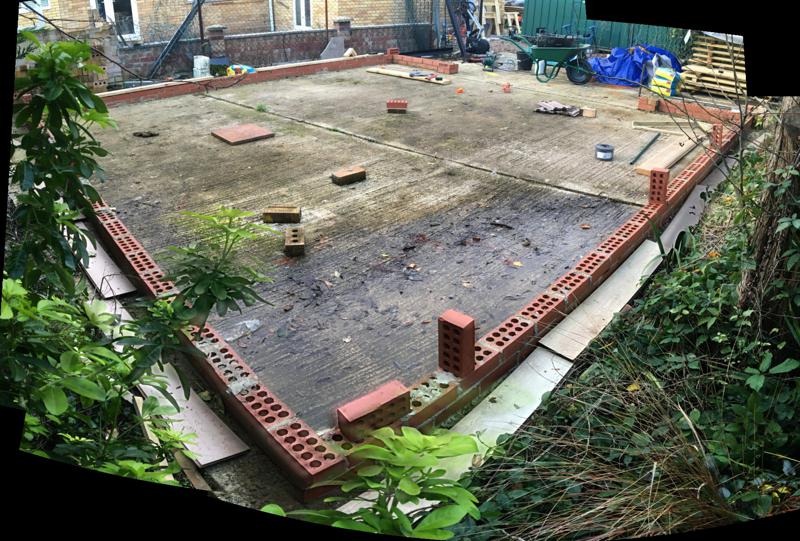 before it got too dark, with the laser level, I worked out the measurements for the firring, 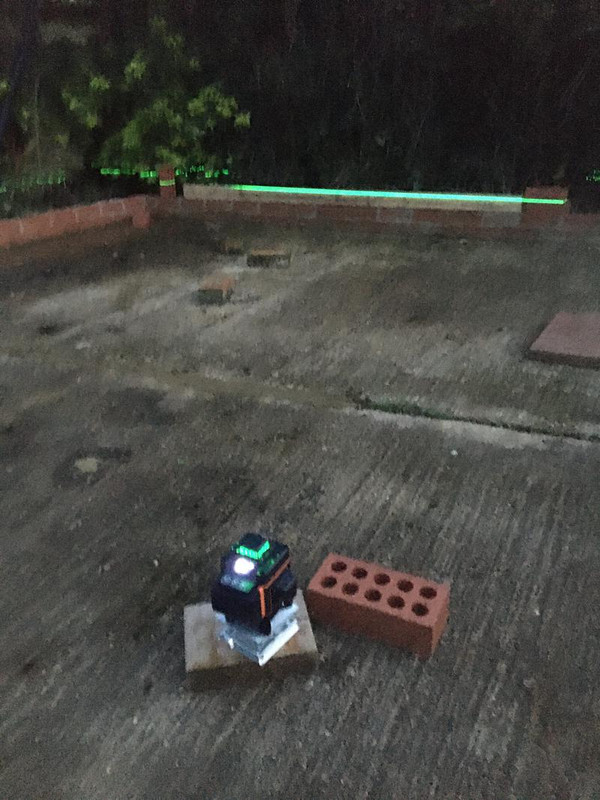  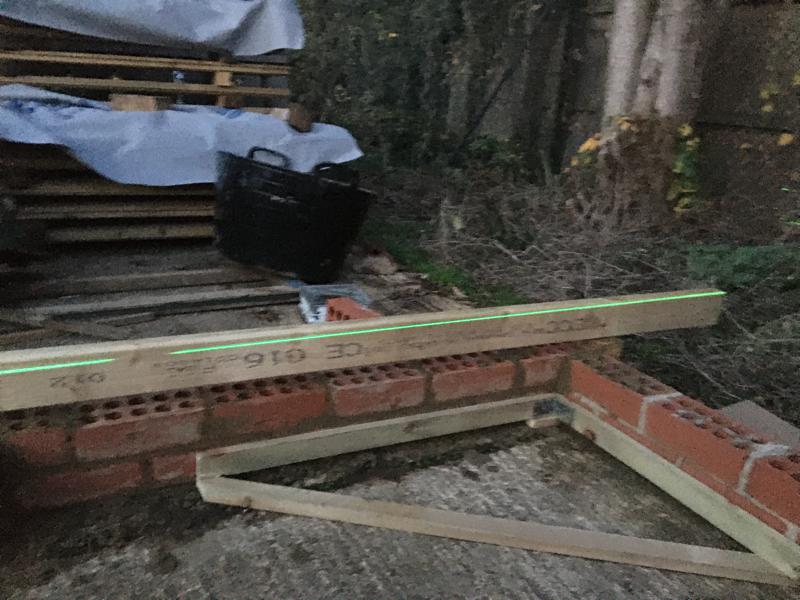 I’ll be taking these measurements to T&P on Monday afternoon |
| |
|
|
|
|
|
|
|
Nov 29, 2020 21:02:51 GMT
|
|
what laser have you used been locking to get one but so many choices
|
| |
1978 mk2 escort mexico
|
|
|
|
|
Nov 30, 2020 19:55:01 GMT
|
I bought mine off eBay for £56 a couple of months back, it has 4 points of laser (16 lines), 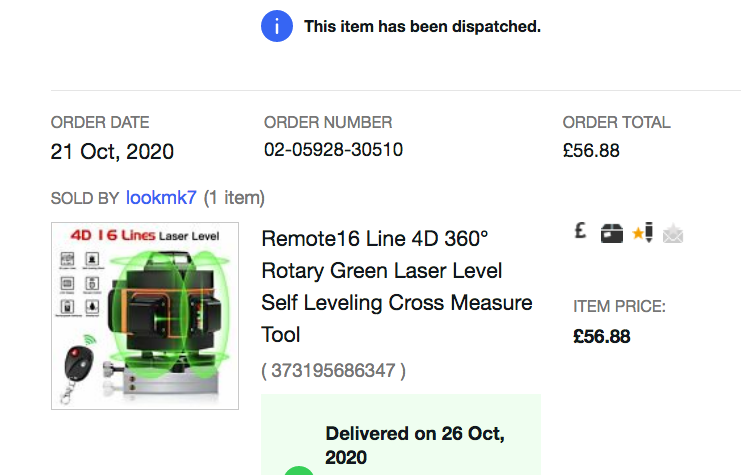 but I see he now sells them for £60  www.ebay.co.uk/itm/Remote16-Line-4D-360-Rotary-Green-Laser-Level-Self-Leveling-Cross-Measure-Tool/373195686347?hash=item56e43241cb:g:nyUAAOSwDiZfqkVc&var=642314997656 www.ebay.co.uk/itm/Remote16-Line-4D-360-Rotary-Green-Laser-Level-Self-Leveling-Cross-Measure-Tool/373195686347?hash=item56e43241cb:g:nyUAAOSwDiZfqkVc&var=642314997656for me it’s paid for itself (in time taken and the accuracy & ease of use) when I first had the concrete pad laid I requested the slope for rainwater run-off, now I need it corrected could of done it the hard way with a spirit level, but made my life so much easier. was quicker and easier to getting the right measurements for squaring the brick corners and the measurements for the firings to level off the wall, I am booked to be at T&P tomorrow afternoon with my measurements and they will be cutting my firtings (fingers crossed, this has already been put back a week) with all this rain going on I’m tempted to buy a 8M x 8M tarpaulin and put this up so I can get on with building the garage irrespective if it’s raining or not, been told it’s going to be another long week of rain |
| |
Last Edit: Nov 30, 2020 19:55:58 GMT by mollydog1
|
|
|
|
|
Nov 30, 2020 20:25:09 GMT
|
You want one of these, this was going up at my house, it's wrapped now so we can work in all weathers. 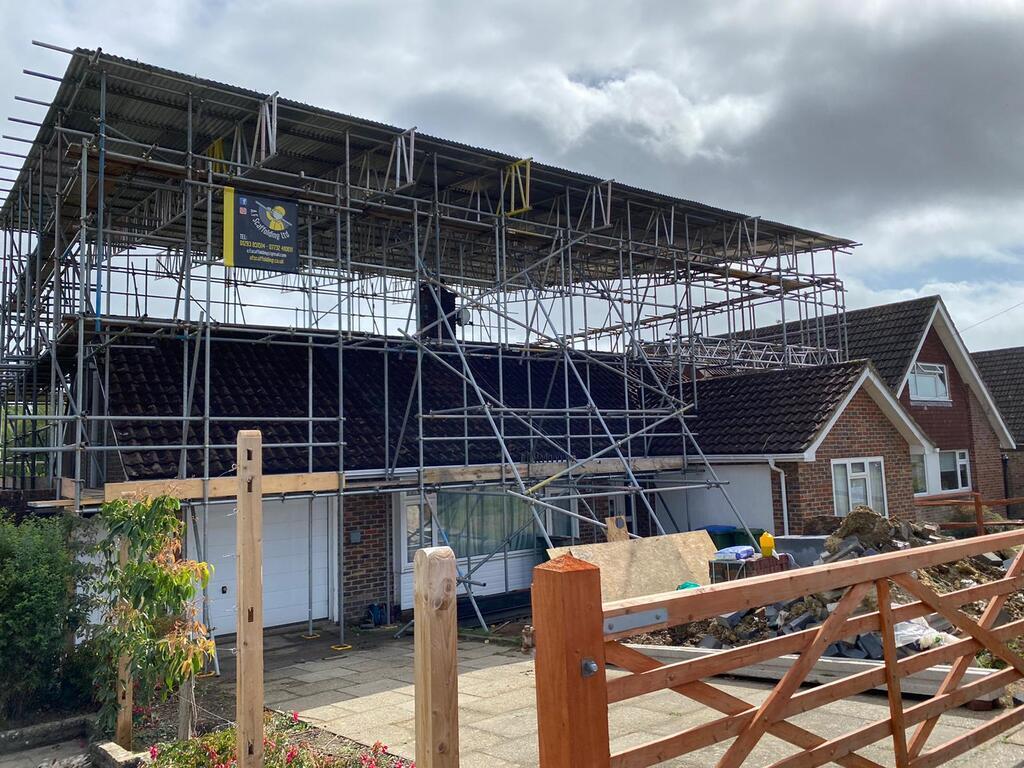 |
| |
|
|
|
|
|
|
|
|
I hate to think of the cost of that scaffolding! Doesn't half make life easier for working under though.
|
| |
|
|
|
|
|
|
|
dodgeroverI’m impressed, my goodness I should think this must have cost as much as my total budget for my garage/workshop I turned up at Travis & Perkins this afternoon and with a few of my diagrams and images, I explained my exact measurements to the guy doing the firings I think having images/diagrams was a great help to him, as he got a better idea of what I needed, this also helped me as he managed to eliminate the need for the 50mm x 100mm timber and used some of the off cuts one of the few diagrams to show him my measurements for the firrings, showing the gradient of the firring, for each side 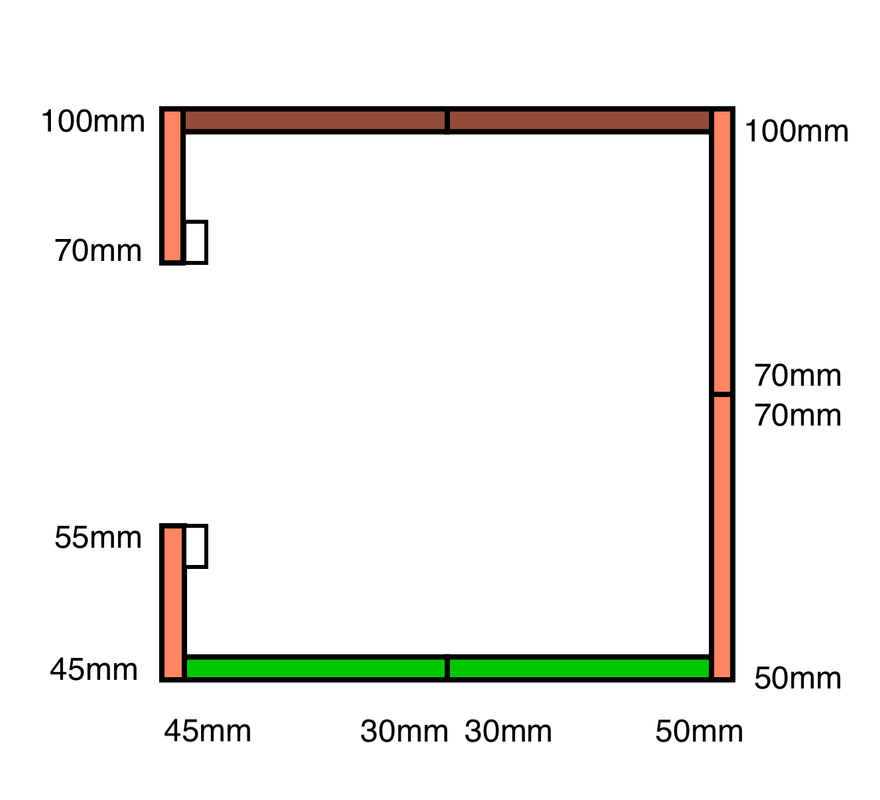 I ended up with only needing 6x 100mm x 100mm x 3M  the guy in action 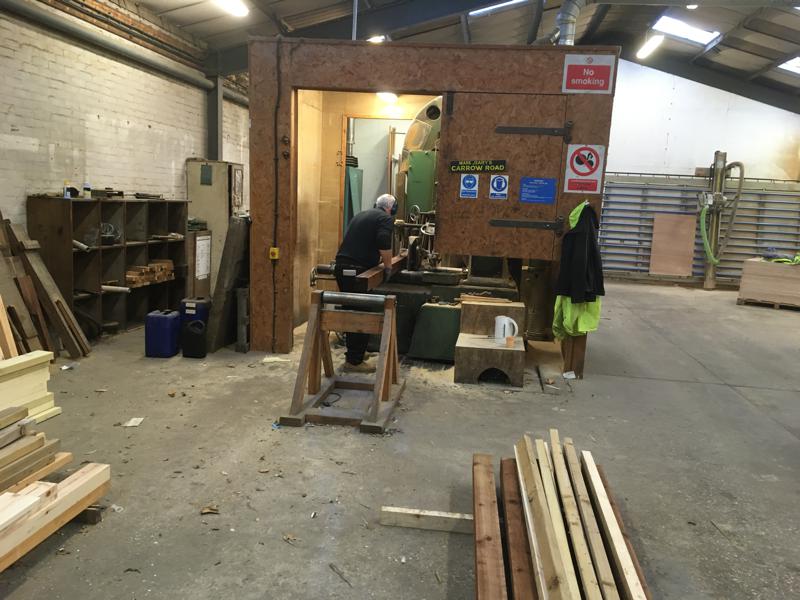 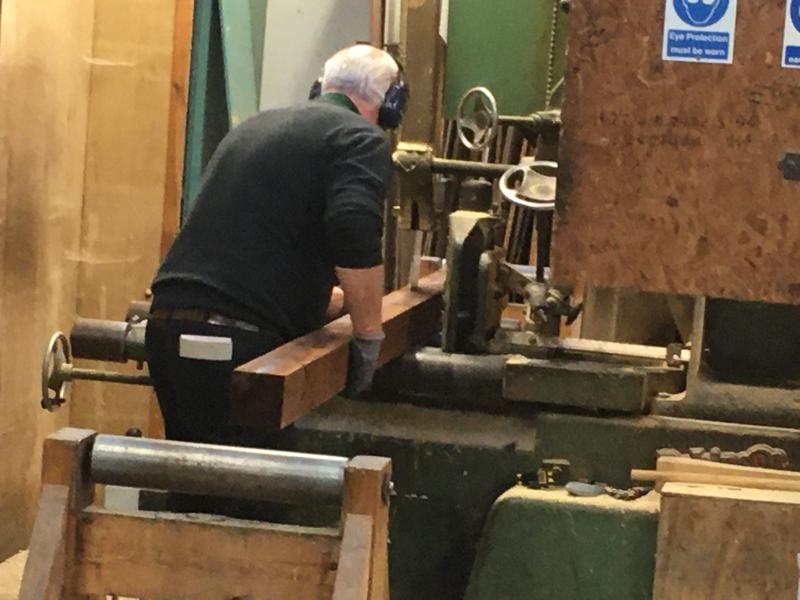 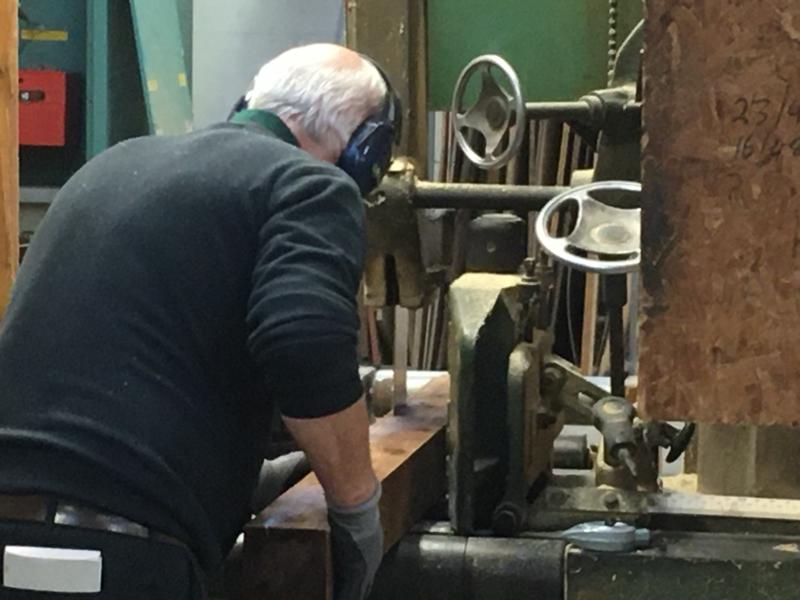 some of the firrings  the machine doing the cutting 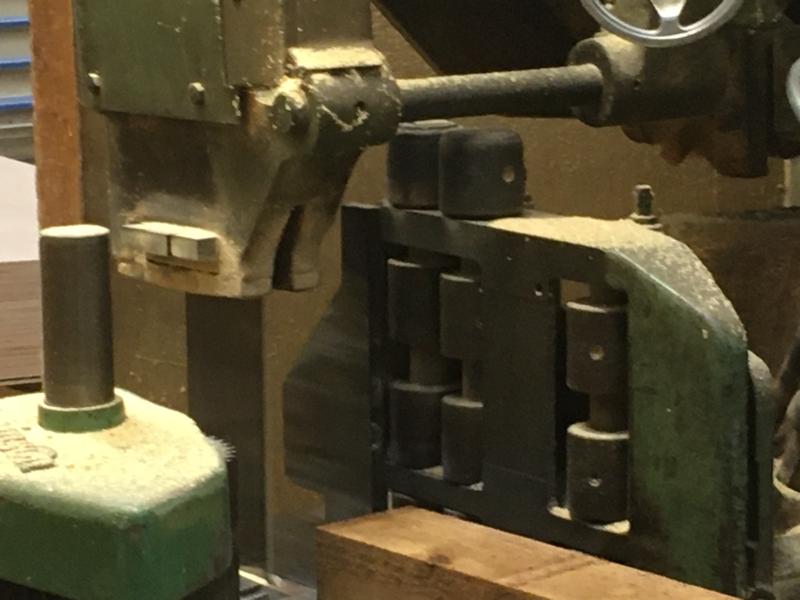 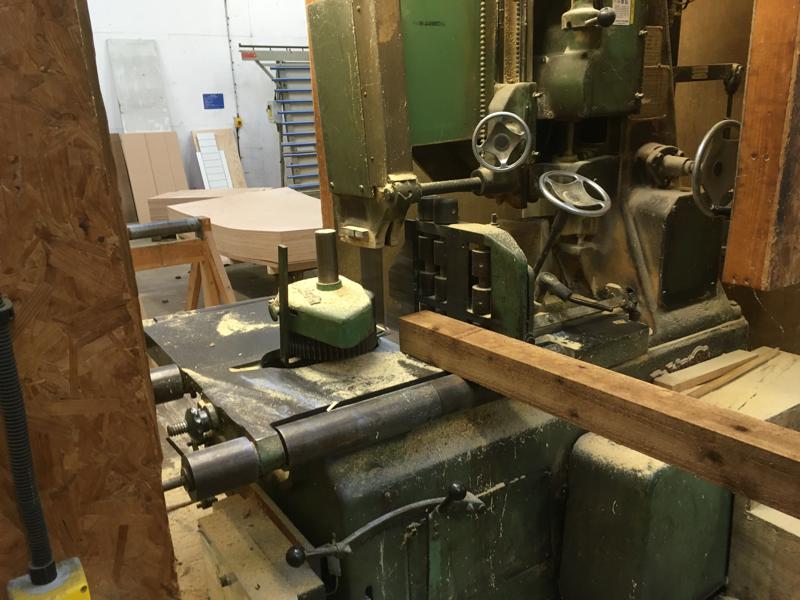 marking the timber with chalk line  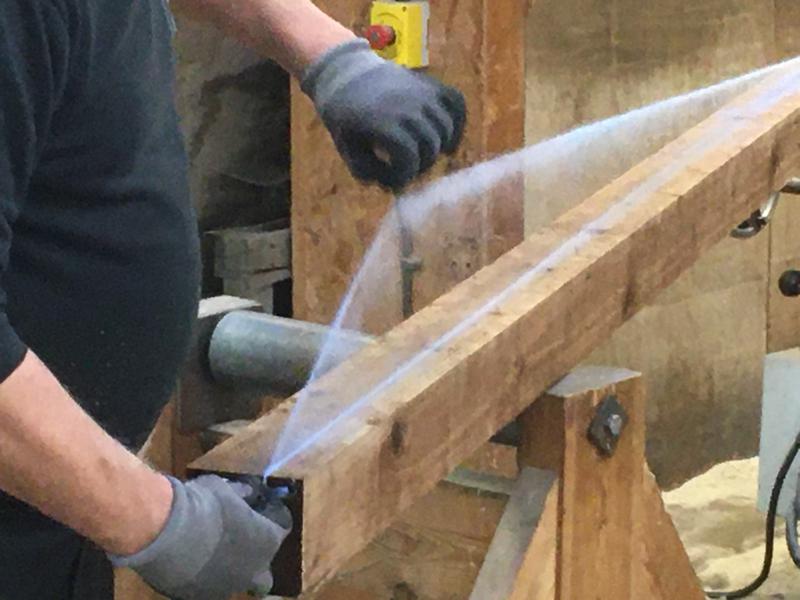 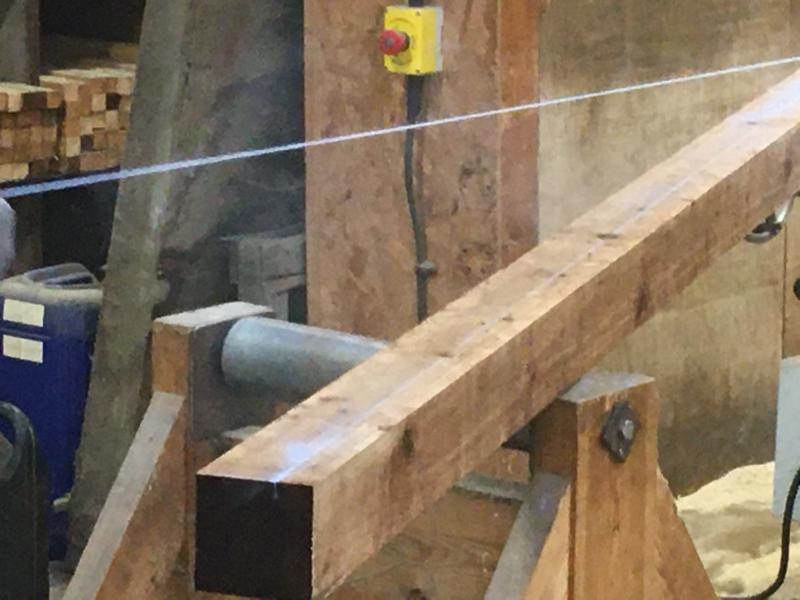 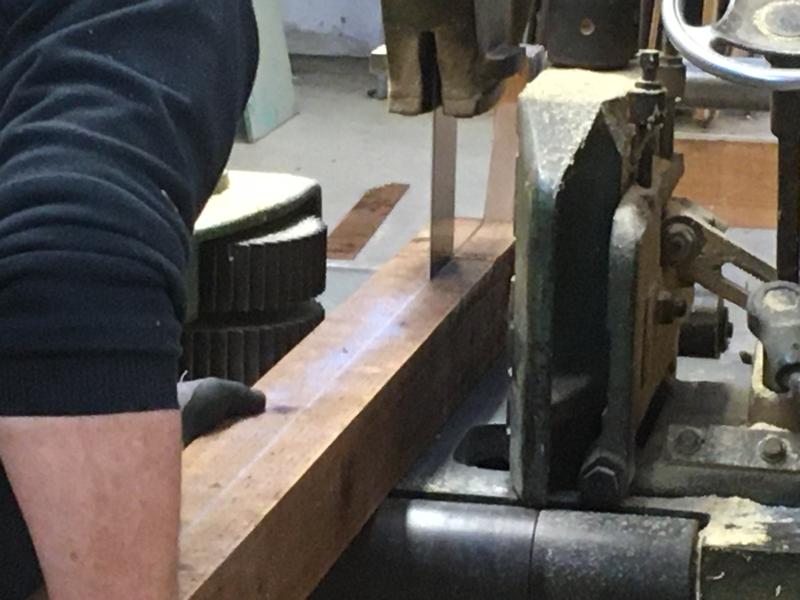 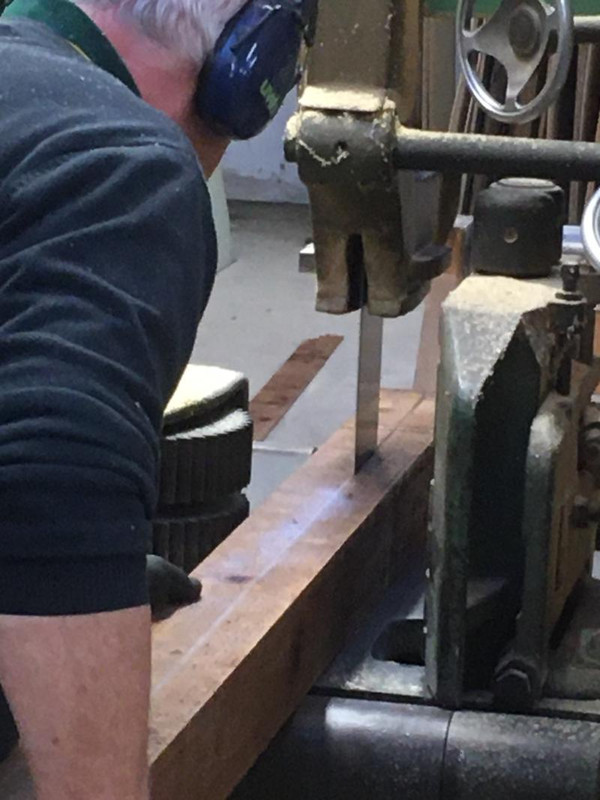 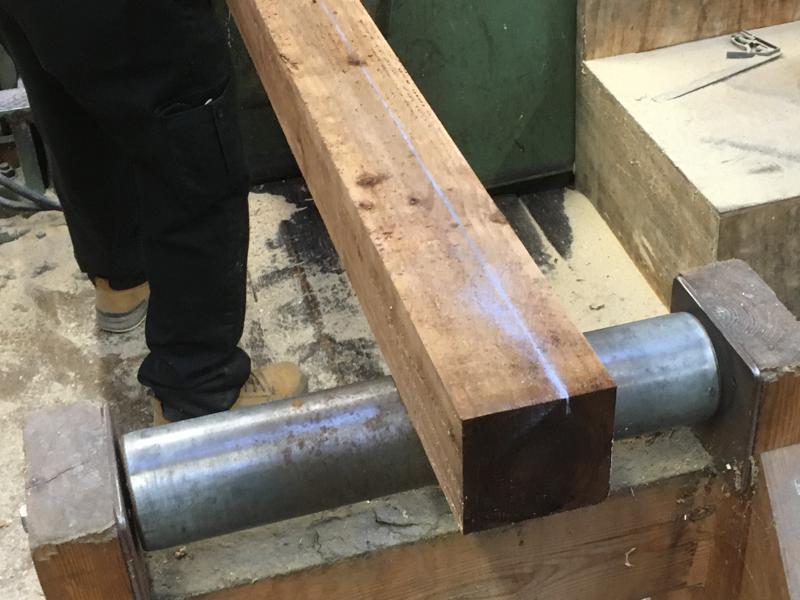 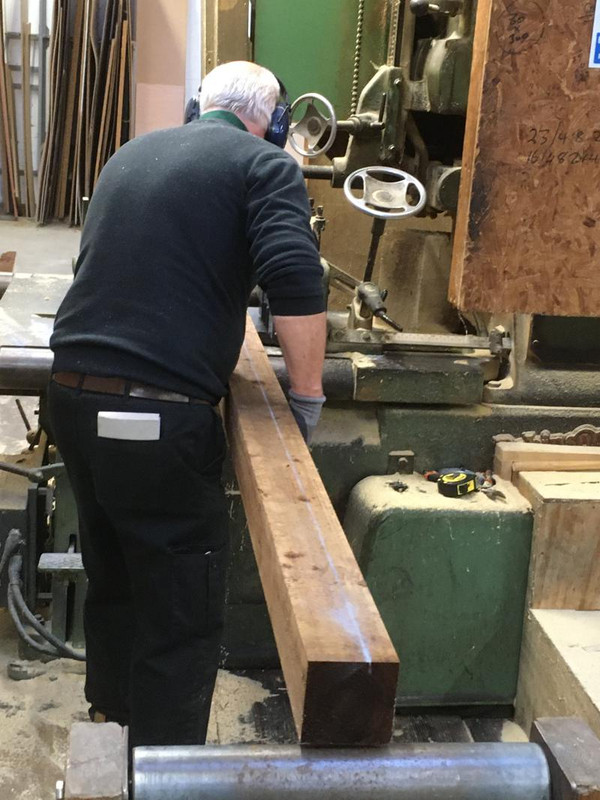 for the garage door frame, I’ve bought 2x 100mm x 200mm x 2.4M sleeper posts/joists 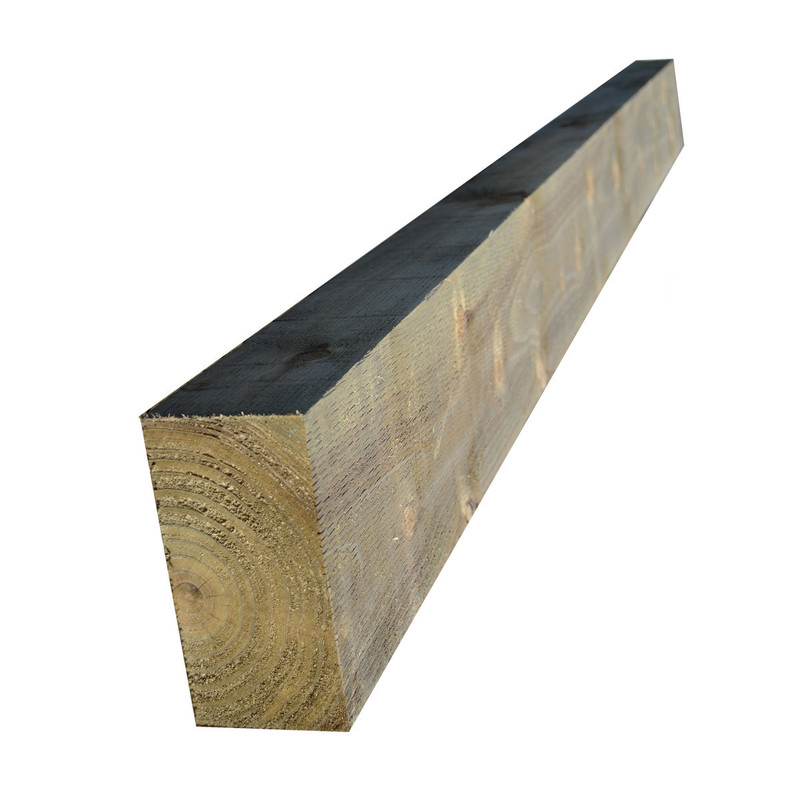 I’ll be cutting a 45mm x 45mm channel (with a router) from top to bottom. and slide one end of the dung board in to this 45mm channel, hopefully it gives the door jamb some strength to be able to hang the doors on 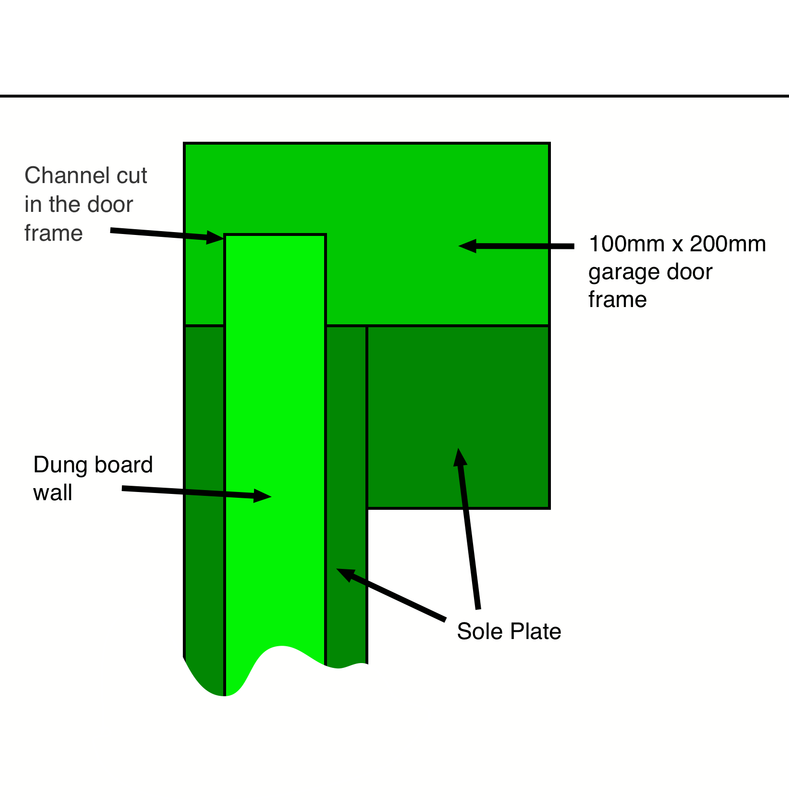 3D view of this  they said I should be getting them tomorrow afternoon but Thursday the latest, now just hoping no rain for a couple of days for tying in the beam above the garage doors my plan is have the joint something like this 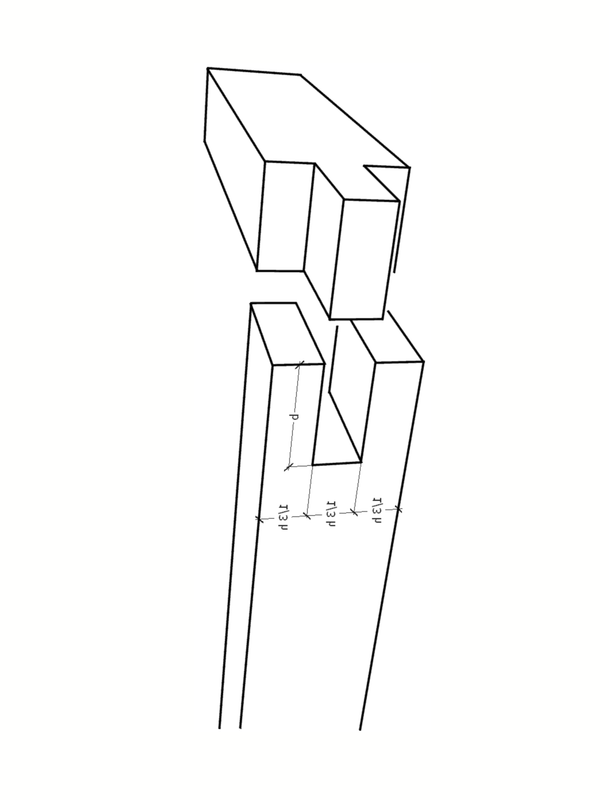 with a wood dowel through the joint like this 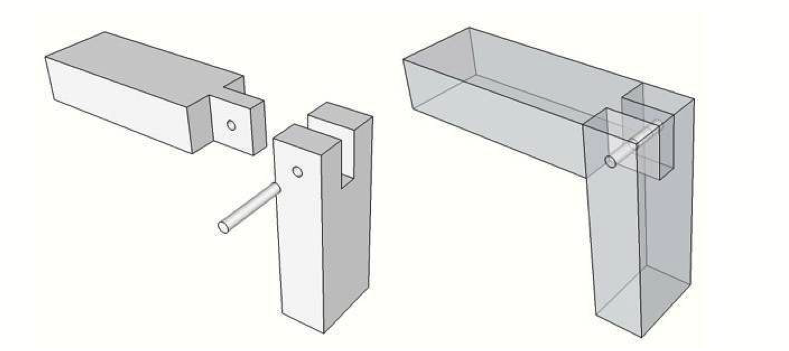 at the moment they don’t have any 100mm x 100mm or larger in stock, but as I won’t be needing this for some time, I’ll buy this at a later date
|
| |
|
|
|
|
|
|
|
Apologies in advance for the thread hijack The tin lid was a considerable expense but they did me a really good deal (more than I've ever spent on a vehicle in my life and it was enough to have bought me a cracking V8 van!) but there's no other way of doing it without leaving the house open to the elements. Currently looks like this from the back Today 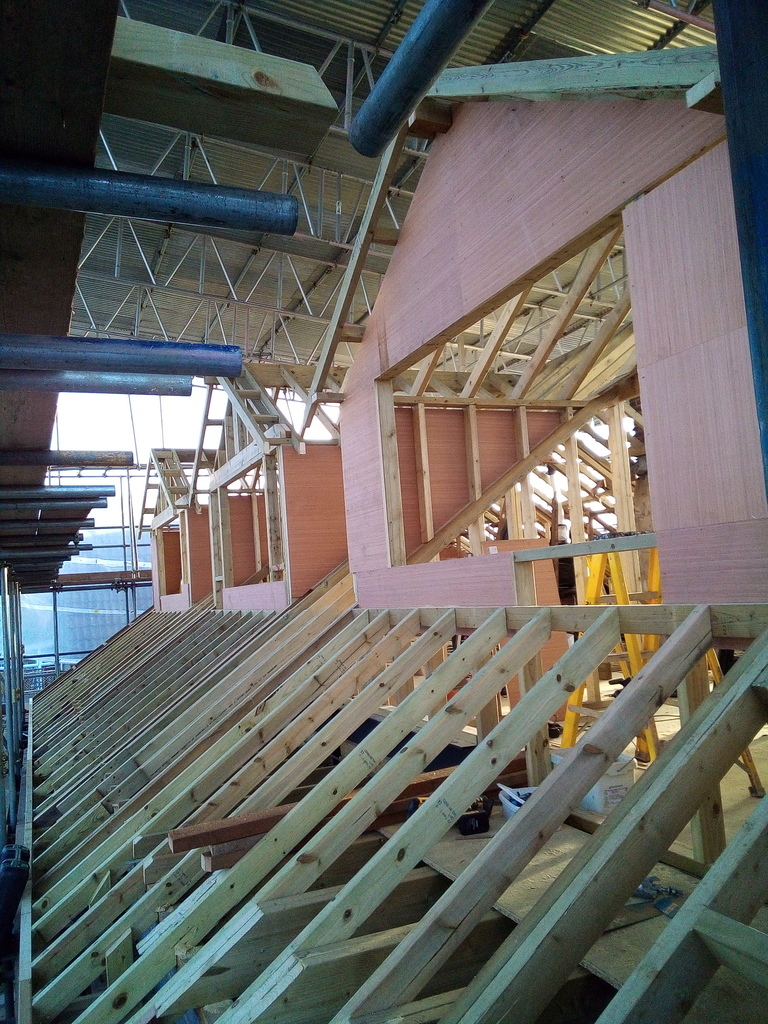 About 3 weeks ago 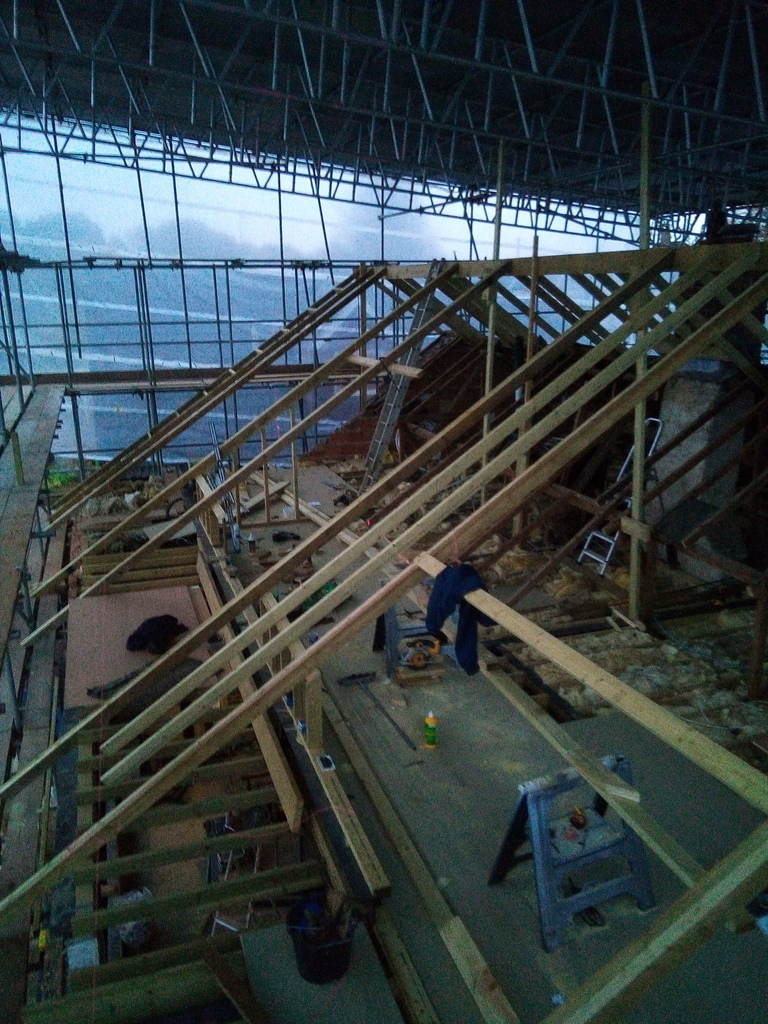 I'm doing a loft conversion and repitching a mainly new roof with 3 dormer windows to cover a 3m wide extension out the back Not to bad considering I've not done first fix carpentry for a few years and have been mainly on my own. Aren't chalk lines great! With your attention to detail yours will come together really well, once you start going up it will be done in no time! |
| |
|
|
|
|
|
|
|
dodgeroverno issues ever about being off topic of thread hijack, I think its a good way of picking up many tips and information, so please feel free to post anything you like using a chalk line must be about the best way of marking a straight line I will take back saying your scaffolding wold cost as much as my garage build, now seeing these other images I would say maybe cost as much 5X my garage my timber firrings from Travis & Perkins arrived this afternoon , but could I do any work? nope
|
| |
|
|
|
|
|
|
|
|
Apparently we have snow forecast tomorrow, I'm hoping it adds to the insulation value of the tin lid....
|
| |
|
|
|
|
|
|
|
|
yep, a dab of sleet first thing in the morning followed with a drop of snow early yesterday morning, was dam cold taking our dogs out for their first walk of the morning, thats for sure
|
| |
Last Edit: Dec 5, 2020 14:06:53 GMT by mollydog1
|
|
|
|
|
|
|
|
|
nothing much happened this weekend, as I mentioned, my timber firrings arrived on Thursday, today I thought was as good a day I am likely to get, so I got the firings coated with wood preservative along the cut’s being a bit of a cold day I only gave them one coat for today, I’ll be give them a further two coats on two separated days to give the timber time to soak in the preservative between coatings 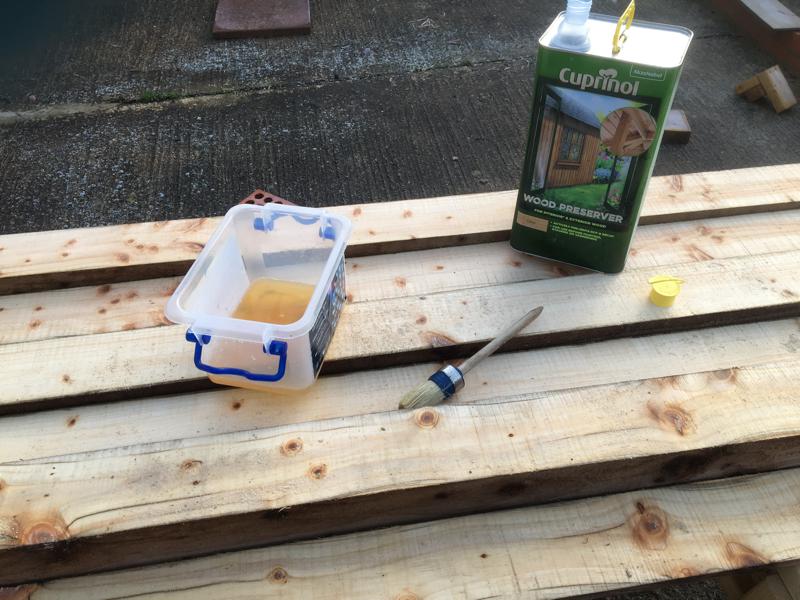 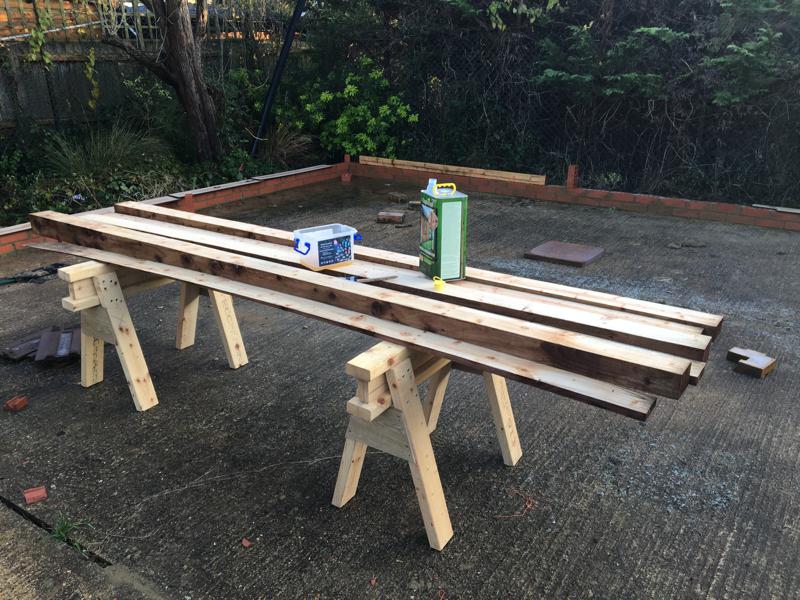 putting them back together before wrapping them with a tarpaulin 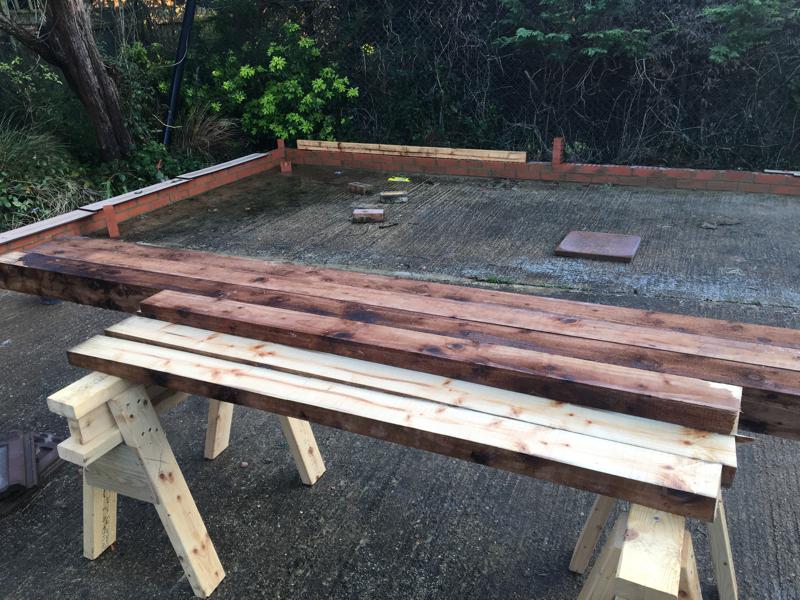  and showing the two 100mm x 200mm x 2.4M logs to be used as door frame 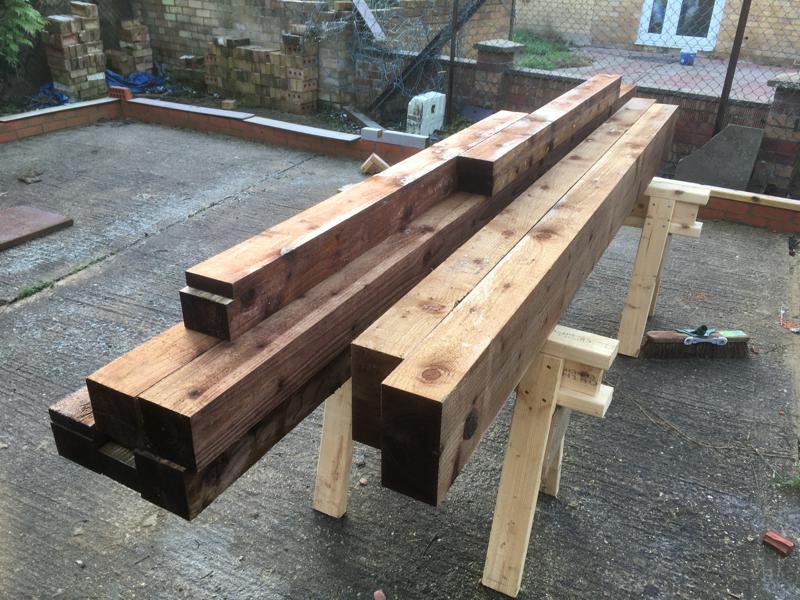 |
| |
|
|
melle
South West
It'll come out in the wash.
Posts: 2,010
|
|
|
|
|
Progress is progress! I would be tempted to paint the bottom sides with red lead and/ or use dpc between the bricks and the wood.
|
| |
www.saabv4.com'70 Saab 96 V4 "The Devil's Own V4" '77 Saab 95 V4 van conversion project '88 Saab 900i 8V
|
|
|
|
|
|
|
|
Paint the bottoms and outside sides with bitumen (just paint a small return on the inside edge with bitumen so wood can still breath.
+1 for the dpc as well.
|
| |
|
|
|
|
|
|
|
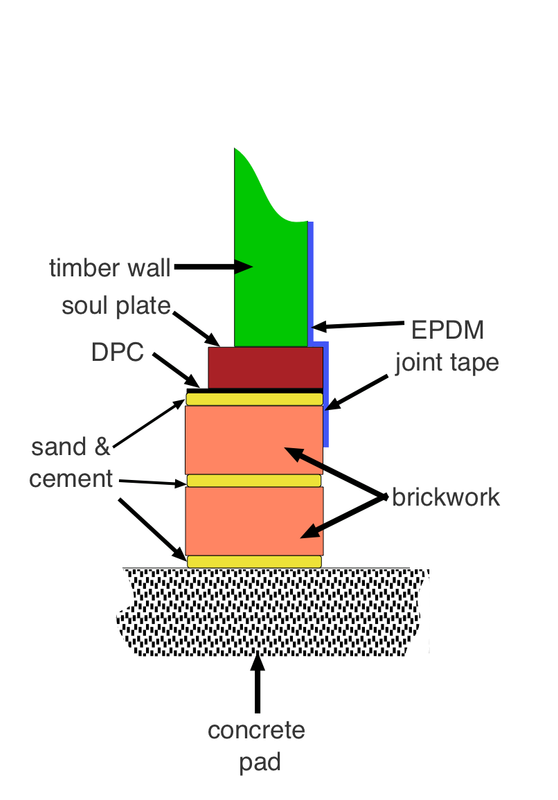
thank you both (mello & blackpopracing) for this advice, I’ll now be looking in to both these red lead and bitumen paints in the next day or so and use one or the other, I see they aren’t that expensive for a 5lt can my initial plan for where the dwarf wall and timber firring make contact is as shown in the image below, not to scale I had planed to use EPDM, but read on Screwfix website that the Bostik Bituminous Black Paint they sell “We would not recommend its use with EPDM since the bond between the substrate and the paint will be poor” so maybe if I go with the Bituminous paint, just use it along the cut edge (base) and not on the outside facing of the sole plate (firring) |
| |
Last Edit: Dec 8, 2020 6:58:02 GMT by mollydog1
|
|
|
|
|
|
|
I’ve not done much on the preparation on the dwarf wall, the weather has had a bit to do with it 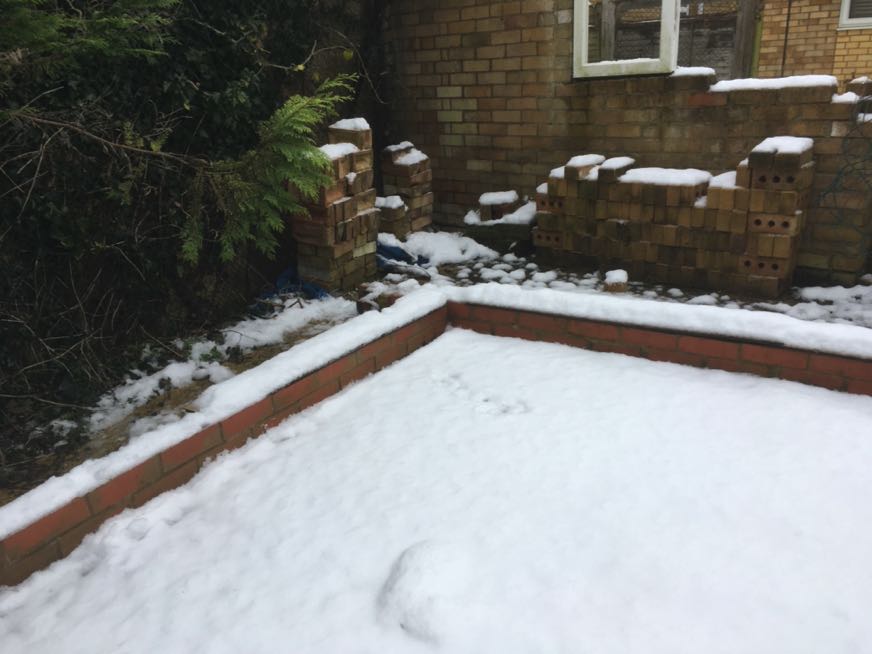    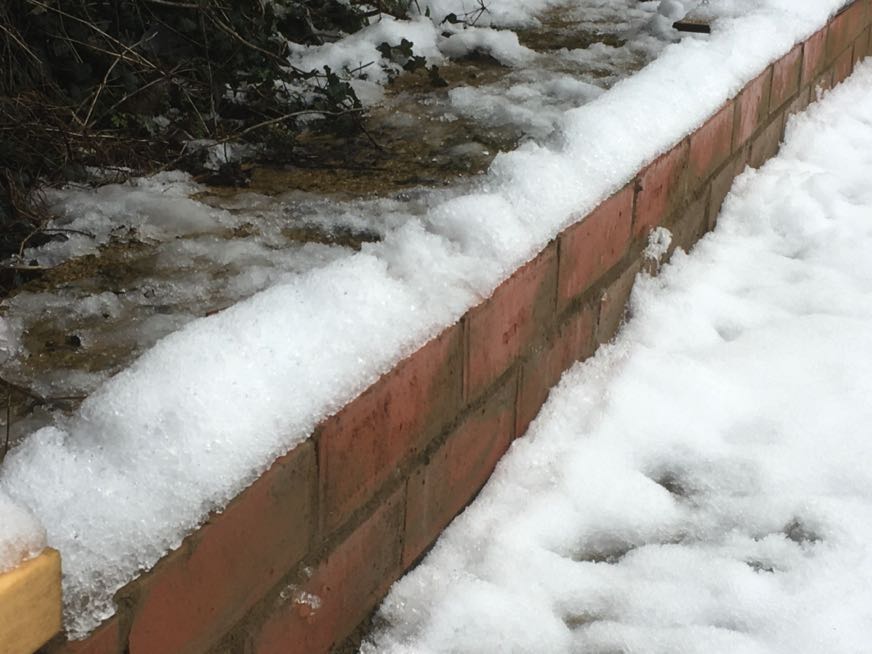 Even had a feathered friend pop over to inspect 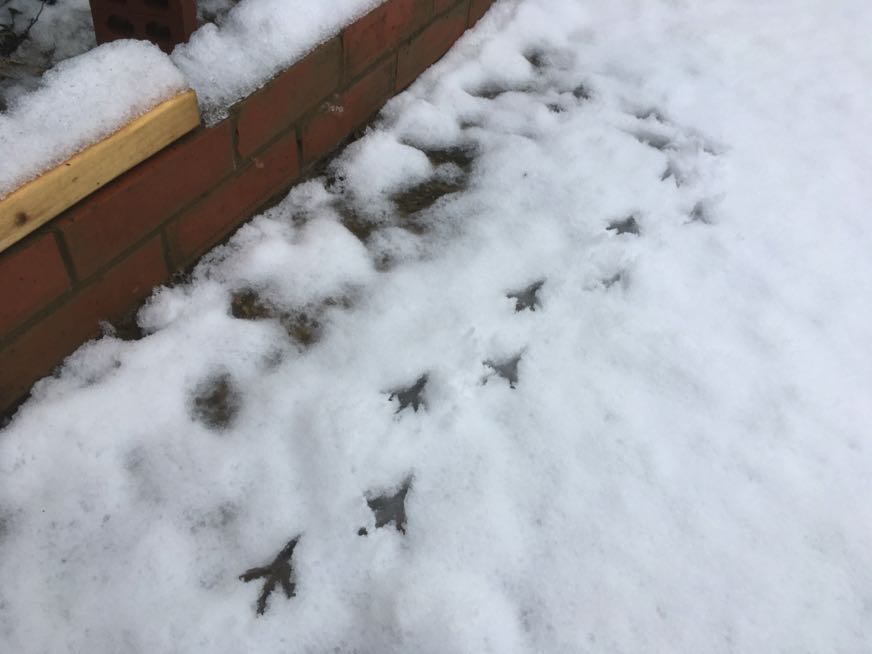 to be honest, I’ve had a bit of a bad back for a few weeks now, maybe as far back as the beginning of January, I tend to notice it a lot after our dog walk, So with the freezing January mornings or raining (snowing) days I’ve not had the inclination to get out and laying my sole plates, I’m hoping I might get a few good days soon to hold down the sole plates & brickwork to the concrete pad, I couldn’t find long enough (at reasonable cost) through bolts/expansion bolts, so I’ve bought enough threaded rods to use as anchor bolts with enough lock nuts & washers and resin 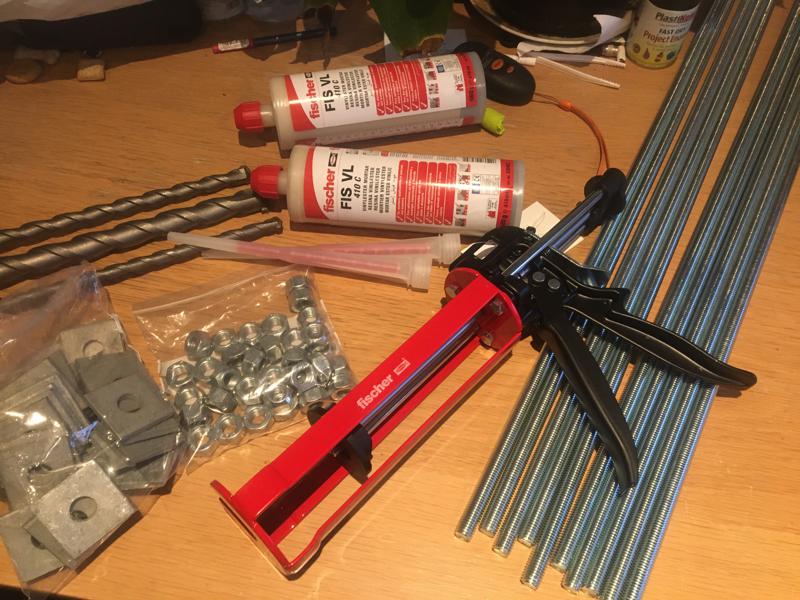 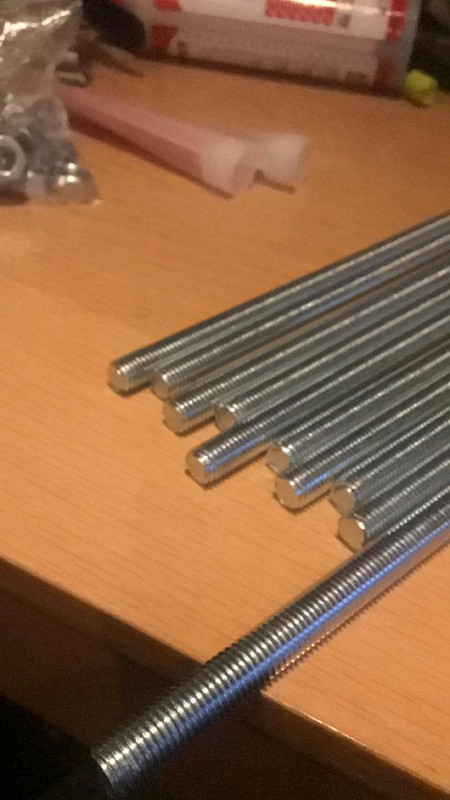 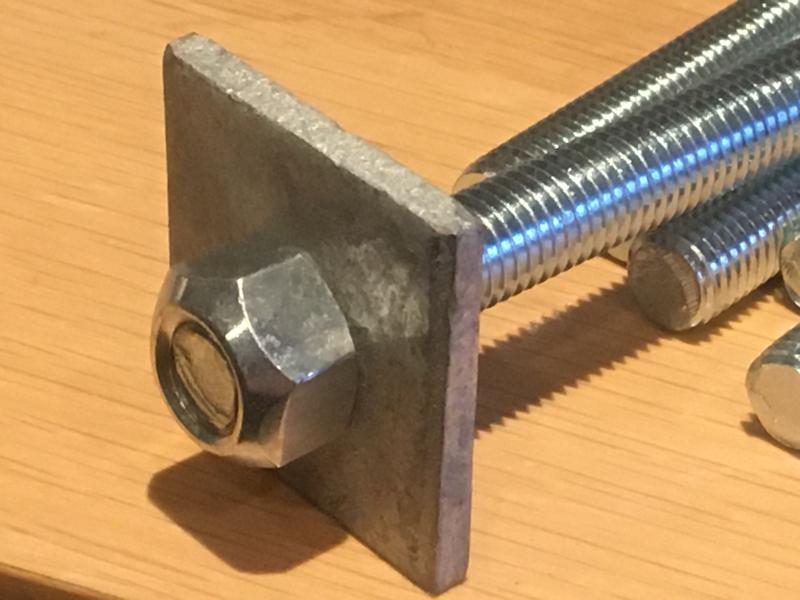 and some resin 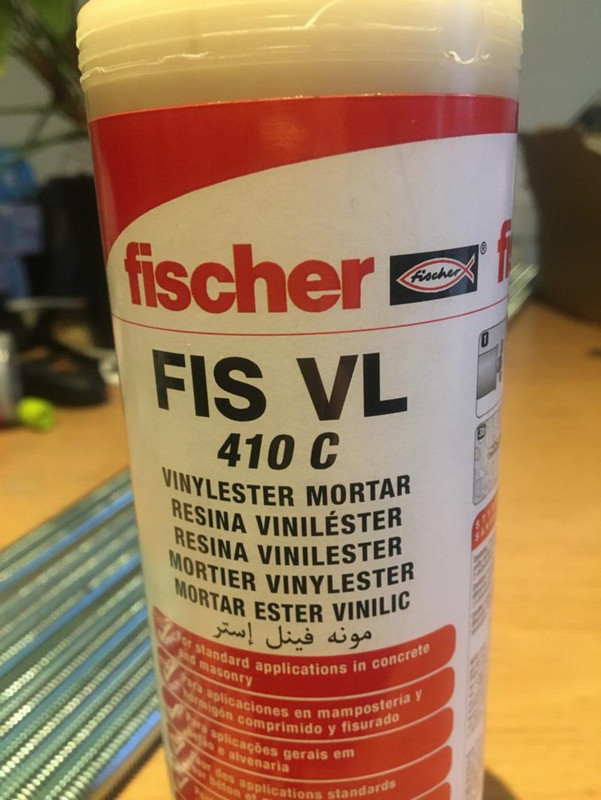 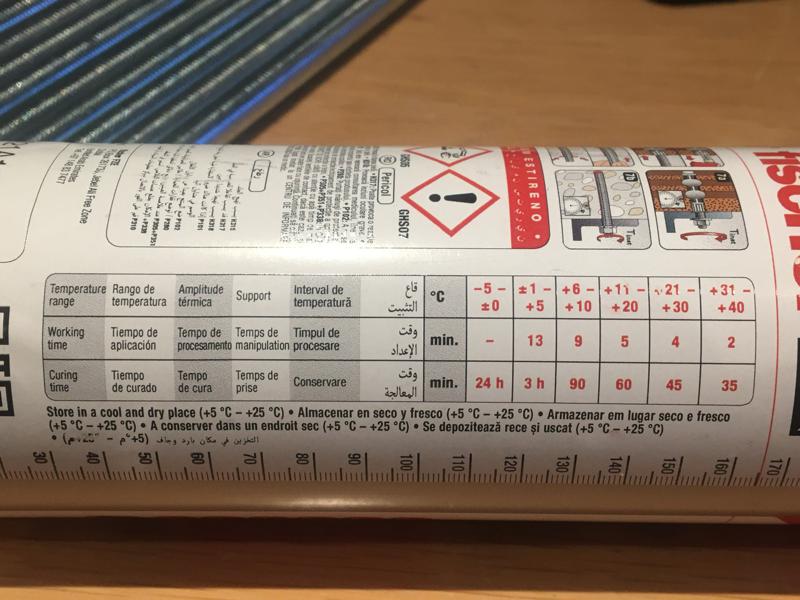 Listing to my engineering friend, the anchor bolts will be spaced out at one at 50CM from each end and one in the middle per 3M length of sole plate (6 per side, and 3 on each side of the door) (white dots in the image) 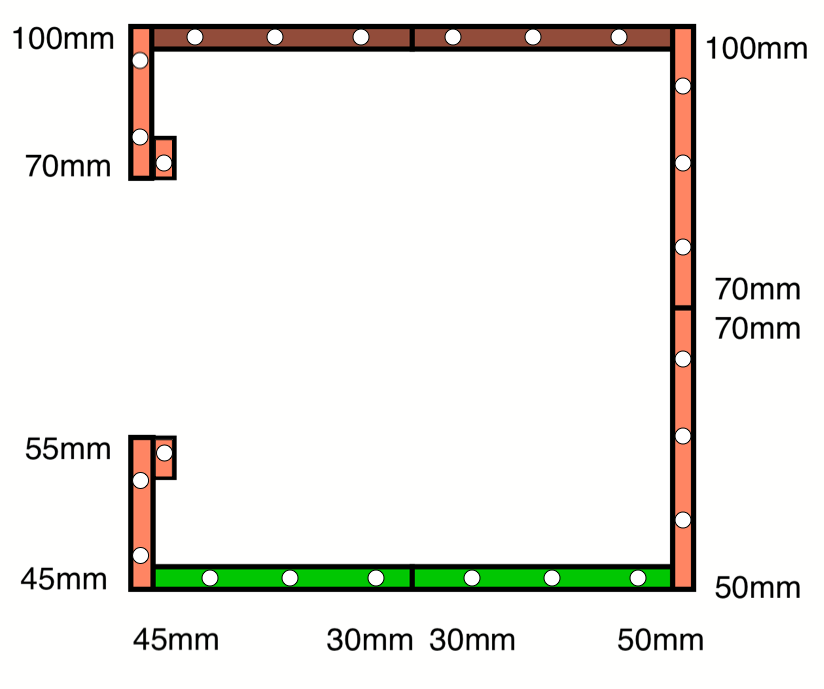 approx one 50CM from each end and one in the middle of each 3M length sole plate/ferring (not to scale)  For the 12mm diameter threaded rods I would of thought a hole with maybe 16mm or 20mm diameter was needed, but I’ve been informed direct from the resin manufacturer Fischer, that for a 12mm diameter threaded rod (what I have) a hole with a diameter of 14mm is all I need for this job 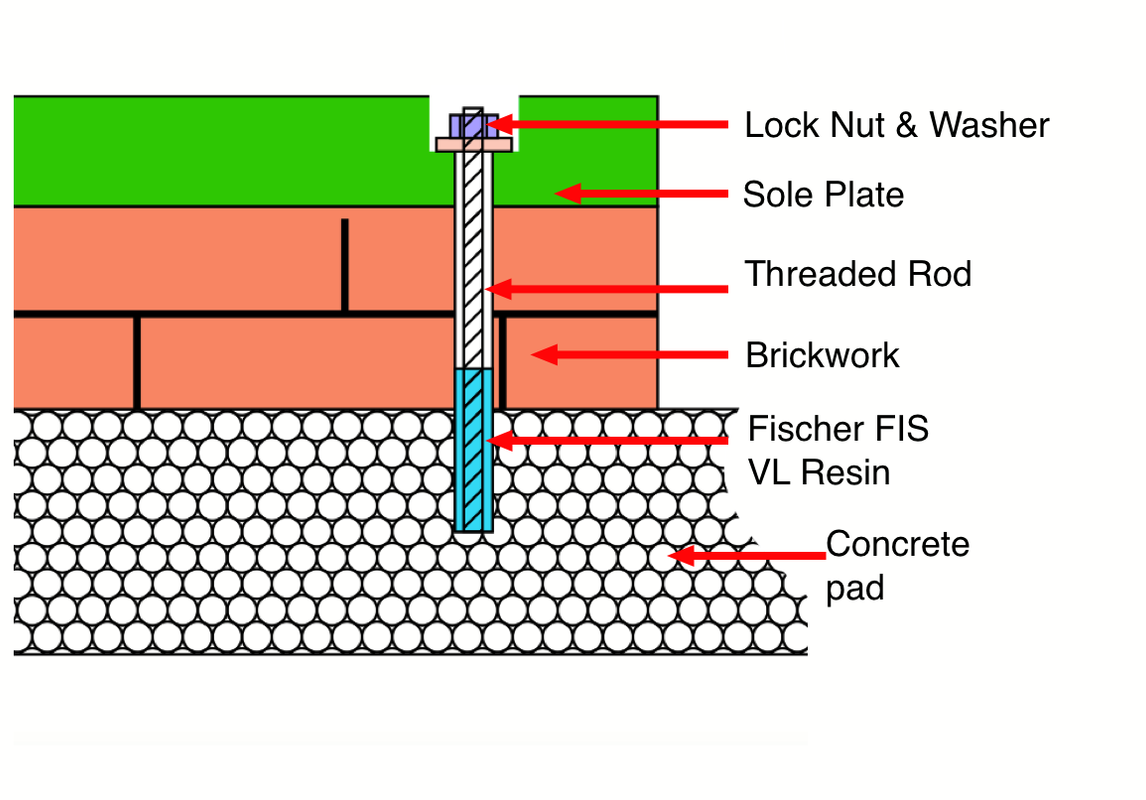 (In the image above I missed out showing the DPC and sand & cement course between the brickwork and the sole plate) we’ve all seen image of wind damage,   maybe if we did get a very strong storm what I’m doing might not make much of a difference, or it might be the difference between a damaged garage or a garage blown all over my garden I plan not to use as few screws and nails as I can get away with on the wall’s above the first course of walling, having the end notching keep the garage together, the exception would be the roof and doors for the roof I will wait till I get to roof hight before deciding what materials to use and how to support it once it’s up then I would be able to gauge if I need extra support at the corners and in the middle, this is all a case of playing it by ear and any advice I get, if I do need extra support my plan is to have 100mm x 100mm timber in the corners fixed to the walls with wooden dowels  used something like this, maybe a dowel every second or third row 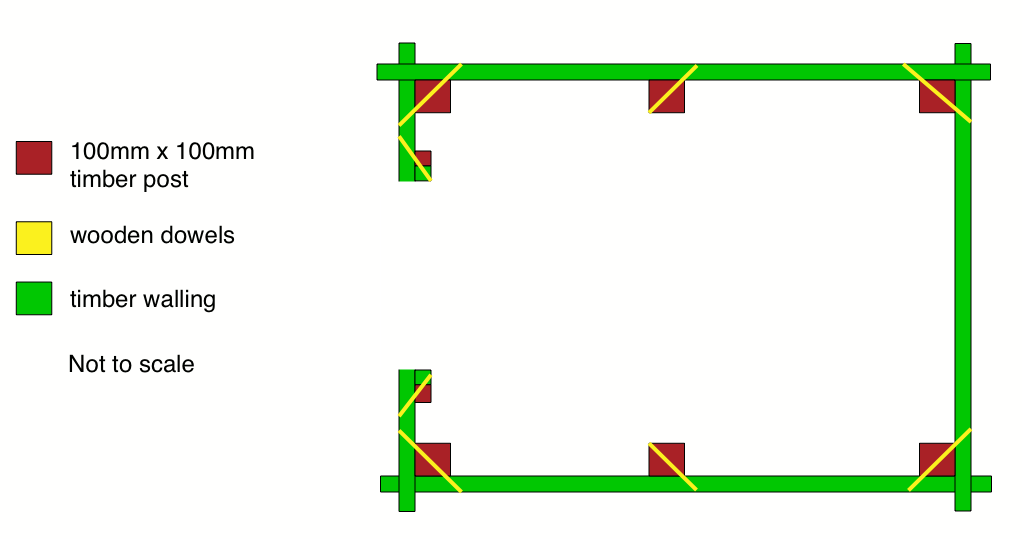 and the use of L brackets (approx) everyone.5M inside the garage to anchor the first course/row of the dung board to the concrete pad (Not to scale) 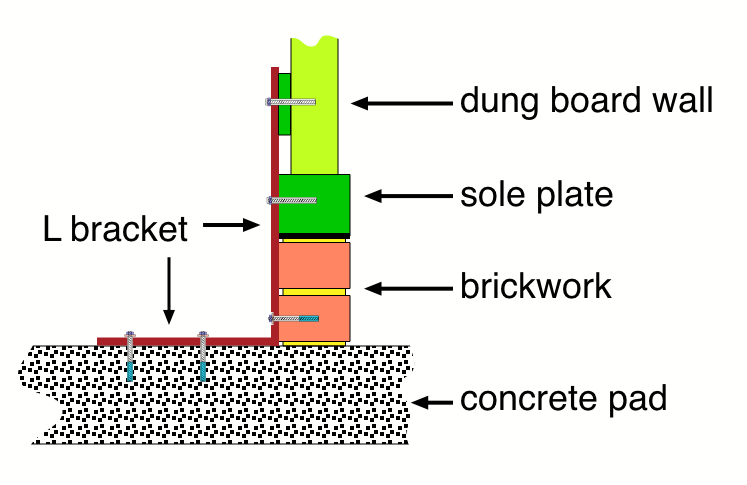 I can’t wait for the better weather to get here |
| |
Last Edit: Feb 7, 2021 1:49:25 GMT by mollydog1
|
|
|
|
|
|
|
|
I used that fischer stuff 20 odd years ago to bolt a 8 metre long timber to the side of our house for the second floor of the extension I built to hang off, it's amazing stuff our house is built of crumbly old stcks held together with crumbly lime mortar, studs held in with that stuff were rock solid all tightend FT with no movmement at all.
|
| |
|
|
|
|
|
|
|
|
thank you for this info Kevins, gives me more confidence I made the right choice
|
| |
|
|
|
|
|
|
|
|
Well planned out, only issue i see is water landing on the exposed concrete base will creep into and through the bed joint under the bottom brick.
maybe apply a waterproofed sand cement fillet all around the outside or the lower brick ideally to the edge of the slab ?
|
| |
|
|
|
|
|
|
|
|
Just remember to either hoover the dust out the fixing holes or blow them out with compressed air. It's good stuff that resin, as are concrete bolts but you would struggle with length of them.
|
| |
|
|
|
|
|
Feb 28, 2021 16:03:27 GMT
|
For sure my back is still in pain, but as we’ve had a bright week I did some drilling First was to see if I could drill through the semi engineering bricks, I drilled through a couple of them, on these two, with care I managed to drill 14mm holes without splitting the brick, but it was going to be hard work doing 24, at best a 50/50 chance of being able to drill through them without cracking/splitting the bricks 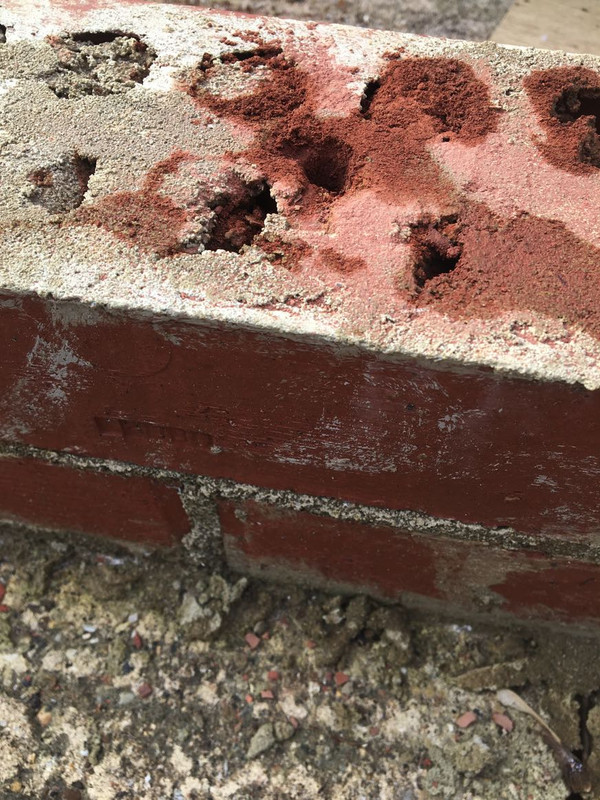 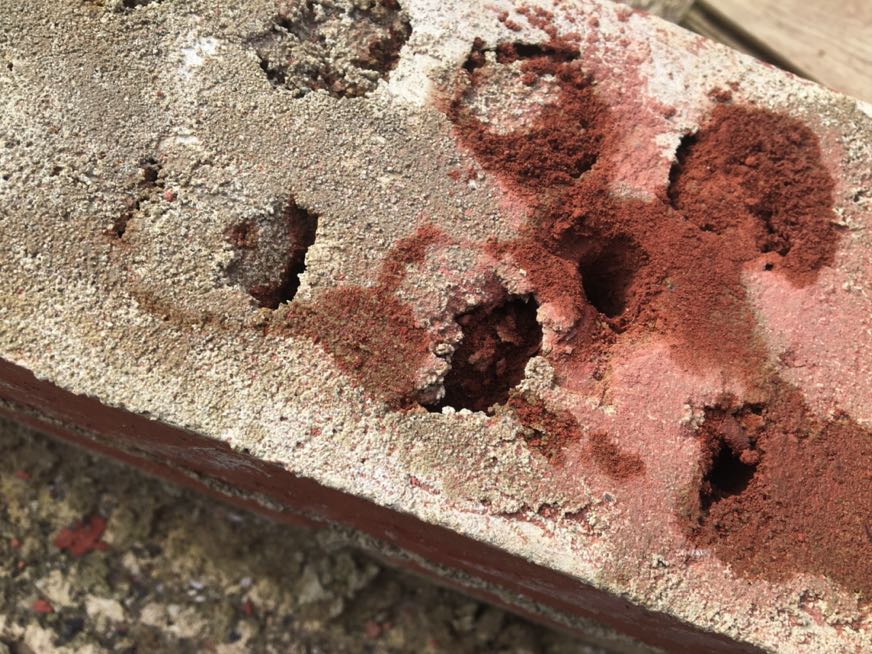 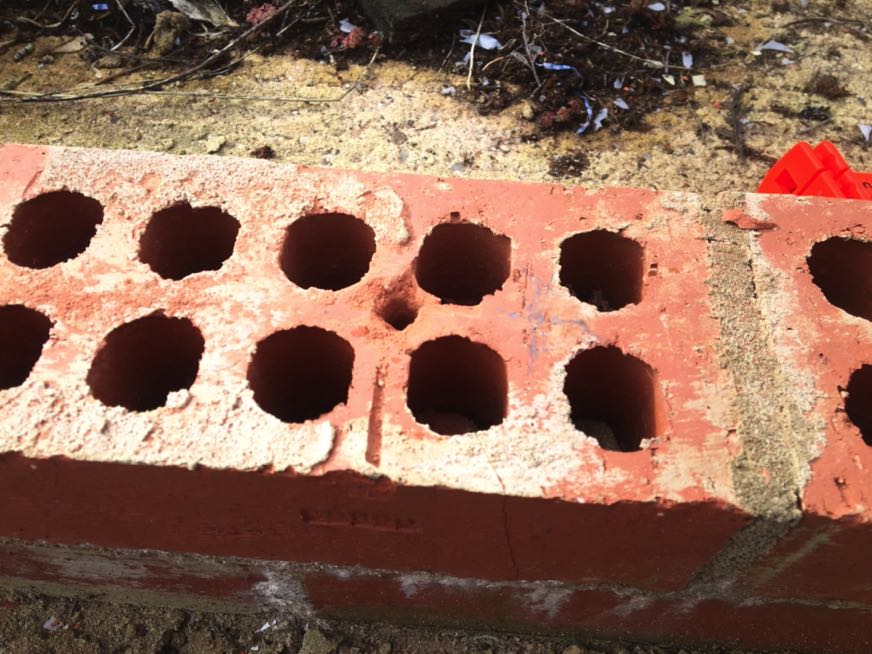 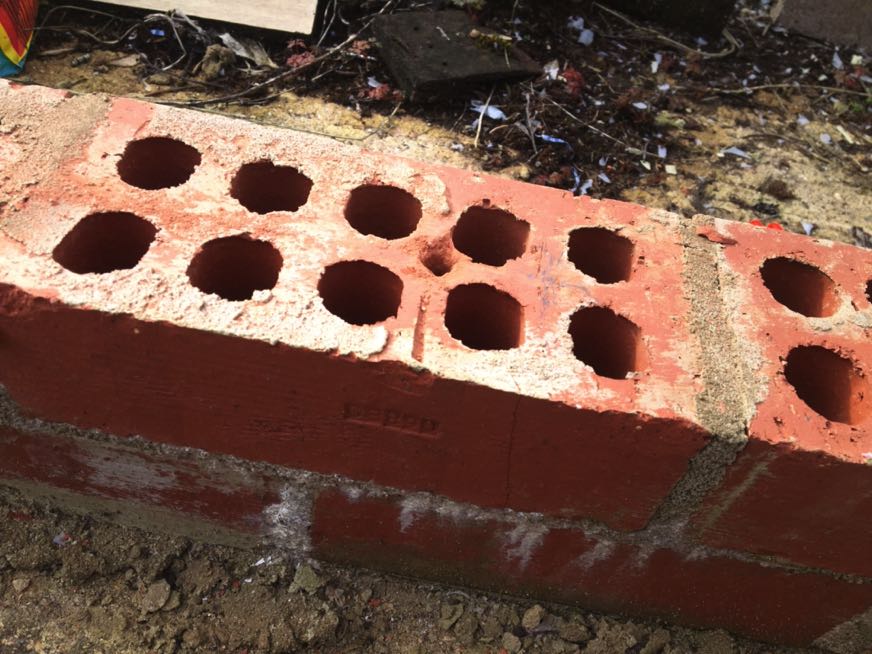 me drilling around 24 of these holes and not crack any of the bricks is asking too much so this method of holding down the sole plate to the concrete has been aborted I am thinking of using something like this bracket 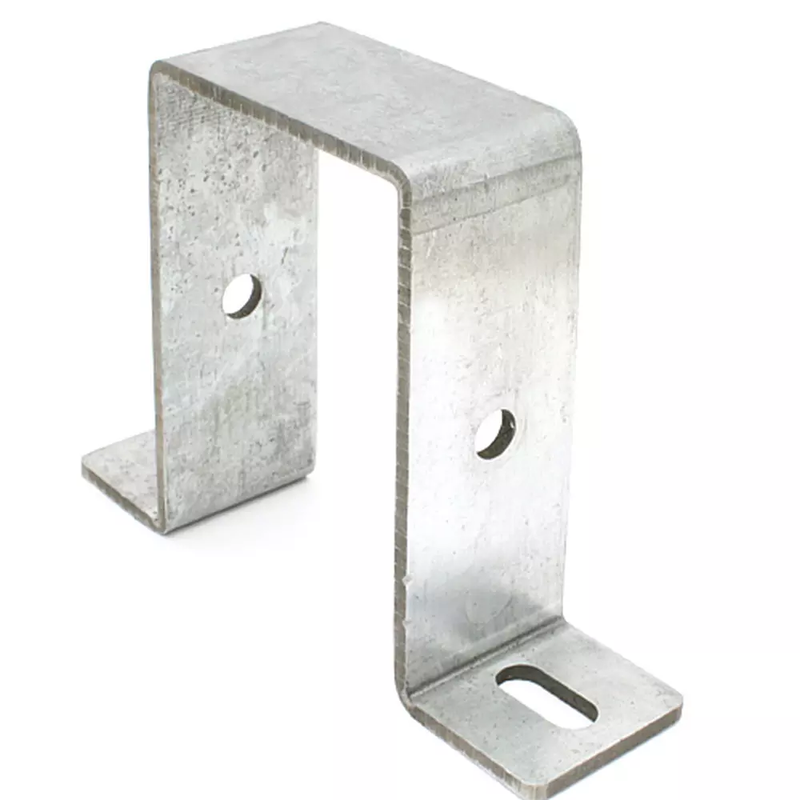 This way I can still fix the sole plate to the concrete and not having to drill the bricks I’ve been laying out the sole plates on the dwarf wall in fixing order and by looks of it my sand and cement bed won’t need to very much in thickness to get the sole plate level As I think I got the measurements near enough first time and the guy at T&P did a good job of cutting the firings Using a spirit level and the laser level this is what I got   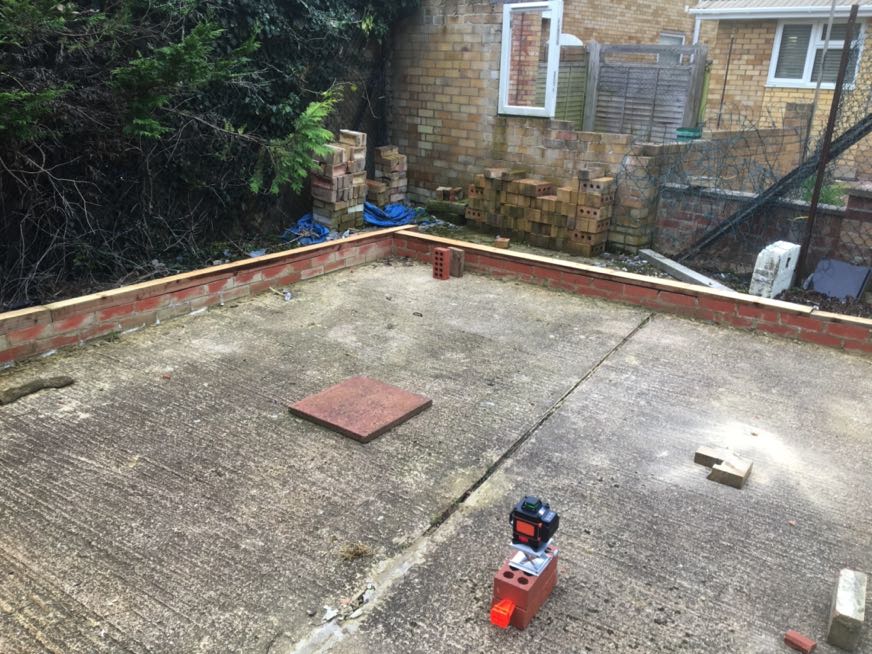 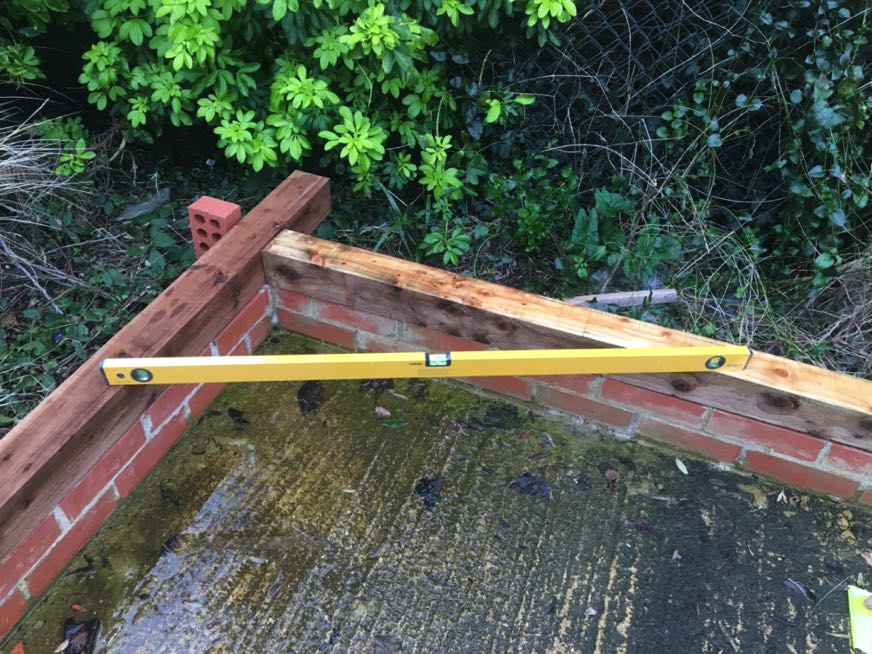 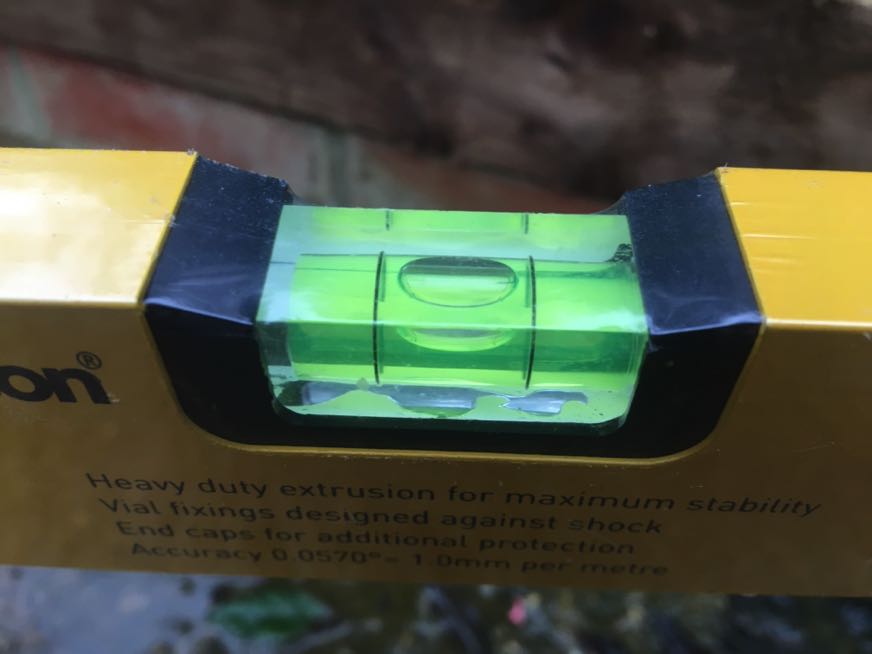 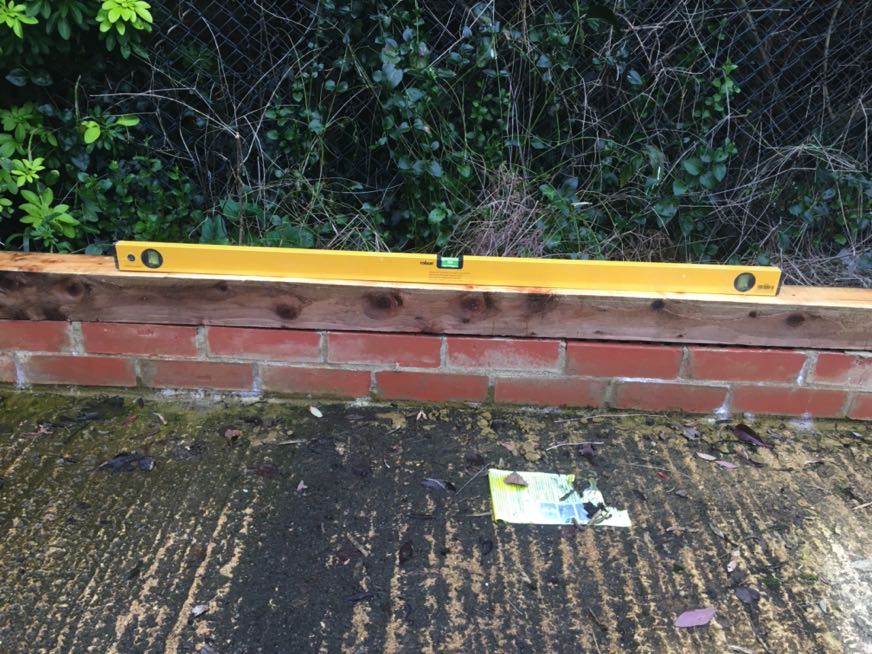 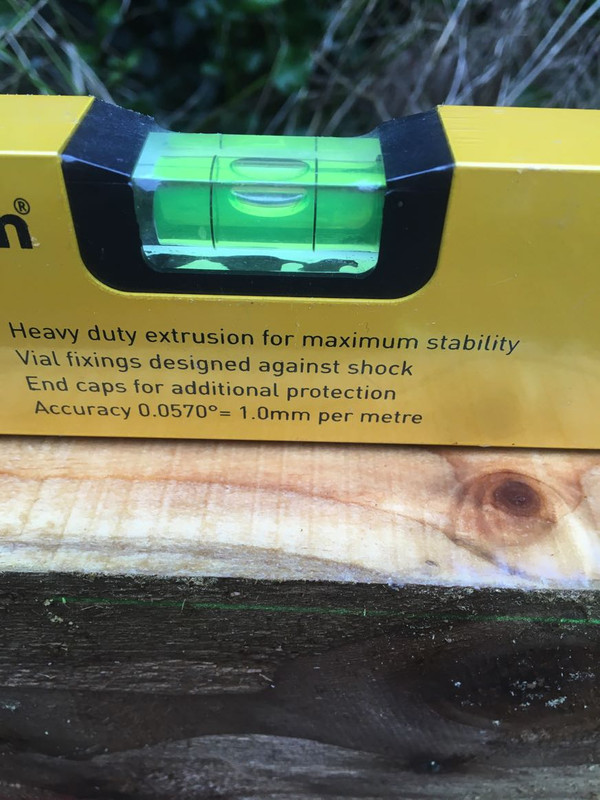 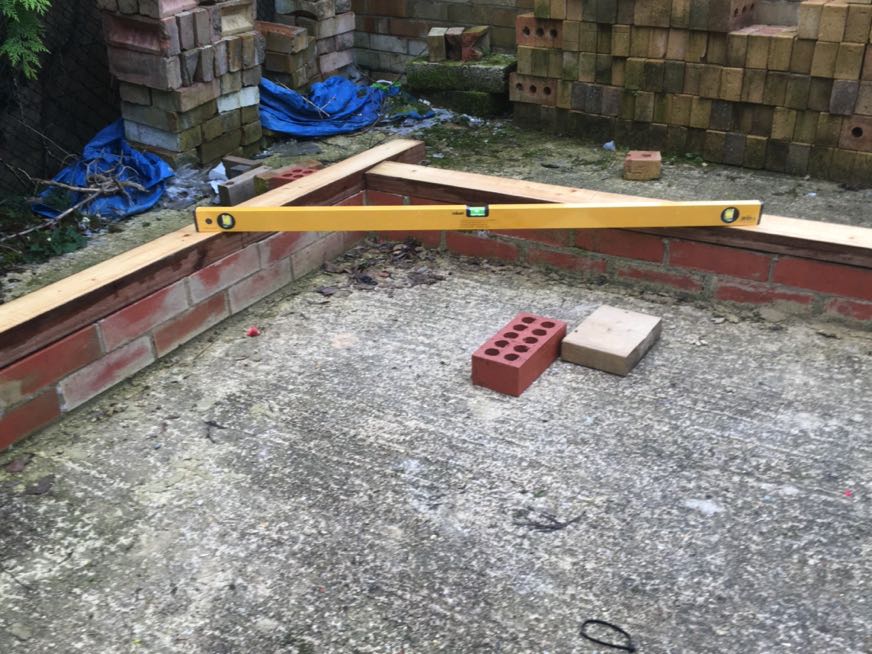    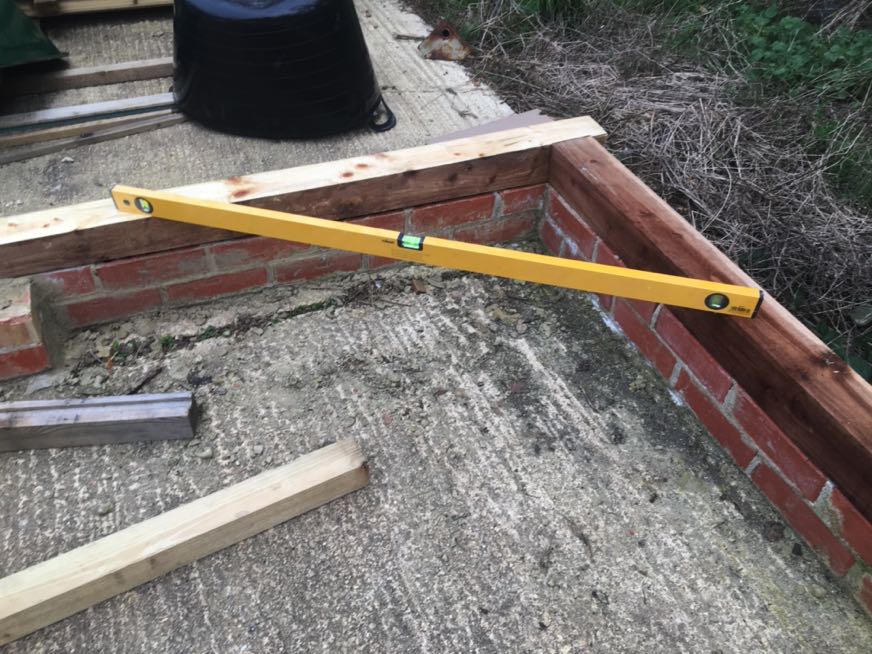  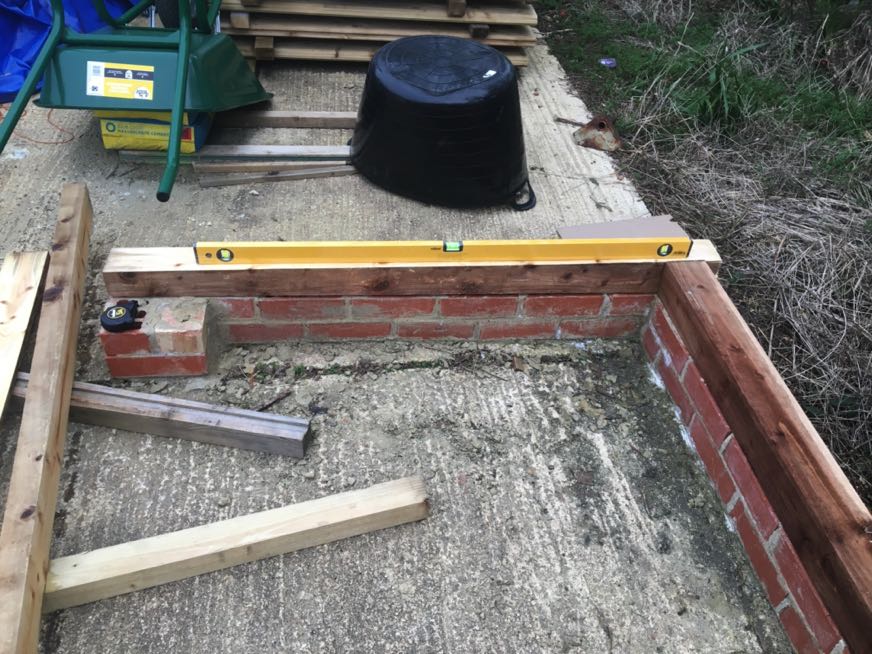 And with the laser level, I used these white cones as it was still too light to get the green laser to show up in the images 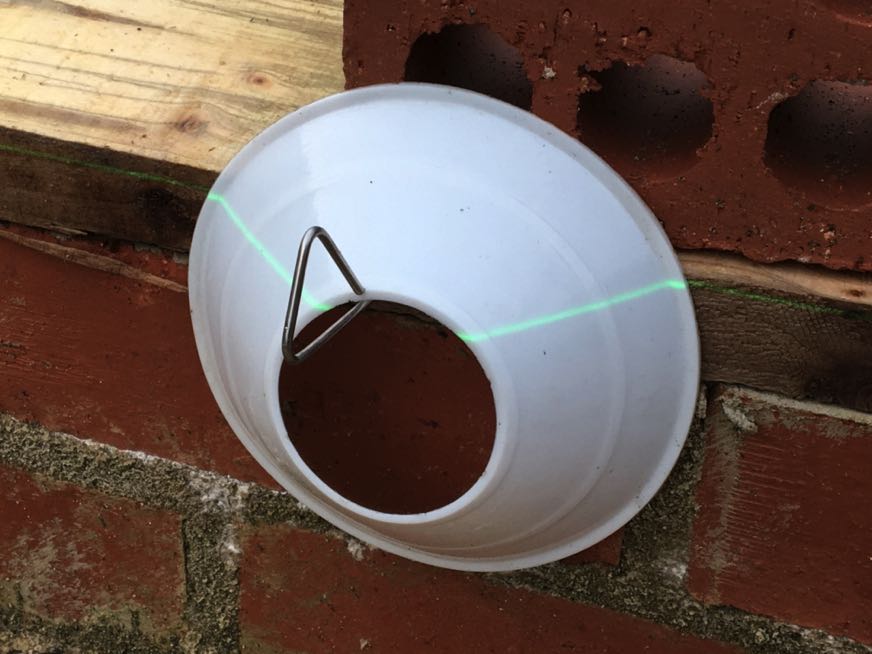 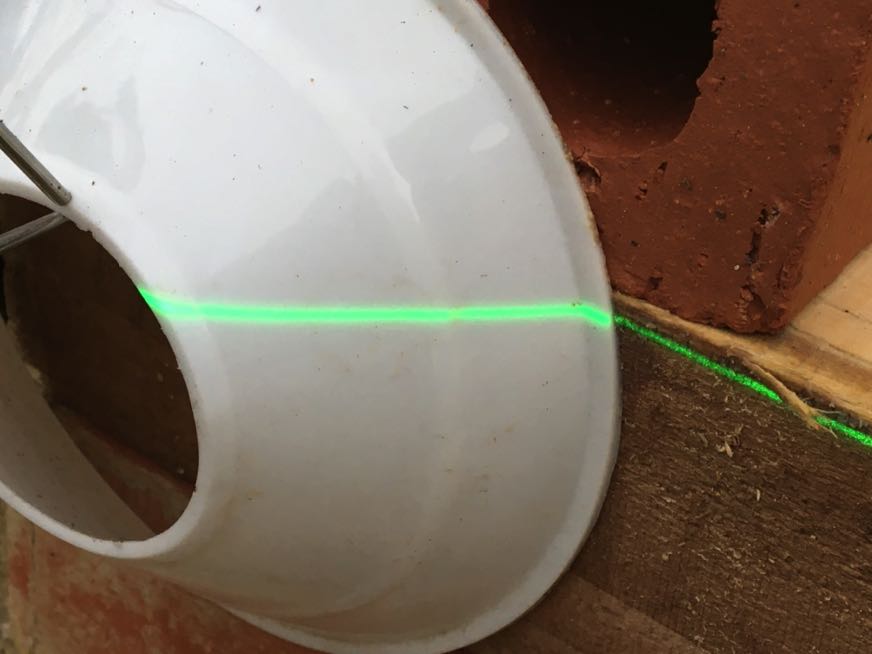 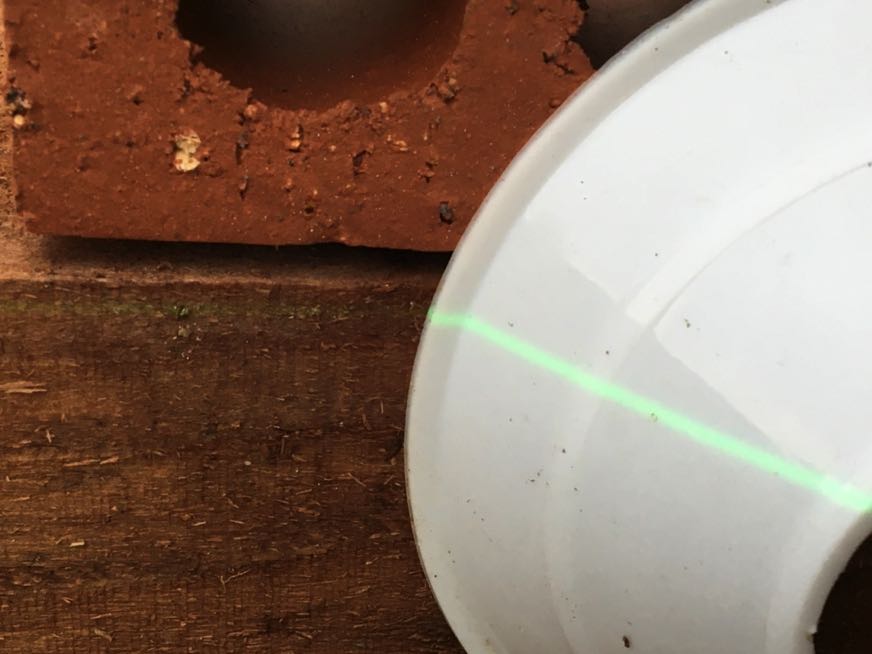 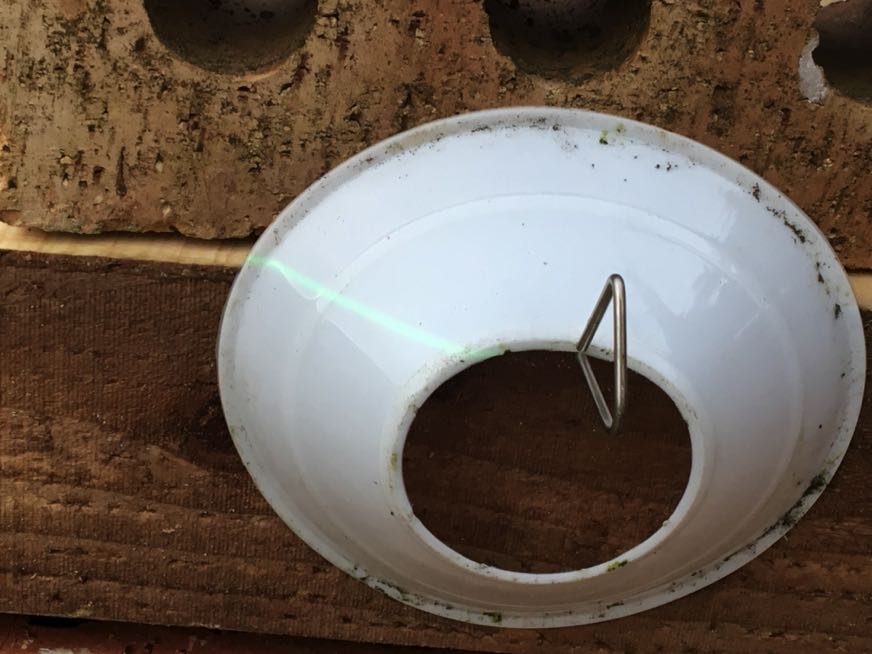 The other drilling I have been doing is to check just how thick the concrete pad is, as mentioned it was originally made for our dogs as a compound, I know the edge of the pad is approximately 150mm but I wanted to get some idea of the thickness for the holes I’ll be drilling for the sole plate bolts So spent a couple of days (my painful back) drilling a few holes in different locations on the pad to see just how deep I could go with the holes before I hit the hardcore I discovered I am safe to around 120mm, then I go through the concrete with the drill The red tape on the drill bit was measured to 100mm from the tip of the drill to the tape, and the tape was around 20mm~25mm wide so think I have around 100mm to 120mm to drill The hole is a lot wider than I’ll be using for real, I made it this wide (25mm) as a stop gap I was using part of a hose pipe to vacuum out the dust and the hole needed to be wide enough, 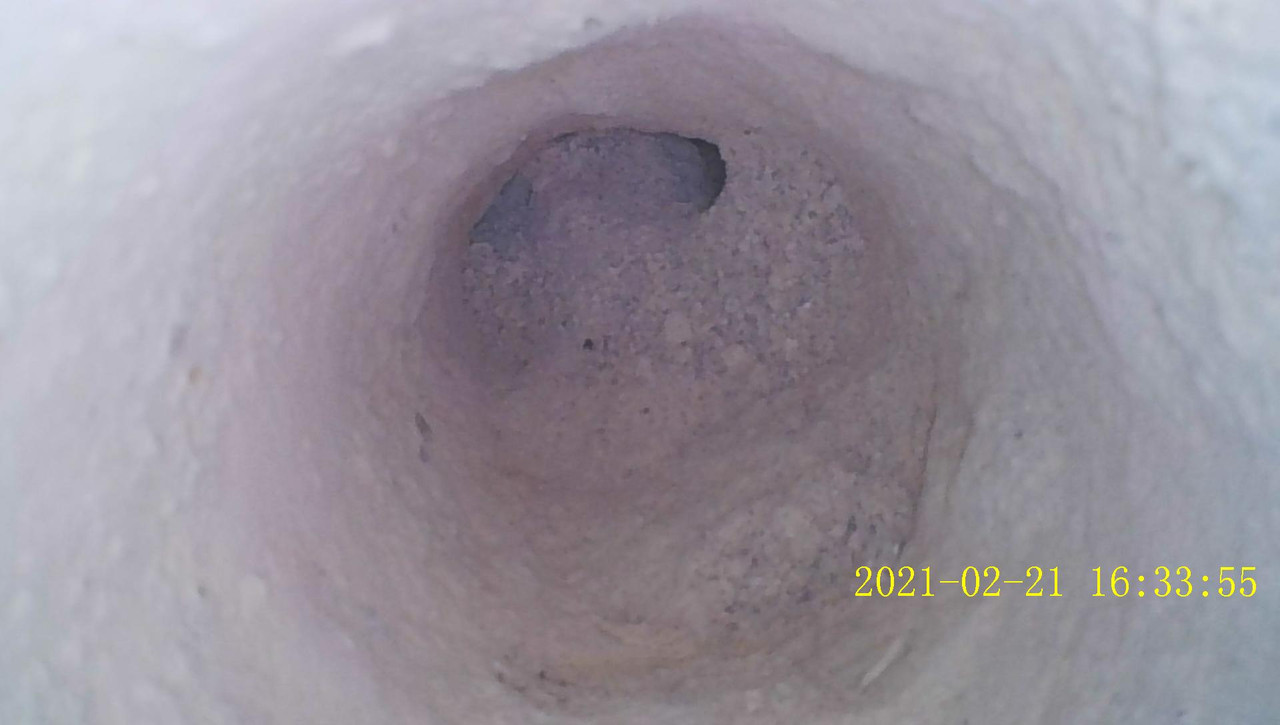 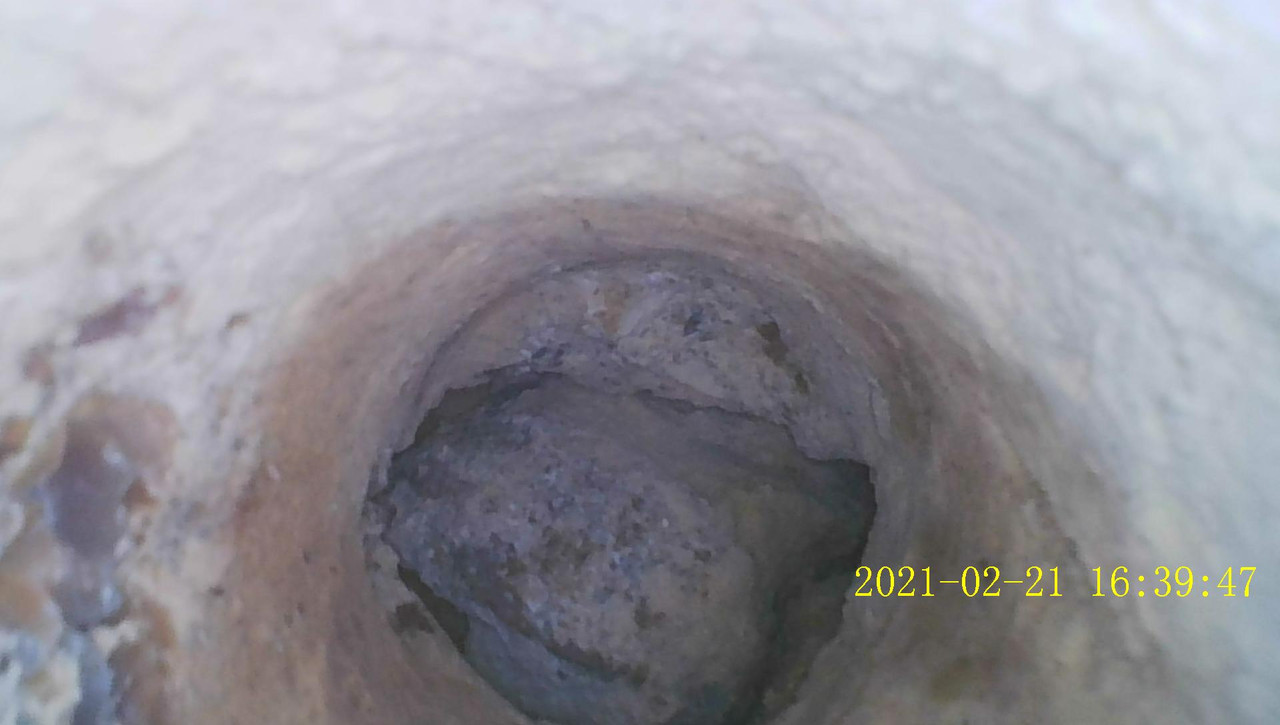  All being well i.e. both my back and it’s not raining I’ll be laying the sole plates this week ,as these are 3M long each, I’ll have around 200mm+ to cut off each side as the walls are approx 5.8M long |
| |
|
|
|
|