|
|
|
Dec 24, 2019 22:48:46 GMT
|
Started a seperate thread for my steering wheel restorations. Recently i had a table with my steering wheels at a classic car show and a man told me he was building a Bizzarrini for a customer and needed a steering wheel for that car- I am not so familiar with Italian classic so i thought it was a kind of Italian kit car. I soon learned that mr Bizzarrini was a former Ferrari employee who started building exotic sports cars himself in the sixties i believe. 2 weeks later i visited his workshop and was faced with a very good looking classic sports car as you can see in the picture beneath
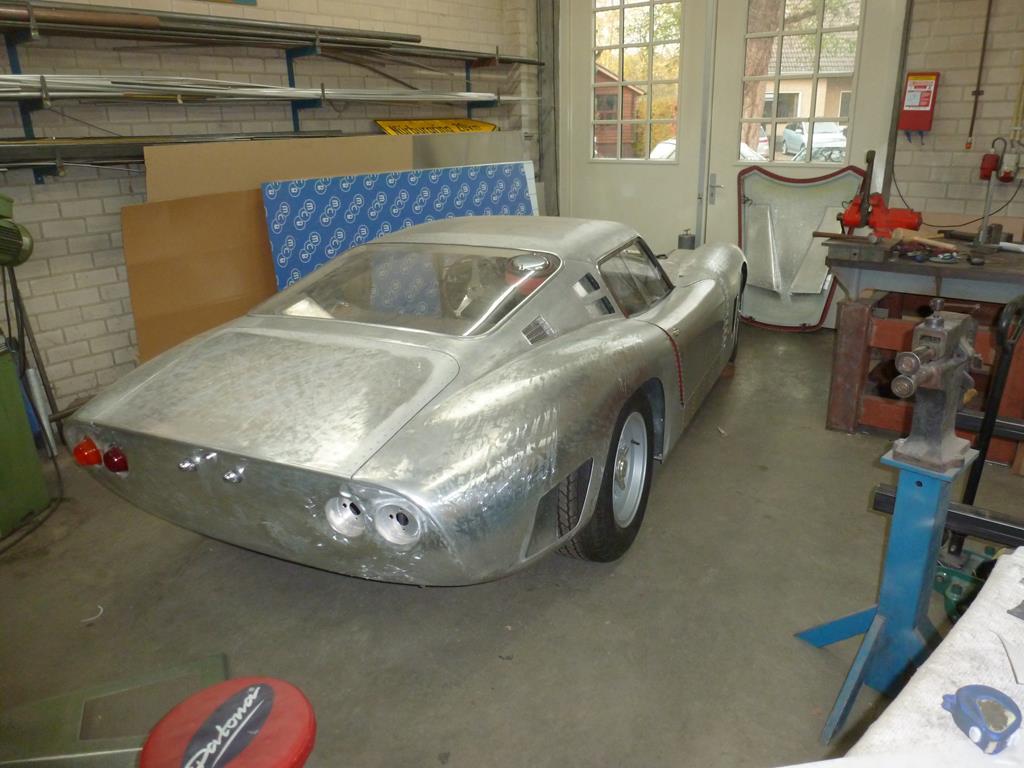 He made this car from scratch in aluminum without any drawings or dimensions. His only source was a lot of pictures. He has amazing skills. In his workshop, he was also building a copy of the Ferrari breadvan. This is a one oof kind of estate Ferrari. The owner is scared to drive it so he ordered a copy..... The steering wheel has to look like this 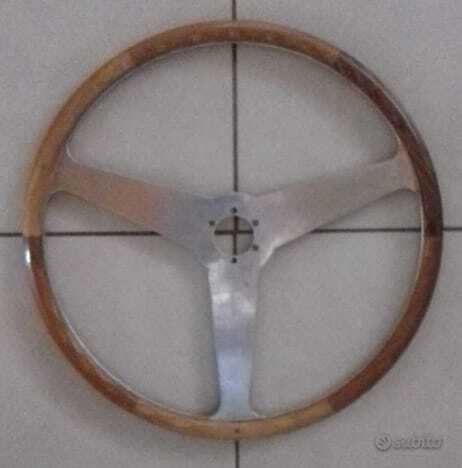 As this man has good contacts in the aluminum industry, he could get hold of high grade aluminum steering wheel frames. This week i received 3 as these are CNC laser cut and the more you order, the lower the price gets I cleaned up the rough edges and gace the spokes and center a polish 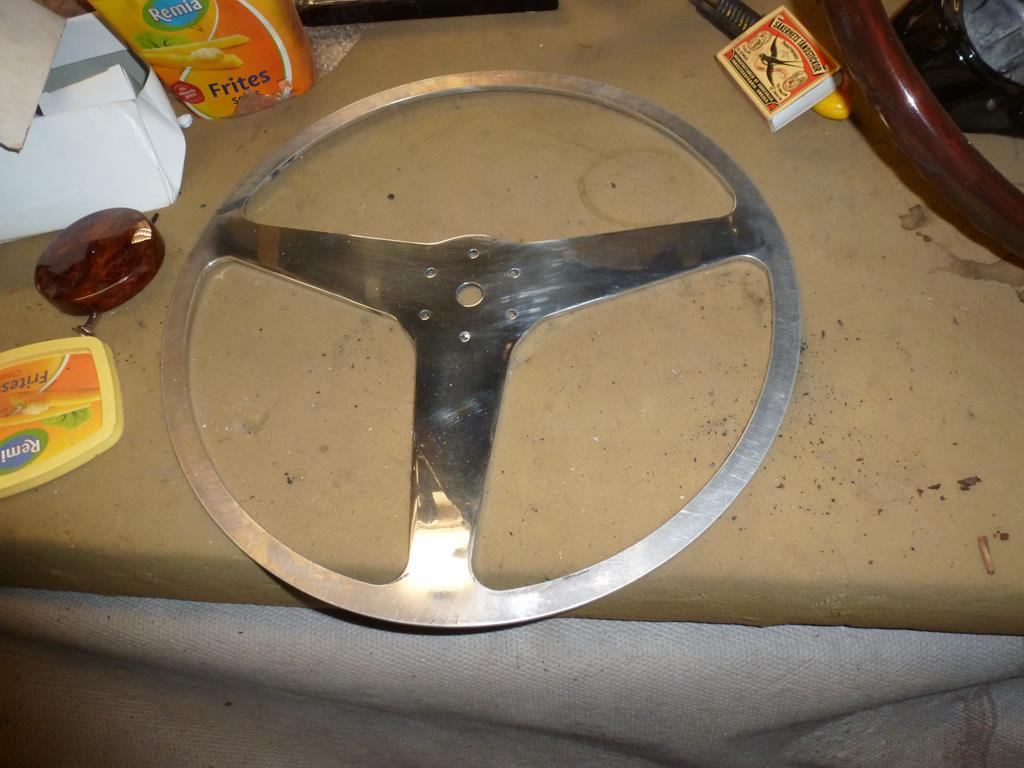 already received the Mahogony wood so the fun beginns. More later Peter |
| |
|
|
|
|
|
|
|
Dec 24, 2019 23:20:51 GMT
|
On the classic car show a man wanted a woodrim steering wheel for his Jaguar MK2 and also asked if i could restore the wooden interior panels and the dash of his MK2. As i did the wood in my Rovers, i agreed to do that. These Jags have afair bit of wood 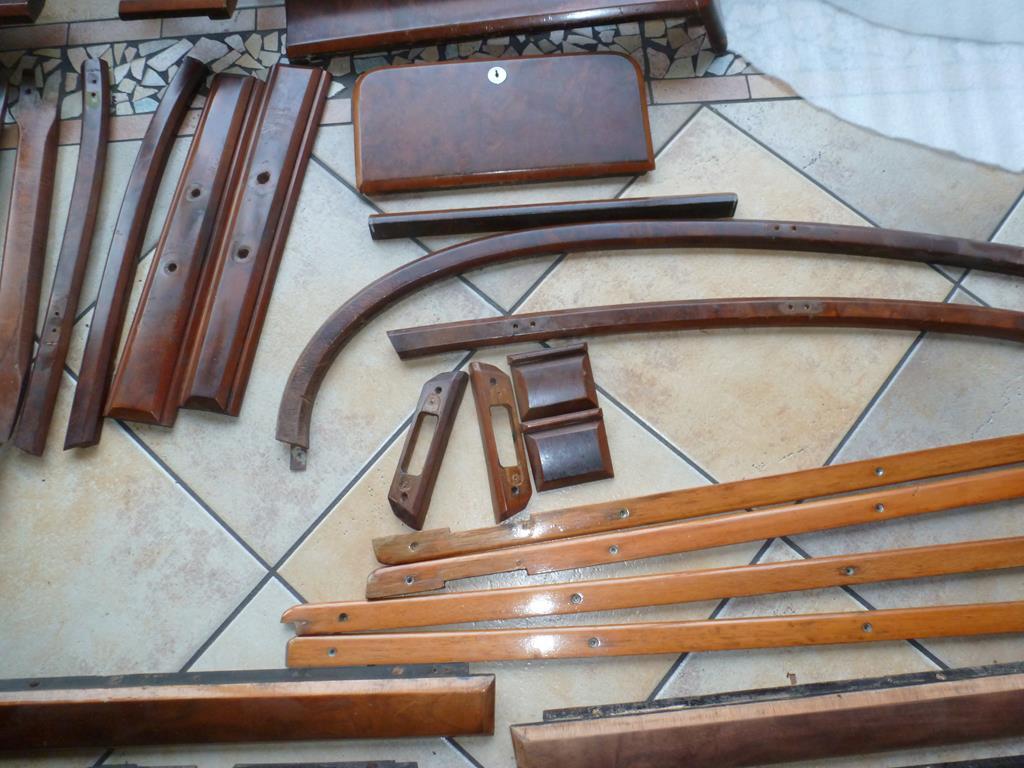 The wood was in good condition. the varnish was cracked in some places and had turned a bit yellow. the first step was to remove all the varnish with paint stripper. soon after the paint stripper was applied, the color of the wood began to get darker and a much nicer contract. The LH psrt of the dashtop shows where the paint stripper was active and the RH shows how it was 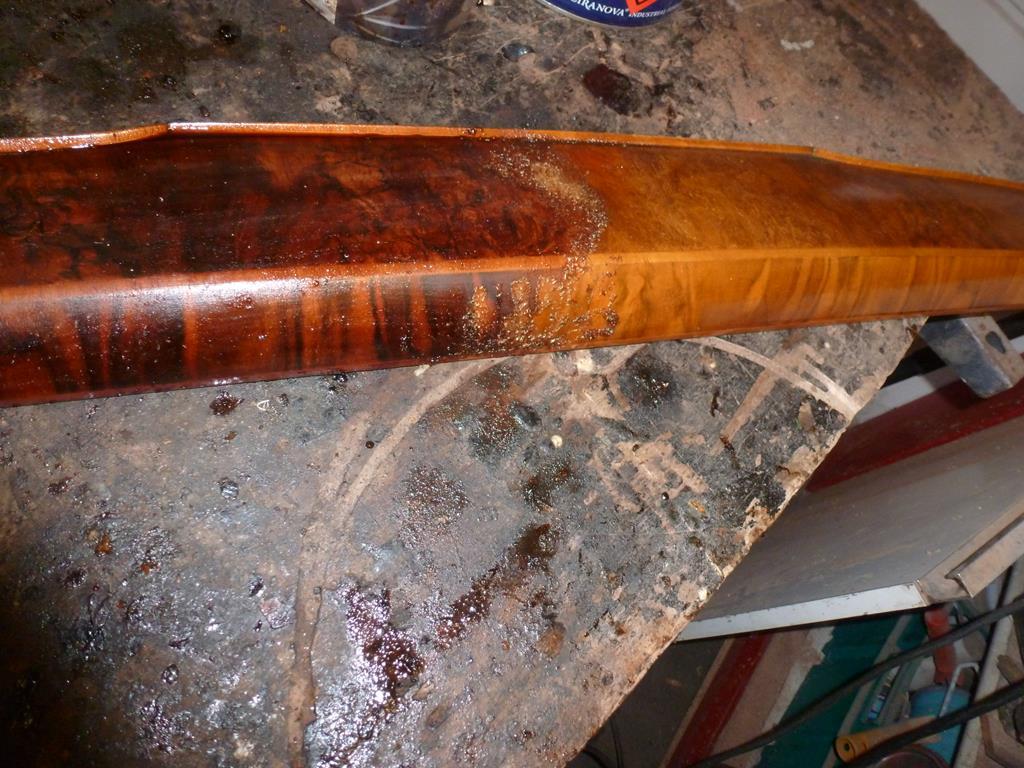 Work on the steering wheel was also started. As his MK2 had power steering he wanted a reduced rim diameter so after all the bakelite was removed, a new steel rim was fitted 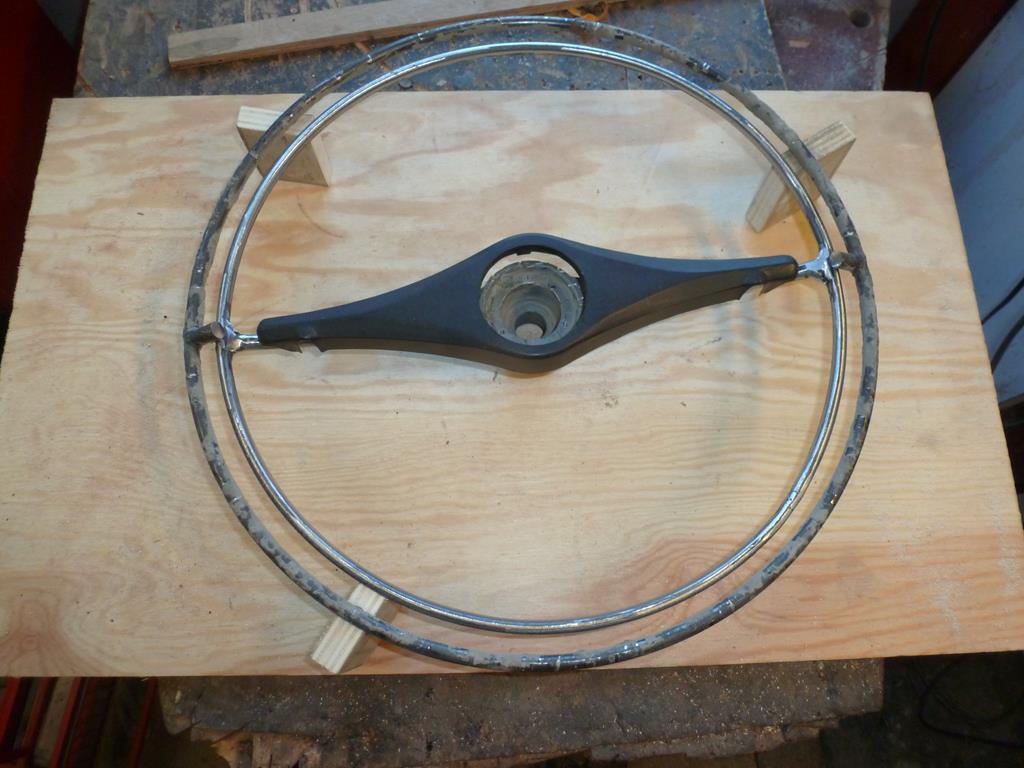 The woodrim and horn cover were made 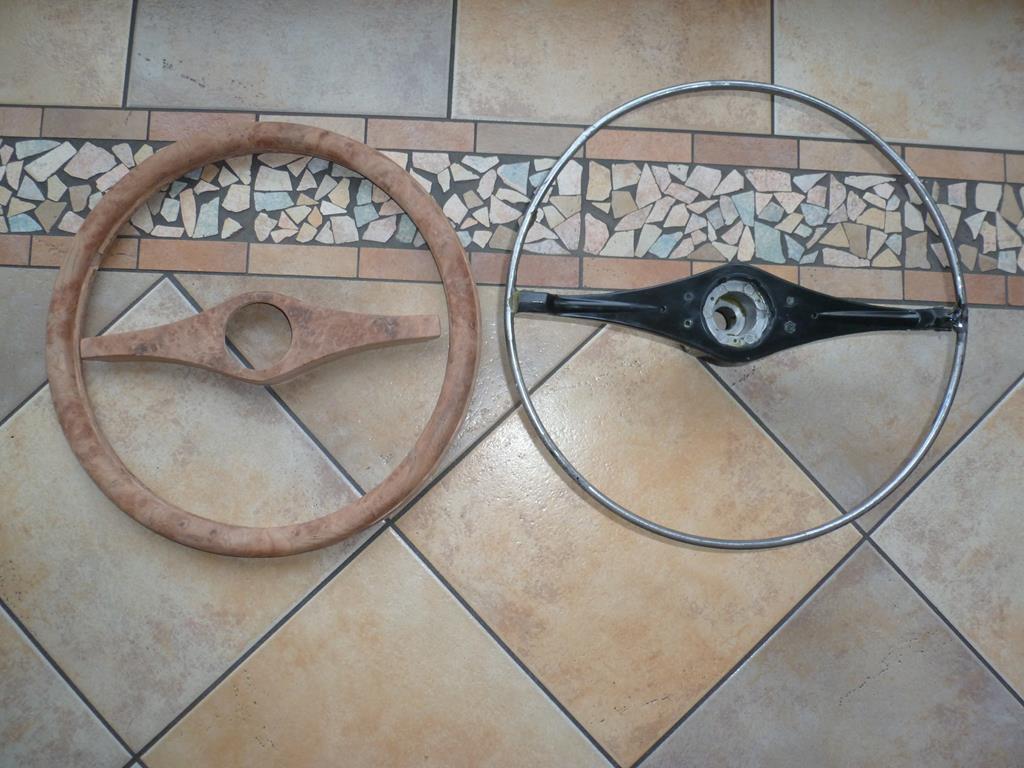 And attached to the steel frame and given the first coat of clear by brush 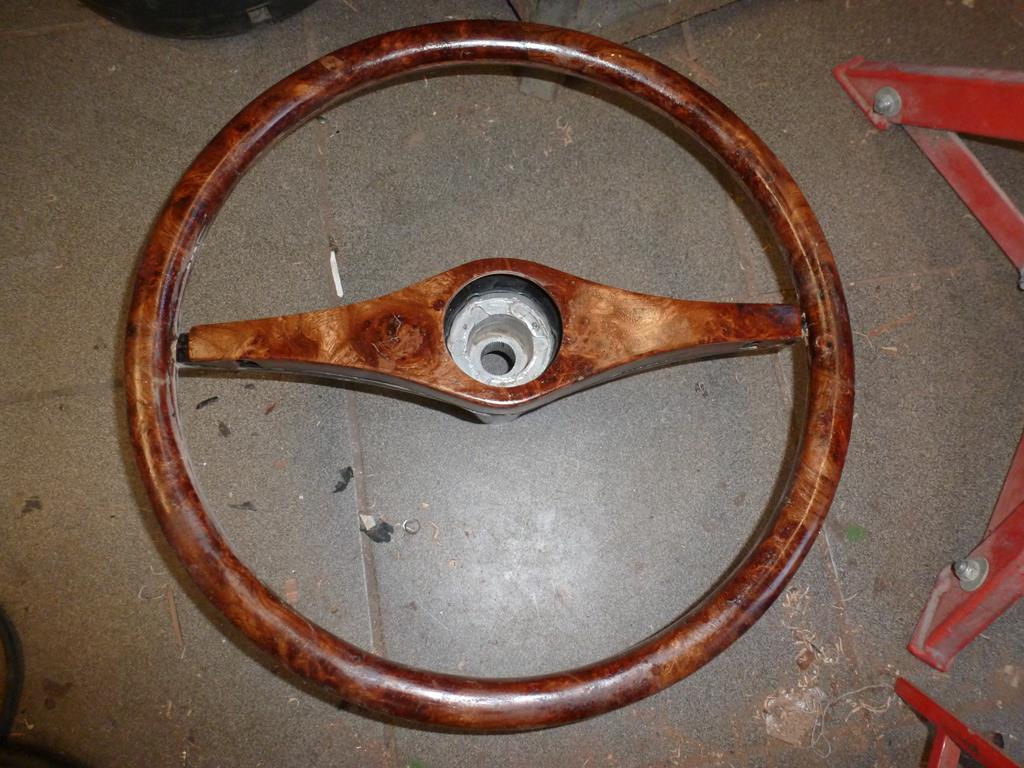 I also was able to buy and MGA steering wheel in poor condition cheap 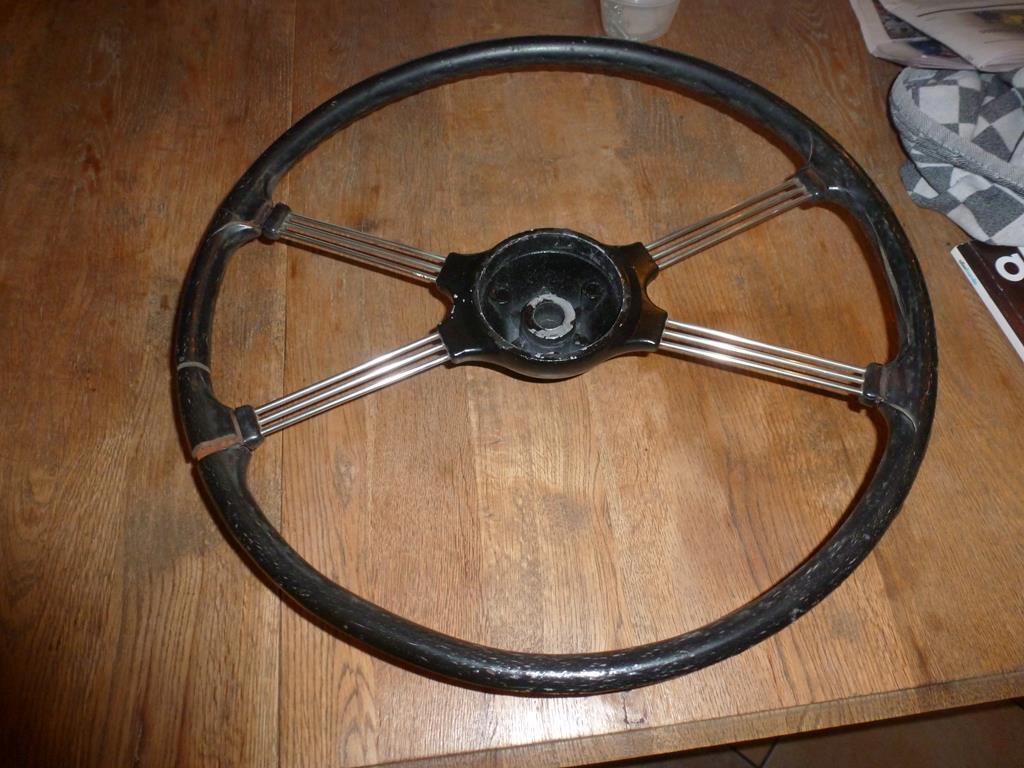 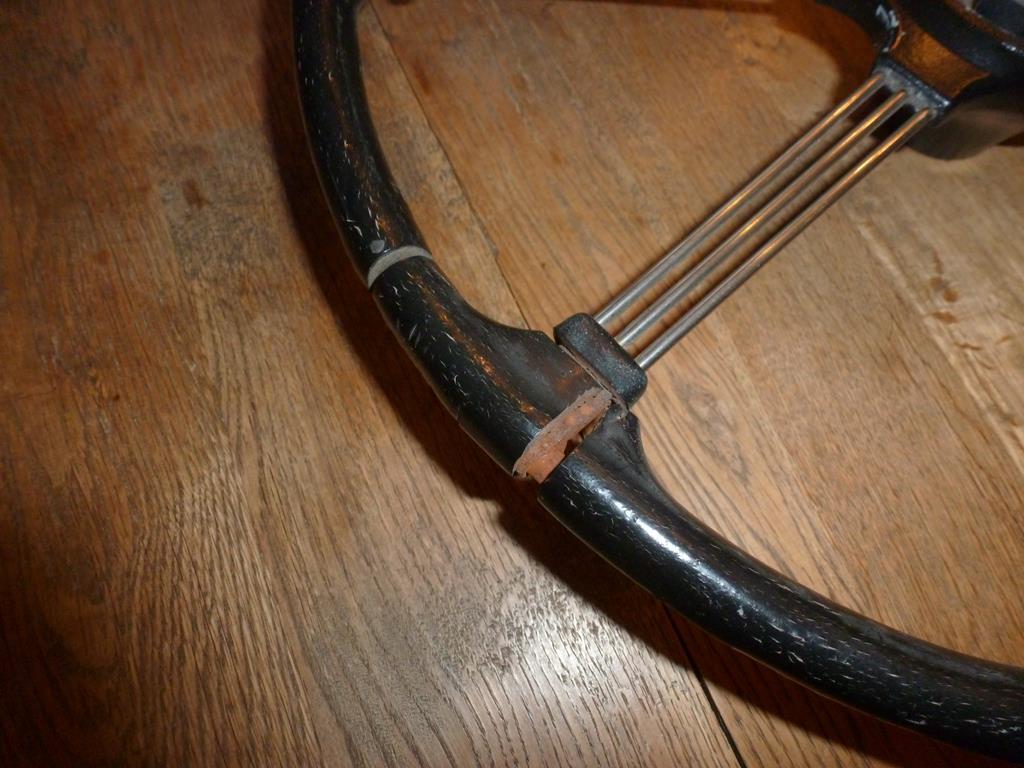 And made and fitted a Mahogony rim for it 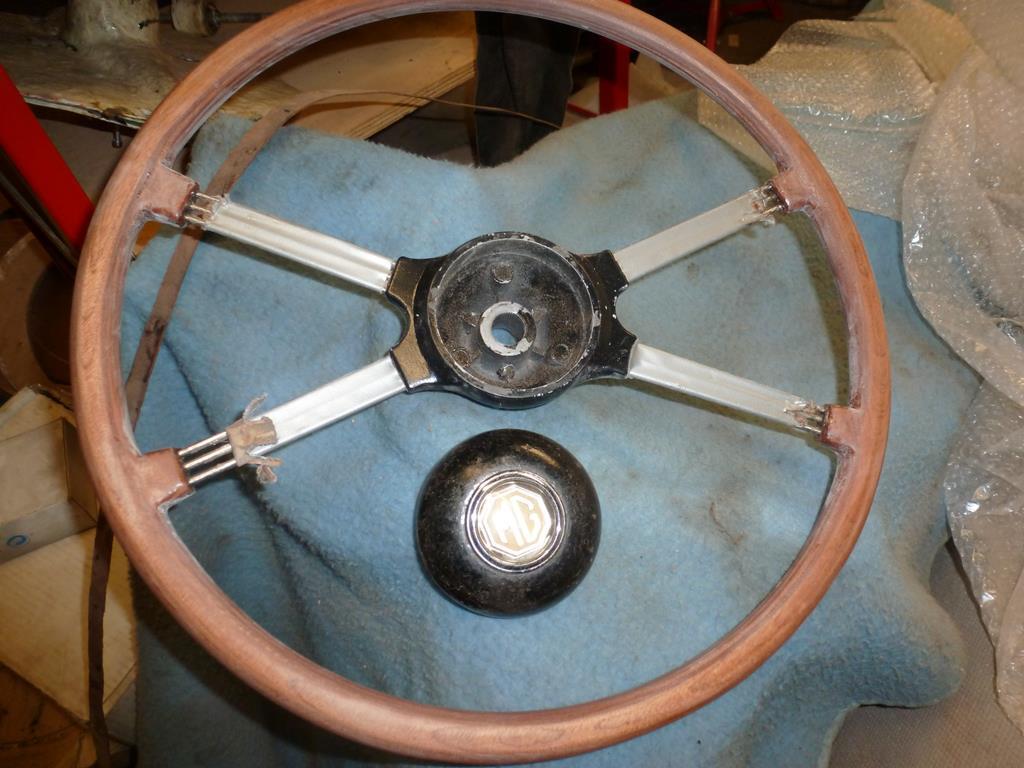 the steering wheel still needs clear coating and came with a center knob with MG logo which was for an MG TD. Some time i restored an MG TD steering wheel as a demo and this knob was missing so a win. More later Peter |
| |
Last Edit: Dec 24, 2019 23:22:34 GMT by petervdv
|
|
|
|
|
|
|
|
Wonderful work and bookmarked.
|
| |
|
|
79cord
Posted a lot
  
Posts: 2,617
|
|
|
|
Figured I'd best link the origins of this thread here unless you were going to copy them across. Rover-p5b-coupe-MGB-v8....Great to see the workmanship & its results. Also good to see the variety of techniques used both originally and in restoration/recreation, with spiral wound & glued veneer for stronger consistent grain (tennis racquet), sectional like that Bizzarini wheel or big sheets for the burl walnut. I've even got a '70's Japanese wheel of wood-fibers in resin (where a previous owner stripped out much of the resin with paint stripper). Very different from the painted 'wood' look that has it's own long history. |
| |
Last Edit: Dec 26, 2019 4:01:28 GMT by 79cord
|
|
braaap
Posted a lot
  
Posts: 2,746
|
|
|
|
|
Some really nice work!
Could you go a little more into detail of how to make the wood parts for a steering wheel, please?
I would like to convert both a momo leather sport wheel and some plastic airbag wheel into wooden wheels.
But I have zero knowledge of what to look out for when gluing the two halfs together - and how to produce those halfs.
|
| |
|
|
|
|
|
Dec 26, 2019 23:29:20 GMT
|
Wonderful work and bookmarked. Cheers George! Figured I'd best link the origins of this thread here unless you were going to copy them across. Rover-p5b-coupe-MGB-v8....Great to see the workmanship & its results. Also good to see the variety of techniques used both originally and in restoration/recreation, with spiral wound & glued veneer for stronger consistent grain (tennis racquet), sectional like that Bizzarini wheel or big sheets for the burl walnut. I've even got a '70's Japanese wheel of wood-fibers in resin (where a previous owner stripped out much of the resin with paint stripper). Very different from the painted 'wood' look that has it's own long history. Thanks for posting the link. I also saw dipping processes for copying wood patterns Some really nice work! Could you go a little more into detail of how to make the wood parts for a steering wheel, please? I would like to convert both a momo leather sport wheel and some plastic airbag wheel into wooden wheels. But I have zero knowledge of what to look out for when gluing the two halfs together - and how to produce those halfs. I used 3 techniques which can be seen in the fake demo steering wheel i use for shows and this shows how the 3 techniques are done 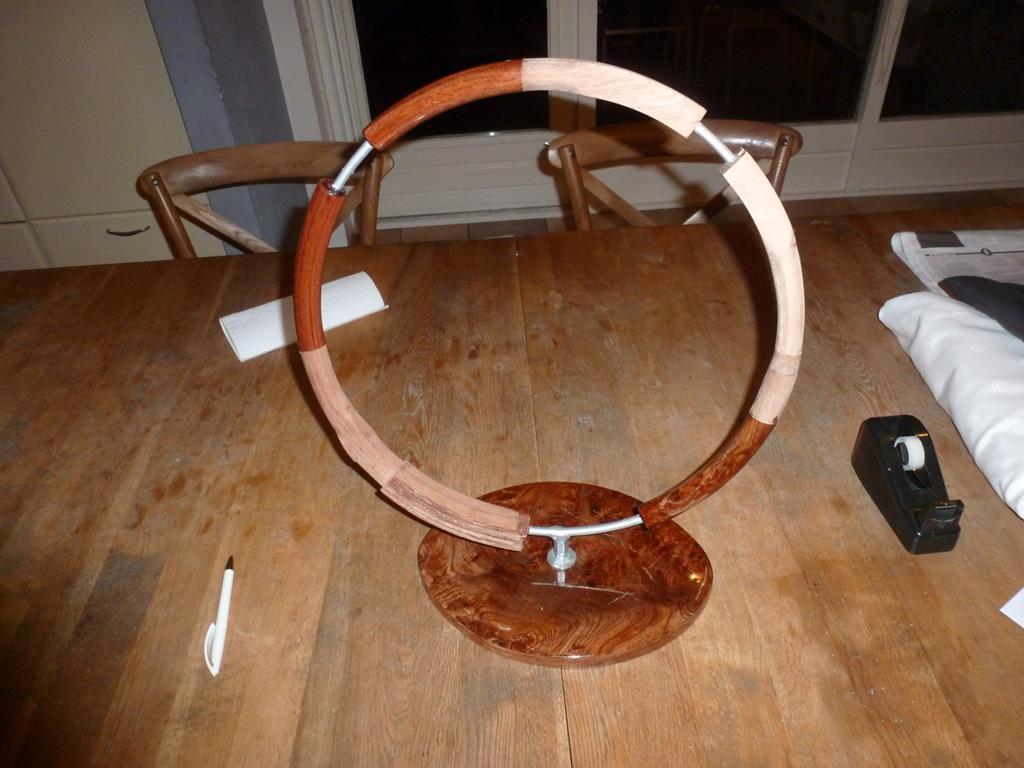 The first technique is glueing Mahogony strips in circles to have a circular pattern of the grsin. Then with a router making it flat, with a saw cut it in 2 pices and with a router the round shape is made and an ingress for the steel rim. Then it is glued onto the steel rim and clear coated 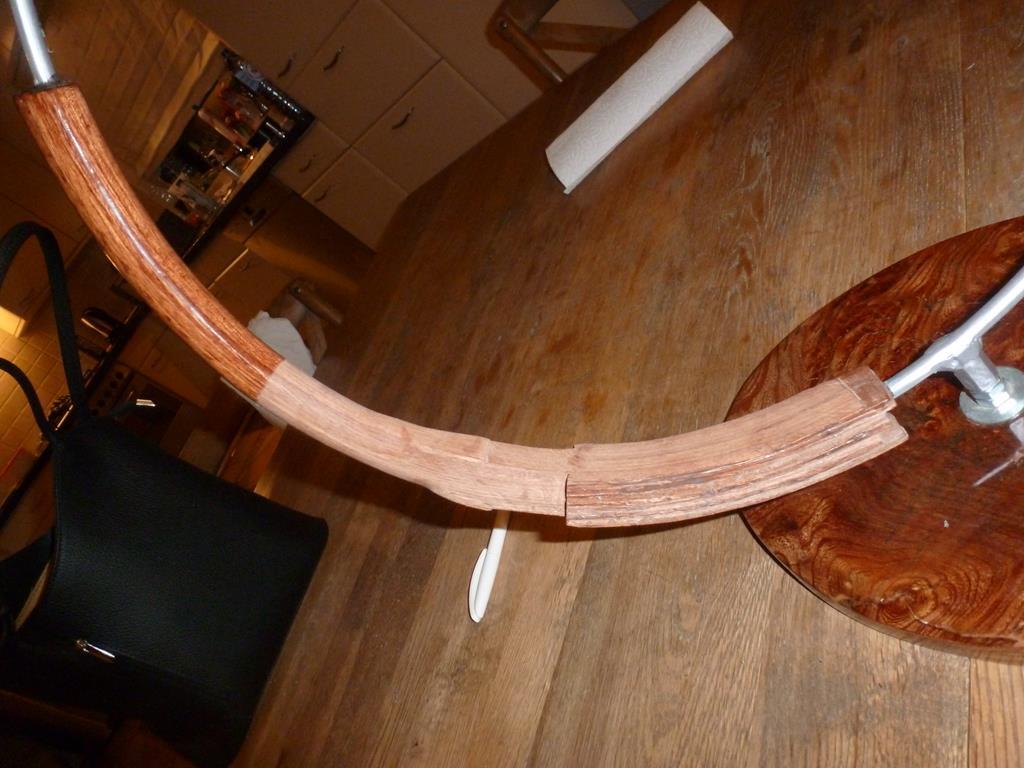 The second technique is making 2 rings out of Mahogony ply wood. Taking it to a round shape with a router, making the ingress for the steel rim and then glue the 2 halves onto the steel rim. The grain is not in circular direction but this is the easiest technique. 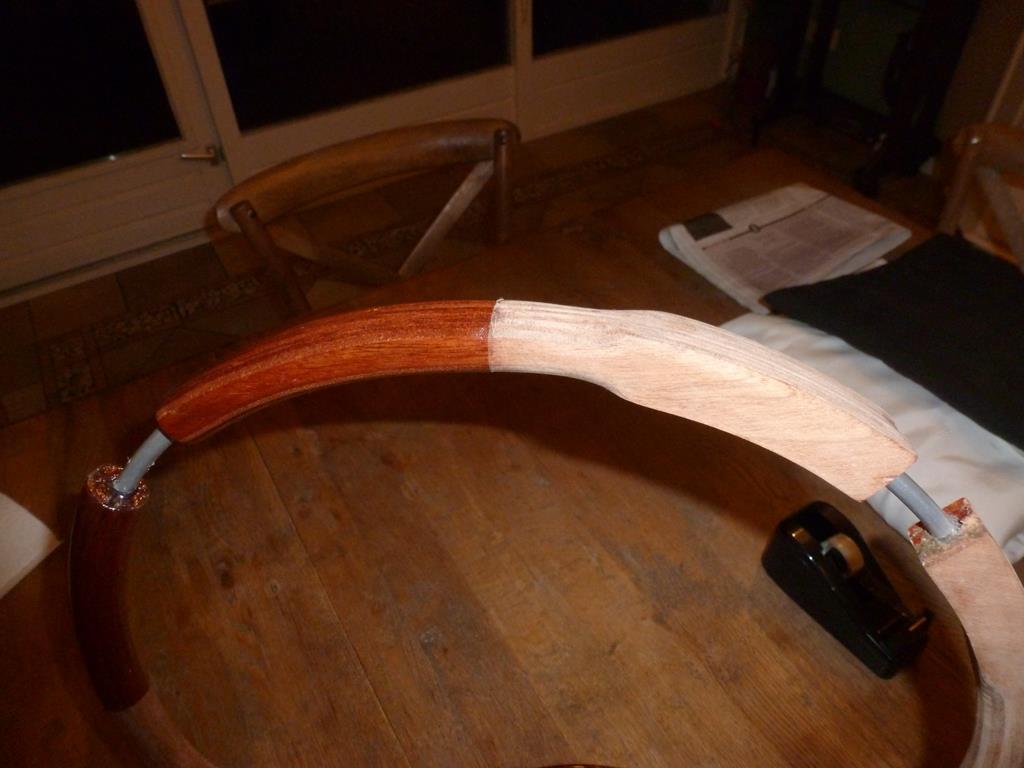 The third technique is done by making two rings of plywood, taking it to a round shape with a router and then glue burr veneer to the halves and glue both halves to the steel rim. 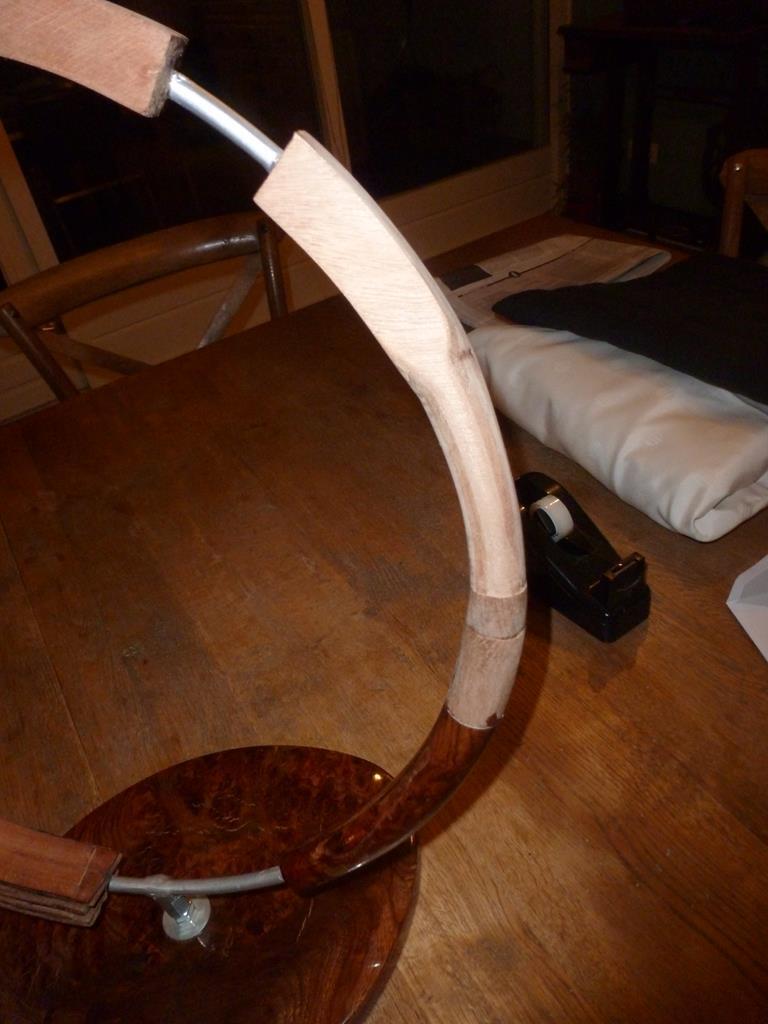 for all 3 techniques, after gluing the halves to the steel rim, the ingress for the fingers can be made with a drum sander before applying the clear coat. Regards Peter |
| |
|
|
braaap
Posted a lot
  
Posts: 2,746
|
|
|
|
Thanks a lot for this answer, Peter! I just bought my first router and wasn´t sure if this would be the right way, but I feel I had a not-so-wrong idea of how to do it.  Although I will use mdf for my first try and paint that grain on. I don´t know if it will work on mdf too, but I know a technique using a torch flame and less oxygene to give things a root wood apearance. |
| |
|
|
|
|
|
Dec 29, 2019 20:51:39 GMT
|
Started a new project which is the restoration of a Jaguar MK9 dashboard and interior trim. This needs a bit more work then only a fresh clearcoat
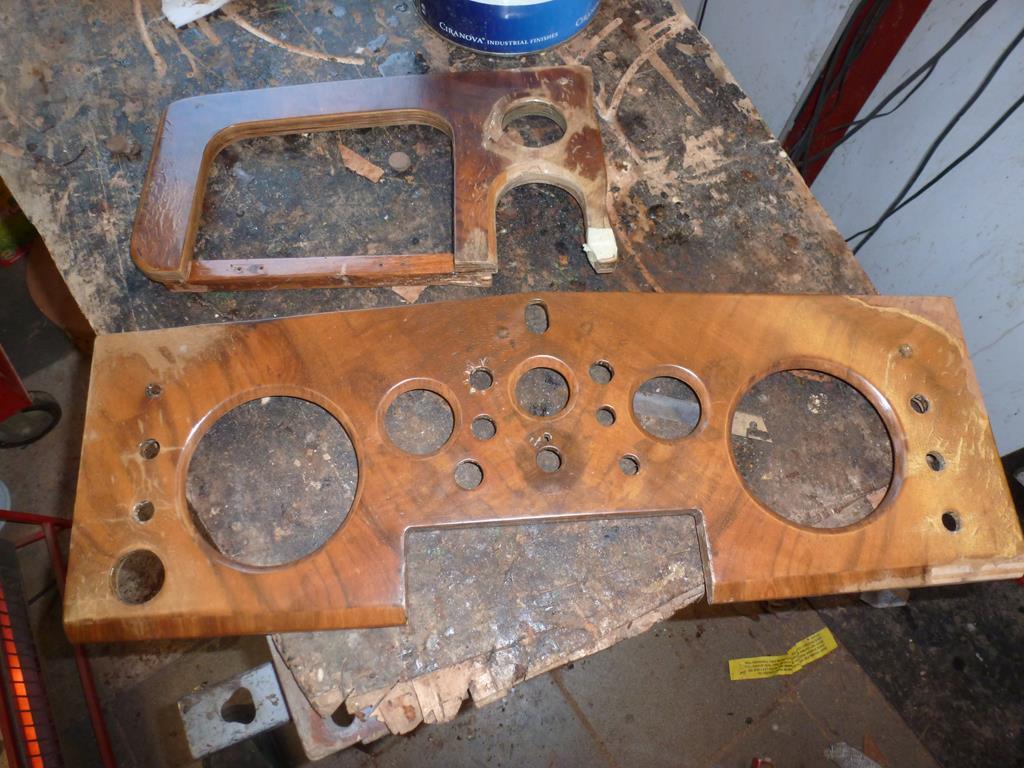 Pieces of veneer have come loose and also layers of plywood on the dash have lifted. All were carefully lifted and with a hobby knife glue was put between the lifted parts and the base and then clamped 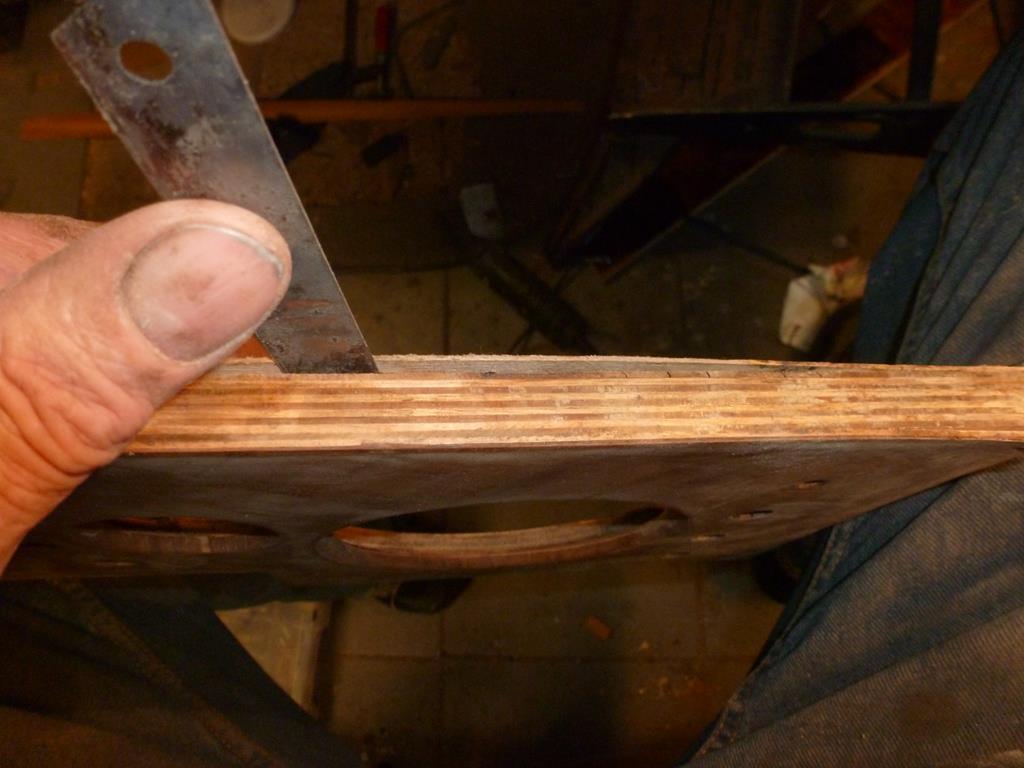 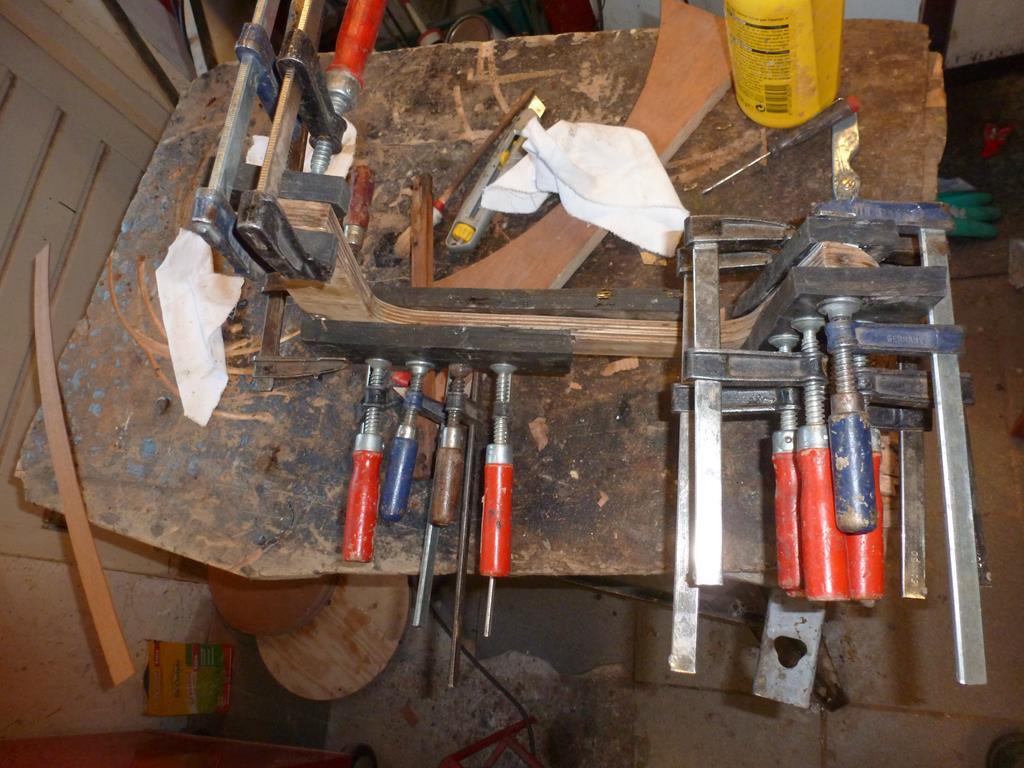 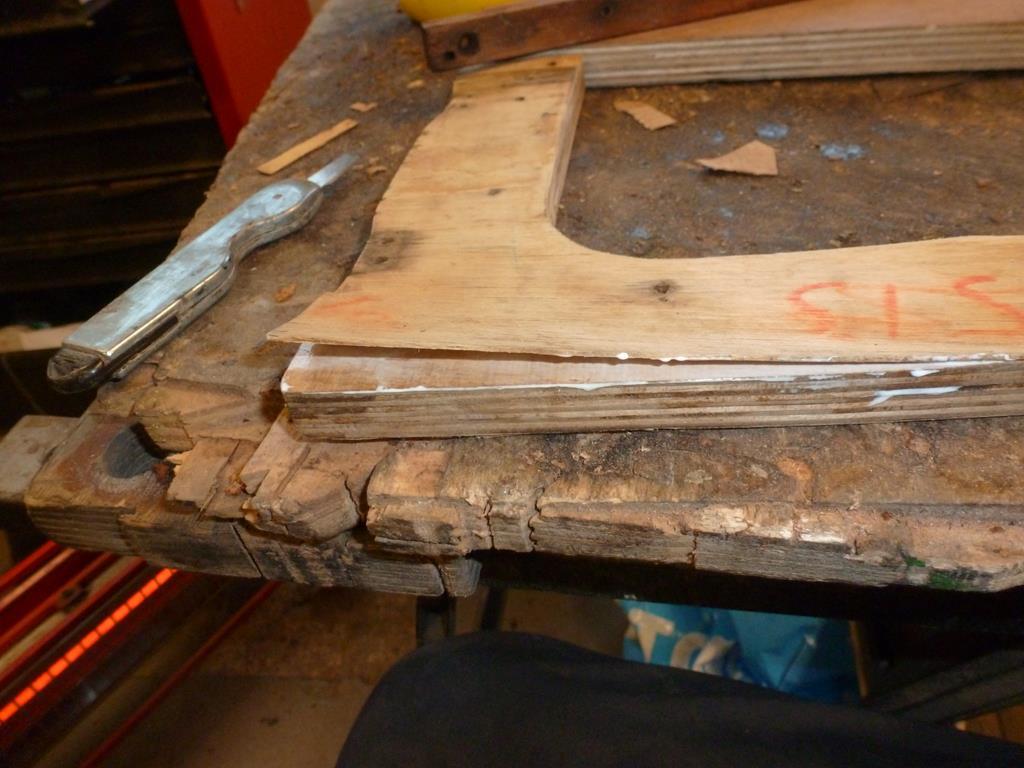 After these repairs the paint stripper was called in and this gave an identical color change as with the MK2 interior 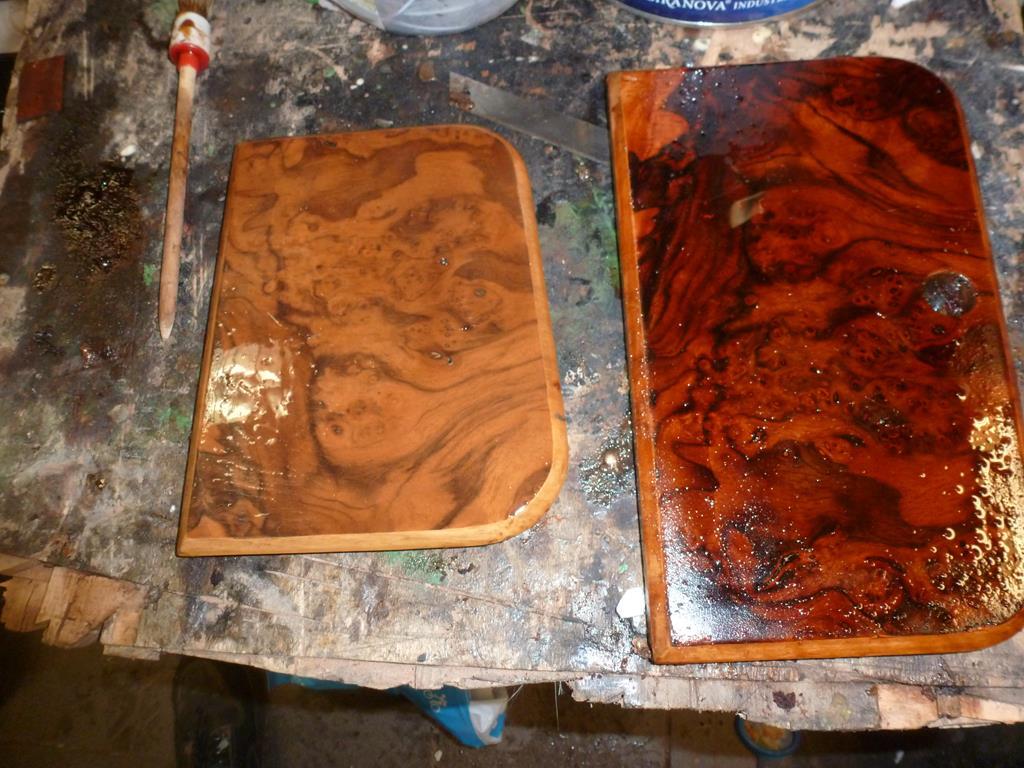 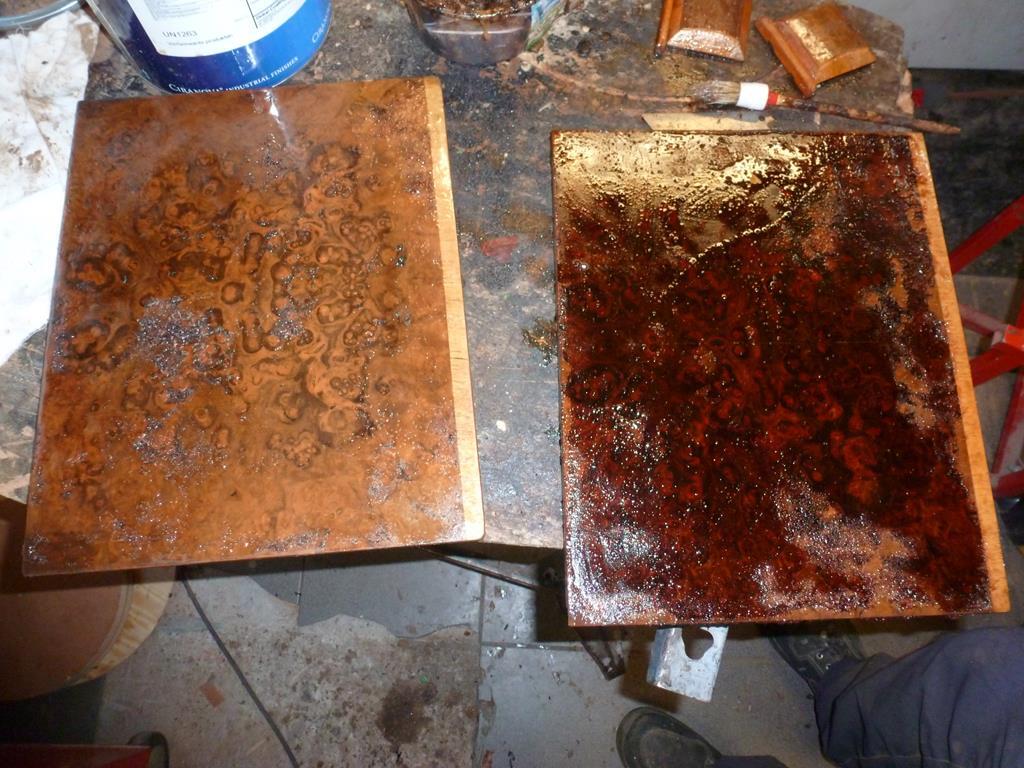 After removing all the old varnish, some other repairs were needed. Both the pieces of wood where the glove box lids were attached has some seious damage 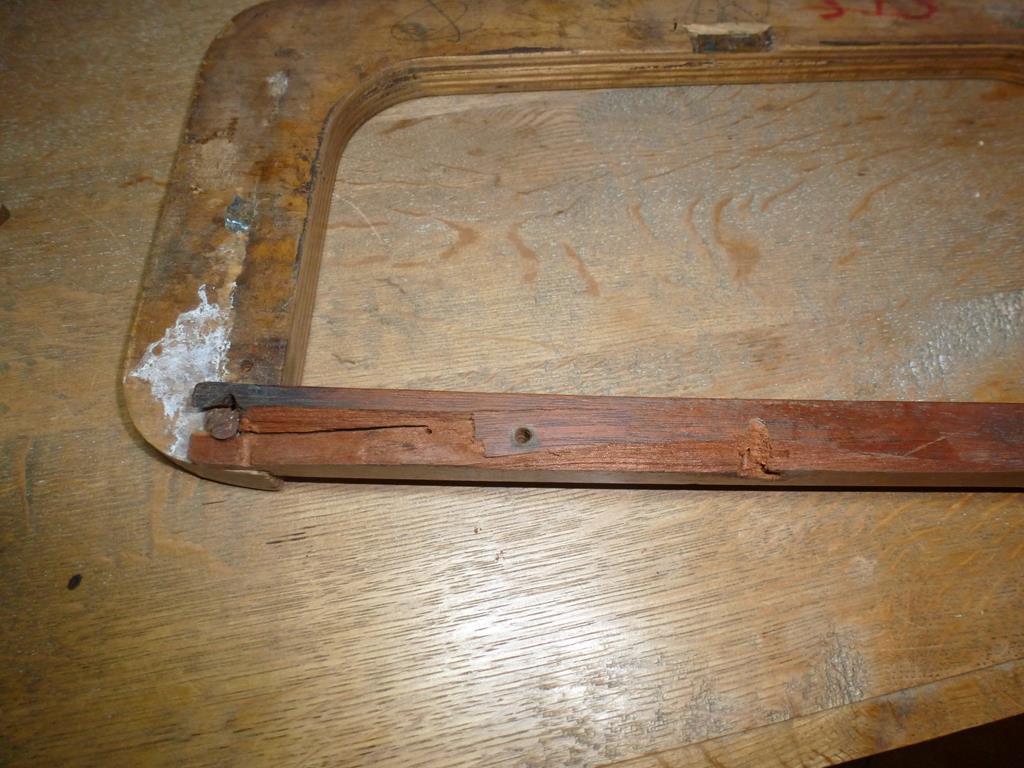 After emoving one the decision was made to repair it as the wood i have has a different grain and color 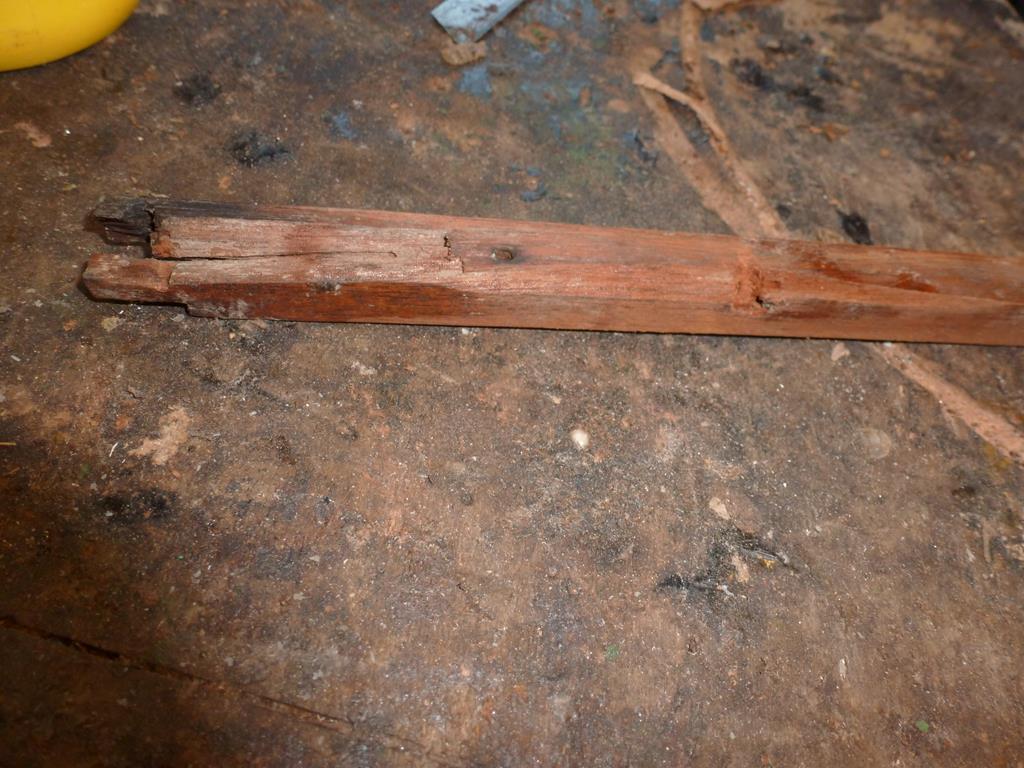 With the router and file some material was removed and the goal was that from the front view, the repairs could not be seen Strips of wood were step wise glued to the base so it would be as strong as possible 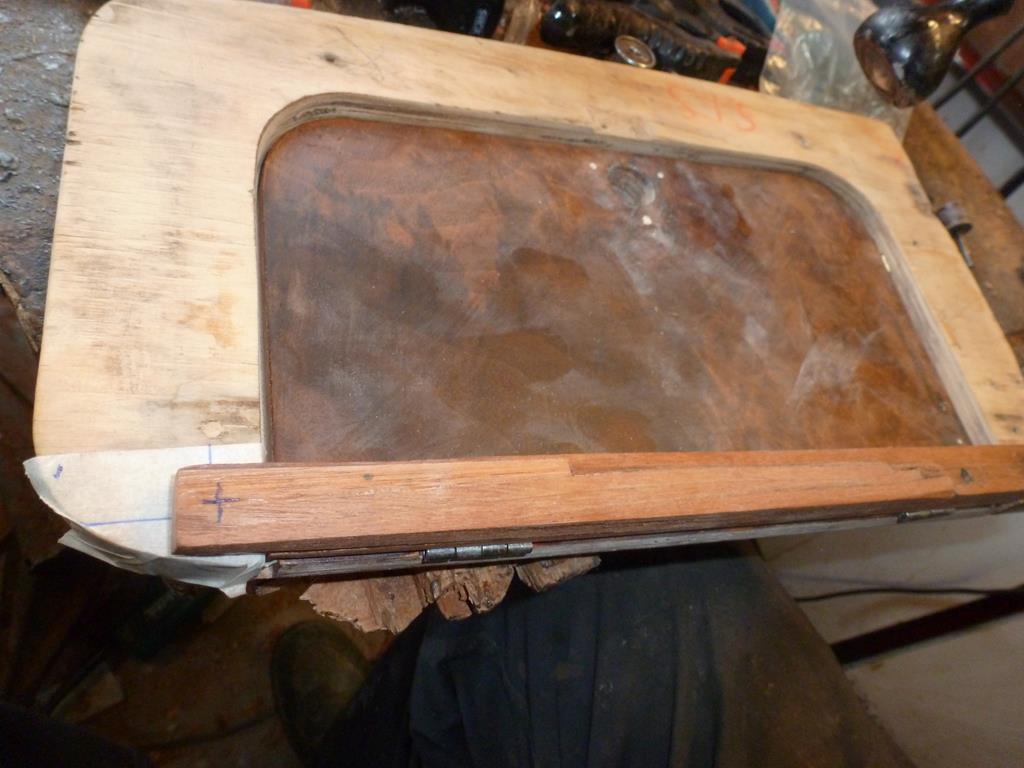 All went well and the repairs are invible from the front vieuw 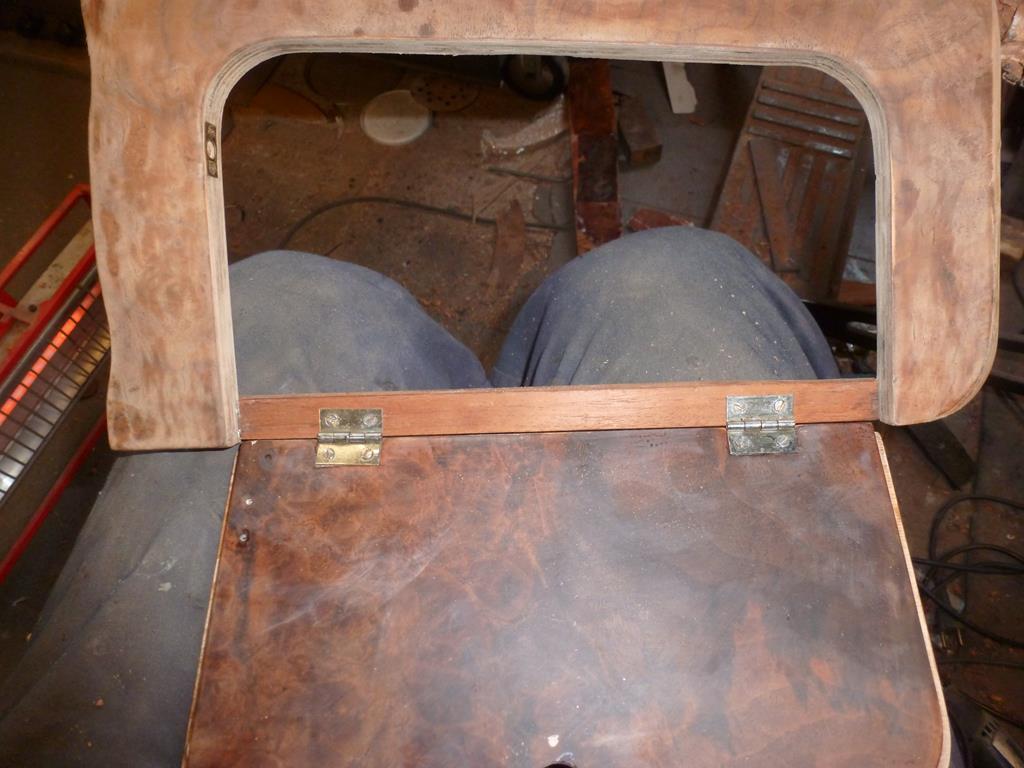 |
| |
|
|
|
|
|
Dec 29, 2019 21:09:35 GMT
|
The dashboard top part has 3 strenghening pieces. 1 was still there, nr 2 was already loose and nr3 was missing. nr1 was removed as it was rather loose and i made a new one and all 3 were glued to the dash top 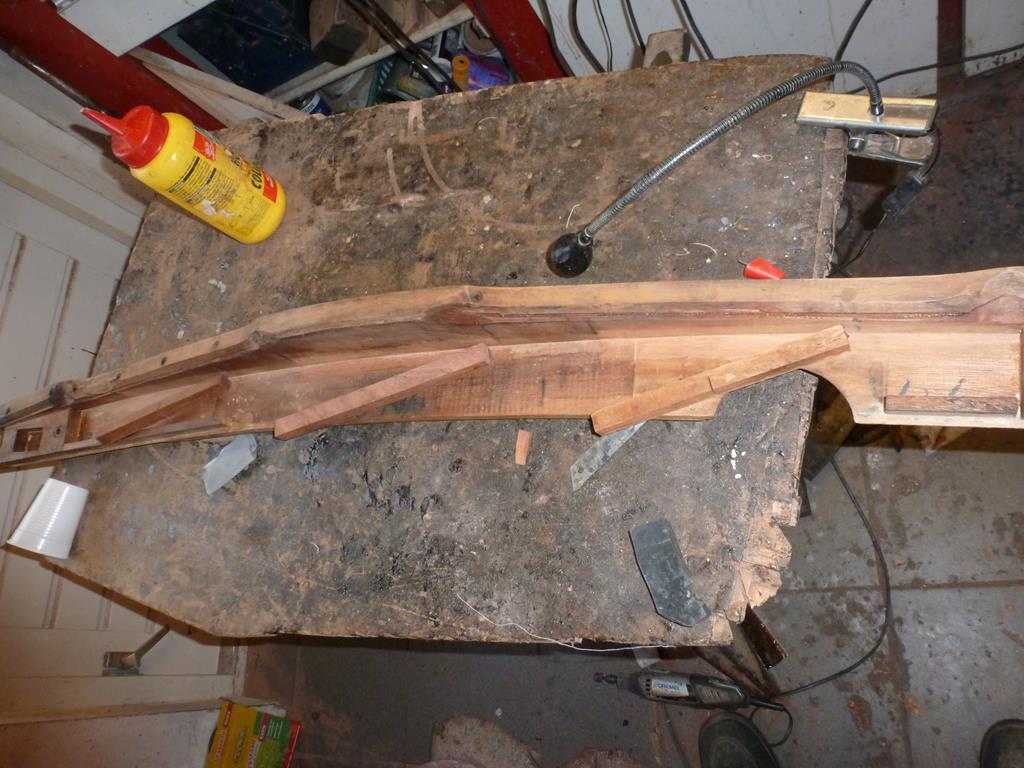 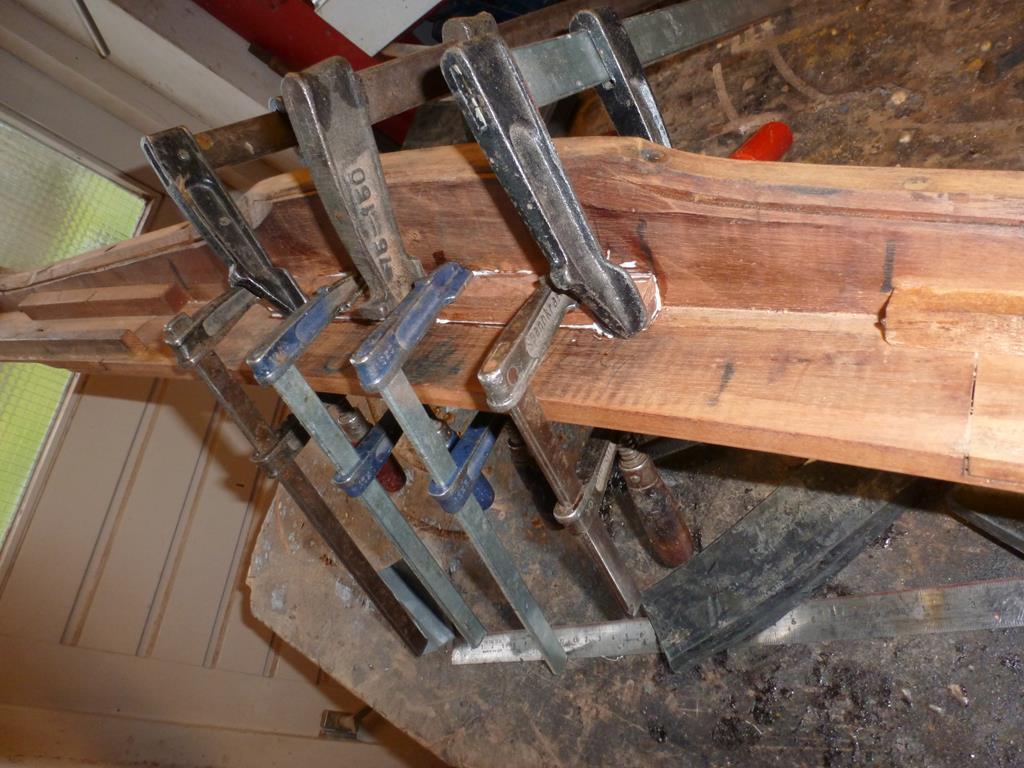 One of the trim pieces was broken and this was also repaired. First in a kind of jig and lots of clamps the 2 pieces were glued together. 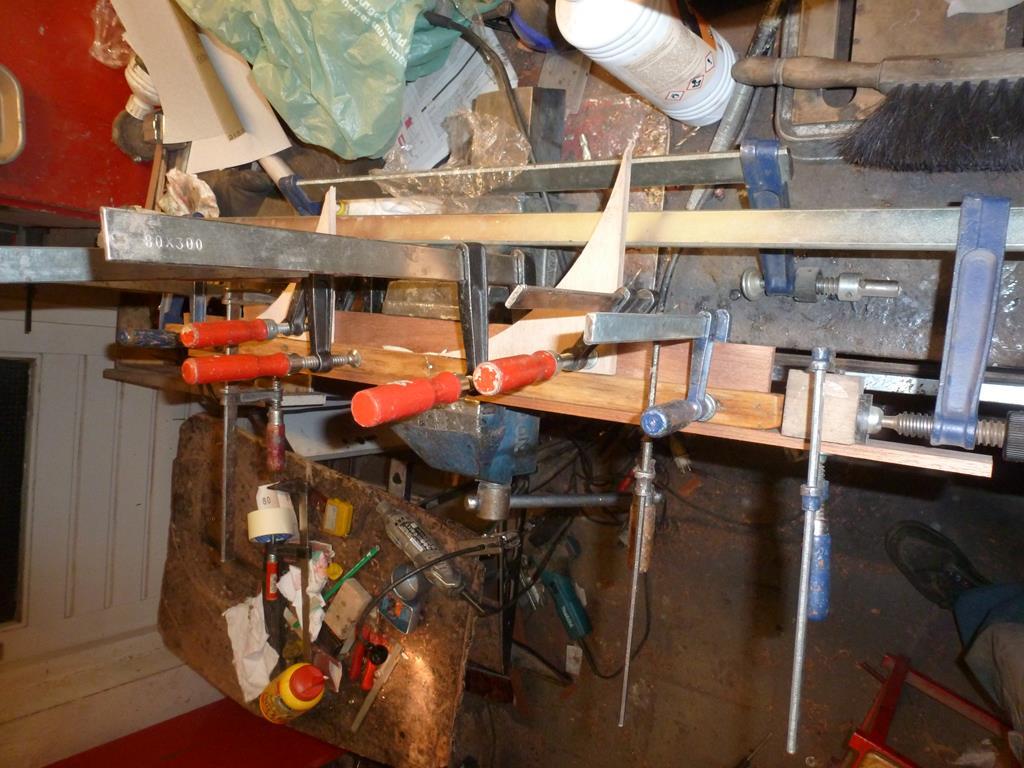 This would not last so after the glued was cured a sort of chamber was made into the strip with a router a piece of 2mm thick aircraft plywood was glued in 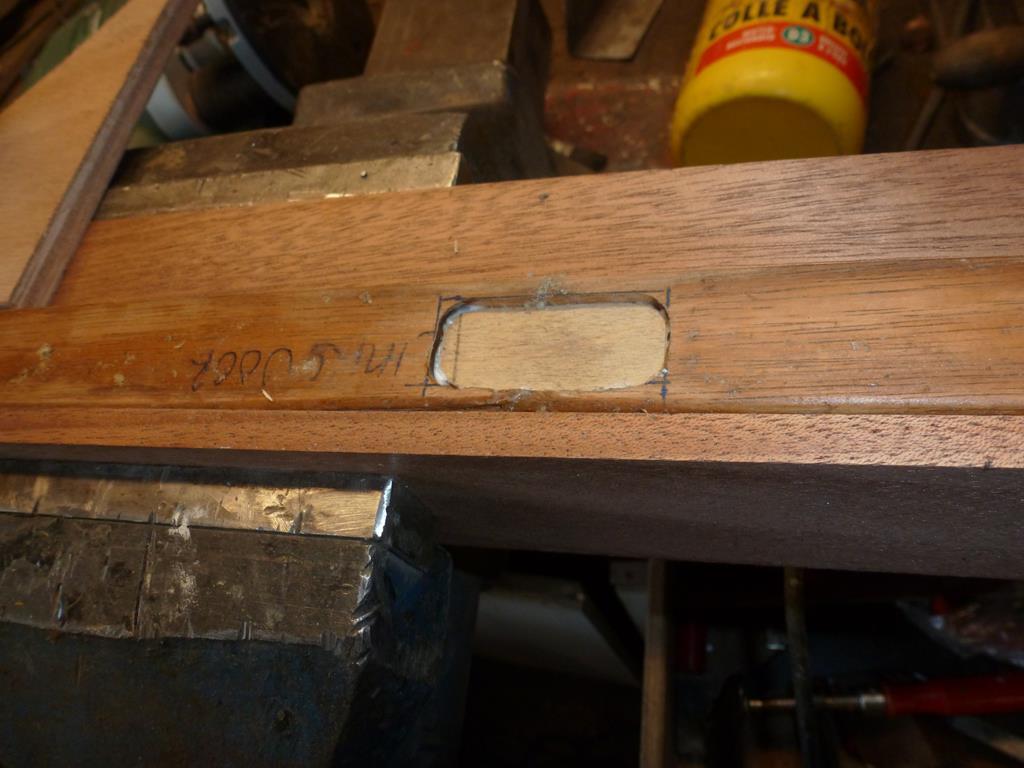 Then another longer chamber was made with the router over the first one to create a stepwise repair 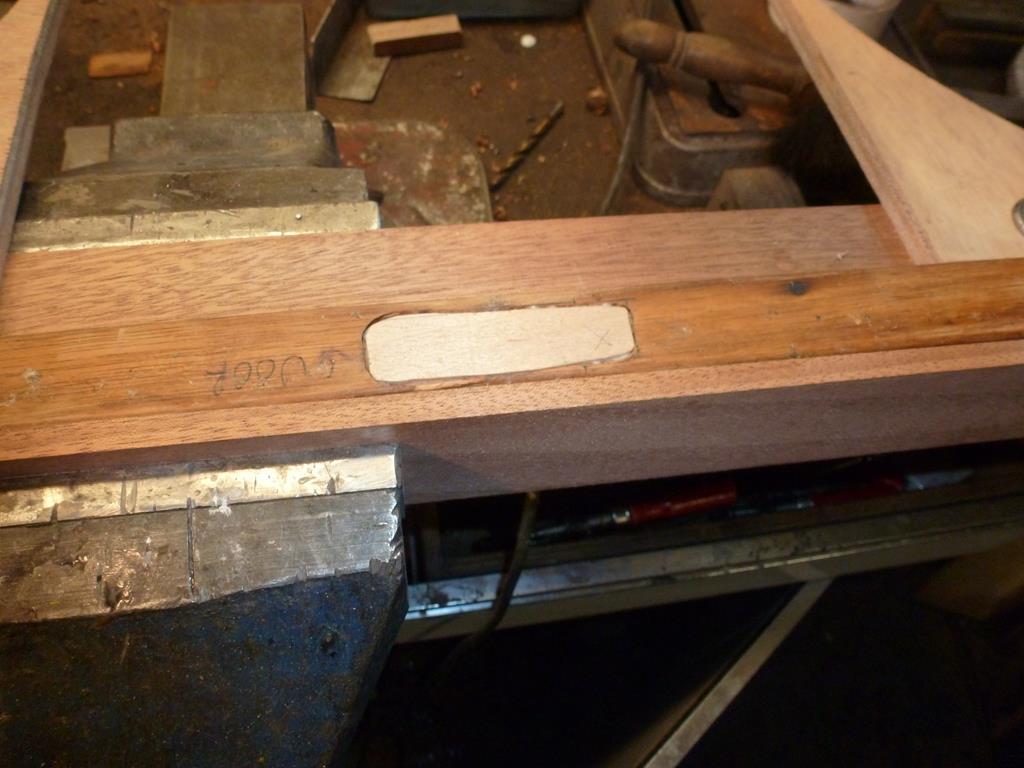 Now the strip feels solid again I had not enough room to store all the parts of the two interiors. I had a rack but not enough shelfs so made storage brackets out of steel 15 x 15 square tube. Gave these a coat of epoxy primer and as the temperature was rather high that day, i left them to dry outside 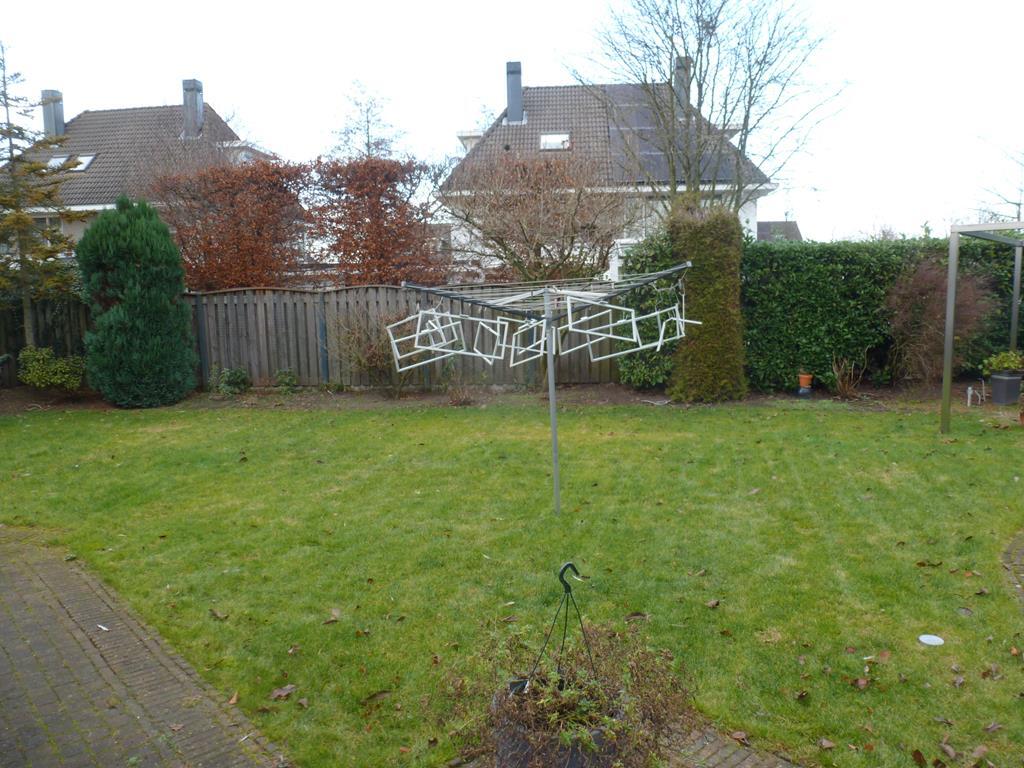 Now have enough storage room 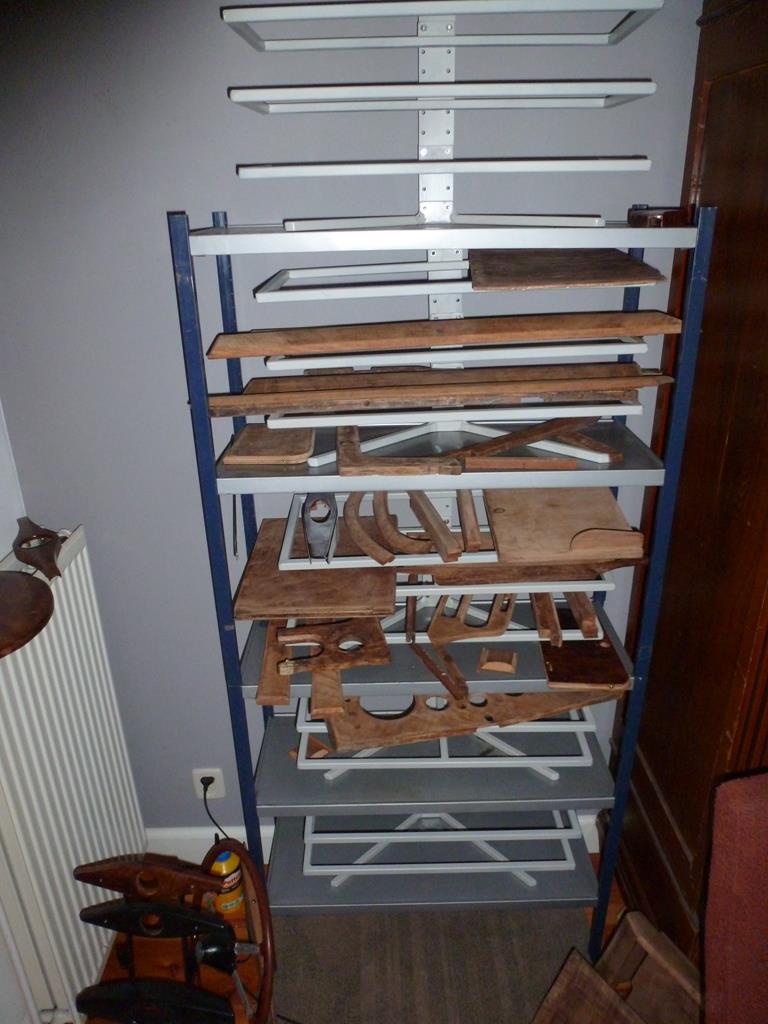 More later Peter |
| |
|
|
|
|
|
|
|
|
At the serious risk of repeating myself; stunning work.
I love the mock wheel with the three different types of repair.
|
| |
|
|
|
|
goldnrust
West Midlands
Minimalist
Posts: 1,887
|
|
Jan 14, 2020 20:46:01 GMT
|
Lovely work you're doing here Peter  And very interesting to watch, as I'm starting to tackle the wood trim on my Daimler (basically the same as the Mk2 Jag wood you've been working on). I look forward to seeing more. May I ask what your preferred choice of clear coat is? I've been reading up on it and it seems like there's a big variety of approaches. I'm not sure where to start! |
| |
|
|
|
|
|
Jan 14, 2020 22:03:25 GMT
|
Lovely work you're doing here Peter  And very interesting to watch, as I'm starting to tackle the wood trim on my Daimler (basically the same as the Mk2 Jag wood you've been working on). I look forward to seeing more. May I ask what your preferred choice of clear coat is? I've been reading up on it and it seems like there's a big variety of approaches. I'm not sure where to start! Thanks. Best is to remove the old clear coat with paint stripper as then you get the original darker color and contrast back. After washing of the paint stripper off, and some light sanding, i give it a coat of 2 pack epoxy with a brush. The epoxy is not a reeel paint. I also use to glue steering wheel halves together and it also fills the grains nicely and does not contain any solvent so it will not react with the glue or traces of old paint. Then sand it back and if not all grains are filled, Then another coat of epoxy- After another sanding (mostly by hand) you get a smooth surface and then i spray paint it (3 or 6 layers, ) with some 2k automotive clearcoat. I like the 2k clear coat as it hardens much faster then 1k clear coat and because i do not have a dustfree spray booth, dust particles can be polished out easily and i like a glass finish which is easy to achive with some polishing
Good luck and if you have more questions, let me know
Peter
|
| |
|
|
|
|
|
Jan 15, 2020 21:38:53 GMT
|
Did some more work on the steering wheels. The MGA center was sprayed black and the rim got a few layers of clear coat and is finished now 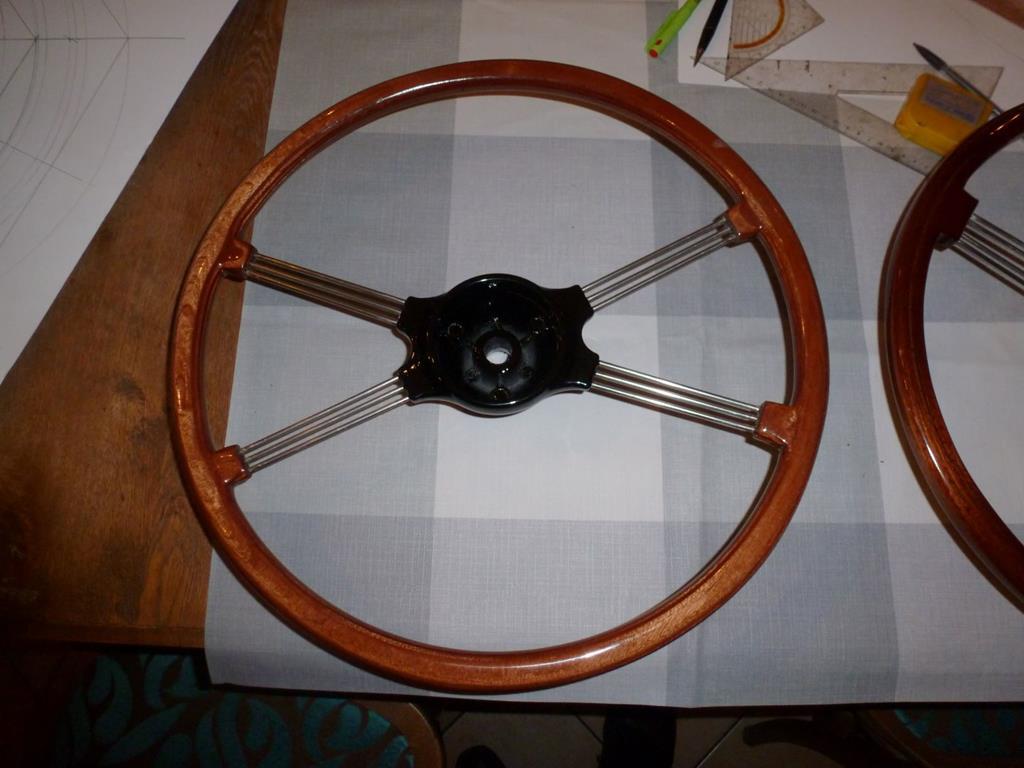 Also worked on the Bizzarini steering wheel. It originally consist of 4 layers of 6 pieces of Mahogony wood and this was copied. It took a while to set up the saw to the correct angle and then the pieces were cut and clamped on a piece of wood onto the drawing 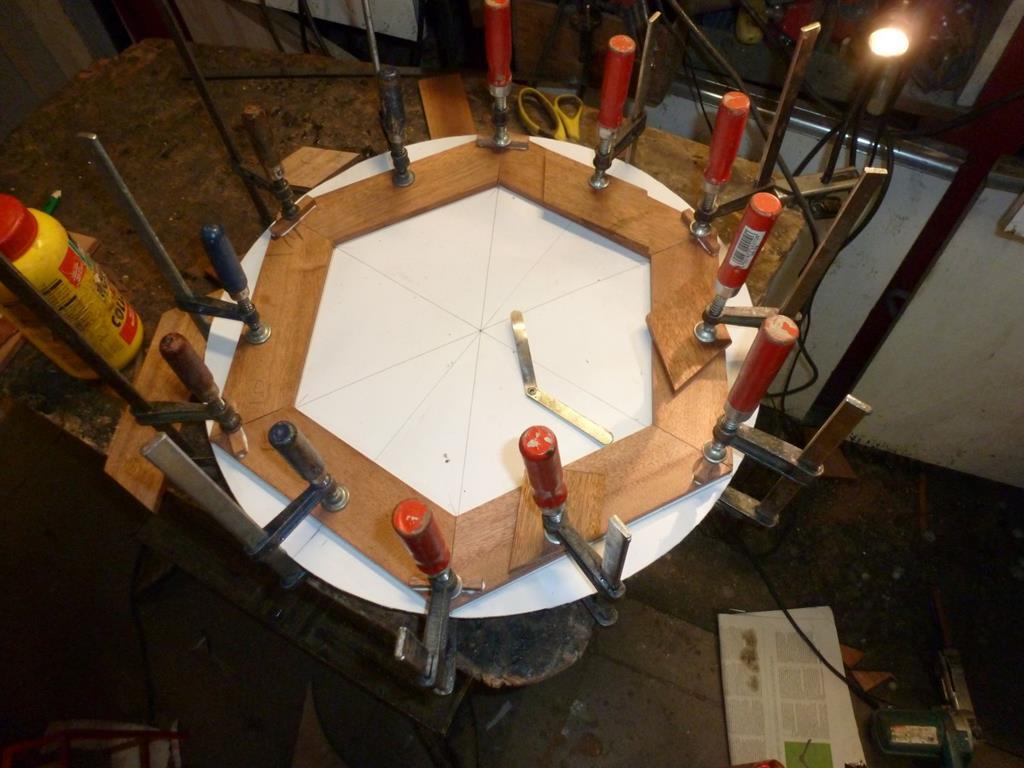 The 6 pieces were connected with glued on small pieces of wood. Then a second layer was made and this was glued on the first layer and with a router, the inner edge was turned into a circular shape 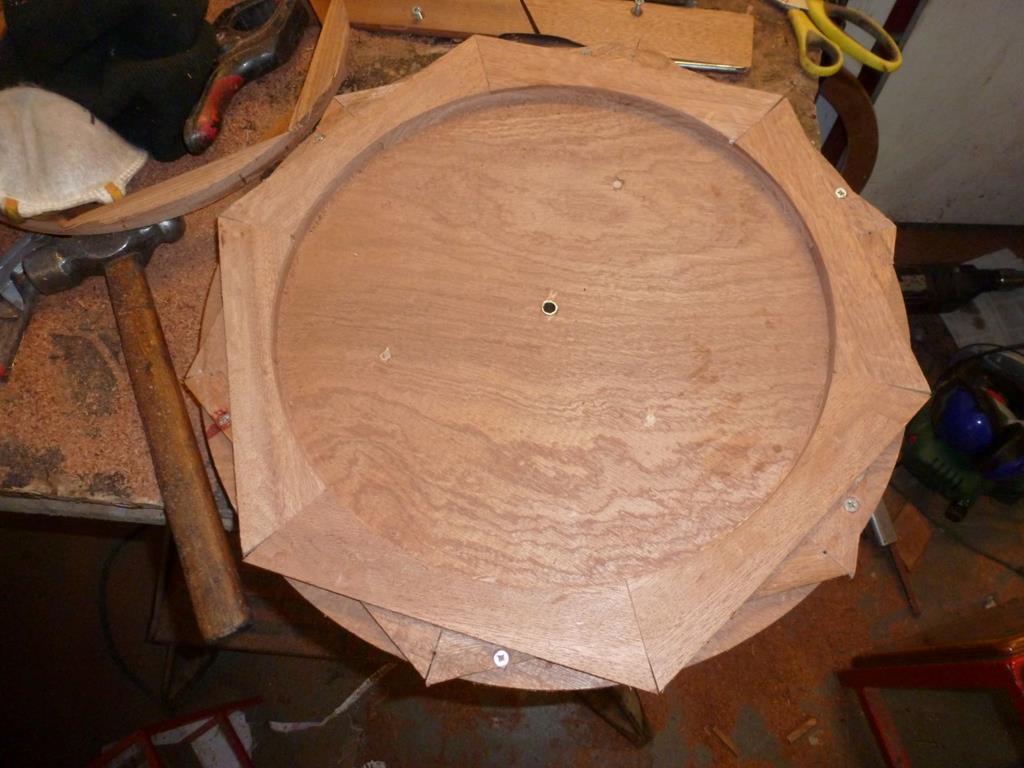 Then the upper edge was rounded of with a router 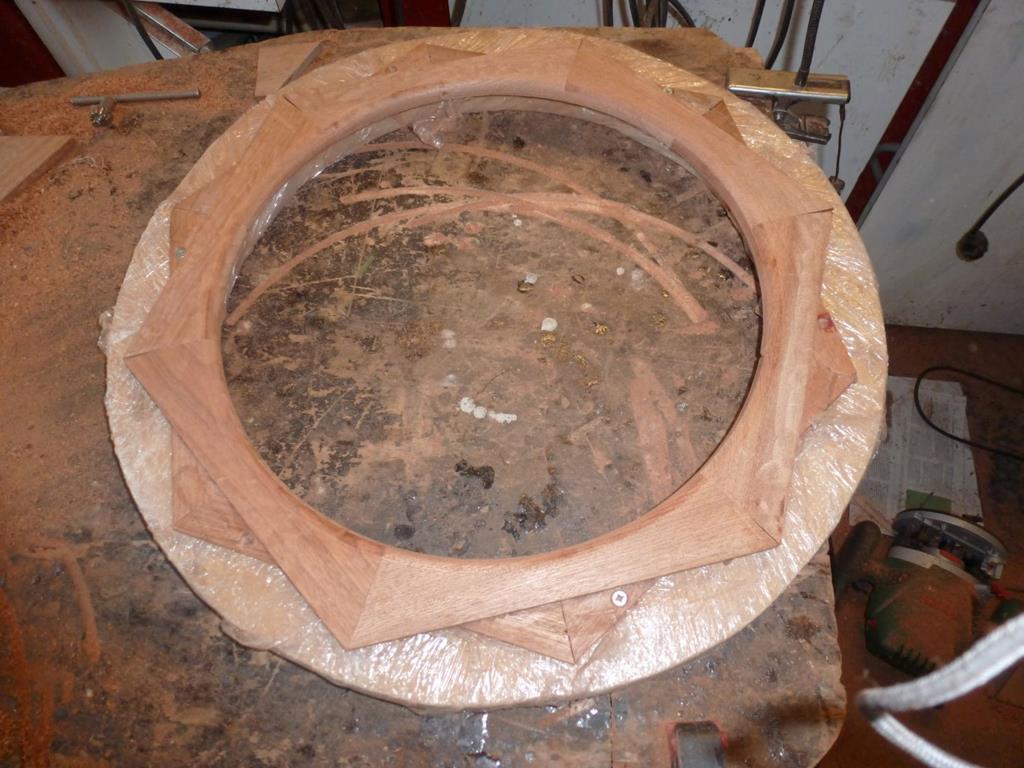 Then layer 3 and 4 were made in the identical way and a chamber was made into both halves to house the aluminum part 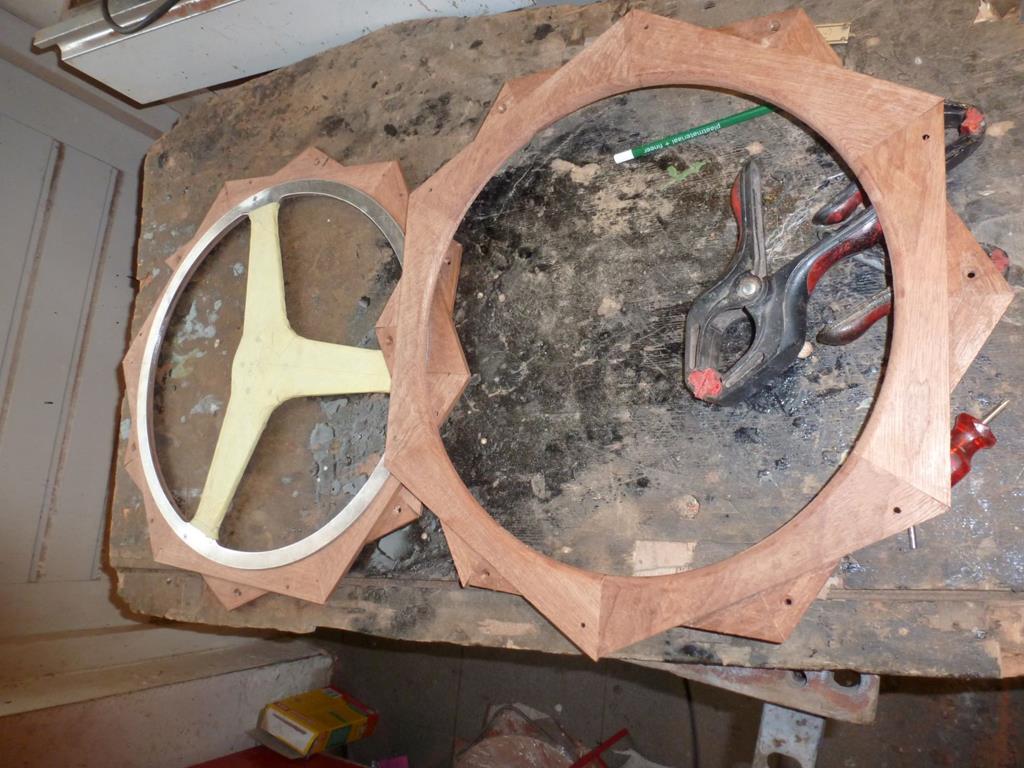 Both halves were joined with the aluminum part and glued together with epoxy glue 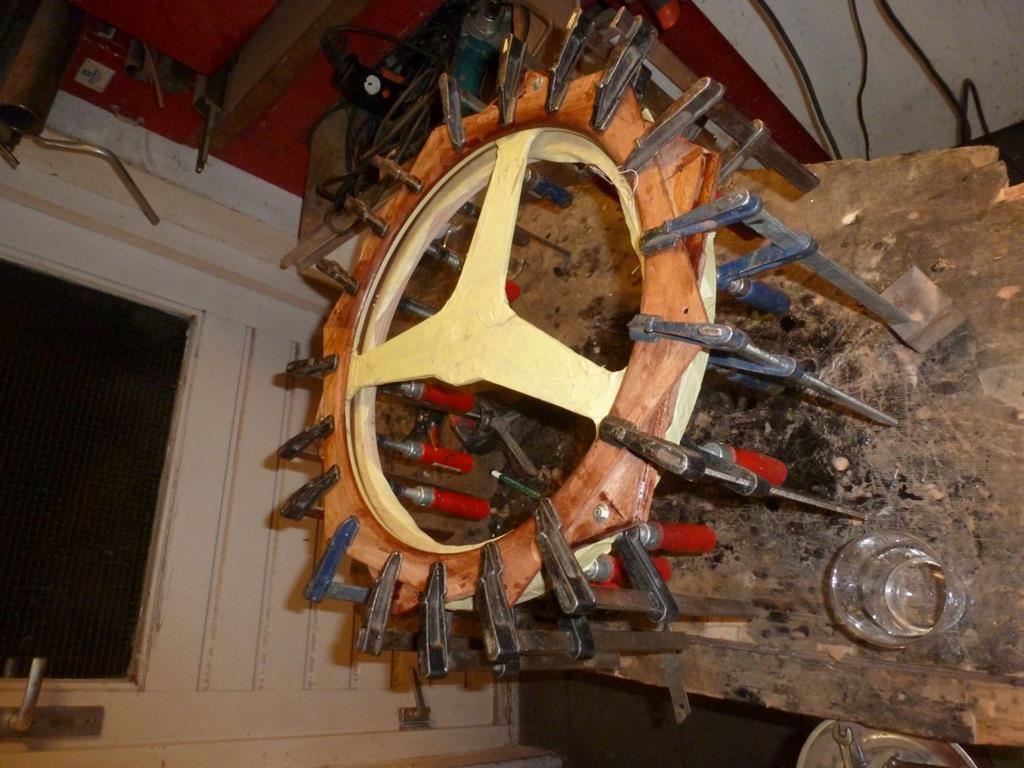 Then the outer edge was turned into a circle with a tool connected to the router. I kept this work after the glueing as the rim halves are easy to connect with some bolts and cannot slide during the glueing process. After that the finger grips wre made into the back side of the rim. 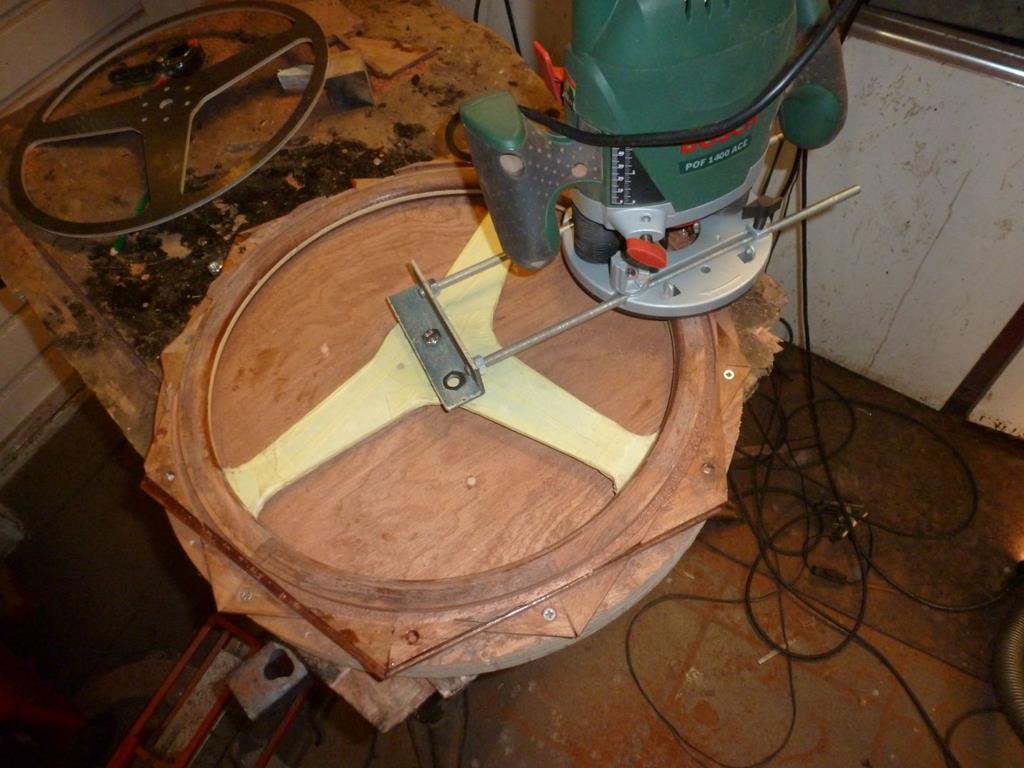 The steering wheel got a few layers of epoxy and then sprayed with 2K clear coat. I am happy with result although i would prefer some holes into the alu spokes
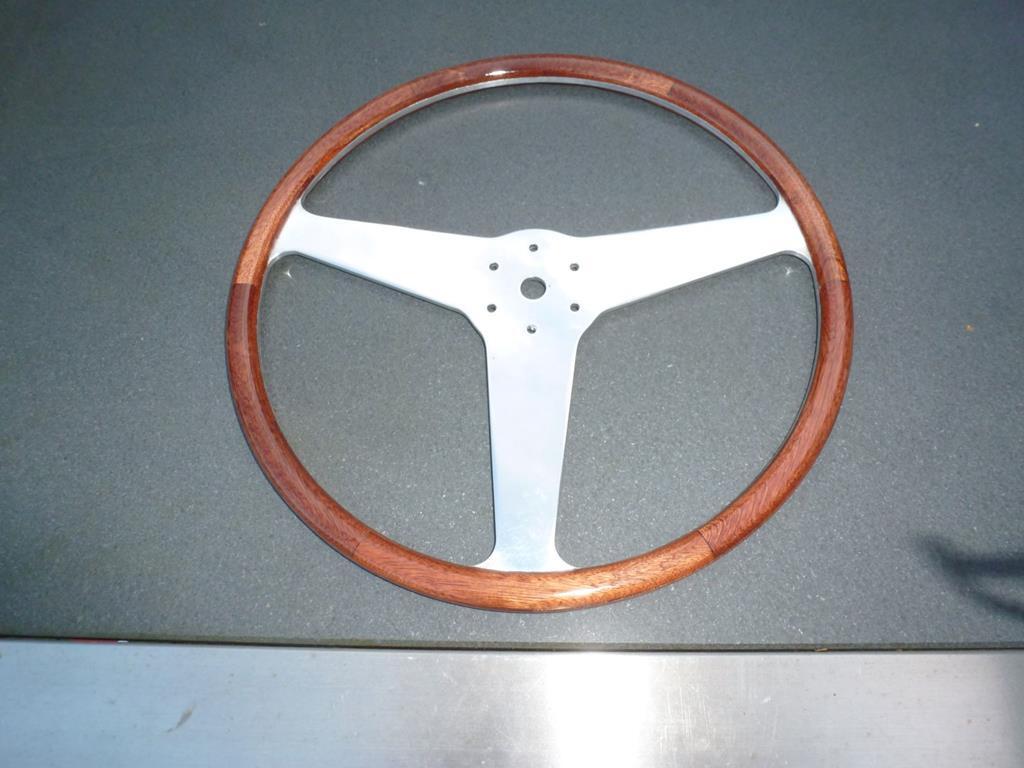 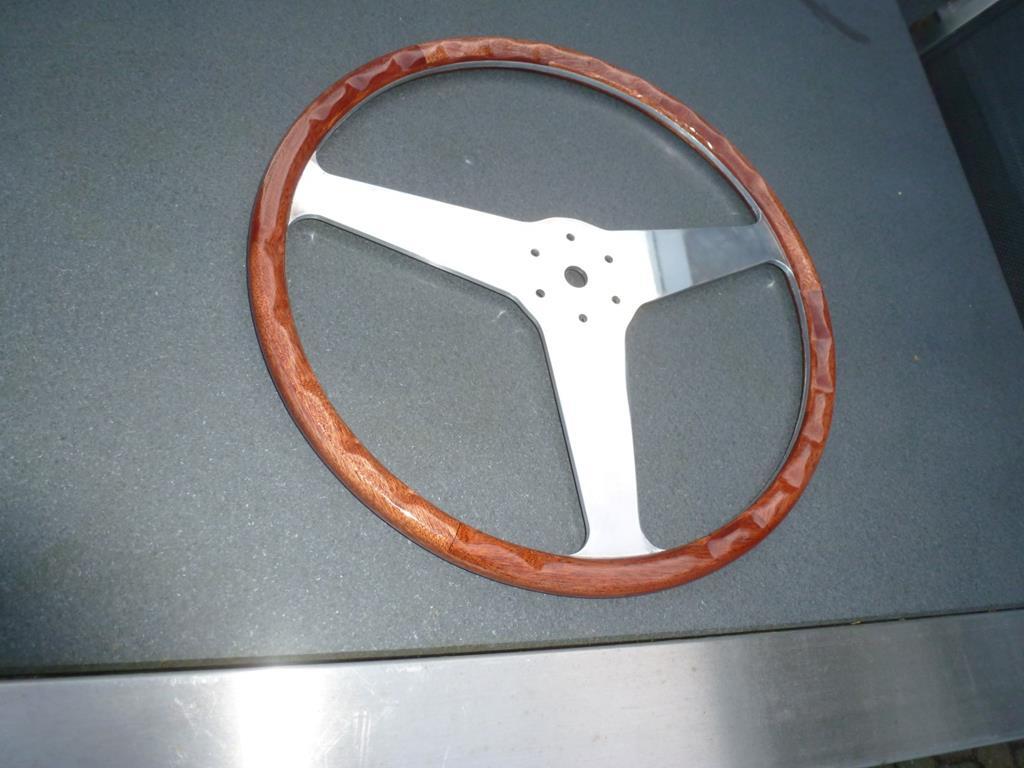 Peter |
| |
Last Edit: Jan 15, 2020 21:41:50 GMT by petervdv
|
|
820
South East
Posts: 793
|
|
Jan 15, 2020 22:01:41 GMT
|
|
Absolutely brilliant, round works of art, makes me want to buy an old wheel and have a go.
|
| |
|
|
|
|
|
Feb 19, 2020 21:34:50 GMT
|
Rather a long time since my last update. Have been on holiday, isolated the garage doors and finished the MK2 wooden interior bits and the MK2 wood rim steering wheel. Not many pictures as its a repeating procedure of applying clear coat, sanding it back, degreasing it and applying more clear coat. Underneath a picture of the wood rim steering wheel (which was reduced in diameter because the owner fitted power steering) beside a standard steering wheel and a wood rim steering wheel with standard diameter and the finished wooden parts 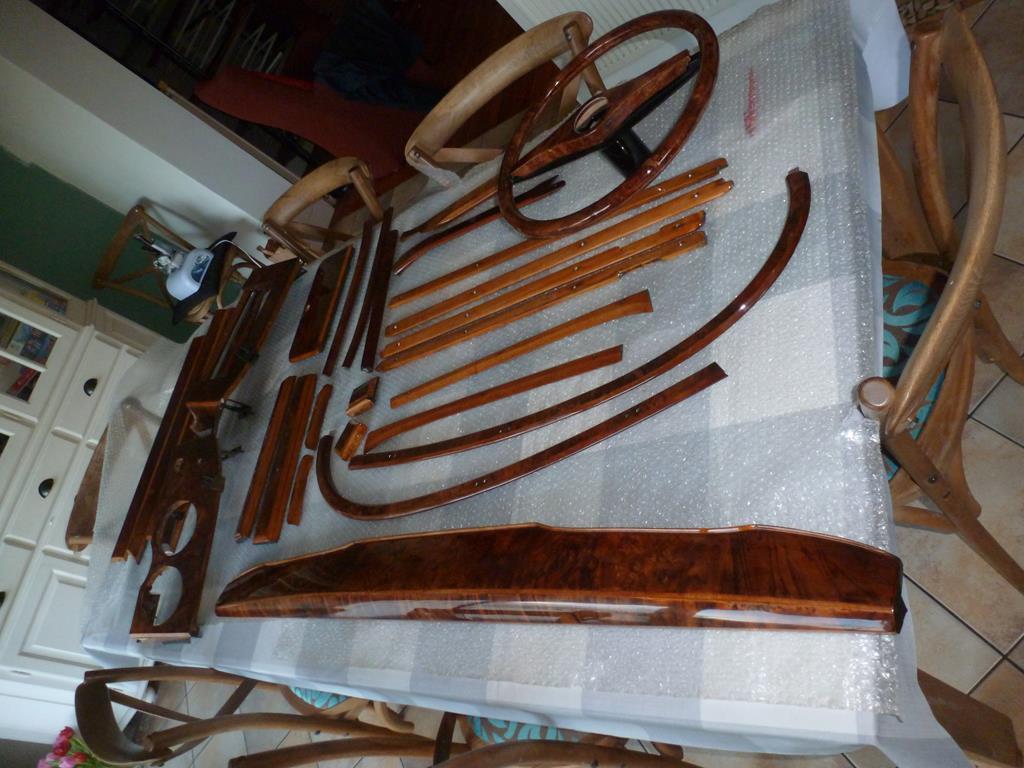 Am happy with the result and the owner was also happy. One of the dashboard panels was handled rough and therefore there was a crack visible where 2 wooden parts were connceted 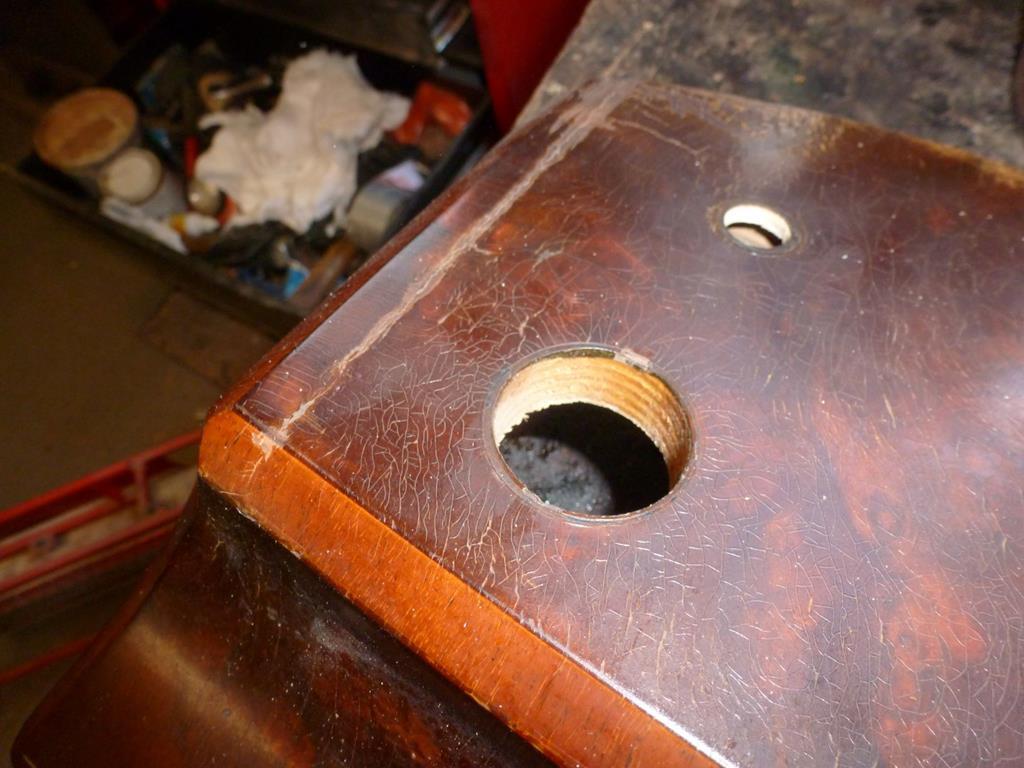 Tighthening the screws and sanding it smooth, the crack was no longer visible after the layers of clear coat 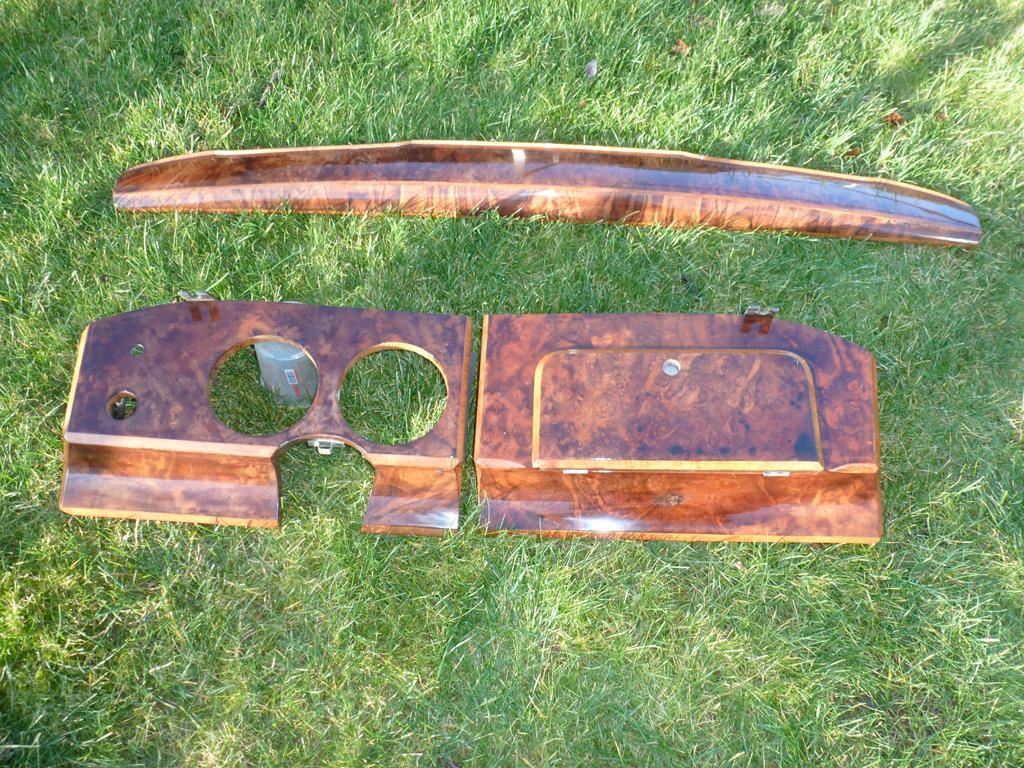 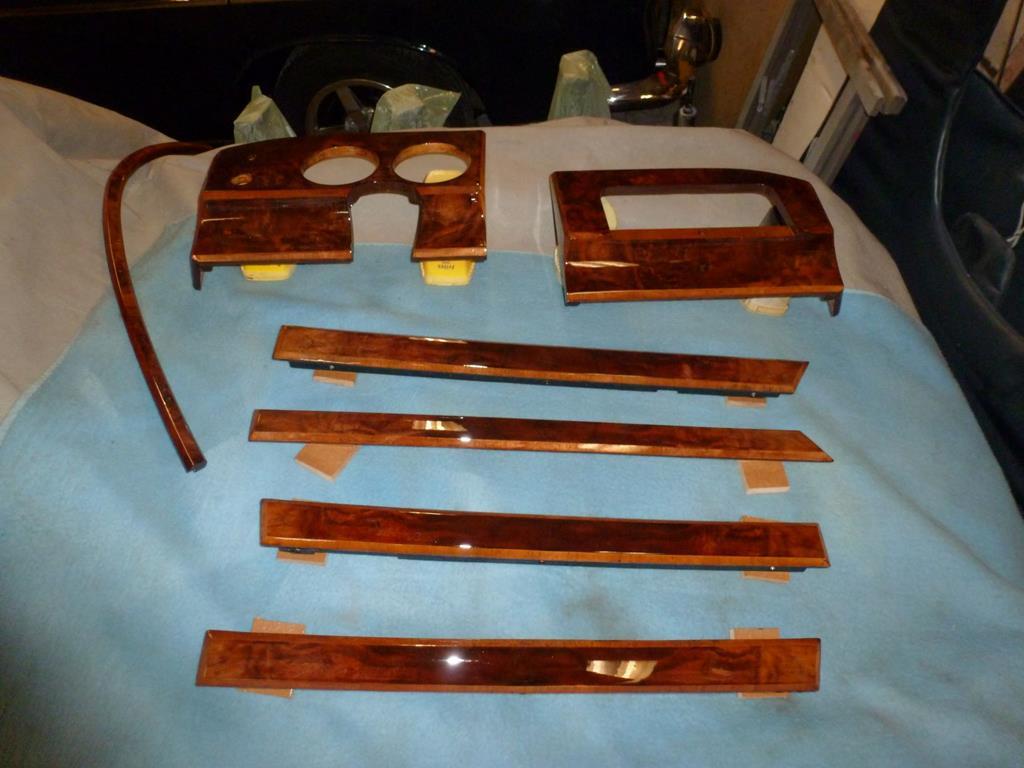 The colors are and the contrast is much nicer and after the last coat was sanded, with grid 2000 and polished, it was a glass finish Peter |
| |
Last Edit: Feb 19, 2020 21:41:57 GMT by petervdv
|
|
|
|
|
Feb 19, 2020 21:54:42 GMT
|
Those Jaguar steering wheels are very delicate, I thought finished in planks it was going to look absolutely ghastly . . . 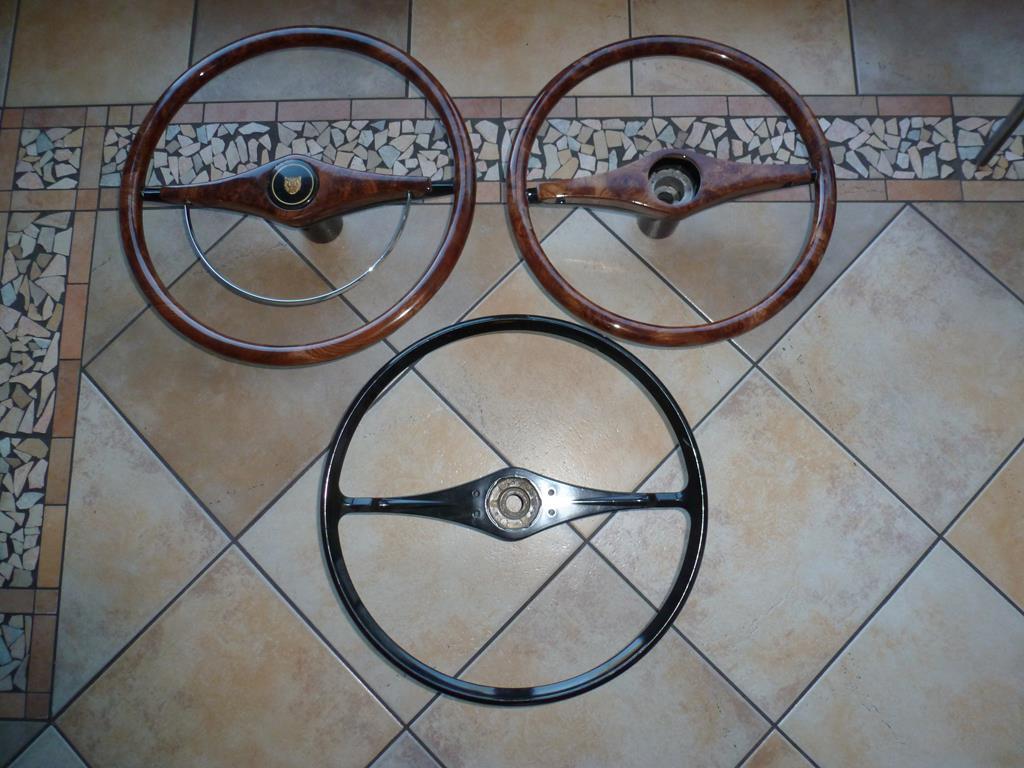 . . . how wrong was I ?! The quality of finish is phenomenal, you should get a few tutorial videos up on youtube. |
| |
Last Edit: Feb 20, 2020 10:36:15 GMT by MkX
|
|
|
|
|
|
|
Peter - Stunning work - I would be happy to ship you anything that comes into my workshop that requires veneer repairs / refinishing - although there are companies over the UK that undertake this type of work I would much rather use someone who operates on the same principals has I do - I.E. Nothing goes out of the door until you are 101% happy with it  |
| |
Last Edit: Feb 20, 2020 7:19:25 GMT by Deleted
|
|
eurogranada
Europe
To tinker or not to tinker, that is the question...
Posts: 2,556
|
|
Feb 20, 2020 10:11:40 GMT
|
|
Very nice job!
|
| |
|
|
samta22
Club Retro Rides Member
Stuck in once more...
Posts: 1,276  Club RR Member Number: 32
|
|
Feb 20, 2020 11:57:25 GMT
|
|
Simply stunning Peter, thanks for sharing.
|
| |
'37 Austin 7 '56 Austin A35 '58 Austin A35 '65 Triumph Herald 12/50 '69 MGB GT '74 MGB GT V8'73 TA22 Toyota Celica restoration'95 Mercedes SL320 '04 MGTF 135 'Cool Blue' (Mrs' Baby) '05 Land Rover Discovery 3 V8 '67 Abarth 595 (Mrs' runabout) '18 Disco V |
|
|
|
|
Feb 22, 2020 22:34:03 GMT
|
Those Jaguar steering wheels are very delicate, I thought finished in planks it was going to look absolutely ghastly . . . . . . how wrong was I ?! The quality of finish is phenomenal, you should get a few tutorial videos up on youtube. Thanks! Peter - Stunning work - I would be happy to ship you anything that comes into my workshop that requires veneer repairs / refinishing - although there are companies over the UK that undertake this type of work I would much rather use someone who operates on the same principals has I do - I.E. Nothing goes out of the door until you are 101% happy with it  Thanks Chris, it is appreciated and would be happy to do some veneering work for your magnificent projects. Cheers Alex! Simply stunning Peter, thanks for sharing. Thanks Sam! |
| |
|
|
|
|


 And very interesting to watch, as I'm starting to tackle the wood trim on my Daimler (basically the same as the Mk2 Jag wood you've been working on). I look forward to seeing more.


