lebowski
Part of things
  Hillman Avenger, Clan Clover
Posts: 488
|
|
Dec 15, 2019 13:34:25 GMT
|
I finally got round to fitting the gearbox yesterday. Getting the old one out was probably more difficult than putting the new one in. The Avenger box has little wings on the bellhousing which makes it very tight in the tunnel on removal (in retrospect I should've removed the prop cradle before the gearbox).
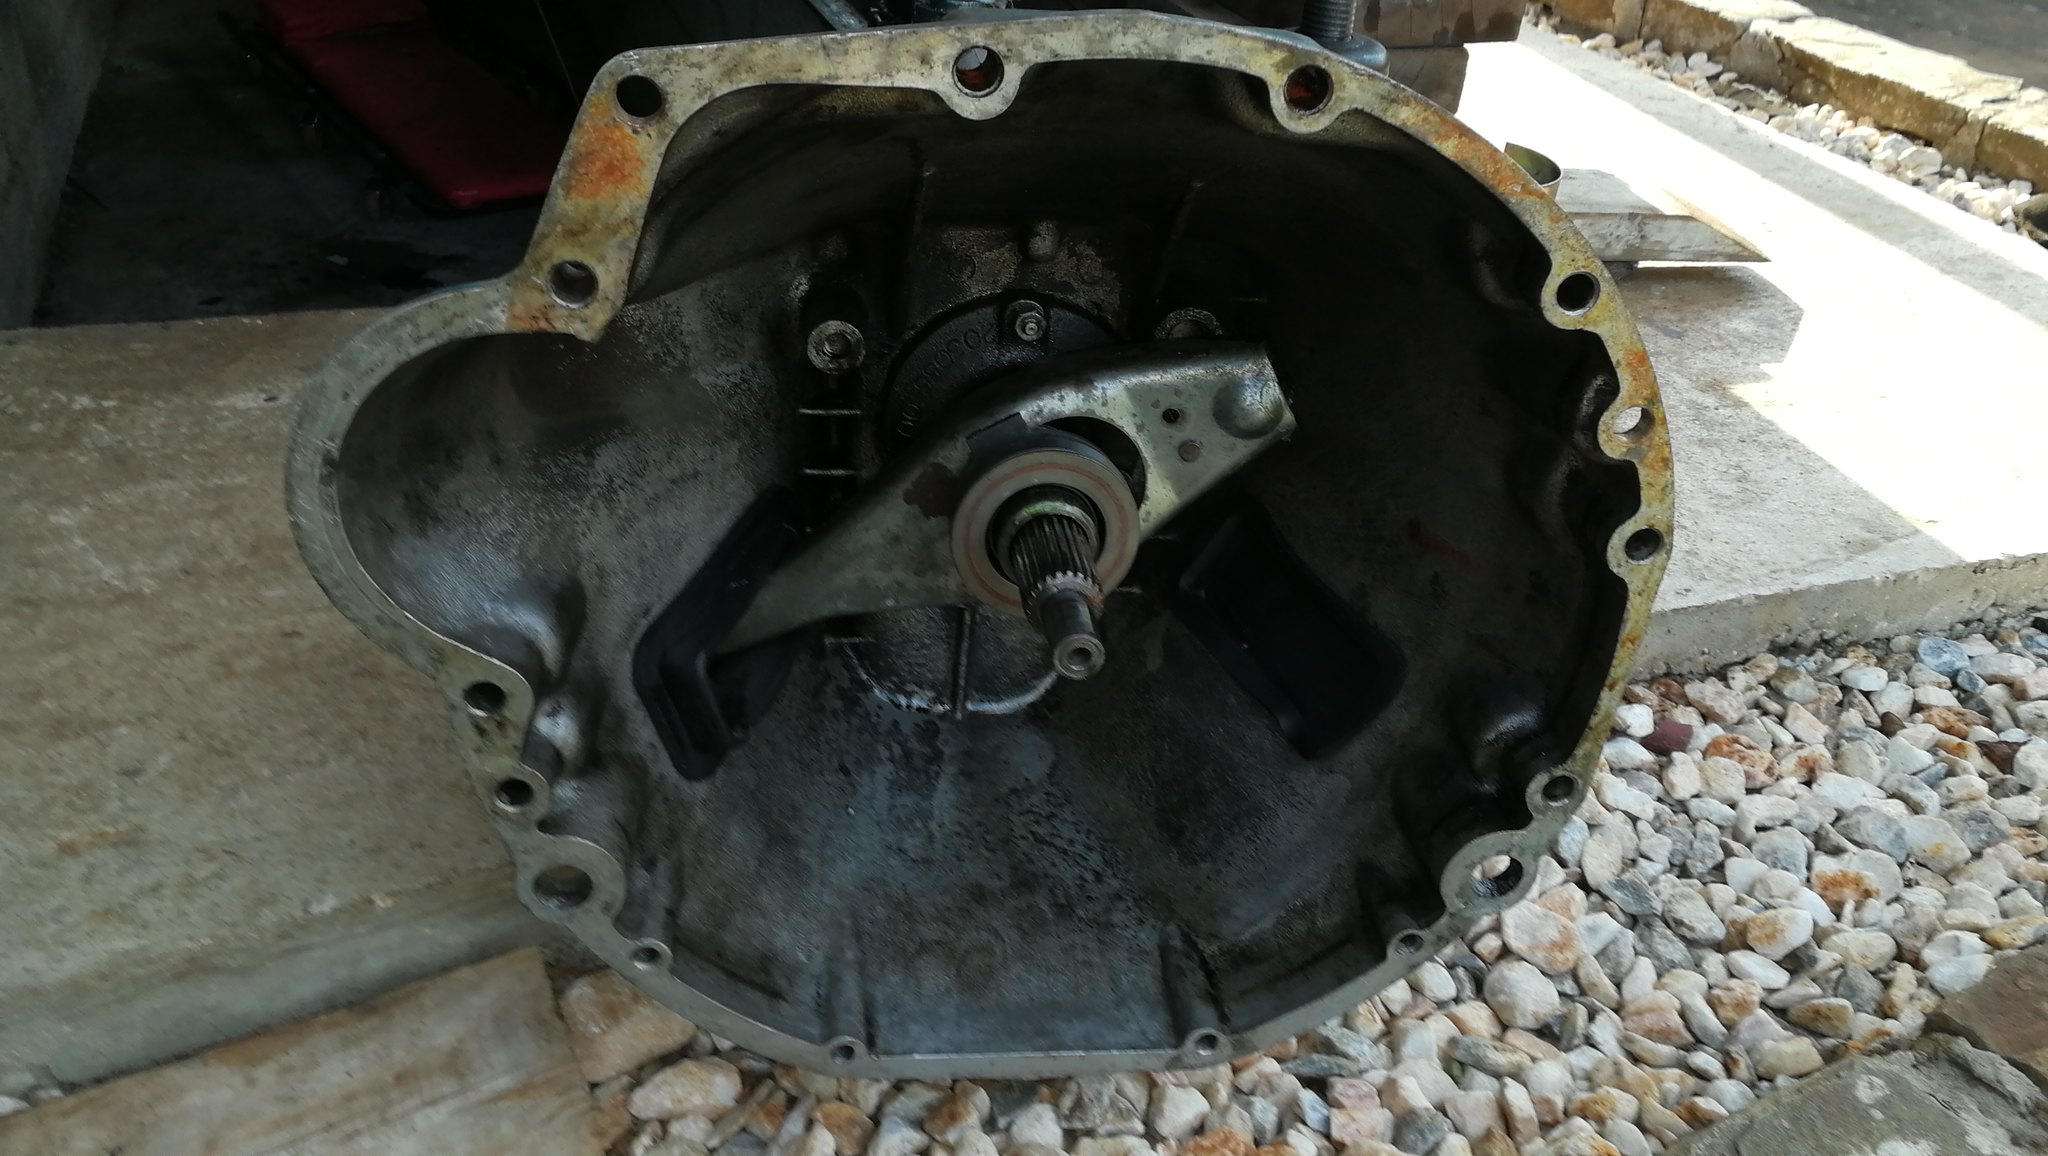
The tailhousing of the Avenger box sits as below, with the flat piece of wood placed across the floor just in front of the prop cradle. The main reason I actually wanted to change the box was because the 4 speed one leaked a lot of oil, and every time I parked the car it would leave a little pool beneath it. You can see some buildup in the bellhousing after I took it off. I had to take the clutch off so that I could fit the new pilot bearing for the Ford box. I had a spare Avenger input shaft which I wanted to use to align the clutch with the pilot bearing. I had to turn down this extra bit of copper pipe and tape it on so that it was a good fit in the Ford pilot bearing. After removing the prop cradle, the gearbox went in pretty easily, although it can't sit with the tailhousing at the same height as the Avenger box without modifying the tunnel. At this stage I'm uncertain whether to modify the tunnel or leave it a little lower. |
| |
|
|
|
|
lebowski
Part of things
  Hillman Avenger, Clan Clover
Posts: 488
|
|
Dec 15, 2019 13:35:29 GMT
|
While I was under there I also decided to take the sump off because that was also leaking. I wanted to clean up the faces and put a little silicone either side of the gasket, which I didn't do the first time round. Unfortunately it took longer than I hoped because I have a baffle in there which means the sump gets trapped between the cross member and the oil pump when removing it in situ.  IMG_20190527_143024 IMG_20190527_143024 by Chris Witkowski, on Flickr It would've been a nightmare to clean the faces, apply silicone neatly and refit with the sump hanging in the way, so I thought I'd try removing the gauze filter at the bottom of the oil pump to see if that gave enough room to get the sump off.  IMG_20190527_143038 IMG_20190527_143038 by Chris Witkowski, on Flickr Unfortunately I dropped the stubby screwdriver whilst undoing the filter, and somehow it managed to fall instantly down below the baffle. Now I had to get the sump off. Luckily with the filter removed, the sump could come off  IMG_20190527_144055 IMG_20190527_144055 by Chris Witkowski, on Flickr Getting the filter back on whilst balancing the sump pan with one knee was a bit of a challenge, but it went back together and hopefully won't leak anymore. Here's the Ford gearbox in place being held up by the jack at the moment  IMG_20190527_143047 IMG_20190527_143047 by Chris Witkowski, on Flickr |
| |
|
|
lebowski
Part of things
  Hillman Avenger, Clan Clover
Posts: 488
|
|
Dec 15, 2019 13:36:56 GMT
|
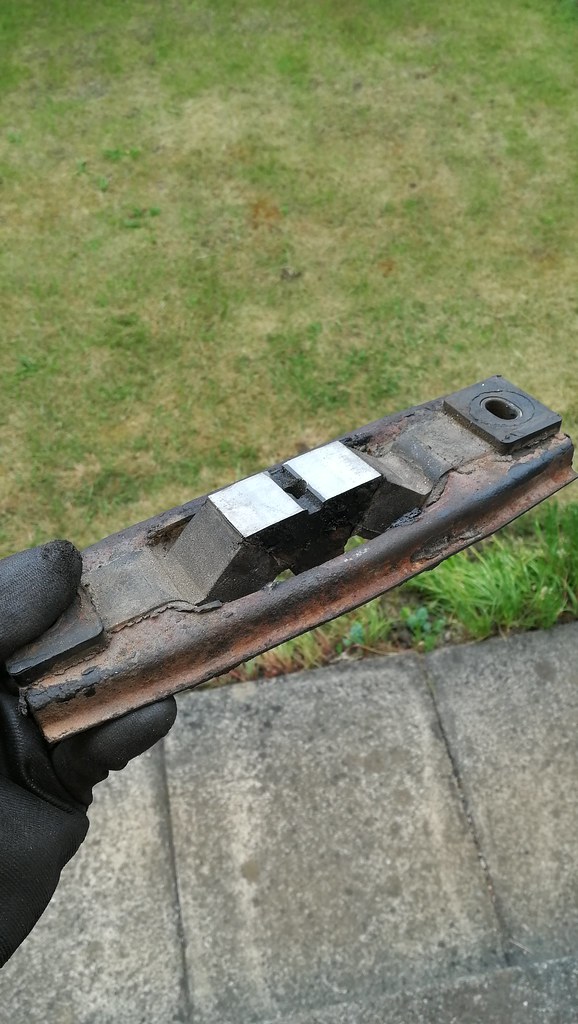
To make the gearbox mounting, I used the standard Avenger mount. This has a V-shape on top which fits onto the Avenger box. I had to grind this flat to suit the Ford gearbox. I also had to enlarge the hole through the centre to suit the Ford bolt.
With this mount bolted to the gearbox in the car, and the gearbox jacked up as high as I could safely get it, there is a gap of 30mm or so between the mount and the body. The holes also don't quite line up (although you could possibly flex the rubber to align them, but the mount would be constantly under stress).
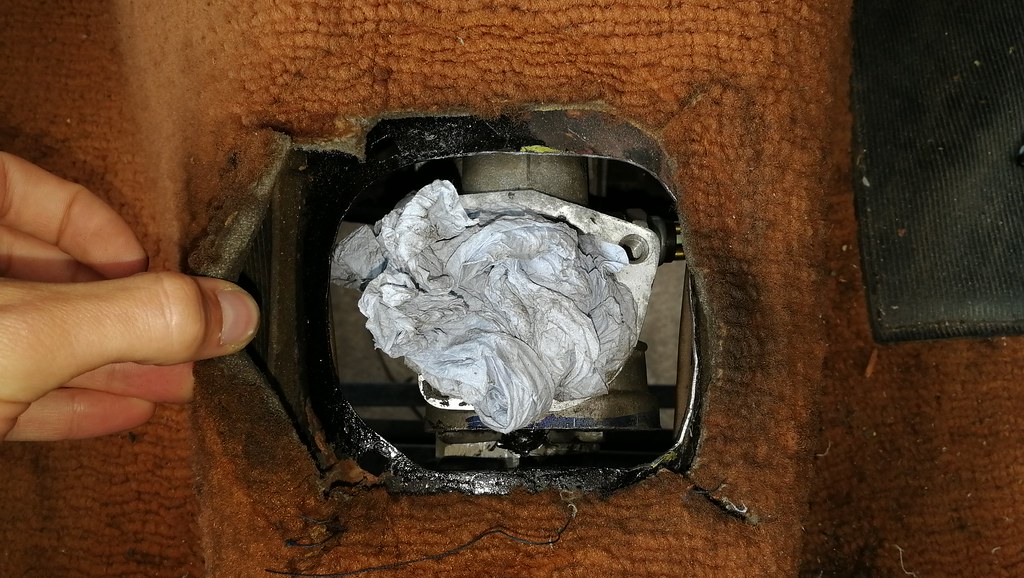
I made these slighly offset mounts out of thick box section. To get the gearbox this high, the gearlever hole needs opening out, mainly on the drivers side. I'll also be using a quickshift which will protrude further into the cabin. I'll need to drill some new holes and modify the metal cover so it clears around the gearstick.
This is the final height of the tailshaft, which is about the same as the Avenger box was in the post above.
Tomorrow's job is to fit the exhaust and the quickshift.
|
| |
|
|
lebowski
Part of things
  Hillman Avenger, Clan Clover
Posts: 488
|
|
|
|
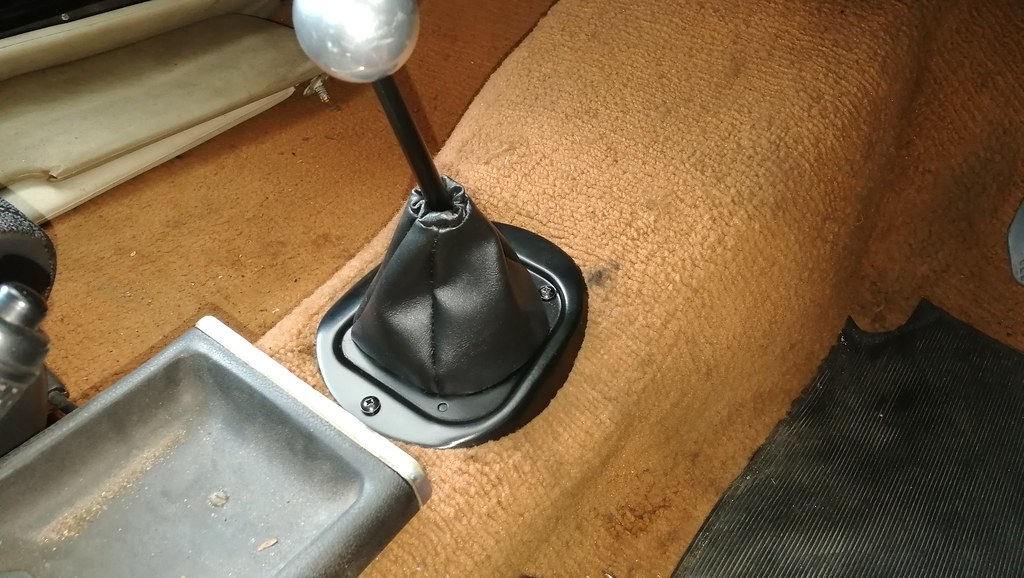
For the gearlever gaitor, the original rubber one can't really be used with a quickshift block on the Type 9 gearbox, because the extra height of the gearlever base interferes with the gaitor. I also had to enlarge the main hole in the metal cover to clear the shifter, which meant that there's not much left to retain the rubber gaitor.
I made a base from some vinyl to fit under the metal shroud, and my Mum made a gaitor and stitched it to the base.
I then put some soundproofing underneath and it ended up looking like this... |
| |
|
|
lebowski
Part of things
  Hillman Avenger, Clan Clover
Posts: 488
|
|
|
|
I've done a few bits of work on the Avenger to try and get it ready for remapping on the rolling road. I want to raise the boost a bit and get it mapped in Hybrid Alpha-n mode, which uses both the throttle angle and map signal as inputs, rather than just the map signal as it is now. Last time it was mapped there was a fuel problem which meant it could only be mapped upto 6500rpm (whether the turbo/Ti cam combination will actually allow it to rev much more is unknown as yet, but the engine has been built to rev higher). The fuel pump is a Walbro 255 litres per hour pump, which is plenty, and the injectors are 360cc/min which is also plenty, so I suspected that perhaps the electrical system wasn't keeping up with the demands of the pump and it was not running at full speed.
I have already changed the alternator from a 30A unit to a 75A unit as the battery kept going flat. I also did some reading and it seems that running long wires from the fuse box at the front of the car to the fuel pump at the back could lead to significant voltage drop at the pump. I therefore changed the wiring from this (see the long blue wire to the fuel pump): To this, incorporating a new relay mounted in the boot and fed directly from the battery, using the existing wiring to switch it on.
Hopefully that will be enough to cure any problems. I ran thicker cables to the in tank pump too, because the original Scorpio ones were very thin.
I made a new exhaust. It's a 2.5" stainless exhaust from the turbo back. I only put one straight through silencer in it rather than the usual two boxes, so it's a bit louder than the previous Ashley exhaust, although still not too bad. The main noise on the motorway is still wind noise. I haven't taken any pictures of the exhaust yet but will do next time I'm under the car.
I still need to change the slipping clutch and then I think I'm ready for the rolling road.
|
| |
|
|
|
|
|
Dec 16, 2019 10:23:12 GMT
|
|
I like how you've stuck with the original engine instead of opting for a modern unit, would you recommend the megasquirt ECU?
|
| |
1966 Ford Cortina GT
2018 Ford Fiesta ST
Full time engineer, part time waffler on Youtube - see Jim_Builds
|
|
lebowski
Part of things
  Hillman Avenger, Clan Clover
Posts: 488
|
|
Dec 16, 2019 13:24:58 GMT
|
|
The Megasquirt ECU is great, but I think the latest ones are much closer in price to the big brands. When I bought mine it was something like £100 for a kit.
I guess it comes down to finding someone to map it on a rolling road. If you have someone fairly local who does Megasquirt then it's no problem, but there are probably more options for Emerald etc.
|
| |
|
|
Phil H
Posted a lot
  
Posts: 1,448
Club RR Member Number: 133
|
Hillman Avenger TurboPhil H
@philhoward
Club Retro Rides Member 133
|
Dec 16, 2019 14:36:07 GMT
|
|
Unless you’re going to map it yourself (or at least be the laptop operator), then finding a rolling road then going with their preferred ECU is probably best it seems.
MS (and subsequent clones - or anything which uses TunerStudio) seem to work different to many others - not all dyno operators seem to get on with it when used to the other mainstream ones like Weber, Omex, Emerald, DTA etc.
|
| |
Last Edit: Dec 16, 2019 16:48:17 GMT by Phil H
|
|
|
|
|
Dec 16, 2019 16:32:13 GMT
|
|
Its a nice read so far looking forward to the next rolling road results! that clutch cover looks well out of balance going by the big chunks welded to it!
|
| |
|
|
asbo23
Part of things
 
Posts: 93
|
|
Dec 16, 2019 21:45:56 GMT
|
Awesome thread. Nice work,  |
| |
|
|
|
|
lebowski
Part of things
  Hillman Avenger, Clan Clover
Posts: 488
|
|
|
|
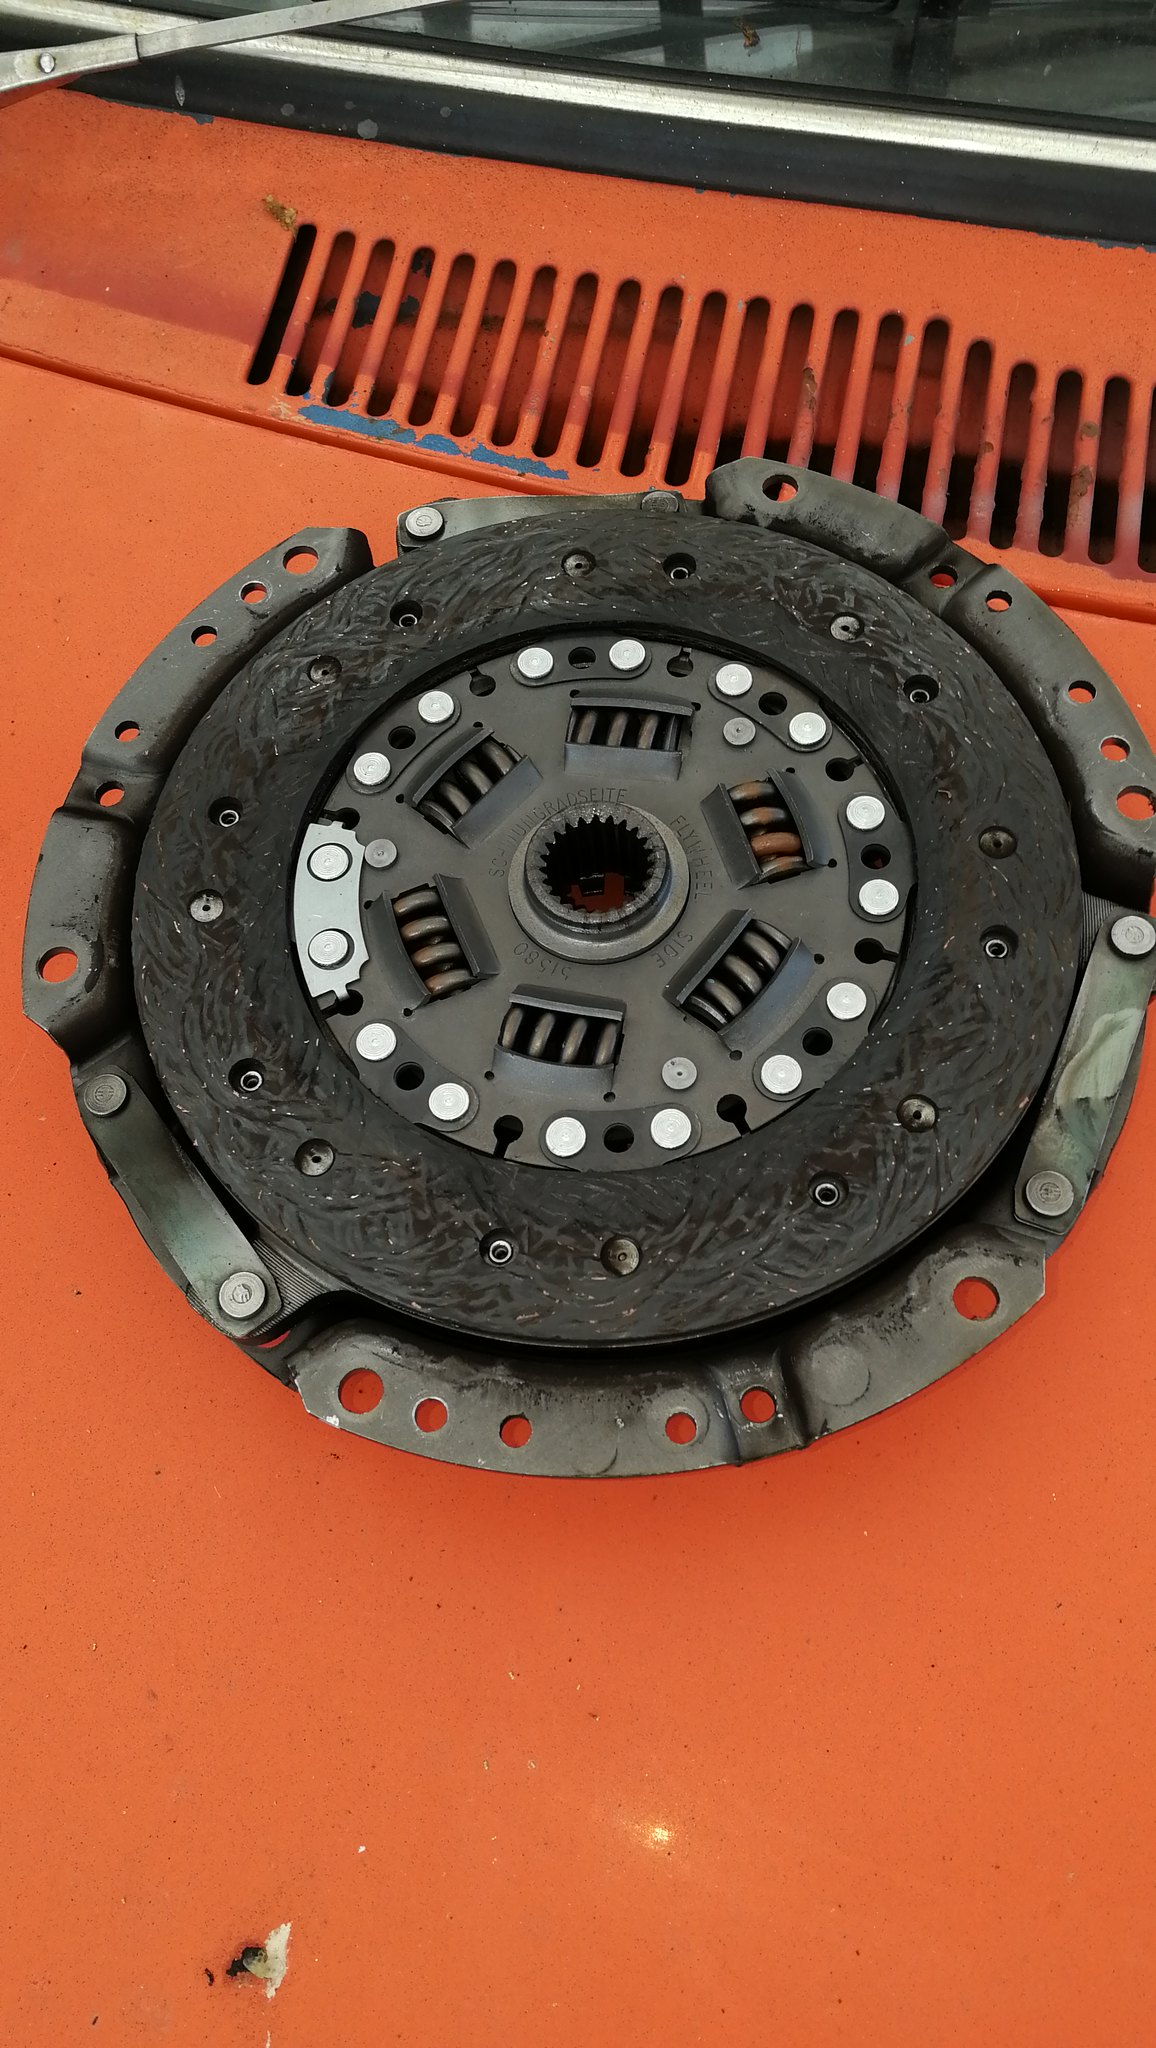
I bought a new clutch. The previous one just about held at 12psi boost pressure. When I made a new larger diameter exhaust my boost pressure rose a little to about 14psi (before I turned it back down), and accelerating hard in third gear would cause the clutch to slip. Since I plan to get the car remapped and increase the boost pressure, I don't want to find out my clutch is marginal at the rolling road.
This is the previous one. Its spec is unknown because I bought it a long time ago, and googling the numbers stamped on it doesn't bring up much at all.
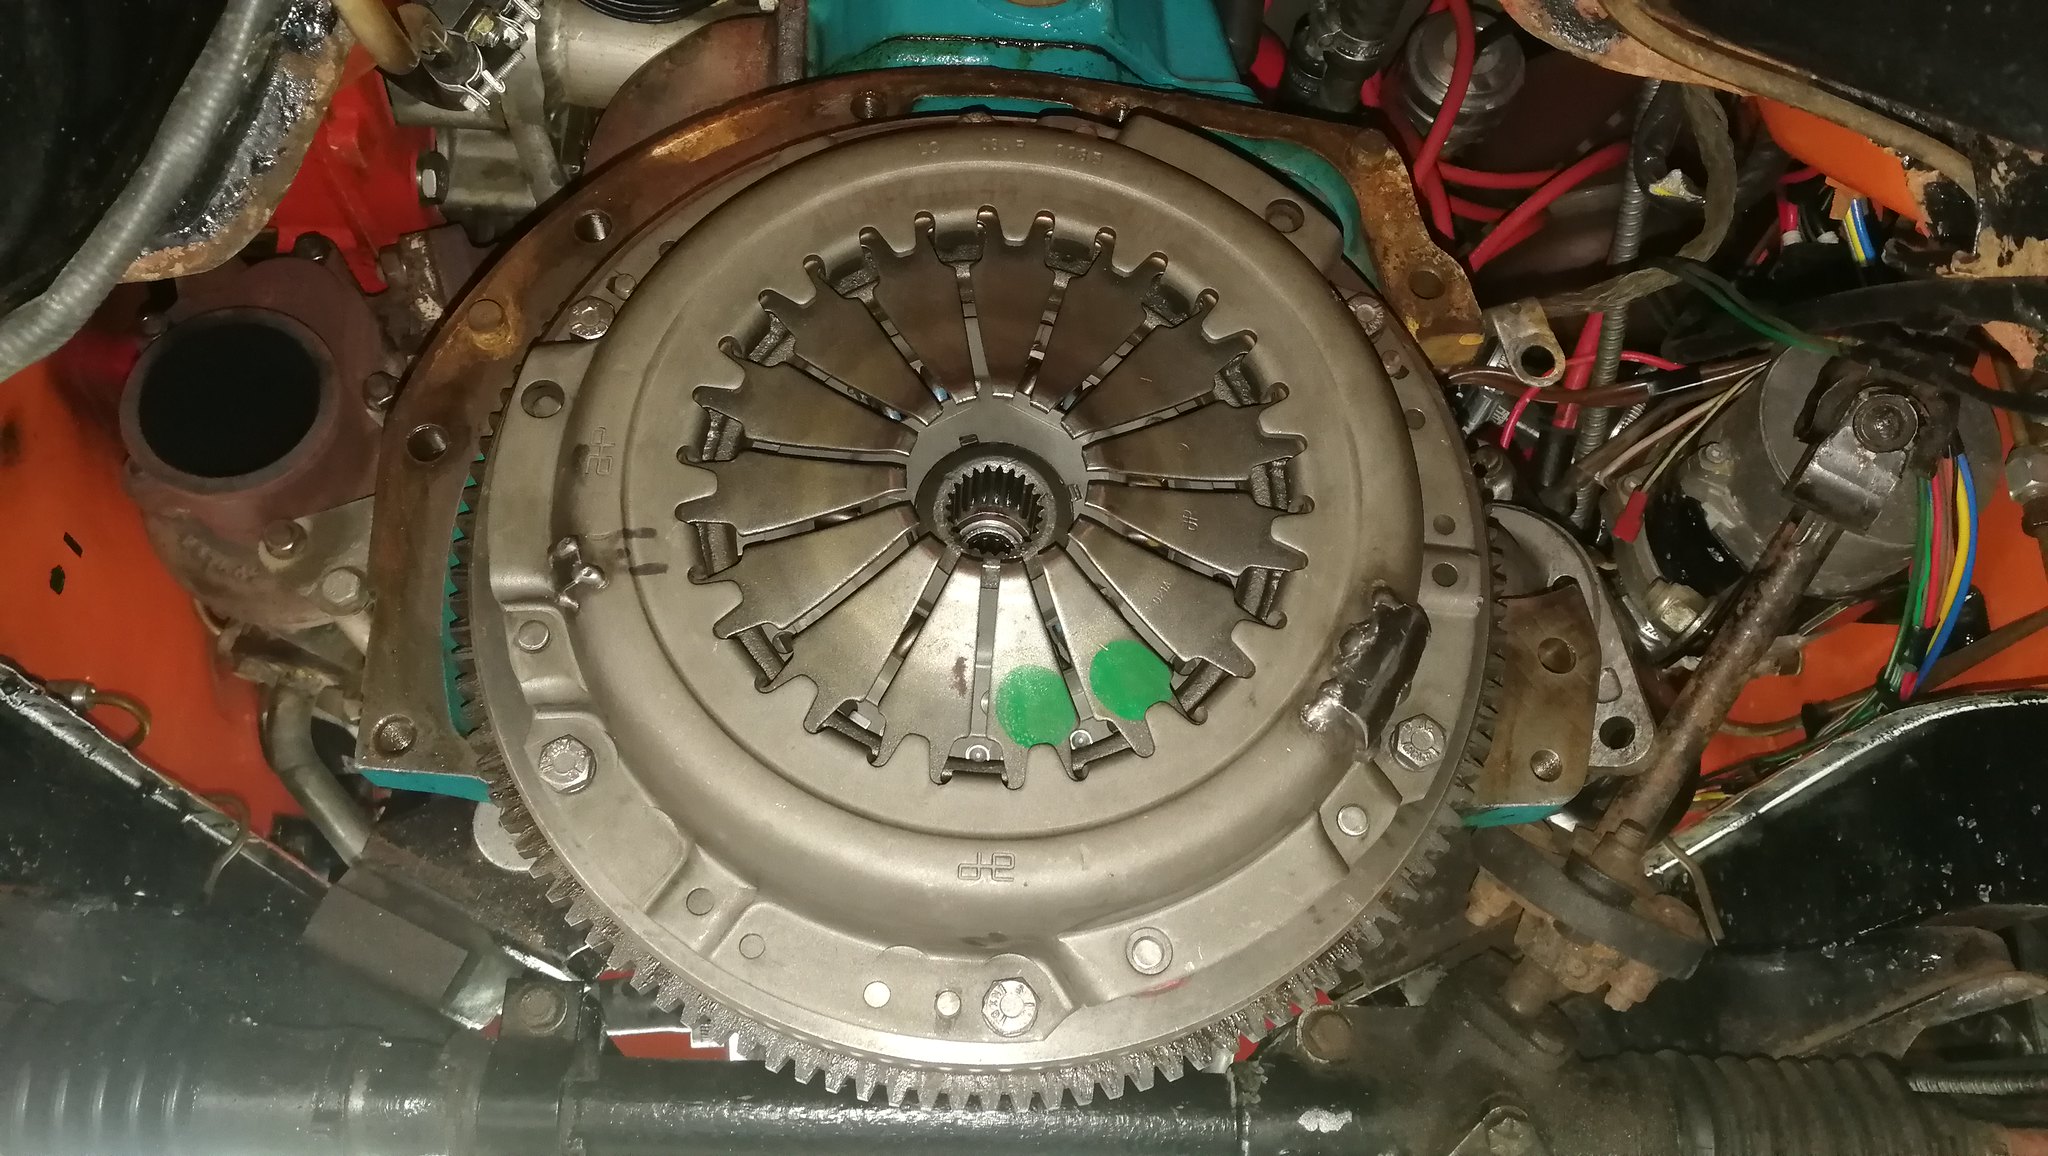
I got hold of a Ford Duratec uprated clutch. There seem to be two AP clutches available for the Duratec. One is rated upto 177lb/ft torque, and the one I bought is apparently higher rated (although I can't find an actual number anywhere). Anyway it bolts straight in place of the old one. I also bought a new clutch disc.
It's ready to be remapped now, I just need to book it in somewhere. |
| |
|
|
lebowski
Part of things
  Hillman Avenger, Clan Clover
Posts: 488
|
|
|
|
The first non return valve I had fitted to the brake servo was one I got from ebay, and basically was a smaller diameter valve and an adaptor to bring it up to the larger grommet diameter. It worked fine for a while but then stuck open and caused the engine to misfire under acceleration. I replaced it with a genuine valve which also worked fine for a while, but then on one particular drive I got the same symptoms. The next time I took the car out it was fine again, so I presume it just got stuck and they don't like positive pressure.
I decided to add a second non return valve, and also rerouted some of the vacuum lines on the car. The throttle bodies are all tee'd together and before I had just one line from them to the vacuum manifold on the bulkhead. I now have three lines from them to the manifold, and the vacuum signal is slightly stronger and a lot more stable.
The second non return valve also has a convenient second connection which I used to tidy up the dump valve plumbing.
The servo was originally connected to the fitting below on the vacuum manifold, but it was a pain to fit/remove the hose due to its location and its large barb, so I tapped a 1/8" npt thread into it and blocked it off, using one of the other fittings instead. The new clutch doesn't slip and the car is booked in for remapping at Northampton Motorsport on 1st October. |
| |
|
|
lebowski
Part of things
  Hillman Avenger, Clan Clover
Posts: 488
|
|
|
|
I also upgraded my ECU to Megasquirt 2. It originally had a MS1 processor which works well, but there are several improved features with Megasquirt 2, which I want to use. The hardware upgrade basically involves dropping in the blue MS2 daughter board in place of the original processor.  IMG_20190913_151957 IMG_20190913_151957 by Chris Witkowski, on Flickr The main advantage for me is that MS2 can use blended fuel and spark tables, ie. Throttle position vs rpm and another table for MAP signal vs rpm, with the two tables blended together as a hybrid. Megasquirt 1 could do Hybrid Alpha-n, but for fuel only. The ignition in Hybrid Alpha-n mode for MS1 is throttle position Vs rpm only, which is not ideal in a turbo engine. |
| |
|
|
lebowski
Part of things
  Hillman Avenger, Clan Clover
Posts: 488
|
|
|
|
I had the car remapped at Northampton Motorsport on October 1st 2019. After fitting the upgraded ecu I remapped the car myself on the road, in a hybrid mode using the throttle pot signal and the map signal combined. It actually drove pretty well but I couldn't get the acceleration fuelling quite right, and the car would stutter slightly upon initial application of throttle. Unfortunately I chose the worst day of the year to make the 2hr30min drive down to the rolling road. It rained all day the previous day, and basically all day again the next day. My Dad and I set off at 5.30am and it was tiresome driving with the Avenger's relatively poor headlights, wimpy heater and thick fog and rain for the entire 5hrs of driving.
Anyway, below is an initial power run taken without making any changes. I did want to get the car remapped upto 7000/7500rpm ish, and also increase the boost level above the current 12psi. Unfortunately (as always) there were a few issues which made things less straight forward. The blue line on the graph above is boost pressure. As you can see, at around 5500rpm onwards, the boost is creeping upwards. This means some time was needed tapering off the boost map at high rpm to try and keep a constant boost level. The other issue is the strange dip in power/torque at the top end, which was present on every run. It wasn't clear whether it would be worth revving much higher. The final graph looked as below. So there was a 20bhp and 20lb/ft gain overall, with max flywheel figures of 180bhp and 167lb/ft. The boost curve is also nice and flat, but the dip in power/torque at the top end is still present.
I haven't had chance to evaluate the car really given the awful weather yesterday, but it was certainly much more economical on the drive back home. The slight stutter on throttle application is unfortunately still present. I'll have to work a bit more on that one.
I'm not currently sure what to do next (if anything) with the engine. It was built to rev higher and it seems like a waste to have the rev limit set to 6600rpm, but obviously there seems to be some kind of mechanical/setup limitation which is causing the dips in the curves. I suspect the Ti cam is stopping it revving higher and that I'd need a custom turbo cam.
I still think the engine will happily take more boost. It was rising to about 14/15psi on the couple of acceleration runs I gave it but I suspect there'll be no issue with 18/20psi and tweaking the ignition/fuel maps.
|
| |
|
|
jonnyf
Part of things
 
Posts: 177
|
|
|
|
|
Looks awesome, look forward to seeing more
|
| |
|
|
Davenger
Club Retro Rides Member
It's only metal
Posts: 7,272
Club RR Member Number: 140
|
Hillman Avenger TurboDavenger
@dminifreak
Club Retro Rides Member 140
|
Dec 19, 2019 21:23:18 GMT
|
|
Did you grind the gearbox mount flush with the carrier?
Need to rethink the mount on mine
|
| |
|
|
scimjim
Club Retro Rides Member
Posts: 1,503
Club RR Member Number: 8
|
Hillman Avenger Turboscimjim
@scimjim
Club Retro Rides Member 8
|
Dec 19, 2019 22:06:12 GMT
|
|
Great stuff - we went to NMS in the snow in 2018 😬 much better in 2019 when they mapped the zetec on MS.
|
| |
|
|
|
|
|
Dec 19, 2019 22:16:27 GMT
|
|
You deserve an OBE for that
|
| |
|
|
|
|
|
Dec 19, 2019 23:22:52 GMT
|
|
I know what some people do, is to cut the original gear lever hole out of the tunnel, but cut out an inch further back on the back edge than on the front. Then, they turn the cut out piece through 180 degrees and weld it back in and therefore it sits the extra inch back. The only thing you need to do then, is to fit a quickshift kit to the sierra box to stop the gear lever hitting the handbrake when in 2nd and 4th.
|
| |
1964 Saab 96 two Stroke
1971 Hillman Avenger 1500 GL (Tuned 1600 fitted)
1976 Saab 99 2dr EMS (Project of very slow progress)
1978 Saab 99 2dr EMS (Awaiting reshell)
1981 Saab 99 2dr Turbo (Awaiting reshell)
|
|
lebowski
Part of things
  Hillman Avenger, Clan Clover
Posts: 488
|
|
|
|
Thanks for the kind comments. For the gearbox mount, I just took off the minimum amount necessary to make it flat, whilst trying not to put too much heat into it for the rubbers sake. If I had the gearbox off the car though, I would cut off the type 9 mount at the horizontal web, and weld on a 15mm ish plate slightly forward, to match the avenger box (if that makes sense). Then I'd drill and tap a single hole as per the avenger.  IMG_20190406_140204 IMG_20190406_140204 by Chris Witkowski, on Flickr |
| |
|
|
|
|


