|
|
|
|
|
Continuing on the floor repairs and related brackets. I decided to cut another piece out of the floor on the inside edge of the repair as I was fighting pinholes to a frustrating level. So out came the grinder again. So glad I did...no more weak metal and much nicer welds! 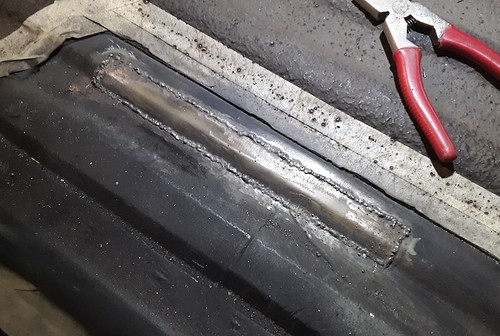 and in the bracket department, I was able to use some fender patch metal to shape the new heat shield brackets. I flattened one of the old ones which revealed many pinholes. I traced the shape, measured the bends, and drilled some holes for plug welds and the captive nuts.  it worked quite well. I made some bends with a pair of pliers around the edges to copy the old brackets and it does give them some strength. The captive nuts went well, even though I welded the first one on the wrong side!  It does not look like a lot of work, but it all took most of the day....Still moving forward!  JP |
| |
I know its spelled Norman Luxury Yacht, but its pronounced Throat Wobbler Mangrove!
|
|
|
|
|
|
|
Nov 12, 2019 12:06:16 GMT
|
|
Man, you're doing a great job with this!
|
| |
|
|
|
|
|
|
|
Thanks, RK! Today consisted of reorganizing the shop and getting ready for sandblasting. I needed the dolly out from under my dakota truck bed so tilted that up on end, cleaned that bay out to get it ready for the Tacoma bed. But before I could do that, I had to hang the roof box off the passat wagon back up on the ceiling as I'm done with it for a while. So I could get my bigger bay back for a while I decided that the small bay would be a good spot to finish up the Tacoma bed.... 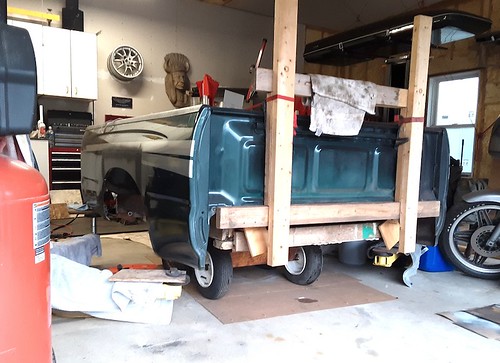 It was really uneventful and unexciting lowering the bed onto the dolly....somehow, but luck alone, the frame of the dolly matched up perfectly with the runners under the bed....  How did it go, you ask, tilting the bed up on end by myself?...well, I rolled it into position and and lifted it onto the runner extensions which touched down nicely. No cracking lumber so I lifted some more until it was on its way up. The only surprise was when the dolly wanted to slide out from under the tilting bed as I was lifting it...  I cleaned all the debris off the dolly, which was pretty much a catch all for everything I didnt know what to do with for the last year and took some time cleaning and organizing... 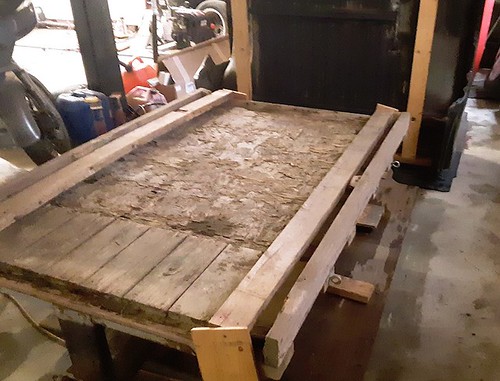 Then "Q" from "Q Branch" brought me a little attache case with perhaps the latest tech to add to the Toyota...bumper mounted machine guns, maybe. A cool zip line watch?...  But, alas, it was just some cleaned and painted parts.....  I think that brief case was my dads from the 70's...He was not a secret agent. anyway, it felt good to get the garage cleaned up. I brought my wagon in for an oil change, some front brake and rotor painting for the winter months which are hard on those components, and swapped out my good wheels for the winter ones....Now I can check those items off the list! thanks for looking! JP |
| |
I know its spelled Norman Luxury Yacht, but its pronounced Throat Wobbler Mangrove!
|
|
|
|
|
|
|
Today was a bit odd in that it felt like I didnt get much done, but am now prepared to start sand blasting...I did get another section of floor cleaned up with the knot wheel on the grinder, but half way through that, the grinder began slowing down until it just plain stopped!...I did take it apart to see if I could fix it, but the brushes are toast! Rather than wait to order a new set or track some down, I went to our somewhat local Harbor Freight and picked up a new one.  I also picked up more cutting discs, another knot wheel, some rust treatment, undercoating and truck bed spray on material. But the big deal is what you see here, a new sandblast unit!...it was on sale, and I had my 20% off coupon...back in business. With my buddy's large compressor, which is now here, I should be all set.  Media for the machine is far cheaper at Tractor Supply, so thats where I sourced this stuff...  So now I have only the tricky parts of the bed floor to get to...and with the sandblaster, it should go well. thanks for looking JP |
| |
I know its spelled Norman Luxury Yacht, but its pronounced Throat Wobbler Mangrove!
|
|
|
|
|
Nov 16, 2019 13:17:26 GMT
|
|
I - like many others, I'm sure - will be fascinated to see how your blasting goes. Best of luck, John
|
| |
|
|
|
|
|
|
|
thanks, man...me too!  I have already made some small modifications to the fittings and bought a better nozzle for it. Hopefully it will reduce the number of clogs in the line and provide more control at the nozzle....Going to get set up tomorrow and try it out.... JP |
| |
I know its spelled Norman Luxury Yacht, but its pronounced Throat Wobbler Mangrove!
|
|
|
|
|
|
|
A bit more done after work today..... The cross member section that I had to remove early on in this project was finally able to go back in place tonight. I patched all the pin holes in the floor repair, primed and painted it. This area is now done save for the seam sealer and final painting. 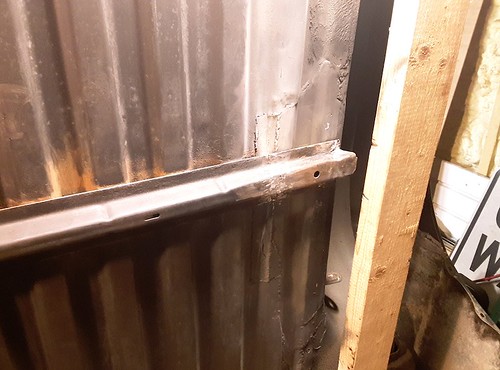 I also used some crate wood that I got at work and recovered the dolly. The old floor was toast!  the weather should cooperate tomorrow so I have some sandblasting planned..... thanks for looking JP |
| |
I know its spelled Norman Luxury Yacht, but its pronounced Throat Wobbler Mangrove!
|
|
|
|
|
|
|
|
Just realised, I did not comment on blasting.
Do you have a lot of air?
I found it a struggle with one of those pots before.
I was using glass media.
|
| |
|
|
|
|
|
|
|
Just realised, I did not comment on blasting. Do you have a lot of air? I found it a struggle with one of those pots before. I was using glass media. Hey, Grizz I borrowed my buddies compressor to push a lot of air through the blaster...so should be okay. I watched several Youtube videos about the blaster from Harbor Freight and made the suggested modifications/improvements to the nozzle and feed lines. I will be using the fine volcanic media....fine for under the truck bed. JP |
| |
I know its spelled Norman Luxury Yacht, but its pronounced Throat Wobbler Mangrove!
|
|
|
|
|
|
|
The weather did not cooperate today for blasting so I pressed on with other repairs. started with giving the frame its final protective coating. a rubberized undercoating to help keep chemicals and moisture out of the frame channels and other areas. I will be spraying cavity wax in all the areas prone to rusting.  and made the quickest repair to date on a fairly complex (for me) shaped area right behind the rear wheel arch on the inside fender. I knew this area might be fairly big, but excavating the bedliner material revealed a 12" wide rot hole....this of course was made worse by previous repairs filling in over rotten metal... Heres the affected area (Didnt see the motorcycle in the background until I posted the picture here just now!) 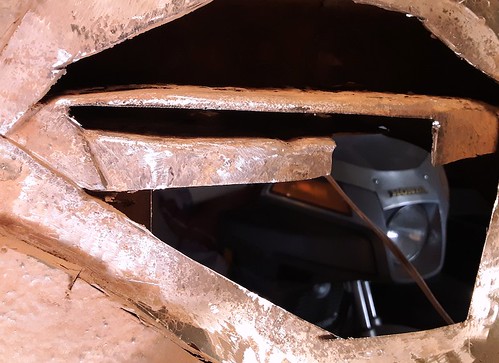 You can see the frame cross member under the floor needed fixing too...so the rust was a couple of layers deep. Here is the area from inside the fender well  I patched the cross member  and began shaping the repair piece. its a sort of bowl shaped piece on the right with two raised section to finish the ends of the ribs in the floor on the left.... 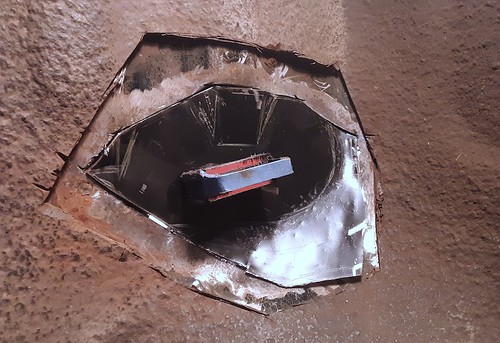 Here it is taking shape and with plug weld holes ready to go 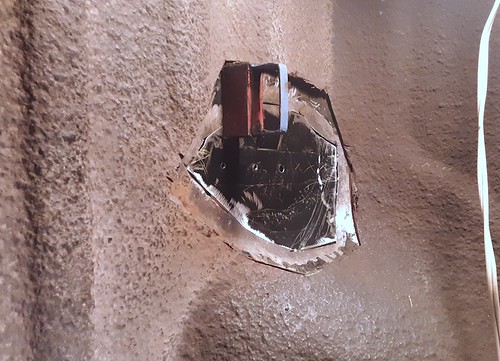 it took a little doing to get the shape right, but patience paid off....here it is buzzed in, but not cleaned up.  and from the other side  I also got to try out the new brushable seam sealer...it works great 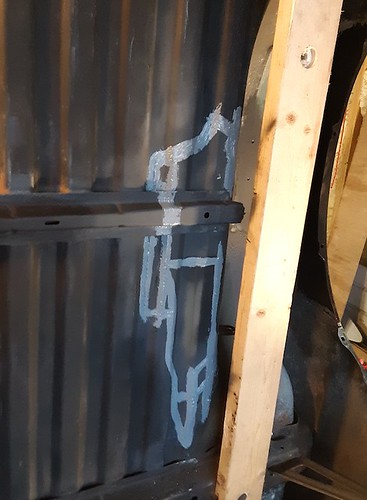 So thats the large section of the floor done and seam sealed ready for paint, ect and the last floor section repair needed at least buzzed in and ready for dressing back. I'm sure there will be a few pin holes to fill in, but I felt good about the progress today thanks for looking |
| |
I know its spelled Norman Luxury Yacht, but its pronounced Throat Wobbler Mangrove!
|
|
|
|
|
|
|
Nov 23, 2019 10:30:23 GMT
|
Parcel delivered by postie yesterday. From NY state. Thank you JP for the plates and note. Much appreciated, especially the NH plate which I did not have. 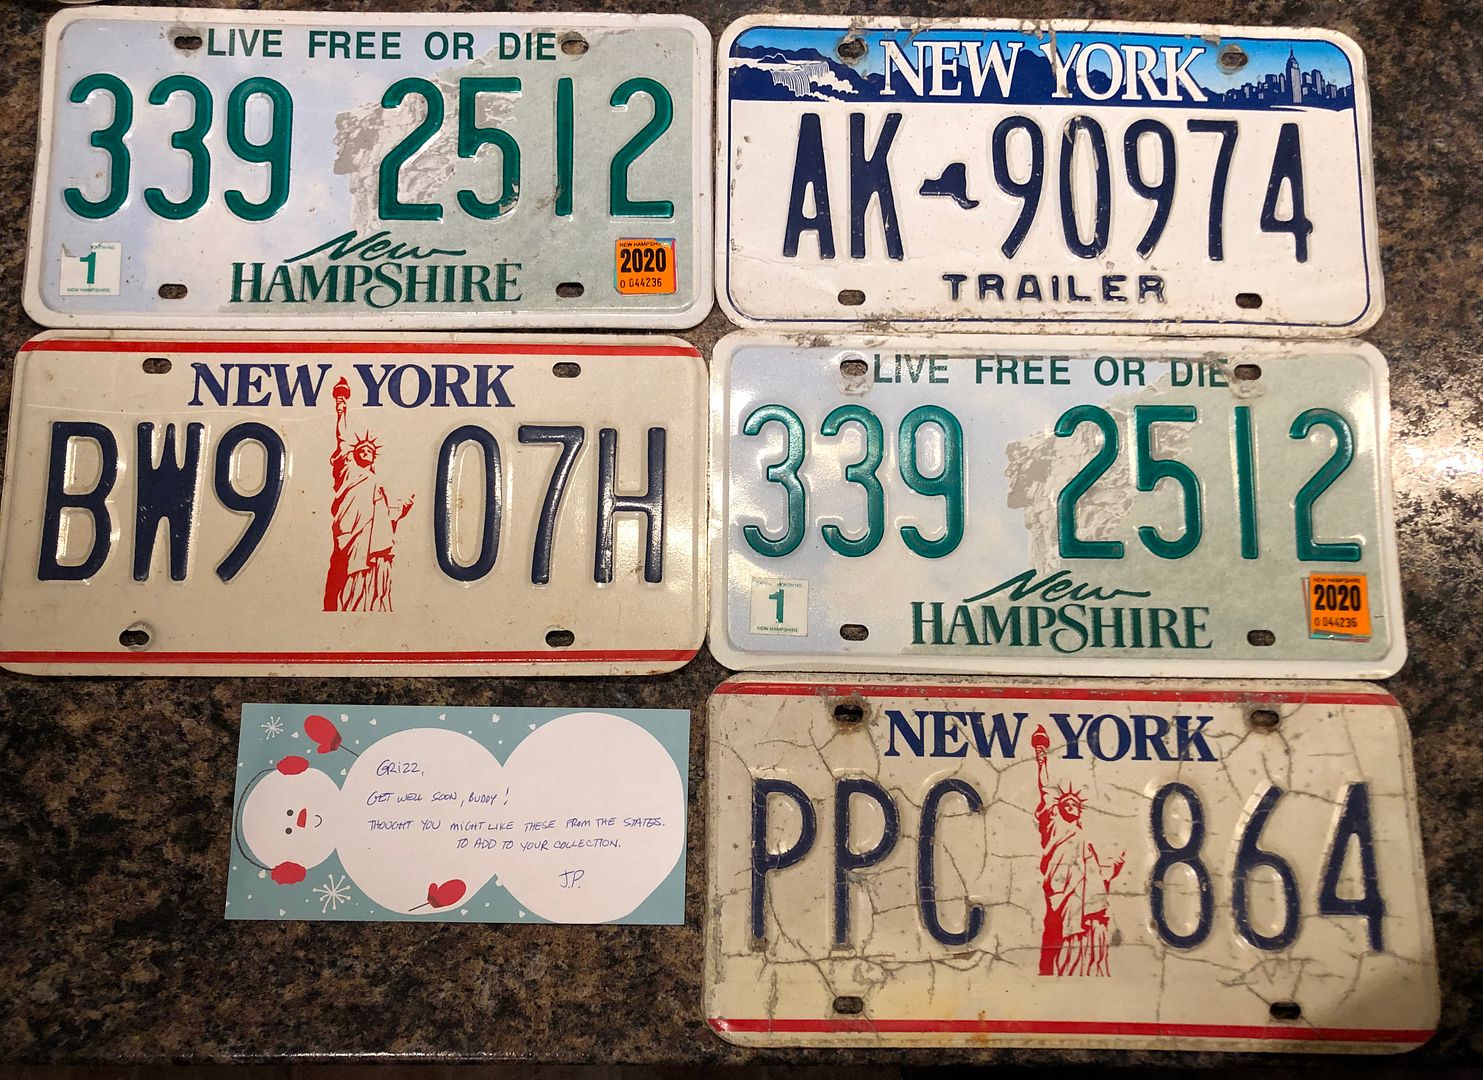 |
| |
|
|
|
|
|
Nov 23, 2019 16:21:12 GMT
|
|
your welcome, buddy! The PPC plate is from a 1992 Mitsubishi Eclipse that we just loved (before kids), the trailer plate is from my dads old utility trailer, the NH plates are from a well used chevy pick up that we used at Camp in NH for many years, and I don't know where teh BW9 plate is from!
JP
|
| |
I know its spelled Norman Luxury Yacht, but its pronounced Throat Wobbler Mangrove!
|
|
|
|
|
Nov 23, 2019 17:01:40 GMT
|
your welcome, buddy! The PPC plate is from a 1992 Mitsubishi Eclipse that we just loved (before kids), the trailer plate is from my dads old utility trailer, the NH plates are from a well used chevy pick up that we used at Camp in NH for many years, and I don't know where teh BW9 plate is from! JP Brilliant JP, Thanks for the stories. I love to know the histories or back stories to plates. Hence collecting used plates, rather than buying new off online sites. Thanks again. |
| |
|
|
|
|
|
|
|
So I tried out the new sandblaster today...I found a window of opportunity in the weather and did get the rest of the underbody done....Moving the bed outside was pleasant enough, but rather than lower the bed onto the dolly and risking having it scoot out from under, I brought the dolly up to the bed and attached it with some screws, THEN, lowered the whole thing down onto the wheels. it was rather uneventful after that! (funny the solutions you come up with when having to work alone...though SWMBO did come out to help getting the dolly in place the first time)  The blasting went very well, but good god does that stuff get EVERYWHERE. proper clothing is an absolute must. respirator, hood, as many goggles as you have available, ear protection, gloves, ect.  It does a very complete job. What I would change for next time? turn the bed around and have the sun at your back. visibility under all that clothing and goggles was frustrating. the hood provided with the unit fogged up in no time and was basically useless after that. Even though the compressor I had was quite big with a big tank, it was no match for the blaster. I may have a solution for this. get smaller nozzles and try them out so that Less volume comes out. This means a smaller blasting pattern...but what I had bought, though much better quality than the nozzle that came with it, was a bit big. I think a smaller nozzle would solve a couple of issues. This pic shows the bracket under the fender half way done so you can see the difference.  and the scene of the crime. I would have taken more pics, but was just covered in media dust and honestly just wanted to get it done!. standing back and looking at the overall result was quite satisfying.  Was it worth it? in short, yes. a good result. was it a chore? yup...it was! thanks for looking JP |
| |
I know its spelled Norman Luxury Yacht, but its pronounced Throat Wobbler Mangrove!
|
|
|
|
|
|
|
|
Yup.....
It makes a mess for sure
But progress is progress
|
| |
|
|
|
|
|
|
|
In my world I simply don't have the time or the space to get involved in blasting - I have a small but very good blasting firm 10 miles away that are competitive on the prices too hence they get all my work - its a pleasing but somewhat thankless task and has you say it goes everywhere - but good that you made progress  |
| |
Last Edit: Nov 24, 2019 8:38:33 GMT by Deleted
|
|
|
|
|
|
|
thanks, you guys...yes, I can imaging that having a good blaster nearby is a godsend. The blasters around here are just too expensive to justify...they have all gone to dustless blasting, and mobile blasting, ect. very commercial. There used to be a guy in the next town who was very reasonable. but he is long retired! anyway...more progress today...I rust treated the bottom of the bed and let it sit all day. Its in areas like this one that I am thankful I had the blaster.  and, inspired by grumpynortherner who makes most of his repairs look factory, I stippled the seam sealer to mimic what Toyota had done originally. I think it looks good, and painted looks great...very happy  Inner fender wells got a wider application of sealer than factory as the inner fender shield just does not overlap it enough and rubbed through the paint over time, causing some of the rust up there.  Heres the whole bed rust treated, awaiting the top coat.....  and finally, the money shot...a freshly painted satin black bed floor...its been a long time coming!  I still am planning on a couple of coats of bedliner material (spray on) and then two coats of undercoating (rubberized) I can count the things left to do on this project with one hand! thanks for looking JP |
| |
I know its spelled Norman Luxury Yacht, but its pronounced Throat Wobbler Mangrove!
|
|
|
|
|
|
|
The To Do list is getting shorter and shorter.... Today I checked off 3 items. -Heat shield brackets welded in and heat shield drilled and painted -Lower rear fender arch repair welded in and flatted back, ready for body work -Inner fender area rust treated above the repair areas -outer fender arch patch trimmed and fitted, ready for welding. Okay, thats 4 things.... heres the heat shield brackets welded in and painted  and the lower fender arch patch welded in.... 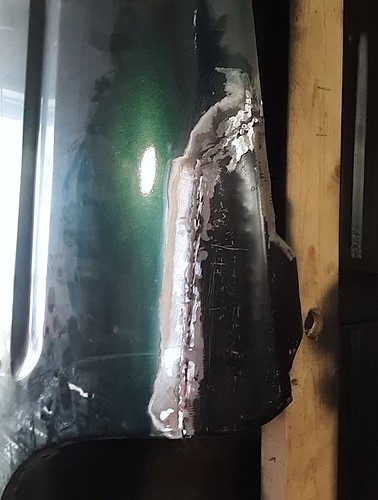 and smoothed out a bit  and the fender arch repair panel fitted ready for welding....  Finally, the inner floor patch towards the front of inner fender welded in with no more pin holes...its also welded both sides. It will get cleaned up, seam sealed treated, ect...  So all in all, not bad... whats left? Here is the final list for 2019! -weld in DS fender arch repair panel -position and weld fuel filler brackets -position and weld inner to outer fender arch /fender liner brackets -Drill and mount rear mud guard brackets to new lower rear patches -install hub caps -tighten new shiny chrome lug nuts -attach heat shield -Undercoat bed with rubberized material and cavity wax -reinstall bed to chassis! -apply first skim coat of glass fiber reinforced filler, smooth and prime -take truck to body shop for final prep and paint! thanks for looking! JP |
| |
I know its spelled Norman Luxury Yacht, but its pronounced Throat Wobbler Mangrove!
|
|
|
|
|
|
|
Okay, more progress today... from the list: -weld in DS fender arch repair panel-position and weld fuel filler brackets-position and weld inner to outer fender arch /fender liner brackets -Drill and mount rear mud guard brackets to new lower rear patches -install hub caps -tighten new shiny chrome lug nuts -attach heat shield -Undercoat bed with rubberized material and cavity wax -reinstall bed to chassis! -apply first skim coat of glass fiber reinforced filler, smooth and prime -take truck to body shop for final prep and paint! Only two items checked off, but there are 4 brackets in the fuel filler area and everything needed rust converting, painting, seam sealing and top coating..... That arch repair panel took a good chunk of the afternoon, and I knew it would , so left plenty of time..... The first bracket went on the inside of the repair patch, well actually, the first two brackets. these two were welded together, but first the whole assembly needed several dry fits so that I could be sure it all fit against the inner fender bracket. Sorry, its hard to see here. Bolts were cut to size, then nuts and lock washers added and mounted to the panel.  Then the inner fender bracket could be located on the inner fender. This is the bracket I had to make several weeks ago!  That was treated to paint and seam seal  The repair patch was set in place with clamps and holders. I took this opportunity to bolt the two brackets together. This also helped reinforce the repair panel for welding.  And finally, the last big section to weld back to the truck...here it is buzzed in but not cleaned up yet. I do have a couple of spots of minor distortion, but should be able to tap them out....  And under the floor patch, I added some seam sealer  Once I get the inner fender to outer fender brackets welded in place tomorrow, I can get the bed back in place! thanks for looking JP |
| |
I know its spelled Norman Luxury Yacht, but its pronounced Throat Wobbler Mangrove!
|
|
|
|
|
|
|
Where is that list? Nothing to check off but I did get some figuring done regarding the inner fender shields and inner brackets. I decided to redesign the cross piece. Using what I learned from making the heat shield brackets, I turned the edges up on either side of the cross pieces and this strengthened them quite a bit. very happy with the result. You can see the 4 pieces that will make up the 2 brackets. I will weld the bracket to the inner fender and have decided to bolt the other end to the fender arch return lip. The edge of the bracket will not touch the inside of the quarter panel like in the original design...I'm hoping this reduces corrosion in that area by allowing airspace between the bracket and the inside of the panel. It will be undercoated quite a bit too...and it is all up above the inner shield.  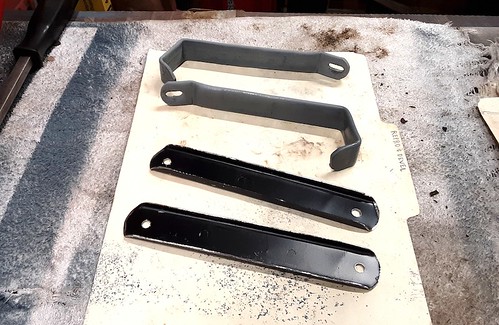 and the inner fender shield. I did order 100 new plastic anchors that clip into the fender return...these made it easy to temporarily fit some self tapping screws to hold it in place....  and finally, the heat shield...not very exciting, but also not available anymore...so it had to be repaired. ( I probably could have wrapped the muffler or something, or, used an aftermarket heat shield, but what the heck....  Ill get the brackets figured out tomorrow then I can cross another thing off that list! thanks for looking JP |
| |
I know its spelled Norman Luxury Yacht, but its pronounced Throat Wobbler Mangrove!
|
|
|
|


