|
|
|
Sept 29, 2019 2:16:13 GMT
|
|
New parts arrived today! diff locker, tank strap, nuts and bolts. Of course, Ill wait to put the tank back in place until I'm done with frame repairs and paint....
On order: frame crossmember. Found this online for a steal...very happy with that.
Brake regulator bracket above the axle...its toast.
a few other bits and whatever....
JP
|
| |
I know its spelled Norman Luxury Yacht, but its pronounced Throat Wobbler Mangrove!
|
|
|
|
|
|
|
|
|
Today I got the DS wheel arch cut out which took a little figuring on just where to cut... The area behind the fuel filler door was pretty toasty so I decided to replace that feature as it was molded into the repair panel. What was not included was the bracketry behind that area to give it all some added strength. The brackets, all but one, were too rusty to save, and I cannot find replacements, so Ill have to make them...ahh well...its all good practice, even if it is time consuming! heres the DS arch cut out...  and trial fitting the fuel door, housing, and home spun brackets (out of sight on the back side of the panel) Happy to say, It all fits and the door closes perfectly.!  here you can see the "CAD files" I created to make the support pieces behind the opening. The top of the photo shows the old support. this was made, I think, for ease of production as well as simplicity...everything lines up and must go in the right place when the bracket is used.(this bracket was spot welded to the original panel)...My CAD pieces fit the contours of the new panel and I was careful to mark the hole centers correctly. With the right stainless hardware, all should be fine.  I seem to have lost a couple of photos, but was able to get a good section of the rear frame painted as well as the gas tank.  Thats about it for now. Next, I'm going to get the DS panel fitted dry for now, as I still have to make those brackets behind it (that attach to the inner fender) before putting the panel in place. It will be very hard to weld them in otherwise.... thanks for looking JP |
| |
I know its spelled Norman Luxury Yacht, but its pronounced Throat Wobbler Mangrove!
|
|
|
|
|
|
|
Found the pics that I actually DIDNT loose...back of the fuel filler door brackets. the one on the left gets a 90 degree bracket that attaches to one more bracket on the inner fender...I'm thinking Ill also tack these in place so they wont move around during installation or come loose in future....  and some more new parts: diff locker actuator, fuel tank strap (from Toyota, no less. guess how much?!), new bolts and washers, Also present are the paper templates/old rusty fuel filler bracket. (rust trap?), aaaannnnd, Didnt notice it before in the pic, the bracket that goes on the inner fender is sitting under the fuel tank strap....  I do have to move the truck soon to weld the frame...but the gas tank is out...hmmm...poor planning!....Maybe a short welding session with the welder outside on an extension cord wont be so bad....  thanks for looking... JP |
| |
I know its spelled Norman Luxury Yacht, but its pronounced Throat Wobbler Mangrove!
|
|
|
|
|
|
|
Clean up continues on the DS inner fender area. I cleaned the rust off the mounting area for the inner fender bracket, and unfortunately found another area of rot in the lower back corner....Ill have to repair it from above as there are two crossmembers in the way from below... 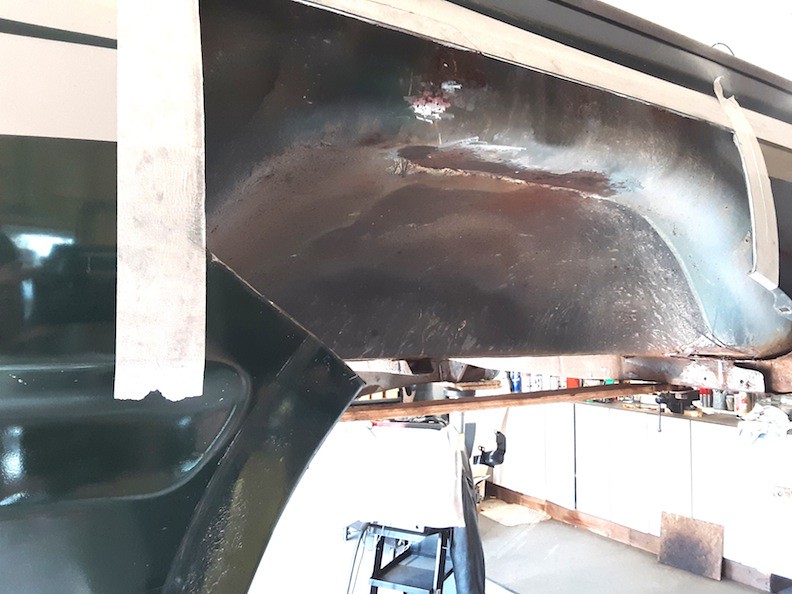 DS panel cut to shape and that looks promising. Its nice to know that Ill be working with fresh metal now!... The big question of my day today, was, Can I replicate this rusted inner fender bracket from a paper template and some old truck bed flooring?...If I get the flat shape right, it should work, right?  Here they are after a bit more shaping of the new piece. I got my shrinker/stretcher out hoping it would do the trick....  In short...no dice!...the bracket has a couple of compound curves to it as it mounts to the underside of the inner fender on one end, and up on the side of the inner fender on the other...all fitting along a curving and sloping inner fender...So, out came the grinder for a pie slice approach...which in the end got me there...but it took the better half of the day to finish it up.... It seems I can replicate brackets if I really have to...but I wish I could go to bracket wizzardry school. (Binky School!)  Gas tank is now painted with satin black, bedliner material and undercoating...that should do it! 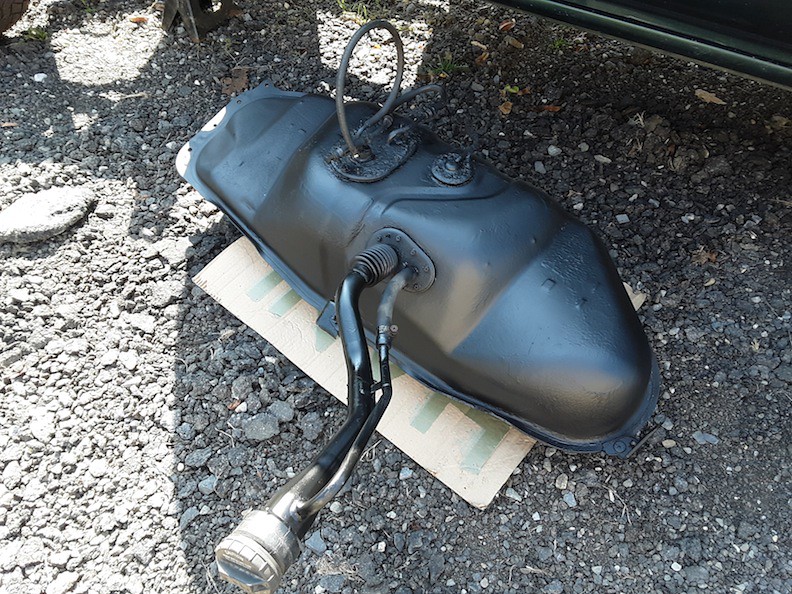 not too bad for the day....but that bracket gave me pause. JP |
| |
I know its spelled Norman Luxury Yacht, but its pronounced Throat Wobbler Mangrove!
|
|
|
|
|
|
|
Another fairly productive day....After going back and forth from the garage to the truck one too many times, I enlisted the help of the garden tractor to help move the little beastie. Now its quite close to the garage doors...big help now that I'm working on the frame again....(sorry for the blurry picture)  The crack in the frame was surrounded by very very thin metal, so a good chunk had to go...of course there is a bracket for the gas tank strap right there, as well as another hole for one of the lower cross member bolts...so after scratching my head a little, I decided to cut the chunk out and remove the bracket carefully for reuse, and measure the hole's location....(you can see evidence of previous patchwork)  and cleaned up with some galvanizing primer sprayed on...  And the patches...one for the frame here, and the other one for the front bed support that I discovered was rotted through on one side....ahh, the joys of doing this kind of work....  How the bed support rotted like this is a mystery...except maybe for moisture forming inside the sealed cavity and just rotting it out from the inside... 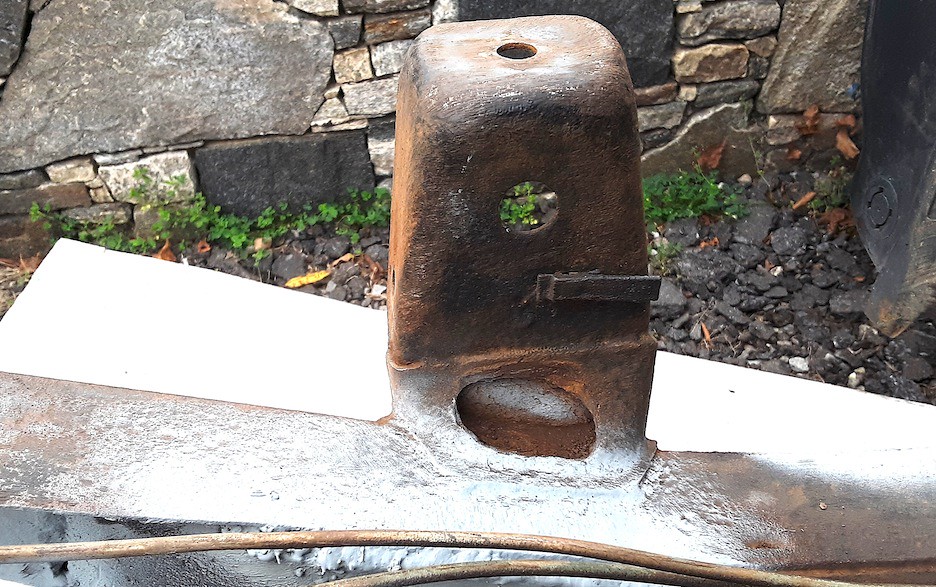 take the patch and bracket, orient them correctly.. 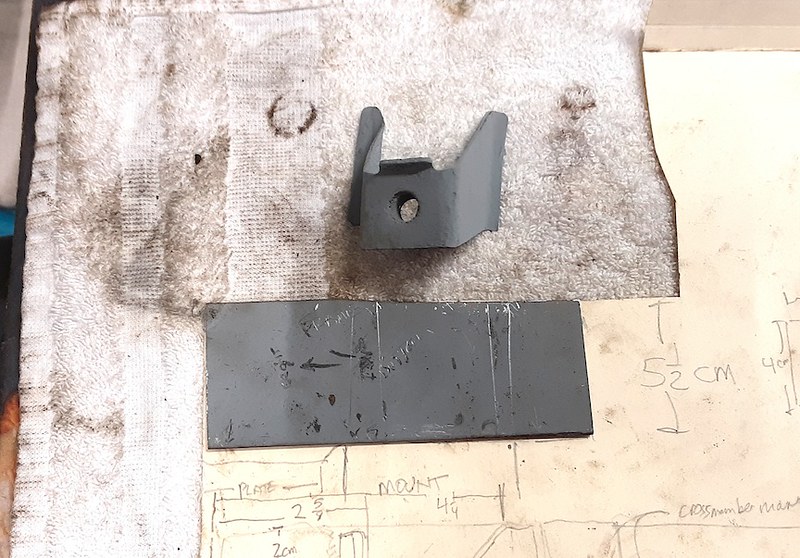 and we have something like this. I still have to weld the bracket in place and mark the hole for the crossmember bolt....I want to weld the bracket on the patch before putting it all back in..very hard to reach with the welder afterwards...  Heres the patch welded in for the bed support...  I did get some primer and paint on there as it started to look like rain....which, of course, it did... I also decided to drill a hole in the bed support on the outside panel. This hole leads to the repair area cavity. I sprayed some Fluid Film in there and will use a plastic plug to cover the hole...  Close up of the hole with the fluid film inside...this stuff does smell for a few days....but Ive used it on my other vehicles and it does a good job...  Hopefully Ill get that other patch welded in this weekend...then the crossmember can go back in place.... thanks for looking JP |
| |
I know its spelled Norman Luxury Yacht, but its pronounced Throat Wobbler Mangrove!
|
|
|
|
|
|
|
A bit more done after work today...got the trailer hitch and more of the frame done...little by little! 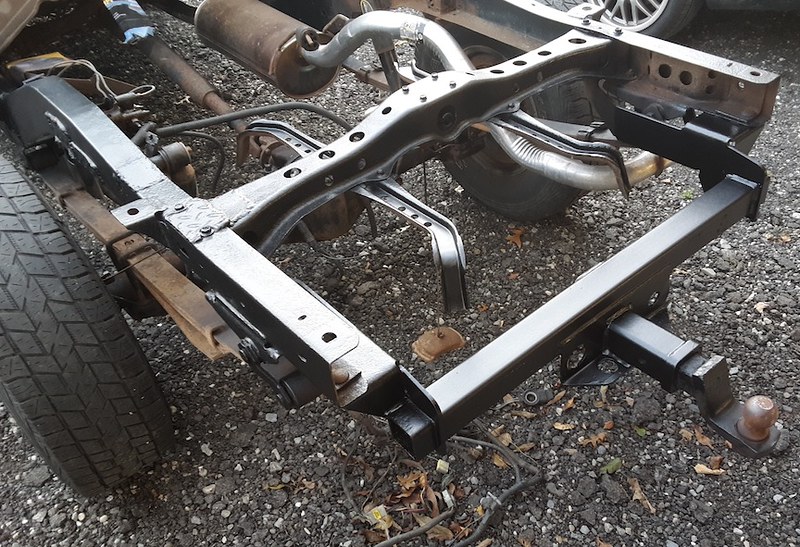  I'm planning on getting that frame patch welded in tomorrow..that will be a big step forward... JP |
| |
I know its spelled Norman Luxury Yacht, but its pronounced Throat Wobbler Mangrove!
|
|
|
|
|
|
|
Bracket for the frame repair done!.....I got the gas tank bracket mounted to the frame patch:  drilled the hole for the crossmember bolt and set it in place, ready for welding:  Here it is buzzed in from the top side. I cleaned up the welds where the bracket needs to sit:  and from the bottom side. I decided to double weld this patch as it is structural: (When does a welder get up and start dancing wildly?...why, when he forgets to close his jacket and is welding upside down!)  Very happy that's in...Then I turned my attention to a bit of fun...finished up the trailer hitch, and though ironically, the hitch is rust welded in place, I added a new lock pin, cause it shiny!  and cleaned up the DS brake drum, then gave it a few coats of matt silver.  I'm happy with that! JP |
| |
I know its spelled Norman Luxury Yacht, but its pronounced Throat Wobbler Mangrove!
|
|
|
|
|
|
|
I was hoping to tackle that brake proportioning valve bracket today and simply cut all the mounting bolts and drill out the remnants... This is how it looked. You can see the assembly on the frame...  well, thats what I was hoping for...but the truck had other ideas.....this was one stubborn assembly!...it took quite a while to prize the unit off the mount and when It did finally give up, I found that the mount welded to the inside of the frame was pretty much gone too....aaaaand found another crack in the frame. Thats what I get for painting the brake drum and having a little fun... heres the old and new valve bracket: 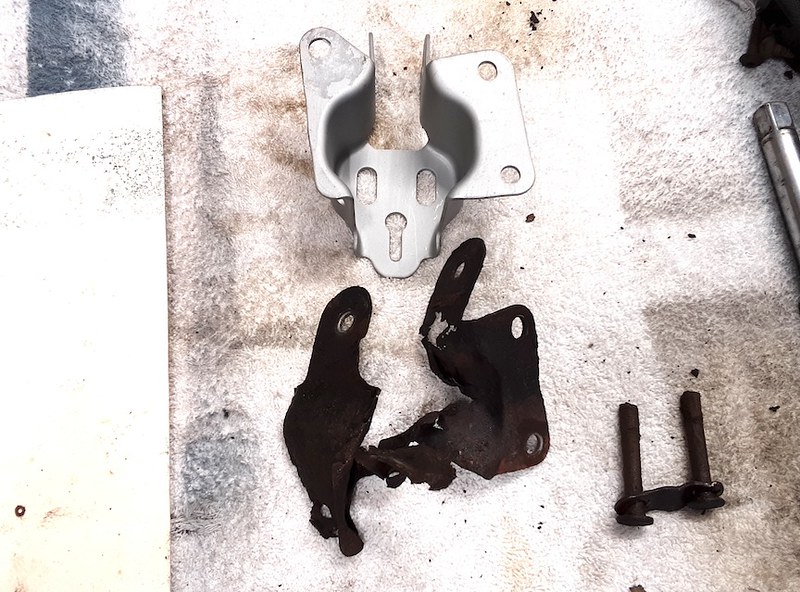 and the toasty valve mounting surface on the frame....( I had already cut the bottom rot out thinking I could just patch it...but there was so much rust and scale inside the mount, I decided to cut the whole thing out...  aaannnd look what I find inside the frame rail......oops a pretty big hole.  Because of the complexity of the part, with all its weld nuts and mounting holes, I decided to fix it instead of making a new one...not sure which one would have been better in the end....  and from the backside....it still looks pretty crusty, but the metal is solid towards the top...just needs a very good cleaning and rust treatment....  Sorry for the blurry photo...a new space in the frame where some rot used to be...  The frame piece Ill have to replace with new steel. I think Ill reuse this bracket too...it needs a small patch on one side, but is okay otherwise...  On the bright side!...our new used crossmember came in and it is in fantastic shape!...I'm very happy with that!  thanks for looking JP JP |
| |
I know its spelled Norman Luxury Yacht, but its pronounced Throat Wobbler Mangrove!
|
|
|
|
|
|
|
soldiering on....got the bracket off the frame section and sorted out. that little rotted section on the bracket turned into both sides and the bottom...(murphy is visiting for a while apparently!)  cleaned up and mounted to a new frame section  and in place ready for welding.  Next up, Ill get that section welded in and begin fitting the brake valve mount... thanks for looking JP |
| |
I know its spelled Norman Luxury Yacht, but its pronounced Throat Wobbler Mangrove!
|
|
|
|
|
|
|
A bit more done this afternoon... buzzed in the repair section  primed the mounting bracket  and set it in place for welding...which I did get finished but it got too dark to get good photos....  The little magnet with the handle is really powerful and quite useful..my go to! thanks for looking JP |
| |
I know its spelled Norman Luxury Yacht, but its pronounced Throat Wobbler Mangrove!
|
|
|
|
|
|
|
|
|
|
finished welding in the bracket mount/frame gusset today and its looking pretty good. Ill still need to repair the bracket to the right in the above photo, but that will hopefully be just a patch.
Then I can get the rest of the frame painted on this side which means I can put the gas tank, skid plate, brake valve, and differential locker back in place!...
That means I can start concentrating on the other frame rail, where I see only one area to cut out and make another frame patch where the bump stop bracket is located....then the truck itself will be done for now!....
JP
|
| |
I know its spelled Norman Luxury Yacht, but its pronounced Throat Wobbler Mangrove!
|
|
|
|
|
|
|
|
You are doing good man !!
|
| |
|
|
|
|
|
Oct 15, 2019 12:02:00 GMT
|
thanks, Grizz... The leaves are falling and its getting cold at night...SWMBO is politely asking for her garage space back....gotta button this thing up!  JP |
| |
I know its spelled Norman Luxury Yacht, but its pronounced Throat Wobbler Mangrove!
|
|
|
|
|
|
|
Today was a good day, Heres the brake valve frame gusset with all voids filled in and ready for paint 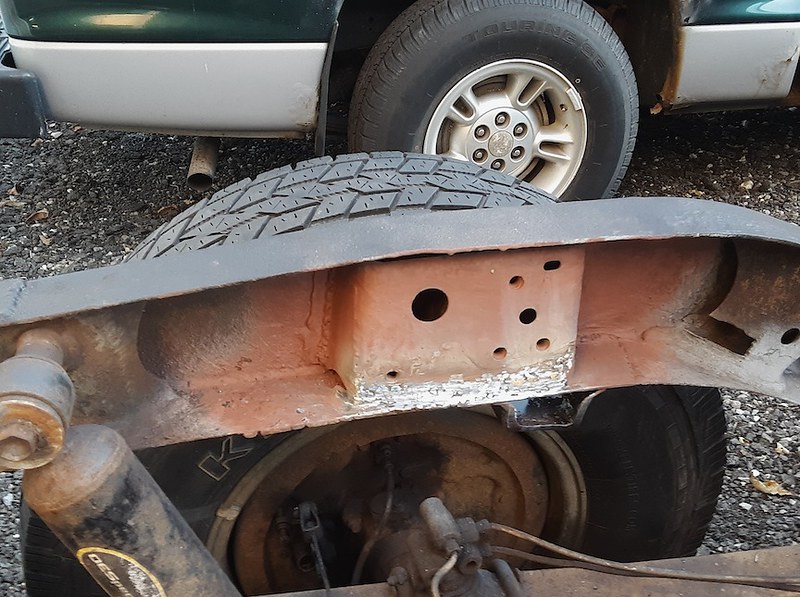 Some metric bolts and nuts were purchased at the local hardware store which has two isles floor to ceiling with just what you need and more!  Got some paint on a few of the suspension pieces...rust converter, primer, satin black and then some bedliner material  Freed up the parking brake system, which was a bit crusty and stubborn in places. the adjustment is under the cab, as seen below, this took some patient nut turning with penetrating oil, and back and forth spinning of the nuts until I had room for adjustment for the parking brake. works great now.  Brake load sensing valve back in place on a new gusset, bracket and all new hardware...camouflaged to look like it has never been touched! (irony?)   Rear of the frame on both sides is now done.  and I gave the muffler a coat of galvanizing paint...it seems to work great. the muffler on my Dakota still looks newly painted and that was done last year. 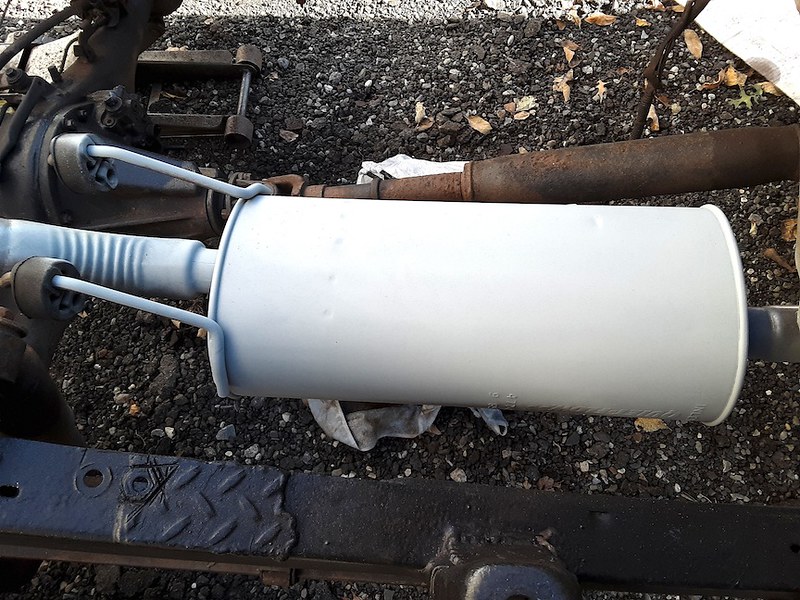 I still have one last gusset to repair, the diff. locker actuator to reinstall and the gas tank/skid plate to put back in place, then this side is done from the cab back!...wahoo! thanks for looking JP |
| |
I know its spelled Norman Luxury Yacht, but its pronounced Throat Wobbler Mangrove!
|
|
|
|
|
Oct 17, 2019 22:31:29 GMT
|
|
Very nasty weather here the last couple of days...Noreaster blew through here and dumped over 3" of rain and provided plenty of entertainment in the form of high winds too. I ended up wrapping tarps around the frame and bungee cording them in place until the weather clears up a bit...tomorrow is supposed to be nicer....then Ill be back on it!
I really should move the bed of this thing to another location in the garage, but I'm getting close...so forging ahead!
JP
|
| |
I know its spelled Norman Luxury Yacht, but its pronounced Throat Wobbler Mangrove!
|
|
|
|
|
|
|
Progress was pretty good today, 2 steps back kind of thing... That last gusset on the Drivers side probably should have come out to repair it...but I did it in situ...its only time, right? arrggghh... here it is finished, though, so thats good.... 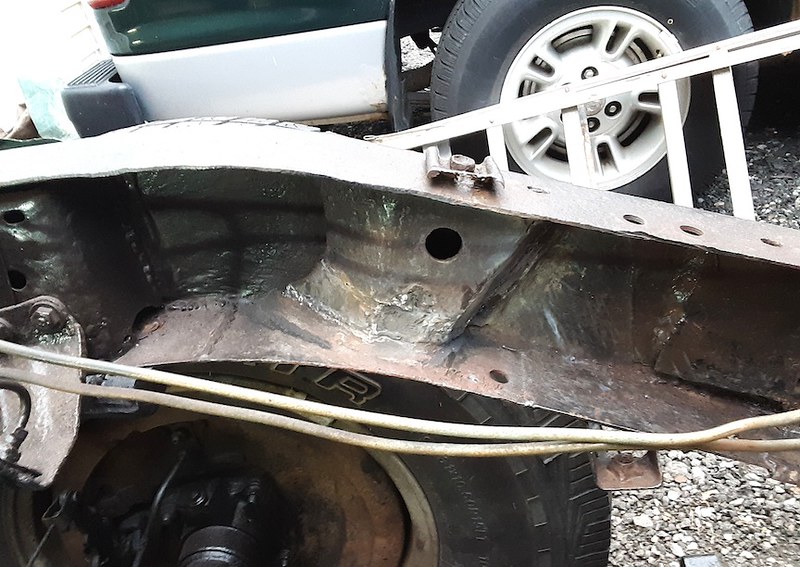 and, moving on to the other side of the frame, I needed to cut this gusset out, remove the bump stop bracket, and replace the section of frame....it turned out to be just as bad or worse than the first side, but thats okay as I am now familiar with the process. Ill replace this gusset with new metal as nothing attaches to it, and its placement is not critical to anything....(thought it will be going back in the exact same place)  Cut the gusset out 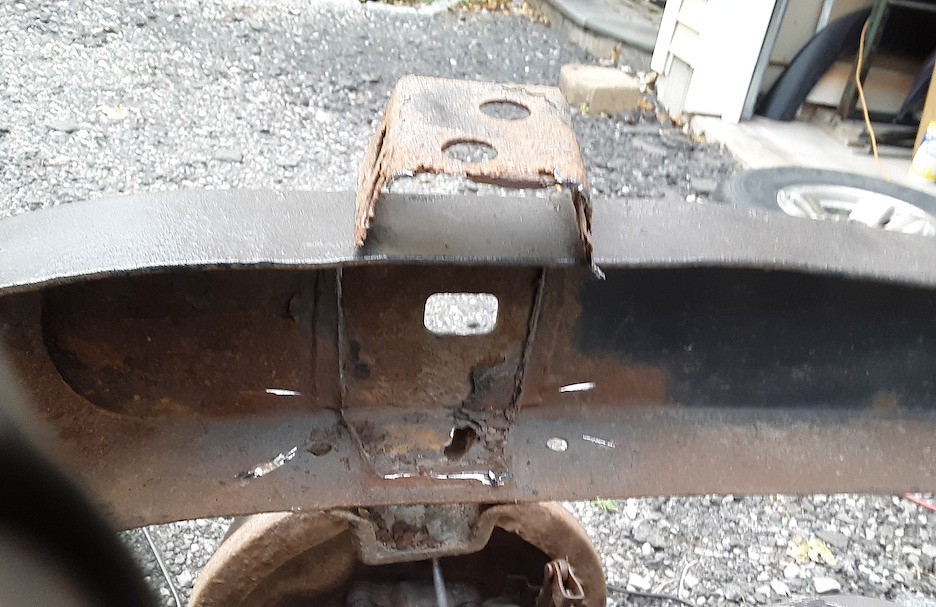 assess where to cut the frame & remove it with the bump stop bracket attached  cut some new metal for the frame and make up a CAD template for the gusset... 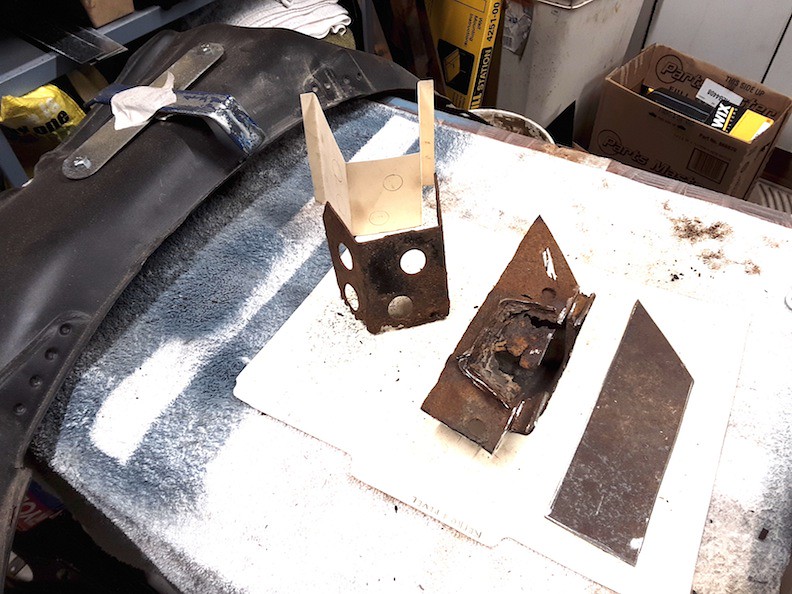 Hopefully I can get this section done tomorrow morning and that should finish up the welding on the frame! thanks for looking JP |
| |
I know its spelled Norman Luxury Yacht, but its pronounced Throat Wobbler Mangrove!
|
|
|
|
|
|
|
|
Lots of work, diligently performed.
This one wasn't covered by Toyota's frame recall? Best, John/CT
|
| |
|
|
|
|
|
|
|
Hey, John...we have our doubts due to its age and mileage. There was something done for owners of 1995-2004 trucks with a reimbursement program and in some cases a buy back program. There was no frame replacement program on those trucks...by the looks of the condition of the metal, perhaps there should have been. I have seen videos of some 2004 and up trucks getting replacement frames at the dealership. what a mess. in one video, the forklift comes and takes the old frame out and stacks it neatly with at least 10 others! There have been horror stories where folks have gotten new frames, and they fail too!... I think this truck comes in before the debacle really hit the fan with all the class action suits... at any rate... I forged ahead with expectations of getting the cab buttoned up today, but again, the truck had other ideas. For starters, the crossmember will not go in unless I disconnect the brake valve, PS shock and drop the exhaust!...so that was done. the crossmember JUSSSSSSST fits in its opening...there were several moments of shear doubt and plans to use dynamite......but after all the components were relocated, all was good. dodged one there. so on to the progress, or to use the analogy again.."One step forward...." Here is a little patch I decided to weld in on the DS where I was sure water and debris would find its way in to the closed section of the frame when things get wet. its all sealed up now....  Back on the PS, here are the 3 pcs for the bump stop area...the repaired bump stop, new frame piece, and new gusset (the CAD template worked great on this piece. I scored the metal and then heated it up with a torch and bent it in the vice with a 5lb persuader and a cold chisel) 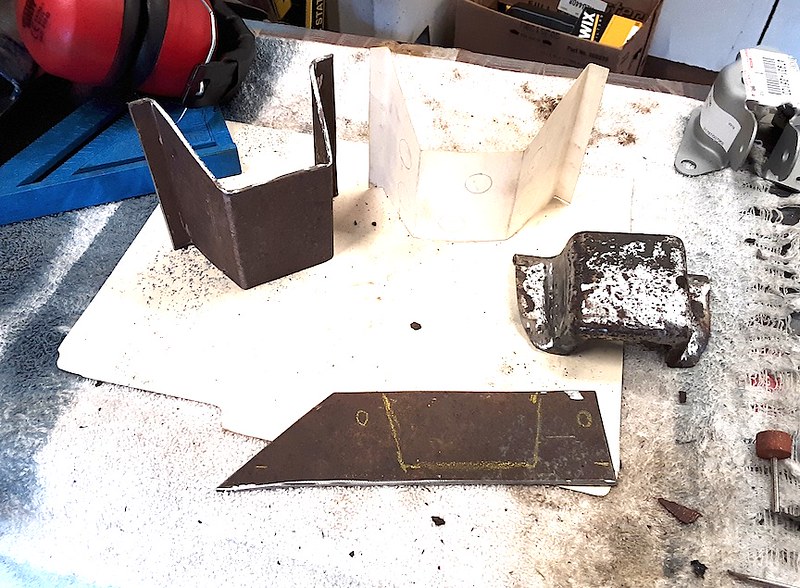 The frame piece and bump stop will get welded together like so...  and the gusset goes in like this  The gusset got 4 plug weld holes drilled in. Ill use these to set it in place for the rest of the welding....which will be seamed along the bottom and up both sides.  The frame had 3 small areas to repair..two from rust and one factory rectangle that was open directly to the inside of this assembly. not sure if it promoted air drying, or caused some of the rust as its right behind the tire.  inside the frame in that same spot. I welded both sides of the repair for peace of mind.  And heres the bump stop and frame piece ready to go back in....  and all in, cleaned up and primed...save for the gusset.  So, here is where the "two steps back" part of the analogy come into play....looky what I found while cleaning up the frame ahead of the last repair getting ready to put the crossmember back in place...  Yep, I had to cut these two panels out as they were paper thin toward the bottom of the frame. I must have scooped, vacuumed and blown out a pound of rust and debris...I just could not leave it the way it was, even though it looked okay from the outside except for two tiny little rust spots......is there such a thing as "Two giant steps back?"  So the plan now is to direct all my attention to this area..Ill have to get creative. and go a bit outside my comfort zone. if you look closely, you can see two holes in the frame just above the leaf spring mount. I will probably open the frame side up and bend it back to get to that area. if I have to remove the leaf spring, so be it...but I have dealt with leaf spring bolts before!...could be a problem if its frozen in place. but I'm optimistic..can you tell?  wish me luck! JP |
| |
I know its spelled Norman Luxury Yacht, but its pronounced Throat Wobbler Mangrove!
|
|
|
|
|
|
|
I decided to explore the new repair area and see if I could find a rarity....good steel! and I eventually did, which I'm quite happy about. Its not as bad as it could have been. In fact there are traces of a sort of rubberized paint and clean steel on the inside surfaces of the frame. good stuff there. Heres the stuff I had to cut out.....  and a "wee pile o rust"  The area is now defined and I can reach the holes inside the frame from within. They are on either side of the rear part of the leaf spring bracket which is still quite solidly held in place by good metal. whew! Ill clean this up quite a bit more, weld in some repair patches inside, treat the daylights out of it with rust converter, etc, then get the new side panels welded in place.  Then, it started to rain on my parade, so I moved operations indoors where the bed was waiting patiently for me to get back on it.......  Here is the inner rear quarter.....it cleaned up quite well in this area.....with only a small repair section needed... 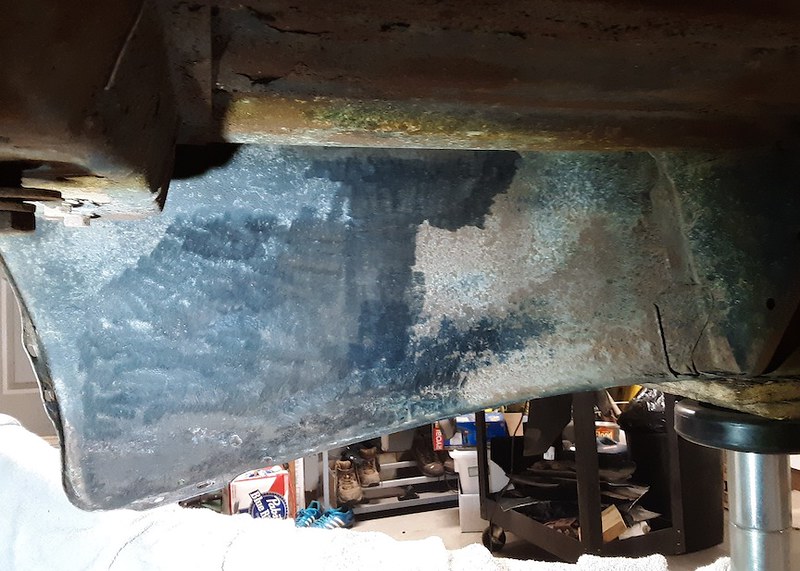  and the repair piece ready for welding tomorrow......I wanted to use some original metal from this truck and found a small section from where I cut the fender arch out....of course I had to clean the bondo off it! 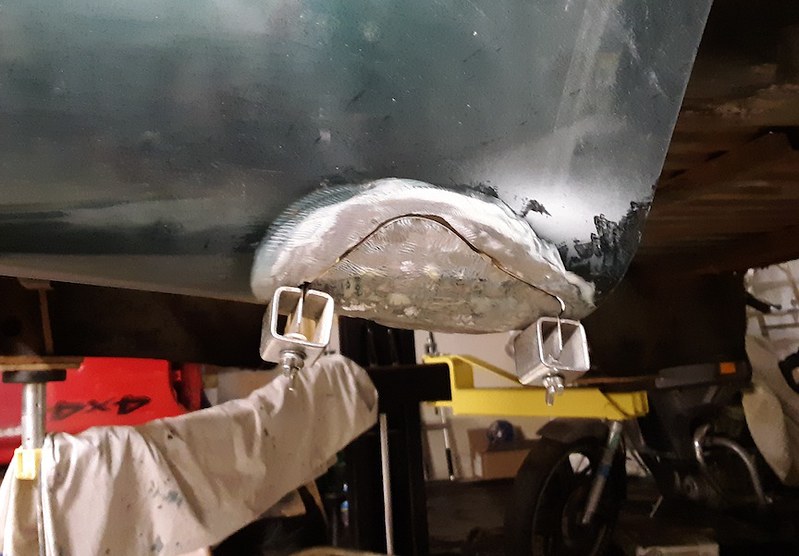 all in all, good progress...back on track, I guess! thanks for looking JP |
| |
I know its spelled Norman Luxury Yacht, but its pronounced Throat Wobbler Mangrove!
|
|
|
|
|
Oct 21, 2019 14:57:02 GMT
|
It took a while for the fog to clear out and everything was soaking wet for most of the morning...so I kept going inside until around mid morning. I finished off the lower rear quarter patch and it came out pretty good...I welded both sides, so felt more confident in getting the welds ground down a bit more on the front side.  I took a look at the other lower quarter on the drivers side, and it was "repaired" the same way...metal patch over rusty metal, and it too was bubbling. I'm still amazed by the good body work and paint by the previous body shop, but the rust repair was just not done to last. I mean you can still see the old rust hole on the inside of the piece I cut out.....  I used some of the repair panel sheet metal left over from the fender arch for this piece...you can clearly see my somewhat crude hammer marks...I guess a rubber or plastic mallet would have been a better choice. I opened the vice a little, layed the piece in the open jaws and hammered out the rough contour. The shrinker tool helped add the curve to the flange.....  rough trial fitting with the fender liner in place....looks pretty good so far.....  I really don't have much else to show for todays work....I really felt like there should be more...though running out of mig wire didnt help, and there was a bit of paperwork to do..... thanks for looking JP |
| |
I know its spelled Norman Luxury Yacht, but its pronounced Throat Wobbler Mangrove!
|
|
|
|


