|
|
|
May 22, 2019 19:53:51 GMT
|
My biggest fear is having to remove the engine to gain access to the clutch. To begin with I removed the slave cylinder and noticed that the bolts were not securing the cylinder tight enough, with it removed I bought myself a WiFi Endoscope Borescope for £20 which I've fed through the hole and noticed the release arm had come attached from the pivot pin! The Haynes manual states I would have to remove the engine and gearbox to reattach it, but after doing extensive research on the internet it seems possible to drill a hole to the underneath of the gearbox bellhousing and with some luck should be able to fix it. 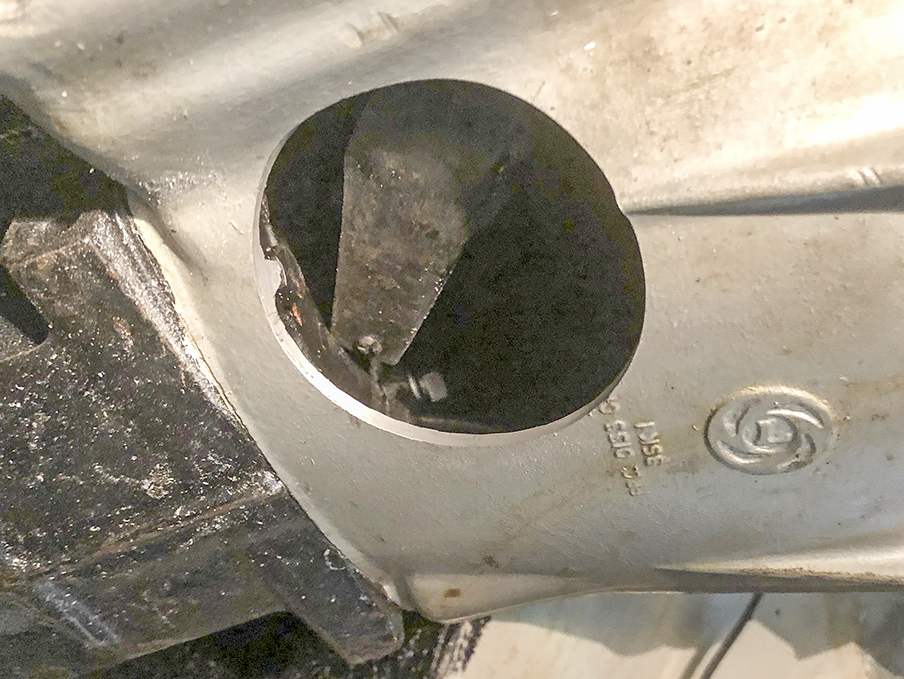 One hole which I must admit is a bit big but I thought it would be easier if I could get my hand in to do the job, and its just as well I did as the following pictures show the release arm had also come of the release bearing! 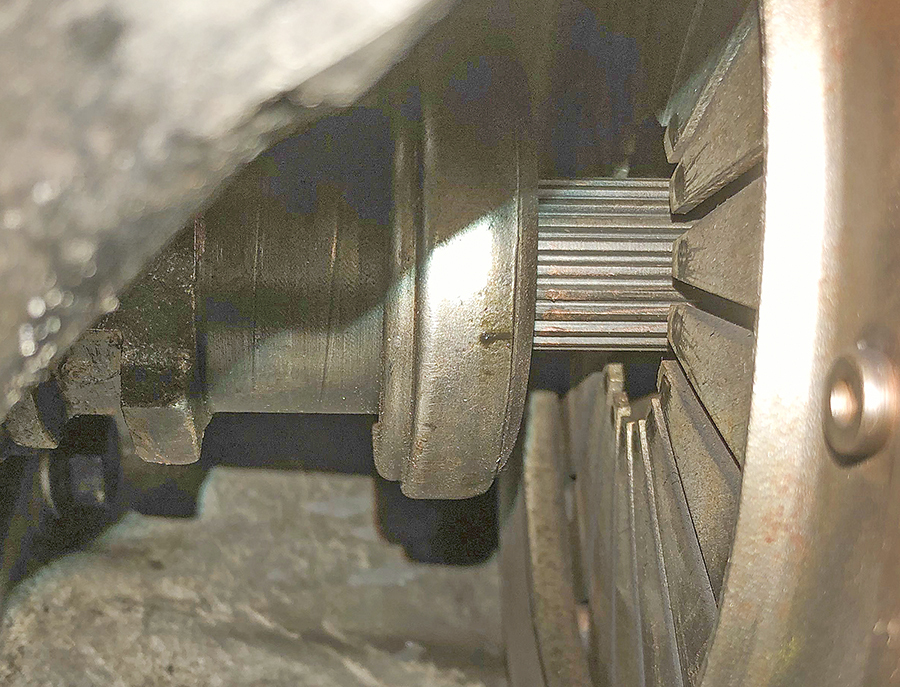 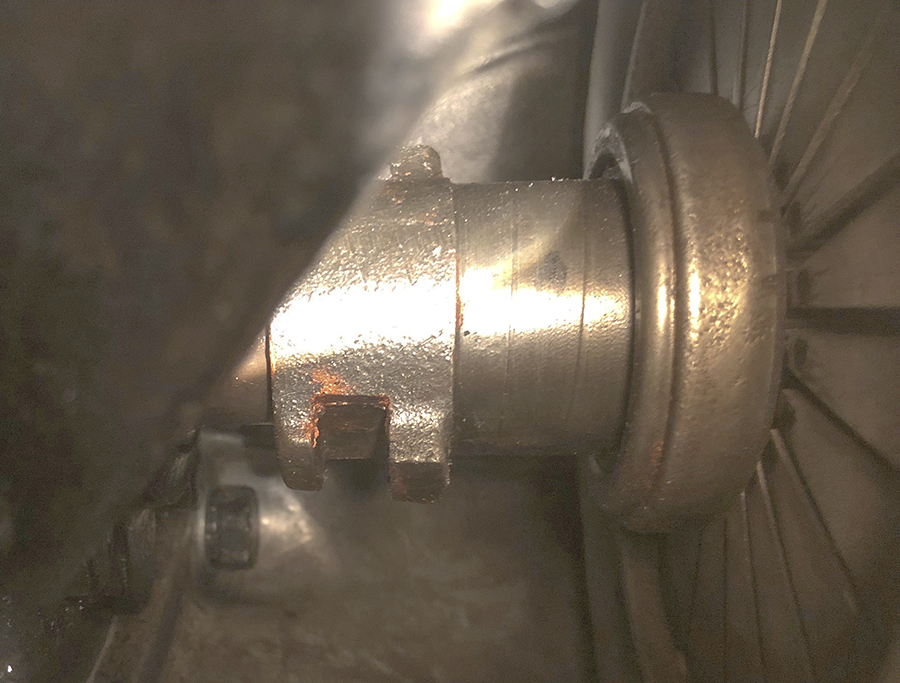 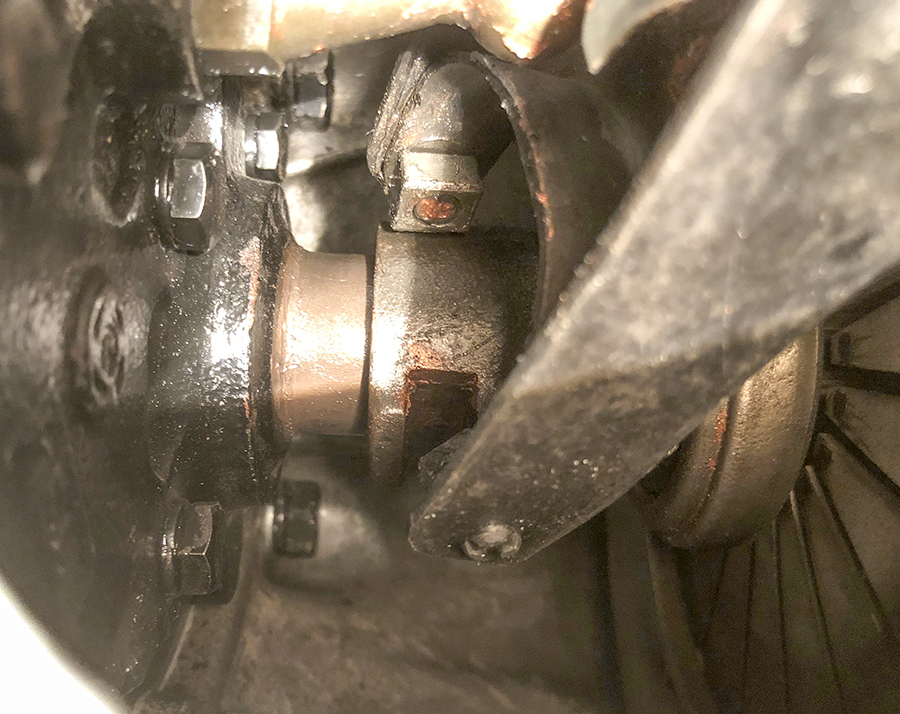 It took some quite some time (hours!)to get the slippers to align with the release bearing, it's all now attached and seems to be working ok which is a huge relief. I've now made a cover plate to keep everything free from dirt. 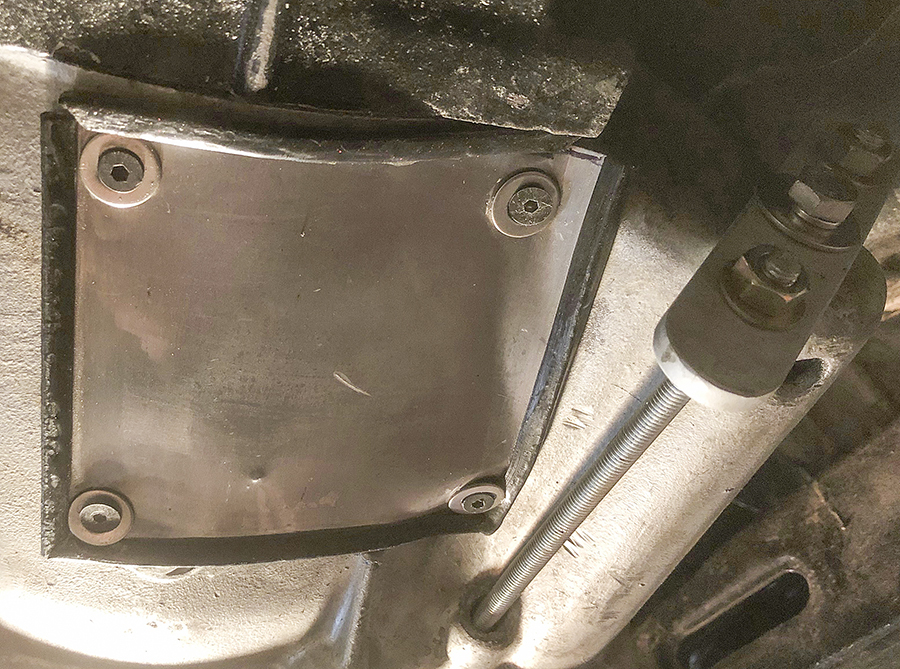 To ensure the slave cylinder does not move I've made a saddle to bridge the rear of the bellhousing and used 8" of threaded bar to hold it all together. 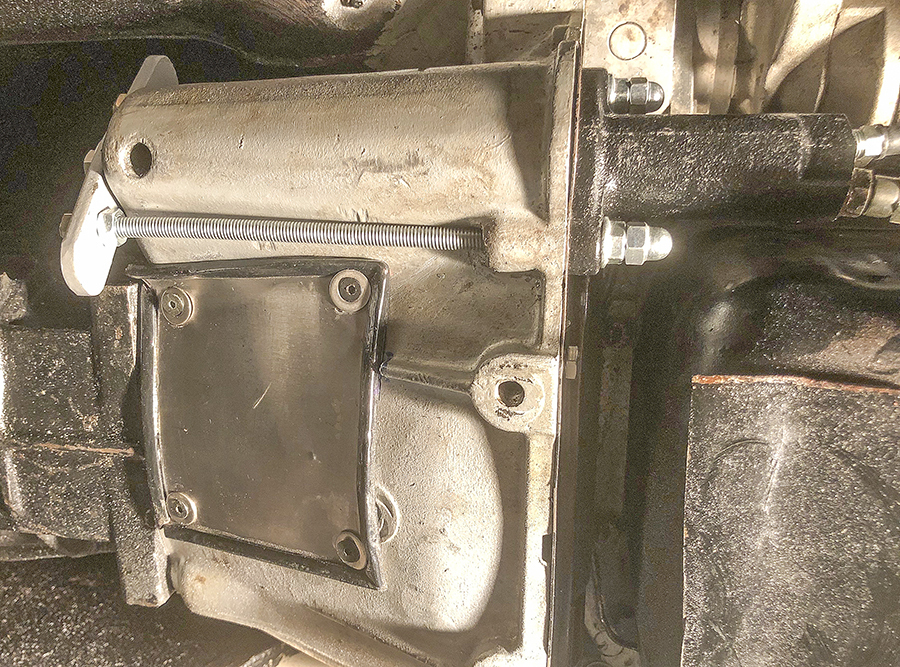 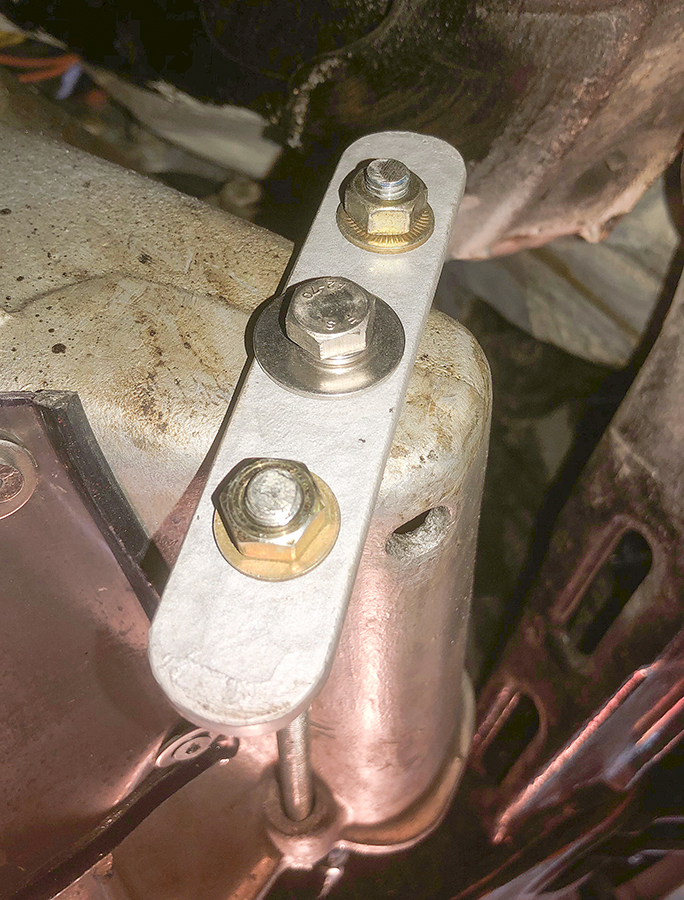 |
| |
Bib
|
|
|
|
|
|
|
May 23, 2019 12:27:50 GMT
|
|
Get some nylocs on there or some spring washers or it will come loose again.
|
| |
|
|
|
|
|
May 23, 2019 13:26:46 GMT
|
Nice work. I have a question. What is the material you've used to seal the hatch over the hole now. The stuff wrapped around the metal plate.... 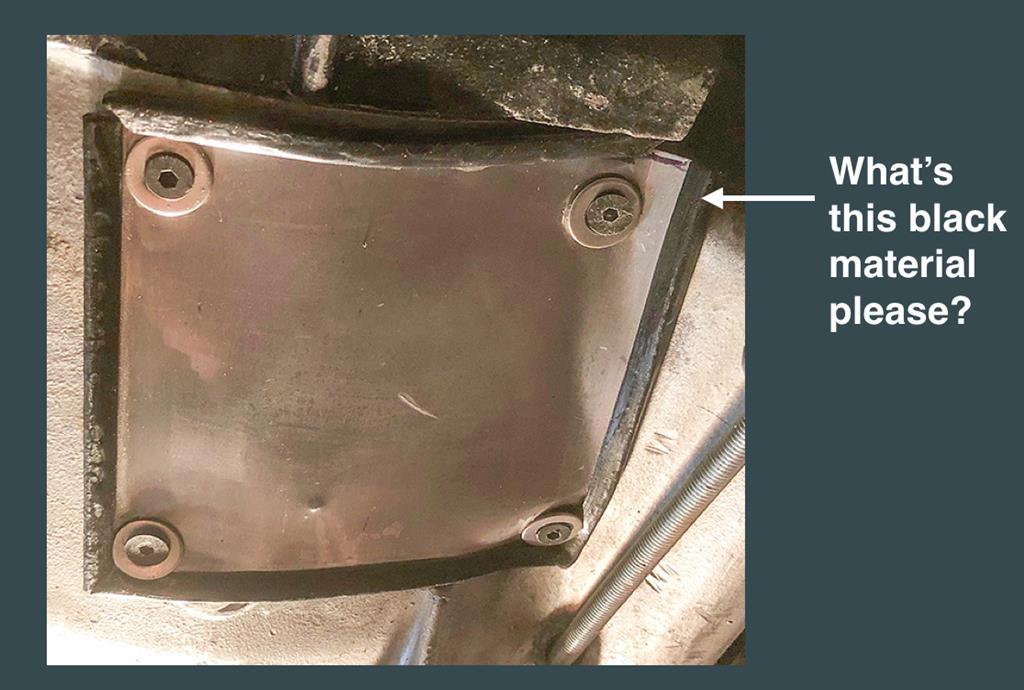 |
| |
|
|
|
|
|
May 23, 2019 17:02:23 GMT
|
Sugru!!  |
| |
|
|
|
|
|
May 28, 2019 23:00:50 GMT
|
Hi Quatermass, its square edge rubber U channel £2.10 mtr (TRMU1SQ) from www.carbuildersolutions.comI've had a bit of a setback the rubber boot on the clutch slave cylinder had split in half so I ordered a new slave, a genuine rover sdi part, all installed no problem. Tried self bleeding the system firstly by vacuum from the top reservoir, result floppy peddle. Second attempt sucking from the bleed nipple on the slave, result floppy peddle. Third attempt reverse flushing from the bleed nipple on the slave, result floppy peddle. Removed and compared the two slaves only to find the new one to have a 2mm bigger bore! Looks like the master cylinder which is an unbranded unit with a .7 bore is not big enough, I've now got a Wilwood .75 unit coming I really hope this will fix the problem. |
| |
Bib
|
|
|
|
|
|
|
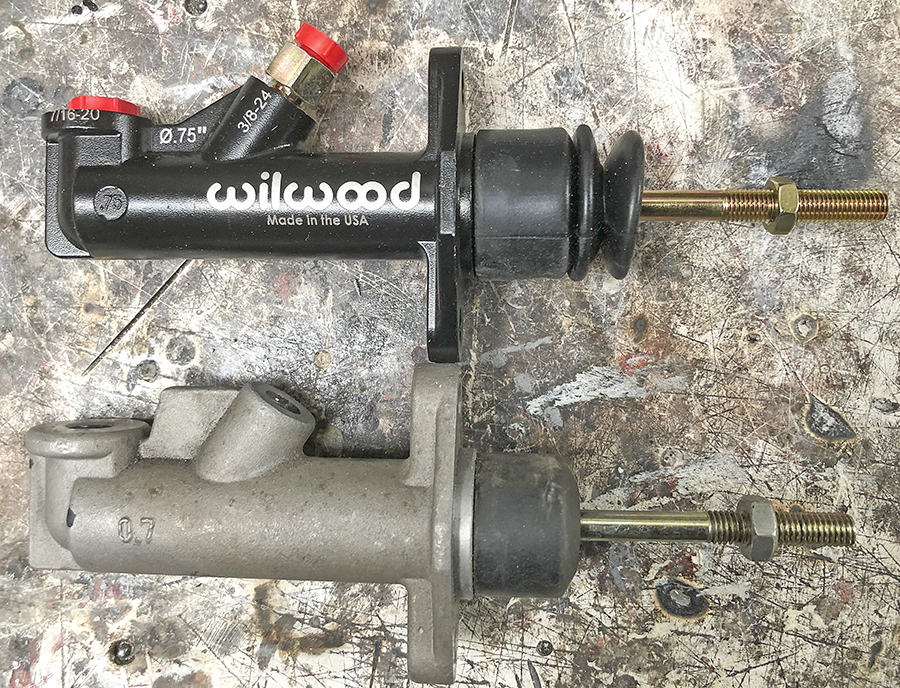 Another set back! My existing rod end won't screw onto the Wilwood thread, why? Because Wilwood is imperial and my existing one is metric. So while I'm waiting for the new rod end to arrive, I've had an idea. There are so many speed bumps around this area some bigger than others I need something to tell me if the front splitter will go over these humps or not. So my plan is this, I've made up a bracket which I've attached a micro switch to, and also extended the switch arm to project passed the front edge of the splitter by two inches. 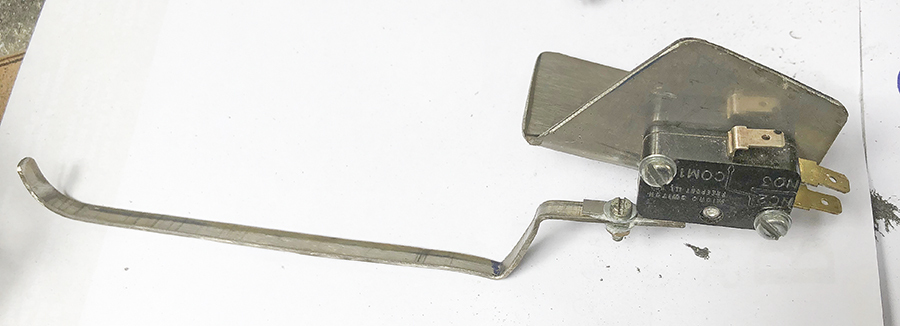 This in turn is bolted to the underside of the splitter, then in theory this will ride up over the speed bumps giving me hopefully enough warning to stop. 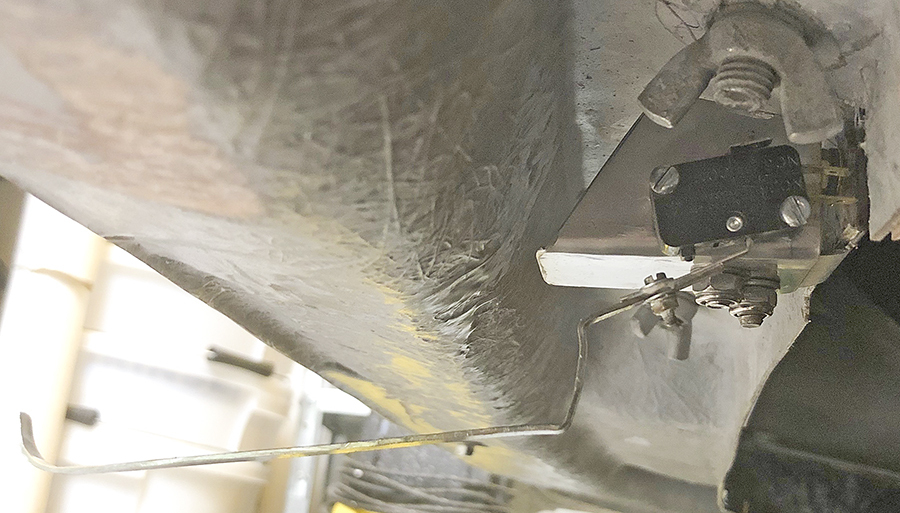 The warning system comprises of a buzzer and a secondary backup of a red warning light. 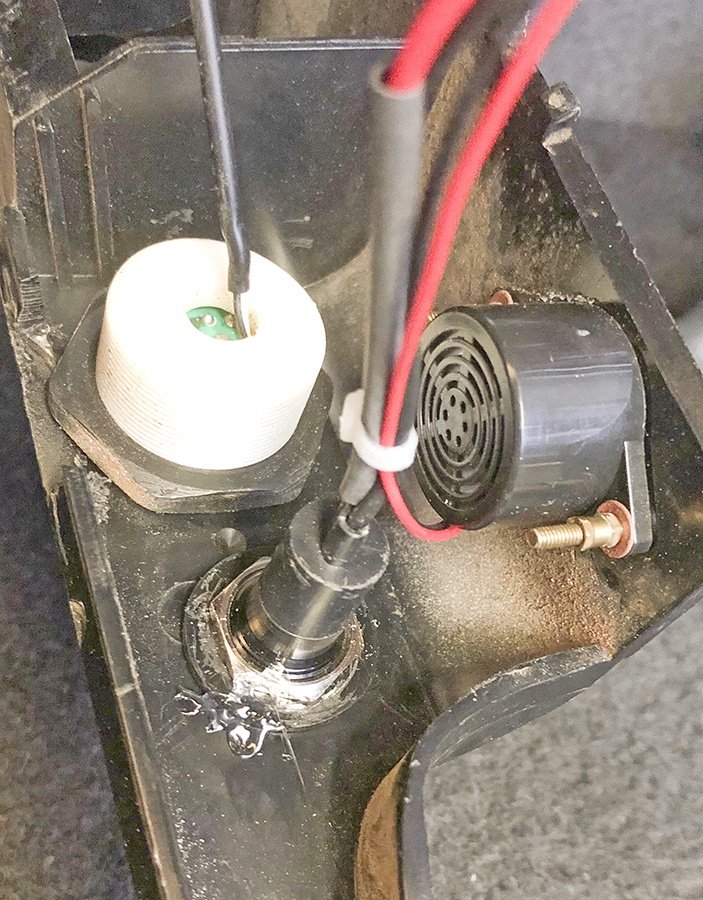 |
| |
Bib
|
|
|
|
|
Jun 10, 2019 19:21:56 GMT
|
|
Good news, the clutch is now working! The bad news, the brake pedal is really hard to push and I can't get the front brakes to lock up, tested the servo and that's fine. Looks like there's not enough vacuum to have the brake servo working fully so looks like I need a electric vacuum pump, this is never ending!
|
| |
Bib
|
|
|
|
|
Jun 10, 2019 23:08:50 GMT
|
|
do you have a one way valve on the vacuum line to the servo? and is it the right way round? just a thought
|
| |
|
|
|
|
|
Jun 18, 2019 22:16:28 GMT
|
Hi fiestaholic, yes to both those questions, good call though. When I put my foot on the brake pedal and then start the car the pedal does drop in height although only slightly so I know the servo is working and the vacuum gauge is only showing 16 - 18 hg. I believe this confirms a lack of vacuum,I'll soon know as the vacuum pump and fittings have all been ordered. Another problem has now risen, the fuel level sensor unit has now packed up! I've had problems finding a replacement so I've had to adapt one to fit. Fuel tank removed to aid installation. 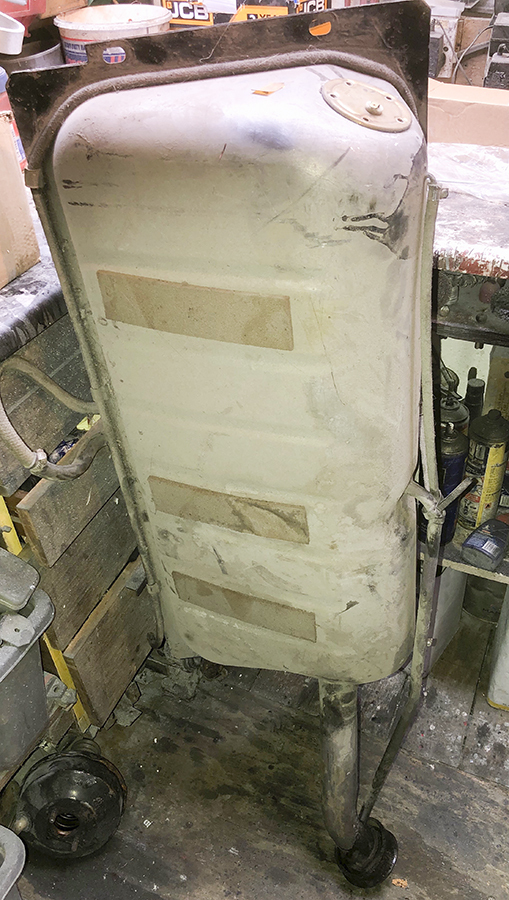 The new part is smaller than the original (new left, old right) 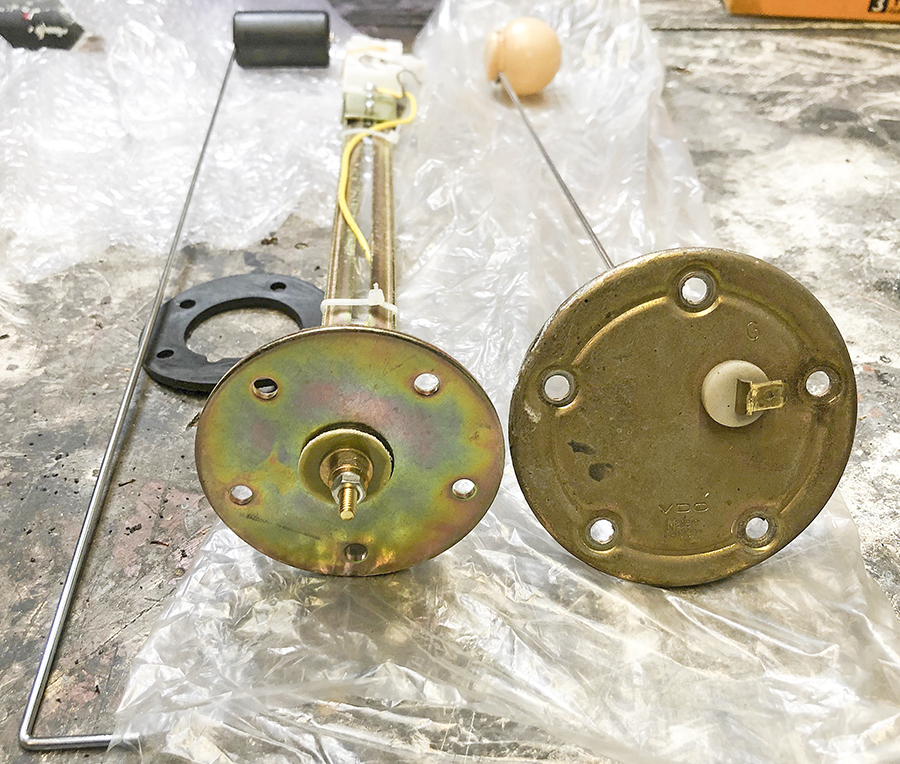 I've stripped out all the old sensor parts 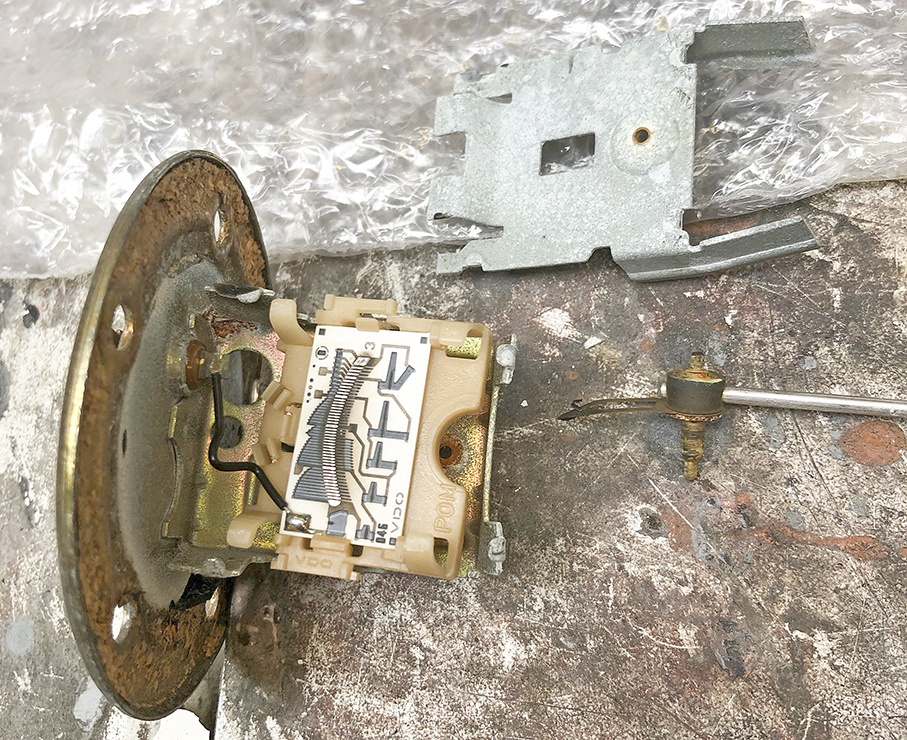 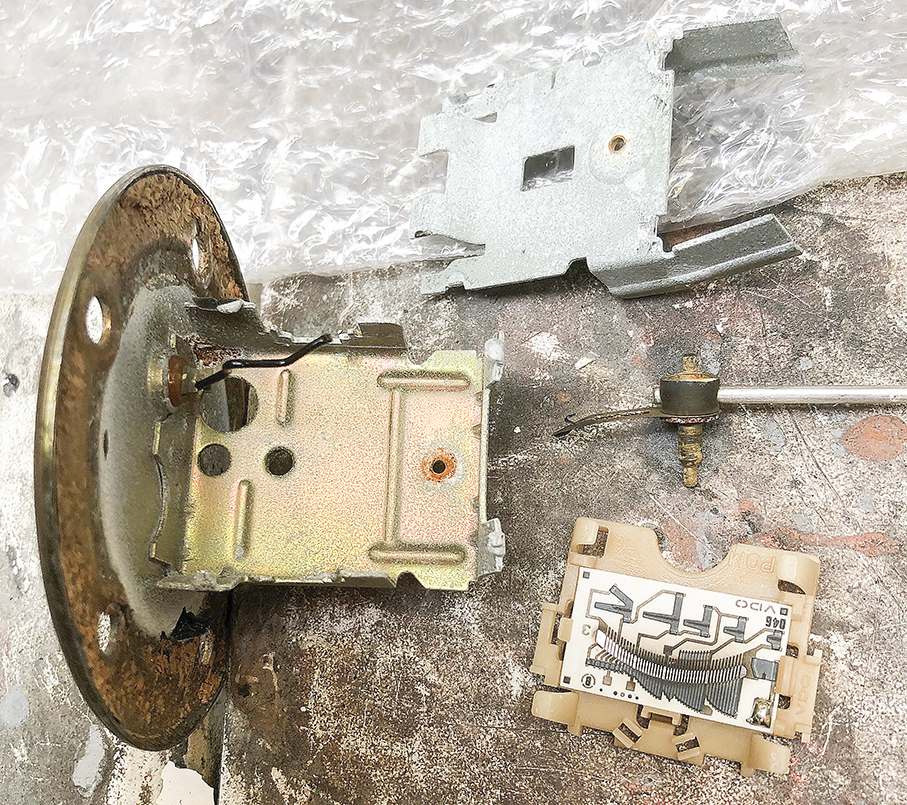 Removed the new sealing face plate. 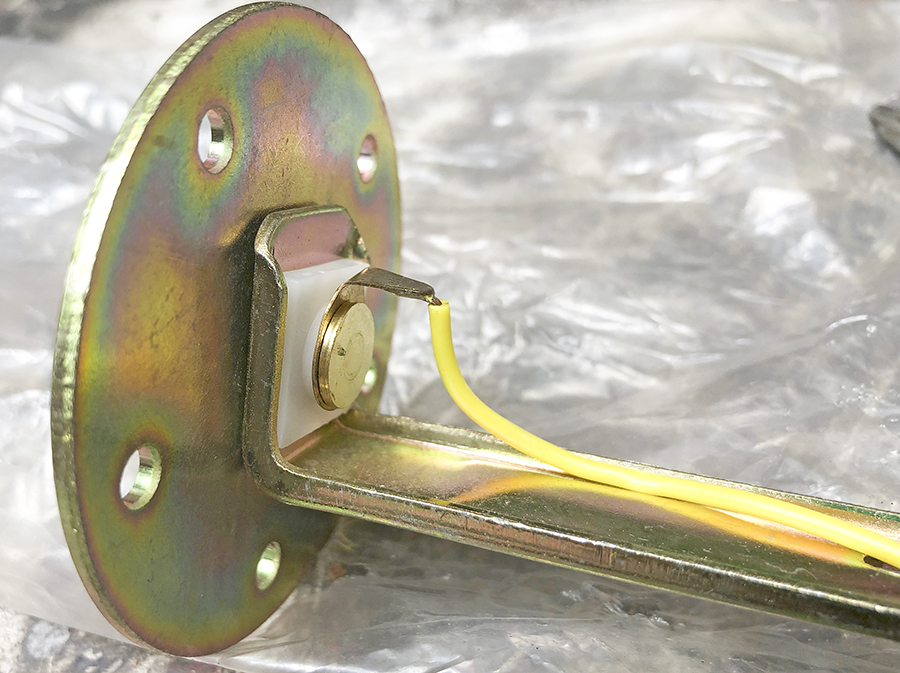 and welded it to the old face plate. 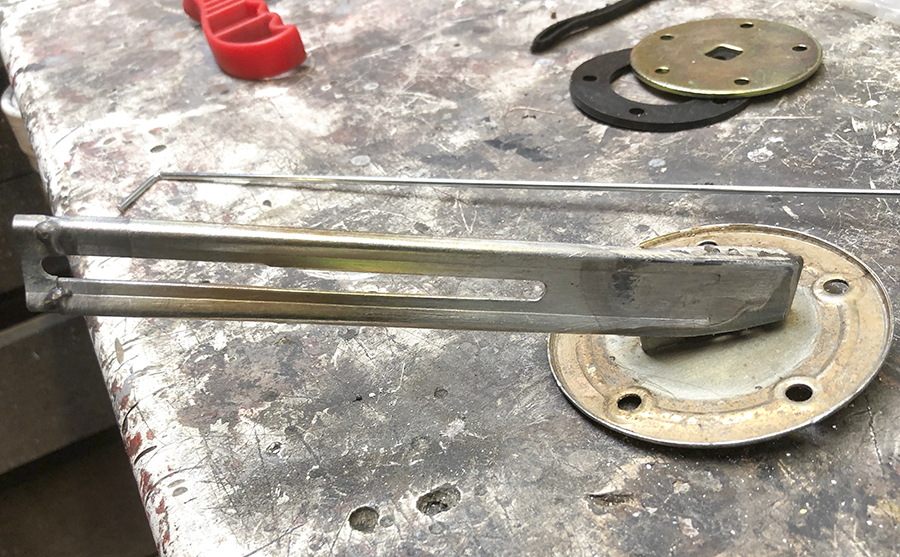 Reinstalled all the components works a treat. 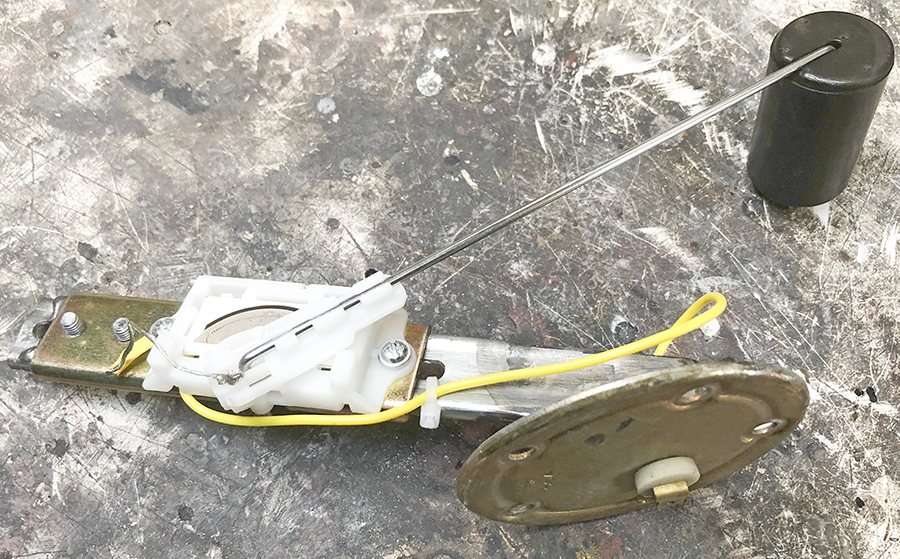 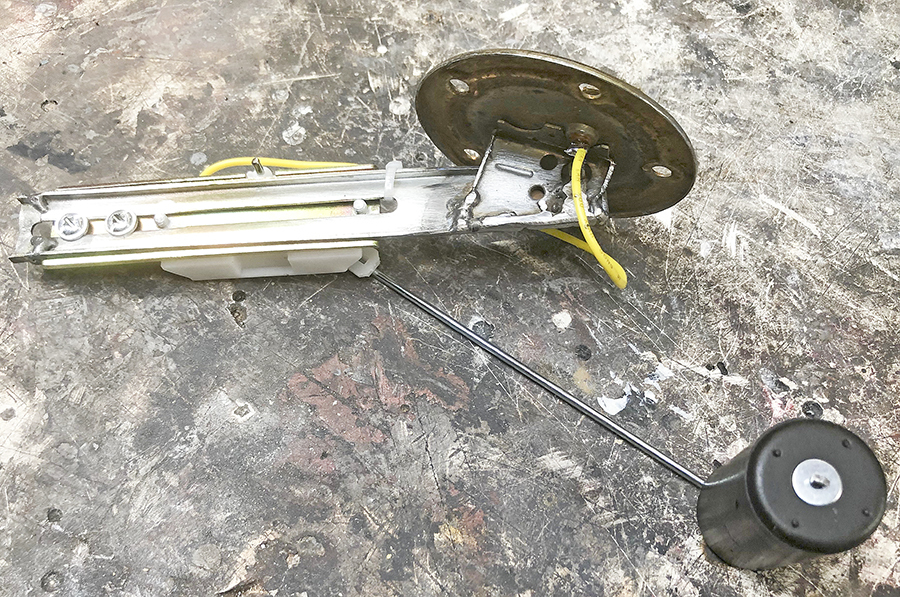 Out of interest I took a photo of the inside of the 33 yr old petrol tank not sure what I'd find, I was gobsmacked! 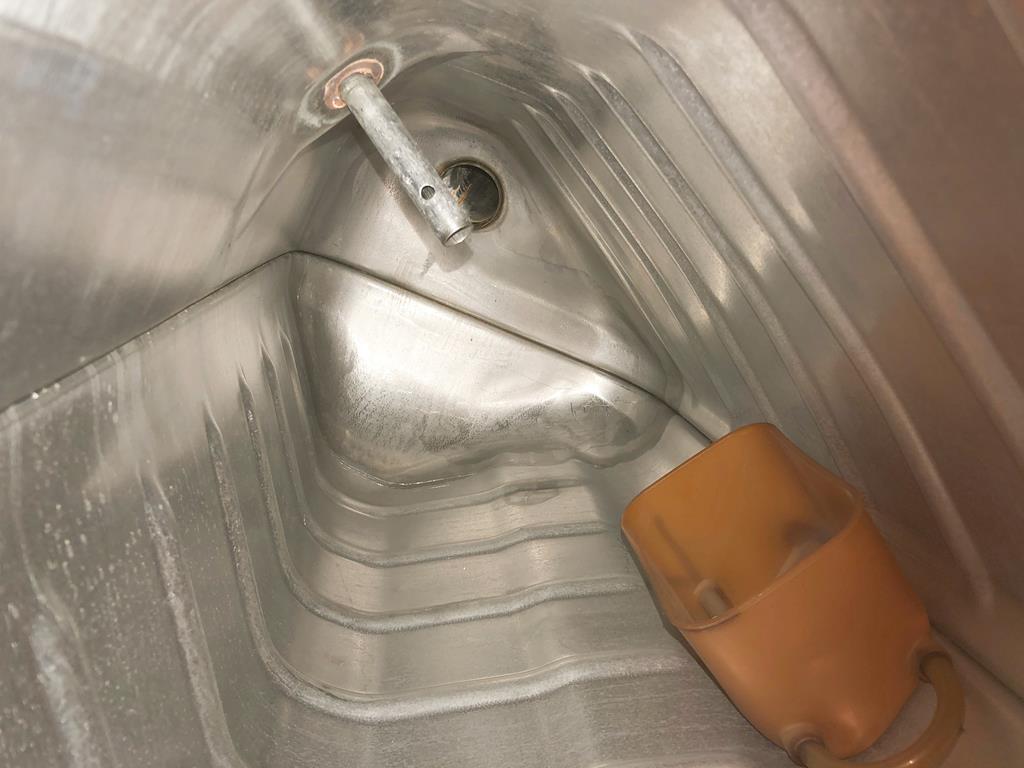 |
| |
Bib
|
|
|
|
|
|
|
|
Lovely work on this Manta. What vac pump have you ordered? I'd love to see the plumbing in of this, as I'm thinking of fitting one myself.
|
| |
|
|
|
|
|
|
|
Jun 25, 2019 20:46:35 GMT
|
Hi Petroholic, hope this helps. This is the pump I've order which should arrive next week! 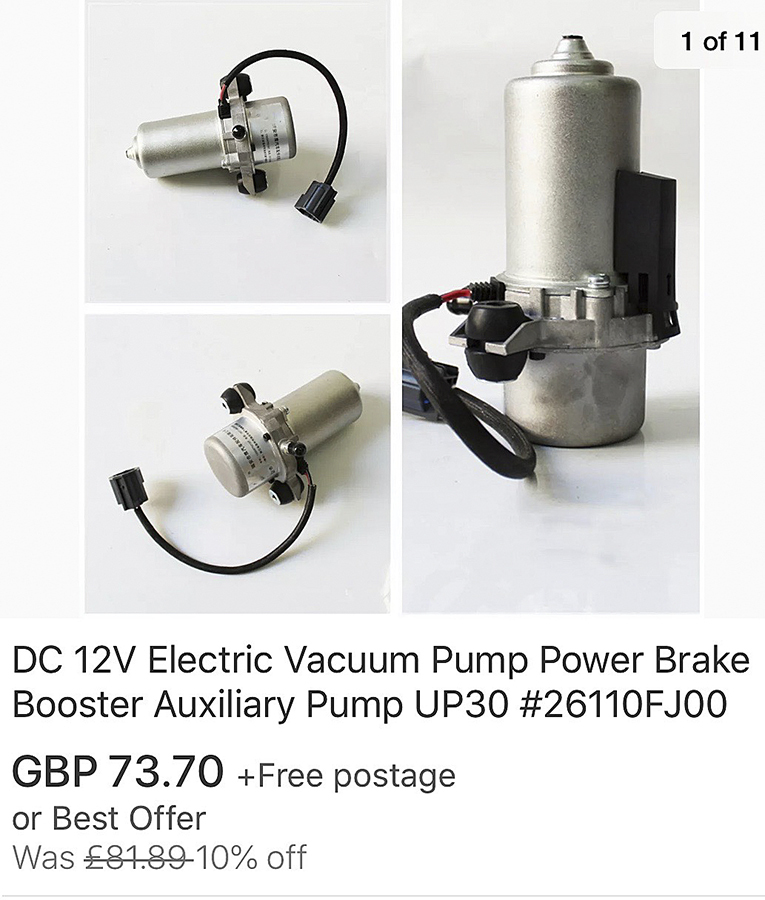 The vacuum switch is:- 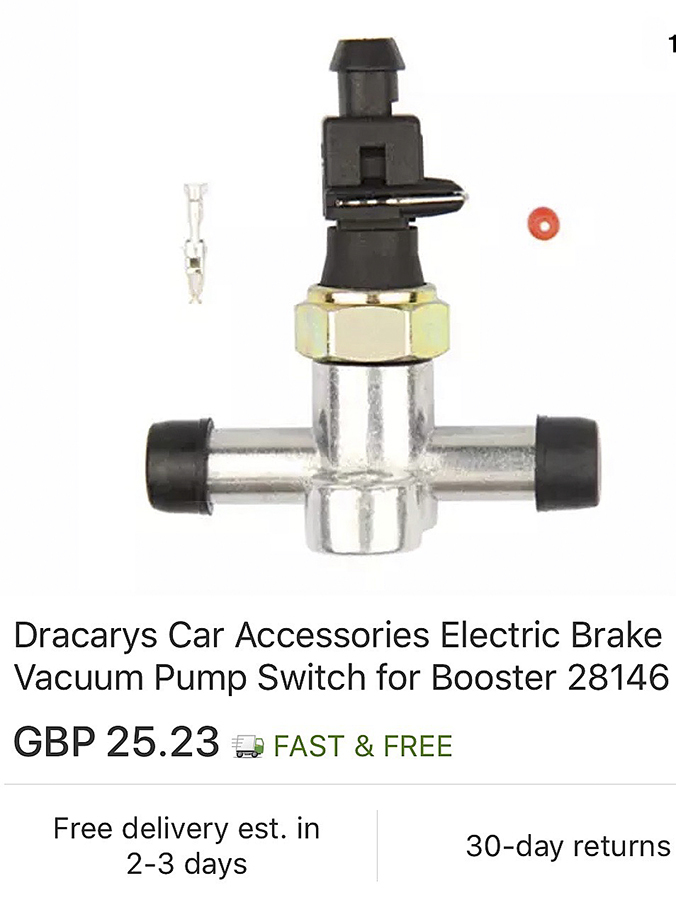 Managed to find dimensions to start making the brackets. 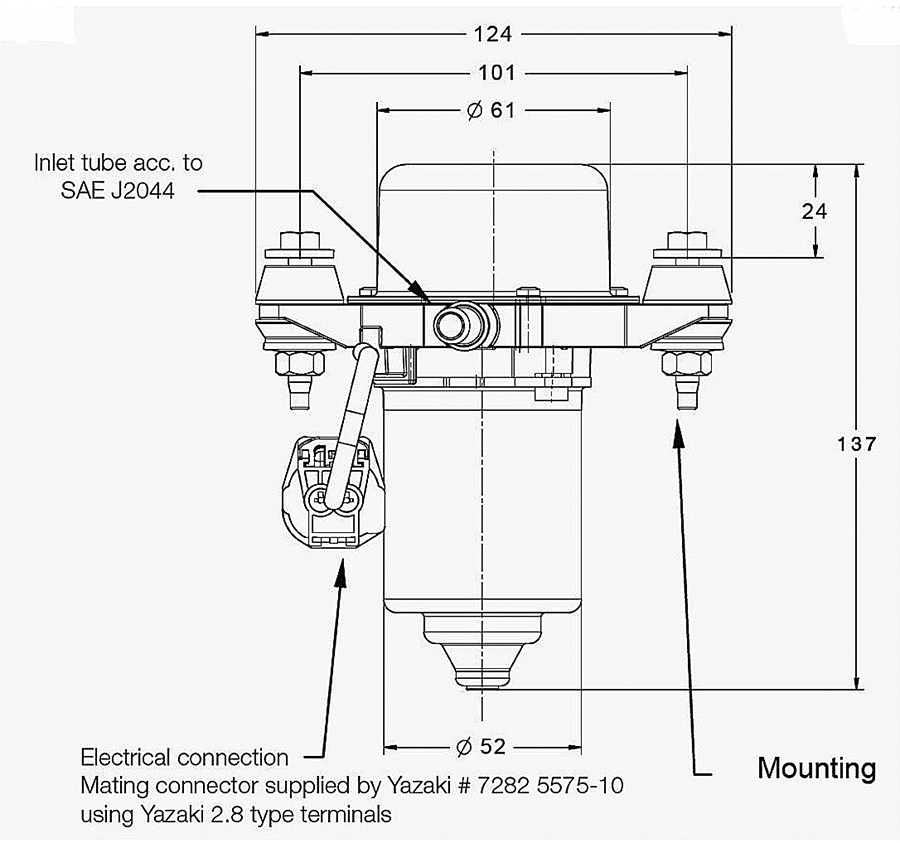 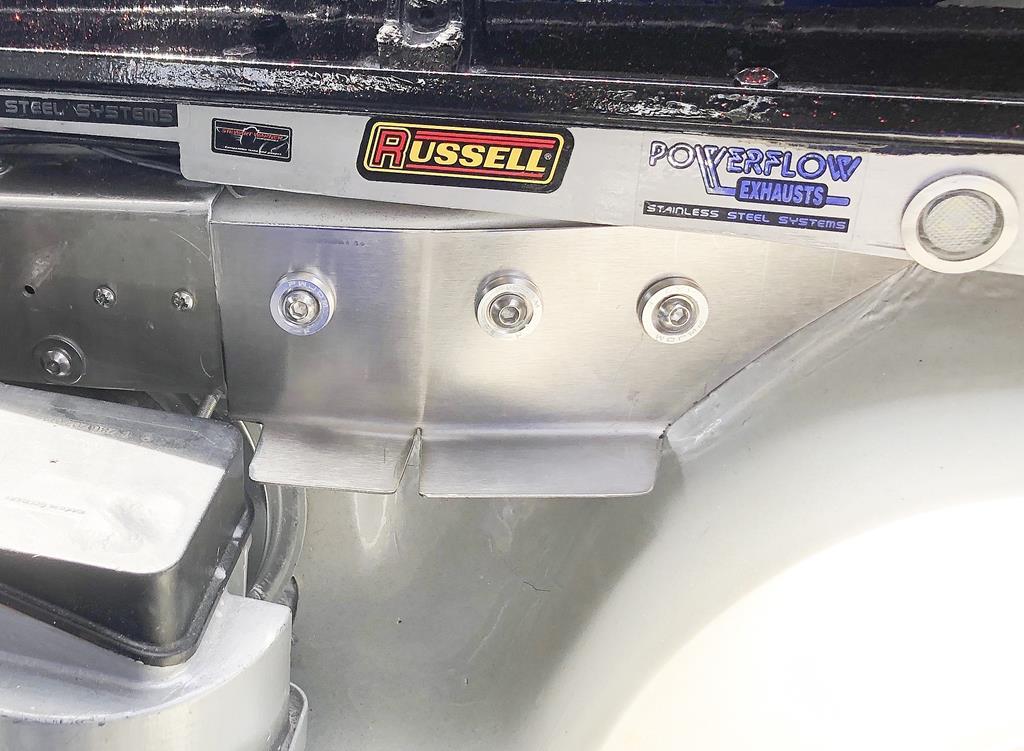 Started with installing the vacuum switch, which I've positioned above the Brake servo. 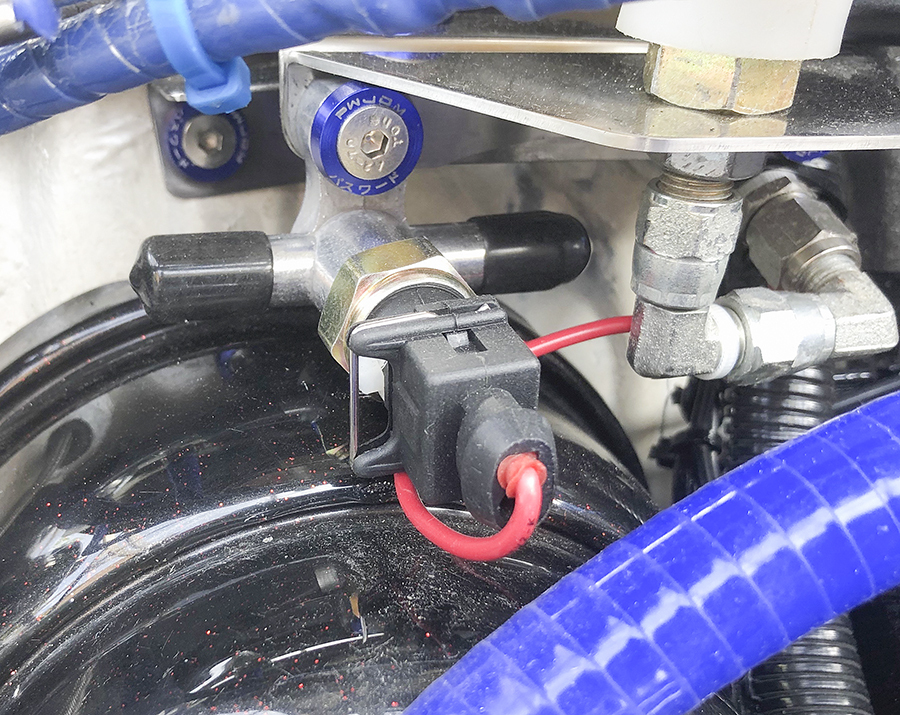 All the electrics are now installed and this is the schematics. 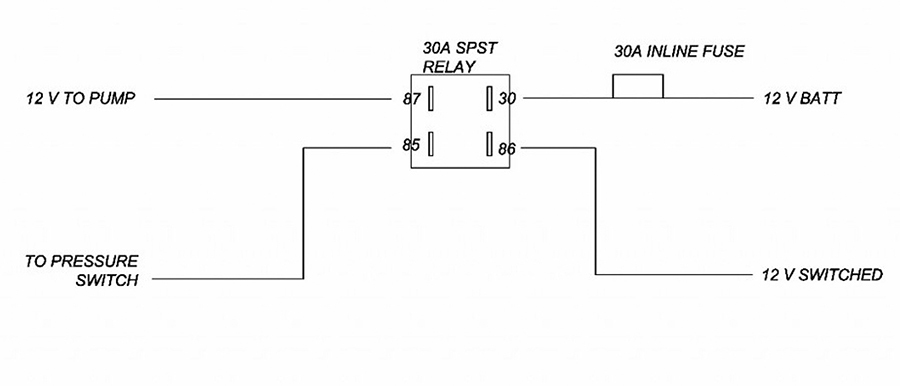 |
| |
Bib
|
|
|
|
|
Jul 15, 2019 20:11:35 GMT
|
Vacuum pump arrived, unfortunately it was damaged in transit! 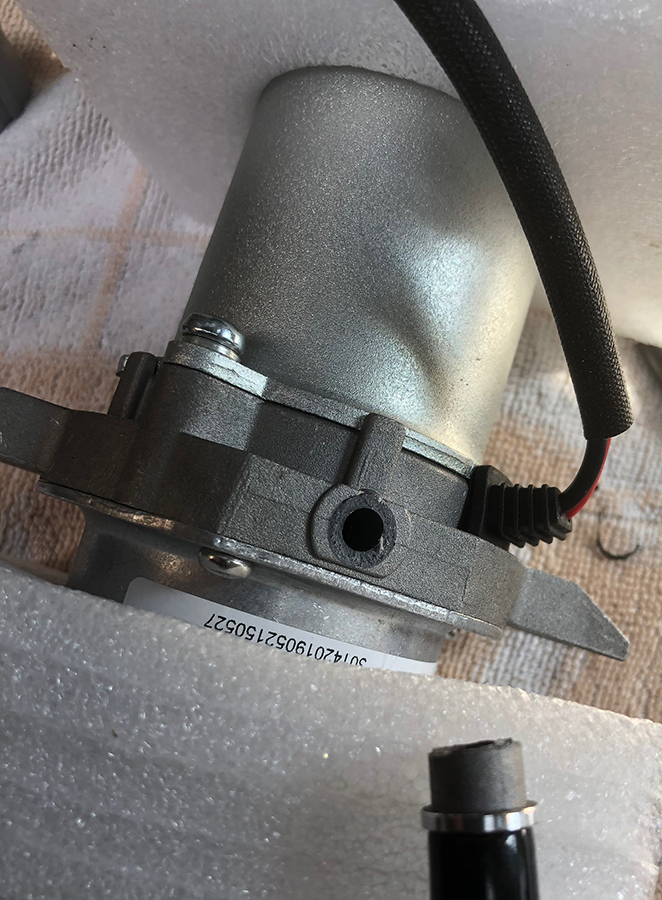 The vendor has kindly offered to send me a replacement. But I cant wait another 3 weeks so I've found a second hand pump from an VW Golf Mk4 1JO 612 161 1998 to 2004 £36 to my surprise its a lot smaller. 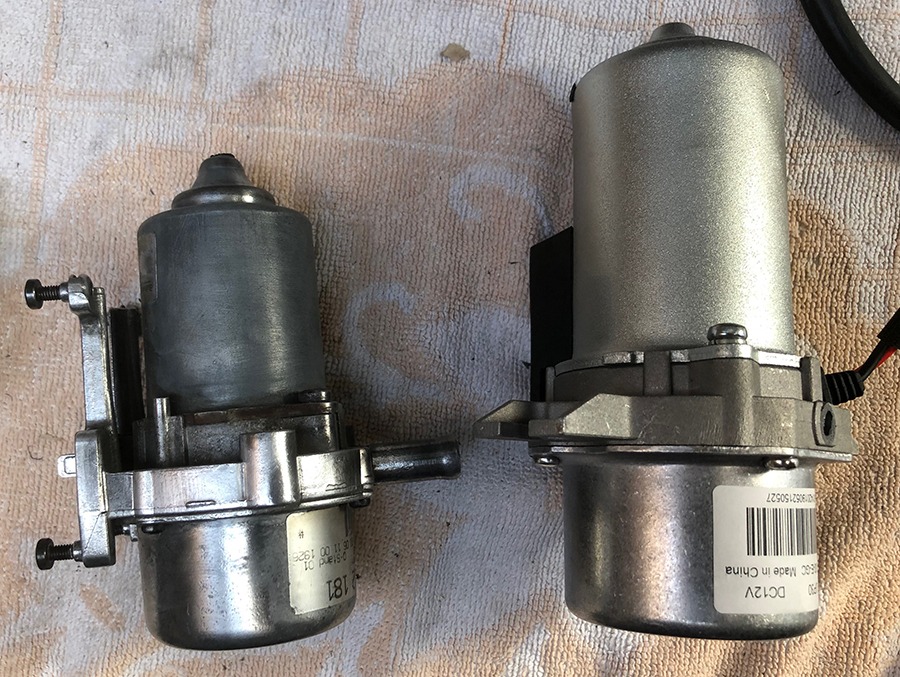 The first thing to do was to remove the control box on the side of the unit. 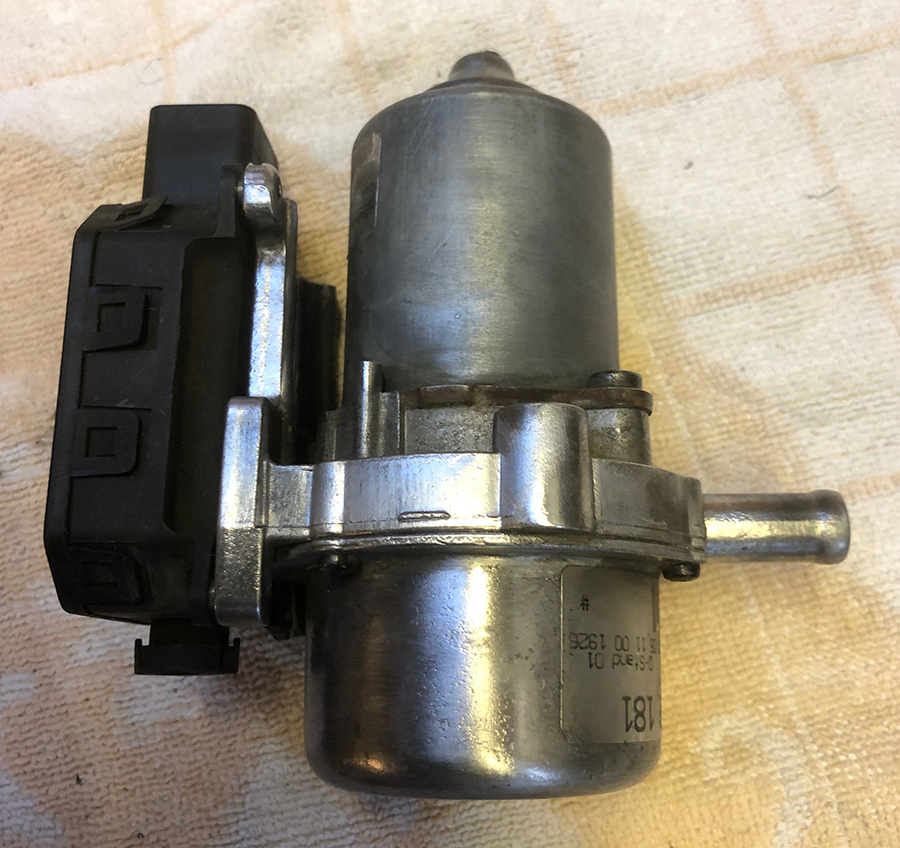 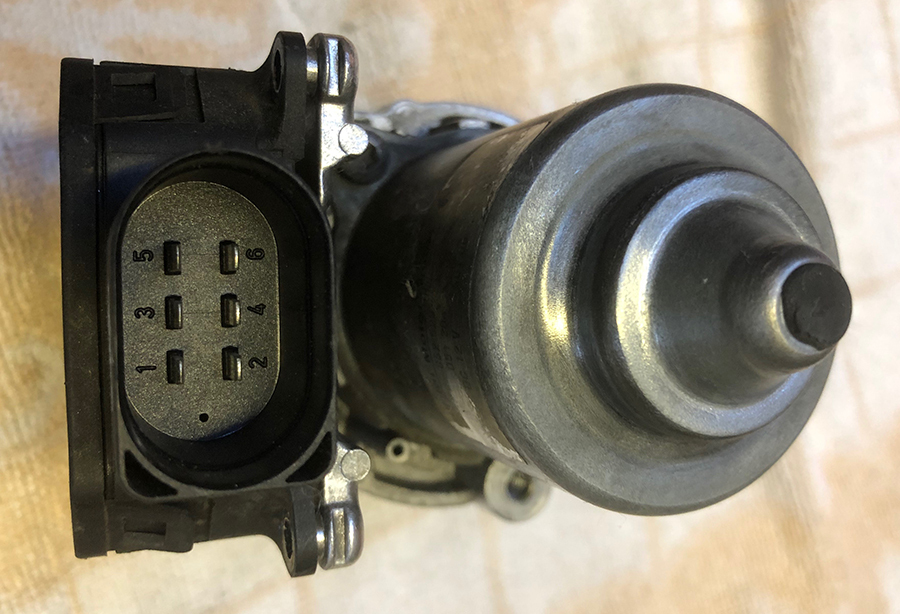 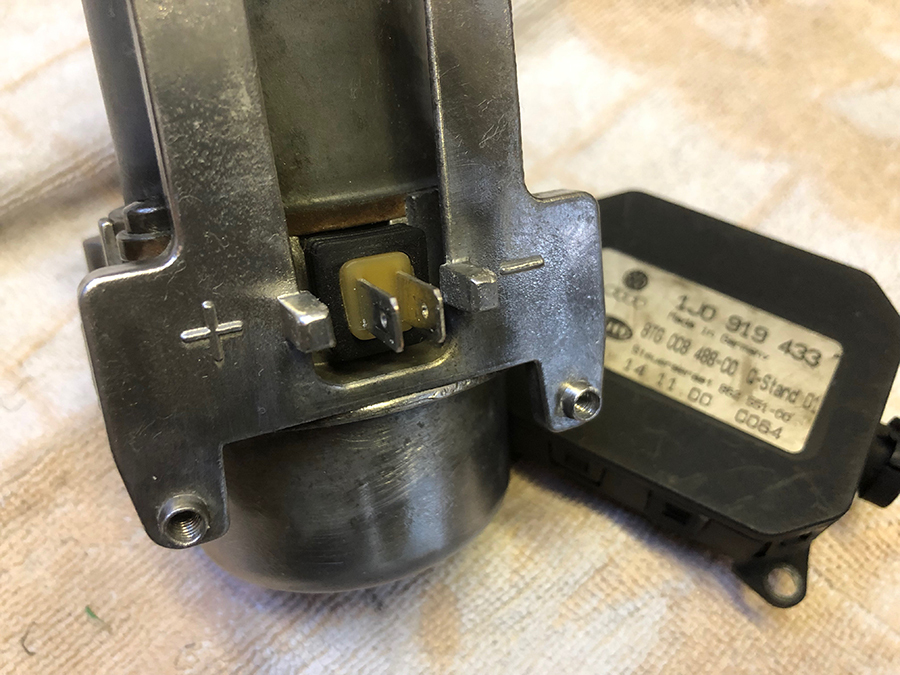 This has revealed the two terminals, once installed after having to re-engineer the bracketry due to the size difference and connected to the power source I moved onto to the pipe work. 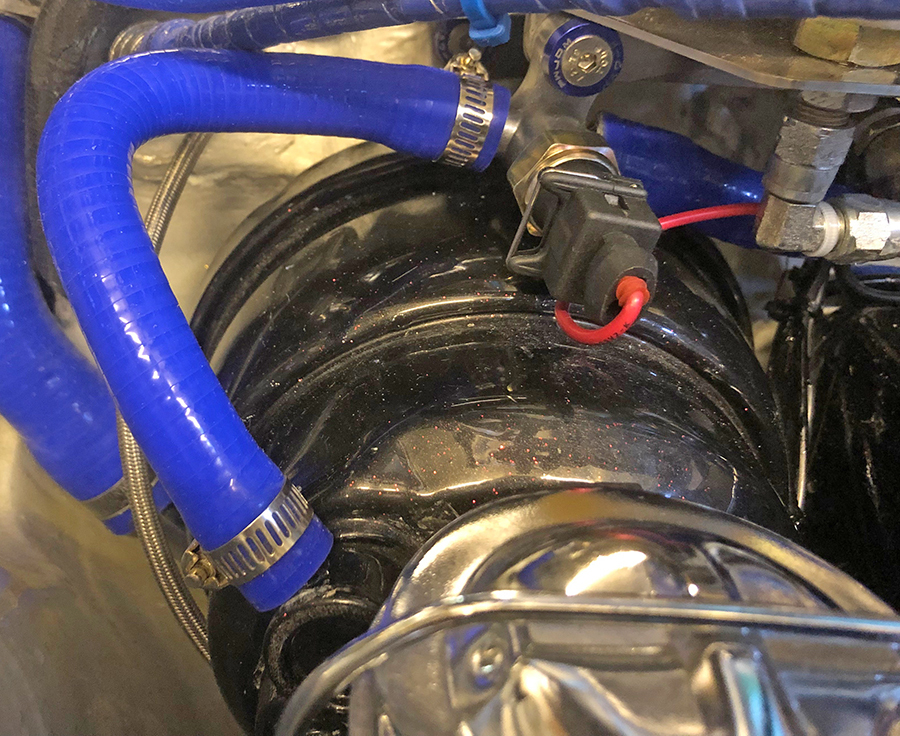 |
| |
Bib
|
|
|
|
|
Jul 15, 2019 20:16:55 GMT
|
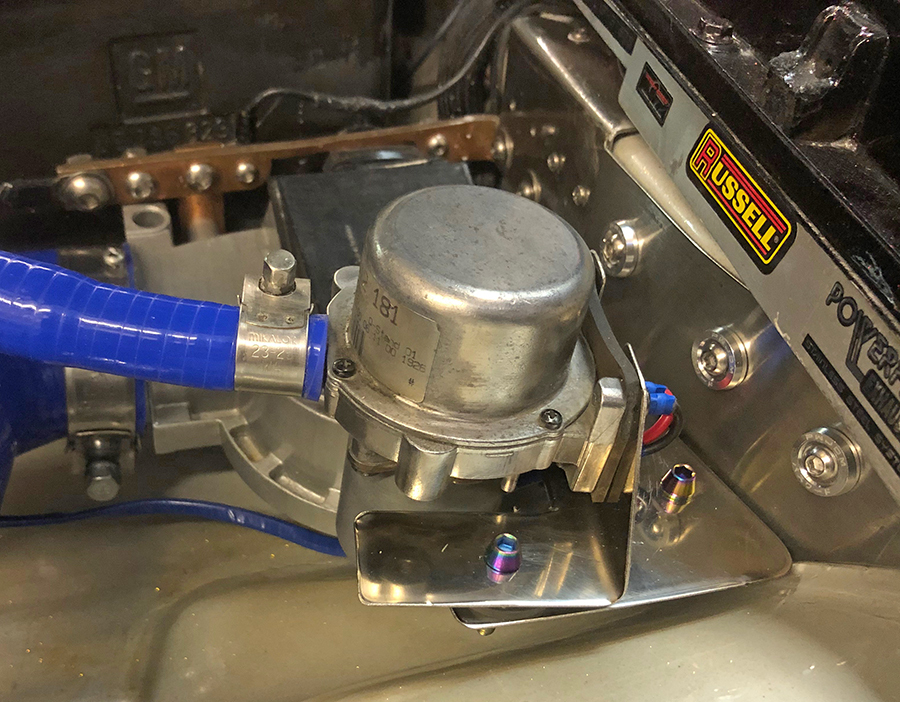 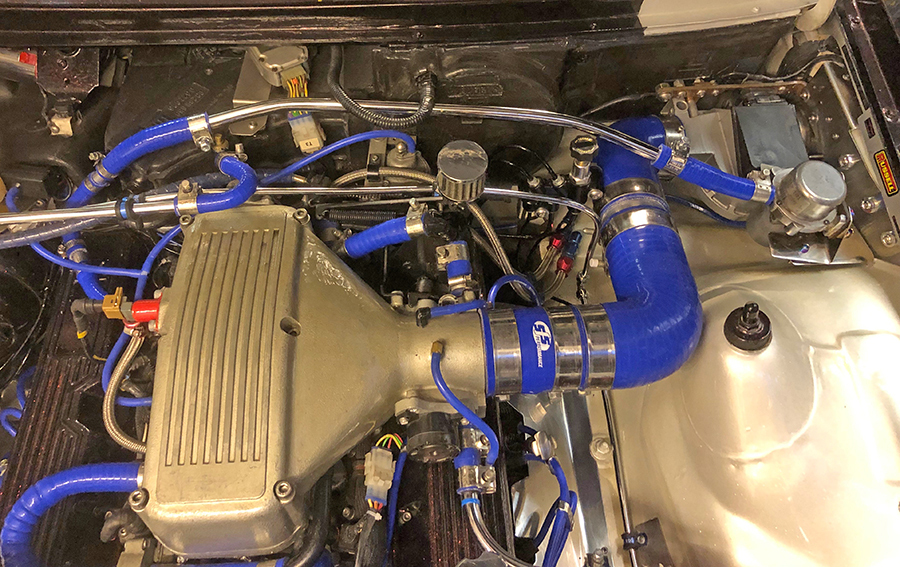 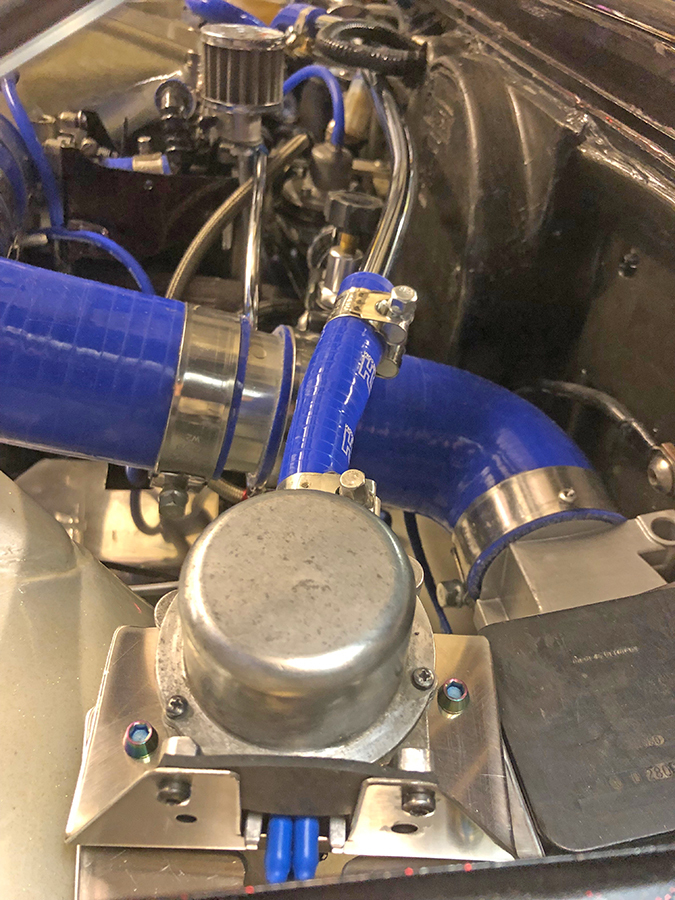 This has certainly made a noticeable difference but still I'm unable to lock up the brakes. Which leaves me with the peddle brake ratio dilemma. |
| |
Bib
|
|
|
|
|
Jul 16, 2019 12:13:08 GMT
|
|
Brake pedal ratio should be around 7:1. You can get away with less with a servo though.
I suspect your M/C is too big though. How does the pedal feel? is it rock solid but a bit 'wooden' or does it travel more and have a bit of 'spring'
|
| |
|
|
|
|
|
|
|
|
Hi blackpopracing, you’re right the master cylinder is to big. The pedal Ratio for the Manta is 4:1 with servo assisted. I’ve managed to drill a new pivot hole for the master cylinder to attach 20mm higher so the ratio is now 6:1 I’m not sure if I can increase this anymore.
What are your thoughts on changing the front brake callipers from two pots to four?
|
| |
Bib
|
|
|
|
|
Jul 17, 2019 12:31:57 GMT
|
|
4 pots might improve things - but if M/C is wrong then it's painting over the cracks.
You need to know the volume of the pistons in both front & rear brakes to get the correct M/C size. You need at least 1100 Psi to get effective disc brakes, if MC is too big then you won't be getting these figures and brakes will always be curse word.
EDIT,
4:1 is marginal with a servo but 6:1 is fine.
|
| |
|
|
|
|
|
Jul 17, 2019 15:18:31 GMT
|
|
Epic build and a very entertaining read!
I'd be interested to know more about how the V5, and insurance went once you finally got it on the road. How do you go about declaring all the mods?
Although all the ICE, the engine install, brakes and air flow work is very very interesting, i'm sorry but the top project for me has got to be that speed-bump splitter warning. That is pure genius! Does it work or don't you know yet due to the brake issues?
|
| |
|
|
|
|
|
Jul 31, 2019 13:12:26 GMT
|
|
Hi toast00
Thanks for the feedback appreciate it. Yeah the speed bump warning works a treat it’s saved me a couple of times!
On the brake issue I’ve ordered a smaller brake master cylinder 7/8” cylinder bore. Had to order it from the states, trying to find Wilwood parts in this country is ridiculous. Also noticed the rear near side brake Caliper was weeping, I had rebuilt the Caliper before I installed them, so the choice I had was to either send it of for a rebuild (£120) or purchase two new ones for £199, so I’ve opted for two new Ford Sierra rear Brake Calipers. They should be with me this weekend fingers crossed.
|
| |
Bib
|
|
|
|
|
|
|
Hi Toast00, sorry I forgot to answer your post. (I'd be interested to know more about how the V5, and insurance went once you finally got it on the road. How do you go about declaring all the mods?) Firstly I got the car mot tested at my friendly garage so they could see the rebuild and asked them for a headed letter from them stating the cars registration, chassis number, the new engine number and capacity. This I sent to the DVLA along with a receipt for the purchase of the engine which happened to be 20 yrs ago! I got the updated details back about a month later , no problems.  Now the insurance I was dreading 😟 but I went with A-Plan ins. Limited 5k mileage, fully comprehensive all mods listed for £220! Result! To say I was pleasantly surprised 😮 would be an understatement. |
| |
Bib
|
|
|
|
|
|
|
|
Callipers have arrived, painted and installed as have the Wilwood master cylinder. What a vast improvement, finally! Will post photos when I fix/install new hard drive to computer 🤬
Took car for its MOT last week passed the emissions with lower readings from the previous year, engine must be settling in ok. Then they checked the lights and left everything on, high beam, fogs, hazards, driving lights then the engine fan started up, the outcome of this was the battery couldn’t take it and died. Jumped the battery but wouldn’t hold any charge so had to abandon the test until I installed a replacement. All passed now hurrah! 😁
|
| |
Bib
|
|
|
|


