autojumbled
Club Retro Rides Member
Posts: 226
Club RR Member Number: 106
|
|
Sept 5, 2017 17:05:45 GMT
|
Was looking for a sensible diesel for the 140 mile daily commute when I bumped into an old mate in the Co-op. He knows of my love affair for 90's Japanese go-fast tin and promptly dragged me over to his place to show me a Celica GT4. The rest is history. It may have been owned by Barry prior to my ownership as it had some questionable modifications that I promptly reversed. The stickers, wheels, manual boost controller, dodgy fuel cut device, and Bailey's dump valve all binned in favour of back to standard or something a little less horrid-looking. Picking her up: 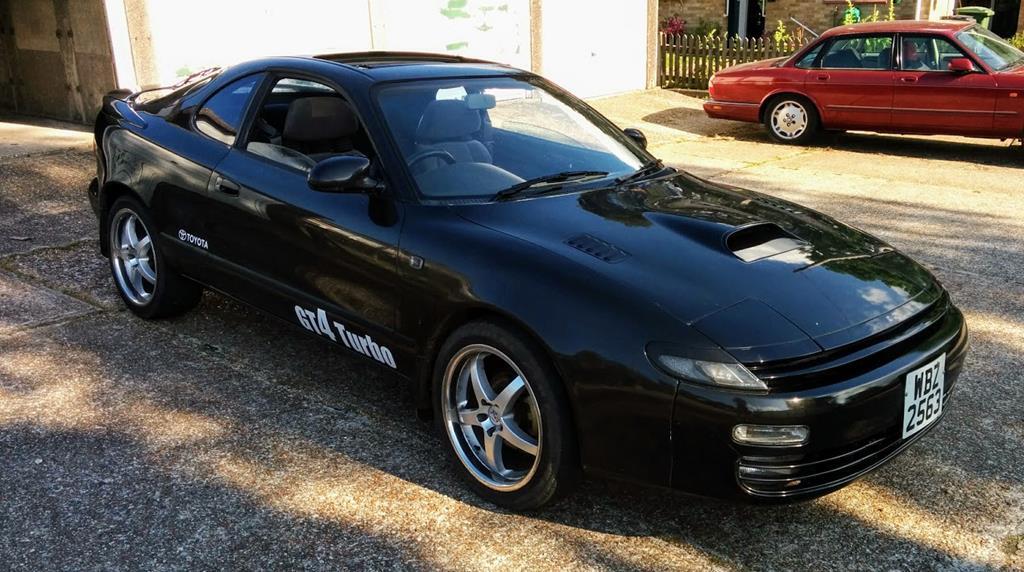 Aside from the wheels and non-original stickers, it looks alright in the photos! What you can't see is the lacquer peel which is affecting almost every panel, as well as the front wings have had a bad respray in the past. Looks ok from a distance! The underside not so much though: 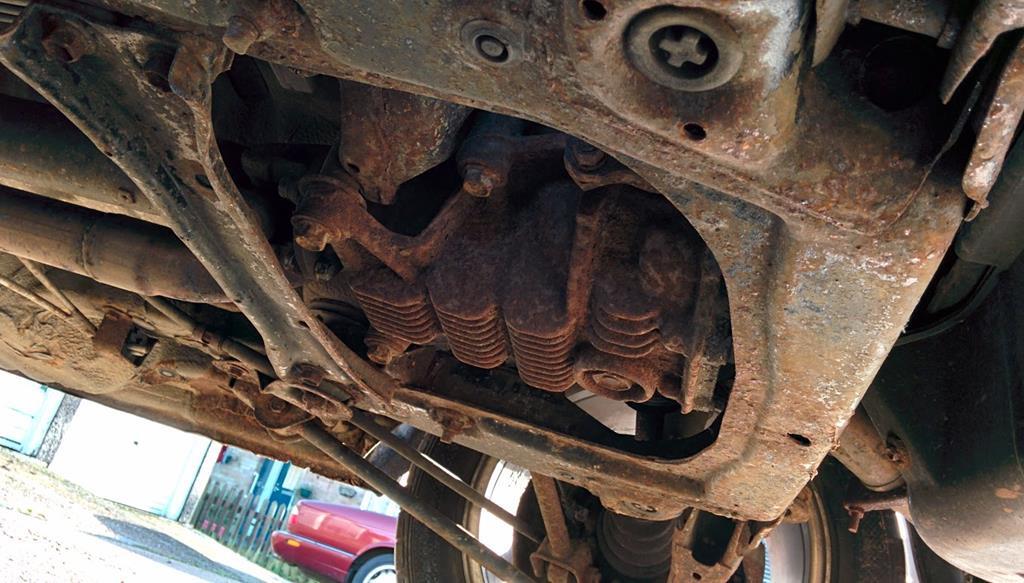 Upon closer inspection all the rust turned out to be surface only, mostly on bolt-on components. The underside metal and load-bearing sub-frames etc are all intact. and how it looks after putting 'back to standard' and driving it for a bit before the MOT expired: 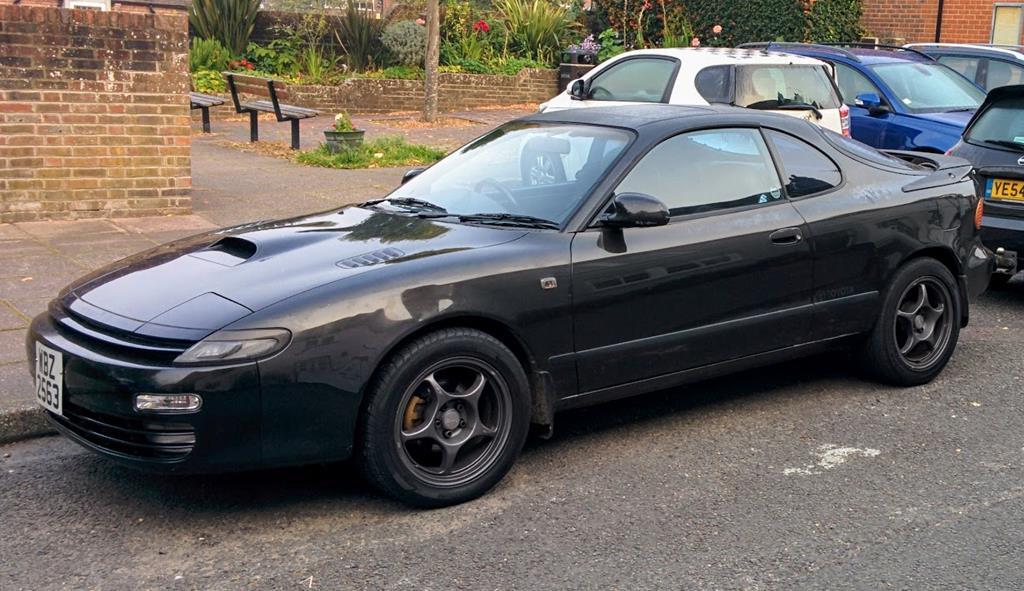 More info on what I've done to it over the past couple years coming up...........hint, it involved lots of time sitting on axle stands.  |
| |
Last Edit: Sept 5, 2017 21:17:26 GMT by autojumbled: played around with image tags
|
|
|
|
autojumbled
Club Retro Rides Member
Posts: 226
Club RR Member Number: 106
|
|
Sept 5, 2017 17:09:54 GMT
|
|
Hmm, images uploaded direct to RR don't display - updating links to link direct to google photos....
|
| |
|
|
|
|
|
Sept 5, 2017 18:32:37 GMT
|
|
I love these Celica's and the shapes before it. Regarding photos, on some forums I have switched to using Imagebb as an easy way to share photos.
|
| |
|
|
|
|
|
|
|
|
I bought the same car for my son as first car. A great car till he wrote it of....
|
| |
|
|
autojumbled
Club Retro Rides Member
Posts: 226
Club RR Member Number: 106
|
|
Sept 6, 2017 11:07:04 GMT
|
I spent a few months driving the Celica before the MOT ran out. Gave me an opportunity to get a feel for what jobs would need doing on it and what i'd like to change. During the obligatory oil & filter change, spark plug change, and compression test I removed, painted and replaced the rocker cover. This resolved an oil leak from the rear of the engine from worn rocker gasket (and loose fixings!). I've gone for a fetching VHT anodised purple: 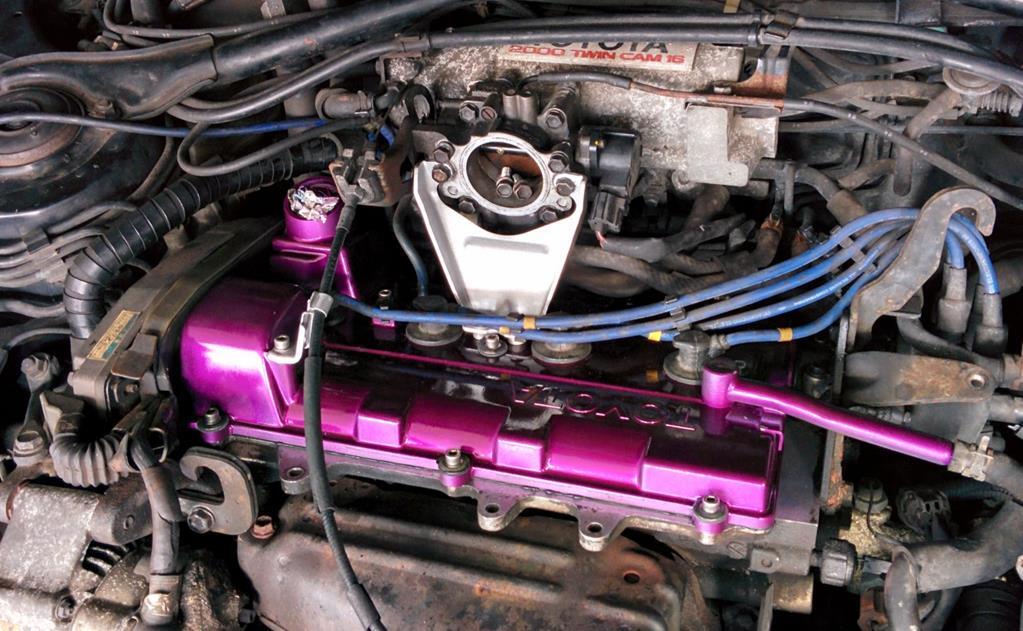 Once the MOT expired, there was no way it was going to pass as it was. In fact, I'm fairly confident it must have scraped through the previous MOT. I mean take a look at the exhaust! 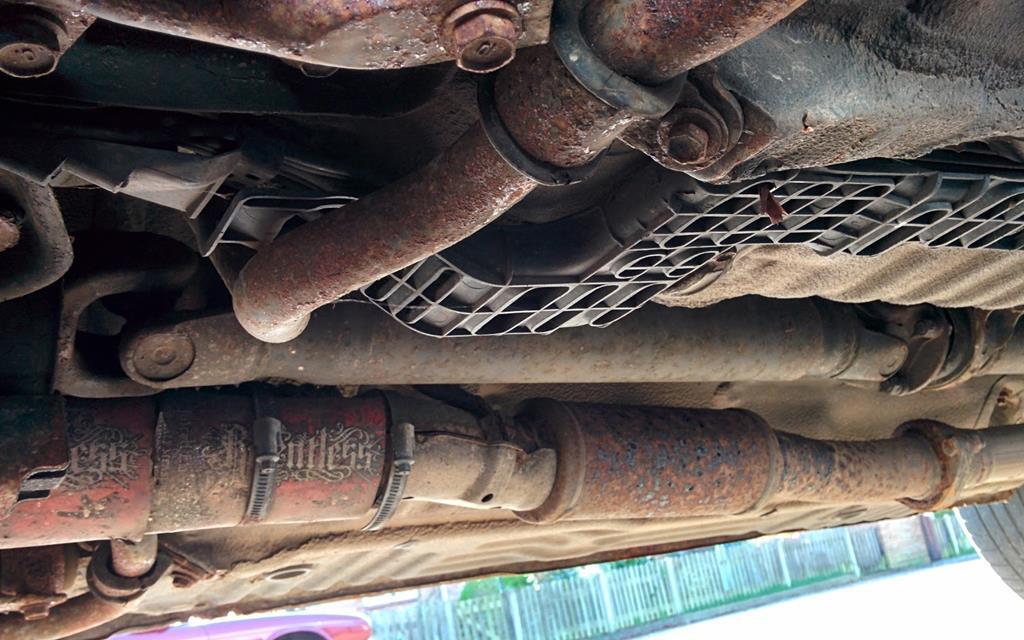 Took the opportunity to start de-rusting and got to ripping parts off.... 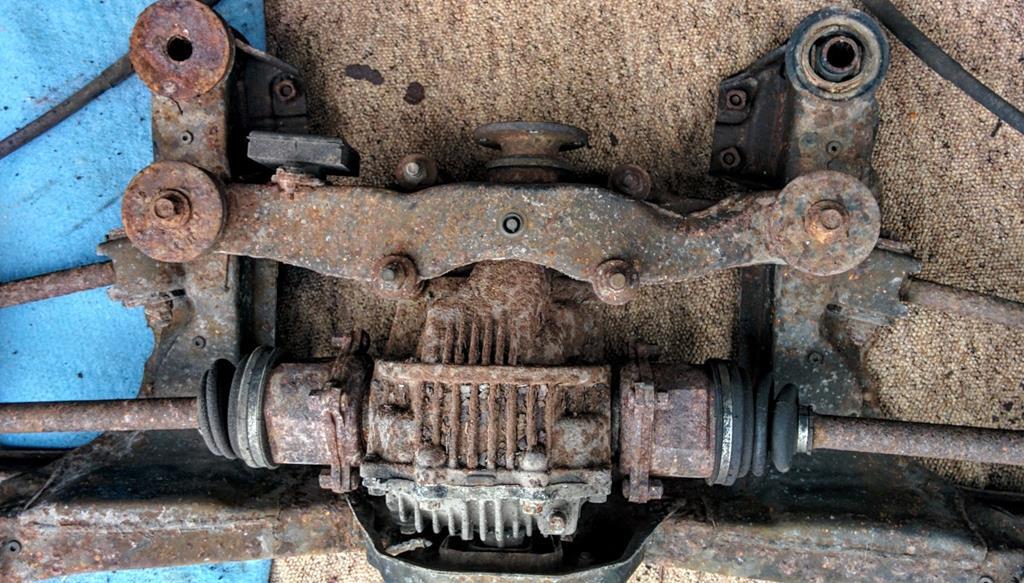 After plenty of wire wheel action and then a bath in de-rusting stuff, the rear diff and sub frame came out quite nicely: 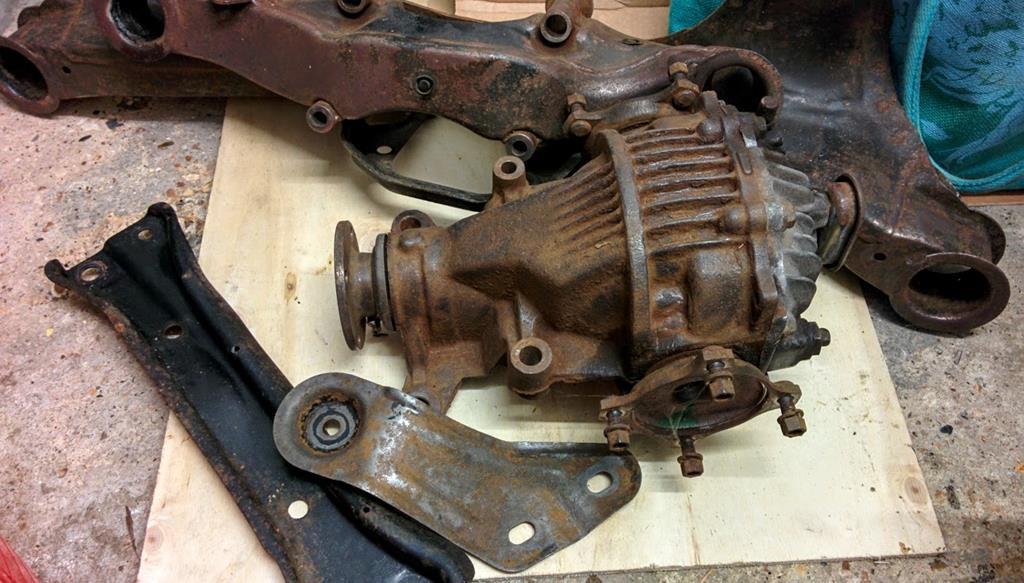 Grabbed some new poly bushes from BRD and painted both the sub frame and the diff. It then must have taken me about 3 months or so before I got anywhere near to bolting all back onto the car! Moving house and all that jazz meant the Celica took a back seat but the new house meant a new garage (a small one but attached to the house this time)... 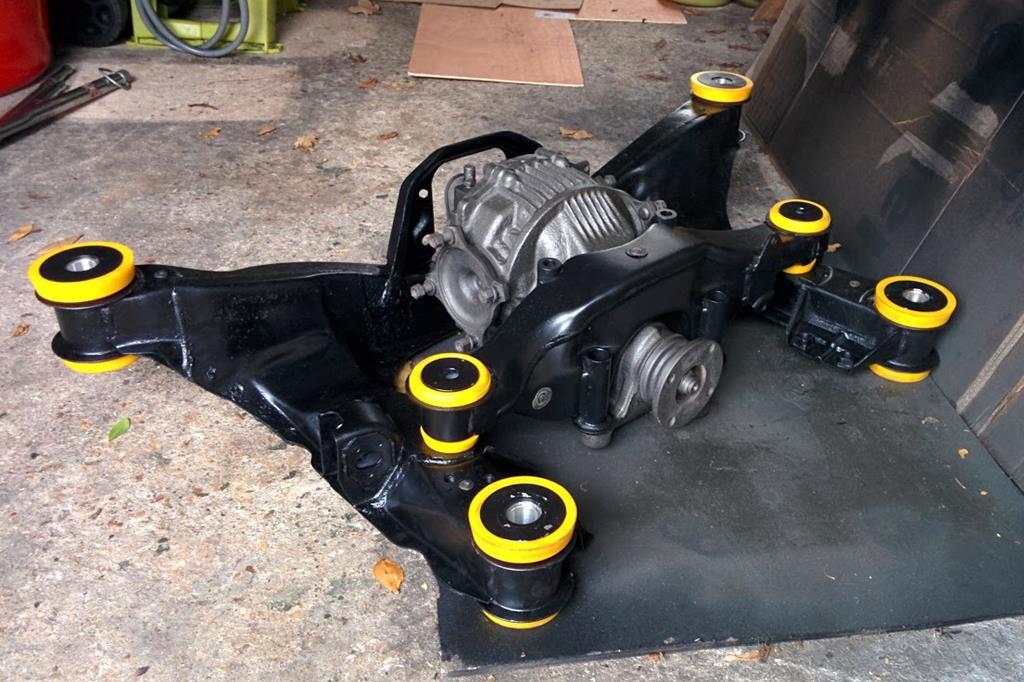 |
| |
|
|
|
|
|
Sept 6, 2017 13:22:58 GMT
|
and how it looks after putting 'back to standard' and driving it for a bit before the MOT expired:  This looks great on those wheels. Even the square numberplate looks right |
| |
|
|
autojumbled
Club Retro Rides Member
Posts: 226
Club RR Member Number: 106
|
|
Sept 6, 2017 13:56:37 GMT
|
This looks great on those wheels. Even the square numberplate looks right Thanks. Can't go wrong with a set of old Enkeis! |
| |
|
|
|
|
|
|
|
|
Looking forward to watching the progress on this.
I still think these are great looking cars, they've got quite a unique style and I love the front grille.
Enkeis look great, much better wheel/tyre ratio.
|
| |
|
|
|
|
|
Sept 7, 2017 11:00:13 GMT
|
|
I absolutely love these cars. Definitely keeping an eye on this one. The repair job on that exhaust is shocking!
|
| |
F503 FRM - MK2 Ford Fiesta - (Mo Filla, No Thrilla)
T527 LCJ - S2 Peugeot 106 - (Donor car for an AX GTI - scrapped)
CA57 GWP - MK6 Fiesta Zetec S - (Daily derv go-kart)
|
|
Geordie
North East
Course I'm out of my mind...........it's dark and scary in there!!
Posts: 2,520
|
|
Sept 7, 2017 11:49:55 GMT
|
|
|
| |
CURRENT FLEET
'95 Rover 623SLi (65k miles)
'99 Renault Laguna Executive
'55 BMW 318i (52k miles) for sale
'06 Audi A6 (18 year old 'modern' daily)
|
|
|
|
autojumbled
Club Retro Rides Member
Posts: 226
Club RR Member Number: 106
|
|
Sept 7, 2017 15:59:07 GMT
|
Nice RC! Body work on mine will never look as good as what yours did but then I've never been one for form over function...  |
| |
|
|
autojumbled
Club Retro Rides Member
Posts: 226
Club RR Member Number: 106
|
|
|
|
Continuing in the direction of bringing the Celica up to being MOT-ready whilst at the same time cleaning up some bits, I decided to book it in for a bunch of jobs that let's face it, non-one wants to do in their garage at home. Took it to Barry at South Coast Workshop in Emsworth (Portsmouth) as he comes from a Celica background and knows his way around them. He firstly stuck it on the ramp and I asked him to poke and prod and advise on whether it needed any metal work doing underneath or on the sills. Everything actually came back ok. Just surface rust to worry about and a previous sill repair that wasn't pretty but was doing the job. Nothing I didn't already know about. Next on the list was: * New OEM clutch. * New fuel pump carrier as was badly corroded - this requires the tank to be dropped. * New ST205 fuel pump, because whilst you're there, you might as well. * Replace all hard brake lines and fuel lines from front to rear. * Fit new braided brake lines. * Fit new exhaust - a super cheap 3" ebay stainless item. They come up every now and again ranging from £150-£300. Grabbed one at the lowest I'd seen it! * Fit new downpipe - Not new but one I had kicking around from my MR2. Essentially a decat pipe. Replace the gasket and nuts with new parts whilst there. * Full rust rub/wash down and underseal Nice big list consisting of a lot of jobs that I didn't fancy doing with the car only on axle stands in the garage! Jobs like the decat pipe and brake lines were thrown on the list as seeing as he was going to be working on that area anyway.... Most things went smoothly. The ebay exhaust didn't fit for toffee which I was expecting, but not to this extent! Turns out the the pipe had been assembled the wrong way round with the flanges at the incorrect ends. 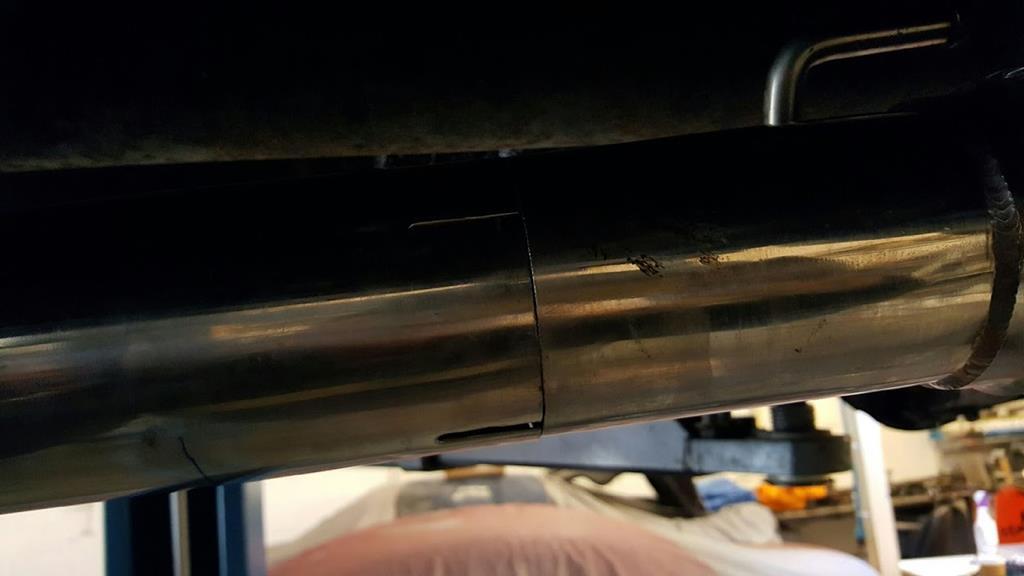 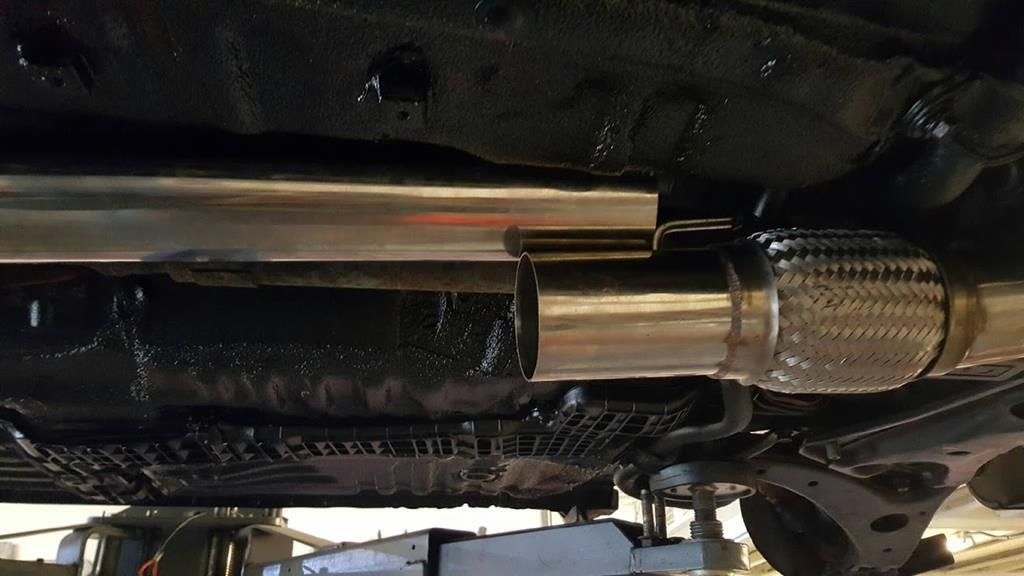 Barry rectified it pretty quickly though 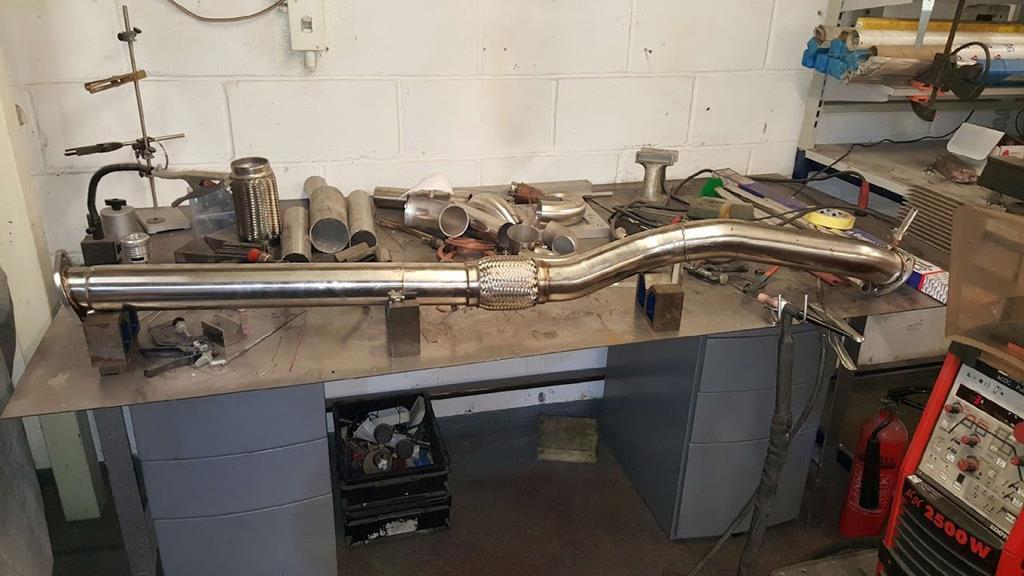 Also, when it came to fit the new braided brake lines, they didn't fit. Leaked fluid and didn't tighten up correctly - I got onto HEL and they sent out a different set free of charge so no complaints there. The new lines didn't fit either but more on that later. We put the original rubber hoses back on for now. New hard lines throughout to replace the corroded originals. Pic before they were tidied up: 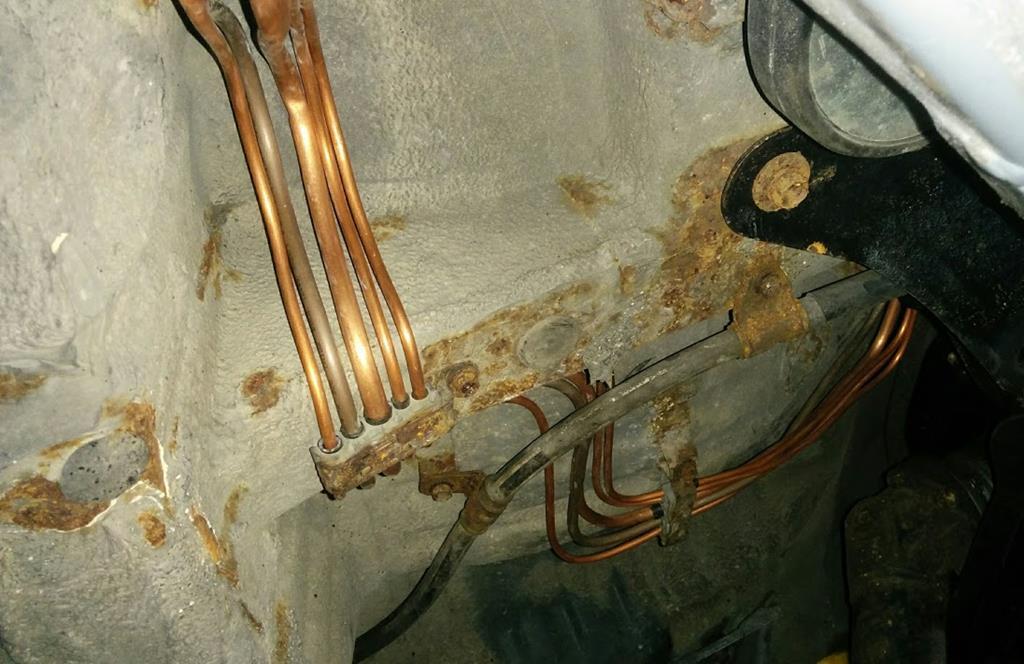 Once all the jobs were done, just the surface rust treatment left. They wife wheeled some of the crustier patches and then painted any exposed metal. Then used some rust treatment goop and a scrub etc and was left to dry before undersealing the complete underside. I'm so much more happier now that this is done. It looks lovely and I'm sure it will appease the MOT man! 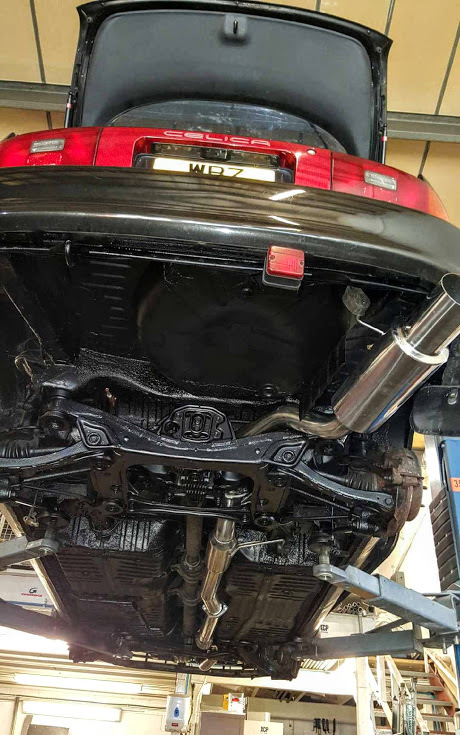 We're now at a stage where the car is back with me in the garage and I am tinkering as time allows - brakes are next on the list, again because they surely are MOT advisories/fails. Not going to be overhauling the original units though, will opt for ST205 calipers etc, as well as look at why the braided lines aren't working. |
| |
|
|
|
|
|
Sept 26, 2017 12:26:32 GMT
|
|
Nice work. Best colour for these too.
|
| |
|
|
autojumbled
Club Retro Rides Member
Posts: 226
Club RR Member Number: 106
|
|
Sept 26, 2017 13:52:50 GMT
|
Nice work. Best colour for these too. Cheers! Just realised I barely have any photos of the actual car (exterior shots) from the past few years. Need to get it off the axle stands and rolling again.... |
| |
|
|
autojumbled
Club Retro Rides Member
Posts: 226
Club RR Member Number: 106
|
|
Sept 28, 2017 16:25:55 GMT
|
Once the Celica was back in my hands I settled it into the garage and set to work on renewing the rear brakes. Opted for gen 6 (ST205) calipers and discs as they're a direct bolt on for the rear. Offering up the caliper to confirm the fit: 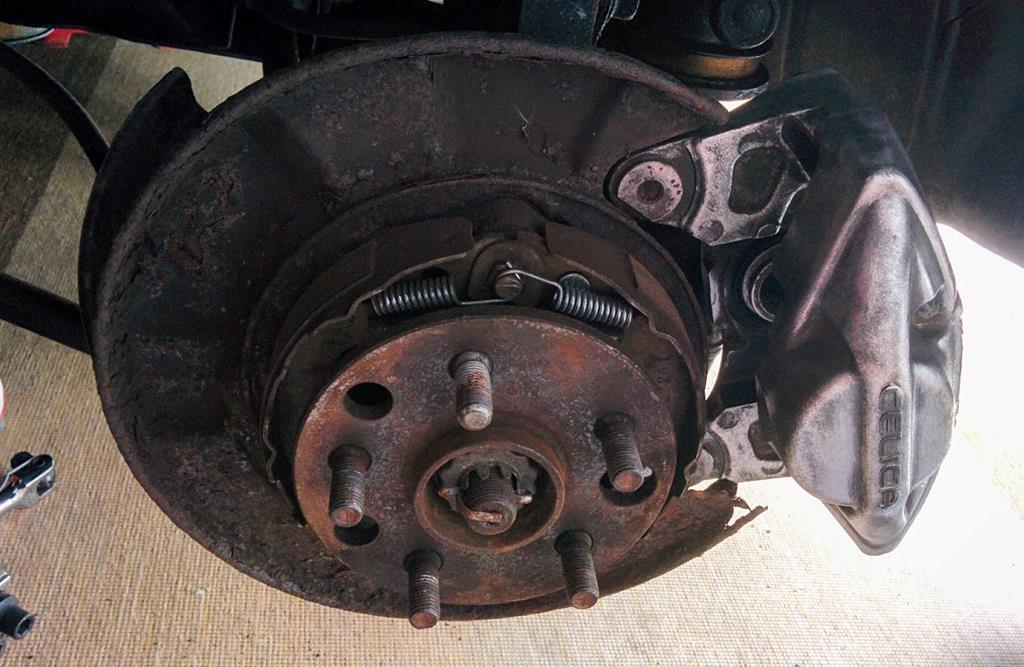 For comparison, the original ST185 caliper: 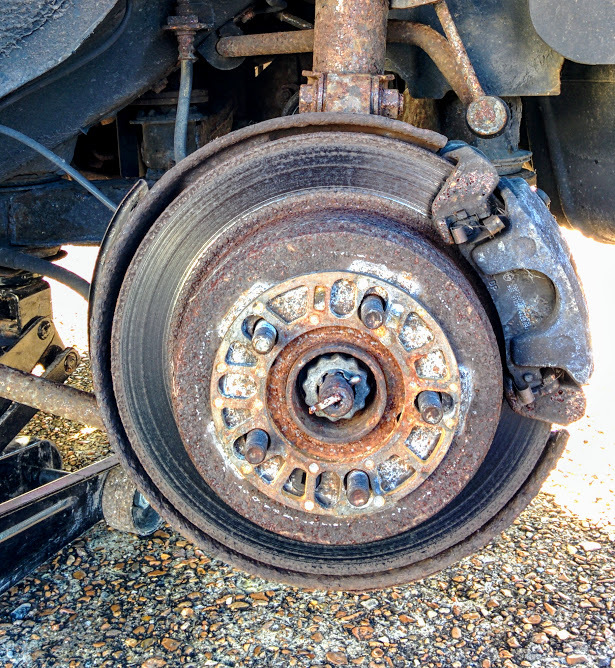 The gen6 discs are 315mm and so considerably larger than the gen5 (285mm I think) and so the dust shields need bending or trimming to prevent the larger discs from fouling. Cleaned and de-rusted the shields, then trimmed the lip off. I'd rather have part of the dust shield in place rather than bashing it with a hammer or removing completely. Incidentely, new replacements for these shields are eye watering as there's not much stock left. One side is over £200...left side I think. 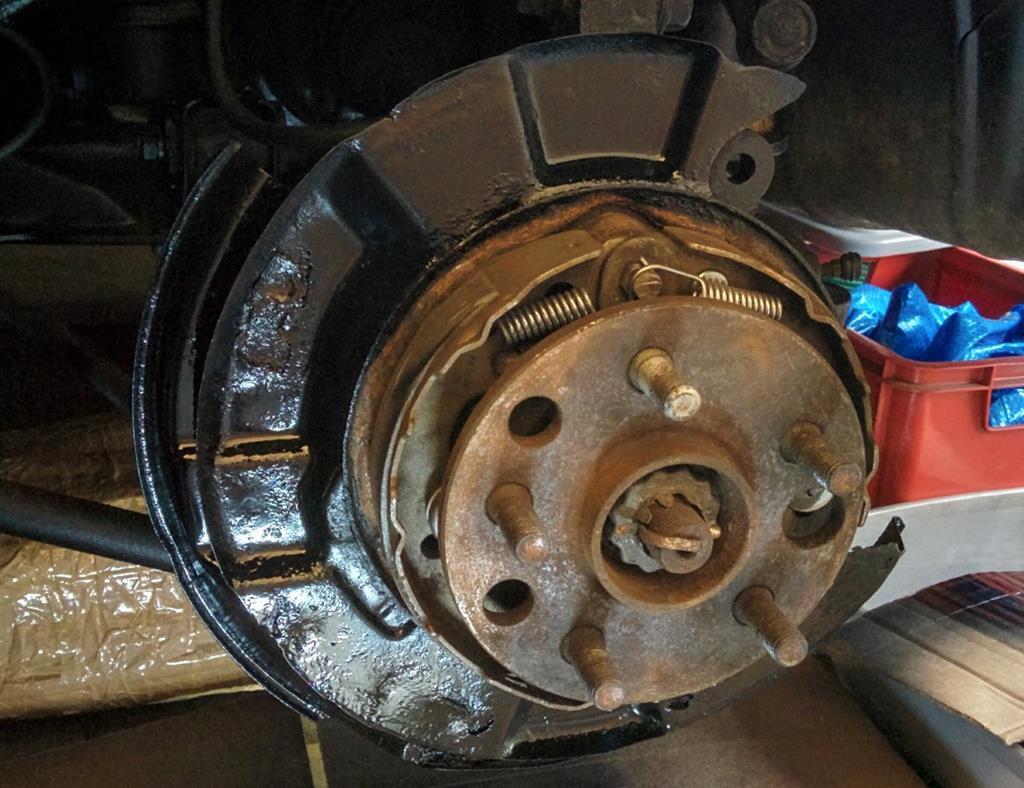 I then set to work re-building the gen6 rear calipers. Went through the now familiar process with most of the parts I've removed and replaced on this car: wire-wheel, bathe in de-rusting stuff, wash with metal prep/etch, paint. 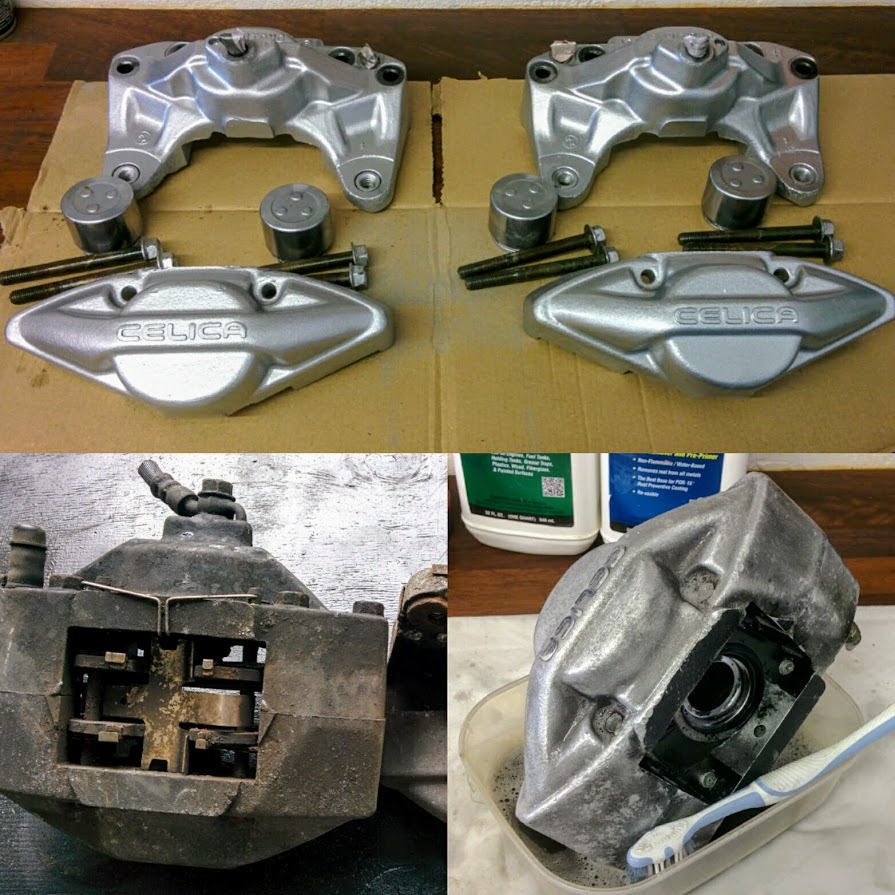 I am a J car lover at heart and as a result, cannot resist the occasional wild colour thrown in and so to match the cam cover colour-scheme, I opted to use the same VHT anodized purple. Baked in the oven much to the chagrin of SWMBO. New rubber seals, slide pins, bleed nipples, all that jazz for the rebuild. Discovered whilst sourcing rebuild kits that the internal rubber washers that seal the brake fluid channels of the halves of the calipers are discontinued, so that's worth bearing in mind when splitting them! Don't drop 'em.... Oh yeah, the braided HEL lines which the garage couldn't get to fit - I took a look at these now that I wasn't paying by the hour and sure enough, the new lines did not fit the new hard pipes Barry had made up. The fittings just span and didn't seal. Did some detective work and discovered the braided lines screwed perfectly into a spare male union I had in my parts box. This meant one thing - the unions that had been used on the new hard pipes were not 1mm pitch. They were the 3/16 imperial jobbies....probably. I didn't bother to figure out exactly what they were, just knew they had to be replaced. This tool to the rescue then - hand held brake flare tool. Made it easy to replace the unions on the car: 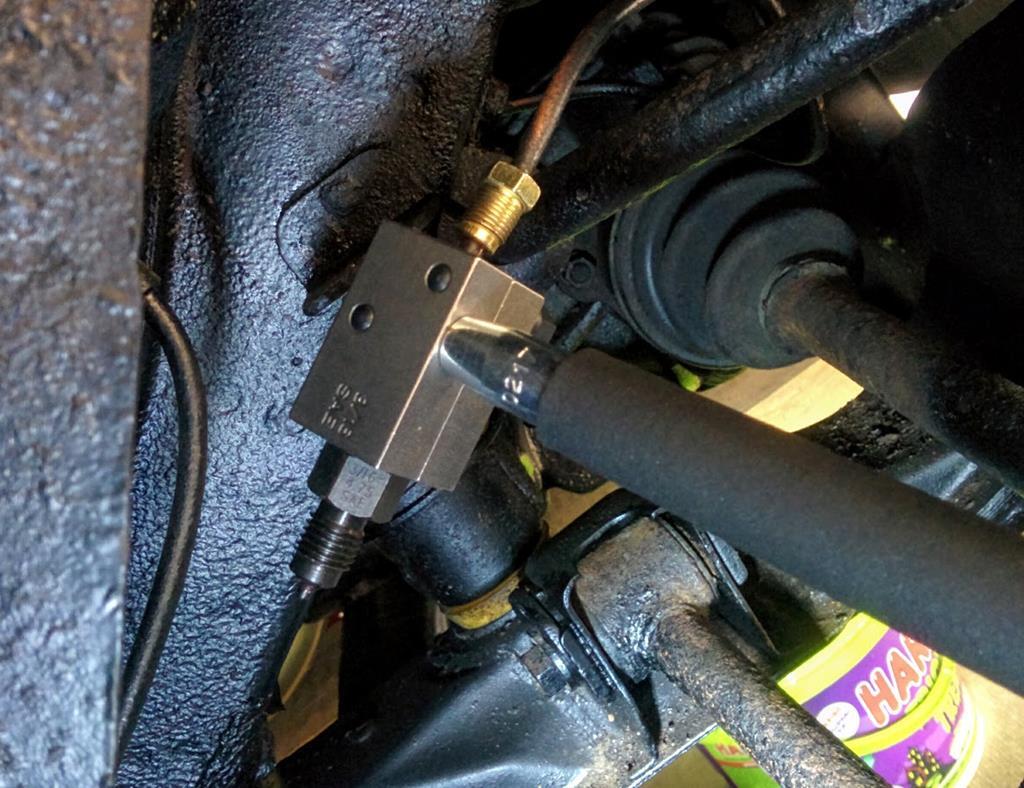 With that sorted everything went back together perfectly. new gen6 rear discs, pads and calipers all fitted and shiny new braided lines installed! 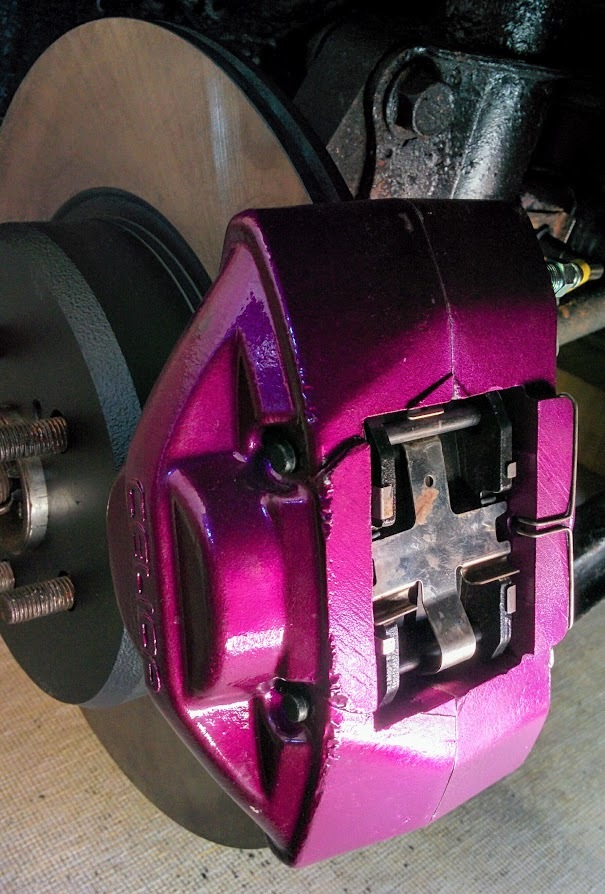 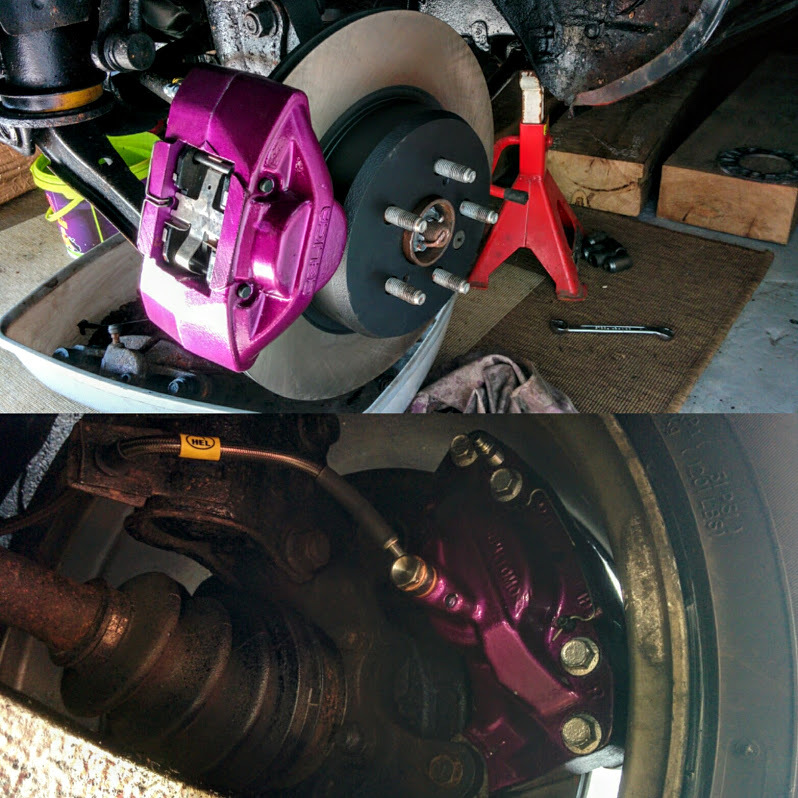 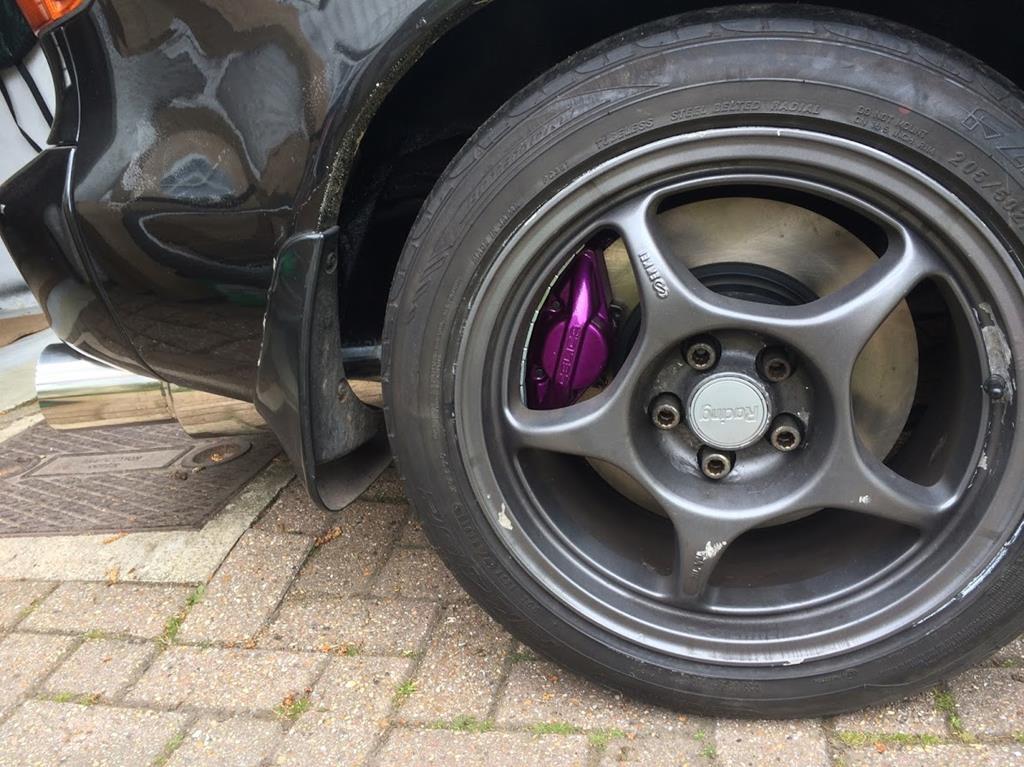 Purple right?  |
| |
|
|
|
|
|
|
|
|
Great car. I knew some one with one many years ago and from then on they have been a dream car of mine.
|
| |
|
|
autojumbled
Club Retro Rides Member
Posts: 226
Club RR Member Number: 106
|
|
|
|
Been slacking on the updates! I've completed the swap of the front brakes over to GT4 ST205 (gen6) calipers and larger discs. Loads of different reports on the internet about how to make 205 calipers fit and armed with all that I went ahead and tried it out. I opted for Avensis 2.0L D4D discs (295mm from a 03-08 model) because they didn't require any machine work or spacers to fit the hubs and provided enough clearance from the lower ball joint. When measuring the calipers up for fitting it was clear that I would need to skim the mounting tabs of the calipers in order to push them out to align with the centre of the disc. 4mm needed to come off. 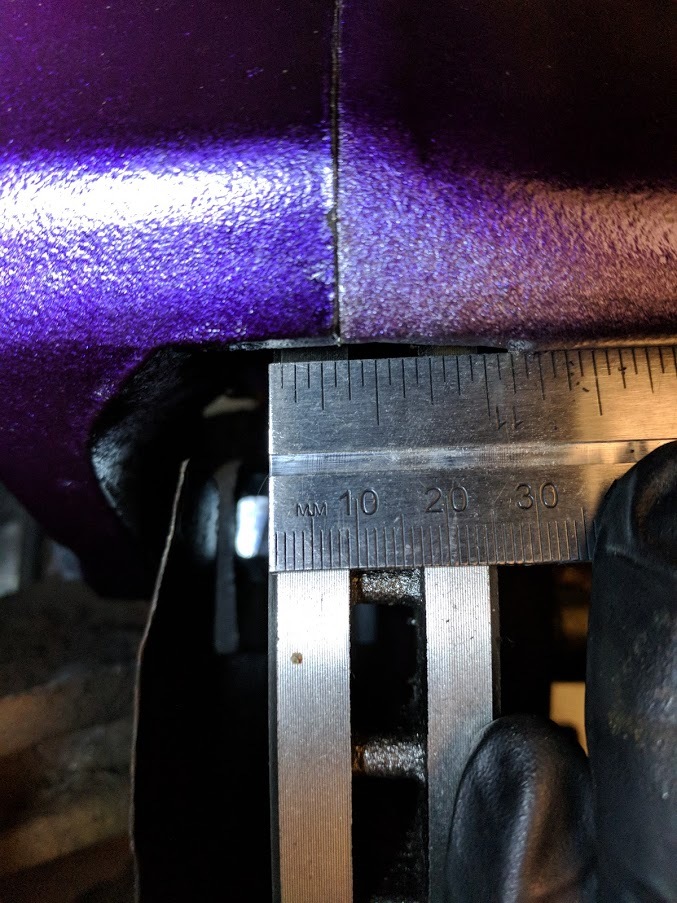 Once machined, ended up with this: 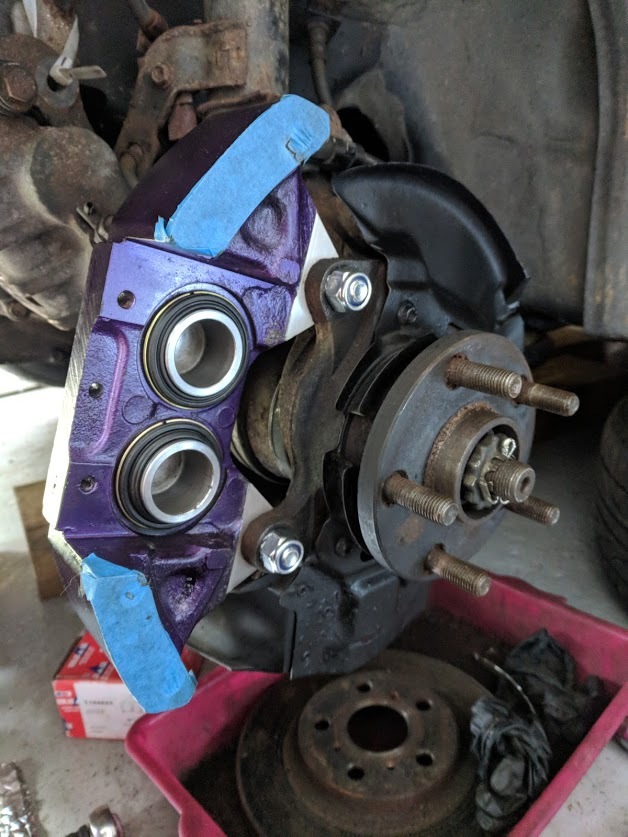 The 205 calipers do not use the same mounting bolts as the ST185 so I have opted to use a new (high tensile) nut and bolt for now to get the kit working. Will revisit that to see about making the nut retained or tapping the hub. So skimming the caliper mount points, changing the retaining bolts, and trimming the backplate are the only tricky things needed with this setup. I've rebuilt the calipers with new seals and pistons, painted them sexy purple as per the rears and installed braided hoses - sorted. 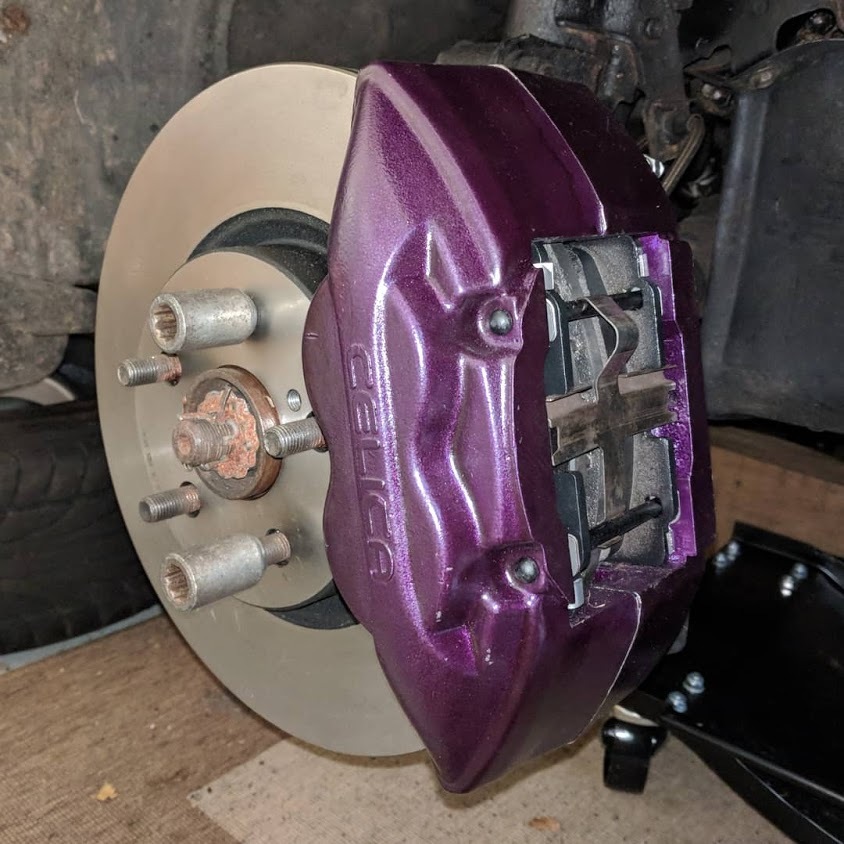 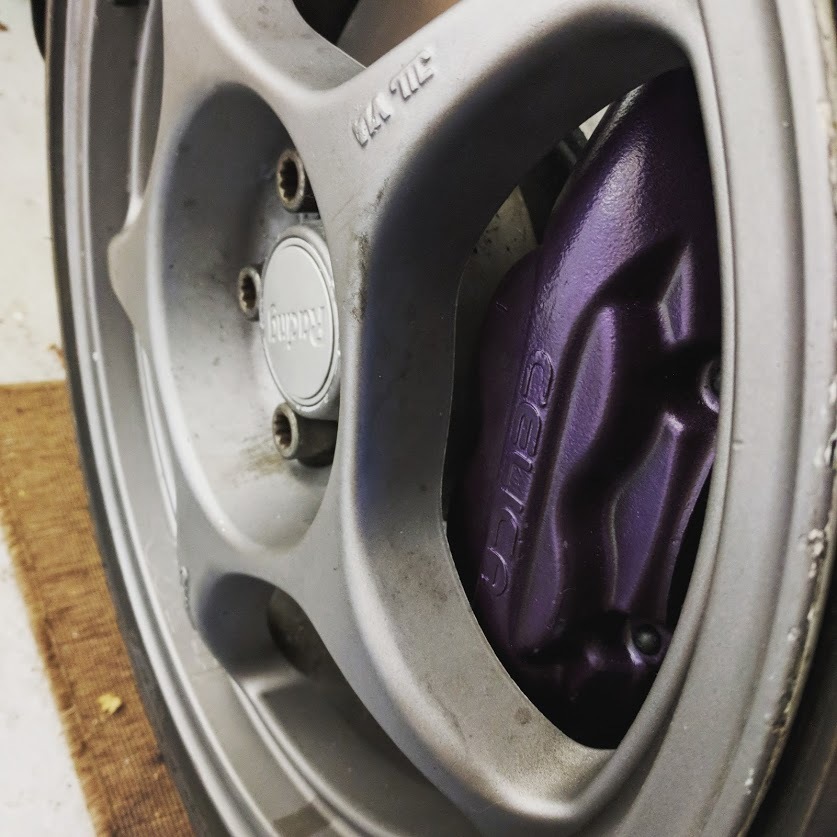 System still needs another round of bleeding and a possible pedal adjustment. Saving all that for when it's next out the garage and more accessible at all 4 corners. For now though its great to be able to actually move the car by hand! no seized brakes to get in the way!  |
| |
|
|
autojumbled
Club Retro Rides Member
Posts: 226
Club RR Member Number: 106
|
|
|
|
|
I now need to look at a rough running issue that the GT4 has had ever since it came back from it's fuel system work. It bogs when revved and sounds like it is missing a cylinder.
It had new fuel lines made up front to back, the tank was removed and a new fuel pump was installed. I'm thinking its possible its got a blockage from sludgy old gunk in the system?
Things on my list to troubleshoot:
1) Top up with good fuel as it's pretty empty.
2) Replace fuel filter.
3) Remove injectors and have cleaned.
Troubleshooting so far I have removed plugs and inspected. Probably worth a new set but they seemed ok, if a little sooty except for no4 - it was wet and smelled of fuel.
What do we reckon? replace with new plugs and retest?
|
| |
|
|
The Doctor
Club Retro Rides Member
Posts: 3,449
Club RR Member Number: 48
|
|
|
|
|
Did you replace the o rings between the two halves?
If yes what did you use for them?
I misplaced mine and every one tells me I shouldn't have split them, because 'that o ring is made out of unobtanium and some very special material because of brake fluid.'
I haven't had the chance to dive into it, but seeing yours split I was wondering again 😁
|
| |
|
|
autojumbled
Club Retro Rides Member
Posts: 226
Club RR Member Number: 106
|
|
|
|
Did you replace the o rings between the two halves? If yes what did you use for them? I misplaced mine and every one tells me I shouldn't have split them, because 'that o ring is made out of unobtanium and some very special material because of brake fluid.' I haven't had the chance to dive into it, but seeing yours split I was wondering again 😁 I didn't misplace mine...  |
| |
|
|
|
|


