|
|
|
Jun 30, 2022 11:17:35 GMT
|
Back to the grot. When I had the lower door pillar open I could so part of the old inner sill was grotty inside. Under the seat cross member wasn’t to clever ether. So out it’s the grinder 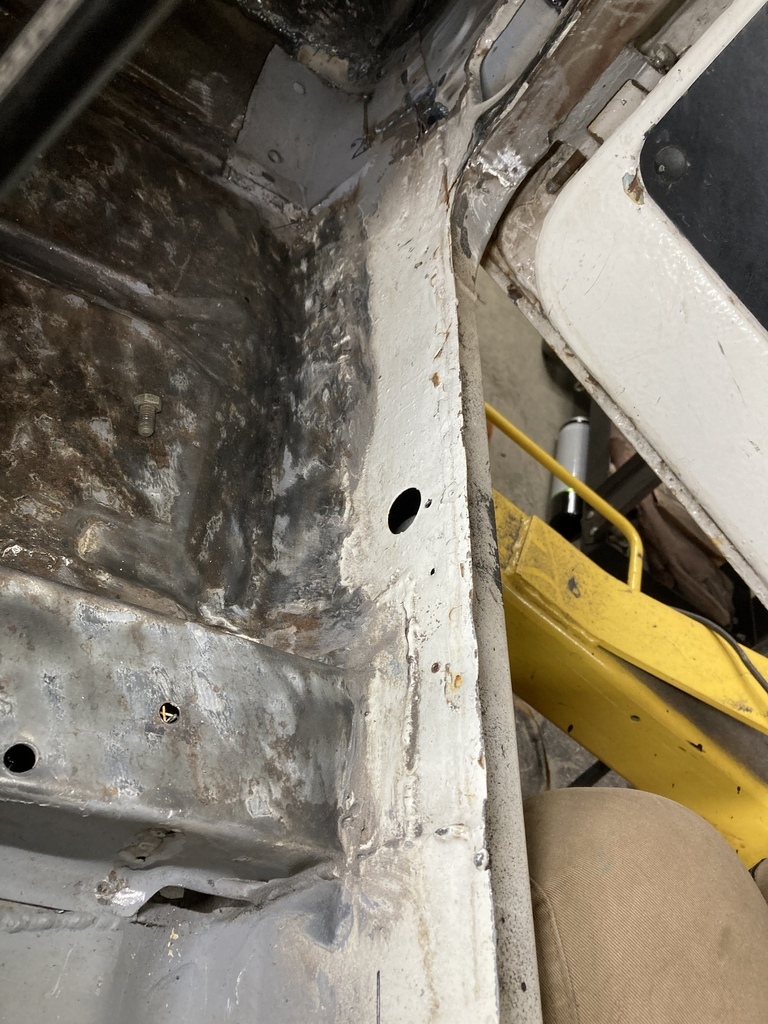 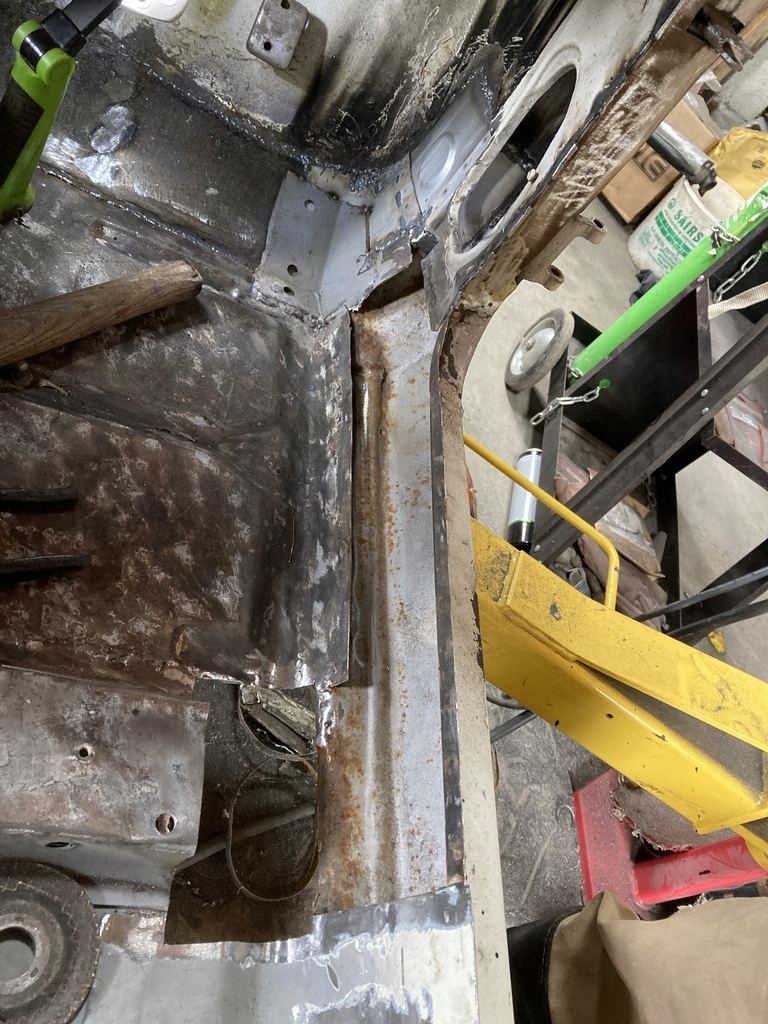 The bottom of the inner pillar was rotten so that got cut out. 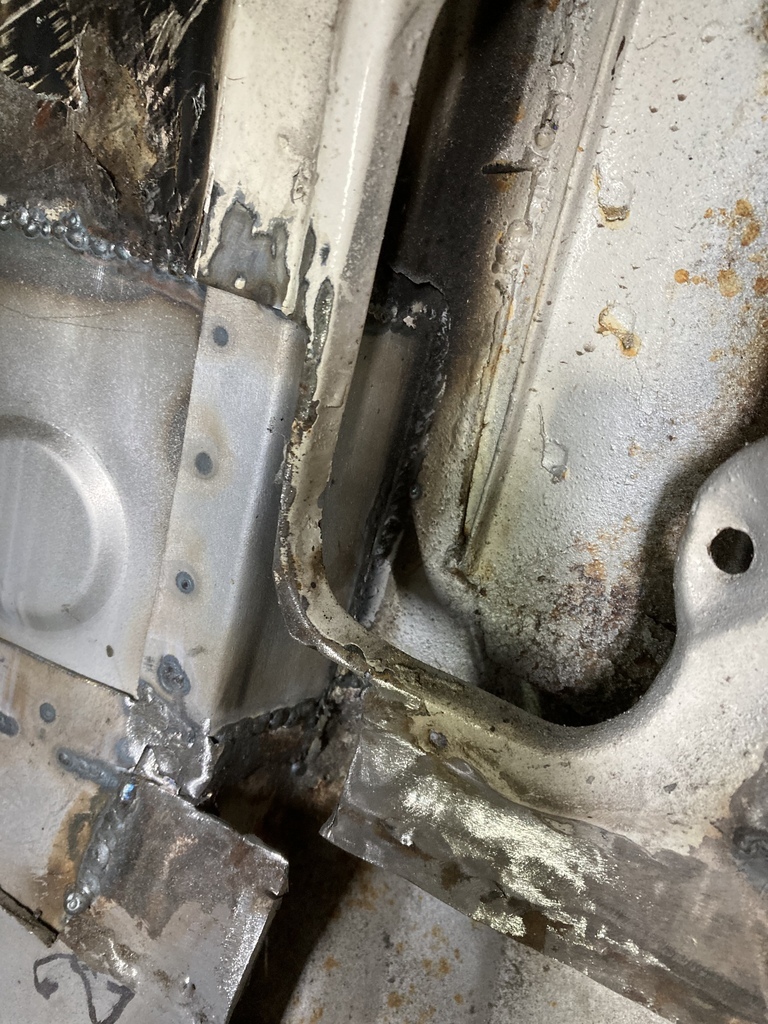 And a new bit made 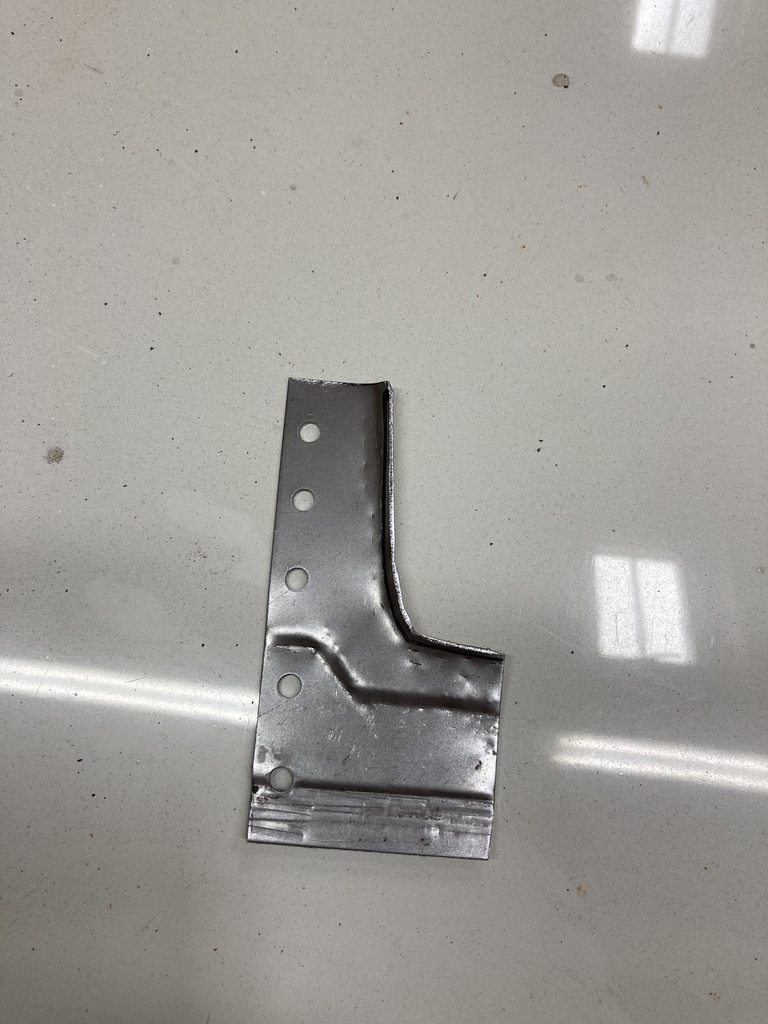 And welded in 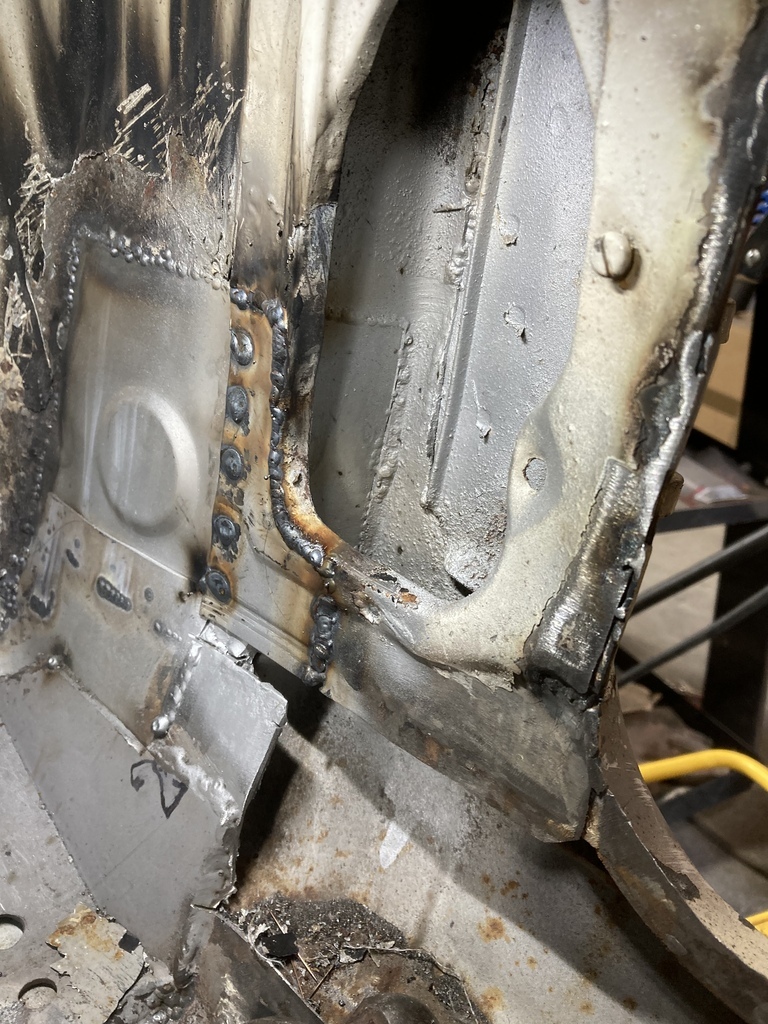 And ground off 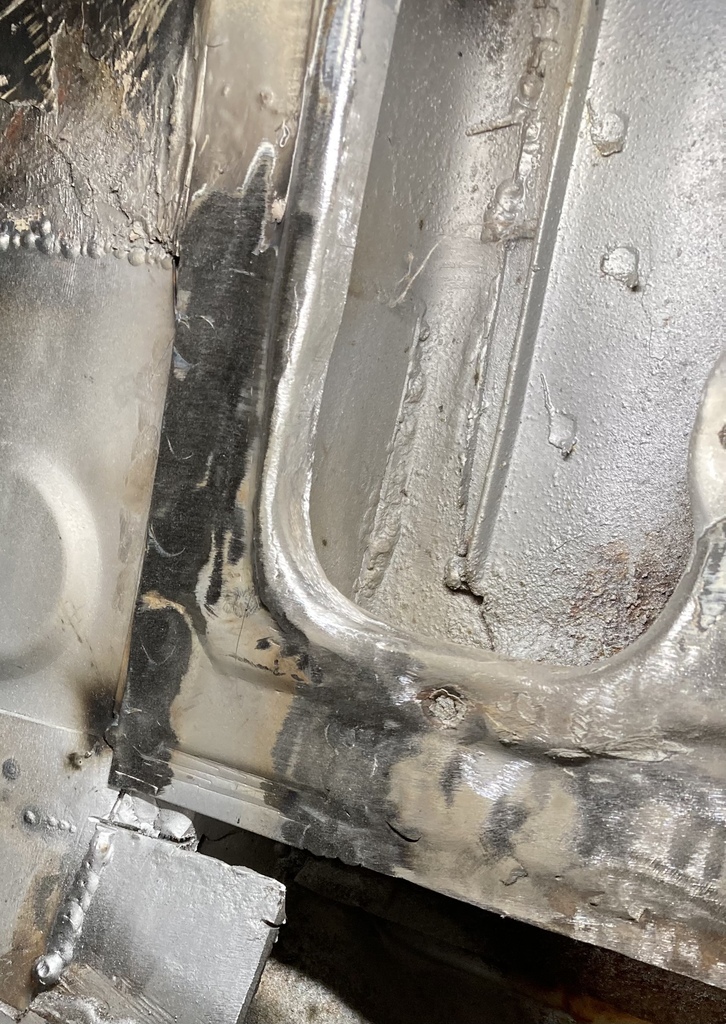 I’ve got this bit that I could use to weld back into the inner sill but it doesn’t go back far enough to go under the seat cross member. I’ll have a better look next time. 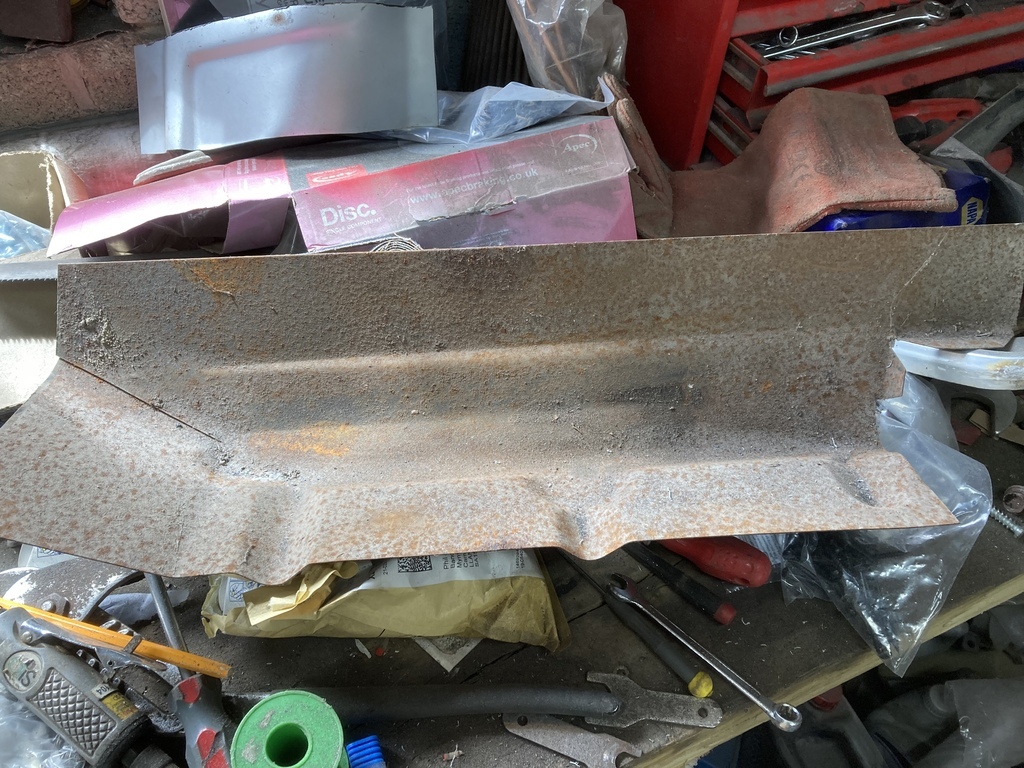 |
| |
Last Edit: Jun 30, 2022 22:47:09 GMT by jonsey
|
|
|
|
|
|
|
Jun 30, 2022 21:10:00 GMT
|
|
Sparco still list the sprint on their website, another seat to consider that's quite narrow is tillet carbon fiber range, have you thought about side mounting the seats on a billet bracket. I managed to get my Escort seat so low that I could just see over the steering wheel, the base was almost touching the floor, but that was back around 95/ 96 I don't know if this fitment is still okay with FIA approval. It looks like you can lower the tubes a bit, top fab work as always
|
| |
|
|
|
|
|
Jun 30, 2022 22:44:18 GMT
|
Sparco still list the sprint on their website, another seat to consider that's quite narrow is tillet carbon fiber range, have you thought about side mounting the seats on a billet bracket. I managed to get my Escort seat so low that I could just see over the steering wheel, the base was almost touching the floor, but that was back around 95/ 96 I don't know if this fitment is still okay with FIA approval. It looks like you can lower the tubes a bit, top fab work as always Thanks General I didn’t realize they still did them. I’ve had a quick look and they do a standard and large. The large is still 50mm narrower than the OMP. The seat mounts I have are side mounted and I can adjust the seat lower as long as the shoulder can clear the door. The seat either has to be bolted through the floor using 3mm plates or I have to use the tubes at 35mm diameter. Sadly the Escort floor doesn’t lend itself to floor mounting as it’s nowhere near flat. I’m going to have a bit more of a play before I commit to anything. |
| |
|
|
|
|
|
|
|
Sadly steel frame seats are no longer allowed in rallying so the Sparco Sprints are out of the equation 😩. While I was at the rally on Sunday I took a walk around the service area to check out what seats people were using in their mk1s. Sparco pro 2000 fitted - just. The guy let me sit in it too and my chunky butt fitted ok. Before work today I spent a couple of hours trying to fill this. 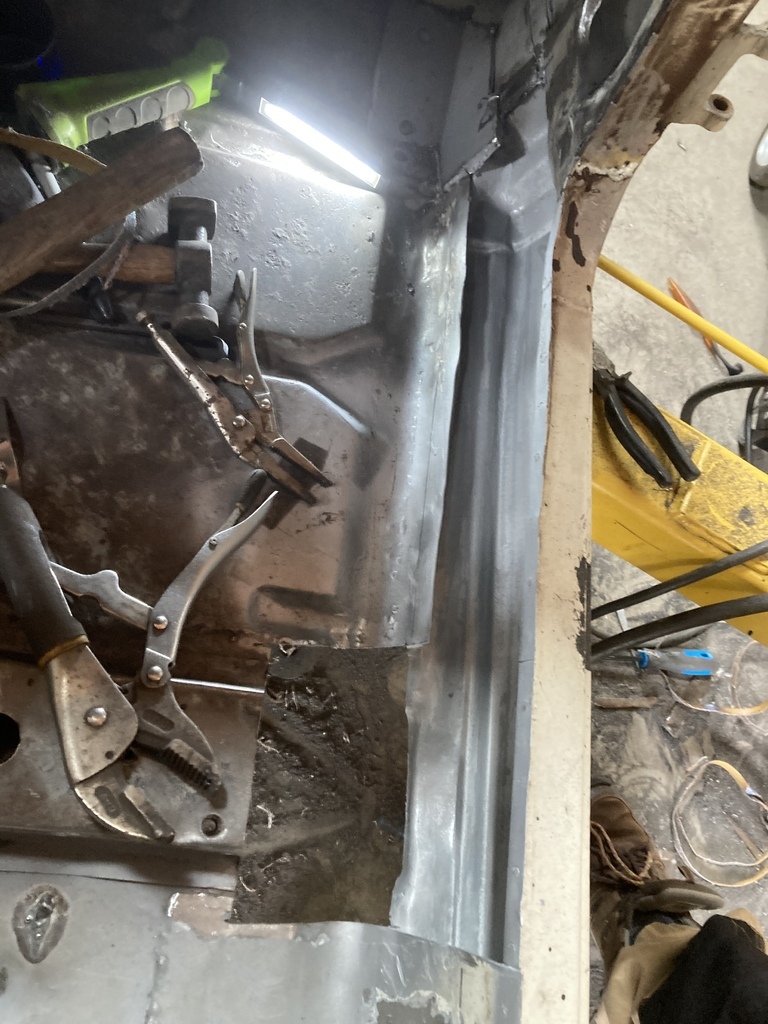 The panel I’d bought all those years ago didn’t come back far enough. They are designed to fit over the seat crossmember rather than under it, so a made this 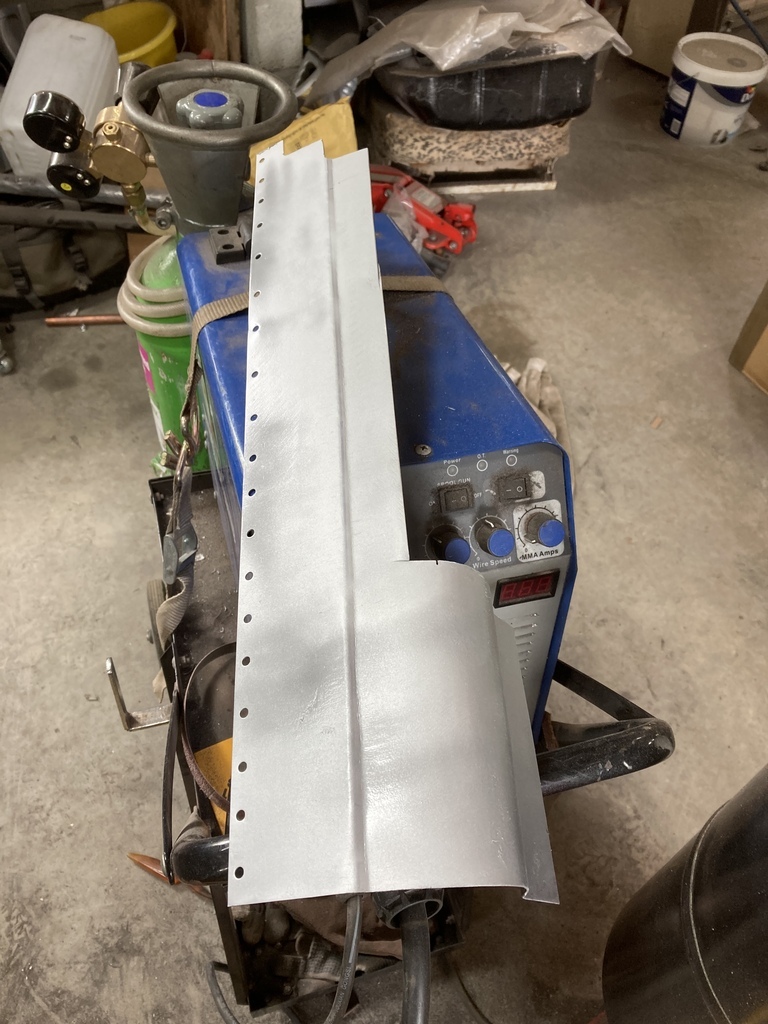 And welded it in here. 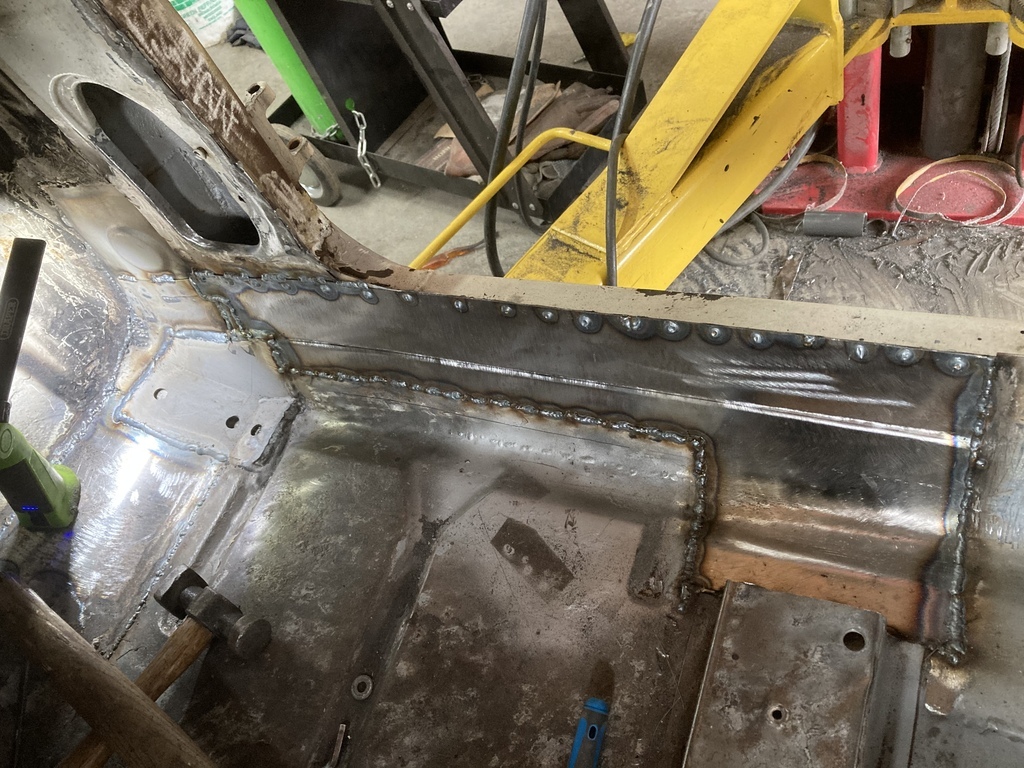 I’ll grind it off next time |
| |
|
|
|
|
|
|
|
I got the Inner sill all ground off today. 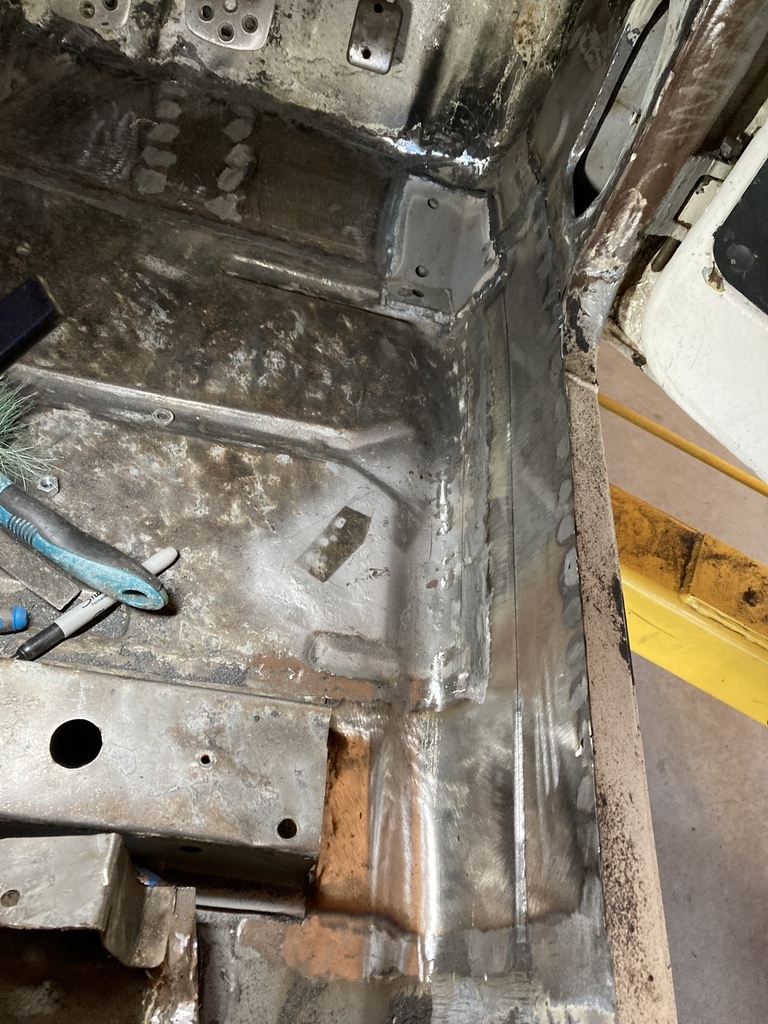 I didn’t want to buy another new seat cross member even though I probably should, as I’m tight, so I made a new end to replace the bit I mangled. 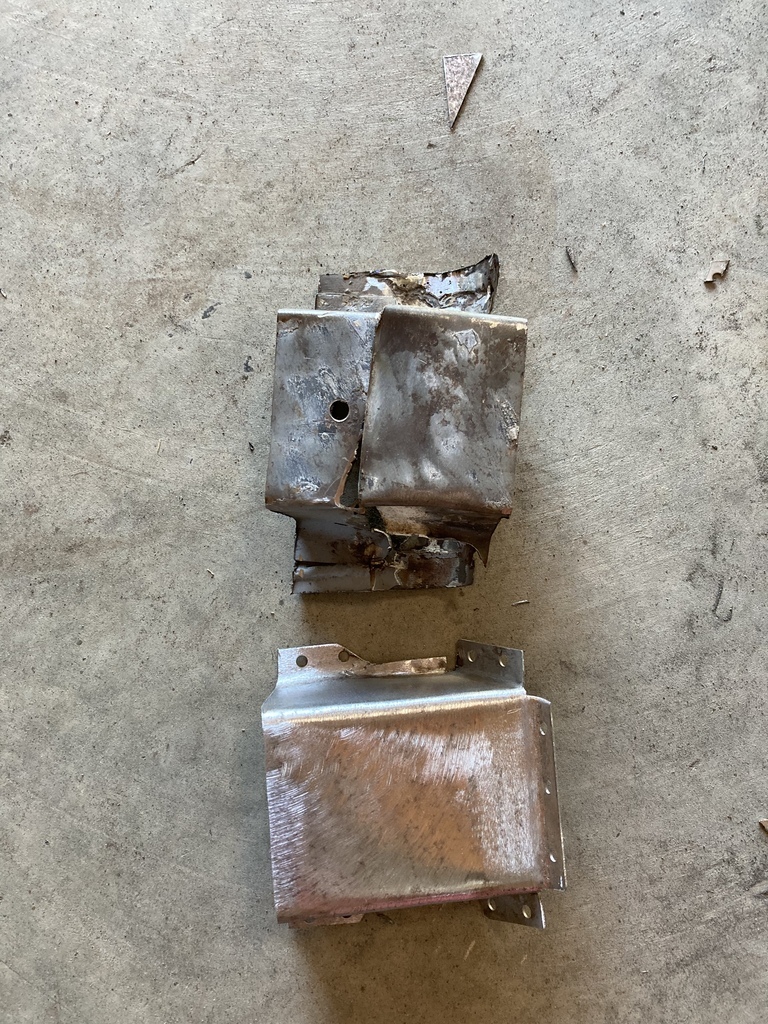 It goes here like this 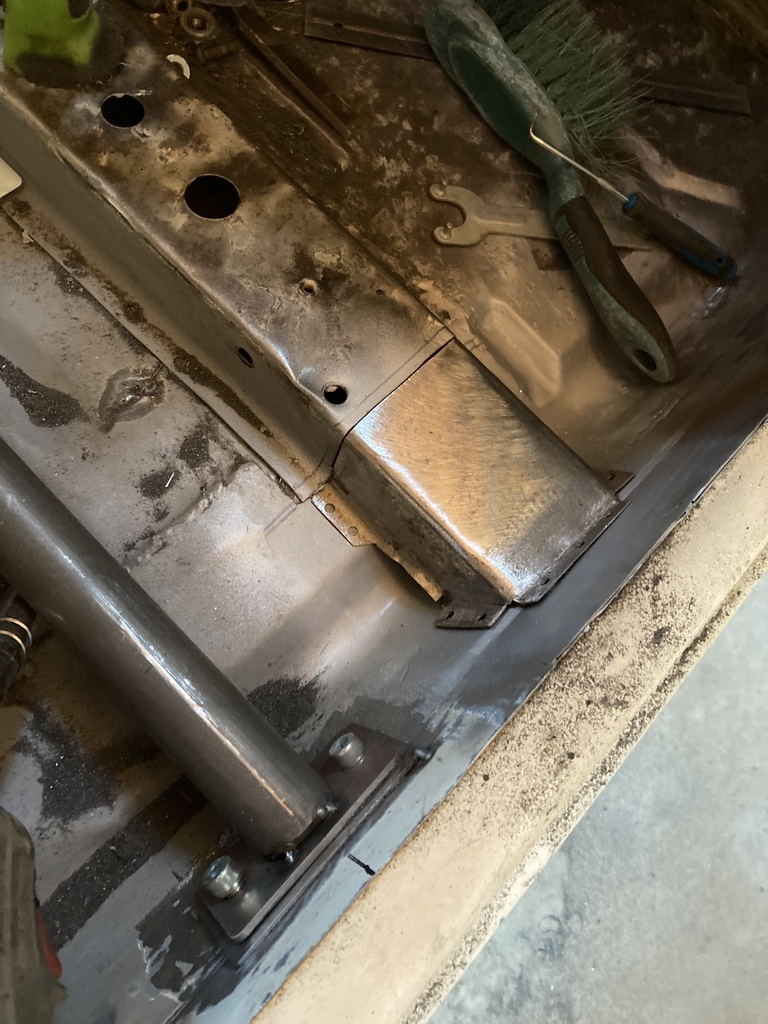 I’ll weld it in tomorrow |
| |
|
|
|
|
|
Jul 10, 2022 17:11:35 GMT
|
This morning welded in the end of the seat cross member. 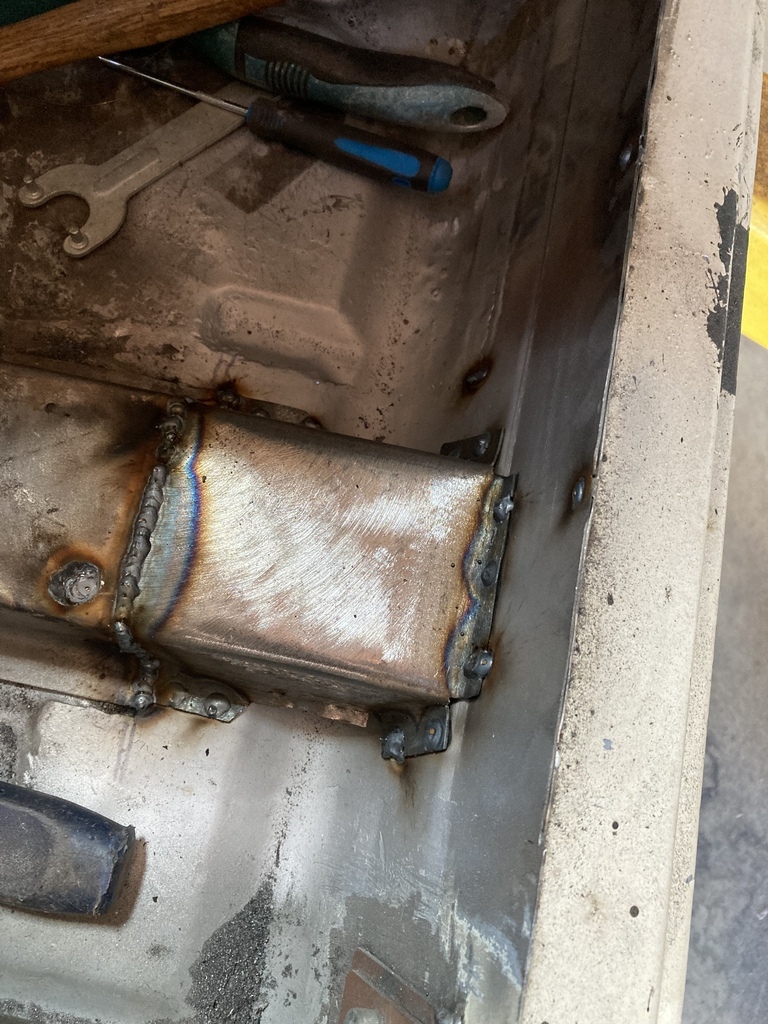 And then ground it all off. 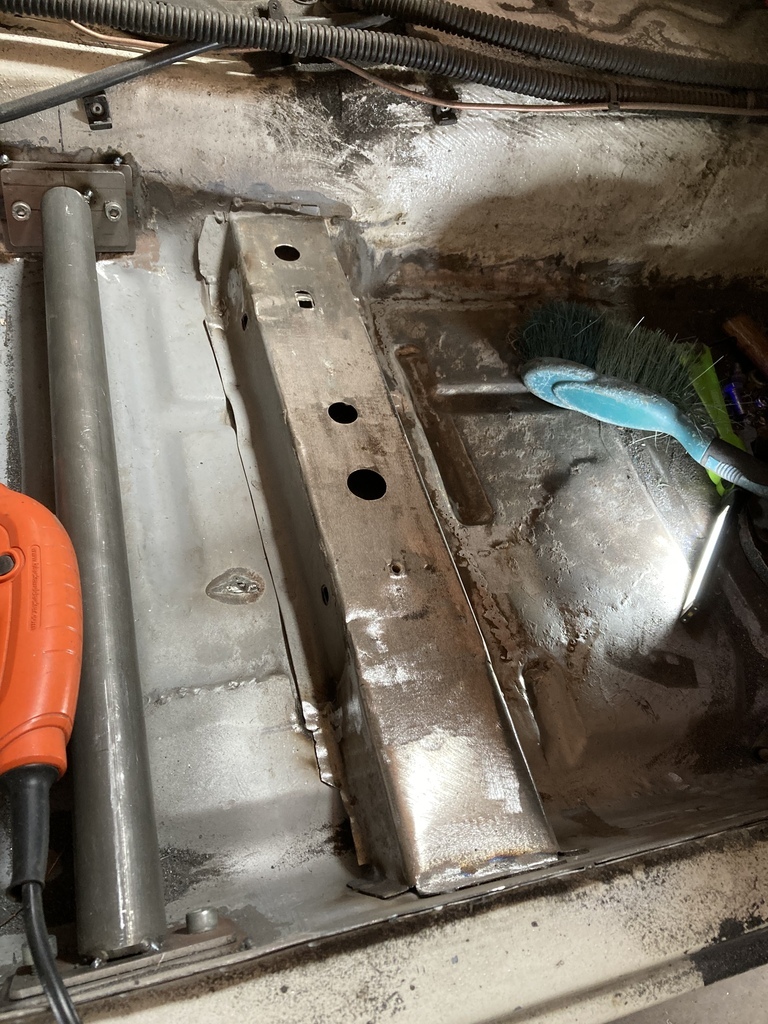 It’s not a perfect fit but it is under the carpet. Next I moved onto the driver side bulkhead/inner wing/A panel/wing rail area. 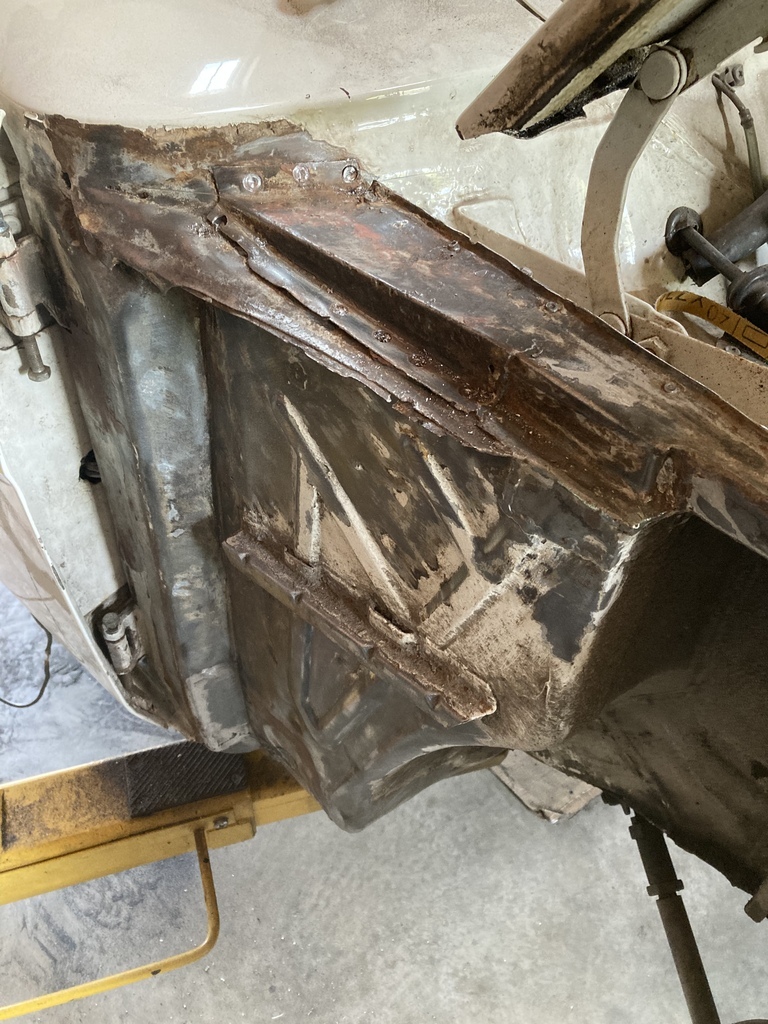 This side is mostly original so definitely worth a poke around. Wing rail end off. 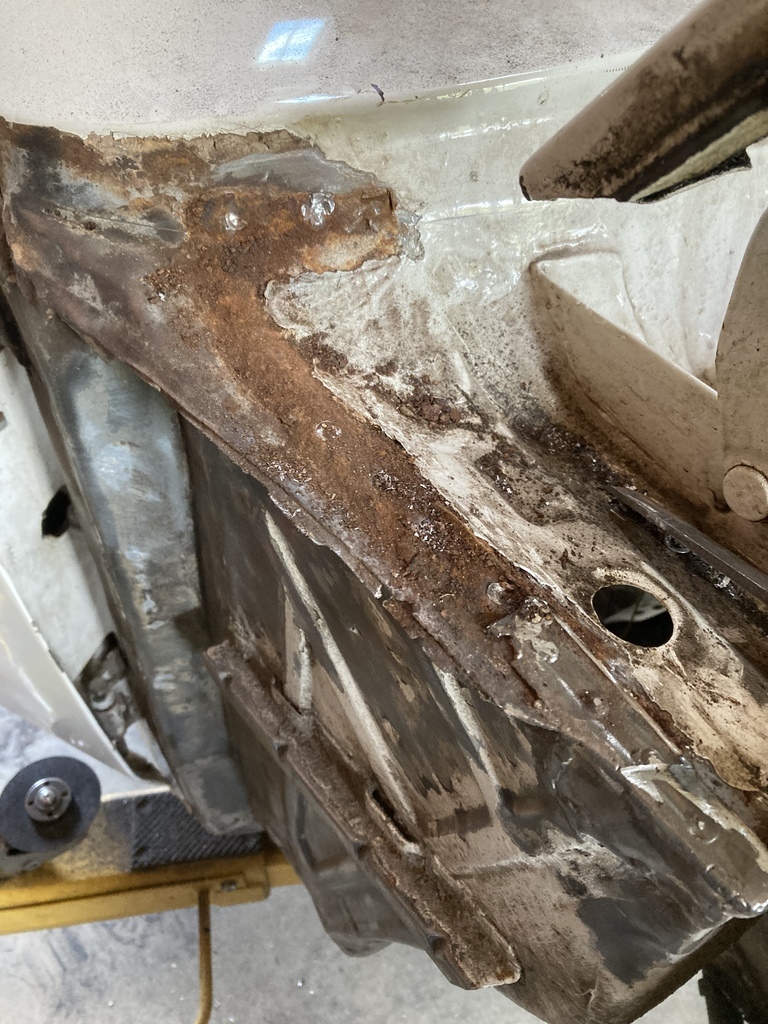 A bit of grot there so dug a bit deeper until I had a big hole 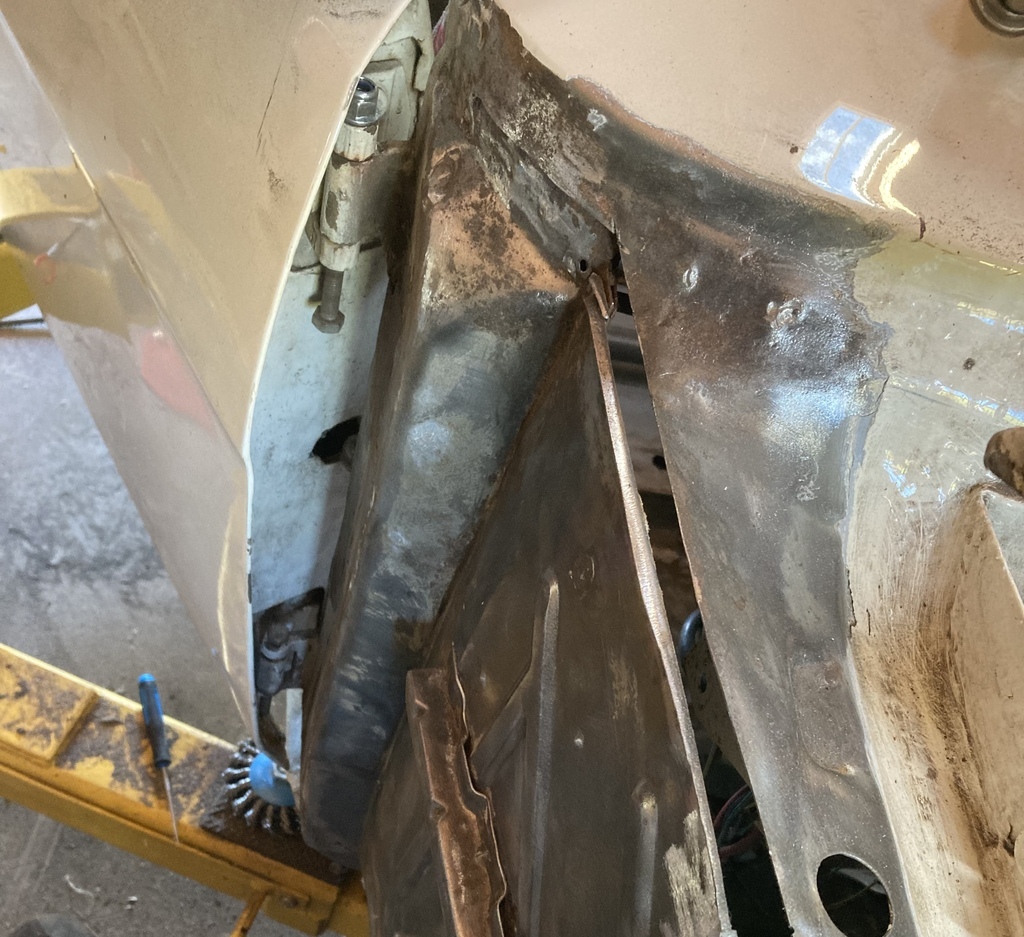 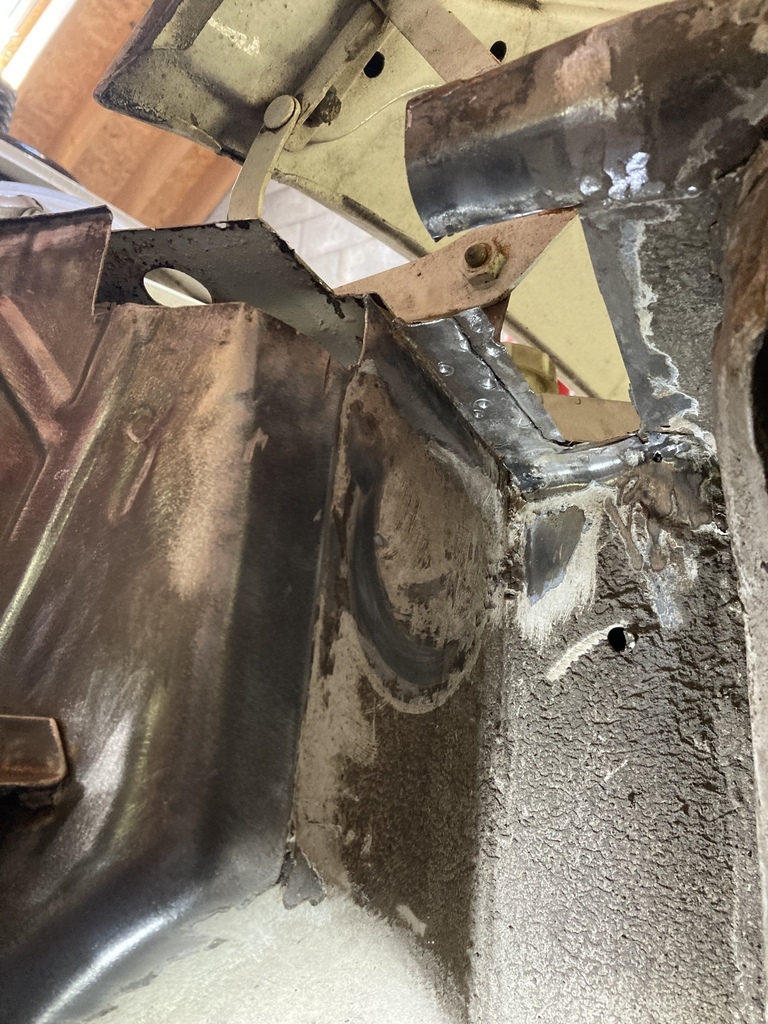 I then started making section to build up the layers. Lower bulkhead and A panel corner first. 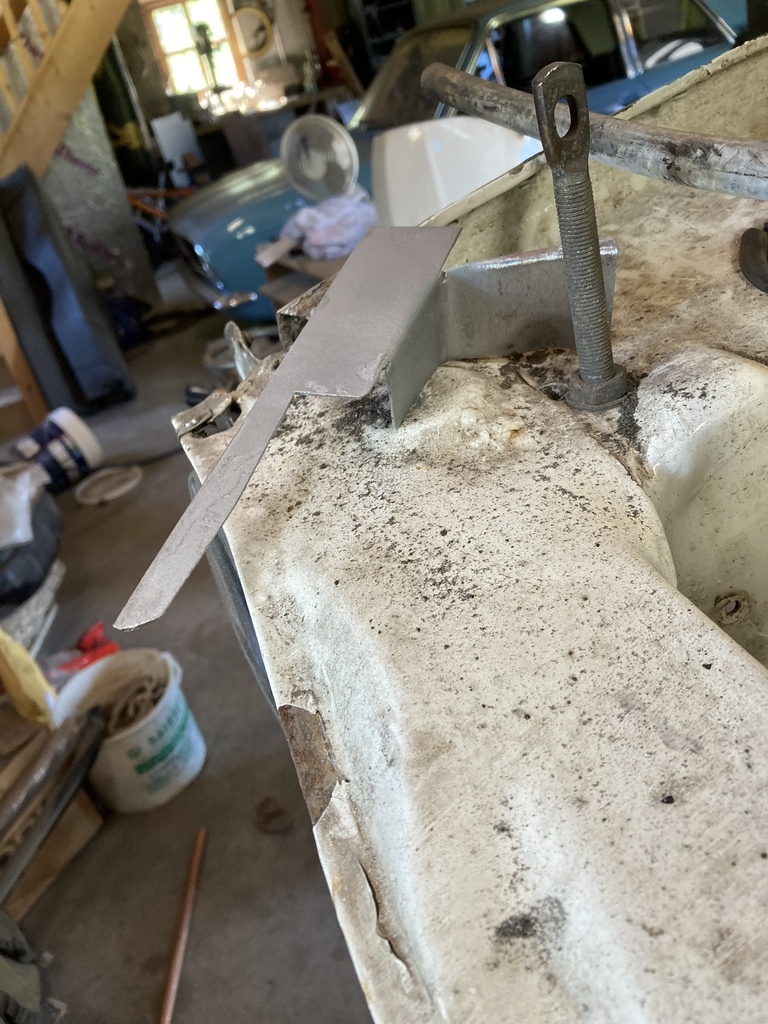 And welded on 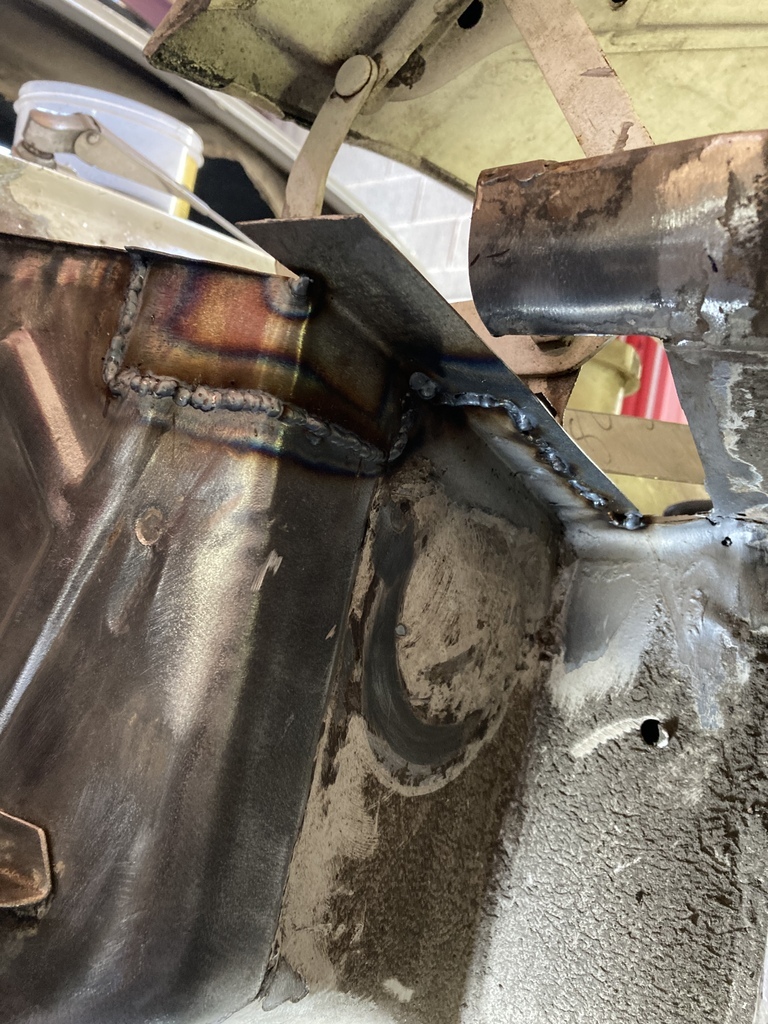 And ground back 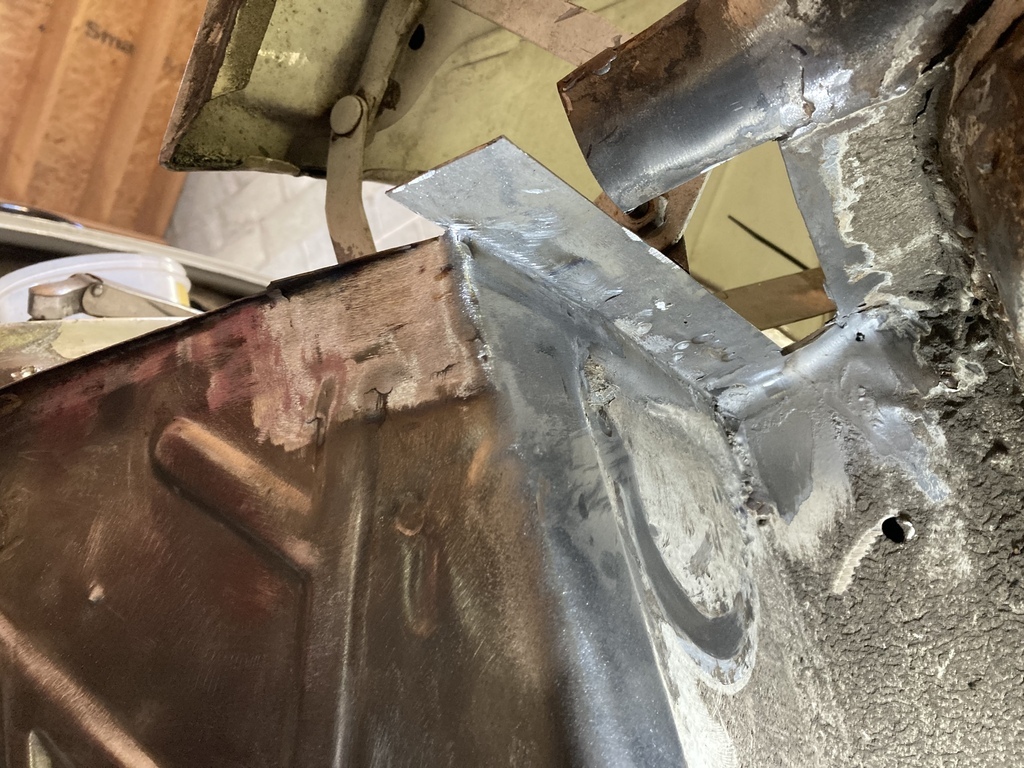 Then the inner wing section 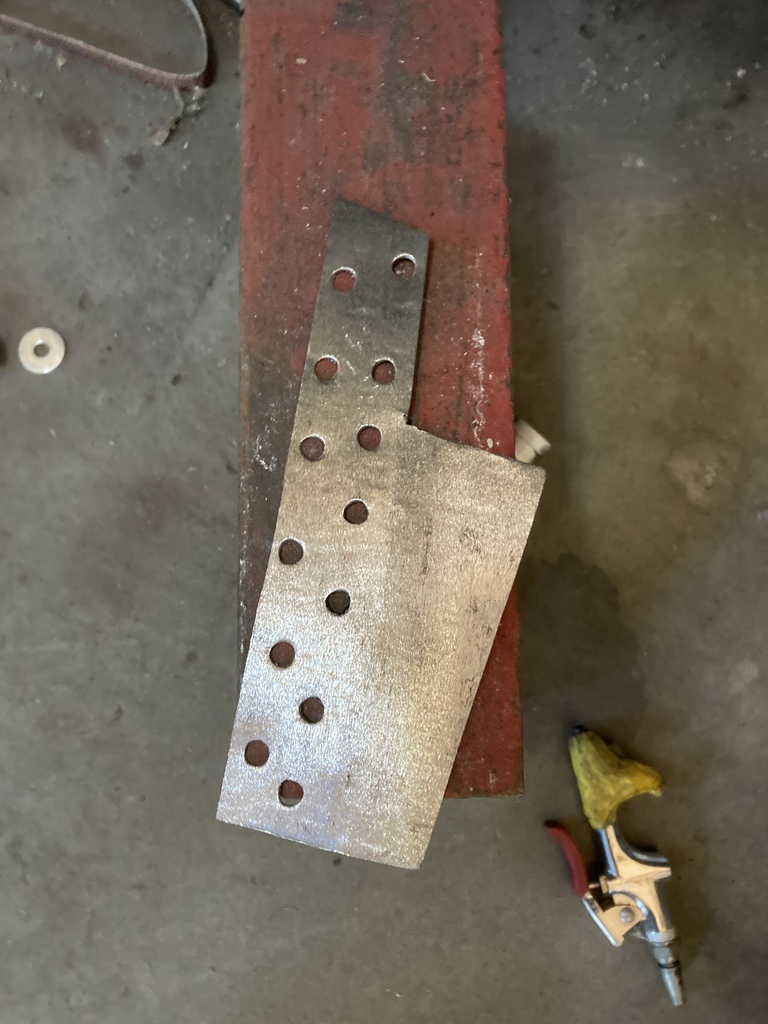 Welded on 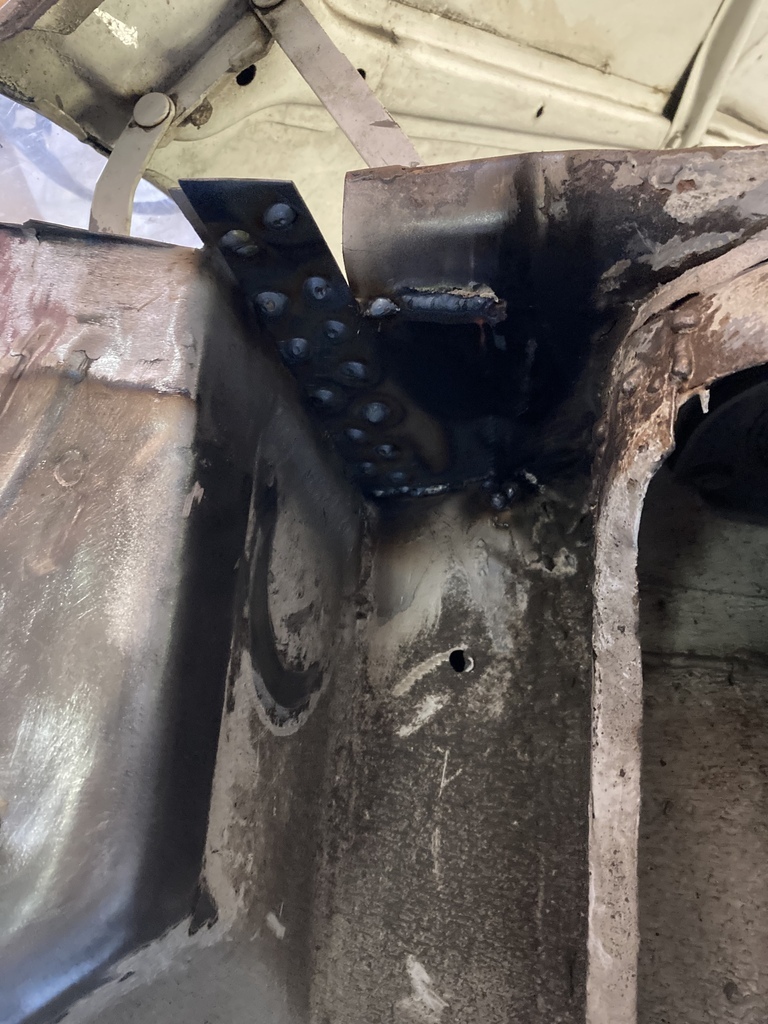 And ground back 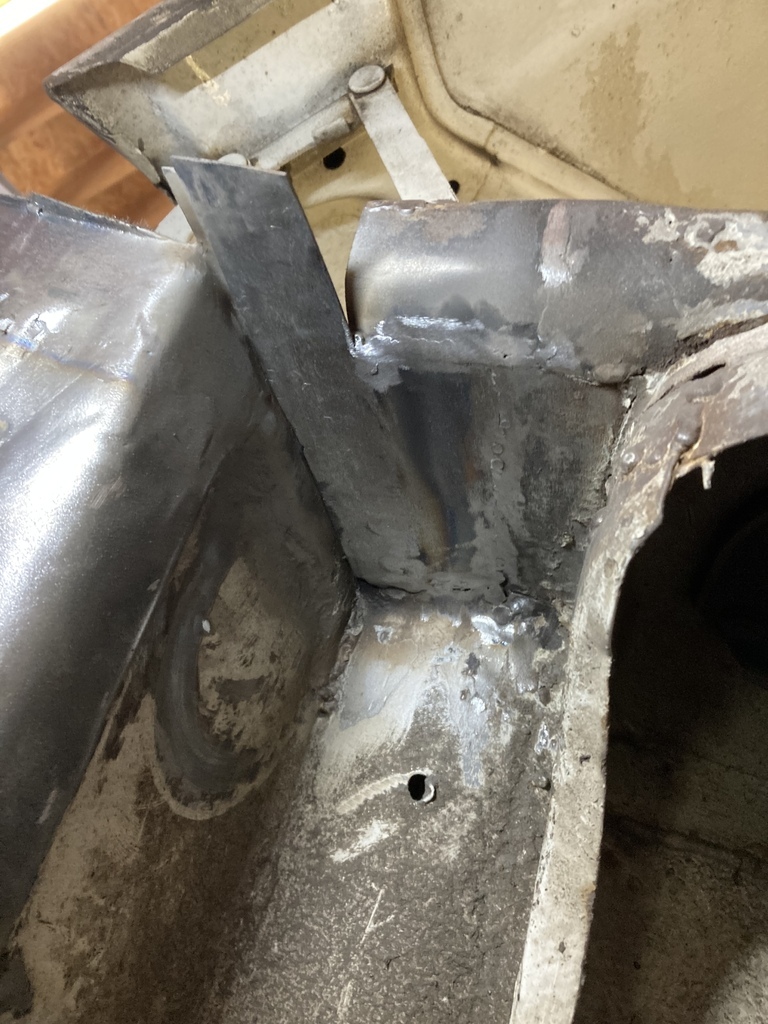 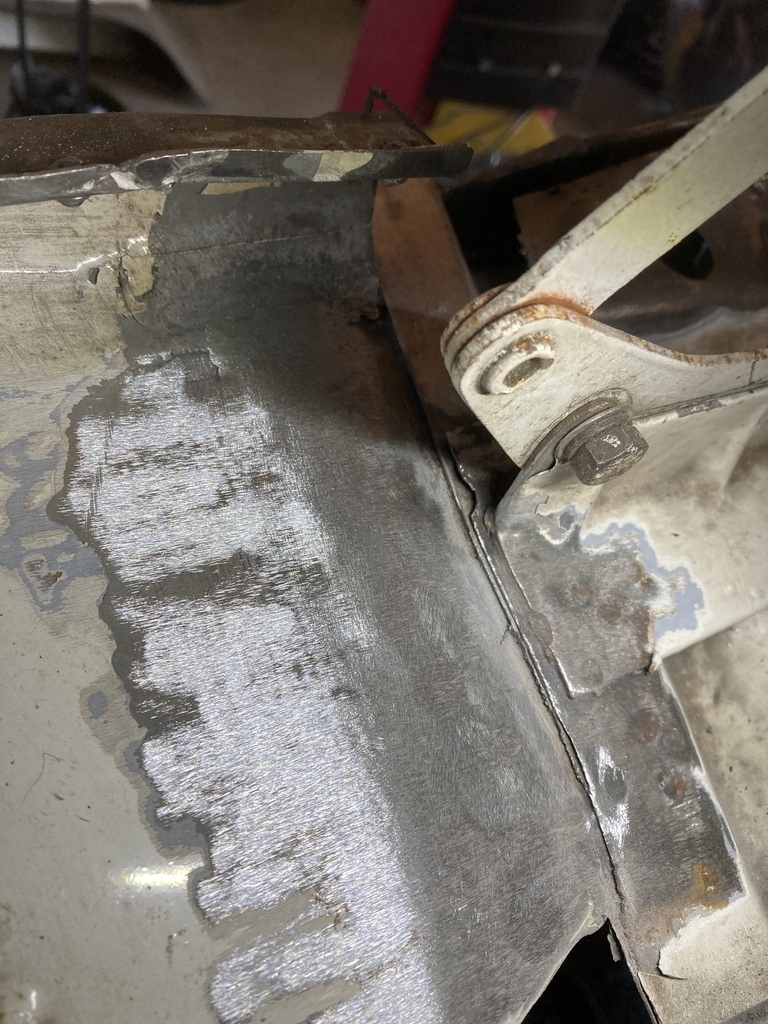 This side is going a lot quicker then the other side did as I now know what I’m doing - sort of. Next I will tackle the A panel top lip and the upper bulkhead to fill this gap. 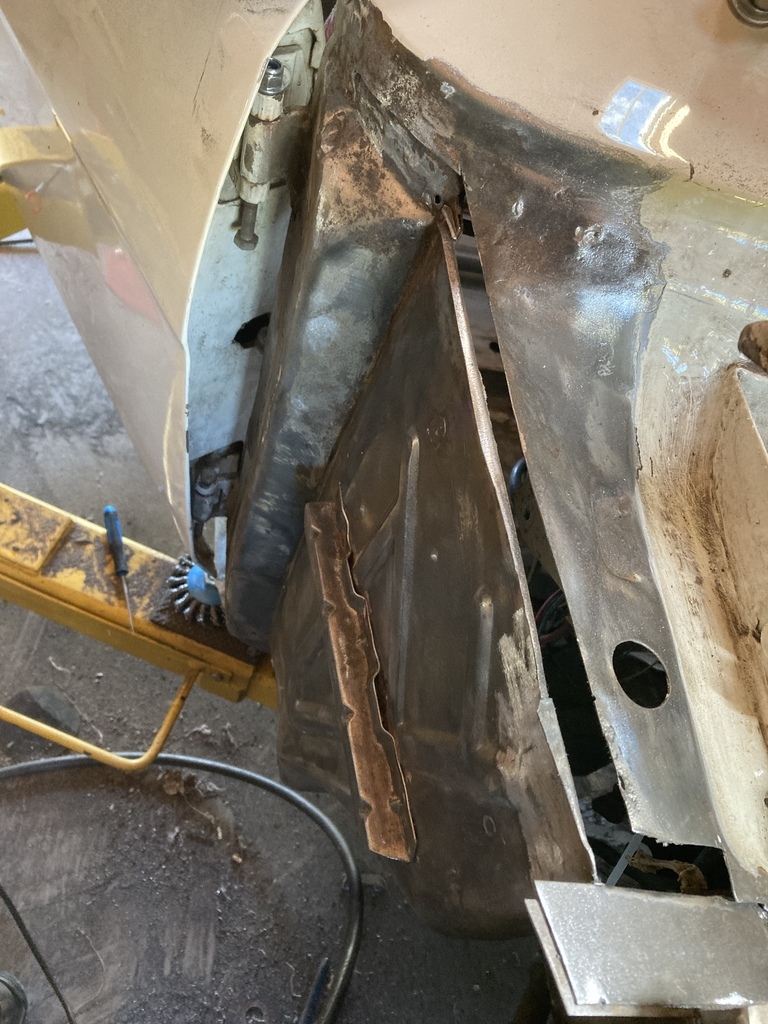 |
| |
|
|
|
|
|
Jul 11, 2022 14:58:57 GMT
|
I’ve got Covid so can’t go to work so after a bit of moping about and the paracetamol kicking in I went out the garage for a bit. Slow progress. Made a bit. 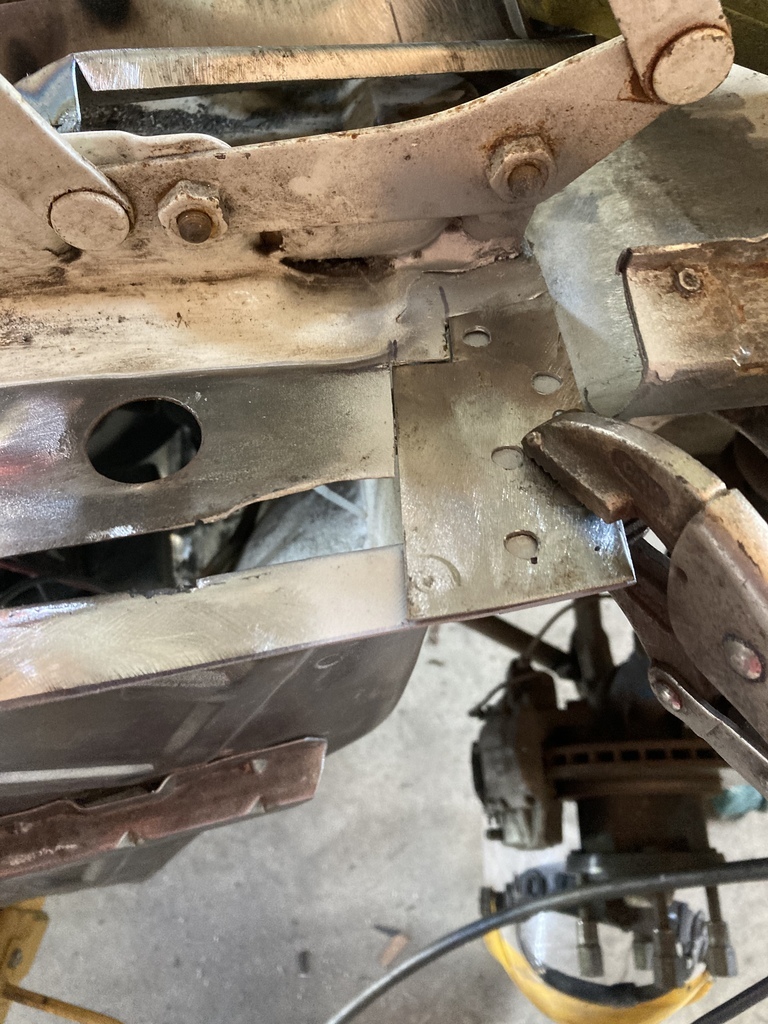 Welded it on 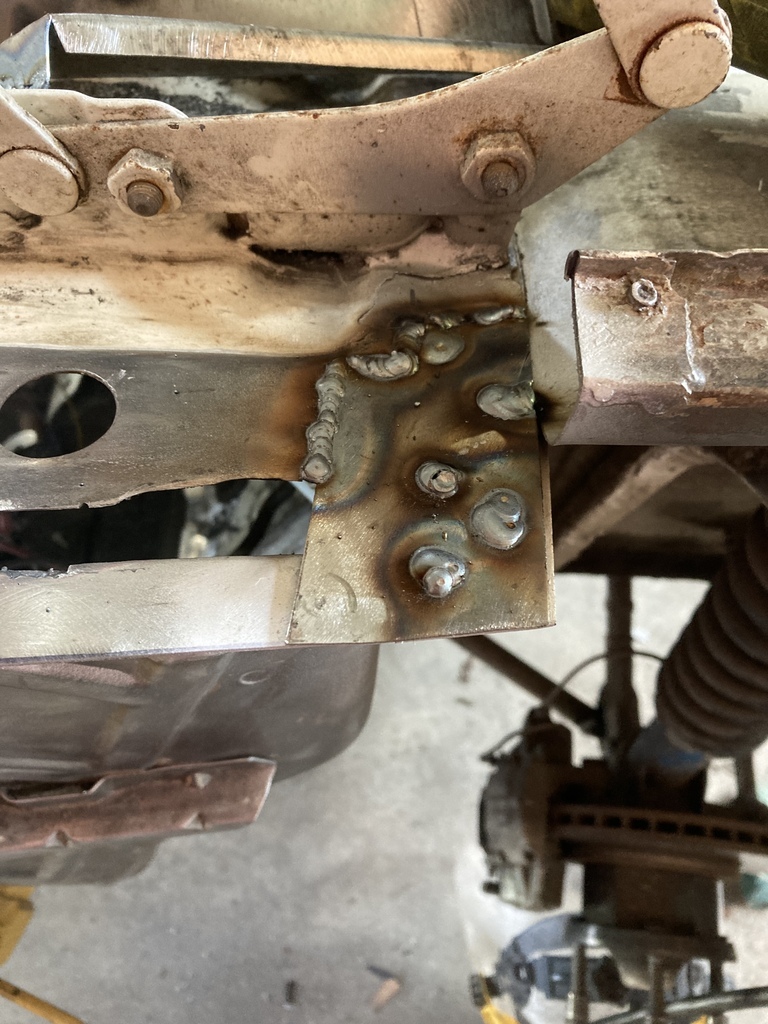 And ground it off 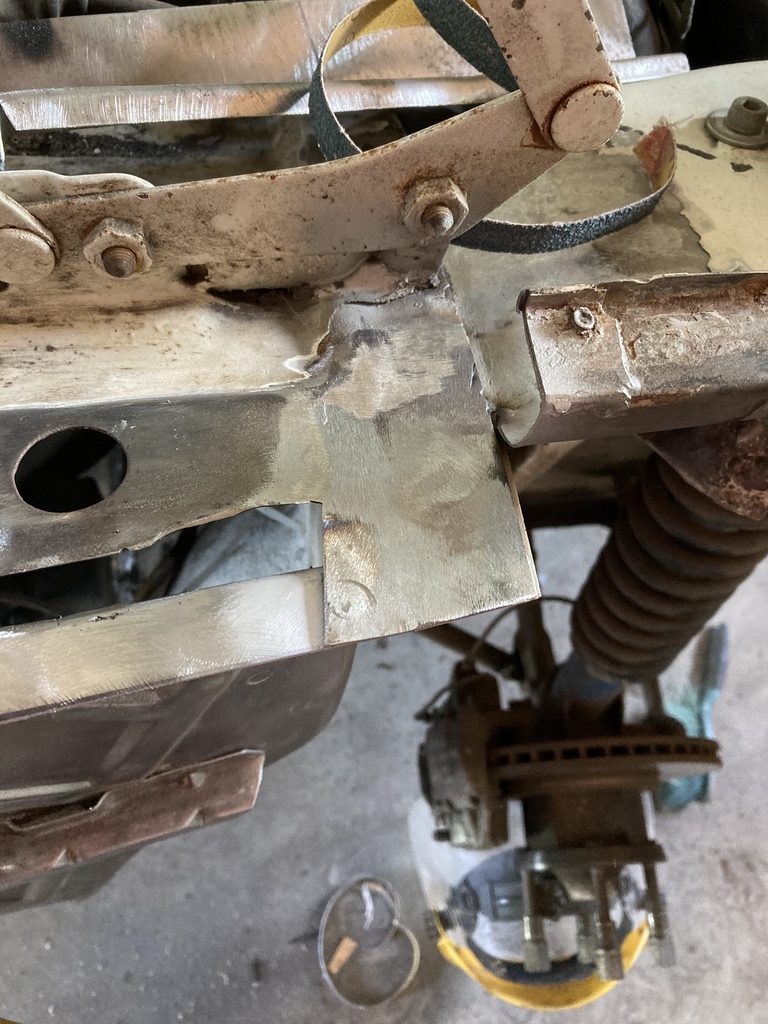 Made another bit (no photo) and welded it on. 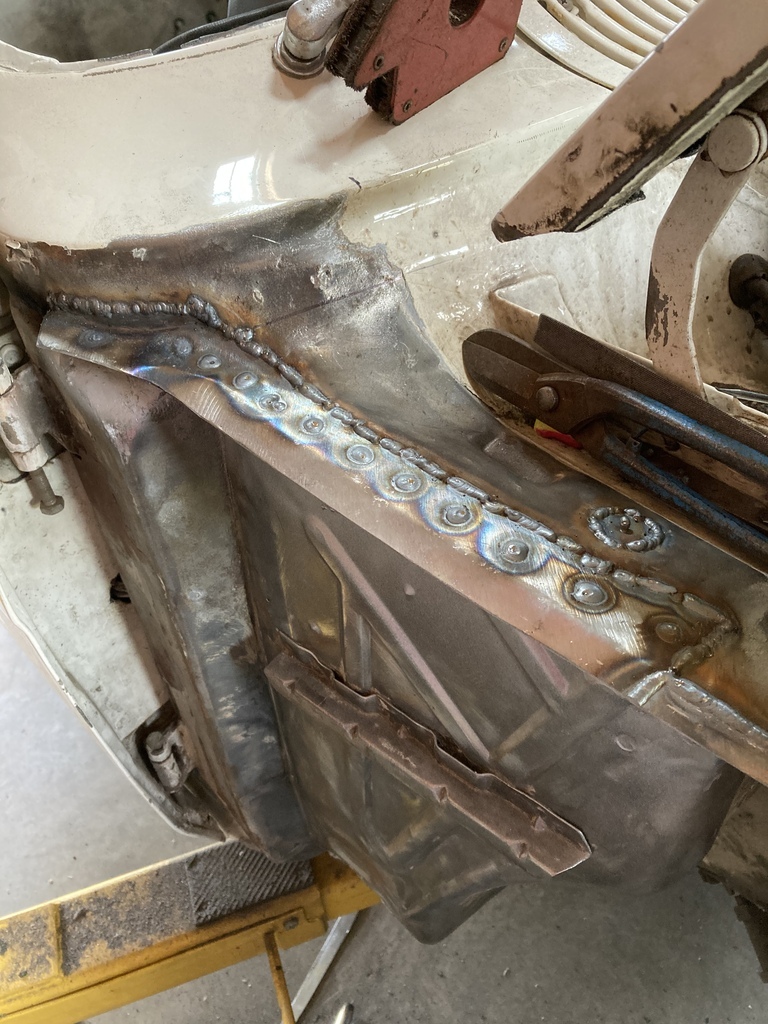 Made a section to close off the bottom to stop the crud coming in the car. I’d didn’t turn out brilliantly. 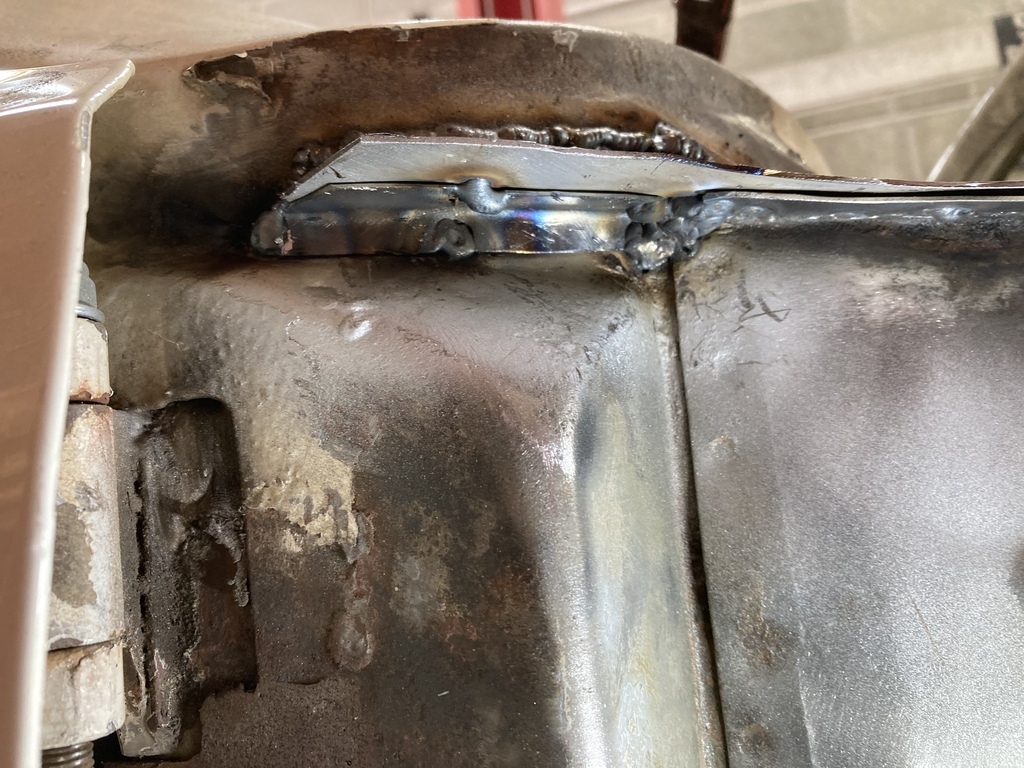 But you know what they say, if you can’t be a good welder, be a good grinder. Doubt I’ll get much in there to clean it up. It is all the way up under the wing though so no great issue |
| |
|
|
|
|
|
Jul 12, 2022 17:00:10 GMT
|
First I ground off yesterday’s welds 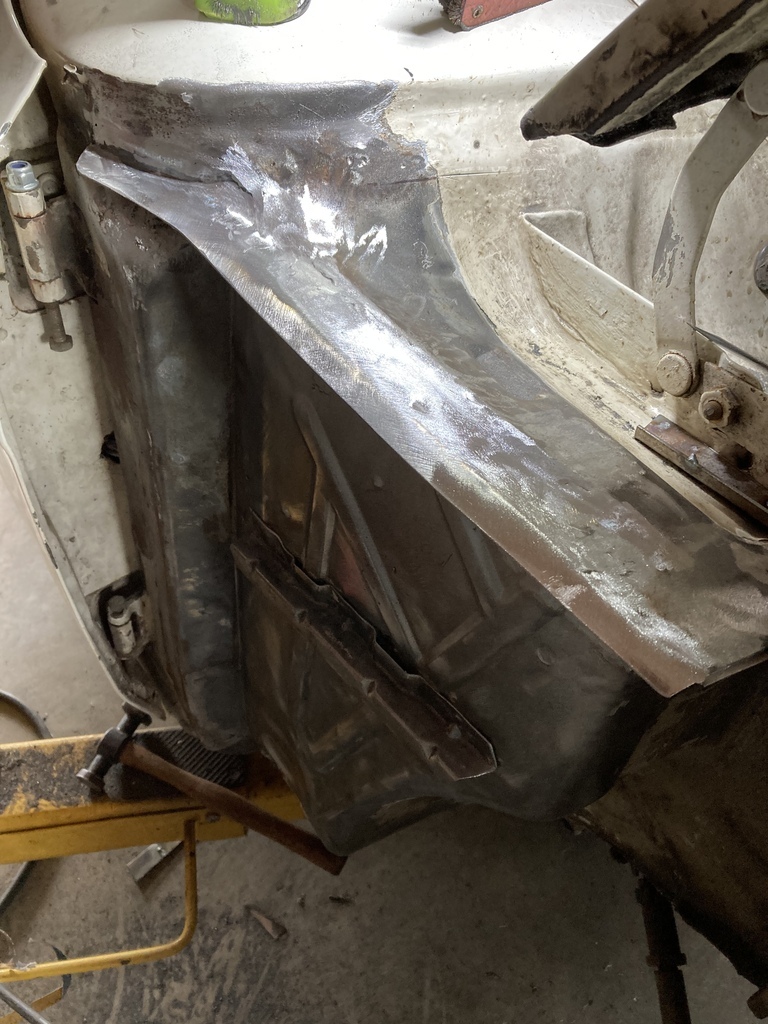 Then I made the wing rail end. 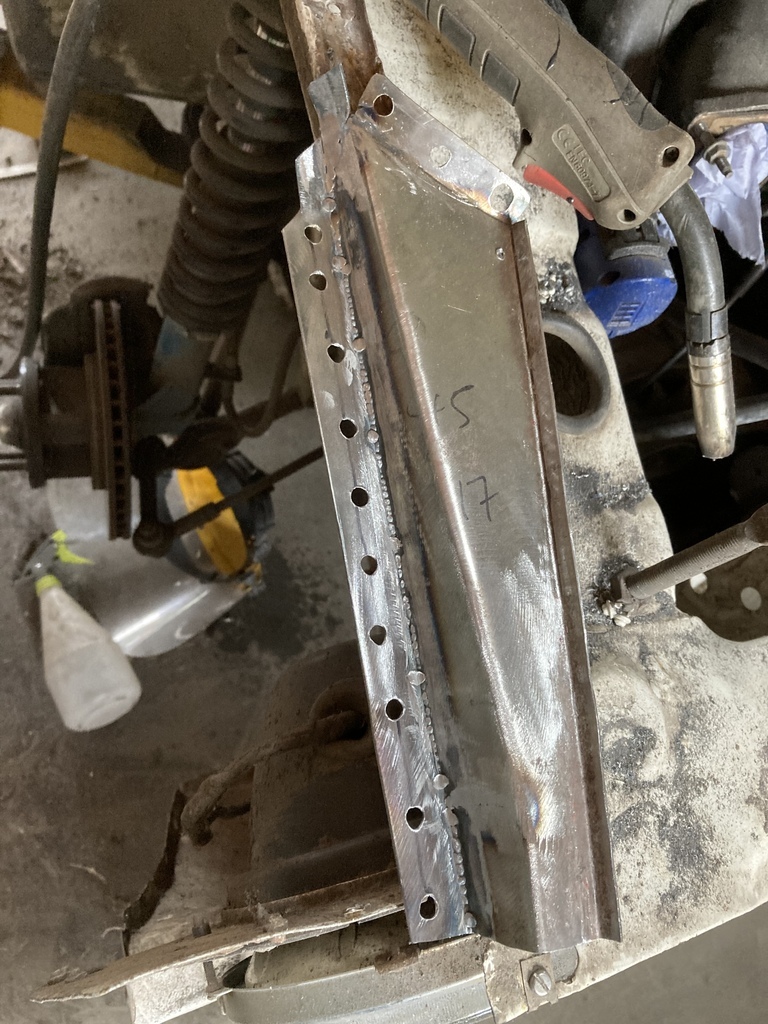 And welded it on 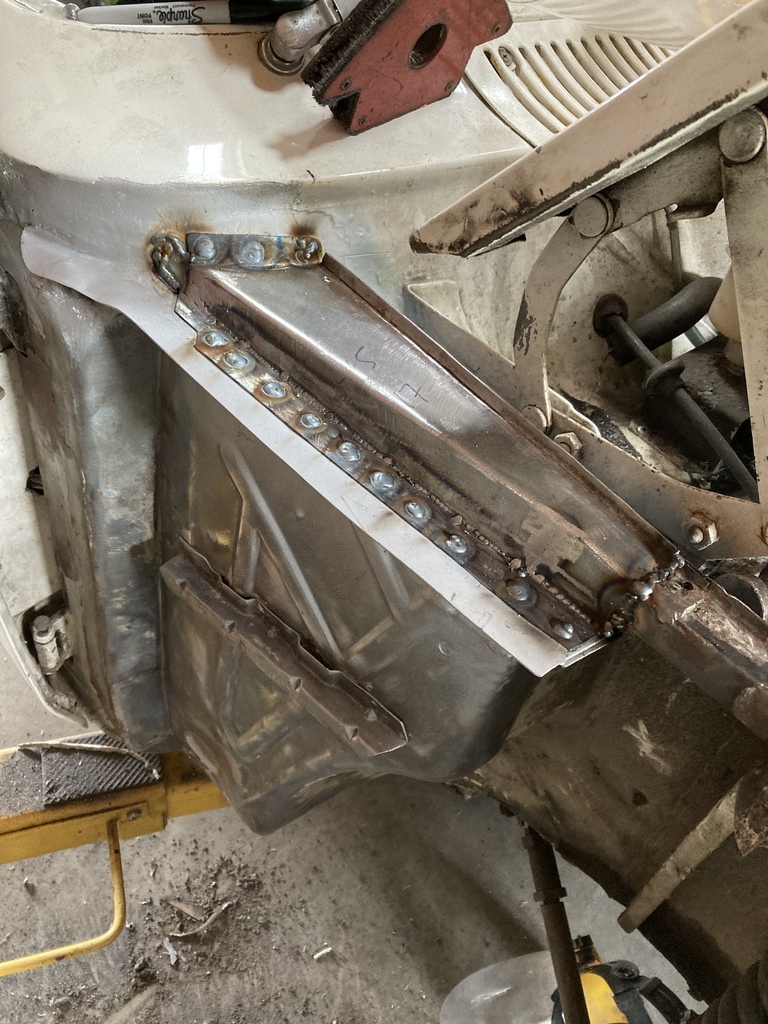 And ground it back off 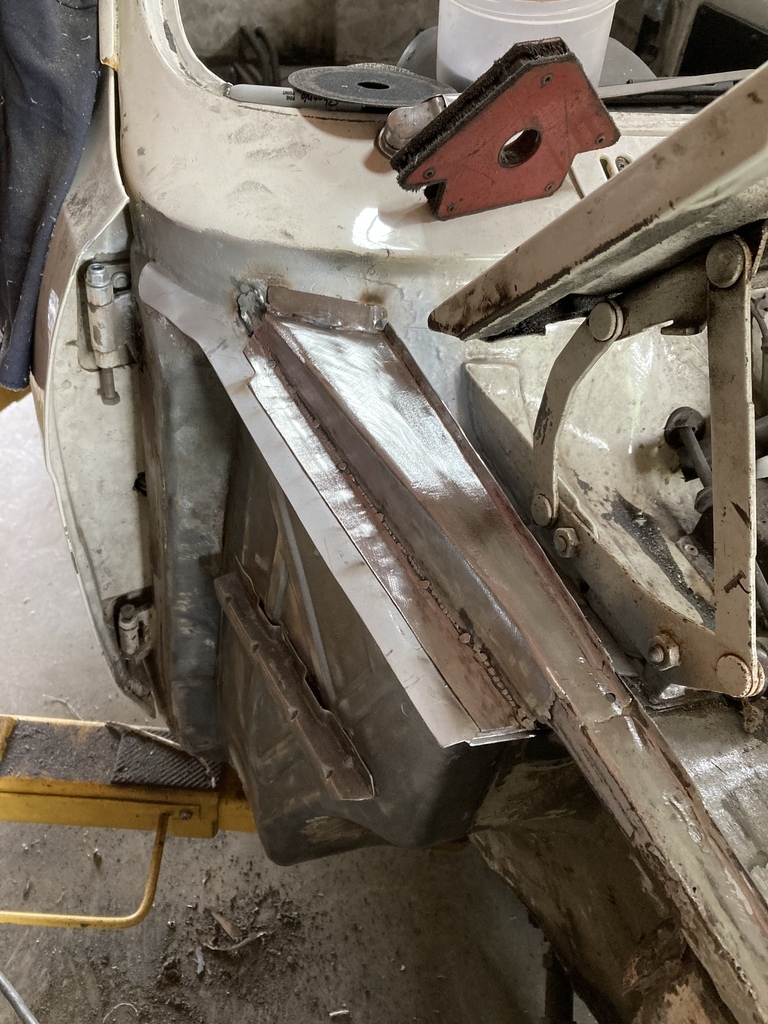 Next I thought I would wire wheel some of the stone chip off the inner wing. 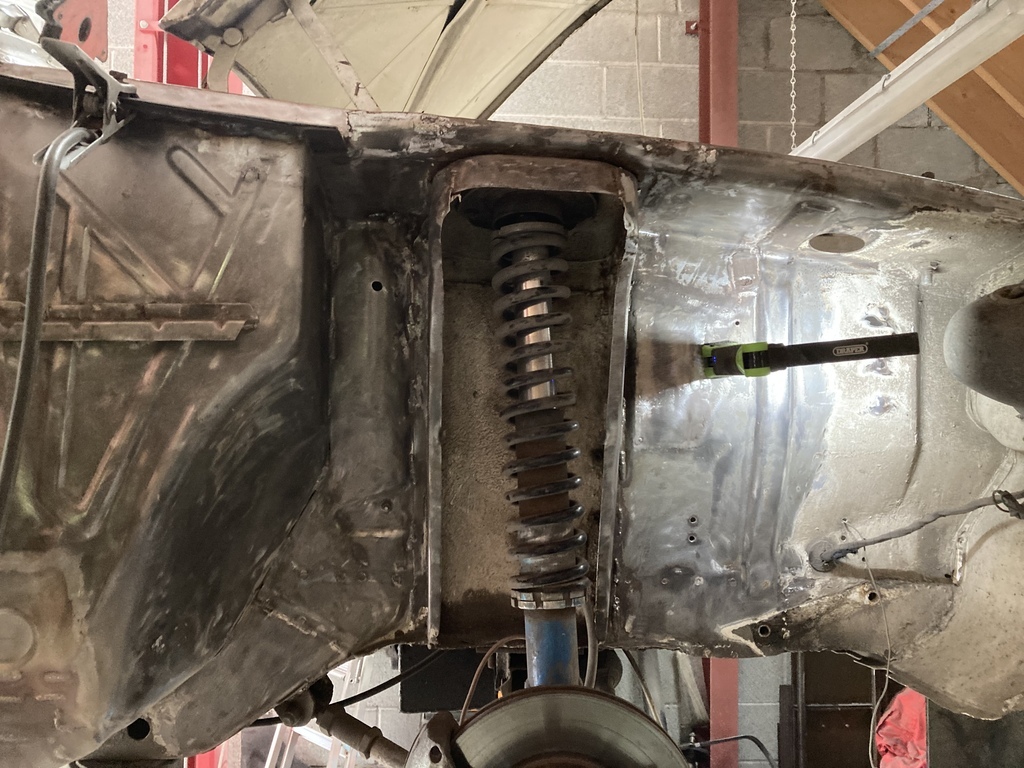 There’s a patch here that needs investigating 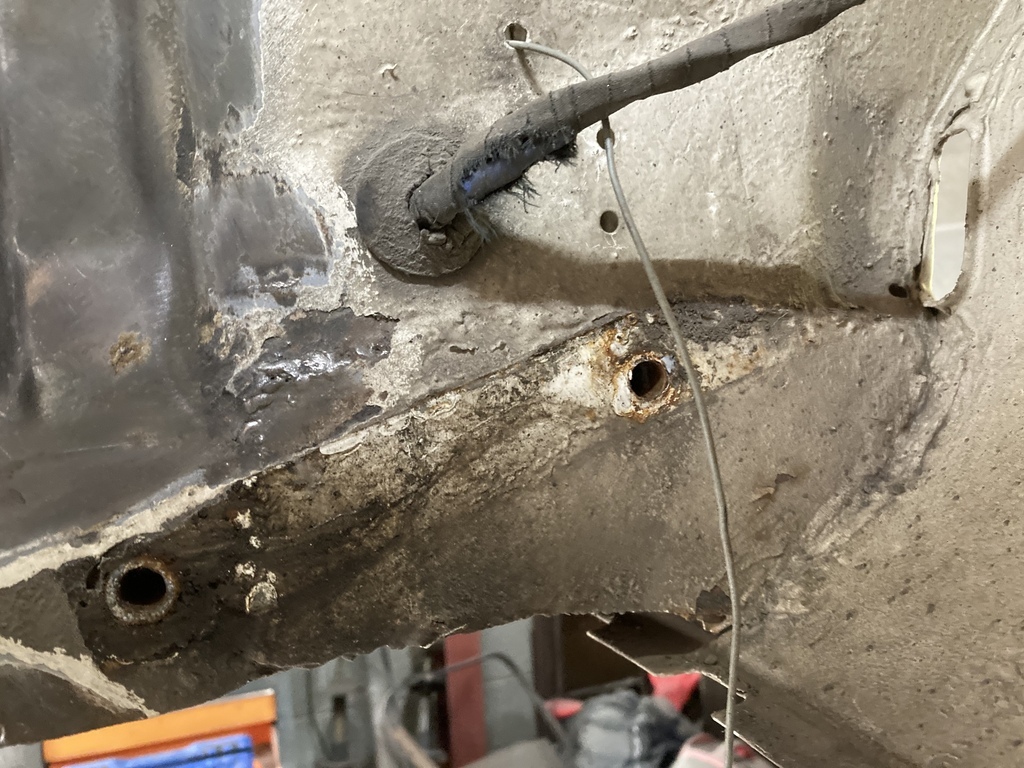 So I did . 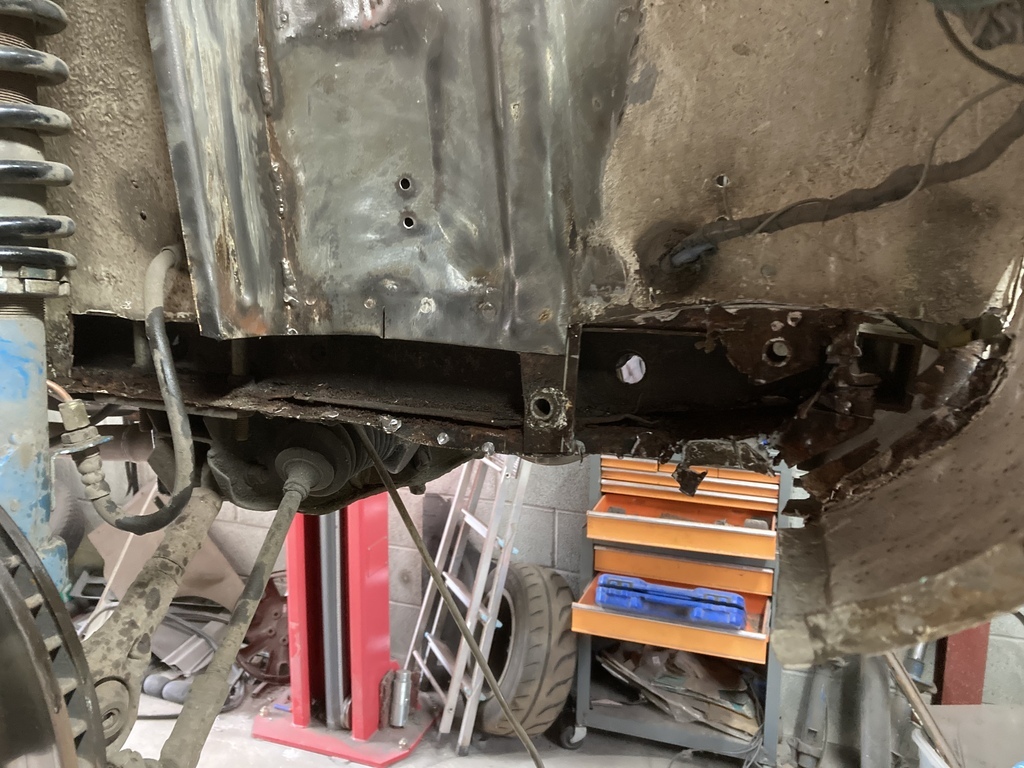 And now I wish I hadn’t 😩. It’s all several layers deep here. The bottom of the chassis rail has also been plated over(I think I might have done that) so that will need replacing too. I’ll have to blag some 1.6mm steel off my brother. |
| |
|
|
|
|
|
Jul 12, 2022 17:16:28 GMT
|
|
Nice work! Hate to hear you're still finding stuff, but at least it's getting fixed "right" this time...
|
| |
|
|
|
|
|
Jul 12, 2022 20:49:58 GMT
|
Nice work! Hate to hear you're still finding stuff, but at least it's getting fixed "right" this time... Thanks Rascal. The end is in site- of the welding at least, but there’s still lots I’m not happy with. But it’s only a rally car not a show car. |
| |
|
|
|
|
|
|
|
|
All of it looks like progress to me.
Amazing amount of work you are putting in.
|
| |
|
|
|
|
|
|
|
All of it looks like progress to me. Amazing amount of work you are putting in. Thanks Grizz. Progress is good at the moment, but today we’ve got a guest in the shepherd’s hut so no grinder action. I’ll find something to get on with though. And as a caveat to the end in site comment above, I meant rot repair welding on the body. I’ve still got to sort the doors yet. |
| |
|
|
|
|
|
Jul 13, 2022 16:55:29 GMT
|
Yesterday I’d also cut out a plate that was starting to rot again. As we had our guest I thought I could weld in a new bit without making any noise. 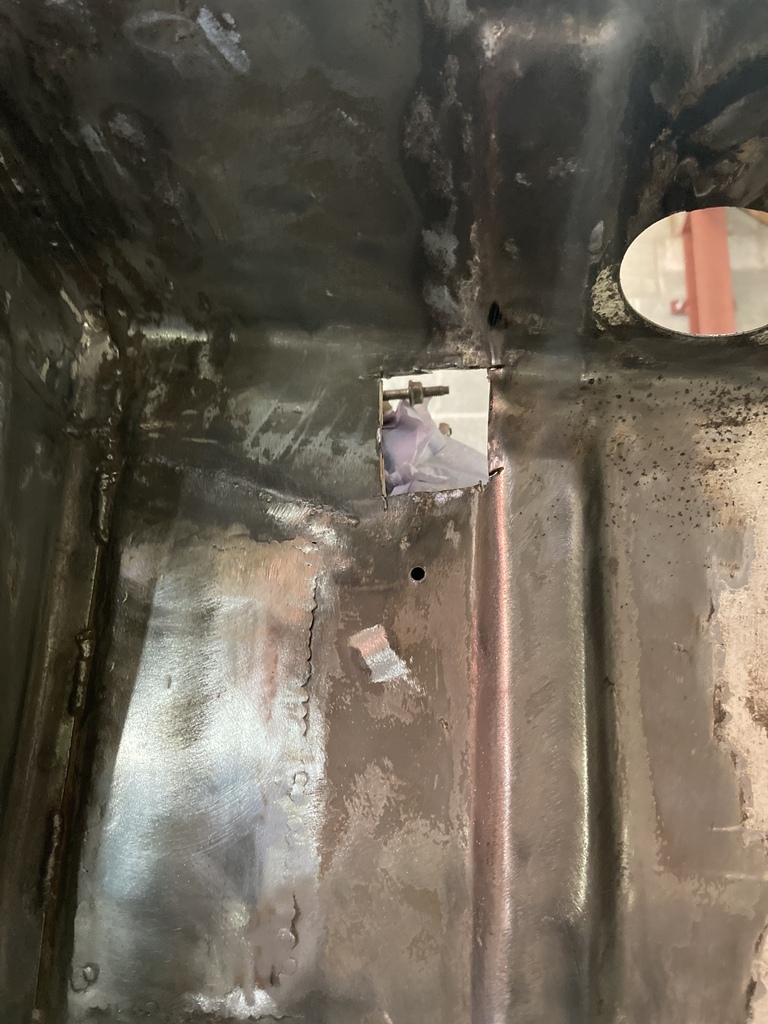 But then I noticed our guest had gone out for the day so I jumped back on the grinder and continued to cut out the grot in the chassis rail. 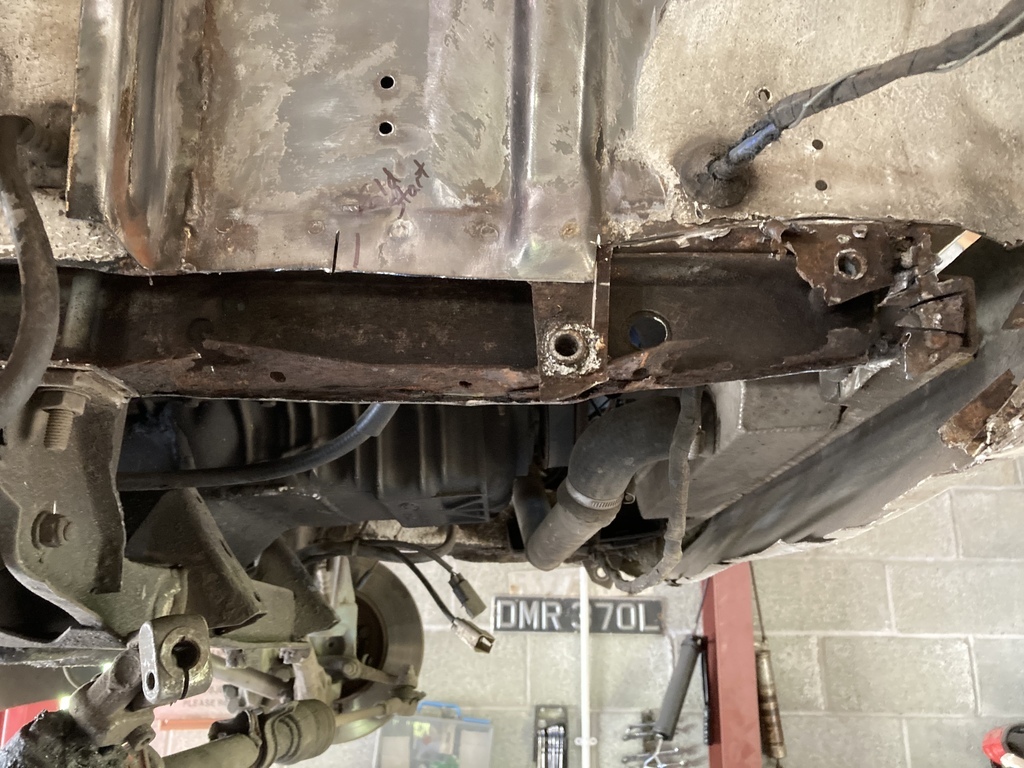 The manky bit you can see is the bottom part of an internal strengthener. This got cut out and a new one welded in 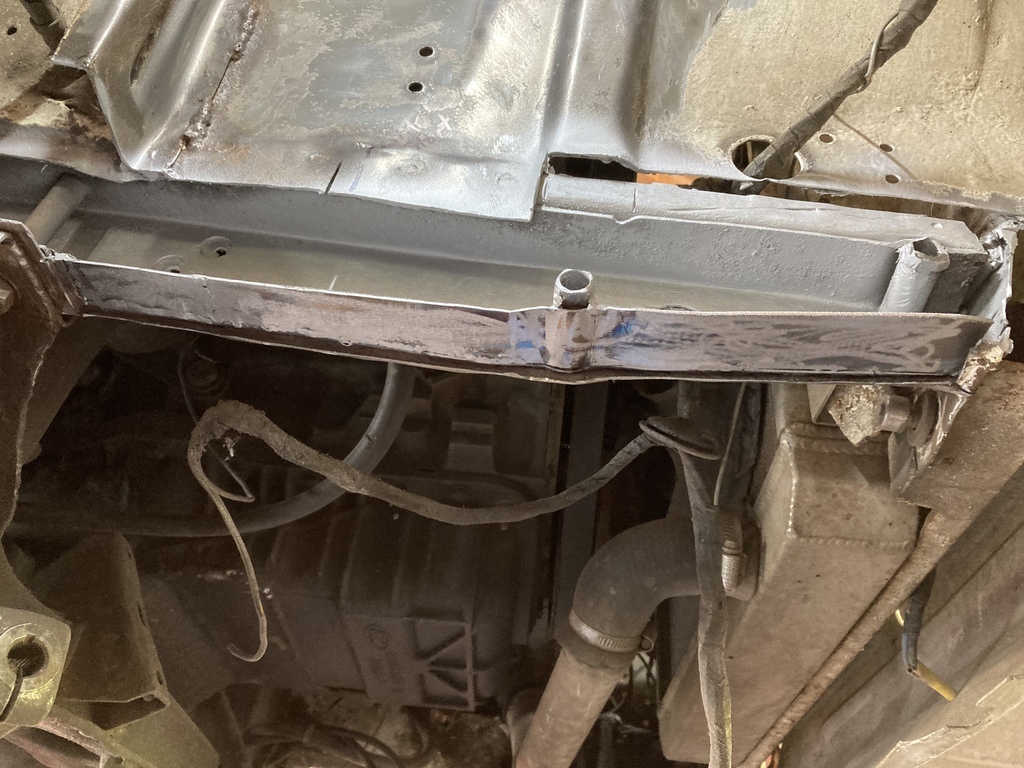 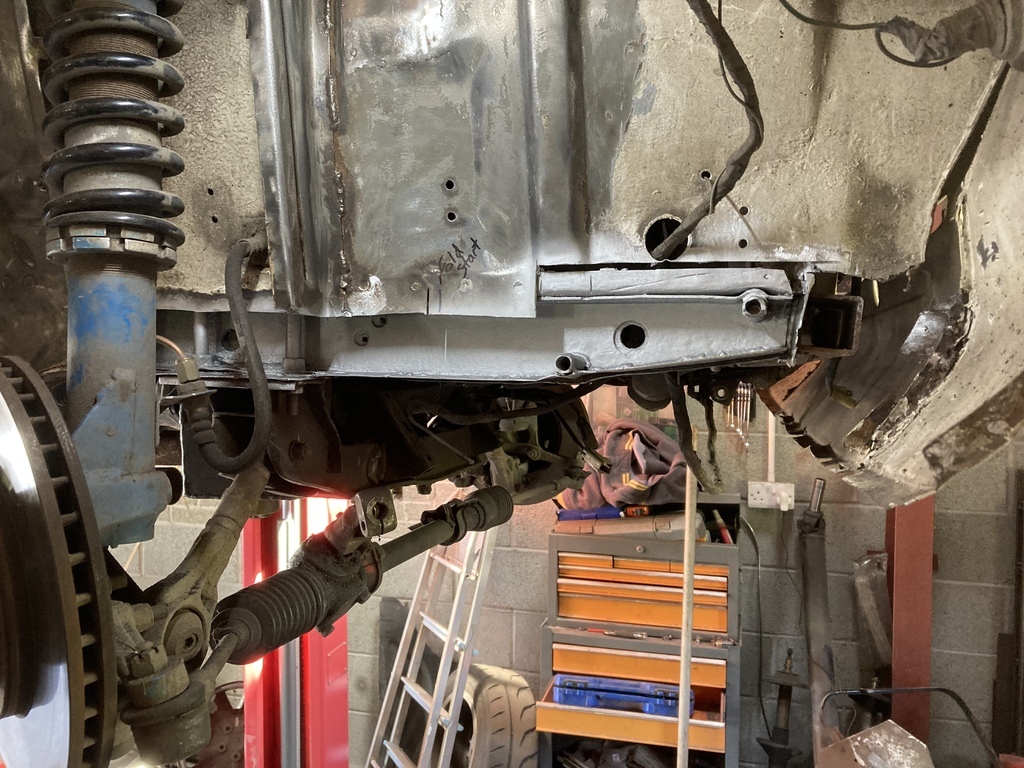 The 2 tubes you see near the front hold the bumper irons. They also hold a bracket in the engine bay which in turn holds the anti roll bar. To beef this bit up there is also a strengthens plate. So I made one. 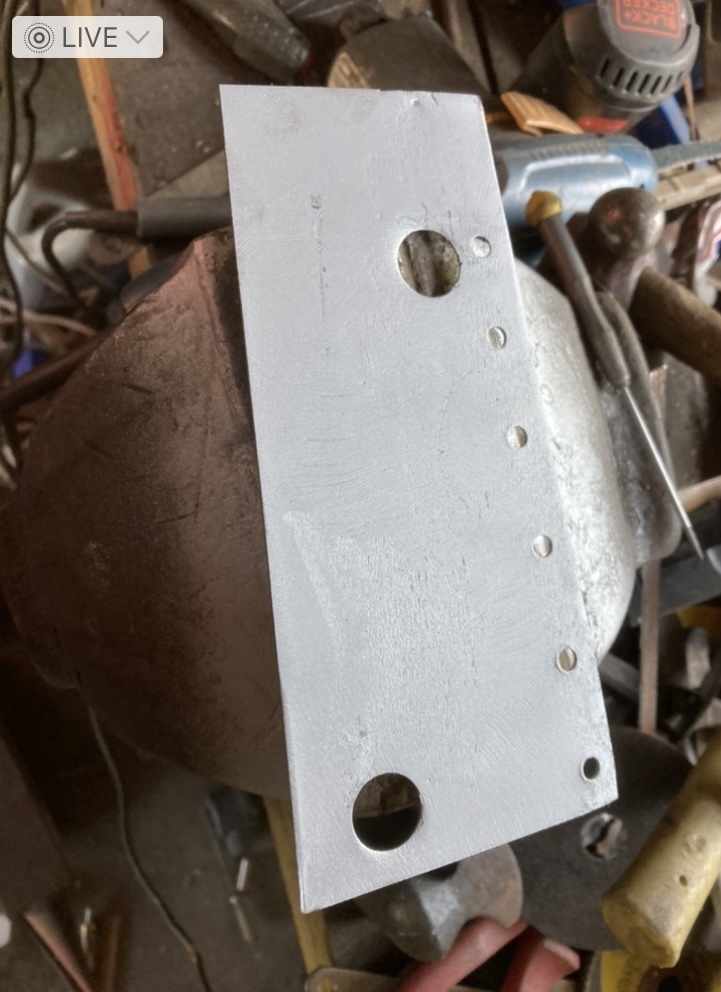 And welded it on 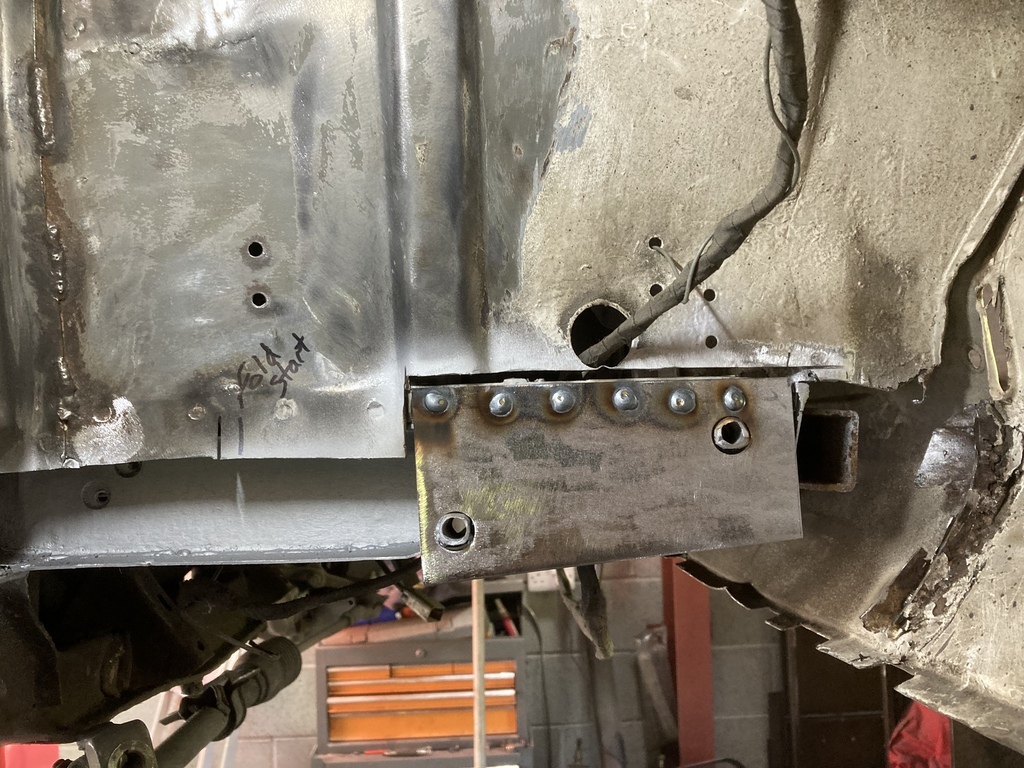 And all ground back 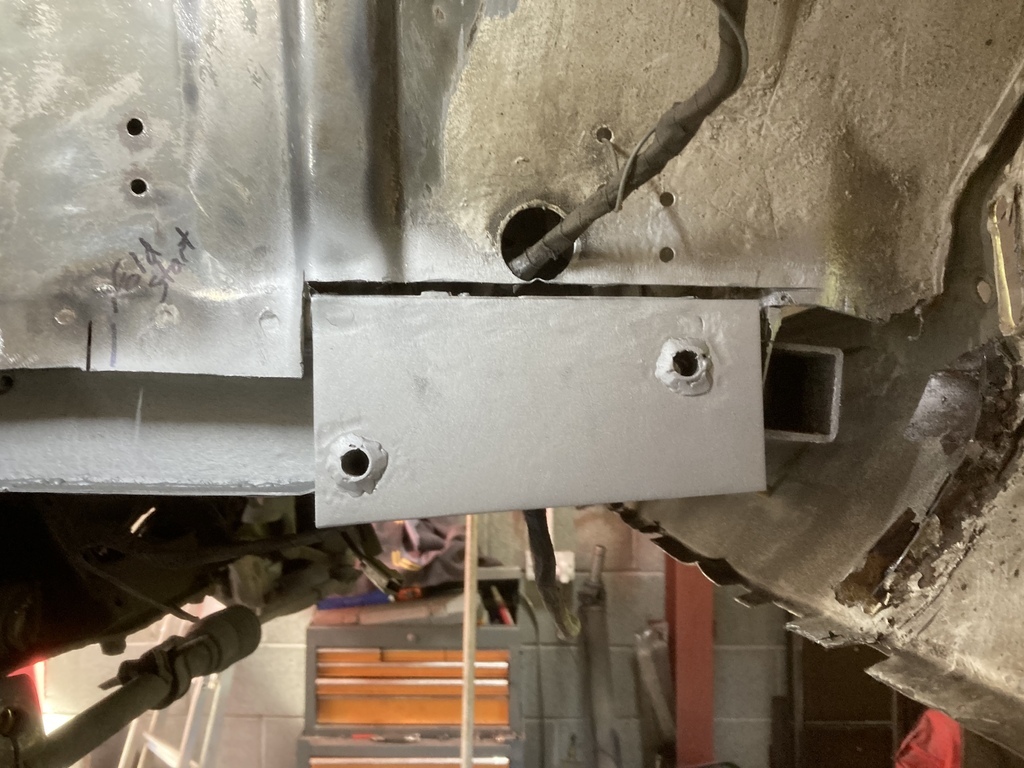 Not that my car needs all this strength here as I’ve dumped the anti rollbar so the wheels are now located from behind the engine cross member using compression struts. The shape that was in the inner wing is cut out to remove the rotten strengthener would be a pain to remake so I welded it back on 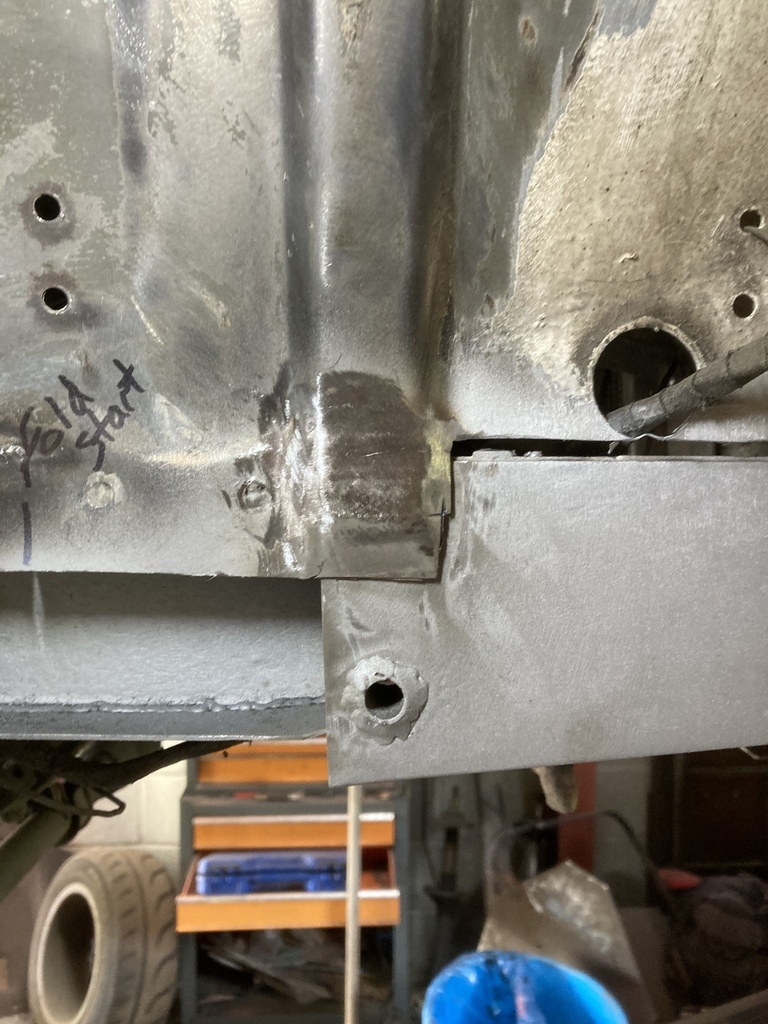 And I made some sections to repair the bottom of the inner wing 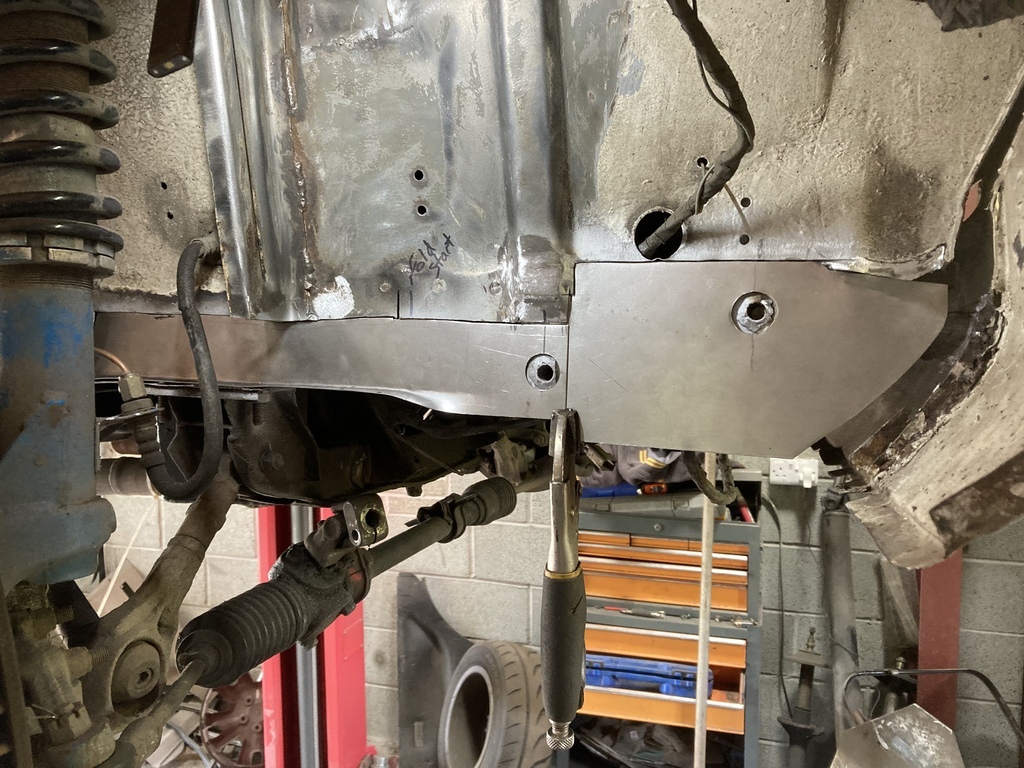 I’ll repair the rest of the chassis rail tomorrow and these plates can then be welded on. |
| |
Last Edit: Jul 13, 2022 16:58:43 GMT by jonsey
|
|
|
|
|
Jul 14, 2022 16:57:58 GMT
|
So the bottom of the chassis rail got constructed. 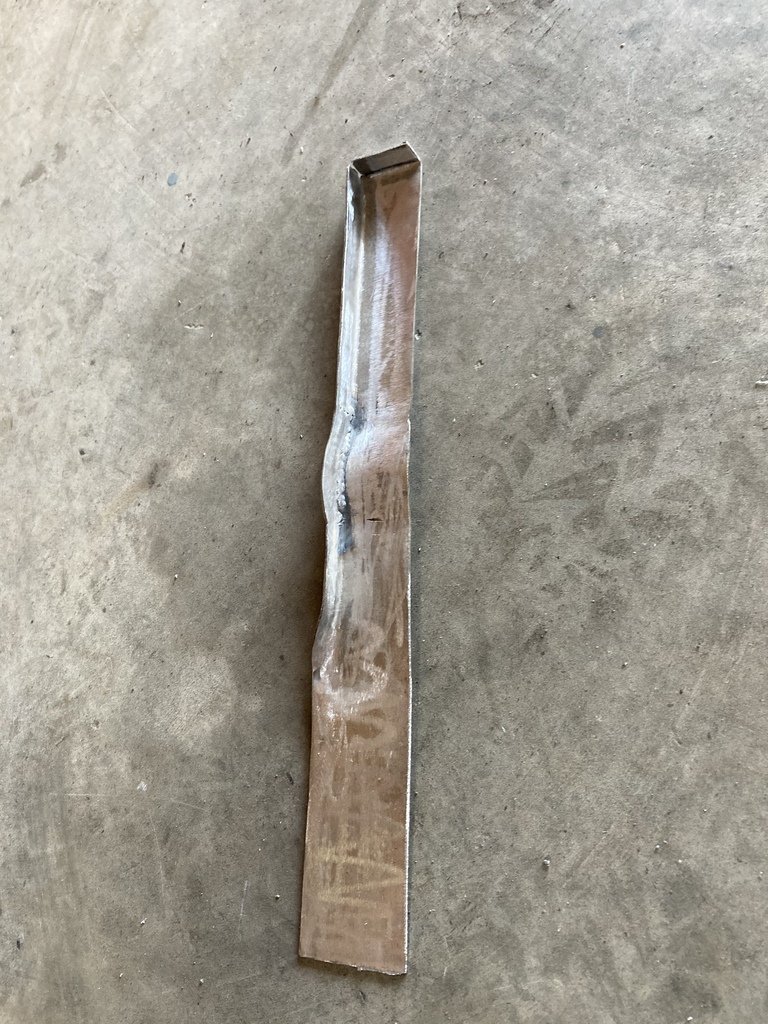 And then welded into place with the amps cranked up so it don’t fall off. 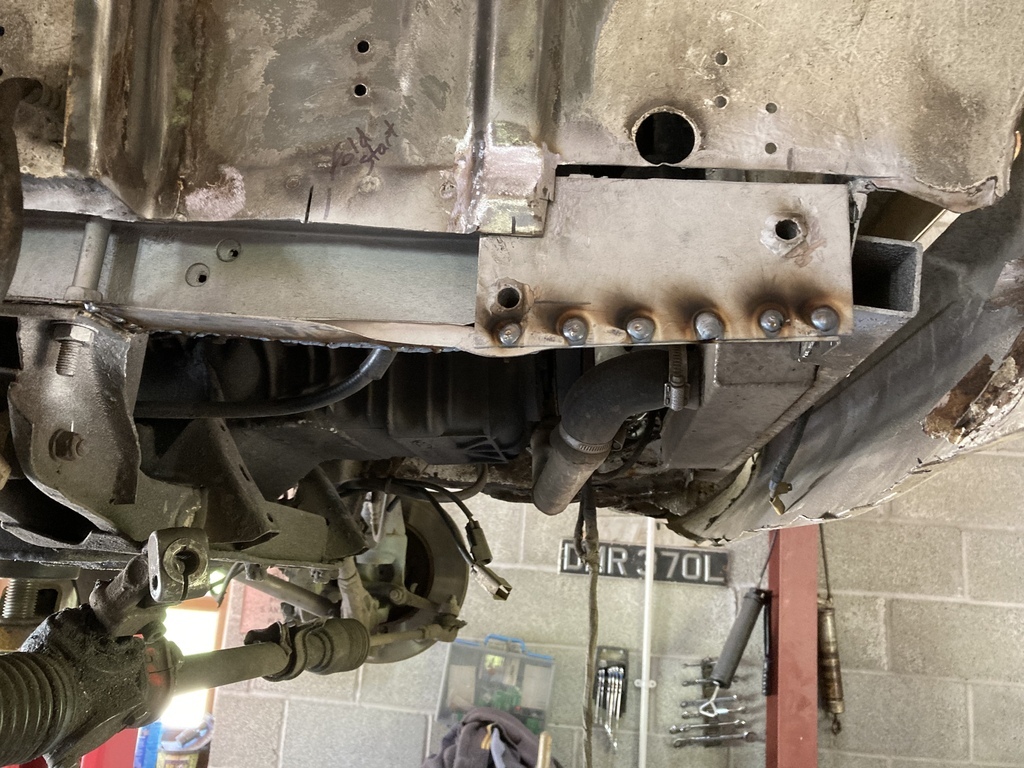 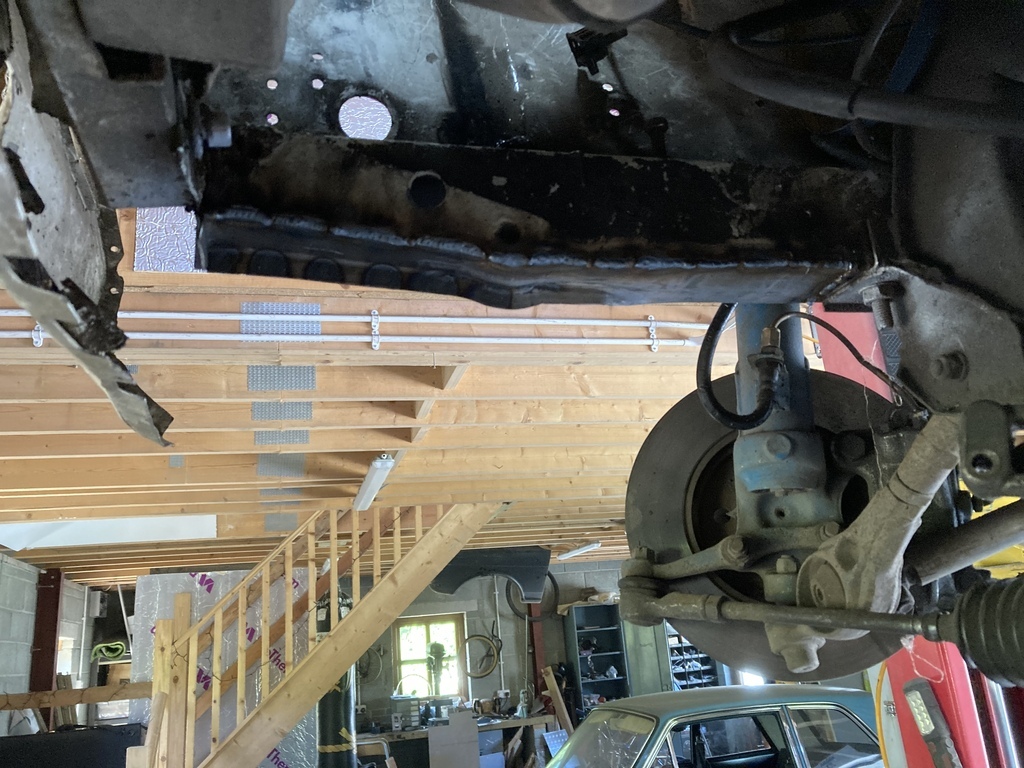 And the ground back off again 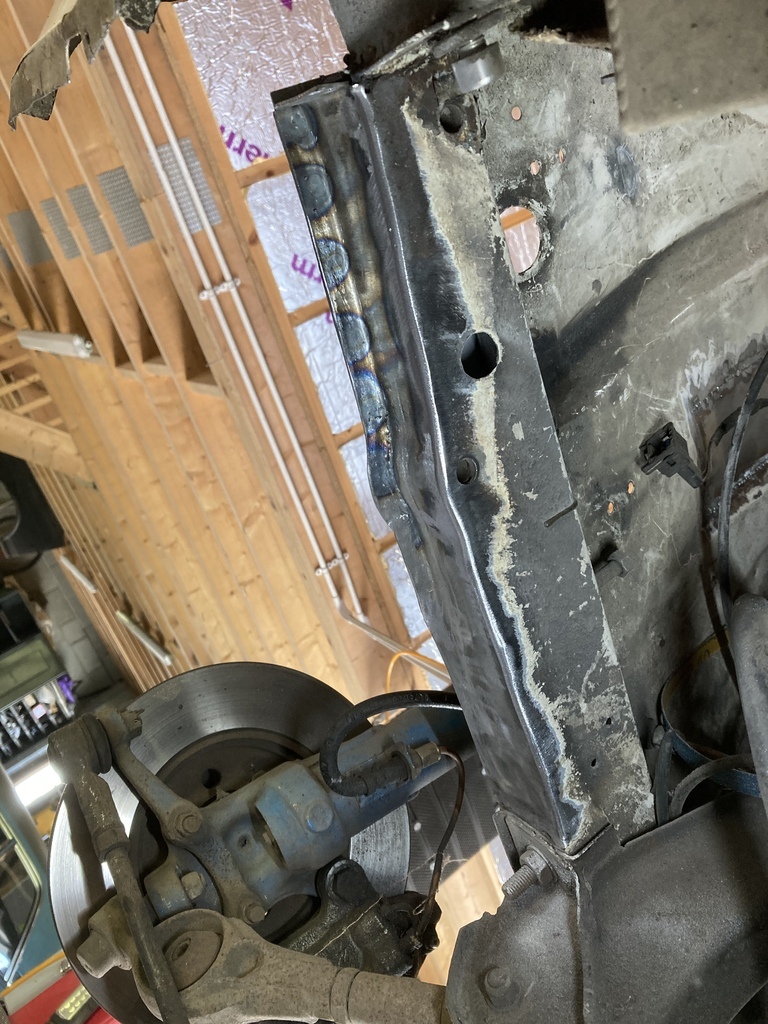 So then I could weld these bits that I made yesterday, to finish it all off. 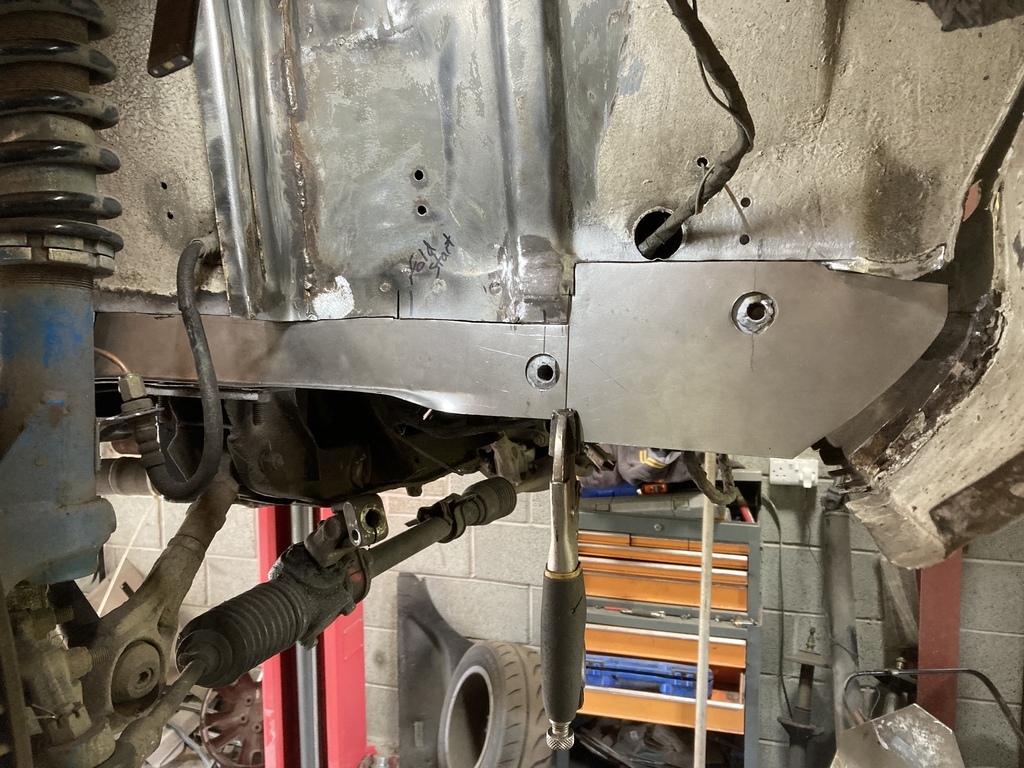 But I didn’t. I made them from a sheet of 0.9mm steel but they just felt to flimsy. I gave the sheet a measure and it’s actually only 0.6mm FFS. So I remade them. 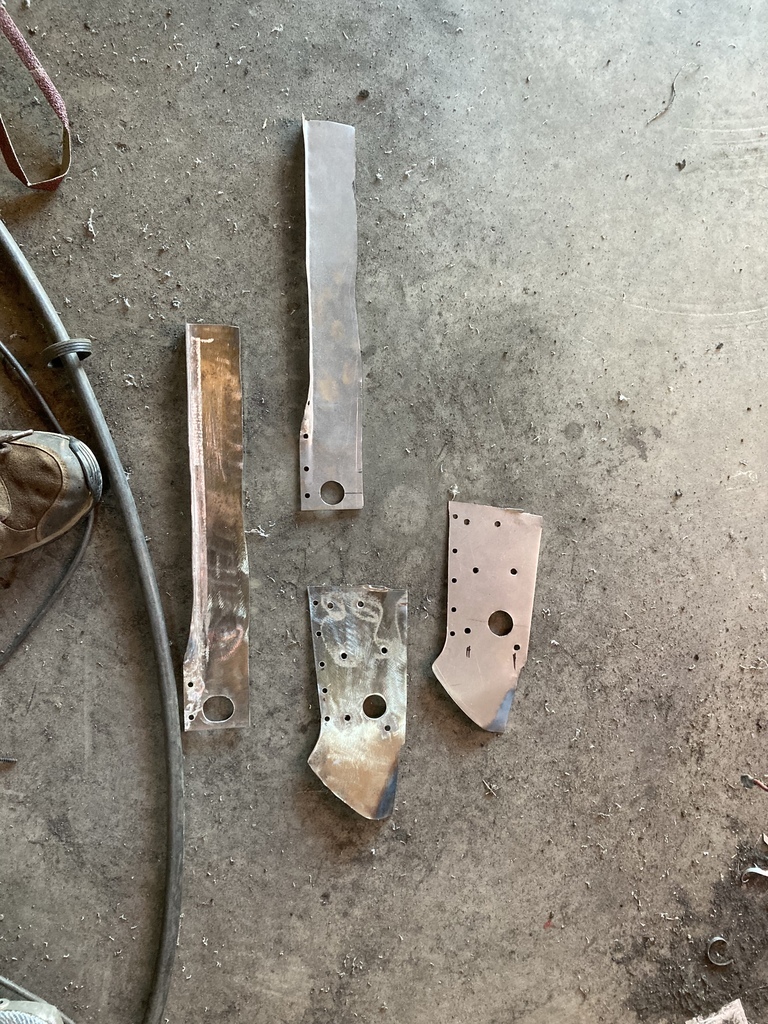 And welded them on. 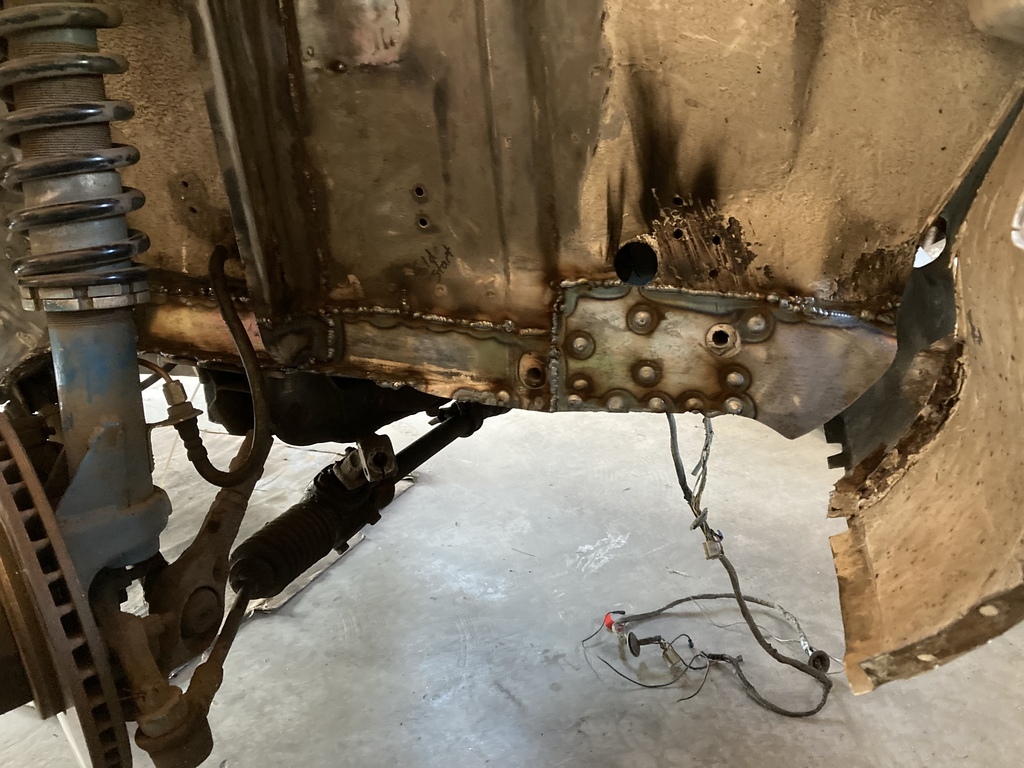 And welded this bit of the strut tower back on too. I also seam welded the bottom edge of the chassis rail but the welder started playing up a bit. It would sometimes do nothing when pulling the trigger and other times it would weld and the the feed would slow and the welded would just ‘blob’. I tried it welding on a bit of scrap plate and it worked fine??? So those welds look really curse word. Grinder will sort it though. 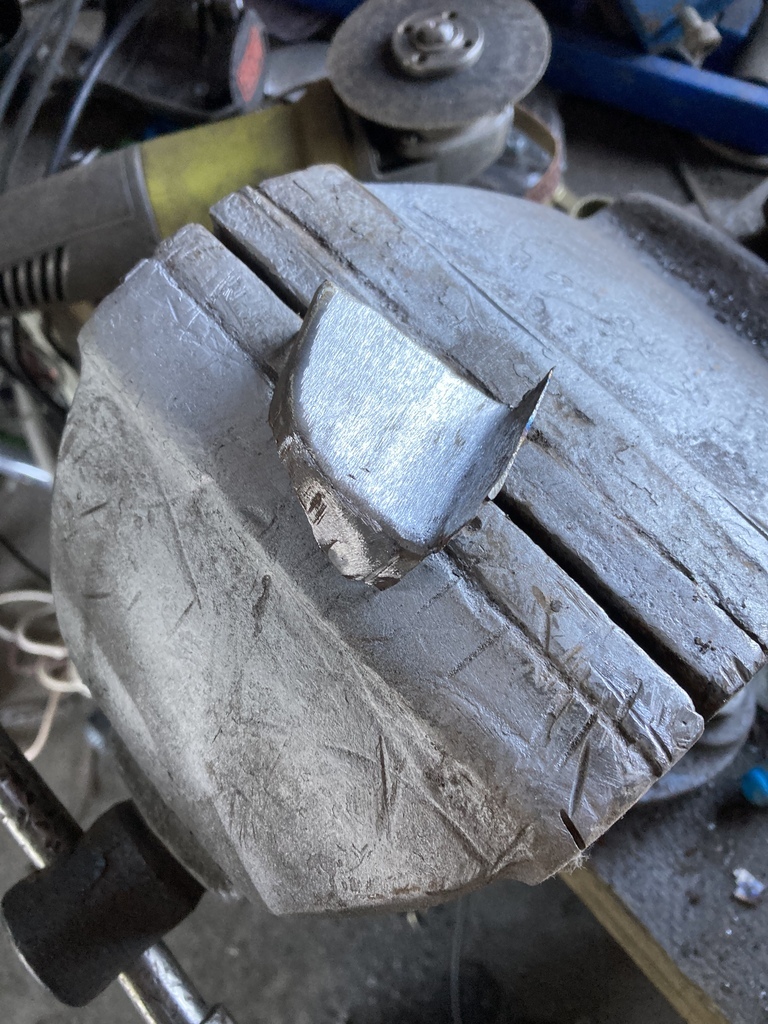 I’ll grind it all off as out Shepherd’s hut guest was back and I doubt she wanted to here any of that. I had a quick look at the other side 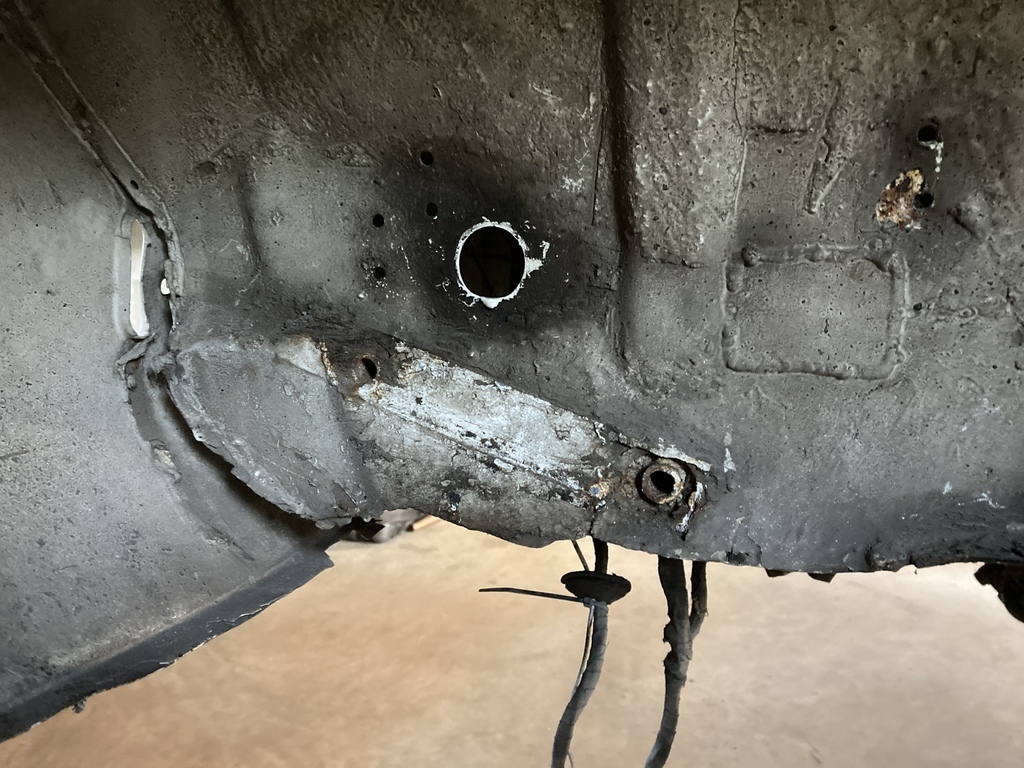 You can see what’s going to happen here😩. |
| |
|
|
glenanderson
Club Retro Rides Member
Posts: 4,360
Club RR Member Number: 64
|
|
Jul 14, 2022 18:39:42 GMT
|
|
Liked for the progress, not the state of the other side. 👍
|
| |
My worst worry about dying is my wife selling my stuff for what I told her it cost...
|
|
|
|
|
Jul 14, 2022 18:50:15 GMT
|
Liked for the progress, not the state of the other side. 👍 Thanks Glen. Preliminary investigations suggest the chassis rail section might be ok, but this is subject to change. |
| |
|
|
|
|
|
Jul 14, 2022 19:34:52 GMT
|
|
You & I had the same problem with welder gas flow valve, now we have the same trigger problem, R-Tech had this to say
"The torch has a 3 month warranty, and the machine has a 3 year warranty. If the torch is under warranty I can have a replacement sent to you, otherwise feel free to open it up and I can help when looking what to check.
It sounds like an inconsistent trigger to me. One thing you can check is the brass nut that holds the liner in and make sure it's wound tight. If not, then it can push the trigger pins on the torch away from the euro fitting, causing inconsistent connection.
Kind Regards,
Ben K
Technical department"
In my case the problem fixed itself, may be an insect had got into the contact.
|
| |
|
|
|
|
|
Jul 14, 2022 21:25:46 GMT
|
You & I had the same problem with welder gas flow valve, now we have the same trigger problem, R-Tech had this to say "The torch has a 3 month warranty, and the machine has a 3 year warranty. If the torch is under warranty I can have a replacement sent to you, otherwise feel free to open it up and I can help when looking what to check. It sounds like an inconsistent trigger to me. One thing you can check is the brass nut that holds the liner in and make sure it's wound tight. If not, then it can push the trigger pins on the torch away from the euro fitting, causing inconsistent connection. Kind Regards, Ben K Technical department" In my case the problem fixed itself, may be an insect had got into the contact. Thanks for that Mr Legs. I did strip the torch down a month or so ago as it was doing the same thing then. The liner had moved and I could not screw a new tip in. It was fine after that and I forgot all about it. I’ll have another look next time. To be fair, I drop the torch all the time so it has taken a beating. |
| |
|
|
|
|
|
Jul 15, 2022 17:06:29 GMT
|
I had a couple of hours spare so I thought I’d investigate the patches on the other side inner wing. Started with a bit of wire wheeling. 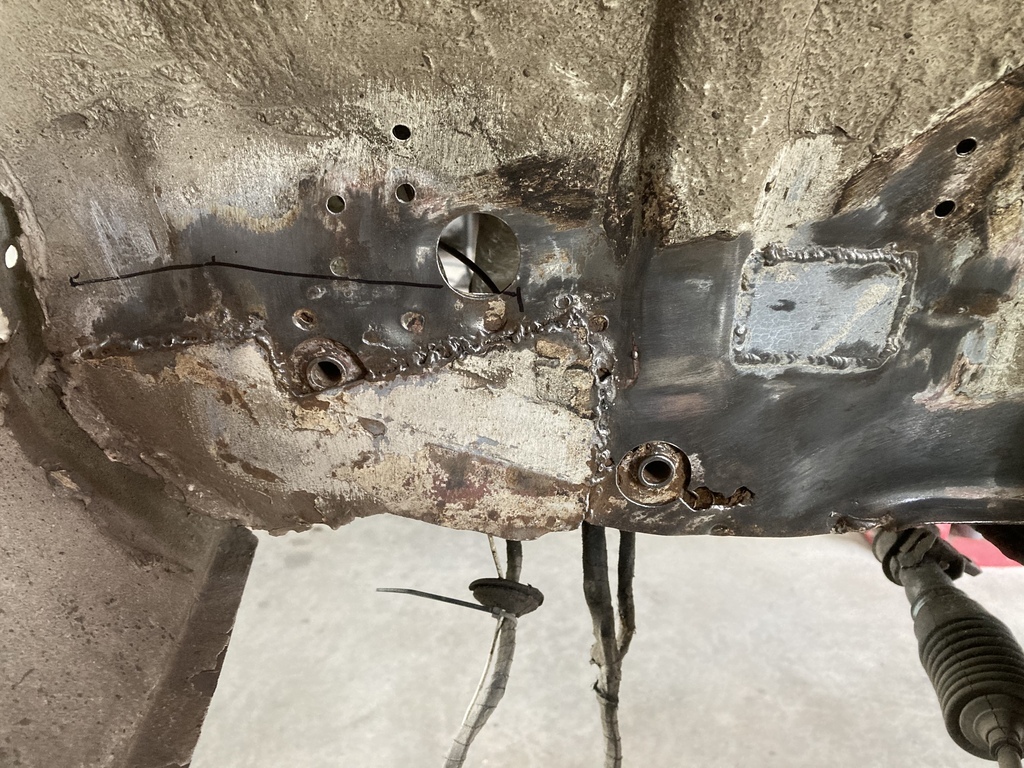 Lovely welds there. Dug a bit further. The internal strengthener is a lot worse this side 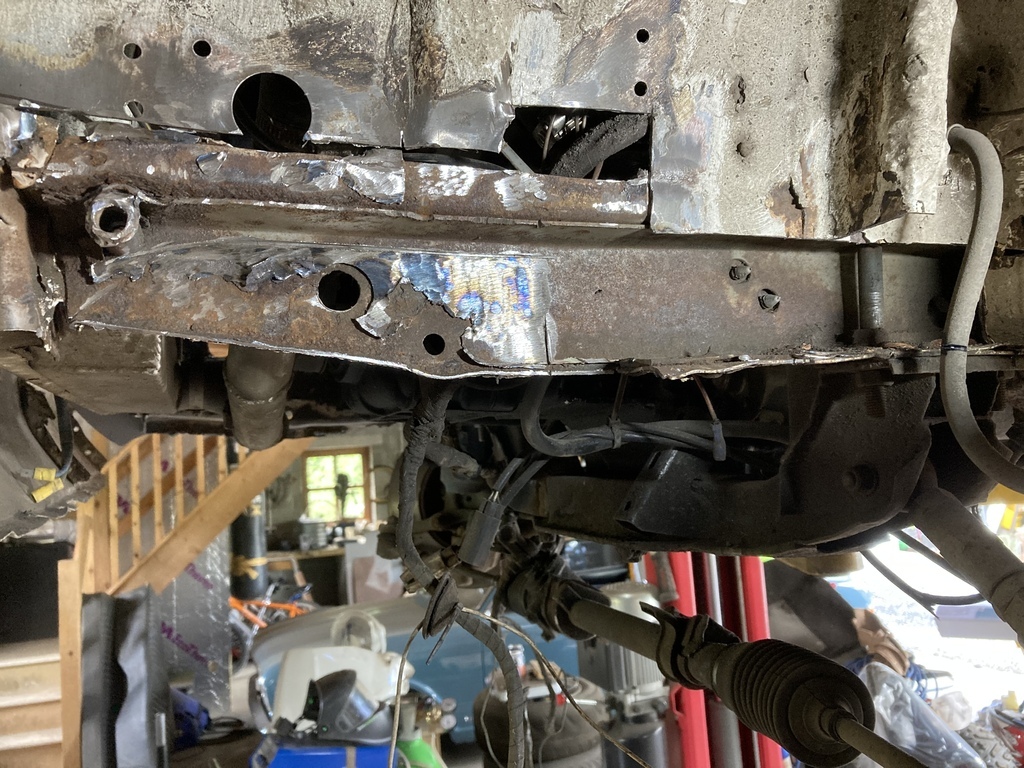 I then noticed the chassis rail where the cross member bolts had ballooned due to rust between the to layers of the rail. So much so, the chassis rail side was now touching the cross member. There should be a gap here. 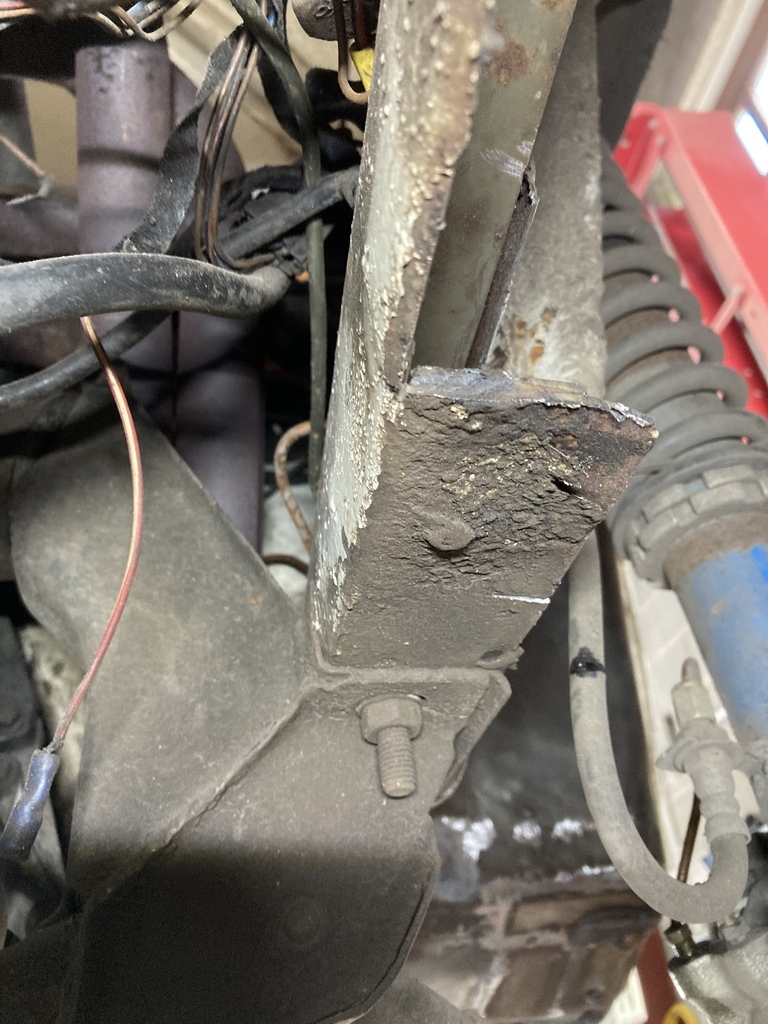 So the chassis rail side came out too 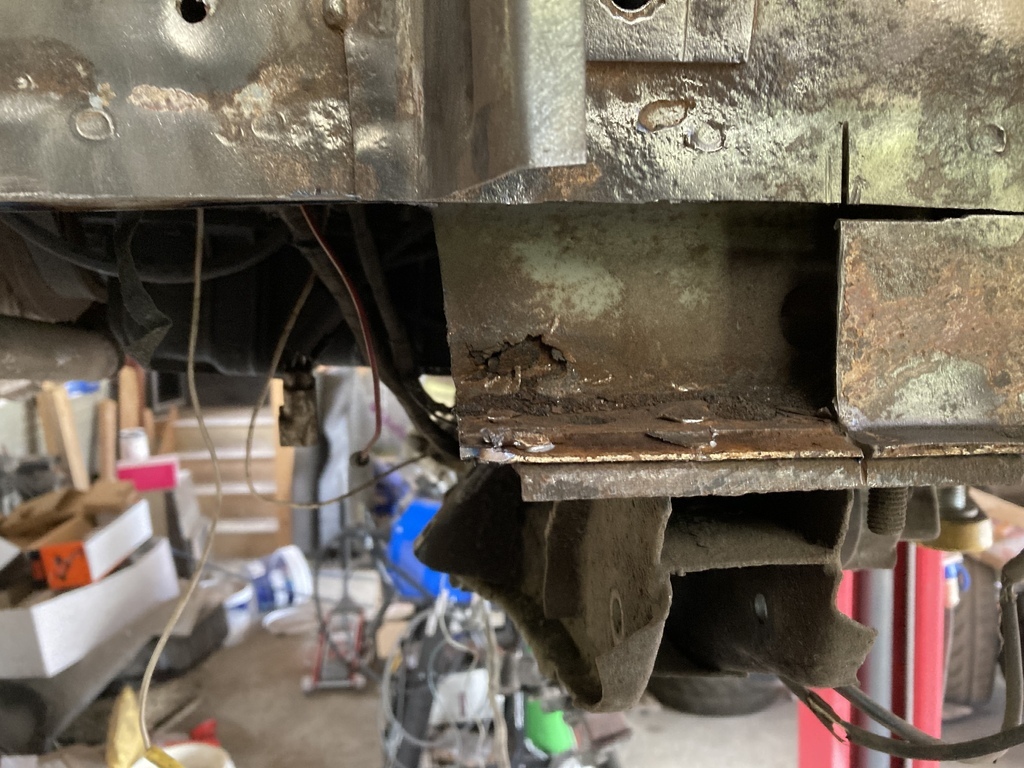 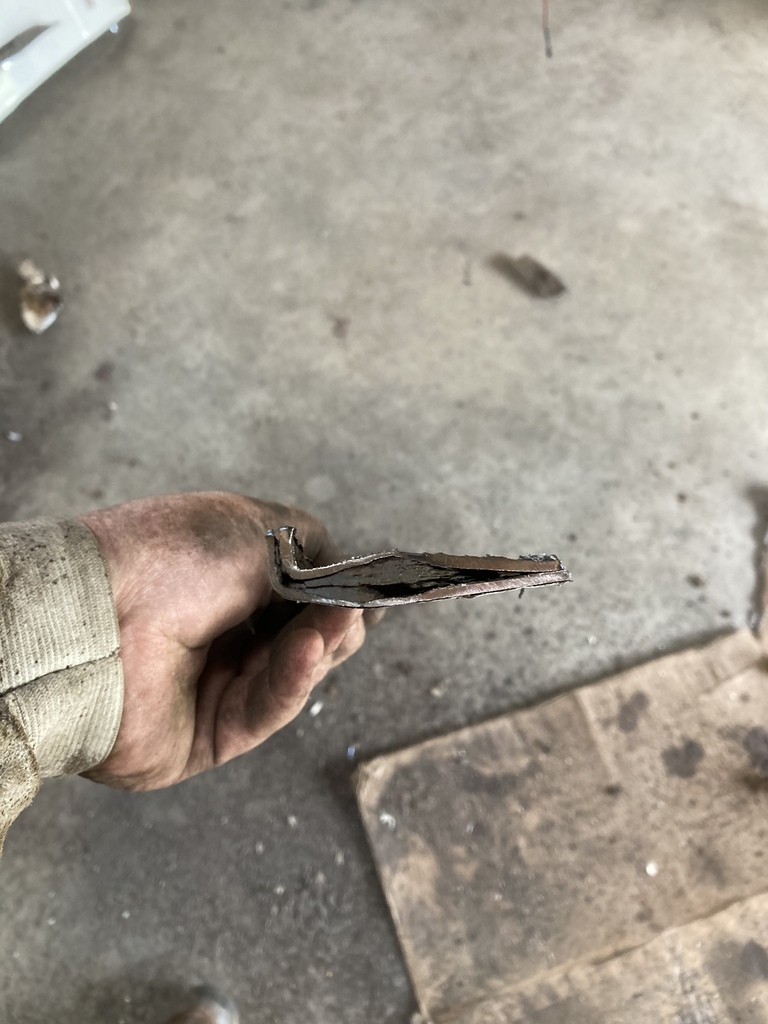 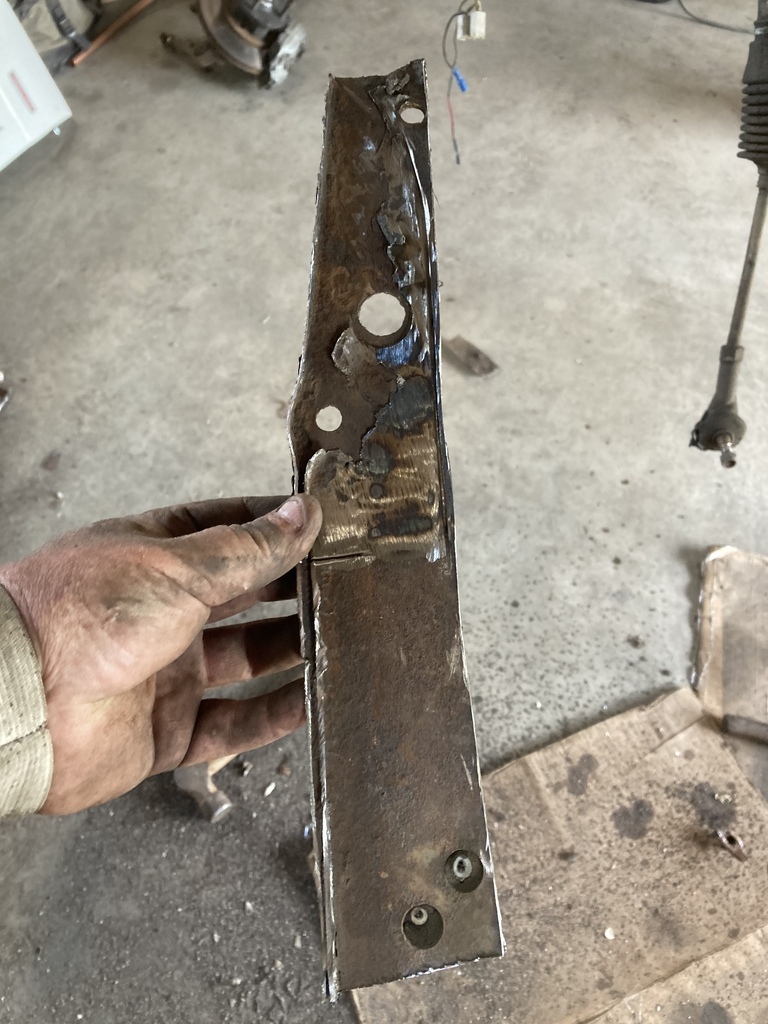 It was a pain to cut all the rust out as I can’t remove the cross member as the engine is still in, and the angle grinder couldn’t reach. I removed the suspension and got the 9” grinder in though so all the grot was removed eventually. 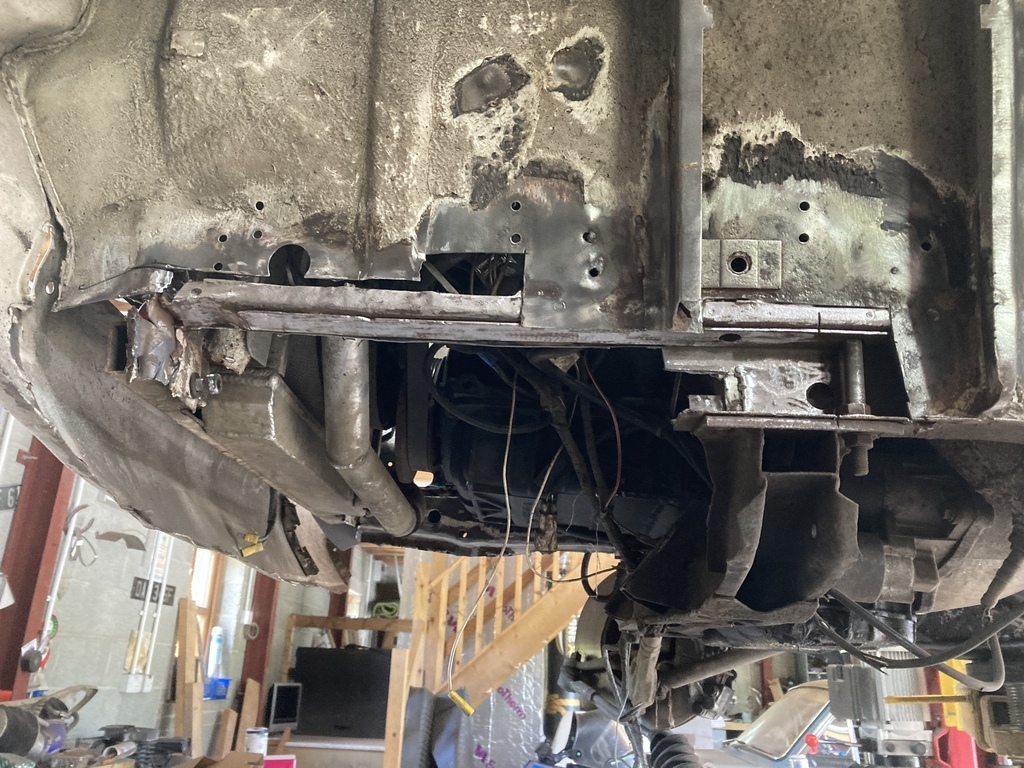 I made a start grinding off the other side, but need to take the strut off this side too to be Abe to reach all of it. I just need to blag some more steel to remake the chassis rail now. 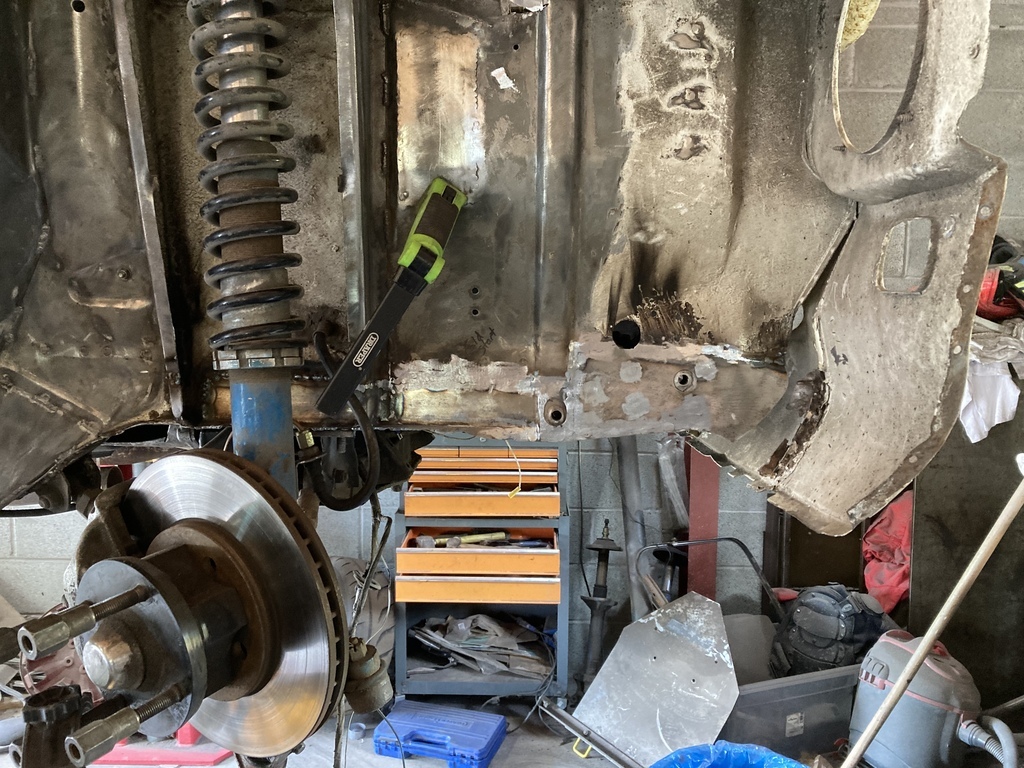 |
| |
|
|
|
|
|
Jul 16, 2022 16:54:18 GMT
|
With no metal yet to make a chassis rail, on the hottest day of the year so far (in West Wales anyway), I decided to get the rest of the black curse word and stone chip of the inner wings I also ground down all the welds. 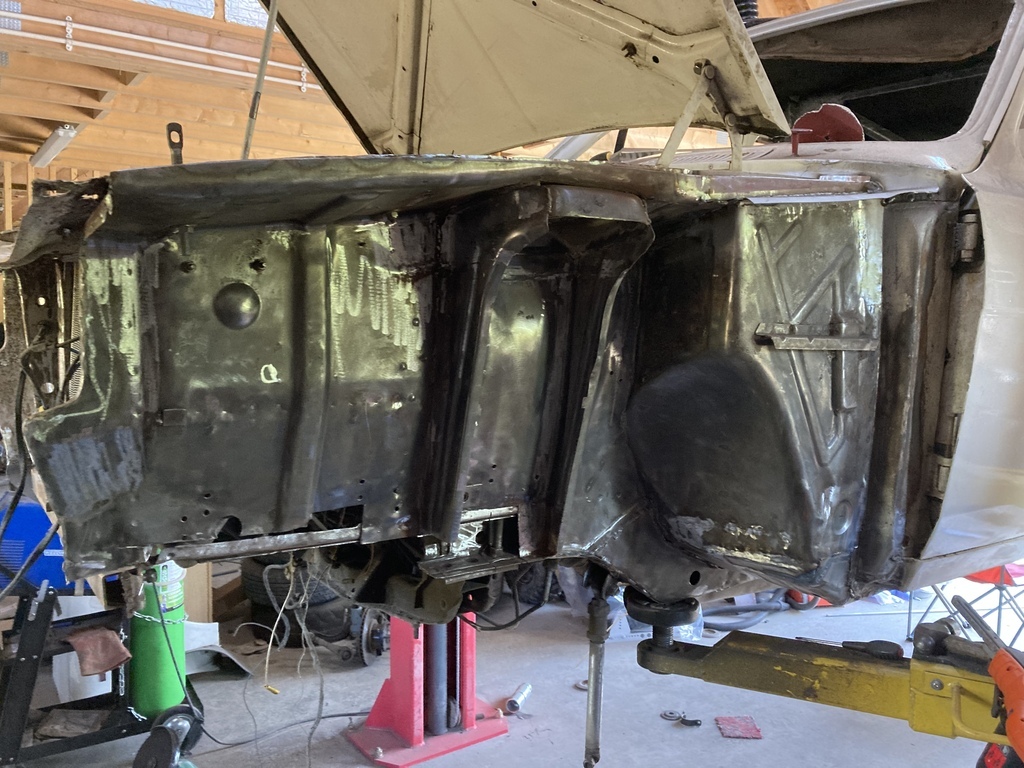 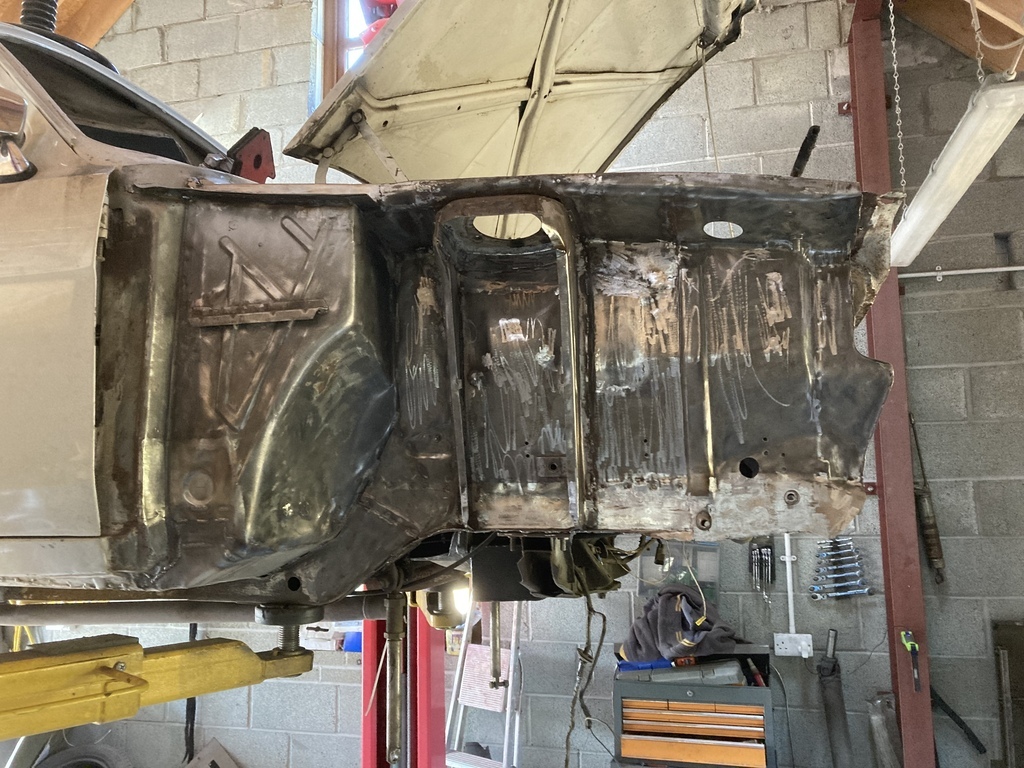 The front panel was also removed as the lower valence was quite badly dented and I figured it was cheaper to buy new than pay the labour to get it straightened when it’s painted. 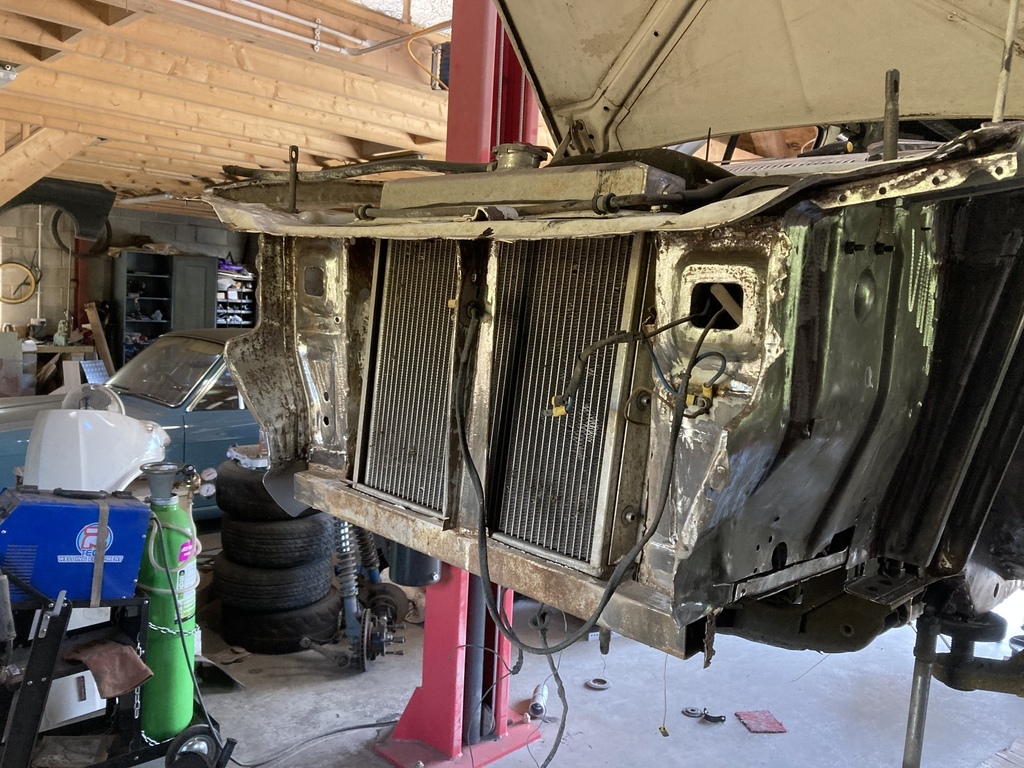 [img style="max-width:100%;" src="https://img.retro-rides.org/i/v/jonsey/efac I also had a little play with the welding torch on the mig. The trigger switch contacts had some small black marks on them. I gave them a scape with a razor blade and gave it a go on a bit of scrap. Much to my amazement it worked!!! No more blobbing and fizzing sound, but back to my normal shonky weld quality. Thanks go to Daddy short legs for the info. 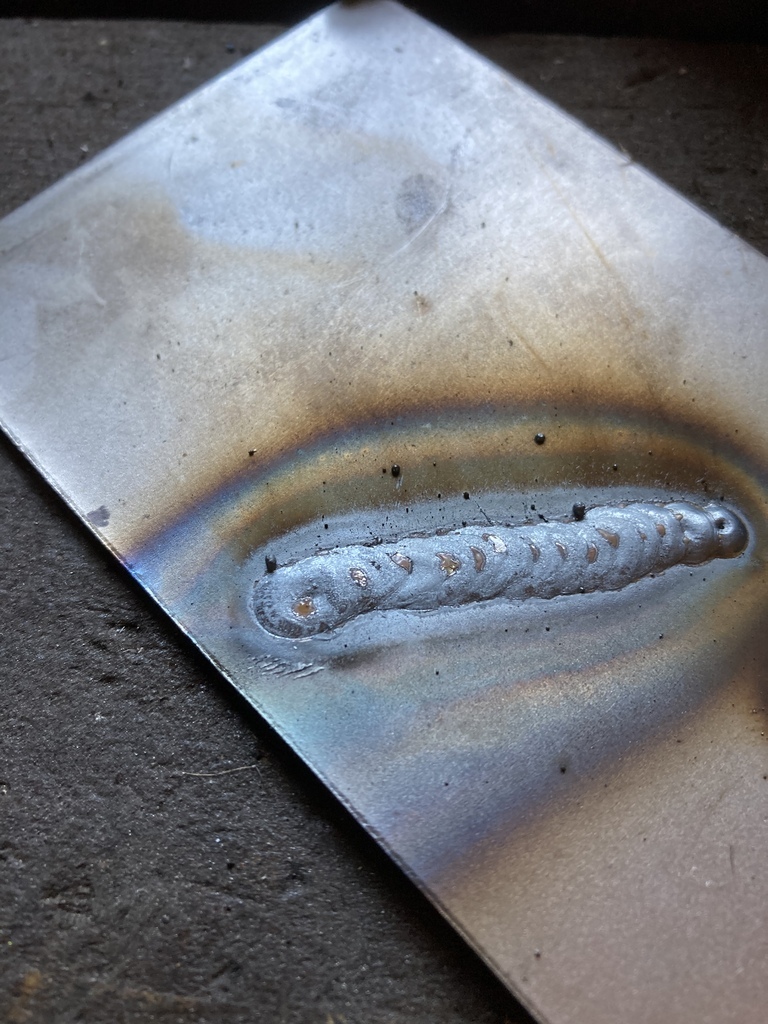 |
| |
Last Edit: May 25, 2024 18:51:28 GMT by jonsey
|
|


