XL391
Part of things
 
Posts: 160
|
|
Apr 25, 2016 16:39:30 GMT
|
Decided I didn't have enough on my plate with one restoration on the go so I decided to take the plunge with this last week... 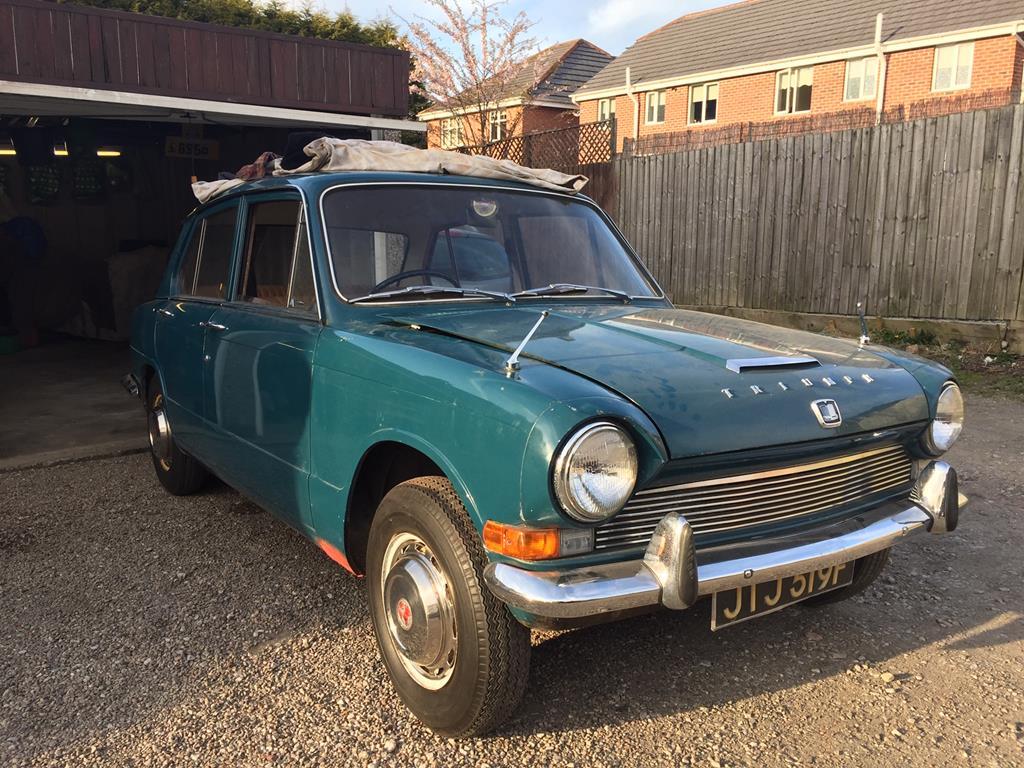 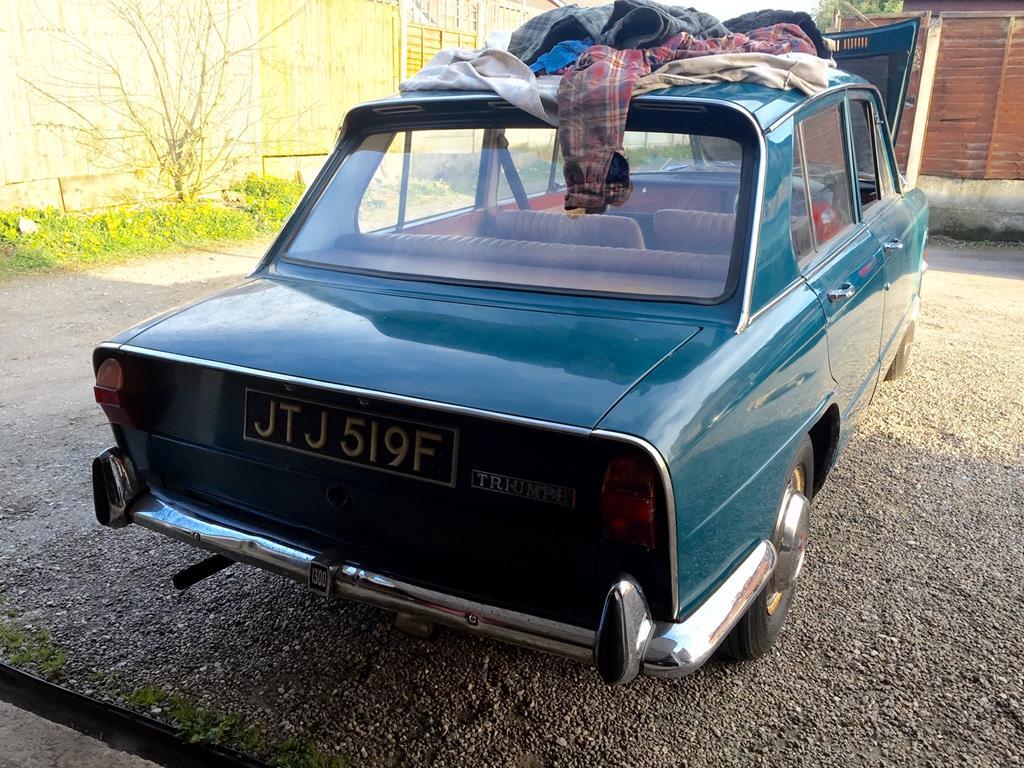 It's had two owners, one of whom never drove it so really it's had the proverbial one lady owner from new with 46k miles on it which I reckon could be genuine. It's still on its original (perished) cross plies! It was bought from nearby from a garage in Crosby, Liverpool. I wonder if these adverts for the selling dealer caught her eye?  Condition wise, the floors, sills, boot floor, doors, all rock solid. Never been welded, nor do they need it. The rear wheelarches are a bit frilly and the wing bottoms have rusted through. The LH inner wing behind the strut turret requires some fresh tin and the extremities of the scuttle. 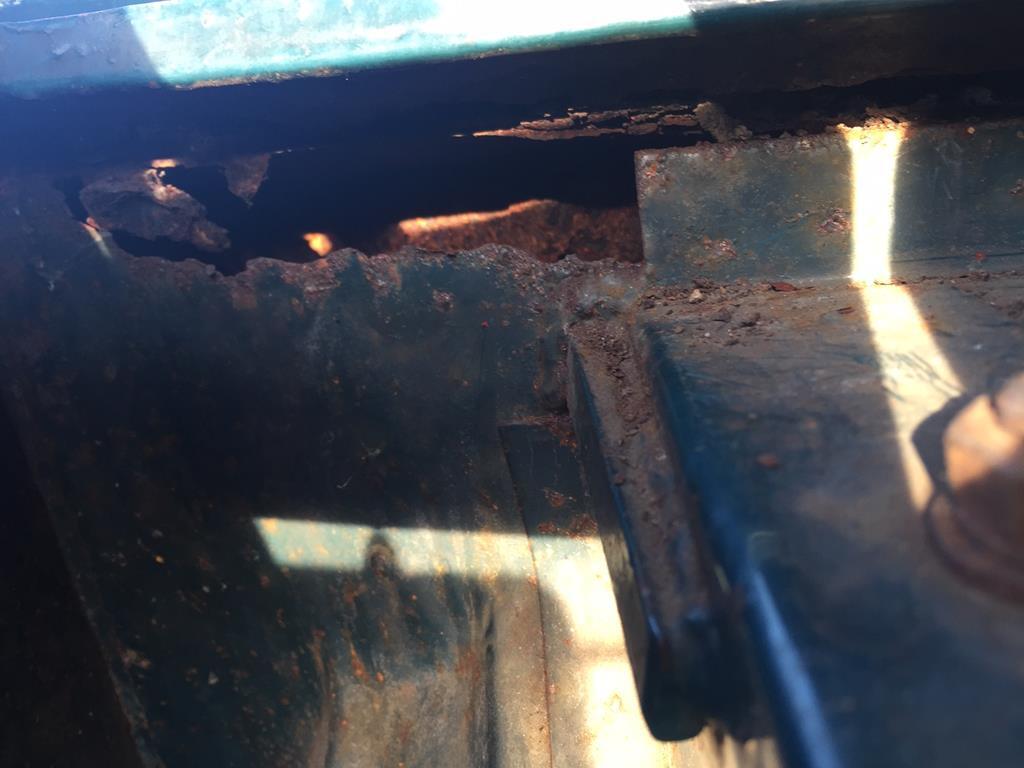 It was a non runner due to an ignition fault but I've found that it's the wire from the coil to the fuse box, severed at the bulkhead. So, up on the ramp this week, check the engine over, set the tappets, new fuel line, engine block flushed and the rad refitted, hopefully, we'll have a runner this week! Few more pics: 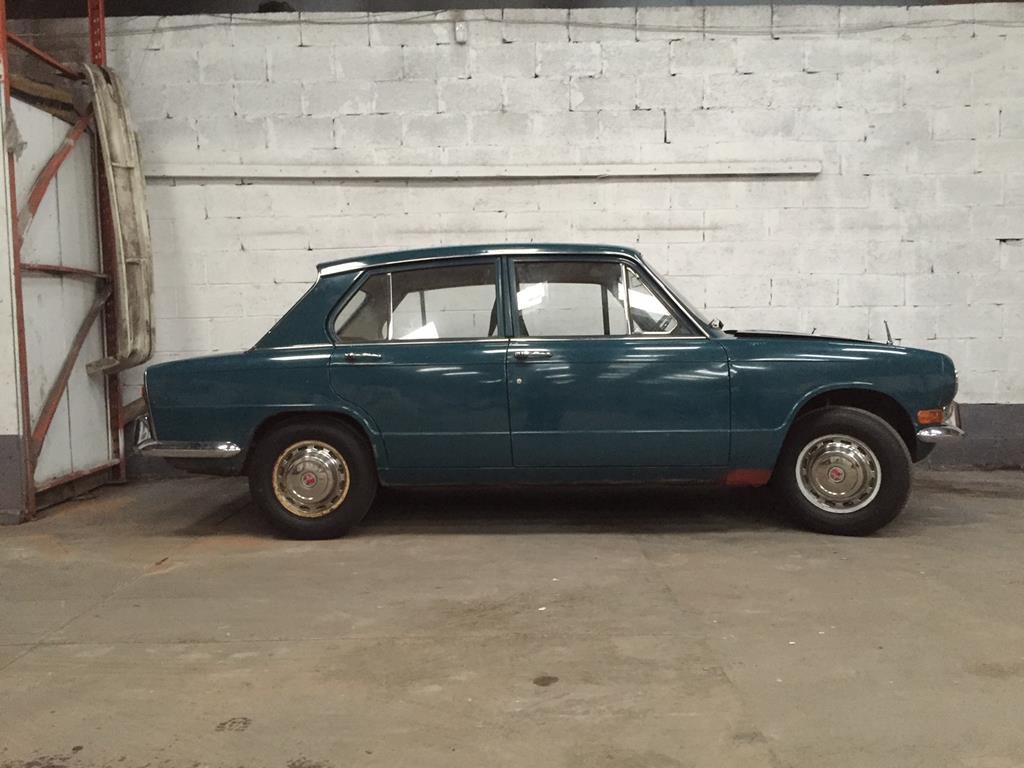 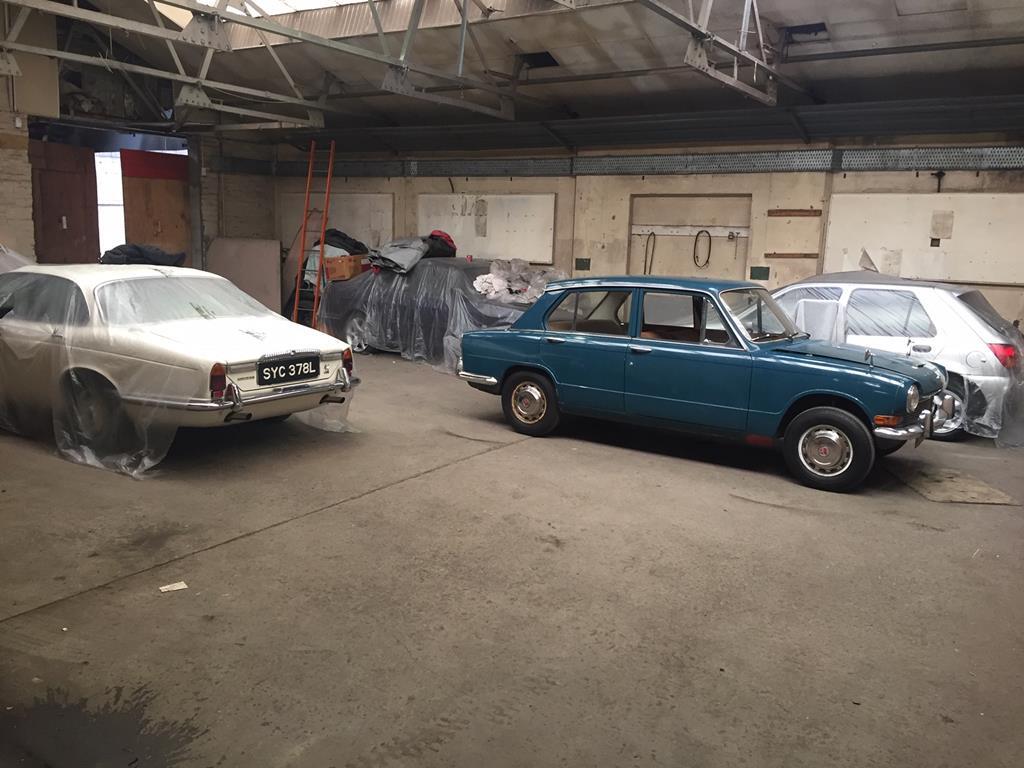 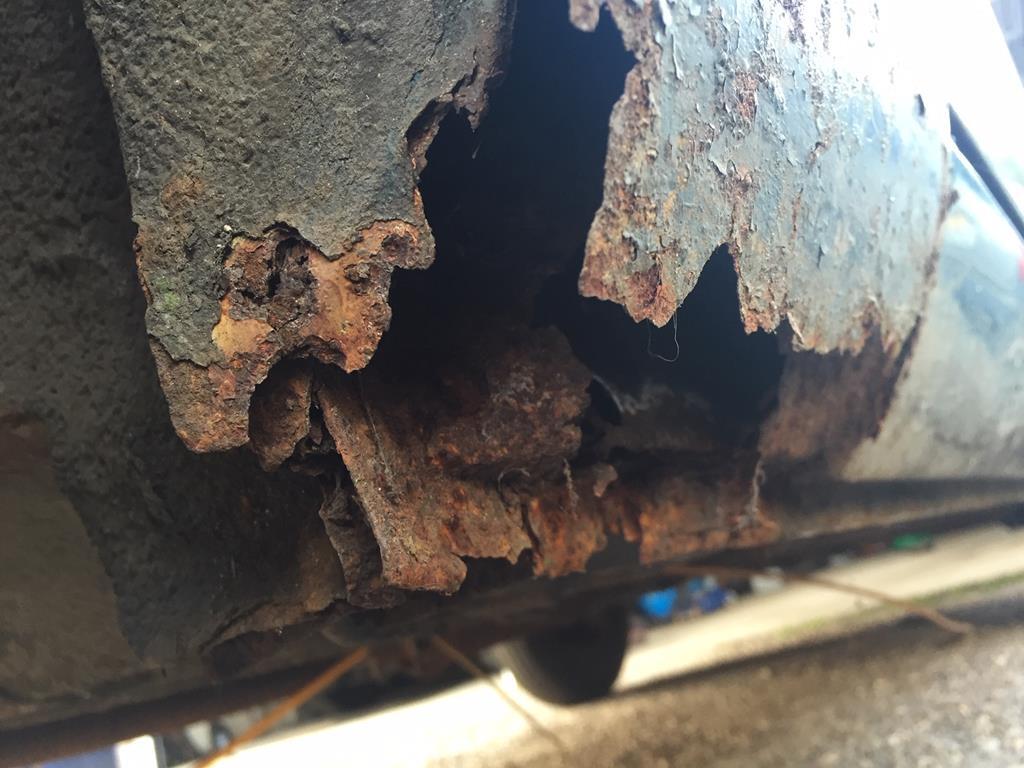 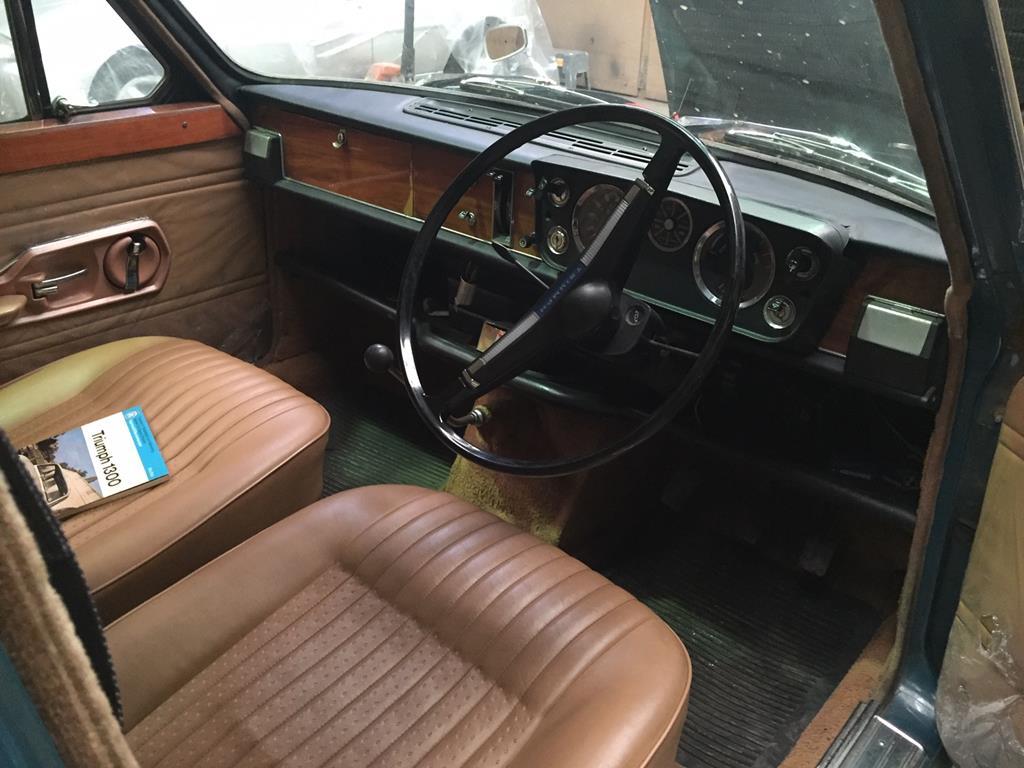 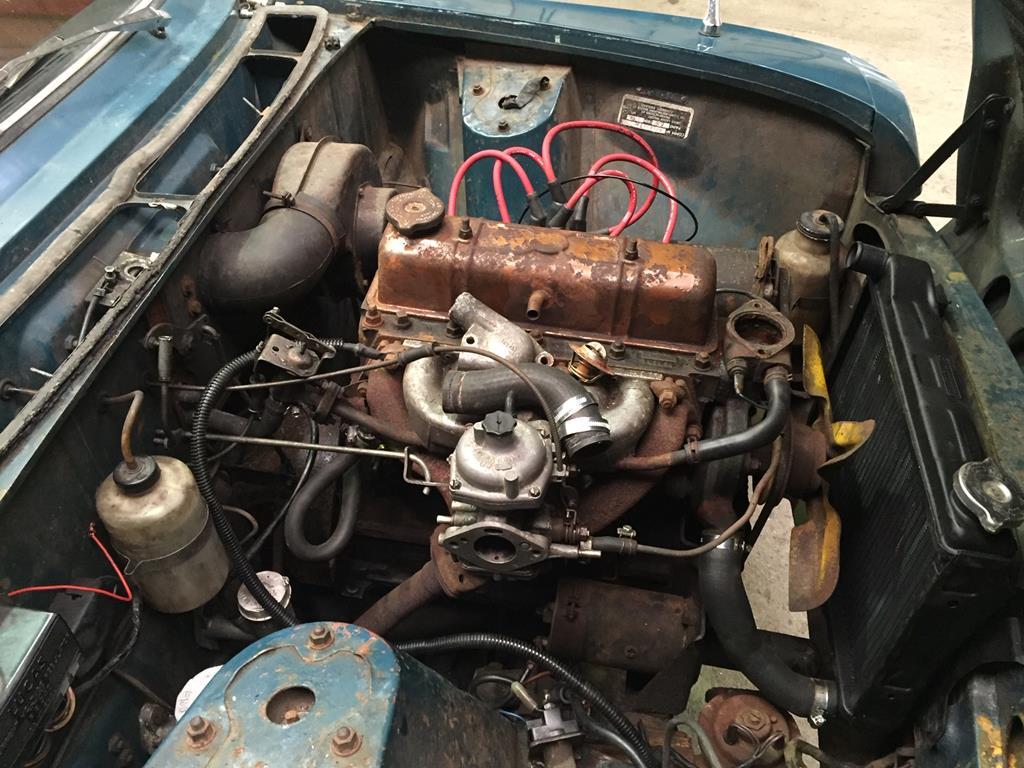 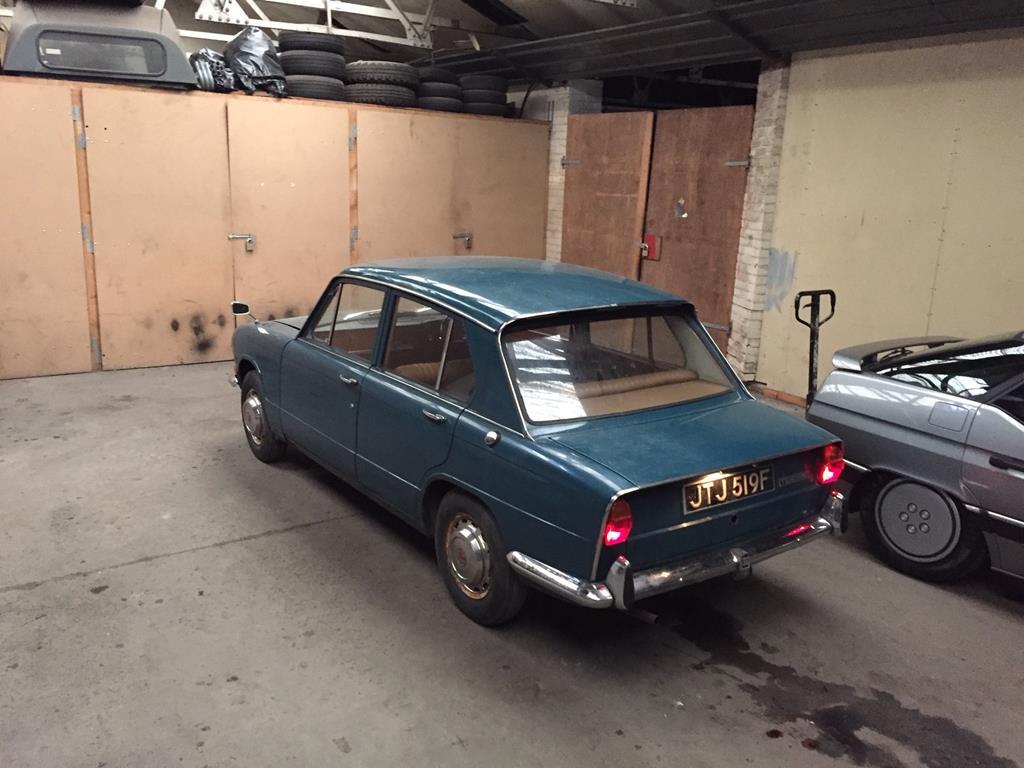 |
| |
Last Edit: Mar 15, 2020 12:01:26 GMT by XL391
|
|
|
|
|
|
1968 Triumph 1300 FWDMercdan68
@forddan68
Club Retro Rides Member 68
|
Apr 25, 2016 16:50:17 GMT
|
|
Great looking little car these,and those interiors are great,foldaway window winders and a great dashboard, one of those cars I've always admired,nice buy fella, bookmarked
|
| |
Fraud owners club member
2003 W211 Mercedes E class
1989 Sierra sapphire
1998 ex bt fiesta van
|
|
|
|
|
Apr 25, 2016 17:32:50 GMT
|
|
A couple of very good mates have these little cars, love them a little more everytime I see one!
Rotoflexes that aren't made of cheese are very hard to find nowadays. Great cars.
|
| |
|
|
XL391
Part of things
 
Posts: 160
|
|
|
|
Not done a great deal with this, it was pushed into a corner of the lock up and left alone. I did manage to get it running, unbelievably it started first turn of the key after 16 years of inactivity... The reason for the lack of progress is the work I'm doing on another big project, not likely to be finished before 2018. The bodyshell of that one goes away for blasting, welding and painting soon so last week I took pity on the old girl just sitting in the corner. 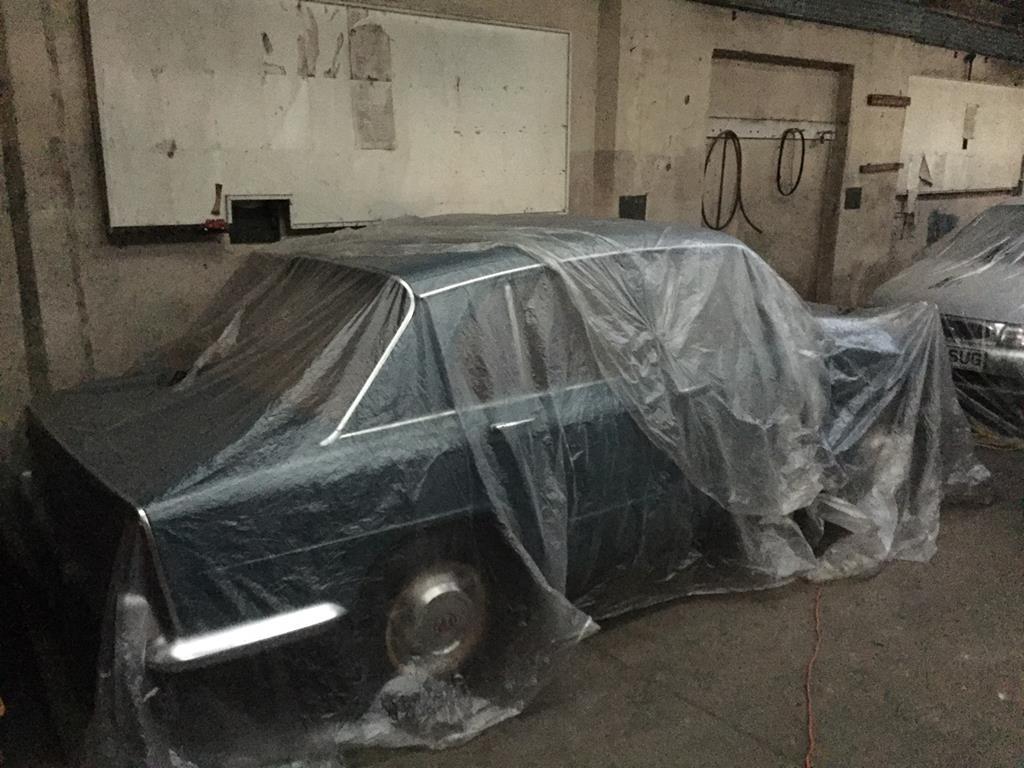 I decided to push her out of her resting place and have a good look over it to see what it'll take to get it roadworthy again. I reckon £800 will get it on the road again, I'll do a full resto if it needs it after I've finished the other car. The biggest challenge is the wing and scuttle repairs. I refuse to bodge it up so both front wings and the front doors will be coming off to get at the scuttle, A-pillars and inner wing areas and add any fresh metal required along the way. Got a nice NOS wing for £15 off Ebay... 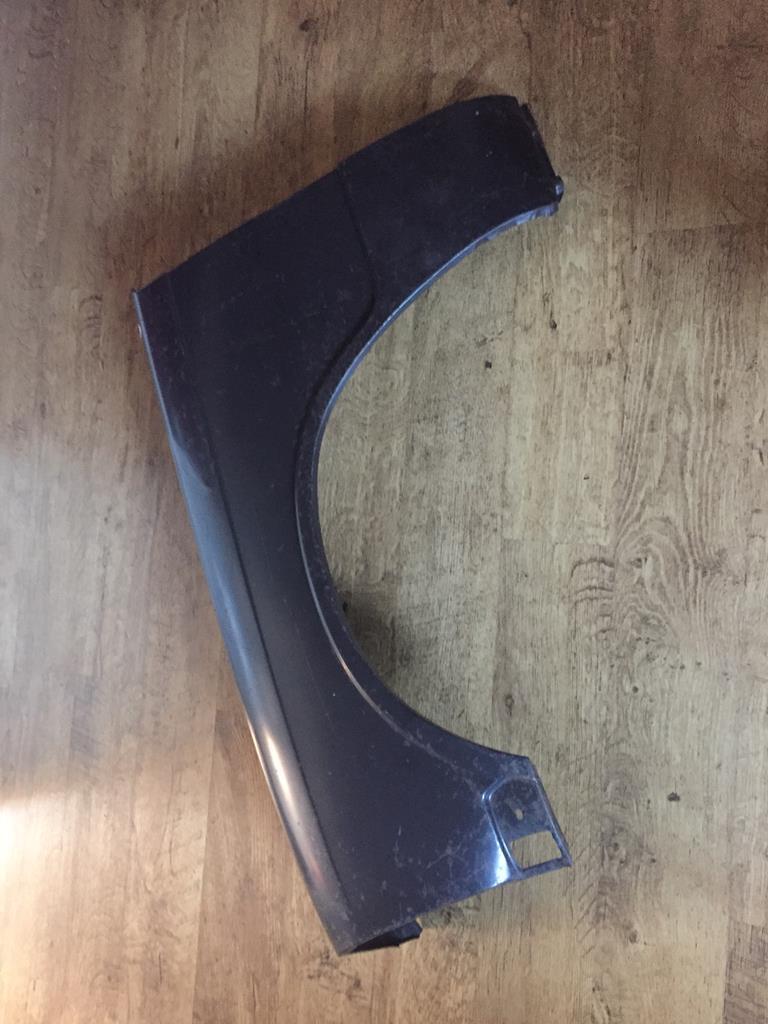 I had reconnected the old fuel system but the car was continually stalling due to all the crud in the line from the tank. Blowing through with an airline had no effect so with some old brake pipe I made a new fuel line. It now runs longer but eventually still stalls. More investigation needed. 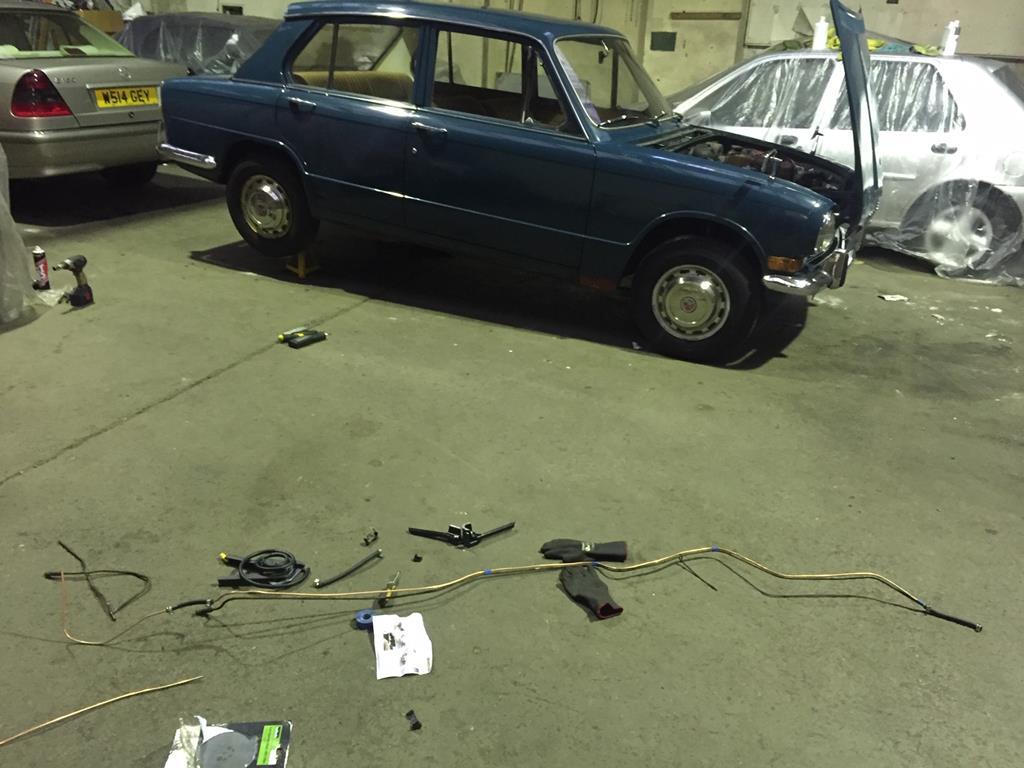 So, I've done a list, I'll update you as I work through it. 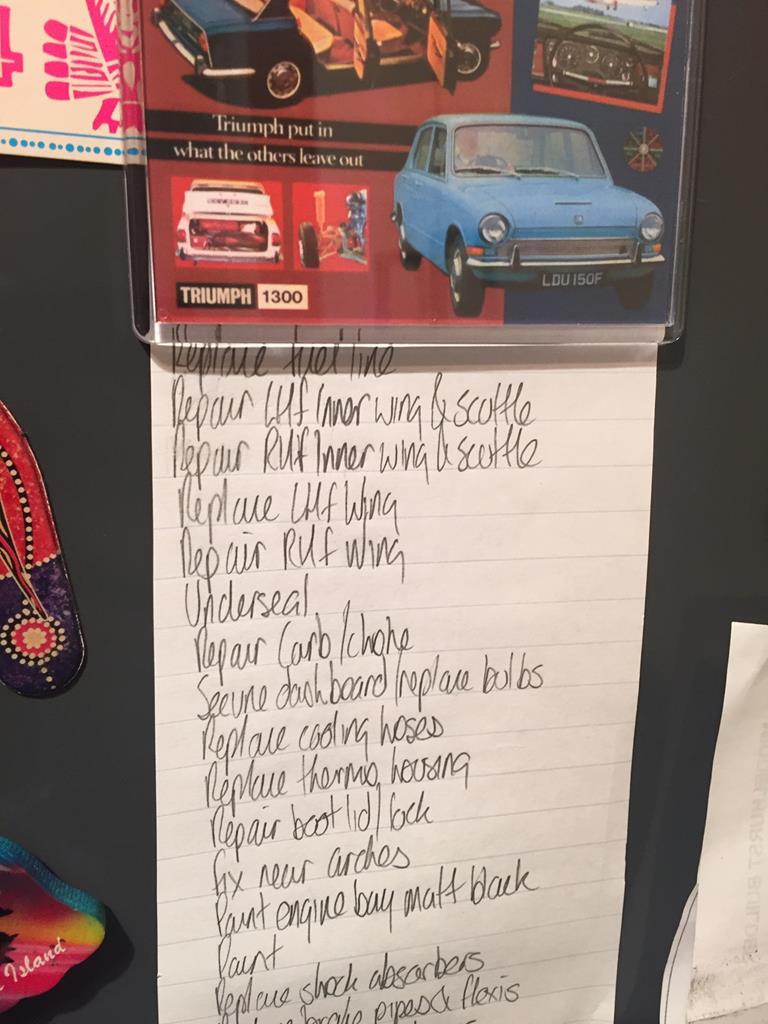 |
| |
Last Edit: Jan 26, 2020 15:39:41 GMT by XL391
|
|
XL391
Part of things
 
Posts: 160
|
|
Apr 18, 2018 18:21:34 GMT
|
Well, exactly 2 years ago I bought this little Triumph and nothing has been done to it. Mainly because of the greedy curse word on the far end of this line hoovering up lots of time and pllllllenty of money. 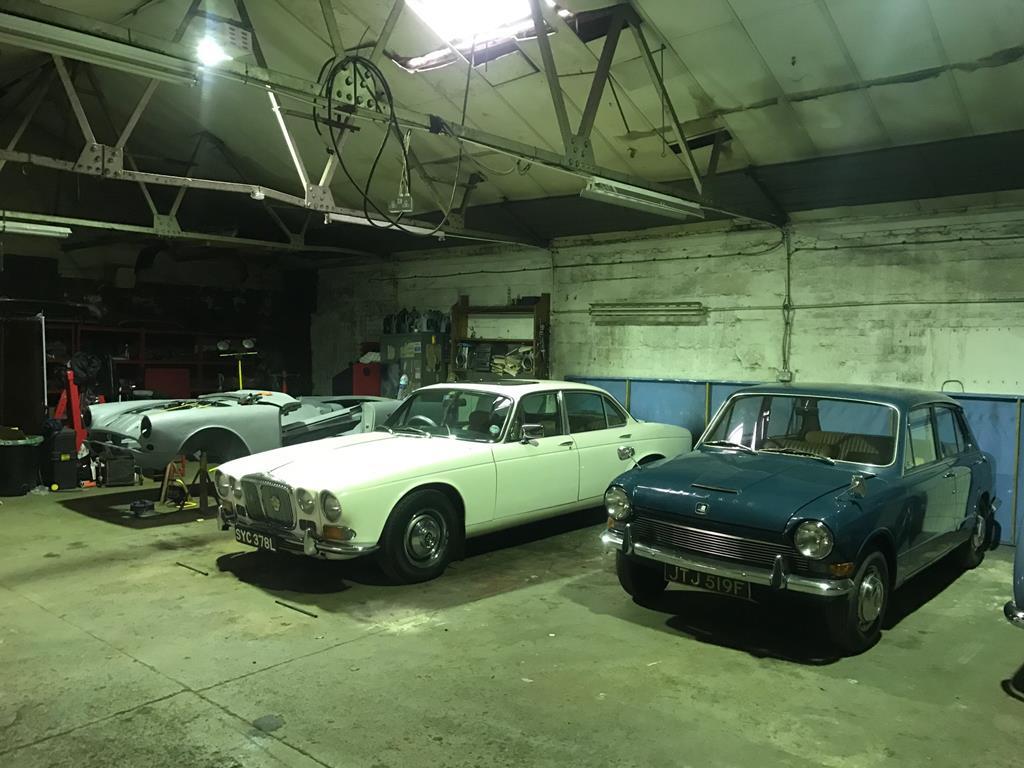 We’ve since moved from this place to a smaller unit. It’s a lot drier though and no rats present! So with the body of the Sunbeam is out of the way now having some major work done so after completing the major winter servicing work on the Jag, I’m pretty much twiddling my fingers. 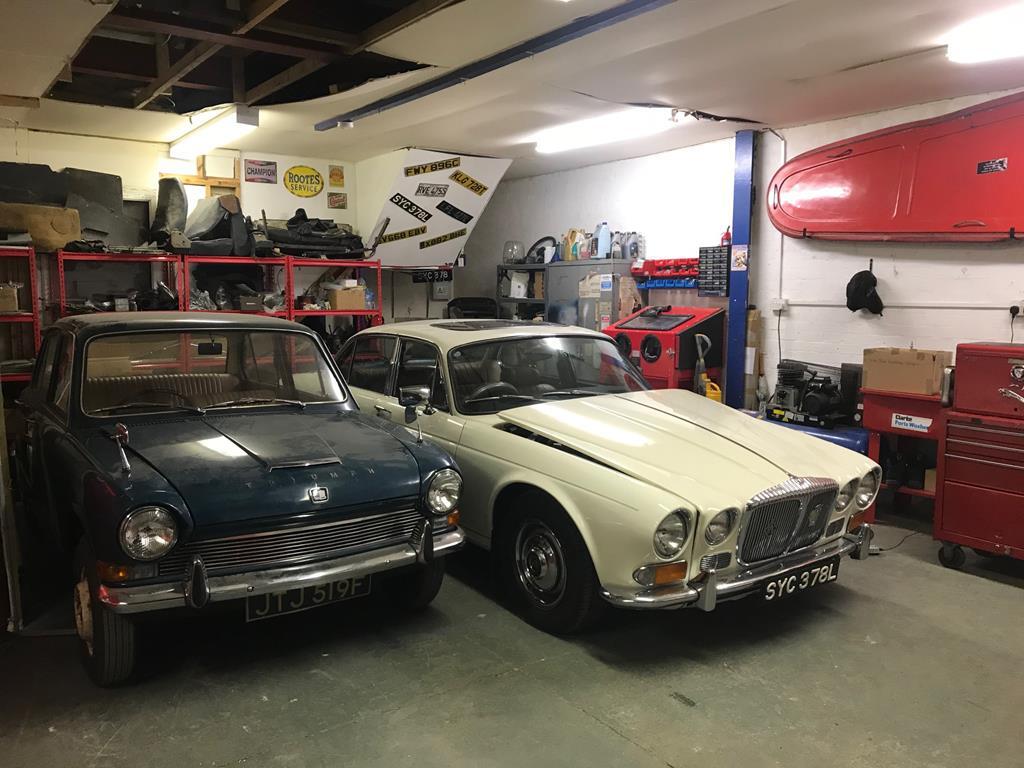 So, on Sunday after ordering a RH wing for it (sadly not as cheap as the LH one I bought), I decided it was time to crack on with this and get to work bringing it back to life. With The Boss (Other Half) restricting financial outlay due to house hunting activities, I had to be cute to get this proposal passed by the board. I said that I have most of the stuff required to complete it and it just needed a few ‘consumables’. I don’t thing a wing and a new Mig are classed as consumables normally, but for her benefit that is exactly what they’ll be classed as. 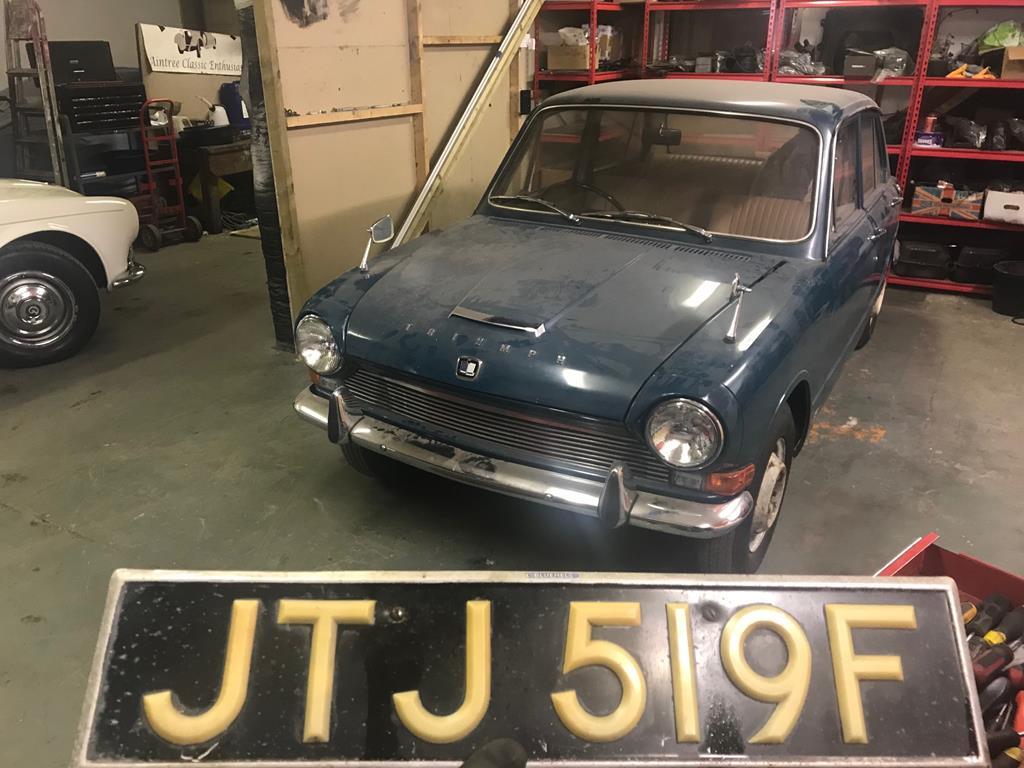 On Monday I got to work stripping down. Everything has come apart reasonably well up to now with no bad surprises. I was dreading what the front panel which makes up the Grille opening and headlight apertures would look like but it’s just minor surface rust. 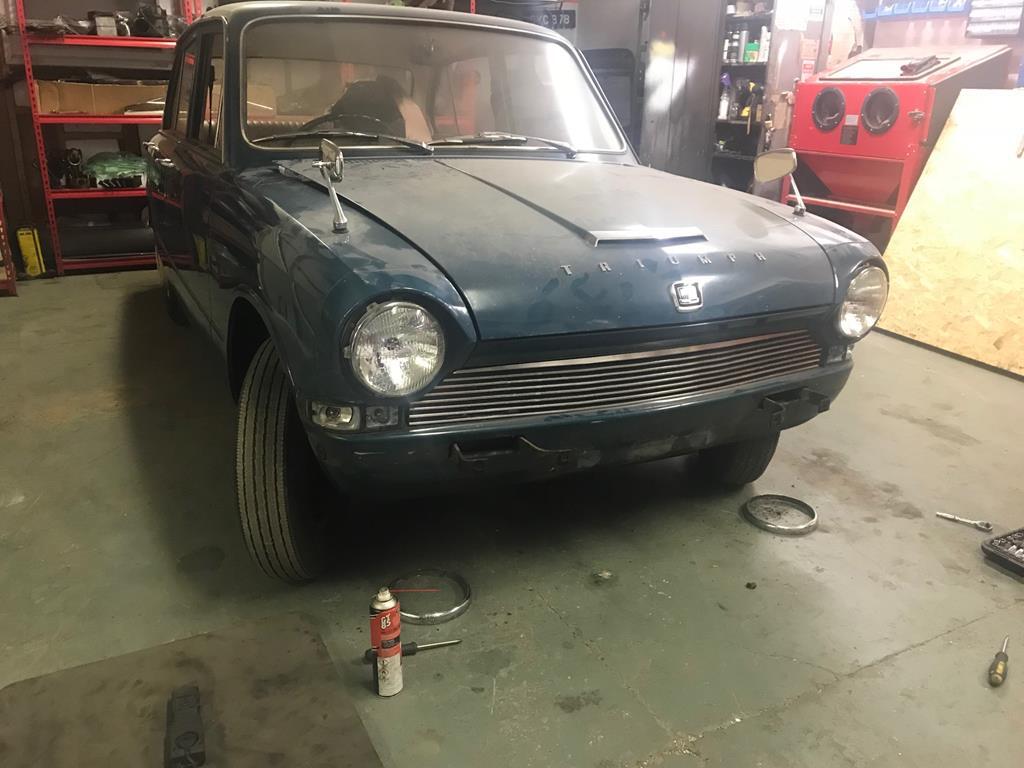 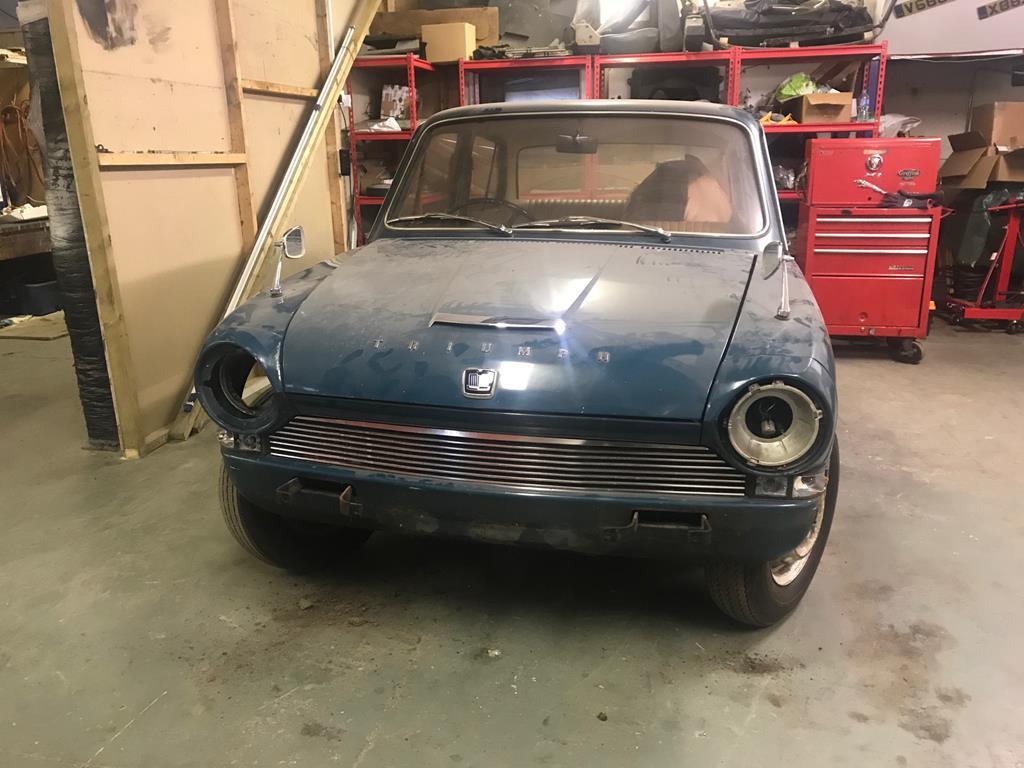 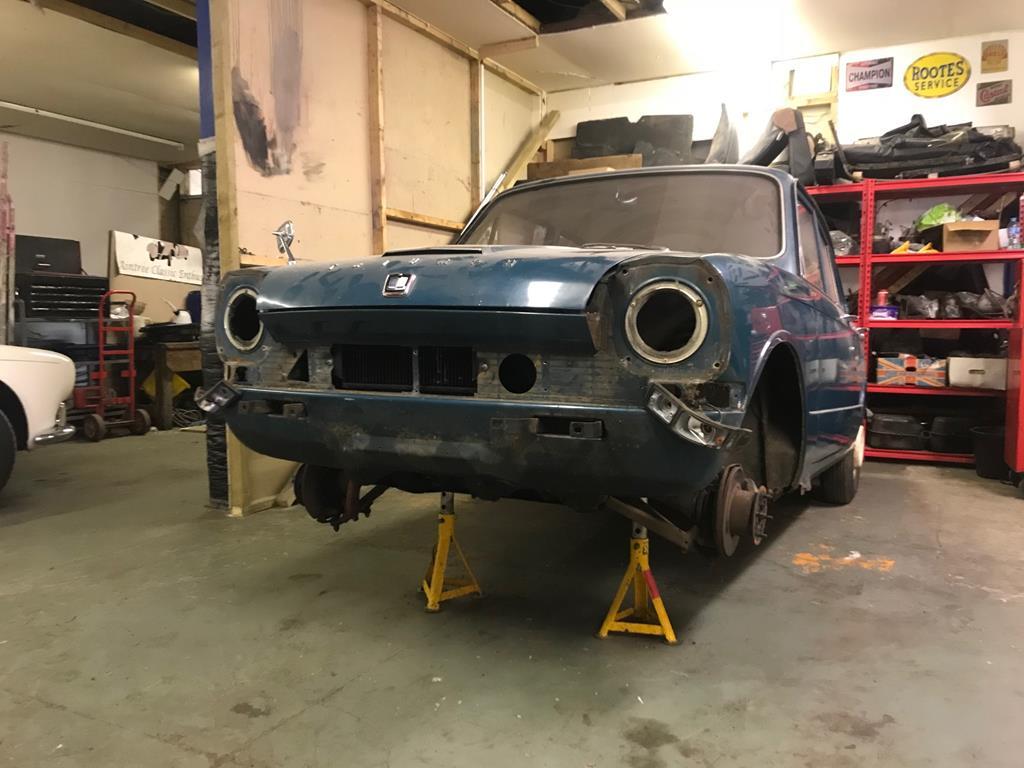 Hopefully I’ll have the passenger wing off by next week, I’ll keep you posted on what I find under there... |
| |
Last Edit: Mar 15, 2020 12:19:23 GMT by XL391
|
|
|
|
|
Apr 19, 2018 10:55:43 GMT
|
|
Please do. I learnt to drive in one of these more than 30 years ago, so this is very nostalgic.
It handled beautifully on the winding roads. It had a chronic fuel starvation problem when it was warm & had you had to know where to find each gear.
Keep up the good work.
|
| |
|
|
XL391
Part of things
 
Posts: 160
|
|
|
|
So last weekend I had the wing removed revealing what lay ahead. Although initially this looks pretty bad, I’m actually quite pleased. 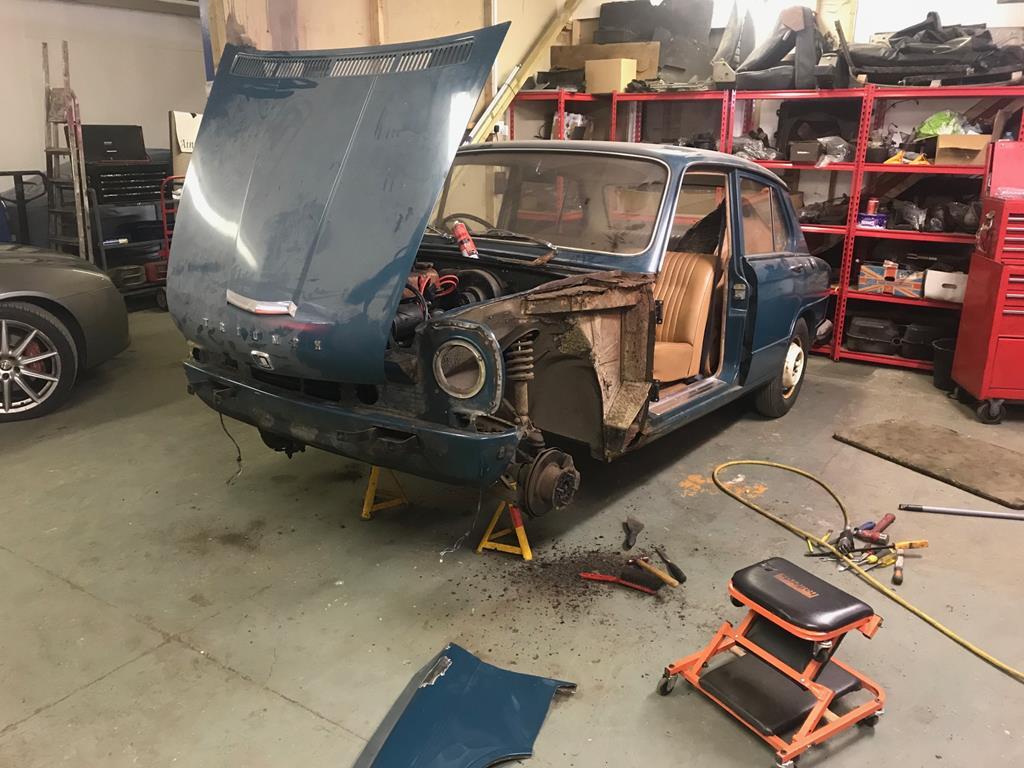 The car was undersealed from new with some thick bitumen based gloop and it’s done a phenomenal job of protecting this little car. It’s also been remarkably easy to chisel off. There is some rot to attend to though. This has been confined to the areas on the car that were unable to be rust proofed. 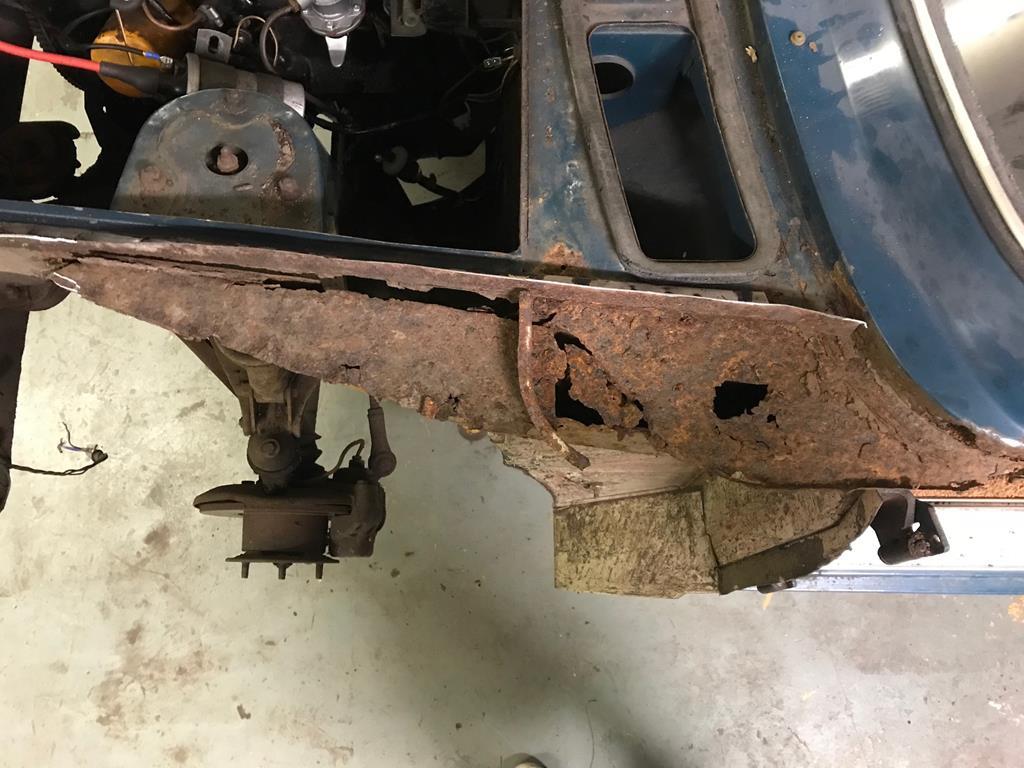 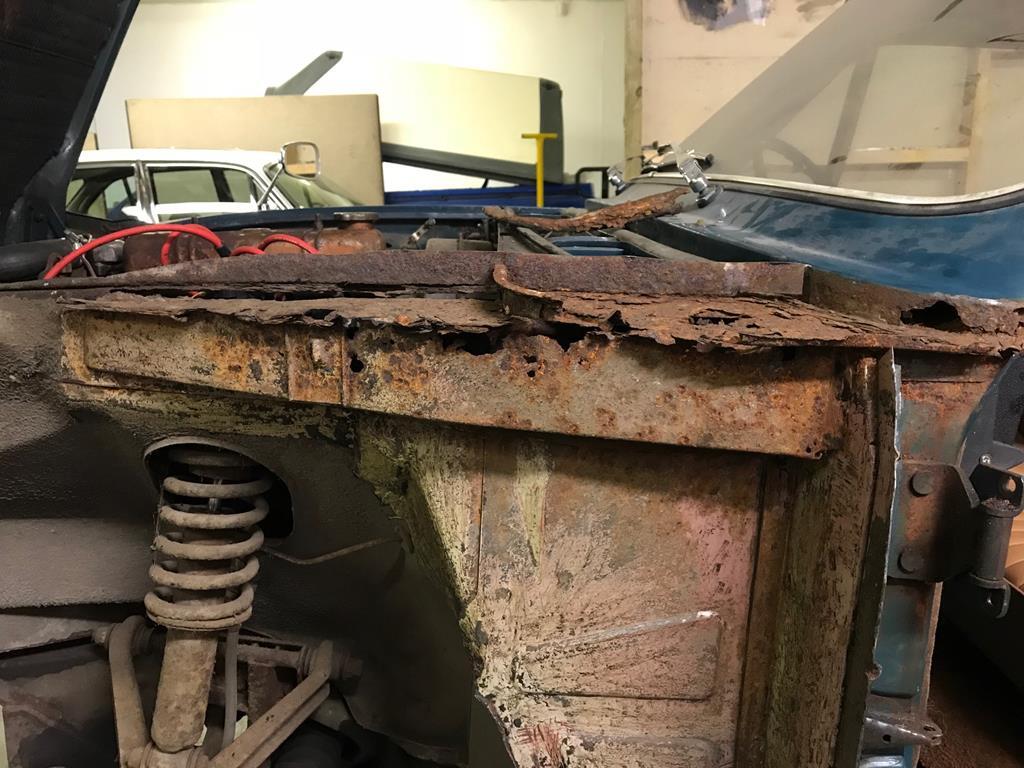 I knew the inner sills were fine but after seeing the size of this hole I was wondering how much of the middle sill would’ve been consumed by the Tin Termites. 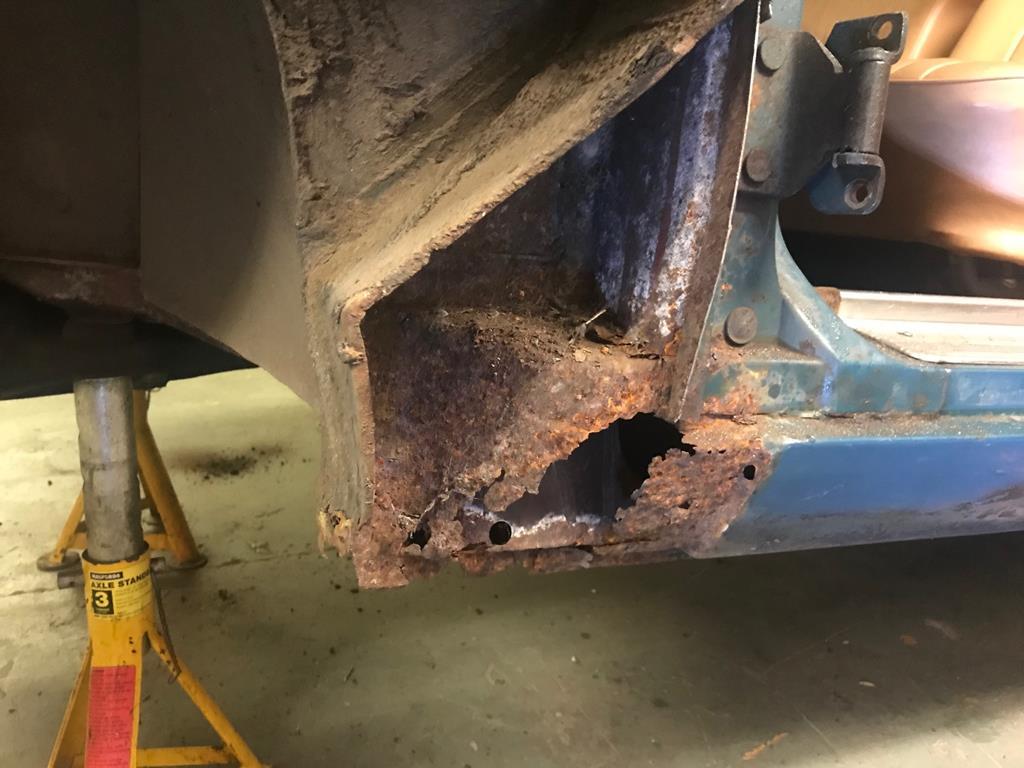 I was surprised, not to mention delighted, when I peered down the length of the sill with a torch to reveal this... 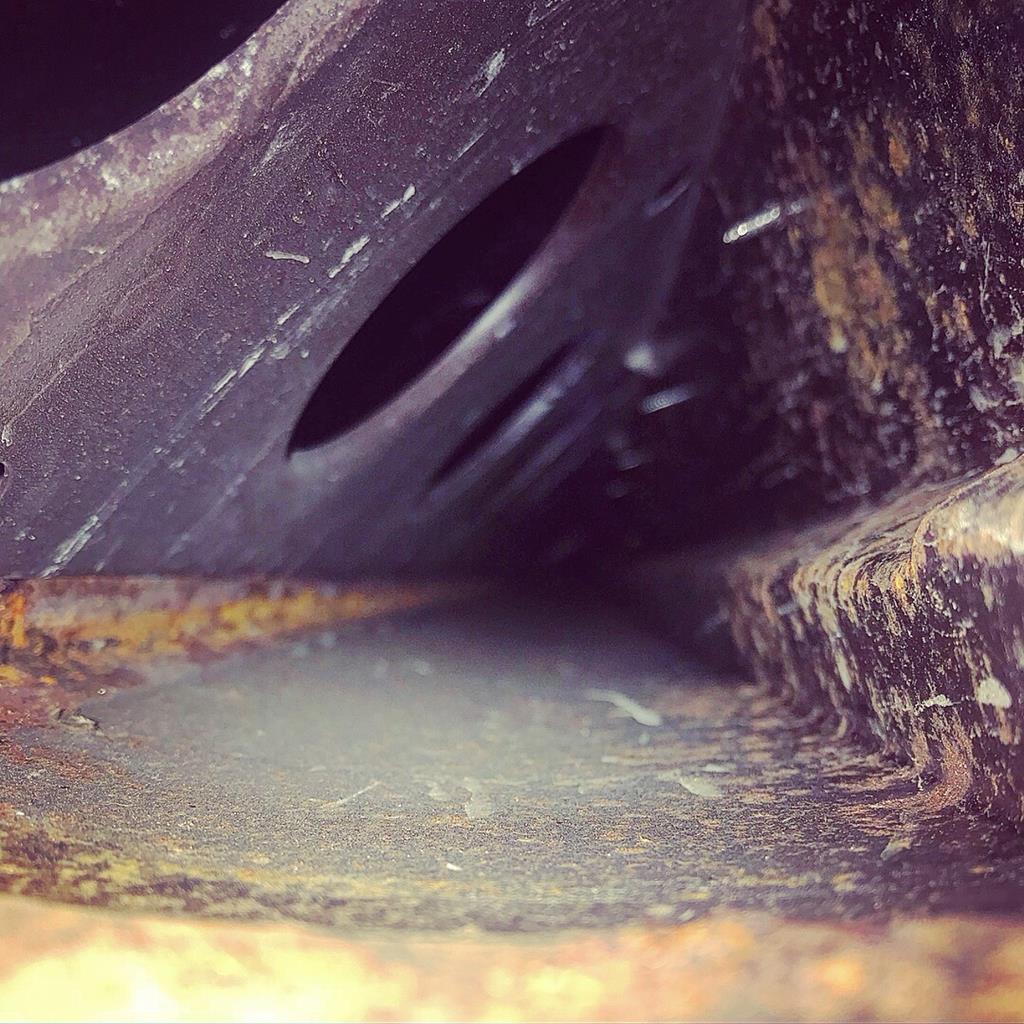 So, after removing the last of the gash metal I checked the fitment of the NOS wing which was damn near perfect. 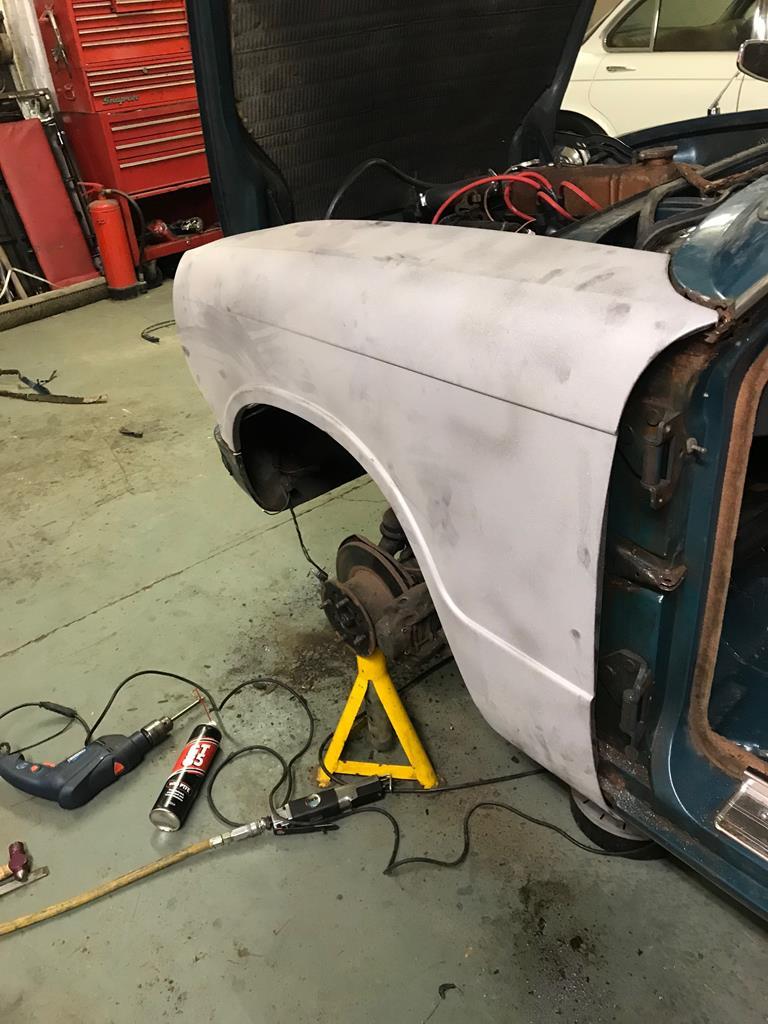 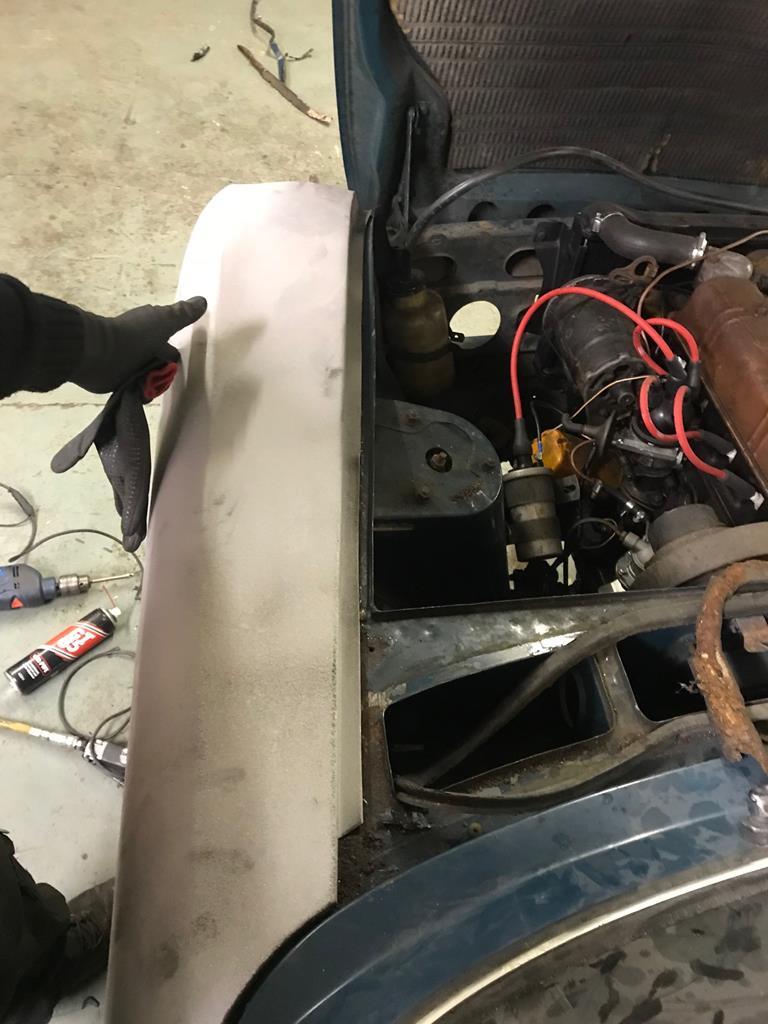 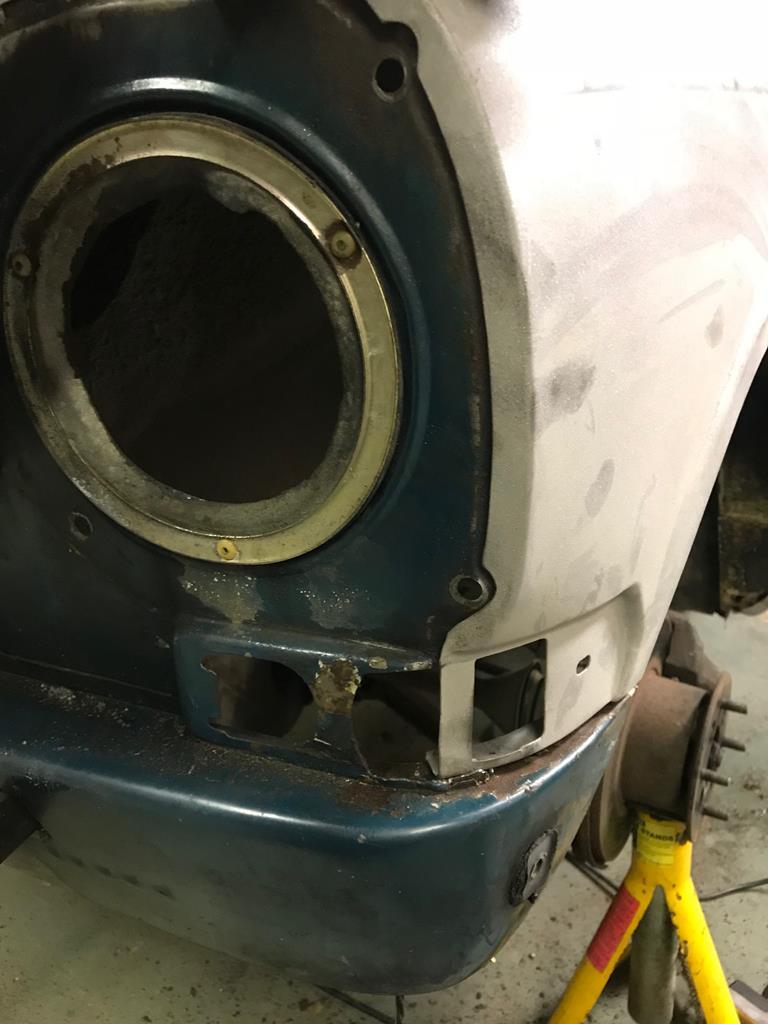 I’ve made a start cleaning up the rusty metal to see what is salvageable and what is being fabbed. I’ve started making repair sections for the sill which is the first area I’m going to sort out. More pics soon. |
| |
Last Edit: Jan 26, 2020 16:00:53 GMT by XL391
|
|
|
|
|
|
|
|
There was one of these on Eastenders last night. Same colour as well!
|
| |
1953 Minor (Long term project)
PT Cruiser
|
|
XL391
Part of things
 
Posts: 160
|
|
|
|
Lots of boring adult stuff has been getting in the way of this in the last 6 months. I want to have it roadworthy for Summer so I’m going to be spending as much time as I can at my Man Cave over the Winter to hopefully achieve this. I’d decided to start at the LHF sill edge. I cleaned up the rust back to bare metal to be pretty much left with this. 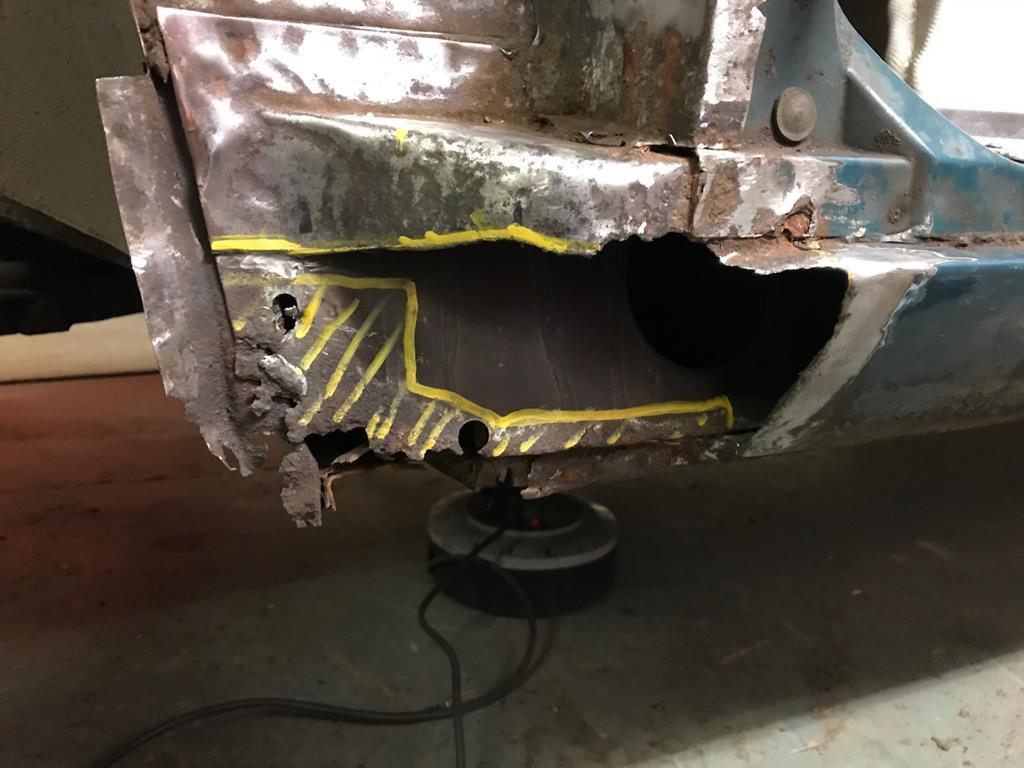 Cutting this out left me with this before I began to fabricate the repair sections to go into here. At this point I decided to cut out the bottom of the wheelarch, sill and jacking point, deciding to make these from scratch. 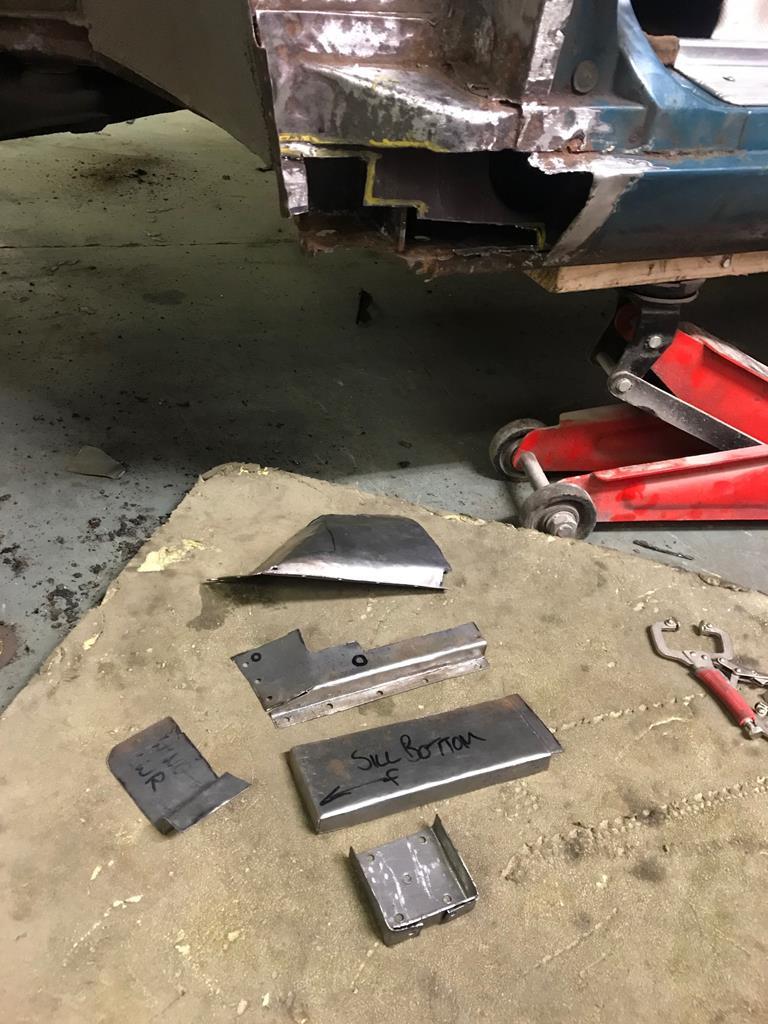 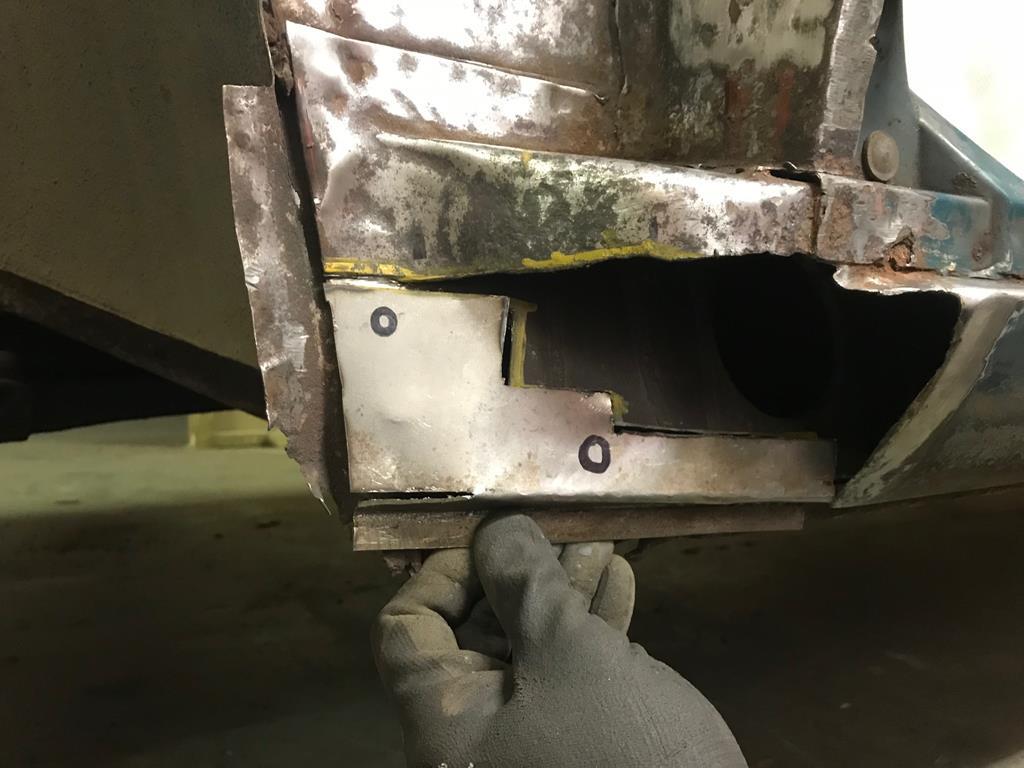 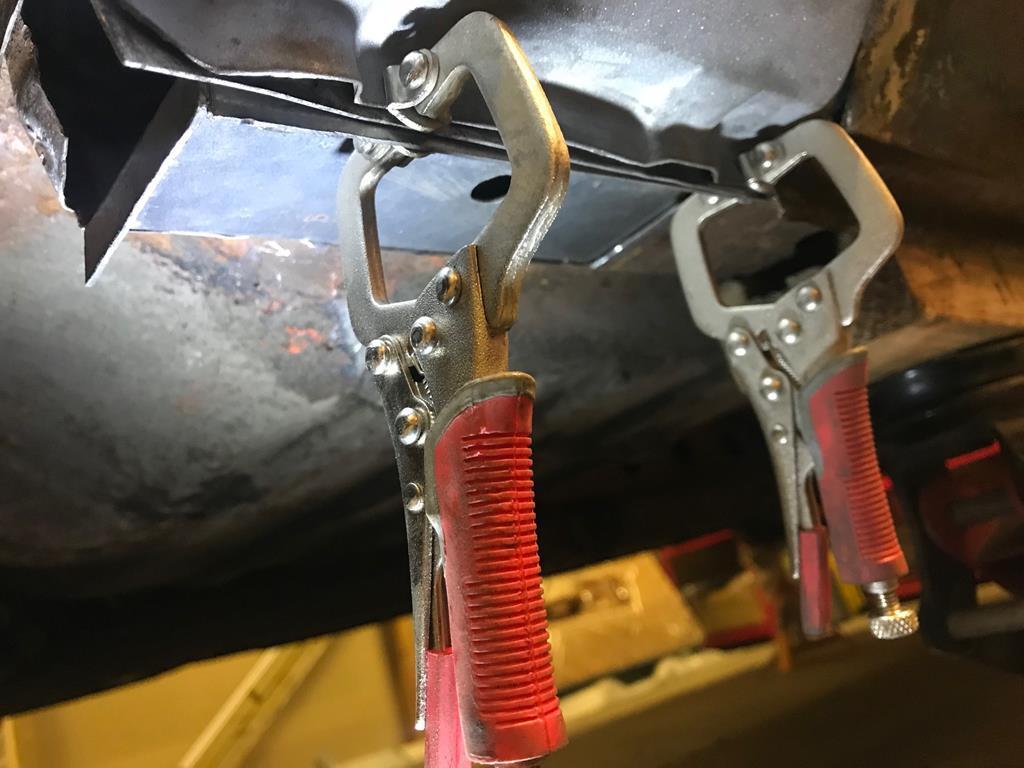 As I said in my last post, the remainder of the sill was in superb condition. After spraying rust converter into the sill to take care of the surface rust, I etch primed over the top before sealing the area up. 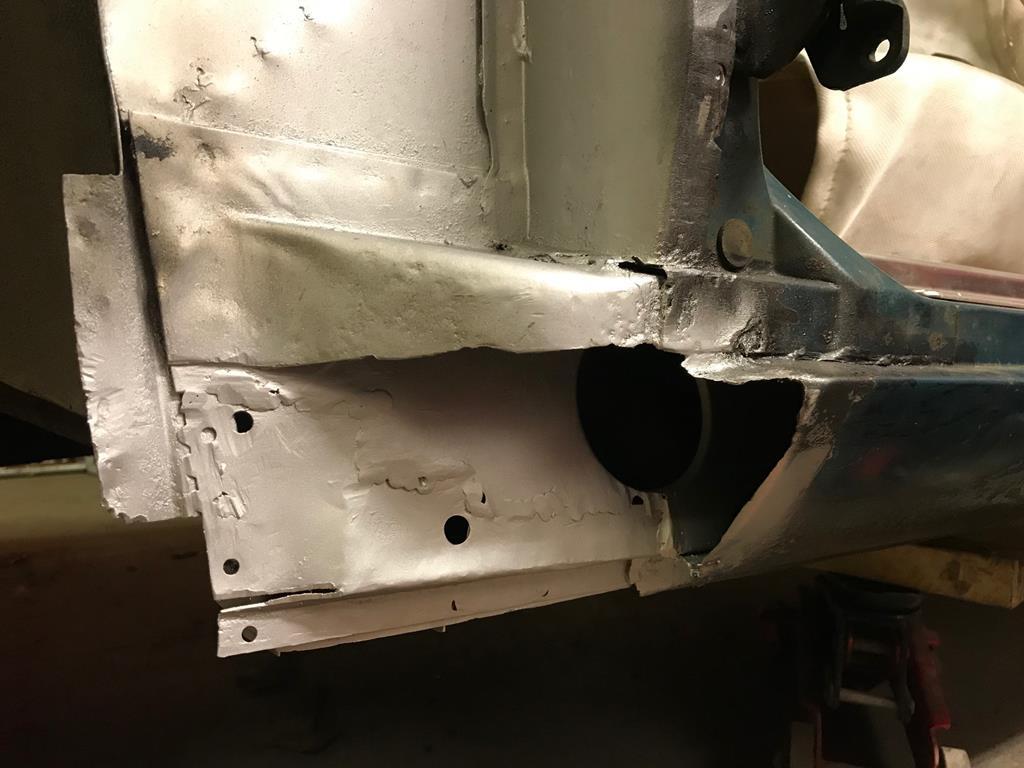 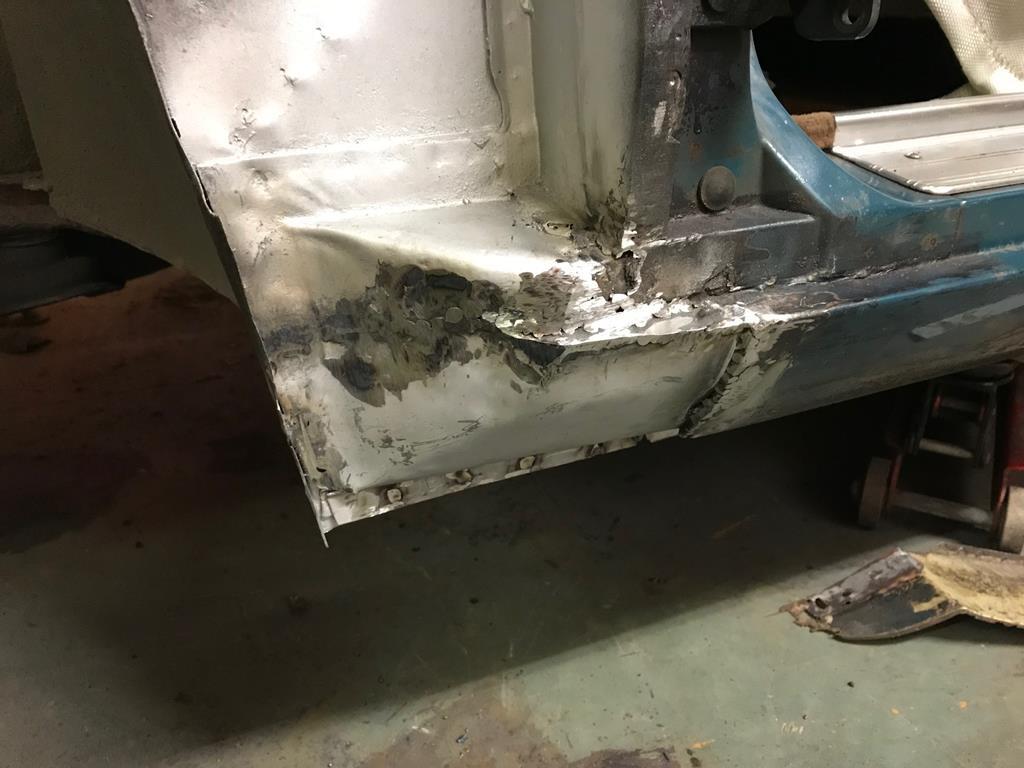 The inner splash panel was probably saveable, requiring a repair at the bottom, but it was covered in surface rust. By the time it would’ve took to repair and get rid of the surface clag, I decided to fabricate a new one from scratch and slap it on. 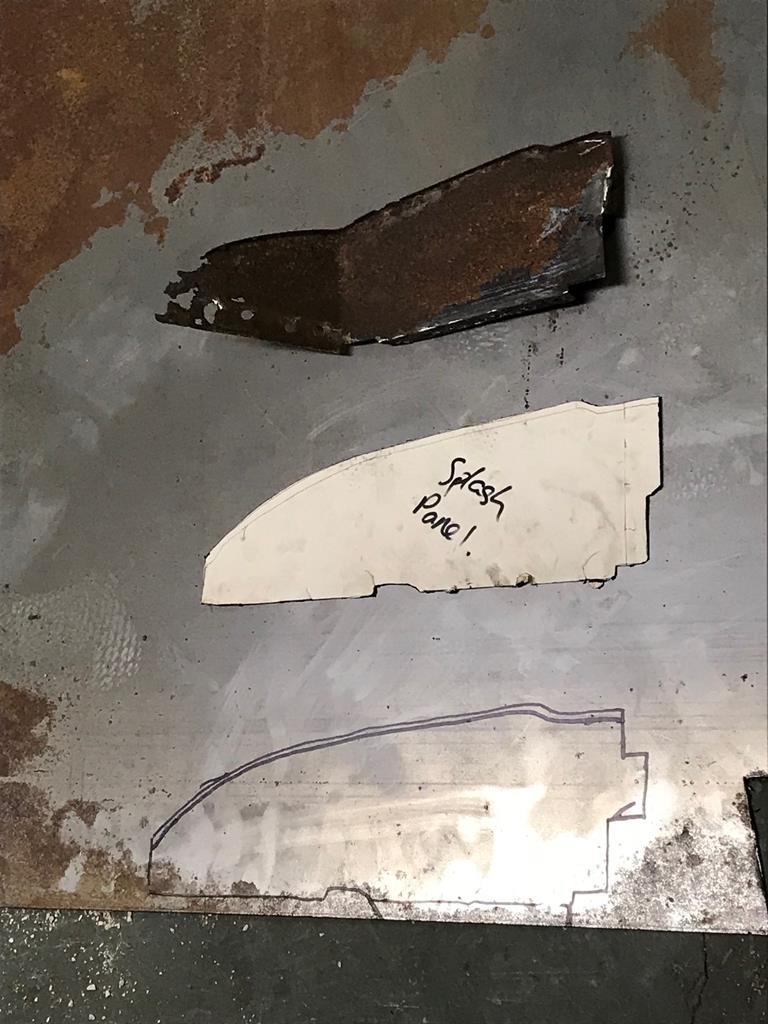 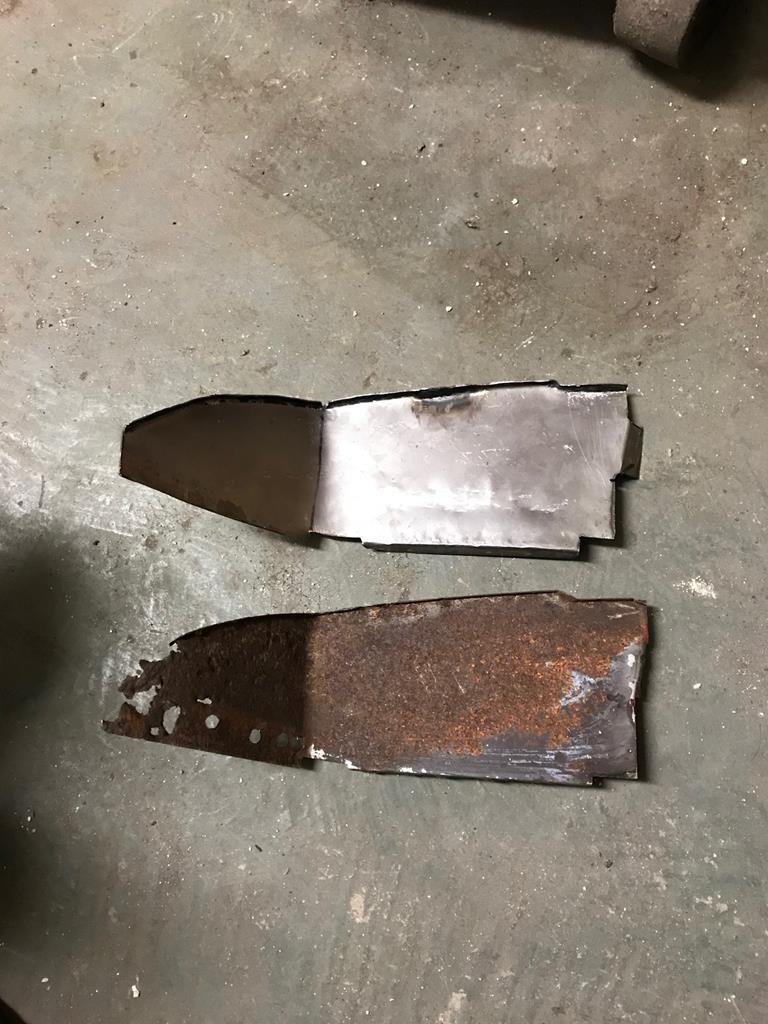 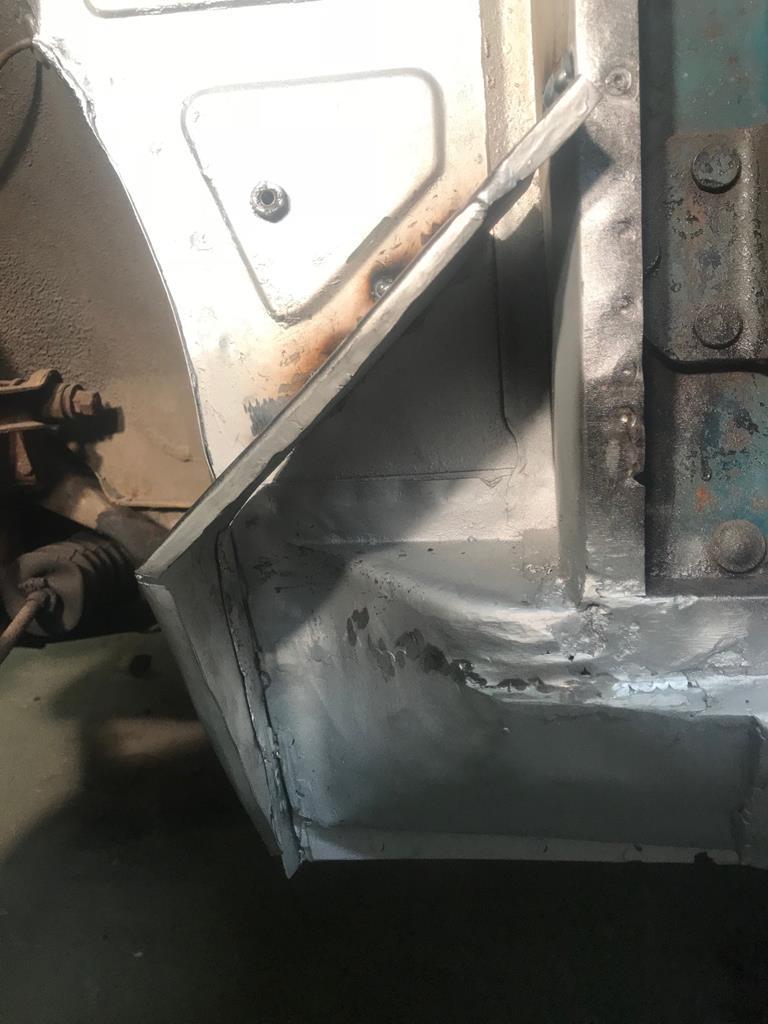 This area now looks a hell of a lot better... 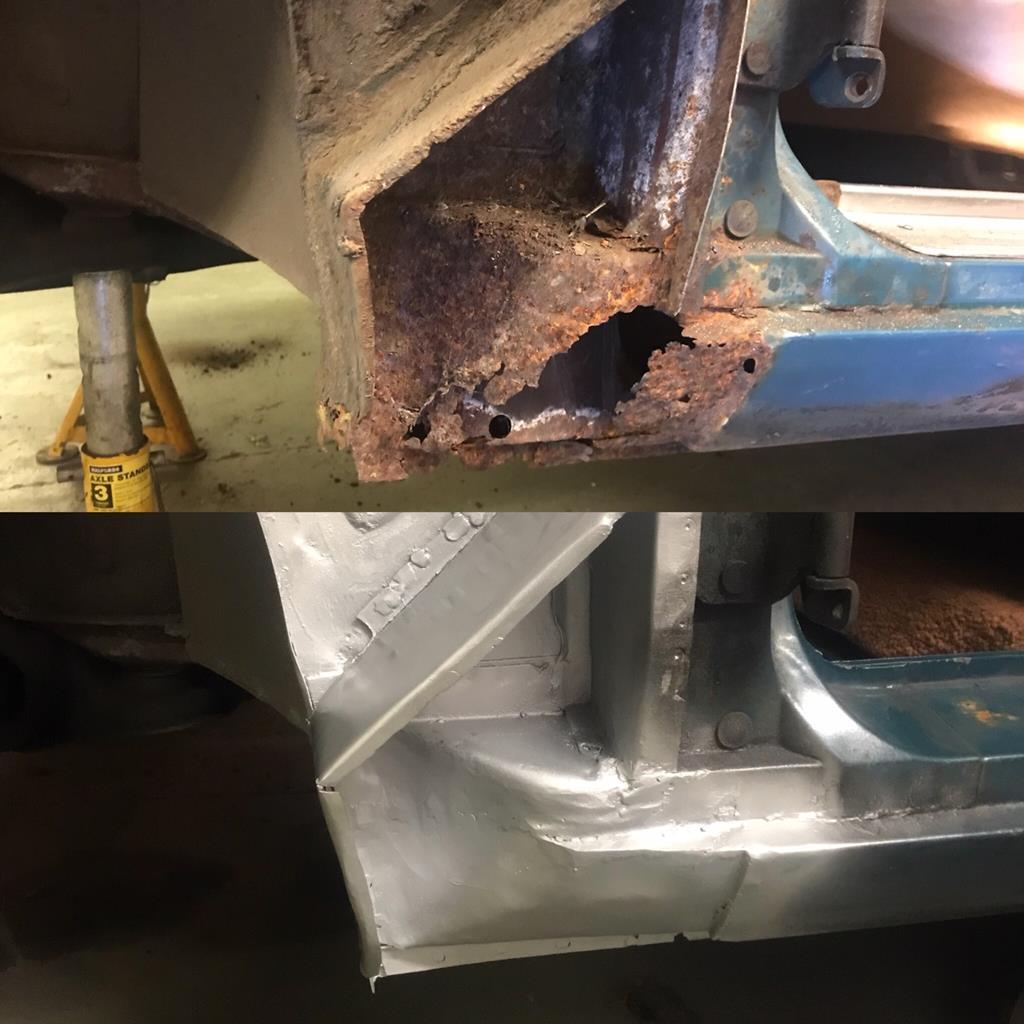 With this bit complete it’s now onto by far the worst area of the car, the inner wing strengthener and scuttle area. 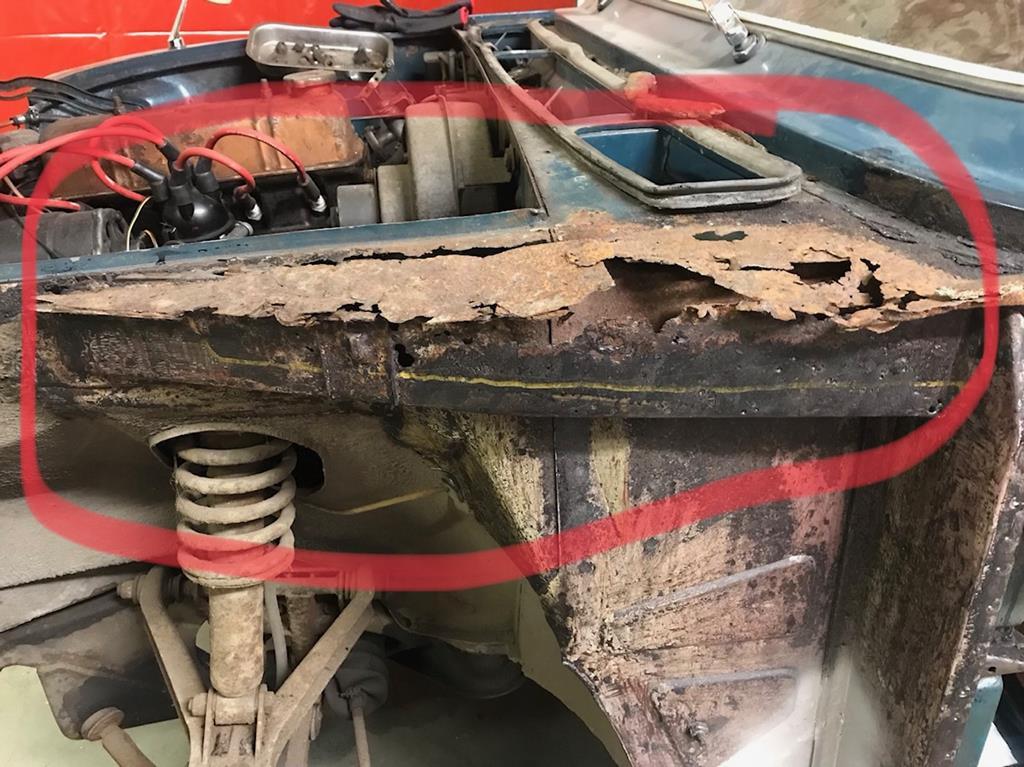 I was worried about the rot around the scuttle so I decided to remove the dash last week to see how bad it was. Thankfully it was rock solid in there. 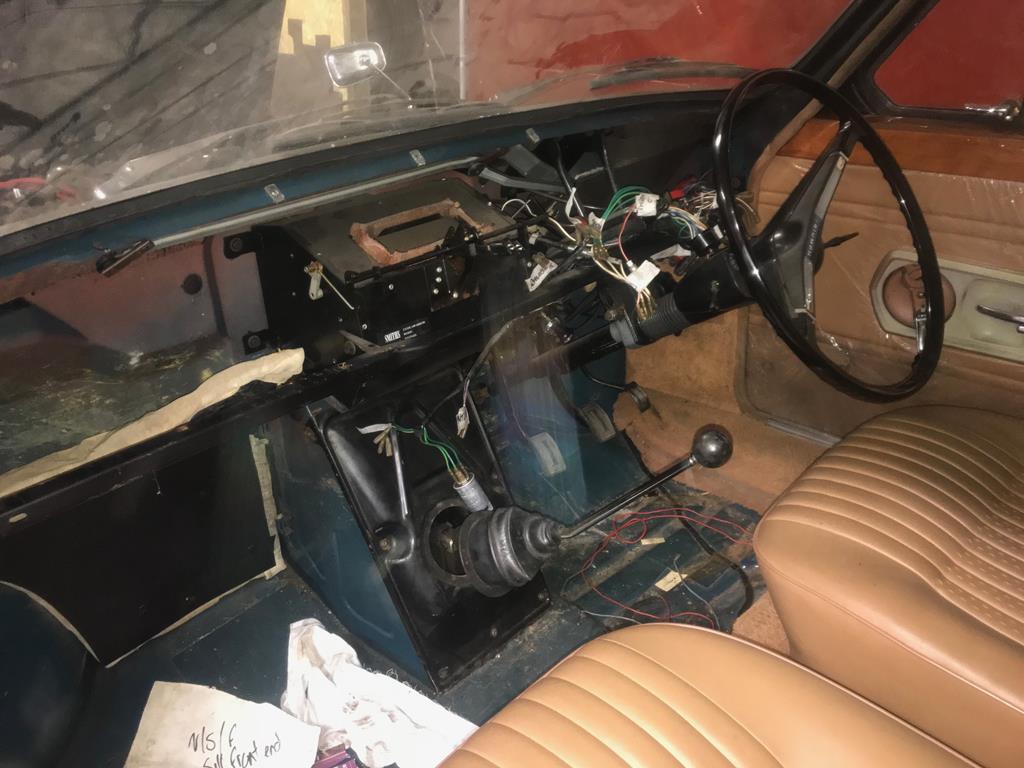 I took the dash home for two reasons. Firstly and most importantly to annoy the Missus and secondly to strip it down and clean it up. 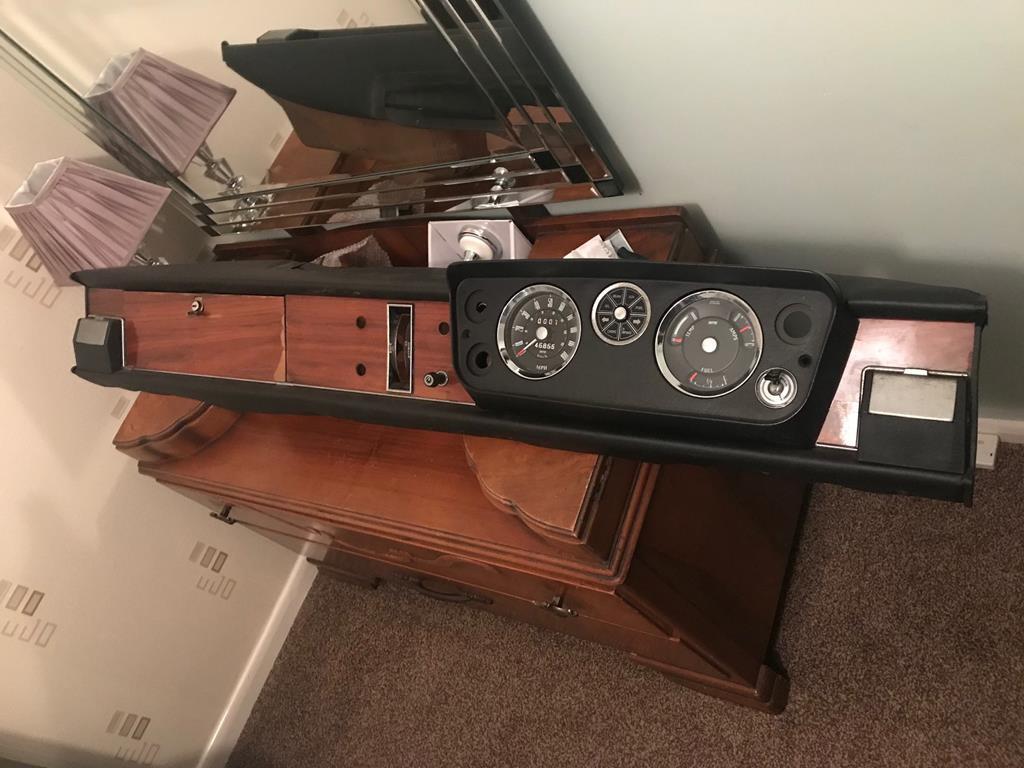 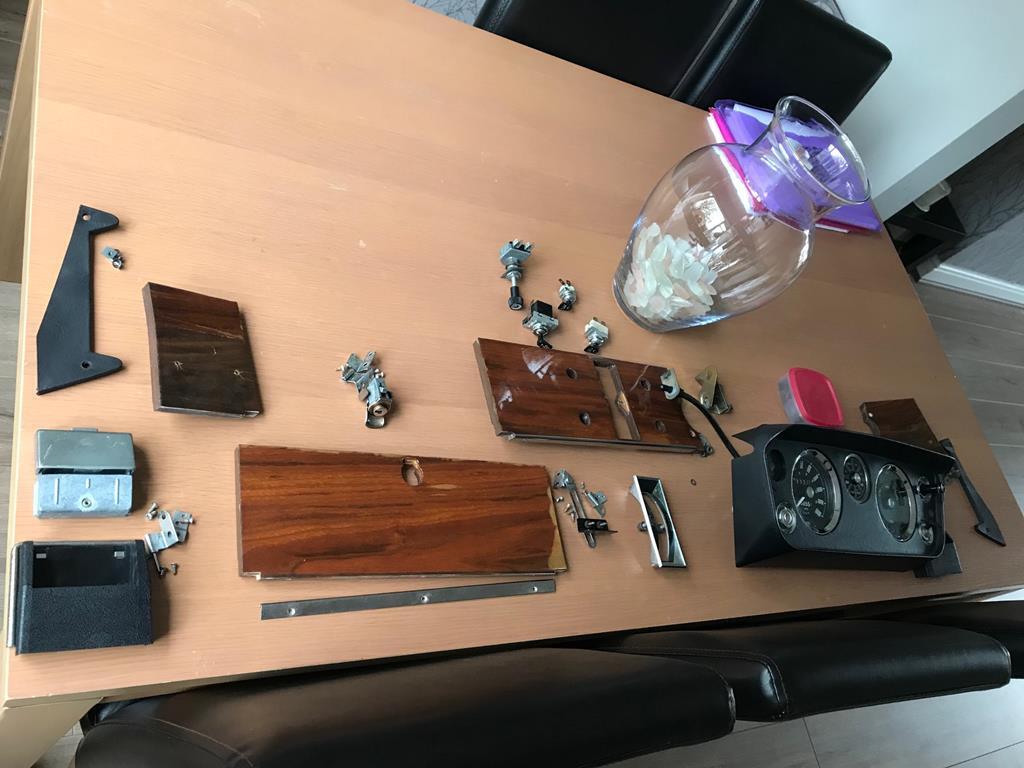 The chrome and dials have come up a treat but the wood is in worse condition than I thought. Thankfully my cousin has refinished a few Classic Car dashboards so these pieces will be getting dropped off with him next week. 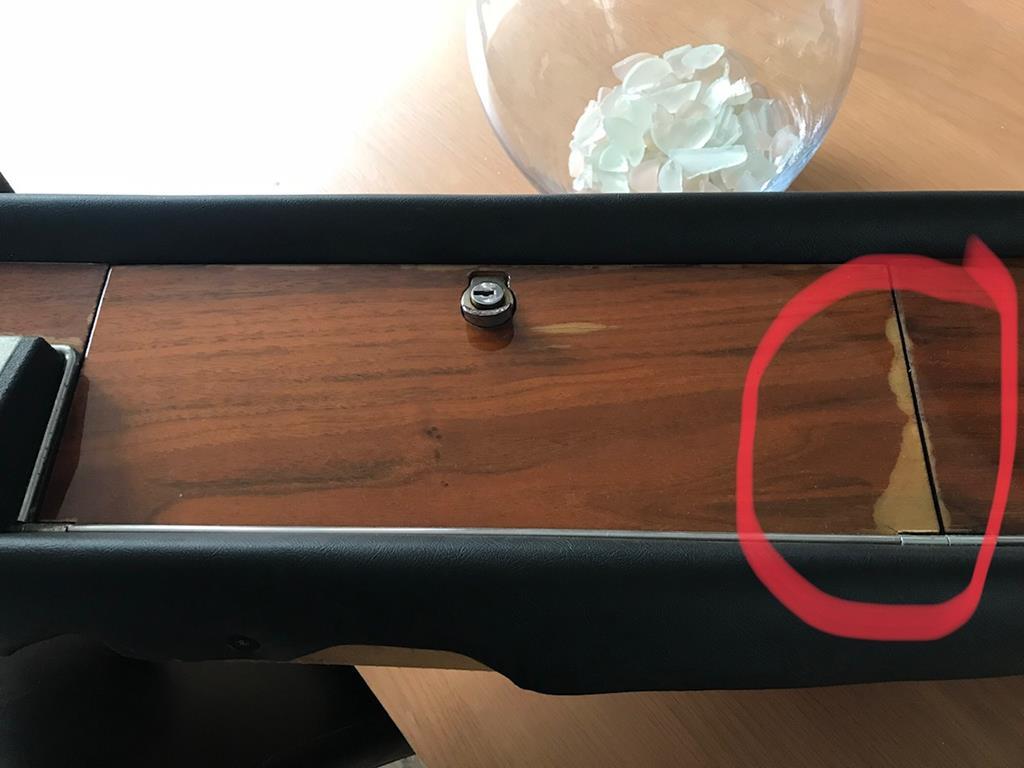 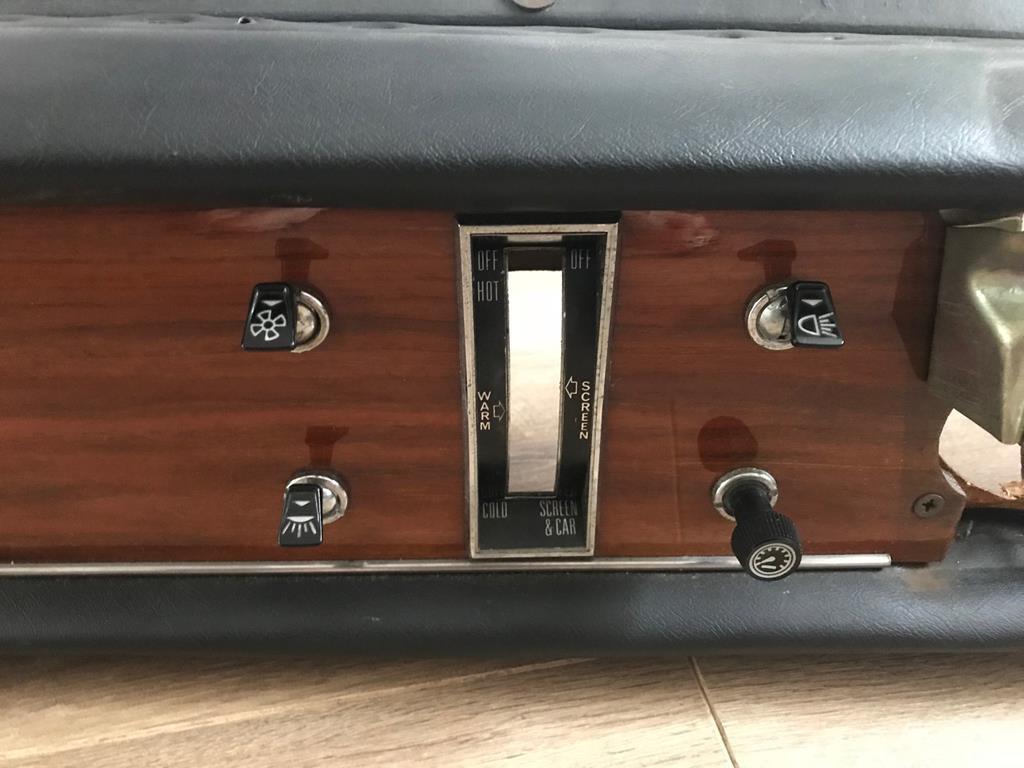 Hopefully another update next week after getting stuck into the inner wing. Thanks for reading. |
| |
Last Edit: Jan 26, 2020 16:17:24 GMT by XL391
|
|
|
|
|
|
|
Looking good  For the fuel starvation, try running a line to a jerry-can in the passenger footwell. I had occasional problems - with a jerry can eventually traced it to crud in the tank blocking the fuel pickup pipe. Maybe check your inside your tank and add a gauze filter if there's not already one there? |
| |
|
|
|
|
|
|
|
|
|
|
If you are able to tackle that kind of rust you are a hero in my books!!
|
| |
|
|
hagus
Part of things
 
Posts: 35
|
|
|
|
|
Beautiful work, great to see 👍
|
| |
|
|
|
|
|
|
|
|
Nice fab work. I love to see a bit of rust repair. Keep us updated.
|
| |
|
|
XL391
Part of things
 
Posts: 160
|
|
Nov 28, 2018 17:02:54 GMT
|
Thanks for all your comments guys. Looking good  For the fuel starvation... Thanks Nomad. I’m sorry I should’ve said, I sorted out the fuel starvation issue about 18 months ago by using another gasket on the fuel pump. Runs great now! I took it for a little trundle around the yard when it was sorted. 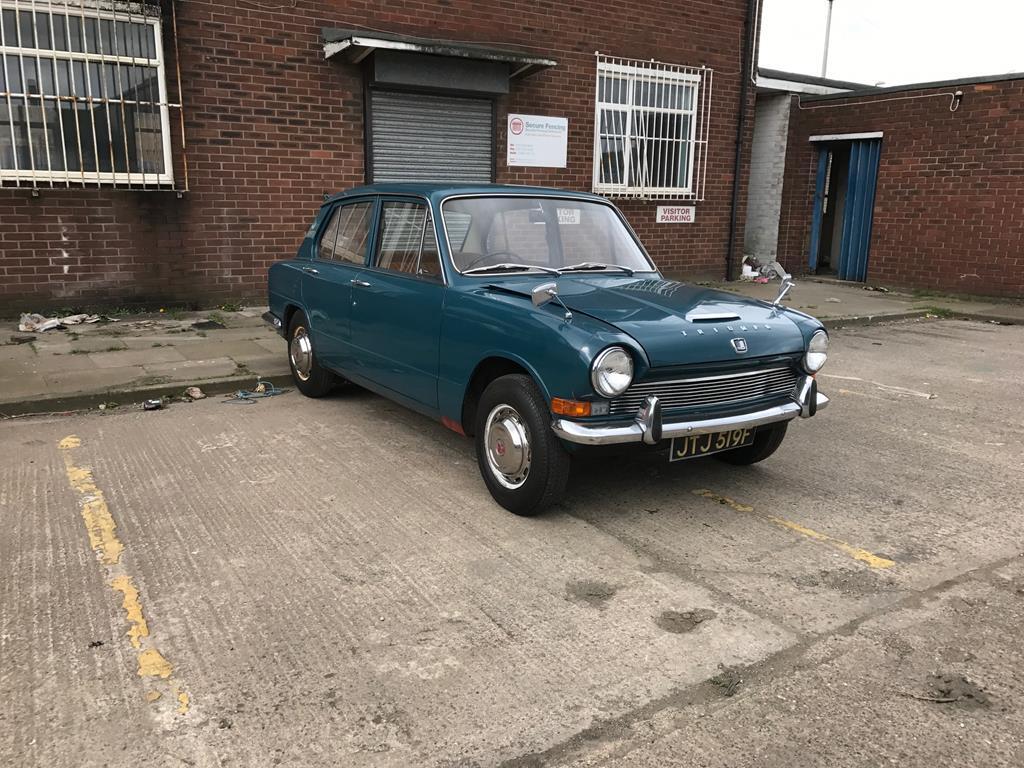 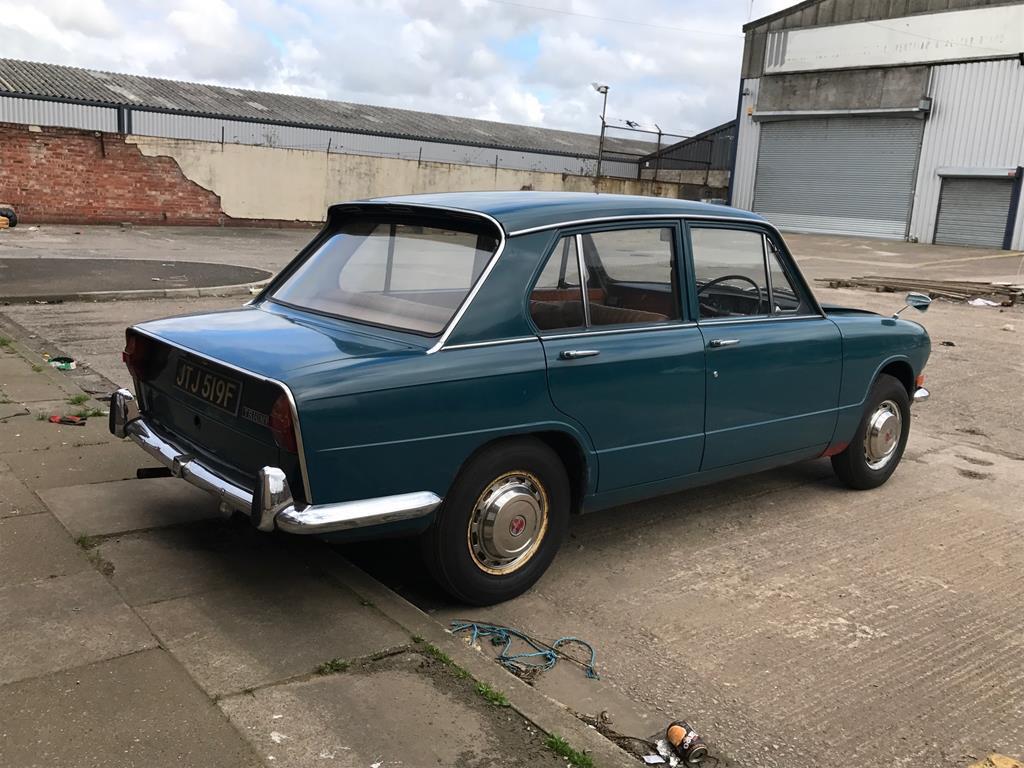 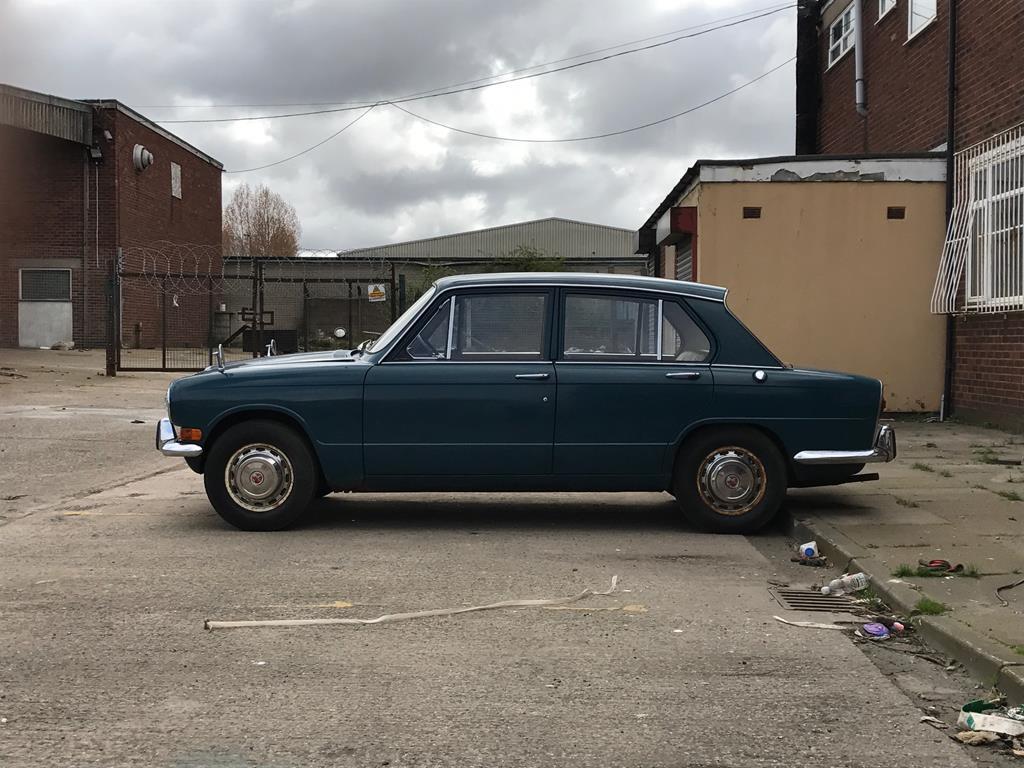 |
| |
Last Edit: Jan 26, 2020 16:27:55 GMT by XL391
|
|
|
|
|
Nov 28, 2018 19:14:32 GMT
|
|
lovely fab work
|
| |
|
|
XL391
Part of things
 
Posts: 160
|
|
|
|
So much for a week to the next update! Sadly the boss has had me working on our new abode leaving very little time to sort this little beauty out. I have done a bit when I could snatch time from the jaws of household DIY. We are now onto the top area of the LH inner wing and scuttle area. First piece to come off was the wing strengthening section. Sadly it’s rotten. Although you can’t see it here it will be a swine to make, a very complex pressing. 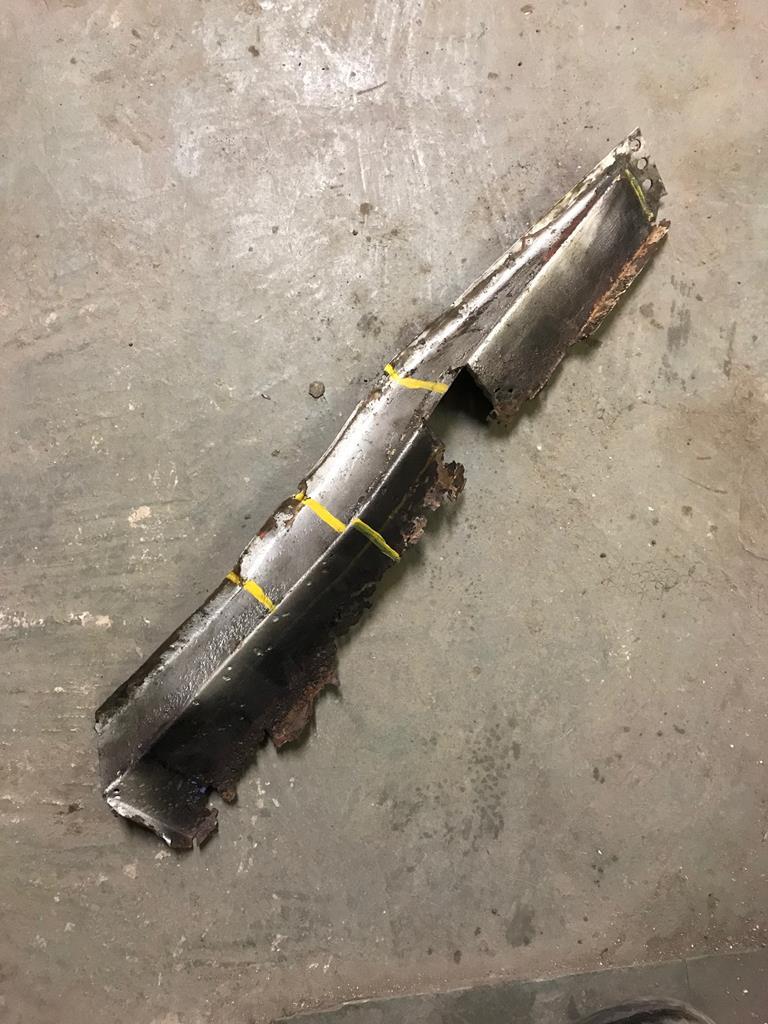 With wisps of smoke exiting my ears due to an overheated brain I decided to leave the fabrication of the strengthener for a bit and move on. The poor design of the inner wing and scuttle drain had built in a remarkably good water trap that had rotted out not only the scuttle but the strengthener and the inner wing itself. 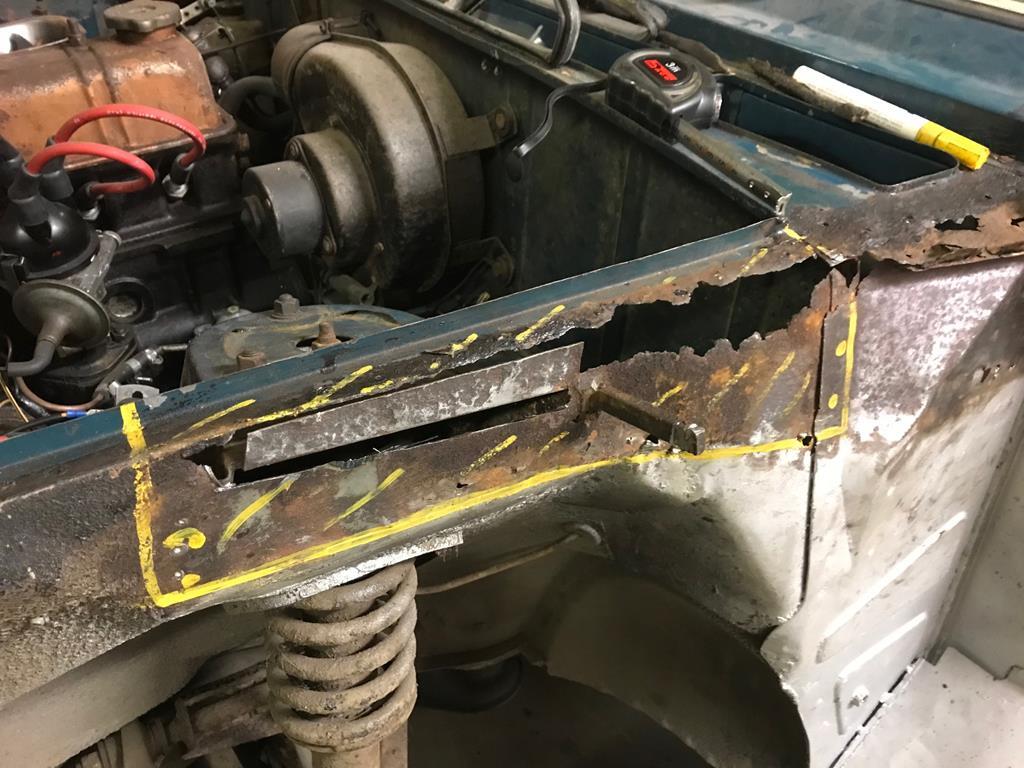 After marking up where the rot ended and the decent metal started, a repair section was fabricated and the rot was evicted from the wing. 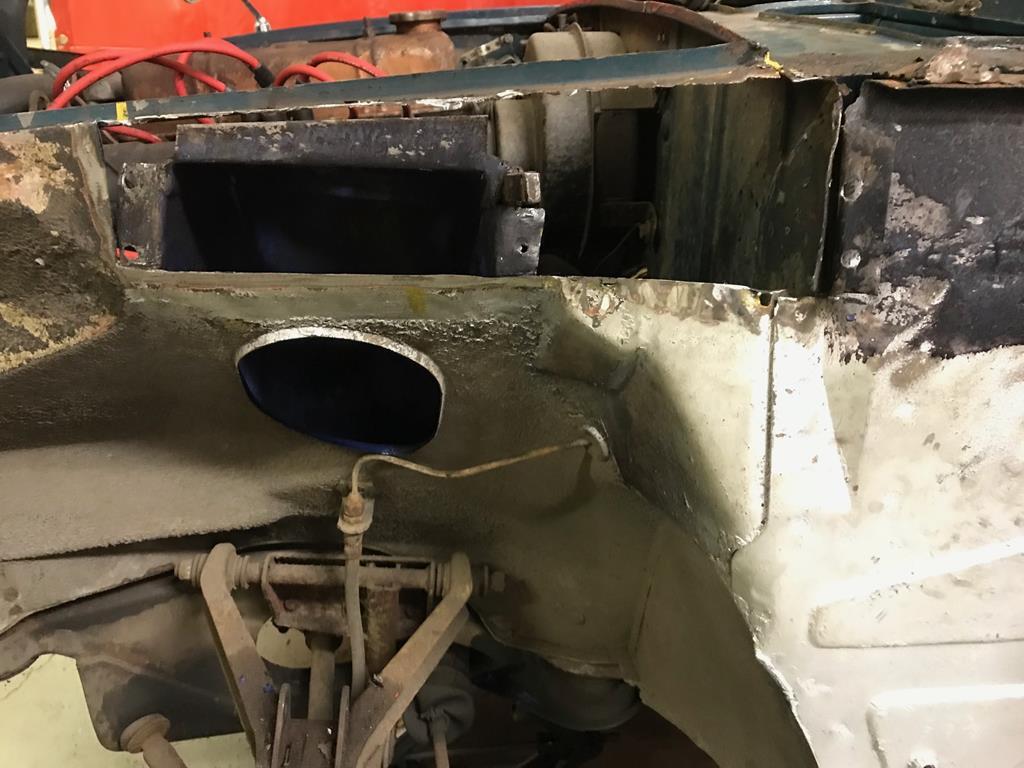 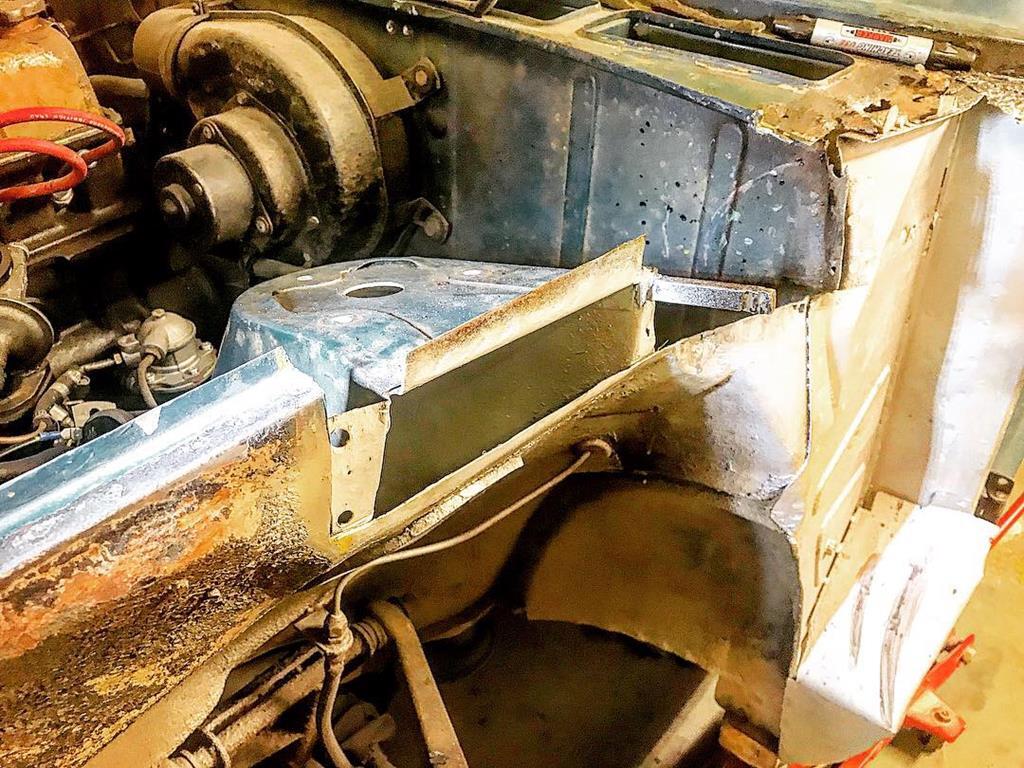 After that it was stiched in, cleaned up and etch primed. 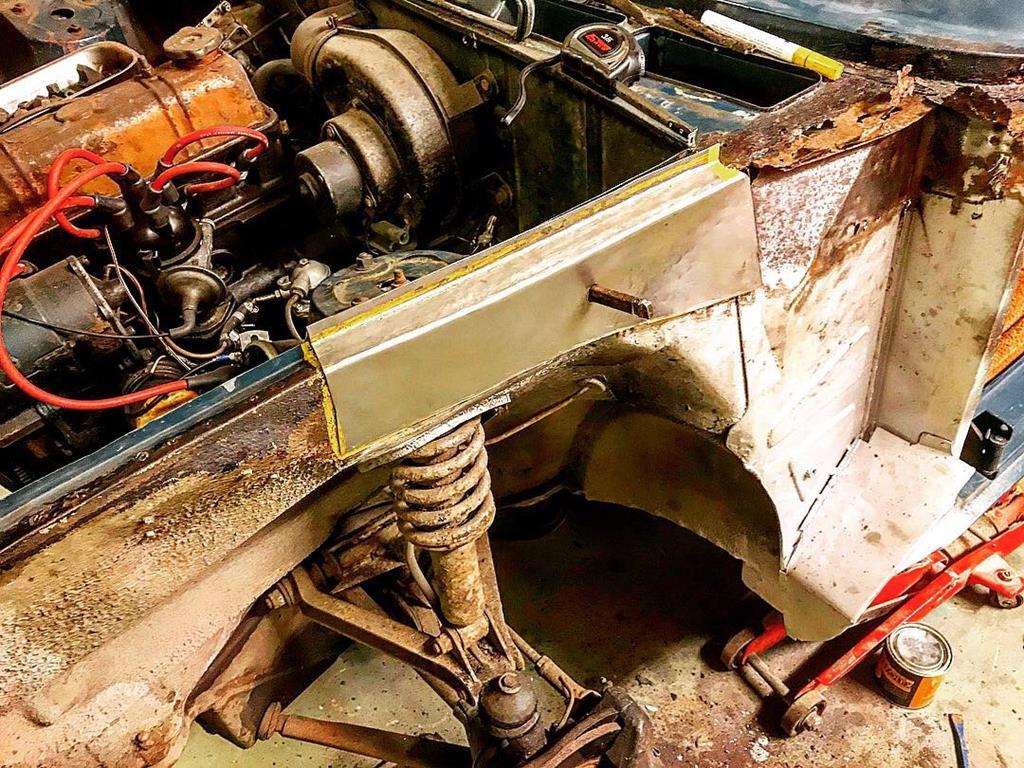 I was still on a break from the strengthener (still am) so therefore it was onto the scuttle area. As you can see, it looks like Ze Germans have had a bloody good go at it. Not much left of it for reference sadly. So, the angle grinder was deployed and I opened up the right hand wing to see if that side was any better. 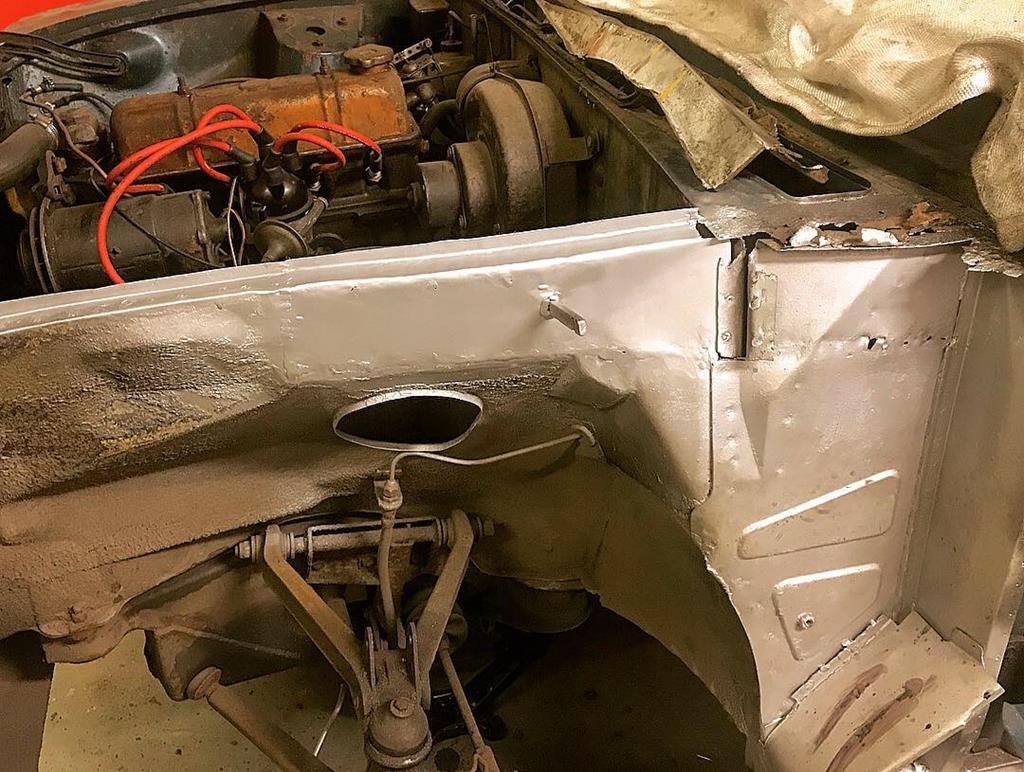 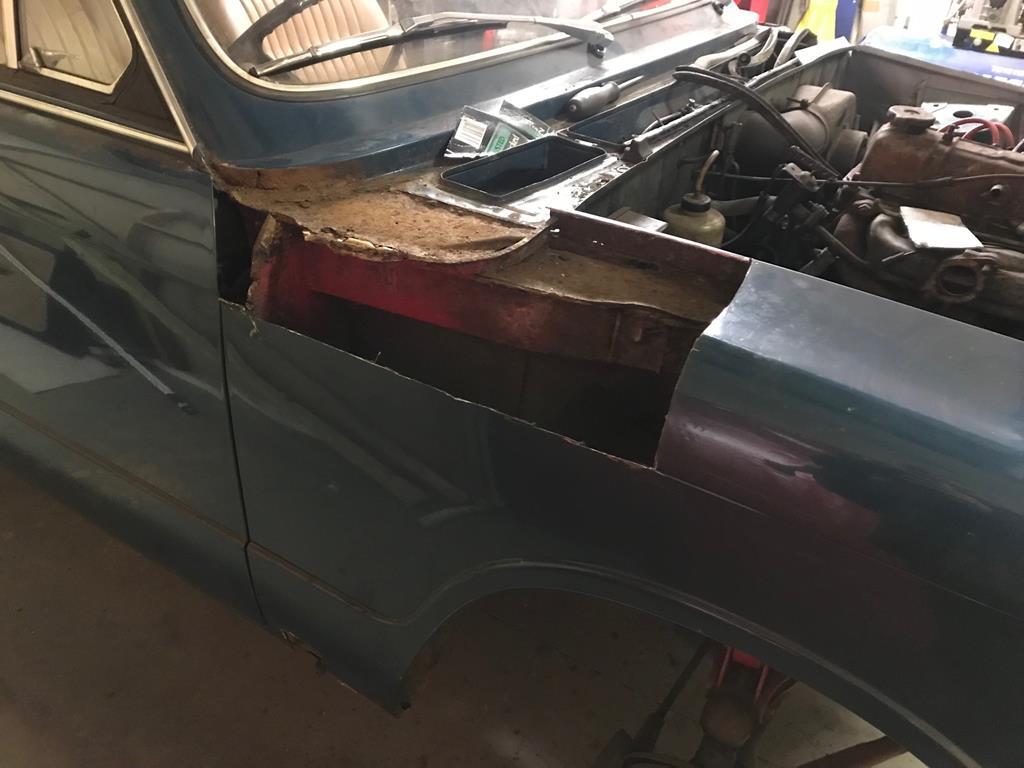 Thankfully it was, although not much. All this will eventually come out as a bit of pokey pokey finger fun revealed just what state it was in,but for now I could copy the shapes and flip them for the left hand side. 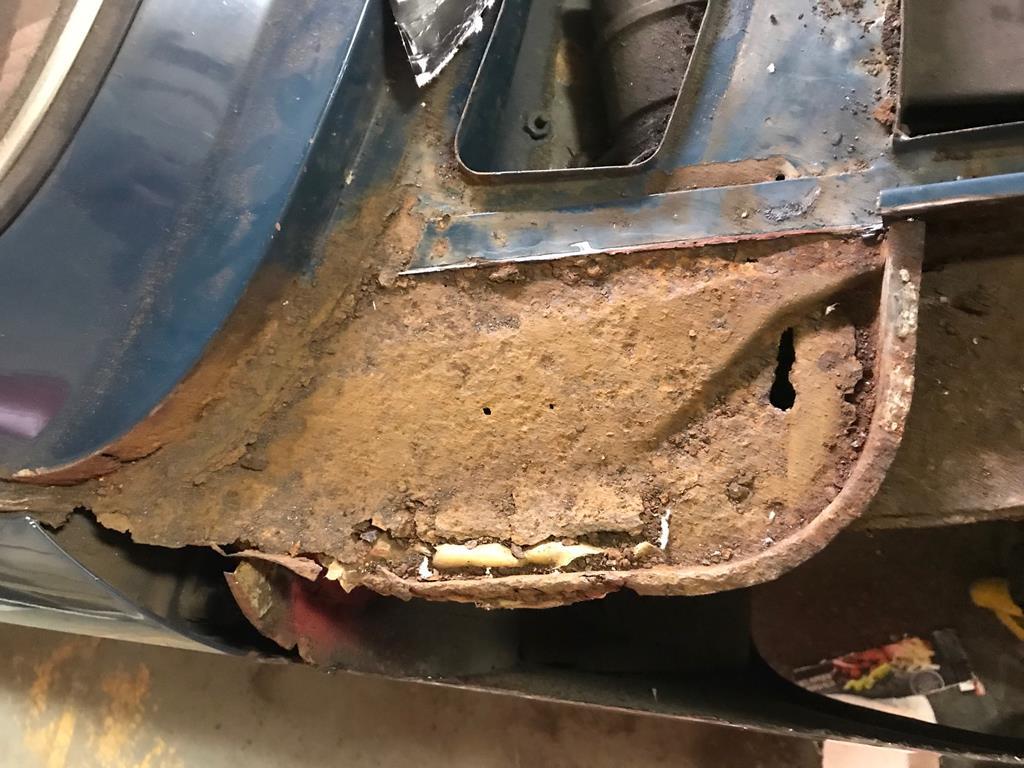 After this it was time to dig out all the rot from the scuttle. I was digging for a while... 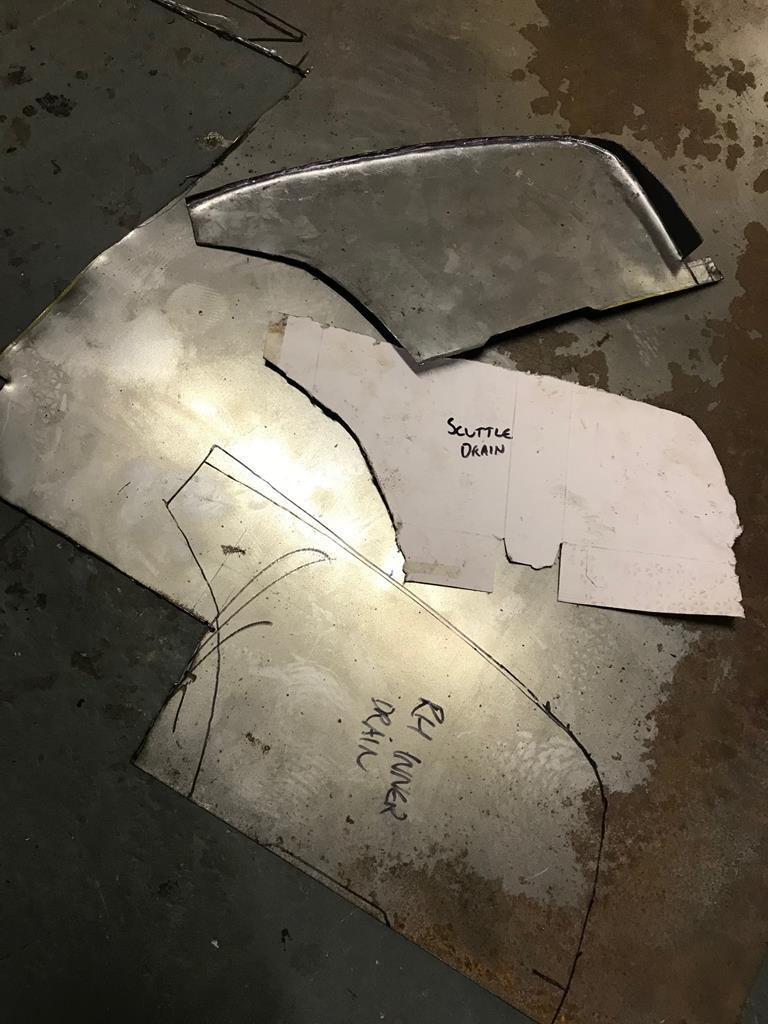 The top of the A post was rotten and also there was rot in the A pillar which had to go. 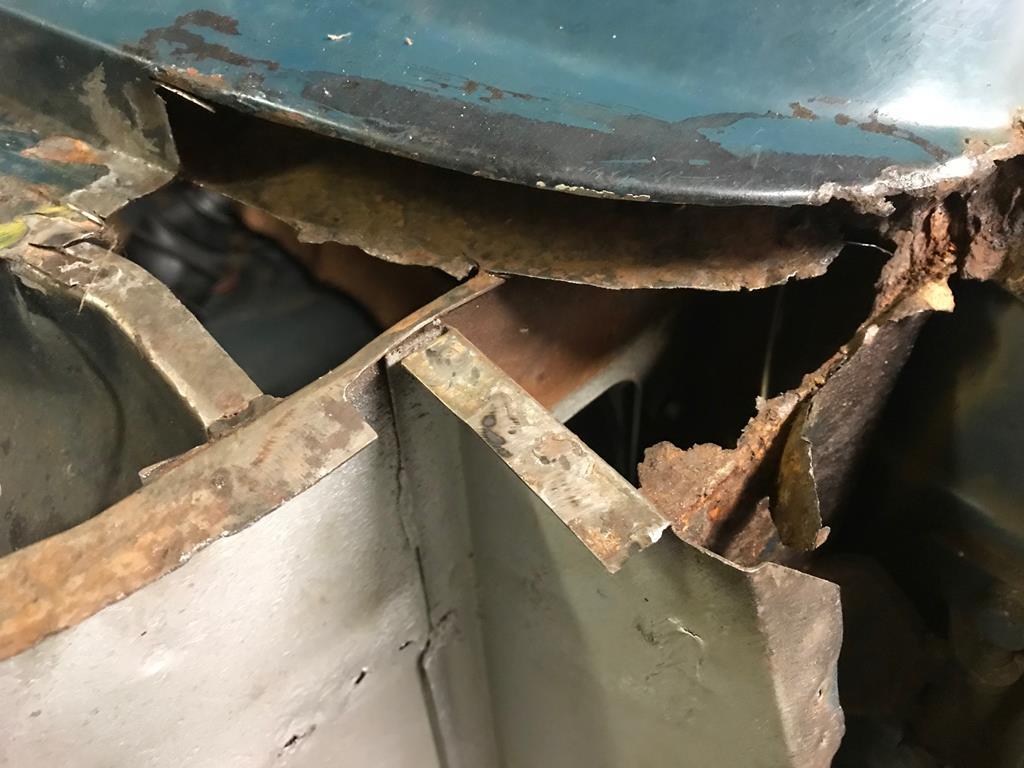 So, after bracing the little blighter and taking some brave pills I made a repair section and began chopping. 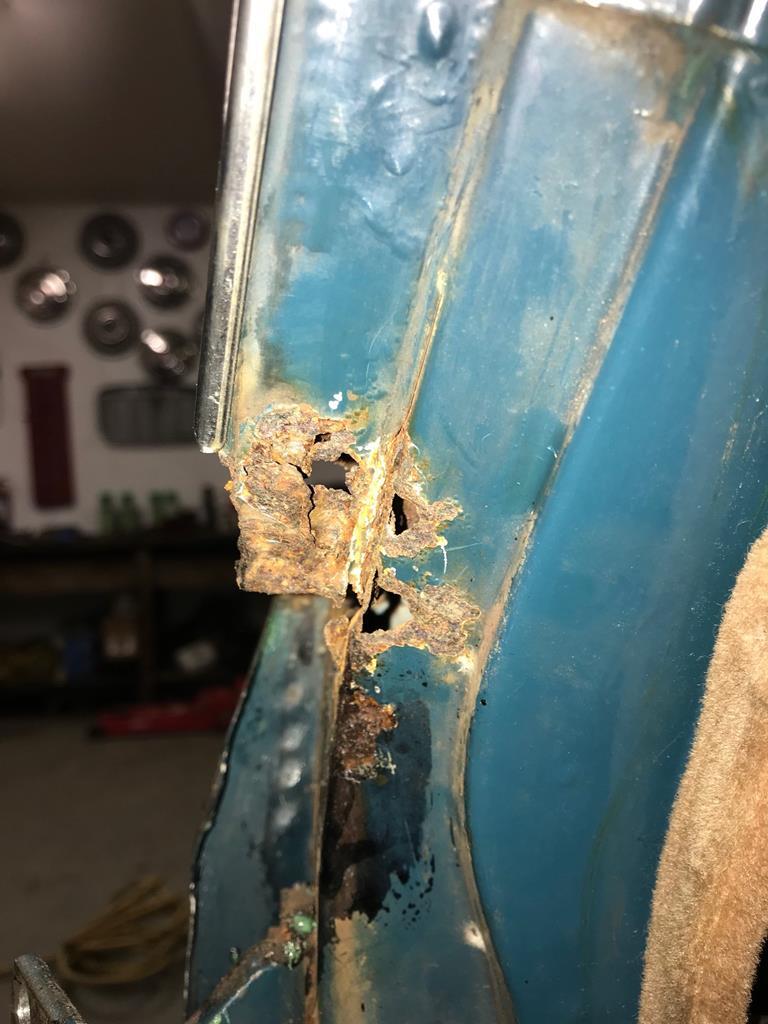 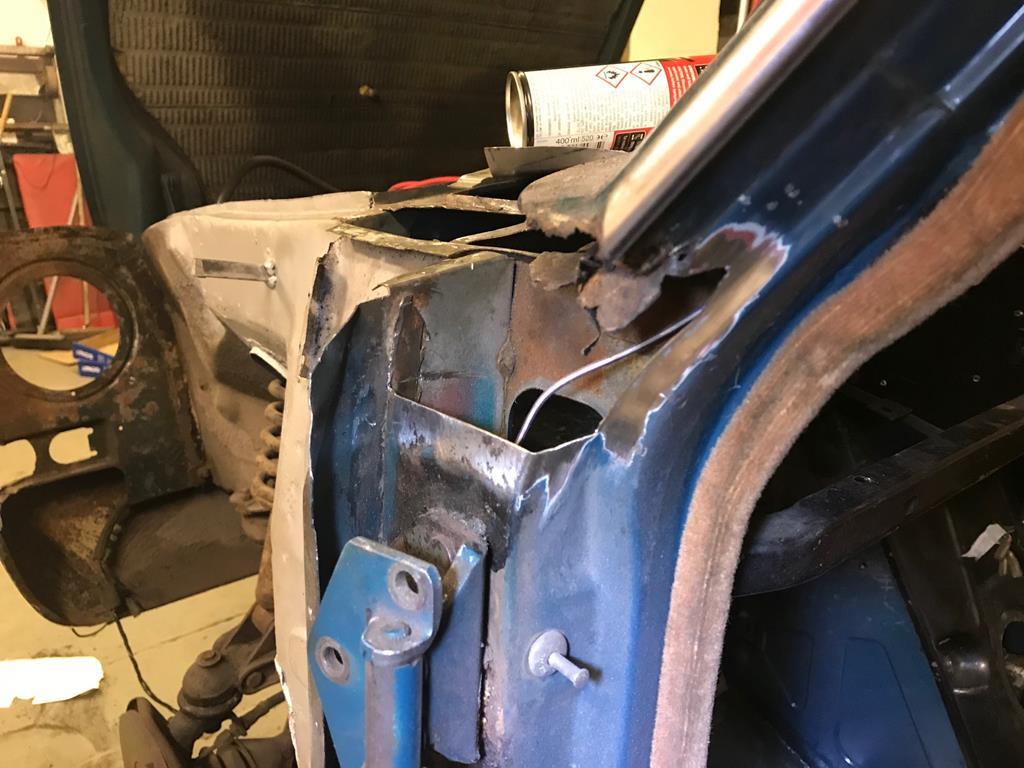 Once out I slotted the repair section in and adjusted the fit, all good! 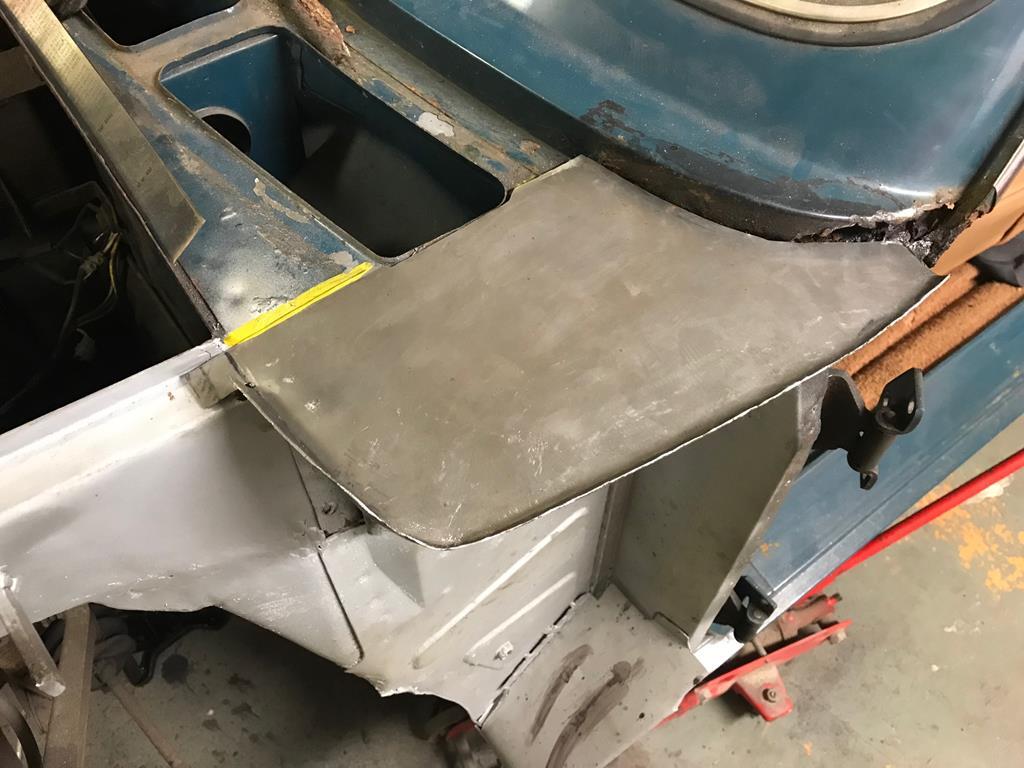 The new scuttle piece is now a flat piece of metal curved down towards the extremities. Water will hopefully collect at the edges where I will be drilling drain holes so the water will drain out into the Wheelarch as opposed to into the strengthener box section. In theory of course. It’ll all probably end up in the glovebox or on my shoes. I believe Triumph modified the design a few months after my car was built. The new sections have been dry fitted ready for welding together. I’m pleased I’m at this point now. I’d been avoiding tackling the A post/pillar rot like you avoid picking the s**t kid for your footy team. 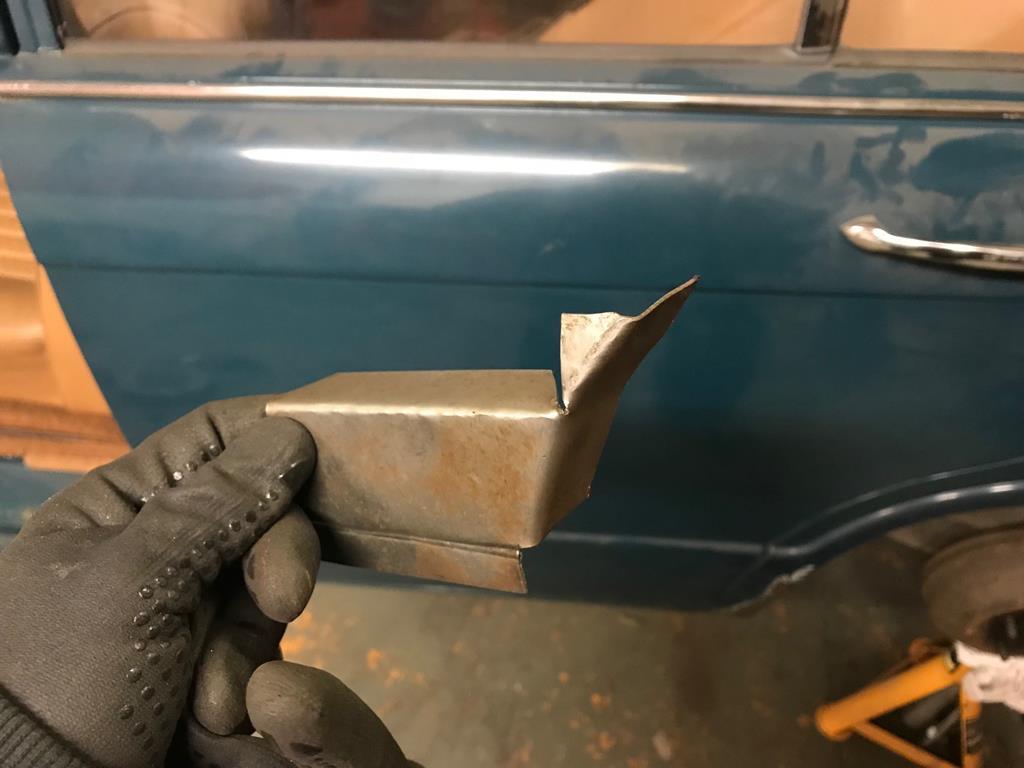 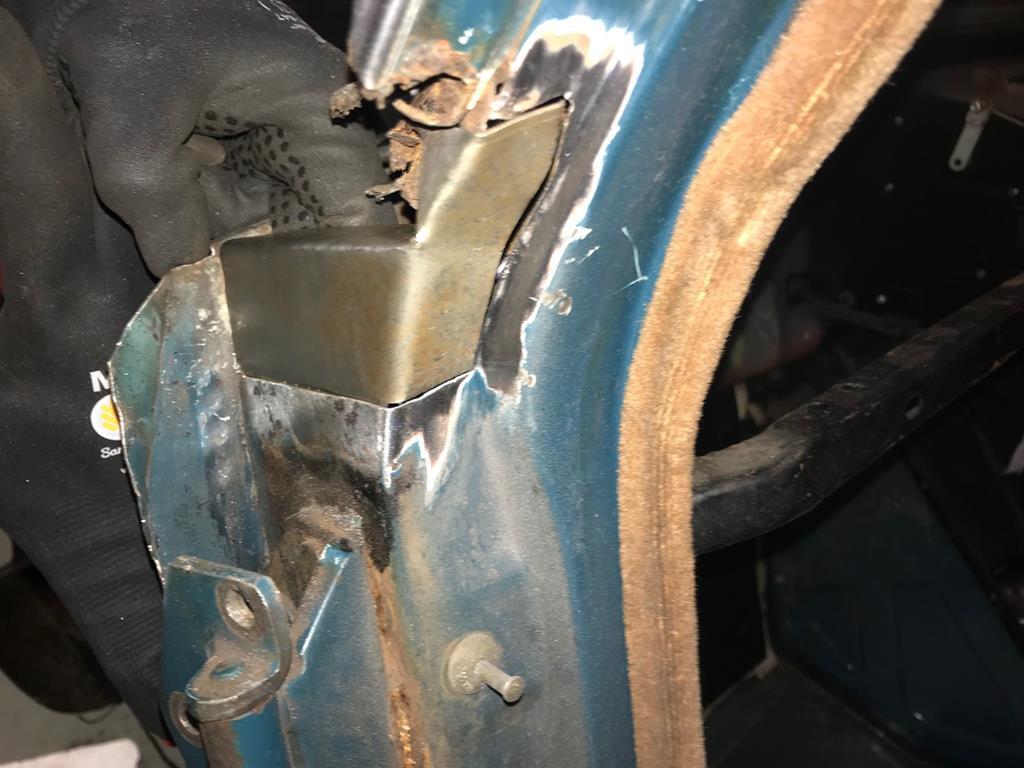 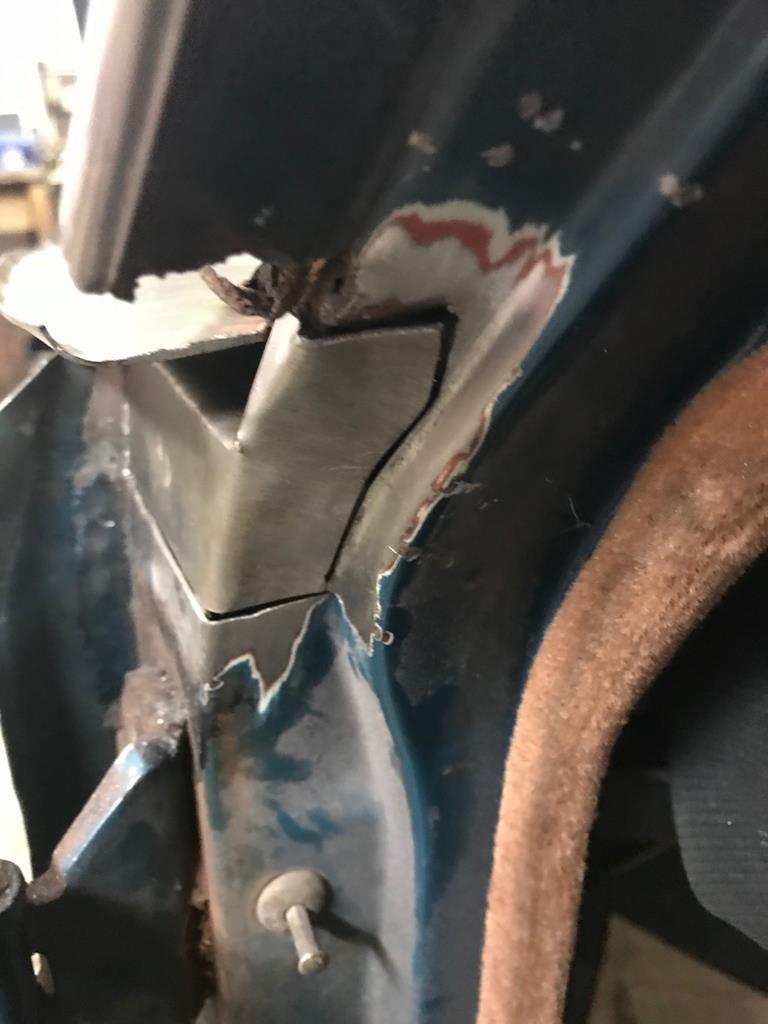 Hopefully another update soon. Until then, it’s back to painting bloody fences...  |
| |
Last Edit: Jan 26, 2020 16:45:25 GMT by XL391
|
|
piguin
Part of things
 
Posts: 136 
|
|
|
|
|
Good to see this still being worked on, and getting back on the road properly.
Have a soft spot for these, had a red one as my first car 31 years ago. Amazingly, it was in way worse shape than yours even then. It does bring back a lot of memories...
|
| |
|
|
|
|
|
|
|
Good to see this still being worked on, and getting back on the road properly. Have a soft spot for these, had a red one as my first car 31 years ago. Amazingly, it was in way worse shape than yours even then. It does bring back a lot of memories... agree it was a nice surprise to see the thread pop back to the top |
| |
|
|
|
|
1968 Triumph 1300 FWDMercdan68
@forddan68
Club Retro Rides Member 68
|
|
|
|
Nice work ,and great to see an update !
|
| |
Fraud owners club member
2003 W211 Mercedes E class
1989 Sierra sapphire
1998 ex bt fiesta van
|
|
ovimor
North East
...It'll be ME!
Posts: 934
|
|
|
|
|
There is some guy running his IMP (rotoflex couplings) using BMW prop couplings...
They might do on a FWD Triumph, perhaps?
Lovely car, getting the proppa lurve....
OVIMOR
|
| |
Knowledge is to know a Tomato is a 'fruit' - Wisdom, on the other hand, is knowing not to put it in a 'fruit salad'!
|
|
|
|


