|
|
|
|
|
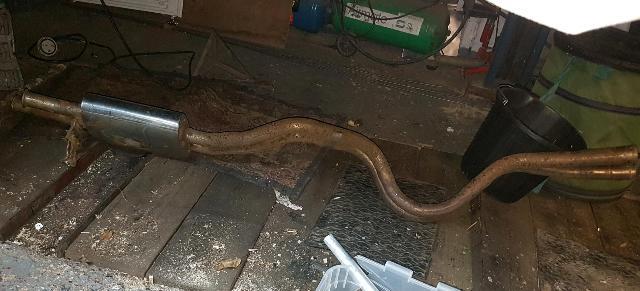
Ka doesen't seem to be getting any weter, so I lifted the carpet and pointed a fan heater at it, seems to have dried out now, also washed the minor ka and mazda. 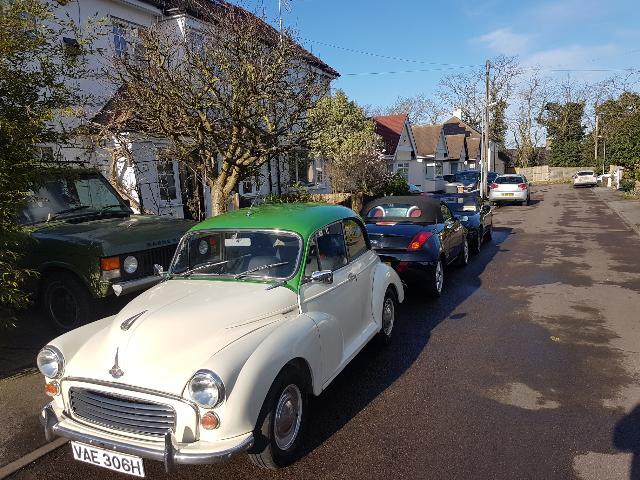 Used the minor for severeal trips today and after some use the brakes feel much better so no need to re bleed them. Moved on to sorting out a few issues on the TR, firstly the oil leak, both the original and my spare pulley had pretty substantial grooves. 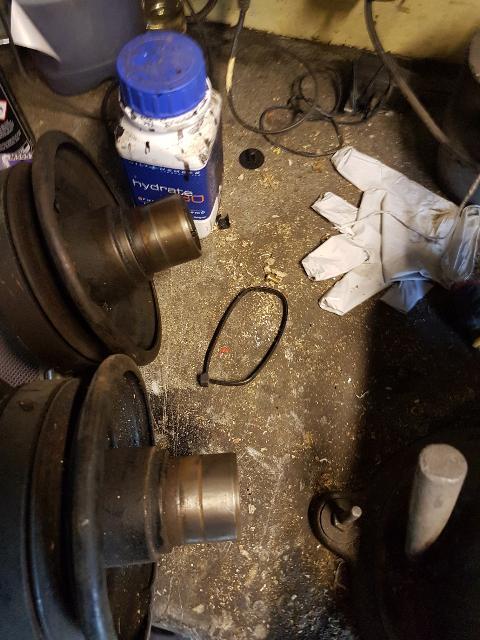 So I opted to fit a speedi sleeve, drive it over the shaft with tool provided and some thread lock to give this. 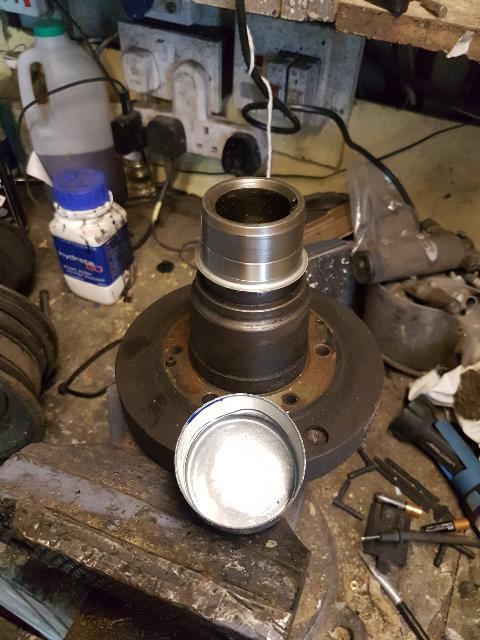 Then you break the collar off to give this. 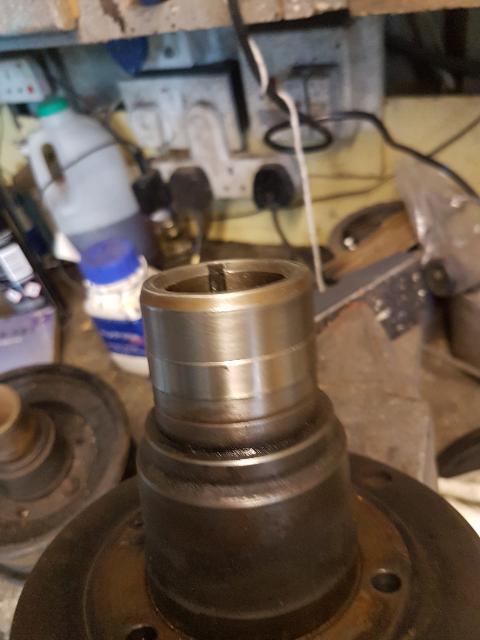 Fitted it all back together and it seems dry so far. Also noticed a few holes in the exhaust, I really need to buy or make some new downpipes but for now and hopefully the mot in march I have welded the holes up not pretty but it works. 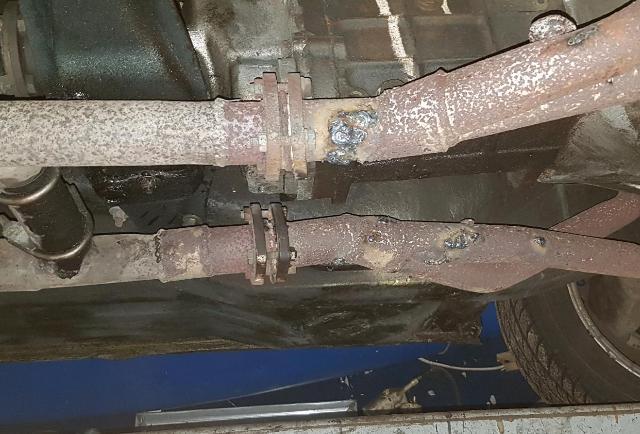 Also ran a bead of pu over the seam between the rear deck and wing as water was leaking through, bolted the battery down checked all the fluids, and pumped the tyres up, good news was it then started almost immediately after having stood for 2 months. I may even use it for work a few days this week. |
| |
Last Edit: Dec 20, 2020 22:35:05 GMT by kevins
|
|
|
|
|
|
|
Feb 10, 2020 17:18:36 GMT
|
|
For the last 5 days both the KA and Mazda have sat outside with ciara throwing pouring rain and gale force wind at them, rather suprisingly they both still seem dry inside so it looks like the leaks are fixed, The underside of the TR is also not dripping in oil for the first time in ages, it still has a bit of old car character with the usual gearbox weep around the selector shaft and some dampness around the diff cover but nothing major.
With all these sucsesses and she who must be obeyed agreeing to the expenditure its getting to the point where I am going to have to get on with the range rover, so next weekend I plan to reverse it around the block and into the workshop, in the mentime need to dig out / make the tools required.
|
| |
|
|
|
|
|
Feb 12, 2020 13:25:01 GMT
|
|
With the range rover being indisposed I really needed another car to use for the next few weeks so after fixing the oil leak, letting the tyres down(they had stayed at the 50psi I stored it at) checking the fluids (it has a small weep from the end of the radiator so I may stick a bottle of k seal in it for now but it only took a cup full of coolant anyway) I started using the TR for work, Initially it ran on what sounded like 5 cyl, the heater wouldn't move to the hot position and the lights stayed up and only half the radio display worked but like something coming to life the engine cleared to running on 8 as it warmed up, repeated tries slowly got the heater moving and working and the lights and radio seemed to work once the battery was fully charged and they had been on for a while, by the time I got to work everything seemed to be working and it was driving great, the engine seems to still not be dripping in oil and keeping the tyres pumped up seems to have eliminated the usual steering and brake shakes after it has been standing for a while.
So overall a success, something will probably pack up in the next few weeks but for now I have something I can use to get to work in.
|
| |
|
|
|
|
|
Feb 21, 2020 23:10:41 GMT
|
Finally got my act together and started on the range rover. The exhaust y pipe had to be cut off but it was pretty rusty any way so no great loss, otherwise the props, x member, gearbox mounts and cables all came off easily enough. I have made the fixture according to the drawing in the manual so it should all be out tomorrow. So far the only issues I can see a a few areas of light surface rust on the chassis, and engine oil in the torque converter housing so the crank seal might be leaking. I have some pics but the uploader seems to be playing up, i will try tomorrow. 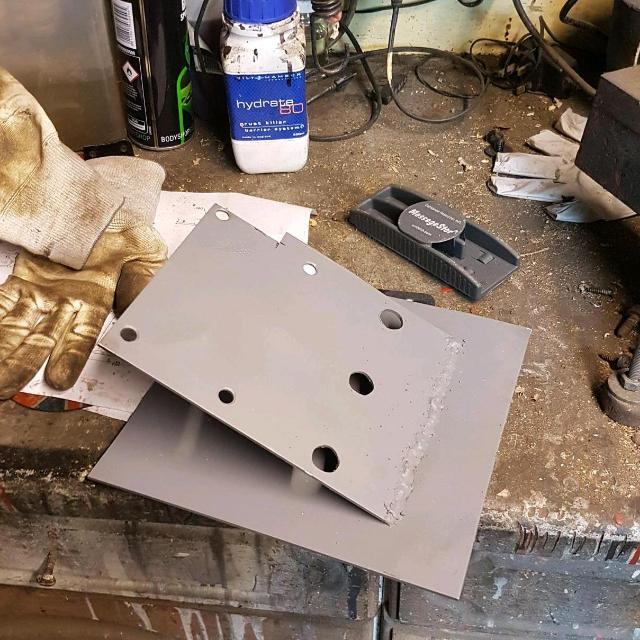 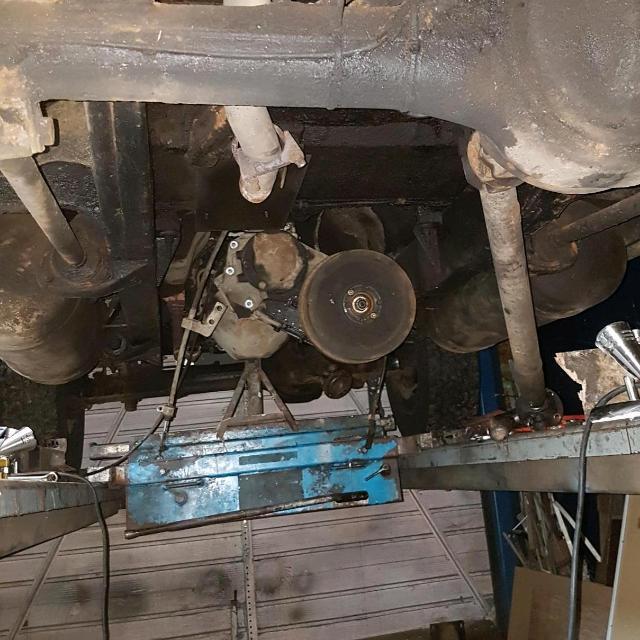 |
| |
Last Edit: Feb 23, 2020 18:02:51 GMT by kevins
|
|
|
|
|
Feb 22, 2020 20:03:46 GMT
|
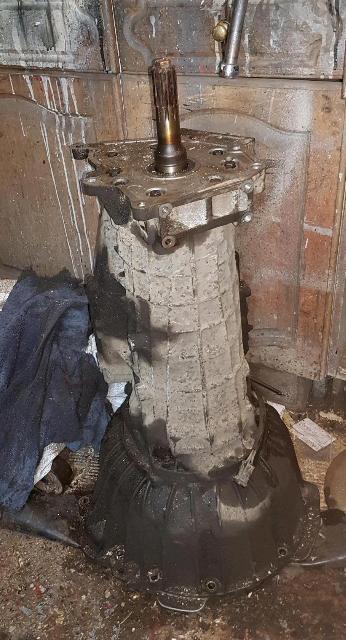
Gearbox is out, getting the transfer lever off and torque converter bolts out was a bit of a fiddle but otherwise it came out easily enough. So what go we have,? Output shaft splines are worn to about half their depth, input gear in transfer box is the same. Transfer box intermediate shaft o ring is weeping, but hole doesent look ovaled. Crank oil seal is weeping Someones murdered the handbrake drum screws but I have got them out Down pipe end is all chewed up on one side from previous work (was patched up with bits of ton wrapped around it) A few areas on the chassis need cleaning up and treating with converter. So overall not too bad, I will need to partially re-build the transfer box but the parts aren't too expensive and I can do this while Ashcroft are doing the transmission.[ 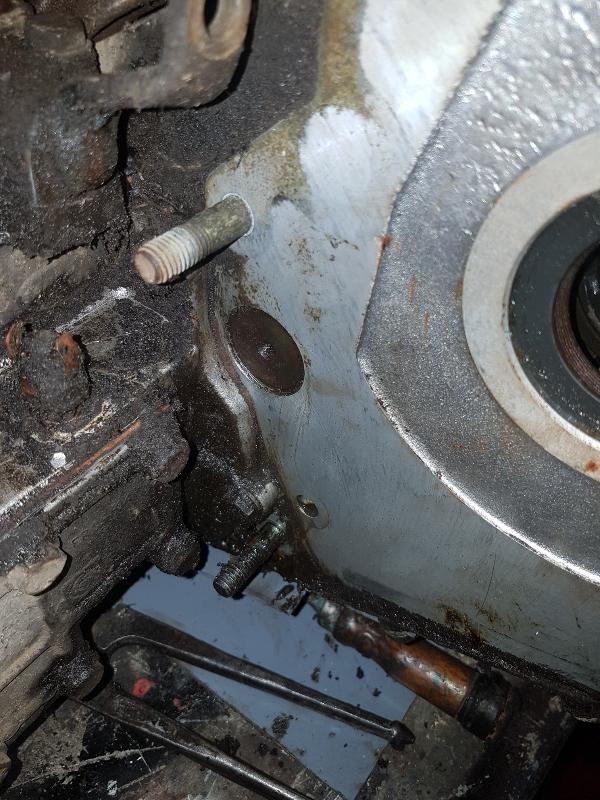 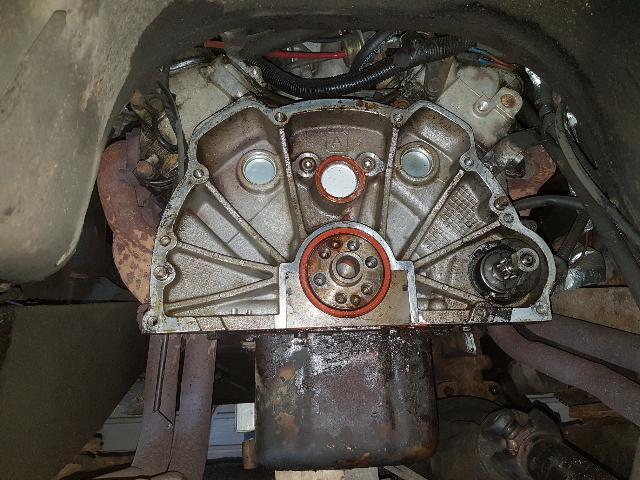 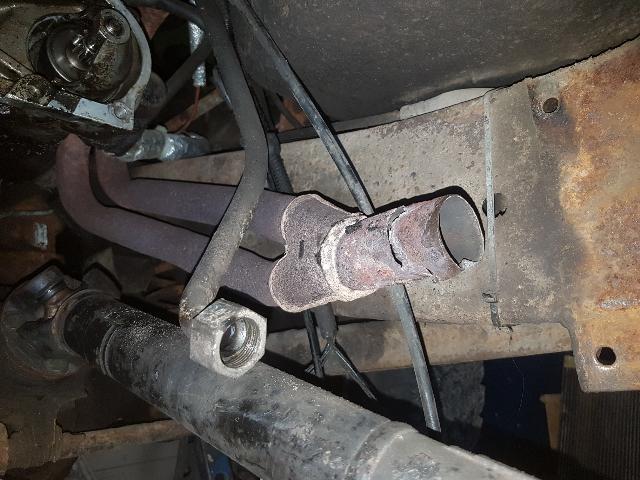 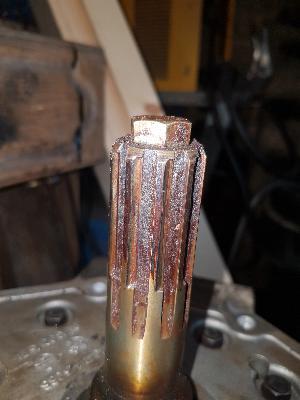 |
| |
Last Edit: Feb 23, 2020 18:09:02 GMT by kevins
|
|
|
|
|
Feb 23, 2020 18:00:24 GMT
|
|
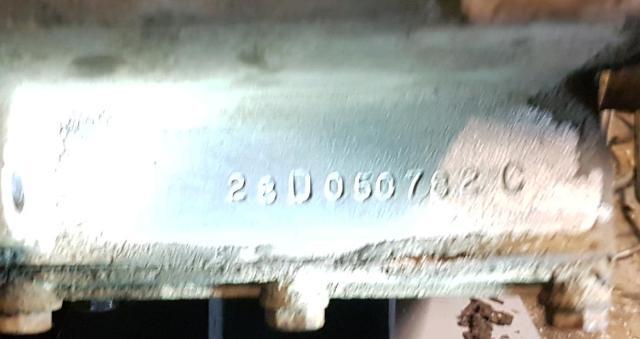
Not done much today, tidied up a bit, took the brake assy off the transfer box and checked the serial number, good news is it is a C suffix and can take the improved x drilled gear. Ive ordered £70 worth of parts from craddocks(exhaust parts, gearbox mounts, gaskets crank seal etc) tried to order oe and avoid the blue boxes where possible. With the gearbox and transfer box input gear and oils it should all come just short of a grand, at a couple of thousand miles a year it should outlast me though. More good news is it looks like the engine has had some work, all the core plugs on the back and even the oil gallery plugs have red sealer around them.
Then I took a look at the ka, it has stood outside for both storm ciara and Dennis and drivers floor is crispy dry(passengers always was dry) so the sill trims etc can sll go back on (if I can find the screws).
Finally 2 new tyres for the mazda arrived goodyears the same as the back, just need to clean the wheels up and get them fitted.
|
| |
|
|
|
|
|
Feb 23, 2020 20:08:46 GMT
|
|
|
| |
|
|
|
|
|
Feb 28, 2020 22:24:14 GMT
|
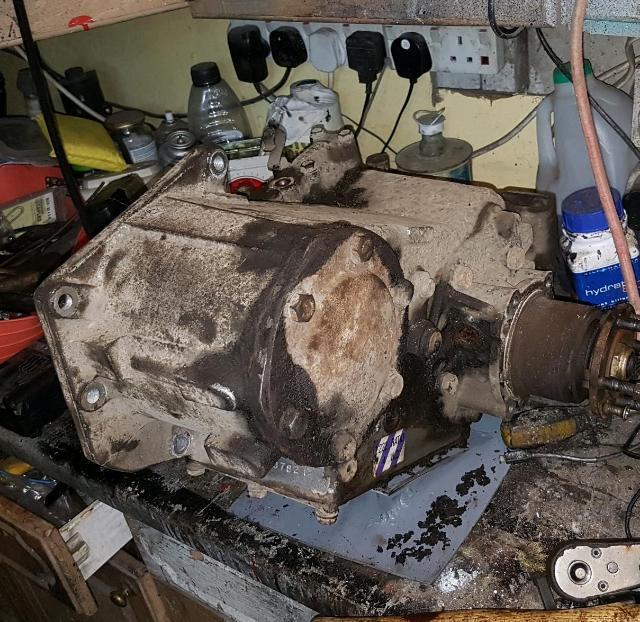
Trans is now with Ashcrofts to be collected in a couple of weeks, also picked up these while I was there. 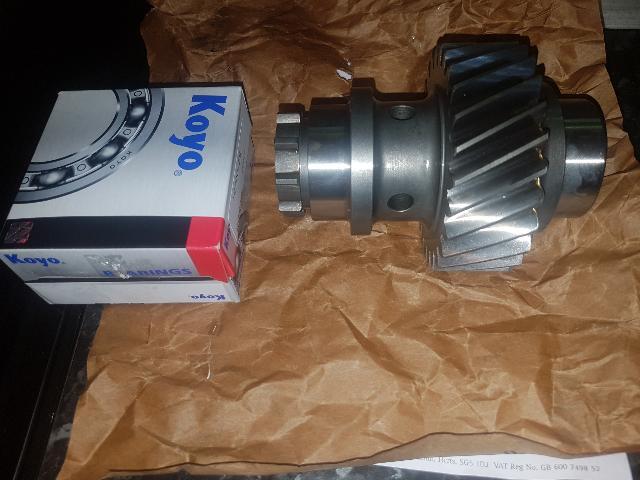 I've also cleaned up the transfer box 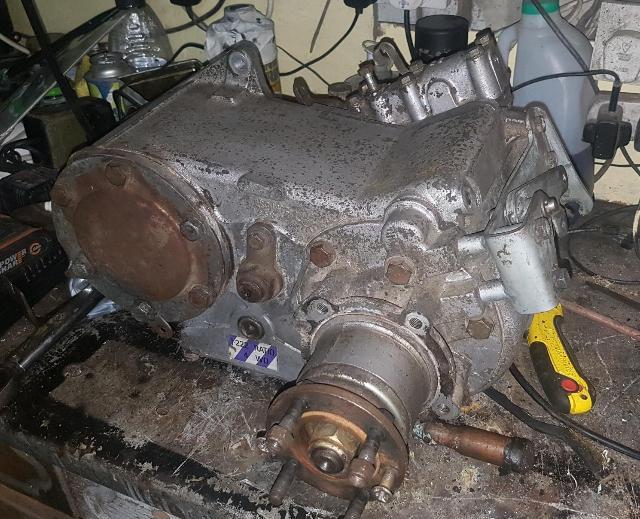 So quite a few things to do before I collect the trans 1.Replace gear, centre shaft o ring and free up hi low selector on transfer box 2. Fit new crank seal and flex plate 3. Fix downpipe 4. Clean up and treat surface rust on chassis. 5.Clean and if need be paint all the steel brackets etc. Thàt should keep me busy for the next week. |
| |
|
|
|
|
|
|
|
Spent most of yesteday cleaning up parts then tidying the garage, all the brackets were cleaned and any rusty areas given a coat of converter. 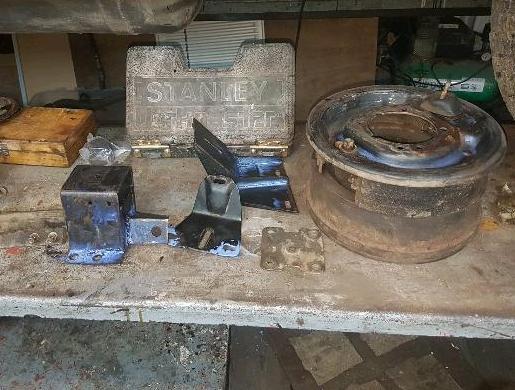 I'll brush a coat of teamac over them later. Also fitted the crank seal, bit of a fiddle pushing it backwards over the crank but I managed to get on ok. 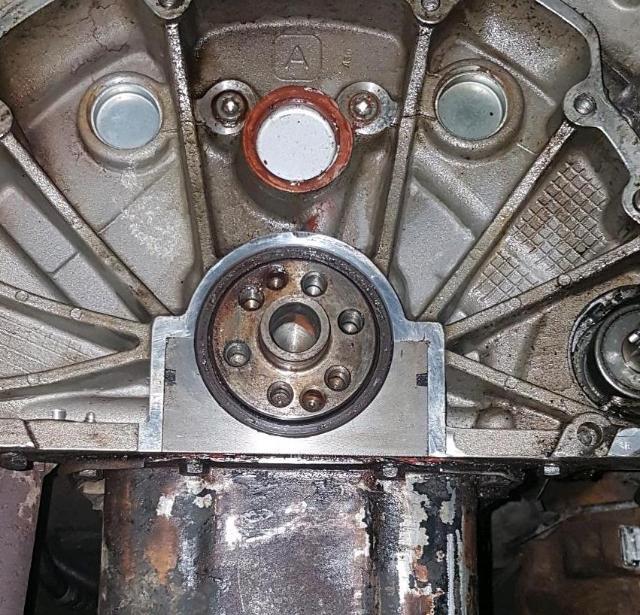 I also cleaned up the chassis and treated a few small areas of light rust with converter, i'll follow this up with wax. |
| |
|
|
|
|
|
|
|
This is the chassis after cleaning up and treating with hydrate 90. 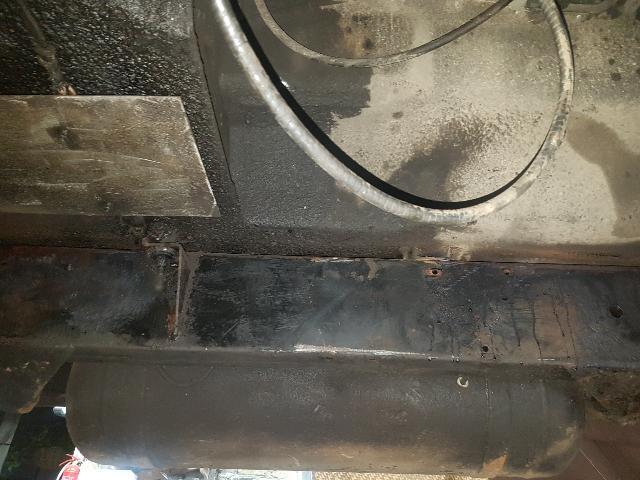 I am not sure about this stuff, it seems to coat the rust rather than convert it, as you can see the rusty patches are still visible, I might go back to cortanin, that seemed get into the pits better and to turn it all black with just one coat. Also put the back of the engine back together, firstly he adaptor hub tightened to 85NM. 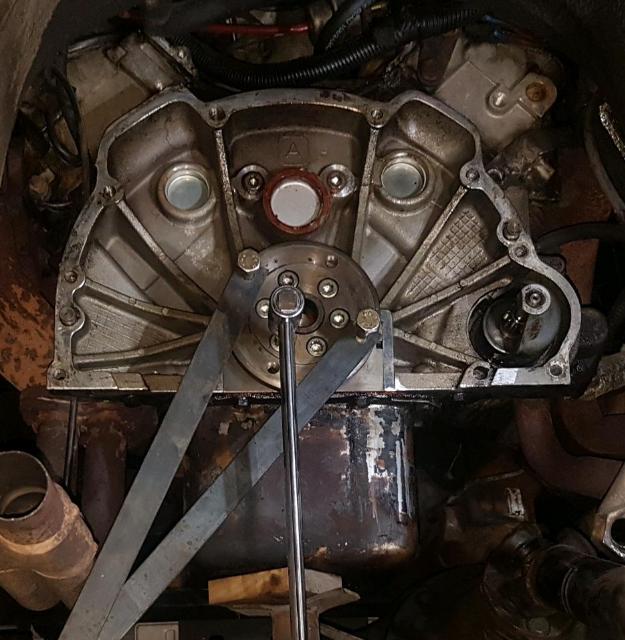 Then the ring gear, second hub and flex plate to 45NM.(after carefully checking for cracks). 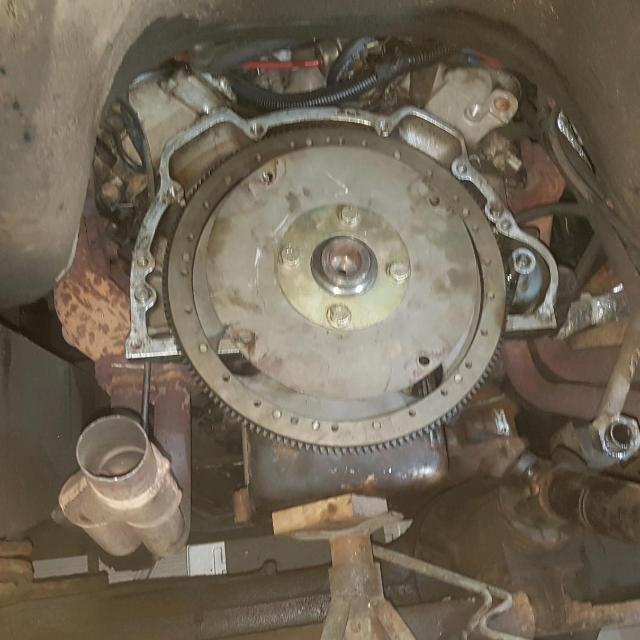 I also looked at the exhaust, rather predictably it doesent fit the downpipes on the car, it looks like the side I have to repair would have fitted fine but on the other the down pipe and Y pipe are the same size and one is supposed to slide in the other. Also the Y pipe it 15mm wider than the down pipes, I don't want to risk trying to loosen the downpipes, that could lead to a much bigger job if the studs break, so I will cut the lateral part of the Y pipe and add a sleeve instead. |
| |
Last Edit: Mar 1, 2020 19:44:46 GMT by kevins
|
|
|
|
|
|
|
|
I also had a look at the Mazda, it has developed a knock on the LH front corner, turned out the long bolt which is at the inboard end of the top wishbone was moving. Put some spanners on it and the nut was tight. Got a bigger bar out and managed to tighten it up a couple of turns, all I can think is the subframe is a slightly different dimension and the nut was binding on the gummed up unused part of the thread.
|
| |
Last Edit: Dec 20, 2020 22:38:43 GMT by kevins
|
|
|
|
|
|
|
|
Kind of lost my mojo to work on cars in the cold and wet plus for the last week my son has been improving the efficiency of the garage log burner, it now has heat exchanger tubes welded in the top and air blown around shrouds welded to the side plus a coil of copper on the flue connected to a radiator behind his lathe.
Doesen't look like A level revision to me but at least the garage is warm.
All this cutting and welding is not really the environment to re-build a transfer box in so nothing has happened in the week and for the next week I have escaped to warm and sunny Cyprus. Spent today sitting on the prom watching some lovely classics go by, a mint 1600e, vw bus, big Farina, alfas 60' Norton, mojo is returning!
|
| |
|
|
|
|
|
Mar 14, 2020 21:05:00 GMT
|
Had a lovely week in the sun, plenty of classics in Cyprus and loads of defenders most seem to be used for off road tourist trips, they do a local mod of adding very neatly approx 14" onto the rear. Got home to find out I'm working from home for the forseeable future because of the virus so saving a couple of hours commuting will give me some more time to work on the cars. Today I looked at the indicator stalk on the TR7, the high beam function had packed up. I couldn't find a TR7 switch so took a risk on a mini one which looked very similar, first I tried plugging it in, it fitted and fortunately everything worked, the mounting to the column and the mount for the wiper switch were also identical, the only differences are the arm, the TR one has a more pronounced bend in it. 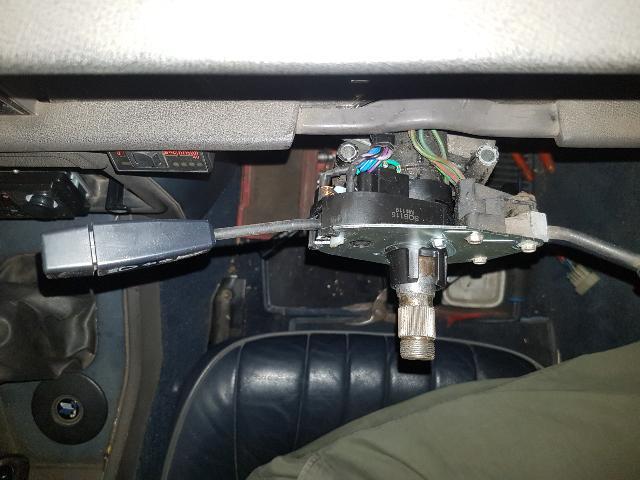 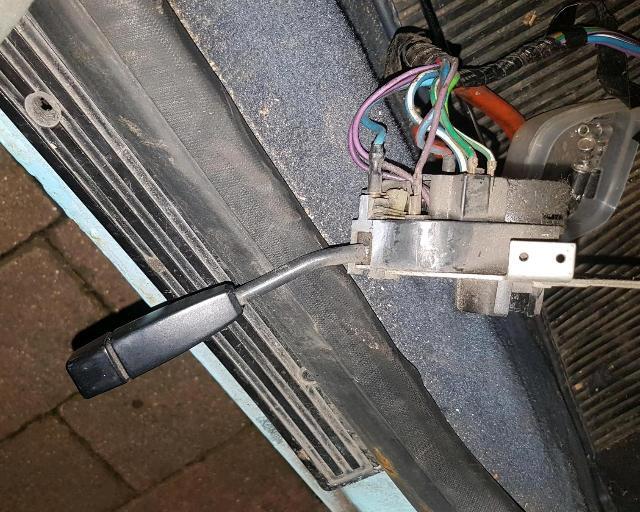 TR one top mini one bottom, the length is very similar and overall the angle ends up very similar. So the only other thing it needed was to cut the loom tape back a bit so there was more room to fit it around the column then mount the switch 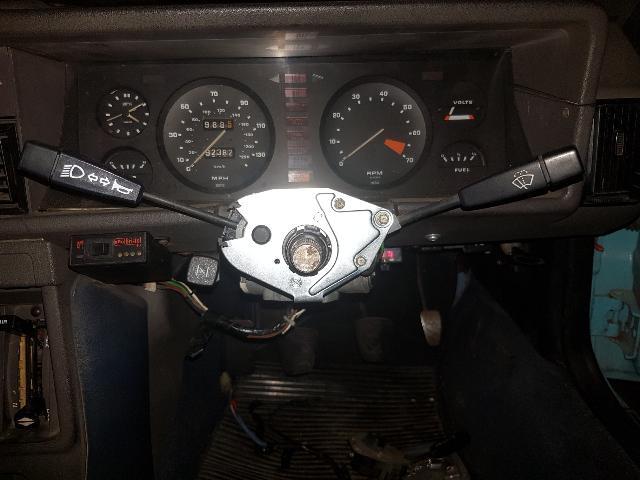 Everything on the column switches now works but in pulling the wiring around the ingnition has a loose connection, it was getting dark so that will have to wait until tomorrow. On the range rover I have ordered some viton o rings for the intermediate shaft on the transfer box, and am picking the recondìtioned gearbox up on tuesday so it should start going back together next weekend. |
| |
Last Edit: Mar 14, 2020 21:18:34 GMT by kevins
|
|
|
|
|
Mar 16, 2020 18:34:36 GMT
|
Sorted out the dodgy connection on the tr7, it was one of the dismal connectors used all over the car, closed the socket up and all seems fine. Did find another problem though, the steering wheel would not fit on . It turns out the spigot for the self cancelling on the new switch was longer. Original 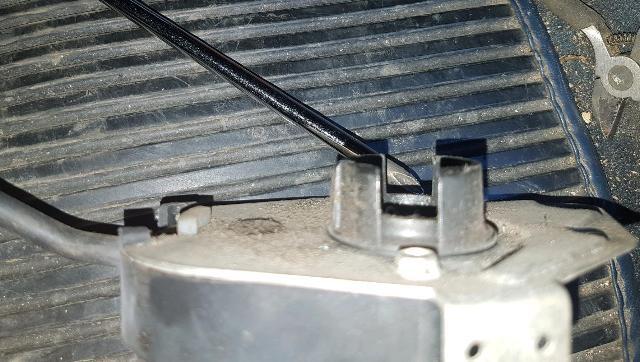 New 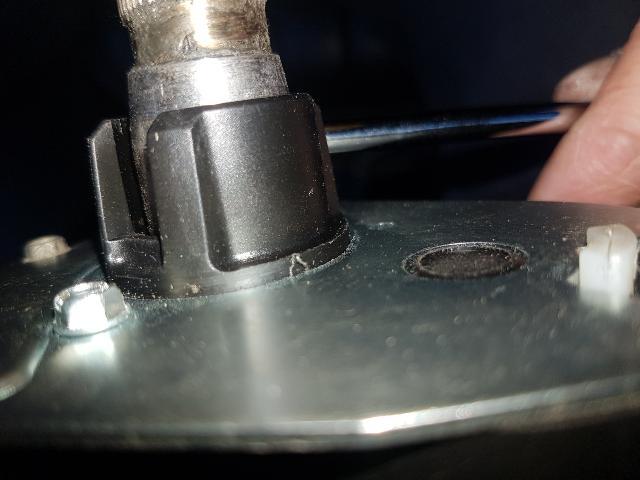 Easy enough to cut 6mm off the new one and it all fited fine. 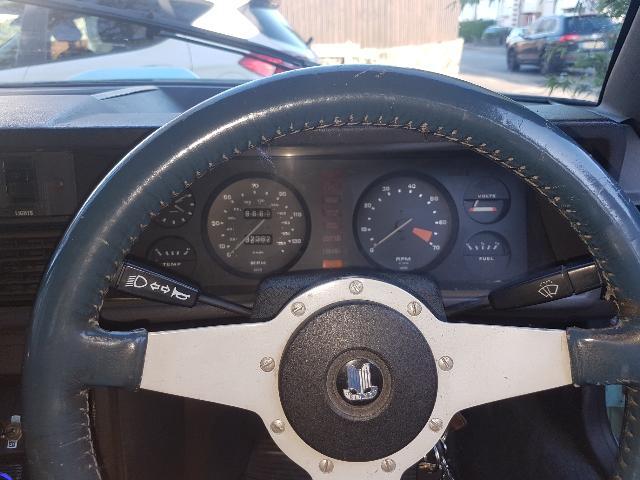 If you look closely the shaft is a smaller diameter and it sits a couple of mm higher but considering all that is available in the way of original parts is overpriced 40 year old secondhand parts this will do fine. |
| |
Last Edit: Mar 16, 2020 18:39:57 GMT by kevins
|
|
|
|
|
Mar 17, 2020 21:51:54 GMT
|
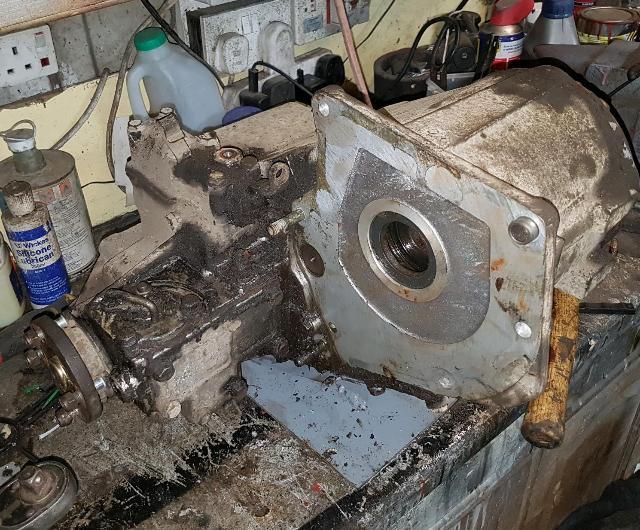
Appart from the steering wheel being a bit off centre its electricaly all working fine. Went and picked up the re-built transmission today, certainly looks a lot better than it did. Before I can put it all together I need to repair the transfer box and flush the trans cooler out. Had a look at what I can do to make something to do the flushing, I have a number of fuel pumps kicking around, I think the 2 Bosch high pressure ones I was given as spares for the v12 xjs I once had might blow it to pieces, so I will start with one of the carb ones and a couple of litres of cheap ATF. On the transfer box I started taking it àppart and only got this far. 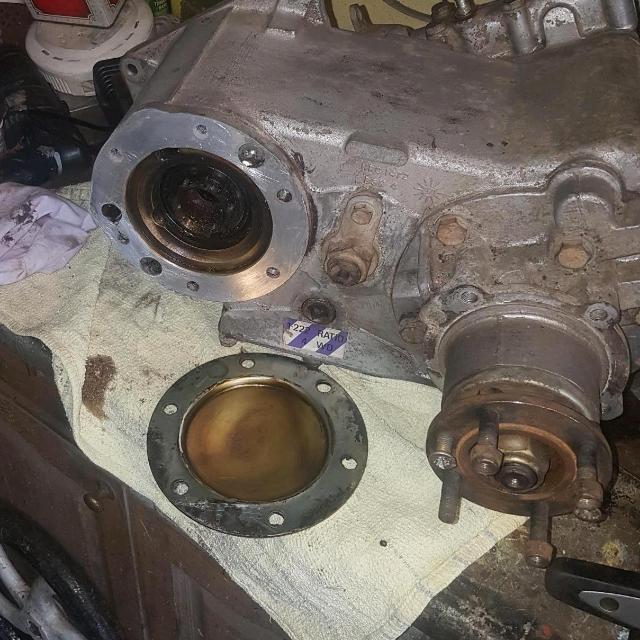 All the bolts were loctited in but worse was to come, the 2 cross headed screws holding the bearing carrier in are very tight and also appear to be loctied in, tomorrow I will try heat and an impact driver, if that doesent work it looks like they will have to be drilled out. |
| |
Last Edit: Dec 20, 2020 22:40:52 GMT by kevins
|
|
|
|
|
Mar 18, 2020 10:25:00 GMT
|
|
The worn output shaft must cause the backlash felt when selecting between drive and reverse on these ? That and associated wear along the drive train and diffs. Should feel nice and tight again after it’s back in.
|
| |
|
|
|
|
|
Mar 18, 2020 19:45:04 GMT
|
|
Yes it did make an almighty clonk when going from forward to reverse, there seems to be virtually no play in the transfer box now but there still is a bit in the rest of the drive line (mostly the diffs), hopefully with the damping effect of the oil and all the play at the input gone it should be much better.
Got the transfer box apart today, one screw came undone with an impact driver the other eventually rounded out so I had to drill it out. Once the bearing carrier was off the remains of the screw came undone easily enough with a pair of Mole grips though, the 2 screws only seem to be an assembly aid , the 6 bolts also hold it all together, and apparently the later ones only had 1 screw so even if I can't get another in time to put it back together it won't be the end of the world.
Hopefully I will find the time to press the bearings on the new input gear and measure the pre-load tomorrow to check if I need a different shim or not, also need to measure the torque converter/gearbox to make sure it has the right shim between the crank and flex-plate, hopefully as it is the original box it should be OK. Then it can start going back together.
|
| |
|
|
|
|
|
Mar 18, 2020 22:42:49 GMT
|
|
Can’t see you needing to shim the flex plate. Same thing going back together, I’ve never bothered.
The new gear with the oil ways should help longevity. The diffs are easily adjusted to take up a bit of slack.
|
| |
|
|
|
|
|
Mar 19, 2020 21:59:35 GMT
|
I hope you are right, I was suprised about the crank shim most of the moderns I have seen don't seem to have any such thing. This working at home lark is not all it's cracked up to be, seem to be working longer hours and then I get the "seeing as you are at home can you just...." requests from the family. Any way I got another hour on the transfer box this evening. All appart and cleaned up, new bearings pressed in and dial gauge found, hopefully I will get a chance to measure the endfloat tomorrow and check I have the right shim before the world stops. 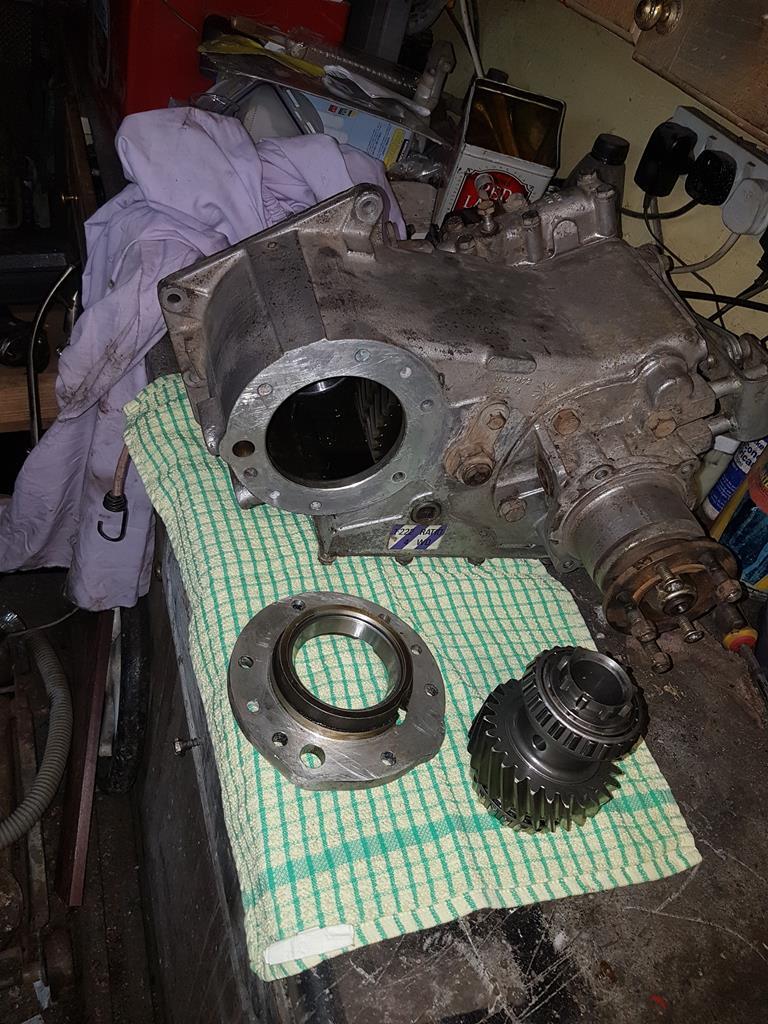 |
| |
Last Edit: Mar 19, 2020 22:01:22 GMT by kevins
|
|
|
|
|
Mar 20, 2020 21:59:22 GMT
|
Measured the input shaft endfloat and it was 3.32mm, pre-load is .05 mm so need 3.37 mm shim, the original one measured up at 3.38 (not a std size so must have been gound) but should work fine. 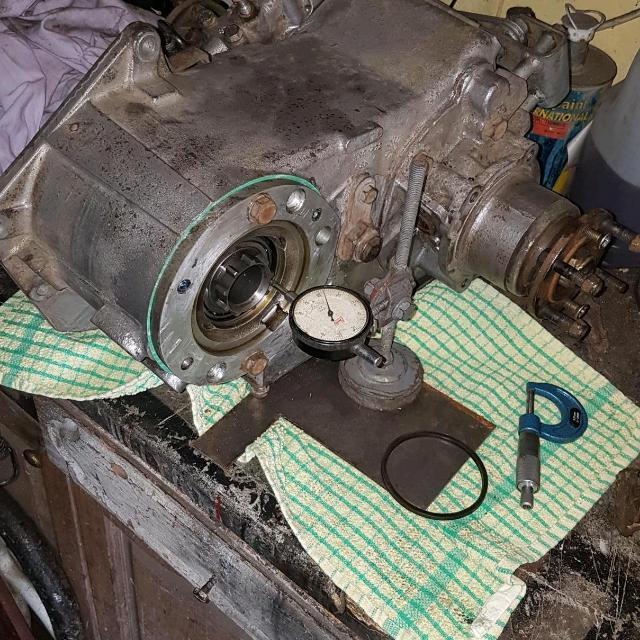 Hopefully get the transfer box back together tomorrow. |
| |
|
|


