|
|
|
|
|
Been using the TR all week and it hasn't been too rosy, good news first is that it seems to be doing close to 30 to the gallon on petrol when driven sensibly (not my natural behavour with a 1000kg V8 car, but don't get much choice in rush hours). Given its a 14 mile round trip to get LPG now I am thinking about ditching it all and save 50 odd kg. But it has had a few promlems, firstly one rear light and the number plate lights packed up, turned out to be a poor connection where the front and rear looms join in the passenger footwell. Secondly the radio packed up £12 ebay bluetooth cheapie ordered to replace it. Thirdly the instrument lights packed up , seems to be the rheostat which is now bypassed and will probably be ditched as its always been on full. Forthly the indicators packed up earth wire had fallen off relay, crimped up tighter And then finally today the battery died. Not sure about my idea of using it over the winter now.... On the Range Rover the wheelarch is now sealed and painted with stone chip, but I have found more rust in the chassis on the other side, stupid design has 2 webs reinfocing the crossmember to chassis connection which form a pocket to collect mud on top of the chassis, not much rust but accesss is poor, worst case the boot floor will have to come up (it's an alloy panel pop riveted on). Appart from that the rest of the chassis and body looks good. Oh and the exhaust back box has a rust hole in the bottom. To lighten my mood I did something positive and finished off one of the headlamp panels, at least that has come out pretty well. 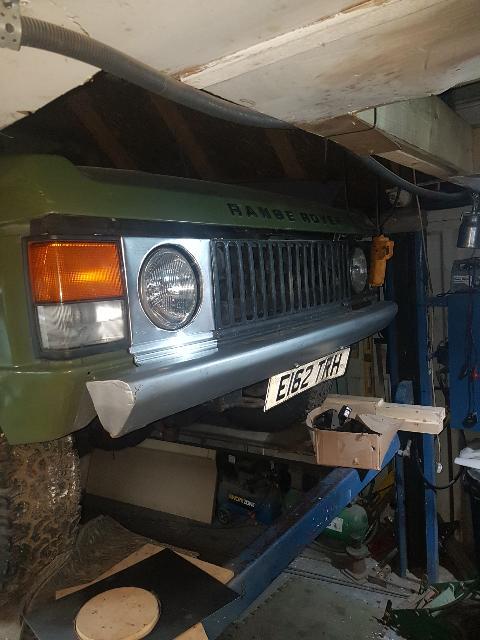 |
| |
Last Edit: Nov 6, 2019 21:34:50 GMT by kevins
|
|
|
|
|
|
|
|
|
Picked up a secondhand battery for the TR 6 month old 600A for £30 from a local guy who had bought it and then found the engine was knackered, Turns over better than it ever has. Started on the other side of the range rover, the main issue was the area on top of the chassis where the cross member in front of the axle attaches. There are 2 triangular webs which reinforce the joint, in the picture below you can see the inner one the outer one has already gone. As well as the webs the top of the chassis and the back of the crossmember have rusted through. Its a stupid design as the gap between them fills up with crud and then inevitably rusts away. 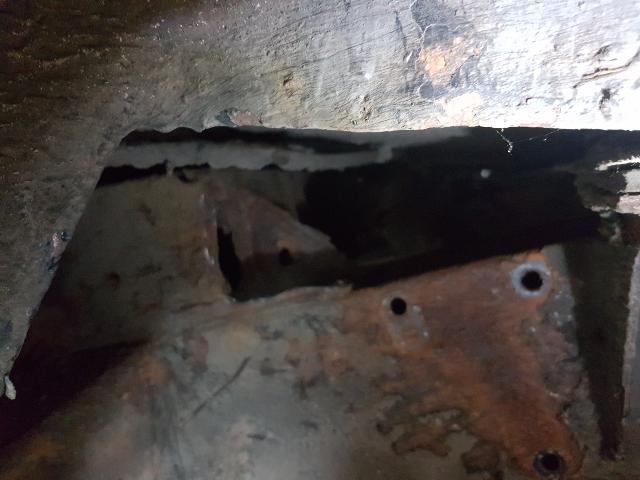 It took a couple of hours but eventually I got to this. 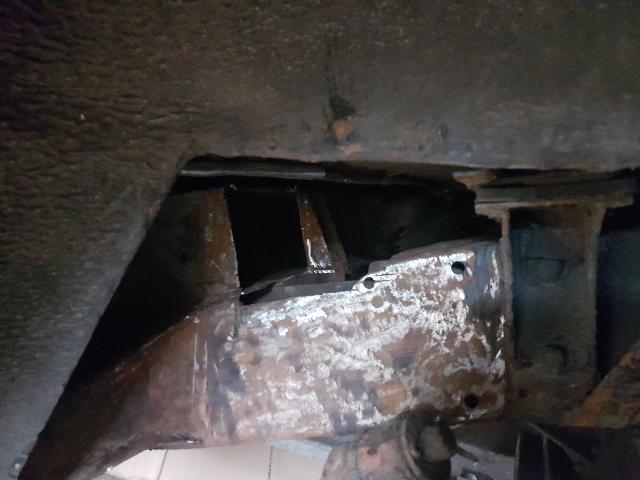 Access to both sides and the cross member end is pretty good, the back weld accross the top is going to be difficult but I think I can just about get to it. The webs will be replaced with with a closed section to get rid of the rust trap. Also cleaned a lot of the underseal off the chassis, looks like it has been painted over surface wax, I'm not sure what to do with it really, I will never get it all back to shiny metal and don't want to seal it in with paint, I'm thinking about some sort of wax with a rust converter in it any ideas? |
| |
Last Edit: Nov 9, 2019 21:08:55 GMT by kevins
|
|
|
|
|
Nov 12, 2019 22:13:37 GMT
|
Braved the cold and set too the welding on the Range Rover tonight. Firstly made a new section to replace the top of the chassis. 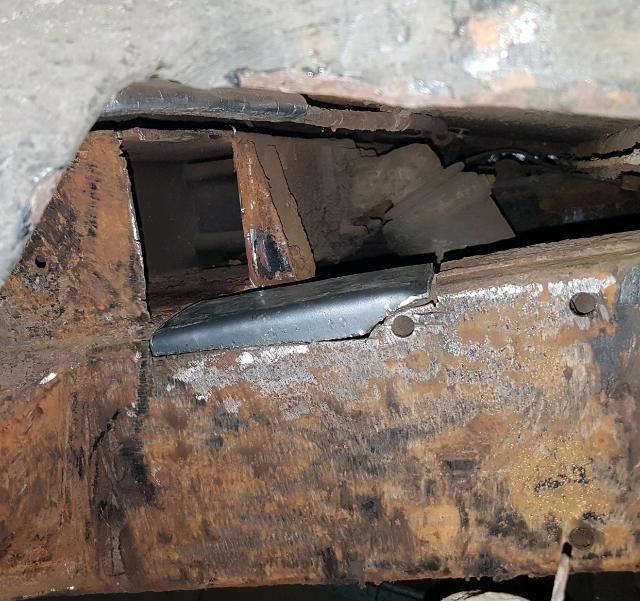 Then welded it in and another horizontal piece behind. 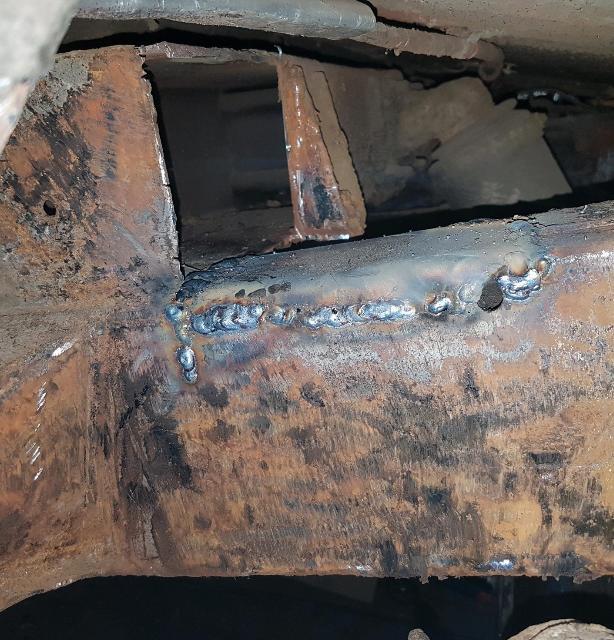 The piece behind was a Horrible job from underneath with the bits of tarry underseal in the seams I couldn't get to melting and dripping on me. With that done another plate was welded in the rear of the crossmember. 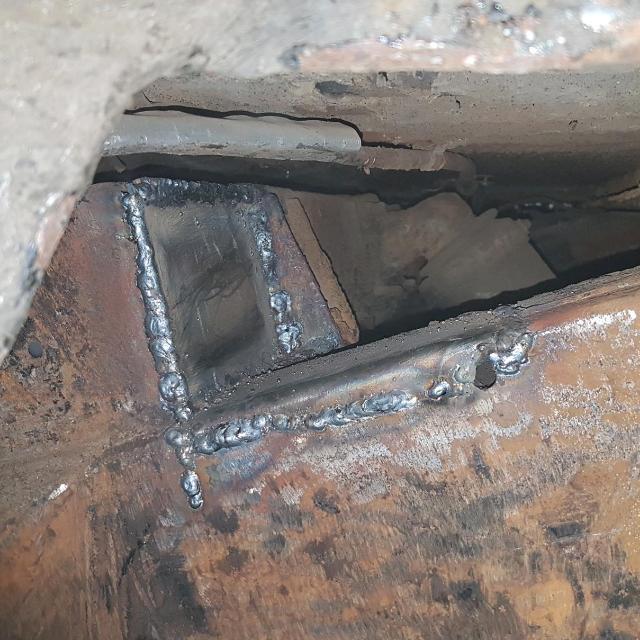 Just the webs to replace tomorrow, i'll probably close the top off to form a wedge and get rid of the rust trap. Web mocked up in cardboard. 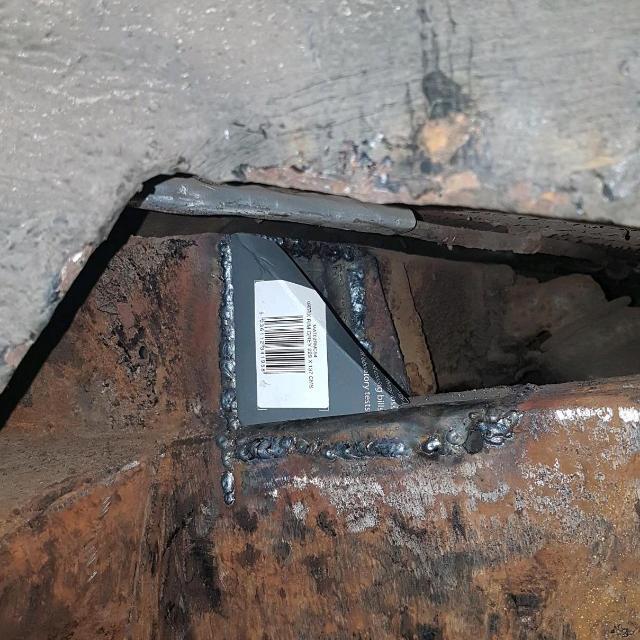 Gone 9 by then soa bit late to cut more steel with the disc cutter. Measured the other side to get the dimensions of the web and the inside one is pretty rusty, but no holes yet so for now I will clean up the worst of it and treat it with the Dynax s50 I have bought to go over the chassis with. Still using the TR for work, heater fan speeds 1 and 2 packed up today, wiggling the connector on the resistor fixed it so looks like another dodgy connection, hopefully these are all due to the loom change and it will all settle down soon. Also remembered the main beam position on the light switch has stopped working the flash position works so hopefully just a matter of stripping the switch and cleaning it. New radio also turned up as it has the same din connectors as the old one shouldn't take long to fit either. |
| |
Last Edit: Nov 12, 2019 22:15:36 GMT by kevins
|
|
|
|
|
Nov 13, 2019 11:18:16 GMT
|
|
Kevin - Personally with the rusty chassis areas I would clean up has best you can - degrease the areas with a solvent wipe and I would apply a couple of applications of Bilt Hambers 'Hydrate 80' - prior to applying any underbody wax to it - Over the years I have many full / part restorations under my belt and virtually all of them has seen use of this product - not one of them has returned for rust ingress / rust related remedial works in the areas that I have used the Hydrate 80 upon
|
| |
|
|
|
|
|
Nov 13, 2019 11:48:22 GMT
|
|
Ta,
I'll give that a try, getting all this lot off has been a filthy mucky job I don't want to do again (it also got inside my boots and consequently trodden inside the house with all the grief that gets!), fortunately it's only the back 4 or 5 feet that has the surface rust, the front and crossmembers have been preserved by Land rovers usual self preservation system of oil leaks.
It also seems to have some sort of wax inside the chassis which means there is virtually no sign of rust at all there, not sure if that's factory or aftermarket.
|
| |
|
|
|
|
|
Nov 13, 2019 12:30:53 GMT
|
|
Got my daughter to order the hydrate 80 from Amazon with her prime account, I think the worlds gone mad, I drive past their warehouse on the way home, their office is a mile from home, the local distributor only stocks the car care stuff so the only way I can get it the next day is to order it via an American company!!!
|
| |
|
|
|
|
|
Nov 14, 2019 18:09:22 GMT
|
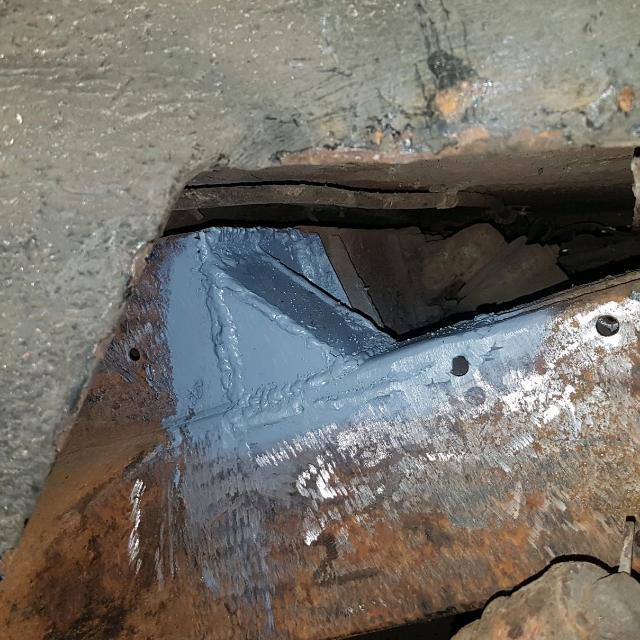 Final piece welded in and all given a coat of etch. Also a small piece on the spring mounting the same as the other side. 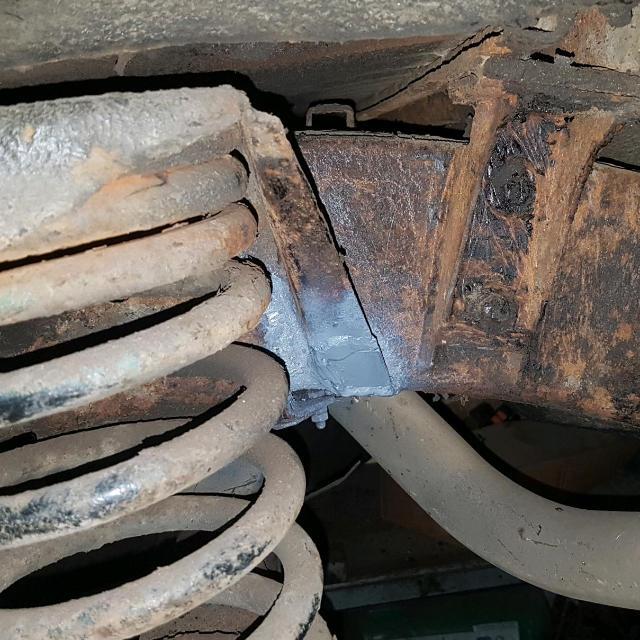 Also found this in my store, its an sd1 part I havf been tripping over for yesrs but the muffler is the same size as my rusty one, it also has a single rather than twin outlet but I can live with that, so a bit more welding will be required to put this on. 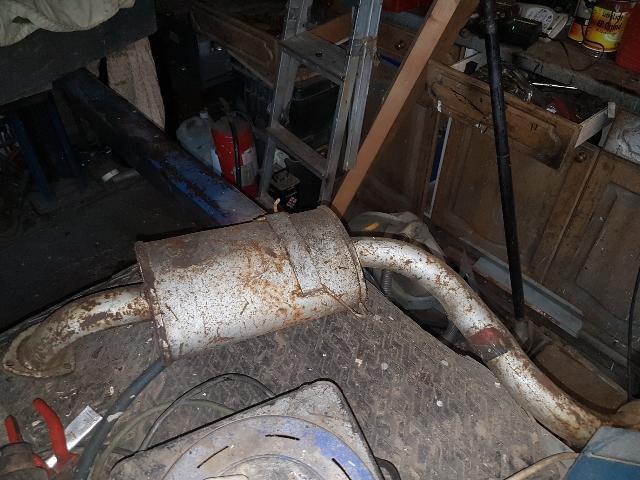 |
| |
|
|
|
|
|
Nov 15, 2019 22:25:33 GMT
|
Cleaned up the chasis as best I could and gave it a coat of hydrate 80. 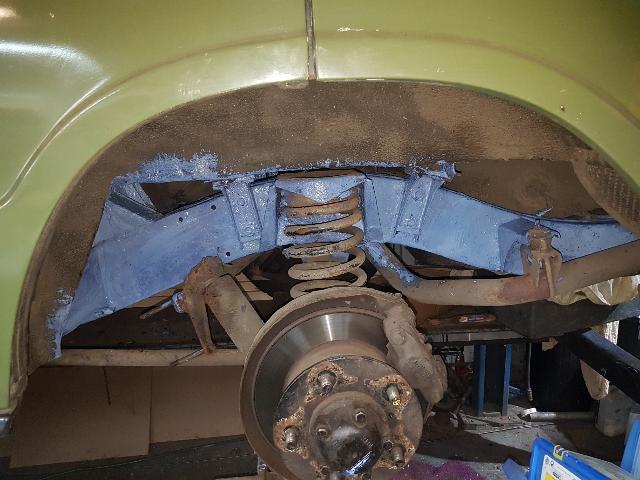 There is still a quite a bit of surface rust on the top of the crossmember but it a feels solid so for now it will have to be the wax which protects it, long term I will probably pull the boot floor out and go over everything properly. Used the TR again today, fitted the new £12 bluetooth radio, which has also fixed the whining axle and squeaks and rattles. 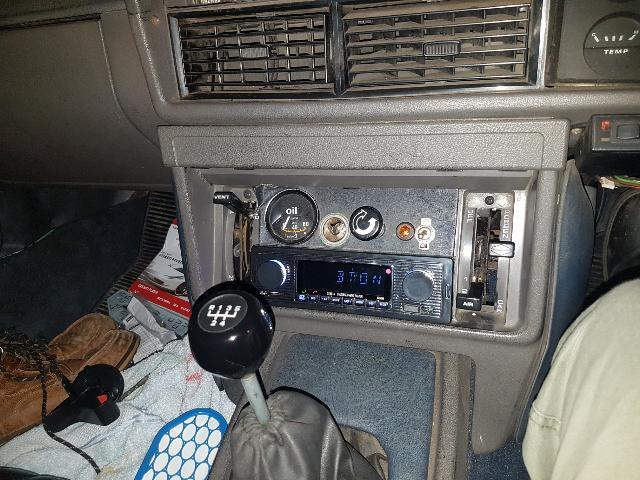 Only thing which electricaly seems to have packed up is the handbrake warning light, that will be the mickey mouse switch, perhaps one day I might add a proper one. Suprise and delight feature is the low fuel light actually works. |
| |
|
|
|
|
|
Nov 19, 2019 22:19:53 GMT
|
Had a nasty cold for the last few days so progress has been slow, waxed the lh chassis after the converter had dried to give this 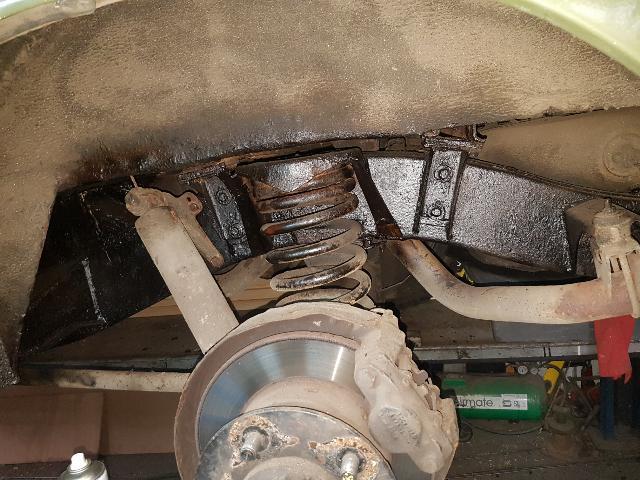 Then I started cleaning up the rear of the chassis and found a whole load of corrosion around the rear crossmember / fuel tank mounting. 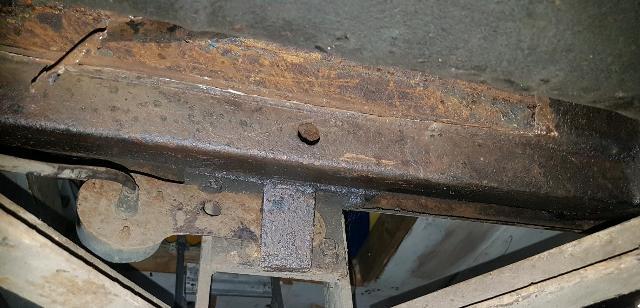 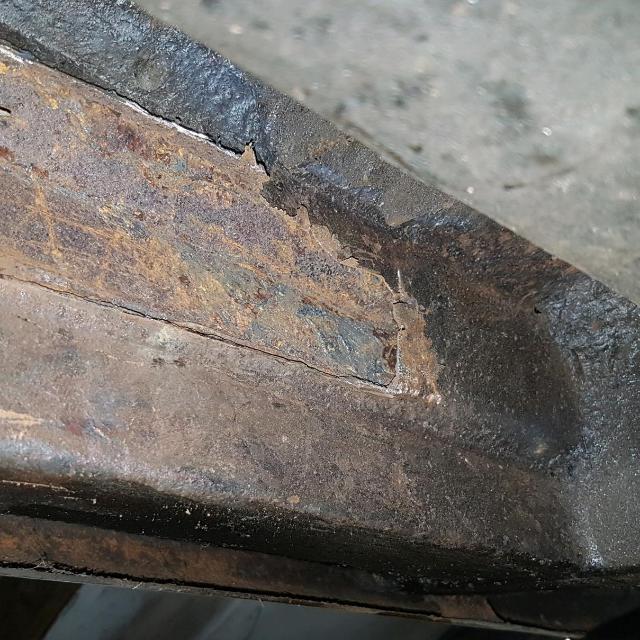 The upper part of the crossmember is double skined and the top of it sits in a trough so inevitably moisture finds its way in and it rusts. Only way to fix it is to chop the whole lot out and replace it so the fuel tank needed to come out, fortunately it seems to have been replaced recently and all came out easily enough, someone was determined it wasn't going to corrode between the tank and the skid plate, there must be a whole tin of grease spread over it. 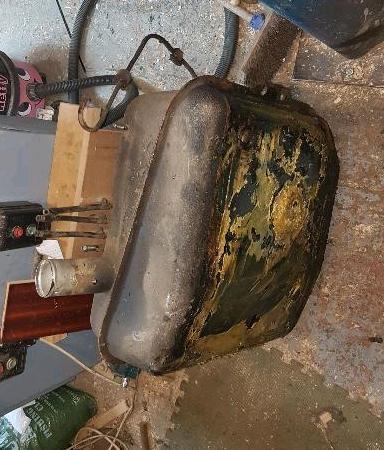 Given this all started as a quick tidy up of some minor surface rust I'll be happier when all the rot is chopped out and I can start putting it back together. For the fuel tank mounting others have replaced it with a piece of box section or angle to eliminate the rust trap I am thinking of doing the same. |
| |
|
|
|
|
|
Nov 21, 2019 22:29:56 GMT
|
Went to use the minor today but it wouldn't start, looked at it this evening turned out the distributor cap has had it, the centre electrode is very worn but I managed to stretch the spring and get it working OK until a new cap turns up, the thread for one of the cap screws was also stripped so I tapped this out to M6 which seems to work fine. Also cut all the rust out of the rear x member horrible filthy mucky job but at least it's done now. The good news is the inside is virtually rust free, looks like it's been waxoyled in the past. The bits I cut out 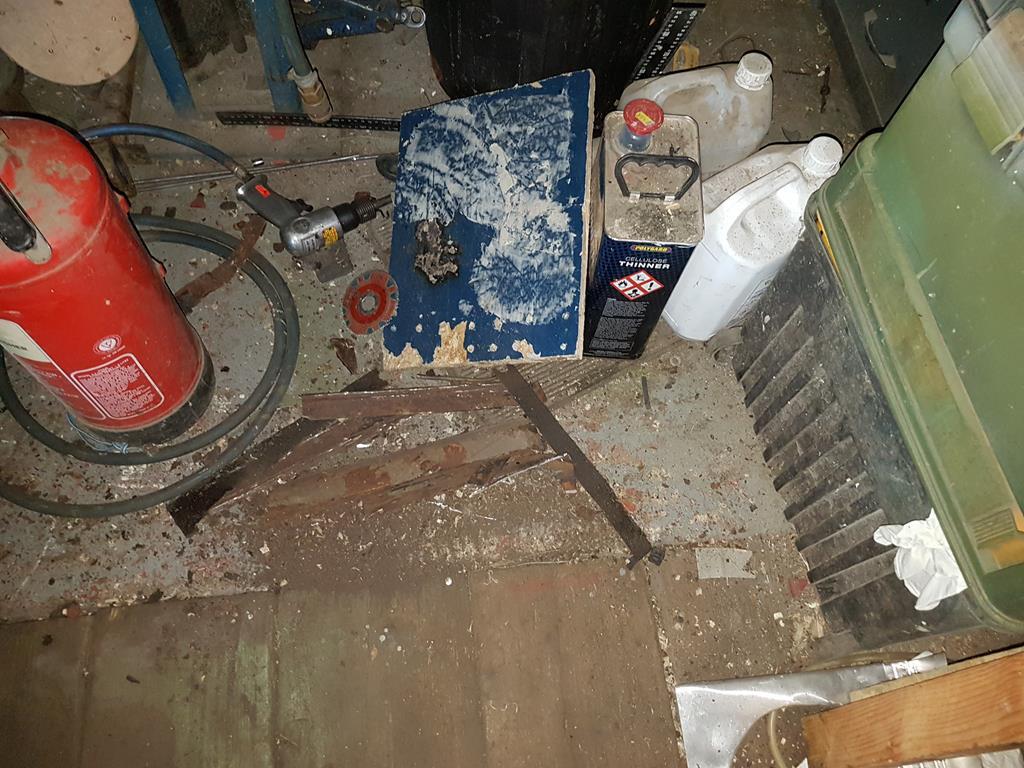 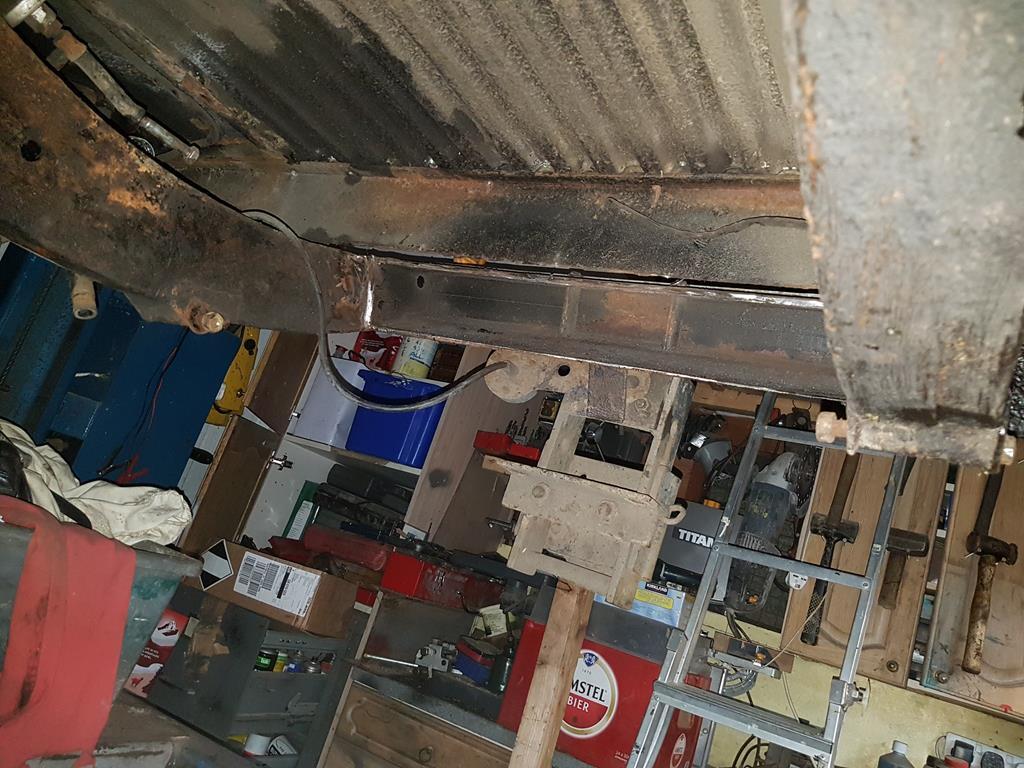 |
| |
Last Edit: Nov 21, 2019 22:31:04 GMT by kevins
|
|
|
|
|
|
|
New metal now welded in, new fuel tank support fitted and the whole lot cleaned up and treated with hydrate 90. Welding waa a horrible job, combination of old pitted steel you can't completely clean up and some rather good previous internal eust treatment that even after cleaning still seemed to sweat out as it got hot meant quite a bit of spitting and bits needing going over again. Got there in the end though. 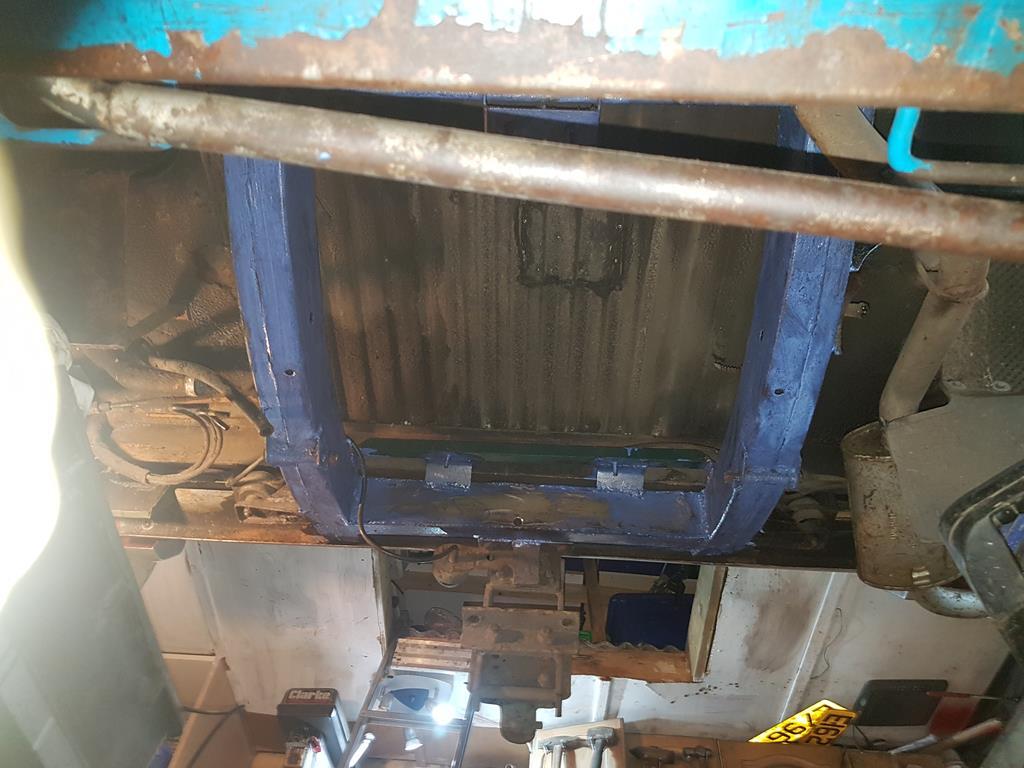 Also welded the old sd1 muffler I had been tripping over for years on, it'l do for a while until I can come up with a stainless replacement. 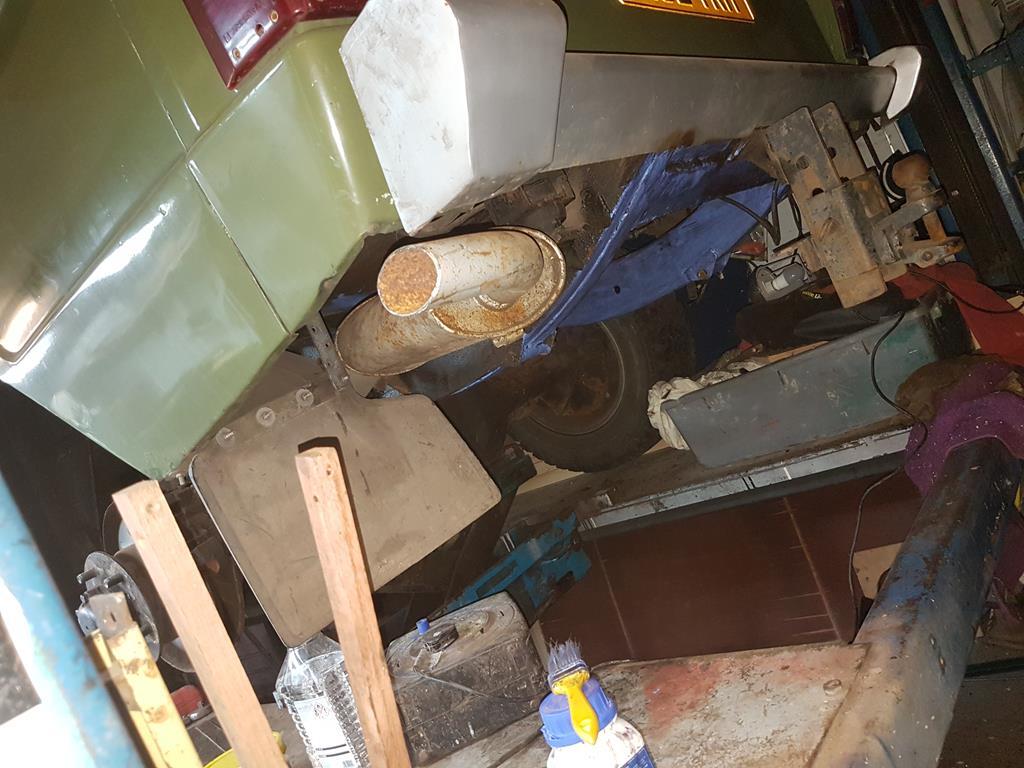 |
| |
|
|
|
|
|
Nov 28, 2019 22:22:57 GMT
|
Spent a few days away, for one reason or another we ended up taking the street ka and leaving our daughter the daily modern, aside from being intimidated by a mixture of trucks and monster suv's driven by nutters on the motorway apparantly oblivious to the pouring rain it was fine and didn't miss a beat. Meanwhile I had left the fuel line off the minor to try to get to the bottom of why it floods when parked for a length of time, I can confirm it doesent with the fuel line off, so I am now confident the issue is the aftermarket fuel pump being too high a pressure. Fixes could be new pump, pressure regulator or adding a return line. On the range rover front iit's now all waxed and hopefully the fuel tank will go back in tomorrow. 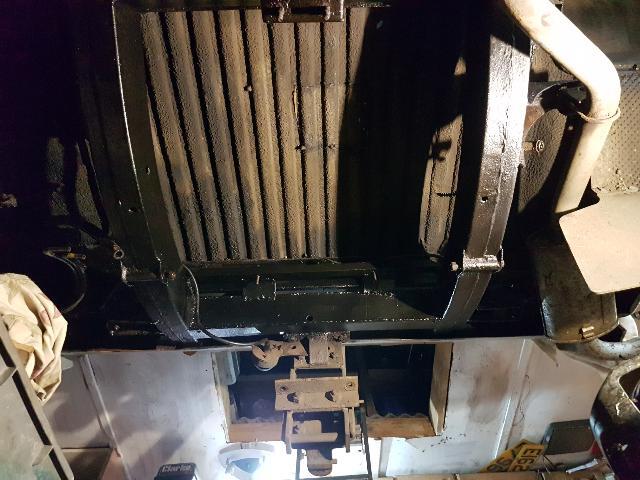 |
| |
|
|
|
|
|
Nov 30, 2019 18:33:56 GMT
|
|
Fuel tank went back in easily enough, did find one thing which might explain the occasional smell of fuel, the filler neck hose was only about 10mm on the filler neck and fell off!
Another problem now though, the battery has had it, thats 3 batteries on 3 cars this autumn.
It started easily enough with a jump from the minor though.
On the minor I measured the fuel pressure and it's seems a bit high at around 2.5 psi, I'll measure it more accuratley with a clear plastic tube when I get a chance. I have filter king regulator on the way anyway which should make sure it is under control.
|
| |
|
|
|
|
|
|
|
Been working in germany most of the week so not much done this week. Did manage to paint the older style alluy grille for the range rover and the light surrounds I made, its supposed to be satin but looks a bit too glossy, I'll leave it for a while to see if it tones down. Also went to fill it it with LPG yesterday, connected the hose and a large cloud of LPG emerged underneath it, looks like I have damaged the filler pipe somewhere while doing all the chassis work, itsvonly 8mm copper so can't be to bad to fix. Thats just about it for now, I am apparantly going xmas shopping tomorrow so no car time. 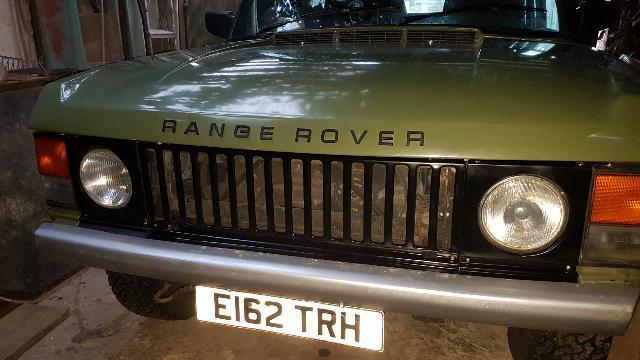 |
| |
Last Edit: Dec 7, 2019 17:46:27 GMT by kevins
|
|
|
|
|
Dec 13, 2019 19:08:56 GMT
|
|
How to turn a simple job into a difficult one.
KA put a mil lamp on, code said heater on lambda sensor, should be a five minute job. Took the old one out, felt a bit dodgy but came out in one piece, put the replacement one and after a couple of turns it seized, wound it out and it felt terrible, thread is completely stripped on the sensor, obviously there is someting damaged in the manifold, fortunatelly the manifold looks like it's recoverable so I need to get a tap and clean it out before I try anything else, hopefully the local motor factors will have something, otherwise I have a dead car.
Also got the bits to replace the damaged LPG fill pipe on the range rover, hopefully I can do this tomorrow without something else going wrong.
|
| |
|
|
|
|
|
Dec 15, 2019 21:15:13 GMT
|
|
Thread chaser for the ka lambda sensor arrived yesterday courtesy of my daughters amazon prime. After a bit of tweaking on the bench grinder to add more of a taper and it worked a treat, new sensor fitted ( a low mileage one I was given) and it seems ok, won't be sure for a few more miles until it has completed all it's test routines though.
Fitted a new length of 8mm pipe with a couple of compression fittings to repair the lpg fill pipe on the range rover, all went easily enough.
Also went round to the lock up and started the Lotus after it has been standing for 3 months, took ages to fill the carbs but eventually started fine, pumped up the tyres and took it for a drive everything still seems to work fine, plan is to fix the gouge in the bootlid over xmas and use it a few days.
So for the first time in a while all 6 older cars are working fine.
I'm sure it won't last.
|
| |
|
|
|
|
|
|
|
Lambda sensor seems to be working ok, but all this rain has highlighted another problem. The drivers footwell has always been a bit damp now it is positively soaking. I had always assumed it was getting in around the hood or door but it seems not. The water is running down the bulkhead around the pedals. It appears its coming in around the brake pedal and bonnet release cable plus possibly the spot welded seam. So I cleaned it all up, treated it with rust converter and left it to dry, them I applied sealer to the seam underneath. 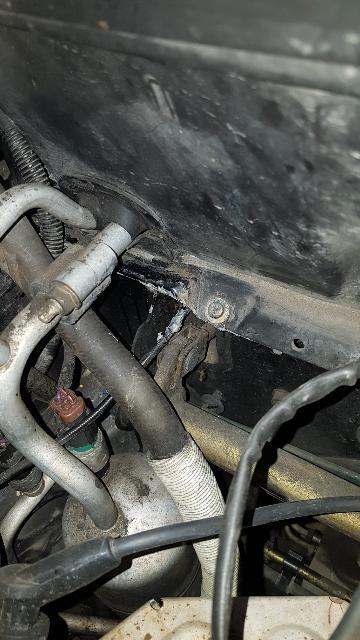 Then I decided to use a piece of pond liner to make a sheild to keep the water away. 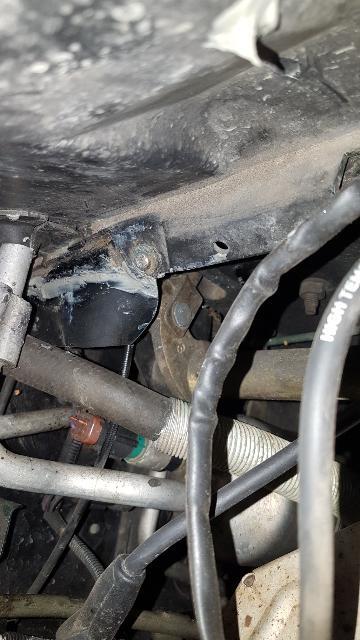 Finally I pulled the carpets up wiped it as dry as I could underneath then put the de-humidifier on the seat and a tubular heater under the floor to try and dry it out. 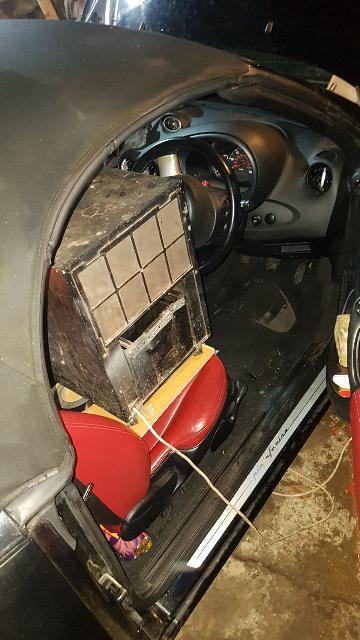 |
| |
|
|
|
|
|
Dec 27, 2019 17:41:07 GMT
|
Been using the Range Rover every day for the last couple of weeks and it has it’s MOT in the middle of January so today I decided to look at a couple of issues. First up was the handbrake running out of travel, a quick crawl underneath with a ½” spanner had this adjusted and working. Next up is the fuel consumption, on LPG it does around 14mpg so should do around 16 on petrol but is does around 10mpg. To re-cap when I first bought it the idle was all over the place after testing just about everything and fixing many minor issues I concluded the ECM was at fault, re-soldering all the joints inside got it running fine after I had re-set the air meter tension spring to give the highest idle speed (it had previously been adjusted I assume to get it through an MOT). Adjusting the spring tension on the air meter to the point it was so weak it didn't idle properly made it drive better than ever so the problem seemed to be the fueling was too rich accross the rest of the range when the idle was OK This left me thinking there were 3 possibilities, fuel pressure, air leaks or the ECM was still faulty. The fuel pressure checked out so I moved to looking for air leaks, noting was obvious but with my hand blocking the air intake and the engine running there was a definite hiss from somewhere but I couldn’t find anything obvious so today I decided to take the plenium off and have a better look. Pulled the hoses off and then the first sign that someone had been here before me the 6 bolts were ridiculously tight, using some leverage I got them all undone and it just lifted off (it’s supposed to be fixed with a bead of sealer) there was some sealer but it was white, the only white sealer I have seen is used on bathrooms! There were clearly some areas it had been leaking but closer inspection revealed a bigger leak. 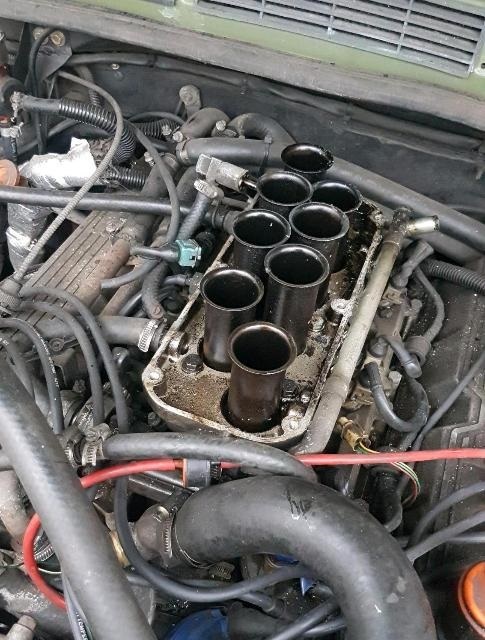 On the bottom of the plenium is an area where it looks like whatever the plenuim came off of had a chamber with coolant in it to warm the manifold, this is not used on mine 2 of the M6 mounting holes had bolts in them the others didn’t it turns out one of these goes right through to the breather pipe and consequently lets un-metered air in upstream of the throttle what gave it away was the oil around it. 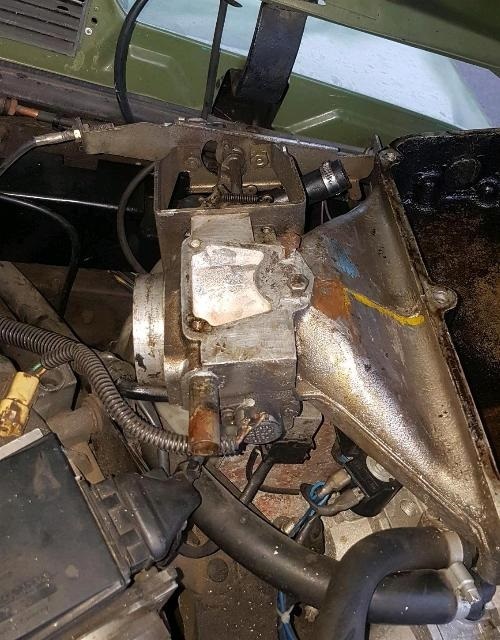 So I blanked (off the bolt hole with a bolt, cleaned up everything, replaced a broken throttle return spring and fitted it back with a light bead of RTV sealer. Put everything back on and then noticed the wires to the throttle pot had finally given up and broken. Even so it starts and runs fine and the wiper on the air meter is further up the potentiometer than it used to be at idle which looks promising. So now I need a new throttle pot, You can’t get the original ones, second hand they go for around £100 and you can get a modern one adapted to fit for £200. Both too expensive for a tight git like me so the plan is to get a modern one for hopefully around £20 and make an adaptor to fit it myself. So I am looking for a 100 to 5000 ohm pot which turns anti-clockwise as you look it (the old one was sprung in one direction not sure if the all do this or some can be used both ways) , I have already checked the mx5 and it goes the wrong way – any ideas? |
| |
Last Edit: Dec 27, 2019 18:55:01 GMT by kevins
|
|
|
|
|
Dec 31, 2019 18:20:20 GMT
|
|
Bought a gm/peugeot/fiat tps, unfortunatelly it only has a 3000 ohm range I'll give it a go though I suspect it won't make a lot of difference.
On the minor I have taken the filter out of the carb feed and now it doesen't seem to flood when parked, I've also bought a filter king to fit. On taking it for a drive I have confirmed the heater matrix seems to leak, on turning it on a cloud of steam comes out, fortunatelly a new one was only £23 and it's not too difficult to change.
Also had another go at the steering on the mx5, a few months ago I replaced the bent subframe, this vastly improved the steering but it still felt strange about the straight ahead position and the effort pulsed on sweeping bends. Looking at it I realised the rack was about 45 degrees off centre at the steering wheel. So I decided to set it up with the rack in the centre, appart from a hell of a job getting the wheel off it all went easily enough and now the steering is much better and the pulsing has gone.
|
| |
Last Edit: Dec 31, 2019 18:21:10 GMT by kevins
|
|
|
|
|
|
|
Fitted the new heater matrix to the minor today, a bit easier to get out than modern cars, after 15 minutes the heater was out. 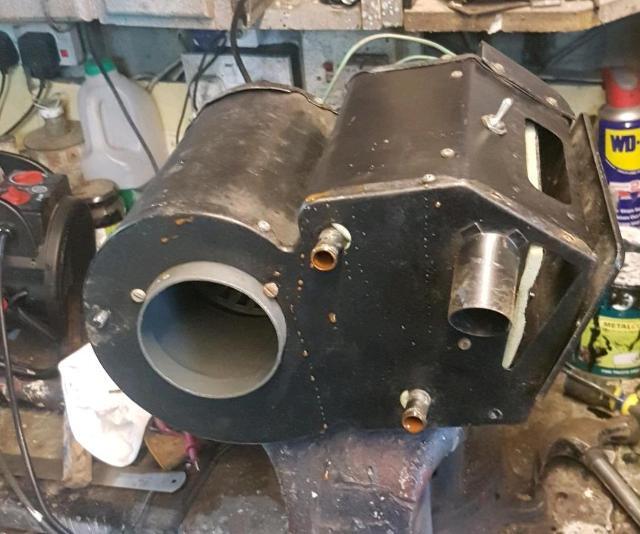 Took the end plate off and removed the matrix. 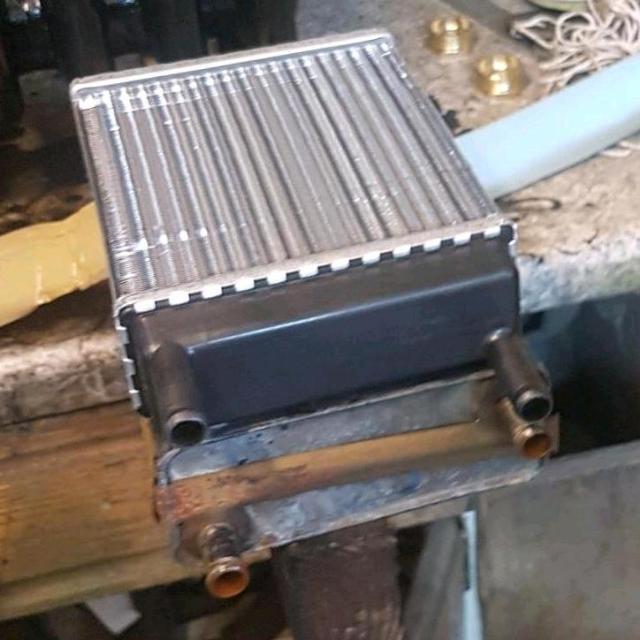 First problem, the pipes are in the wrong place, easy enough to drill a couple of extra holes in the end plate though. Also decided to have another look at the flap seal, the foam had started to break up already, so I looked around to see what would be a bit harder wearing, I settled on the carpet I had removed from the TR when I set fire to it. Cut a rectangle out and glued it on. 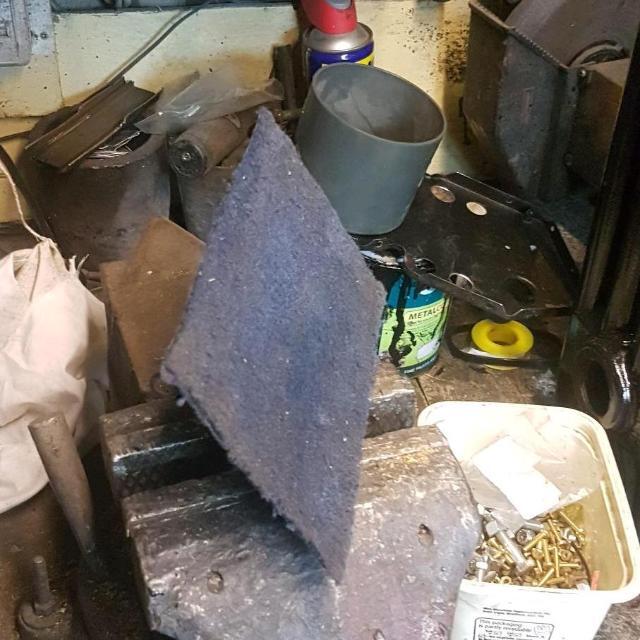 Also noticed the self taping screws which hold the intake duct in were loose so I replaced them with loctited nuts and bolts. 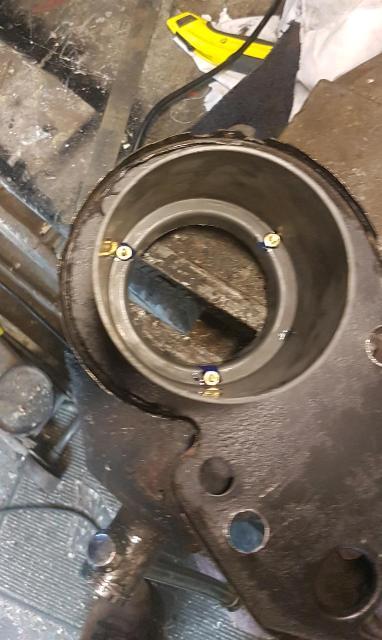 Put it all back together with foam around the matrix. 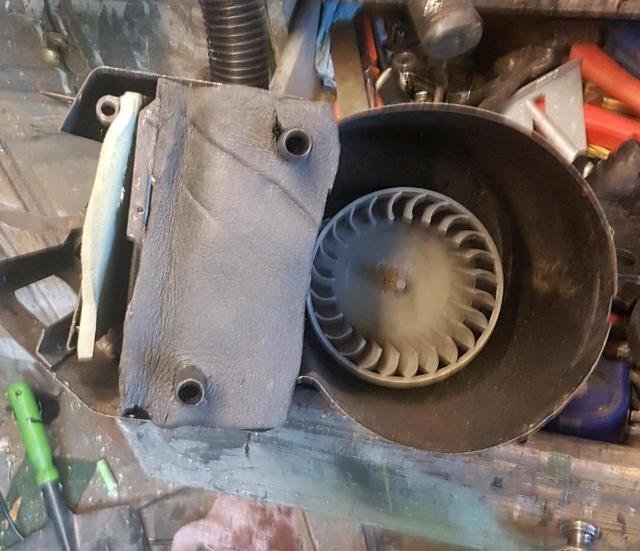 And after a total of around 1.5 hours it was all back in the car and connected up. Also gave the Range Rover a final check over before its mot on tuesday, everything seems OK so lets see what they find. |
| |
|
|


