|
|
|
Dec 21, 2013 13:55:28 GMT
|
|
Yes, that does look quite tight for space.... although the engine cover hinging upwards at least gives good access.
Did you use an oil cooler matrix as the main charge cooler element? I thought about doing exactly the same thing, but I wasn't sure how restrictive to intake air this might be resulting in a pressure drop across the unit. I've also heard some cases of this kind of cooler not reducing outgoing temperatures as low as an air-air intercooler, which I can't really understand as water should be even more efficient at heat transfer.
It sounds as if you haven't encountered any such problems, and I'm still thinking about persevering with a very similar charge cooler design for my own car.
|
| |
|
|
|
|
|
|
|
Dec 21, 2013 21:21:52 GMT
|
|
In regards to the chargecooler set up. All ive done is a rolling road comparison to the std intercooler before I plated it up. No maths used or real consideration just try it and see. Yes its an oil cooler type matrix again thought I'd give it ago and all seems okay with it
|
| |
|
|
|
|
|
Dec 22, 2013 22:27:30 GMT
|
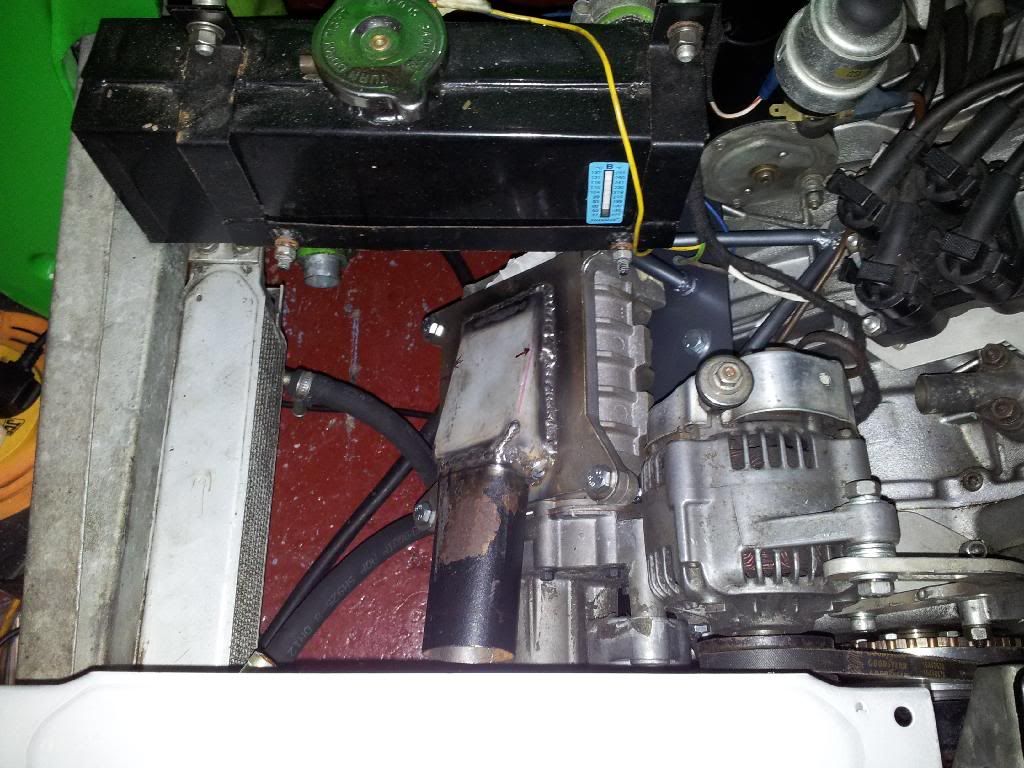
good hour spent tonight, engine up in place with stater on, clutch slave fitted and some other odds and sods. 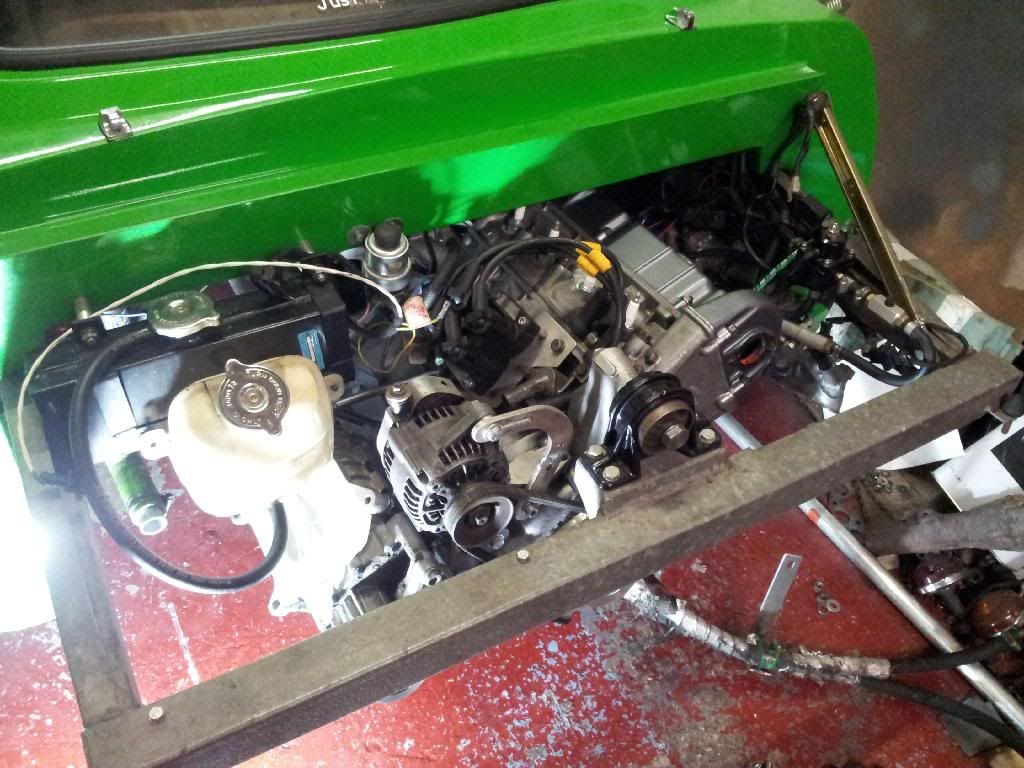 Now when I initially sighted things up with the charger I came to the conclusion Id be lucky if the std coolant tank and mg expansion tank would fit as is... as you can see 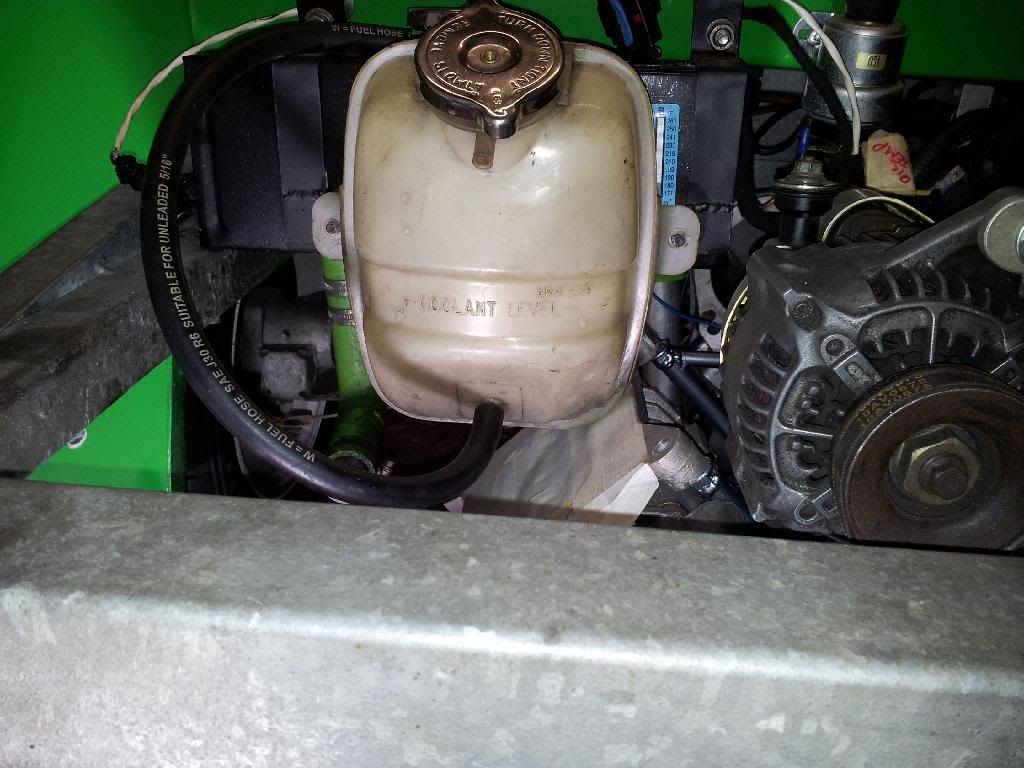 the expansion will need to move but the header should be far enough back and up, I might be able to lift the expansion up clear though, time will tell if all is ok after ive made the inlet, outlet and bypass link! 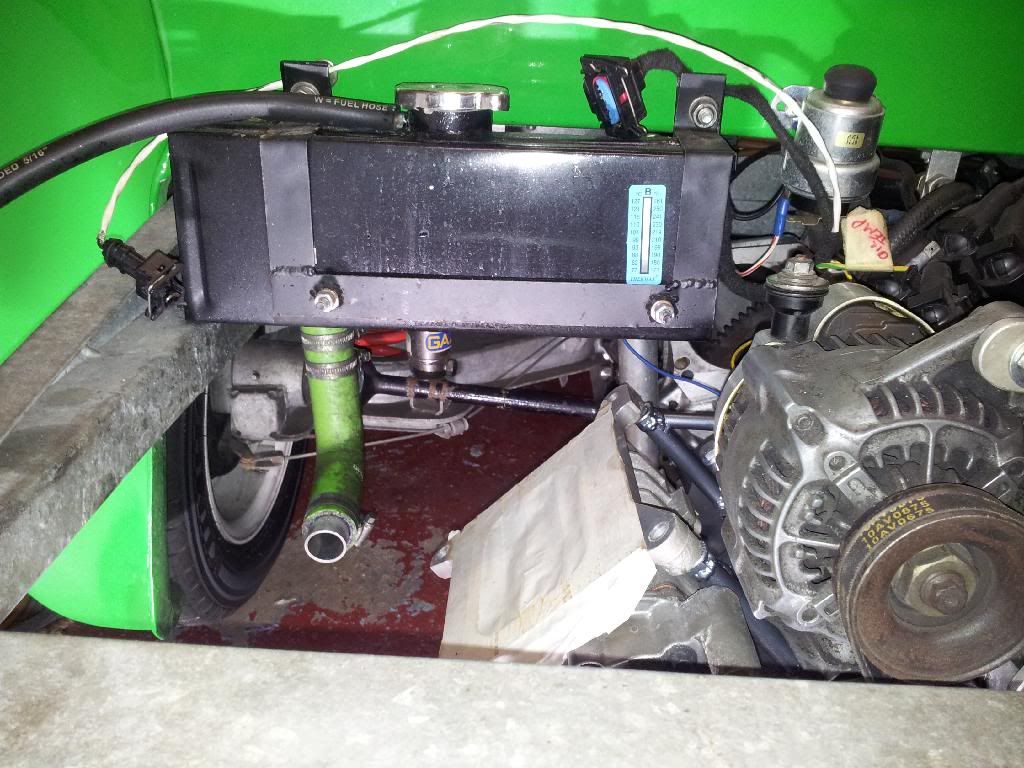 |
| |
|
|
|
|
|
Dec 26, 2013 23:12:34 GMT
|
Started bolting more items to the engine tonight, manifolds on, chargecooler back on, Yoshimura exhaust propped up in place, chargecooler rad and a rough line up of pipework from the charger to cooler to see how its going to work...... looked something like this... 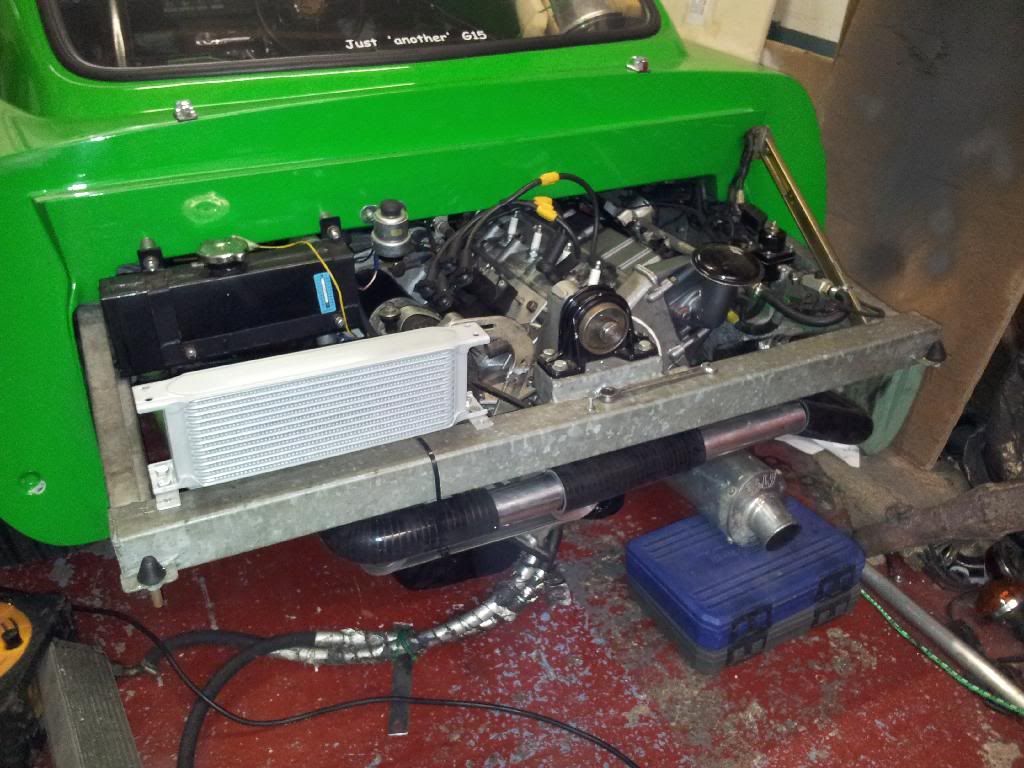 Other lower view, pipes will be 135 angles on the cooler end. This seems to be the best, most direct route, which leads me on to a right ball ache! The oil cooler was to go under the water one below the chassis cross piece, this was the idea with the turbo set up which is why i modified the lower of the boot lid to suit  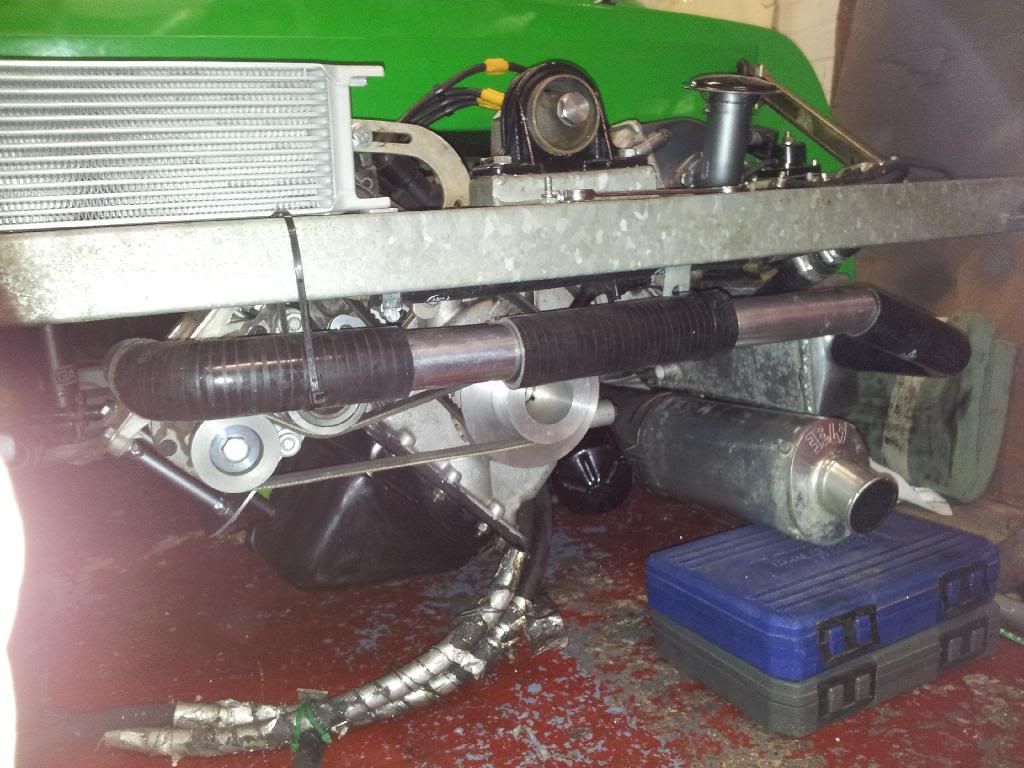 Modified boot, not a real issue but annoying none the less, will still aid cooling and once down hard to see, also who knows I might still yet need to use the lower venting should things change 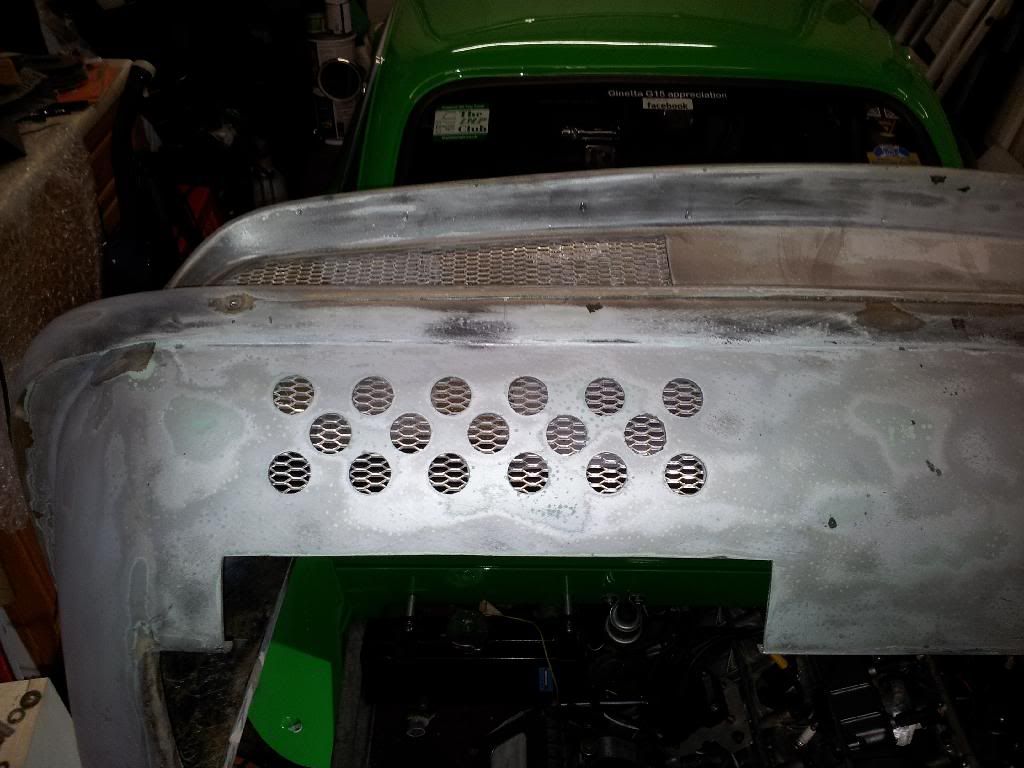 Whats really naffed me off is the charge rad is now fowling the alt pulley now its sat higher than before, solution was to move the rad over to the passenger side more but that means extra holes in my chassis which I don't want to do so figured by spacing it up I can get the clearance needed Catching  Clears, the spacing is just mocking up, Ill make some proper lifted angled things once all proven.  Chris |
| |
Last Edit: Dec 26, 2013 23:14:18 GMT by deadlikeme
|
|
|
|
|
Dec 26, 2013 23:18:21 GMT
|
|
Oh and with the charger belt tensioned up nicely all is good, but if you pinch the belt with your fingers a little more you can see flex in the charger posts. Should be ok, belt feels tight, but thinking Ill be on on version two soon, next set up I want to use a machined block of alloy to mount it on with that bolted to the engine at the same points, should be stronger that way. But all in good time, first i want to see if it is still worth S/Cing the imp engine performance wise!
|
| |
|
|
|
|
|
Dec 27, 2013 23:33:23 GMT
|
|
|
| |
|
|
pork
Posted a lot
  
Posts: 1,666
|
|
|
|
Nice !! Think il be copying that!  |
| |
|
|
|
|
|
Dec 29, 2013 12:51:49 GMT
|
Other flange shapes cut out of plate ready for finishing up and welding. Outlet flange cleaned up with a flap disc and ready for finishing off. 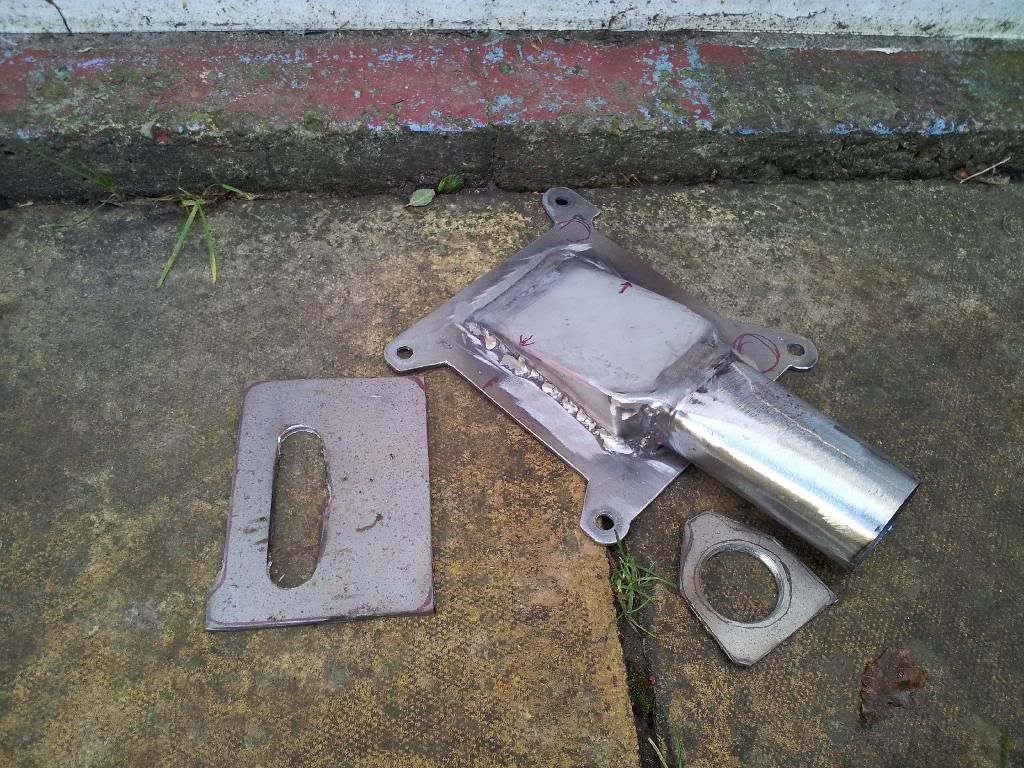 |
| |
|
|
|
|
|
Dec 29, 2013 22:32:52 GMT
|
Hate that moment when your welding gas runs out mid flow  Adding the bypass valve to the outlet like so.... 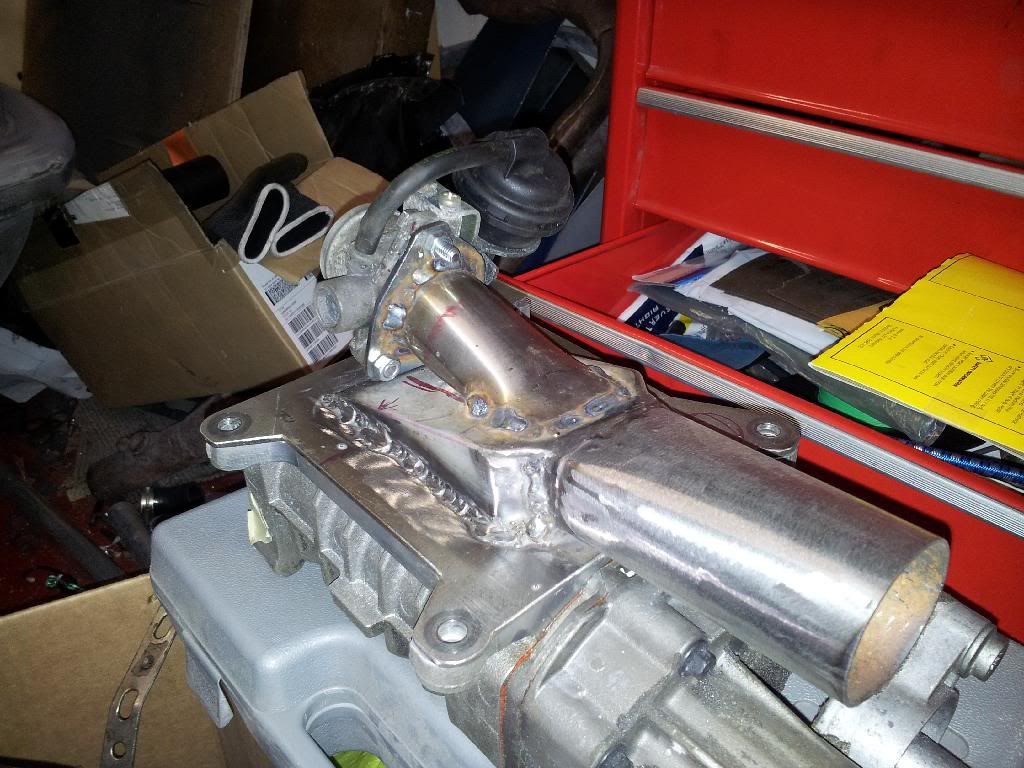 All good till I go and see how it looks on the car.............. Twonk. 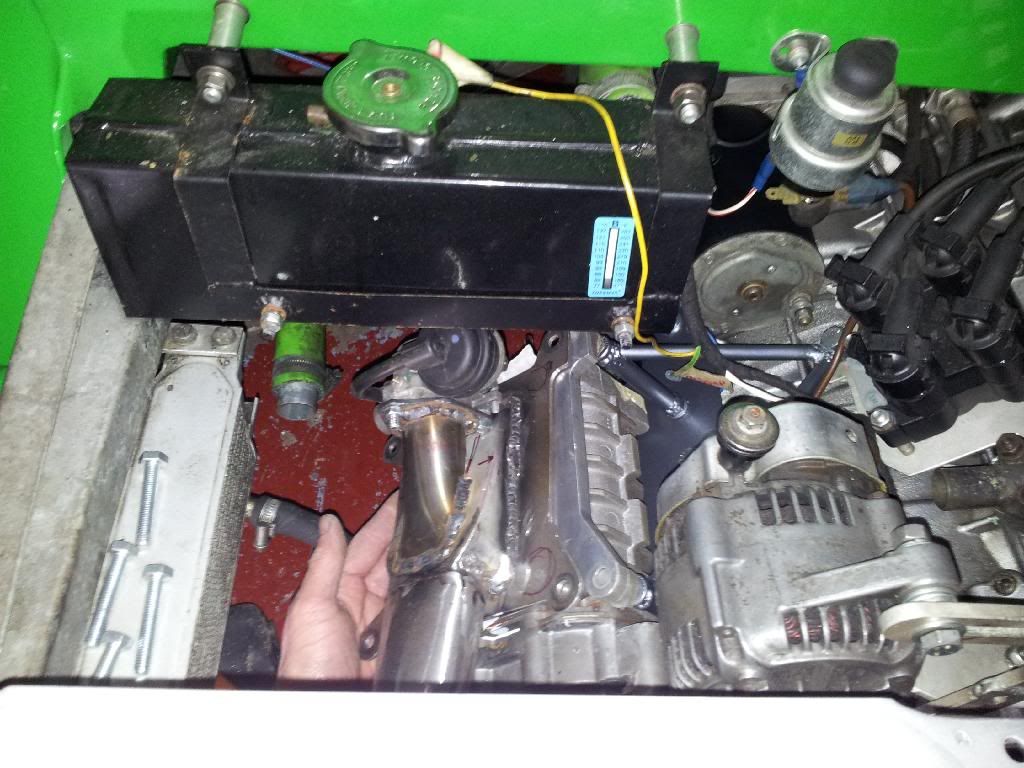 Looking like a good excuse to fit a alloy header tank now. Issue with the std on is the pipes at the rear are right up to the underside of the parcel shelf so cant be lifted up any higher |
| |
|
|
|
|
|
|
|
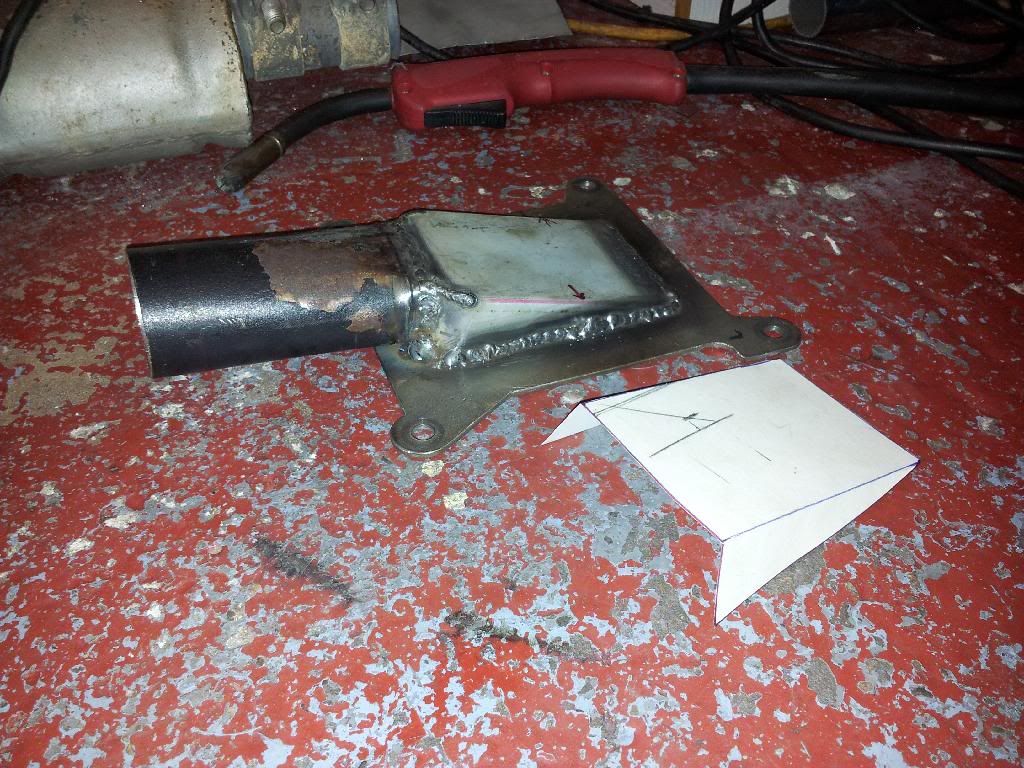
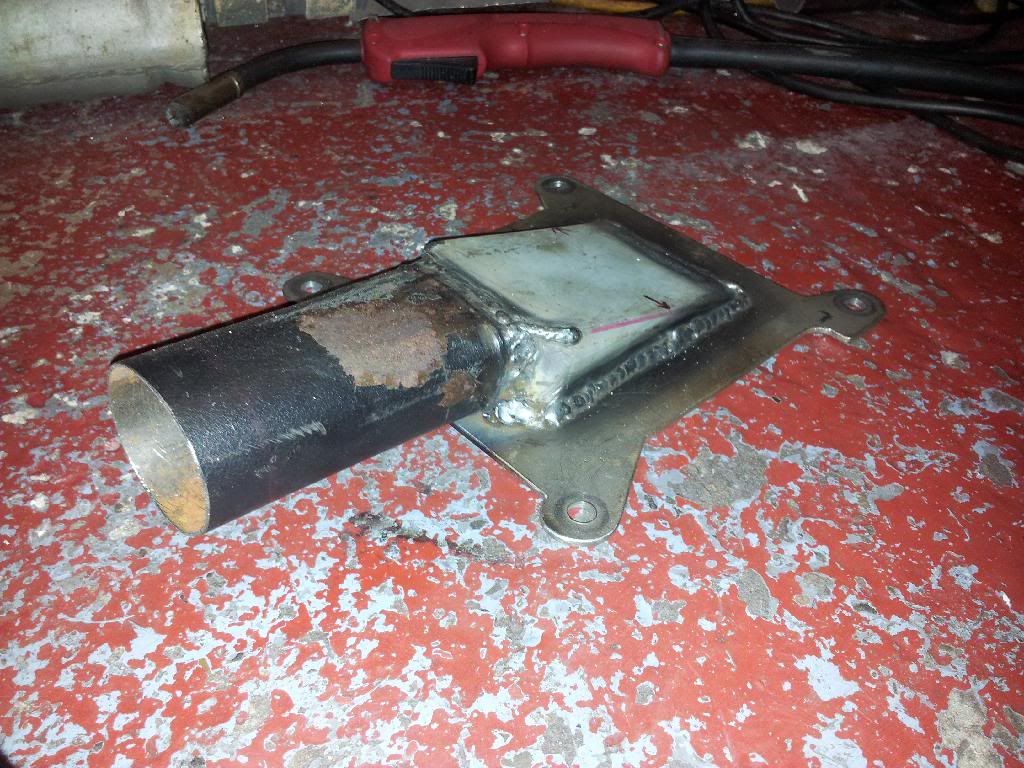
Finally all the fab work is complete! just need to clean it all up, flat the flanges, finish and paint! inlet  with bypass inlet pipe added  and test fit without header in the way, seems ok. 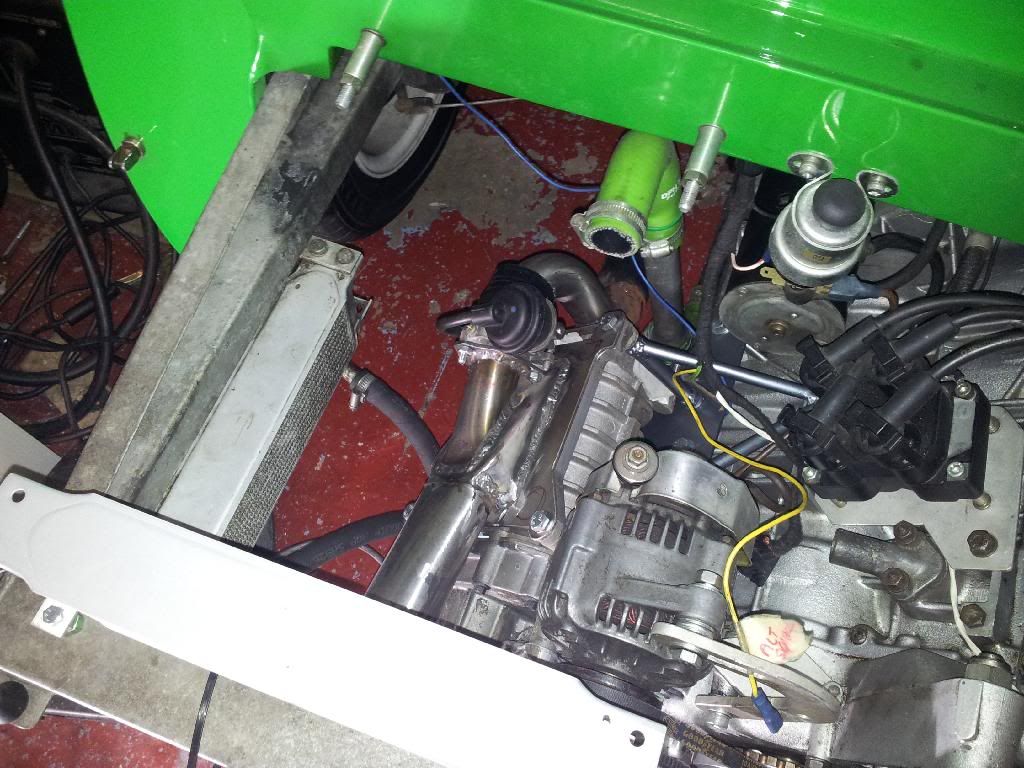 and then as I was cleaning up I noticed that a tub of hand wipes I had was the same dia. as a header tank Ive been eyeing up just longer so a marker pen later I could see if it would fit lol 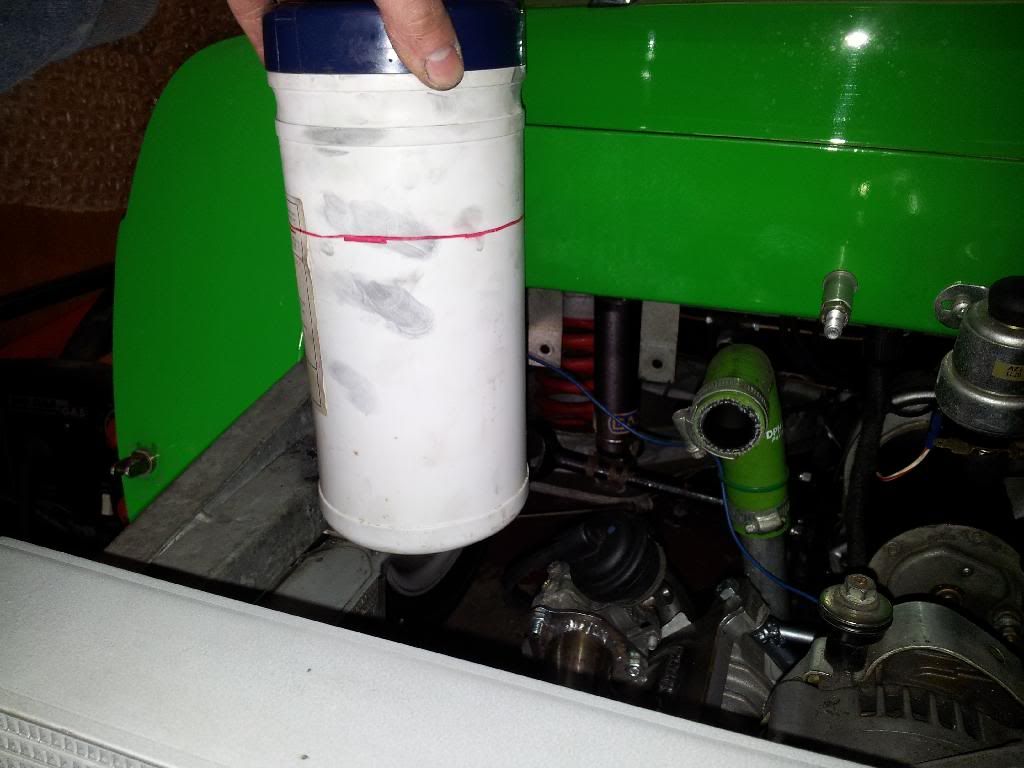 Should be ok. |
| |
|
|
|
|
pork
Posted a lot
  
Posts: 1,666
|
|
Dec 31, 2013 10:46:25 GMT
|
|
Looking good!
|
| |
|
|
crahel
Part of things
 
Posts: 210 
|
|
Dec 31, 2013 11:19:55 GMT
|
|
Looking interesting. I'm planning to supercharge a lancia fulvia v4. I'll be bookmarking your thread.
Craig
|
| |
1973 Lancia Fulvia s2 coupe (sold)
1998 Audi a4 sedan (sold)
2000 Nissan maxima (sold)
2007 Audi convertible.
|
|
|
|
|
Dec 31, 2013 19:45:13 GMT
|
cheers for the comments guys, nice to know people are reading.  |
| |
|
|
|
|
|
Dec 31, 2013 20:08:01 GMT
|
We're reading  |
| |
1974 Skoda S100 tarmac car
1998 BMW 750 daily
1994 Mitsubishi Evo2
|
|
|
|
|
Dec 31, 2013 20:25:40 GMT
|
|
Every day, keep it up!
|
| |
|
|
|
|
|
Dec 31, 2013 20:34:06 GMT
|
not allowed tonight lol, hence being on here now! will be on it tomorrow night though!  |
| |
|
|
|
|
|
Dec 31, 2013 21:21:51 GMT
|
Yep, soon as I see an update I'm here  , love your work. |
| |
|
|
|
|
|
Dec 31, 2013 21:26:59 GMT
|
cheers guys, although I'm always open to criticism as I'm really making it up as I go along  I enjoy it though, 2 or 3 hours at a time is all i can manage with grown up responsibilities lol. Heres hoping Ill be at RR next year, as long as it doesnt clash with imp national which Ive attended for the last ten years or so!! |
| |
|
|
|
|
|
|
|
|
Yes, it is really coming together now.
Just curious, but looking at the crosspipe on the rear of the car it looks to be fairly well positioned for mounting an air/ air intercooler down there, which although is directly behind the engine could have been ducted to get good cooling airflow.
On the other hand, the manifold side of the engine on this non-crossflow design looks to be really quite tight.
I'm assuming that you didn't want to have to alter the lower rear section of the engine cover to fit around an intercooler located under there for cosmnetic reasons, or would it be too low down or be overly vulnerable there? I take it that the cut-out at the nearside was for an oil cooler or intercooler or something from when it was turbocharged?
If it is a spare engine cover did you consider subtly reworking it to fit around an intercooler.... or even used it as the basis for a buck from which to mould another lightweight one?
I'm currently looking into having an existing cast aluminium compressor output manifold modified to suit my purpose, but I'm also considering making an alternative in steel very like yours. The only slight niggle on mine, which is what's making me tend to want to try to modify the original cast part, is how well the flange joint will stand up to a bar or so of internal pressure between the fixings to the supercharger body?
The folded and shaped outlet section will certainly add a lot of stiffness to the part along the welded joint to help stop the main plate deflecting. I'm probably just being a bit pessimistic here, and anyway even if it does leak a little bit at the joint, in steel it can easily be reinforced with little triangular fillets around the perimeter or braced up in other ways.
It will be really interesting to see the car getting closer to completion, and hear your opinions of the direct comparison between turbocharged and supercharged versions of the engine once it is running again.
Sorry if these questions are already answered somewhere in the previous pages.
|
| |
|
|
|
|
|
|
|
Yep Ive always wanted t try and achieve everything within the original body lines and shape as much as possible really on this one. A lot could be done If I went merry with the hacksaw but its more of a challenge to fit it all in neatly and compact  the lower section tucks under alot, infact Ive had to remove some of the lip as It in contact with the charger belt! I do plan on making a mould for a boot but will use my green std one for that as it should produce a nice mould to work from more so than this old boot. for comparrison heres my firends G15 when he was bored and had a badly damaged spare boot lid lol, not shy with the grinder..... the wing is no longer fitted that was another moment of madness which kept attacking him and slicing various body parts while working on it or generally walking past lol no problem with cooling! subtle not, just the way he likes things  lol 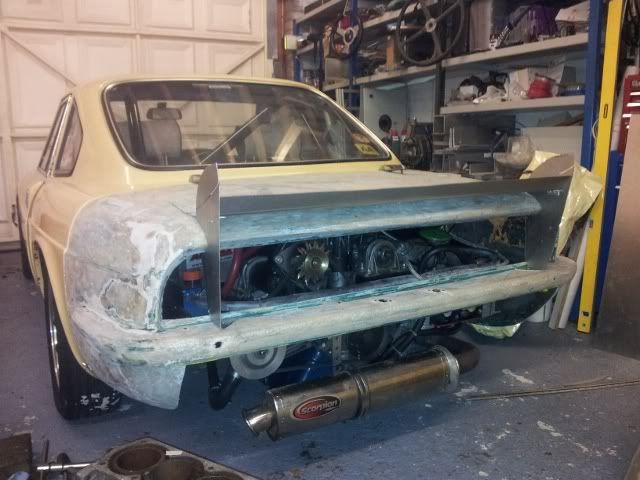 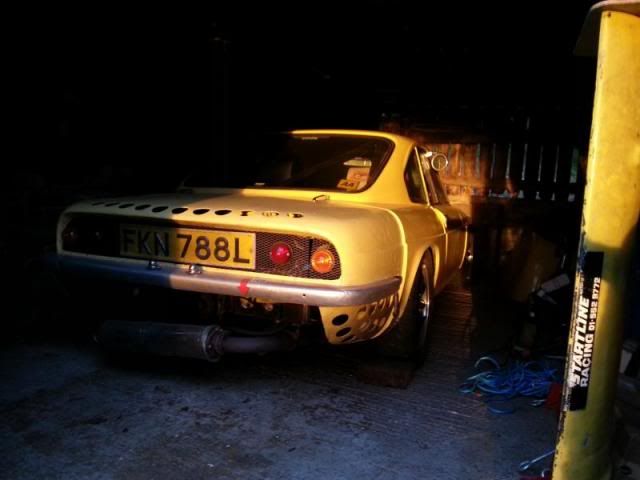 |
| |
|
|
|
|


