|
|
|
Dec 17, 2013 13:01:04 GMT
|
|
It's hard to say without seeing it in the metal but I'd be looking at buttressing the uprights that you've just added and also a lip under the nose of the charger. Obviously before you get busy with the Mig be aware that if you do one continuous seam of weld it'll distort, I'm sure you know that though. I'm not convinced that the strengthening posts to the sump won't crack their welds too, although I can see the problems you've got with trying to make it all secure.
|
| |
|
|
|
|
|
|
|
Dec 17, 2013 14:07:16 GMT
|
|
Ah I think I see what you're saying. Your talking about the ones on top of the plate that bolt the charger down.
To modify those neatly to include triangulations in both directions would require the posts to be fixed in place and probably the base plate needing to be made a little wider to accomidate the extra bits.
That will probably be version 2 to ne honest if it does end up being required due to flex, slip or even belt flinging!
I did plan on adding a lip to both short and long edges, one of each but decided against due to weight again.
As soon as I start up ill watch what it all does it was fully tensioned before and all looked fine after I added the tab at the front.
|
| |
|
|
|
|
|
Dec 17, 2013 14:11:13 GMT
|
|
Ohhhh ive just had one good idea for a triangulation point ill investigate it tonight should tie in the top two mounting posts!
|
| |
|
|
|
|
|
Dec 17, 2013 23:26:22 GMT
|
Barely had chance to get out there tonight but I managed to have a look see. Firstly, once again I had to build up all the bits again!! I also bolted on the starter motor and coil pack mount to get everything on the engine that could be in the way. painted plate and mounts back on 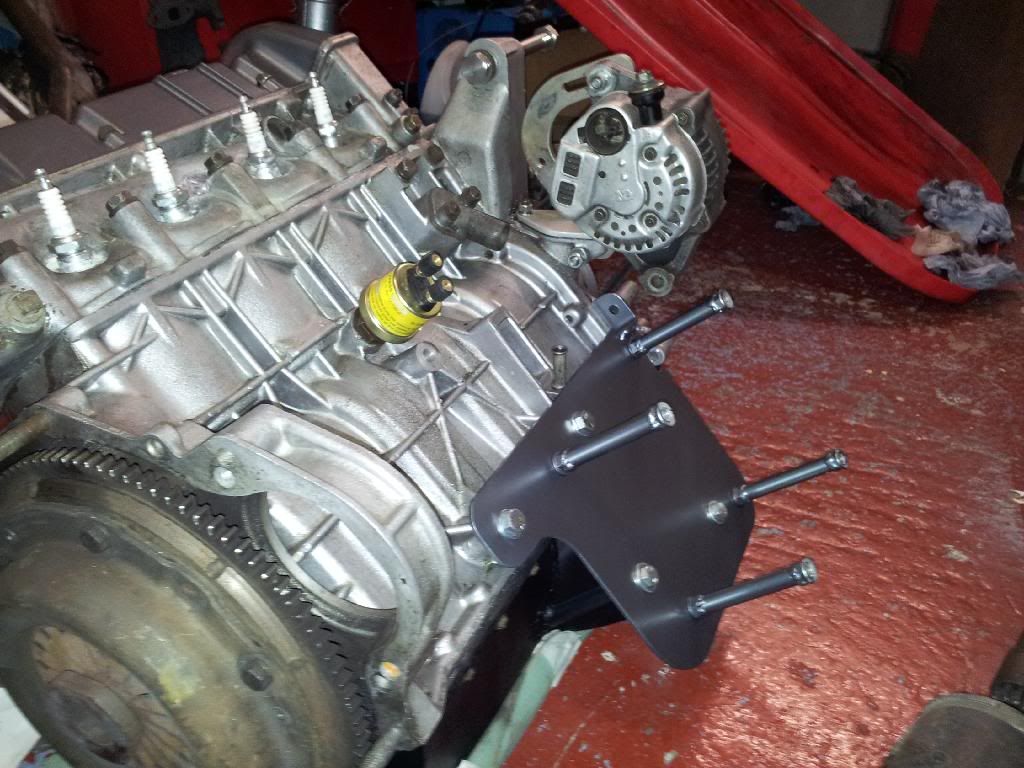 Alternator on 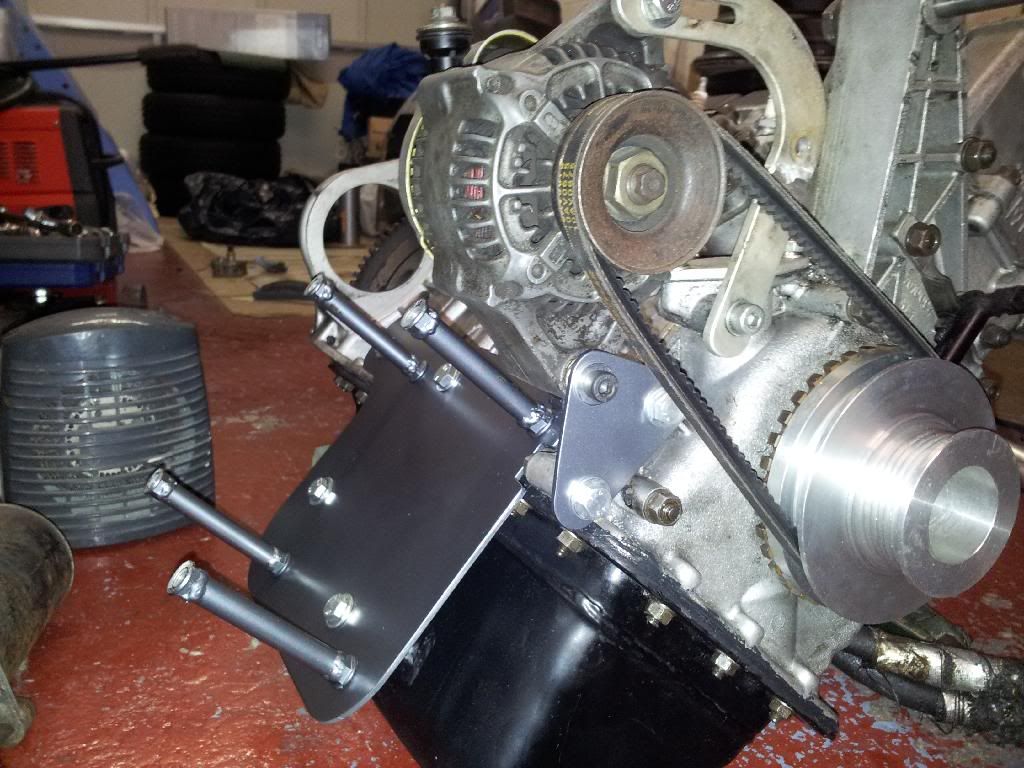 and heres possible triangulation point. Above the chager on the block theres another threaded take off I use for the plate mounting the coil pack, I can use a 10mm thick 'washer' which I can weld two posts on which will be slightly smaller dia. up to the top of the charger mounts like so...... (under the cap head bolt will sit the spacer washer to weld too.) 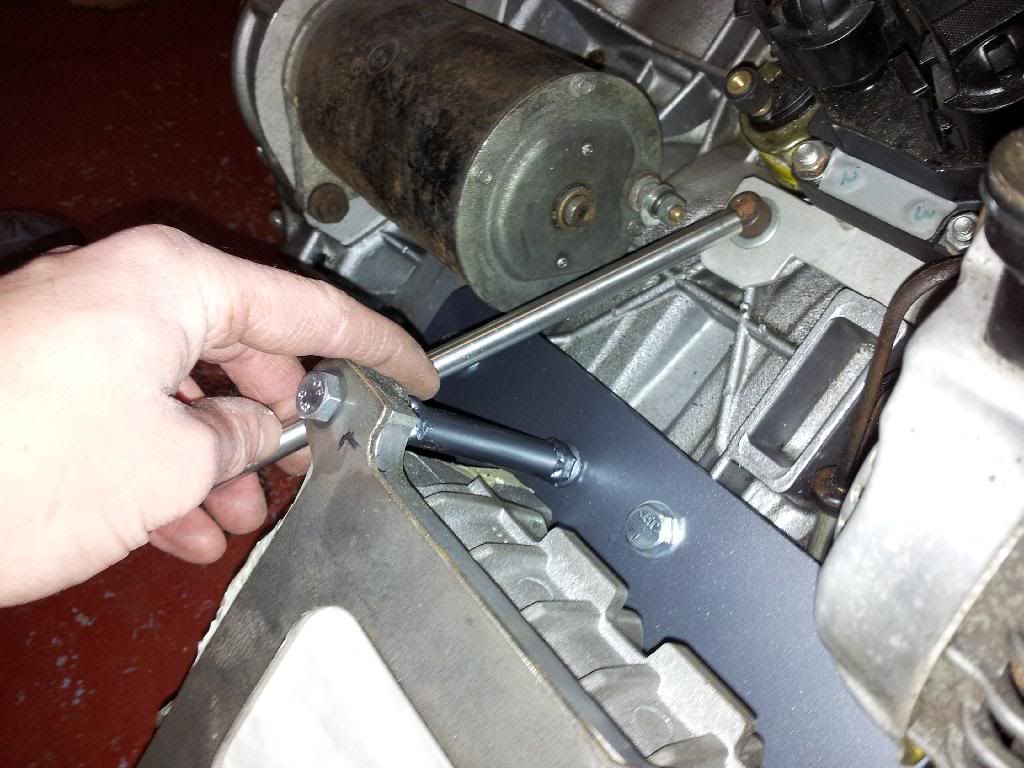 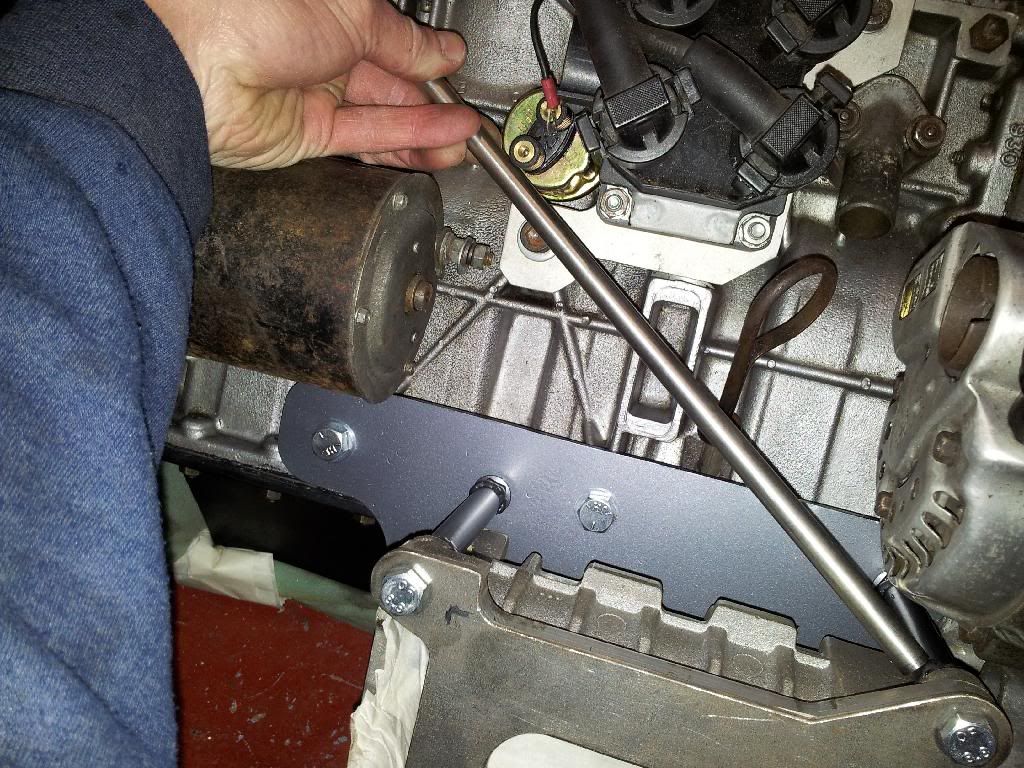 One to the front one to the back, should add extra security/strength?, thats about the only place left to take off any extra mountings Chris |
| |
|
|
Siert
Posted a lot
  
Posts: 1,107
|
|
|
|
|
There's some beautiful engineering work going into that!
|
| |
|
|
|
|
|
|
|
|
Why thank you sir! To be honest I enjoy working on the car mid winter the same if not more than actually driving it in the summer ha ha
|
| |
|
|
|
|
|
Dec 18, 2013 22:29:18 GMT
|
Ive been triangulating tonight....... Cut and tacked in place 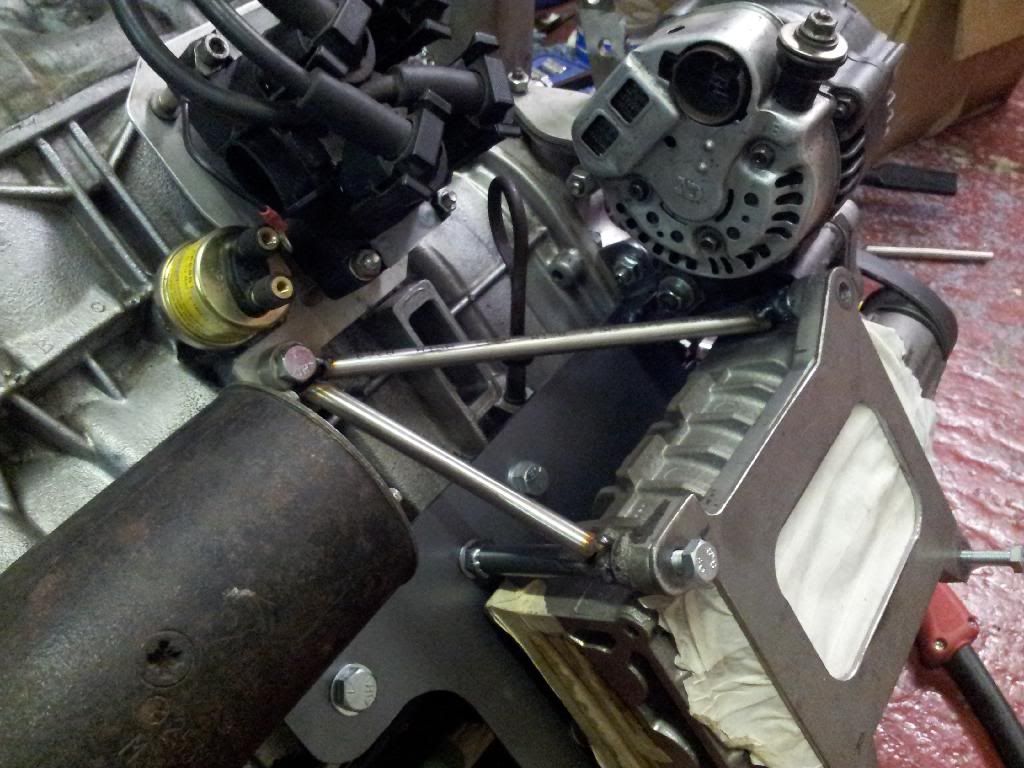 Rods where thin walled so had to be careful welding bit by bit but got there in the end, upon refitting it had moved slightly which was always going to happen welding it in free air and not clamped, just needed the mounting hole opening up and it fits well enough. 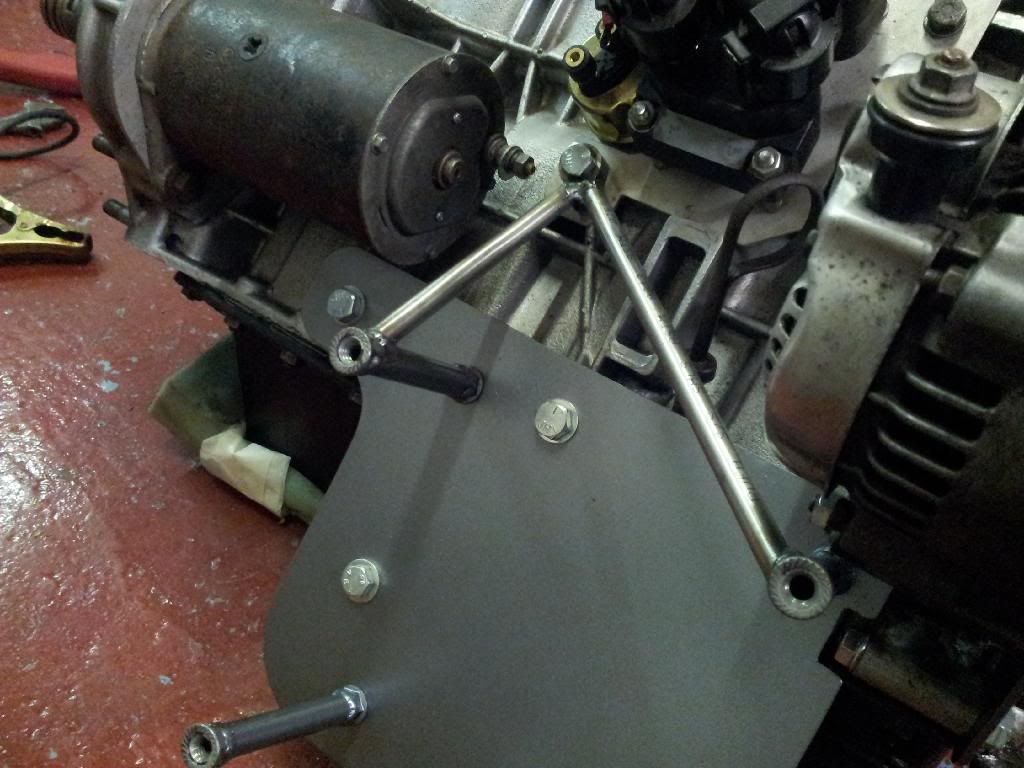 And painted up. 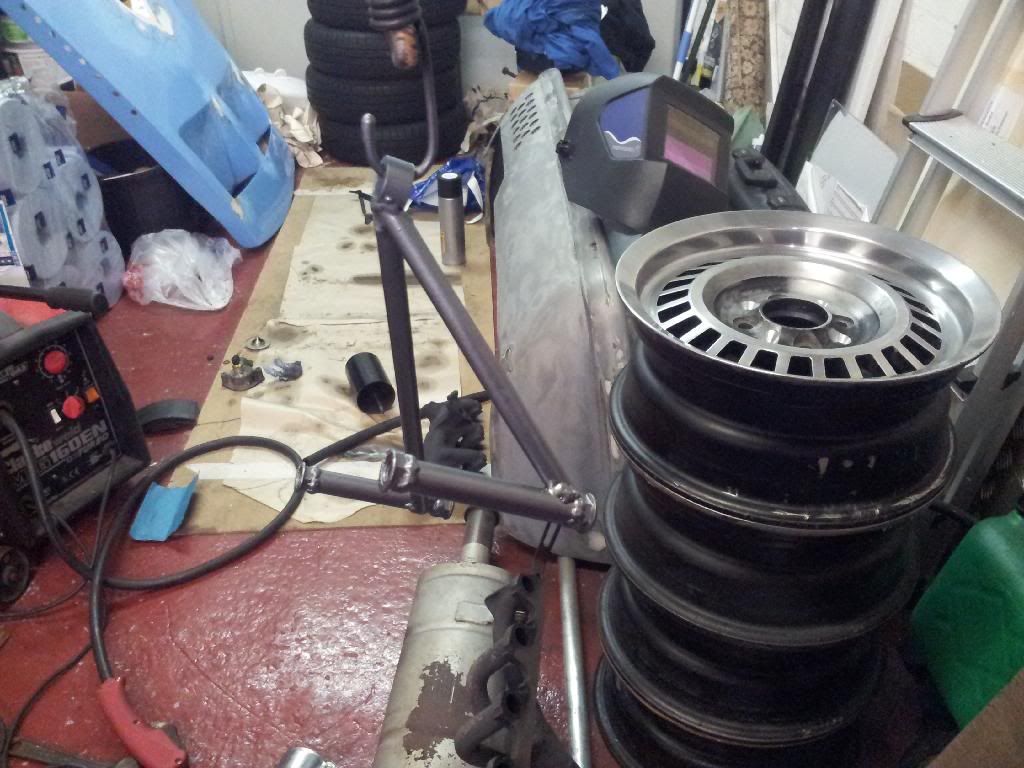 Still planning on dragging the car back up on Saturday. Chris |
| |
|
|
pork
Posted a lot
  
Posts: 1,666
|
|
Dec 19, 2013 20:48:33 GMT
|
Hi, I've sent you a msg, but if like me u get no notifications, il ask here too Could you possibly give me the dimensions of the m24 charger? Thanks, Neil  |
| |
|
|
|
|
|
|
|
|
I get a little 1 in a speech bubble on my phone where it says messages.
Didn't get chance to get out there last night but next time I do ill take a few measurements.
Cheers
Chris
|
| |
|
|
pork
Posted a lot
  
Posts: 1,666
|
|
Dec 20, 2013 10:26:19 GMT
|
I get a little 1 in a speech bubble on my phone where it says messages. Didn't get chance to get out there last night but next time I do ill take a few measurements. Cheers Chris I use the proboards app  Nice one ! |
| |
|
|
|
|
pork
Posted a lot
  
Posts: 1,666
|
|
Dec 20, 2013 10:49:09 GMT
|
Also, whilst I can pick your brain , I'm hovering over the buy button, but this s/c doesn't come with the electromagnetic clutch part. Did yours cone with one , if so, wanna sell it?  |
| |
|
|
|
|
|
Dec 20, 2013 11:24:41 GMT
|
|
Nope didnt come with one. Ill possibly be doing the same next year.
Can be done without the clutch if you can operate a relief valve just dump to air not very efficient but.. or recirc when the turbo takes over. Or compound if you gear the charger correctly.
|
| |
|
|
pork
Posted a lot
  
Posts: 1,666
|
|
Dec 20, 2013 11:45:06 GMT
|
I'm going down the twin charge route so ginna need it. From looks of it , the clutch is part if the water pump ,  |
| |
|
|
|
|
|
Dec 20, 2013 11:56:58 GMT
|
I planed all this a few years ago just never got around to it in the end I deemed it pointless on such a small engine just a fun exercise really. You don't need to stop the charger you can just stop it from feeding the inlet by diverting to atmosphere. You could try a charger with the built in clutch like the one used on the twincharged mr2 or look how nissan did it on the march superturbo? Or just buy a march lol but not the point is it  |
| |
Last Edit: Dec 20, 2013 11:58:20 GMT by deadlikeme
|
|
pork
Posted a lot
  
Posts: 1,666
|
|
Dec 20, 2013 12:55:19 GMT
|
|
Haha, that's it , nothing like somthing you build yourself.
I've just had a mate bring over his m45 to size things up, never realised how small they are!
So think I'm gunna just but this m24.
You ain't got much Left before your up and running again?
|
| |
|
|
|
|
|
Dec 20, 2013 13:08:21 GMT
|
More than I would like! Just randomly found this on my phone just a basic idea of size. 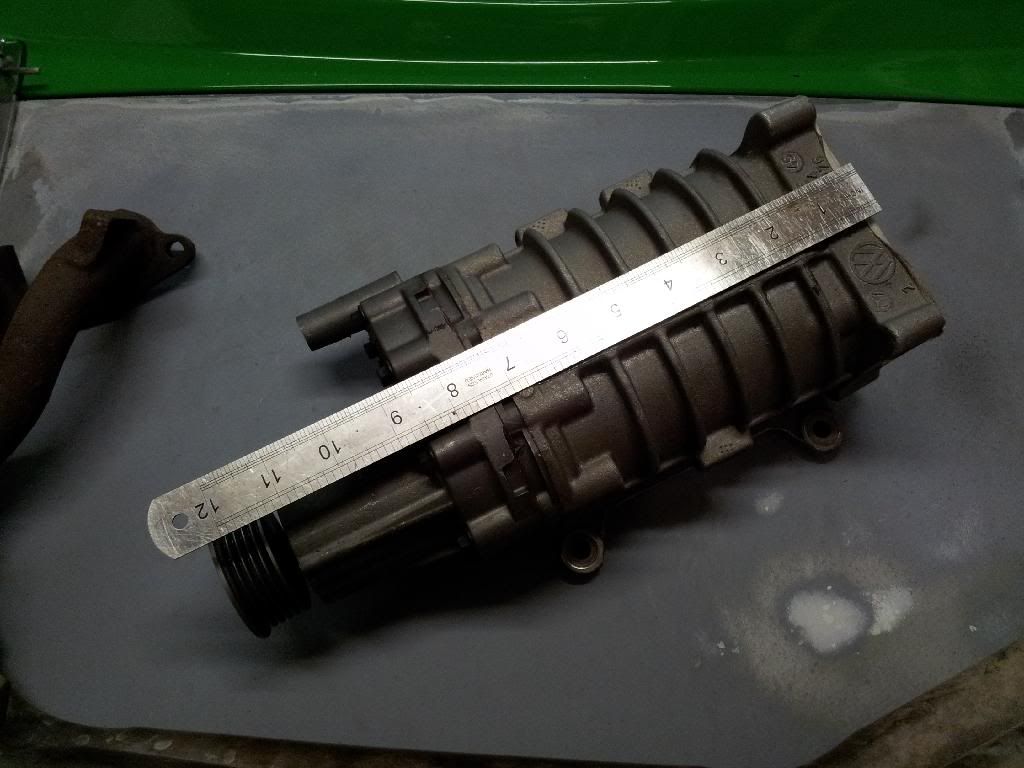 |
| |
|
|
|
|
|
Dec 20, 2013 14:41:37 GMT
|
I've recently looked into the need for bypassing a supercharger like this, as I'm doing something very similar on one of my cars at the moment. When these units aren't being driven against a high intake pressure or being asked to produce it, they don't actually absorb such a lot of power to drive them at all. If you aren't feeding a turbo's output into the supercharger or something like that, and your throttle plate is upstream of the supercharger, I don't believe there is any need to bypass it on its intake side at all, and certainly not to bother about cutting its drive via an electromagnetic clutch. From the compressor flow maps I've seen (on the similar if much bigger Eaton units) the power they use in being driven seems to be pretty much proportional to the pressure ratio that they are operating at (which also increases with their rotational speed), and being mechanically driven and positive-displacement their airflow rate can be closely matched to the engines requirements as well. If the throttle is closed quickly on a rapidly spinning turbocharger there can of course be undesirable pressure effects, but this isn't the case with a supercharger. Personally, I think there is still a very good argument for fitting a compressor bypass valve from the PRESSURISED side, or a normal blow-off valve, but strictly speaking these shouldn't really be necessary either. I realise that with a smaller engine that you will want to minimise parasitic losses, but on that size of supercharger these are not going to be so big either. Here are some charts that you might find interesting, but unfortunately information on the smallest unit available is the M45... www.rbracing-rsr.com/turbo/TurboMaps/M45flow.gifwww.rbracing-rsr.com/turbo/TurboMaps/M45power.gifwww.rbracing-rsr.com/turbo/TurboMaps/M45deltaT.gifI'd reckon that if your engine is of roughly 60 cubic inches capacity that it should flow anywhere up to about 150cfm of air @ 8000rpm. I don't know if you have found the correct map from which to calculate a crankshaft pulley diameter from to suit whatever pressure ratio you plan to use, but for 7psi of boost I'd guess you'd would want about 225 cfm of peak airflow. I think the Imp engine layout lends itself quite nicely to normal air-air intercooling with its non-crossflow design and the space you should have in the rear even with the supercharger in position, or do you have other ideas for this? It will be really interesting to see how you arrange parts like this to get a cooling airfow through it with the rear engined layout. Fun project. |
| |
|
|
|
|
|
Dec 20, 2013 15:28:19 GMT
|
|
Cheers, well basically ill re use the chargecooler set up I made for the turbo set up. I have a air temp sensor after tb and in use the air temp was nicely controlled.
Compared to a std imp enine bay the ginetta is much more cramped, I could make an intercooler set up that would protude out of the bay at the side but it would require big cutting and ugly mis shapes ruining the ginetta shape.
|
| |
|
|
|
|
|
Dec 20, 2013 15:31:46 GMT
|
|
Chargecooler is shown on page 3 basically still that set up with the added benefit no turbo next to it.
|
| |
|
|
meltedcheese
Part of things
  Please, Don't Sqeeze the Volvo!
Posts: 403
|
|
Dec 20, 2013 15:38:54 GMT
|
|
Really interesting build and techniques, bookmarked!
|
| |
|
|
|
|


