|
|
|
|
|
once again all bits taken off, flange faces flattened took a fair bit of work and smoothed out the outlet with some filler, ill leave the inlet as is as its not as on view as the outlet 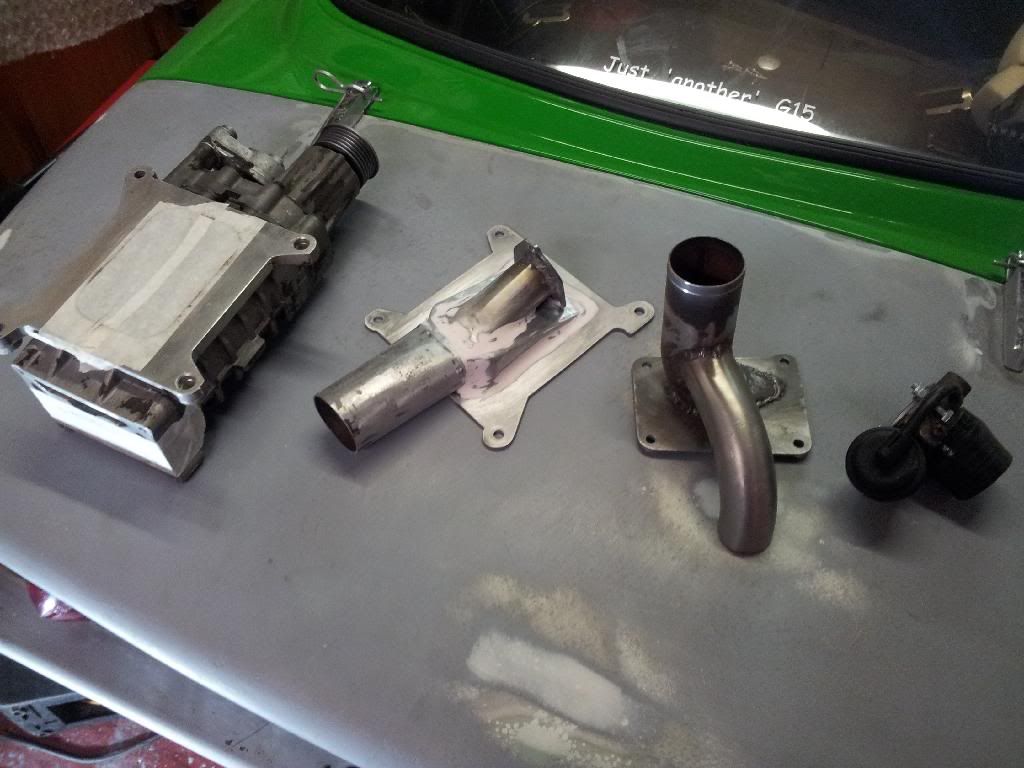 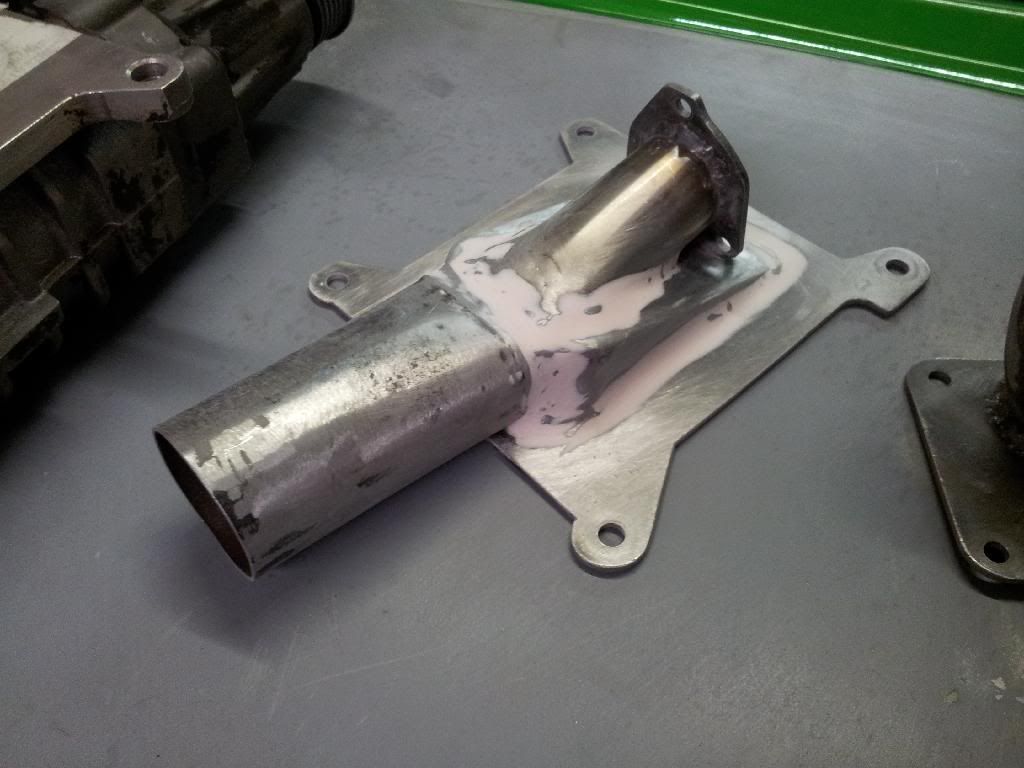 Initially shaped with 80 grit will go over it with 320 before primer, not looking for perfect afterall its all hand made and I'm still treating this as a prototype style build. Chris |
| |
|
|
|
|
|
|
|
|
|
|
Nothing wrong with home made.... a nice coat of satin black paint on that and it will look spot on.
On that note, how hot will these parts actually get after being subjected to the heat of compression despite the airflow through them.... I just realised that I have no idea if normal paint will survive use on there or not.... I imagine it should be OK?
I just saw the mounting flange on your supercharger. You are really lucky there, if your flange does flex fractionally and leak a little you always have the option of simply drilling some additional intermediate fixing holes through your plate and into the cast alloy flange and then tapping them to help out the main fixings, that isn't an option I have on the M112.
Shouldn't be long now until its running?
|
| |
|
|
|
|
|
|
|
|
Not sure about heat to be fair! Ill be painting it graphite grey its a personal thing lol, I miss my grey mx5 ha ha.
Hum good idea re any flex, would be worrying drilling and tapping in to the s/c though lol
|
| |
|
|
|
|
|
|
|
|
The flange looks to be quite thick along the sides, and at the front and back any mid point fixings would also be positioned in the thickest part of the casting between the rotors (at least where the outlet pipe isn't in the way). Even a mid-side M6 fixing would be enough to make a big difference to the reliability of the joint if necessary.
It is definitely worth double checking before doing any drilling into the supercharger casing though!
|
| |
|
|
|
|
|
|
|
|
You won't have any flex issues with that, and I've had automotive paint on my SC for nearly three years with no problems at all. What are you going to use as a gasket?
|
| |
Last Edit: Jan 2, 2014 15:48:39 GMT by claymore
|
|
|
|
|
|
|
Not actually sure what gasket material to use! Any tips? I hope o get some gasket sheet of some sort and cut to shape. Tonight progress was short, quick as I ran out of time, but knowing I wasnt going to get out there tomorrow due to the wifes birthday I had to get on it!! So primed and painted the inlet/oulets, in my haste trying to lay on the paint I ended up with a run on the outlet, right where it will be on view too typically so Ill need to try and 2000 grit that flat and possibly a quick spray blast again.... had to be metallic, making it harder for myself as usual lol  the run  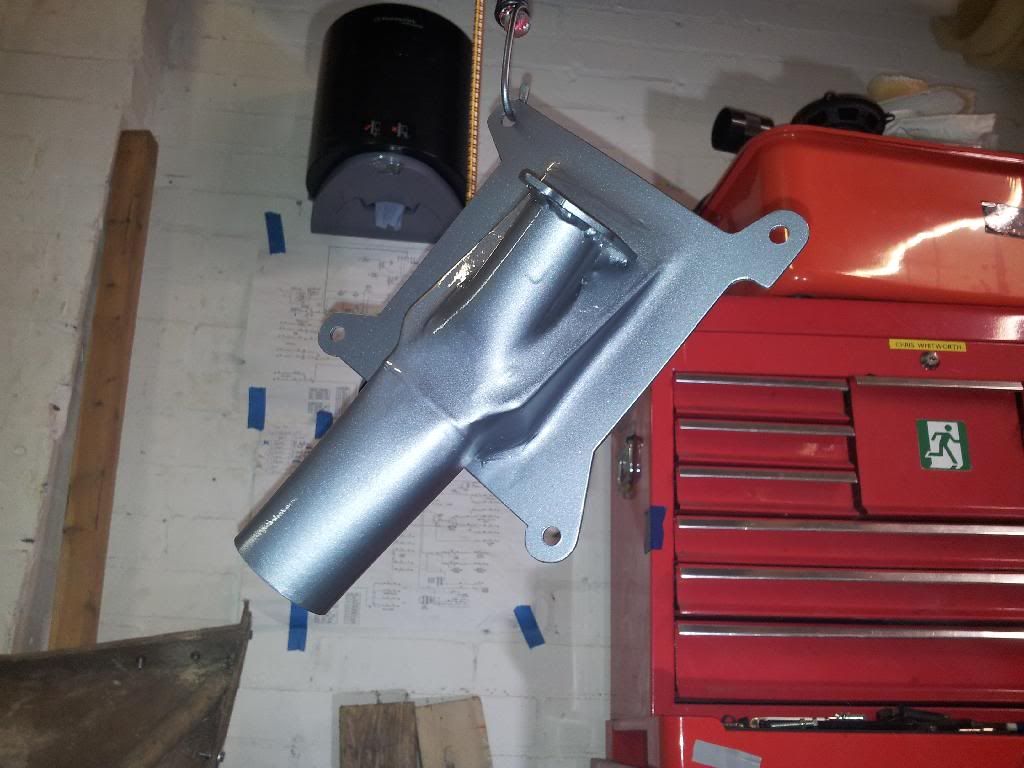  But knowing how my rolling roads go ill be taking it on and off alot and probably end up scratching it too hell!! I will probably end up taking it to the powdercoaters later on in the year if all goes well anyhow. So when will I start it up, first I need to re fit the fuel tank again after removing it from the car to do the pedals then I should be ok for a cheeky start up, then Ill need to finish up the chargercooler system and coolant system once a header tank is worked out, Ill just poor some water into the block for a quick run. |
| |
|
|
|
|
|
|
|
|
Normal practice seems to be 1mm cork gasket so ill get some ordered!
|
| |
|
|
|
|
|
|
|
|
Looking the business now, parts like this always look much better in paint.
It is almost like a metallic blue-grey in the photos, the stock XKR8 manifold I bought was painted in a light grey colour (before I rotary wire brushed it all off), so I guess it will be just fine like that. If you want to keep the filler on it, I don't think it could be powder coated anyway?
Are you using this colour as a 'theme' on some of the other engine parts too? A combination of the steel parts painted in one colour and the alloy parts polished always looks really good, and helps visibly tie parts that don't normally go together into one big assembly.
I just sold a Sunbeam 930 engine last year, and I think a few selected polished parts on it with the engine and supercharger painted in a matching aluminium silver and your contrasting grey on all of the brackets etc would look spot on.....even when parts are purely functional it is nice to have them well presented, especially if the whole engine cover lifts up like on your car.
|
| |
|
|
meltedcheese
Part of things
  Please, Don't Sqeeze the Volvo!
Posts: 403
|
|
|
|
|
Looking good!!!
|
| |
|
|
|
|
|
|
|
|
No photos not much to show.
Ive not done much felt too ill so came back inside.
Fill up with oil connected up the starter and cranked her over (charger not fitted waiting for gasket before final fit)
Let her rest checked oil level had dropped so pump working ok and every crevice filled, so topped back up to max again.
Sounds fine on crank exhaust puffing out on all four strokes and inlet sucking well so that was a relief after doing so much!
Did start to fit chargecooler set up but realised I need to drop the cooler down to replace the tps which seemed faulty last time I drove it.
Oh fuel tank checked and I had fitted it so thats done.
|
| |
|
|
|
|
|
|
|
Jan 11, 2014 22:33:16 GMT
|
well its been a week! Finally been back out there, still not fully well so only did a little and came back in. Gaskets made for the charger inlet and outlet  and fully fitted, not going to remove it now, next up will be first start up 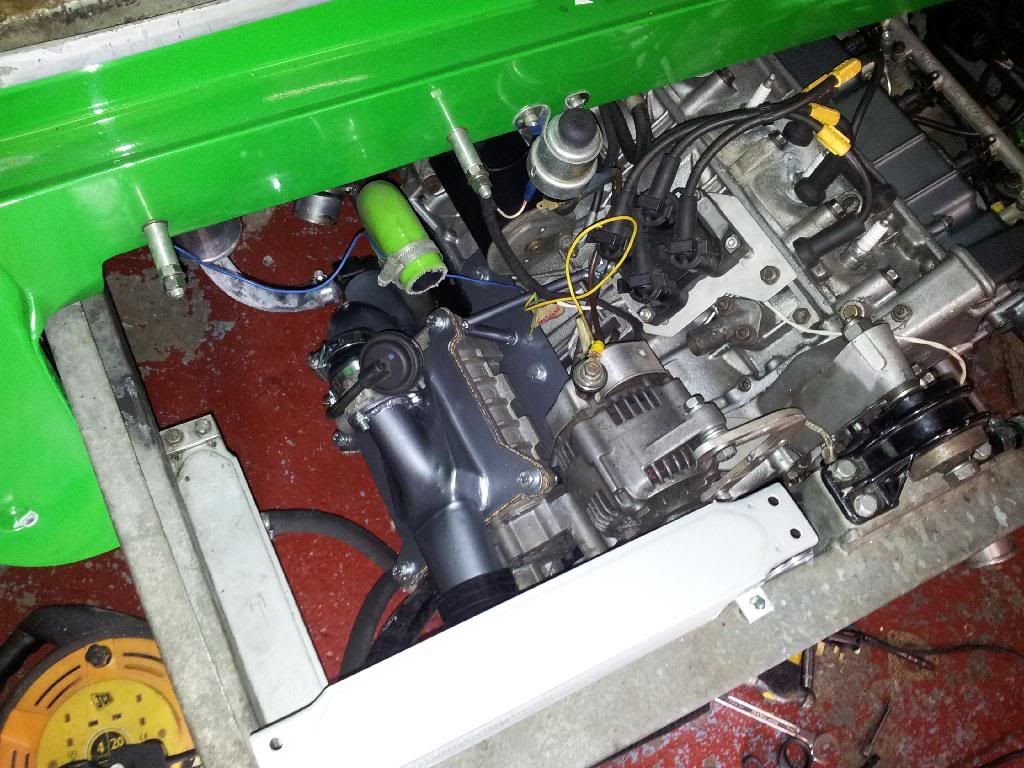 Trial fit of charger to cooler pipework, just need to add some hose clips and eventually make a hanger to bolt to the chassis cross-member  Also removed the cooler so I could put a replacement TPS on the TB, just need to bolt it fully back up gain, complete the coolant side of the chargercooler, devise some sort of exhaust hanger then add petrol see what happens!! |
| |
|
|
|
|
|
Jan 12, 2014 10:12:07 GMT
|
|
Would fitting a hanger to the crossmember be a good idea? the engine moves and the crossmember doesn't, unless you make it out of something quite flexible.
|
| |
Last Edit: Jan 12, 2014 10:13:12 GMT by claymore
|
|
|
|
|
Jan 12, 2014 10:40:46 GMT
|
|
Yeah id hopefully include a rubber bufferb between it all and possibly split the pipe and incude a bumped silicone piece to allow for the flexes involved.
But its not too important yet as it can easily cope without one
|
| |
|
|
|
|
|
Jan 14, 2014 22:28:49 GMT
|
There we have it, apart from finishing the cooling system once I have a suitable header tank, filling the chargecooler system and making an exhaust tie bar rod thingy its in a state to start now!  chargecooler, needs a little polish buff up 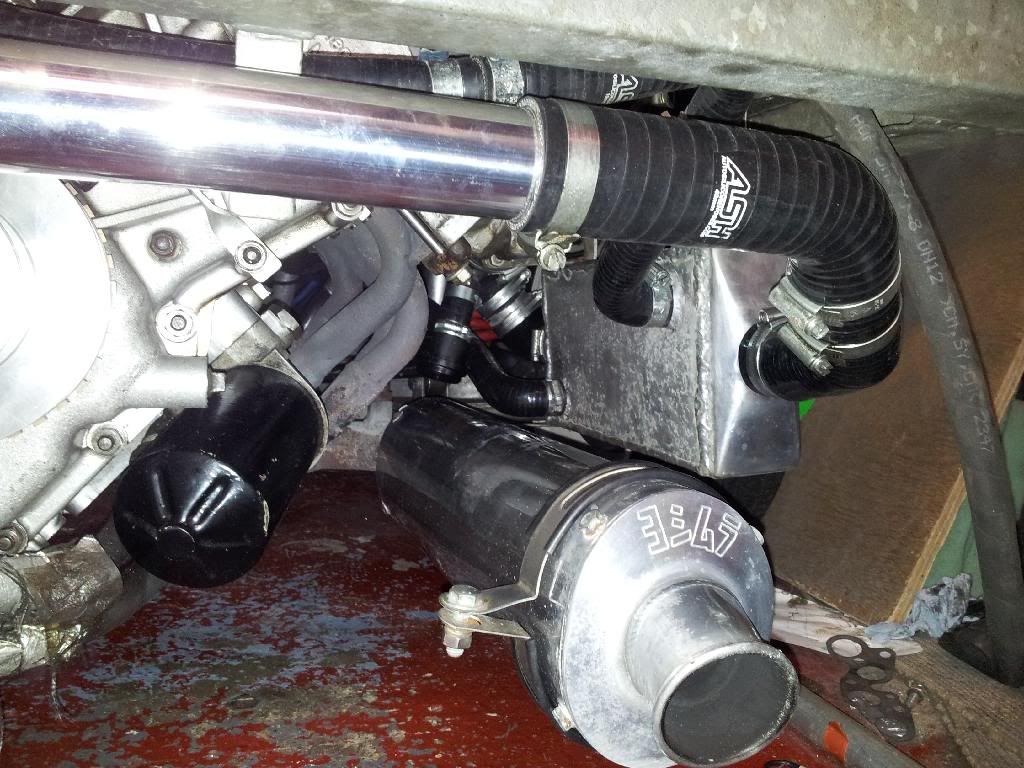 god dam inlet pipe from the side window is a little short, need to buy another lenth to extend it to the charger 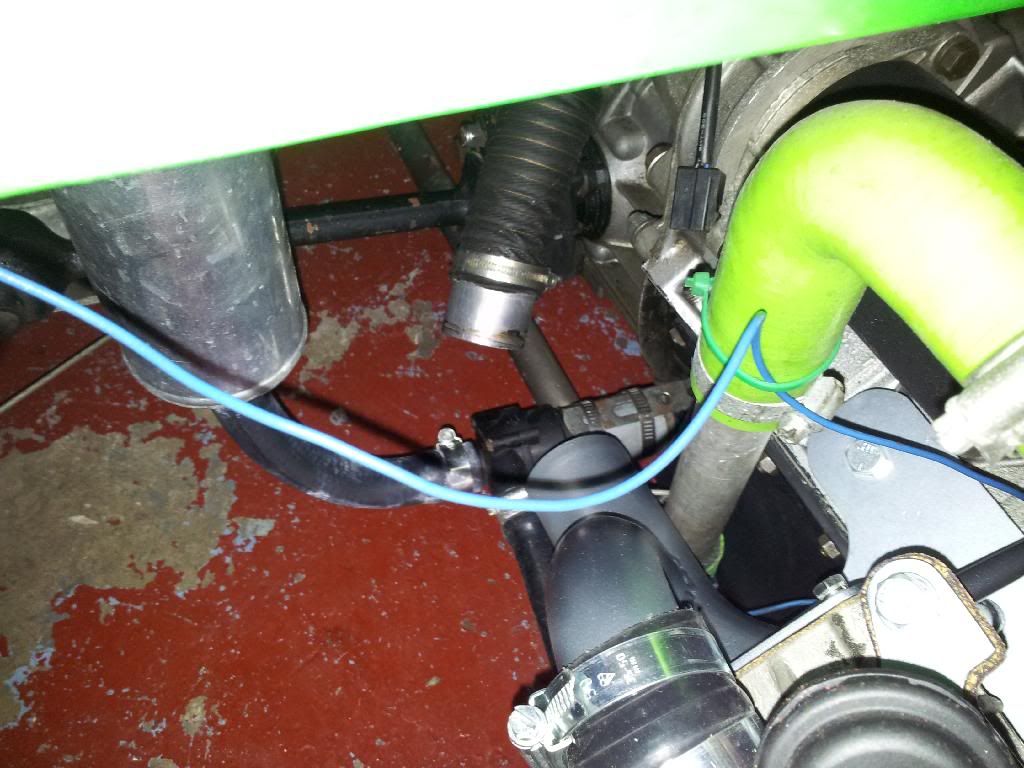 Chris |
| |
|
|
|
|
|
Jan 14, 2014 23:00:23 GMT
|
|
Good progress, you're showing some commitment here! I suspect many others are looking forward to the start up, as I am. What you've done looks really well thought out, hopefully that will keep teething problems to a minimum.
|
| |
|
|
pork
Posted a lot
  
Posts: 1,666
|
|
Jan 14, 2014 23:01:03 GMT
|
Cool! Looking foward to seeing/hearing few vids  |
| |
|
|
pork
Posted a lot
  
Posts: 1,666
|
|
Jan 16, 2014 19:15:27 GMT
|
Ran my m24 for first time today........they make quite some noise with all the sound proofing removed!!!  You ran yours up yet? |
| |
|
|
pork
Posted a lot
  
Posts: 1,666
|
|
Jan 16, 2014 19:15:41 GMT
|
Ran my m24 for first time today........they make quite some noise with all the sound proofing removed!!!  You ran yours up yet? |
| |
|
|
|
|
|
Jan 16, 2014 20:27:17 GMT
|
|
Nope was tempted to run it last night and this evening but decided not to pizz off the wife in case it was loud. .... then I watched yours earlier and was happy not to till the weekend. Christ its noisy! Hope mines quieter with the outlet plumbed in!
|
| |
|
|
pork
Posted a lot
  
Posts: 1,666
|
|
Jan 16, 2014 20:46:29 GMT
|
|
Haha, is a bit!
Yeah, think with all the plumbing done it'll quieter
|
| |
|
|
|
|


