itom
Part of things
 
Posts: 67
|
|
Mar 24, 2012 15:18:38 GMT
|
Thought it was about time to show you all our project - Lenny the 1275 track car A very brief history of the car; it's my first car and has done 47k in its 18 years on the road and was built 3 months before I was born! Also, just before we bought the car the owner slipped in that it had previously been rebuilt by the guy that built James Bond's Aston Martin DB7 and BMW Z8, at which point I went to look for the ejector seat button... I know its there somewhere! All the work will be carried out by me and my dad in the garage, mainly to teach me how to restore/modify a car I.e welding, spraying, filling etc, and how the car works. The aim is to get it fit for hill climbs by the time it gets to summer! This is how it looked when we picked it up: 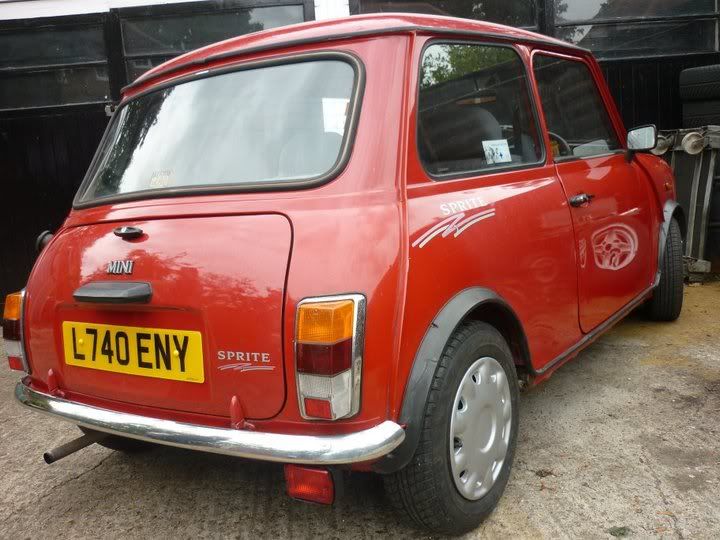 After some small mods such as deep dish wheels, wider arches, an engine start button and a stereo, we dicided it was time to do things properly. So, once I was home from college one evening I parked it on the drive and began the strip-down: 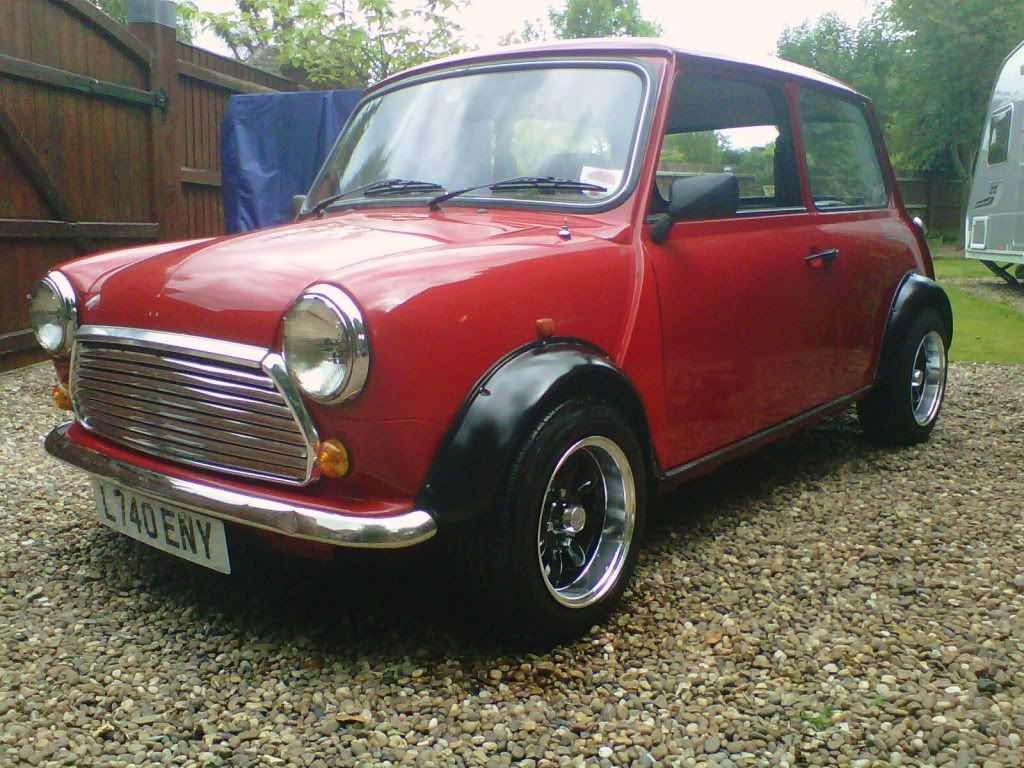 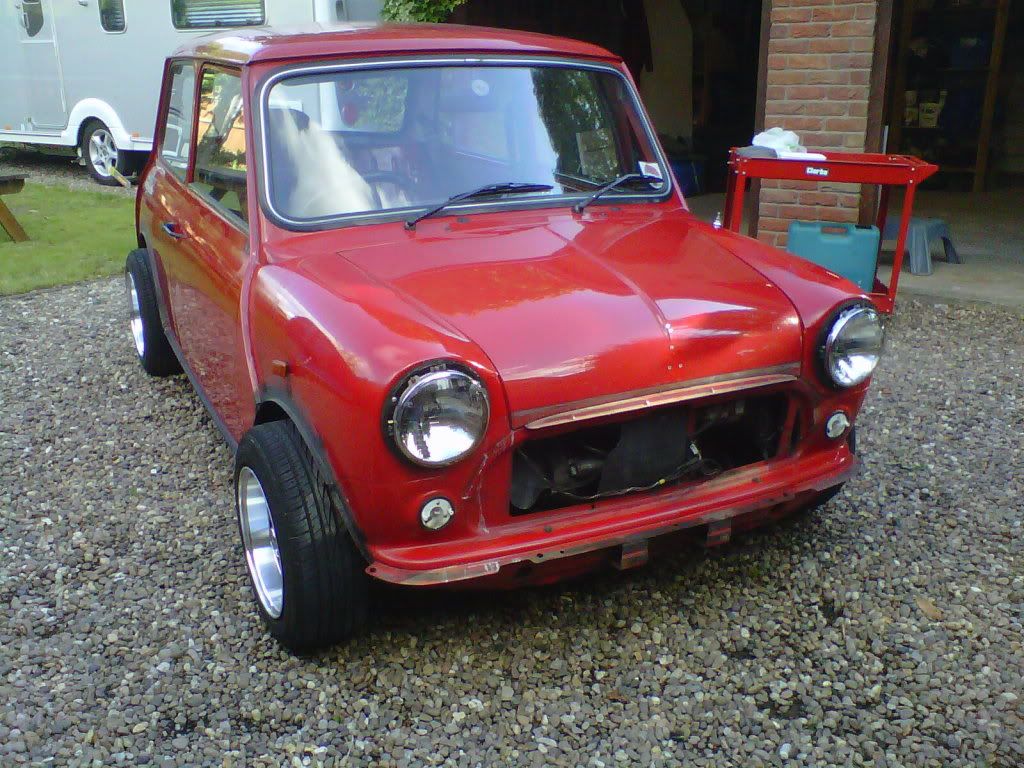 Interior before the rebuild (minus one front seat) 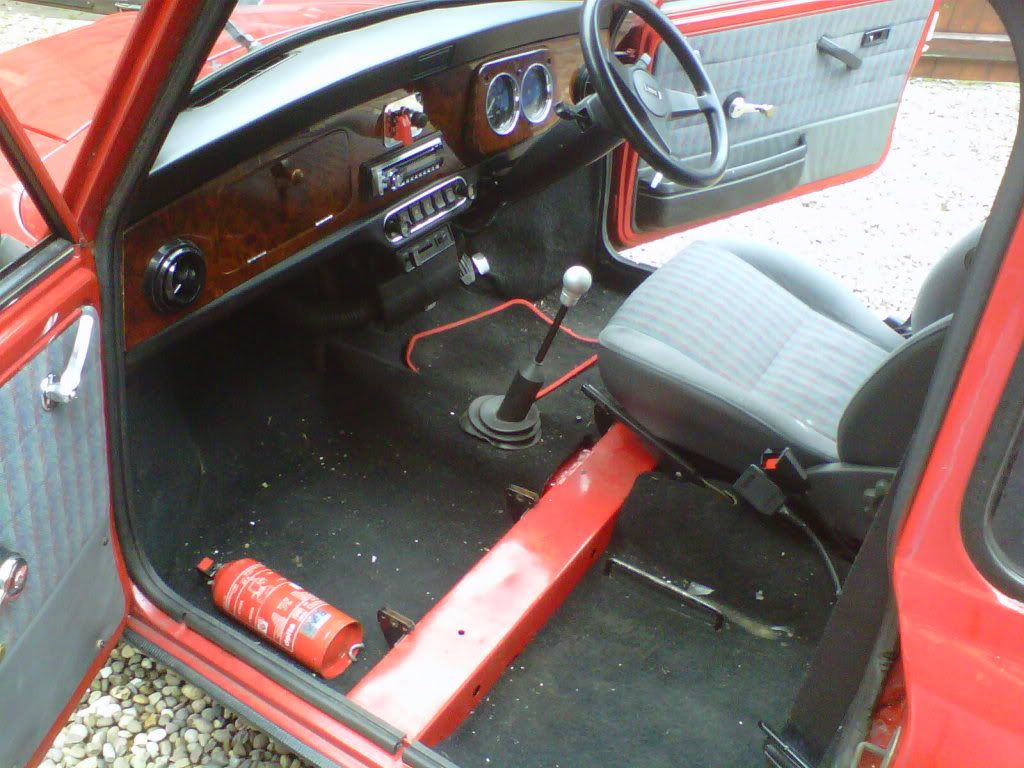 Out with the old! 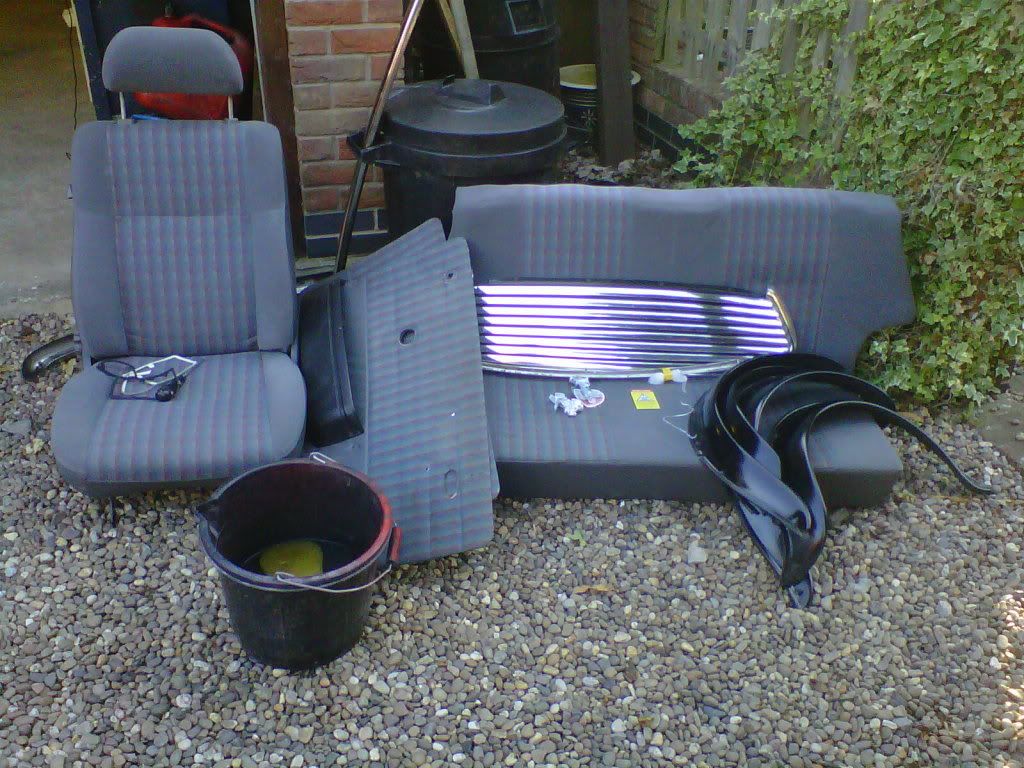 We then rolled it into the garage knowing that it wouldn't be coming back out for a few months, which was sad but I knew it would be perfect once it finally returned to the world  Once we'd got it in the garage we stripped back the paint where bubbles were forming, mainly under the windscreen, below the doors and on the front valance. Once these were treated, we poked around in the boot only to find a hole in the floor which needed sorting out. We ground out the hole/patch of rust, cut a piece of steel to fit and welded it in, ground down the welds and job's a good'n! Weldy pictures will come later once I've found my other camera As we were around the bumper area and had the welder out, it seemed like a good time to get de-bumpering! After much deliberation over what type of bumpers to run on the finished car, we eventually decided that no bumpers at all would be best for a clean, racey look so got to work grinding off the rusty lips and welding up the seems. We found that grind a bit, weld a bit was the best tactic and stopped the valances from falling off like in some of the horror stories I've heard about!  Once we'd skimmed these with filler we went about fitting a sportex 3" cat-back exhaust (which tucks nicely up against the rear valance and doesn't stick out too far) and started the engine for the first time in about 8 months. Sounds like an absolute beast! Really deep note with some nice rumbling on tick over, well worth the money. Once a lack-of-fuel problem was sorted (put a bit of fuel directly into the carb to get the engine turning over and clear the fuel pipes of air bubbles) the engine started straight away! (see the exhaust above ^^^) So this is where we are now, lots more to come and we'll keep you updated as it happens!  Oh and I lost my wheel arches somewhere along the line! No idea where they’ve gone, it’s taught me to be more organised and in control instead of the bull in a china shop approach So these are the plans for the future and how I want it to be when it’s finished: * Debumpered front and back * Mk1 bonnet and grille, and raised bonnet hinges * Smoothed boot lid * Lowered on Gaz adjustable shocks * Stripped interior – remove back seats, floor mats and carpets * Racing seats and harnesses (FIA approved) – Cobra Monacos * Deep dish quick release steering wheel * Carbon fibre dash, door cards and parcel shelf * Safety devices roll cage * 13x8" wheels (Once I get the money to import them) * Sticker bombed details * Sigle seater carbon fibre mirrors * New arches! * All red rear lights and clear indicators and side repeaters 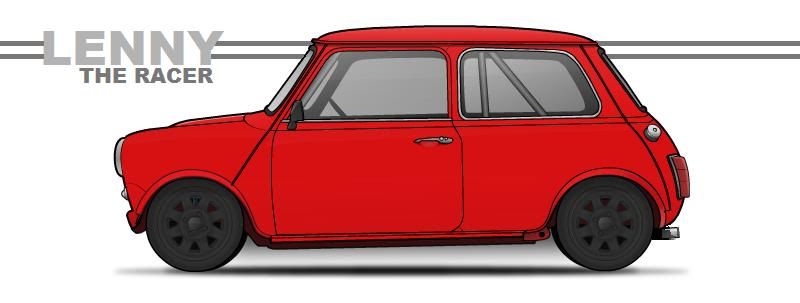 Oh, and all on a student budget! Oh, and all on a student budget! More coming soon, Tom |
| |
Last Edit: Mar 25, 2013 23:46:43 GMT by itom
|
|
|
|
rodney
Posted a lot
   https://www.facebook.com/RD-vehicle-transport-and-recovery-services-525622614268010/
Posts: 1,677
|
|
Mar 24, 2012 17:53:29 GMT
|
|
me likey yes lighty,.
|
| |
facebook: rodney dean / rd transport  |
|
|
|
|
Mar 24, 2012 23:17:54 GMT
|
Pretty good so far, personally i prefer bumpers on them but hey ho. Are you going to cut up the rear arches ?, would be best for 13x8's, otherwise you wont be able to lower the rear a great deal. I'd also recommend Kumho Ecstas, cracking tyres, especially 235/45/13 flavour  |
| |
72 Pontiac Firebird Formula 400. 95 BMW E34 525i Manual. 80 Lotus Elite, sold  86 Mk4 Escort RWD V8, sold  |
|
itom
Part of things
 
Posts: 67
|
|
Mar 25, 2012 11:27:11 GMT
|
|
Yeah I'll need to trim a fair amount of metal off all four wings and probably tub the rear arches, especially once I've lowered it to avoid tyre rub
And cheers for the tyre advice I'll have a look at them, been looking at Yoko 175/50 13's to give a bit of strech but I know that's a very controversial issue for whatever reasons! And they're the cheapest tyres I can find...
|
| |
Last Edit: Mar 25, 2012 11:27:50 GMT by itom
|
|
itom
Part of things
 
Posts: 67
|
|
Mar 25, 2012 11:36:38 GMT
|
Quick post to give more of an idea of what the car looks like at the moment: Garage set-up:  Interior:   Haven't even driven it yet and I'm already on my 3rd set of seats!  FIA approved Safety Devices roll cage: 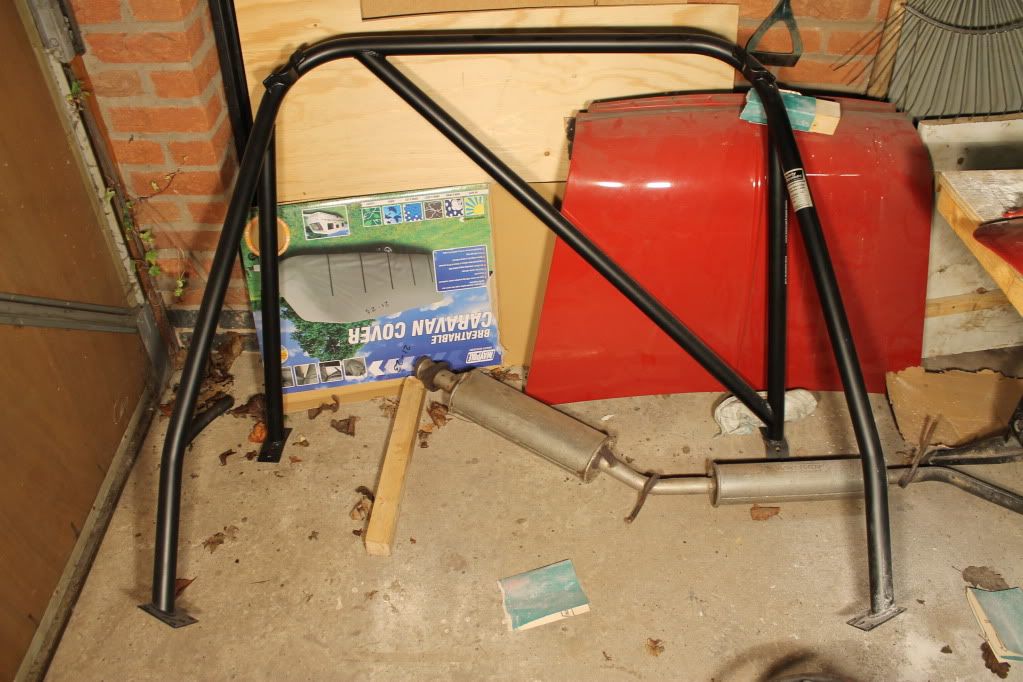 GAZ adjustable lowered shocks:  New steering wheel:  In the process of smoothing the bootlid (which needs some more welding) and deleting unused wiper holes:    New exhaust mmmmm:  HI!  More coming soon... Tom |
| |
|
|
|
|
|
Mar 25, 2012 11:52:01 GMT
|
|
now that looks like one solid shell, few small bits to sort out.
keep the great work coming..
|
| |
 1995 mk3 cavalier 1.8i 1972 1200 beetle 2010 1.2 fiat 500 "sometime's" 2000 suzuki gsxr 600 srad |
|
|
|
|
Mar 25, 2012 19:10:18 GMT
|
|
Looks good Tom. I wish my mini project was that solid, mines a '94 model too.
|
| |
77 Dolomite 1500hl
94 Mini Italian Job
06 Vw Caddy TDI, dropped on 19's
|
|
|
|
|
Mar 25, 2012 20:57:21 GMT
|
|
Looks very cool, looking forward to seeing progress!
|
| |
|
|
itom
Part of things
 
Posts: 67
|
|
Mar 25, 2012 20:58:30 GMT
|
Weekend update: I was working this weekend so dad cracked on with some filling on the front valance and doors which are all nearly finished for spraying now and feeling smoooth. The only other thing holding up painting is the roll cage as ideally the mounting brackets need to be welded in before we spray, so we got to work trial fitting the cage this evening (it's a bit of a squeeze to say the least, and the rear feet don't sit where they should so we'll need to use brute force to eventually bolt and weld it where it needs to be) No pictures of the filling cause it's pretty ugly at the moment and I'm sure you all know what filler looks like, so I'll show you just before we paint it   Rear feet don't sit on the arch properly: 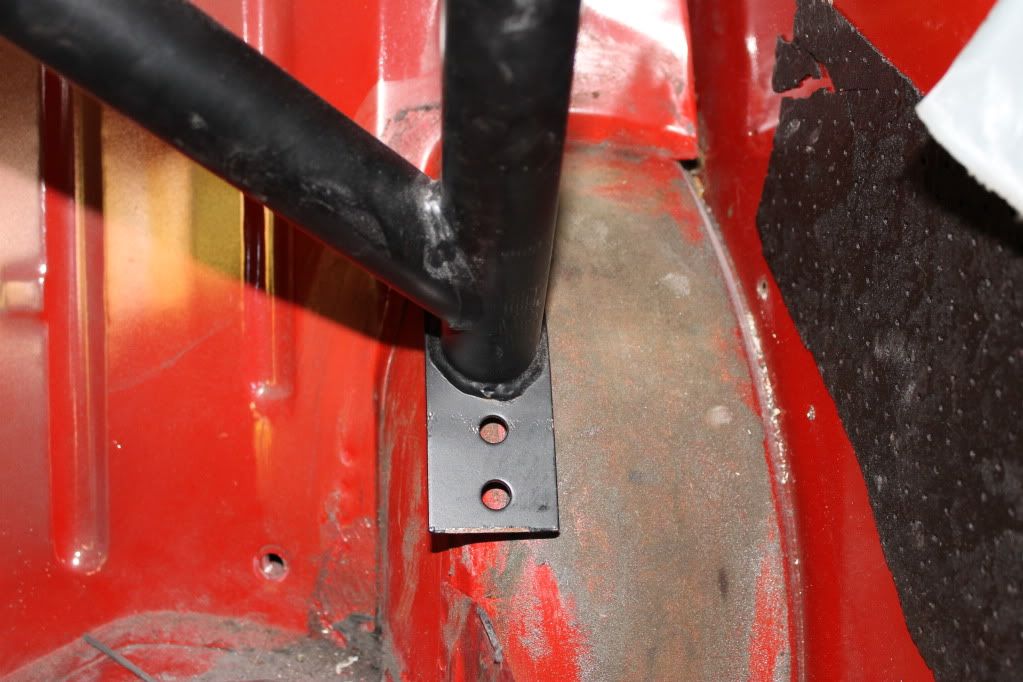 And some pics to show off how solid she is    A bit dusty, filler gets everywhere... More updates soon! |
| |
|
|
luckygti
Posted a lot
   I need to try harder!
Posts: 4,912
|
|
Mar 25, 2012 21:30:39 GMT
|
That is going be a cool little car ;D Looks to be in really good condition as well, plans sound good too. I'd love a Mini one day, be great round here  |
| |
|
|
|
|
|
|
|
|
|
|
Will you be fitting fully adjustable suspension with those 13x8? If you will be hillclimbing, you'll need to sort the camber out.
|
| |
|
|
itom
Part of things
 
Posts: 67
|
|
Mar 26, 2012 13:43:58 GMT
|
|
yep the suspension is fully adjustable, and I forgot to add to the list that I plan to have 1.5 degree negative camber arms (front)/brackets (rear). does that sound about right? or is it too much/too little camber?
|
| |
|
|
itom
Part of things
 
Posts: 67
|
|
|
|
Been working on the mini this week inbetween revising for exams (which I'm pooing myself about), and dad's done a lot in the evenings after he's home from work so there's been some progress. Firstly I decided to smooth the holes in the bonnet where the badge had been by filling them with weld, but every time I went to grind the weld back it just fell off! I was scratching my head for long enough to give up, then realised I hadn't turned the CO2 supply on the welder on! Gave myself some time to overcome the embarassment, then swiftly moved on to another job. Meanwhile Dad cut out the rear bins (looks pretty neat!), welded in the front plates for the roll cage and got that lined up, and solved the mystery of the too-narrow-rear-legs! (shoved a block of wood between them) I've been busy as well, wrapped the dashboard in carbon-fibre vinyl and some old stickers, not bad for a £2.99 job! Oh and I stickerbombed the rear view mirror and sun visors  Anyway enough talking; PICTURES!  It fits!!:   Dashboard:   Mirror:  Sunvisors:  Total spend this week: £2.99. And that's how to modify on a budget  More to come soon... Tom |
| |
|
|
luckygti
Posted a lot
   I need to try harder!
Posts: 4,912
|
|
|
|
Looking good. And yep, £2.99 is a pretty small budget  |
| |
|
|
itom
Part of things
 
Posts: 67
|
|
Apr 11, 2012 12:18:56 GMT
|
Quick update: Spent some time on the mini today, rust proofed all the seems and finished off smoothing the doors and bootlid, also got the rear plates for the rool cage welded in so thats ready to be bolted in after spraying. Took out the headlining cause it was rubbing on the roll cage and i could imagine it wearing out before too long, and it looks much more like a race car without  Also converted the bonnet into a mk1 job - grinded off the lip and folded the edge that was left over on itself, looks tidy and saved some money on a new mk1 one! I plan on converting my mk4 grille into a mk1 one as well, quite enjoy making new parts instead of buying them new  Pics will be up tomorrow probs, but we'll spend most of the day working on the car because we're wanting to spray it while the good weather's here whheeeeyyy! More soon, Tom |
| |
|
|
itom
Part of things
 
Posts: 67
|
|
|
|
Got a camber kit ordered yesterday, 1.5 degrees all round should get it sticking to the road like an obese child to a sweet shop window  and ordered some new rear lights in a style I haven't seen round a lot, but that's a secret for now Also, dad went round putting red oxide over all the areas of rust treatment from yesterday so there's no chance of any rust for the forseable future, and grinded away the front wings right up to the arches so we can really get the front end slammed And as an added bonus got my single-seater wing mirrors in the post yesterday! They fit really well and JJC Race and Rally got them to me really quick, will definitely be using them again No pictures yet sorry, picture-heavy update coming soon so watch out  Tom |
| |
|
|
|
|
|
Apr 12, 2012 11:25:27 GMT
|
|
Looks mega, looks like an awesome base to start a track car project too... you still got the interior??
A quick word on the headlining removal - I glued a piece of carpet to the metal to reduce the drumming effect you will experience when you go over any type of bump, clears my rollcage (cos its only as thick as a piece of carpet) and stops the drumming :-D win-win and it doesn't weigh hardly anything...
With regards to the wheel arch cutting for 13" wheels you at least need the templates from the Mini Spares website, can't say much about suspension settings as I have all adjustable everything everywhere which has nicely ruined the handling cos I've never made time to get it set up properly... If you intend to lower it to the floor make sure you shorten / remove the front bump stops and (effectively) tub the rear arches. This is so that it won't run on the bump stops at the front (ruins the ride and the handling at the same time!!) and so that when the rear wheels touch the arch the lip wont cut into the tyre... Oh and don't use an exhaust with a silencer in the middle of the floor else you'll scrape it over everything and eventually you'll pull it off and that will be annoying in the least...
Will be good to see the 'single-seater mirror' upgrade and the rear lights!!
|
| |
|
|
|
|
|
Apr 12, 2012 11:35:13 GMT
|
|
Also;
1) Where are you "importing" your wheels from??
2) Did you go for "Mk 2" rear lights? That don't have a reverse light / reflector?
If you did I think you will need in-fill plates for the rear panel because I don't think they will fit directly to the later "Mk 3 on" body mountings...
Otherwise looks like a fun project, but there is not much love for Mini's on this forum, who knows why cos I've bookmarked your page and I'm sure others will...
|
| |
|
|
|
|
|
Apr 12, 2012 11:38:33 GMT
|
|
One last thought - you might need adjustable tie rods, lowering, adding camber and 13" wheels will mean from what I have read you pretty much need them...
|
| |
|
|
|
|
|
Apr 12, 2012 12:02:07 GMT
|
FYI you probably should go for fully adjustable bottom arms and adjustable rods . although the 1,5 neg arm will give you more neg camber, the camber won't be the same both sides. same at the back too. ....and to get the best possible handling with 8x13's you'll need everything fully adjustable......otherwise it will tramline like a greased turd  I had 7x13's and hated it so went to 6x13's. handling is perfect with rose pointed suspension virtually zero torquesteer (140 torques) |
| |
|
|
|
|


